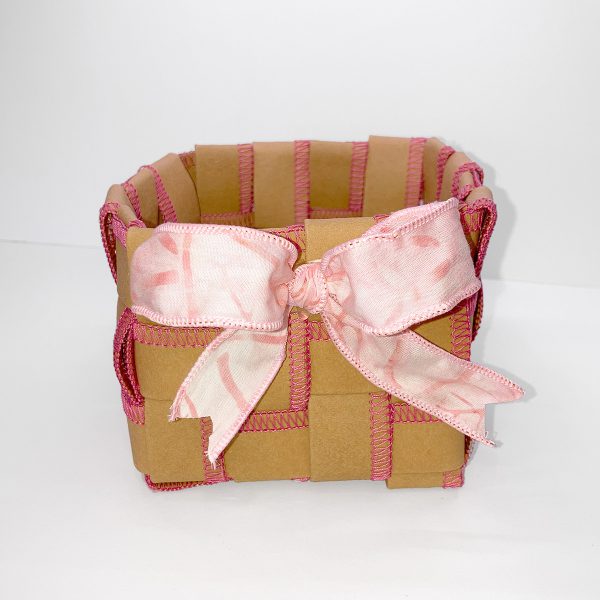
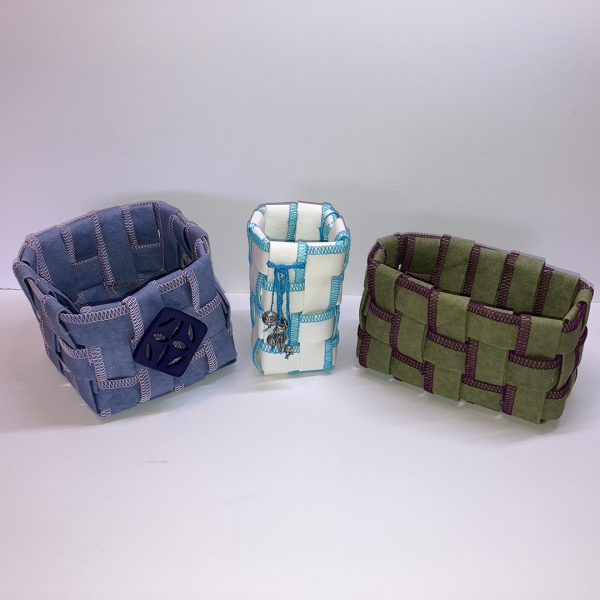
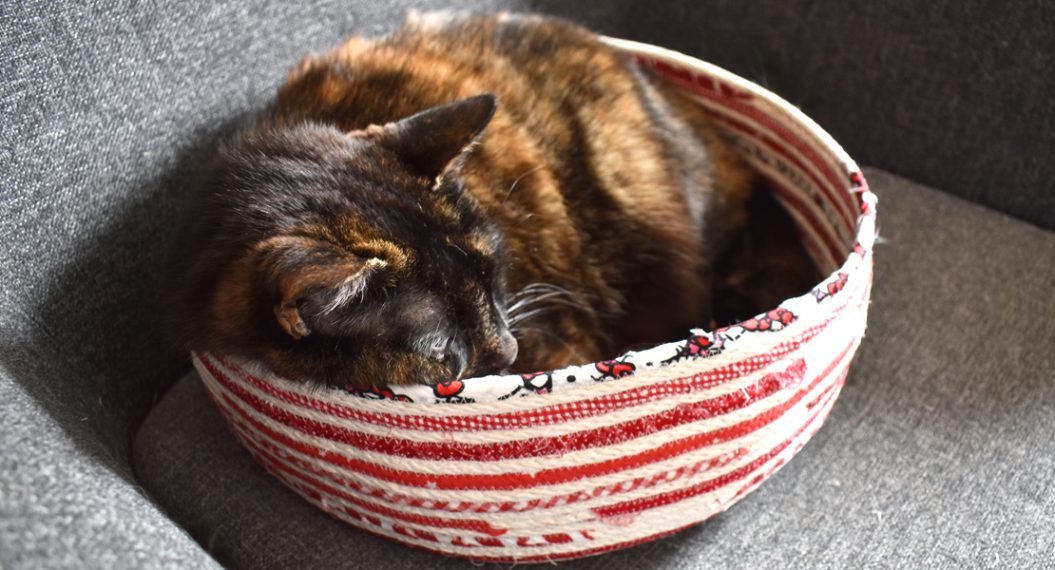
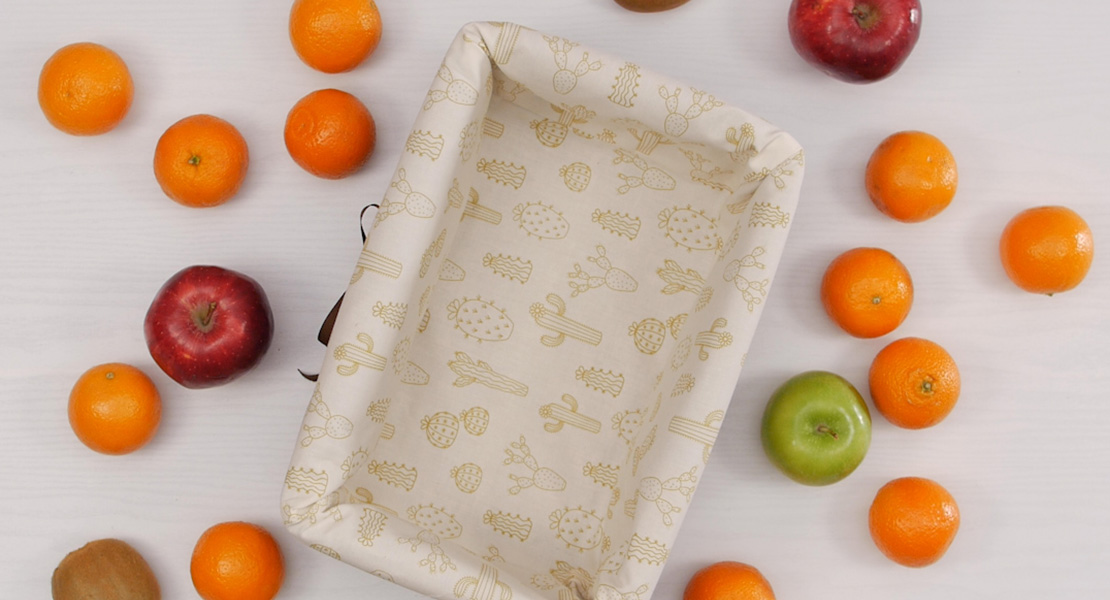
How to Make a Woven Basket with an Overlocker
Let’s get crafty with kraft-tex! This unique material is used to make this fun woven basket. In this BERNINA Community Studio lesson, learn how to use overlock stitches to construct and embellish this quick and fun project.
I will be using the BERNINA L 860 Overlocker, but any 4-thread overlock machine can be used to make this project. A little about kraft-tex, if you haven’t used this product yet, it feels and wears like leather, but cuts, sews and washes like fabric. You can sew, embroider, paint, stamp, and emboss all sorts of things with this fiber product.

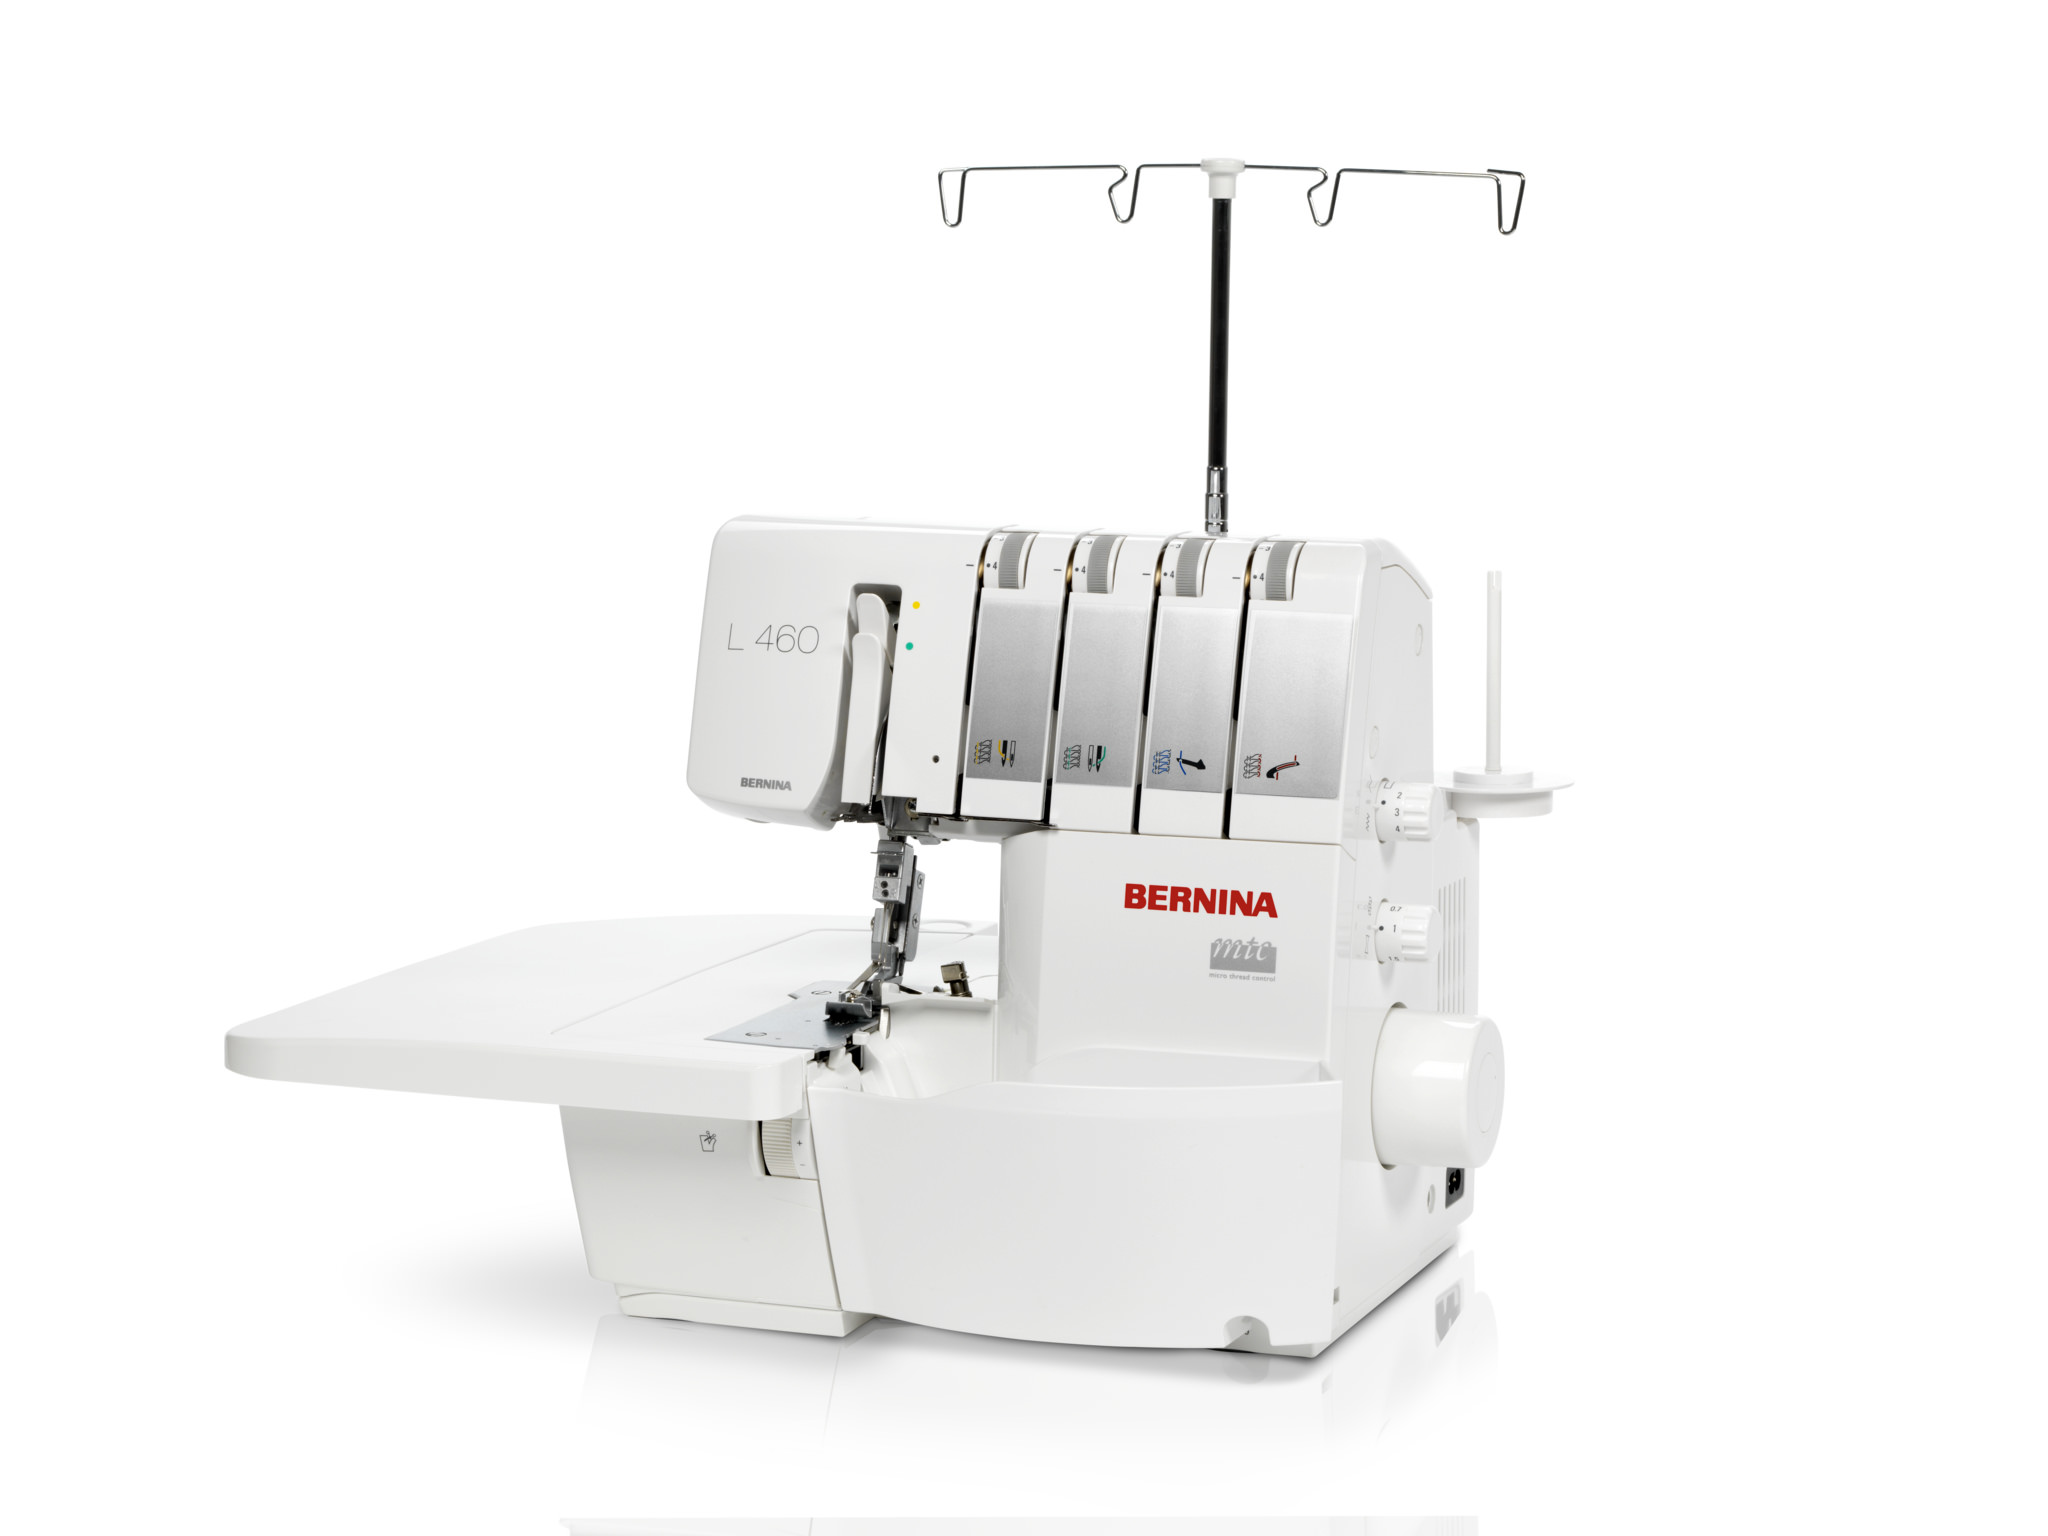
Featured Machine
Other BERNINA models that may be used for this project include:
- BERNINA L 450
- BERNINA L 460
- BERNINA L 850
- BERNINA L 890
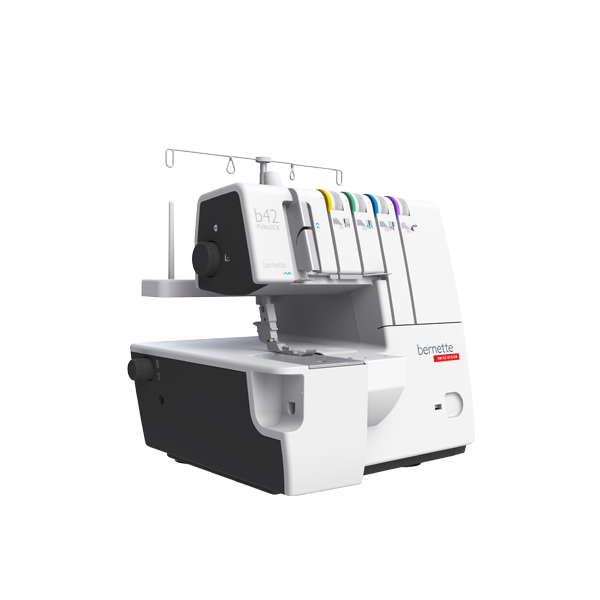
- bernette 44 FUNLOCK
- bernette 48 FUNLOCK
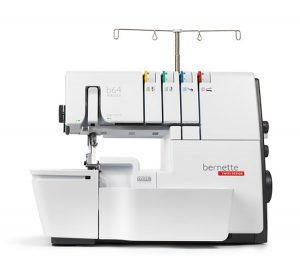
- bernette 64 AIRLOCK
I love the new L 860 Overlocker—this machine has the one-step BERNINA Air Threader making threading a breeze. It also has a touch screen that makes it easy to navigate from one stitch to another, to customize and save stitches, and it offers on-screen guidance through Creative Consultant that will help to set up the perfect stitch for my project. This machine differs from the BERNINA L 890 Overlocker in that it does not do a coverstitch or a chainstitch. We are going to use the 3-thread Overlock Stich and some decorative threads to embellish strips of kraft-tex. Then we are going to weave the strips into a basket.
Feet and Accessories
Fabric
- kraft tex– 3/4 yd – any color, 18 1/2” -20” wide
Notions
- One spool of 12 wt cotton decorative thread (WonderFil Spagetti or Fruitti recommended)
- Two spools of coordinating thread (Isacord, Mettler, Seracor, etc.)
- 90/14 ELX705 needle
- Rotary cutter and mat
- 20” rotary ruler
- Wonder Clips
- Thread snips
- Scissors
- Hot glue gun and glue
- Marking pencil
- Hera Marker or other scoring tool
- Roll & Press
Steps to Make Overlocker Woven Basket
Step 1. Prepare Kraft-tex
Cut 12 strips of Kraft-tex
- 2” x WOF (18 1/2” or 19” long, depending on your Kraft-tex piece).
Note: For this basket, you will only use 11 strips, but it’s nice to have an extra…just in case. Use the leftovers for testing.
Step 2. Sewing Kraft-tex Strips
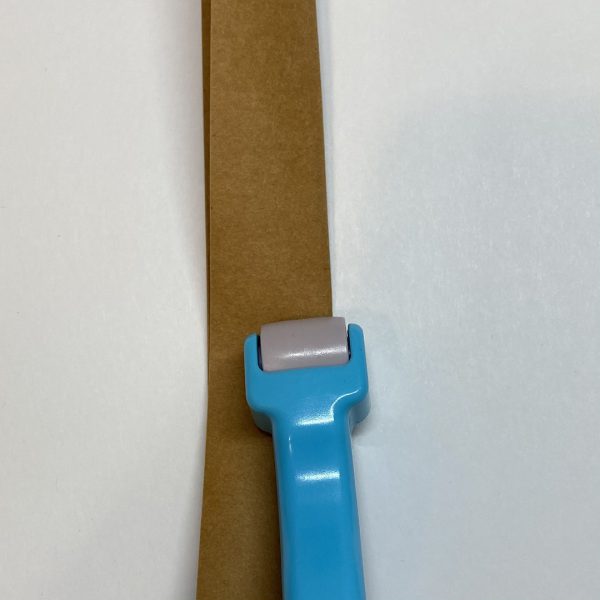
Using the Hera Marker (or other scoring tool) and ruler, score lengthwise down the center of each strip.
Fold each strip in half lengthwise along the score line. Use the Roll & Press to make a sharp crease.
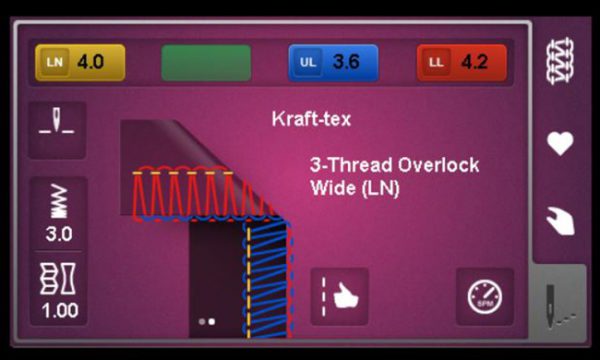
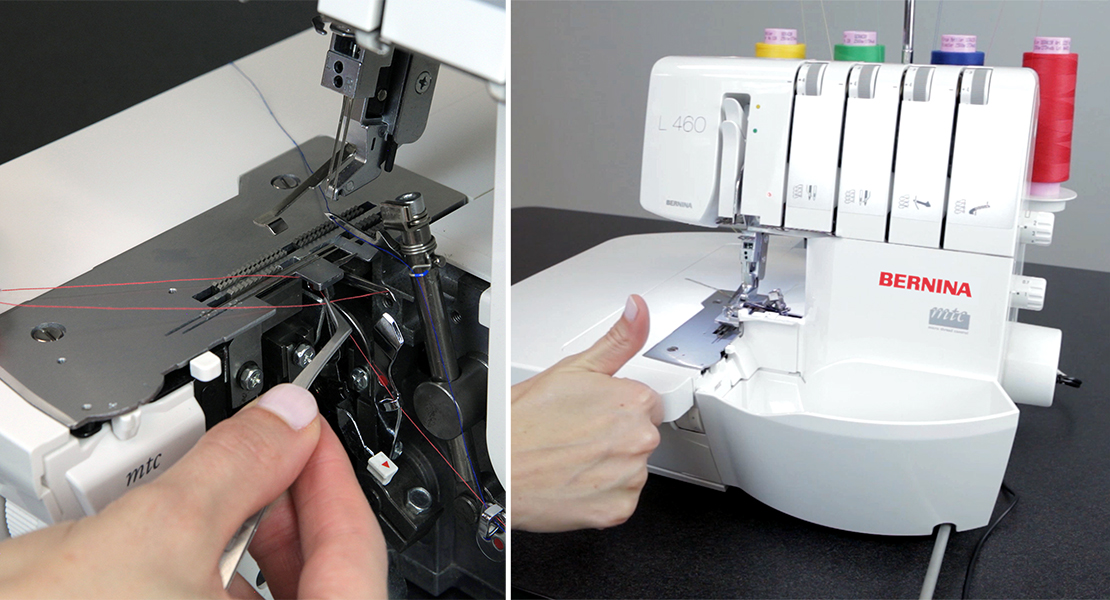
On the L 860 or L 890 machines, select the 3-thread Wide Overlock Stitch #3. For other overlockers, consult your owner’s manual for setup instructions.
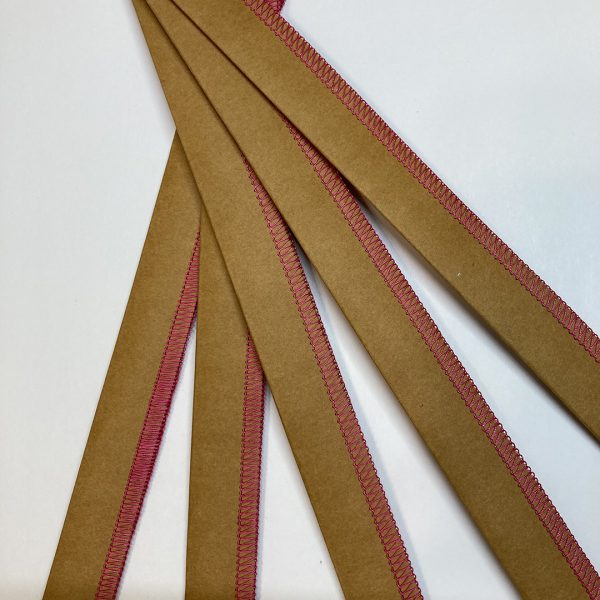
Thread the machine with the 12 wt. thread in the Upper Looper.
Thread the Left Needle and Lower Looper with matching regular thread.
Install the Right Seam Guide and adjust so that the guide is even with the blade and the kraft-tex is riding next to the blade, but not being cut.
These settings worked well for me, but you will want to test on your machine:

Test the stitch on a folded piece of scrap Kraft-tex. Adjust as needed. When you find your balanced stitch, save it to your L 860 or L 890, using the Personal Memory and call it “Kraft-tex”.
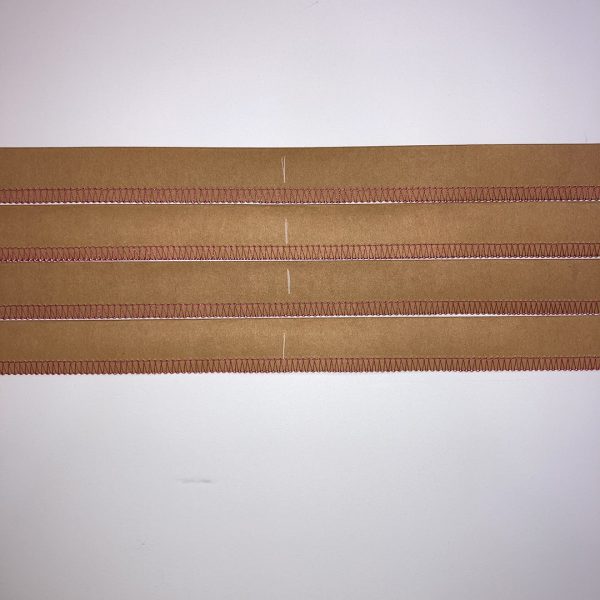
Stitch the long raw edges together on all of the strips.
After making eight strips, mark the center of each strip on the wrong side (non-decorative thread side).
Step 3. Constructing the Basket
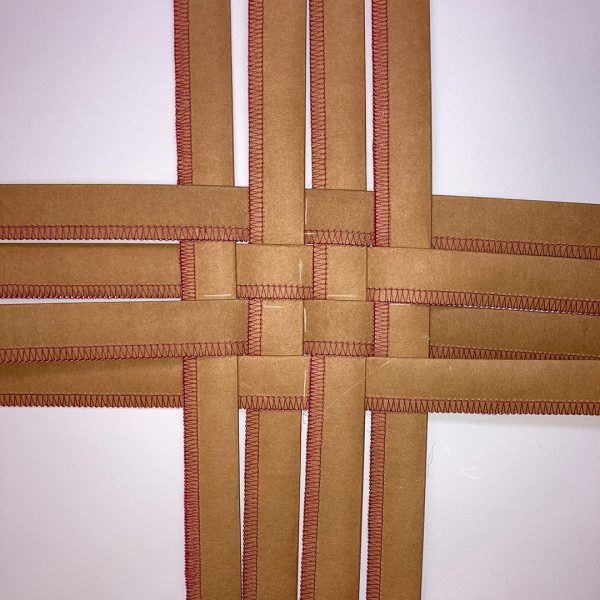
Place four strips horizontally on the table in front of you with the decorative thread side facing down and all stitched ends facing in the same direction.
Place one strip on either side of the center marks of the horizontal strips, right side down. Weave and glue to hold. Use a Wonder Clip to hold a moment until dry, if you like.

Place one strip on either side of the first two and repeat. This is the base of your basket.
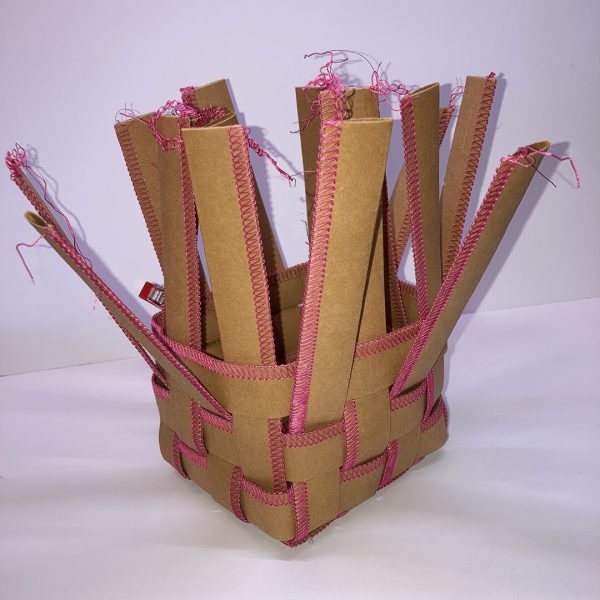
Building Up the Sides
Place the beginning end in the “under” position and glue in place. Make sure that the thread is facing up and the folded edge of the strip is at the base of your basket. Add a clip to hold. Weave the strip over and under till you reach the point where you started.
Snug the strip down to the base. It may be helpful to use clips to hold together the tops of the vertical strips. Trim any excess at the end of the woven strip and glue in place.
Repeat with two more strips.
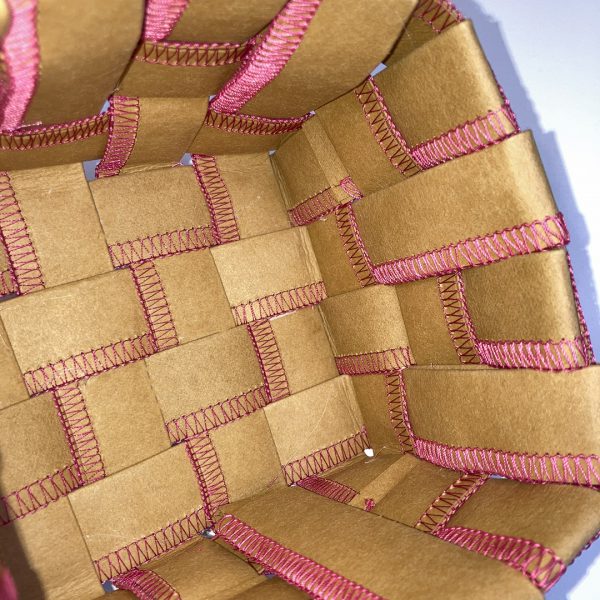
Weave the top ends of the vertical strips back down to the inside. Use glue to hold in place where you can’t tuck in.
Every other strip folds onto itself to the inside and tucks into the second row. Glue at the top to hold.
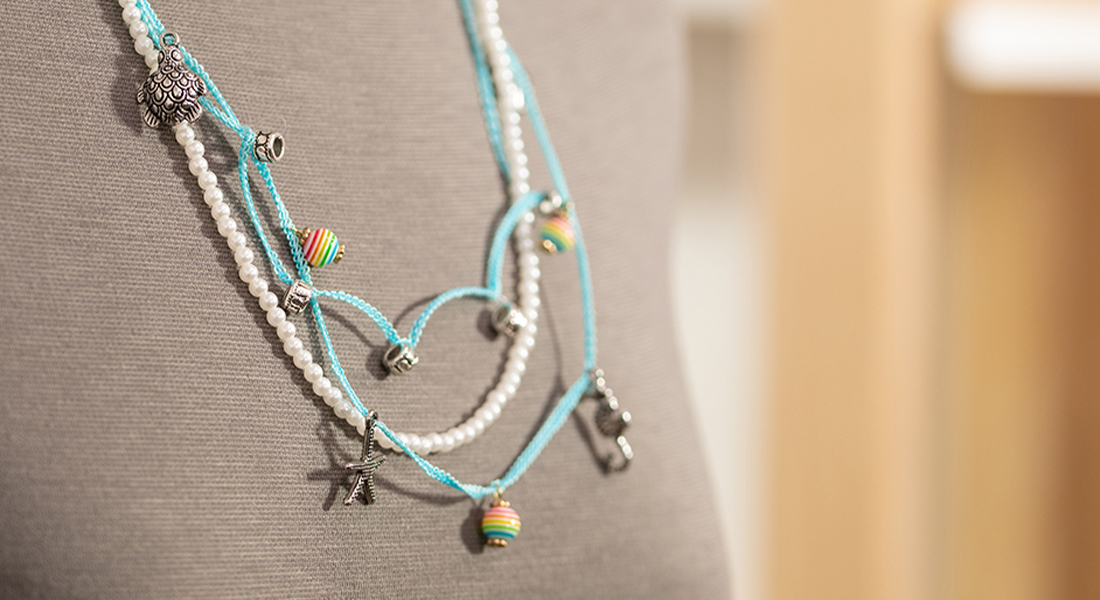
Step 4. Serger Cord & Beads
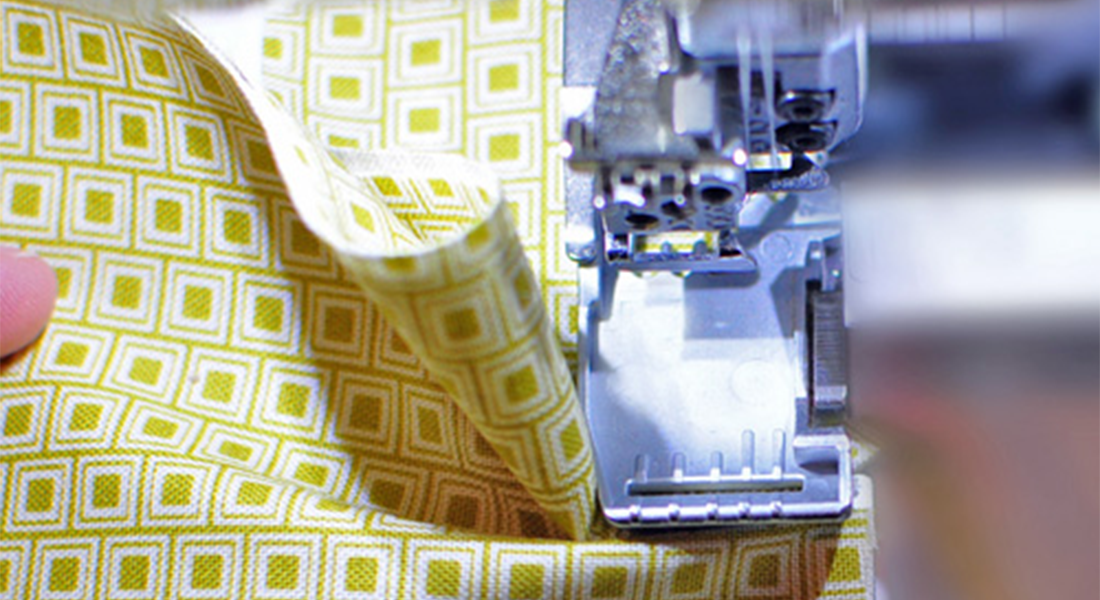
To make serger cording, we are going to use the 3-thread Rolled Hem Stitch #8. (For other machines, consult you machine’s manual to set up a rolled hem stitch.) All we need to do in this case is move the left needle to the right needle position and re-thread.
Here are settings that worked for me.

The secret to a nice serger cord is to use slight tension to pull the thread to the back of the machine as you press on the foot control. If you pull too fast, the cord will look loopy. Some people turn their machine around so that they are facing the back while doing this!
I would say about 3 yards is enough for just about any embellishment. When adding beads, I found that a dental flosser was really helpful in pulling the thread through the beads. Then tie a knot at the bottom of the cord to keep the bead from falling off.
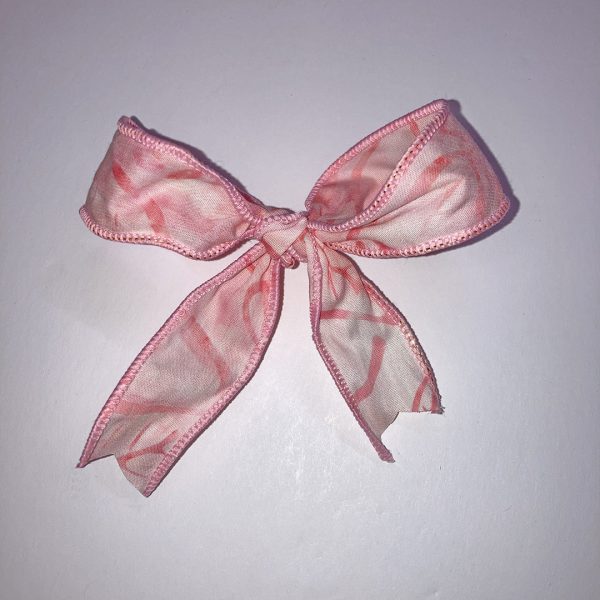
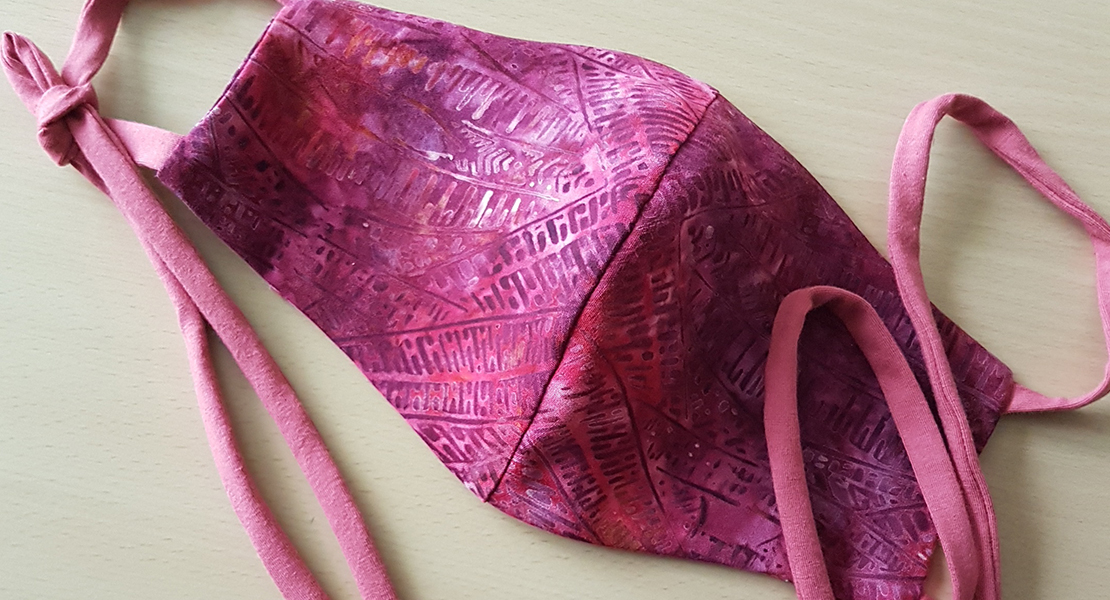
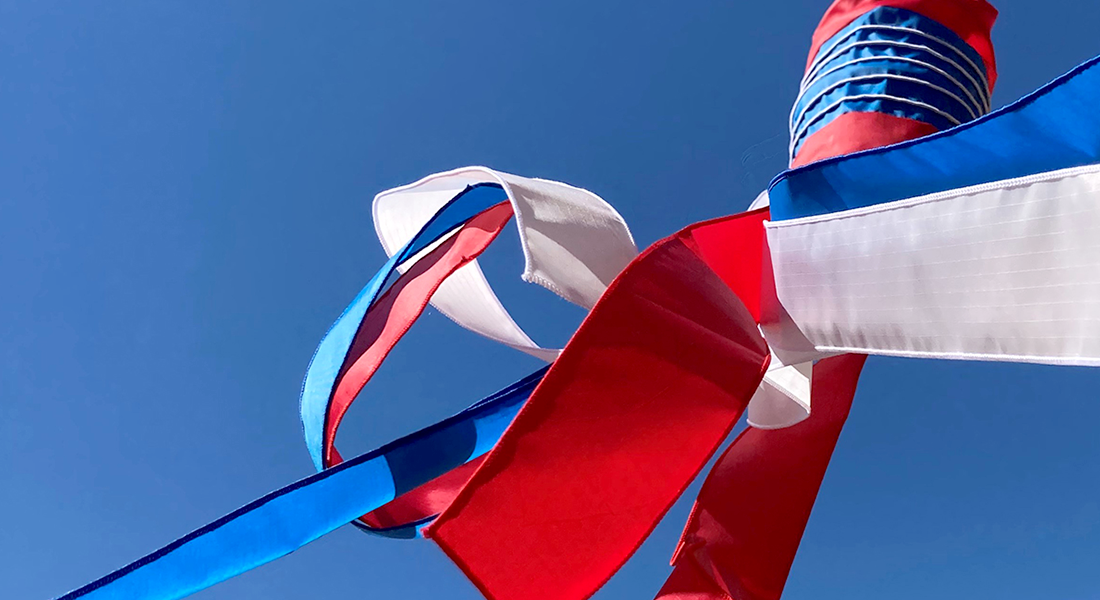
Wire Ribbon and Fabric
Please refer to the DIY Wire-edge Ribbon post on WeAllSew for more detailed information.
You will need the Cording Foot #L17 for the L 850 and L 860.
If you are an L 890 Owner, the cording foot is the #C17.
If you wanted to add cording to your project, say on the edge of a napkin or hem, you would use this foot. It is also great for serging in fishing line (like on a bridal veil) or wire on fabric strips to make wired ribbon. The rolled hem stitch covers it up.
The guides in front keep the cord feeding in a straight line. The tunnel underneath in the back allows for even feeding of the bulk of the cord. You do want to make sure that your cord isn’t too big for the guides.
To make wire-edged ribbon I recommend 26 gauge beading wire.
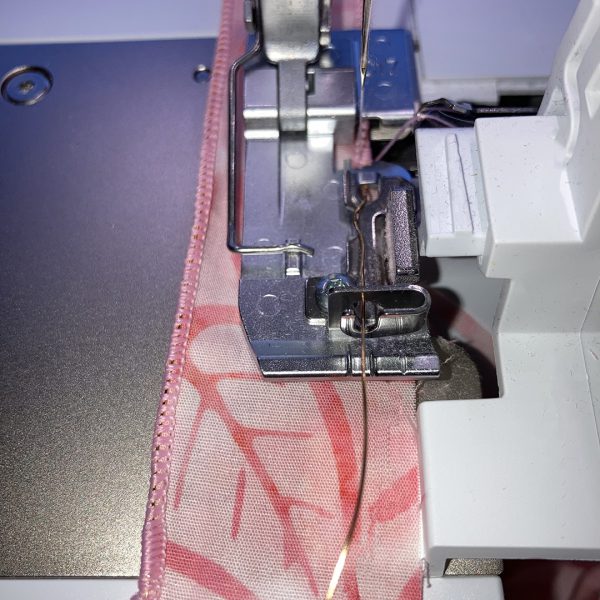
I also used 2-thread Rolled Hem Stitch #13 with WonderFil SoftLoc in the Lower Looper. (You could use a 3-thread Rolled Hem if your machine is not capable of doing a 2-thread Rolled Hem.)
Note: I like batiks for ribbon because both sides are “right” sides.
Experiment with different sized bases and heights. This basket is a 4×4 with a three strip height. Other options are a 2×2 with a four strip height, or a 2×5 with three strip height. You are only limited by the length of your strip of kraft-tex.
Try out different decorative threads and embellishments, too!
Used Products


What you might also like


286 comments on “How to Make a Woven Basket with an Overlocker”
-
Cute basket, but that ribbon made of batiks is to dye for. I love it and definitely want to make this. Great giveaway bundle too!
-
Making bags for a pop up market!
-
I attended a Bernina Academy 1 day event teaching us to use the new L860 on a variety of skills and stitches. What an incredible machine!
-
-
I made a jacket with my L890.
-
I made a tablecloth and learned how to thread a Serger and it was a Bernina.
-
I celebrated by purchasing a new Bernina serger/sewing machine – will pick it up next week, along with the free gifts…can’t wait to start serving and sewing with it!!!
-
Just bought my L890. Can’t wait to start creating.
-
I am just learning how to use a serger. I am so excited with all of the new possibilities this will offer!
-
We got new living room furniture, so I’m making pillows using my Bernette 64. Planning to use simple envelope opening so I can quickly change the covers for each holiday. Embroidery module will get a work-out too! Other goal I set was to pick out a pattern to try a knit top on the serger, but it’s a summertime goal to get to the finished product.
-
I love the bernina 460 serger! This month I’ve made a spencer and a blouse with it.
-
Nice baskets. I’m always happy getting reacquainted with my serger and reminding it I’m not afraid of it.
-
I celebrated Serger month by purchasing the L890 serger!
So excited to get started on this machine.. lots of ideas floating around my head just like sugarplums at Christmas!!?
-
I’ve been making JP pants.
-
I celebrated serger month by making sure I have EVERY L890 foot and accessory. I have it all now except this prize which I want to win! Best regards and thank you.
-
Making lots of napkins for all the holidays.
-
I am making babydoll clothing for my 2 granddaughters. I love my L460. I hope I win!
-
I am learning how to use my “new to me” Bernina 1300 mdc.
-
Celebrated Overlocker month by attending an Overlocker class at my local shop.
[email protected] -
Making a silk shantung long tiered dress with my new L890!
-
I love this idea and the basket for gift container or something like that. Easy peasey! I may take the idea to set up a project for a group of “challenged” individuals who love to “Create”.
What I have been doing this month is sewing garments. I did finish a new skirt with my serger and found it a wonderful way to sew fragile/delicate fabric and not have to worry about fraying, bunching, etc. with the settings correct. Thanks! Rae -
To celebrate, today, I went to my local sewing machine shop to try out a Bernina. My mother always said she waited too long to get a serger… I don’t want to repeat that mistake!!
-
Clever idea but a bit labor intensive. I love my Berninas.
-
-
I will be attending a hands on Serger Academy class to get to know my L890 better.
I love it,best serger I’ve owned. -
I just today purchased a Bernina L460 Serger from my Bernina dealer. Can’t wait to try out some serger projects to celebrate National Serger Month!
-
I took my Funlock 004 out of the closet where it has been for years and had it serviced. I am referring how to use it and having fun!
-
Love this project! I believe I’m going to make some for my only GrandDaughter who will be moving soon and have a new bedroom. I’m always celebrating National Sewing Month by sewing or quilting daily.
Sandie in
Louisburg, NC-
I have been sewing garments and doll clothes for my two great granddaughters. I love my serger for making these projects so much easier.
-
-
Well I am following all the interesting things you can do with an overlocker. Don’t own one yet, but you never know!
-
Making these. Woven baskets.
-
I made caddy jumpers for my 2month old grandson and his 1year old cousin to wear at a Master’s party!
-
I bought a new Bernette serger this month!! Sew very excited I’ve been trying to learn ways to incorporate serging into my quilting. My favorite thing I’ve recently discovered is attaching my quilt binding with my serger. It gives a clean and easy to fold over binding!
-
I am learning to use my new binder feet by making summer tank tops.
-
I bought a new serger and I am learning how to use all the amazing features.
-
I’m celebrating National Serger Month as we move into our new home that took 2 years to build; I just unpacked my serger, and am organizing my threads and accessories. This basket will be a GREAT first project in my new sewing room!
-
I am learning to use mine and following these posts is very helpful!
-
I have been watching and learning. I am excited to try some of the things folks have made. I am celebrating by buying another foot…maybe more!
-
Celebrating National Serger Month by learning new sewing techniques. I just learned to use a serger in the last year.
-
-
I’ve been celebrating by making pillowcases.
-
I had my students make these years ago in one of my serger specialty classes, we used Pearl Crown Rayon in upper and lower looper!! I’m going to have to make another one and show my granddaughter!!! Just yesterday, I showed my 9 year old granddaughter hot to use the serger for making decorative edge on baby blankets that she will be selling at our local farmer’s market this summer!
-
making double layer fleece blankets for chemo patients
-
I celebrated Serger Month by buying the machine of my dreams—an L890! Now, I am seeking projects to make on it. Love the tutorials/videos posted here.
-
I got an L460 last June and have loved getting to know it. I have a shirt cut out and will be embellishing with embroidery on my B790 before constructing on the L460
-
I have been celebrating National Serger Month by using my serger a lot. I made clothes for two American Girl dolls for grands and finished seams and also constructed t-shirts and sweats on the serger for the dolls.
-
I have enjoyed National Serger Month-
I attended the Bernina Serger Academy at my local Bernina store @Bernina World of Sewing in Wilmington,NC and bought the L890! Love my new serger/coverstitch machine and can’t wait to make some really cool projects. I have a knit top cut out to sew on my L890!! -
looking for videos to get my serger up and running and properly tensioned.
-
I have been sewing all my old fabrics into projects so I can buy some new fabrics. I have been using my serger to finish the edges of my projects.
-
Celebrating National Serger Month by using my new L890 to make some tops. Looking forward to learning more how to use it!
-
Making little knit clothes for my new grandbaby!!
-
Cleaning and oiling my three 30yo 334DS sergers! They still work like they’re brand new. ??????
-
Bought a new serger last week! Can’t wait to get some uninterrupted time in front of it.
-
I pulled my Bernette 234 serger out of the closet and am determined to teach myself how to thread it and actually use it!
-
Looking forward to getting acquainted with my new L860. 2 cataract surgeries have put a crimp in my sewing time this year but I hope to be back in action in a month or sooner!
-
National Serger Month has been fun!
I made two projects using my serger.
I raglan sleeve top for me and a matching dress for my sidekick Zoe (doggie)
Its so nice to have a serger for knits. -
I serged a cotton jersey t-shirt, a bamboo rayon sleeveless top and have almost finished an athleisure/yoga top.
-
Recently got the L890 and trying to learn to use it. Love it!
-
Celebrating National Serger Month by saving up for my first serger and dreaming of all the things I could make!
-
I just love my Bernina! I am making curtains for my bedroom. Using my serger makes it a breeze!
-
I have been celebrating Serger month by uncovering my serger and using it. I haven’t been doing any sewing for about a year, life happened. It’s so good to get back to it.
-
I am using my server to make burp clothes for local hospital! ??????
-
I did manage to serge a bunch of fleece blankets for dogs at the kennels.
-
I love working with Kraft Tex! I have it several colors and was looking for something different to make with it. Love the idea of weaving it into this cute basket!
-
I’m celebrating National Serger Month by using my serger to finish the edges of the Supplex I’m using to make my first coat.
-
I’ve been celebrating National Serger Month by making clothes with my friend on my serger & gearing up for a hot southern summer! Getting ready to also make some turbans to stay stylish while keeping my hair pulled up and out of the way for summer too!
-
My 23 year old Bernina 1100DA serger is a trusted friend in my sewing room. It’s always at the rest on my sewing table. Currently I’m making simple cloth napkins and part of a wedding gift but I’ve used it for everything from making figure skating dresses to quilting.
-
Love the baskets! Tutorials are very helpful too.
-
I have visited my local Bernina dealer to learn more about new serger features 🙂
-
I’ve been dreaming of inspiration to make something wonderful!!!
-
I am celebrating by following your posts so I can learn more ways to use a serger 🙂
-
I have been celebrating serger month by serging the inside of bags to finish them.
-
I didn’t know it was National Serger Month! I’ll be celebrating by making hundreds of serger scrunchies to sell at art fairs this summer.
-
I’m celebrating National Serger Month by attending a class on the L890. I’m also stitching a tee shirt on the L890. Hope to do this project soon!
-
To celebrate national serger month I am re-threading my serger.
-
Been in the industry for 20 years but trying to create things at home like this is a different type of joy.
This sever is beautiful. Someone save me from my old Walmart serger ? -
I learned how to use the gathering foot for my 460! Very easy!
-
I took the time to clean my serger and reacquainted with it. I’ve been practicing various stitches.
-
I am enjoying my L890! I am taking classes at my local Bernina dealer and making fun things. We made a scrappy quilted bag at the last class.
-
I took my serger in for a spa day to help her celebrate National Serger Month.
-
I didn’t know it is Natl Serger Month. I need to so a serging project now. I did make an eyeglass case with my serger. I need to explore decorative serging.
-
I was gifted a Bernina serger some time ago. I’m inspired to find a permanent spot in my sewing room so that I can use it more. The basket is the inspiration I need!
-
Love Kraftex and love my L460. Thanks for a new project!
-
Cute baskets, my serger is always out just to the right side of my 750QEE! Wonderful prize package!
-
I bought my first serger in February. An 850. Love ❤️ so much. I am busy altering prom, wedding and bridesmaids dresses.
-
Love both my serger and my cover-stitch machines. Garments look so much more finished and professional.
-
I have been “ogling” sergers( at least 14+ years) forever but am so hesitant to buy one. Perhaps this will answer my problem!!!?
-
I showed a class how to use a lot of stiches on the 890 to create a ruffle and placed it on a towel. Amazing machine!!!!
-
I just took the basic serger class by educator Kathy at Quilter’s Haven in Minnesota. Took home a L890. Let the fun begin. I just finished 10 pairs of boxed shorts. 1 pair of men’s PJ bottoms with pockets. Several pairs of pants for my sensory kiddo.
-
Love my new L890! Everything from baby/adult knit clothes to a mystery make class using the Bernina sergers.
-
I am celebrating National Serger Month by taking the guide class on my new L890. I signed up for several other classes at my Bernina dealer. By making different projects I will learn the features on my new Bernina serger.
-
I used my serger to edge fraying fairing to make a craft or two and to hem a dress
-
This month is flying by, but I want to whip up to some grad gifts.
-
I love this woven basket project, so cute. I will celebrate National Serger Month by taking my serger in for maintenance to make sure it is in good condition to make this basket and some of the other projects shown. Thanks for the inspiration .
-
Cleaning and using my serger to work with some very stretchy fabrics.
-
I have started looking at new serger-specific patterns to try on my sergers.
-
Love the idea must try
-
I also tried to add binding to a quilt using my l850 and fusible thread
-
I used my L890 to hem three new pairs of pants with the blind stitch. They turned out beautiful.
-
I have the Bernina L460 and L850. I just took my L850 to a serger class and we made a knit cardigan.
-
Wish I could say I was making something new and fantastic with my serger. Unfortunately, I broke some ribs and right now it “pains me” to sew anything. In the near future, I hope to make the posted basket.
-
Celebrated the month by serging new leggings and getting my coverstitch tension just right.
-
I have celebrated National Serger month by purchasing a new L890 server along with several additional presser feet, and practice practice practice to get to learn this amazing machine! I love it!!
-
Great way to take in sides of too large shirts?
-
I am celebrating with getting new feets so I can do more with my machine. Working on a table runner in the moment. Looking to learn a lot more as I just got my serger some month ago.
-
I haven’t been serging but quilting in preparation of upcoming local quilt show. Love the basket
-
I added a b42 to go with my L850. Having fun using the flatlock and coverstitch.
-
So many great projects.
-
Making jacket for my granddaughter
-
It’s National Serger Month, and I couldn’t help myself – I just purchased the L890 and can’t wait to get started with it!
-
I’m getting to know the settings and trying out stitches
-
I love my L890!! I am making some additions to my wardrobe, t-tops, leggings.
-
This is such a cute project. To celebrate serger month I made the reversible bomber jacket. I loved that the pattern was free on the website.
-
The new sergers are sew awesome. I saw them demoed at the Houston Quilt Show. The lil basket project is such an easy project. I’d love the serger gift giveaway to help me be inspired to come up with more serger projects.
Danna Breaux -
I have been spending April Serger month watching videos, attending a serger workshop with Bernina educator, purchasing new serger feet, and gnashing my teeth since my Bernina 890 has been in the shop for five weeks now. Once my shop finally received the tools thought to be needed for the repair there was still no success. So the latest is that my machine has been sent back to Bernina. I sure hope it is returned to me soon as I have accumulated so many more ideas for using it.
-
I am going to make this basket! Looks like a great project for secret sister gifts!!
-
Always fun to think up new projects to serge up!
-
Dusted off my server to make some headbands for my new grand baby Fiona!
-
I love my L890 and just finished a tote bag.
-
I am in the process of moving and probably won’t be done until May. I love the basket and that will be one of the first things I do when I get the serger set up as well as my Bernina 880 plus.
-
I have learned how to make a decorative pillow using decorative thread and the chainstitch. I also did applique on the pillow. I am learning my serger/coverstitch can be used for so much more than binding seams. Thank you for all the great ideas.
-
Trying to really get to know my 890
So far machine is a dream
Taking seminar tomorrow!
-
I don’t have a serger. But have enjoyed watching all it can do while making samples for a shop & attending a quilt retreat.
-
Nothing! Covid is a hard bug to get over!
-
I really like this project! I have a server but have not learned how to use it. I will be doing that in commemoration of national server month! Thanks for the kick start!
-
I’ve been thinking about getting a serger. Moe’s the time. Decision, decisions
-
VERY cute basket! LOVE the ribbon! I’ve been preparing for a trip to visit our son so making a few things to take along. I have had my L890 for close to a year now and ABSOLUTELY love it! I currently have three Berninas. The L890, a 770QE and just acquired a Virtuosa 153QE. Wonderful machines!
Thank you for the generous offer of goodies!
-
This month, I have been increasing my serger skills by making several jersey sweatshirts for the family, two for my daughter, one for my grandson and one for my granddaughter. I have made five pairs of flannel pants for grandkids! The more I use my 890, the more I love it. Practice makes it better.
-
I make many grocery bags from upholstery fabric…very washable
-
Love the new sergers! I’m finishing up a lot of unfinished projects! Love all the cute seger projects.
-
I love learning new techniques on the serger.
-
My Bernette serger is over 20 years old and still works but a new one would be fantastic! I do really enjoy reading reading the blog posts on here.
-
I’ve made a dress and a pair of shorts on my L890 this month. Love this overlocker. and would super love this prize.
-
I haven’t really been able to do a lot of sewing right now. I’m recovering from a knee replacement. I have managed to get some pieces for some quilts cut out.
-
I’m celebrating by watching the Webinar tomorrow on creative uses of serger feet. Got an almost new Bernette Airlock B64 and love it. Want to learn how to use it to its fullest. It sews so beautifully. Have had some fun making doll clothes so far.
-
What better time to invest in a Bernina Serger! I’ve seen so many fun and practical projects to make. It’s now or never, baby!
-
Making leggings!
-
I can’t believe April is almost to an end, and so is national serger month. I’ve been busy making Japanese aprons. I can’t wait to make this handy basket!
-
Thanks for the inspiration! I dug out my serger and moved it to an easy access location. I’ve been enjoying getting reacquainted and remembering why I got one in the first place!
-
I’ve spent April Serger Month – participating in all things Serger; oh my there is plenty of serger projects listed on the Bernina web site & the Bernina International blog as well. I serged my PJ top and did most of the seams on the serger as well. Makes it so nice & clean finishes.
-
I’m making a few tee shirts!
-
I love my L890. I’ve made a few items with it and it is so easy to use.
-
Now that I’ve finished my embroidery project, I need to catch up and use my serger with coverstitch to finish remodeling the asymmetrical hem on a blouse before the month is over.
-
I’ve being making lots of fun items for our upcoming family reunion.
-
I have been celebrating National Serger Month by oogling the goodies I could make if I had a serger.
-
I have been spending Serger month by dreaming of owning a Serger. I don’t have one.
-
I altered all the items in my closet that needed a little something!
-
WOW! Great project! I am celebrating by watching videos and picking out a serger!
-
I’ve been spring cleaning my sewing room as well as my serger, altering garments for my daughter’s wedding in June, and preparing to begin summer fashion construction for the grands!
-
I have been spending the Serger month reading up on sergers and coveting my mother’s Bernina serger while I save up!
-
I have been making dresses for my Great Granddaughter. Having such fun.
-
I have been watching videos and learning about Serger machines and how I can make do many different things with a Serger.
-
I’m celebrating national serger month by buying a brand new 890 serger with plans to use it to make all my new leggings.
-
This basket looks great. For National Serger month I am following along on WeAllSew to learn the many techniques from Bernina!
-
I’m shopping at my local quilt shop for all my Serger needs
-
Love my L890, have been sewing curtains for myself and my mom celebrating serger month! Love Bernina
-
I have actually spent some time looking at and reading the instruction manual. Usually I just jump in and start, but that doesn’t always work well for me. I love the how to videos as well, as I am a visual learner.
-
I have been making t-shirt dresses out of batik cotton knit!
-
Celebrating Serger Month by drooling over a new Bernina after using the new one in class. Such cool features too!
-
I’ve been enjoying the blog and the feet sales. Hubby had COVID and has been quarantined in the basement where my studio is. He got cleared today so now I can start with the basket project and go back and do the others!
-
I do some work for a local Bernina dealer. So I have been promoting the National Serger Month specials.
And, I have been reviewing all the wonderful projects here. I have so many great projects for the serger and try to encourage people to get over their fear of them. The new models are so great and easy to use.
Thanks for the giveaways!!!
-
Wanting to make that basket
-
Using my B44 to serge baby blankets.
-
My local Bernina Store is offering a “Serger Project of the Month” of which I am a participant. We’ve constructed a placemat, a tote bag, a wall-hanging memo station, and a bolster pillow. I’ve also stitched many pillowcases and a “quilt-as-you-go” quilt. Sew many options!!
-
I am new to overlock machines, but I’m reupholstering my leather couch cushions and want to finish my seams as I am sewing. Very excited to try this. I’m signed up to go to the Bernina class in Gloversville.
-
I have been doing a lot of hemming alterations and I always serge to raw edges before turning.
-
I am making baby quilts
-
I made a set of dinner napkins for Easter dinner with my server. We celebrated my adult kids being home for the holiday. So fun!
-
Love the woven basket! Just finished my summer table cloth. Saving up to upgrade my serger to the Bernina L890.
-
The serger t-shirt quilt is on my to-do list! Love my Bernina L460!
-
Having fun Celebrating by making these darling baskets To have on hand for various gifts. I love using the surgery to finish off seems and recently made a shirt and finish my seams off with the serger. Thanks for inspiring us with so many fun projects and interesting things to learn
-
I’m making the woven basket.
-
Rolled hem napkins
-
I just finished overlocking the edges of a t-shirt quilt before applying the binding, it really makes the machine binding process so much easier.
I also added a narrow hem around the edges of diaper cloth squares to use as reusable paper towels.
-
I celebrated by getting an L890!
-
I’m learning how to use some of the feet.
-
I celebrated National Serger Month by making sure I have all feet and accessories available for the L890. I have it all now except this prize which I want to win! Best regards and thank you.
-
This is my comment I made it in the wrong area earlier. I celebrated National Serger Month by making sure I have all feet and accessories available for the L890. I have it all now except this prize which I want to win! Best regards and thank you.
-
I celebrated serger month by making sure I have EVERY L890 foot and accessory. I have it all now except this prize which I want to win! Best regards and thank you.
-
I decided to take my serger to my local quilt shop to have it serviced.
-
Redoing my sewing room so I borrowed a friend’s machine to work on place mats. Can’t wait to get my room finished and get to work. Cute baskets.
-
I’m celebrating B-I-G, bought myself my first serger, the L890 and can’t wait to try out all these fun projects.
-
I traded in my DCE2000 for an L890. I love it. Perfect 3thread out of the chute. Thanks Bernina.
-
I’ve spent this time researching sergers and overlockers, which I plan to be in the market for within the next month or two. The one I had was great, but I gave it to one of my nieces who couldn’t get one on her own, so now I’ve been without for a while. I miss my serger .. lol
-
Just finished a tunic top with my L890. Best serger ever!
-
I have a serger but have not learned to use it yet. I will be looking at We All Sew and You Tube videos to learn. Hopefully by next month! Thank you for this lovely give away!
-
I just bought a serger and I’m excited to learn how to use it making tunics and leggings. Thank you for the chance to win this wonderful bundle.
-
I have been reading of all the things a serger can do. Would love to win the serger and try them!
-
I am scared to use a serger. Wish I had a closer shop to learn.
-
Celebrating by getting inspired by the projects in this post! May make the little basket and some strawberries! Thank you!
-
It has been awhile since I had my serger out so I think I will use it to alter some tops I have . Thanks for the chance to play and all of the great tutorials!
-
I made some napkins and table cloth for Easter dinner.
-
I upgraded to an L890 today! I’m excitedly to learn new surging techniques.
-
Giving my very elderly Bernette serger some love; cleaning,oiling,checking the upper and lower blades.It’s been a faithful friend!
-
I made some flannel washcloths and reusable makeup remover pads with my serger. Next I am making napkins.
-
I threaded up my Bernina Serger and made a sundress for my granddaughter.
She loves bees so my fabric was yellow with bees, lovely. -
I think the basket would be a nice project to work with my granddaughter, Willa this summer during her visit. She is learning to sew so maybe she will enjoy making something to have on her desk.
-
Making lots of napkins for all the holidays.
-
Recently retired, I’m looking forward to jumping into clothing construction. Some serged T-shirt dresses are a must for this summer.
-
I gave my serger a spa day, with a good cleaning.
-
I have made the fancy pillow case, baby beanie, napkins with blanket stitch, one of Gail Yellon’s totes made with a serger. Have had so much fun all month!! Thanks for all the ideas and tips!!
I have the L460 and the Bernette b42 Coverstitch/chainstitch machines.
Gypsy Hargrove
-
My celebration of National Serger Month has been quiet, viewing projects, beginners stage is me. Need more time to navigate with the overlock before I can accomplish big projects, so small ones are on the to do list. Hopefully I can be confident to work with my granddaughter, Willa for her summer visit.
-
I celebrated by buying an L 890 – my first serger ever. I even made a little iPad bag. Now I’m signing up for classes and will begin to learn the art of serging.
-
I have a Bernette 234- I love to use it for hemming…. decorative stitching… seam finishing… quilting. Happy that the blog has ideas for how to use the serger. I will be celebrating serger month with getting back to sewing!
-
Daughter expecting twins next month so busy using my 890 to make baby blankets. Love my 890 with the videos, easy threading system. Makes use so user friendly.
This gift would be wonderful addition to my happy place aka sewing room.
-
Started making a cosplay outfit for a friend.
-
I love using my Serger. I use a 3 thread stitch to edge my quilting fabric before i wash it so it wont fray.
-
I love using my Serger. edge my quilting fabric before i wash it so it wont fray.
-
I’ve purchased an Overlocker and signed up for a class to learn about this wonderful machine and to see what I can do with it.
-
Love everything Bernina.
-
National Serger Month- Time to learn new skills and try fun projects!!!
-
Love the basket! I took out my machine as soon as I saw this!
-
I am learning how to use my “new to me” Bernina 1300 mdc.
-
Love making things with the rolled hem feature of my serger. I’ve been making church linens using the rolled hem.
-
I’ve been watching serger videos and webinars and getting ready to take a serger class to learn more techniques.
-
I rescued my serger from storage, took it in for a cleaning and tune-up, and now that it’s back I’m planning a few projects to dust off my skills! ?
-
I need to dust my serger off, clean and oil it and then try making these baskets.
-
For Serger month, I plan on learning one new technique on my serger. Love all the different ways you can use a serger.
-
I have been making things for a snall craft sale..and I love making the little tissue holders..and I can whip them out so fast by using my serger I have had since 1904..I love it..it is a gem, never a problem with it..my Bernett 234 !
-
ooops..I have had my Bernett since 1984 !!
-
I have been making burp cloths and receiving blankets for a new grandbaby.
-
Just learned to thread it! Now to make some artful garments!
-
I have been hemming prom dresses with my serger, making happy memories
-
I have been watching your videos and learning as much as I can about Bernina sergers.?
-
Thank you for all the featured “Serger” projects and tips that you have provided this month. I am learning so many new ways to use my serger and taking advantage of the special pricing for those new feet and accesories to enjoy using.
-
I am ready to sew up a spring weight knit material to make a dress , taking a class at my local dealer trying to learn as much as I can, with my Bernina serger & Bernina 480 . New to sewing but with The right tools I’m on best foundation.
-
Love to use serger for finishing seams. Looking forward to learn more ways to use serger
-
The sergers are great!
-
I have been watching videos from Bernina to learn more about my serger!
Love my L890! -
I am moving into a new home with a wonderful sewing room!
-
Didn’t realize it was National Serger Month. I will have to finish the edges of the two blankets I started. I also need to take a class on how to use my serger to the most of its capabilities. I bought it just before the pandemic shutdown took affect.
-
I bought a new bernina serger last year and am learning how to use it. I will be celebrating serger day buy learning all about my machine. I just love it and am excited to get going.
-
I have a new bernina serger l and am learning how to use it. I will be celebrating serger day by learning all about my machine. I just love it and am excited to get going.
-
I celebrated national serger month with my Bernina L850, making quilts!
-
I am celebrating National Serger Month. I attended a serger class with Bernina Educators and took a test drive on the L890. Would love to upgrade to that model from my 1150!
-
I just went in and purchased my L890! My very first serger!!!! Now to learn how to use it. LOL
-
I have been learning about new sergers and their capability.
-
I plan to make my first pair of leggings with my new L890 serger/overlocker. Any advice would be appreciated . Thanks
-
For National Serger month, I decided to learn how to use the different feet that I purchased for my serger. That is an awesome give-a-way! Thanks for giving us a chance to win it.
-
I’m still using my Bernina DL 2200. It works great, but it sure would be nice to have a new modern machine that does so much more!
-
I’m celebrating national serger month by using my serger every time I sew because it is super fast and finishes my seam allowances so nicely. I’ll also do some creative sewing with it.
-
I’ve been using my serger to finish the seams of a tote bag. I also make flare skirts for my granddaughters finishing the seams and doing rolled hems. The serger makes it a quick sew.
-
I’ve been busy sewing clothes for my grandchildren! I’m having a ball with my new machine,❣️
-
I am in the research process – trying to decide which one to buy. Excited to get started!
-
I’m entertaining all the various projects I’d love to create and learn new techniques along the way.
-
Got my serger serviced and looking at projects to start working on.
-
I have been celebrating National Serger Month by planning some new projects!
-
For National Serger month, I’m going through all my stitches with decorative threads for inspiration. Just playing around with my serger helps me get to know it better. This project inspired me to dig out the package of KraftTex I had squirreled away…I’m now cutting and getting ready to serge a basket!
-
Make lots of clothes with my L890! Love it!
-
LOL – I cleaned my studio so I can actually use it!!!
-
I have an older Bernina serger that I frequently use wirh projects. Hoping to hone some more skills with it.
-
I’ve been celebrating National Serger Month by using my serger for raw jean edges before I sew them pieces together.
-
I pulled out my older Bernina serger and have gone through some online tutorials to help me re-learn how to use it. Had great success using it on my recent denim jeans project! Feeling much less intimidated now that I have practiced threading and making tension adjustments.
-
I retire in a week and can’t wait to make the basket as my first project.
-
I don’t currently have a Bernina Serger but been considering one based on all the different ways I could use it ?
-
I have ordered new feet for my L890 and am learning new techniques on my serger. I’ve loved all the projects and tutorials this month!
-
I love using my serger! It’s a 334D model and still sews like a dream.
-
I have been learning how to use my new L890 and I am looking forward to more serger classes, webinars and projects.
Thank you, Bernina, for a brilliant machine. -
My overlocker is still new and I’ve been learning everything I can find
-
I would like to try a new serger, since I only have an old hand-me-down one that only sometimes works.
-
Have never owned a serger s I would love to win one so I can make those cute baskets
-
Making a wedding quilt for my son.
-
What a precious idea! So many things I must try! Love this!
-
Love my serger. Those are some fun notions and items to have in my serger stash.
Need to be doing more with my serger. This will keep me going. -
I’ve been using my serger to make heart pillows and aprons for people who are recovering from breast cancer surgery. Always love the tips and projects to make. Thank you!
-
Brushing up on my skills, a bit rusty, but they are starting to come back.
-
I want to watch some of the Bernina server videos. Love my Bernina serger!
-
Make myself some sewing accessories like a scrap bag!
-
I just used my L850 to make a bucket hat. It was fast and complete. Nothing more to finish if you use the overlocker.
I have made hundreds of baskets from rattan reed and English wicker, but now I can make one with my overlocker. -
For National Serger Month, I’m learning how to use my serger!
-
I took an online serging class and made a set of placemats with matching napkin
-
I didn’t know it was National Serger Month until I received this email. I will celebrate by completing a little girls dress that my grandmother started smocking.
-
Fun project! I’ve been celebrating serger month by making ballet skirts and learning what my beautiful new B48 can do! ?
-
A serger is an amazing tool. I have been using mine to serge around Terry cloth squares. They are then wash clothes & are sent to children in need along with many other treasures
-
I will take my serger to the shop for maintenance.
-
As I read this blog, I am wearing the fleece hooded jacket I made for my husband 25 years ago on my old serger. I challenged myself to make it entirely on my serger. The jacket is holding up beautifully, although my old serger (another brand) is showing it’s age (much like I am). It rattles and shakes, makes an awful racket, and the differential feed doesn’t work anymore. I still use it.
I quilt almost every day on my Bernina sewing machine, which is wonderful. I prewash my fabrics to preshrink them and prevent excess dyes from bleeding. I use my serger to overlock the raw edges of fabric to keep it from raveling in the washing machine and dryer. The fabric comes out neat and ready to fold, without a lot of raveled threads to clean up. A serger is a big help in quilting. -
Happy National Serger Month! I’ve been challenging myself to use my
serger more often, finding ways to serge seams and embellish every
new project I start. -
I love my serger. I love this idea and can’t wait to try making a basket. Thank you!
-
I have been learning how to use my serger effectively to make simple receiving blankets, burp pads and bibs for babies.
-
I have been following Facebook post on servers but haven’t used my server. Lots of baby being born busy with baby quilts. Plan on using use server soon.
-
I didn’t know there was a National Serger Month, but I use my serger every week making knit headbands.
-
I enjoy all the project ideas in the newsletters. It would be pretty cool to win a prize too!
-
I use my serger for many projects but especially love to serge the edges of my quilts before sewing the binding on.
-
Love my serger! I use it to finish off seams when making doll clothes for our granddaughters. Also use it to finish edges of pants’ hems when hemming them. Only wish I had more time to explore all the things I can do with it!
-
How I’ve celebrated serger month, I’ve been learning more of the capabilities my L460?
LOVE Bernina ❣️ -
I have been making pillowcases on my 460 serger and make up remover pads as well…
Leave a Reply
You must be logged in to post a comment.

WeAllSew 2022 National Serger Month Giveaway
This giveaway is now closed. Thank you to all of our WeAllSew fans who entered!
Congratulations to our winner(s):
Keep an eye out for the next WeAllSew giveaway!