How to Make a Windsock with a Serger
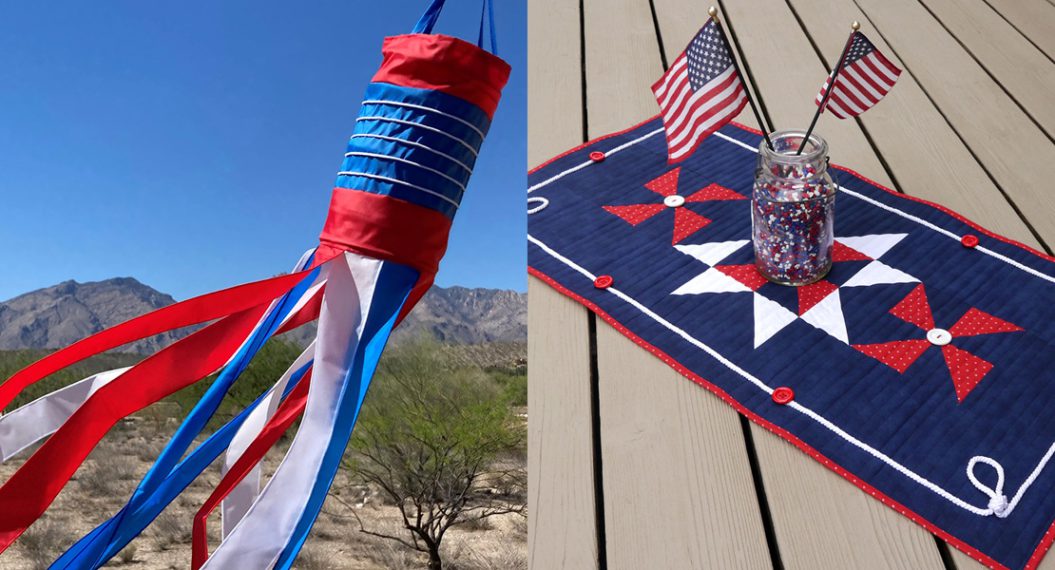
I came across this fun pattern recently and decided that a windsock would be a great addition to my patio. Since cotton fabric will not hold up in the constant sunshine and occasional rain at my house, I decided to go with ripstop nylon fabric. I also decided to customize the design to fit a patriotic theme. (OK, I admit I sometimes look at pattern directions as suggestions!) My overlocker made quick work of a lot of the stitching. I also used my sewing machine for topstitching. Follow my tips and you will have your own windsock made in no time!


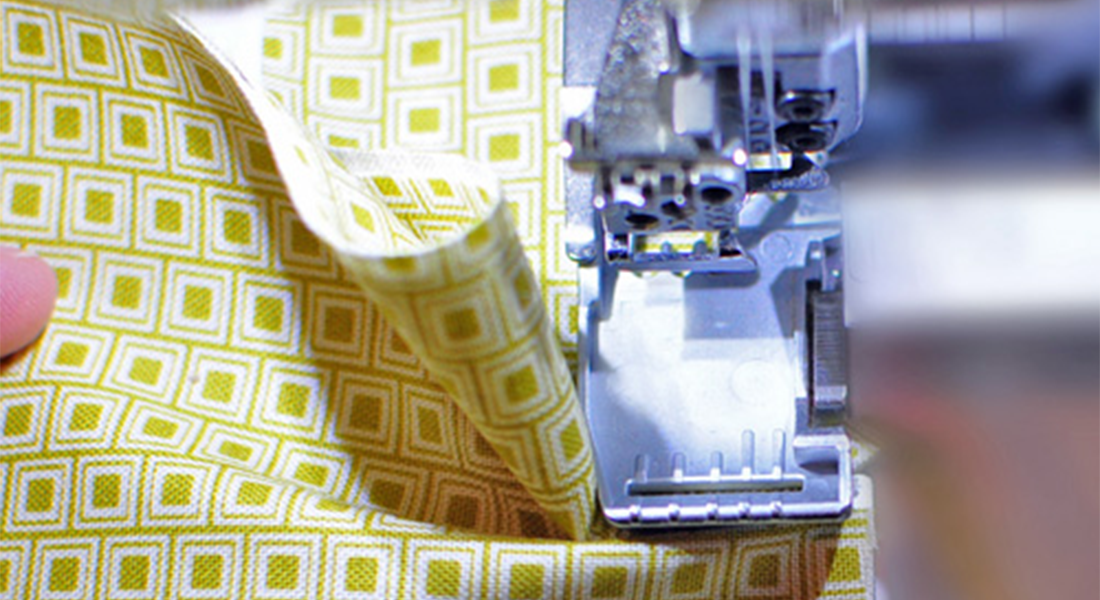
So what is ripstop fabric? It is a woven fabric often made of nylon. It uses a special reinforcing technique during weaving to make it resistant to tearing and ripping. When you look closely at the fabric you can see a cross-hatching pattern. It is strong, machine-washable, and tear and abrasion-resistant. It’s perfect for making outdoor flags, banners, kites, and more. You can even iron it with a cool iron. It comes in different weights and thicknesses for a wide variety of uses…from parachutes to tarps. For the windsock, I am using a 59” wide ripstop nylon easily available at many chain fabric stores.

For my patriotic-themed windsock, I am going to use three colors . . . red, white, and blue. In the pattern, I replaced the center three rows of pieced stripes with one solid blue piece and added white stripes by stitching a double-rolled hem. If you want to make yours the same as mine, I suggest getting 5/8 yard of red ripstop nylon, ¼ yard of white ripstop nylon, and ½ yard of blue ripstop nylon (assuming all yardage is about 59” wide). When cutting, save leftovers for test sewing.
Note: I did NOT use any fusible stabilizer.
You will need the pattern, Windsock Pop-Ups by the Fat Quarter Gypsy, for detailed sewing directions. The pattern ALSO comes with the spring and hanging hardware!
Cut Your fabrics from the Ripstop Nylon:
Red
- 1 – 3 ½” x WOF strip; sub-cut to 2 – 3 ½” X 17 ½” rectangles for outside tube borders
- 2 – 2 ½” x WOF strips for tails; sub-cut to 27” long to make 3 tails plus 1 extra
- 1 – 10 ½” x 17 ½” rectangle for inside tube
White
- 2 – 2 ½” x WOF strips for tails; sub-cut to 27” long to make 3 tails plus 1 extra
Blue
- 1 – 6 ½” x 17 ½” rectangle for center of outer tube
- 2 – 2 ½” x WOF strips for tails; sub-cut to 27” long to make 3 tails plus 1 extra
- 2 – 1” x WOF strips for hanging strings
Materials to Make a Windsock:
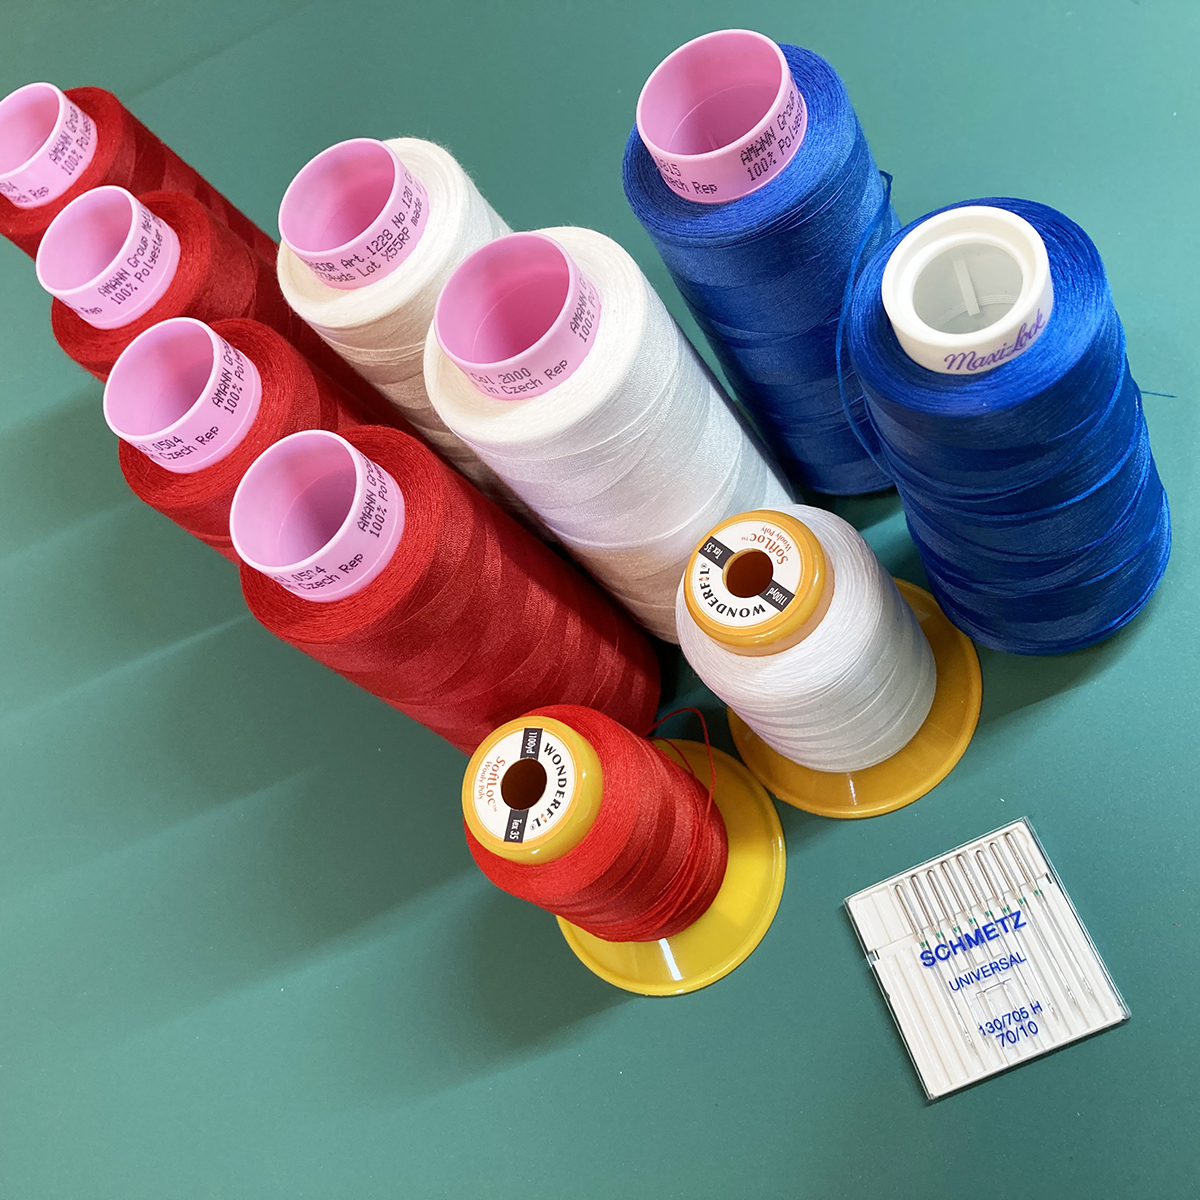
You will need 4 spools of red, 2 spools of white, and 1 spool of blue serger thread. I used Mettler Seracor Polyester thread.
You will also need 1 spool each of red, white, and blue Wonderfil Softloc or Maxi-Lock Stretch for the rolled hems.
I had very good success using a Universal 70/10 needle.
Additional Materials to Make a Windsock:
I did most of my stitching on the bernette 64 AIRLOCK. It sewed the ripstop nylon beautifully!

There are a few steps that require a sewing machine. I used the bernette 79.

Steps to Make a Windsock with a Serger
Serging the Outer Tube with a 4-Thread Overlock
Do these steps instead of piecing the swirled or striped version in the pattern.
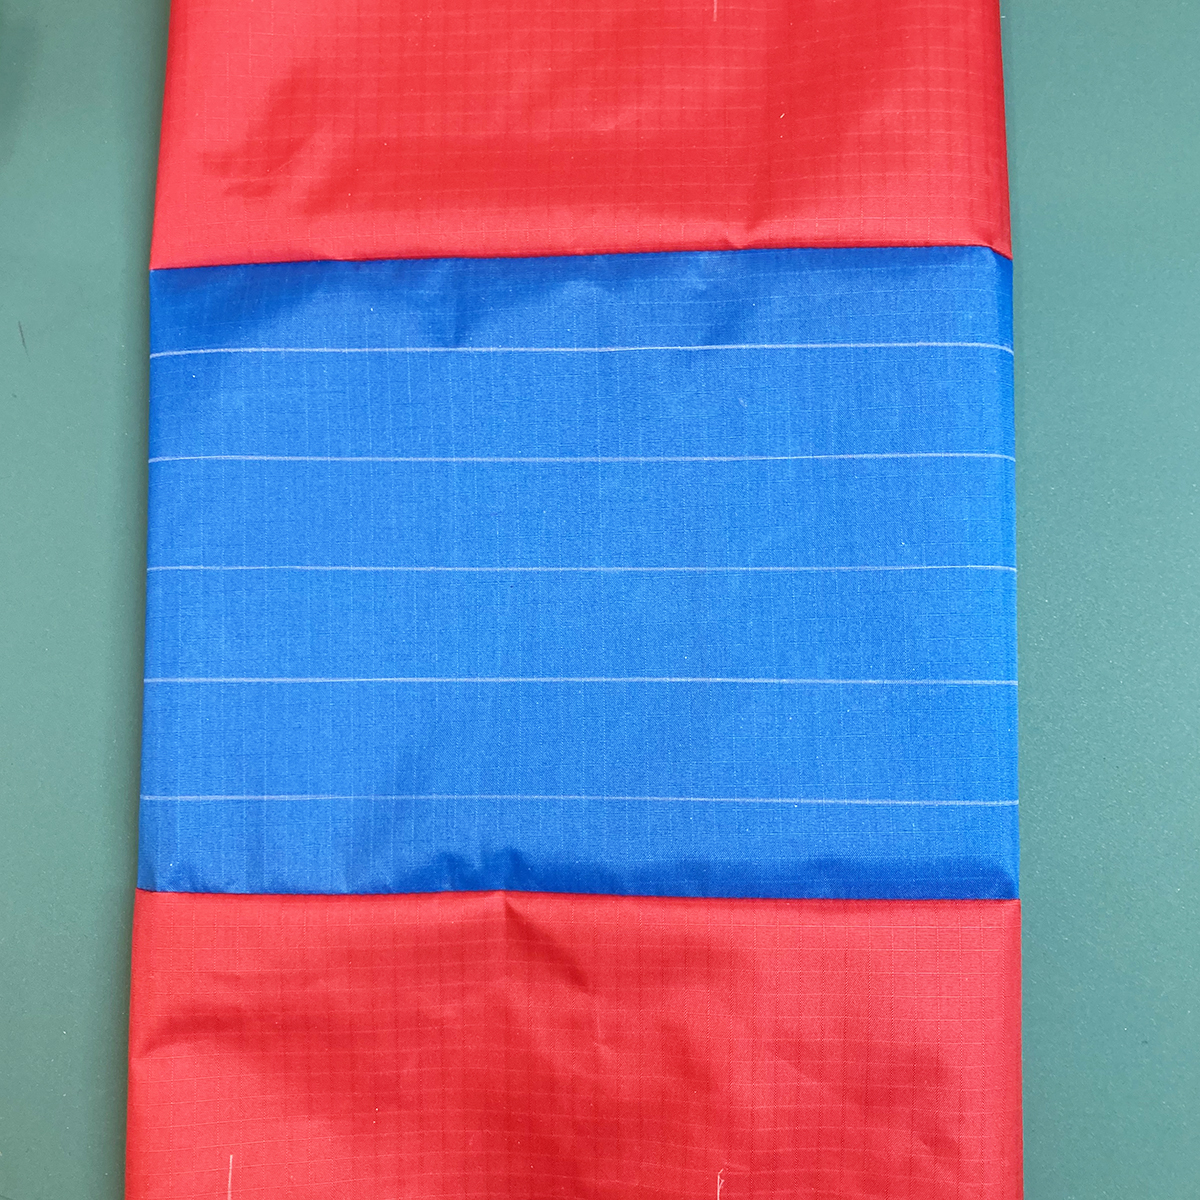
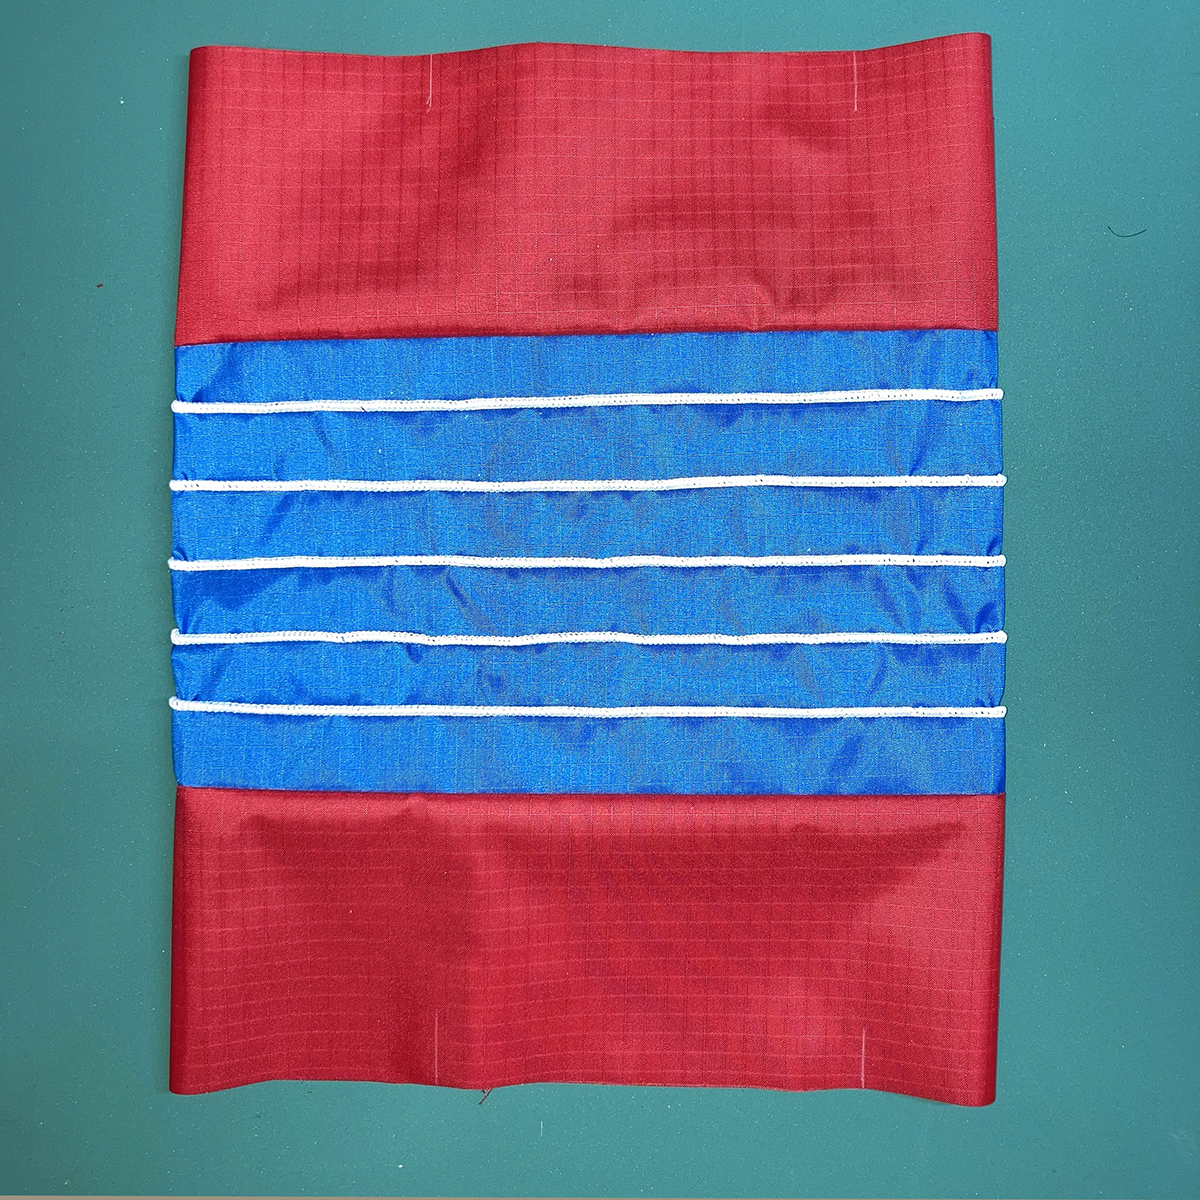
Using a 4-Thread Overlock and red thread, stitch the red 3 ½” x 17 ½” rectangles to each long side of the 6 ½” x 17 ½” blue rectangle. Finger press (or use the Clover Roll and Press) towards the red.

With a chalk pencil (such as the Bohn White Chalk Pencil) and ruler, draw a line in the center of the blue stripe on the right side. Add 2 lines above and 2 lines below, spaced 1” apart. Refer to the pattern directions about marking the outside tube on the red borders. Then stitch the tube together matching seam lines and chalk lines. Turn right side out. Do not trim to size yet.
Serging Stripes with a Double 3-Thread Rolled Hem
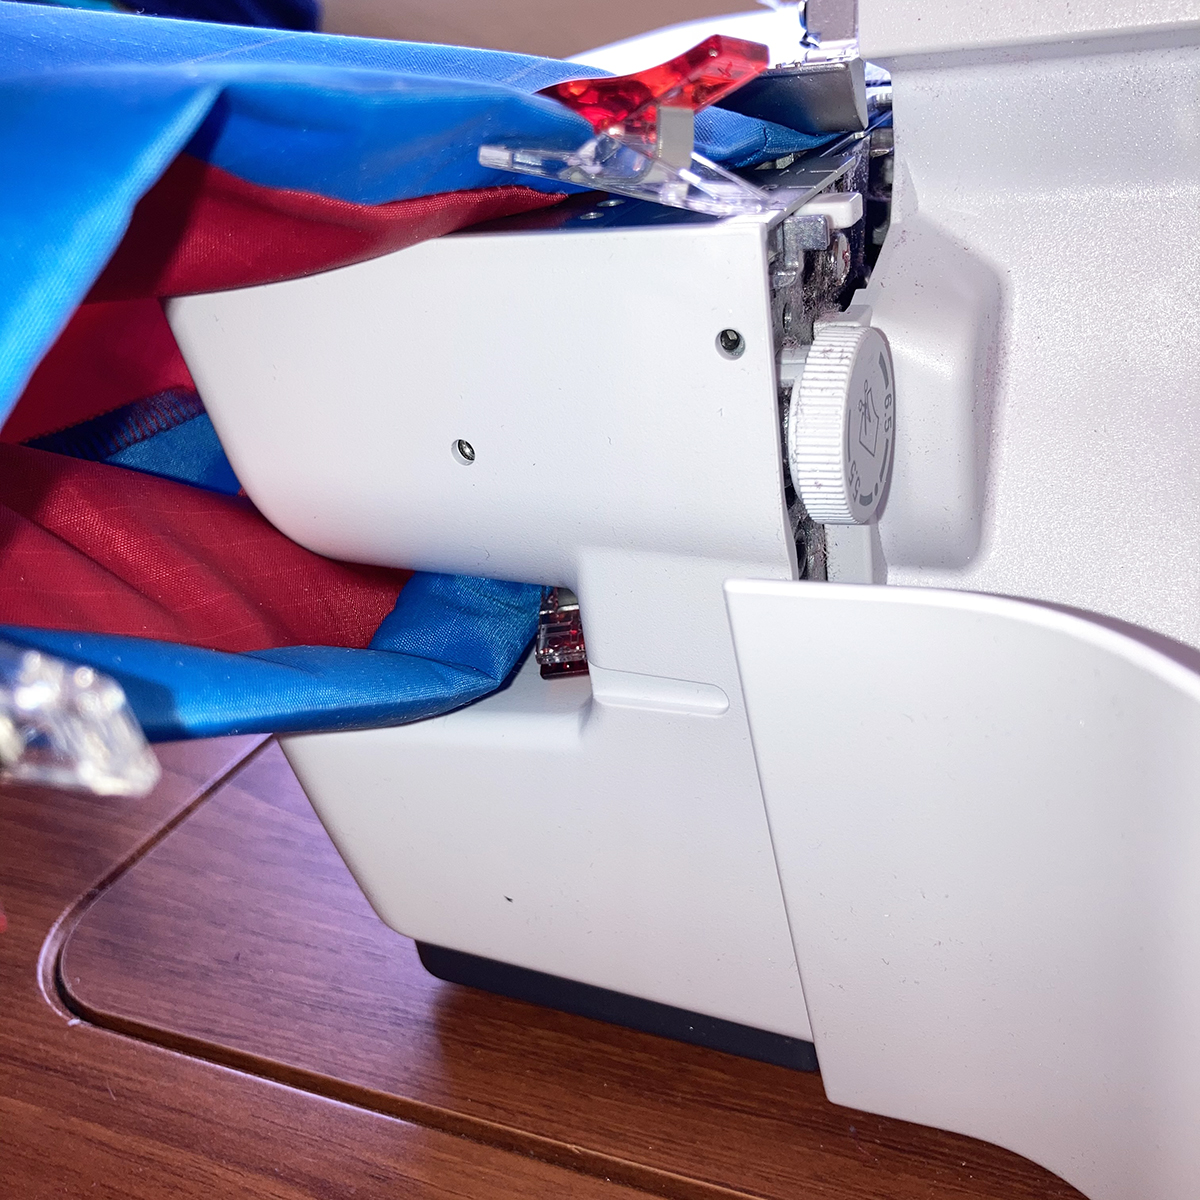
To make the white stripes, you are going to stitch 5 rows of a rolled hem. To make it REALLY stand out, you are going to do it twice! The Freearm is going to make sewing around the tube SO easy! It also eliminates having to match up lines of stitching when closing the tube.
Thread the machine for a 3-Thread Rolled Hem with white Mettler Seracor in the right needle and Lower Looper. Use white Wonderfil Softloc in the Upper Looper.
Remove the Freearm Cover from the overlocker.
Lower the upper knife.
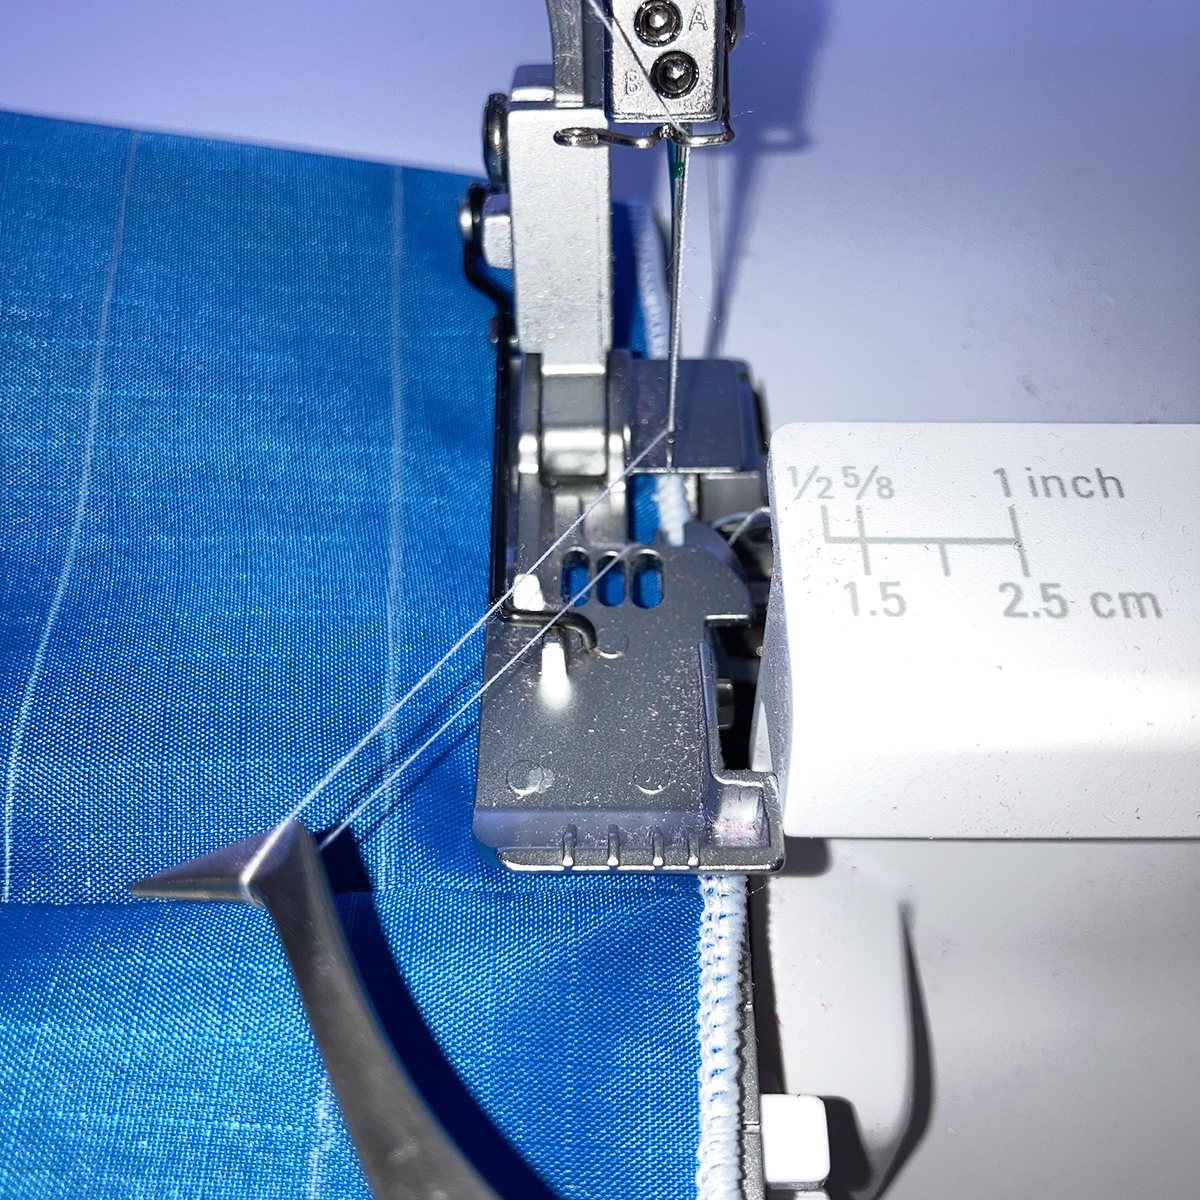
Fold the tube wrong sides together along one of the chalk lines and finger press. Hold with clips if you like. Place the tube around the Freearm about 1” away from the seam line. It’s easier to start and stop away from the seam line.
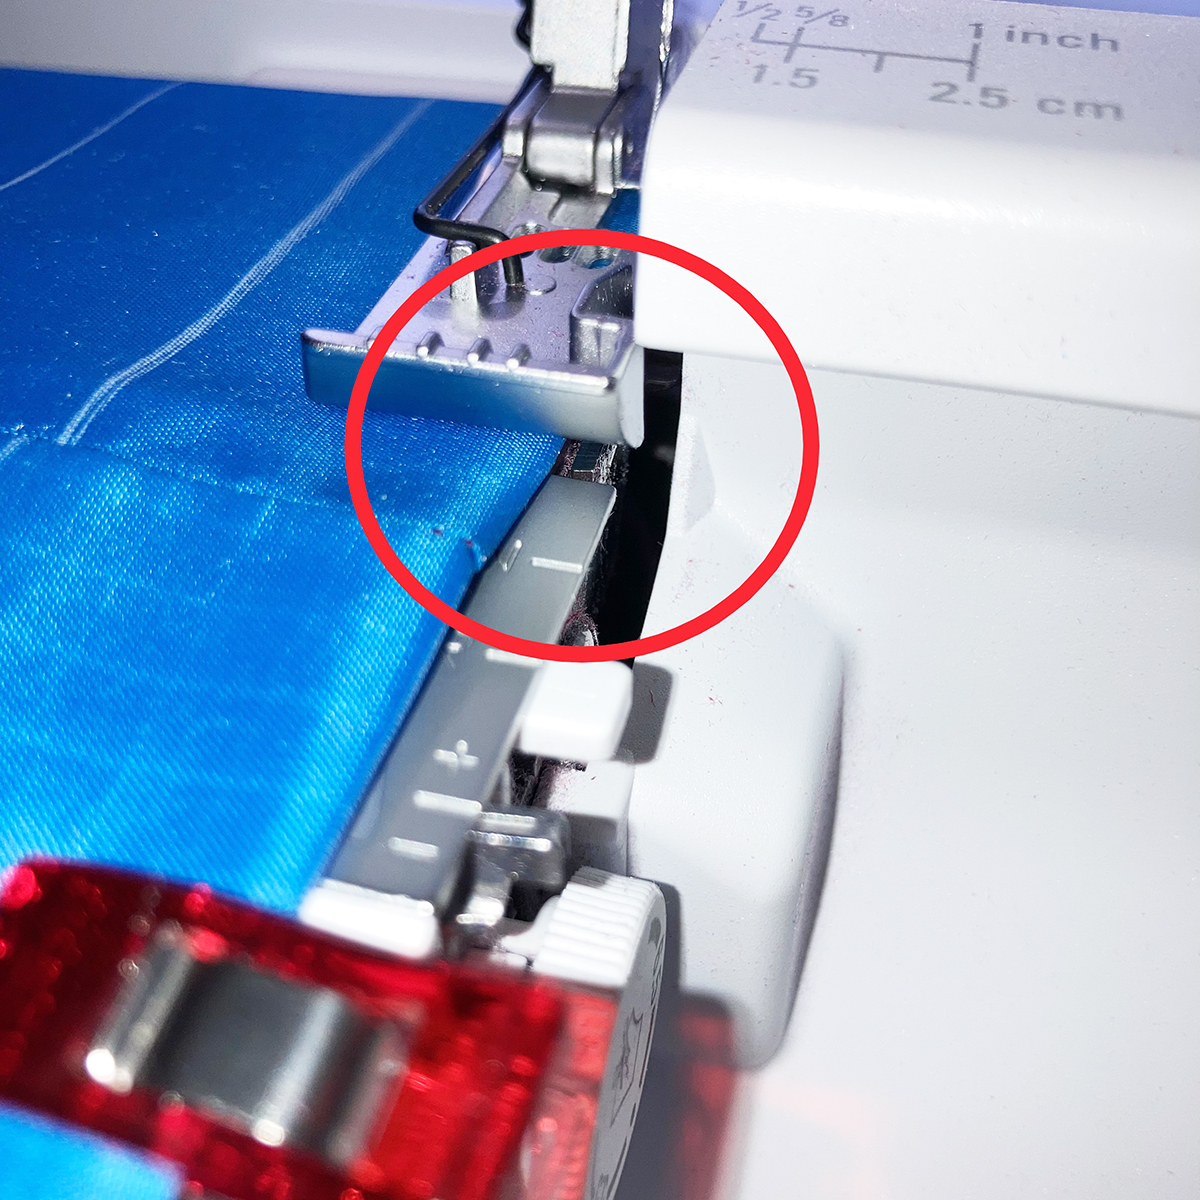
Guide the fold even with the far-right notch on the foot (just a small smidge to the left of where the blade was) and stitch all around. When you get back to where you started, increase your stitch length by about half and go around again. (I recommend practicing this technique first.)
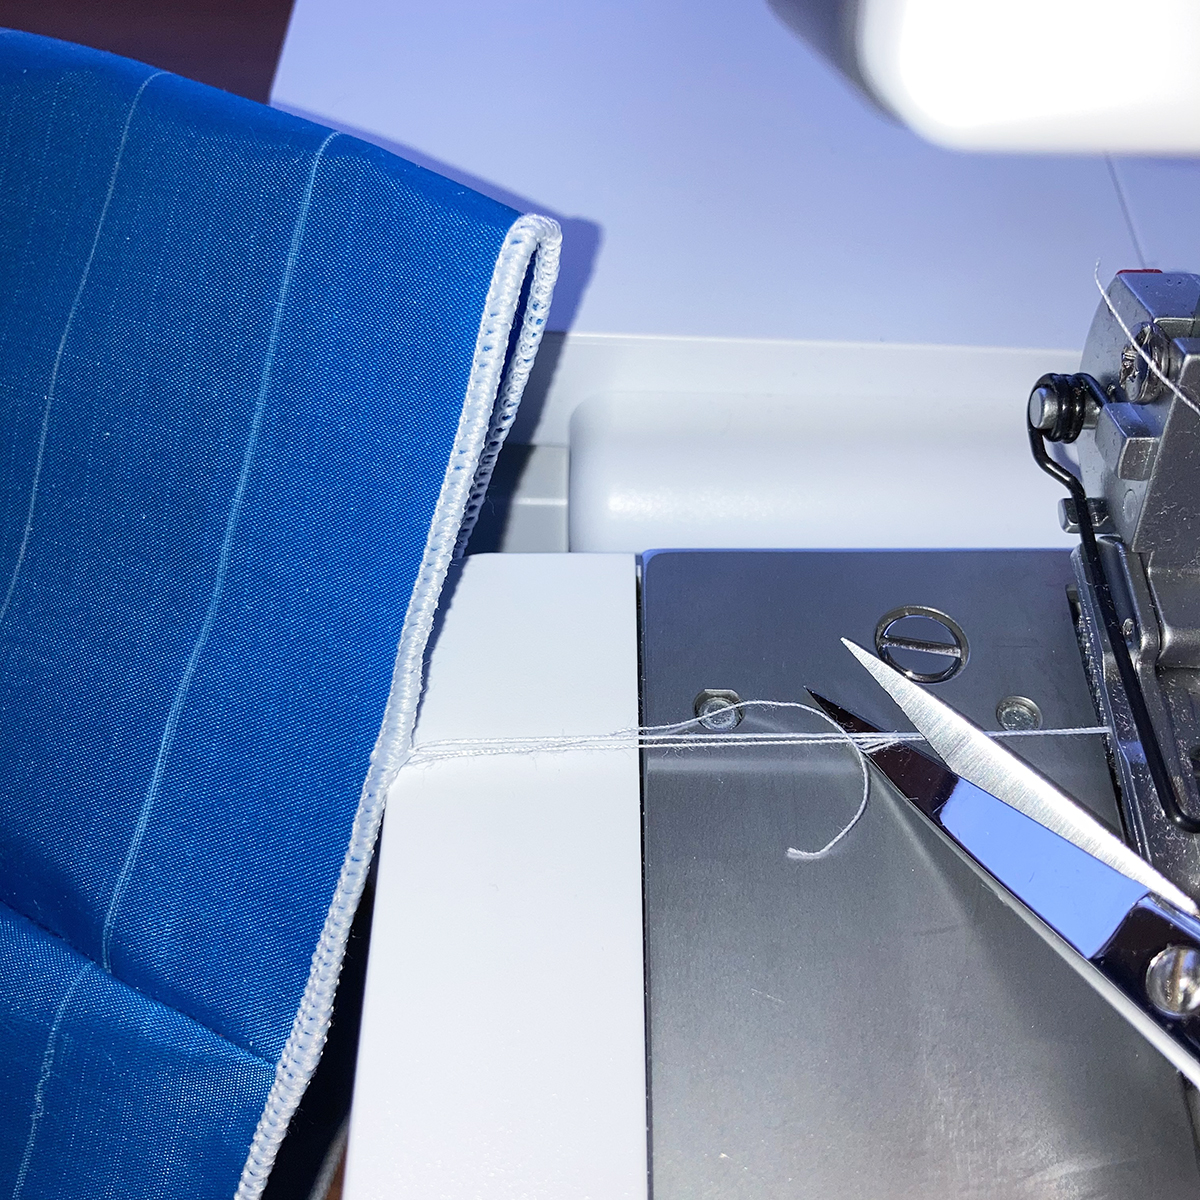
When you come around to the beginning the second time, overlap the previous stitching about an inch. Make sure the needle is in the highest position and raise the presser foot.
Use tweezers to pull the needle thread toward you about 6” inches and cut the thread.
Pull the tube back and cut the looper thread. This is an easy way to release the threads without getting a funny little triangle when you sew off.
Dab with a little Fray Block. Cut the threads when dry.
Repeat for the other 4 stripes.
Step 20 of the pattern tells you to fold the rectangle in half so that the folded dimensions are 8 ¾” W x 10 ½” H and then stitch a ¼” seam. That seam was done earlier, so your tube should now measure 8 ¼” wide. The height on your tube is probably a little more than 10 ½”, so trim evenly on both ends so that it measures 10 ½” high.
Mark the Inside piece as directed in the pattern.
Serging the Hanging Strings with a 2-Thread Rolled Hem
Fold a 1” blue strip in half lengthwise and serge a rolled hem along the raw edges so that the finished piece is about 1/4″ to 3/8” wide. Trim to length as directed. Make 2.

Continue following the pattern directions to attach the strings using the sewing machine.
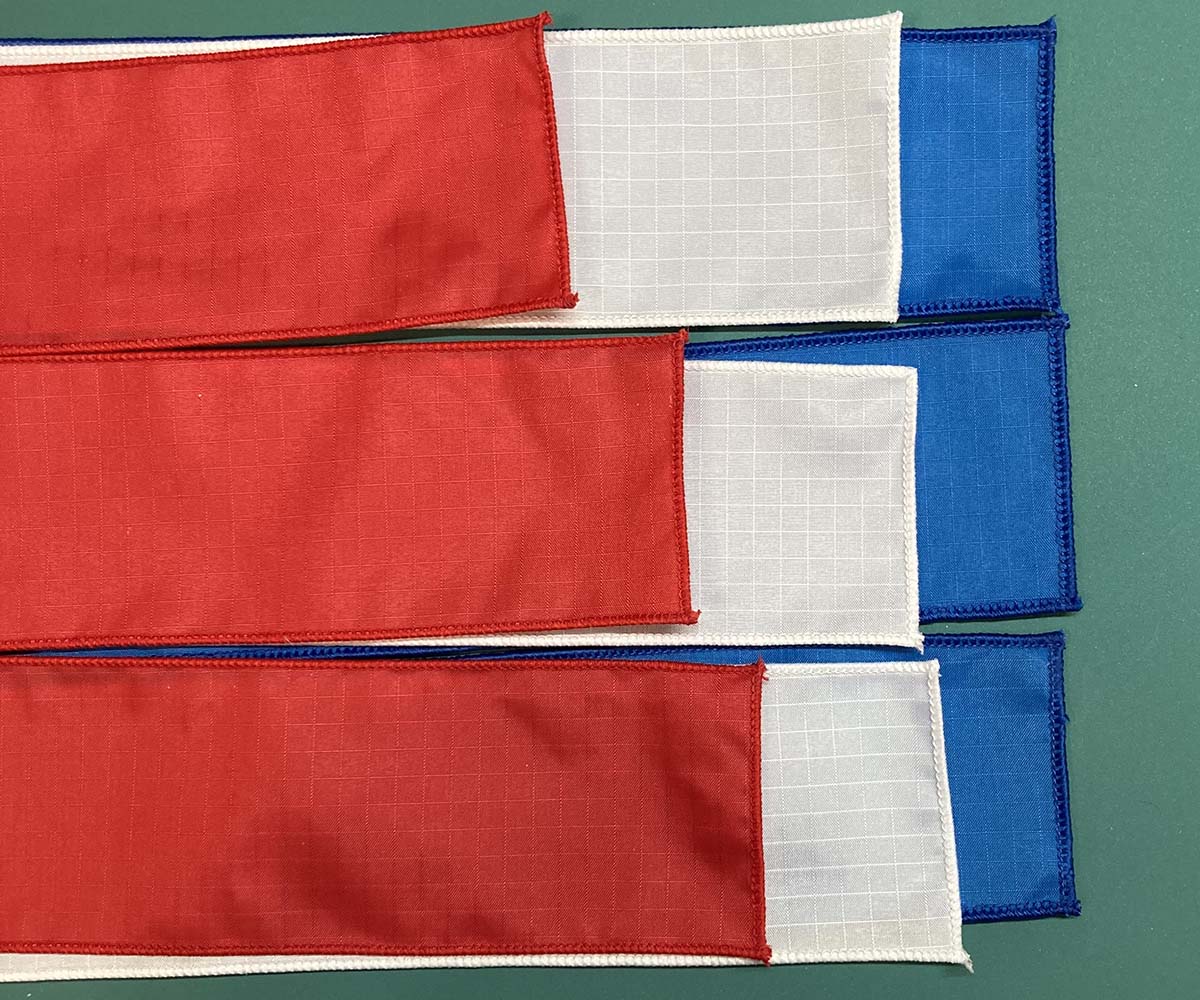
Serging the Tails with a 2-Thread Rolled Hem
Using a 2-Thread Rolled Hem with Wonderfil Softloc in the Lower Looper, stitch along 2 long edges and 1 short edge of each tail. I found it easier to stitch the short edge first and then stitch the long edges, starting at the unfinished edge. Guide the fabric along the edge of the foot, trimming a little bit. Use some Fray Block on the corners. Cut the thread tails when dry.
Wasn’t that fast and easy? Stitch 9 tails and set aside.
Now follow the rest of the pattern instructions to finish your windsock. Don’t skip the safety pin step! I used small quilting safety pins and straight pins where clips did not work. I used my fingernail to scratch out the small holes after the pins were removed.
I did NOT use iron as shown in Steps 37 and 43 of the pattern. Finger pressing (or using the Clover Roll and Press) worked really well.
Steps 38 to the end work best on the sewing machine. Take advantage of that freearm!
I hope you had fun making this windsock! Change up the colors to match the season or your decorating style. Once you have the pattern, all you need is a Small Pop Up Refill to make more!

Used Products


What you might also like


2 comments on “How to Make a Windsock with a Serger”
Leave a Reply
You must be logged in to post a comment.

The link for the pattern does not have purchase options……