How to Make a Fabric Collage with Punch Tool #45
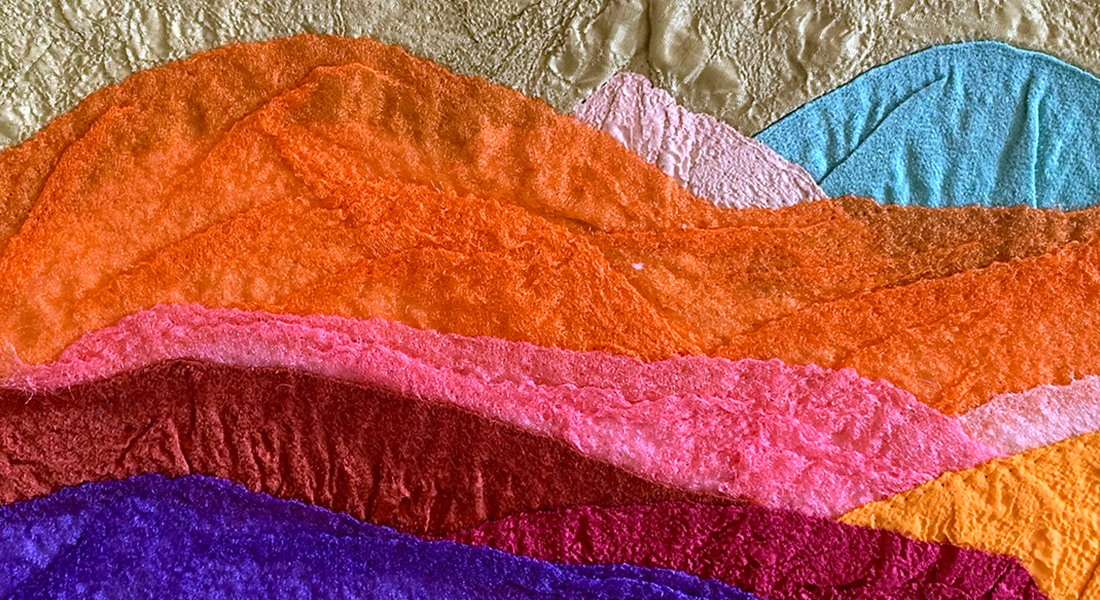
Have you ever thought of creating a fabric collage without using thread, fusing, or glue? BERNINA Punch Tool #45 is the perfect way to build a fabric collage using lots of fun fibers. Here is a felted fabric project to help you get started. I am creating with a BERNINA 770 QE. To prepare the machine, simply follow the instructional booklet of BERNINA Punch Tool #45. I love the ease of having my sewing machine magically turn into an embellishing machine with the use of this amazing tool.
Always keep in mind “less is more” when embellishing. You only need wisps of fibers to felt as you want the fabrics to peek through your work. Take your time and remember you can always lift the fibers you have felted if you want to make adjustments. It’s that easy!

Steps to Make a Fabric Collage with BERNINA Punch Tool #45
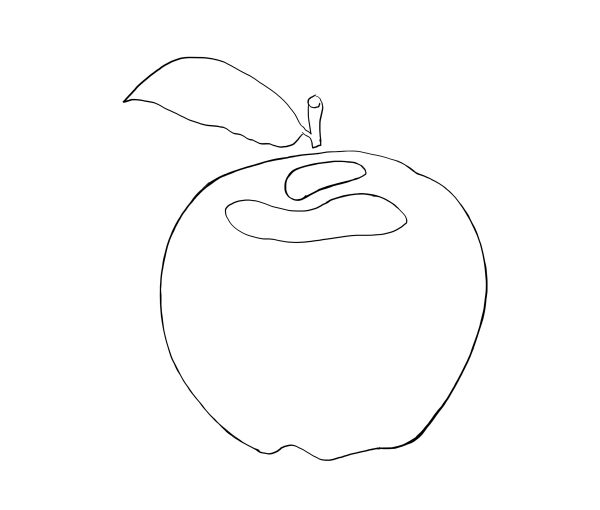
- Using a lightbox trace the pattern onto the muslin.
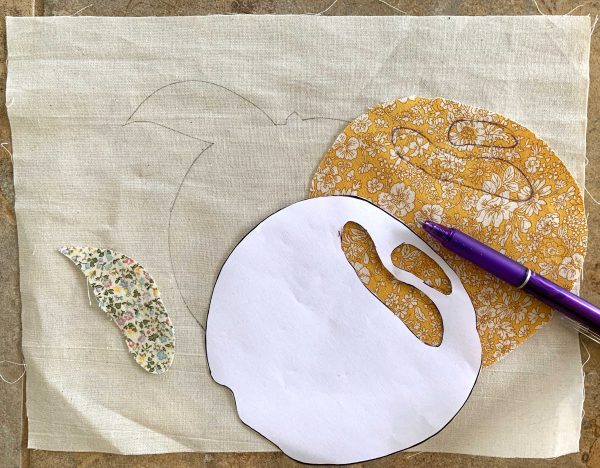
- Cut apart the pattern and trace the apple onto the gold fabric and the leaf onto the green fabric.
- Cut out the shapes and lay the apple onto the traced muslin, set the leaf aside.
- Using the apple pattern, cut the hollowed-out portion of the apple near the stem and the area behind the stem. You now have two holes in your pattern. Lay the pattern over the fabric. Trace these two shapes onto the gold cloth with a fabric marker.
- Blending: Begin with the apple. Blend the merino wool into three tones of lights, mediums, and darks. Use your fingers to separate the strands by gently holding both ends of the 7” wool sections and slowly pulling them apart. You will do this with each color you wish to use.
For lights, select pastel colors such as peaches and light pinks. Stack the colors on top of each other and gently pull them apart and blend them with your fingers. You will need to do this a few times to mix the colors. Set aside. Repeat this process with medium tones and dark tones. You now have three fluffy pre-mixed shades of light, medium, and darks.
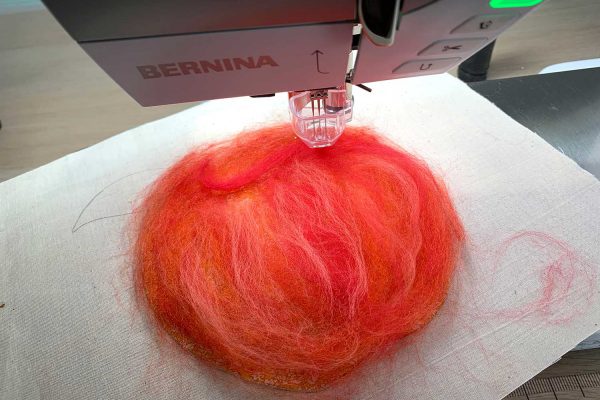
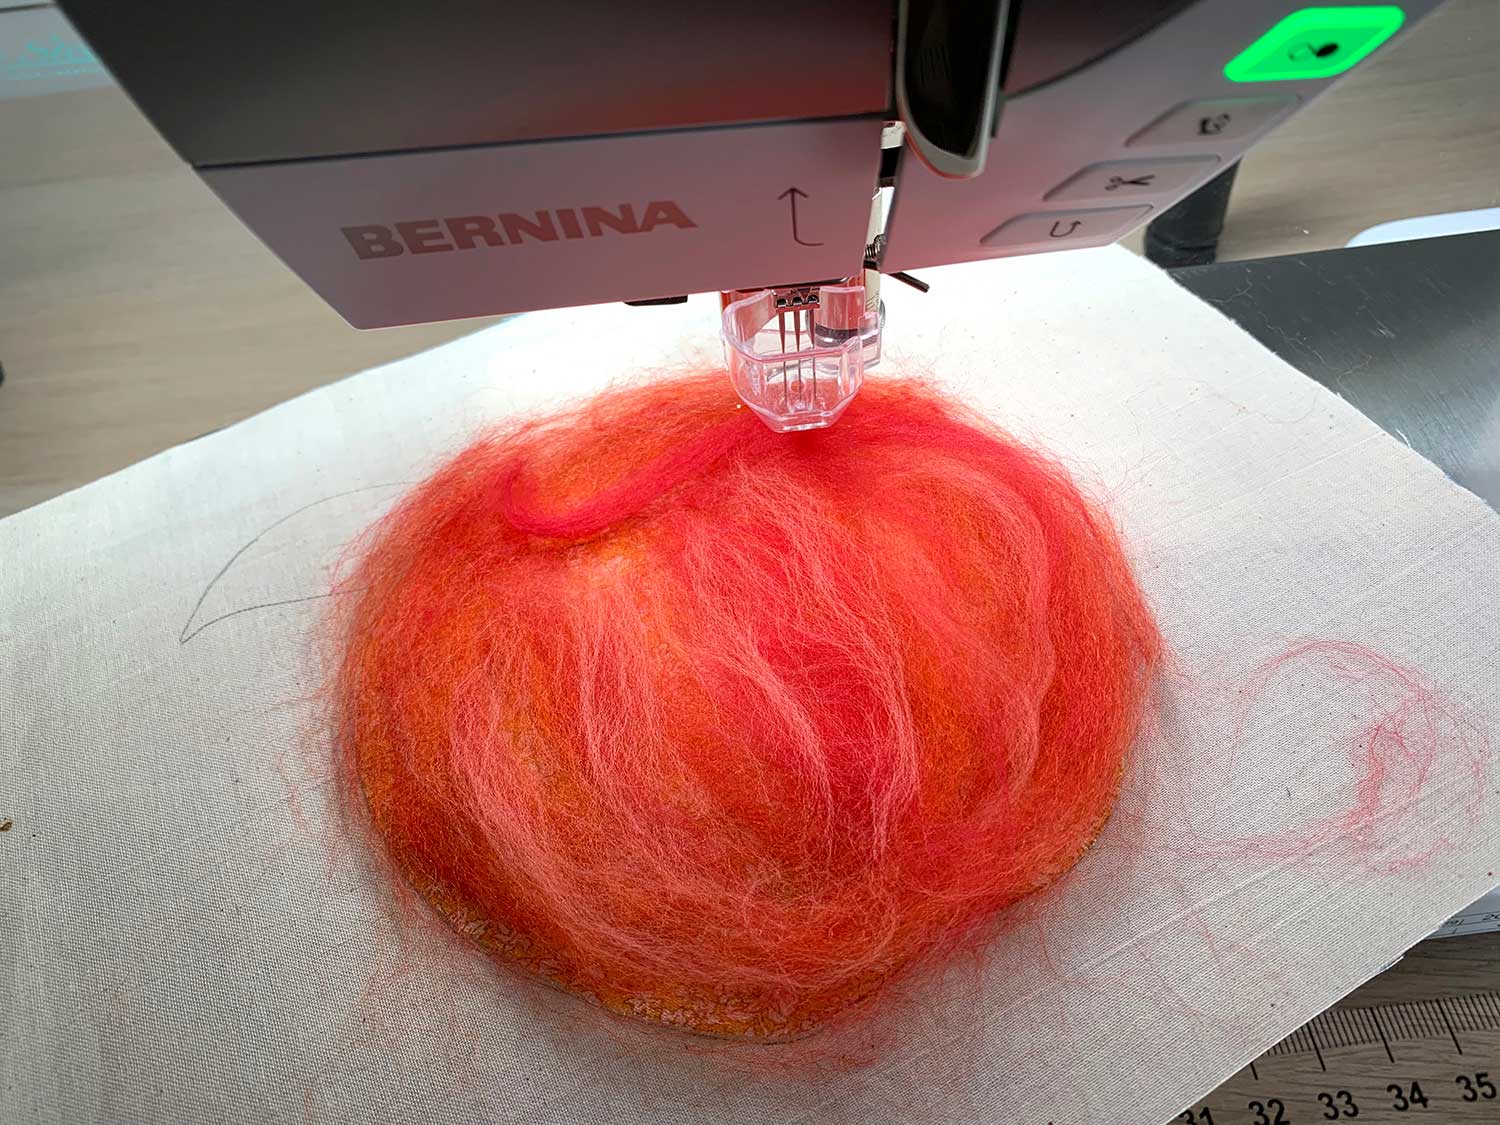
- Now it is time to begin “finger-painting” with wool. Beginning with the mediums, pull several wisps of medium tones and lay them over the apple fabric. Slowly build the mediums allowing some of the fabric to peek through.
- Next, move to the sewing machine and slowly felt the fibers into the apple fabric and muslin. You will shape the apple by moving in the direction of the curves in a free-motion style. Try to keep the felt from covering the edges, you should be able to see some of the yellow fabric.
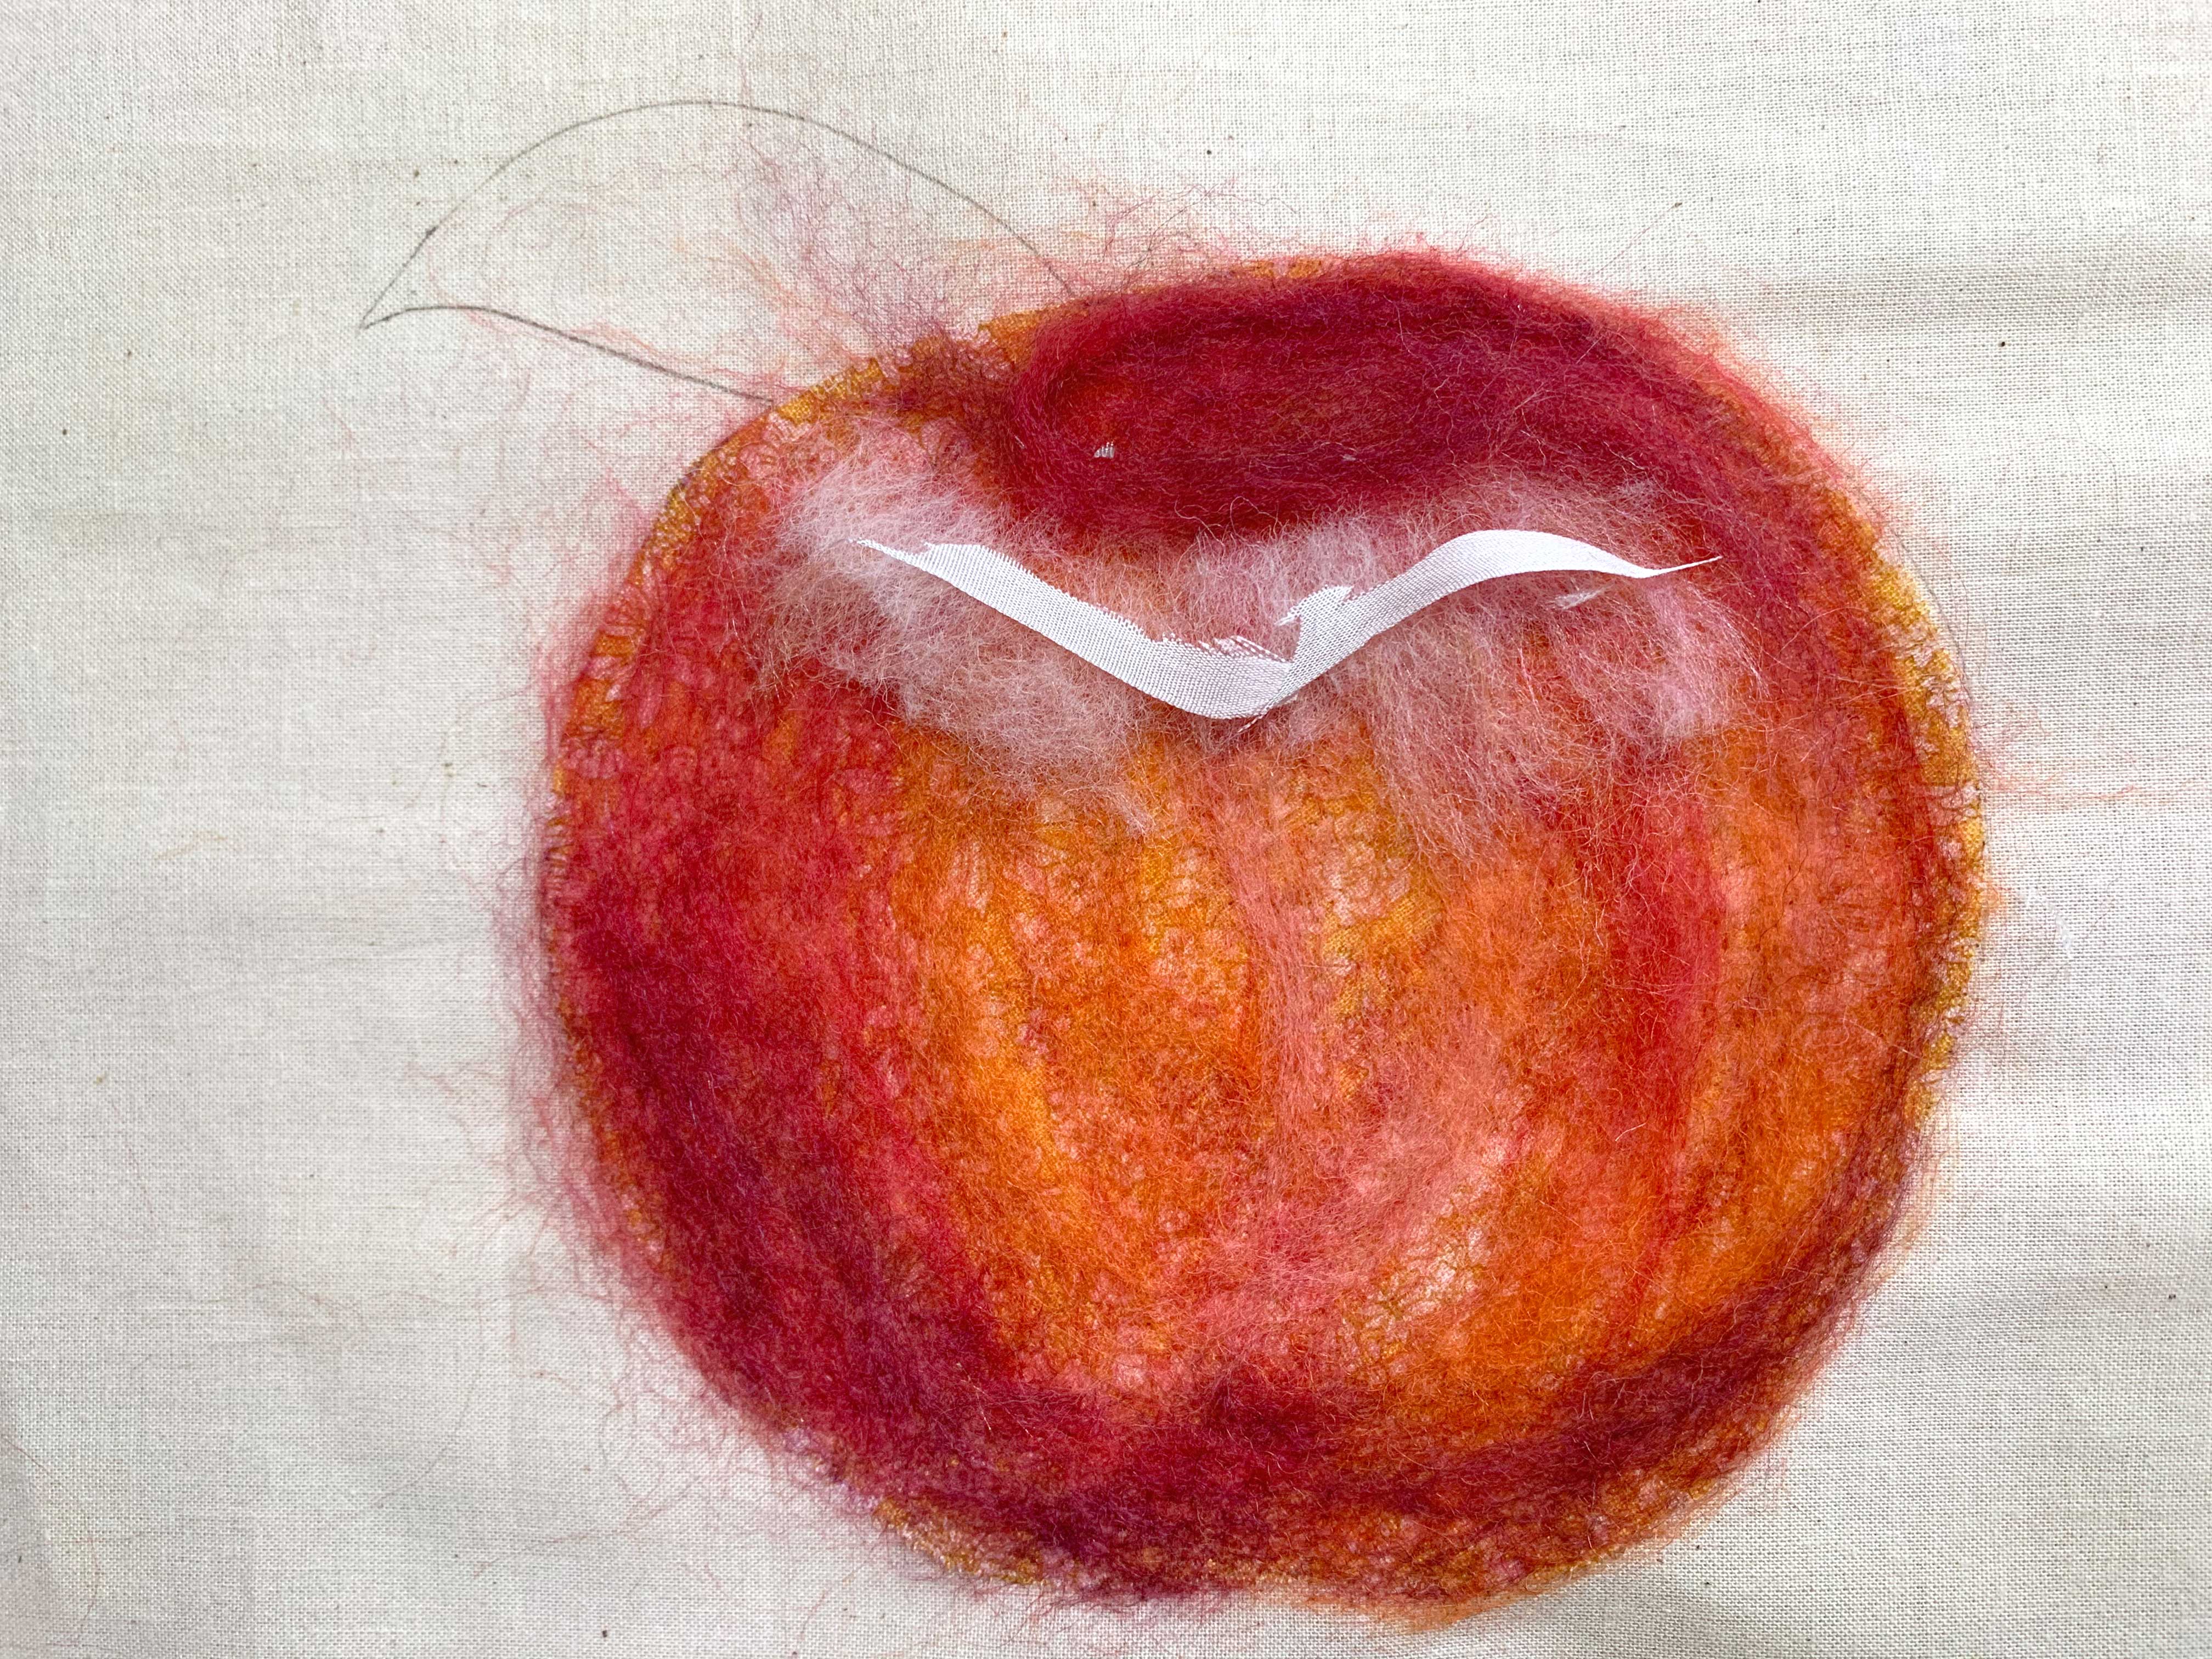
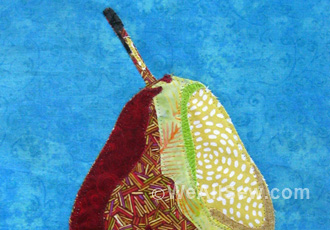
- Return to the table. Using your piece of fruit as your reference, add the highlights. The pre-traced lines will help guide you to the hollowed part of the apple. Squint your eyes and look at the fruit, to see where to add the highlights. Next, select the pre-mixed light tones and lay wisps of wool onto the sections you wish to highlight. Squint your eyes again and look for the brightest highlights. Add white wool to these areas. Use scissors to cut the small white ribbon highlight shapes. Snip a few strands of white wool and cover the white ribbon. The wool will act as a binder to hold the ribbon into place.
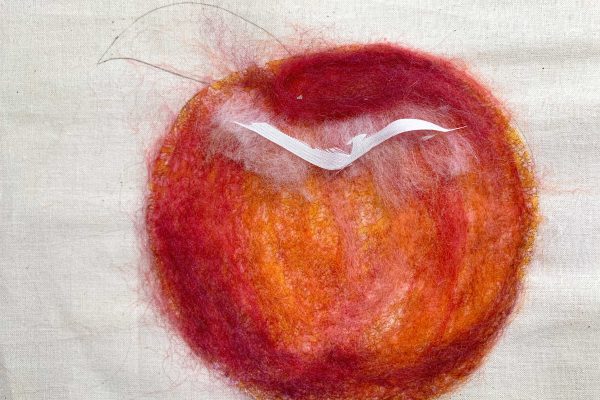
- Felt highlights into place, moving as before to follow the contours and curves of the apple.
- Move back to the table. Next, select the darks and begin shading. Repeat the process of squinting your eyes to find where to add the darkest tones. Be sure to add darks to the hollowed area around the stem.
- Felt darks into place by moving in the direction of the curves.
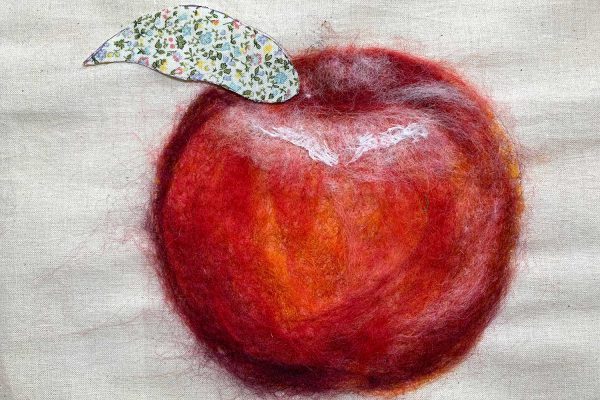
- Next, add the leaf onto the muslin. Add a few wisps of medium green to the overall shape allowing the fabric to peek through. Add light greens to the upper part of the leaf and dark green to the underside of the leaf.
- Felt into place by moving in the direction of the curves.
- Twist a few strands of browns together, about the same thickness as thin wooden skewer. Starting at the top, felt the twisted wool into place. Using your fingers, twist the stem and felt this down, and leave a few strands unfelted. Twist this with your fingers and create a tiny stem to attach to the leaf. Felt down.
- Add the white dots. You will create this with small wisps of silk noil. Be sure to only use a tiny amount, you don’t want clumps of white. Spread it very thinly over the apple.
- Felt the silk noils. As you felt this thin layer down the tiny specs of silk nubs will remain and give the appearance of white dots.
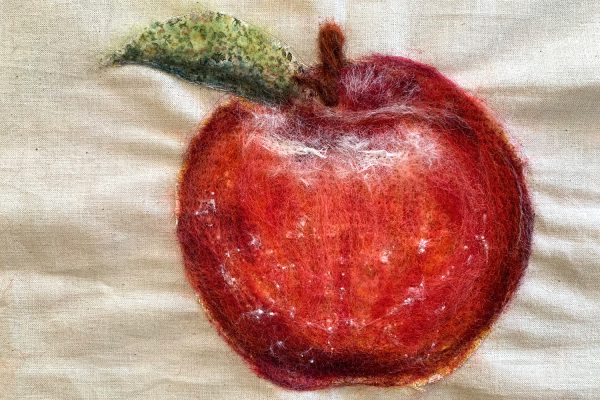
- It is now complete. You may cut it out and adhere to a background fabric of your choice using a double-sided adhesive or by stitching it into place.


What you might also like


4 comments on “How to Make a Fabric Collage with Punch Tool #45”
-
-
Thanks Alberta, glad you like it.
Just click on the black and white image and print to your printer
Lorraine
-
-
Oh you are doing amazing !
Thank you-
glad to help!
-
Leave a Reply
You must be logged in to post a comment.

Where do I find the apple pattern .pdf? Please let me know. These instructions are the best yet!