How to Make a Simple Fabric Book Cover
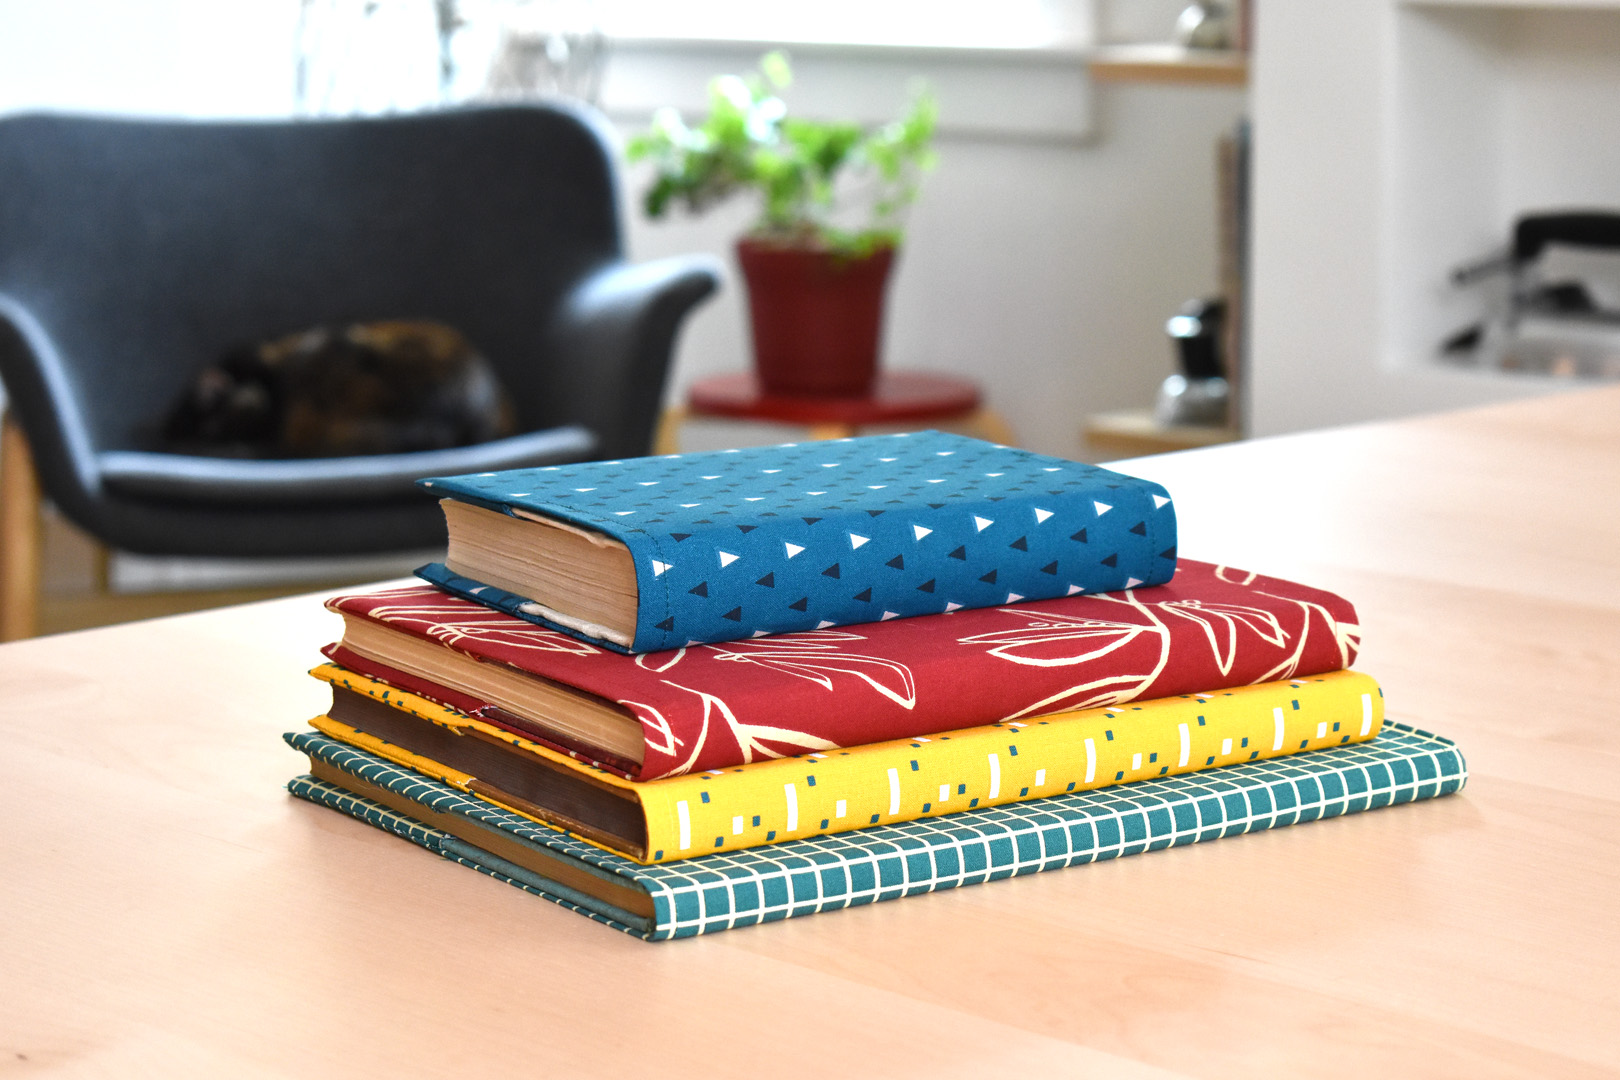
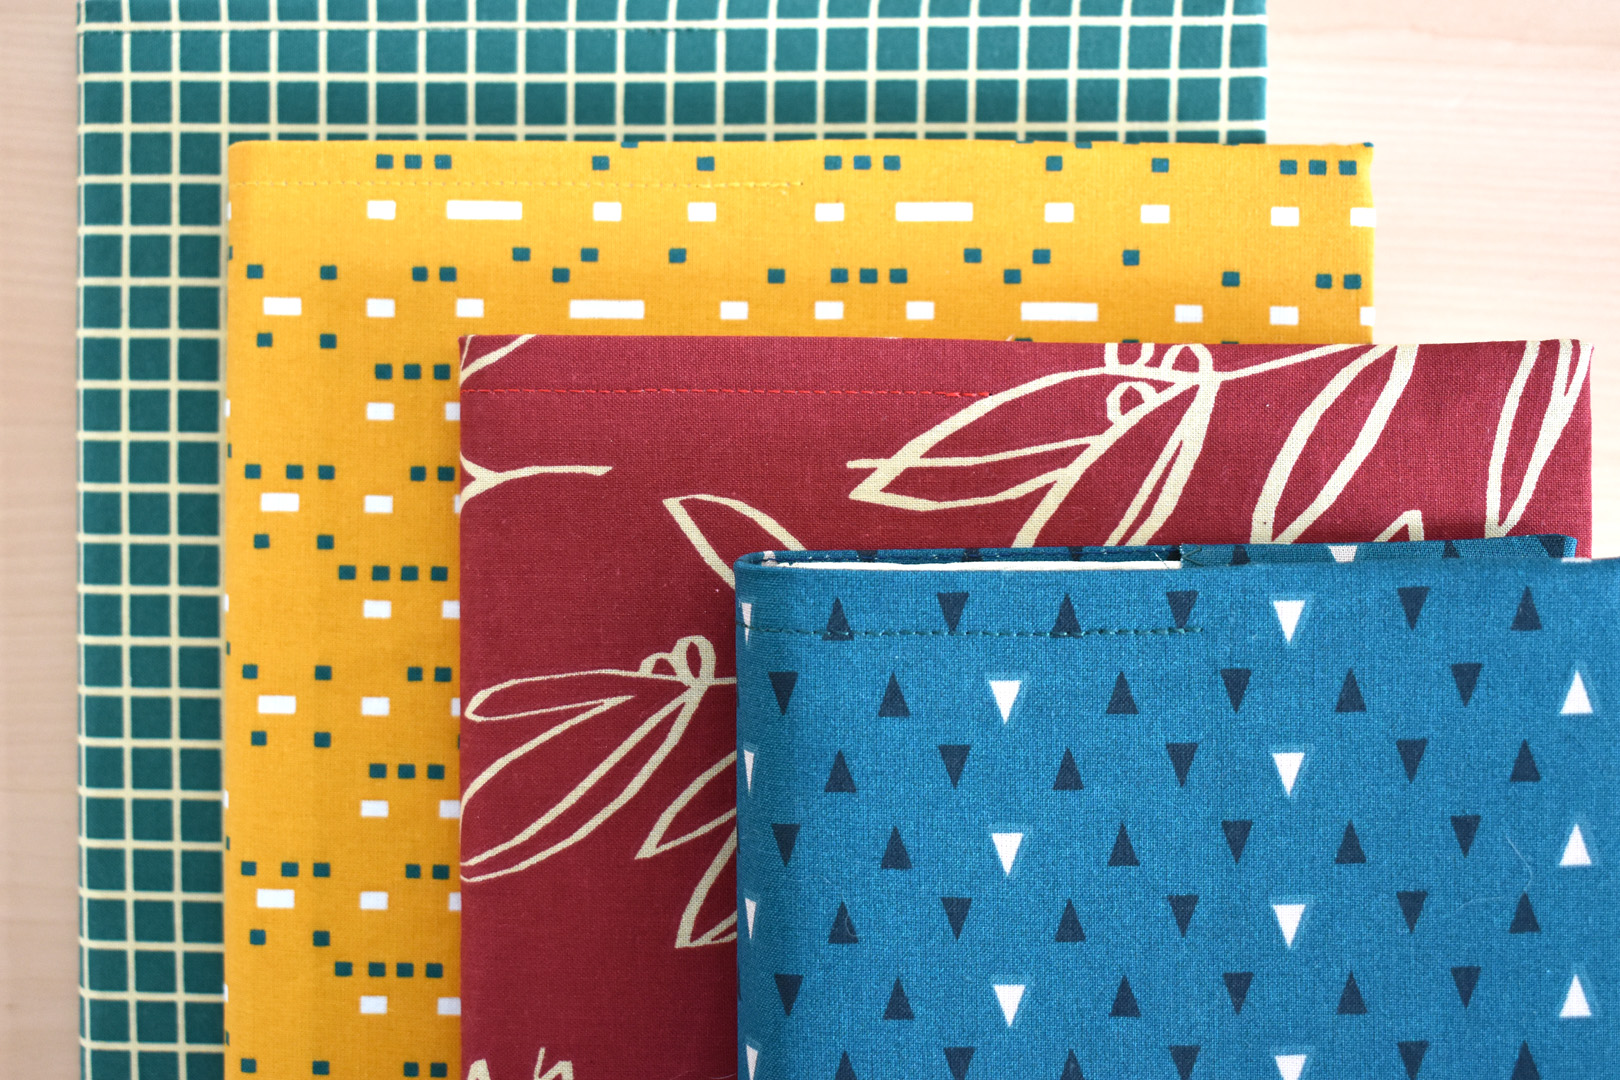
This simple fabric book cover is a quick fix for old, worn-out, or stained book covers and will bring instant interest back to your bookshelves. Create covers with fun fabric prints to brighten up books, and learn how to use decorative stitches in your sewing machine to dress up a boring book.
After seeing how easy these book covers are to make (and how good they look on my shelves!) I started covering all of the “worst offenders” on my shelves (dull or dirty looking books). Read on to find out how to make a simple book cover, and further down find instructions for adding lettering or decorative stitching to the project.
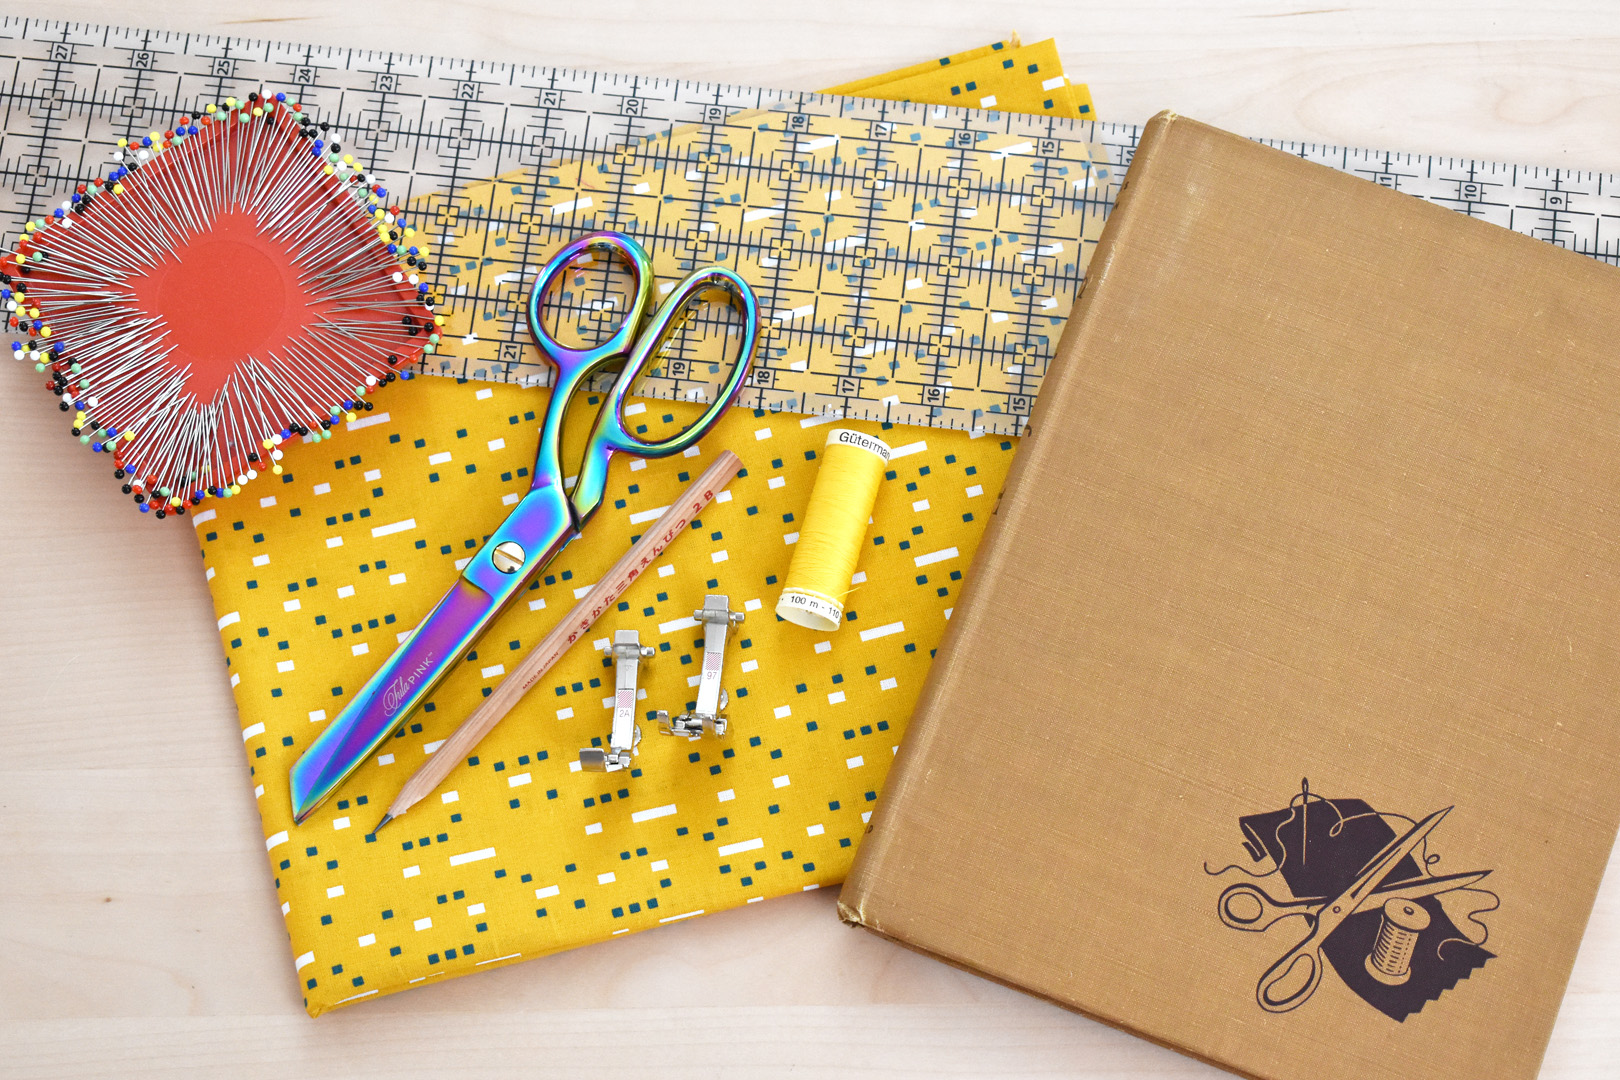
Materials to Make a Simple Fabric Book Cover
- 1-yard Pellon 808 Craft-Fuse (enough to make one or two book covers)
- 1/2-yard 100% cotton fabric in a print or plain color (enough to make one book cover)
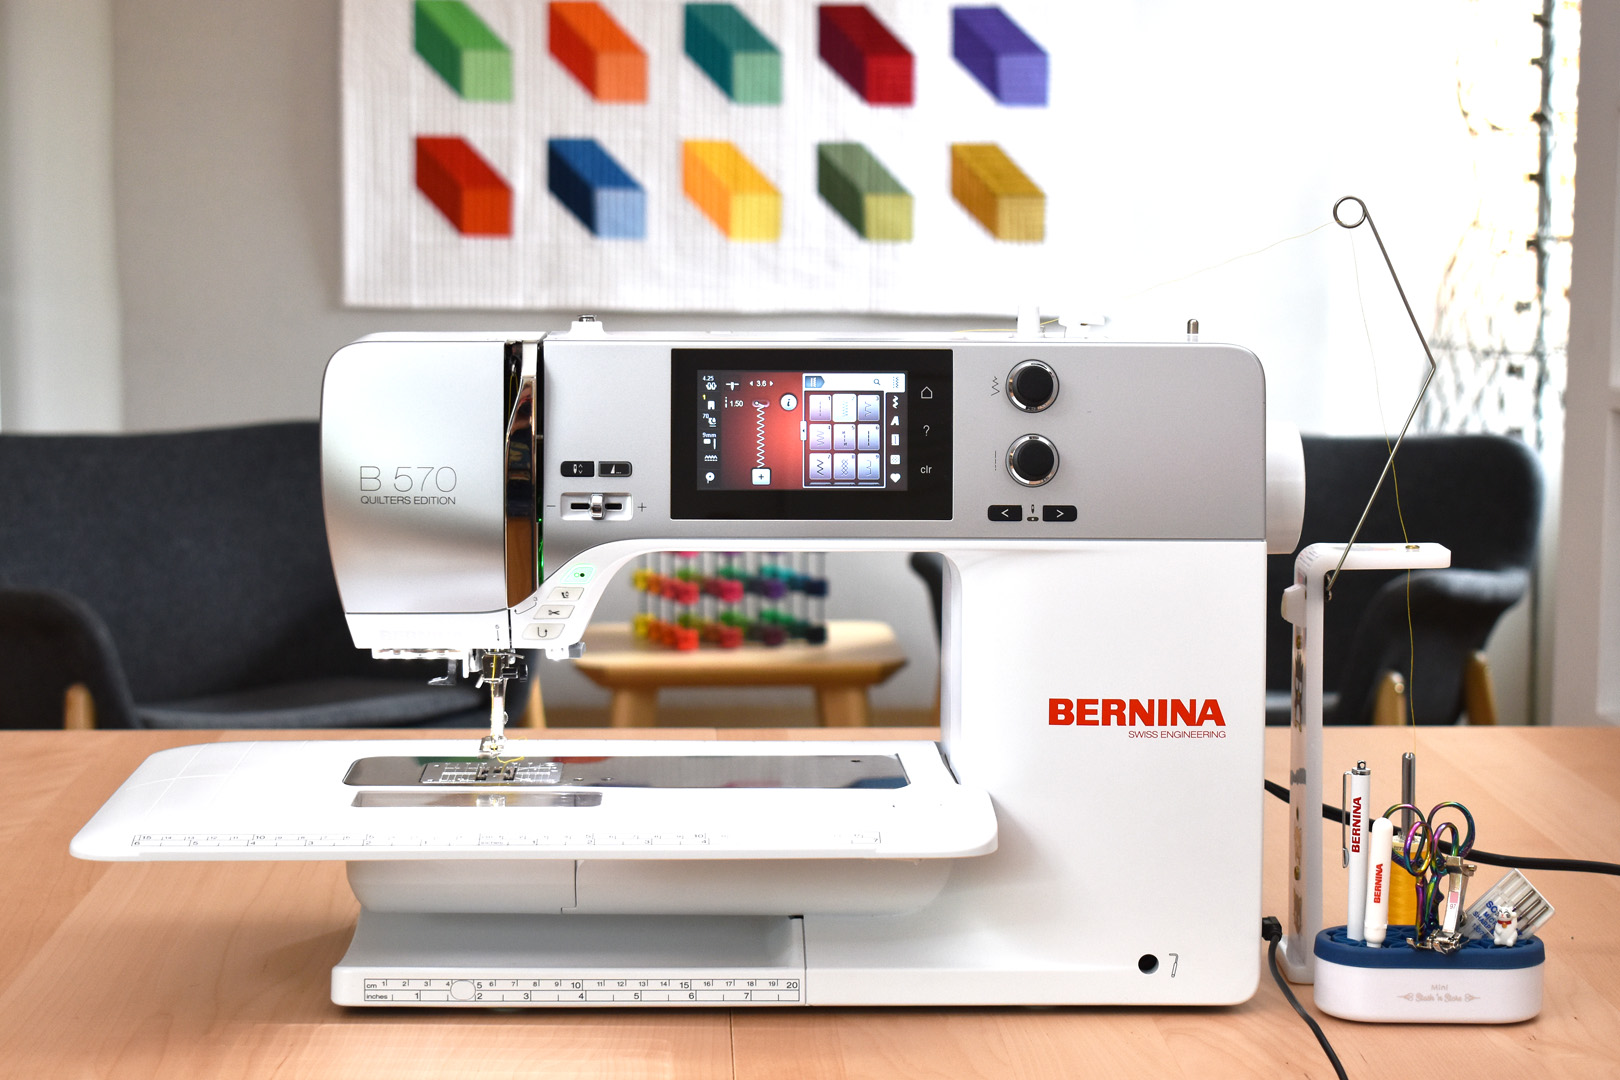
- Sewing machine (I use a BERNINA 570 QE)
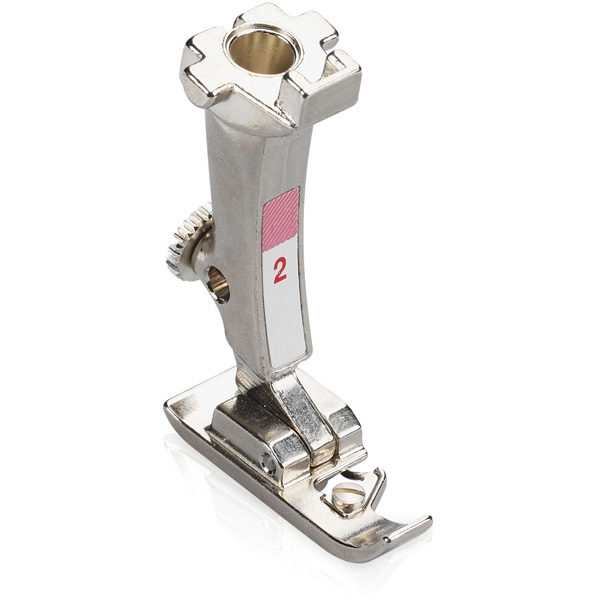
- Overlock Foot #2/#2A
- Patchwork Foot #97/#97D
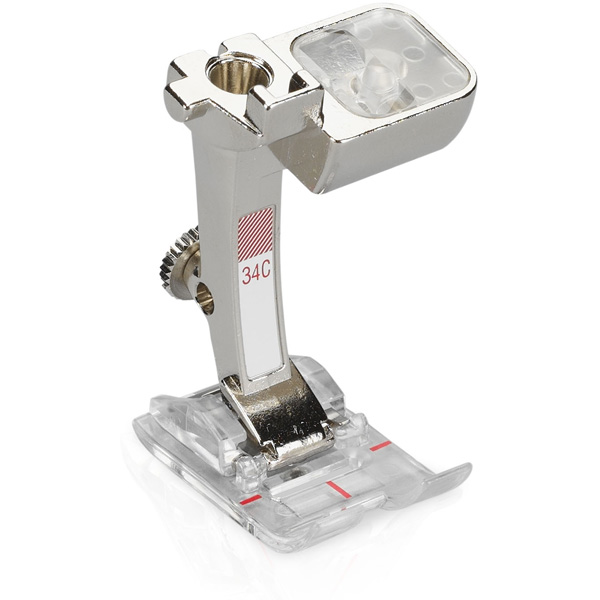
- Reverse Pattern Foot with Clear Sole #34 (for decorative stitching)
- Sharp fabric shears and thread snips
- Coordinating all-purpose 40-weight polyester thread
- Pencil
- Long ruler
- Sewing pins
Measure the book to make a simple fabric book cover.
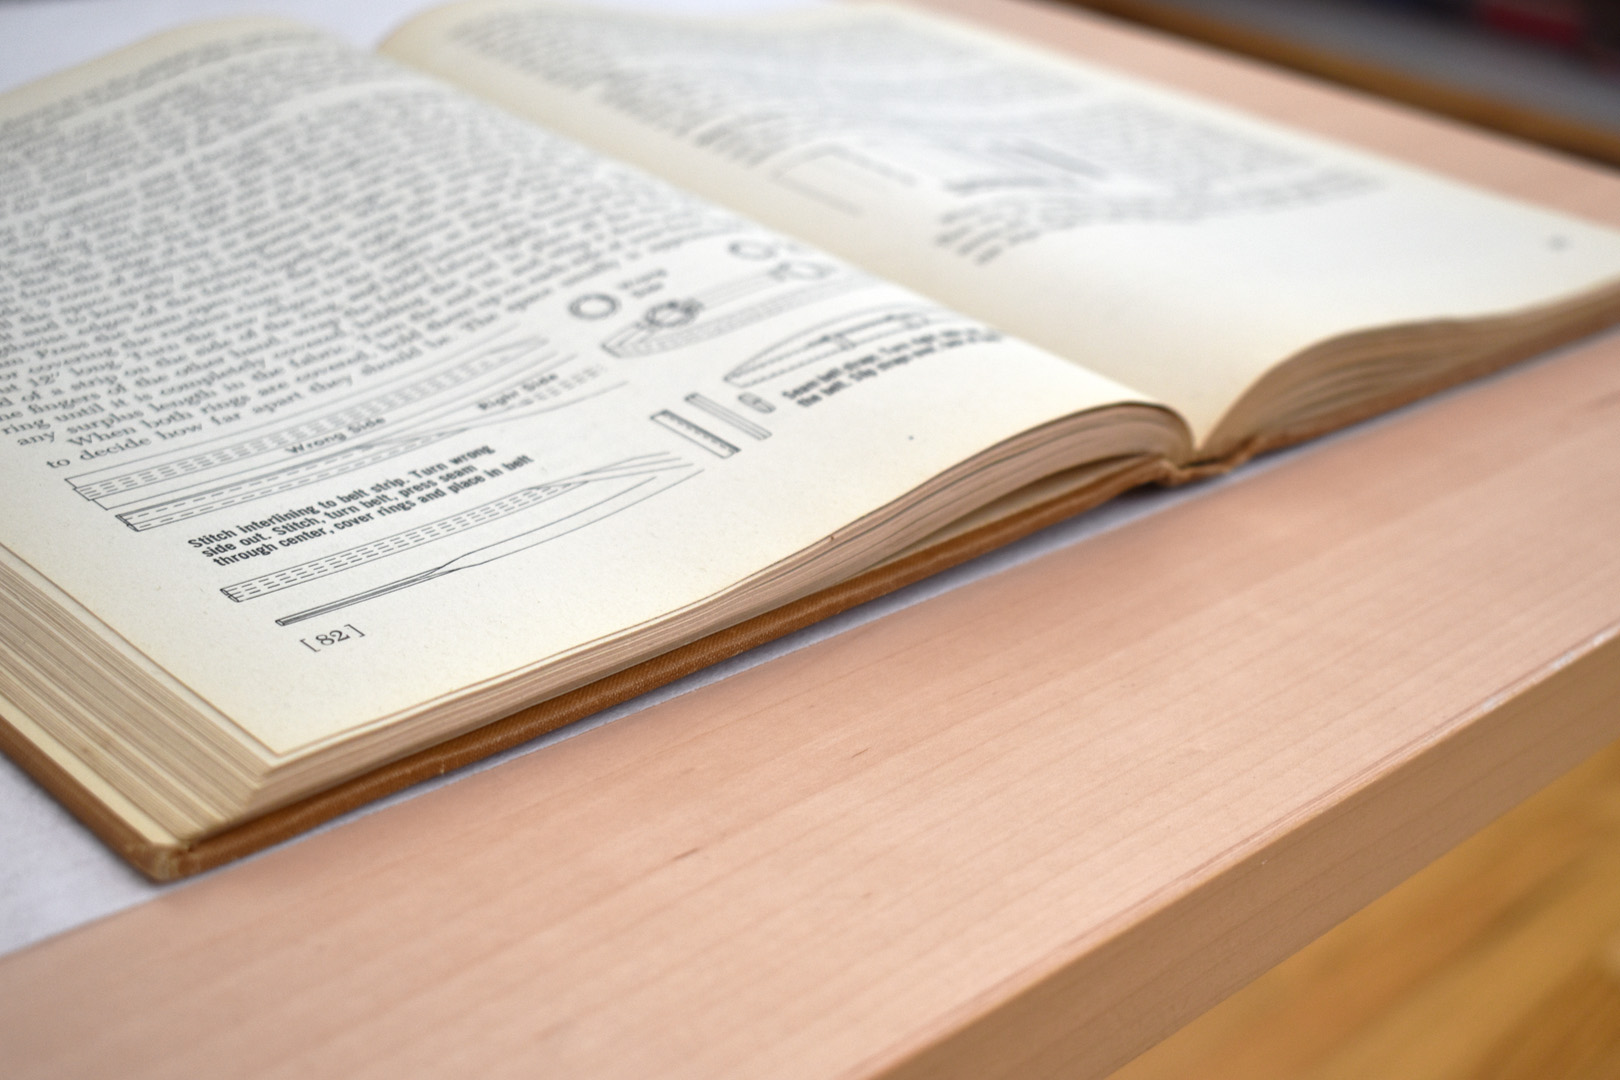
I’m covering a favorite old sewing book, Sewing for Everyone by Mary Brooks Picken published in 1944. It’s a GREAT book, but the cover has seen better days.
Begin by measuring the book. Add the width of the open book to the width of the closed book to find the cutting width for the fabric book cover.
I open the book to measure across the top edge, rounding up to the next nearest inch. My book measures close to 16″ across the top and I record the width as 16″ on a piece of scrap paper.
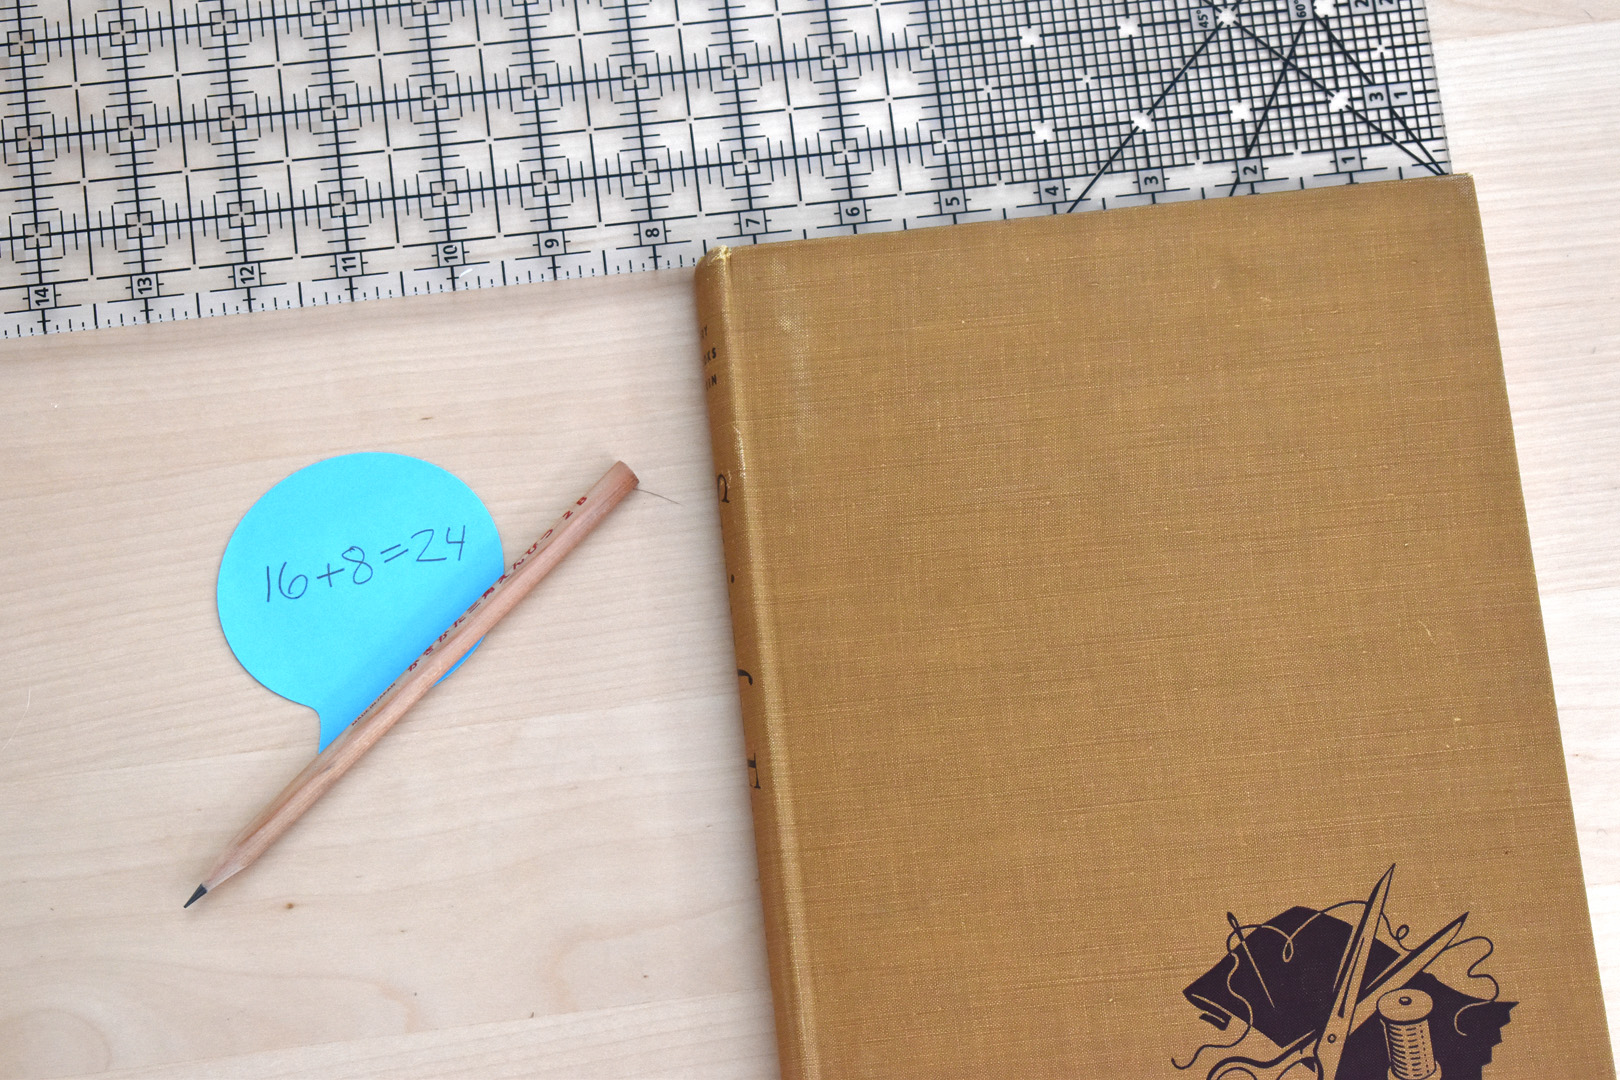
Then with the book closed I measure across the top edge, rounding up to the next nearest inch. My closed book measures close to 8″ across the top and I record this number, adding both together to find the fabric book cover width is 24″.
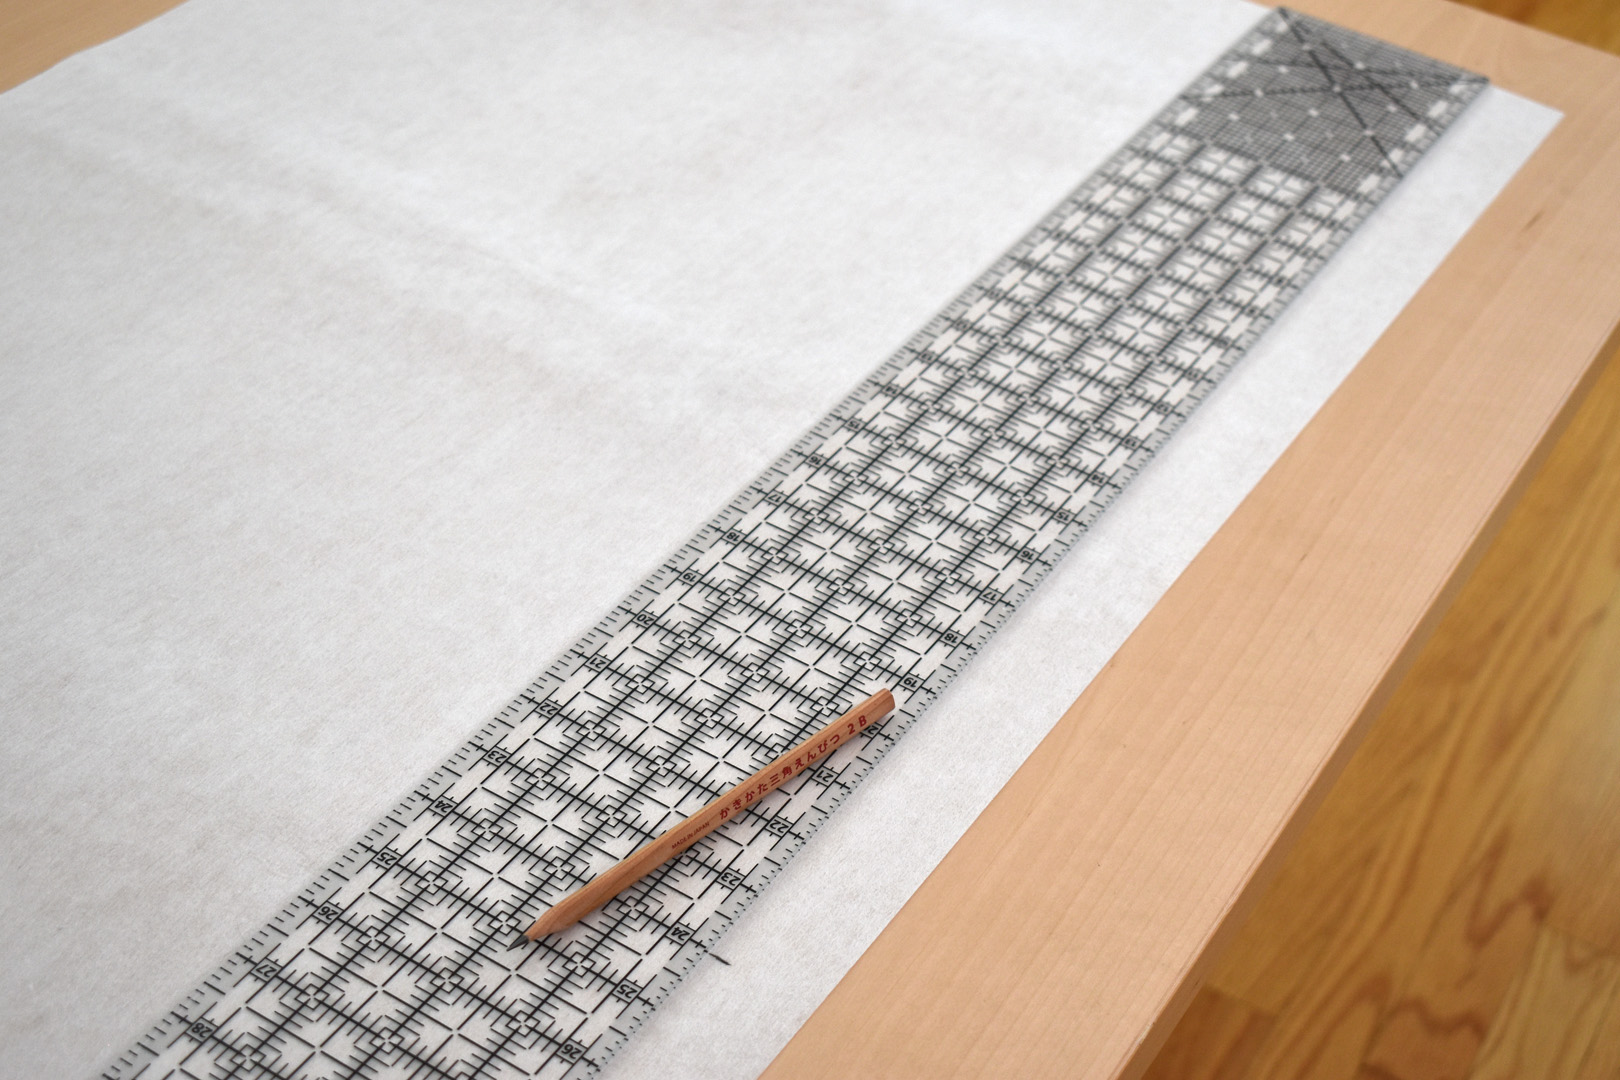
Mark the book cover cutting width and height on the back side of the Craft Fuse lightly with pencil; this will be the cutting line for the book cover.
Place the Craft Fuse on your work table fusible side down (slightly shiny), and measure over from one short end to mark the finished fabric book cover width (my measurement is 24″), and mark lightly with pencil close to the long edge.
Open the book and line up the bottom book cover edge with the bottom of the Craft Fuse, and line up the right book cover edge with the short end of the Craft Fuse.
Trace along the top edge of the book very lightly in pencil (you will use the ruler to make this line straight in the next steps, so don’t worry if the book edge is a bit wobbly or uneven). Move the book over so the left book cover edge meets the pencil line marking the finished fabric book cover width.
Make a light pencil mark along this edge of the book and along the top edge.
Remove the book and use the ruler to straighten out both of the cutting lines for the book cover.

Carefully cut along the straight lines (you may also use a rotary cutter and cutting mat for this step). Get ready to fuse the Craft Fuse to the fabric with a steam iron and ironing board or pressing surface.
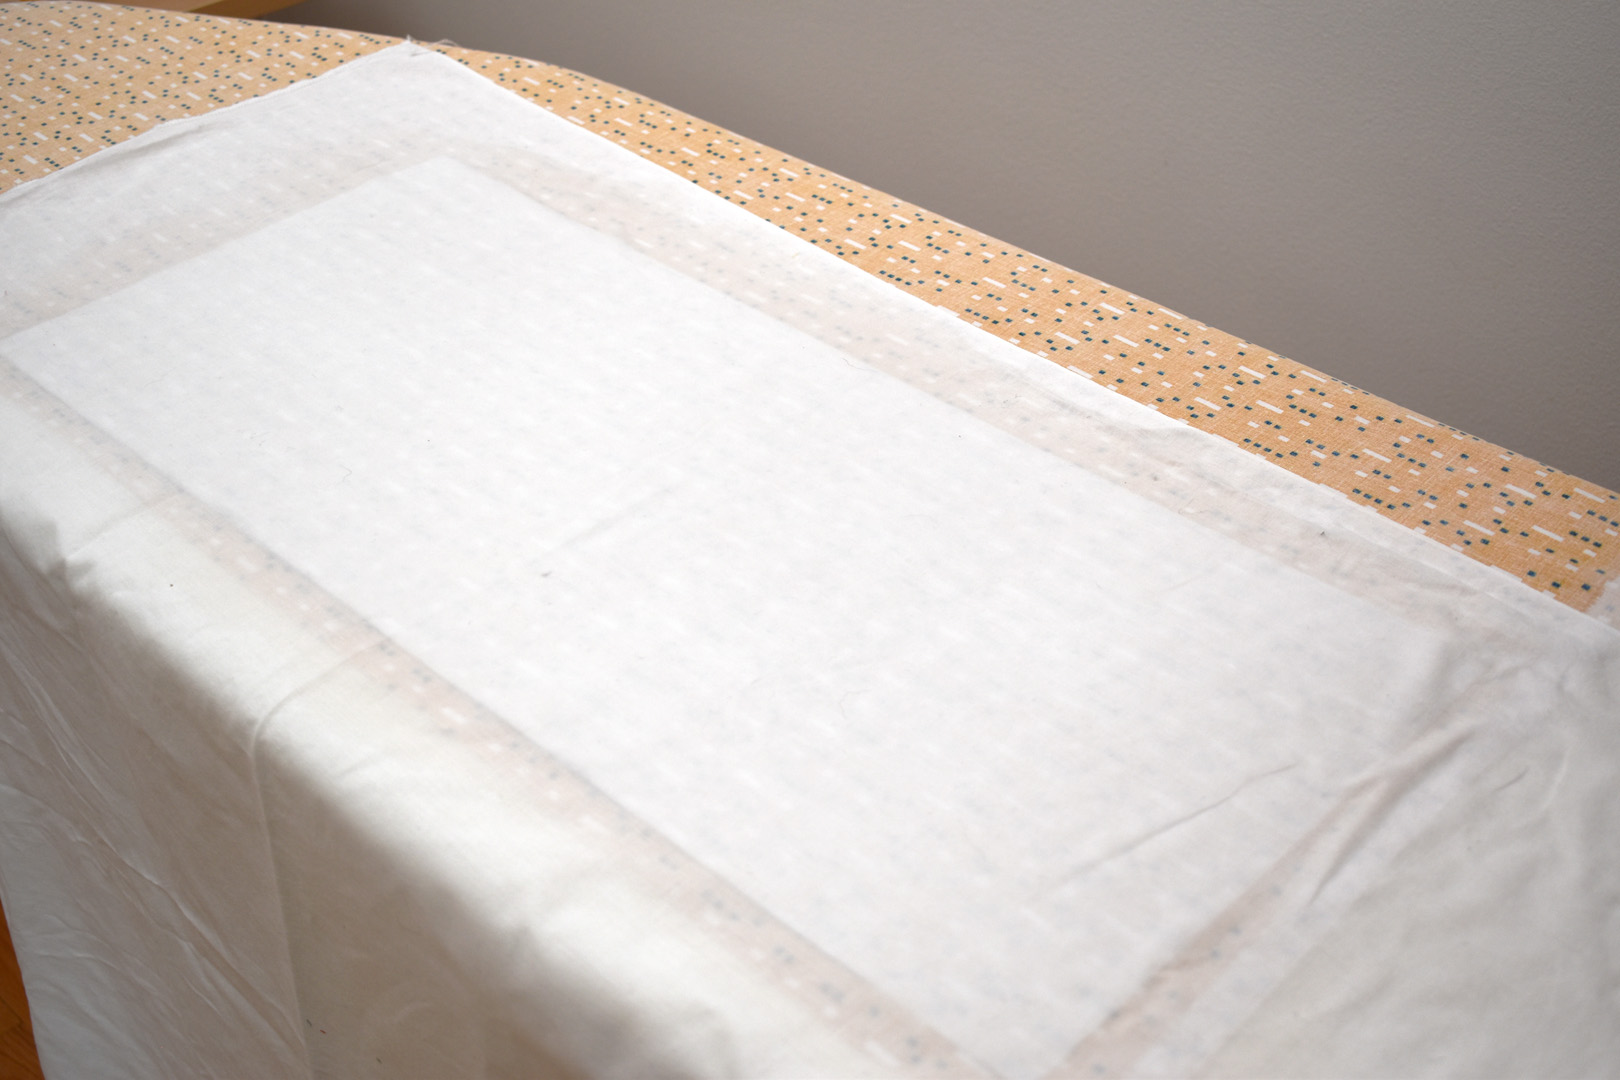
Place the fabric right side down on your pressing surface. Lay the Craft Fuse on top with the fusible (shiny) side down, making sure to leave about one inch of fabric around all edges of the Craft Fuse. Carefully cover the Craft Fuse with a press cloth, and use a spray bottle to dampen the press cloth with water. Set your iron to the WOOL setting and use steam.
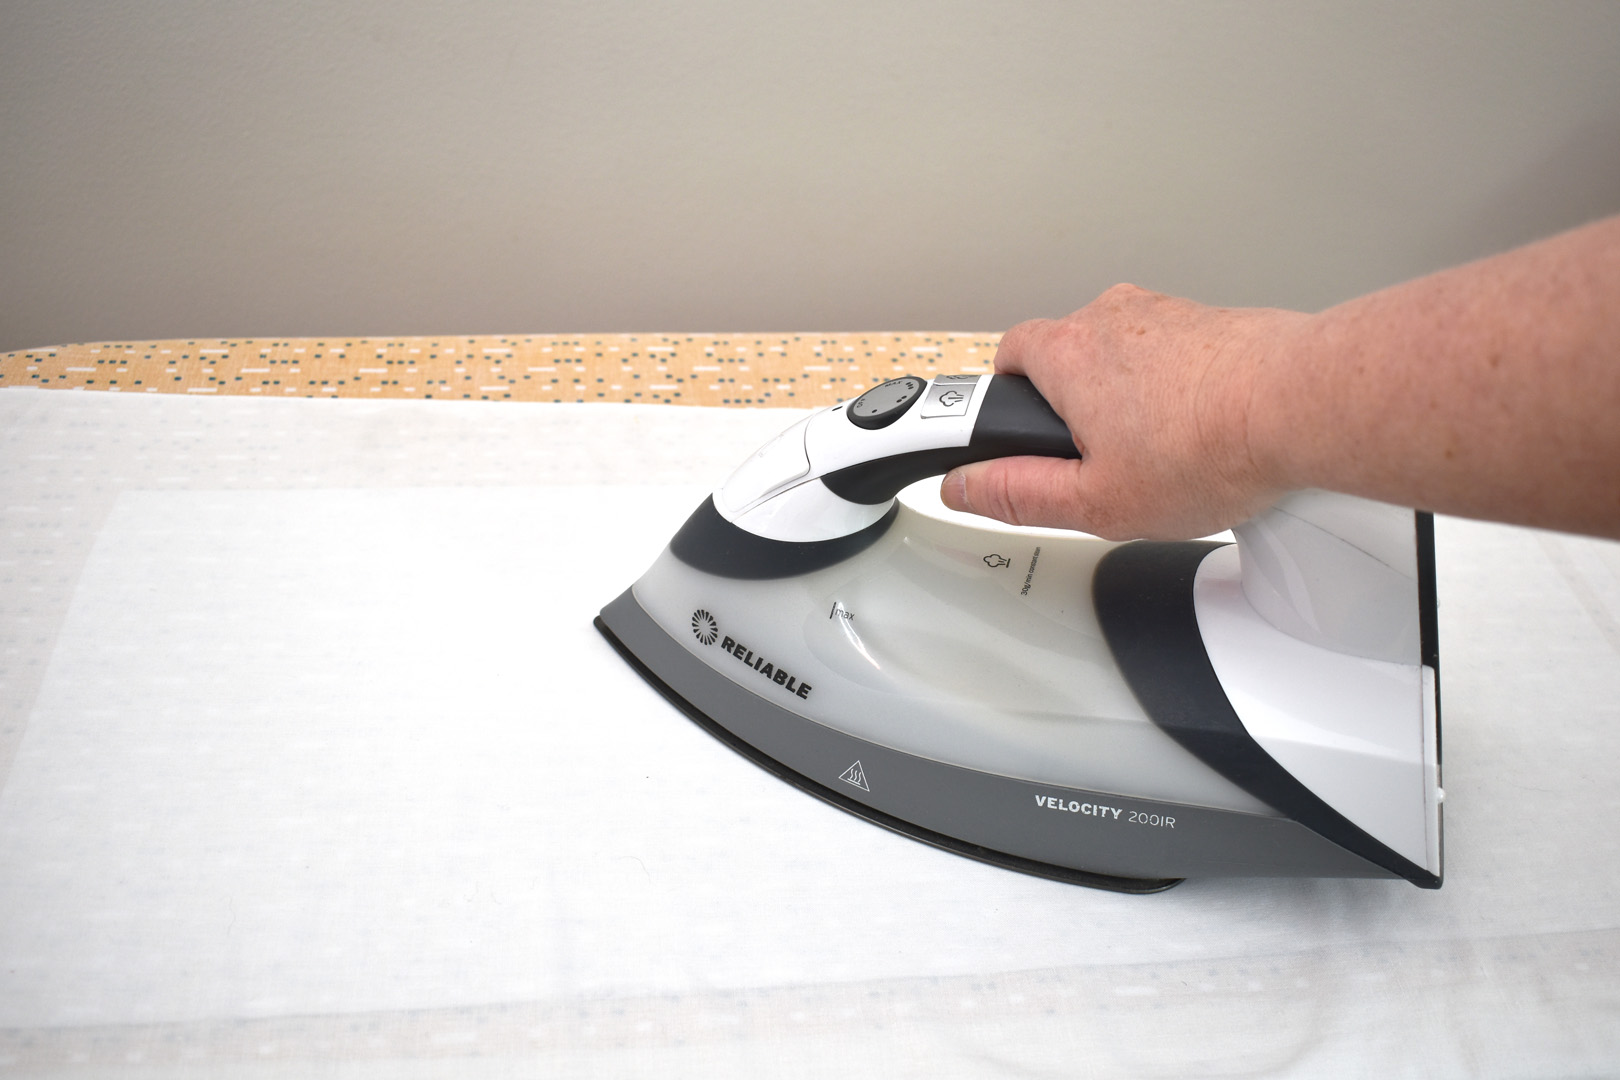
Start in the center of the Craft Fuse and apply pressure with the steam iron. Hold in one spot for a count of 8 to 10 seconds, then pick up the iron and move to the next spot – going from the center out to the edges. Don’t rush this step, holding the iron in one place is what seals the glue. After fusing, carefully check the Craft Fuse to see if it is permanently attached, and if there are any spots that have not fused follow the steps above again until everything is permanently adhered.
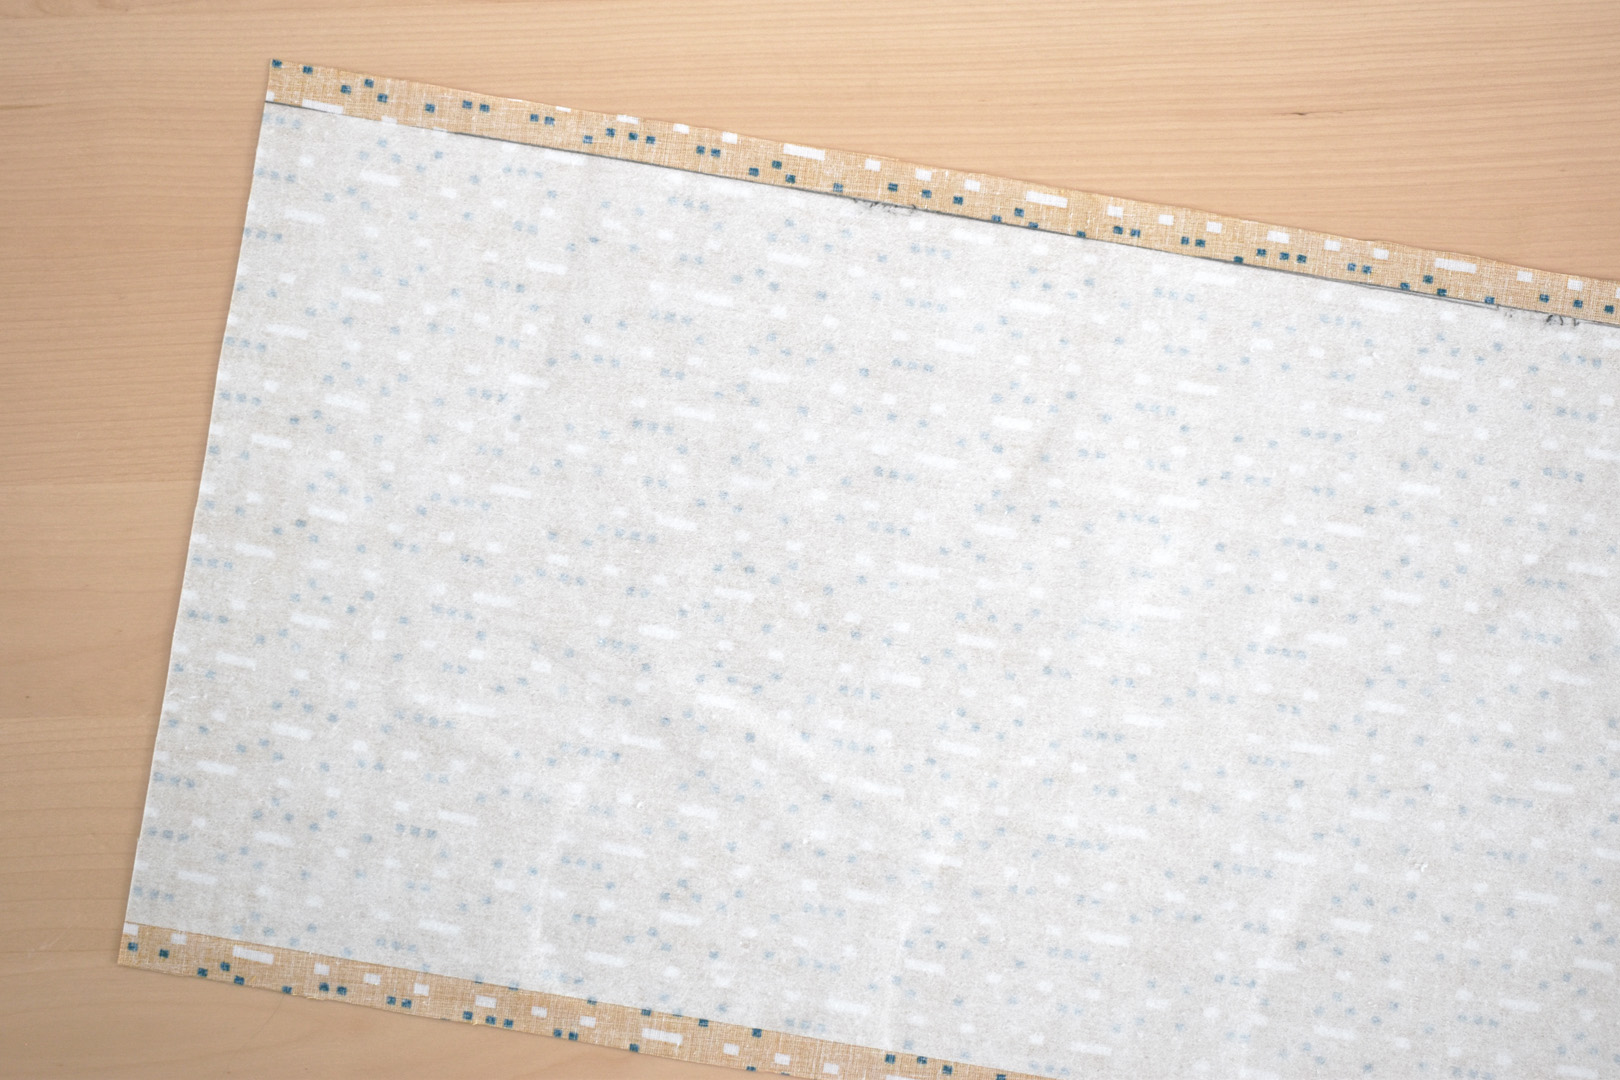
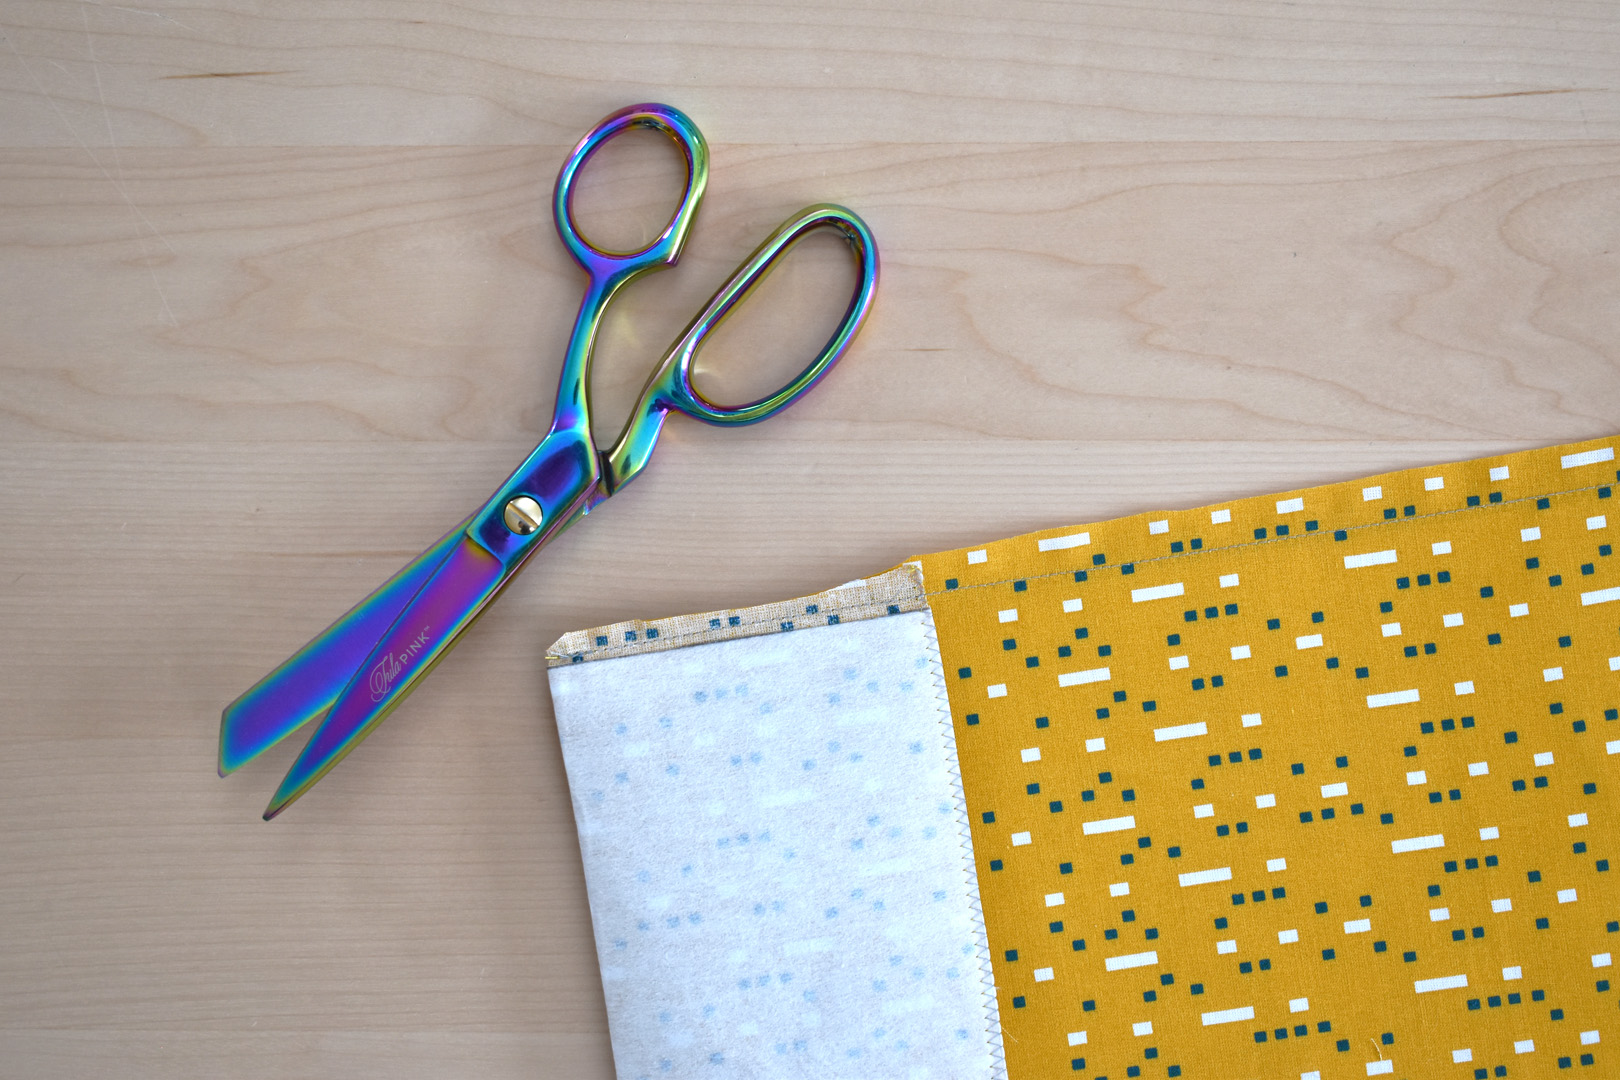
Let the piece cool thoroughly after fusing, then cut the fabric even with the Craft Fuse on both short ends, and 1/2″ away from the Craft Fuse on the two long ends. Now it’s time to start sewing!
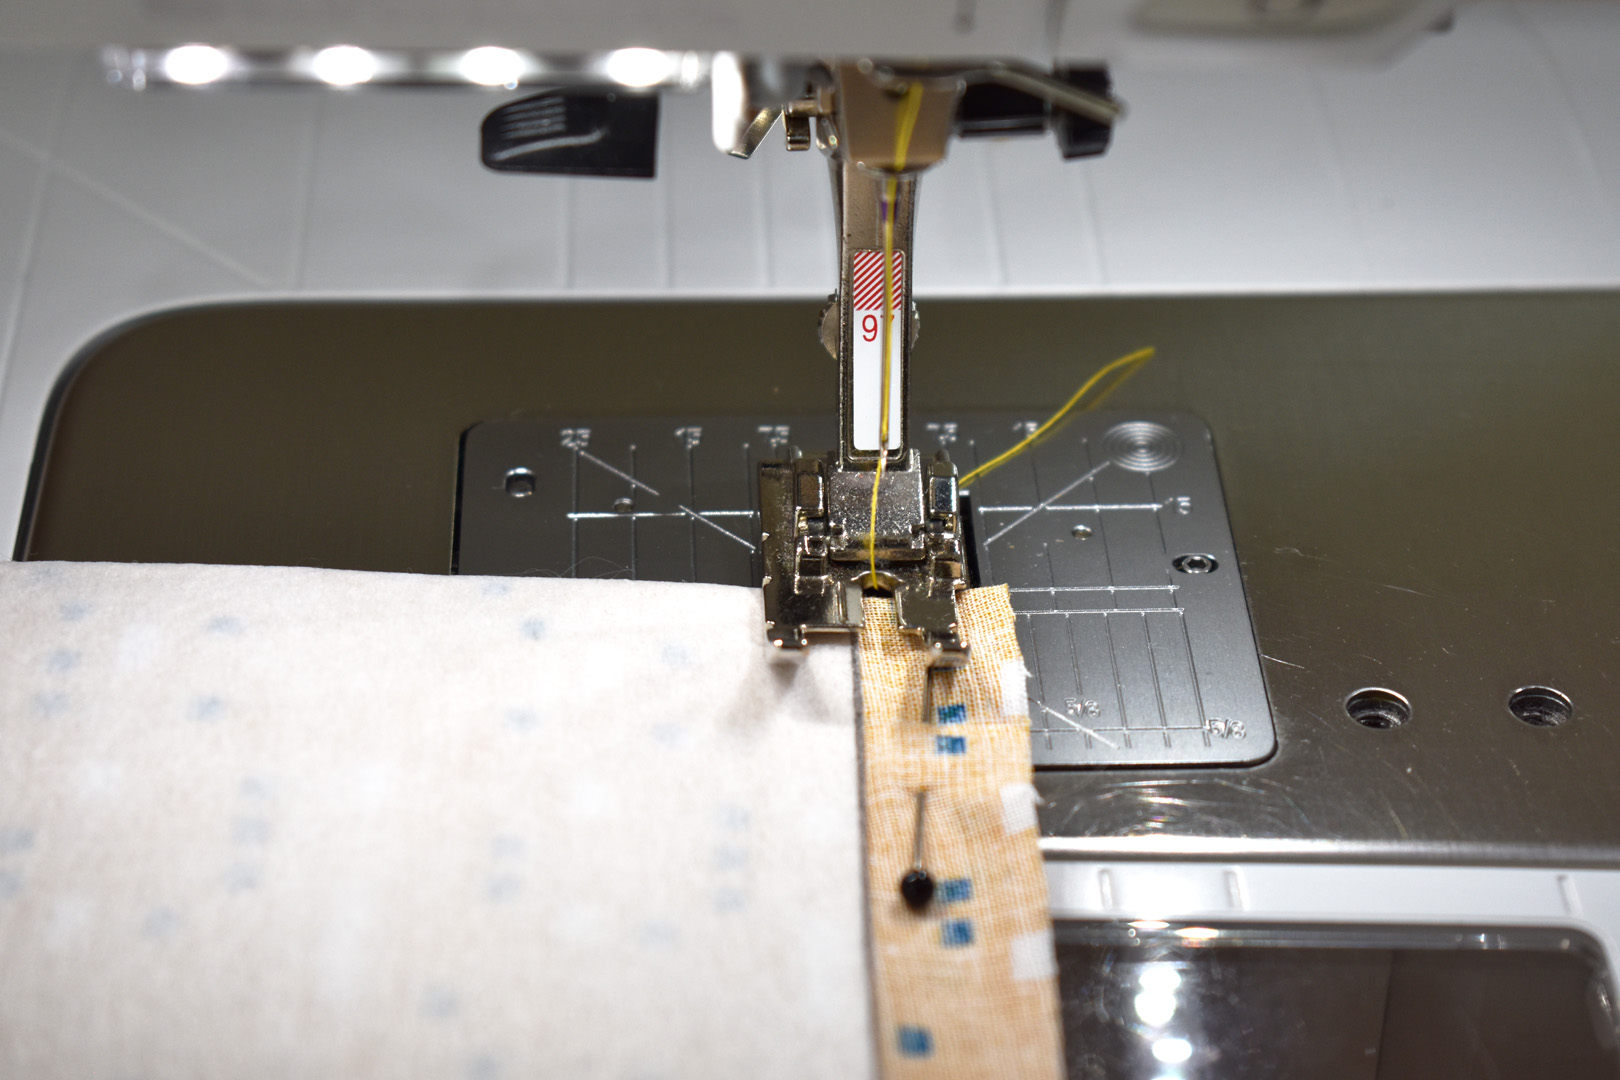
Set up your sewing machine with coordinating thread, Overlock Foot #2/#2A, a zigzag stitch plate, and engage the Zigzag Stitch (this is stitch #2 on the BERNINA 570 QE).
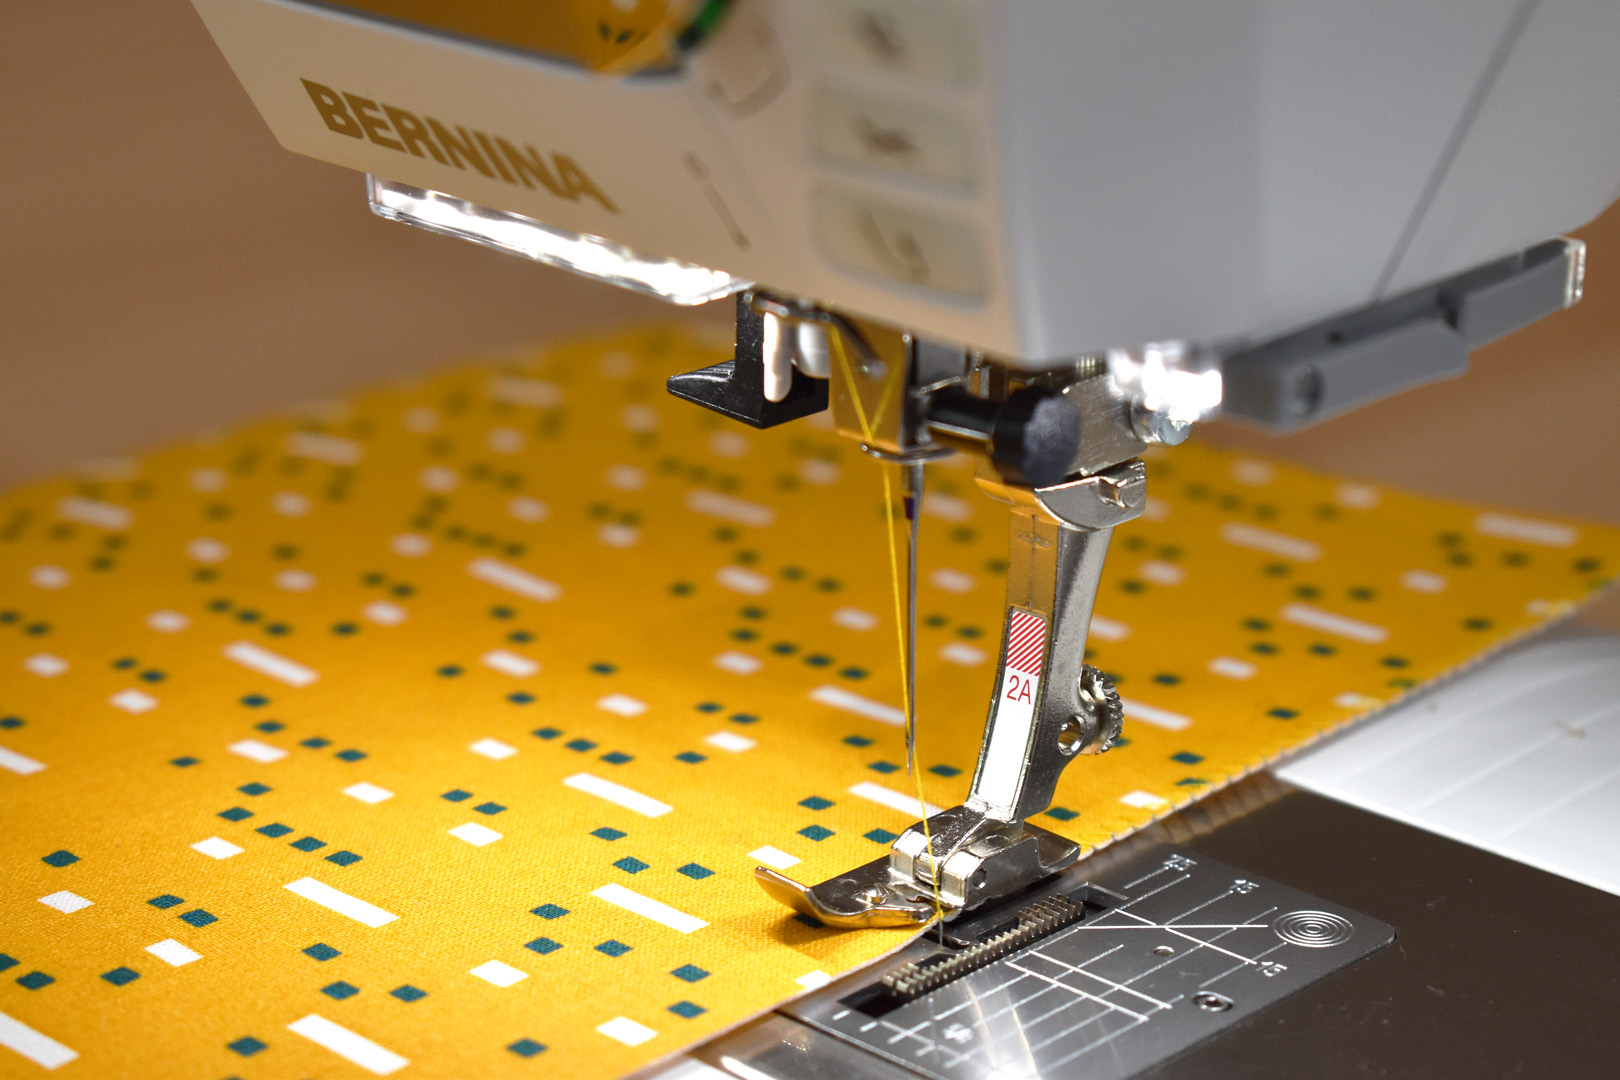
Run a zigzag stitch along the short edges of the book cover with Overlock Foot #2/#2A to keep the edge from fraying in the future.
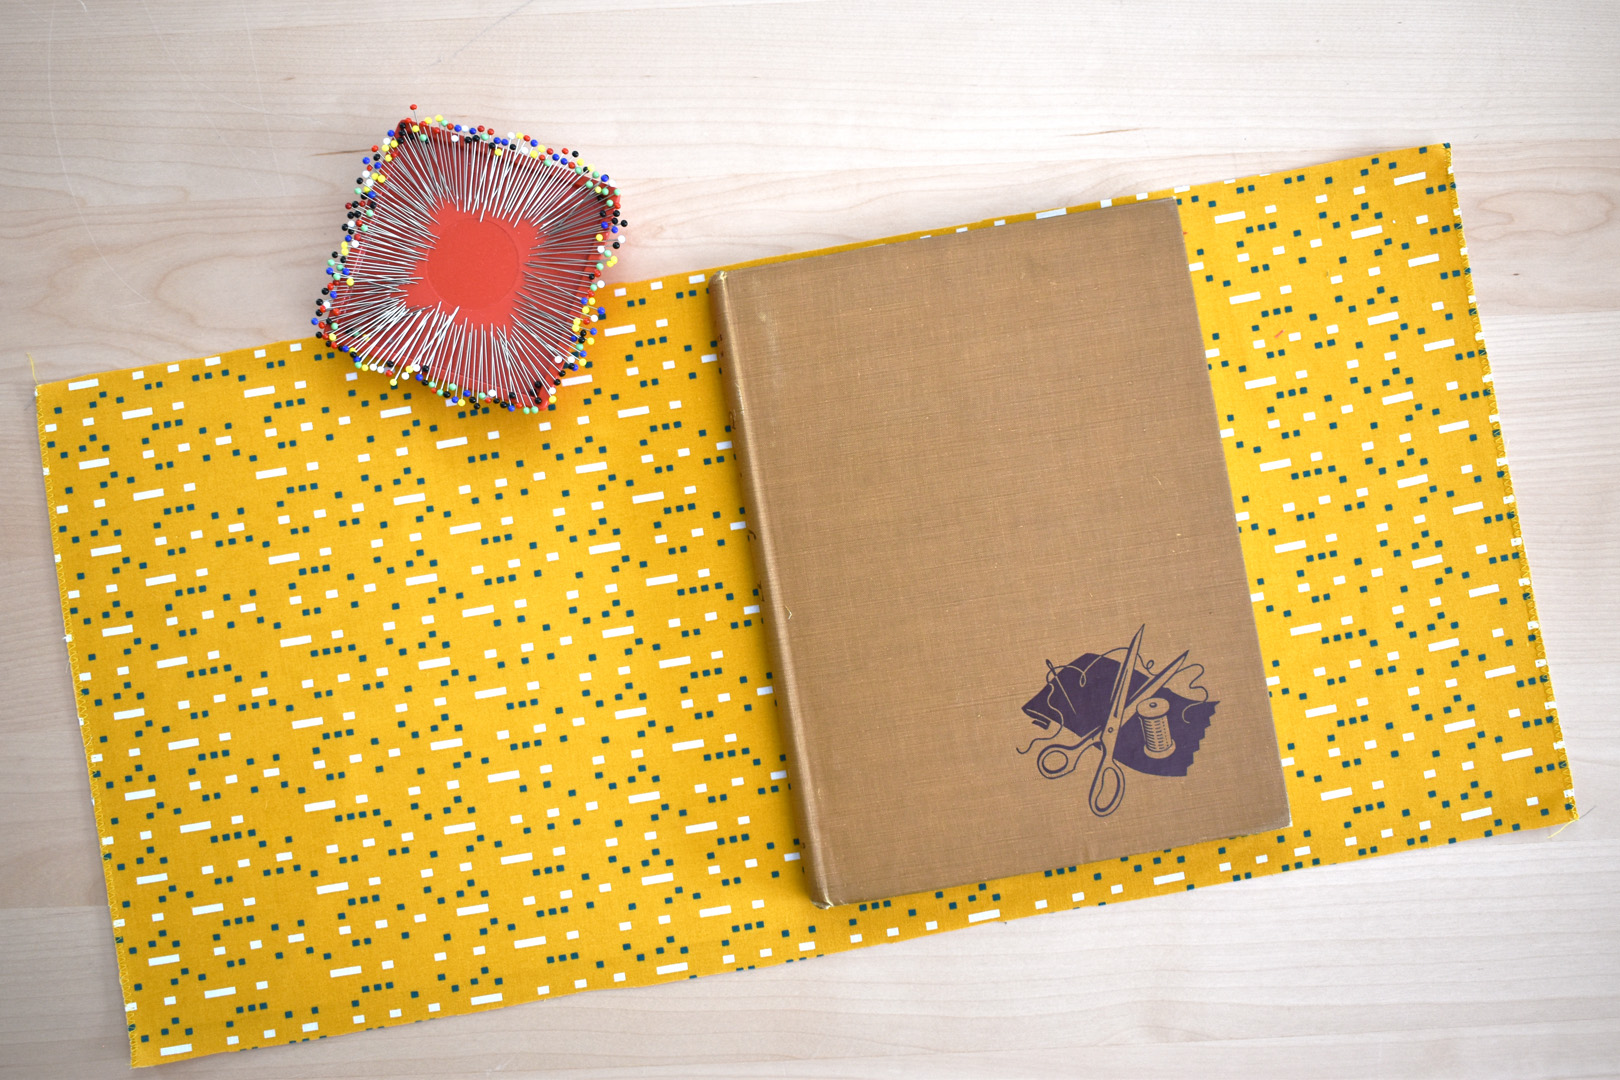
Next, grab your book and straight pins. Place the book cover right side up on a table and find the center by folding the cover in half. Place the book with the spine near the center. Fold the book cover over the book so both short ends meet with the book spine firmly in the fold.
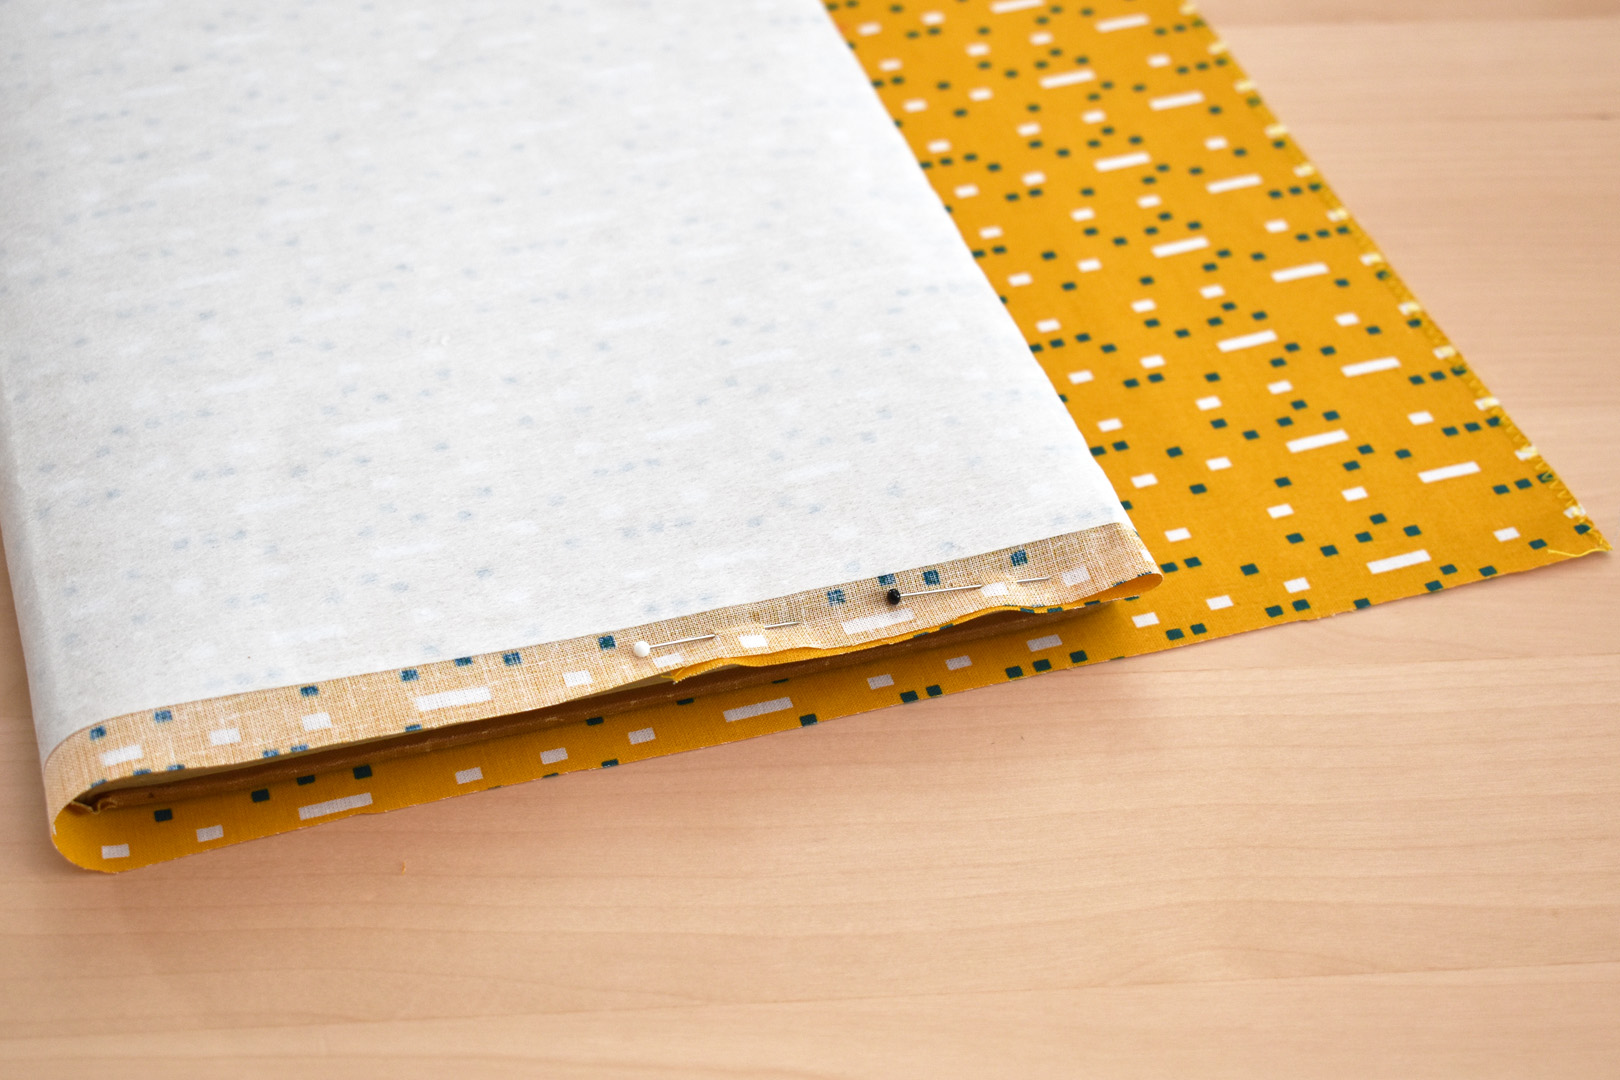
Flip the top edge of the fabric cover over the front book cover and place a few straight pins through both sides to hold in place.
Turn the book and cover over, pulling the loose end of the fabric cover taught over the other side of the book. Make sure there is no slack in the fabric cover, but don’t pull too hard or the finished cover may end up warping the book.

Flip the other end of the fabric cover over the book cover end, and secure with pins as above.
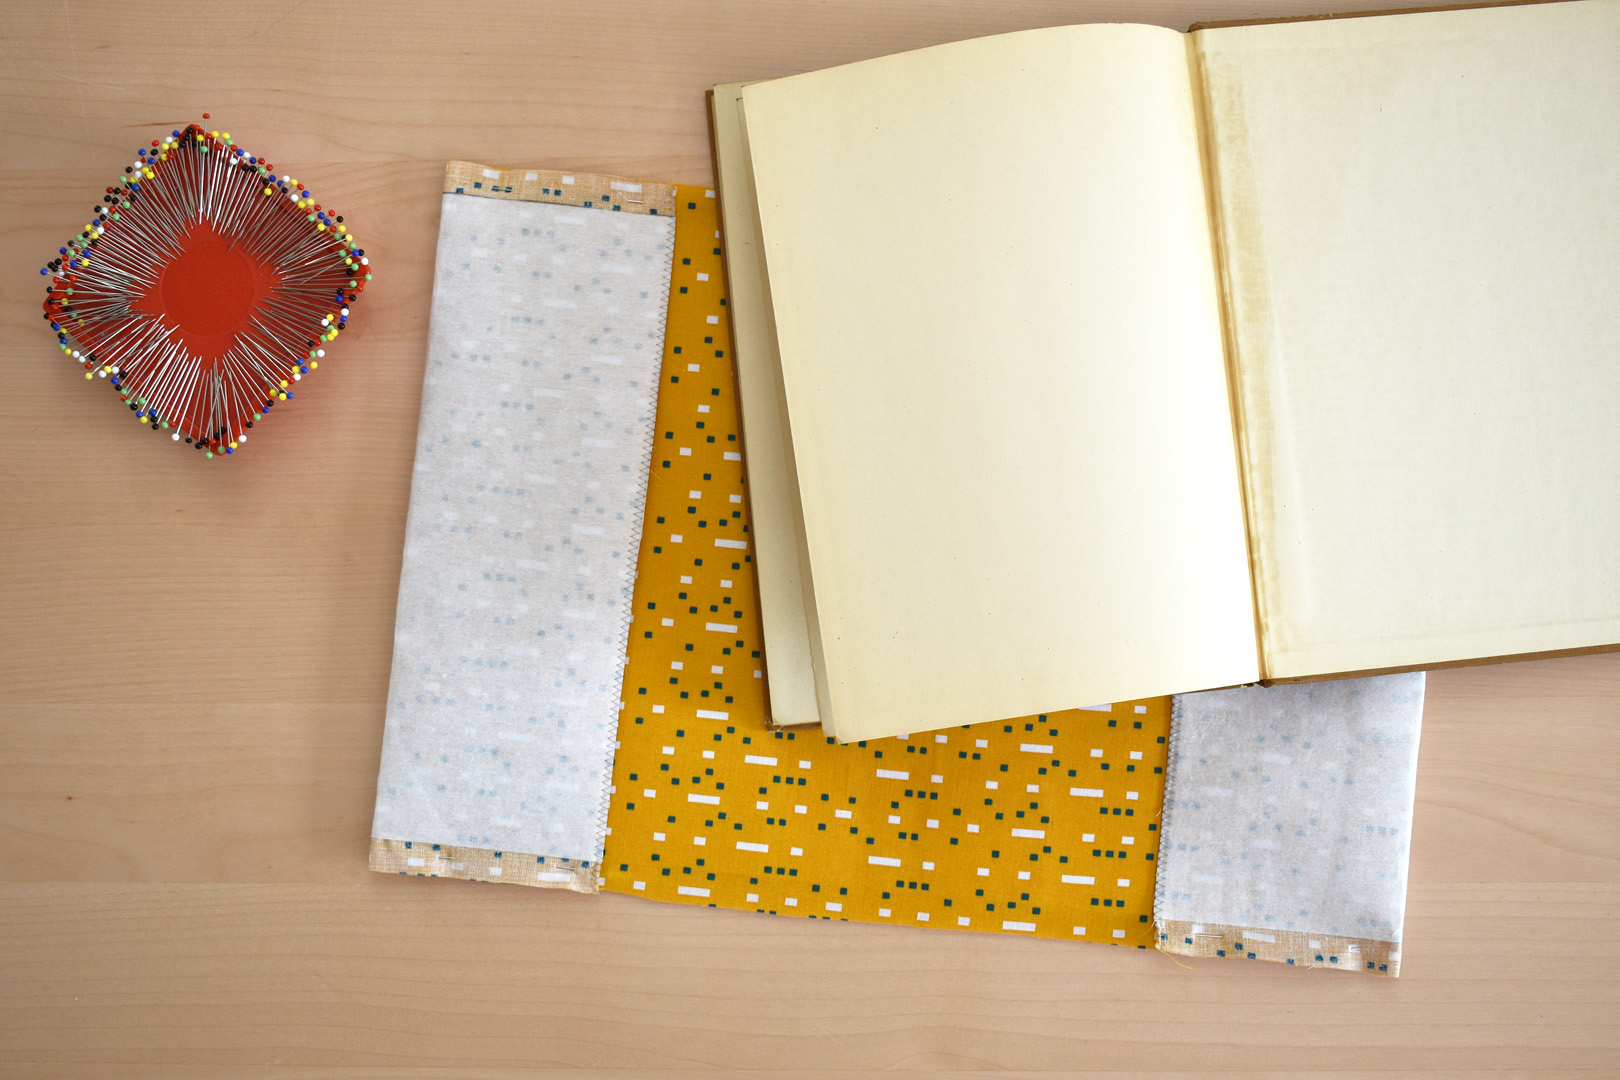
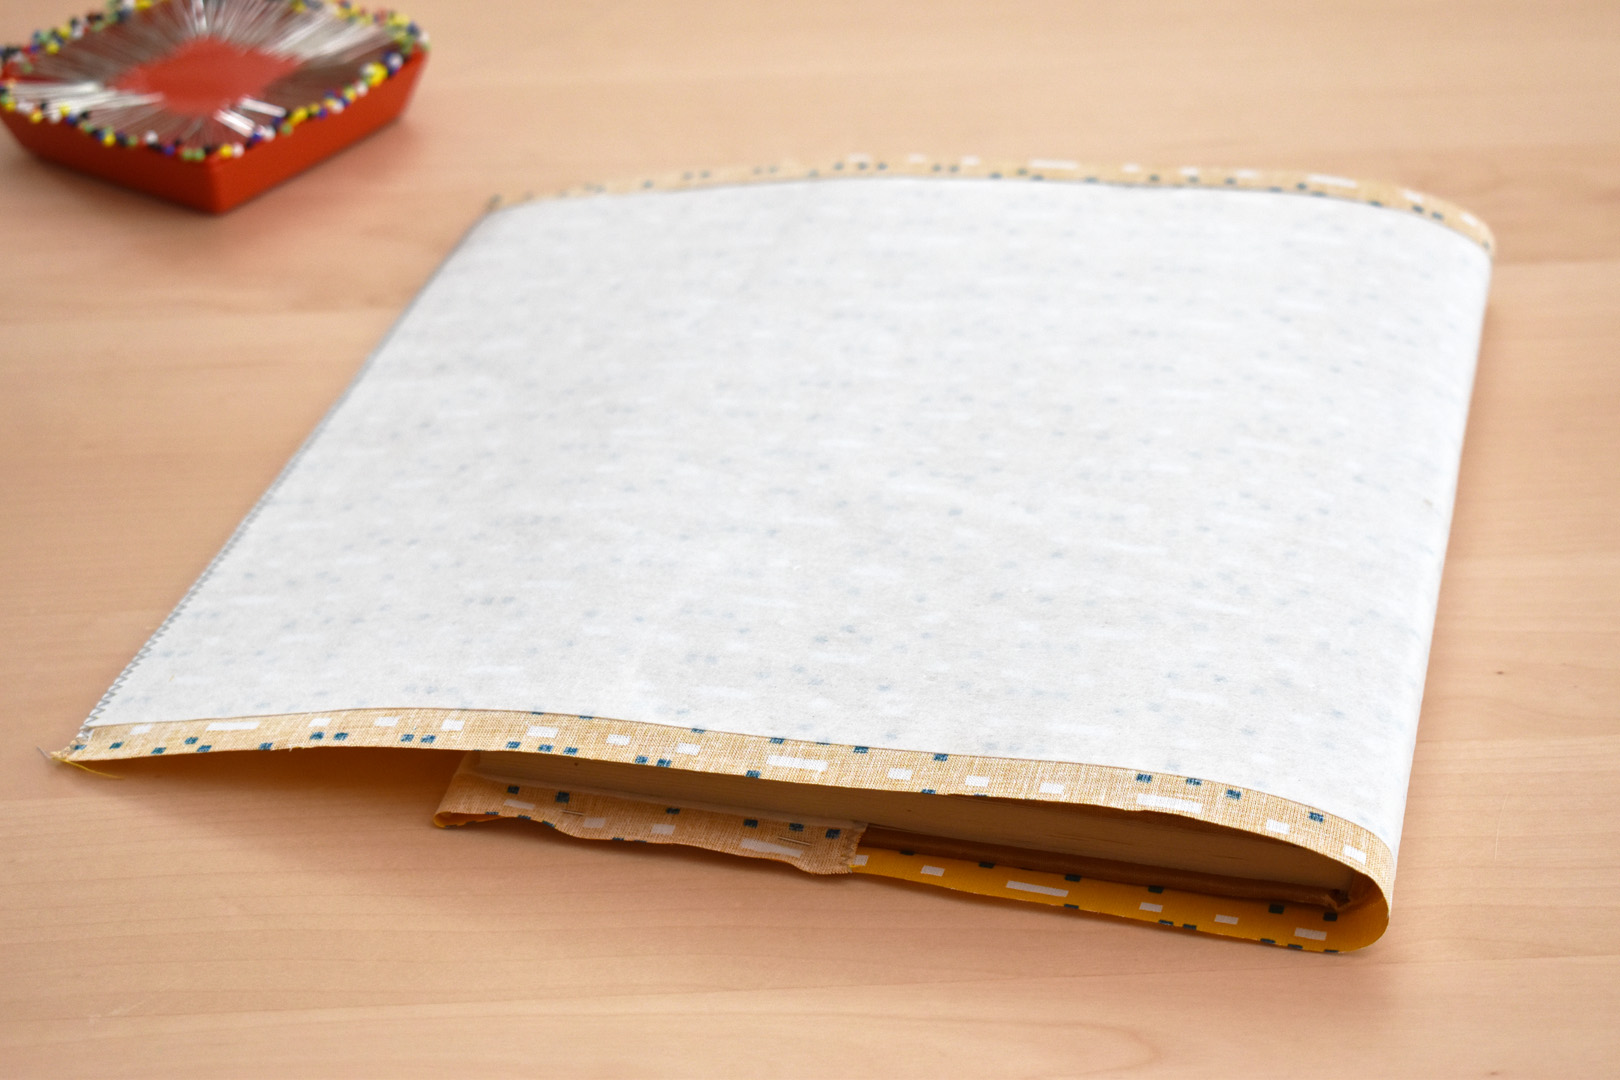
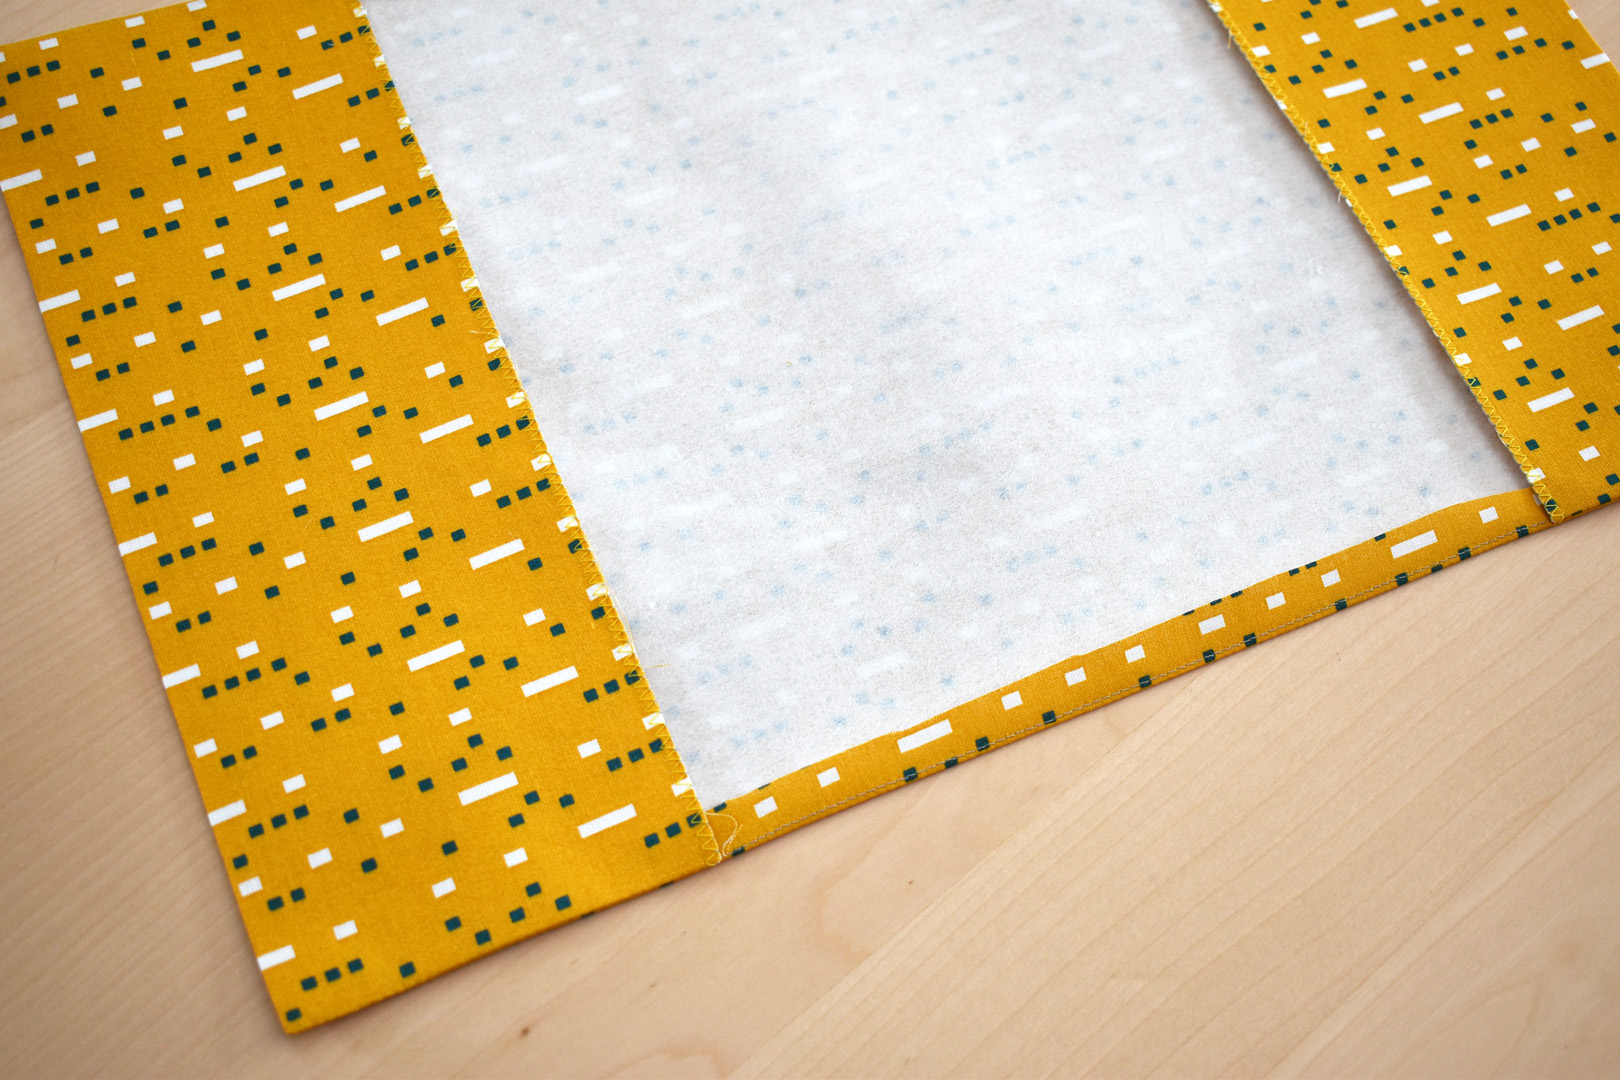
Carefully remove the fabric cover book from the book. Turn the fabric cover over (pockets side down so you see the full Craft Fuse side) to sew a seam along both long edges. Attach Patchwork Foot #97/#97D for the next steps and sew the seam with a standard straight stitch 2.5mm.
Patchwork Foot #97/#97D has special markings to help sew precise quarter inch seams. Line up the foot so the quarter inch mark to the left of the needle is about even with the edge of the Craft Fuse, and stitch all the way down from one end of the fabric cover to the other, backstitching at the beginning and end. Repeat on the other side.
Trim the seams down only over the pockets to a quarter inch, and trim close to corners.
Turn pockets right side out and press well. Flip the extra fabric in between the pockes over the Craft Bond on the long edge so you can see the stitching.
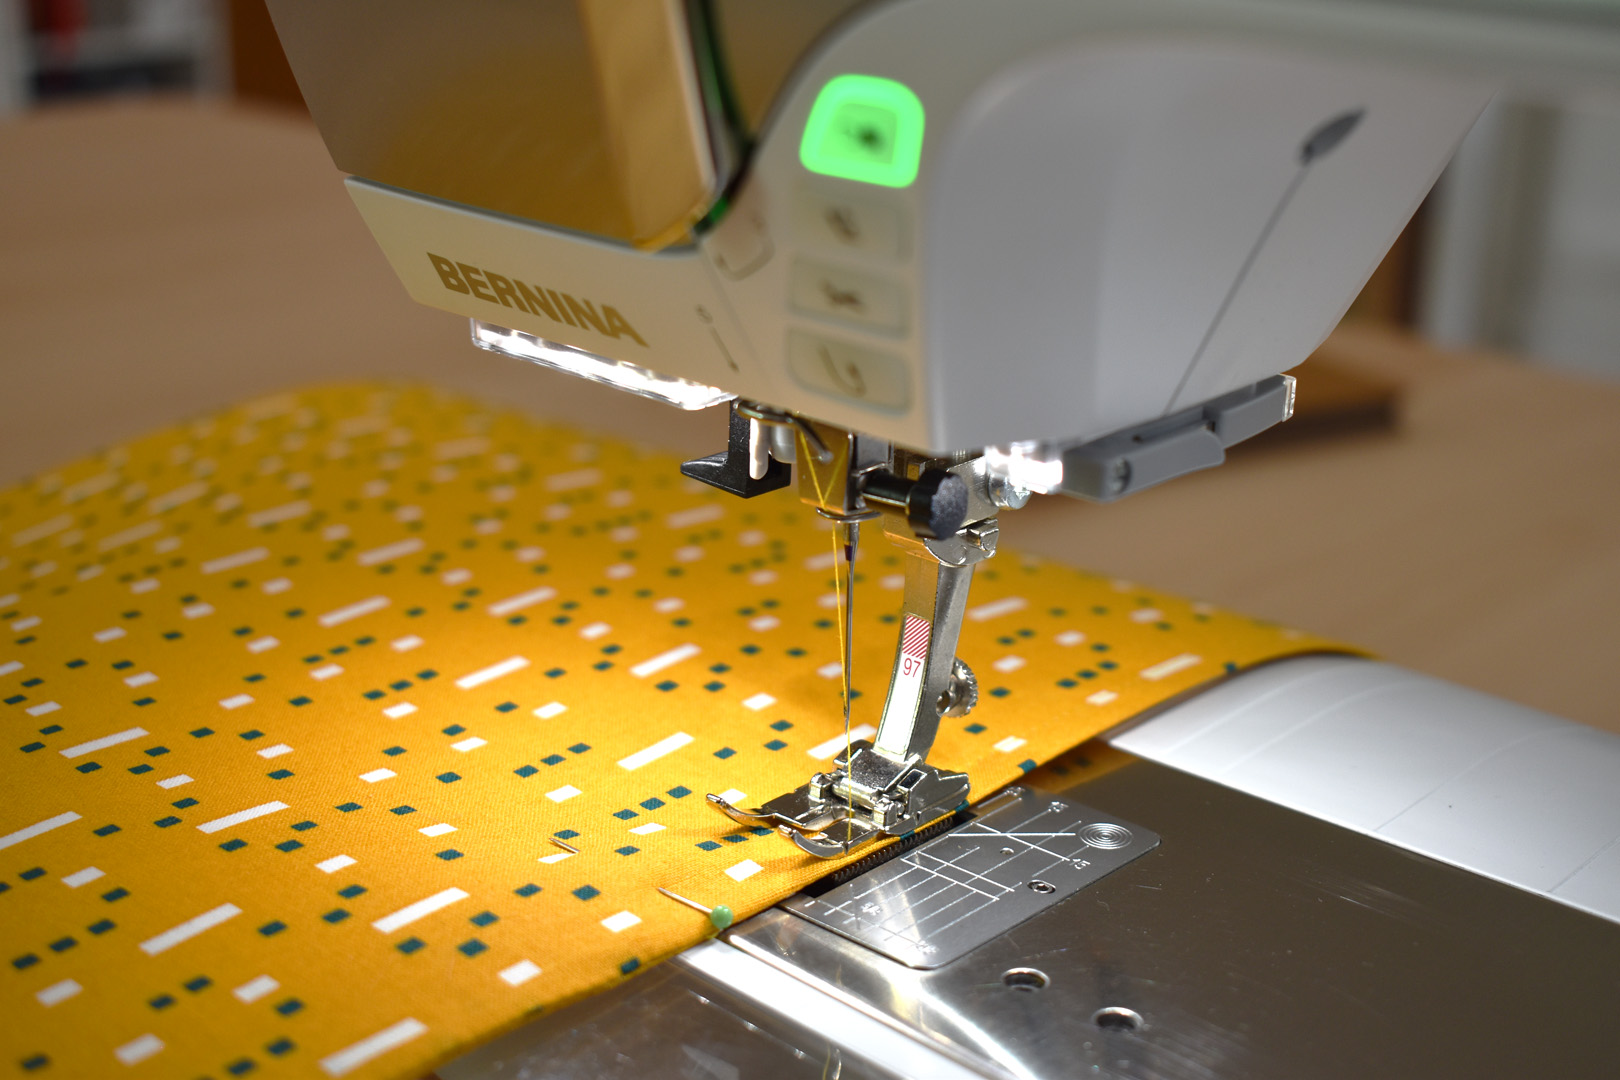
On the right side of the fabric cover, topstitch the long edge between the pockets. Place pins right before the pockets to remind you not to stitch through the pockets.
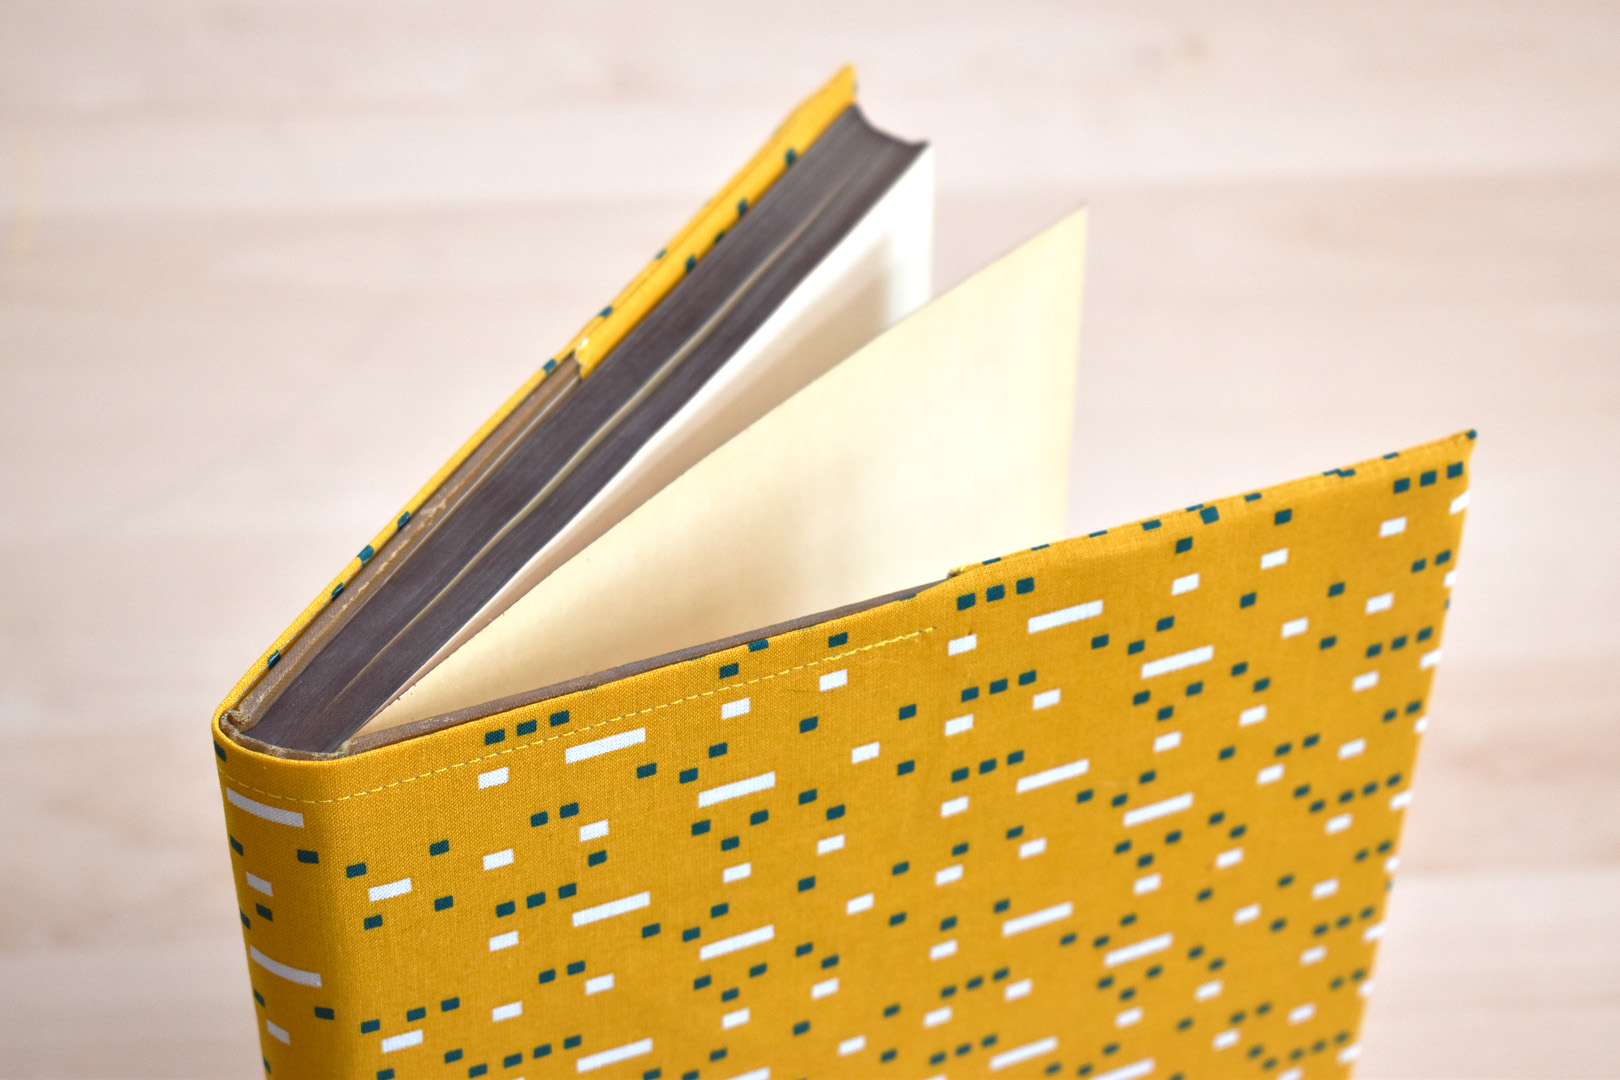
Trim threads and give the cover a final pressing if needed. Carefully slip the book ends into the fabric cover pockets and the cover is finished!
Have fun dressing up your books in fun fabric prints, or read on to find out how to add personality to books with decorative stitches.

Here’s how to make a really unique book cover using the built-in decorative stitches in your sewing machine. These are stitches and features available in the BERNINA 570 QE (and some other current BERNINA models), if your machine looks different than mine, check in your manual or get in touch with your local BERNINA store staff to find out how you can learn to use decorative stitches and stitch features with your machine.
Use the Reverse Pattern Foot with Clear Sole #34 (or Reverse Pattern Foot #1/#1C/#1D), a zigzag stitch plate, lettering or decorative stitches in your sewing machine, a fabric marking pen, small clear ruler, and 100% polyester 40-weight embroidery thread for sewing the decorative stitches. If you’d like to read a bit more about making decorative stitches with your BERNINA try starting with this article here at WeAllSew.

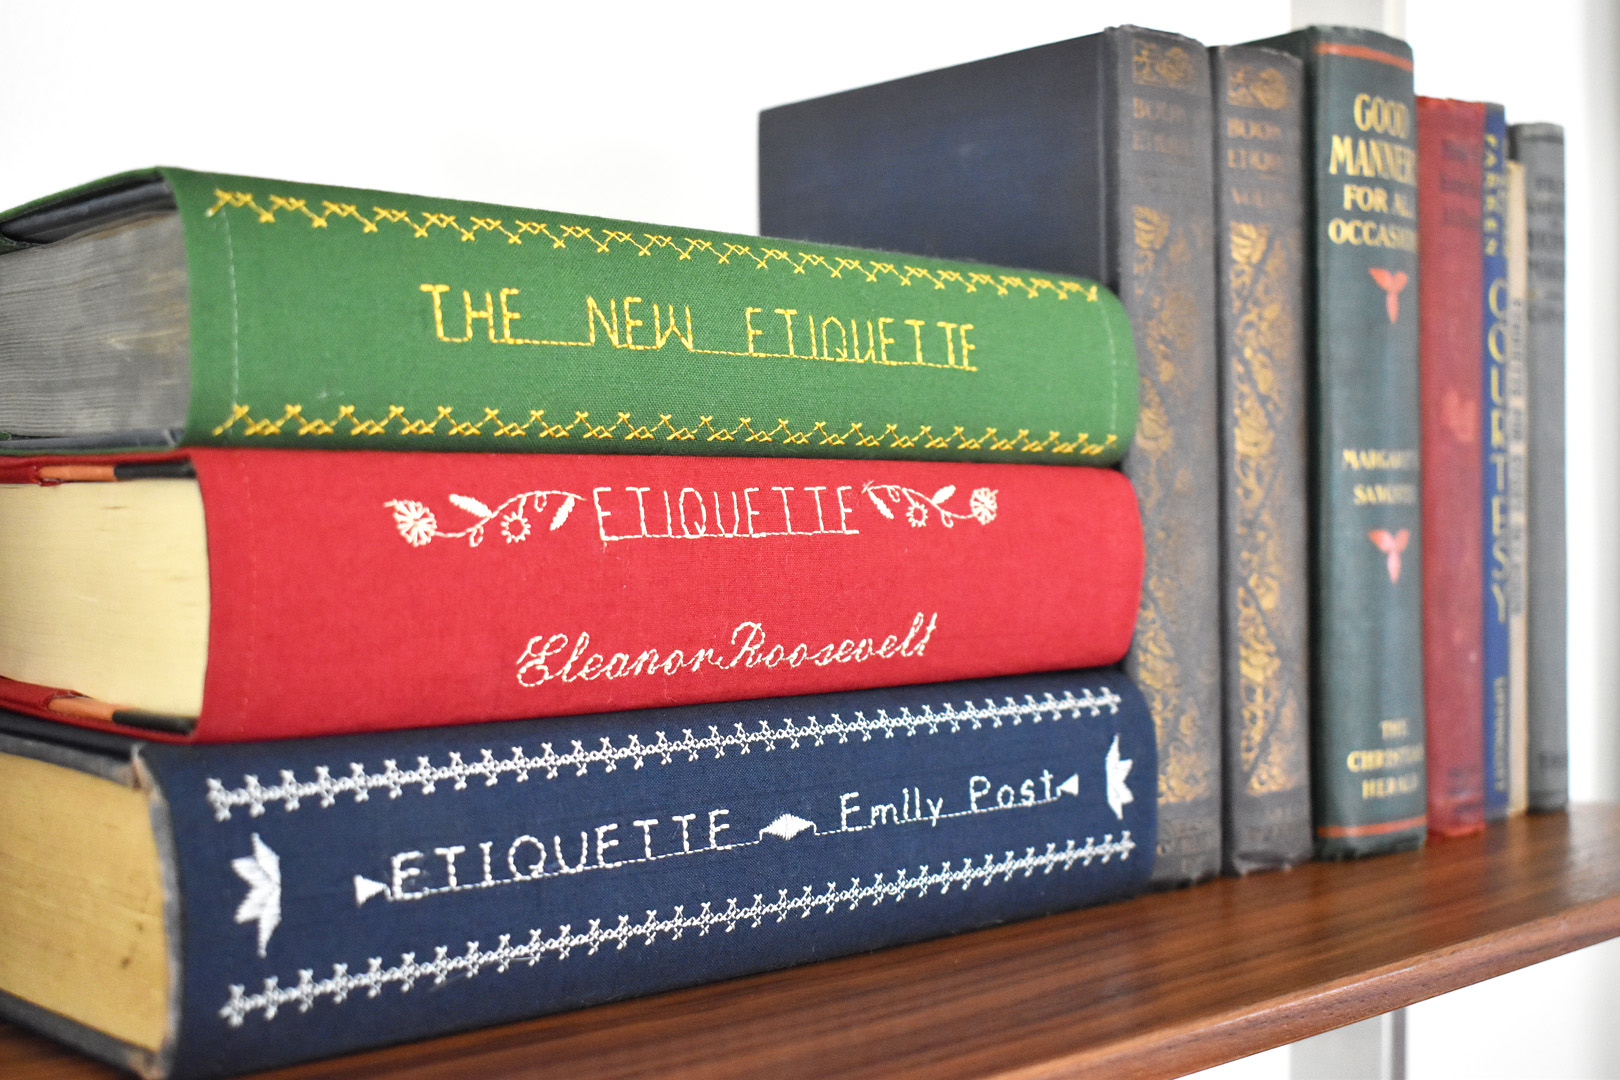
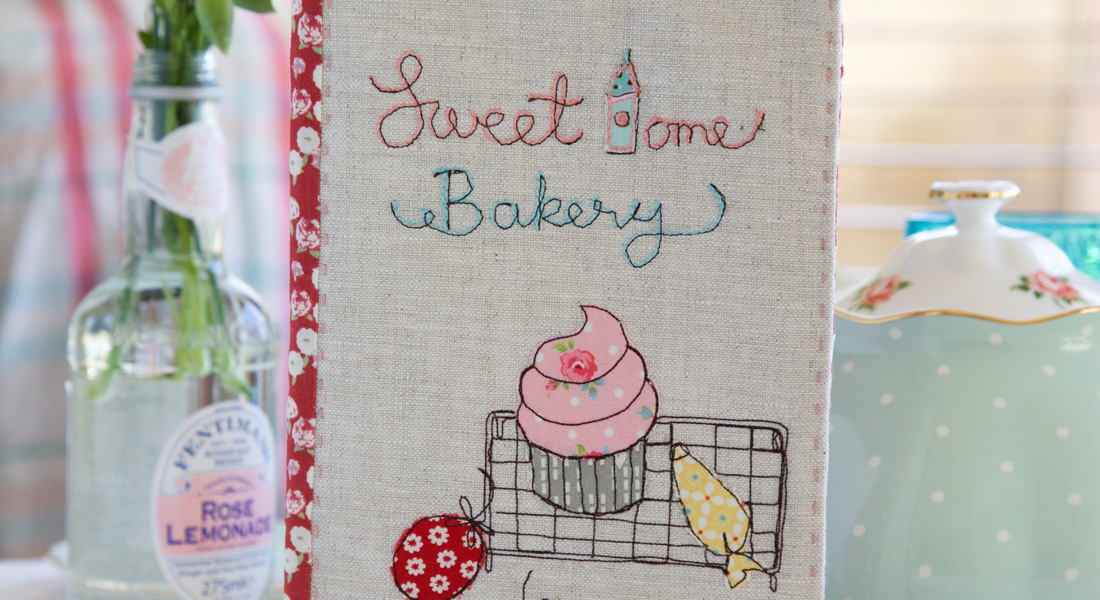
First, decide on the type of stitches to use on your book cover and make a sample using a piece of scrap fabric with Craft Bond fused to the back. The lettering and patterns will look different when actually stitched out, and you will need to measure exactly how long the patterns or letters are to properly fit them on the book cover. I’ll show you how I stitched the red cover with the book title, author, and a decorative motif.
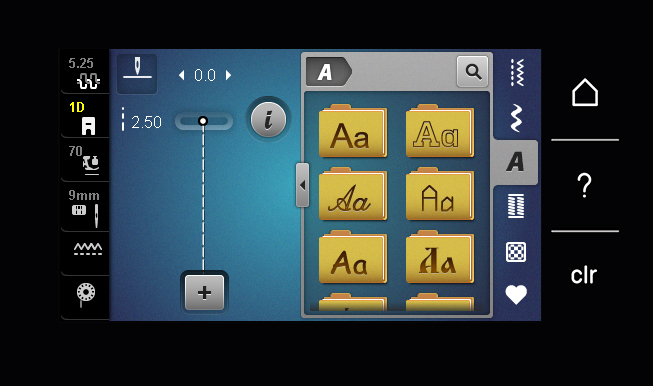
First, select Lettering Stitches from the menu by touching the Alphabets icon.
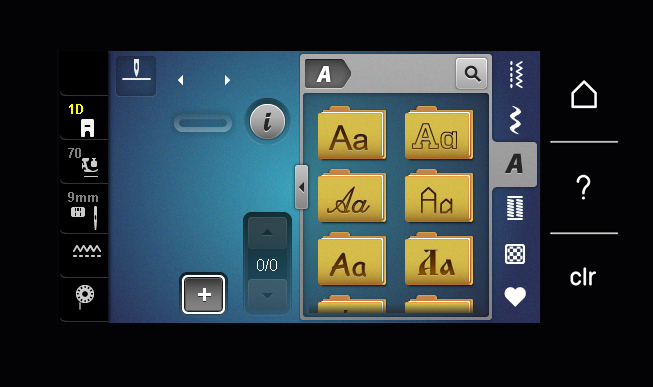
Next, engage Combi Mode by touching the “+” button below the presser foot area of the screen. Combi Mode allows for the combination of multiple stitch elements, such as the lettering.
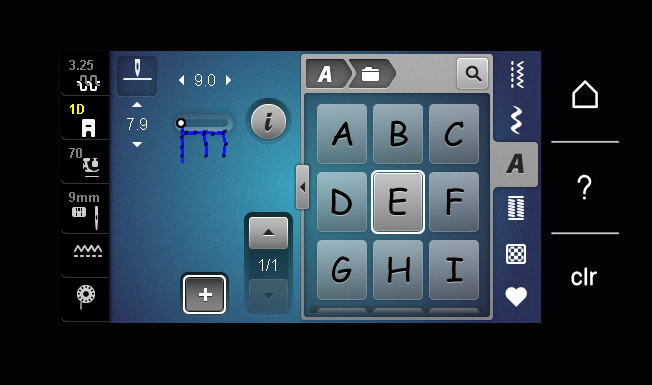
Enter the stitches by selecting the letters with the touch screen. The screen allows you to touch and scroll up and down to view the full range of letters, numbers, and characters included in the font folder. Press directly on a letter or character to select it, and it will be added to the overall design.
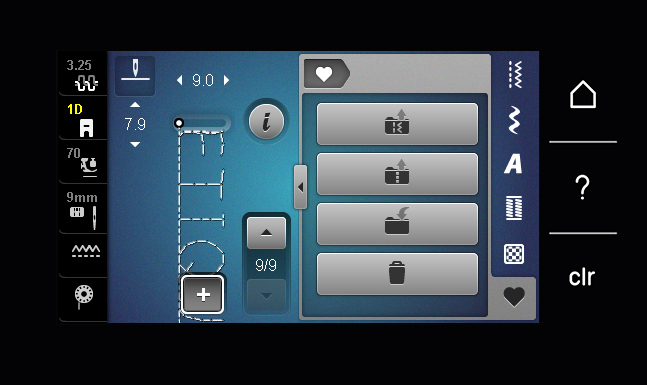
When finished entering the stitch designs, you can either sew the design right away or save it in Personal Memory for later. To use Personal Memory, select the heart icon to view the folder options, and select the Save Stitch folder to save the design.
I highly recommend test-stitching out your letters or motifs to check the fit on the book cover spine. Use a scrap piece of fabric backed with the Craft Fuse to test. The Craft Fuse is the perfect weight to act as a stabilizer for the decorative stitches, so no need to add any extra for this technique.
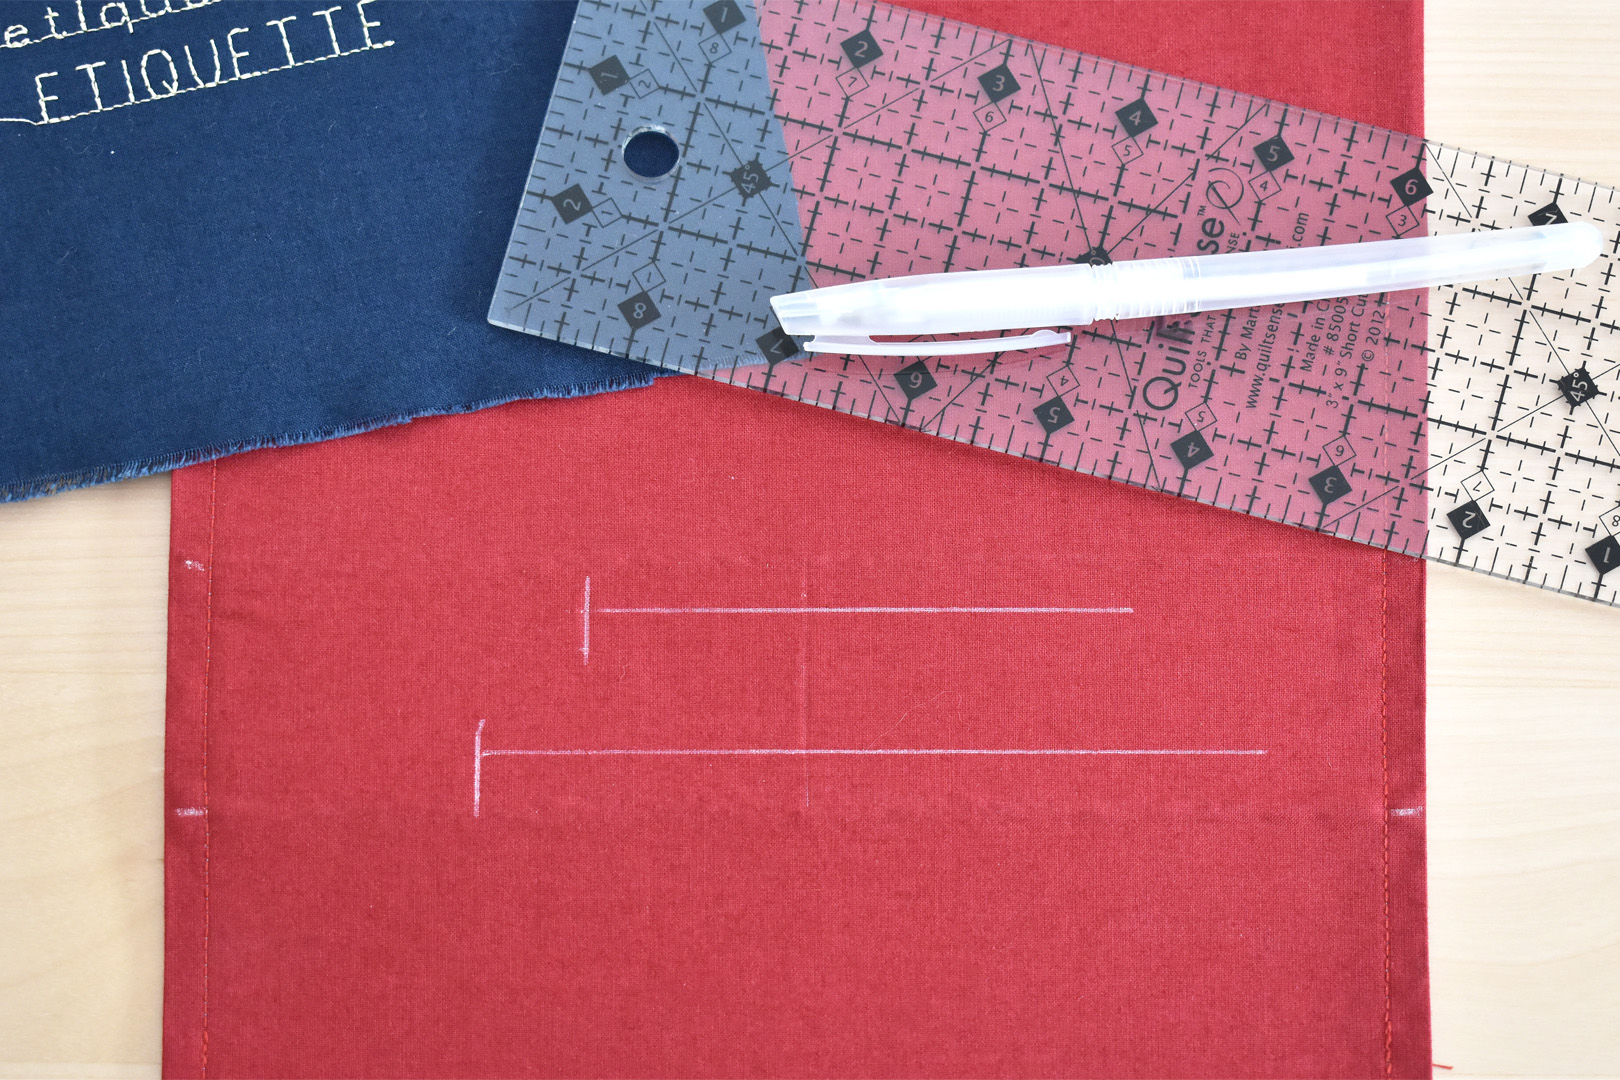
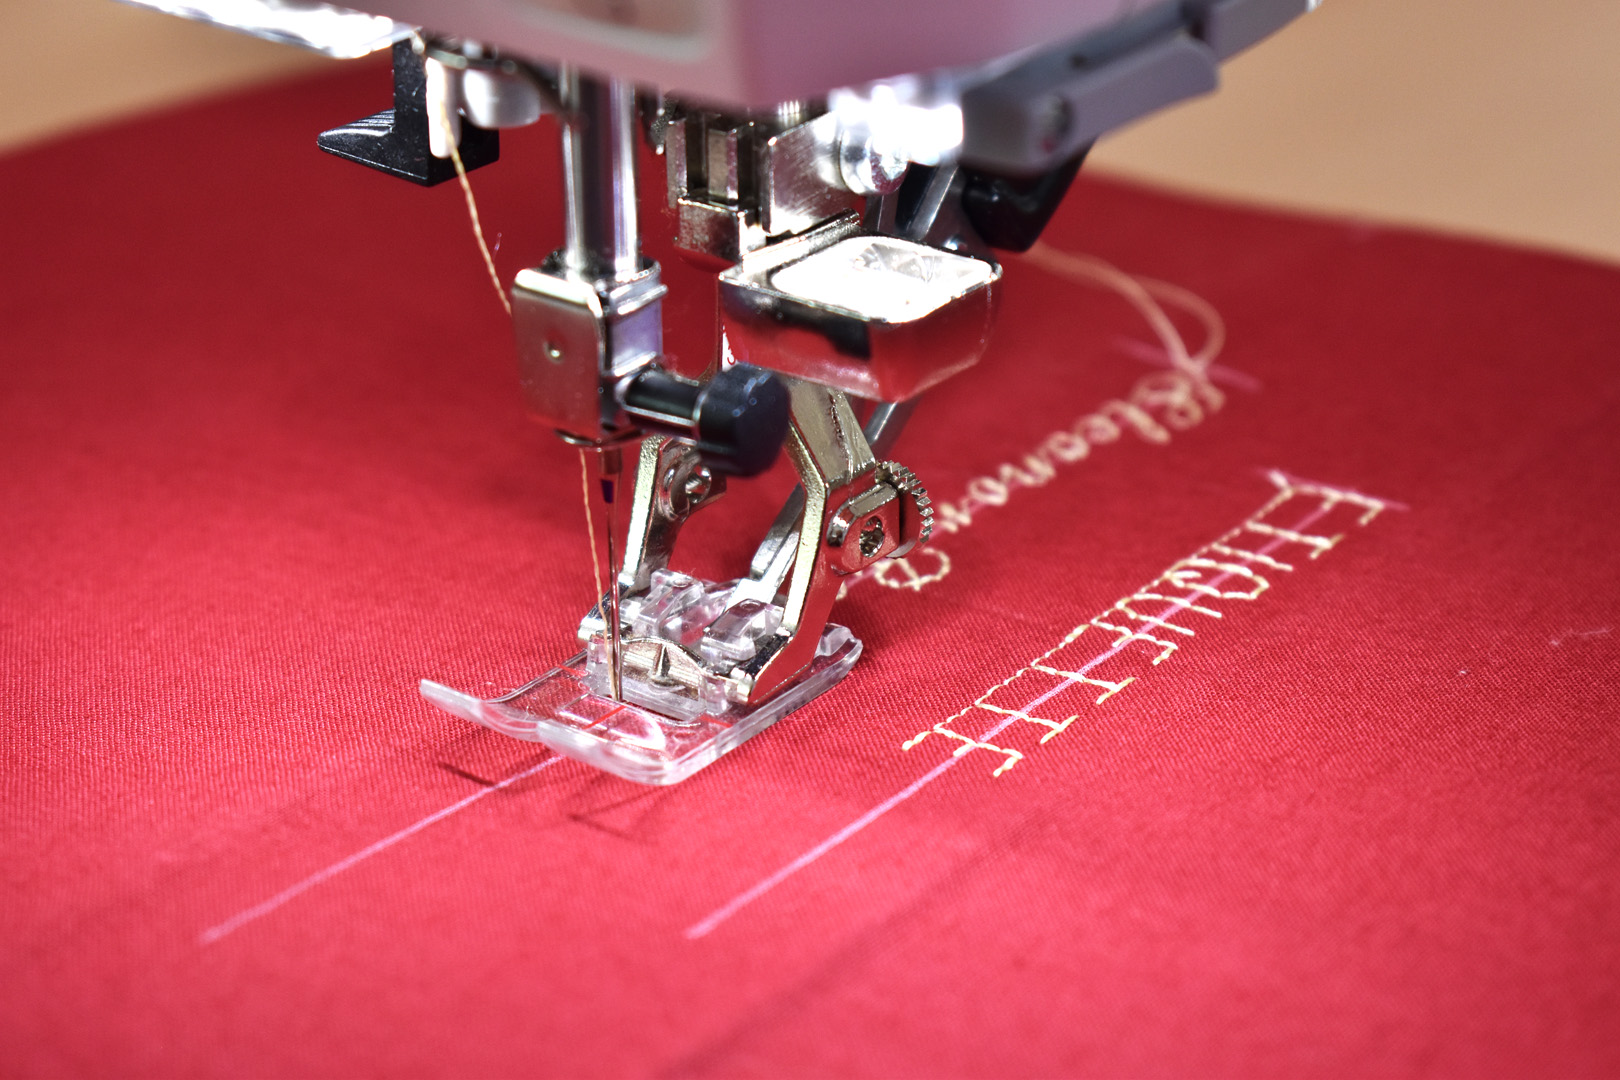
Once you see how the design will stitch out, you can look at where to place it on the book cover spine. It helps to make two reference marks for each design element, a center stitch line to follow with the center red mark of foot #34, and a start point where the needle needs to land to begin stitching.
I marked both sides of the book spine while it was on the book with the fabric marking pen to help me identify the limits of the book spine area for stitching. Then I used these marks to help me find and mark the middle of the spine area so I could identify where to stitch the lettering designs using the stitch-outs made in the last step.
Then I mark centers for each line of stitching with the fabric pen, each line 1/2″ away from the middle of the book spine area. I also use the stitch-outs to help me identify where to begin each line of stitching and mark with a small perpendicular line; this is where the needle will be inserted to begin sewing each design element.
If you need more help laying out the stitch design, try working out your measurements and designs using paper ahead of time and transfer the markings to the fabric cover when ready to stitch.
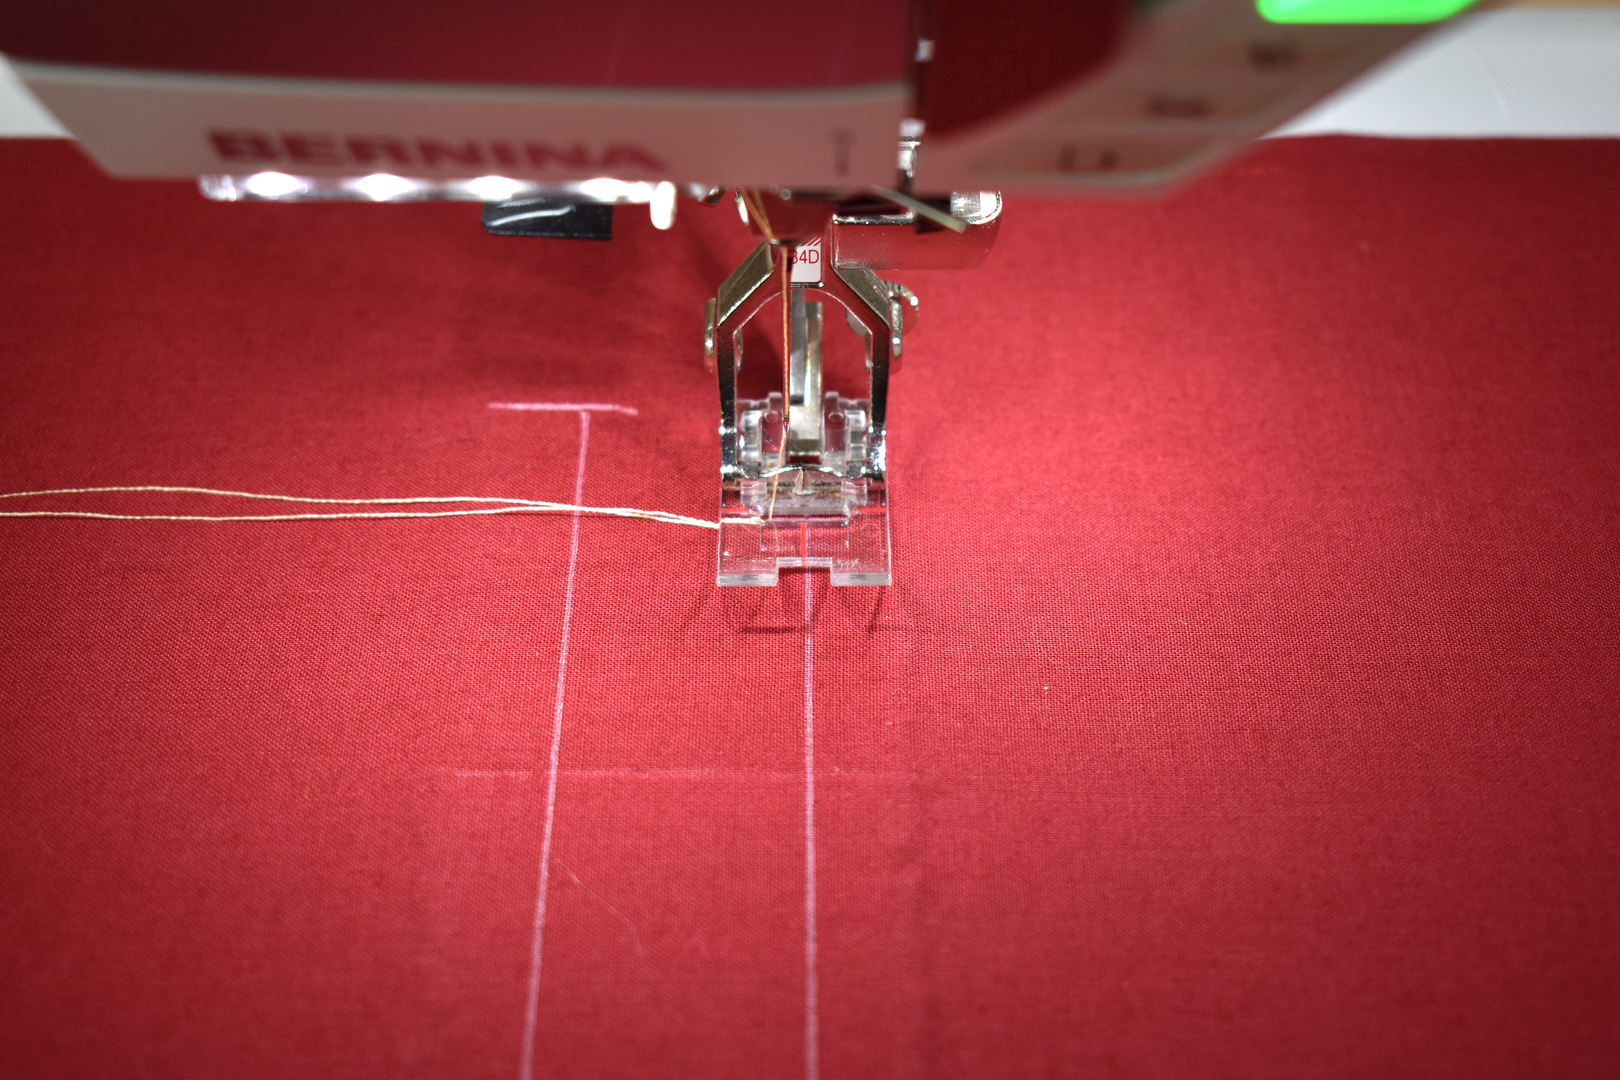
To begin stitching the first word, I center the red line on the front center of foot #34 over the center line marked on the fabric for this word, and drop the needle in the parallel mark made to note the beginning of the design. I pull up the bobbin thread and hold both threads tight when beginning to stitch to keep them out of the bobbin area.
As the machine stitches the design, you can see the letter or element currently being stitched on the screen highlighted in blue with a white dot representing exactly where the needle is in the stitch-out. Use the Pattern End button (above the slide speed control lever on the B 570 QE) to automatically stop the sewing process at the end of the word, motif, or pattern. If you don’t press Pattern End, the sewing machine will move back to the beginning of the pattern and just keep on stitching.
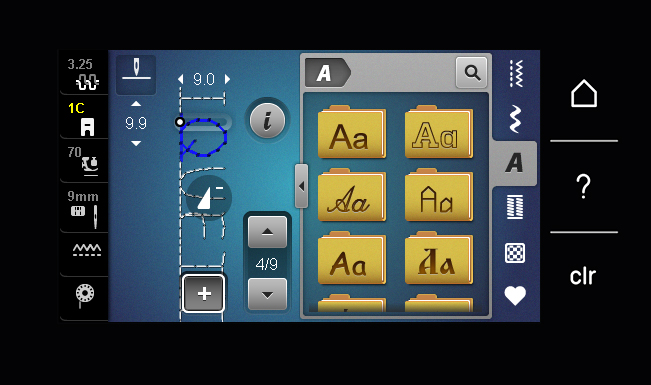
Then I move on to stitching the author’s name on the next line. I decided at this point to add two flower motifs to the word ETIQUETTE at the top. I could have added these motifs to the overall design before stitching it out, but I can still add the flowers now with the design mirrored on each side of the word.

I selected decorative stitch #143 from the folder and decided to flip the flower around to stitch in the other direction. You have the ability to flip designs or motifs with the Mirror Image tools. Select the Information menu, the small letter “i” to the left of the folder view.

The two Mirror Image buttons will flip the design either vertically or horizontally. I flip the design the way I want and then stitch one on each side of the word.
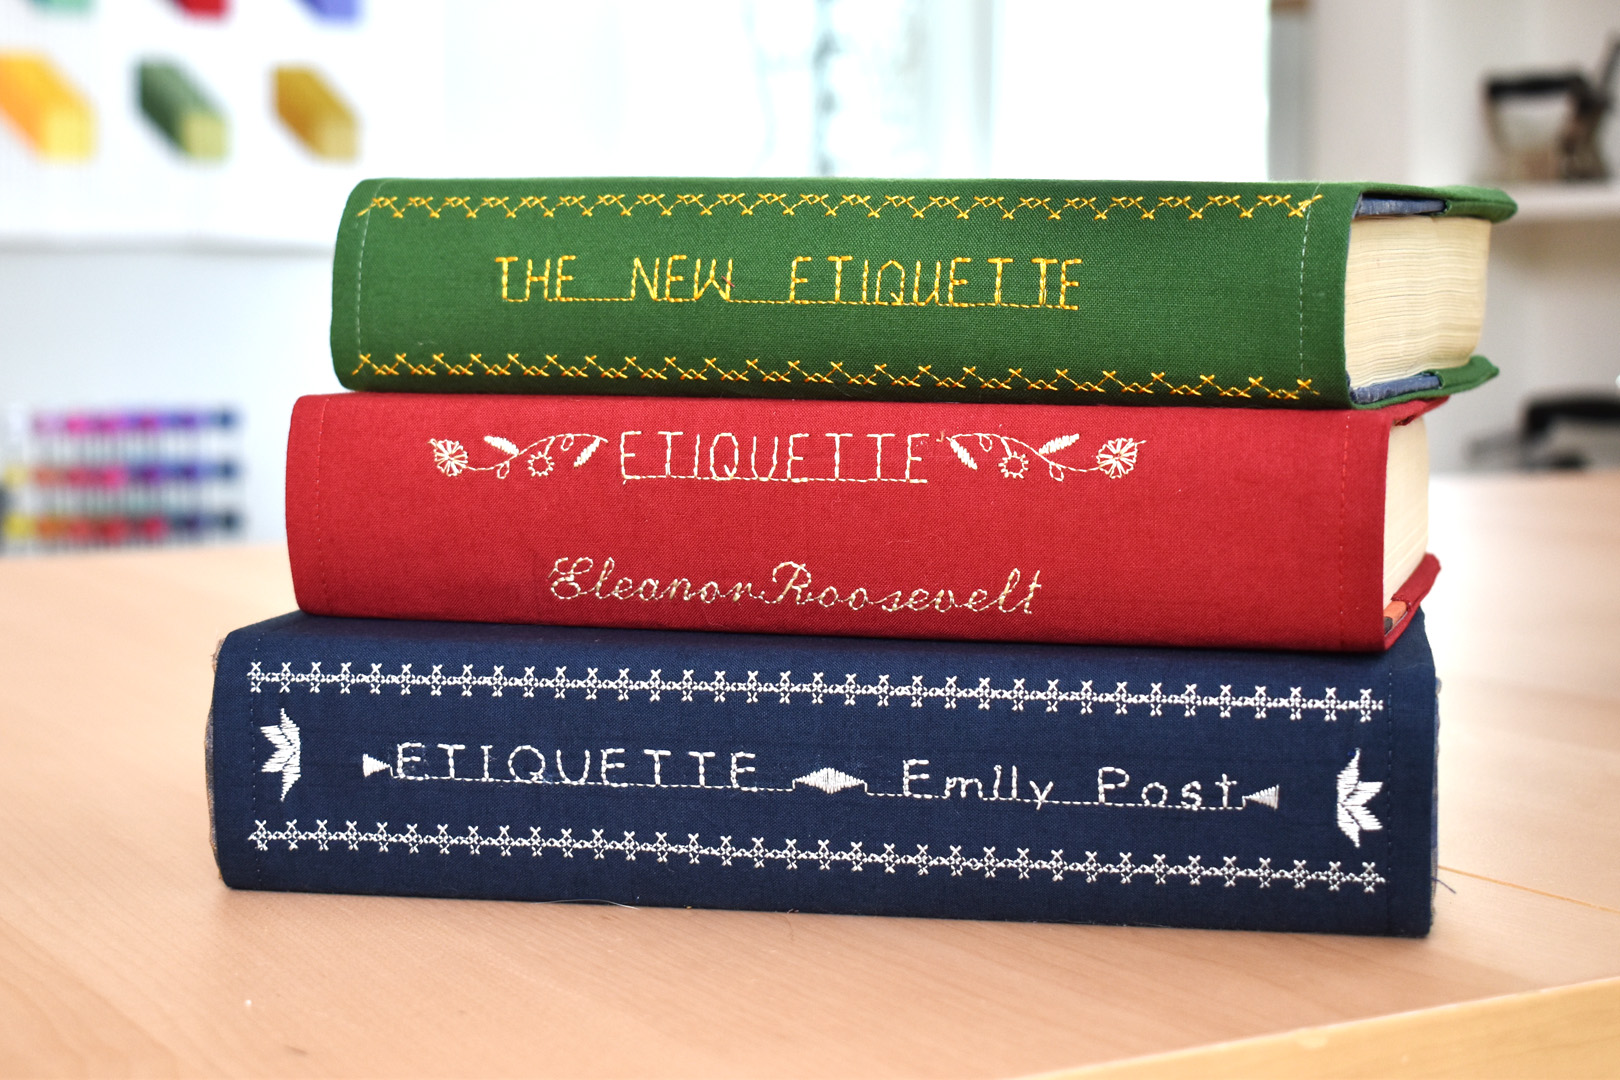
And the finished book cover really dresses up the book. There is so much design potential with BERNINA to combine and position stitches together, the possibilities are endless. I hope you have fun creating some original book covers for your book collection.
Used Products


What you might also like


5 comments on “How to Make a Simple Fabric Book Cover”
-
-
Hi @julietwood and thanks so much for checking out my project! I see you’re in France and the Pellon products are labeled differently where you live. The product is also known as Pellon 808 Craft-Fuse, you might find it by this listing. You can use any heavyweight type interfacing with one fusible side for crafts or home decorating (like a product that would stiffen fabric for making shades for instance). Cheers! – Erika
-
Thank you so much for your reply, I will now get online and order some!
-
-
-
Love the idea for these book covers, but more than that I want that book! Mary Brooks Pickens was a star in her time, not only did she write great books but she helped to teach thousands of women how to sew through distance learning by mail. Trying to find her books is a difficult process. I love collecting vintage sewing books. In this case when I say vintage, I mean vintage, not like so many sellers on Amazon claim that their product is vintage or antique when they just came off the assembly line.
-
You have a good eye! I have a collection of antique and vintage sewing books, and have a handful of Mary Brooks Pickens volumes. She was amazing!
-
Leave a Reply
You must be logged in to post a comment.

Hi, I bought some lovely fabric which has animals on it that look like block prints, perfect for covering hardback notebooks so I’ve printed out your excellent tutorial but I am not clear as to which Pellon product you are using. I live in France so will buy it on Amazon but there are many Pellon products when you enter Pellon Craft Bond. They seem to have numbers so if you could specify exactly which one it is that would help. Many thanks