How to Sew a Fabric Vase
On a recent visit to BERNINA headquarters near Chicago, I stopped into The Art Institute of Chicago. Having not been out and about recently, it was an amazing experience and ignited my creative juices to see works of art both famous and new to me. I stopped in the gift shop—I love a good museum gift shop—and saw a paper vase by the Spanish designer Marcel Baer for Octaevo. The concept is simple: a paper sleeve, shaped like a Greek urn, slips over those ubiquitous glass cylinder vases we all have in the cupboard. I thought, “Hmmm. I think I could expand on this idea and be really creative all with bold piecing and use all of those fabulous decorative stitches on my BERNINA 590.”
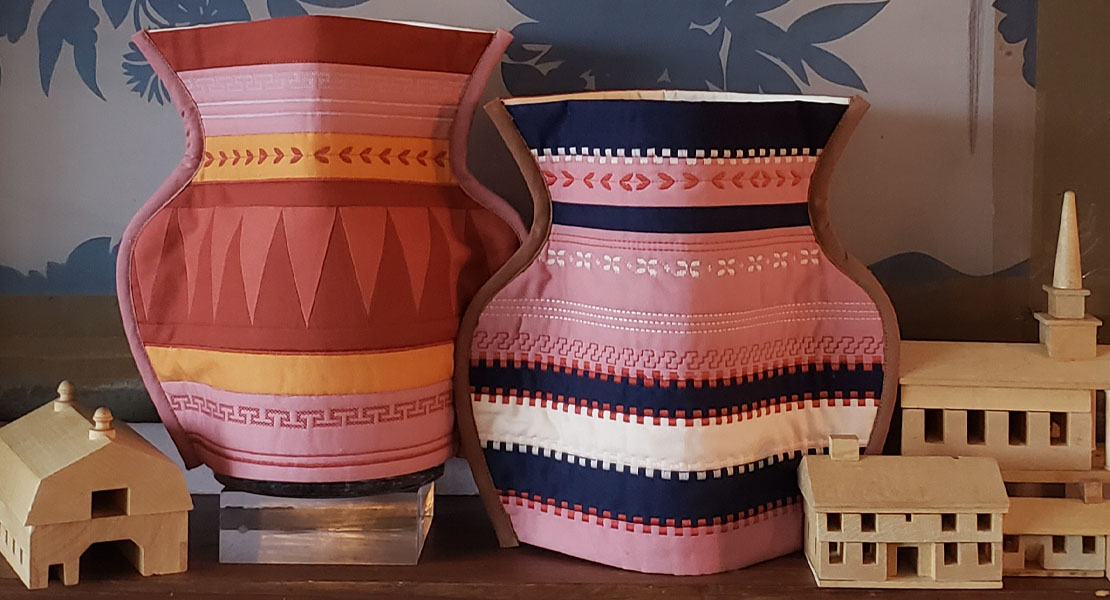
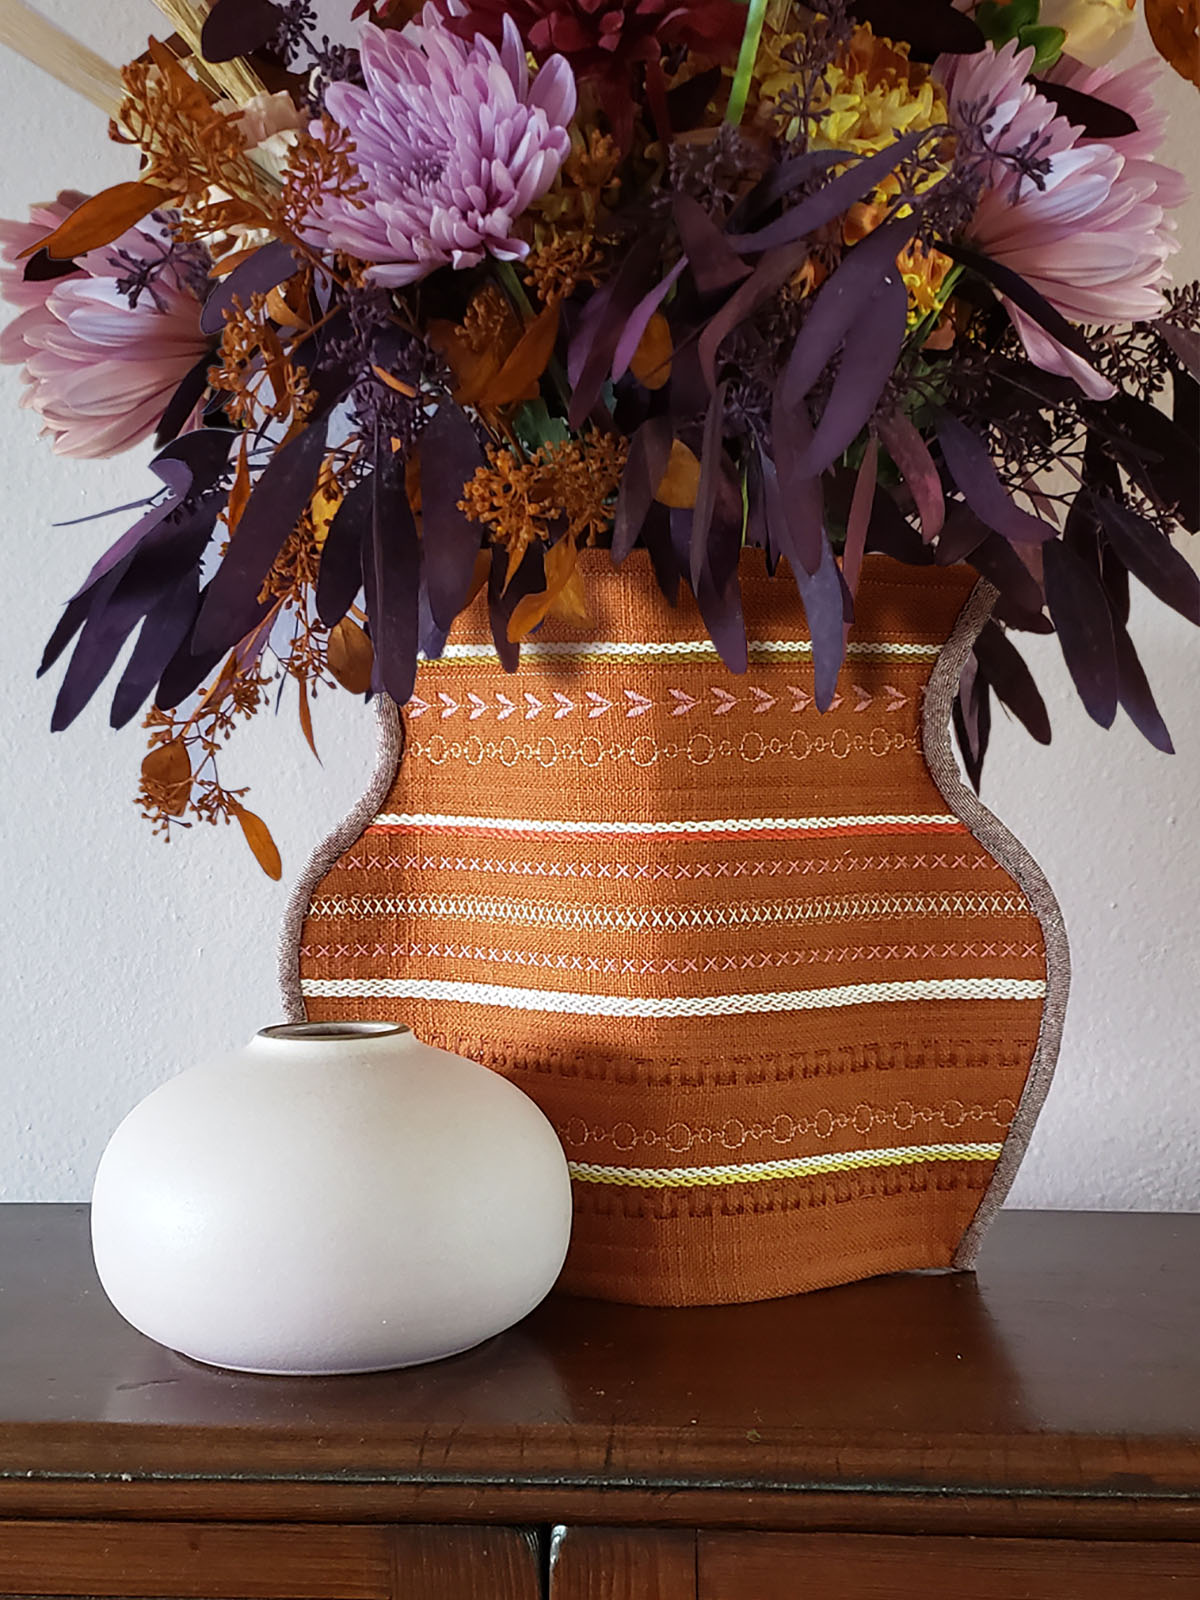
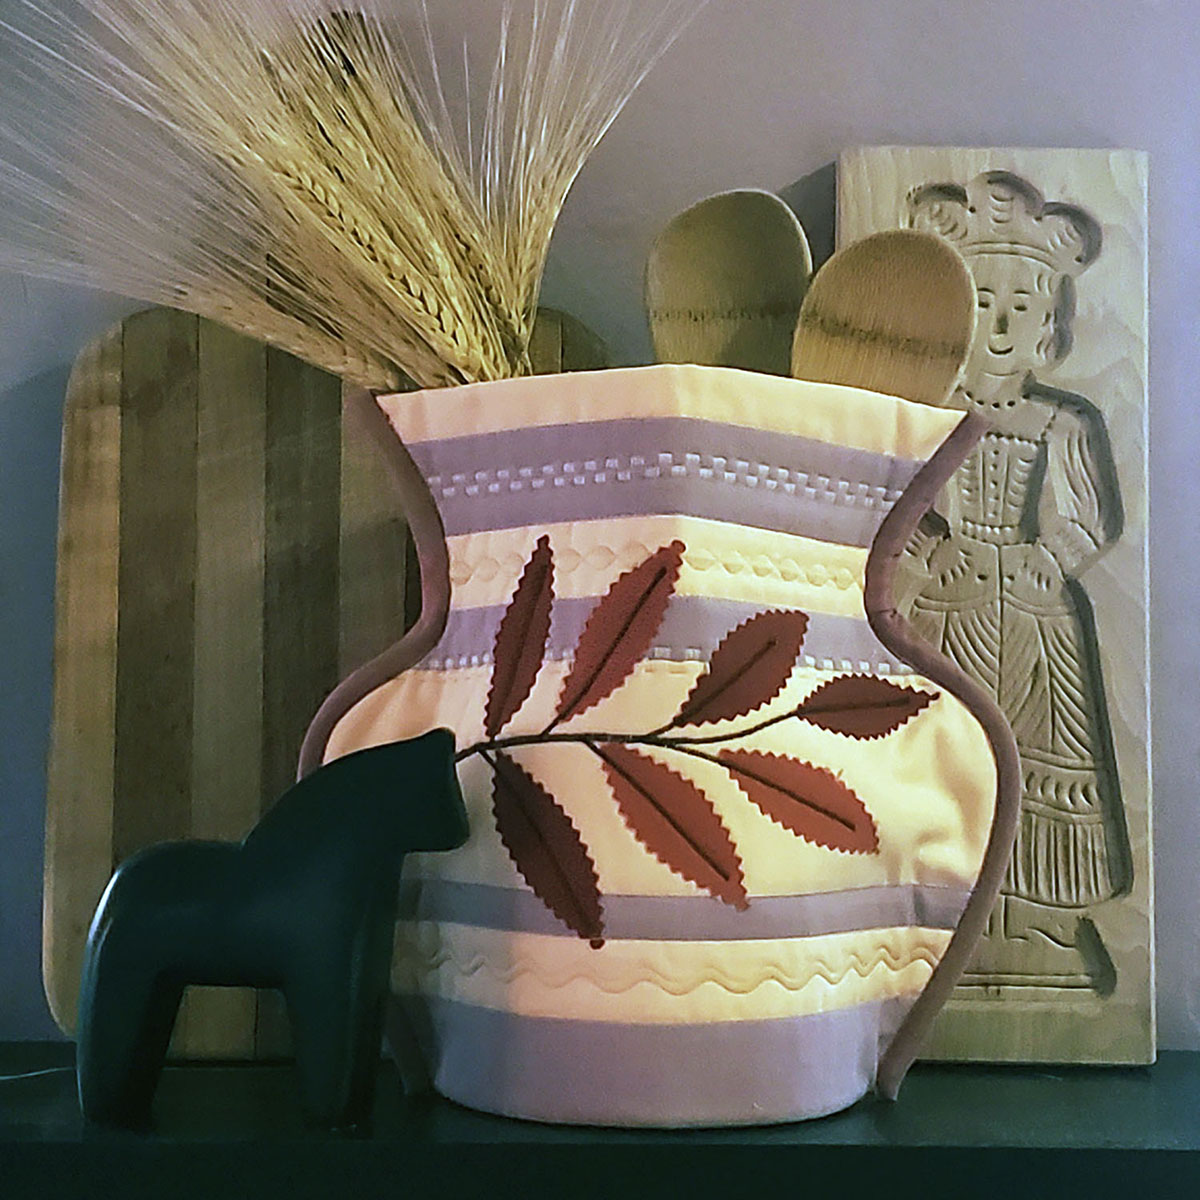
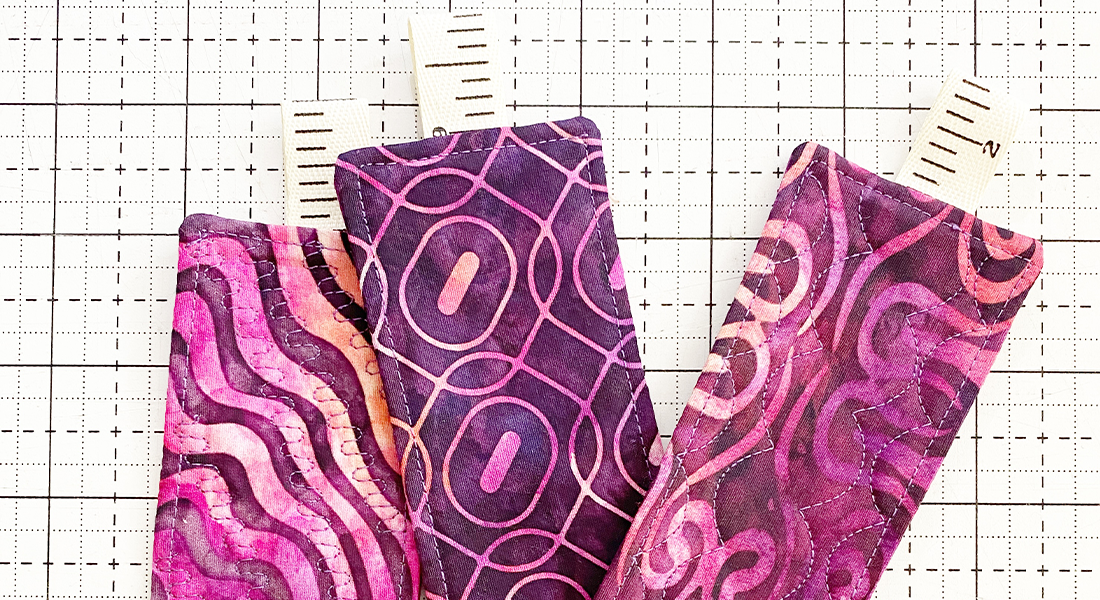
Below are basic instructions and a template for you to launch your creativity. The template is pretty versatile. I have fit it over a wide range of glass vases, including 9”x12” (height x circumference) and 5” x 15.5”. The simplest version uses fabric that you like the look of. For me, the next step was creating rows of decorative stitches with colorful thread. Then, I let loose and started improv-piecing designs that I thought looked like Grecian urns or traditional crockery. These can be used for wooden utensils in the kitchen, filled with flowers or simply left as a decorative object on the mantel. I’m excited to see what you will create!
Materials to Sew a Fabric Vase
- Glass cylinder vase
- Height should be equal to or less than 12”
- Circumference should be equal to or less than 14”
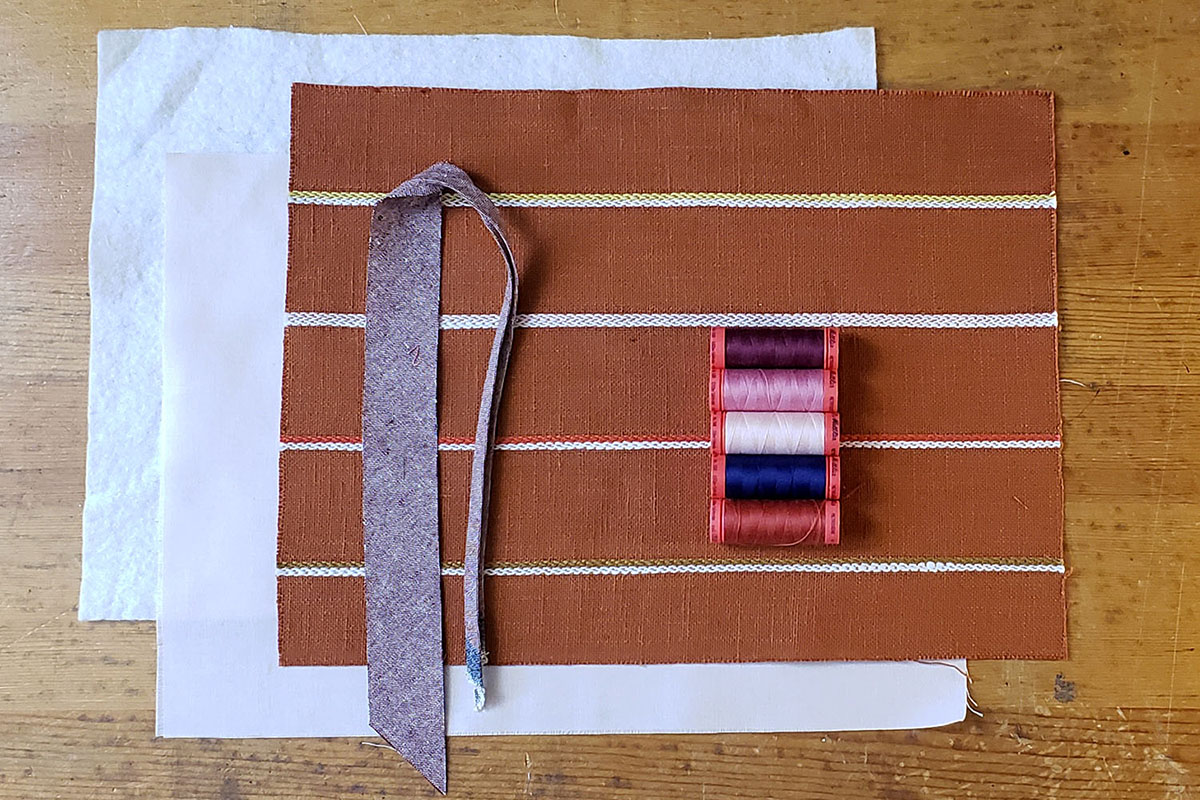
- Lining Fabric: 2 pieces of muslin or quilting cotton measuring 10.5 x 14”
- Main Fabric: 2 pieces measuring 10.5 x 14”
- These can be solid fabrics, printed or decorative fabrics or pieced fabric of your own design.
- Batting: 2 pieces of lightweight batting measuring 10.5 x 14”
- Coordinating thread: as many colors as you would like.
- Binding: 2 pieces of 1.25 wide (before folding) bias tape measuring 12-13” each.
- Embellishments
- You can use scraps of trim, ribbon, ricrac to embellish your vase.

Steps to Sew a Fabric Vase
Step 1.
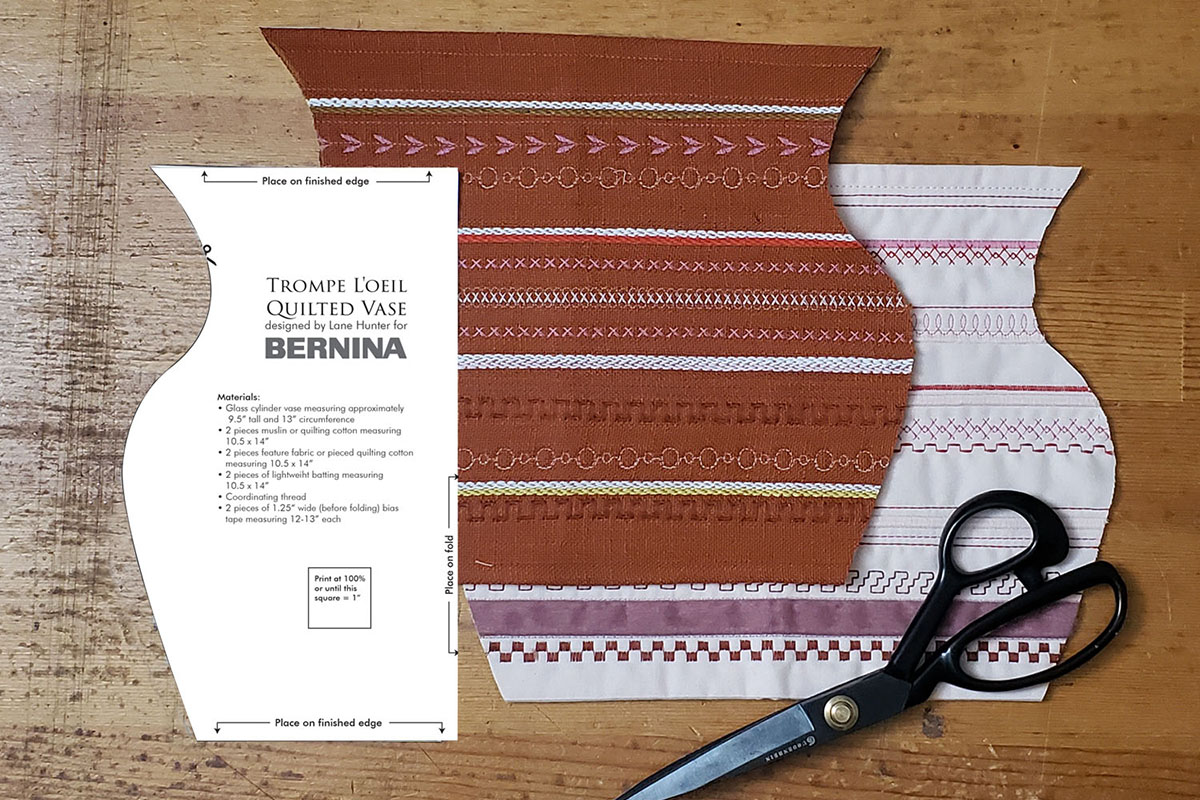
Print out the template. There is a 1” square on the template to help you register your print-out.
Step 2.
On your work surface place one piece of Batting followed by one piece of Lining Fabric (face up) and finally one piece of Main Fabric (face down). The sandwich should be Batting, Lining, Main. (For you avid quilters this will seem like the wrong order but it is correct.) Stitch both the 14” edges with a ½” seam allowance. DO NOT stitch the shorter edges.
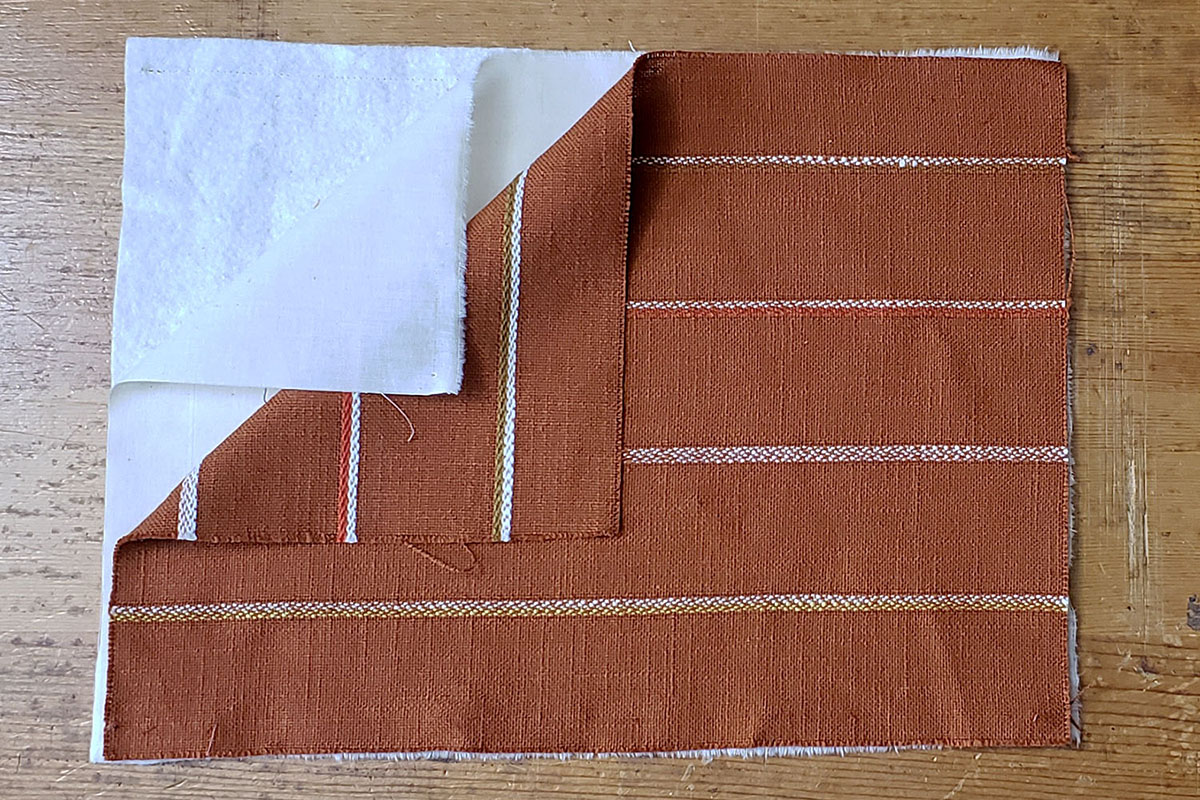
Step 3.
Trim the excess Batting in the seam allowance. Turn the sandwich right-side out so that the Batting is between the Lining and Main Fabric, which are now facing out. Press to get a nice finished edge on the top and bottom of your work. The Laurastar Ironing Systems make quick and crisp work of this.

Step 4.
Repeat with the second set of fabrics and batting.
Step 5.
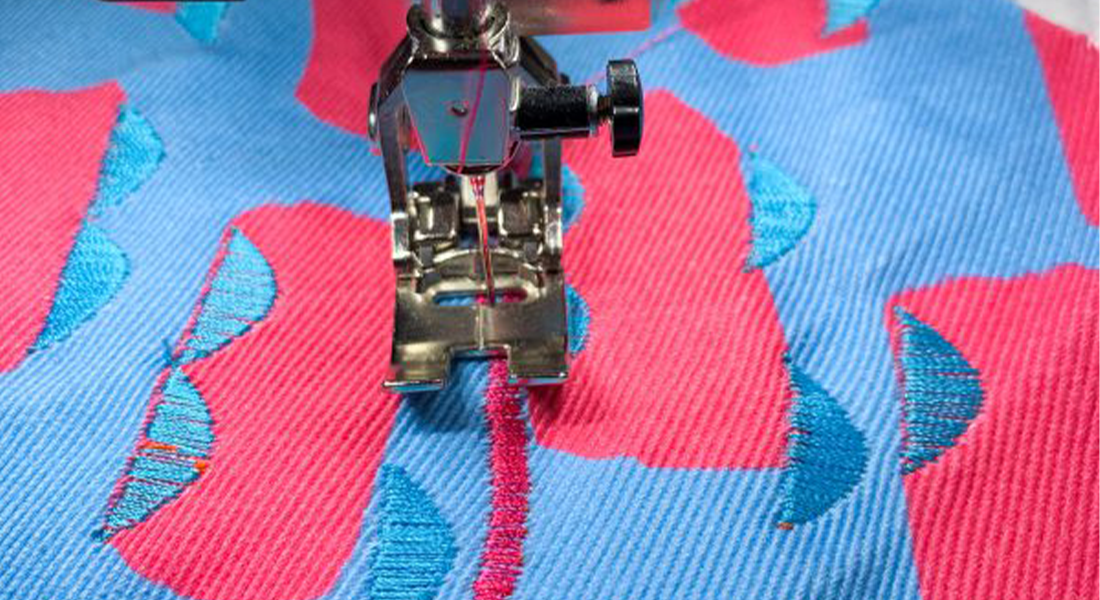
This is the fun part! Take both quilt sandwiches to your sewing machine and stitch from raw edge to raw edge using straight lines and whatever decorative stitches you like. You may want to use a walking foot. I was able to use the Dual Feed function on my BERNINA 590. You may also want to use a BERNINA Open Embroidery Foot #20 to see more clearly where your decorative stitches are landing.


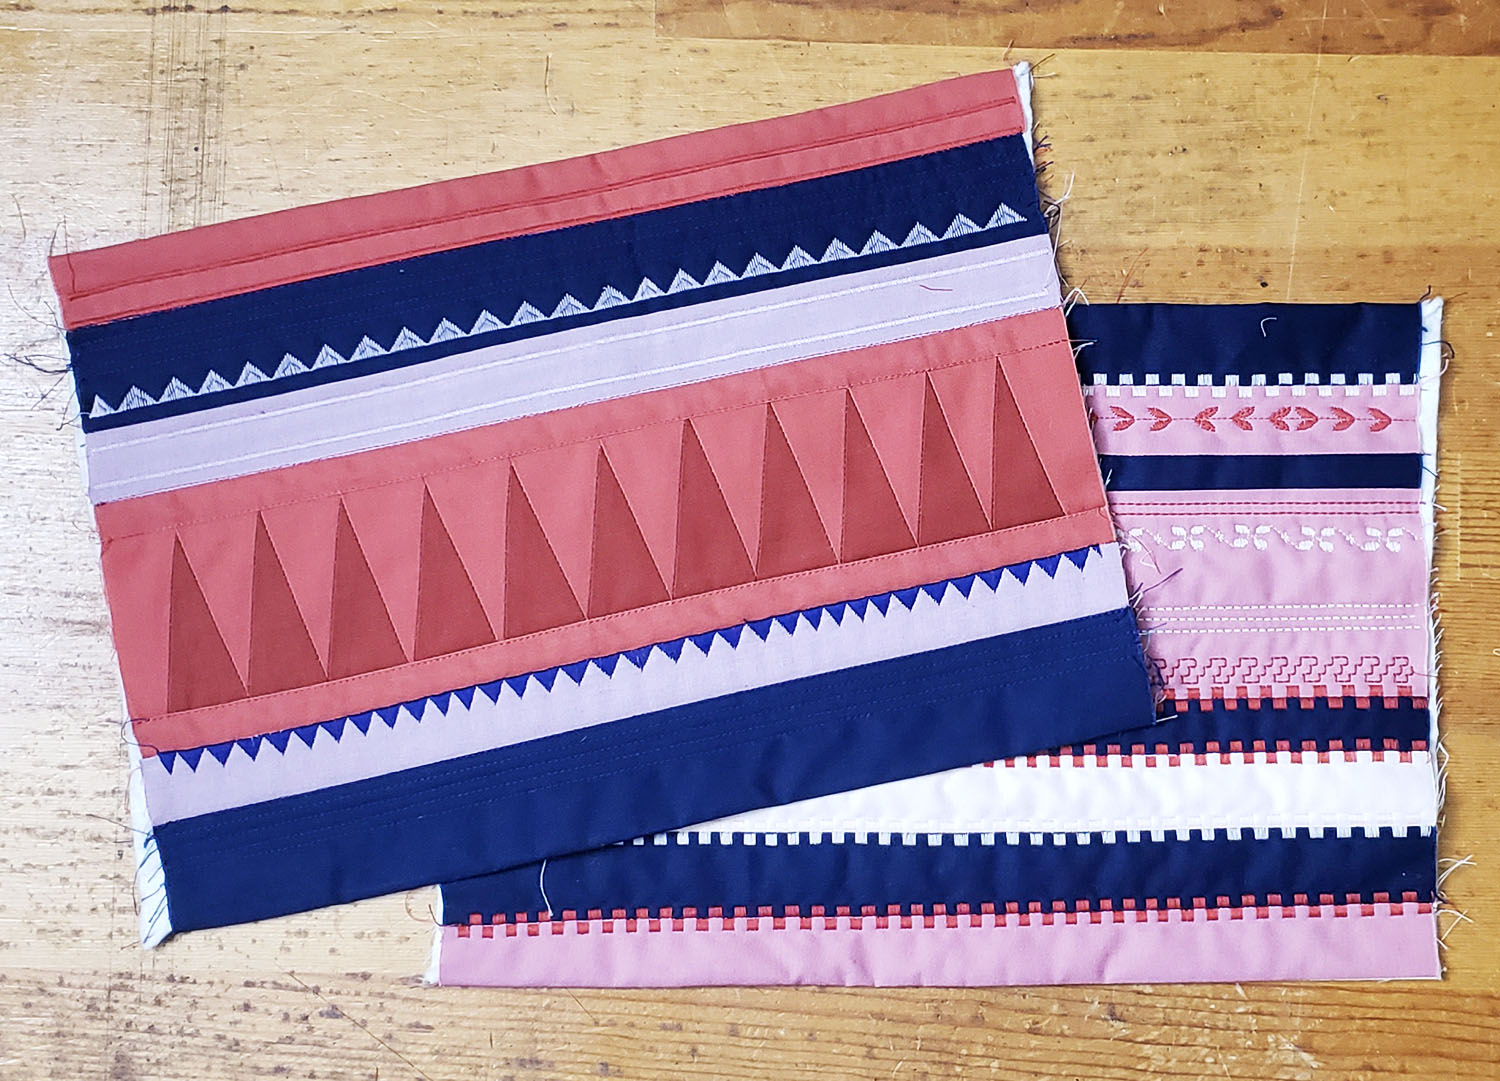
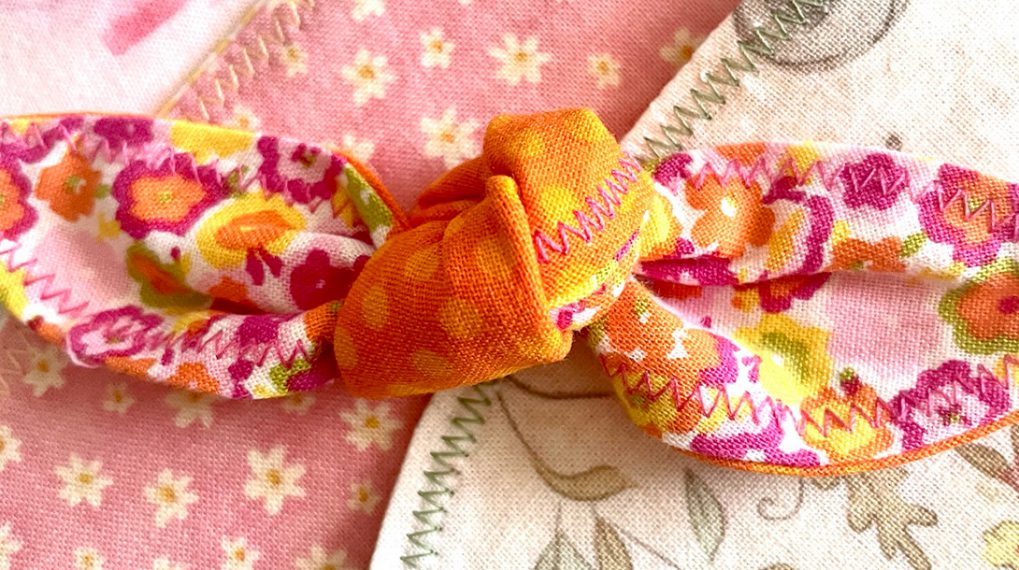
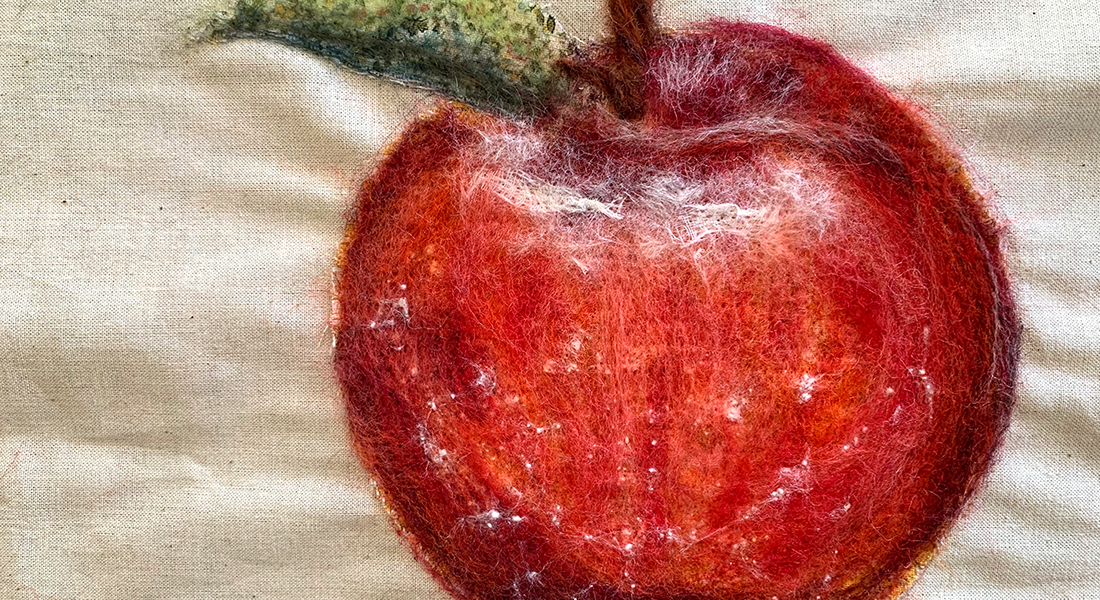
Have fun. Change threads. Explore all of the decorative stitches in your machine. I particularly like the cross-stitch designs and the satin-stitch designs. Rows of tight zig-zag stitches in various widths also create bold stripes. When you are satisfied, proceed to the next step.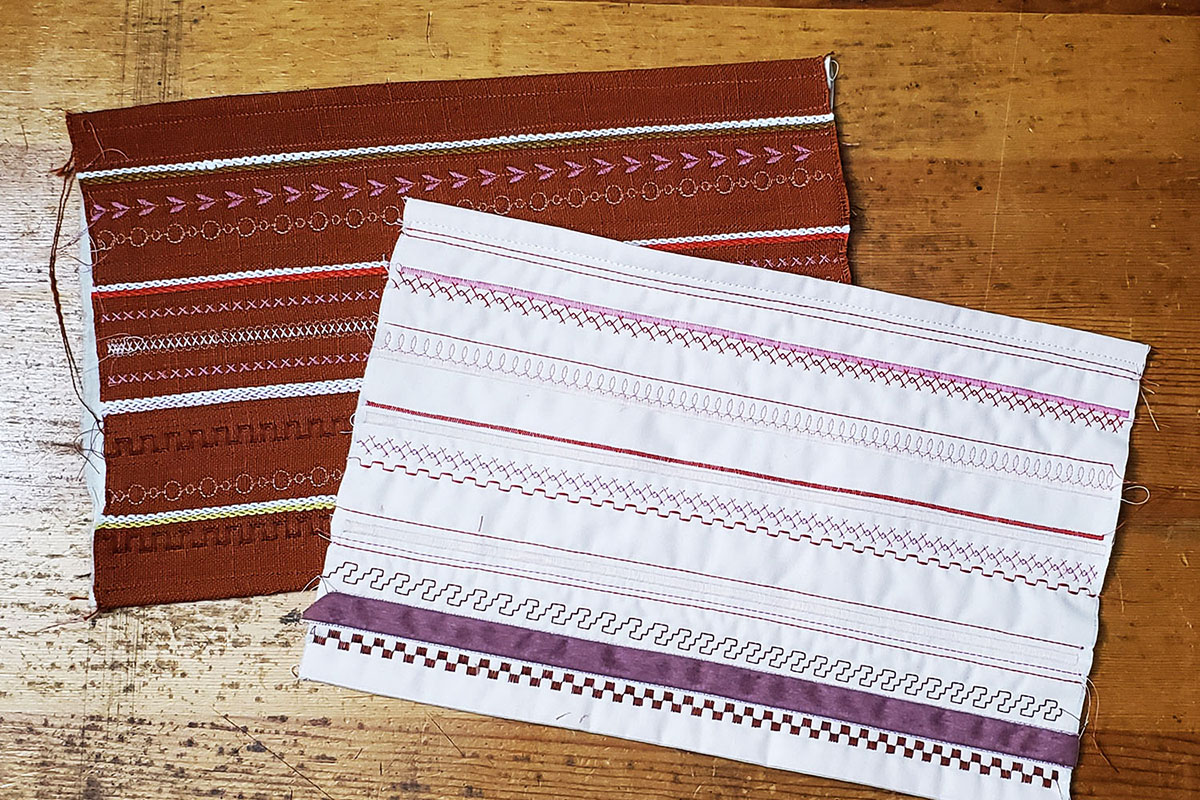
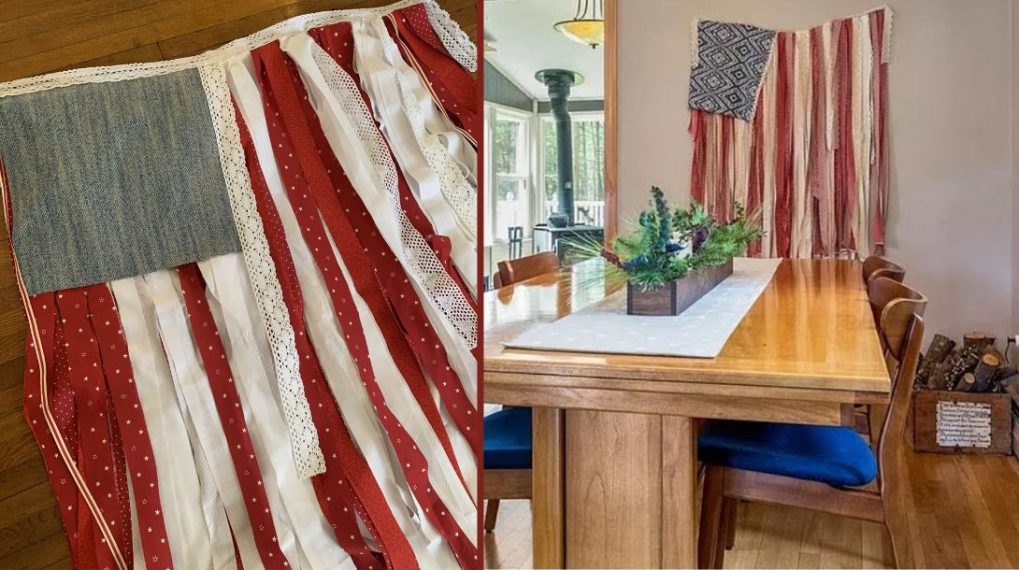
Once I felt confident in decorative stitches, I got a little excited and started to make some pieced blocks and then added some decorative stitches to those. Here is what they looked like at this stage in the project. Raw edge applique, embroidery, whatever you want!

Fold each quilt sandwich in half, matching raw edges.
Step 6.
Place the template along the fold and trim the excess. Repeat with the second sandwich.
Step 7.
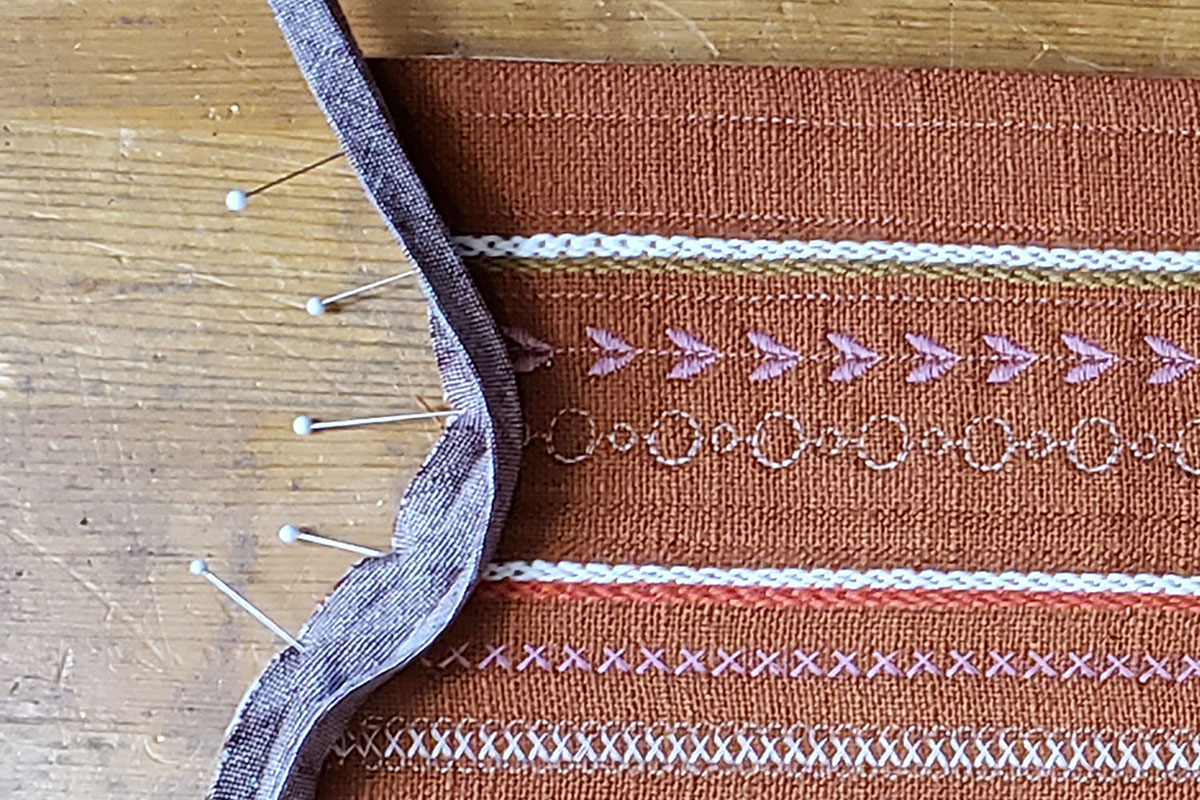
Place both trimmed sandwiches together with Linings facing. Open the bias tape and pin the raw edge along the trimmed curve of the sandwiches. You should have at least ½” of overhang at the top and bottom of the curve. Stitch along the open fold line of the bias tape through all the layers. GO SLOWLY to avoid puckering. I like to use my BERNINA Free Hand System to lift my presser foot and keep my hands on my project to adjust the bias tape as necessary.
Step 8.
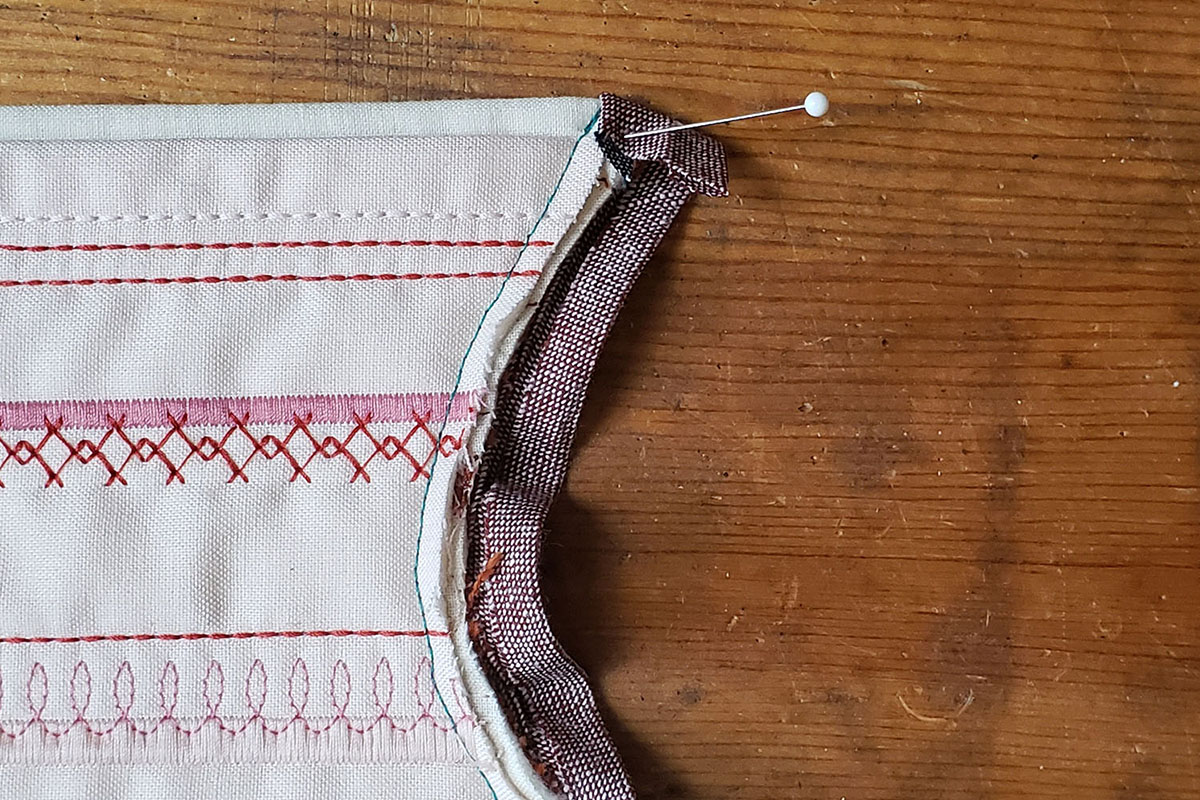
Wrap the bias tape around to the opposite side of the sandwiches. Trim the excess bias tape at the top and bottom to about ½” and fold towards the sandwich. Tuck the bias tape’s second fold in and pin the fold along the stitches from the previous step. Using Wash-Away Wonder tape to stick this edge in place is very helpful. Edgestitch in place. I like to use the BERNINA Edgestitch Foot #10 and move my needle over one or two places to get a clean finish.

Step 9.
Repeat with the second piece of bias tape and the other raw edges.
Step 10.
Slip the fabric vase over a glass vase and display!
Used Products


What you might also like


60 comments on “How to Sew a Fabric Vase”
-
I like to make the gingers from Memories in Thread.
-
I love to customize things for my grandkids!!!
-
Mug rugs, quilts, small hanging quilts. I love embroidering on anything.
-
I like to monogram the limiting in my dresses
-
-
I love to use my Bernina 880 to customize gifts for people…there are so many ways to use the embroideries and custom stitches that can be combined to make themed items that I just keep coming up with new ways to sew!
-
I use my embroidery machine for wall hanging, handbags, tiling scenes, home decor projects and my favorite for quilts.
-
I don’t use embroidery enough. Would like to learn more…
-
I love using my embroidery machine to make gifts for friends and family.
-
I like to decorate my garments with embroidery and add hot fix crystals or a little beading. Just a little to make them sparkle. I decorate my free standing lace with a little colored embroidery.
-
I like just about everything with machine embroidery. I’m currently working on baby gift bundle, all ME (quilt, bibs, burp cloth, zipper bags). I love to make gifts via ME ITH, as well as items to decorate my home. The Happy Snowman design collection has been on my wish list and I would love it. He just makes me smile with delight. And he would certainly make great gifts too!
-
I use embroidery to personalize everything I make, even if I use a commercial pattern the embroidery makes unique.
-
first i need to say this was an excellent post- finally something new!
i like embroidery to make things personal! a quilt with custom and professional looking labels a needed bathrobe becomes a special gift with a monogram, name on beach towels, etc
-
I love to gift my machine embroidery crafts. I am working on my 2022 Christmas ornaments right now (need 50+). I have also used embroidery on many blankets and quilts.
-
Thank You! I’m glad you enjoyed it.
-
-
I love to CREATIVELY deco my clothing a lot … FIESTA 🙂
-
My machine is not a dedicated machine embroidery machine. I would definitely love one. I use decorative stitches to ehance my quilting and piecing projects.
-
I am new to my Bernina 770 and i am learning to embroider with it. Love it. Love it. Love it. I cant wait to get started and probably wont ever stop. The best thing ever.
-
Embroidery adds that special extra touch to labels and gifts.
-
I use embroidery on clothing, for quilting in the hoop, and for home dec items for gifts and for myself.
-
I use my embroidery for gifts. I love to give homemade gifts and embroidery allows me to give unique gifts.
-
I love to customize items for my grandkids!
-
Embroidery makes a nice quilt nicer! I would love to have more confidence in using my embroidery with my 580.
-
I like to make FSL xmas ornaments to add to my xmas cards that I send out every year.
-
I love to embroider on my quilts as labels. I also use embroidery for personalized gifts for my son’s teachers (tote bags, oven mitts, class bookmarks, etc).
-
Recently added the 880+ to my family of Bernina’s for quilts, bags, wall hangings anything embroidery.
-
I love to put embroiling sweatshirts and T-shirts to make them look special instead of ordinary.
-
Love using my Bernina 570, 590, and E16 for embroidery projects. Just finished two quilt with Sunbonnet Sue embroidery blocks for my great nieces.
-
I would love to make the snowman tile scene!
-
I LOVE to customize quilts, especially ones for wee babies, with an initial. It’s the perfect touch of customization without going over the top.
-
I like to embroider my wall handlings and the labels for my quilts
-
I love to use my embroidery machine for in the hoop projects like the snowman! ☃️
-
Love to embellish clothing, baby items and embroider Quilt labels!
Make special dresses for Granddaughter!
Excited to pick up New Bernina Friday!!!? -
Actually, machine embroidery has reawakened my creativity and interest in sewing. The embroidery designs oftentimes influence the theme of projects I create—from potholders, aprons, pillows, table runners, quilts, ITH stuffed animals, to embellished denim jackets. While I choose not to sell, I enjoy gifting items to friends/family, donating them to our church’s “Adopt-a-School” ministry fundraiser auctions, and showcasing the embroidery at the Ark-La-Miss Fair and the State Fair of Louisiana—winning the 2021 Grand Champion ribbon for Miscellaneous Bazaar with my appliqued/embroidered/quilted Halloween table runner.
-
Like to use tile scenes in decorating for each season.
-
I use embroidery on clothing and in crafting. Getting ready to upgrade to Bernina 9 software. So excited to learn more.
-
I love to use machine embroidery to personalize gifts with names, characters, designs, etc. Always a one-of-a-kind gift!
-
I so far have made gifts with embroidery. But I am excited to do more for myself. I now have the embroidery bug!!!
-
I like to add embroidery to household items. I’m starting to add it to clothing and doll clothes, as well.
-
I love using my embroidery machine for both clothes and crafts. I have two Berninas embroidery machines the 590 and the 580.
-
I love to embroider a baby quilts. All blocks done in the hoop.
-
Just finished a two day sewing event where we learned how to double hoop the oesd wreath. So good to learn more about our machines and what we can do with them
-
I use my Bernina570 embroidery unit for many things: labels for my donation quilts, mug rugs for gifts and donations to the hospital gift shop, making small christmas stockings with lace (from OESD) for my daughter to fill and use as Christmas gifts at her job, etc. I could go on forever. Bernina and OESD are a perfect team.
-
I use embroidery for both clothing embellishments and quilt embellishments. Really want to start adding it to handbags as well! So many possibilities!
-
The possibilities are endless. On garments, on bags and totes, framed for special occasions, quilt labels. My 790 can do it all. My favorite is anything embroidered with a Bernina.
-
I like to embroider wallhangings, mugrugs – really all kinds of things!!! Love this tile scene! Would look great with my snowman collection!?
-
I loved making the Starry Night tiling scene, but do a lot of embroidered appliqué for table runners and wall hangings.
-
I made lots of pot holders for Christmas. I am making a rug for my grandson presently.
-
I use my embroidery machine for many projects for family and church. It still fascinates me how it makes beautiful things with a little bit of thread and time.
-
I completed my first tiling scene and will use as a wall hanging
-
I like to personalize items for gifts with my Bernina embroidery machine. It makes a beautiful decorative addition to anything!
-
My husband calls it up-scaling…rising to the next level. Bob started upholstery as a hobby. You can’t imagine what it’s like to have your spouse go through fabric stores with you…not against you. When he does a project, it’s not unusual for him to toss a $20 bill at me and say…you got 30 min. to create this design for my upholstery, fabric is marked and waiting upstairs. He figures since he lives with me, he gets priority and the money goes towards more fabric and designs! Got to be prepared ahead of time! We have created some amazing things together.
-
I like to embroider when I make purses, bags, wallets, or anything! It just gives the item an extra touch that makes people wonder where they can get one too!
-
Have 2 extra same blocks from a mystery class that would be perfect for this super project.
-
That’s a great idea. The hard work has already been done. Now you can play!
-
-
I have used embroidery on clothing, home decorative projects, bags, stuffed animals, and items for classroom instruction. The embroidery is enjoyable for me personally and gives that special extra touch to items made for others or for my personal use.
-
I like to make different coaster using different themes that match the month of the year. i.e. valentine’s day, Easter, 4th of July, Fall, Thanksgiving, and especially Christmas. Lots of good comments from friends and have even used them as gifts. It’s an easy way to decorate for the different holidays.
-
In sewing for my family and friends
-
I love to make personalized labels for my quilts.
Leave a Reply
You must be logged in to post a comment.

Happy Snowman Tiling Scene WeAllSew Giveaway
This giveaway is now closed. Thank you to all of our WeAllSew fans who entered!
Congratulations to our winner(s):
Keep an eye out for the next WeAllSew giveaway!