How to Embroider on Printed Fabric
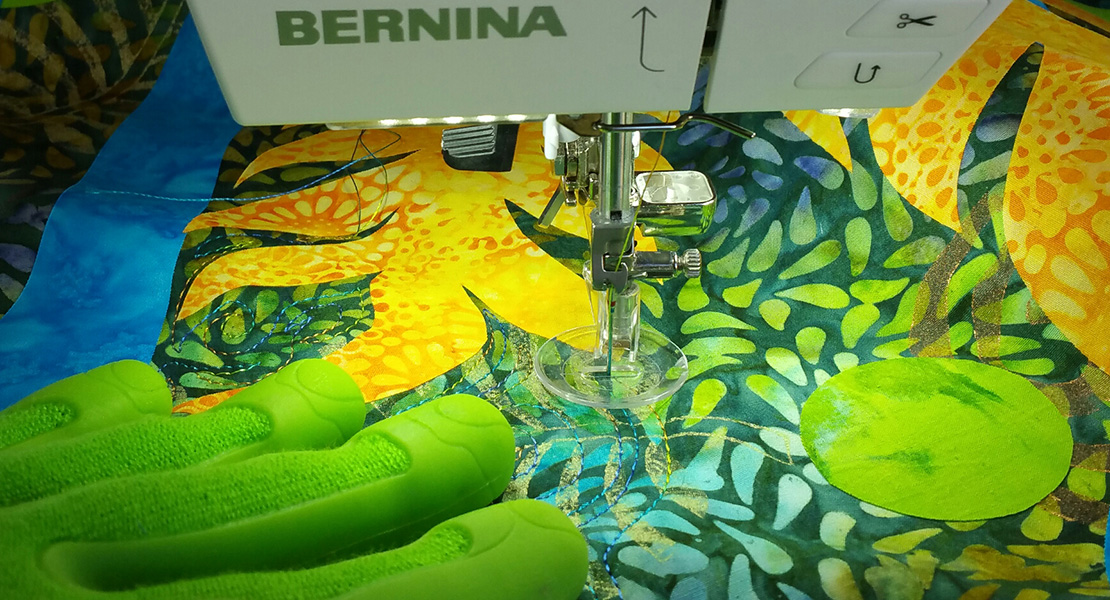
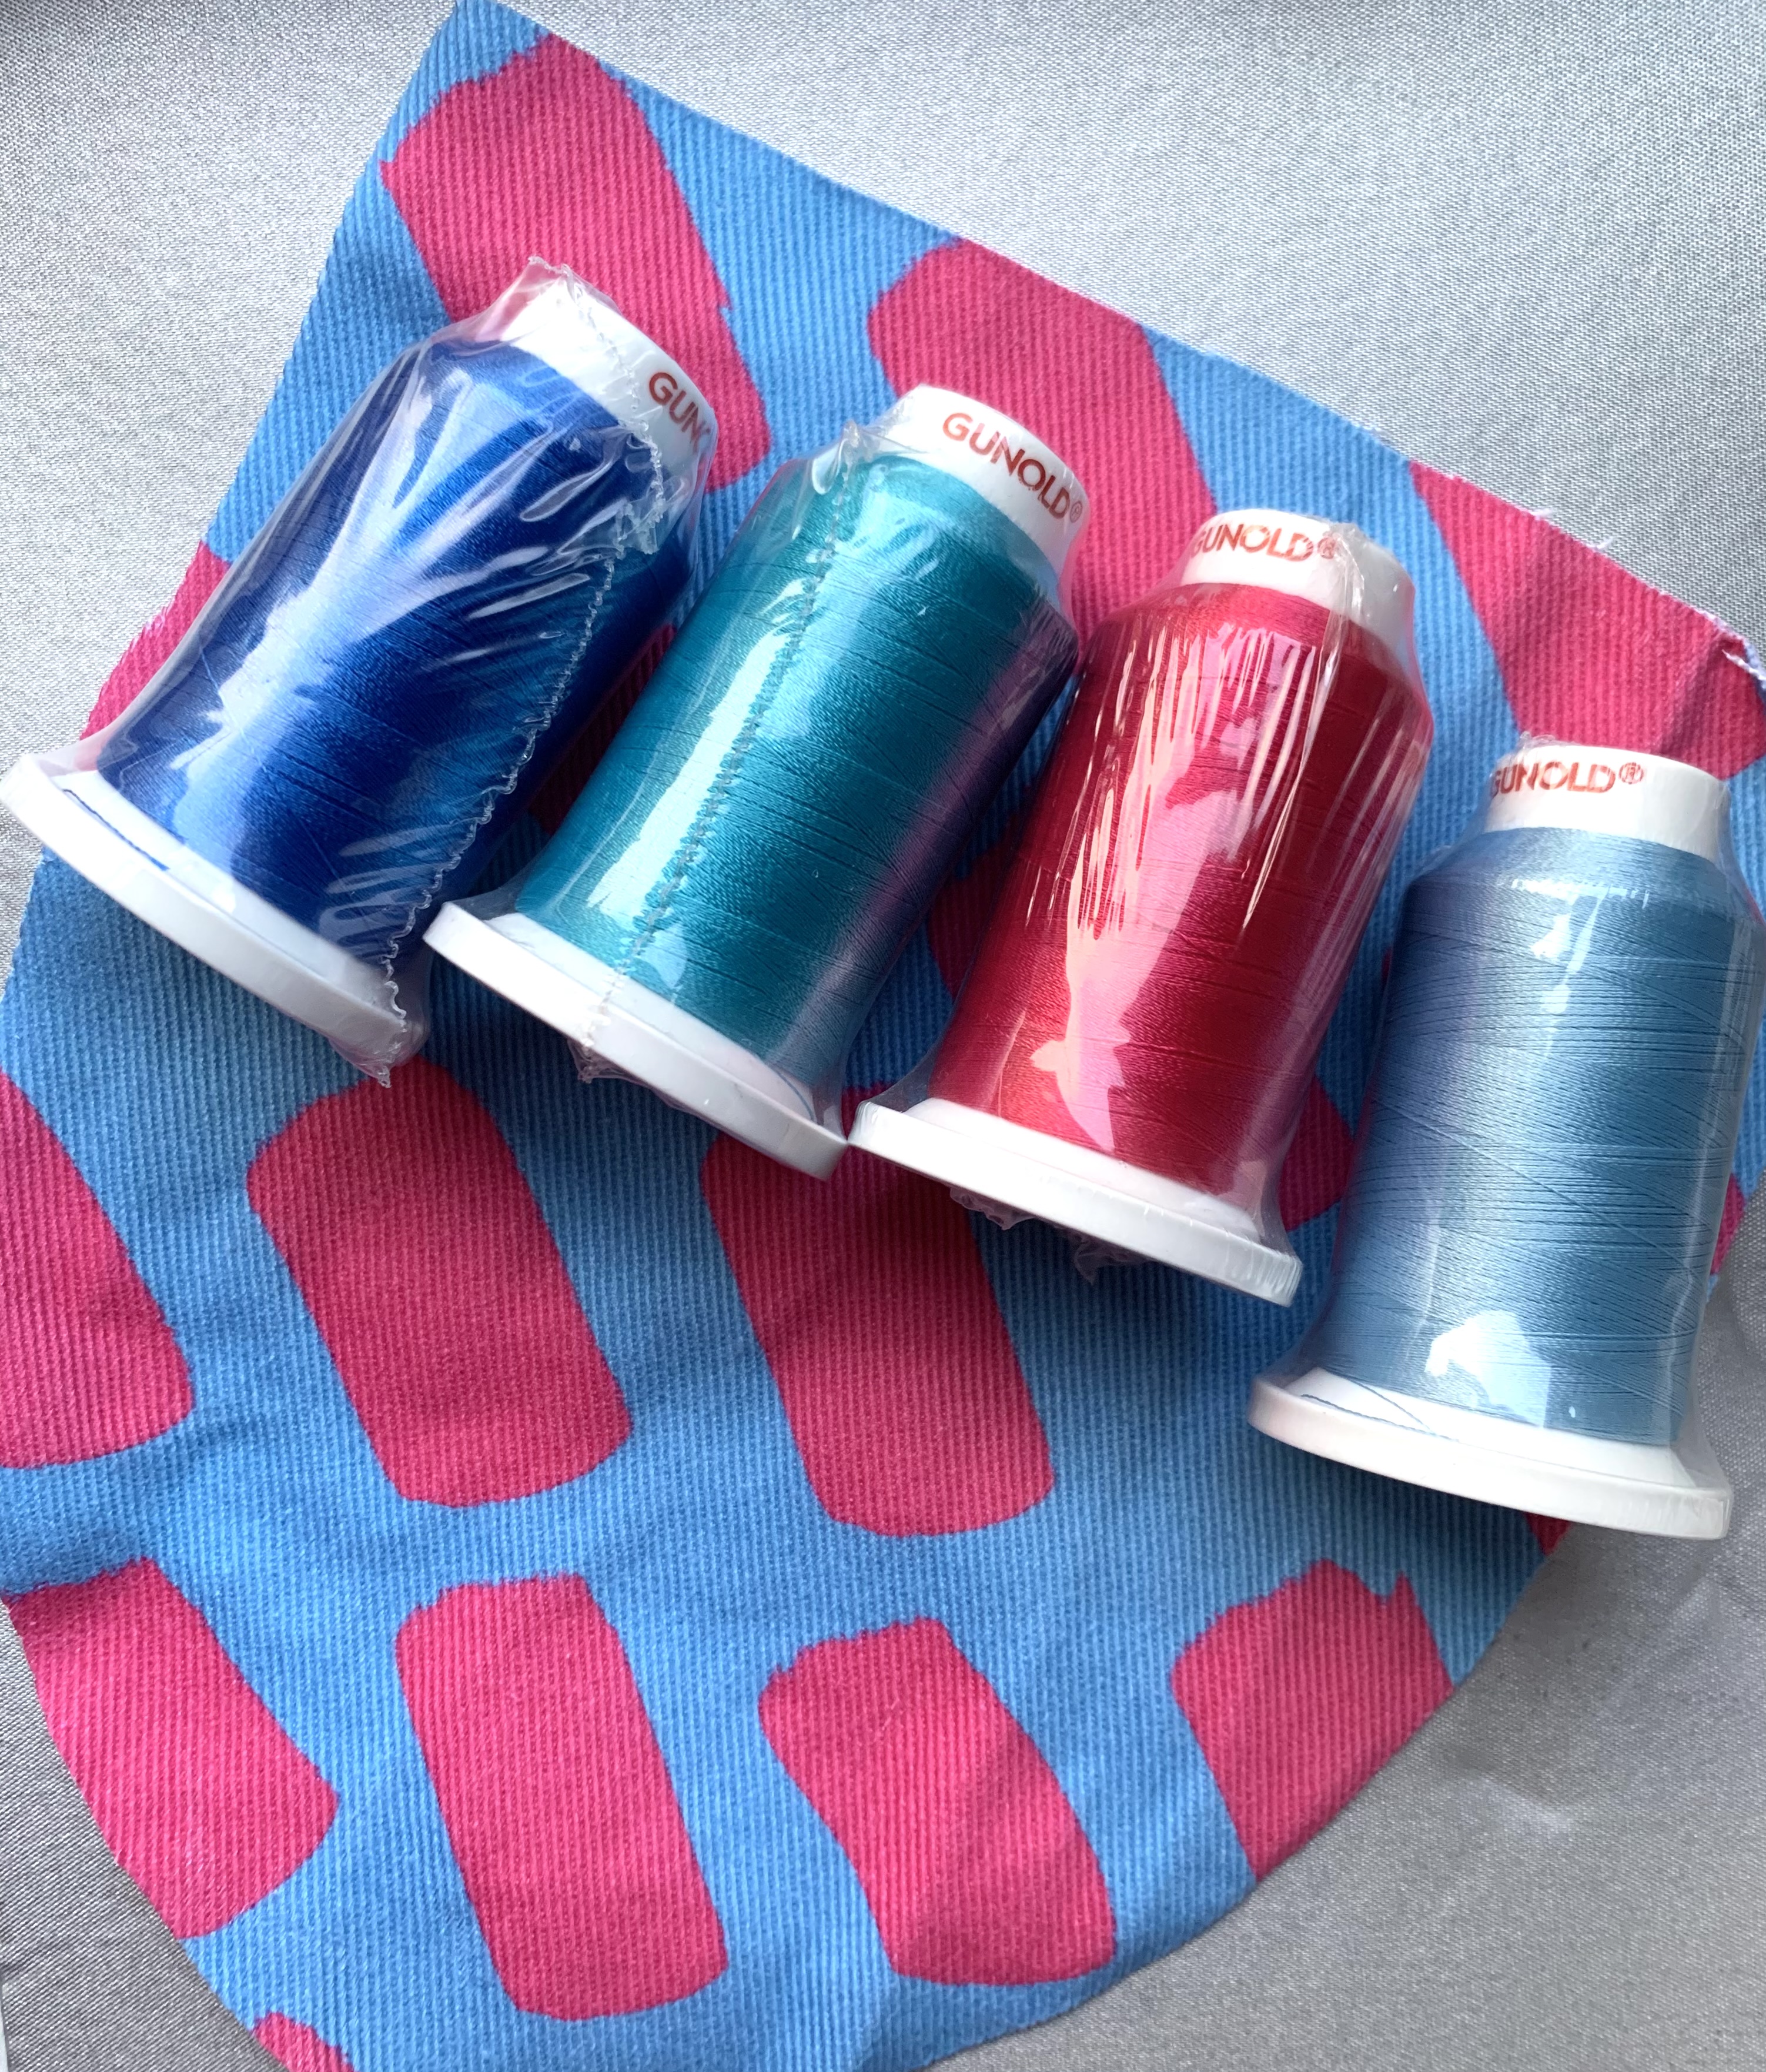
Hi, I am Katie Kortman and I design fabric! I love creating fabrics with bold colors and abstract designs. Recently I was making some pants and wanted to add some texture and dimension to the pockets. I used some simple embroidery motifs on my BERNINA 590 E to add to the print of the fabric.
This post is meant to inspire you to use embroidery in new ways and is for all levels. For more ideas visit my previous post on using simple letters to create abstract embroidered designs on your fabric.
Materials to Embroider on Printed Fabric:
- Embroidery machine
- Embroidery thread
- Embroidery needle
- Stabilizer
- Something to sketch ideas on (paper or computer/tablet)
Brainstorming Your Designs:
I have lots of spools of embroidery thread and a machine full of designs, which can feel overwhelming when starting a new project. The advice I have before starting a project like this is to sketch out your ideas first. Normally, I would just draw them in my sketchbook, but I had an idea to just take a photo and edit in Procreate on my iPad this time. I loved this method because I could really see how it would look.
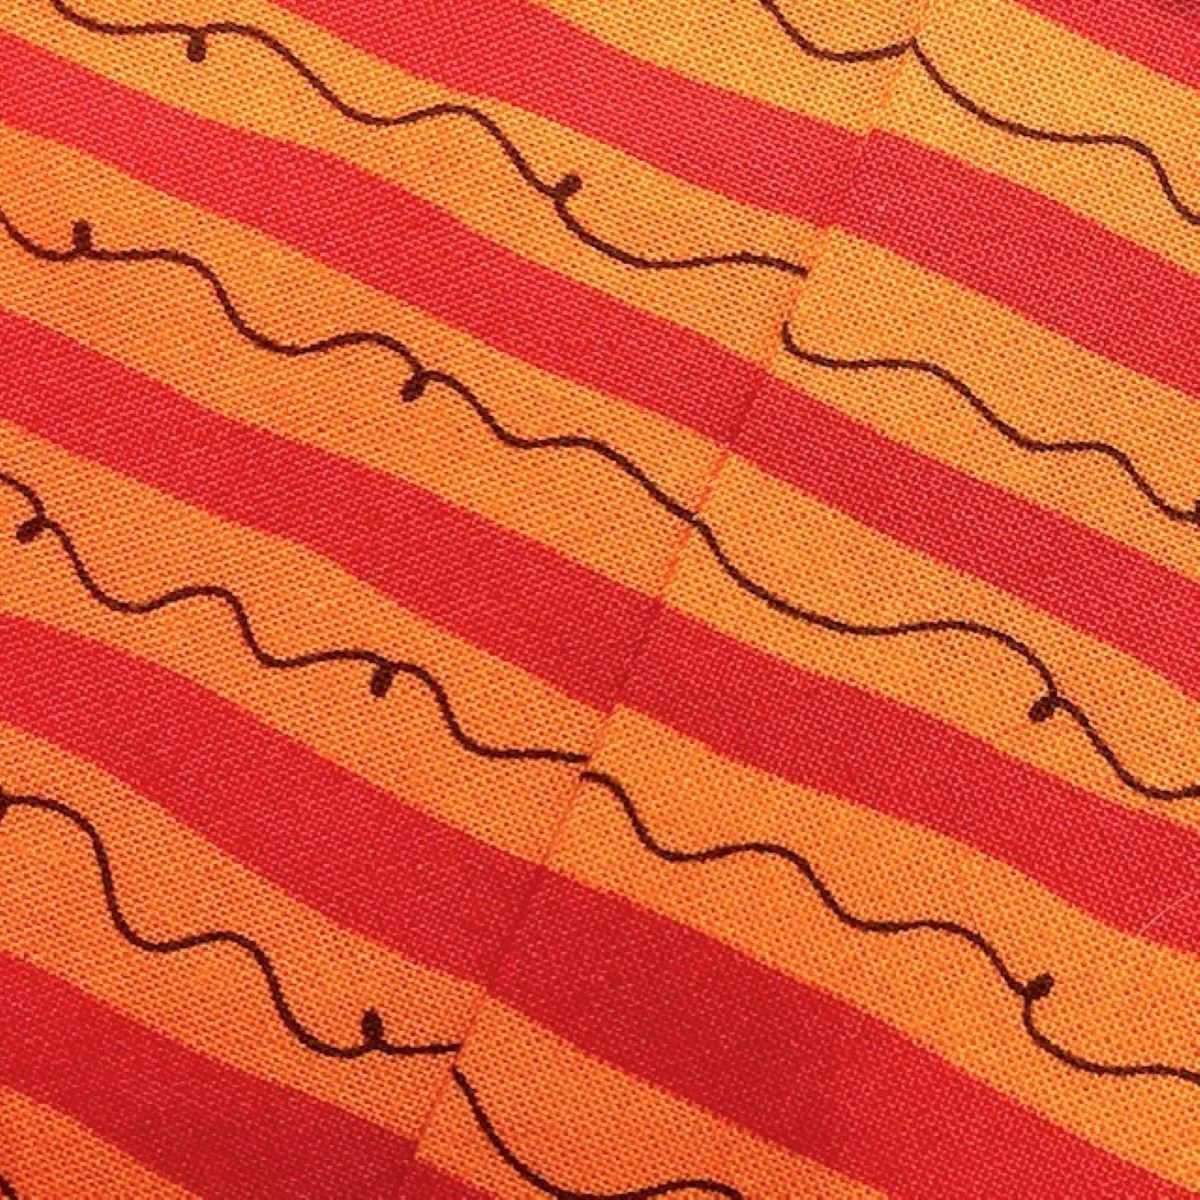
First, I took photos of the pocket fabrics, and then I took photos of the possible embroidery thread colors I planned to use. I did this so I could “grab” the colors with the little eyedropper tool (see photo above). And use them for sketching designs. Then, I started doodling ideas using some simple designs I’d noticed on my B590 E.

These are the finished doodles on top of my photos created in Procreate on my iPad.
You can see I had fun coming up with embroidery designs to go on top of this simple dash print of mine.
Tips for Embroidering on Printed Fabric:
1. Don’t cut out the pattern piece beforehand. When I did this project, I cut the pockets out first, but after doing one, I switched to just drawing the pocket on a larger piece of fabric and embroidering on a larger hoop. I highly recommend doing it this way, because constantly moving a smaller piece around in your small hoop, can get very annoying!
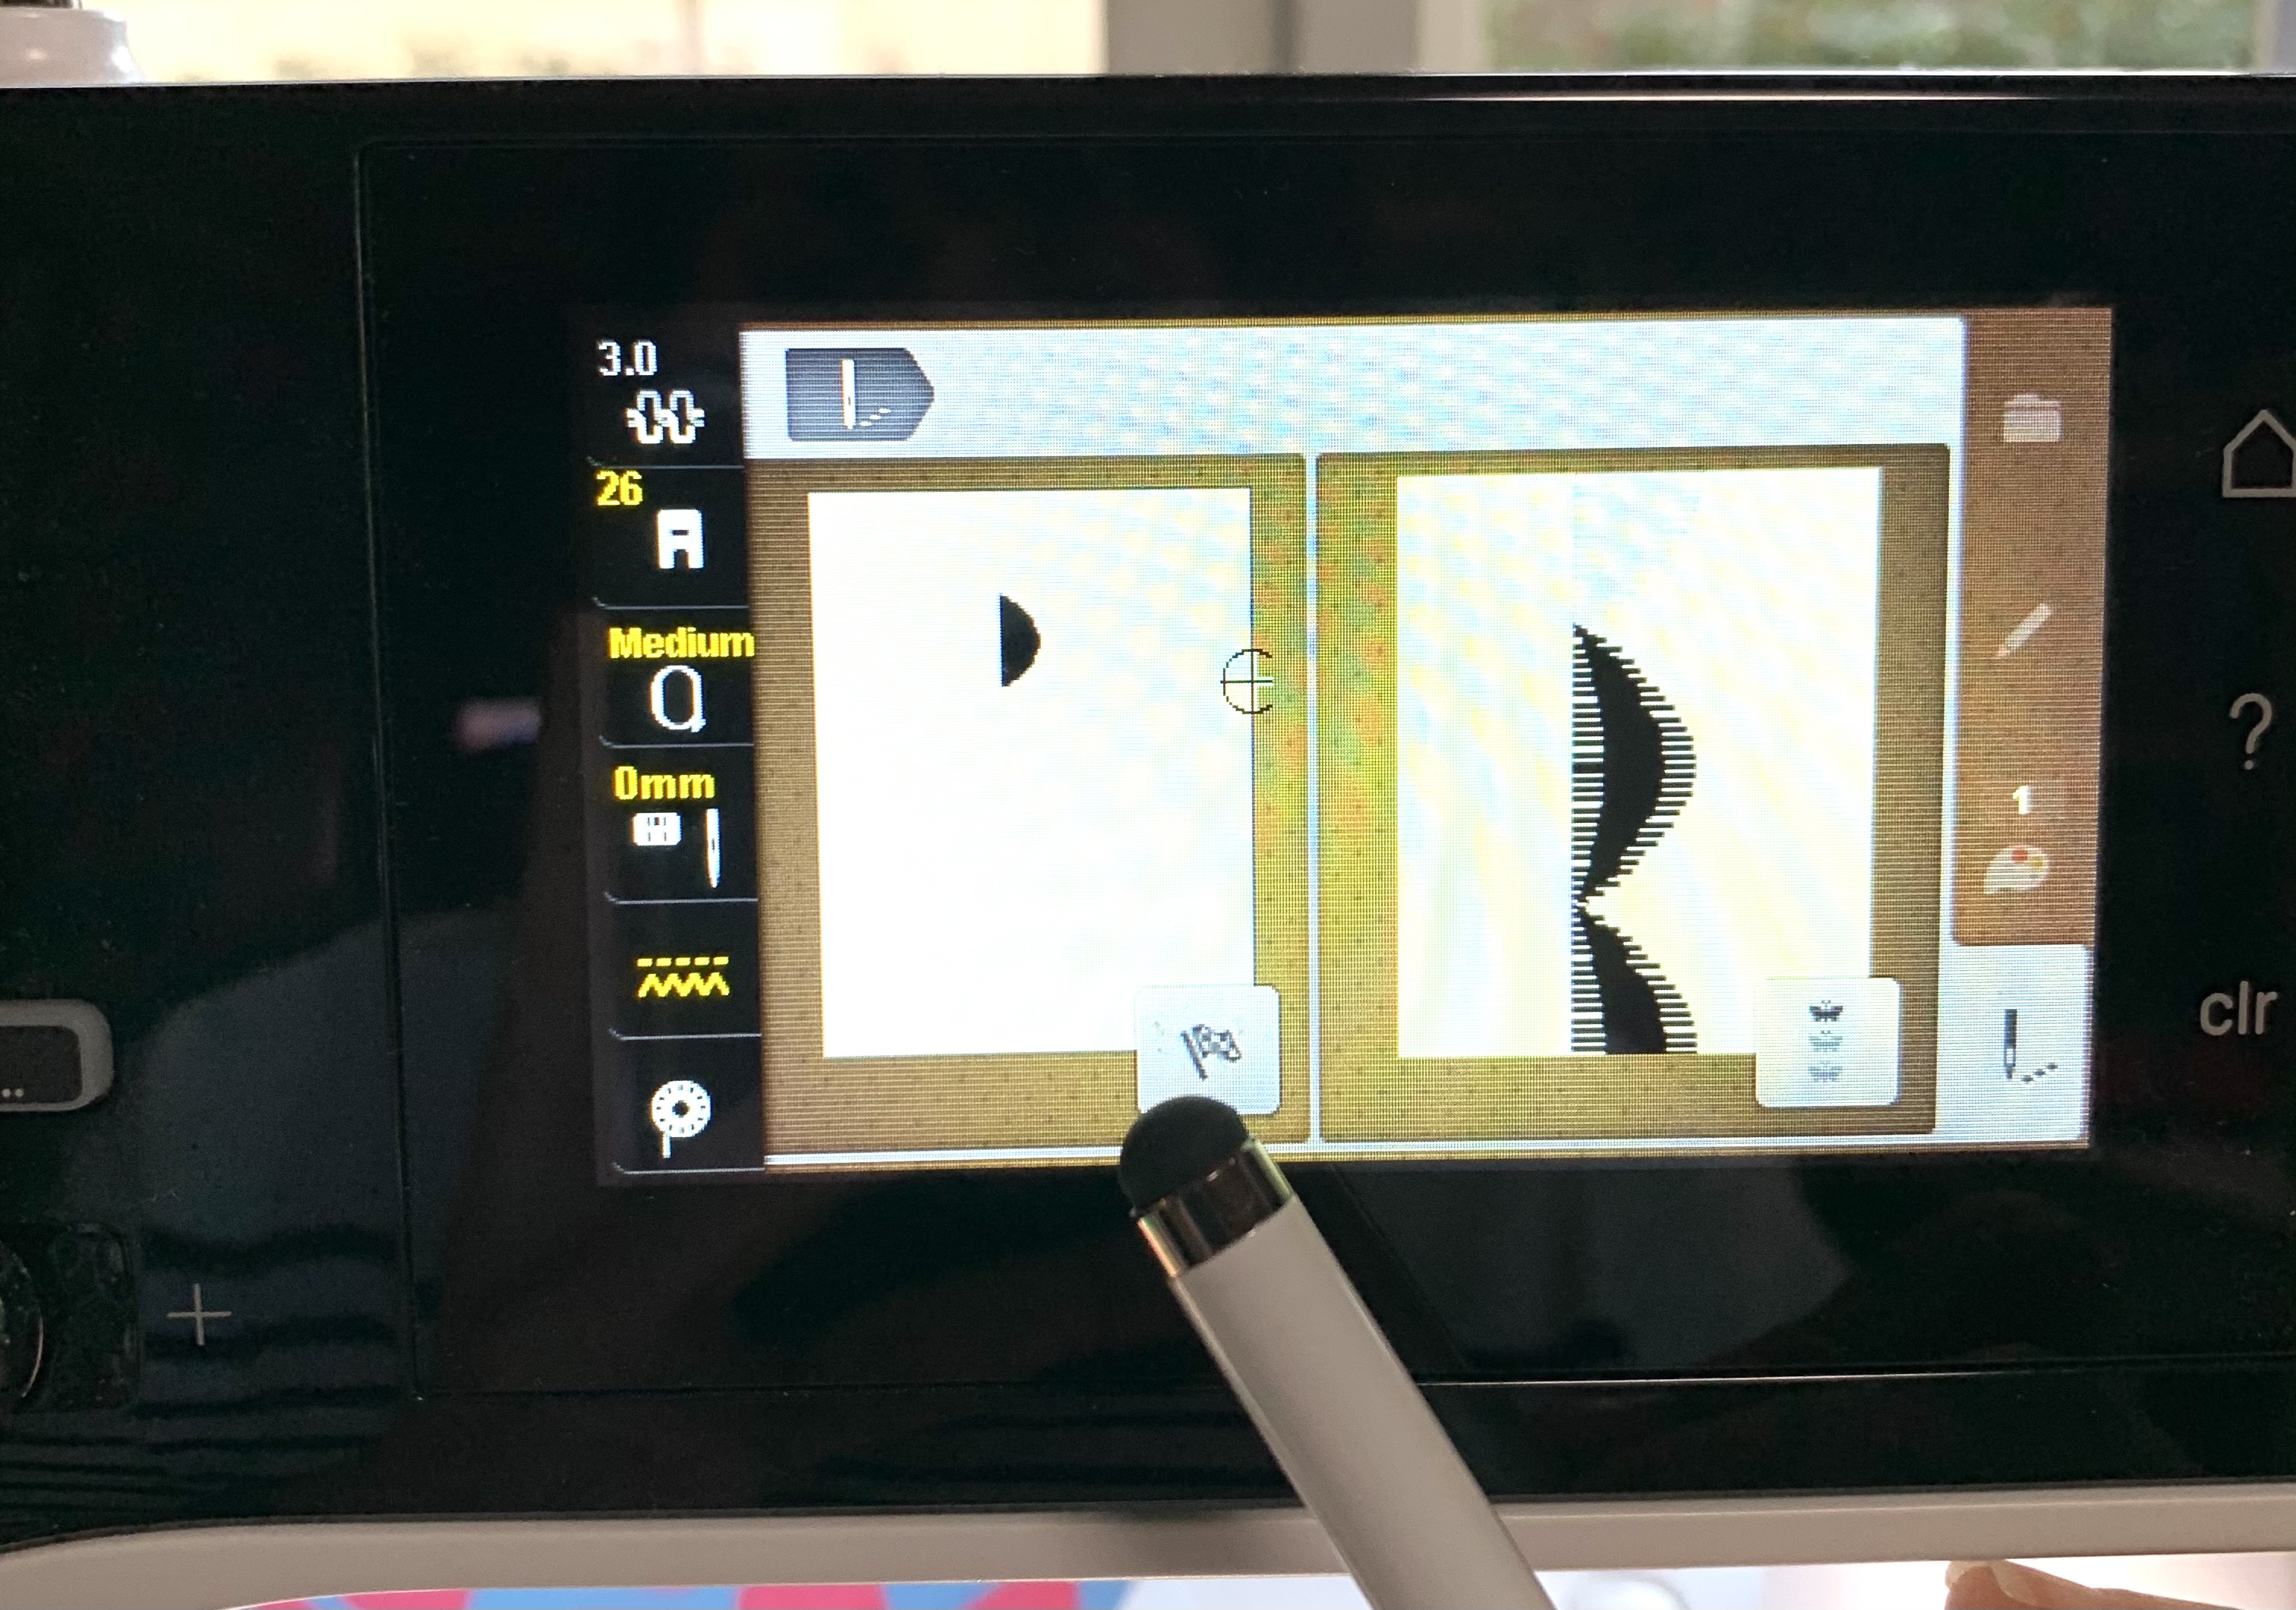
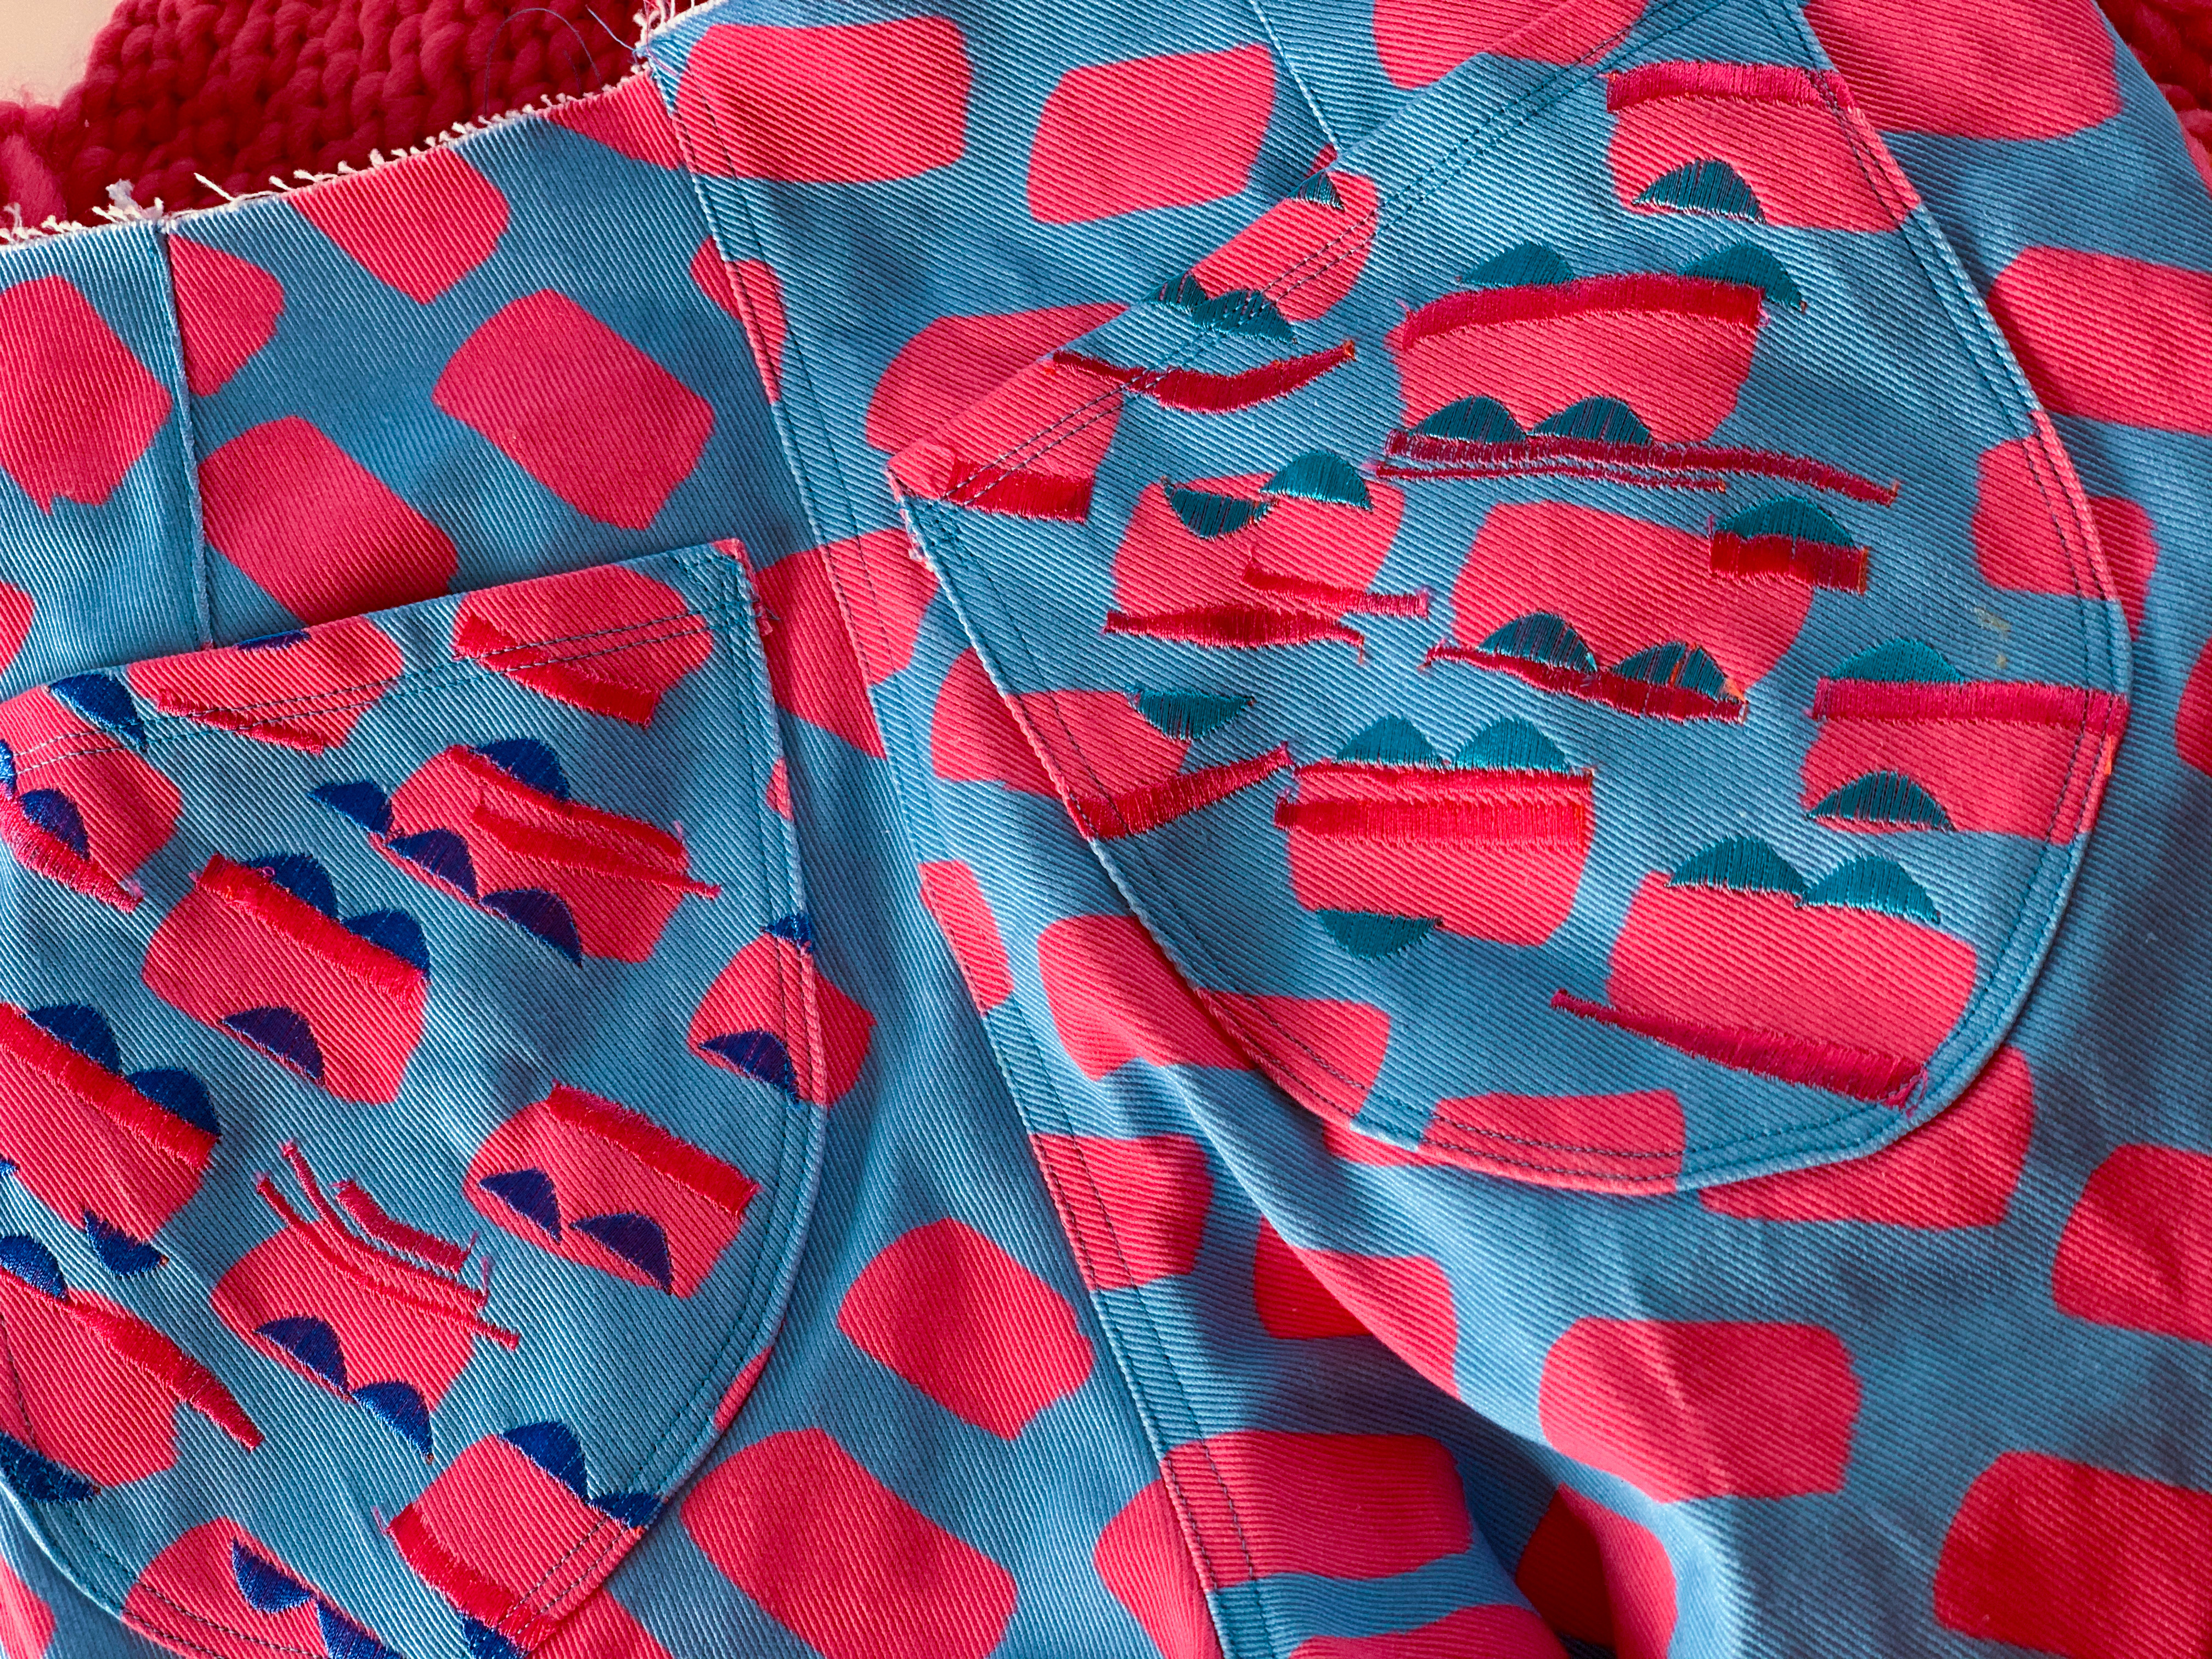
2. You can take the one design (here I used this single scallop) and repeat it using the little butterfly icon during set-up. I chose to use it as-is most of the time, so I could decide where I wanted it to go next, or how many scallops fit nicely on each dash (of the print). When your machine completes stitching the one motif, this screen (photo above) pops up. You can press the little flag and it will prepare to do another (and you can then move it around to other areas of your choice). If you select the butterfly icon at this point, it will go right back to where it left off stitching the last motif and sew another. I preferred to do them this way, having complete control of the little work of art I was creating on my pockets!
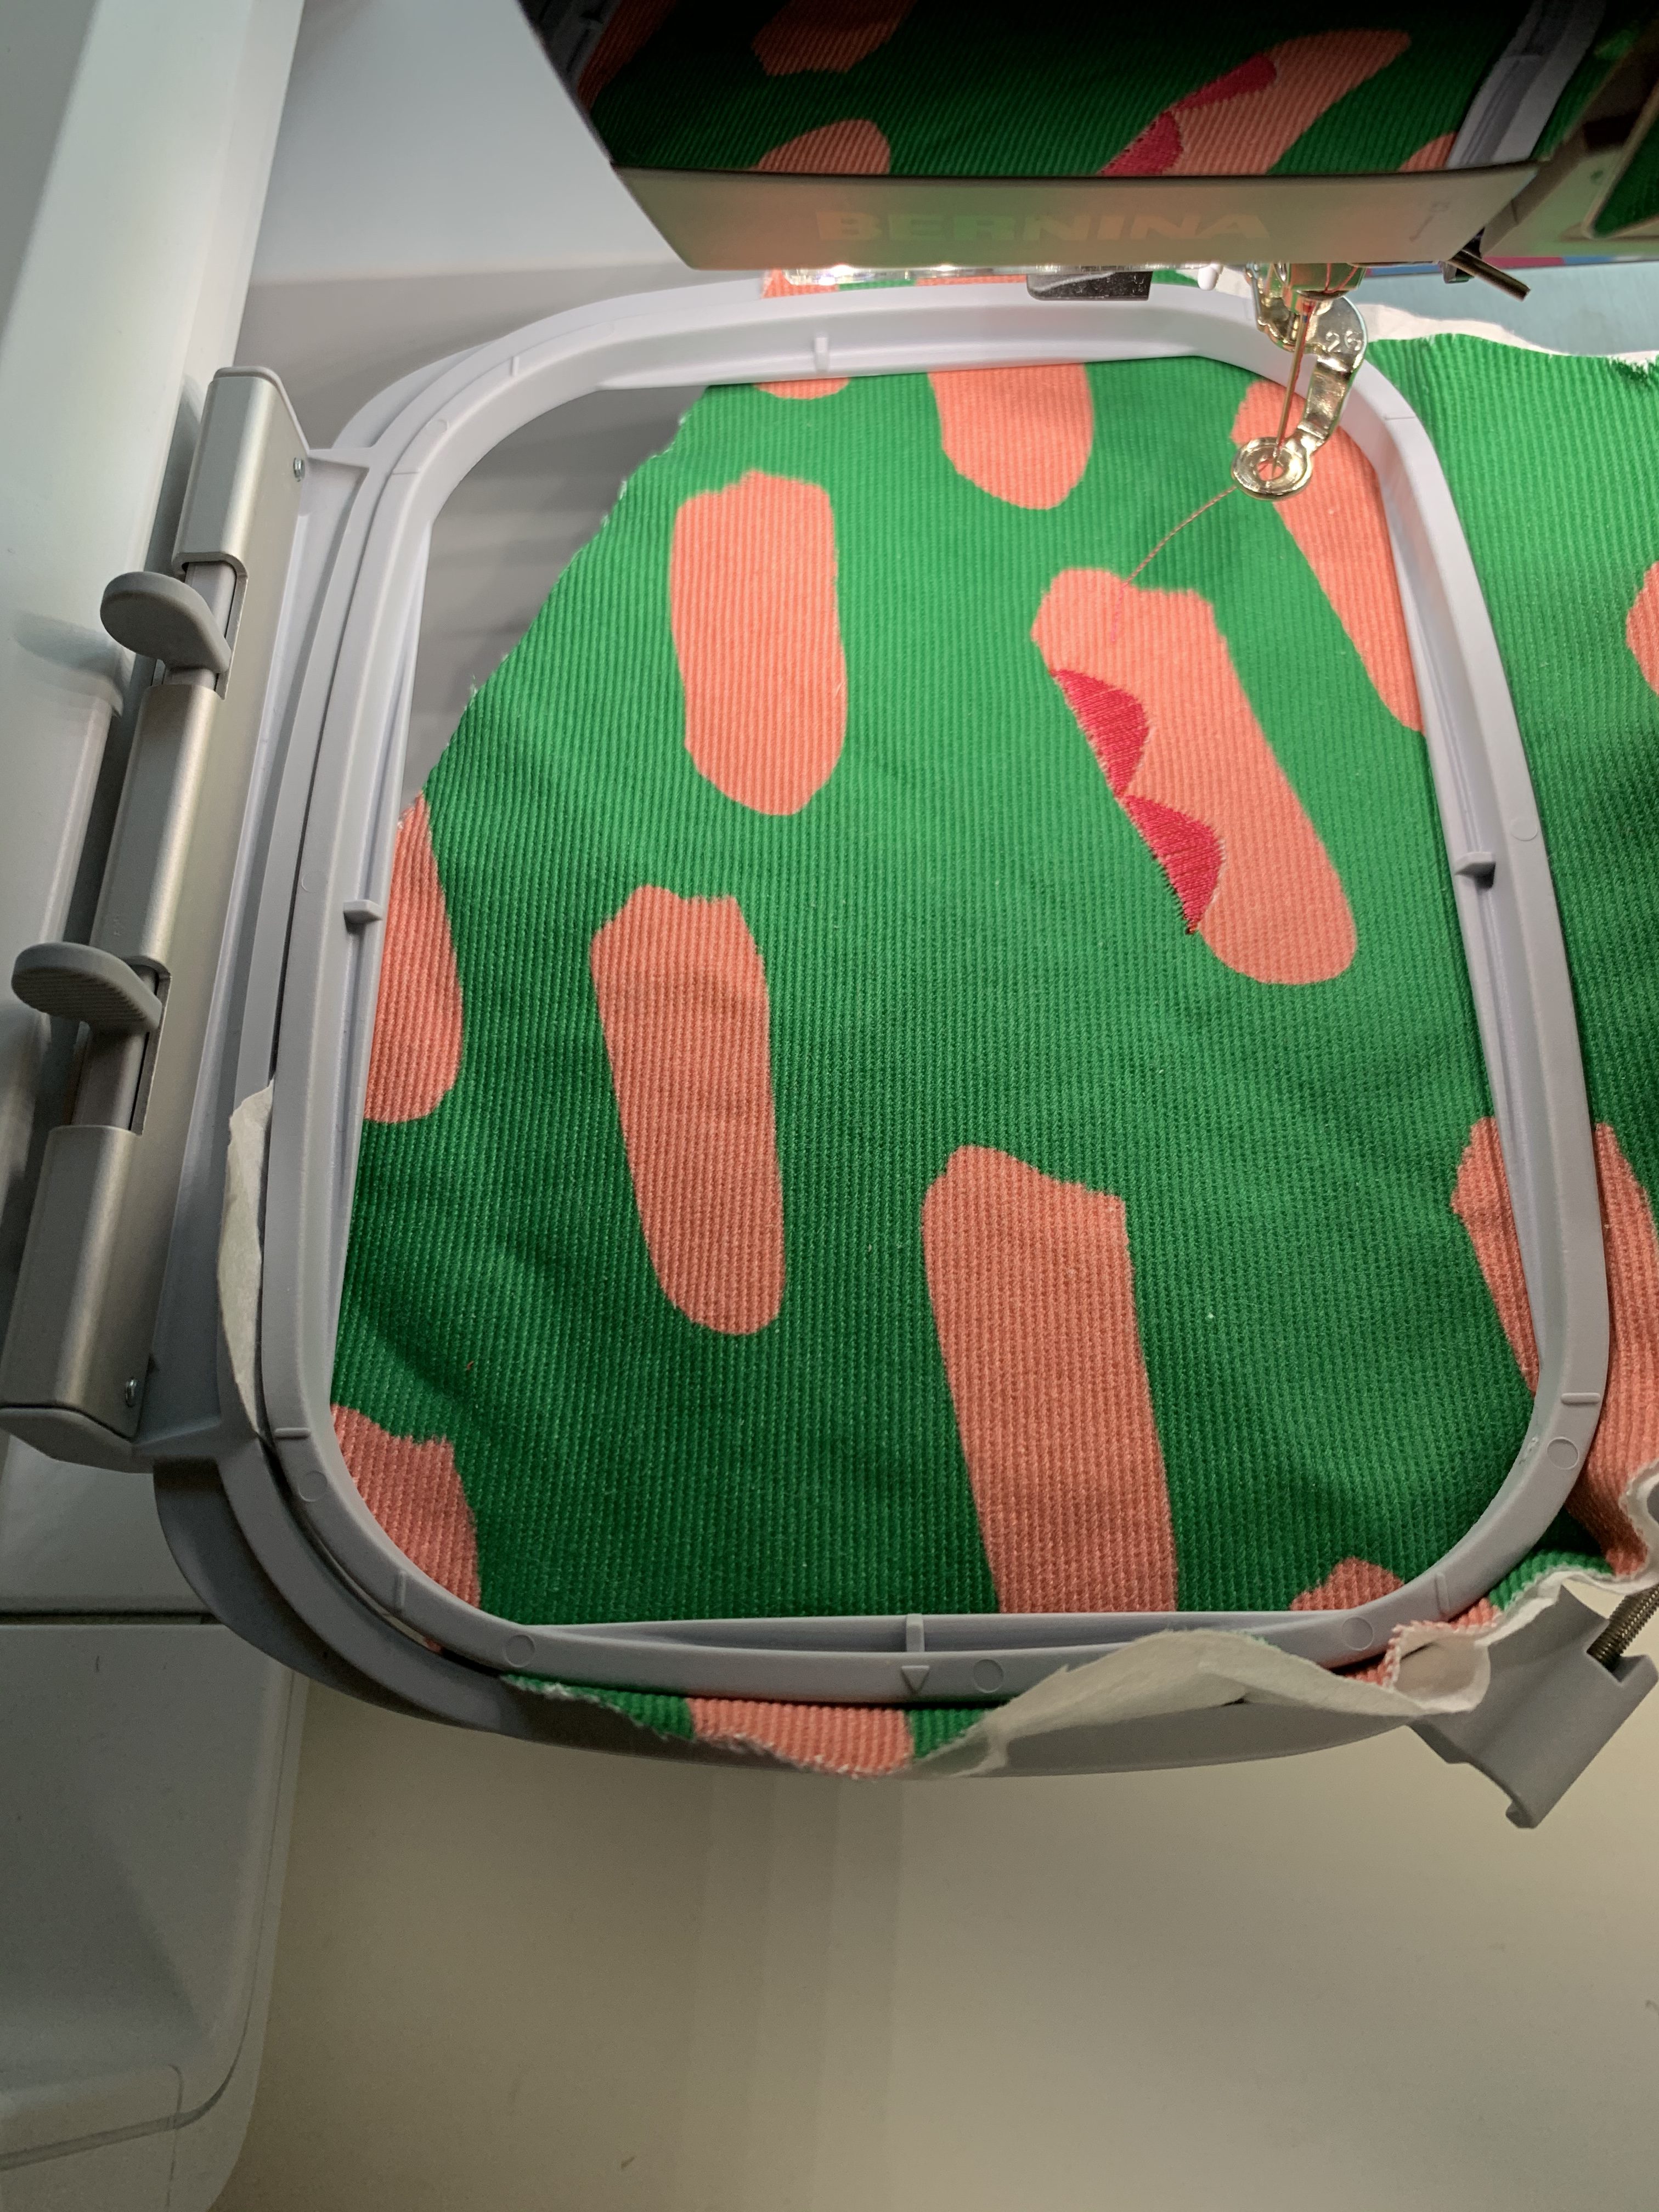
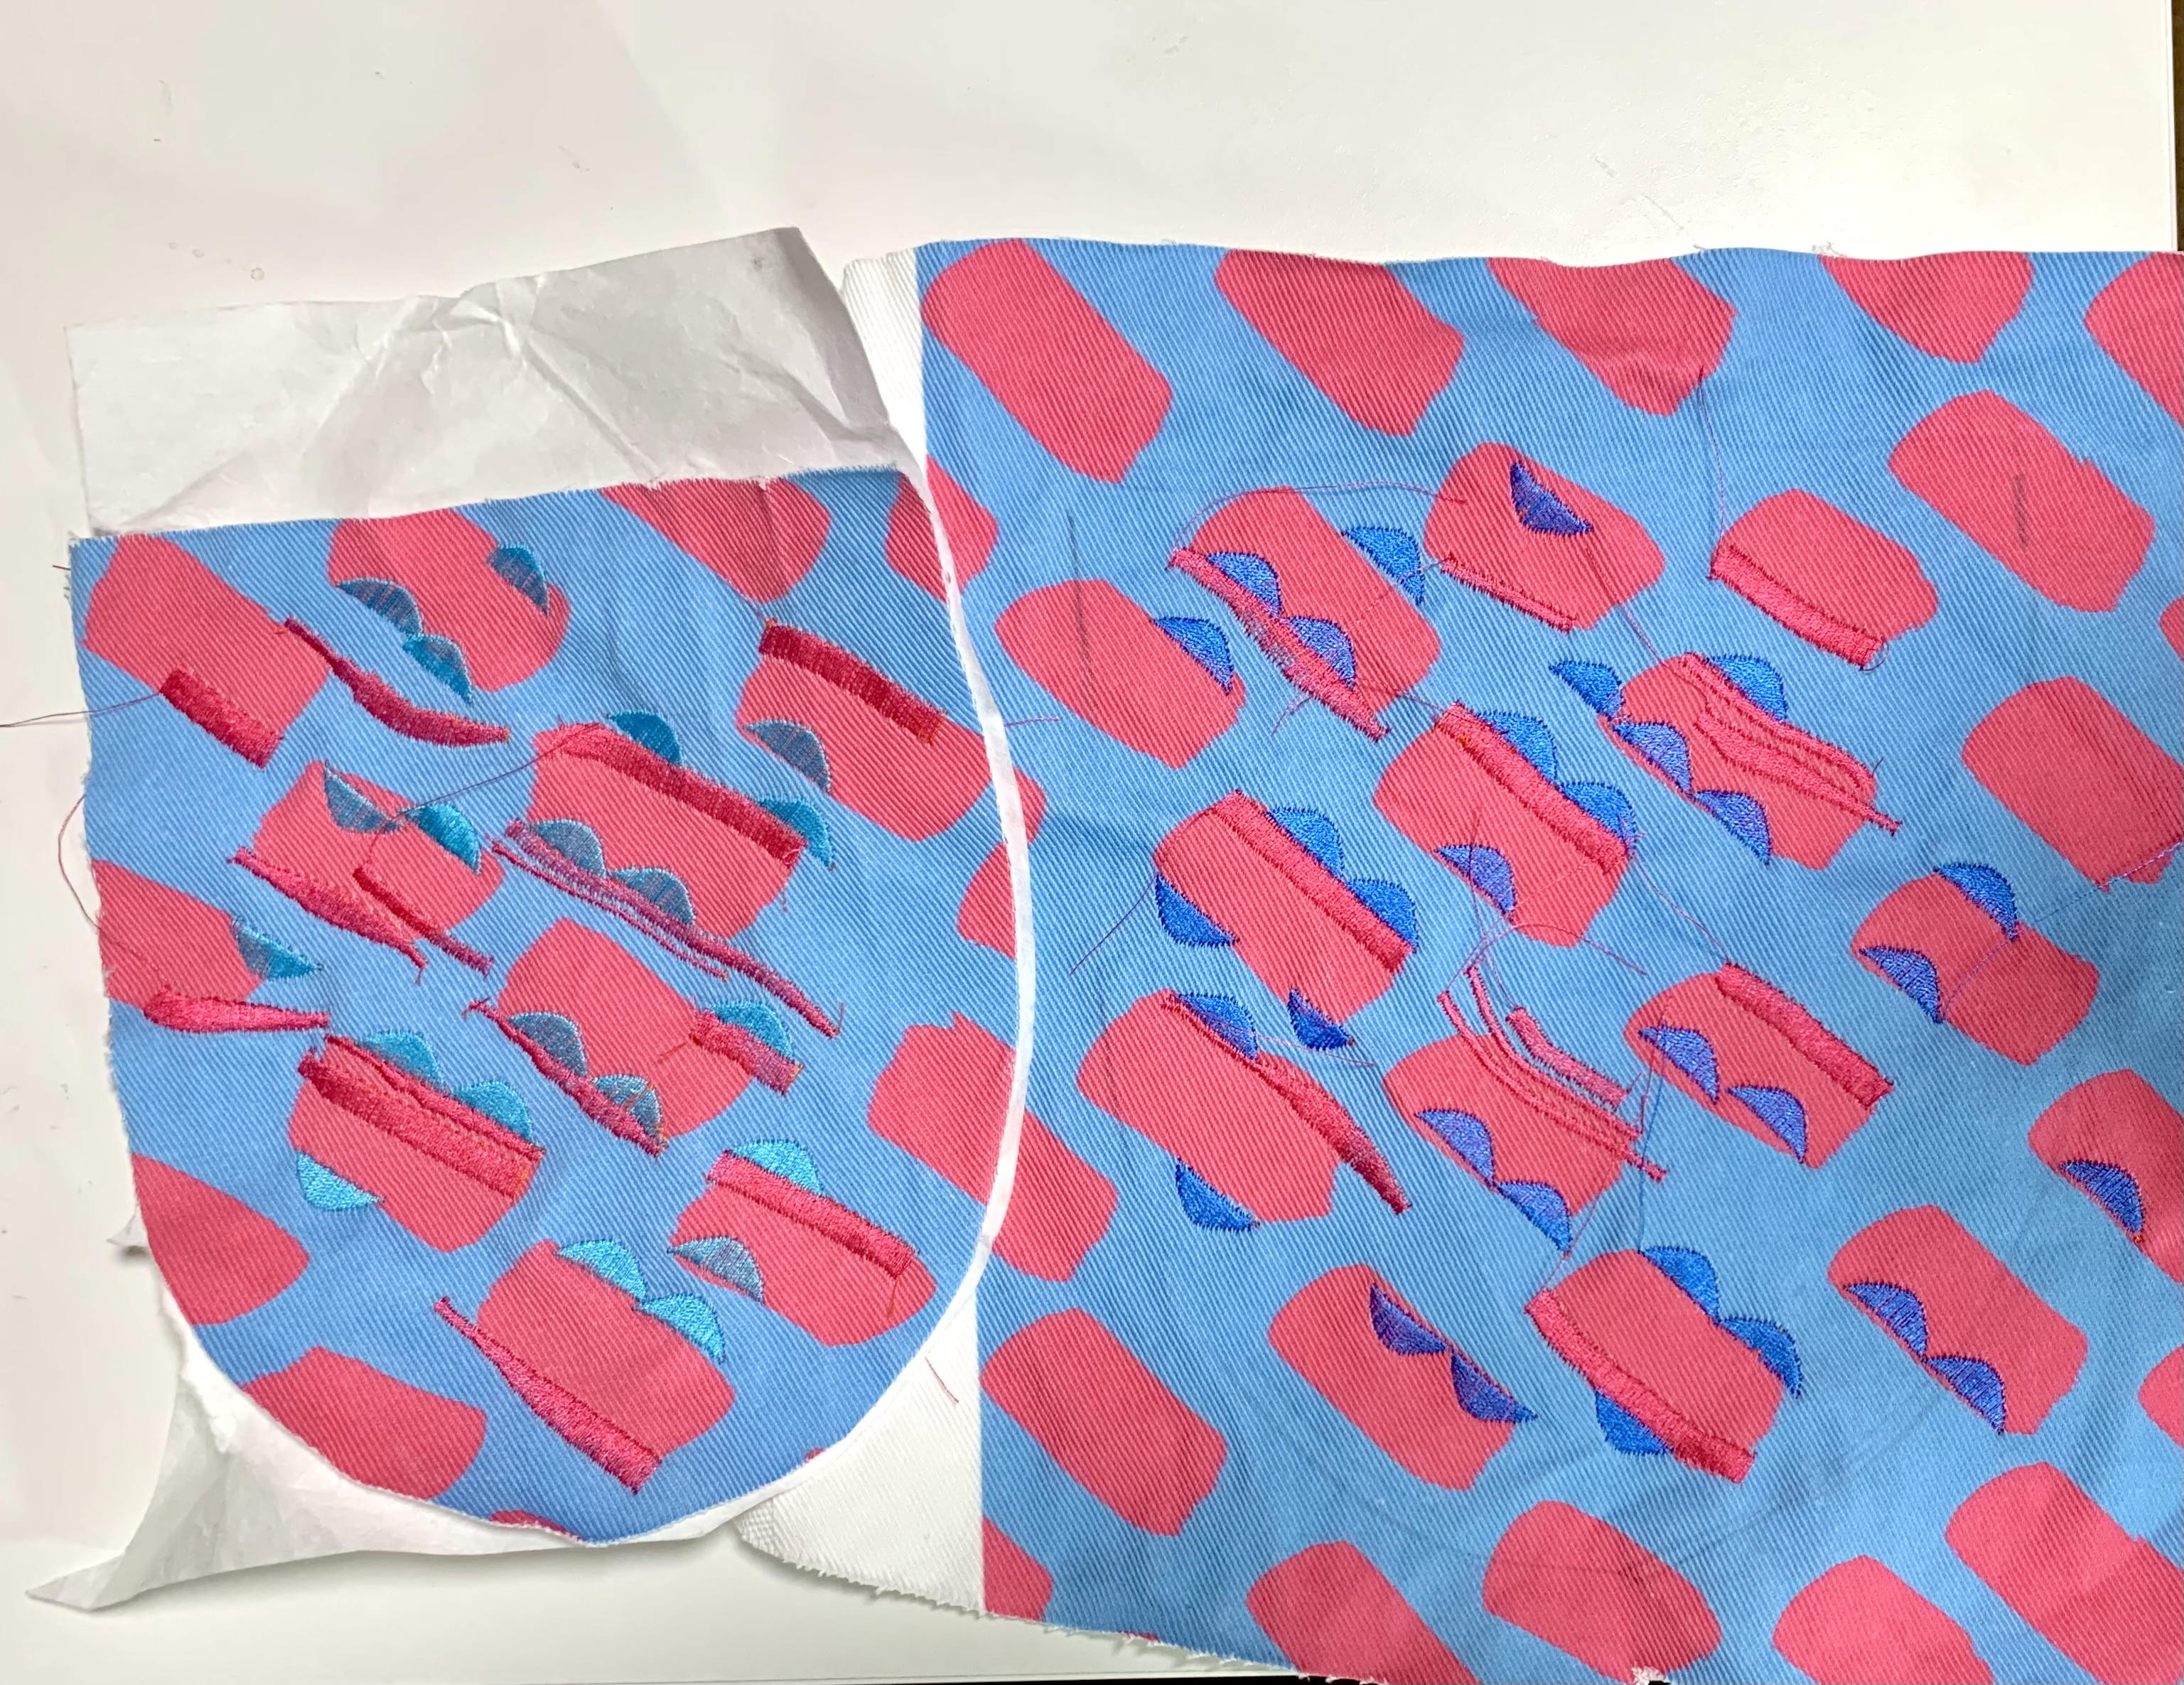
3. When you are loading the fabric into your hoop, thinking about the direction of the print in accordance with how the motif will be embroidered. I wanted the scallops to be parallel to the sides of the dashes, so I had to make sure the design was vertical in the hoop. You can see the design above that was already stitched, that was stitched with the fabric moved at a different angle. I had to then take the fabric out of the hoop and move it to do these other dashes at another angle.

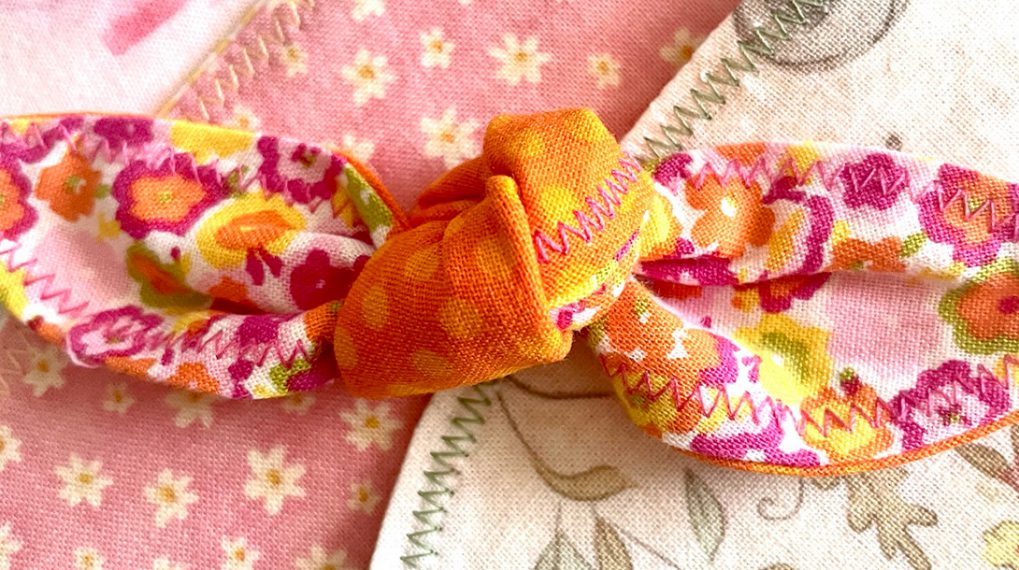
4. I wanted to do some designs with a simple satin stitch zig-zag. First I switched to my 9mm plate (I had used the 0mm plate for embroidery), but the feed dogs back up, switched the foot, and changed to the “sewing” function on my machine.
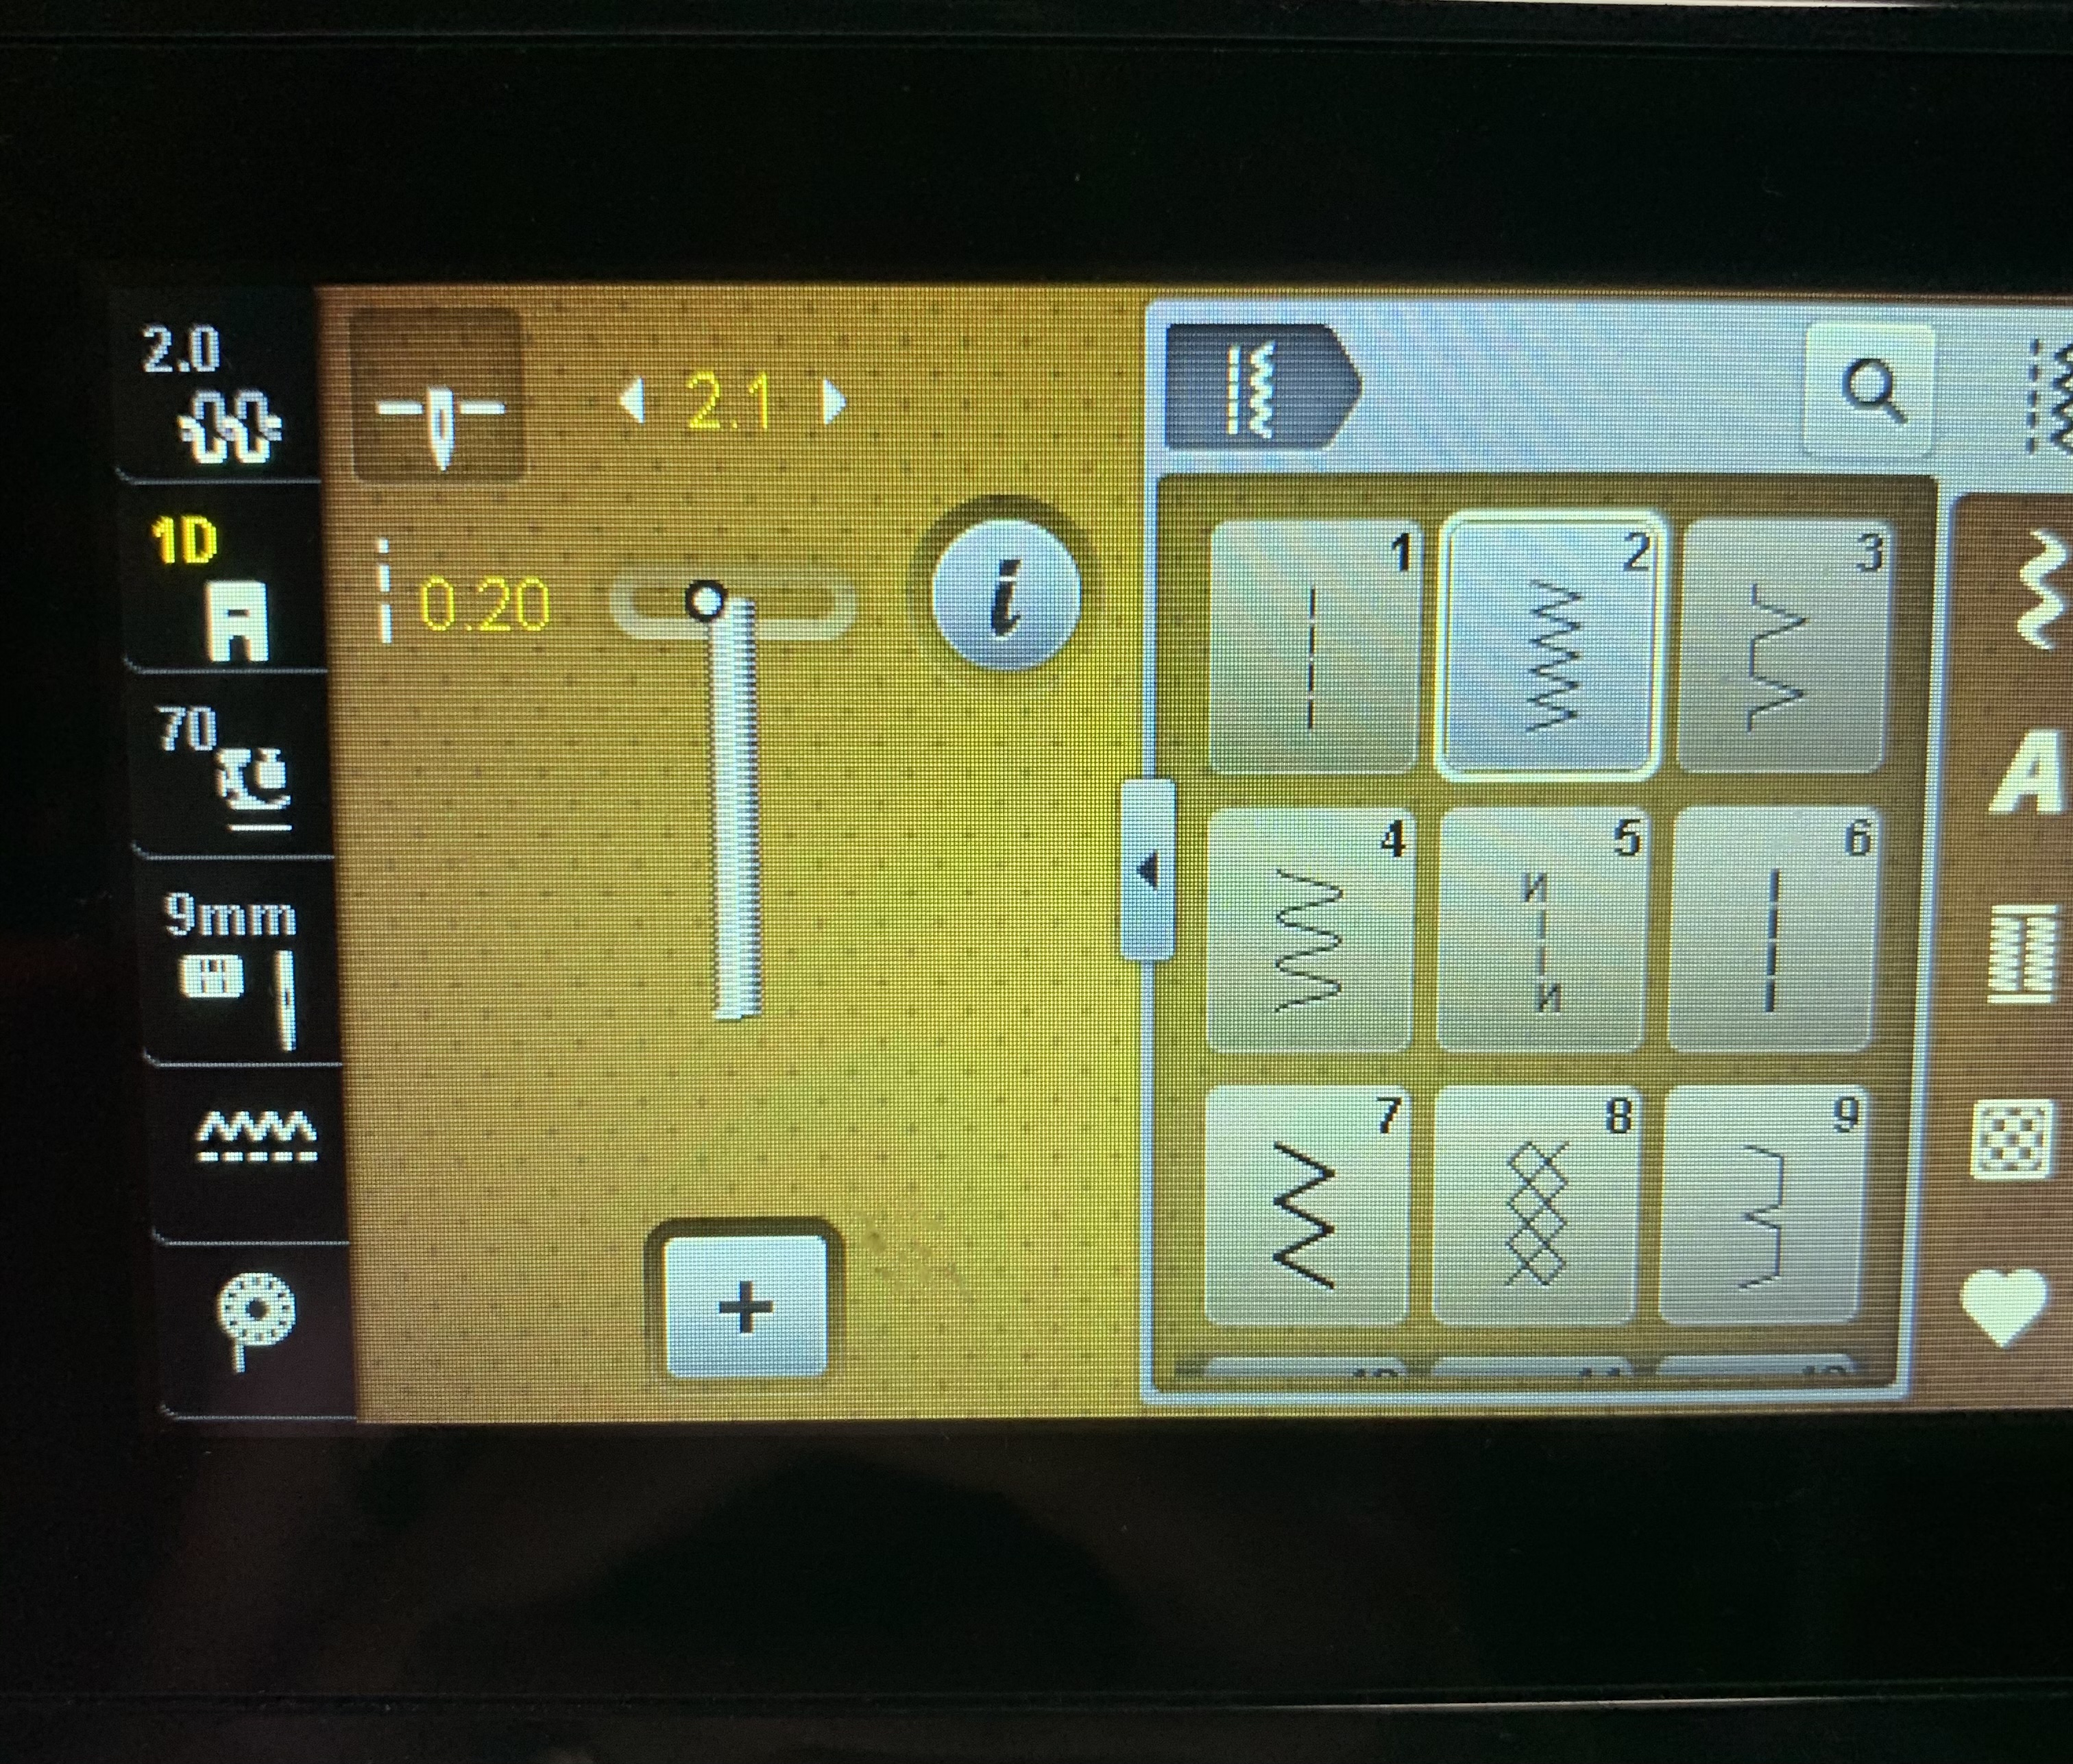
I found it very easy to adjust the width of the stitch as I went, just turning the knob to a narrower or wider zig-zag as I stitched! I went at a medium/slow speed to not create any issues. I kept the spacing of the zig-zag at 0.2 to keep it dense but adjusted the width throughout as you can see below.
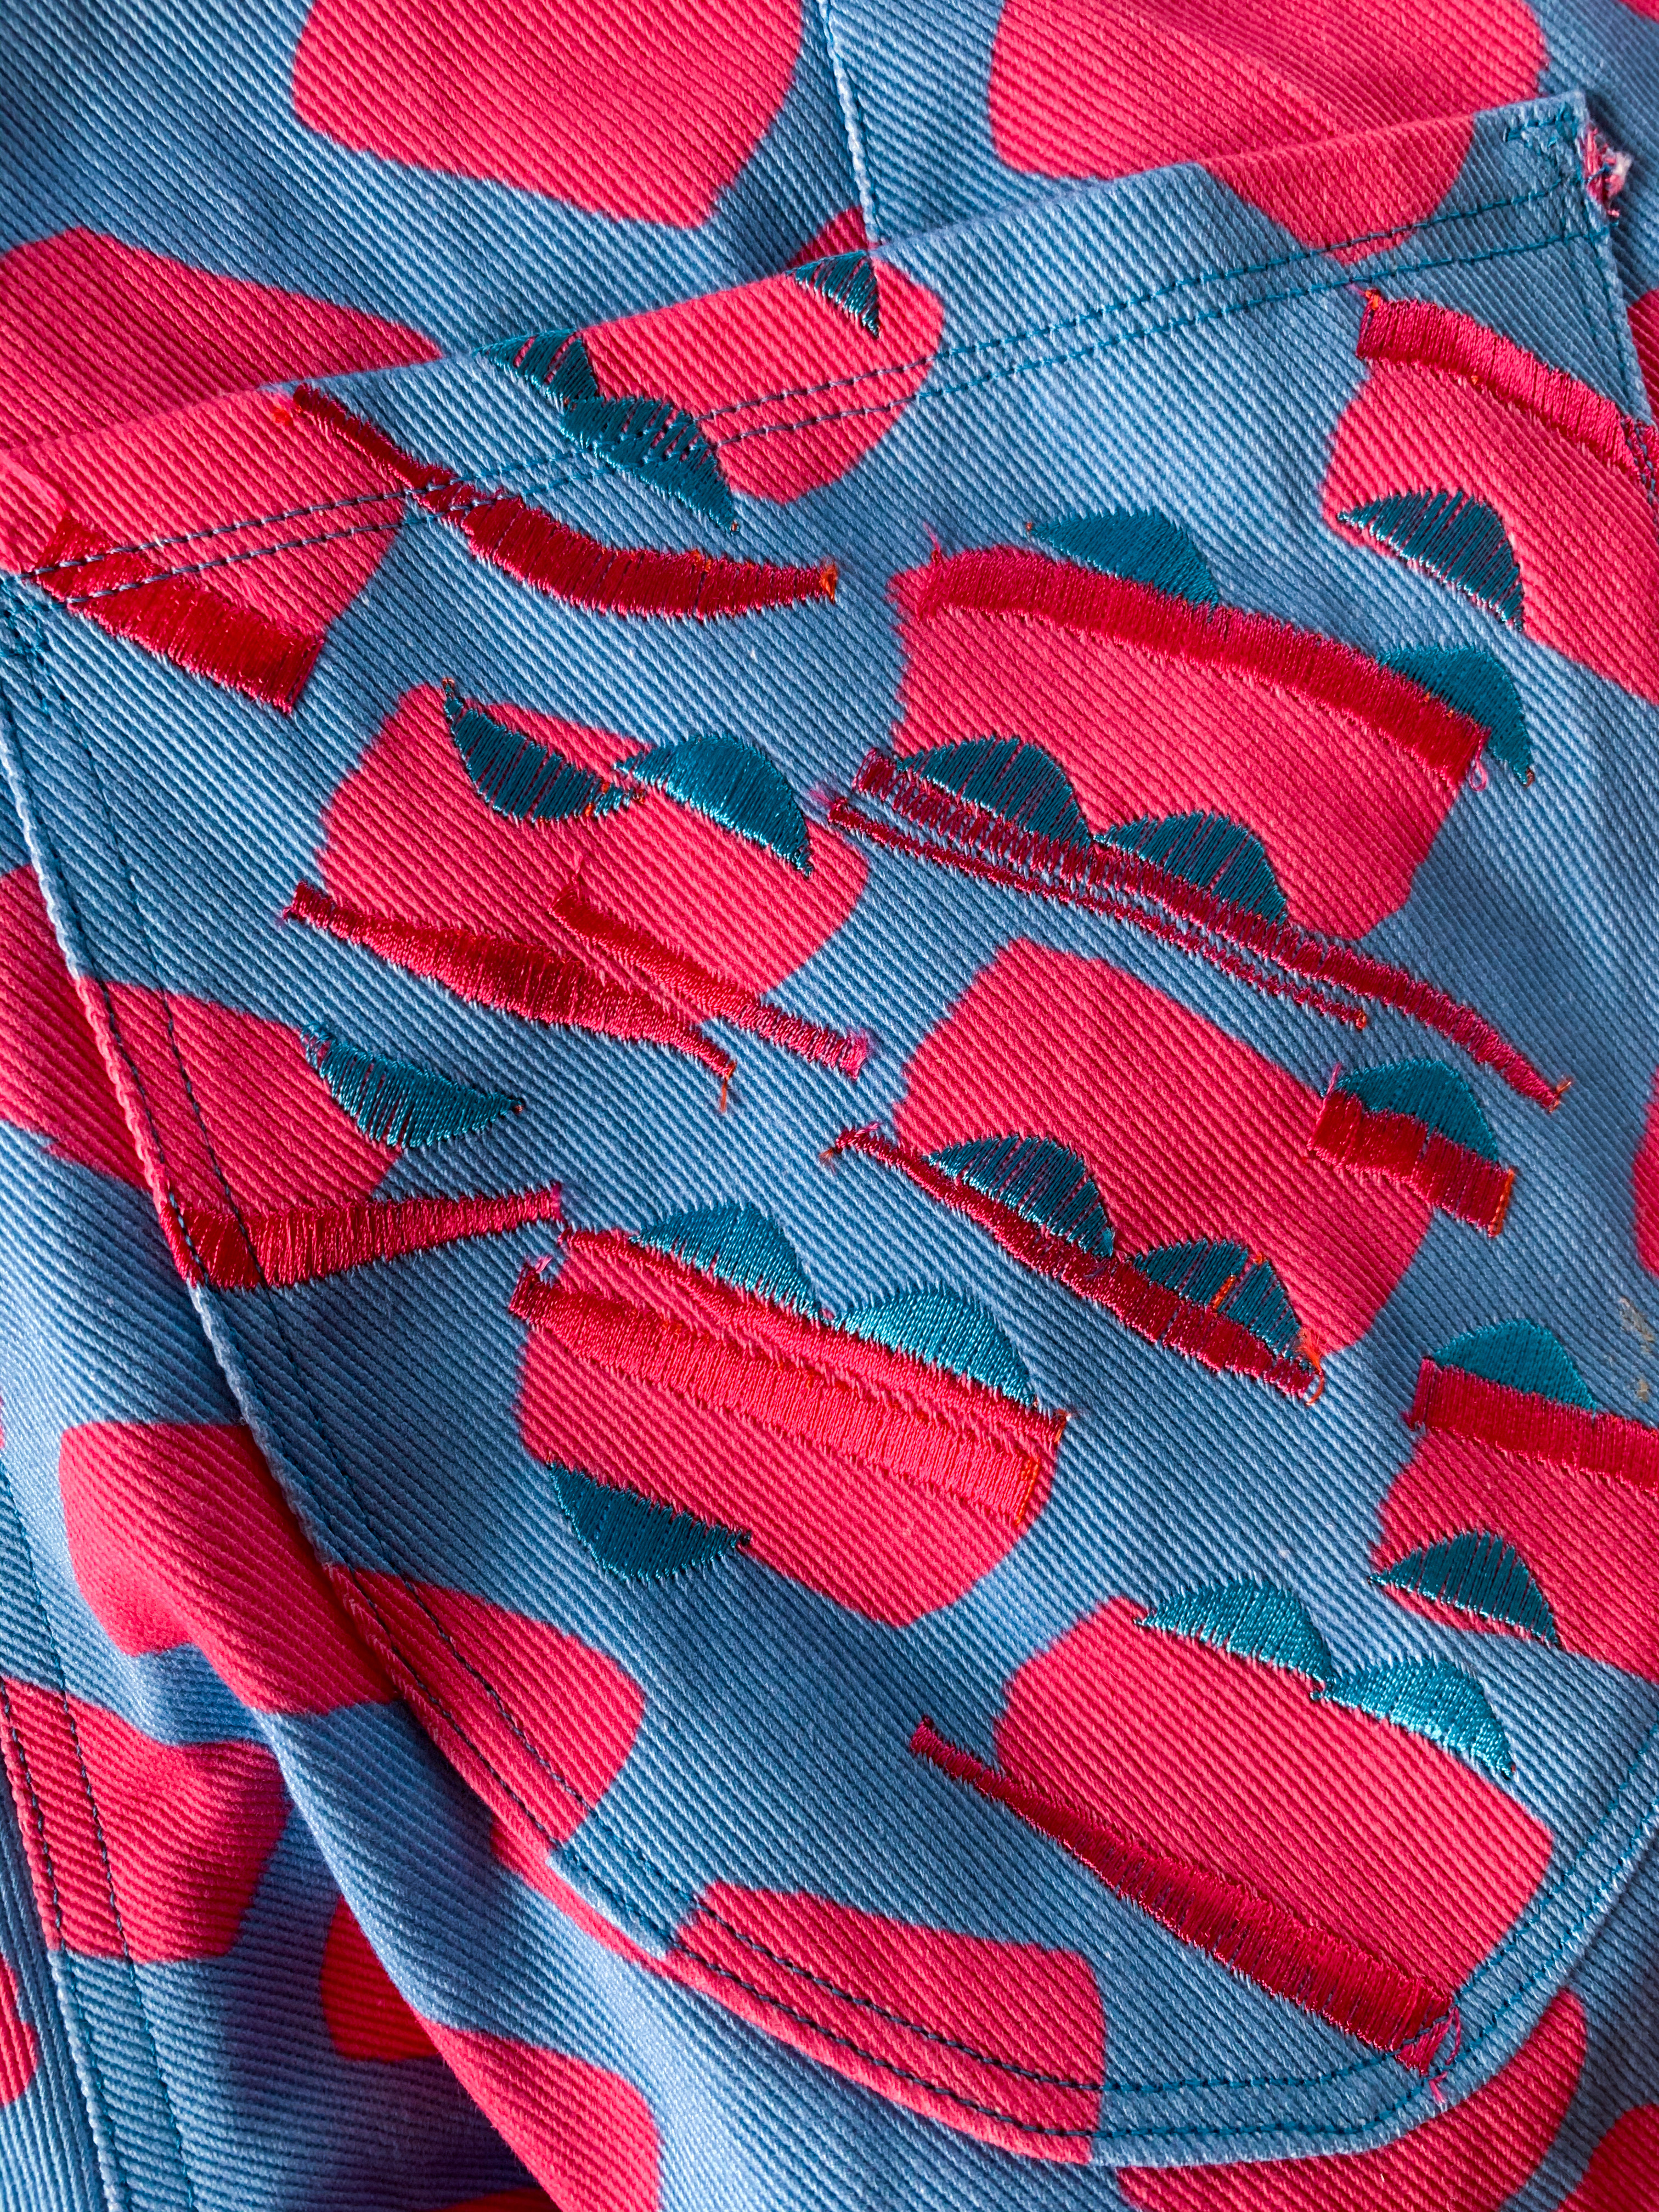
Have fun with this! Pockets, collars, and cuffs are a great place to add some embroidery on a garment with printed fabric. It’s like a painting. There is no wrong answer, and the sky is the limit to what you can do. If you’re extra ambitious, do the whole thing! You can see here that I tried out two different blues on the two pockets. It was kind of an accident, but I decided to just go with it and have two different pockets!

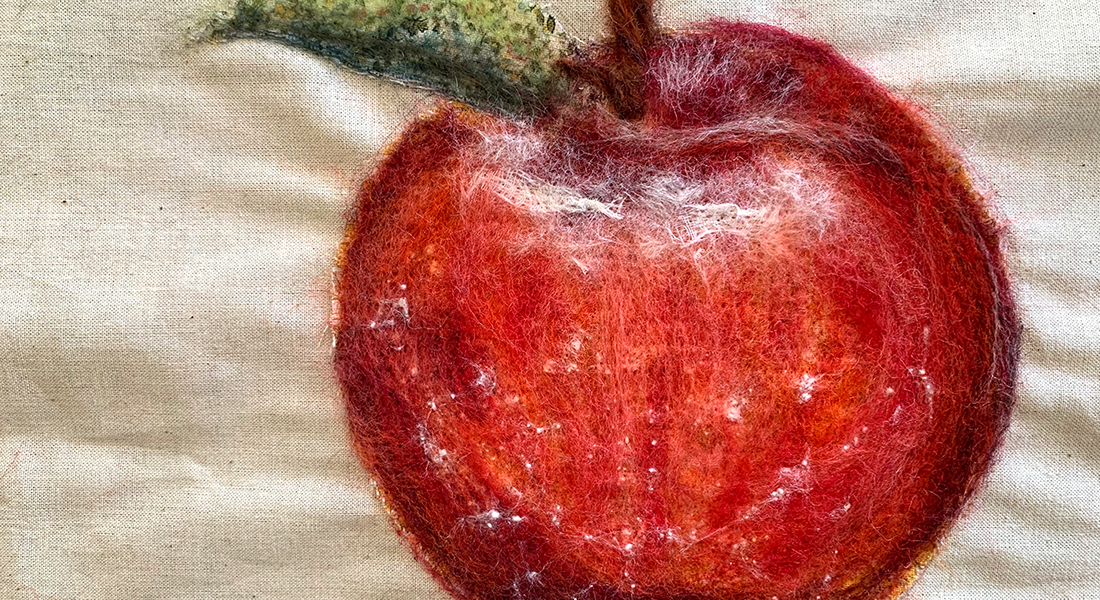
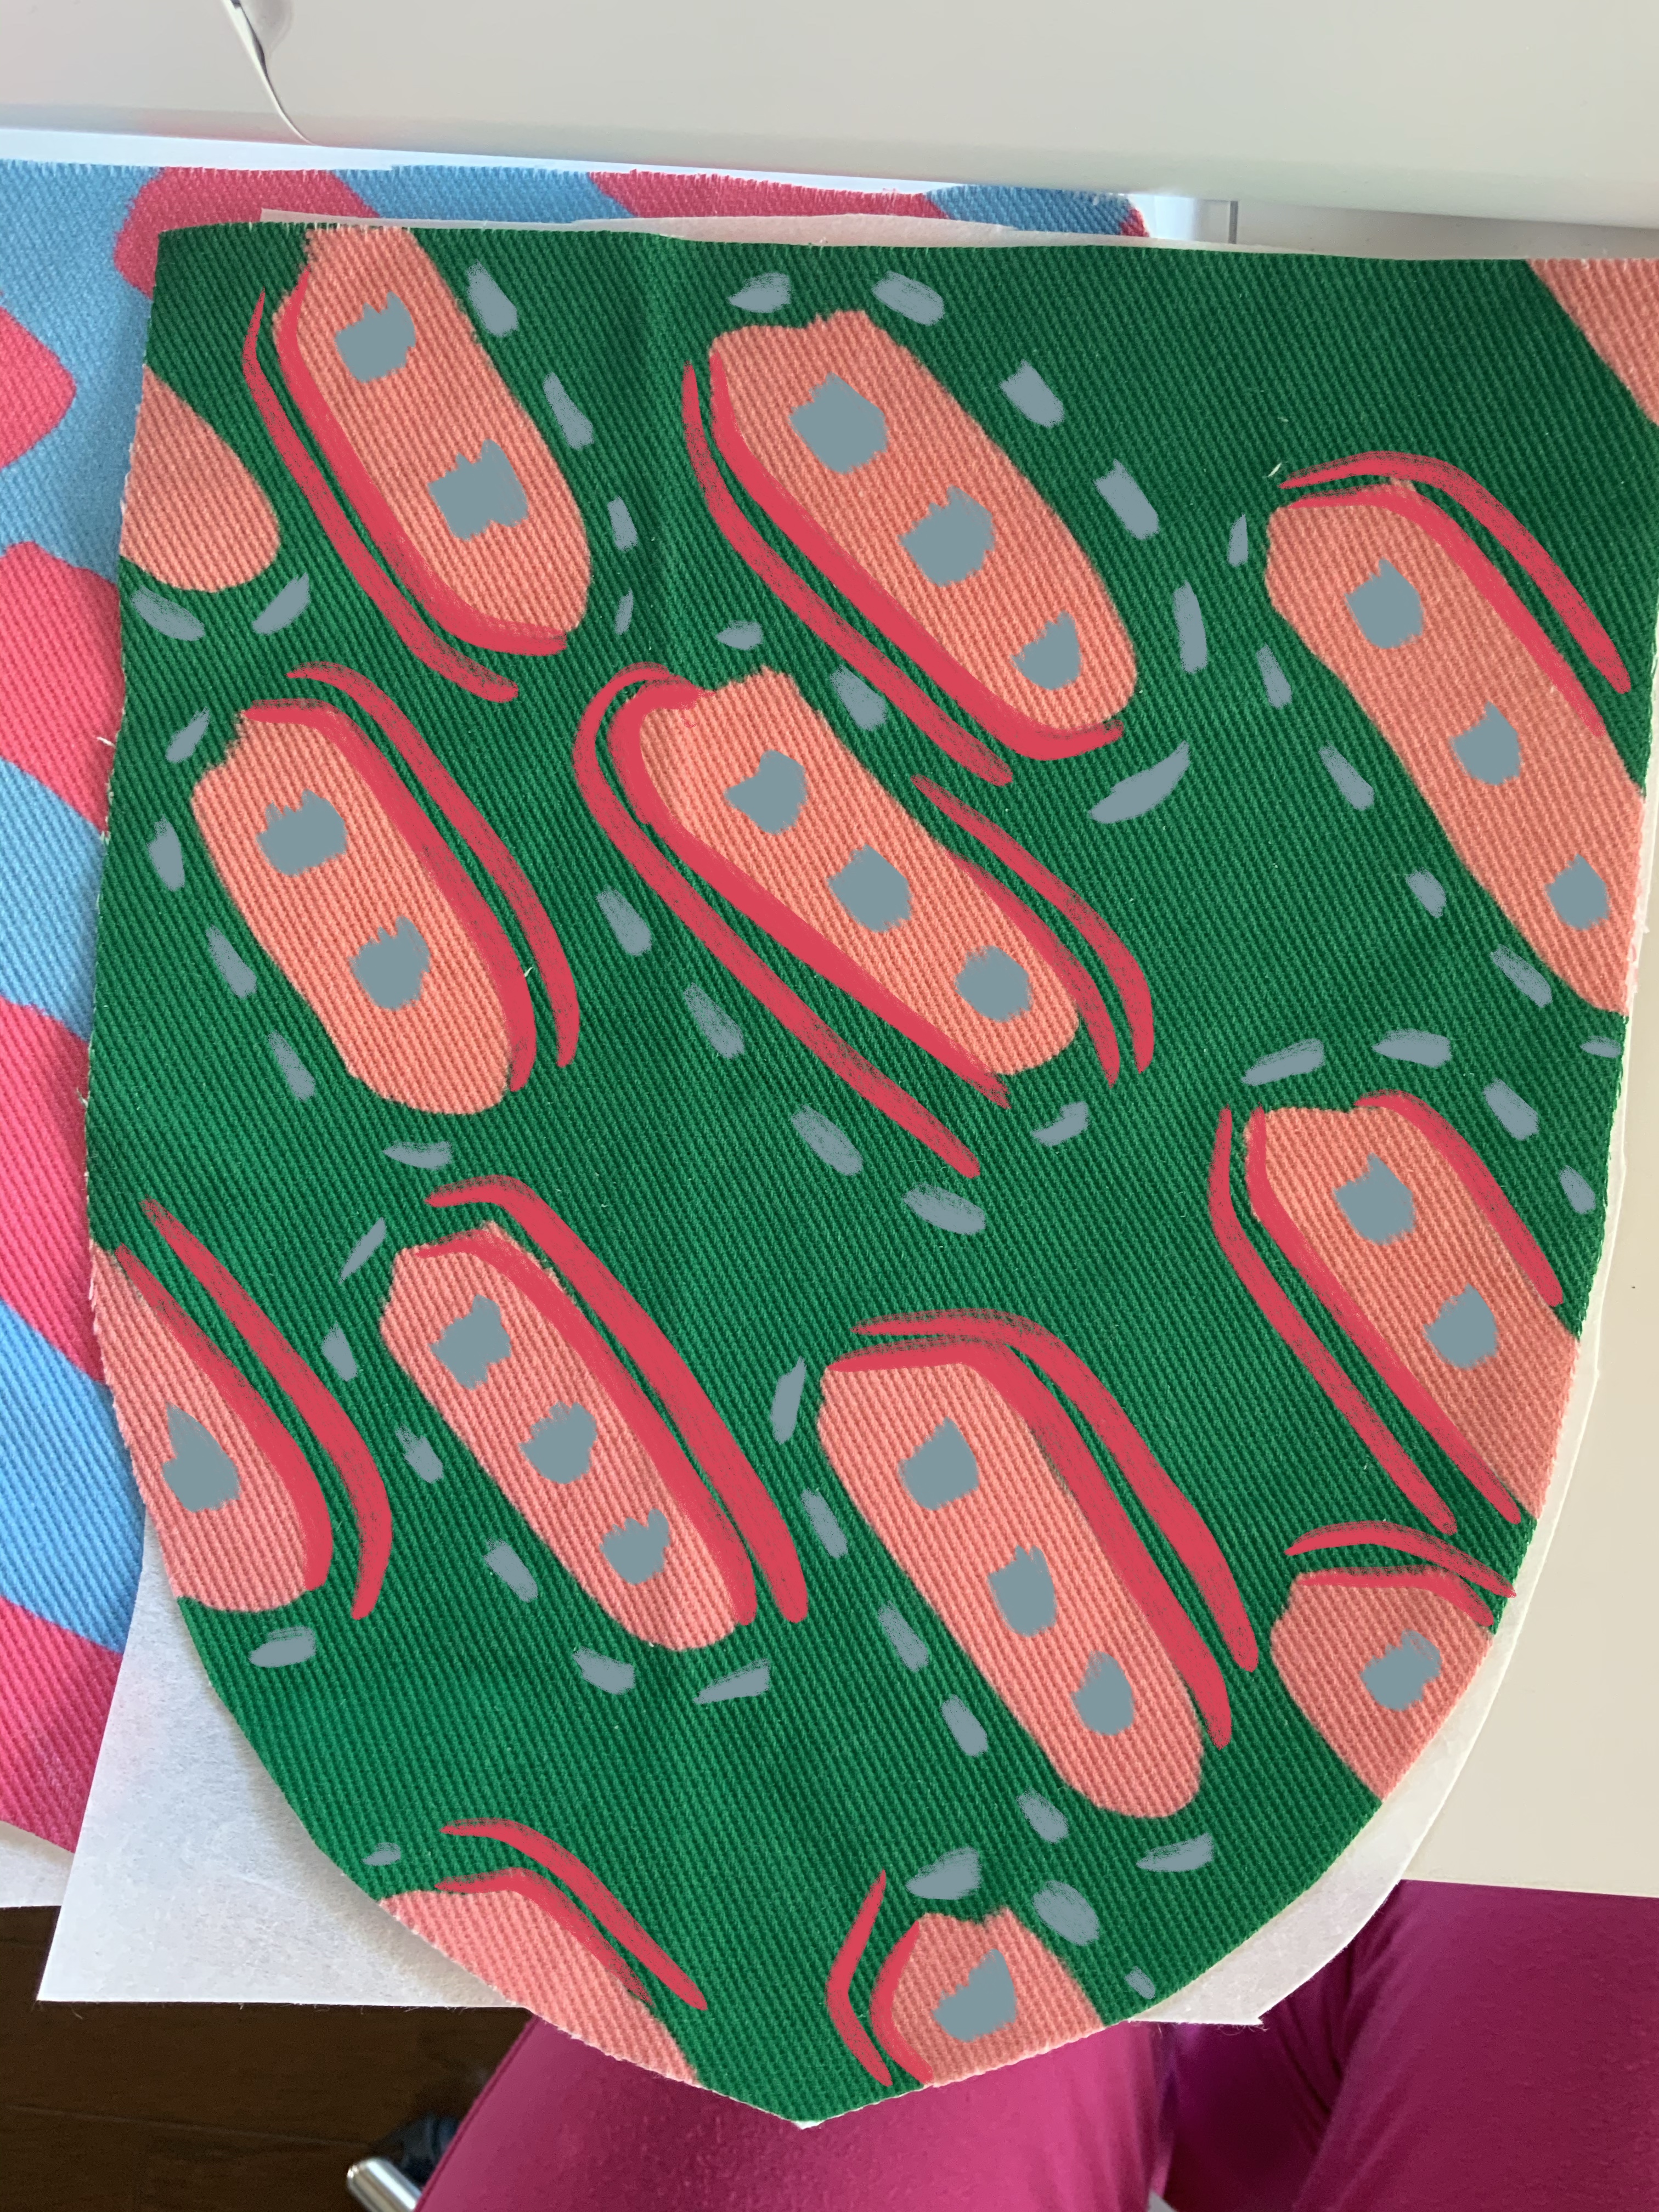
This green pocket was my favorite but was just an experiment. I think I will make another and stick it on my green pants!
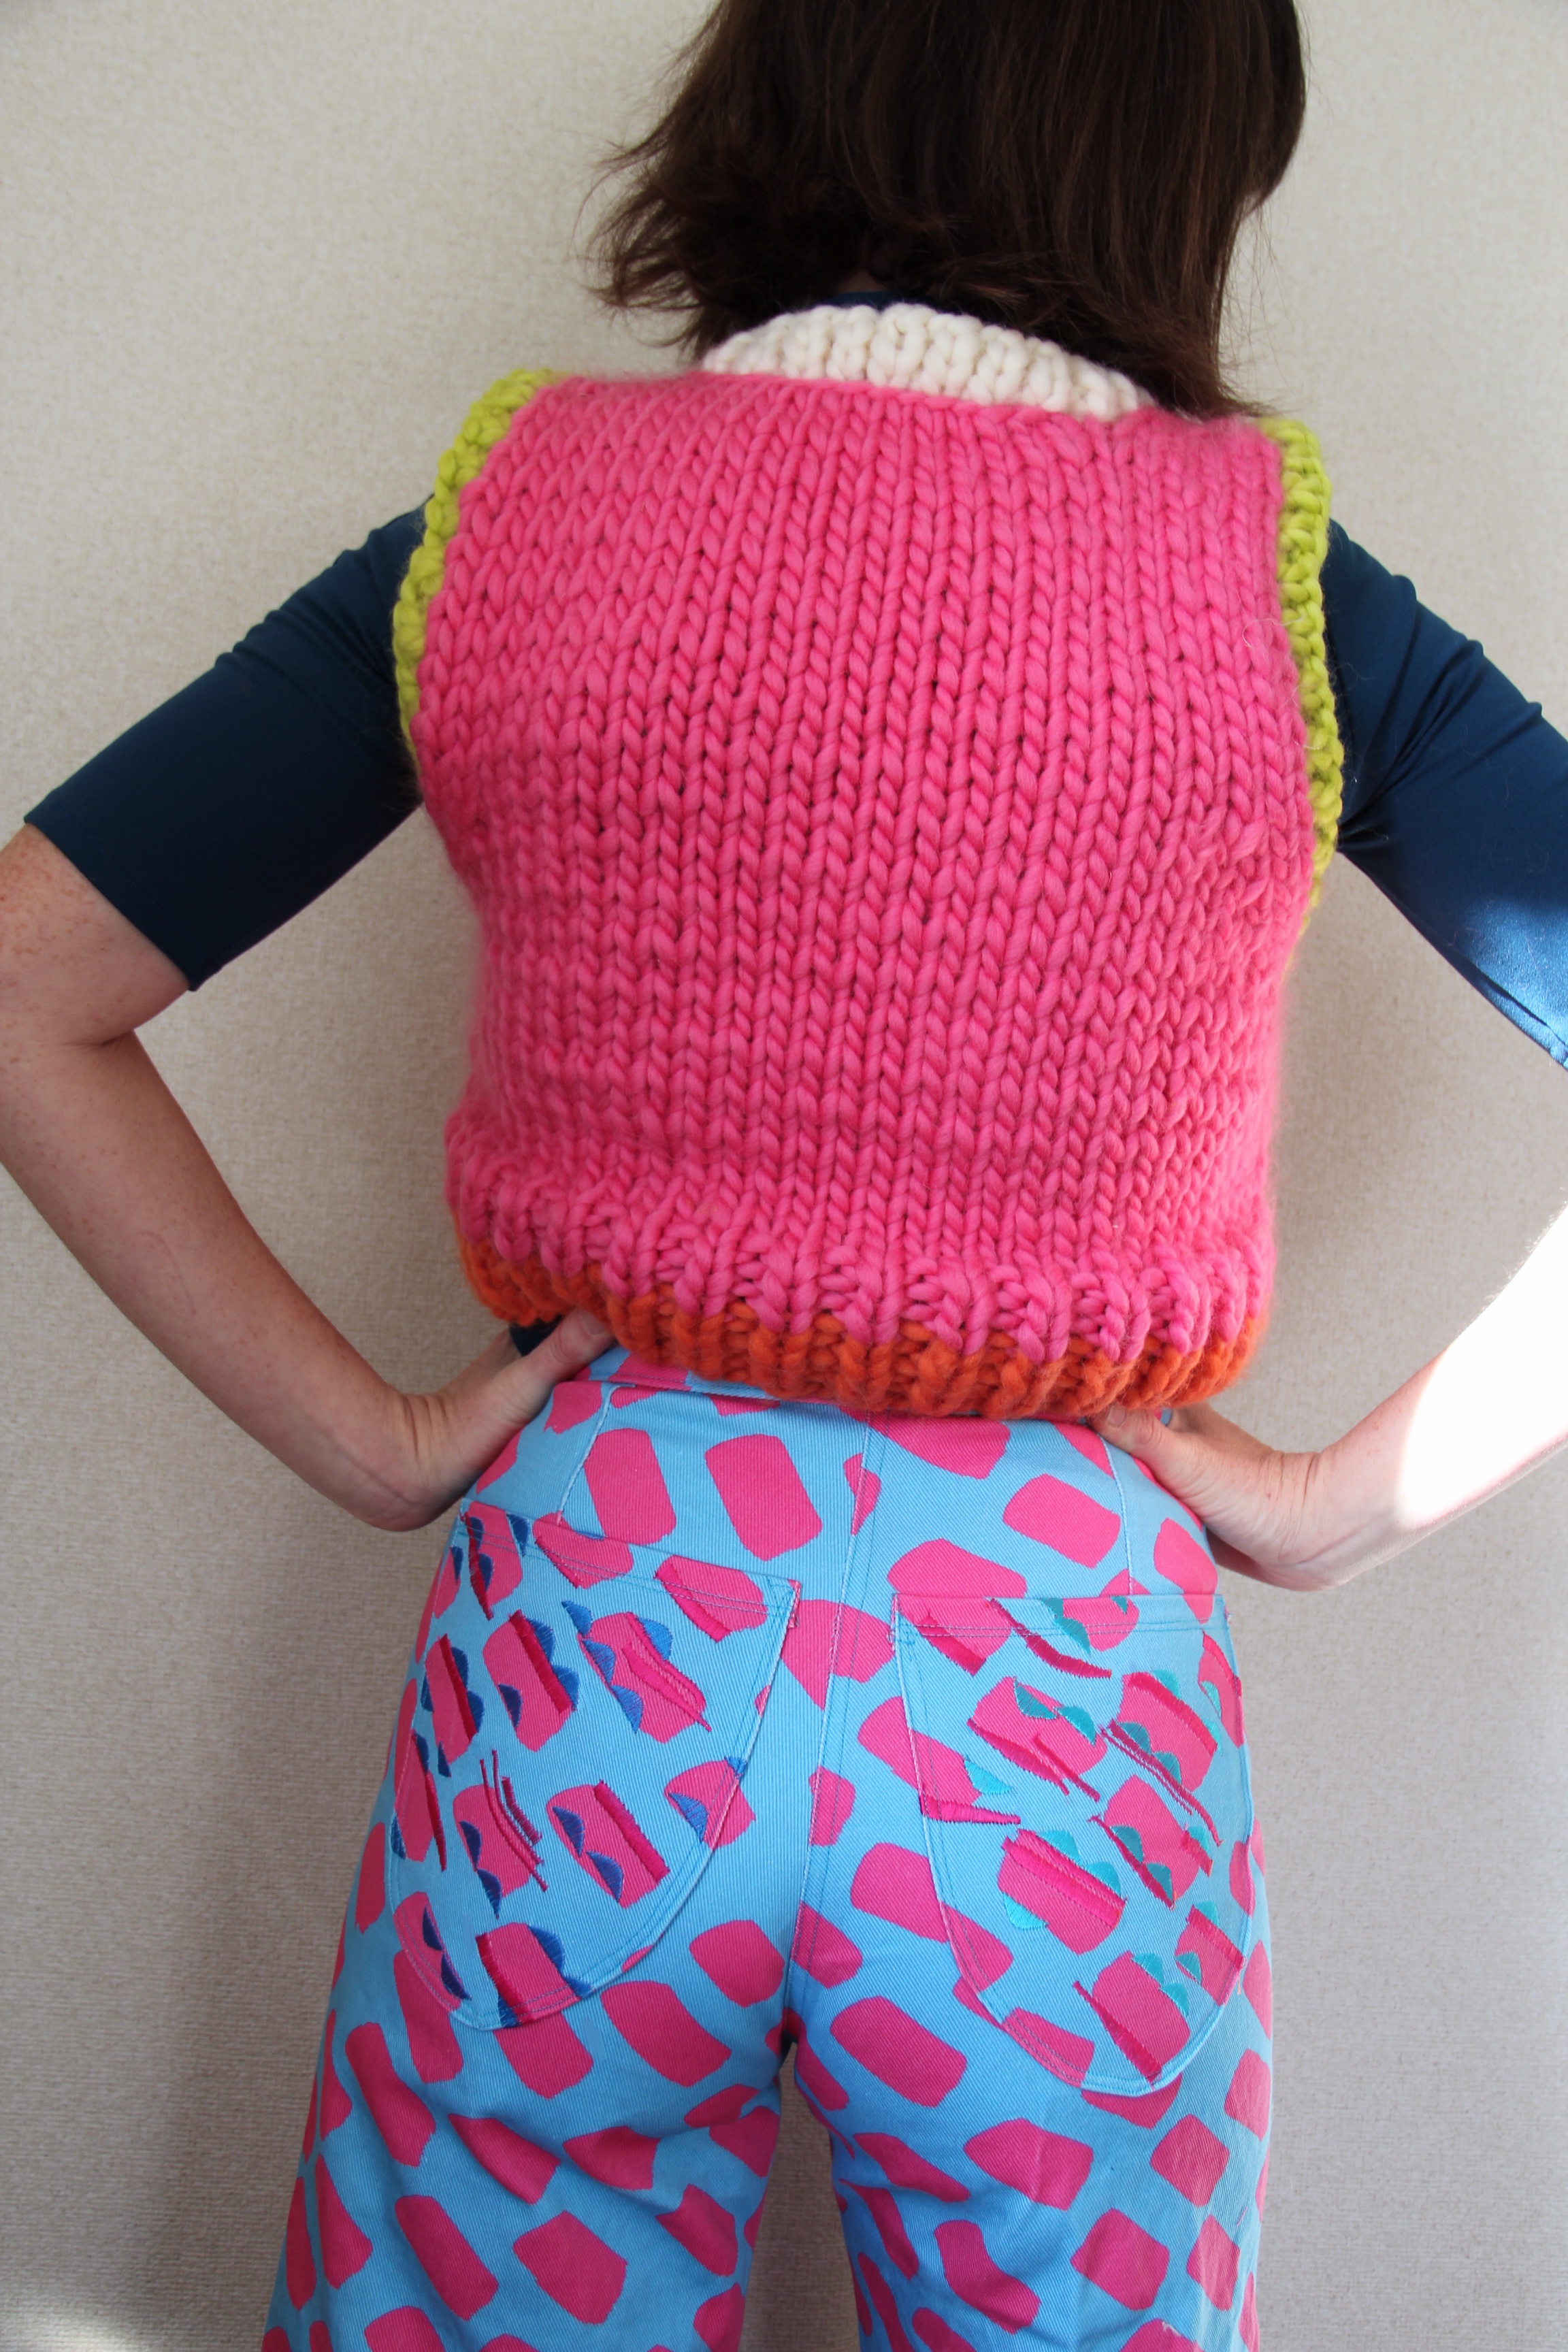
Here are my finished pants. I love them!