Tips for Embroidering on Cork
Hello fellow embroidery enthusiasts! My name is Mandy Leins, and I am a quilter who loves to explore working with all types of materials. As a BERNINA Ambassador, I recently had a chance to play with cork fabric and the Q-matic, stitching out a beautiful Tula Pink design.
I thought then that cork was pretty neat, and it’s been on my mind ever since.
What else can I do with cork fabric?
Recently, I have been playing around with embroidery designs on cork. I knew that the simpler designs like this Satin Bird or this border would always work and be beautiful, but what about designs with more elaborate and intense stitching? I wanted to see how a piece of cork larger than the hoop would work, as well, since it is quite a bit thicker than regular fabric.
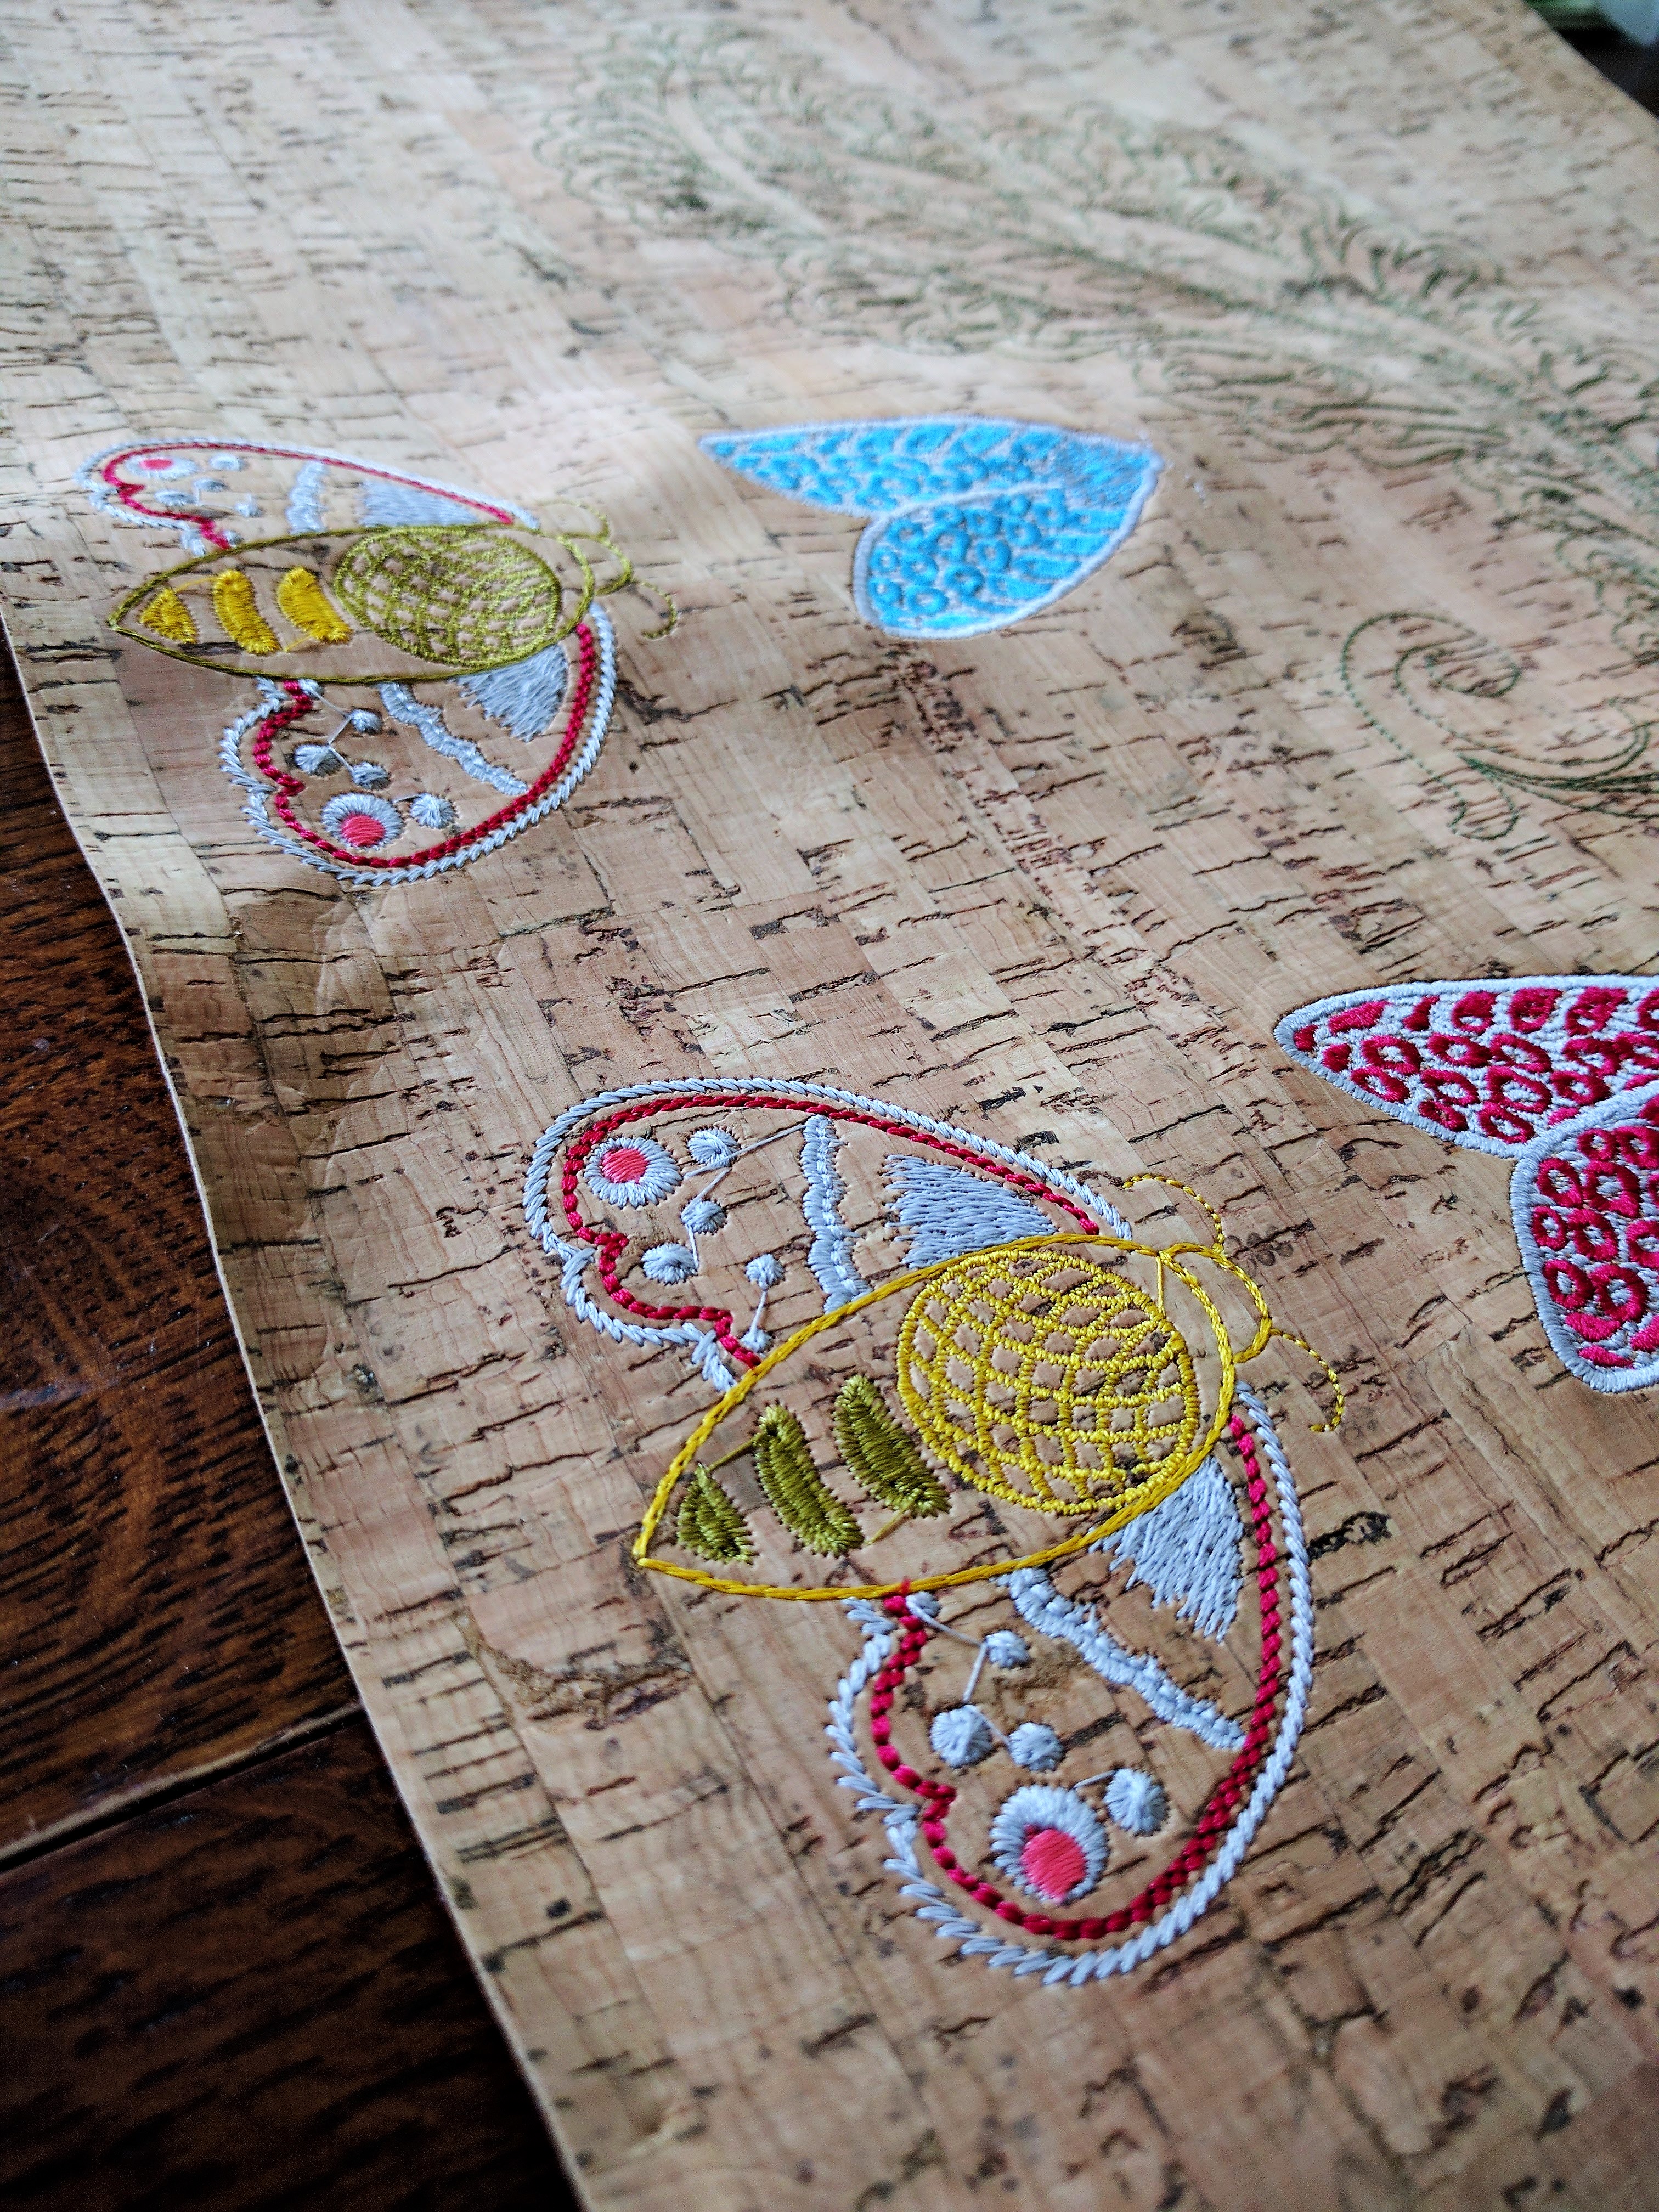
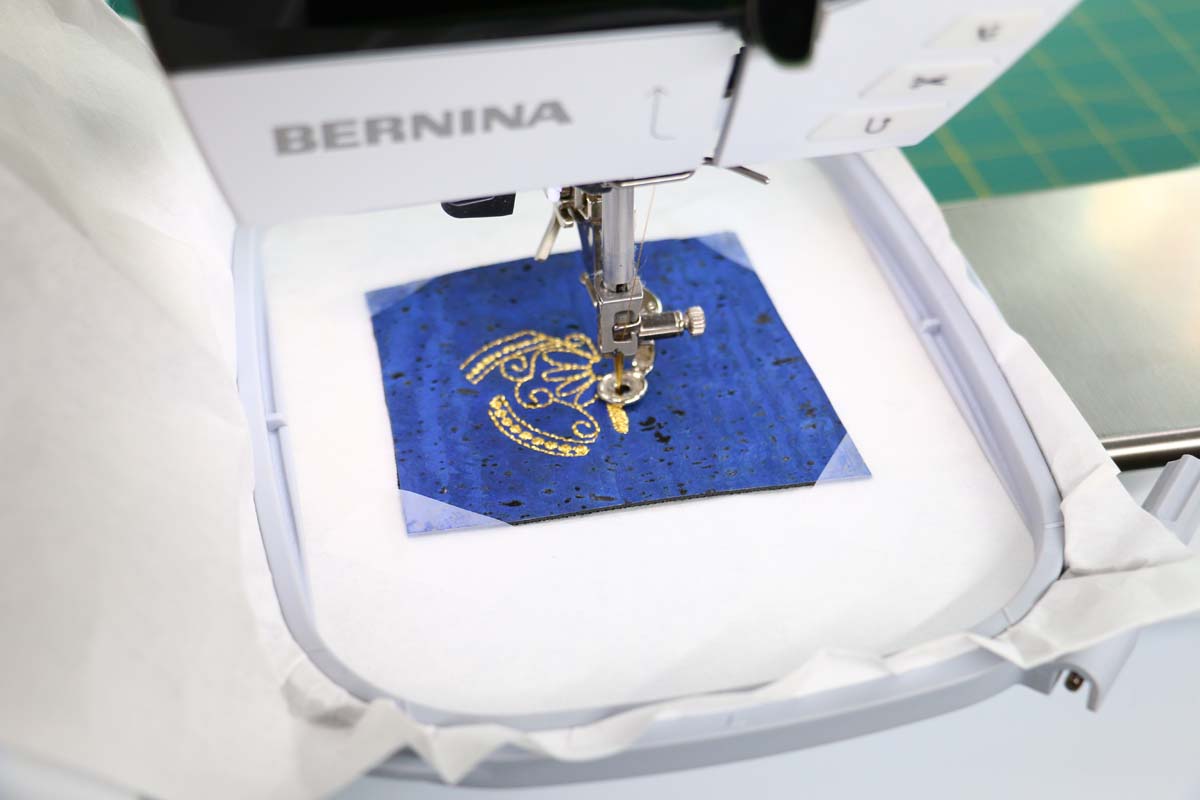
I chose to stitch out two designs by Alison Glass from her Ex Libris collection, one that was solid stitching and one that was a line design.

The Stabilizer Choices
First, I decided to try using only one layer of stabilizer, Sulky’s Sticky +, which is a sticky tear-away stabilizer. I knew that my cork would not be “hoopable”, so this was my only obvious option for stabilizing the cork. Since the backing material for cork is slightly fuzzy, the stabilizer was able to grip fairly well without using any additional clamps or basting stitches (more on this later).
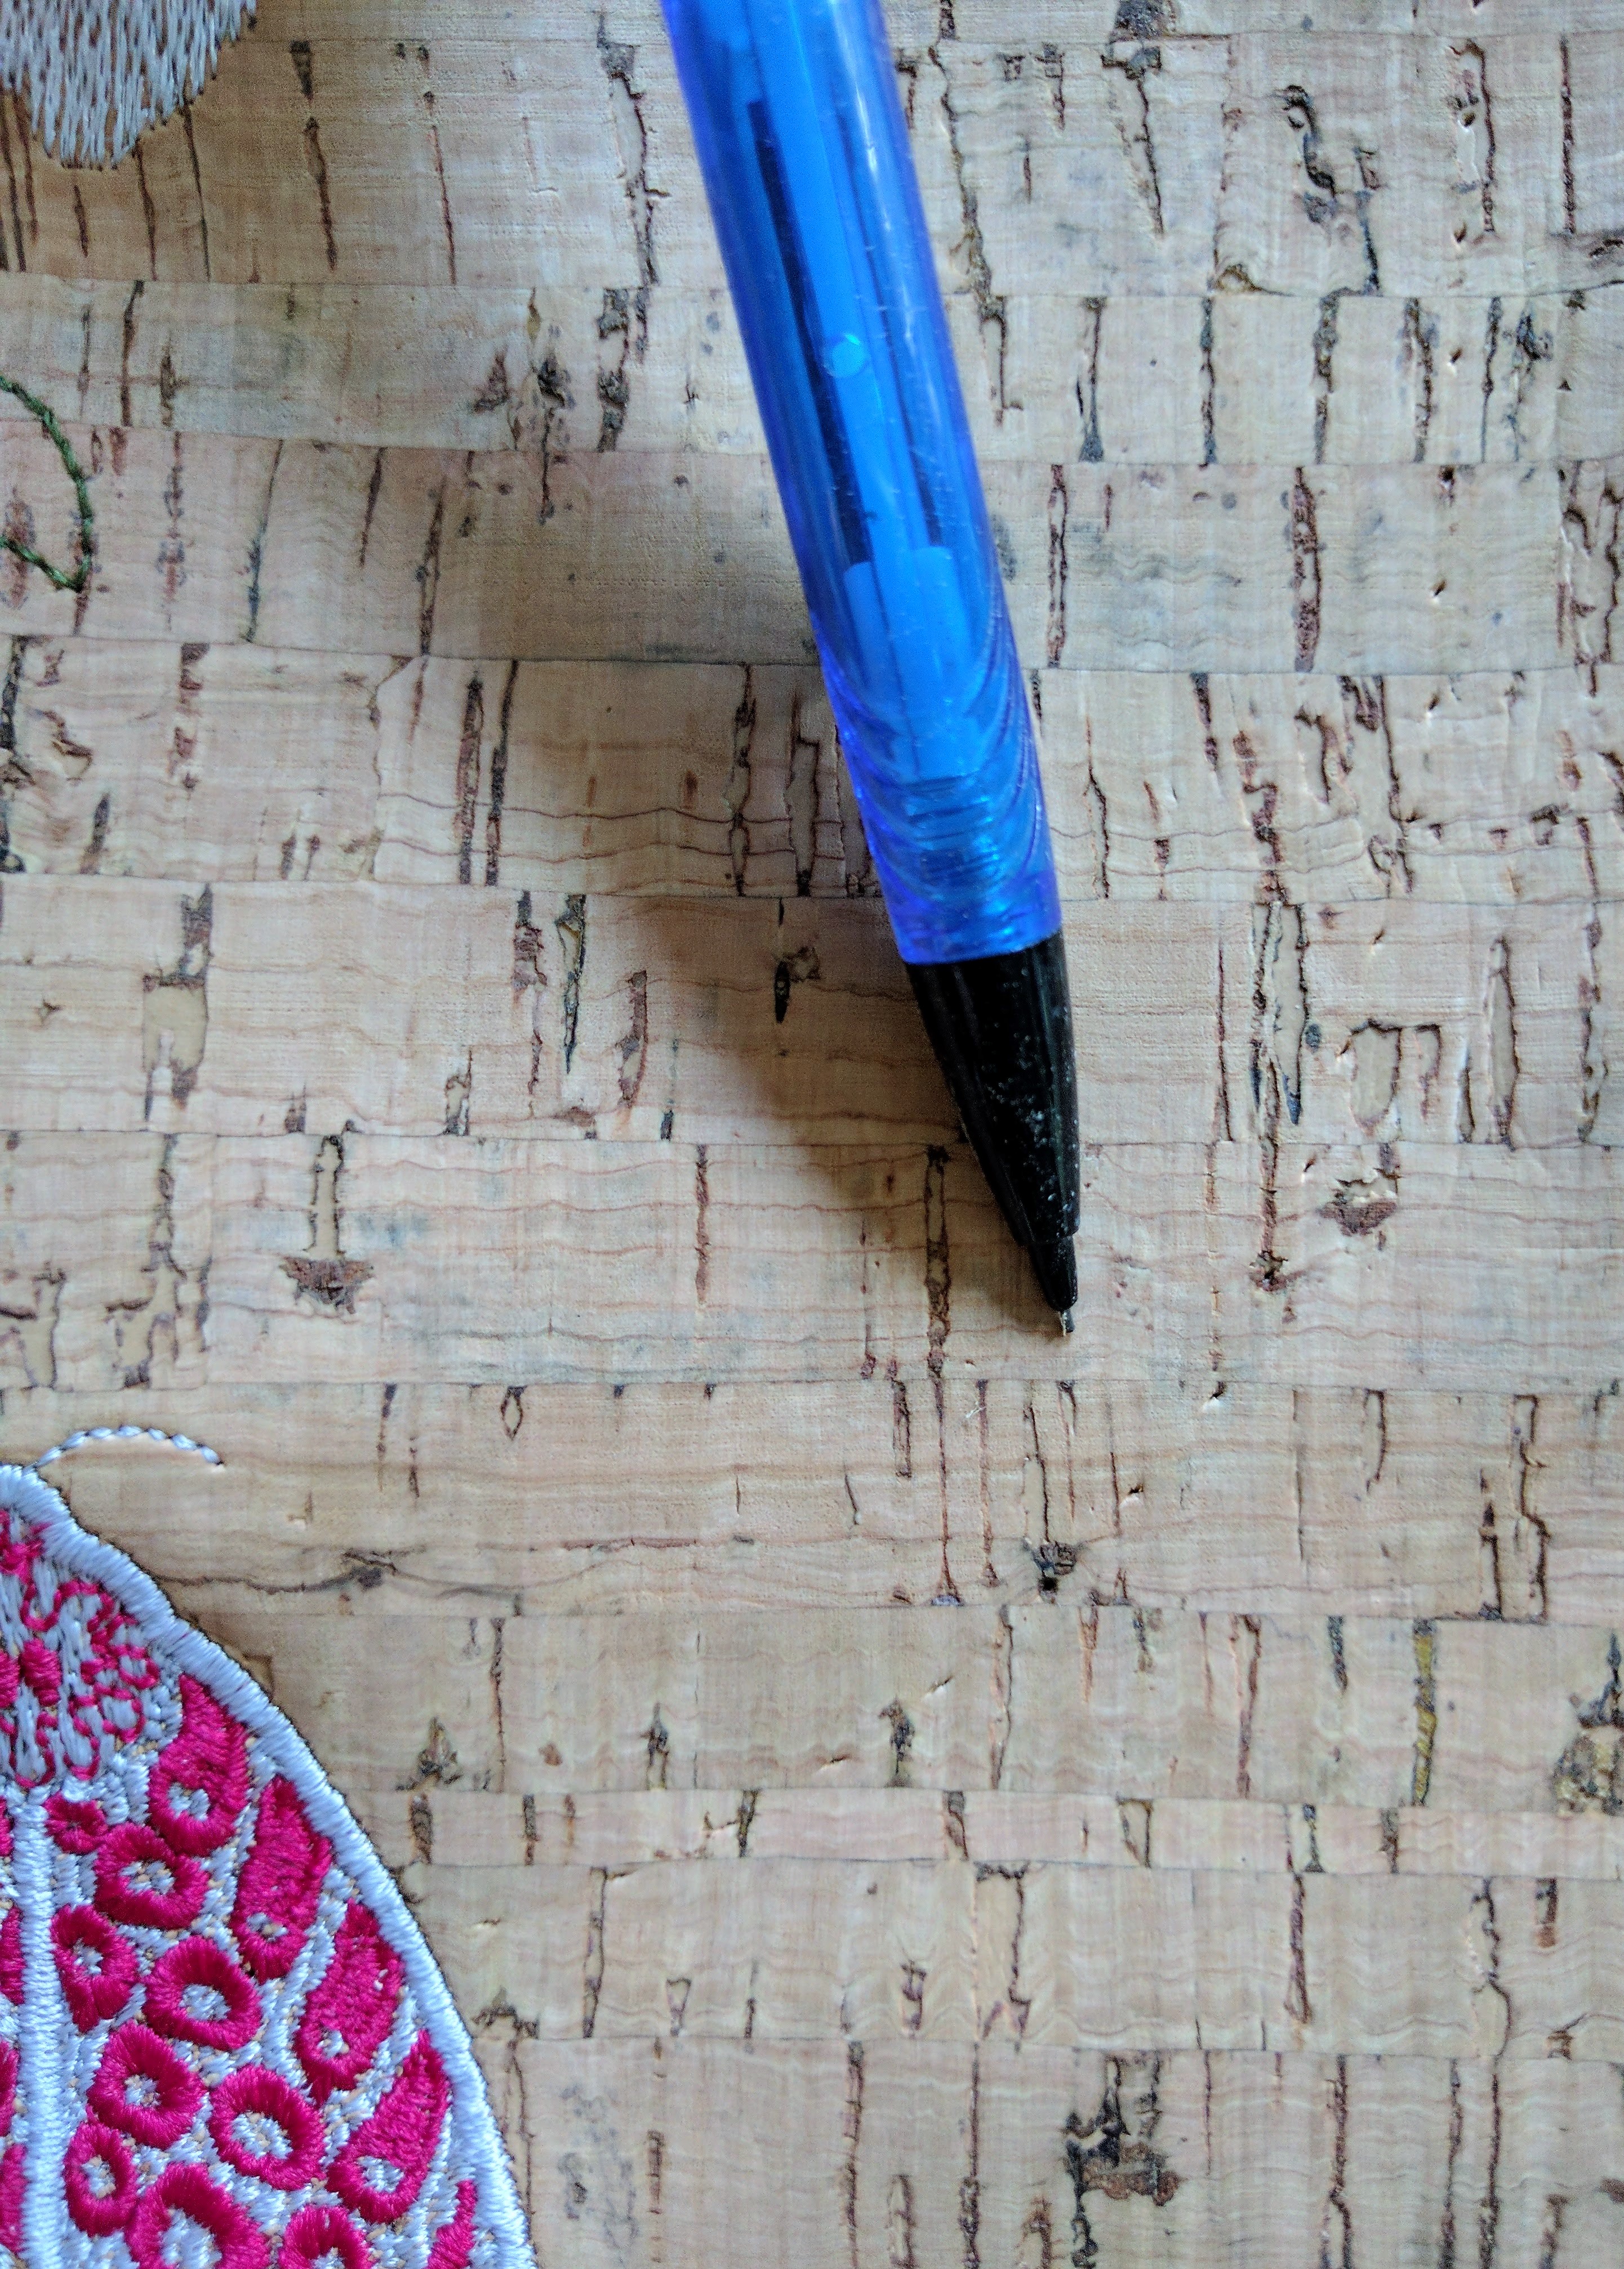
At this point, I would recommend using a size 100 embroidery needle and slowing your machine down quite a bit. The cork does have a memory, so any needle marks (such as for basting) will show.
If your project allows you to cut the cork to fit flat within the hoop, that would be ideal. If not, you can use binder clips to hold it in place.
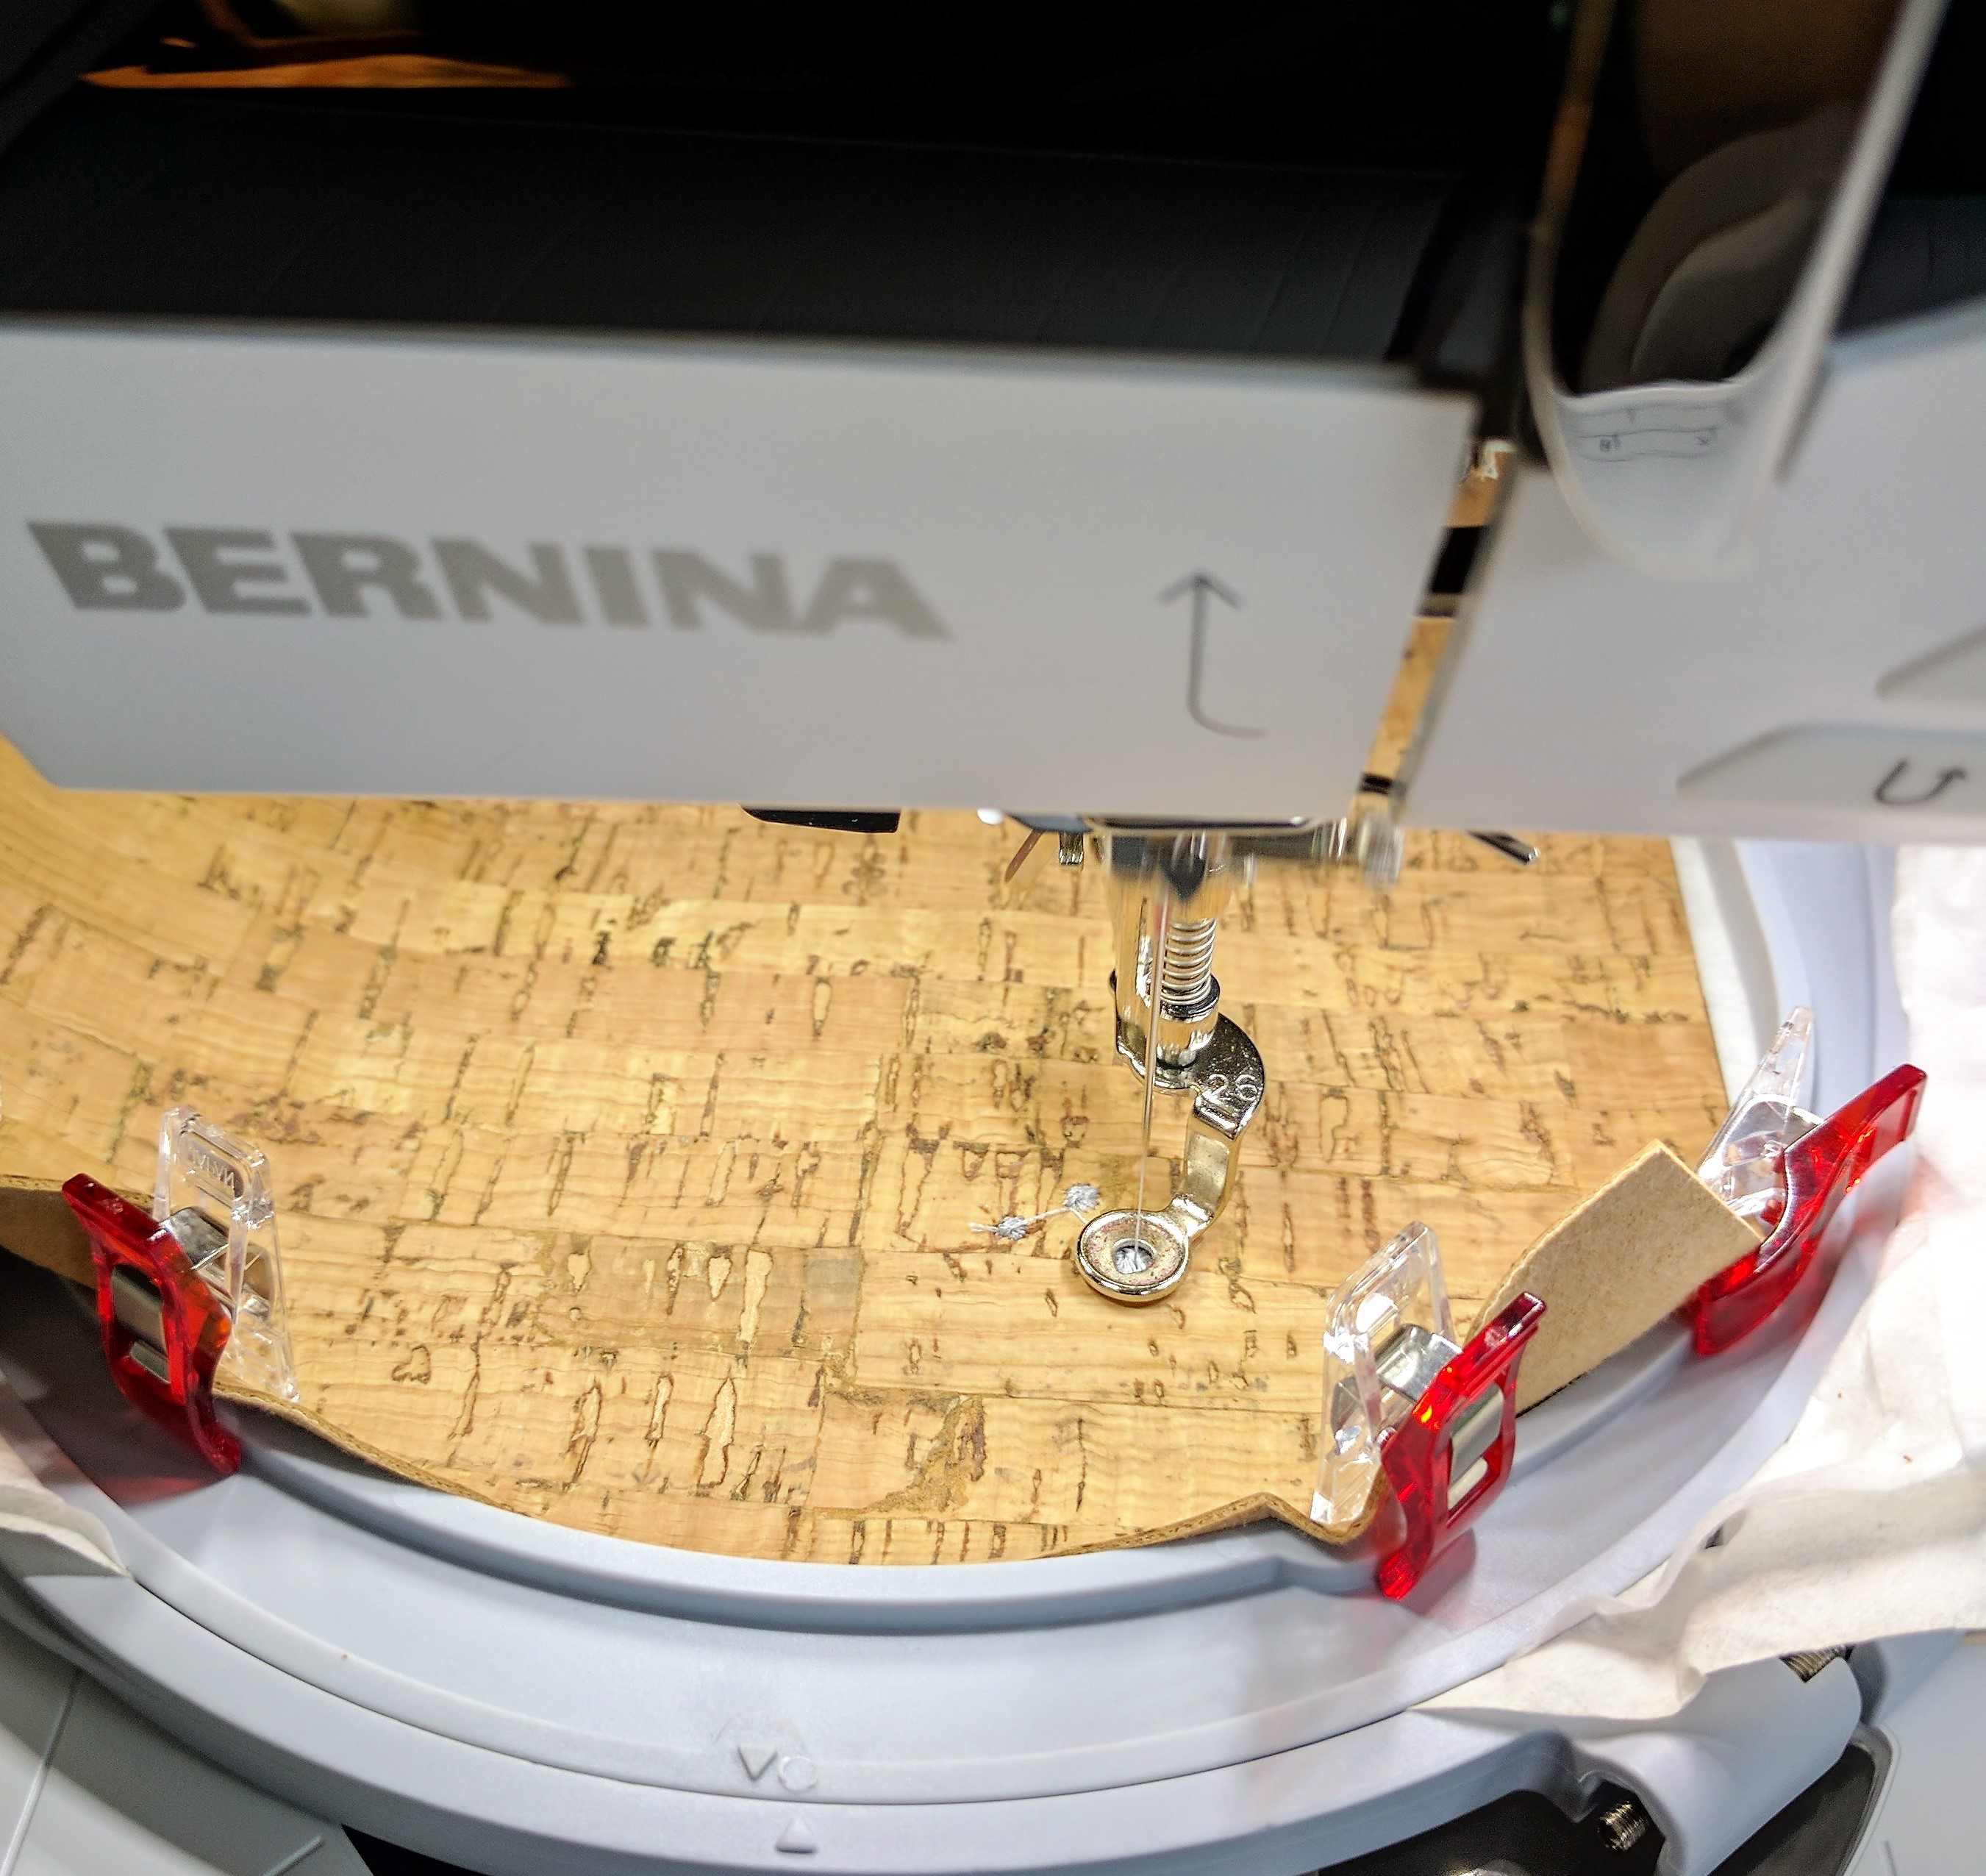
I used Wonder Clips because they were handy, but I would recommend something with a firmer hold, like small traditional binder clips. With just one layer of sticky stabilizer, things appeared to start off well!
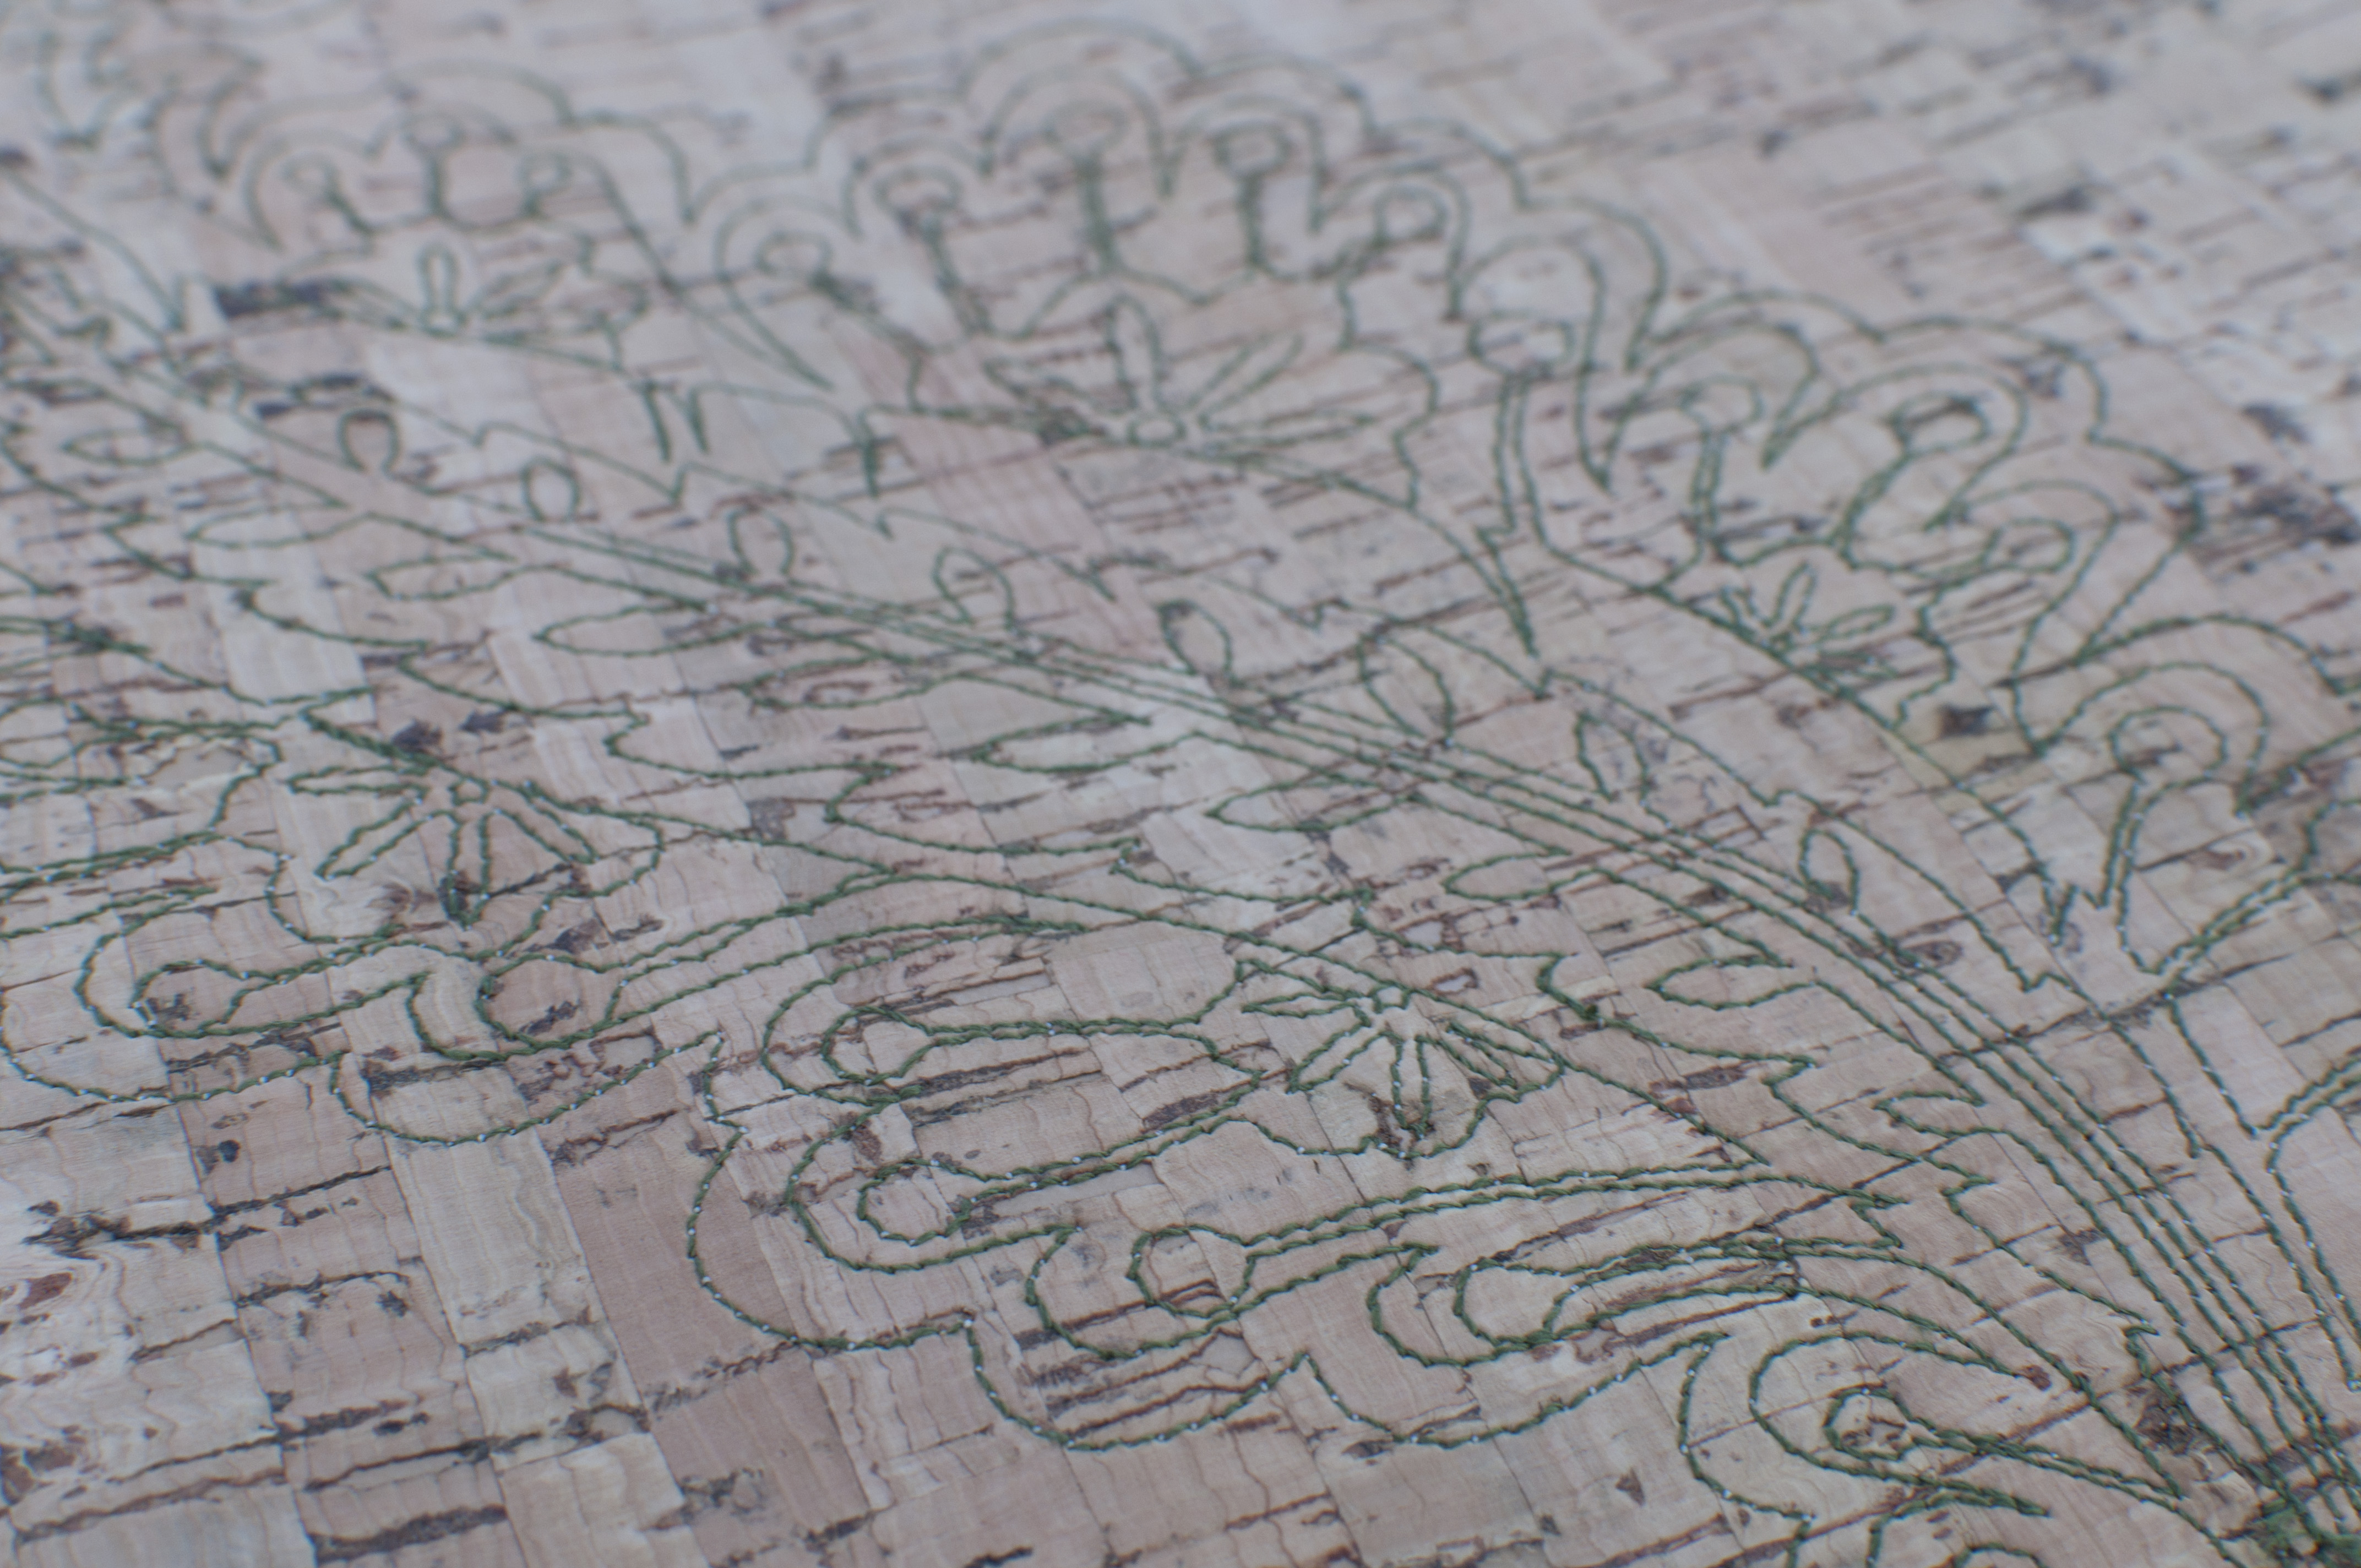
Towards the end of the first round stitching of the silver moth, though, I noticed that the cork seemed to almost buckle a bit around the edges. I knew I had not over-tightened the stabilizer in hooping it.

In the photo above, I am pointing to where you can see the cork beginning to come up a bit. It looked to be as if the stitches compressed the cork while the outer layer stayed its “normal self.” Would this happen with the linear design?

As you can see above, it was much improved, although still a little wobbly. And then I got to thinking. If one layer worked fine, what about two? For my next round, I hooped the stabilizer in two layers: a tearaway stabilizer on the bottom and a layer of sticky stabilizer on the top. As you can see below, it improved the wobbles in the cork, although they’re still present.

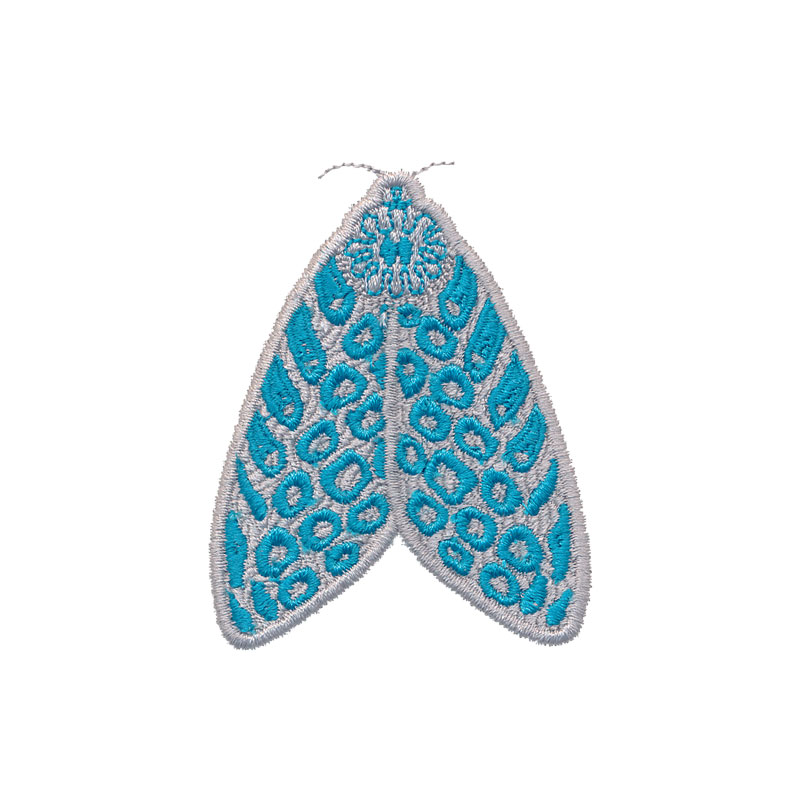
Compared side by side in the photos below, the first round of moths is at the top (the moth with blue dots), and the second is on the right (red dots). At this angle, you can see how the cork has behaved with one layer of stabilizer versus two. In the background, you can further see how a quilting motif sits on the surface nicely, which opens up the possibility of using decorative stitches as well as embroidery stitches.
Would I use dense designs on cork?
This test was very encouraging! I believe that if I used this in a bag or pillow project—something with a pit of puff or bend—the slight waviness in the second try would be within acceptable limits, kind of like when quilters use puffy batting to help with excess fullness.
A Note on My Third and Final Trial…
Using a size 100 needle and three layers of stabilizer, I thought this could be my magic bullet. But alas, the density of the cork and the layers of stabilizer caused issues with both thread and needle, even with lubricant and slowing my machine down to one stitch per second, and I felt that it wasn’t a viable option. I will stick with two layers!
My personal takeaway from comparing these designs to each other and to my quilted design is that I can’t WAIT to embroider more on cork! It makes a lovely and striking surface, especially for designs that are more open and more linear. Have fun experimenting!
Used Products

What you might also like


One comment on “Tips for Embroidering on Cork”
Leave a Reply
You must be logged in to post a comment.

I am quite new to machine embroidery, still trying to work out the finer points of my machine and have tried out all kinds of fabrics. I machine embroidered cork fabric for the first time recently. I used a size 100 leather needle. Framed up a medium weight stabiliser and sticky taped my piece of cork fabric to the stabiliser. My sticky tape was a bit lightweight, being only masking tape, but it did the job. I started out with the machine as slow as possible and when all looked fine sped it up a bit. The design was quite large (25.5 x 17cm), a bit dense stitching wise, did not have a single problem and finished completely flat, no puckers at all. Very pleased.