Serger Tips for Jogger Pants
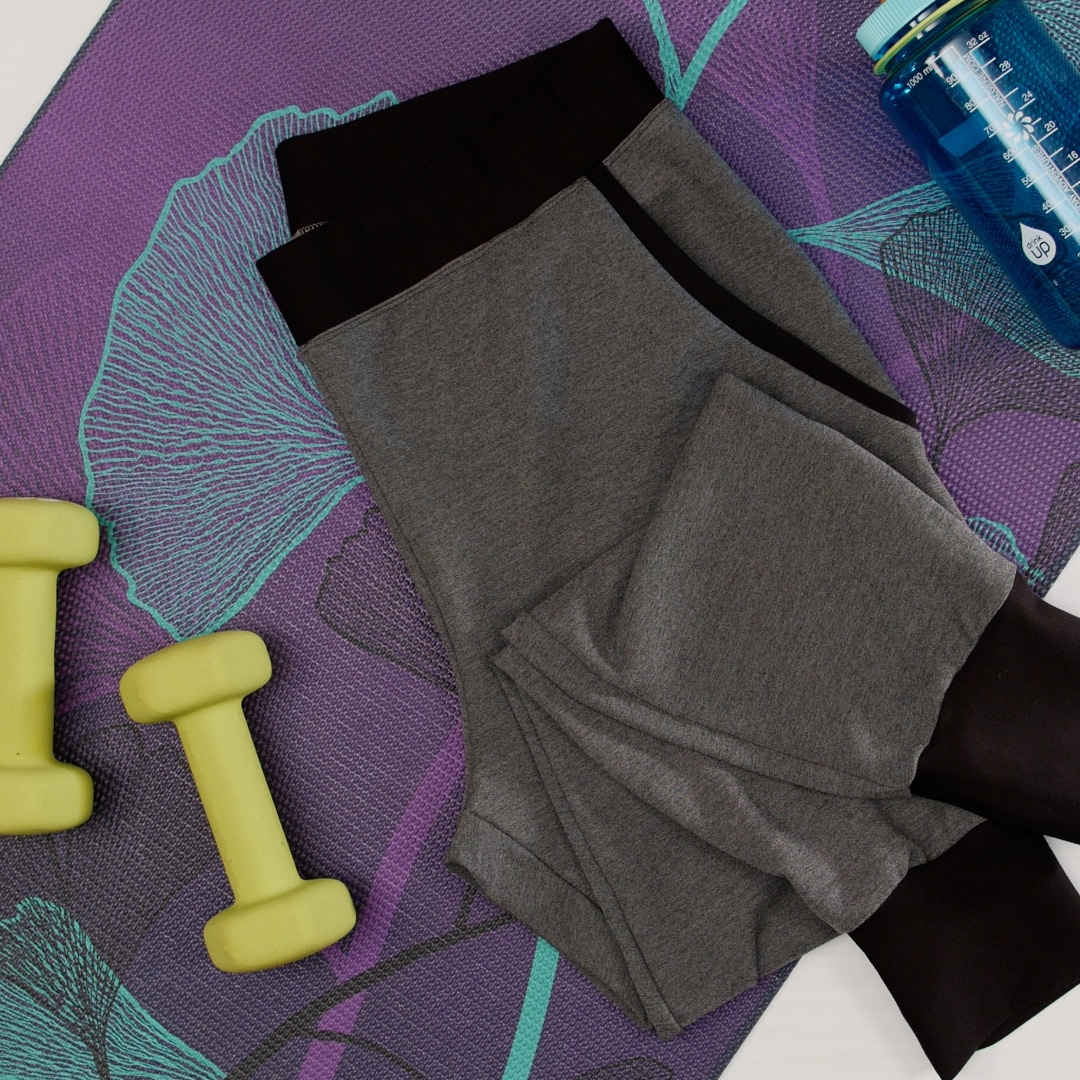
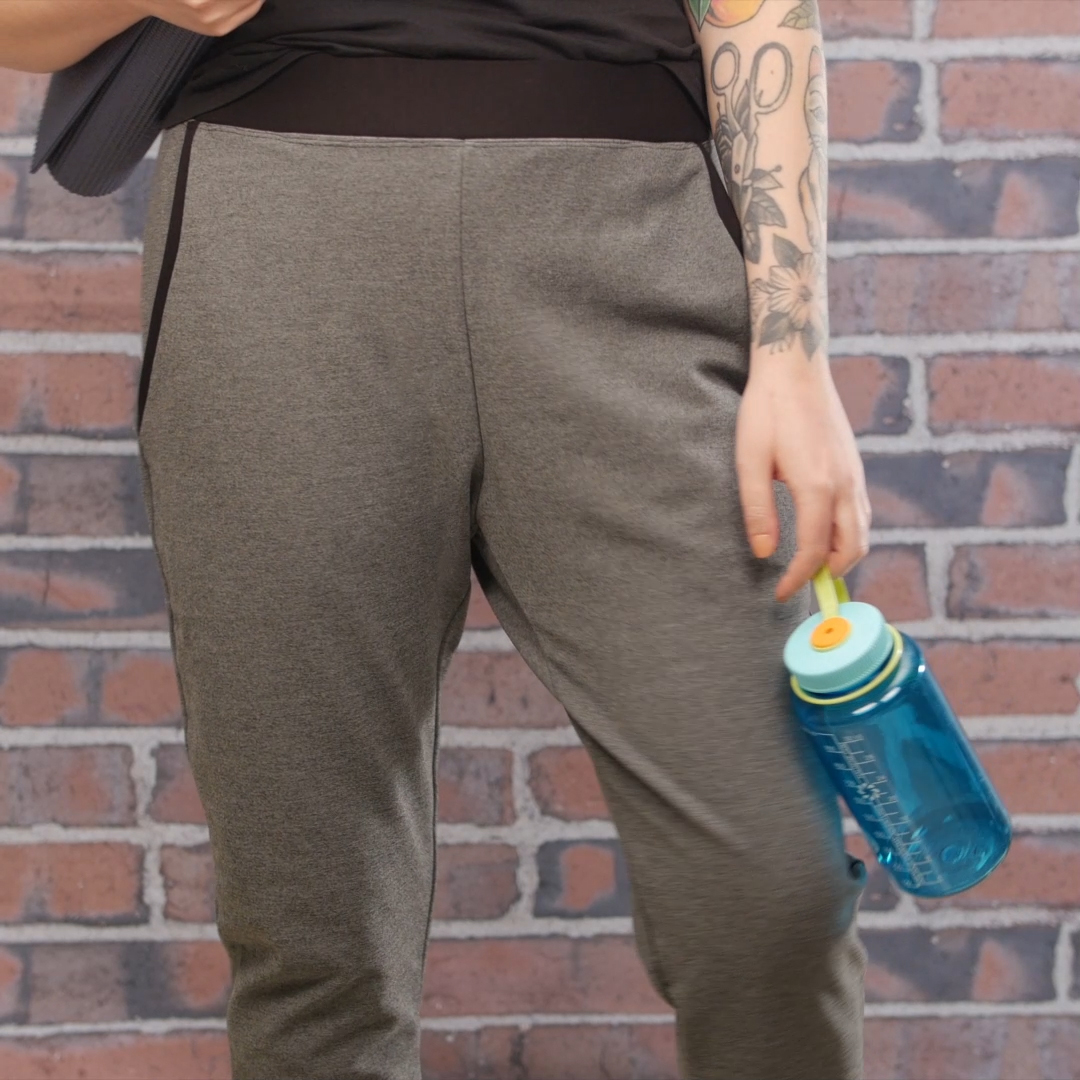
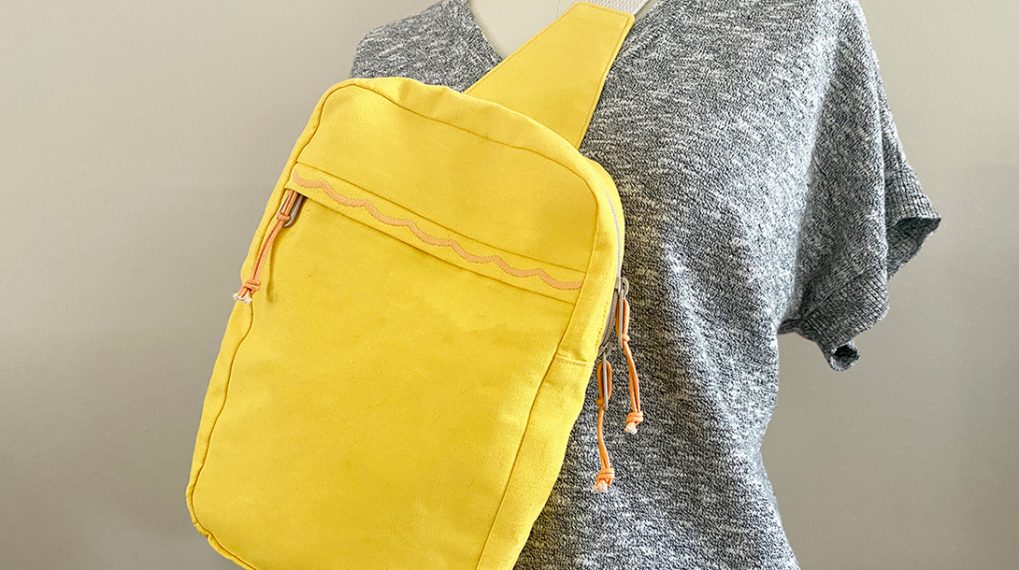
I truly believe joggers are the ideal pants—they have all the comfort of traditional loungewear but offer a more tailored fit that can be styled for going out or just staying home. Spending so much time at home this year has really stressed the value of dressing for comfort! Bonus: Jogger pants are very easy to make yourself and require a lot less fabric than you’d think so you’ll be expanding your soft-pant wardrobe in no time.
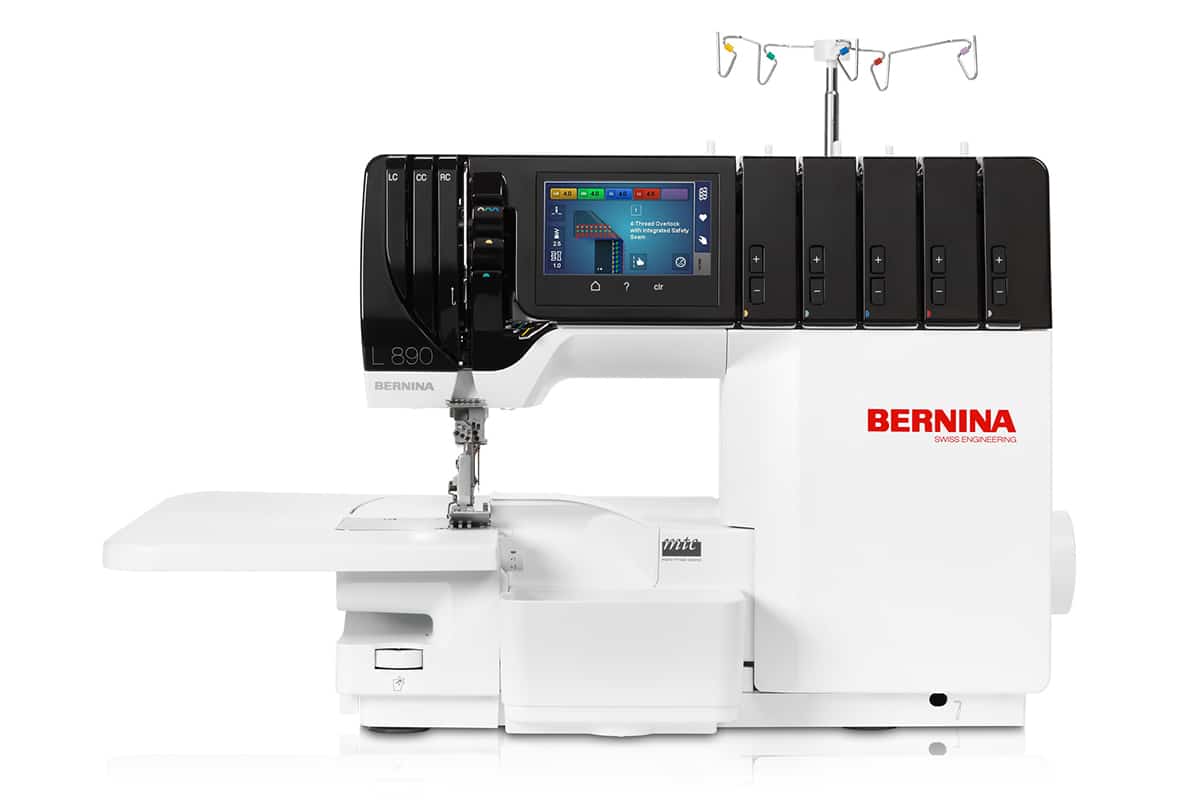
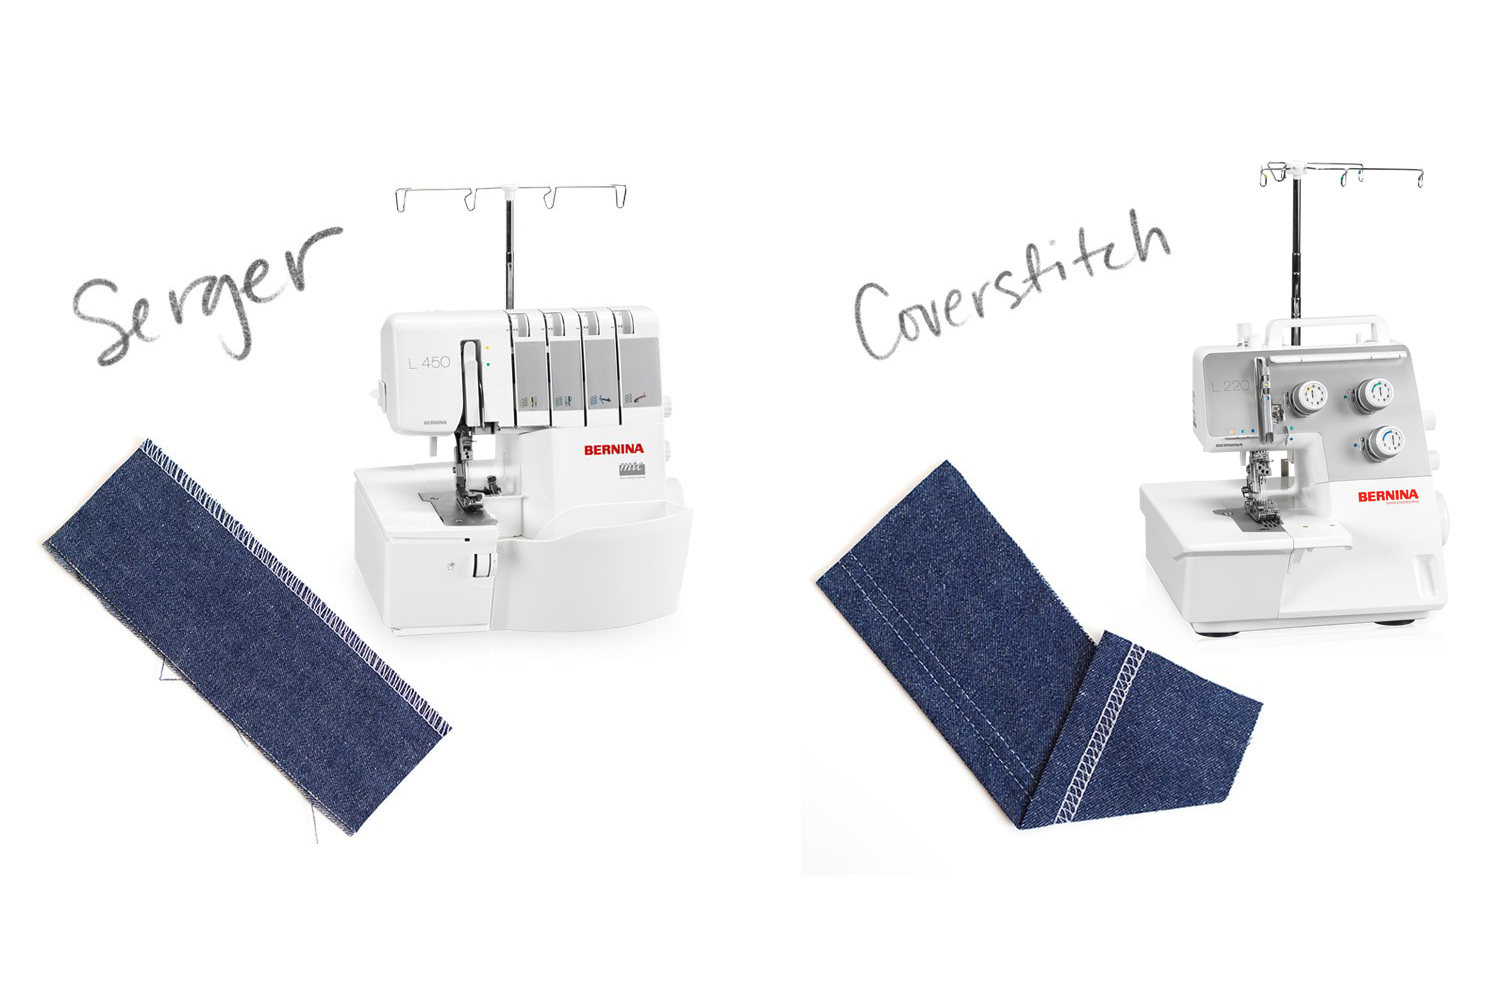
Sewing knit highly benefits from the use of an overlocker as well as a coverstitch machine. While it is possible to sew knit garments and get a fairly clean finish with just your sewing machine, the stitch formation from these specialized machines will allow for more stretch in your seams and create a more professional finish that will greatly increase the lifespan of your garment. Today, I’m going to share some of my best tips for making this garment in particular using the BERNINA L 890, a combination overlock and coverstitch machine.
Jogger Pants Pattern
There are a lot of jogger pants patterns out there. My personal favorite is the Hudson Pants from True Bias. The construction is simple, the instructions are written very clearly, and the best part is that this pattern is not only available in women’s straight sizes (0-18), but also a men’s fit and children’s size and women’s extended range (14-30) coming winter 2020/2021! The True Bias blog also has several pattern hacks for variations on the Hudson Pants including a higher rise (yes, please!) and using woven fabric instead of knit.
Now let’s talk about three key points that present challenges for folks who are new to sewing, and particularly sewing knits, on an overlocker: sewing curves that lay flat, stitching small circumference cuffs, and tidy coverstitching.
Curved Overlocker Seams
On a standard machine, you are probably used to sewing curves by simply turning the fabric as the curved edge moves under the presser foot and needle. Unfortunately, this doesn’t work so well on an overlocker. Because we have a blade trimming about 1/2″ in front of the needles, if you turn the fabric, you’ll likely end up with uneven stitches, looper threads hanging off the raw edge, looper threads pulling in too tight, or a combination of all three.
The trick is to pull your fabric so that the raw edge is positioned to move in a straight line through the machine.
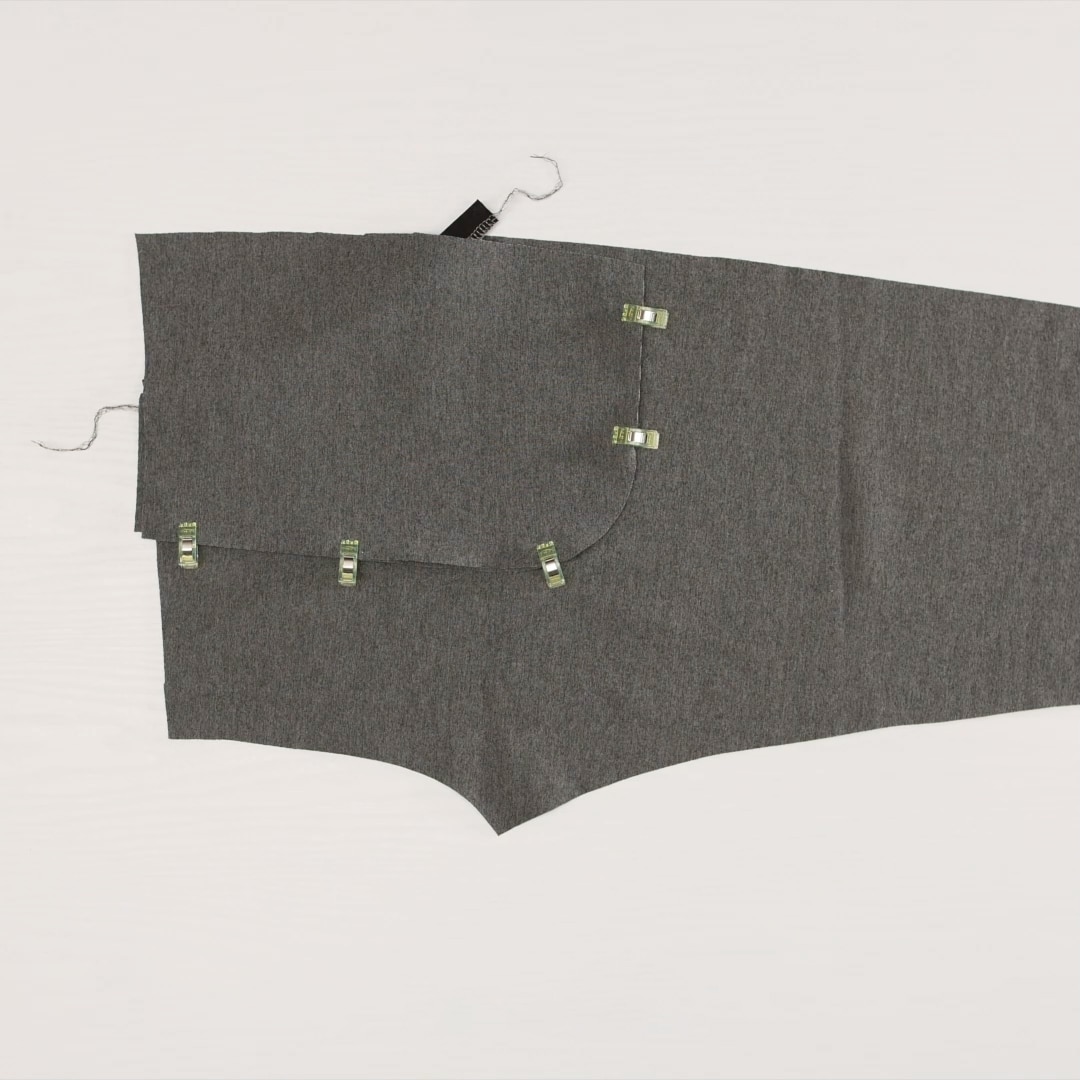
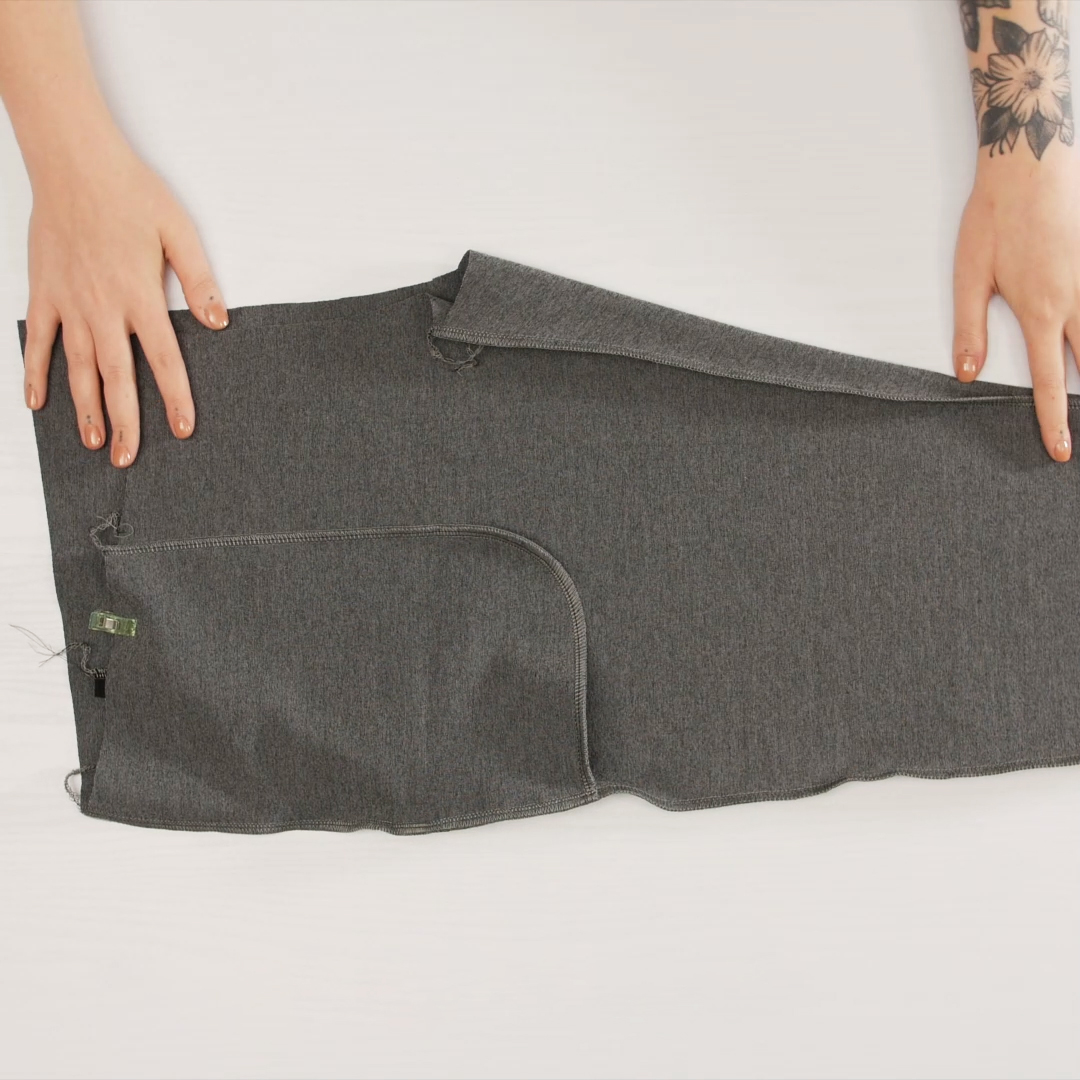
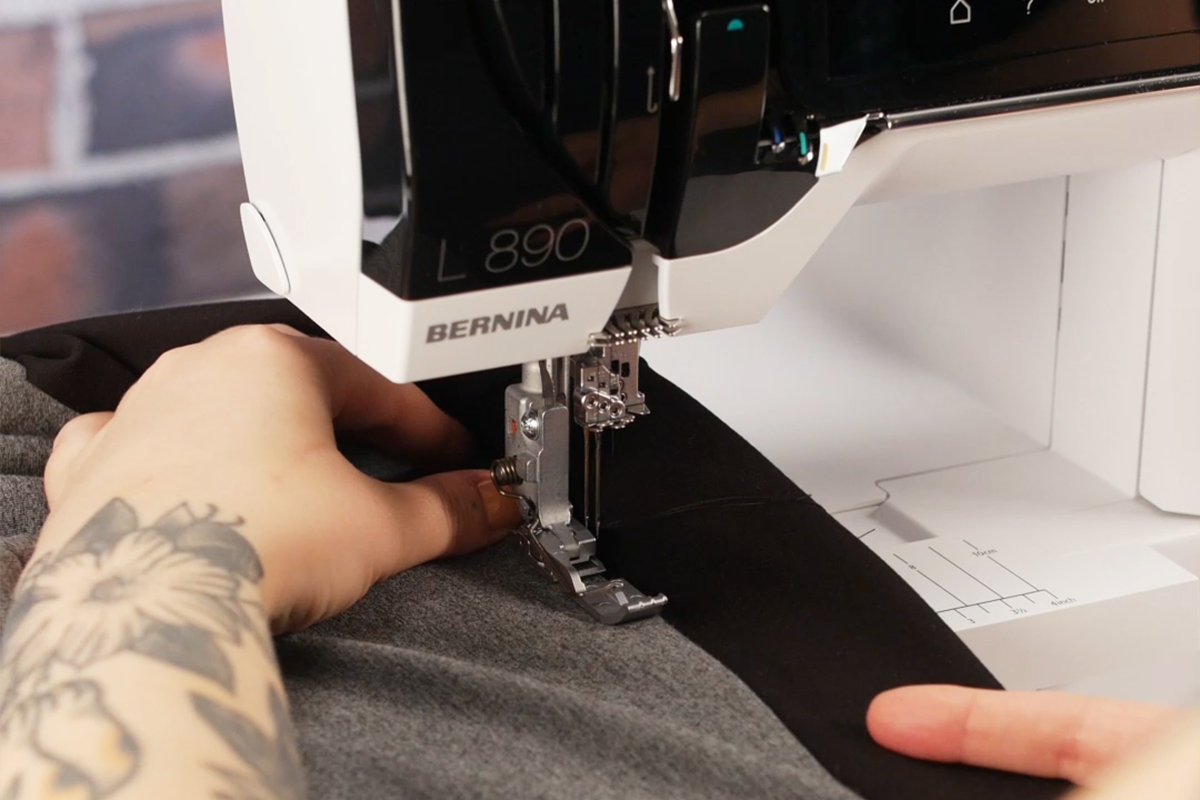
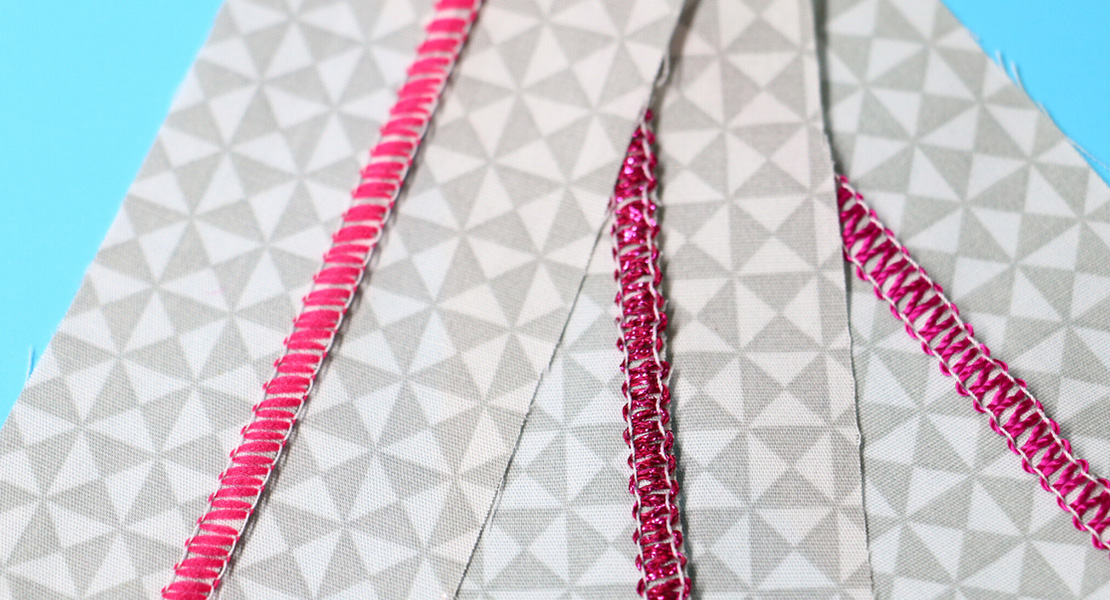
So on our jogger pants, we need to stitch the curve around the pocket bag. That’s a pretty small radius, and it looks like it could be tricky.
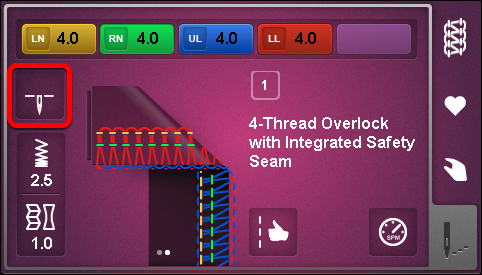
Set the machine for a 4-thread overlock stitch. This stitch will be nice and strong as your fabric stretches, especially around curves. Then install the seam guide for the appropriate seam allowance as dictated by your pattern. This little guide is such a game-changer!

Begin sewing the seam. As you approach the curve, gently stretch the fabric so that the raw edge falls in a straight line in front of the blade and needles. Do this by holding the fabric with your left hand and pulling with your right. You don’t want to pull against the needles! Use your left hand to keep the fabric moving under the foot smoothly and stress-free.
The raw edge should stay lined up with your seam guide as you stitch through the curve. Feel free to pause and readjust a couple times as you move around the curve. I suggest stopping with your needles down. On the L 460, L 850, and L 890, you can use the Back-kick function on the BERNINA Foot Control to drop your needles. But on the L 890, you can also program needle stop down just like on your sewing machine. I suggest turning this on for your curved seams!
As I work around this curve, you can really see where the fabric is stretching between my hands, not between my hand and the presser foot!

Finish stitching around the curve and the remainder of the pocket bag, chaining off the edge when you get to the end. The result is a smoothly stitched curve that lays flat! No wonky warped edges here!
Attaching Cuffs & Stitching Small Tubes
Moving small circular openings for cuffs under an overlocker presser foot can be tough. You’re often fighting two different stretch fabrics, sometimes elastic encased as well, trying to keep seams lined up, and there’s usually not much room to maneuver around. We have two new best friends for these kinds of seams: a freearm and the knife drop lever.
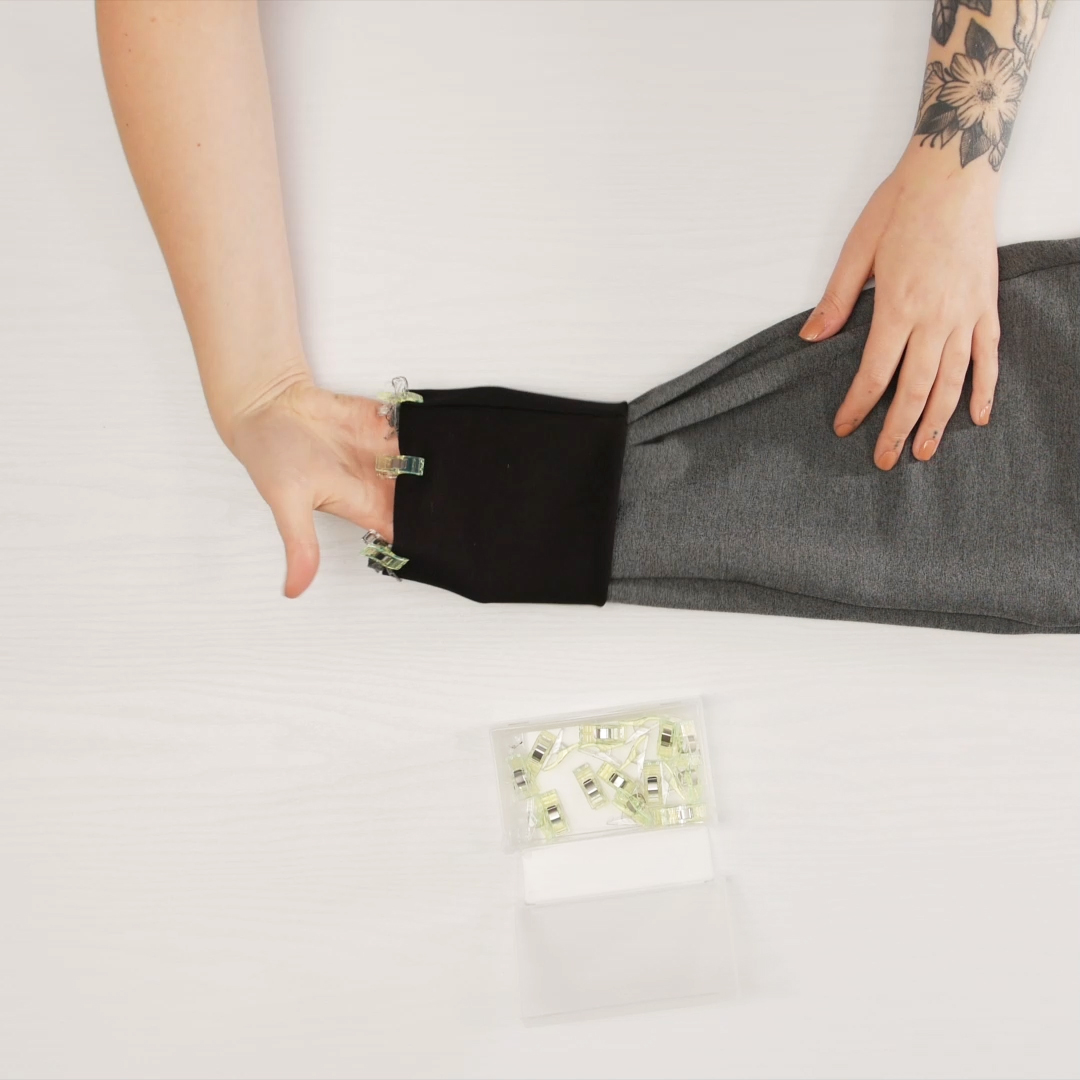
Start by preparing your pant leg cuffs by cutting them out and seaming them each into a tube. Then, fold with the wrong sides together. Bonus tip: for less bulk where the seams come together when folded, lay the seam allowances in opposite directions! You won’t notice the seam allowance “twist” inside the cuff and it’s much easier to stitch this way.
Now insert the pant leg into the cuff, with the raw edges together. Line up the cuff seam with the inside seam of the pant leg. The opening of the pant leg will be slightly larger than the cuff so make sure that it is evenly distributed to avoid pleats or puckers. Wonder Clip around the cuff.
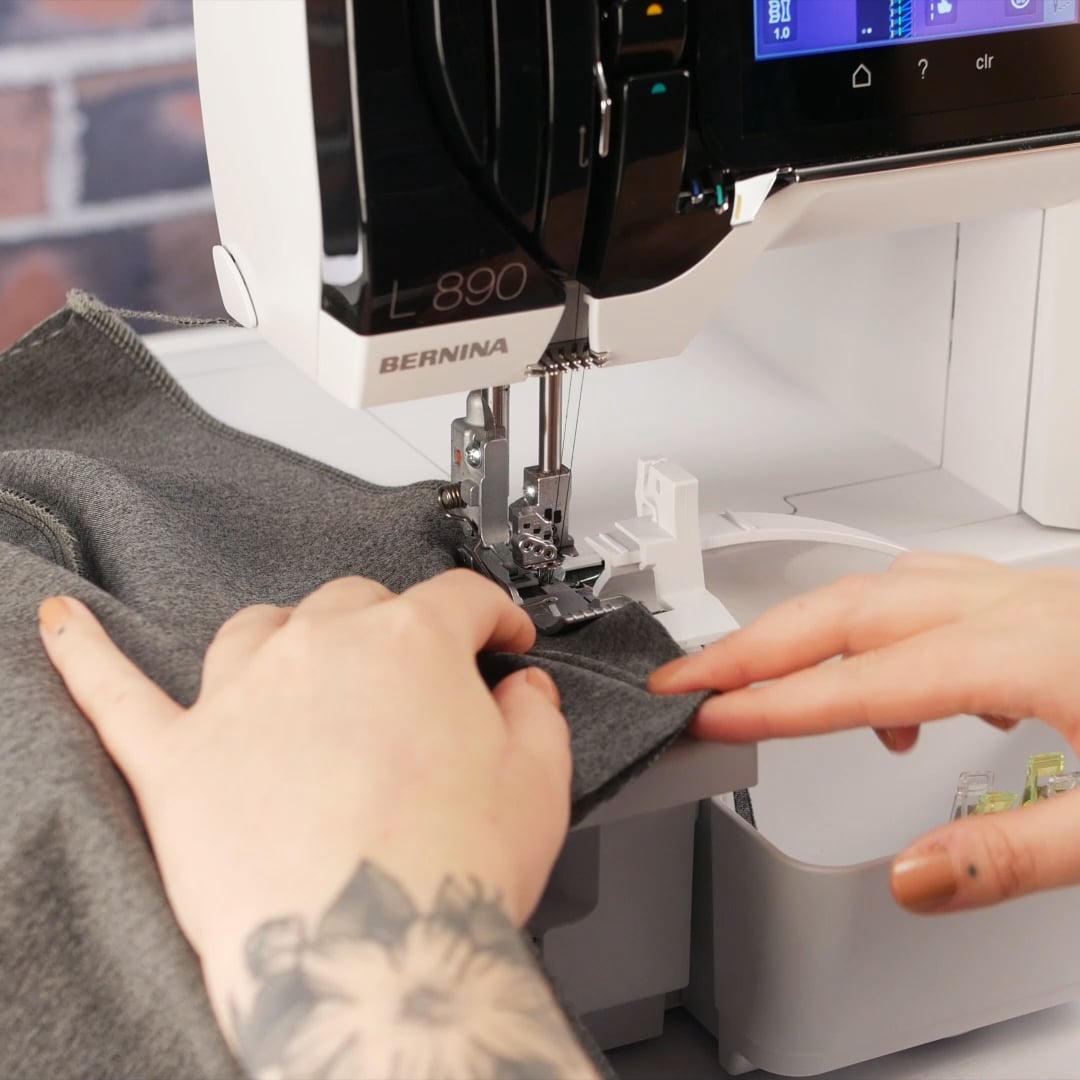
To the machine! Remove the Slide-on Table from the L 890 to expose the freearm.
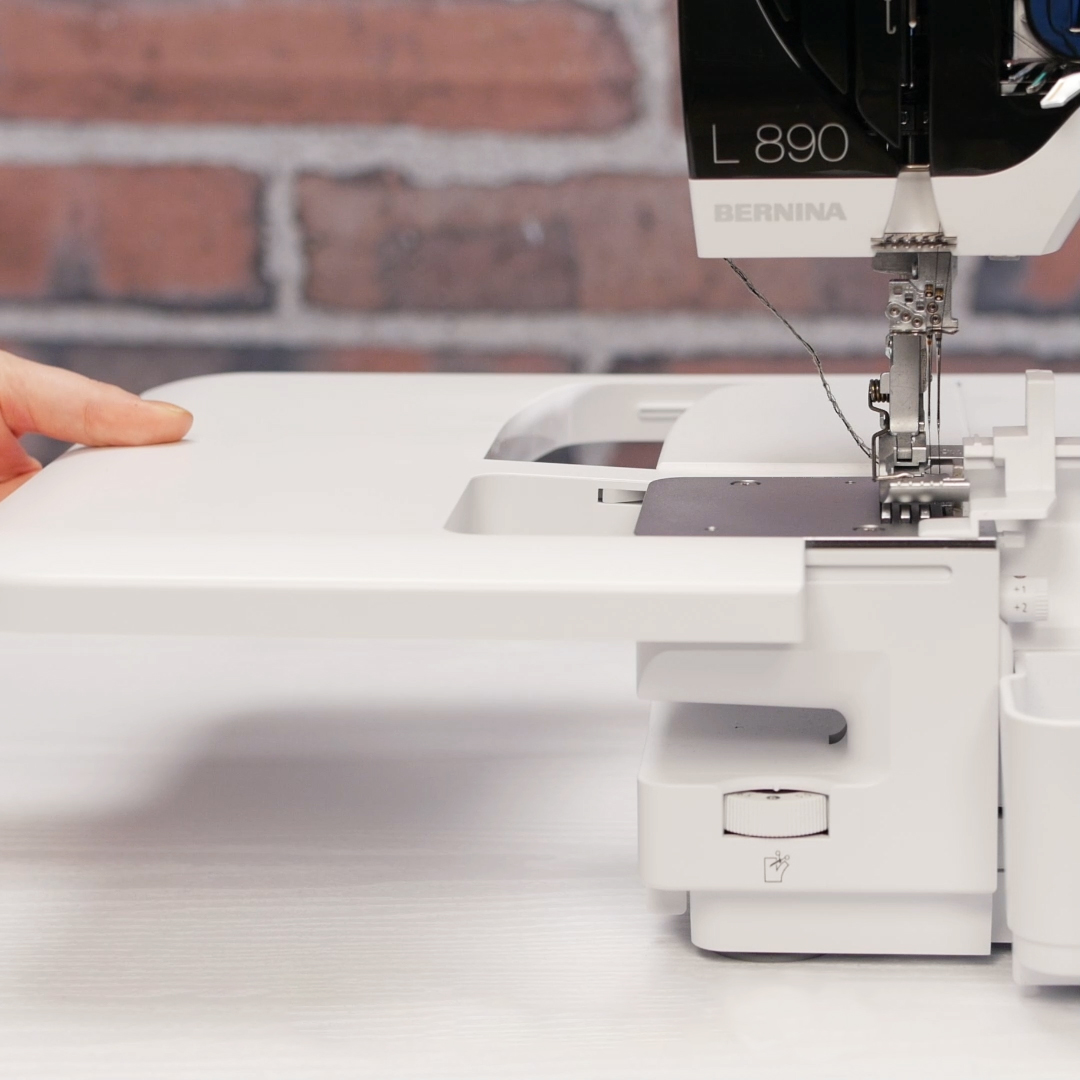
Then slide the leg opening over and around the freearm.
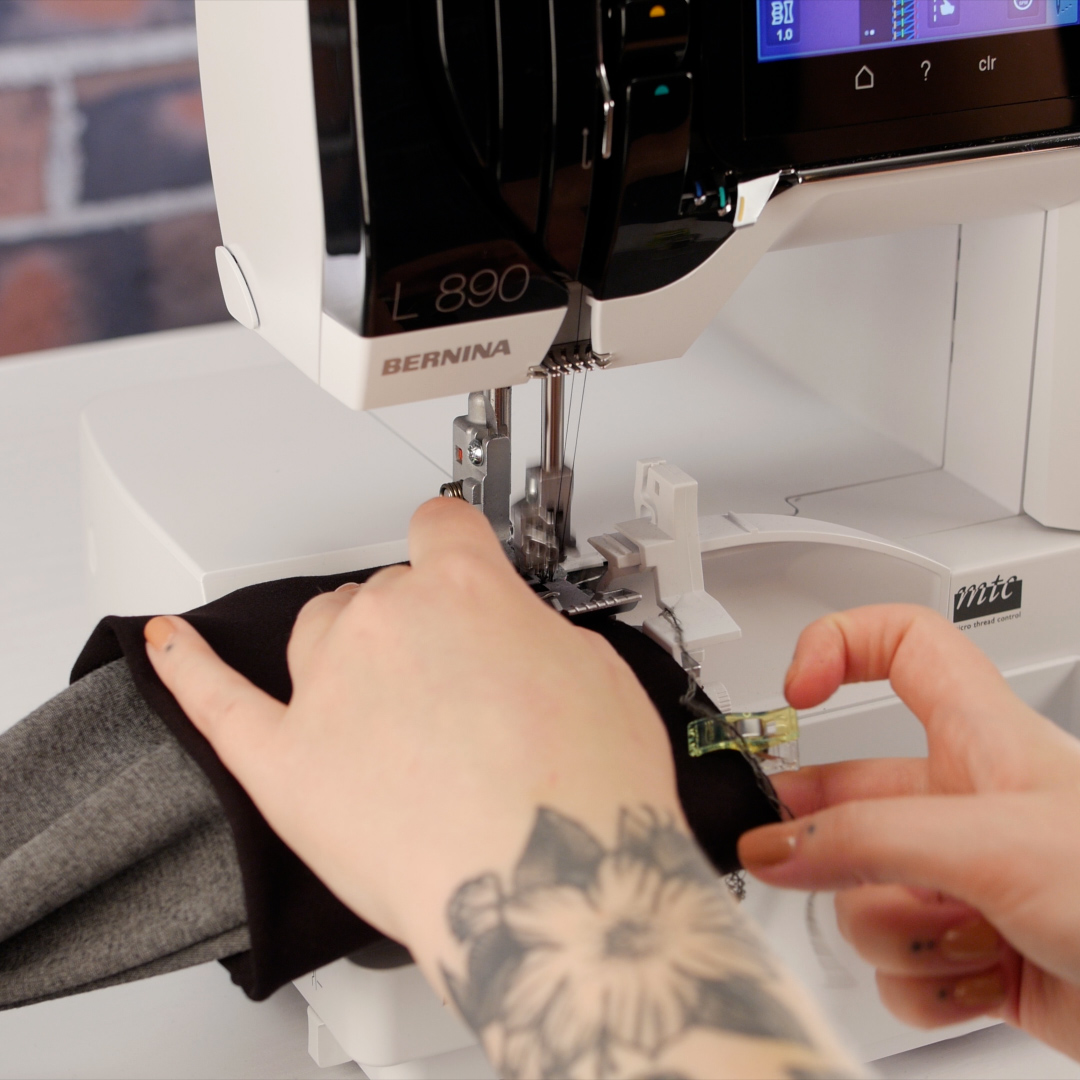
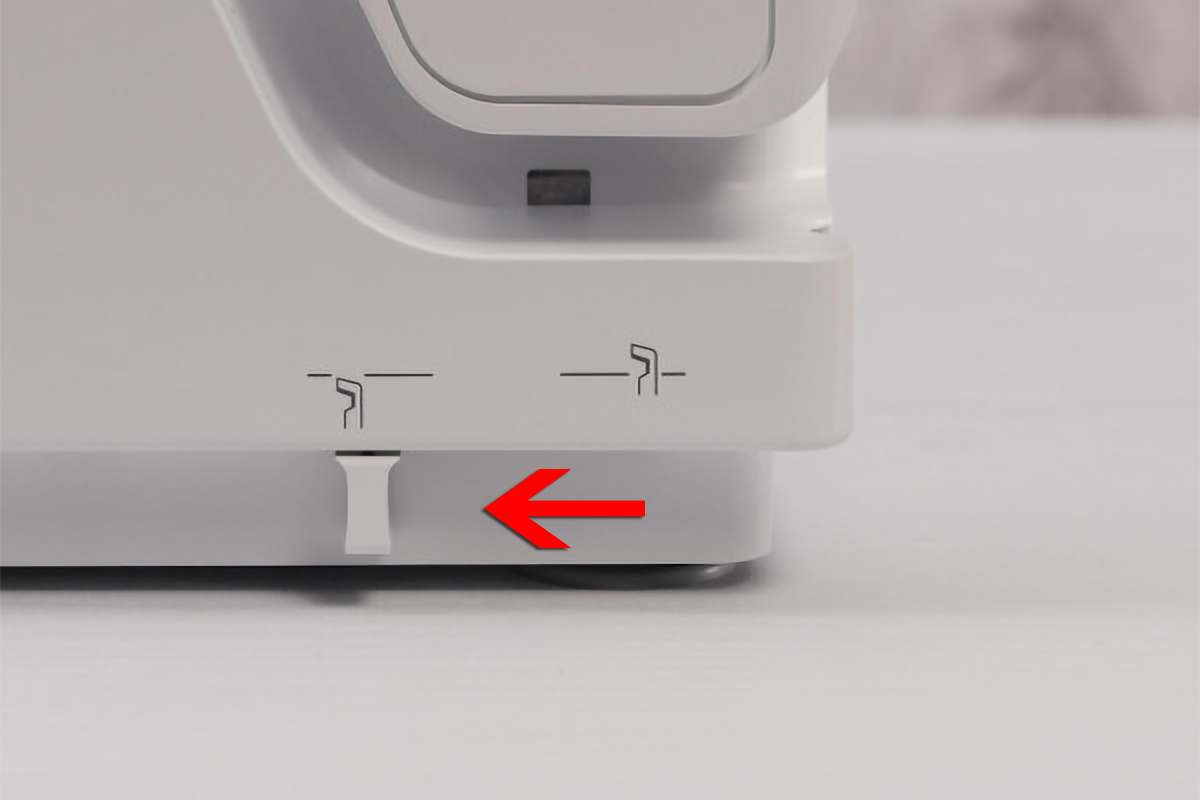
Slide the raw edge of your pant leg underneath the presser foot and begin stitching. Slowly rotate the cuff around the freearm as you stitch. Slow down as you approach your first stitches. When your first stitch passes the blade, stop with your needles down and lower the cutting knife by sliding the lever on the lower left side of the machine.
Then continue stitching to finish the round and sew over your first stitches by about 1/2″.
Tidy Coverstitching
Coverstitching is the icing on the cake when it comes to a professional-looking home-sewn garment. Taking the extra time for this finishing touch is always worth the effort and is much simpler than it seems!
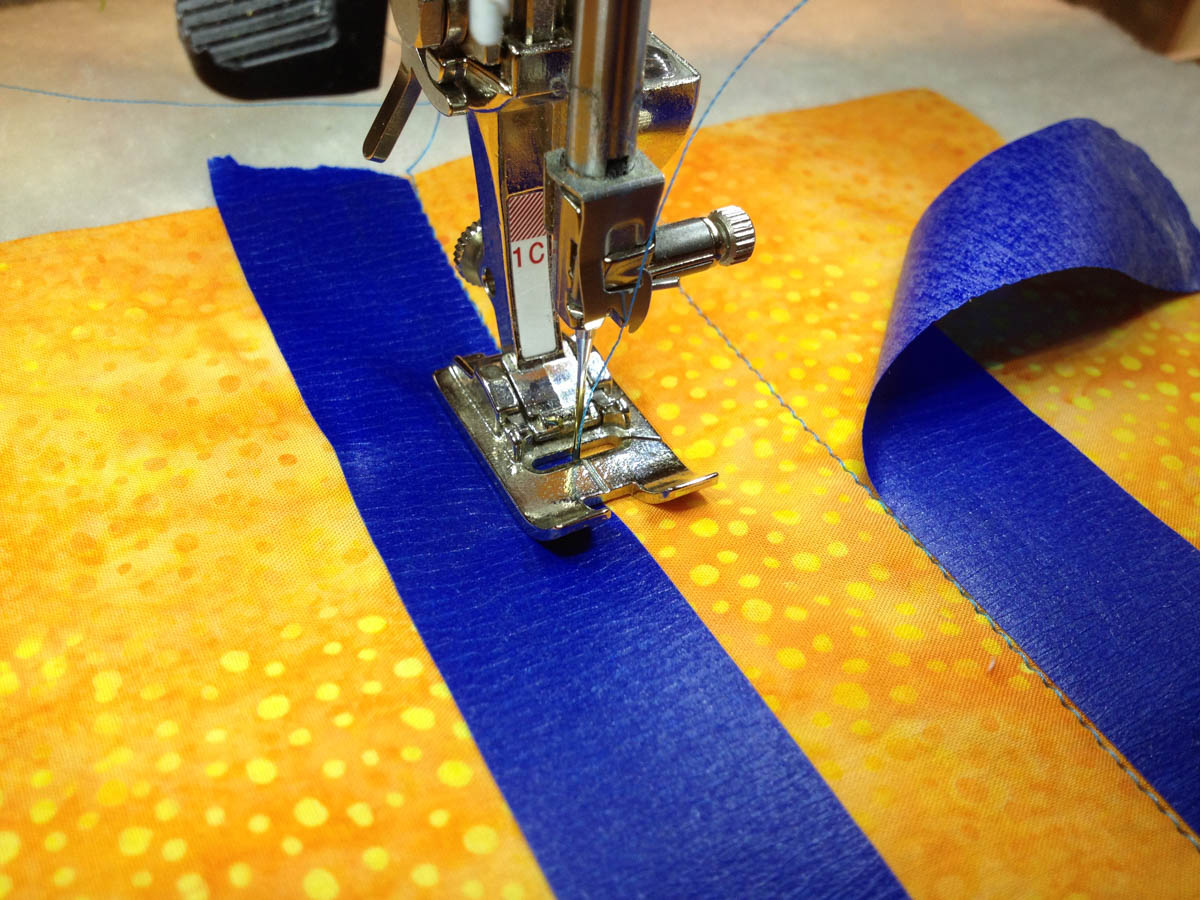
On my joggers, I am coverstitching where the waistband attaches to the pants. This is going to keep that seam nice and flat and add extra strength to the seam. Start by pressing the seam allowance in the direction you want it to lay, toward the pants and away from the waistband. Feel free to press with some steam and use a pressing cloth if working with a textured fabric or synthetic fibers.
Then set up your machine for a coverstitch. The conversion from overlock to coverstitch is super easy on the L 890! I want to make sure I catch all the steps to do so, so I will work in the Guided Mode on the machine.

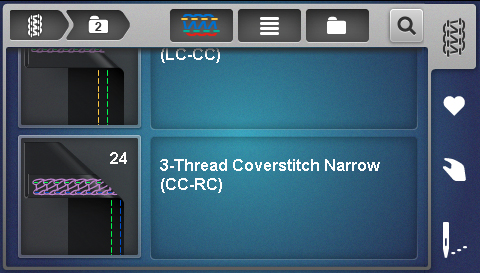
Then I will select the 3-thread narrow coverstitch using the center and right needles (abbreviated as CC for “center coverstitch” and RC for “right coverstitch”).
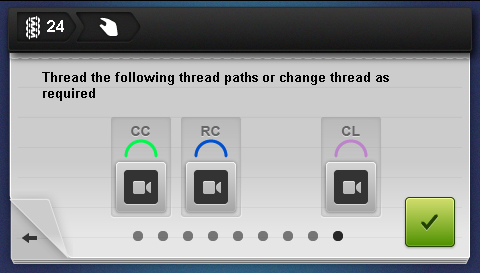
The machine will then direct me, step-by-step, on how to convert the machine! It will tell me which threading paths need to be threaded or rethreaded, what presser foot to use, which needles need to move and where they should go, how to deactivate my upper looper, and so on. Nothing gets missed with the guided walkthrough!
Now we can start coverstitching. Slide the waistband underneath the presser foot and align it so that the right needle falls just on the left side of the seam between the waistband and pants. I like to start at about the center of the backside of the pants.
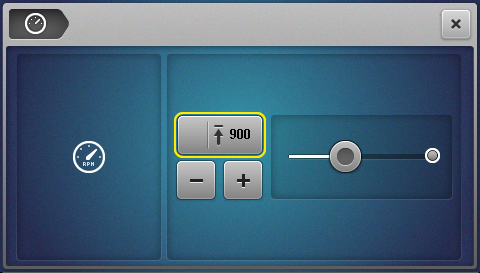
Then start stitching! Sew all the way around the waistband. Stitching through bulky seams (like the front of the pants, where the edge of the pocket meets the waist) can be tricky, but just take it slow. You can lower your machine’s max stitching speed to keep yourself from zipping through too quickly!
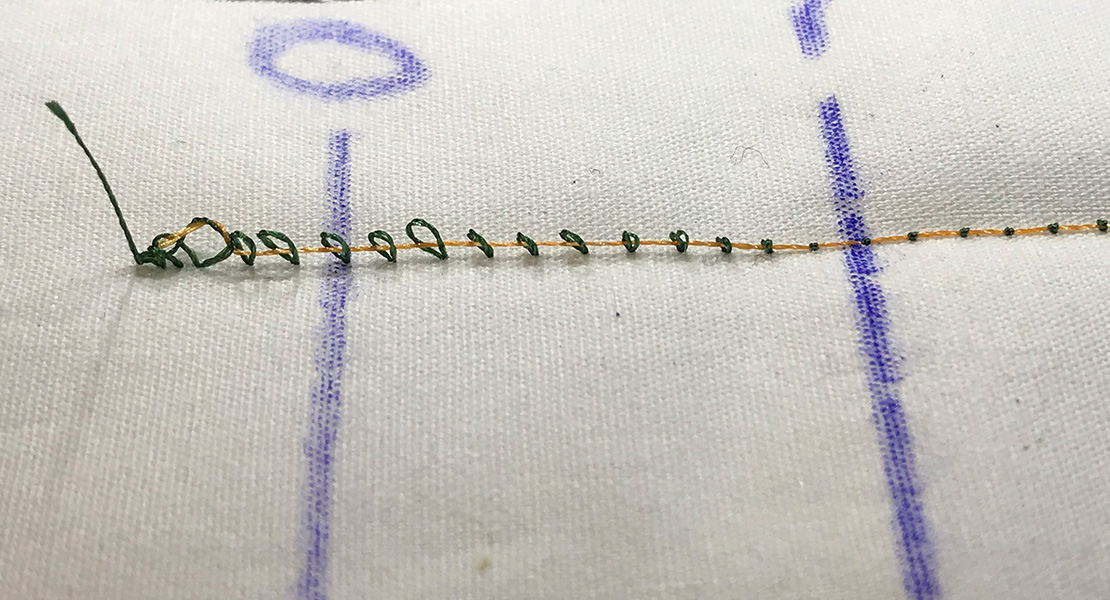
When you reach your starting point, overlap your coverstitch seams with just a couple of stitches. Now the important part: locking the stitch. Without proper locking, coverstitching can unravel very easily. But locking is easy!
When you’re ready to end and lock your seam, stop and raise the needles to the highest position. On the L 890, we set Needle Stop Up/Down needle to stop in the down position; so to raise them up, turn that off and take one more stitch, or just hit the Back-kick on your foot control.
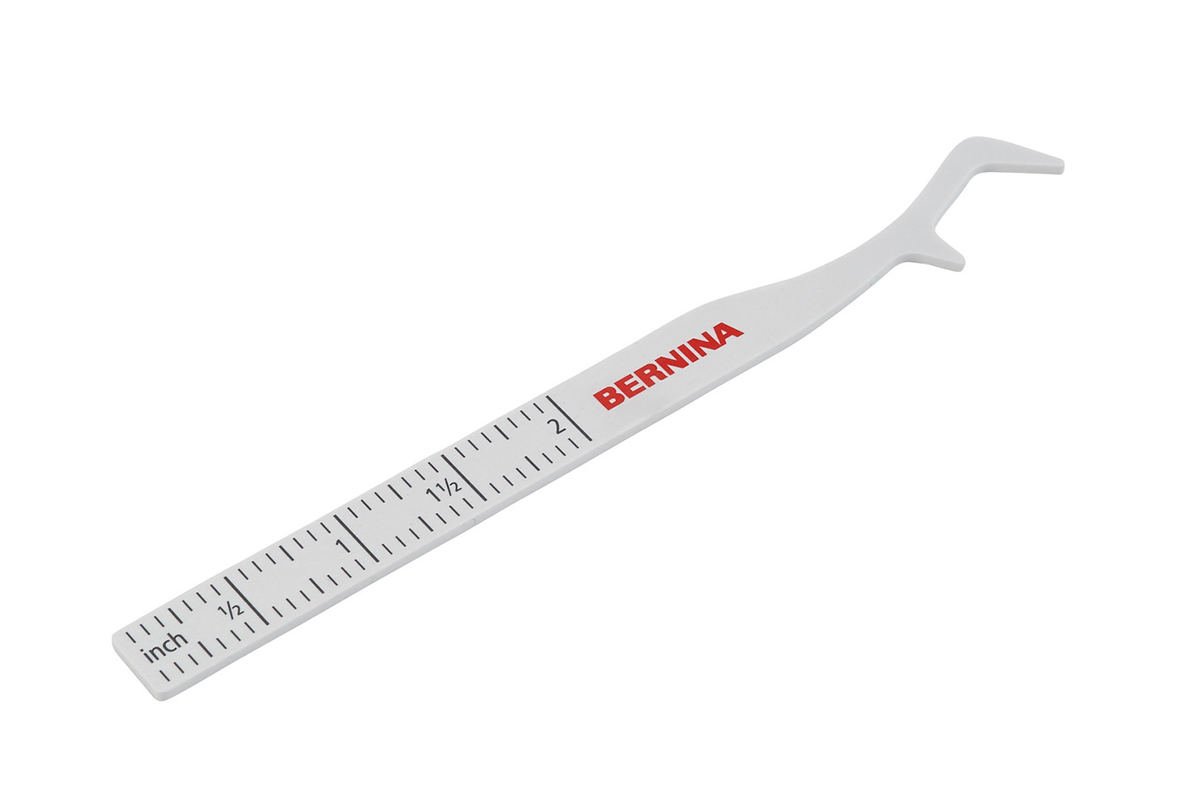
Now I will introduce you to my favorite new tool: the CS Lock tool (CS being short for coverstitch). This little guy was designed for exactly this purpose, but you could use something like a stiletto. You can find a short instructional guide on this tool here.
Raise the presser foot. Use your tool to hook behind the threads between the top side of the fabric and the bottom of the presser foot and pull the thread toward you by 6-8” inches. Then snip the two-needle threads.
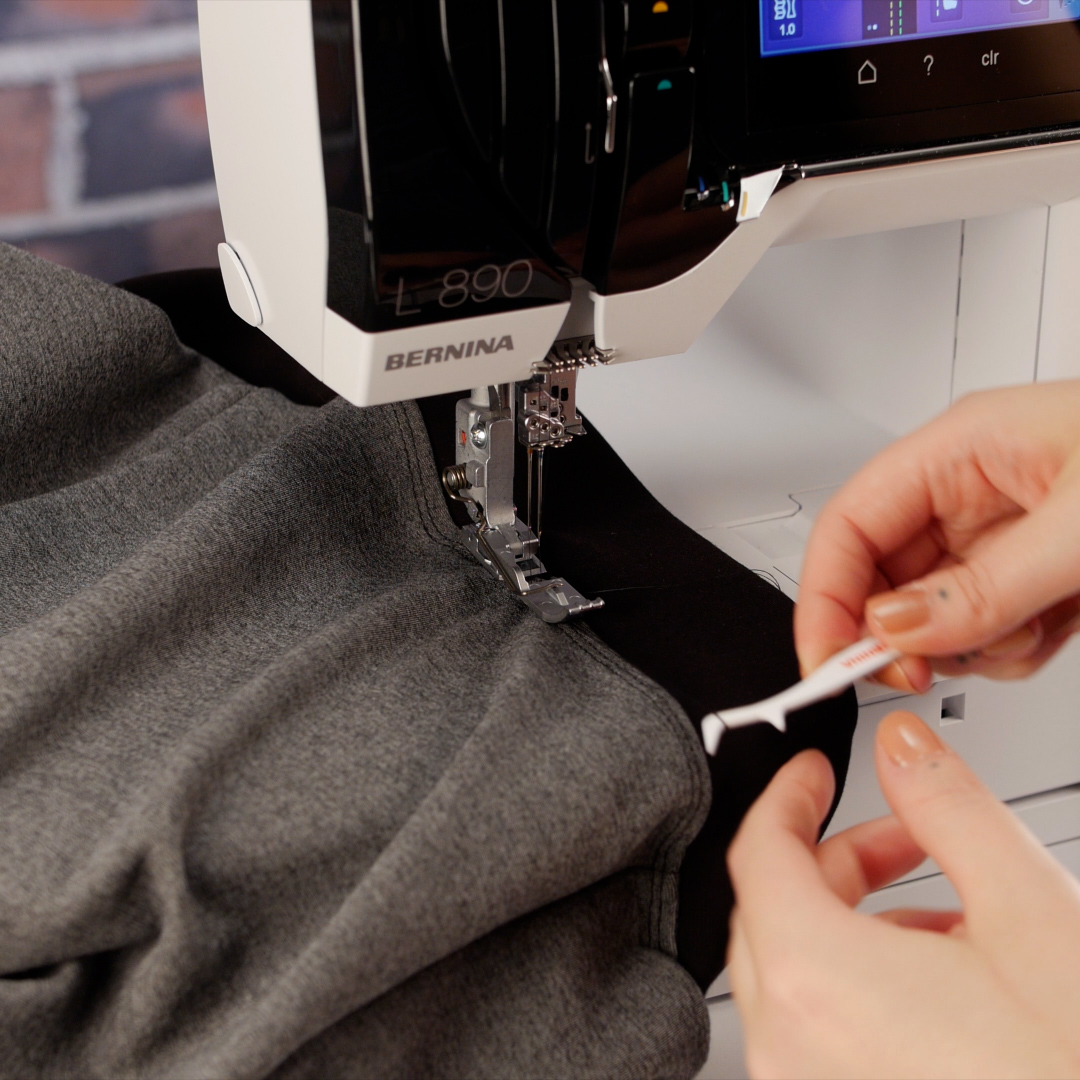
Now pull your fabric to the left and back away from the machine. As you do this, the tension on the looper thread (which is still connected to the machine) will pull the needle thread tails through the fabric to the inside of the garment. When those are pulled through, then cut your looper thread with snips or the thread cutter on the side of the machine. That’s it! Your stitch will be secure. You can knot the thread tails if you want (I usually give them a dab of Fray Check) just to be safe, but it isn’t completely necessary. Just trim and go!
Used Products

What you might also like


4 comments on “Serger Tips for Jogger Pants”
-
-
Great tips!
-
Love these tips on the Overlocker!
-
Super tutorial – Thank you!
Leave a Reply
You must be logged in to post a comment.

This is excellent. I now have confidence to try making them.