How to Sew a Dart
I remember as a beginning sewist my fear when I first saw a garment pattern with darts. I had heard they were hard to sew properly. That they left dimples in the garment at the point of a dart.
I’m happy to report that this is not the case and that my mind was happily changed as soon as I began sewing with a good machine (my first BERNINA, a model 1090 in 1993). Sewing a clean and precise dart is simply a matter of a few key steps with a precise machine.

A Word About Darts
Darts are the ultimate shaping tool. From the general to the particular, draping would be the broadest shaping technique. Then seams, especially curved seams like princess seams, can further detail the lines of a garment and make it espouse a shape. For more precise and localized shaping, darts are the designated device. They are often found around the bust area for that reason. They can be as short or long, wide or narrow, or straight-lined or curved as needed.
I generally sew without pins if possible. Darts, however, call for pinning.
Note: This tutorial is based on a horizontal bust dart and is using permanent markings and contrasting thread for illustration purposes. In real life, I use chalk markings and a fine thread closely matched in color to the fashion fabric to avoid show-through.
So, How to Sew a Dart?
Here are the key steps to follow. None are complicated or difficult. However, none should be skipped over either.
-
Mark the Dart
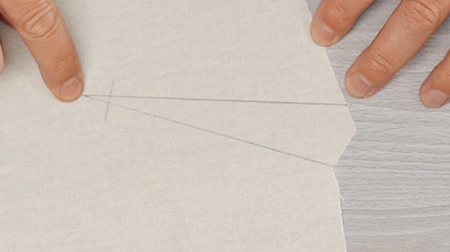
- The pattern will have the lines printed to mark the placement and dimensions of the dart. Mark the fabric accordingly.
- Cross-mark a perpendicular line about 3/8 inch before reaching the point of the dart.
Note: this line may not be printed on the pattern. It will make your dart easier to sew, with a better result. More on that in a bit.
-
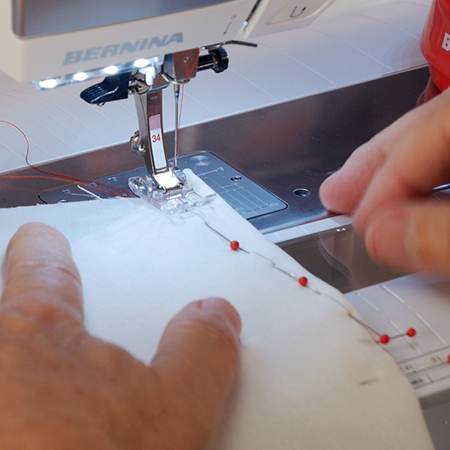
Fold the Dart (Right Sides Together) Pinning the Lines Together
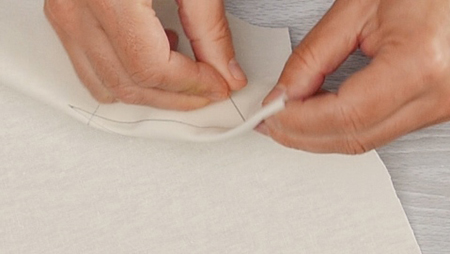
- This is the crucial part: the lines must be matched exactly for the dart to deliver the right shaping and maintain the overall dimensions of the pattern piece.
TIP: Insert the pins along the line, with the point toward the edge of the piece (away from the dart point). This way they can be removed while sewing the dart.
-
Pin the Point (End) of the Dart
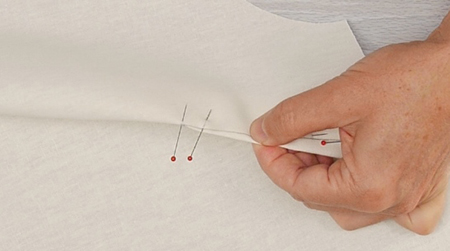
- Insert a pin through the fold at the very tip of the dart.
- Insert a second pin through the fold along the cross-mark. This will be your mark for tapering the dart/stitching before you reach the point.
-
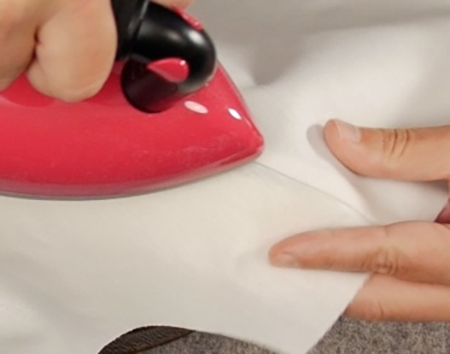
Finger-press or Press the Dart Flat
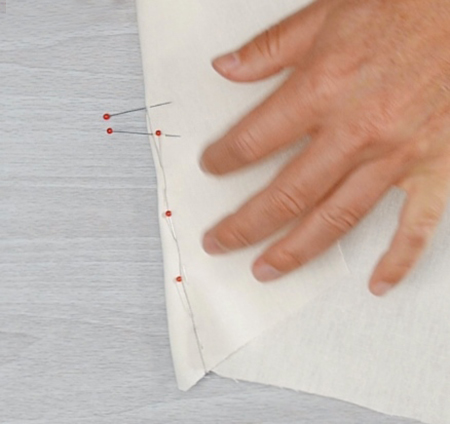
- TIP: Use a dry iron and position it on the fold. You can issue a small puff of steam without moving the iron to flatten the fold and set it.
-
Stitch the Dart, Beginning at the Edge of the Fabric Piece
- Set a straight stitch with stitch length = 2.0 mm.
Tips:- Secure stitching at the beginning of the dart. Start about 1/2 inch into the seam line and reverse to the starting edge.
- Sew forward until you reach the first perpendicular pin (the tapering cross-mark).
-
Taper the Dart Seam Before Reaching the Point (aka The Secret Sauce)
- Tip: If the dart is sewn as a straight line all the way to the point, it can create a stress point where the fabric is suddenly released from a (pinch) seam. This can lead to the dreaded ‘dart dimple’ at the point. To prevent the formation of a dimple, we will taper the seam toward the point, gradually decreasing the amount of ‘pinched’ fabric as we approach the point.
- Upon reaching the ‘tapering’ marking pin, now is where the magic happens:
- Shorten the straight stitch to 1.0 mm. This will ensure proper shaping at the tip of the dart.
- Angle your seam so that you will reach the fold halfway before reaching the dart point. Note: DO NOT sew off the fabric, past the fold!
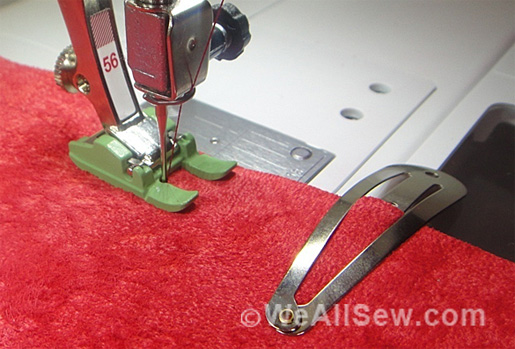
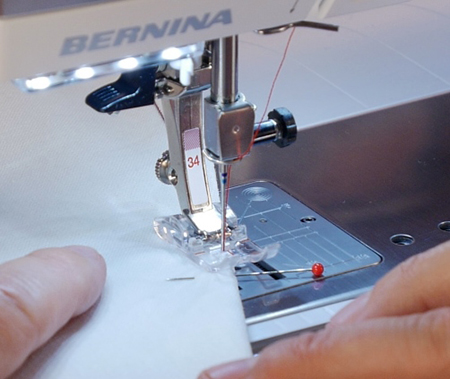
- Finish Stitch Along the Fold (and as close to the fold as possible) until you reach the point of the dart.

Notice how close to the fold the needle is in the fabric. The red marking on the sole of the foot makes it easier to stay right close to the edge of the fold without sewing off the fabric.
Tip: If your machine has an automatic thread cutter, don’t use it here! You need to keep long thread tails for the next step.
-
Remove the Piece from the Machine While Keeping Long Thread Tails (4+ Inches)
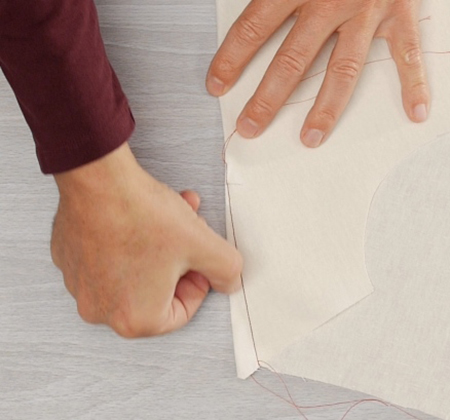
- Pinch the fabric firmly between your fingers to avoid puckering when you pull off the piece from the machine. Tip: Use your Free Hand System to raise the foot. It will release the thread tension and your hands won’t leave the piece as you pinch the dart point right after stitching it.
- Notice the taper near the tip of the dart.
-
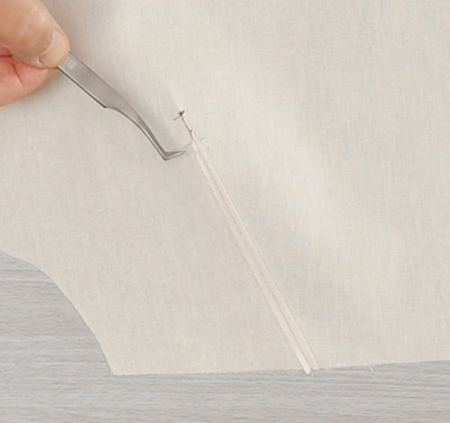
Tie the Threads Together at the Tip of the Dart
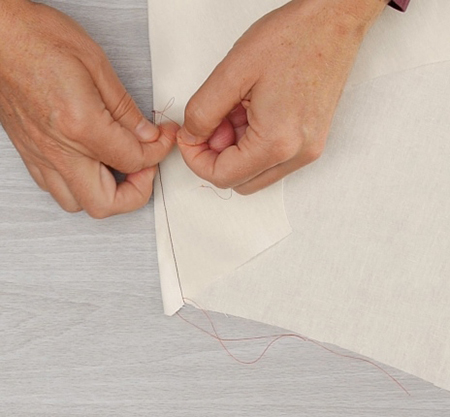
- Double knot the threads together at the point of the dart.
- Tip: Do not tug hard on the threads as this would pucker up your dart tip. For the first knot, gently tug on the threads until the knot just touches the fold of the fabric. Then tie a second knot in the opposite direction and clip the thread tails short (~ 1/8 inch).
-
Press the Dart from the Right Side to Shape the Piece
- Use a dry iron and a pressing ham
Tip: Pressing a 3D shaping seam on the flat is trickier, especially at the point of the dart. The pressing ham will help. - With the dart seam allowances felled toward the bottom of the piece, press from top-to-bottom with light pressure. The goal here is to coax the dart seam to flatten while not flattening the piece as a whole.
- I like to use a light, swirly motion to gradually ease the fabric around the seam.
- Using a pressing ham or similar rounded surface allows you to shape the dart in its intended form.
- Small puffs of steam (while the iron is stationary) will help soften the fabric just enough to facilitate shaping.
-
Optional: Trimming the Seam Allowances Along the Dart Seam
- On very lightweight or sheer fabrics, the felled seam allowances may show through since on that side of the seam there are 3 layers of fabric and only one layer above the seam line.
- You can trim off the seam allowances to avoid the differing sides of the dart:
- Leave only about 1/8 inch of fabric on each side of the seam.
- Start the trimming at the starting edge of the dart.
- End the trimming where the tapering of the seam began (at the cross-mark).
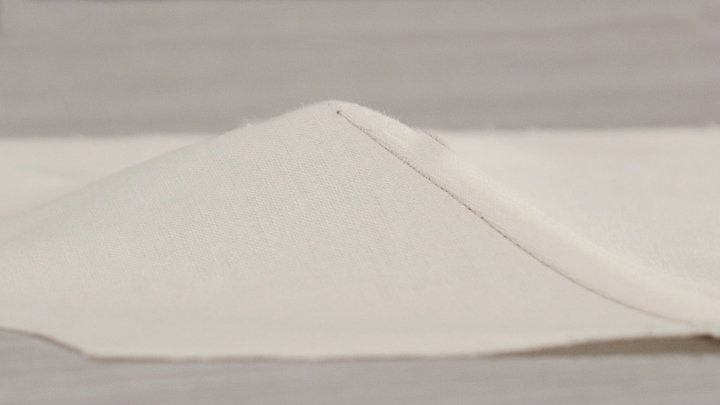
The Final Result: A Shapely Dart
In the end, your dart should cause the fabric to dome up naturally, without any support and without any dimple!