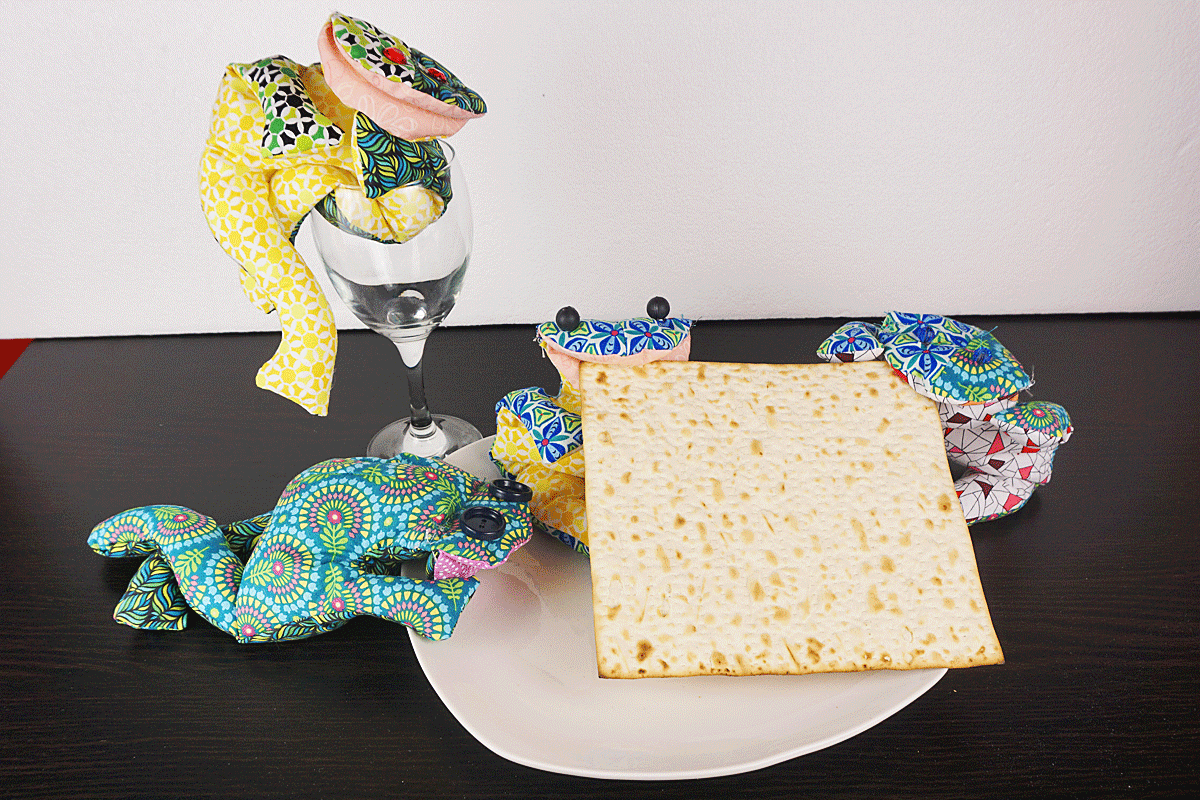
How to Sew a Bean Bag Frog
Frogs are part of the Passover story and have always added a bit of whimsey to our seder table. In the past, I have always had little plastic frogs around the table and the younger kids (and even some of the adults) love to play with them. This year I decided to make bean bag frogs for even more Passover fun. But hey, frogs are always fun, so even if you don’t make them for Passover, try this easy project and add some frogs to your life!
Materials to Sew Bean Bag Frogs
Fabrics to Sew Bean Bag Frogs
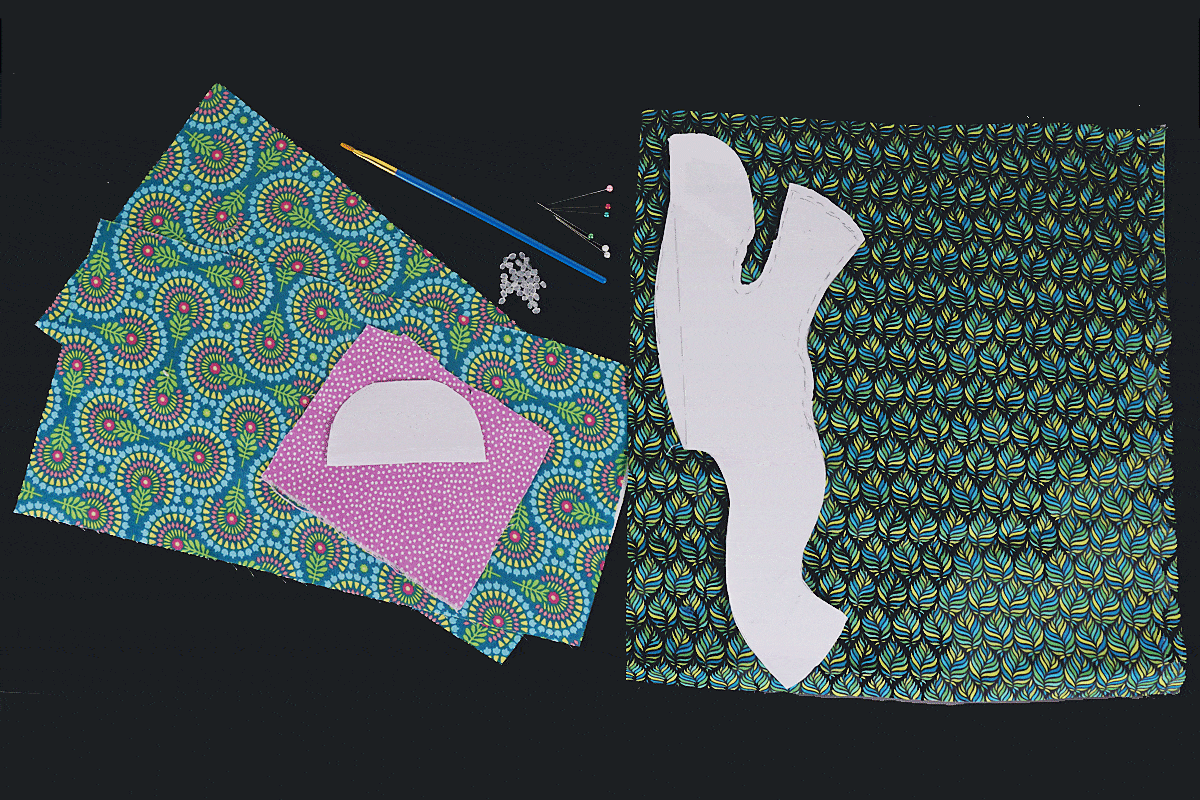
- For the back of the frog one or two fabrics each about 9 x 12;
- For the frog’s belly a piece of fabric about 12 x 18;
- Scraps of fabric for the frog’s opened mouth (or use one of the other fabrics in your frog) about 4 x 5
(Thanks so much to Benartex for providing the gorgeous fabrics I used to make the frogs in this project!)
- Baubles, beads or buttons for the eyes (or draw them with permanent marker)
- Poly pellets (or plain uncooked rice) about two cups per frog. I prefer the pellets as they are not food and therefore will not attract insects. They also will not be subject to moisture problems as rice would be). Please keep mind this is NOT a pet toy and very young children should be supervised when playing with these frogs.
- Sewing machine with BERNINA Patchwork Foot #97/97D and the Free-hand System.
Additional Materials Needed
- A large bowl
- Measuring cup
- Funnel or paper rolled into a funnel
- Chopstick or paintbrush

Instructions to Sew a Bean Bag Frog
Using the pattern provided, cut out two pieces of the top of the frog (it will be his back). This can be one or two different fabrics.
Using the same pattern folded on the dotted line, cut one piece on the fabric fold to create the bottom or belly side.
Cut out two pieces of the mouth from your scrap fabric.

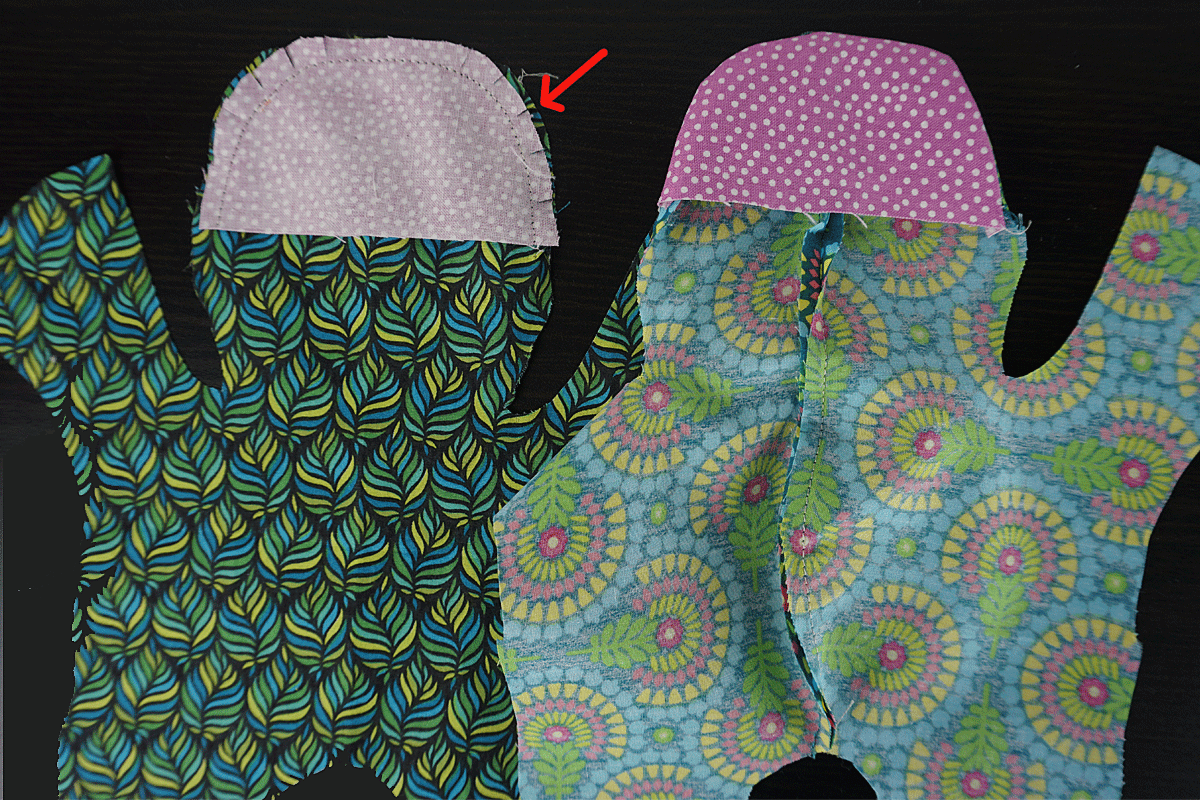
Start by sewing the two frog back pieces together only along the arch. Press and open.

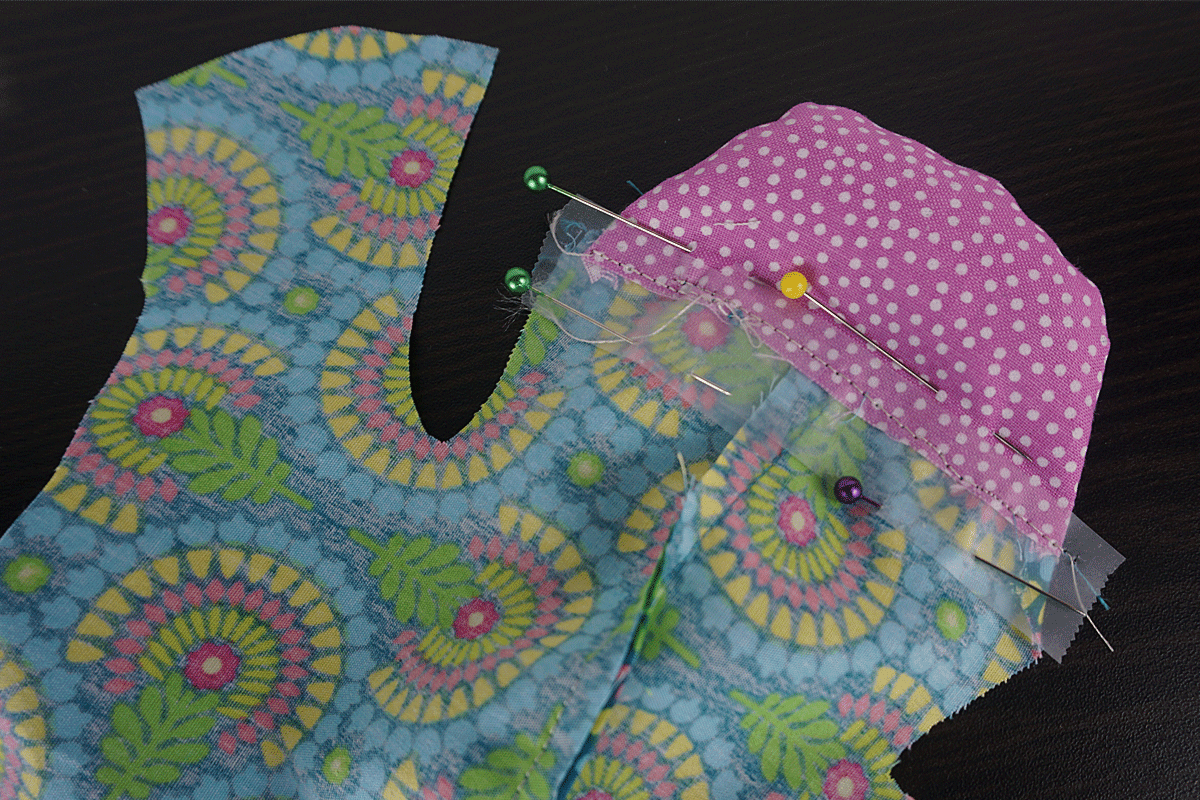
With right sides together, sew a mouth to this piece one and one to the belly piece along the upper curve using a ¼” seam allowance.
Clip the curves and turn the mouth to the right side of both pieces. Press.
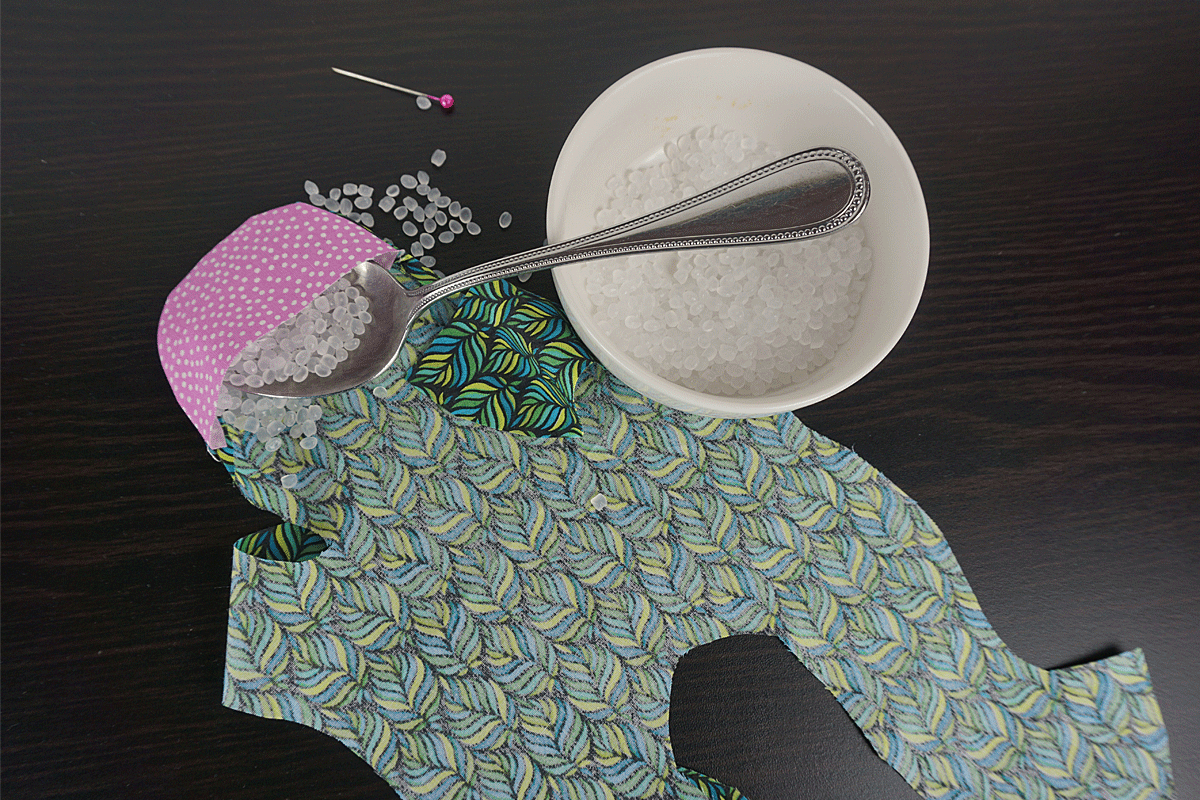
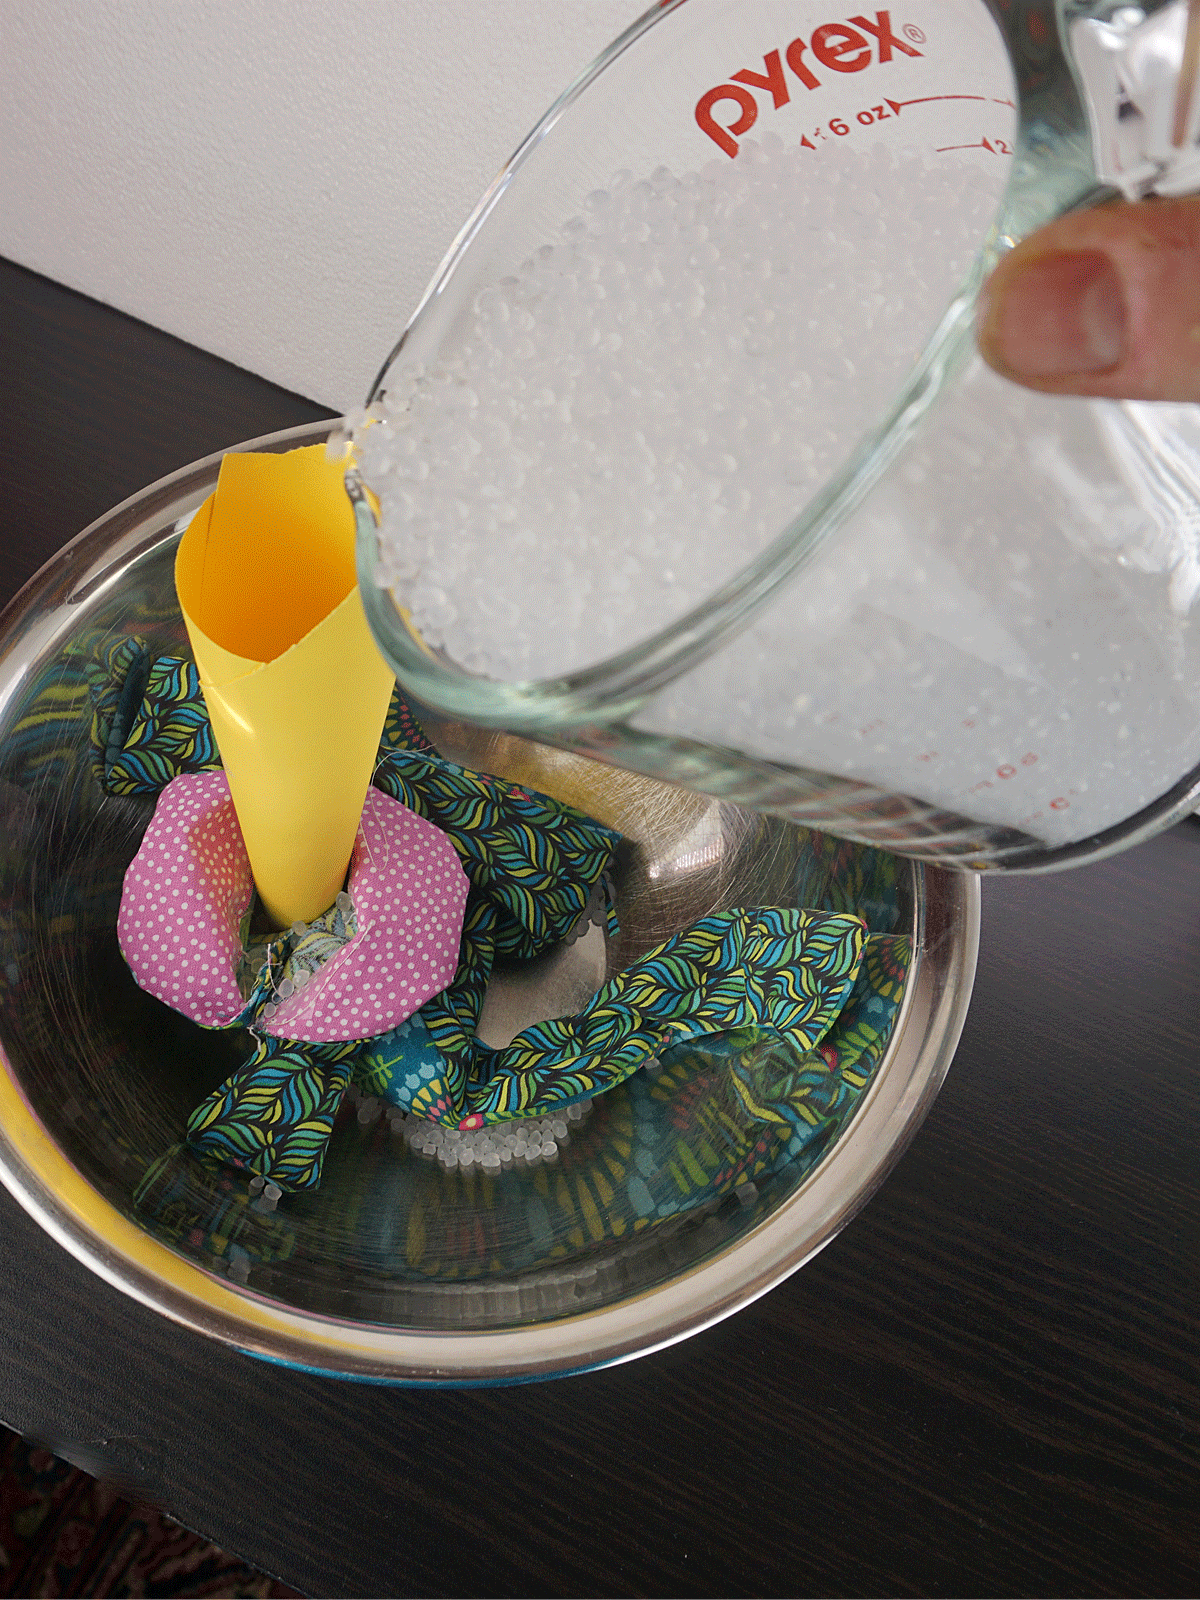
Working over a large bowl, use a spoon or measuring cut put about two tablespoons of poly pellets into each of the mouth pieces—push them to the top so they are out of the way of where you will need to sew the raw edge. I like to use a strip of scotch tape and then a row of pins on each side to hold all those little pellets in place. Slowly and carefully sew ¼” from the raw edge to encase the pellets—using your fingers or a stiletto to make sure there are no pellets in the path of the needle as you go—they will break a needle if you hit one (been there, done that!).
Once both of the mouth pieces are sewn shut, lay the two pieces of the frog right sides together and pin carefully, especially at all the curved areas. I don’t usually use a lot of pins when I sew but find the pieces here will slide around a bit while sewing so I pin generously. Starting at the edge of one side of the mouth, sew ¼” along the edges–I set my stitch length a little lower than the default to ensure none of the pellets will fall out. Sew all the way around to the other side of the mouth. Use the knee lift as needed to reposition your work.
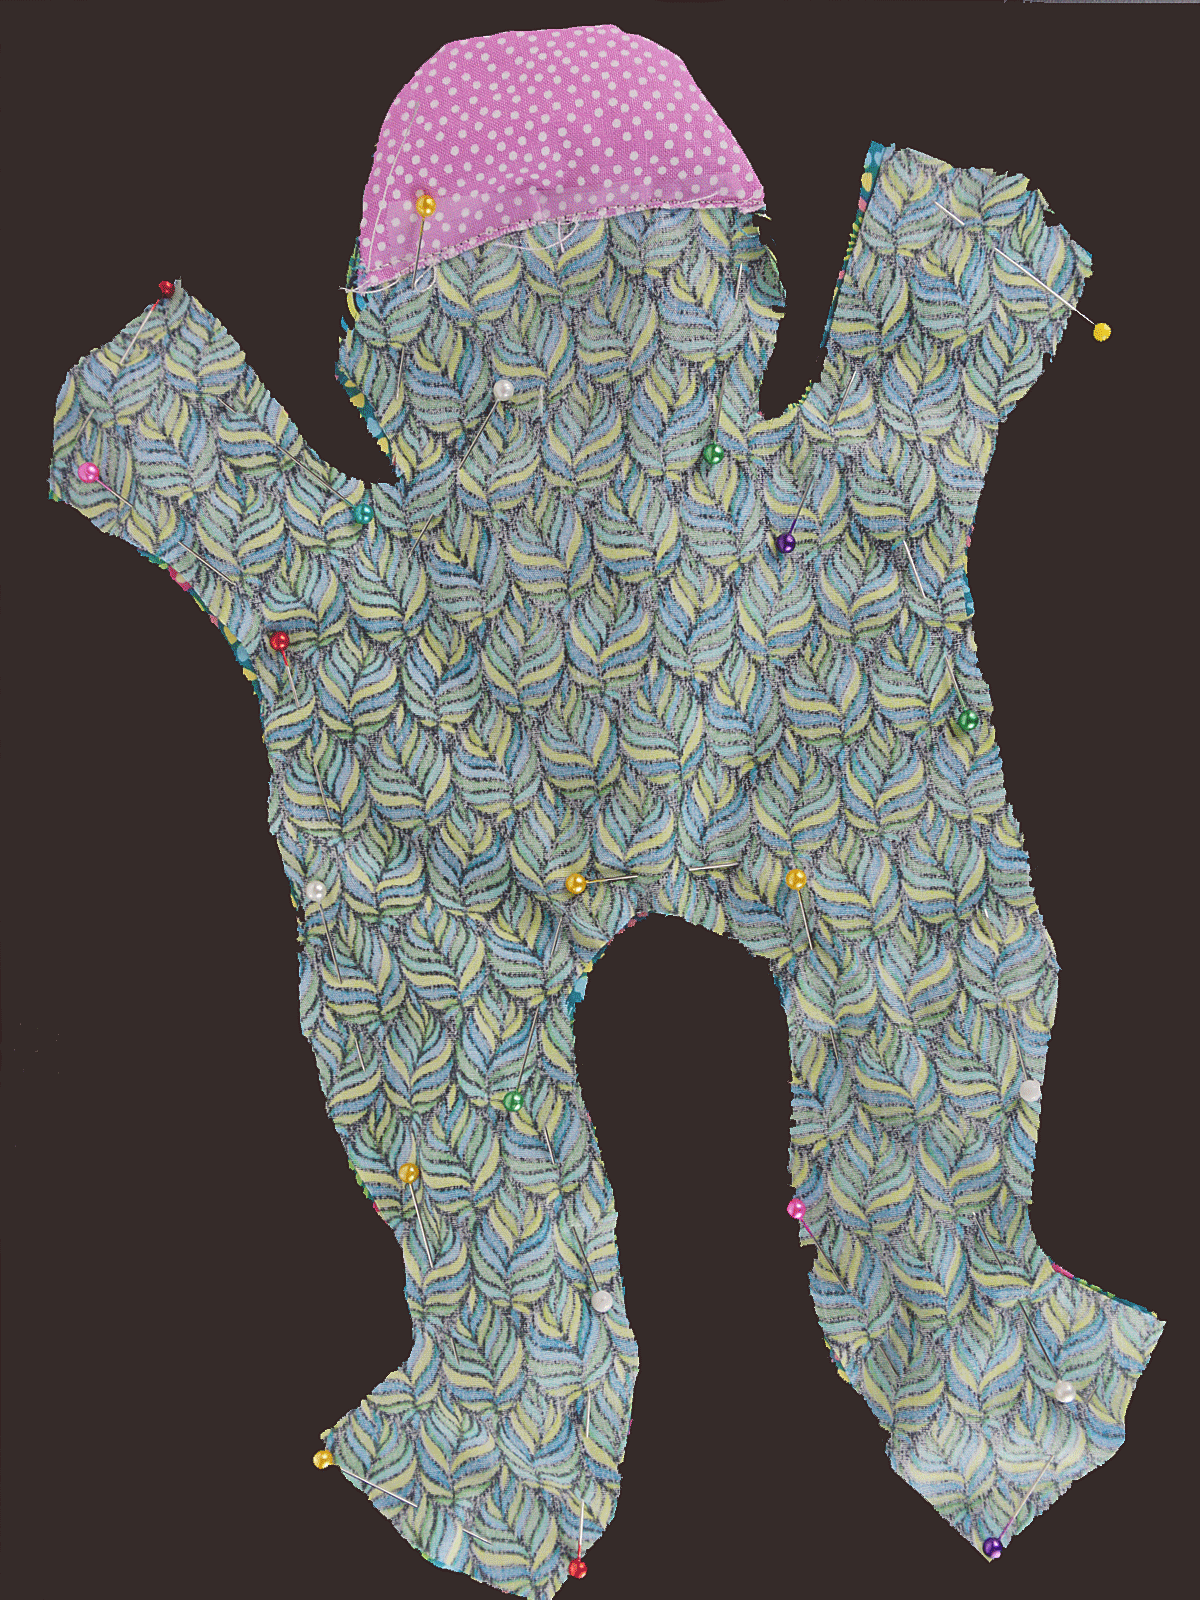
Clip all the small curves then turn right side out, using the opening at the mouth. Work carefully and use a chopstick or the back of a paintbrush to poke everything out.
Working over a large bowl and using either a funnel or a piece of heavy paper or cardstock taped into a funnel shape, fill the frog through the mouth opening. Use the funnel to direct the pellets into the lower legs, and as you add more pellets, work them down into the lower legs and arms. The more pellets you use, the stiffer the frog will be; using fewer pellets will make him floppier and more posable. The choice is yours.
Making sure the pellets are well away from the top of the frog, put some pins to hold in place and return to the sewing machine. Line up the two pieces of the mouth and using the line of stitching visible from sewing the mouth pieces, sew on that line again to close the opening—making sure you go from one side to the other with no gaps, and moving any wayward pellets out of the way as you sew. This is a little tricky so if it seems a little daunting or intimidating, simply sew the opening inside the mouth by hand with a nice tight slip stitch.
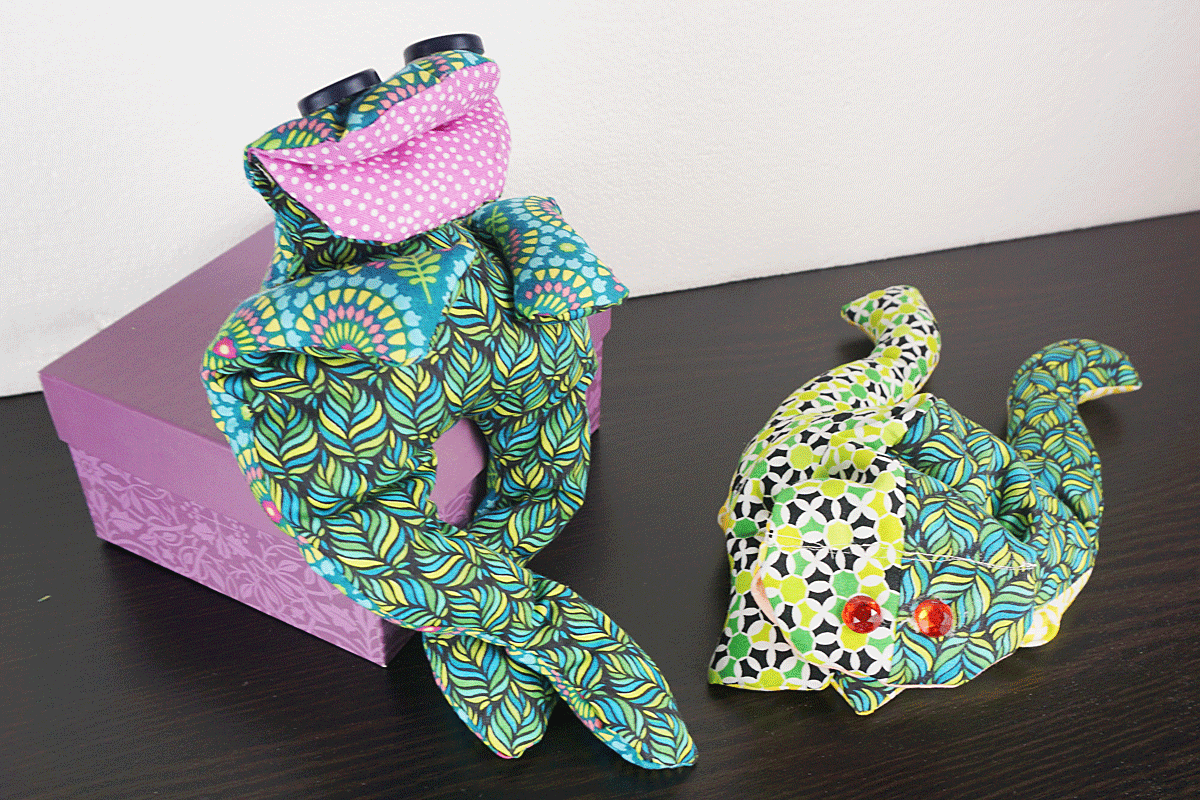
Once that is done, you can maneuver the pellets around the frog so they are placed where you want them.
Depending on your choice of eyes, you can sew, draw or glue them in place now.
What a cutie!
Used Products


What you might also like


13 comments on “How to Sew a Bean Bag Frog”
-
-
Hello! Here is the link to the pattern: https://bit.ly/3wsA3Qp Happy stitching!
-
-
Thanks! My grandkids will love these!
-
I am so glad you like it, hope they do, too! After I made the first one I showed it to my four year old grand daughter. She was very excited and told me she loved it, BUT she would love it more if it were a turtle. Hope yours like the frogs as frogs.
-
I am confused about the belly piece. When lining up the dotted line on the fold the head/mouth section and the legs do not also lie on the fold as shown in the directions. The only way I could figure out to his is to place the dotted line a little lower than the fold and then seam the mouth section together before sewing the contrasting mouth piece to it. Am I doing something wrong?
-
Nope, however it works for you is fine. The webmasters redrew the pattern and I suspect didn’t get it as lined up as the original. So sorry it has been frustrating for you.
-
Hi Leni,
I’ve printed out the pattern and am having trouble getting the pieces to line up correctly. Among the reviews I see a note of the pattern being redrawn and being off by a little. Is there any chance you, or someone else, could email me the revised/updated pattern? I’d really appreciate it: [email protected]
Thanks,
Sue P
-
-
-
Hi, thanks for your comment. It appears that the pattern was redrawn for posting on this project, and therefore the dotted line may have shifted a bit. It also could be distortion when going from the pdf to print. I wouldn’t worry about it, whatever you needed to do to make it work for you is fine. There is a lot of wiggle room in the way it goes together. Where I am confused by your description is the mouth piece, if you sew that together first, where do you stuff it? The dotted line is intended to be on the fabric fold, not a seam line. But like I said before, this isn’t anything so specific and magical that altering it to fit the way it makes sense to you will spell disaster!! use this as a starting point and make it in the way that seems most logical to you.
-
Since the mouth section on the belly piece didn’t lie on the fold, I had to seam it before attaching the contrasting mouth piece. I also just used regular stuffing for the mouth and bean bag pellets for the body and it turned out well
-
As long as you got it to work, that is what counts! With any project or instructions, I always make my own adjustments to do it the way that makes sense to me, glad you did the same. I cook the same way!
-
-
-
I have had so much fun making these frogs! I am mailing 4 to my nieces today in time for Passover. I am making them for 5 kids in my family so I’m up to more than 10 frogs. I took the pdf pattern and printed it at 70% so that the resulting frog was small enough to fit in smaller hands. I would post a picture but i don’t know how. I’ve never used poly pellets before and they are great!
-
Hello! we would love to see your creations! You can share your projects on the WeAllSew Community section here: https://weallsew.com/community/create/
-
-
Yes, all of you who made these frogs, PLEASE share some pictures–I would love to see what you all did!!!!
Leave a Reply
You must be logged in to post a comment.

Where would the pattern be? It reminds me of beanbag frogs I made for my kids , a long time ago. Grandkids would love them.
TIA. :-))