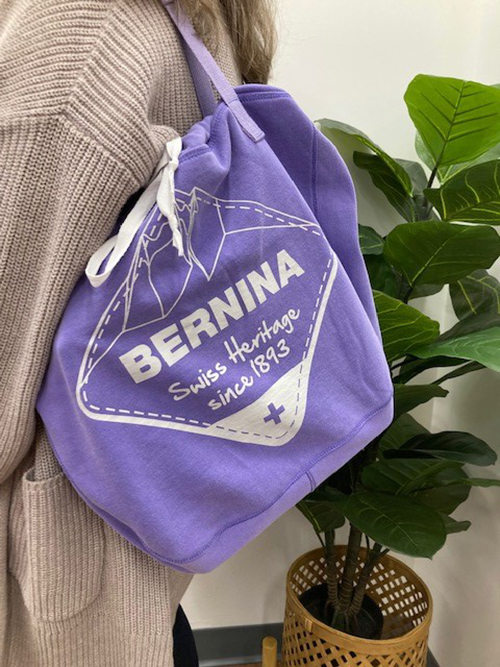
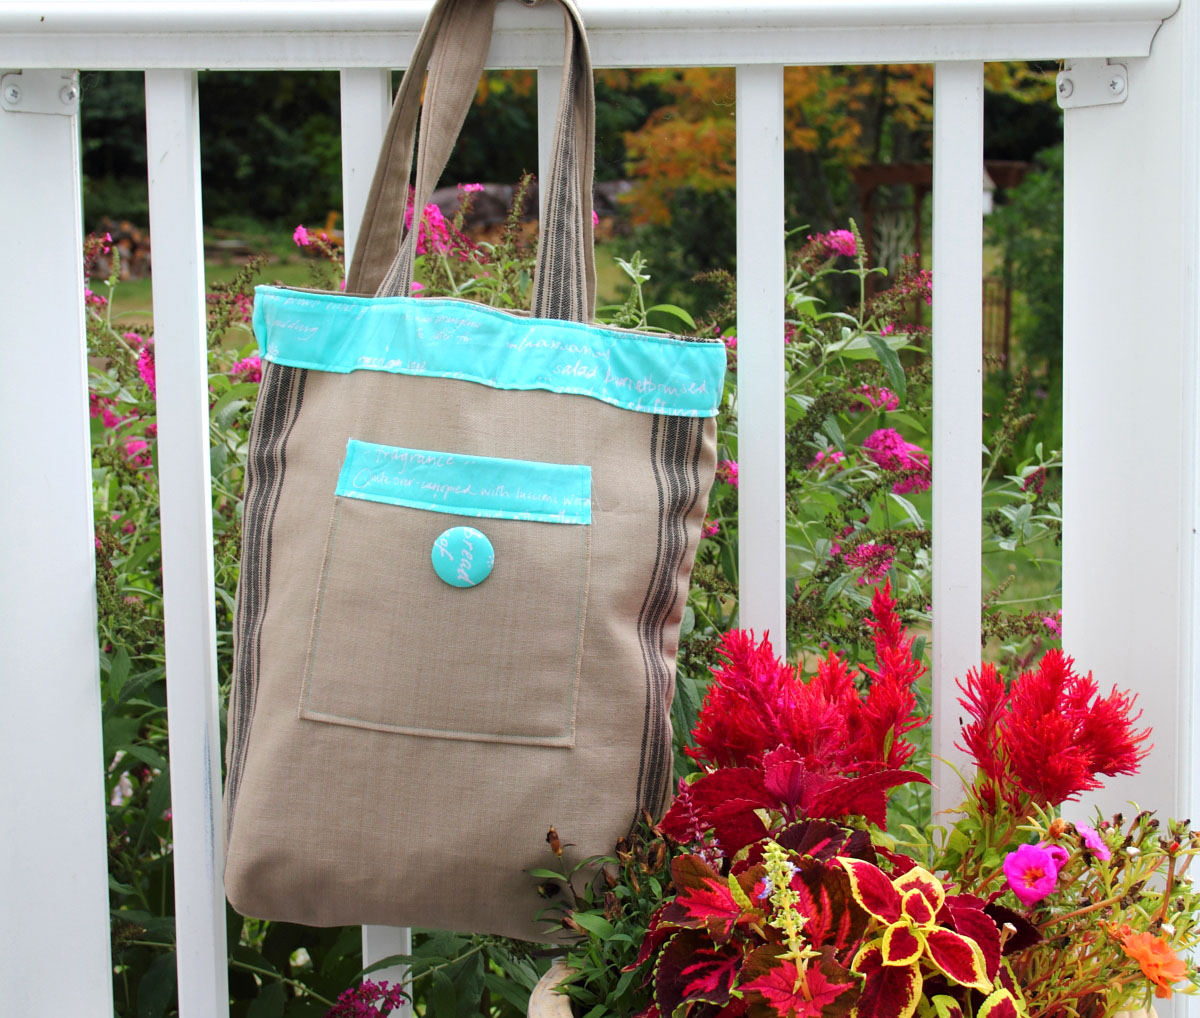
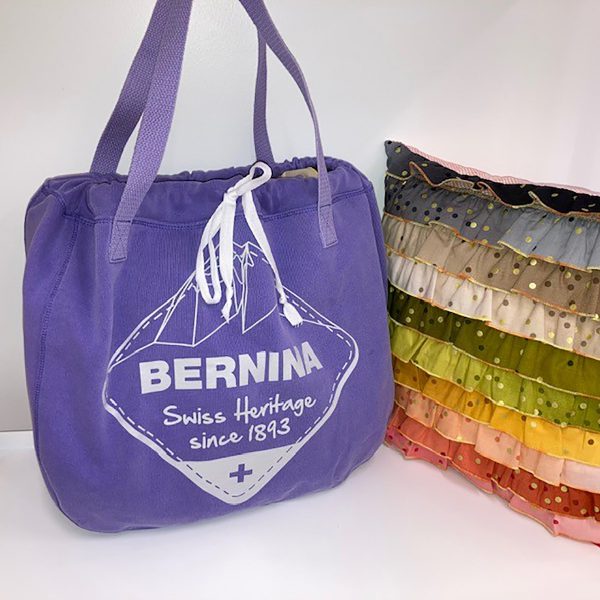
How to Upcycle a Sweatshirt into a Tote Bag
Perhaps you have a favorite sweatshirt hanging out in your closet that you don’t wear anymore but just can’t part with because it reminds you of a special vacation spot or favorite sports team. How about repurposing it into a fun and useful tote bag!
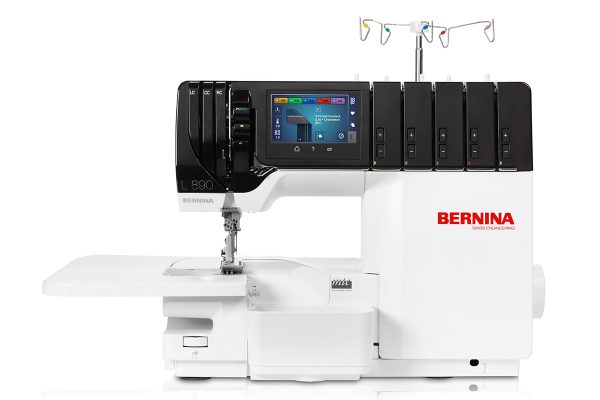
The BERNINA L 890 Overlocker makes this ‘sew’ easy. You will use a 4-thread Overlock Stitch, a Chainstitch and a Coverstitch. You will also sew just a tiny bit on your sewing machine.
Read to the end to see what happens when things don’t always go as planned.
Let’s get started!
All seam allowances are ¼”. Serge with the knife just skimming the fabric.
Supplies to Upcycle a Sweatshirt into a Tote Bag
- BERNINA L 890 Combo (Overlocker and Coverstitch) Machine
- Overlocker Feet:
- Sewing machine (I used the BERNINA 880 PLUS)
- Sewing Machine Feet:
- Reverse Pattern Foot #1/1C/1D
- Buttonhole Foot with Slide #3A
- Jeans Foot #8/8D
- Long-sleeved sweatshirt
- Fabric:
- 2/3 yard 44” wide cotton fabric for lining and inside pocket
- 2 yards 1” wide cotton webbing for straps
- 1 1/2 yards 1/2” twill tape for drawstring
- 90/14ELX needles (overlocker)
- 90/14 Jeans needle (for sewing machine)
- 4 spools coordinating serger thread
- 2” scrap of interfacing or cutaway stabilizer
- Basic sewing supplies
Steps to Upcycle a Sweatshirt into a Tote Bag
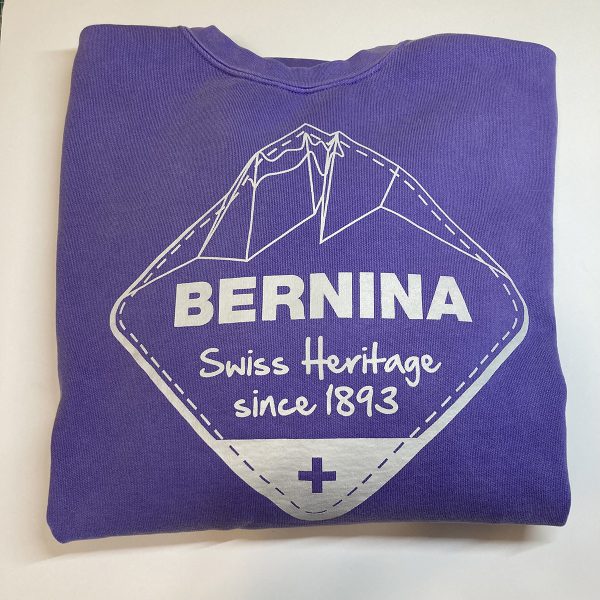
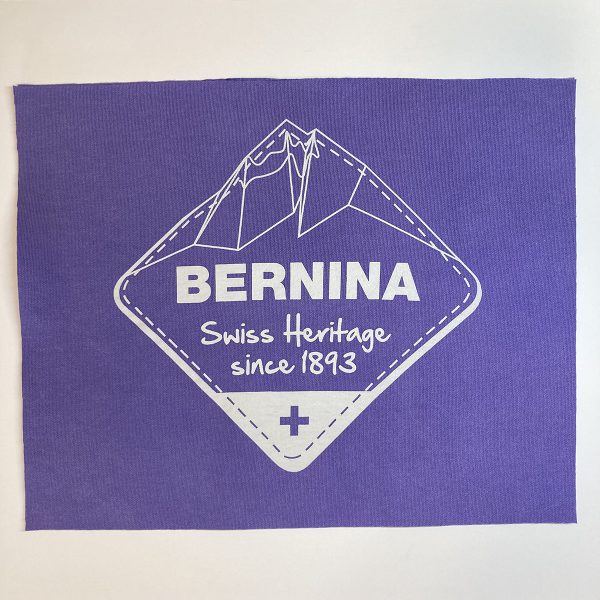
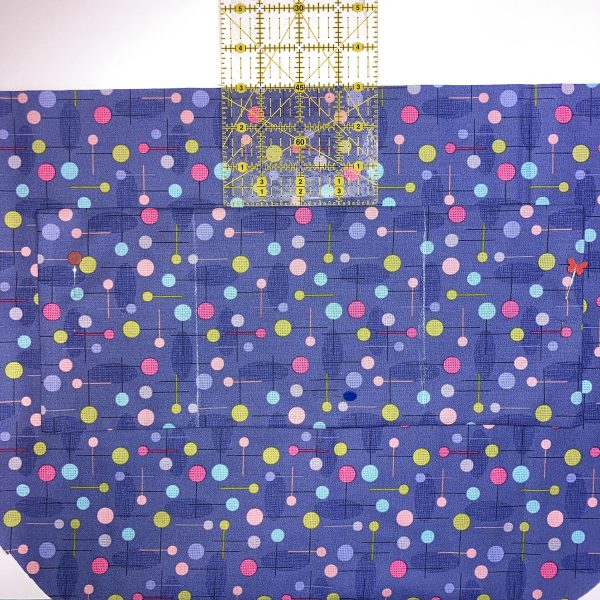
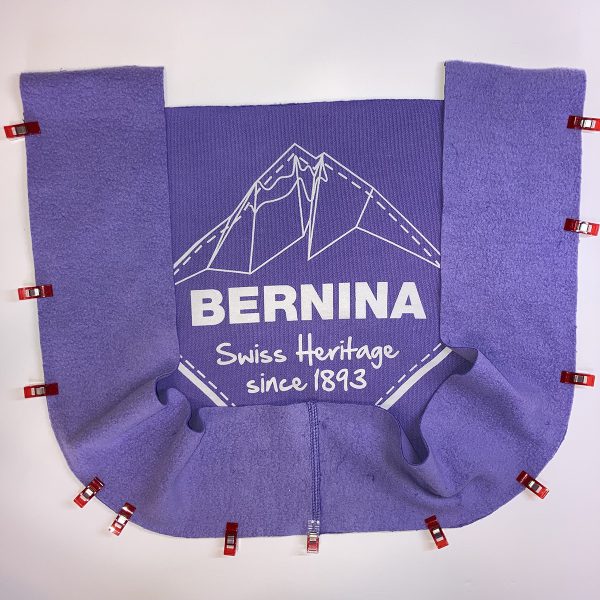
I am constructing my tote bag from an XXL sweatshirt and working around the screen-printed logo. Adjust your cutting measurements as needed to work best with YOUR sweatshirt and the size tote bag you want to make. There is no “right or wrong” size. The finished size of mine is roughly 21” wide and 17” tall.
If using a hoodie sweatshirt, save the drawstring from the hood for the bag. If there is a lower front pocket, un-sew the top seam and fold the pocket down out of the way.
Save scraps from cutting for test serging.
Topstitching details and pocket insertion can be done on the sewing machine if your overlocker does not have cover and chainstitch capabilities. You will definitely need a sewing machine for basting, buttonhole and sewing on the straps.
Cutting
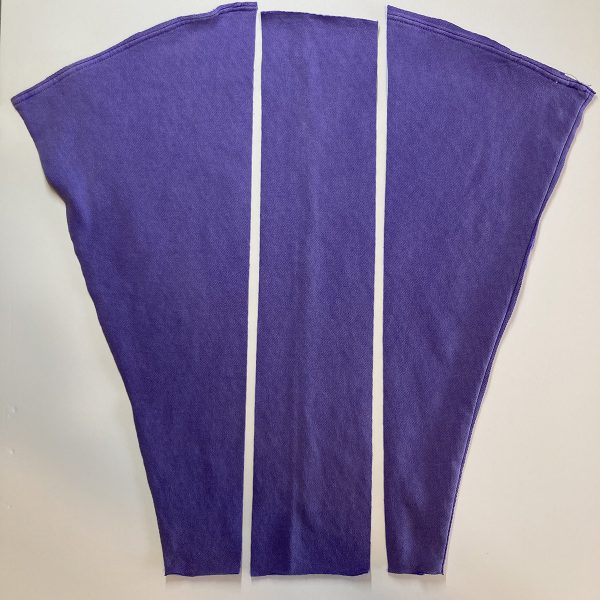
Let’s start with cutting up the sweatshirt. Lay it out flat in front of you with the front facing up. Cut off the bottom band starting at a side edge, leaving the band in a circle and open along the top edge.
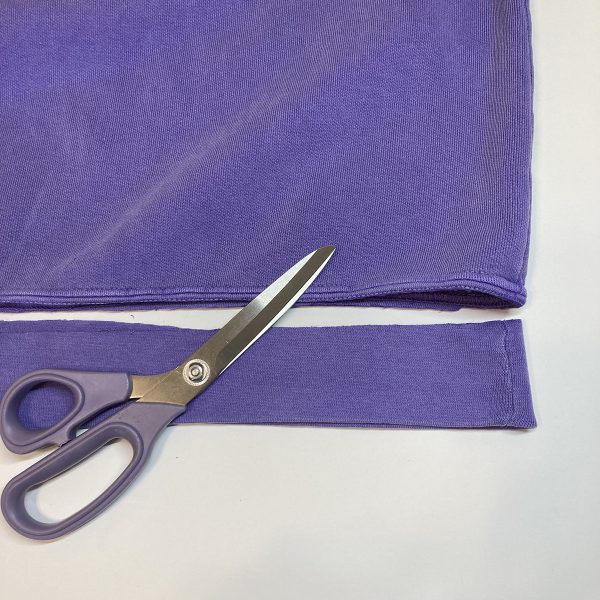
Cut off both sleeves even with the armholes. Cut off the armbands.
Note: If your sweatshirt has raglan sleeves, cut the sleeves from the underarm seam straight up to the shoulder. If you follow the raglan seam line to the neck opening, you may cut yourself short on the bag size. Some of the raglan seam will show on the bag and that is ok.
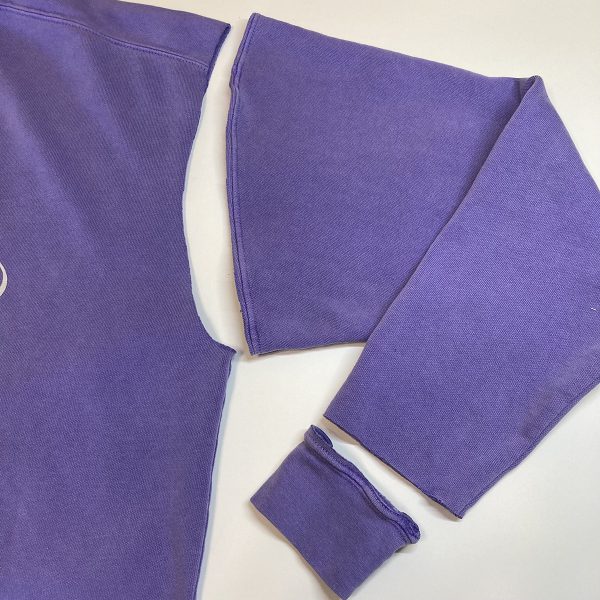
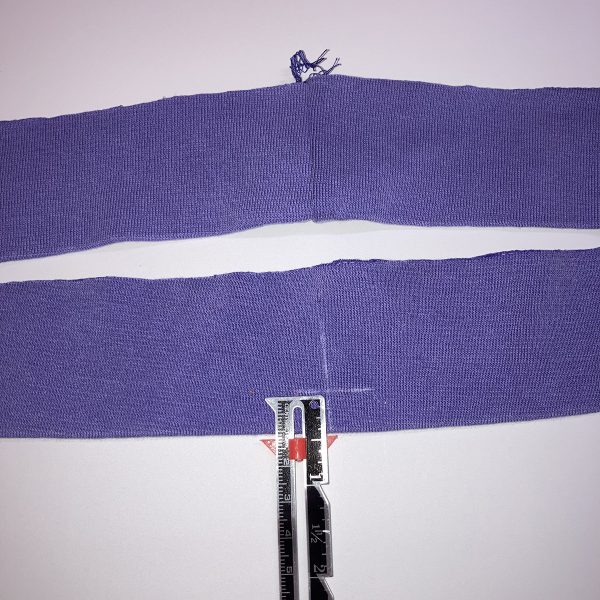
Using a rotary cutter, cut through both the front and back of the sweatshirt together so that both pieces are 18” wide and 14 ½” tall. (This may differ depending on the particular sweatshirt or size of bag that you are making.
Cut the sleeves open along the seam line. From each sleeve, cut one 4 ½” strip the length of the sleeve (about 21”). These will be the bag side panels.
For the lining, cut an 18” by width of fabric strip from the cotton fabric. Sub-cut to make 2 – 18” x 14 ½” rectangles. From the remainder of this strip cut a 15” x 12 ½” rectangle for the interior pocket.
Cut a 4 ½” by width of fabric strip from the lining fabric and trim selvedges. This makes the side panel for the lining.
Stack the front and back pieces of the sweatshirt and lining with wrong sides together. Cut a curve on the two bottom corners through all layers. I found it helpful to use a dinner plate and chalk to mark first, then cut.

Overlock Setup for Knits
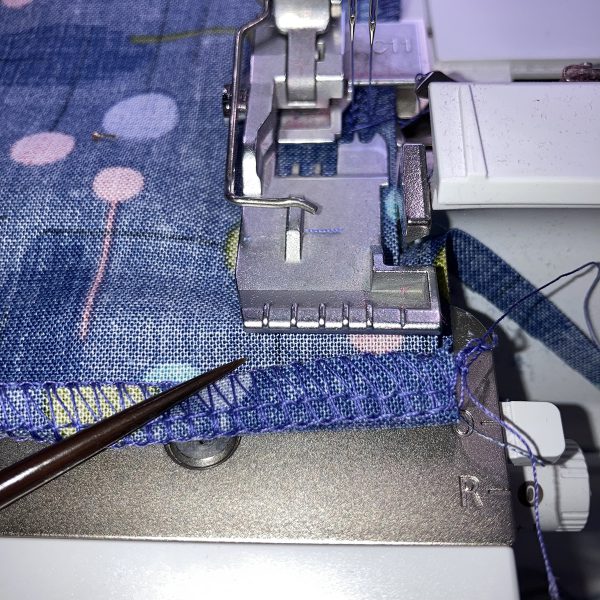
Using a 4-thread Overlock Stitch, sew the short ends of the sweatshirt side pieces together with right sides together, making one long strip. Press seam to one side. Set aside while you make the pocket.
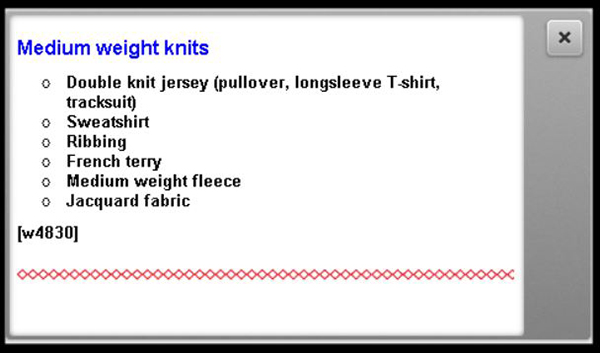
Tip: Use Creative Consultant to ensure proper setup of the machines. Select Home, then Creative Consultant and select “Medium Weight Knit”. When you hover over the icon, the screen shows what fabrics are represented by the icon.
![]()
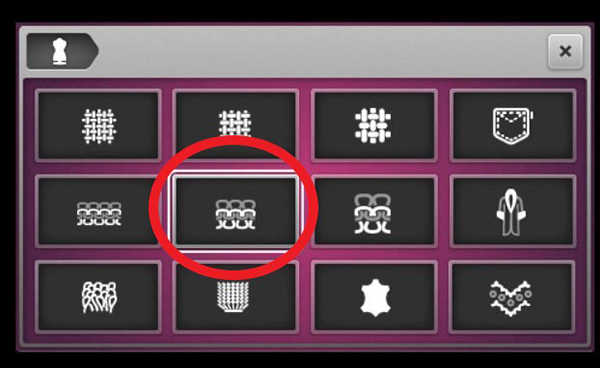
When you select the icon for the fabric, a new screen will open and you can choose the type of stitch that you wish to use. Select the desired stitch, and select the OK button (green check), and the machine’s tensions will automatically be set up for that stitch.
Create Inside Pocket
To make the inside pocket, fold the 15” x 12 ½” rectangle in half with right sides together so that it measures 15” x 6 ¼”. Serge both short sides. If you changed the settings to stitch the first seam on the knit fabric, clear the settings back to the default before stitching on the cotton fabric.
Stitch along the bottom of the pocket, leaving about 4” somewhere near the center open for turning. For a sharp corner, turn up the side seam allowances before serging on or off the edge of the fabric.
Turn pocket right side out and press. Mark division lines 4” from each side.
Center the pocket on the right side of one of the lining pieces, 3” down from the top and pin in place. The fold of the pocket is at the top.
Use a 2-thread Chainstitch to stitch the pocket down, guiding the edge of the foot along the edge of the pocket. Be sure that needle stop down is engaged for easy turning on the corners. Chainstitch the pocket dividers. Take thread tails to the wrong side and knot and trim. I also found it helpful to start and end off of the pocket piece. (If your overlocker does not have a chainstitch, this step will need to be done on a sewing machine.)
Use Creative Consultant on the L 890 to select the Coverstitch for Medium Weight Knit. It is Stitch #23, 3-thread Coverstitch using the left and center needles. Stitch across the seam made on the panel piece with the WRONG side up. Guide along the seam allowance with the far left mark on the foot even with the inside seam line, the stitching made with the right overlock needle. (Topstitch the seam allowance to one side if you do not have a machine that will do a coverstitch.)
The chain part of the stitch will be on the RIGHT side of the fabric. This flattens out the seam and gives a fun finish. Tip: A Coverstitch must start and stop on fabric. Since I was sewing edge to edge, I found it helpful to begin on a scrap of sweatshirt material, serge onto the panel piece and end by stitching off onto another scrap.
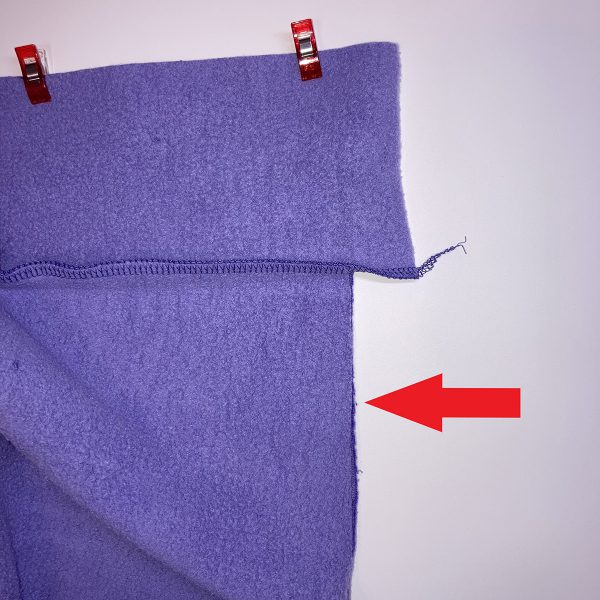
Reset the machine for a 4-thread Overlock. Clip the side panel sweatshirt piece along the side and bottom of the bag front, aligning the center seam with the center of the bag bottom. Serge. Don’t worry if the edges are uneven at the top…you will trim those in a moment. Be careful not to stretch the fabric as you serge.
Add the bag back in the same way, lining up the top edges. Press seam allowances away from the side panel. In the picture below, the arrow is pointing to the bag top and the edges are aligned. NOW you can trim any unevenness at the top.
Repeat these steps with the lining pieces. Insert the lining into the bag and check that both are the same size at the top. If one or the other is bigger, taper in one or two seam allowances so that both pieces are the same size. At the end of this post, I will explain what to do if you forget this step!
Use the 3-Thread Coverstitch as before to stitch along the seam lines of the sweatshirt material and lining.
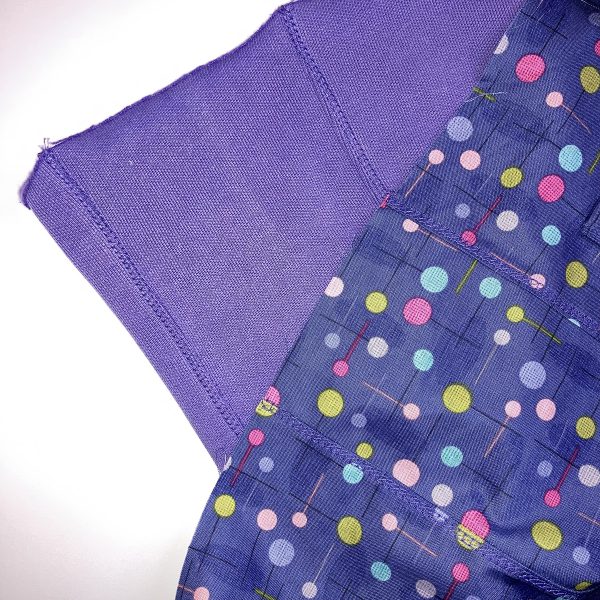
Insert the lining into the bag wrong sides together with the pocket side of lining next to bag back. Clip in place. At the sewing machine, baste the outer bag and lining together at the top with a long stitch.
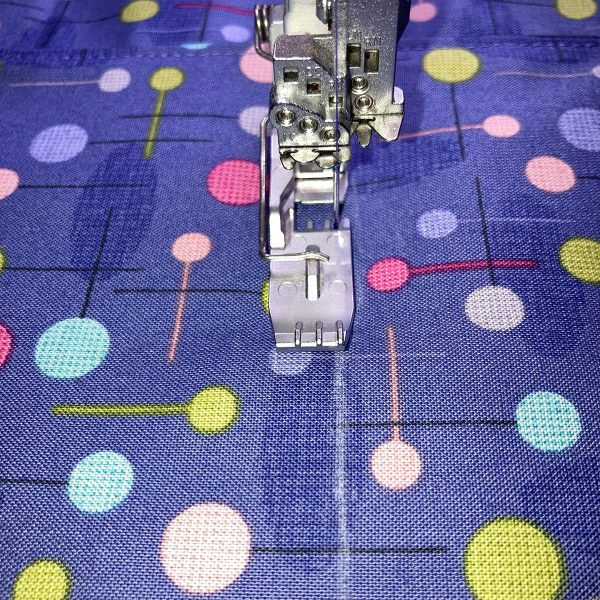
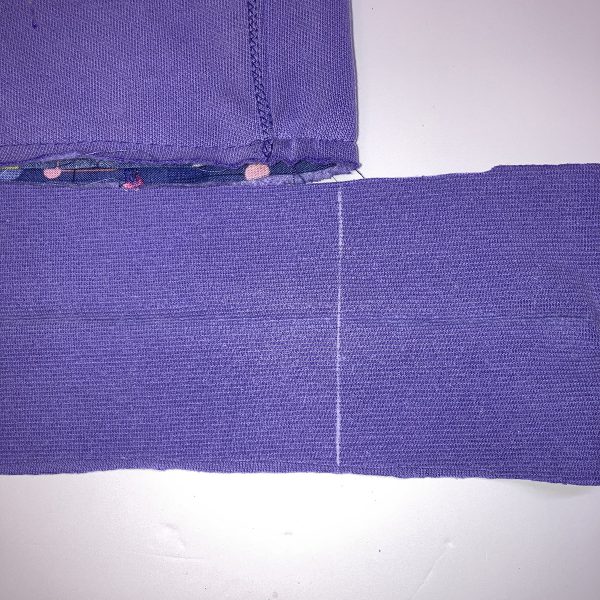
Unfold the bottom band and place next to the top of the bag to measure for size. Mark with chalk the new seam allowance and serge with a 4-thread overlock stitch, guiding the knife along the marked line. You will notice in the picture that I made my chalk line about 1/4″ from the edge of the bag. I will stretch the band just a little bit around the bag.
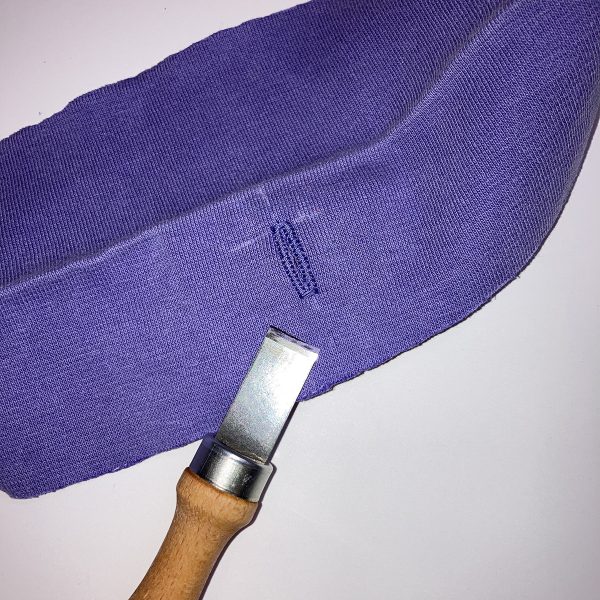
Fold the band so that the seam is at one end. The buttonhole will be sewn on the opposite end. Test sew a 15 mm buttonhole on a scrap of the sweatshirt material with a small piece of interfacing or cutaway stabilizer on the wrong side. Use this as a guide for centering on the band opposite the seam. Don’t forget to take the seam allowance into account when centering. I placed the top of my buttonhole 1/2″ below the fold. I also used Stretch Buttonhole #53. How did I know to do that? Creative Consultant on my B 880 PLUS! Open up the band and make a 15 mm buttonhole on ONE LAYER of the band with stabilizer on the wrong side.
Cut open the buttonhole with a buttonhole cutter. This tool gives you more control when cutting.
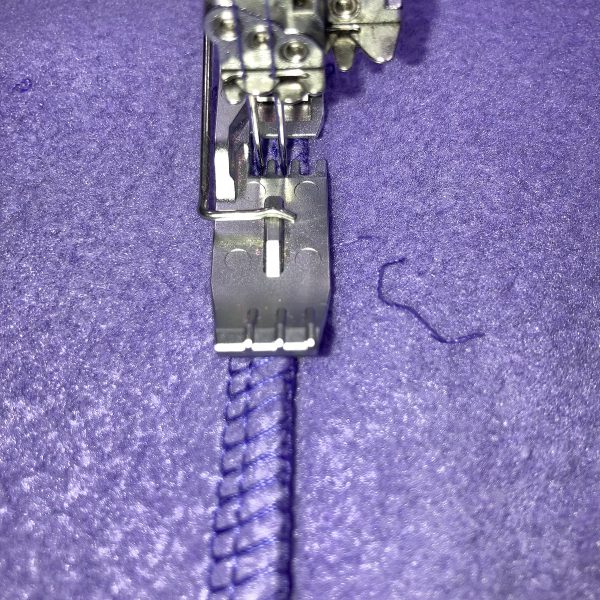
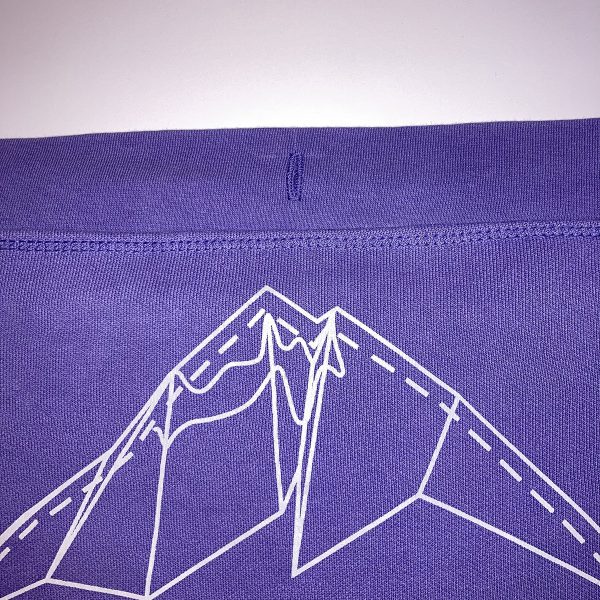
Clip the folded band to the right side of the bag top with the buttonhole next to the bag front and centered. Using a 4-thread Overlock on the L 890, stitch through both layers of the band and the sweatshirt and lining fabrics. Take advantage of that free arm on your BERNINA L 890 Overlocker! Tip: I lowered my Presser Foot Pressure down to 1.
As before, use a 3-thread Coverstitch along the seam just sewn. Again, this serves as a decoration AND helps to hold the seam allowance down. It is helpful to give the seam allowance a good press down towards the bag before stitching the coverstitch.
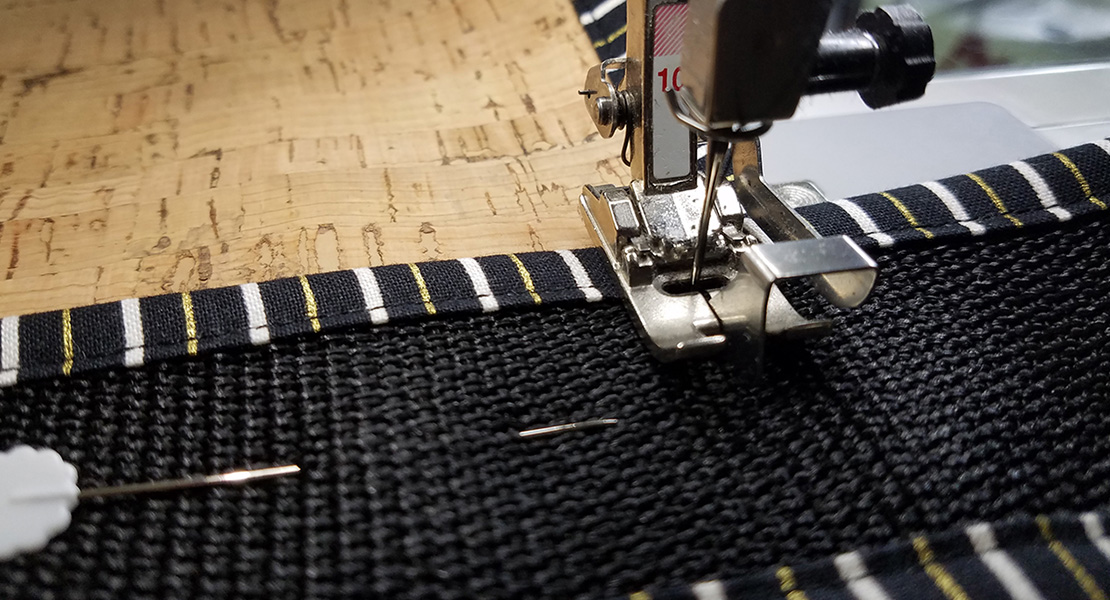
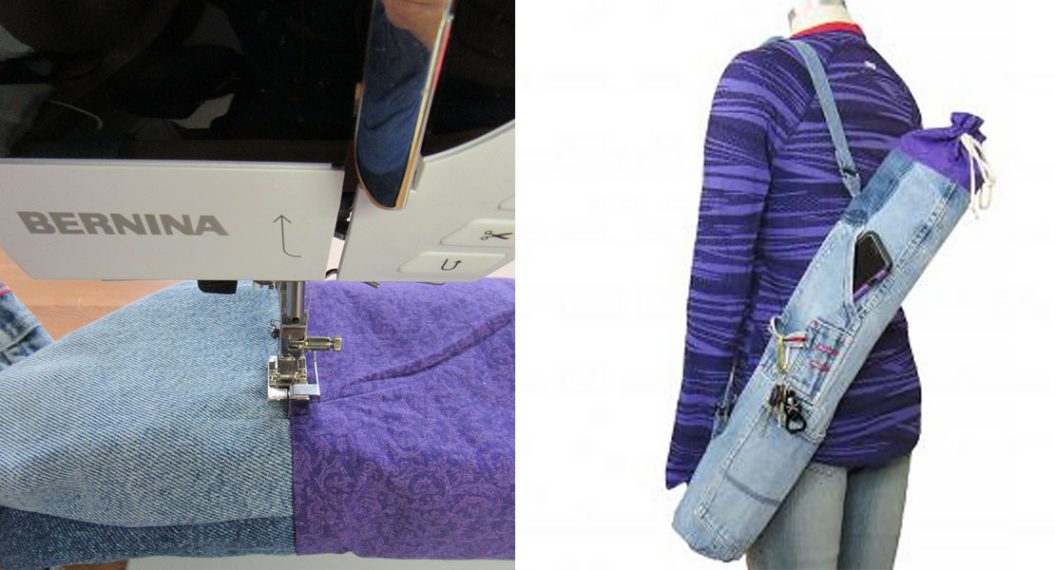
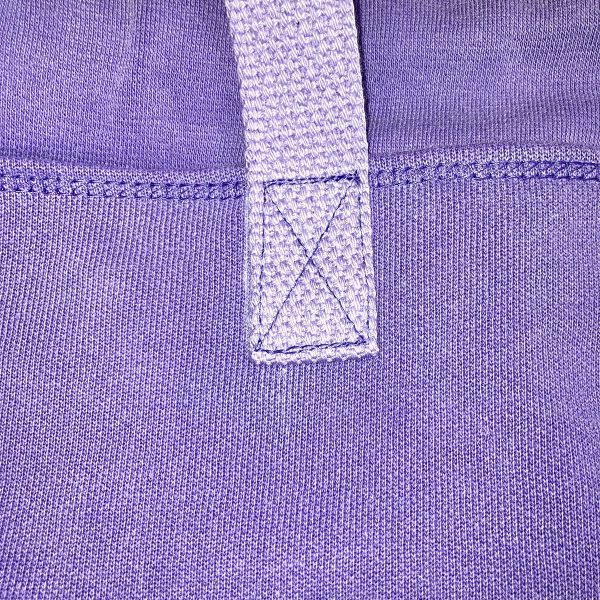
Cut 2 – 25” lengths of 1” wide webbing (or longer if desired). Fold under 1/2″ on each end of both strips. On the bag front, measure over 3” from the nearest side seam and make a chalk mark 1 1/2″ down for band seam. Place the strap as shown and pin in place. Repeat on the other side. Place remaining strap on bag back in the same manner.
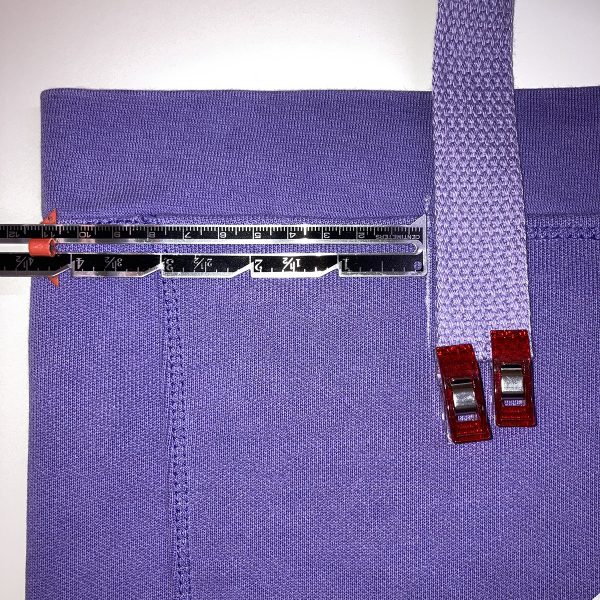
With a stitch length of 3.0, Jeans Foot #8 and a jeans needle stitch down the bag straps. Do NOT stitch through the band . . . that is a casing for the drawstring!
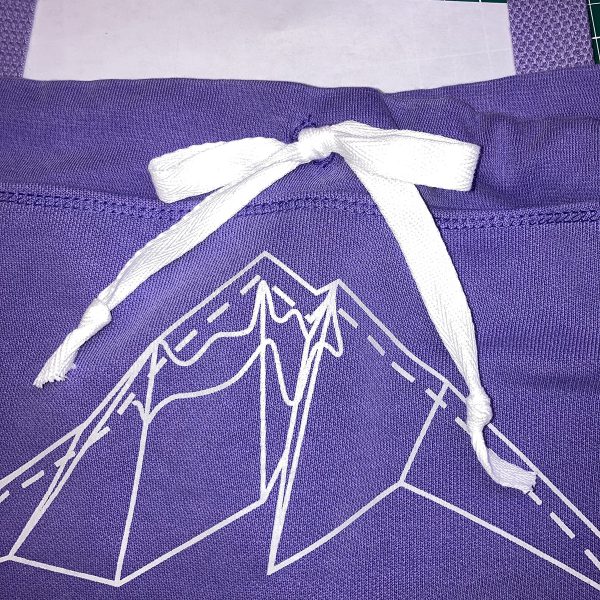
Tie a knot at one end of the twill tape and insert the other end into the buttonhole using a safety pin. Thread it all around the casing and back to the buttonhole and tie a knot.
Fixing an Oopsie
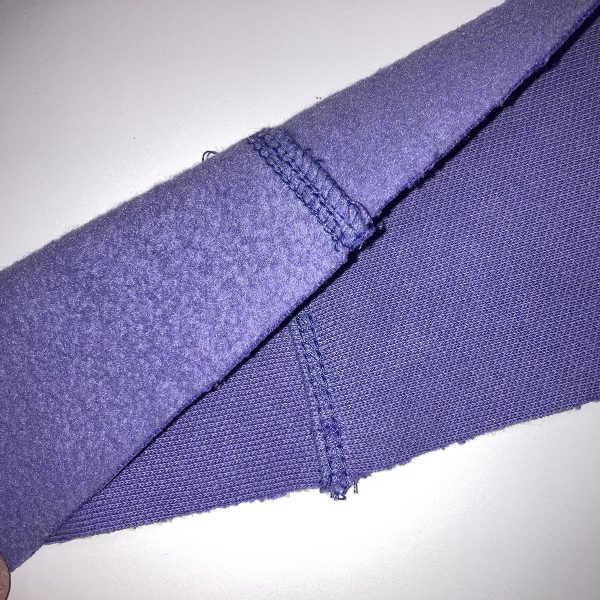
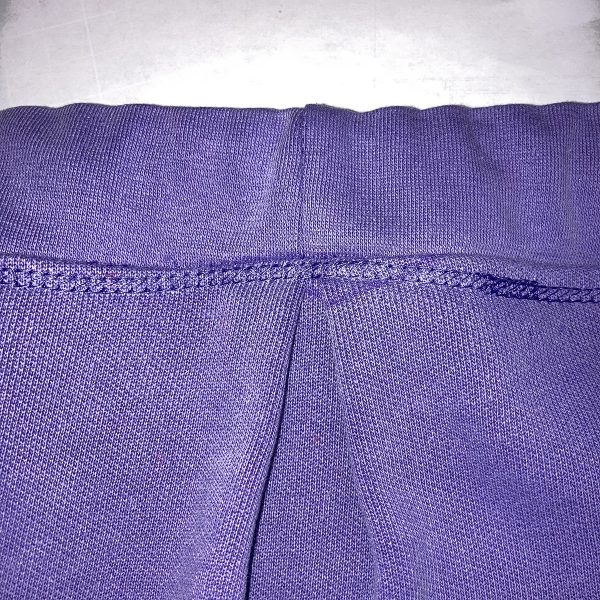
It turns out that I was having so much fun serging that I forgot to check my lining and outer bag sizes. Oops. The exterior piece was bigger than the lining. I added a design element and made a little tuck as shown below. I like to think of it as a creative opportunity! So give yourself some grace when things like this happen and put your own spin on the project!
I hope you had fun upcycling your sweatshirt AND playing with your L 890 Overlocker. My favorite things on this machine are the Creative Consultant and the One Step BERNINA Air Threader. What’s your favorite?
Until next time, happy serging!