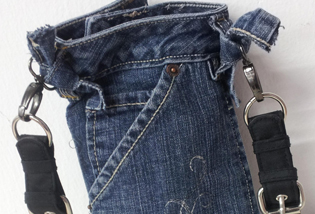
Upcycled Jeans Yoga Bag

In this tutorial, I’m going to show you how to make an upcycled jeans yoga bag. I make my living teaching sewing and quilting to people, but I also still quilt for hire. This means I spend a lot of time standing at my hand guided quilting machine or sitting at my BERNINA sewing machine. Whether you are doing this professionally, like me, or doing it as your hobby, it’s really important that you set up your workspace as ergonomically as possible, take frequent breaks, and stretch. As sewists, we tend to let our shoulders rise up, and this causes us to carry a lot of tension in our neck, shoulders, and back.
Yoga is a great way to help release tension and to avoid neck and shoulder problems caused by bending over your machine. This fun upcycled jeans yoga bag is perfect for carrying your mat to class and by using a pair of carpenter’s jeans you have lots of handy pockets for things like cell phones and car keys. Need a quick break while sewing? Try out one of the yoga poses following the tutorial. These are specifically geared towards sewists. Just make sure you check with your doctor before starting any new exercise programs.
Materials Needed
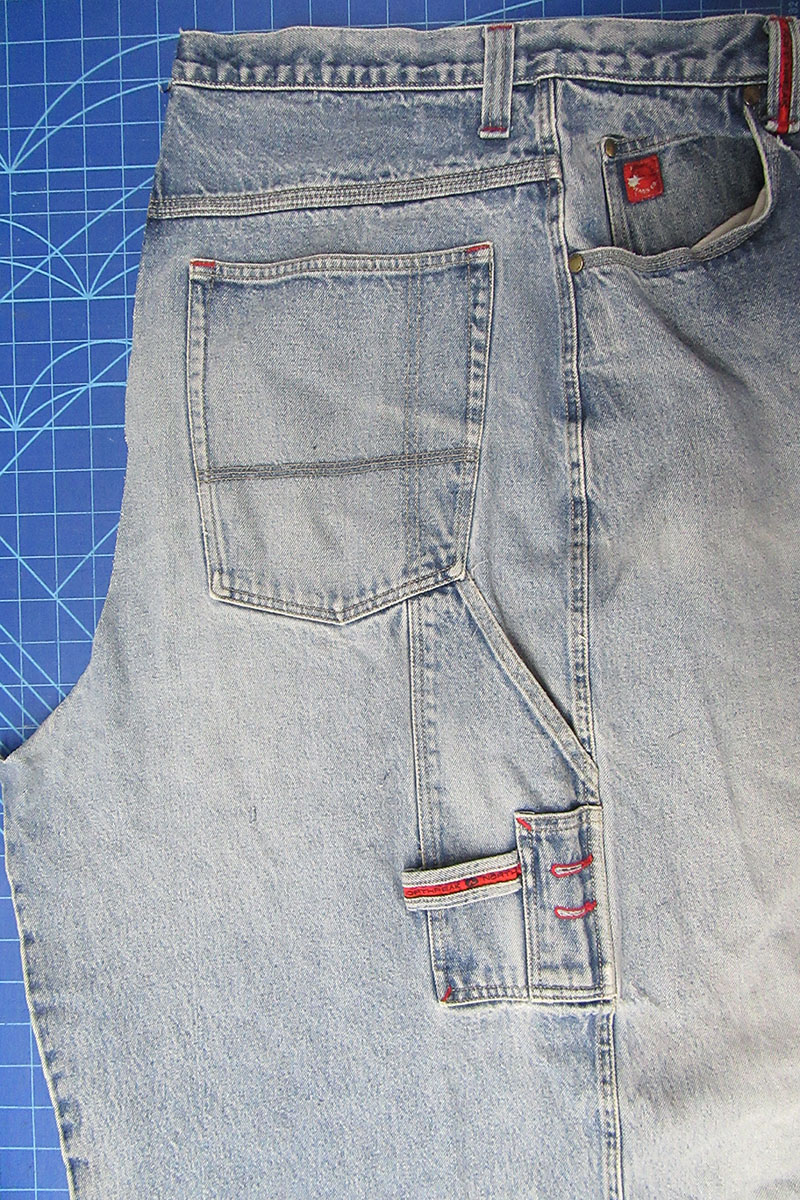
- Pair of carpenter jeans- 32-inch inseam or longer
- 2- 1½ inch “D” ring
- 1- 1 ½ inch slider
- Fat quarter cotton fabric of your choice
- 1 yard ¼ inch flat cording
Assembling Bottom of Upcycled Jeans Yoga Bag
Step 1
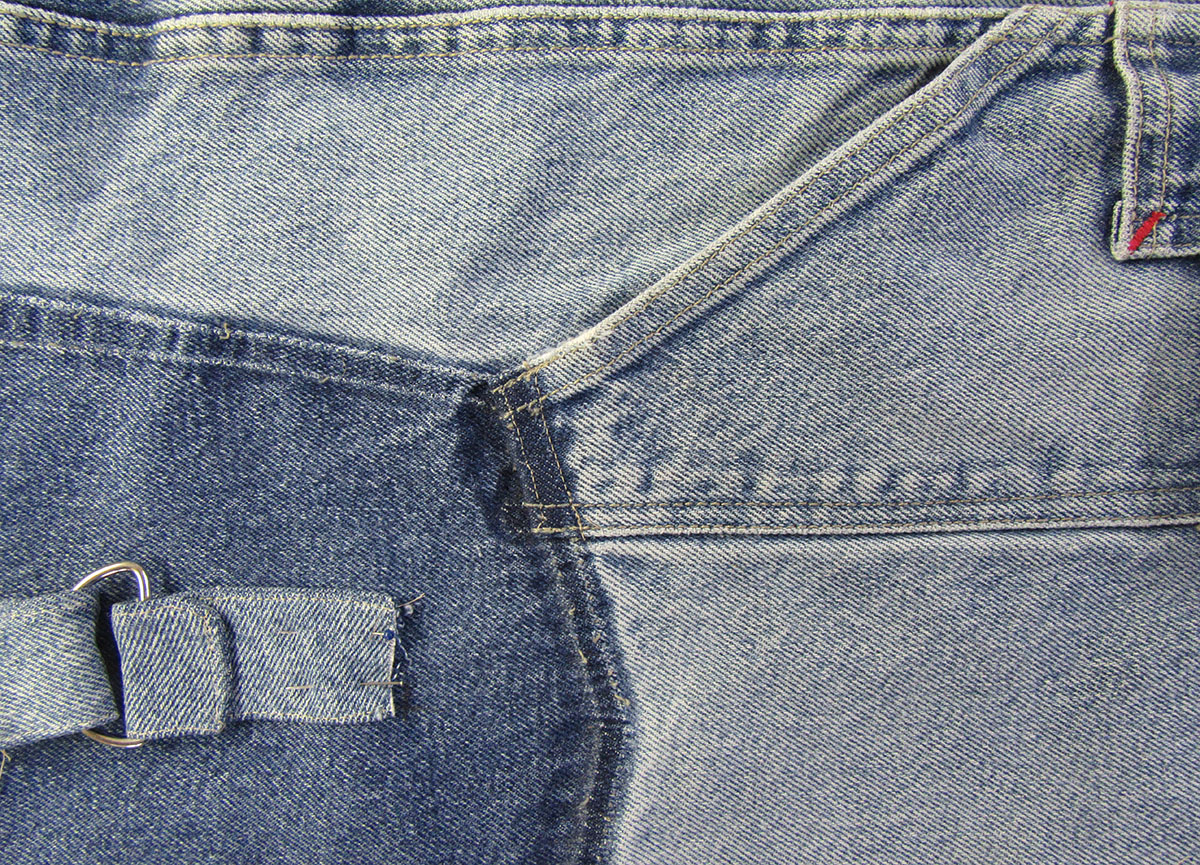
Cut open the inseam on one leg of the jeans. Then cut down from the waist band at the back and around the zipper at the front so that you have separated the jeans into two parts and can lay flat one of the sections. Set aside other jeans leg for later use.
Step 2
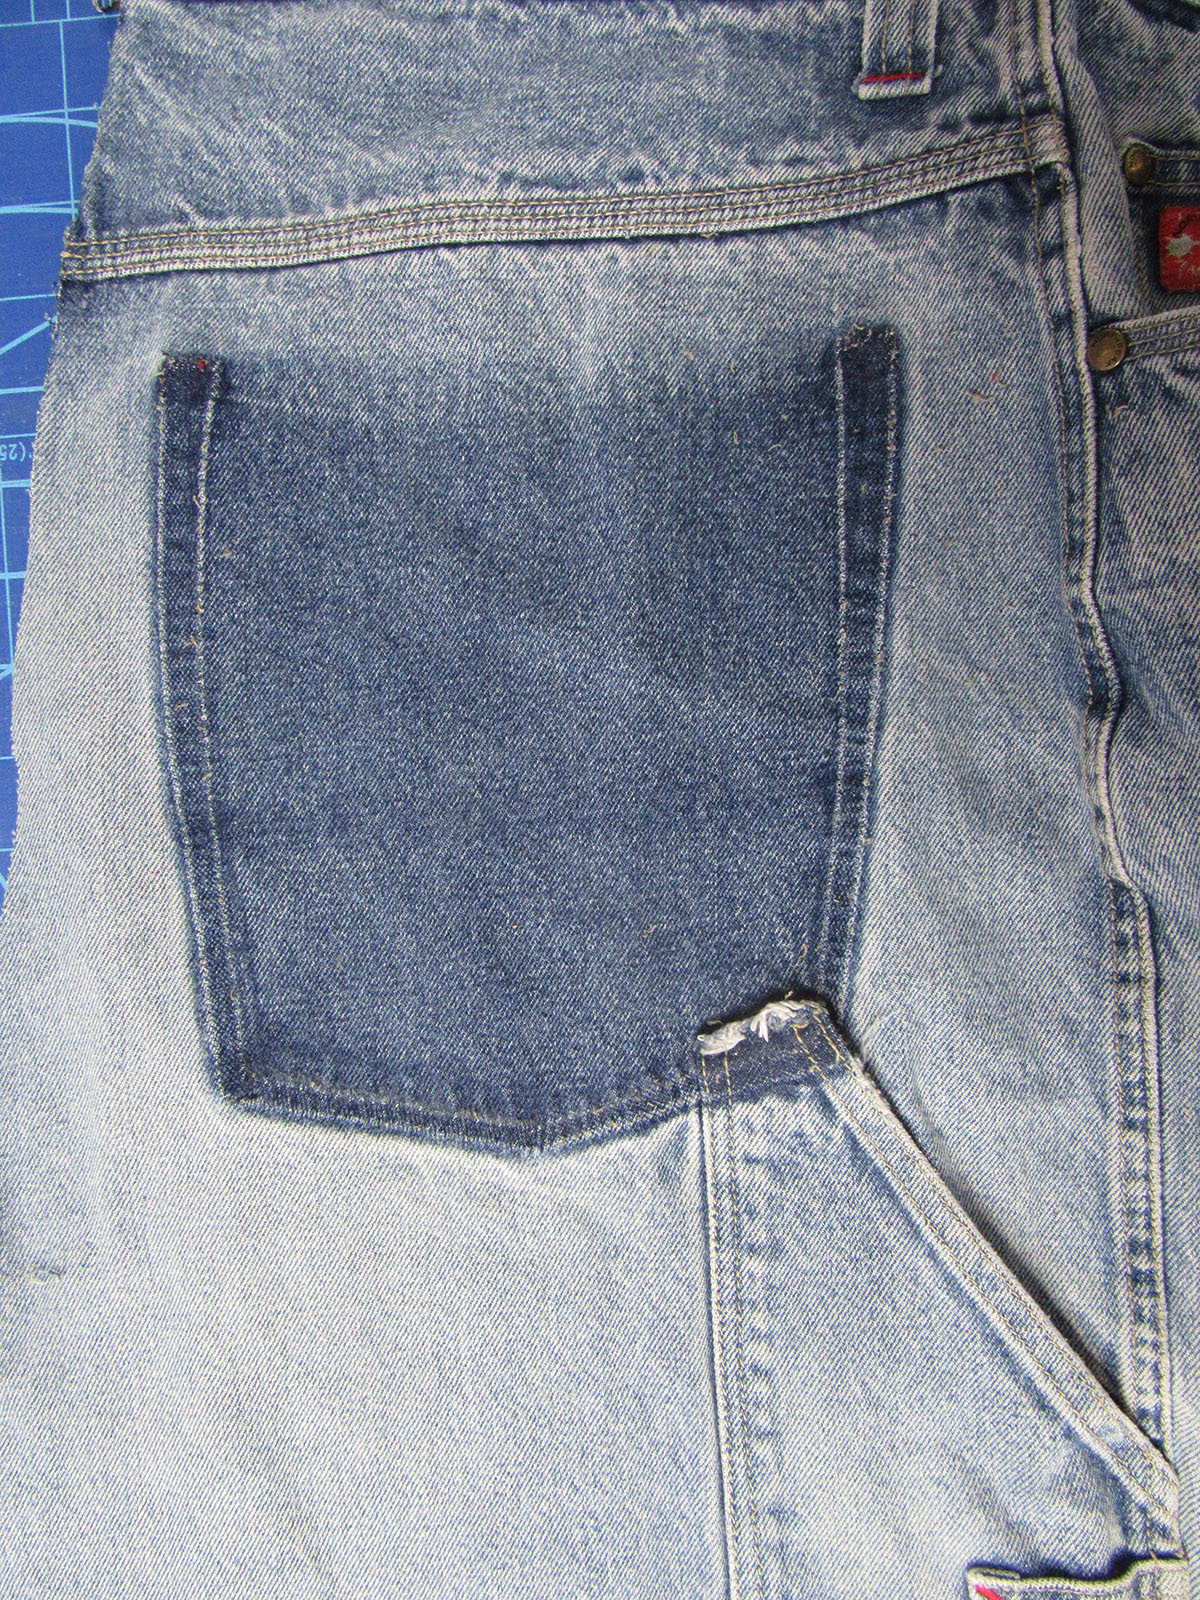
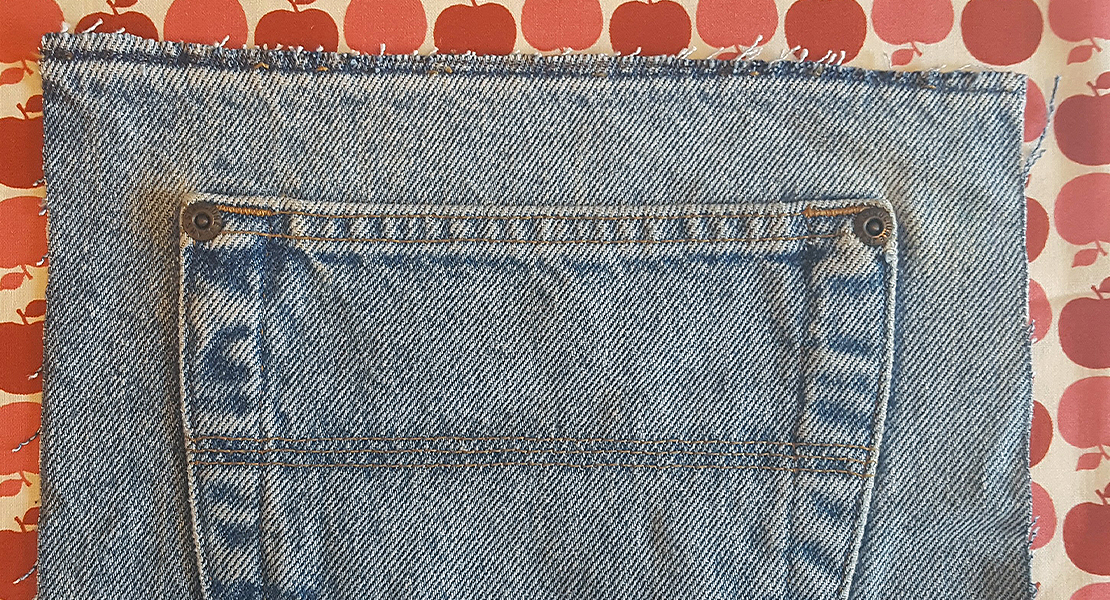
Carefully unstitch the back pocket of the jeans and set aside for later.
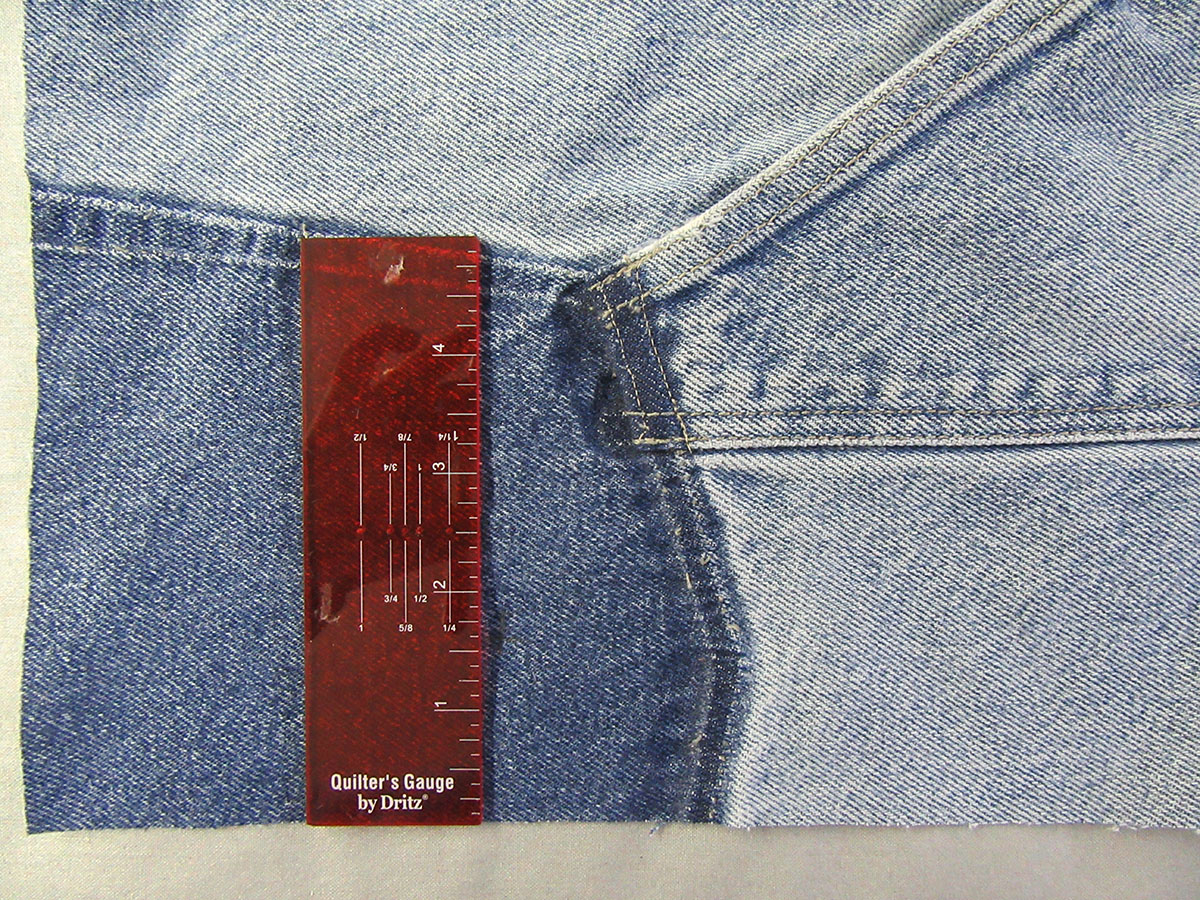
Step 3
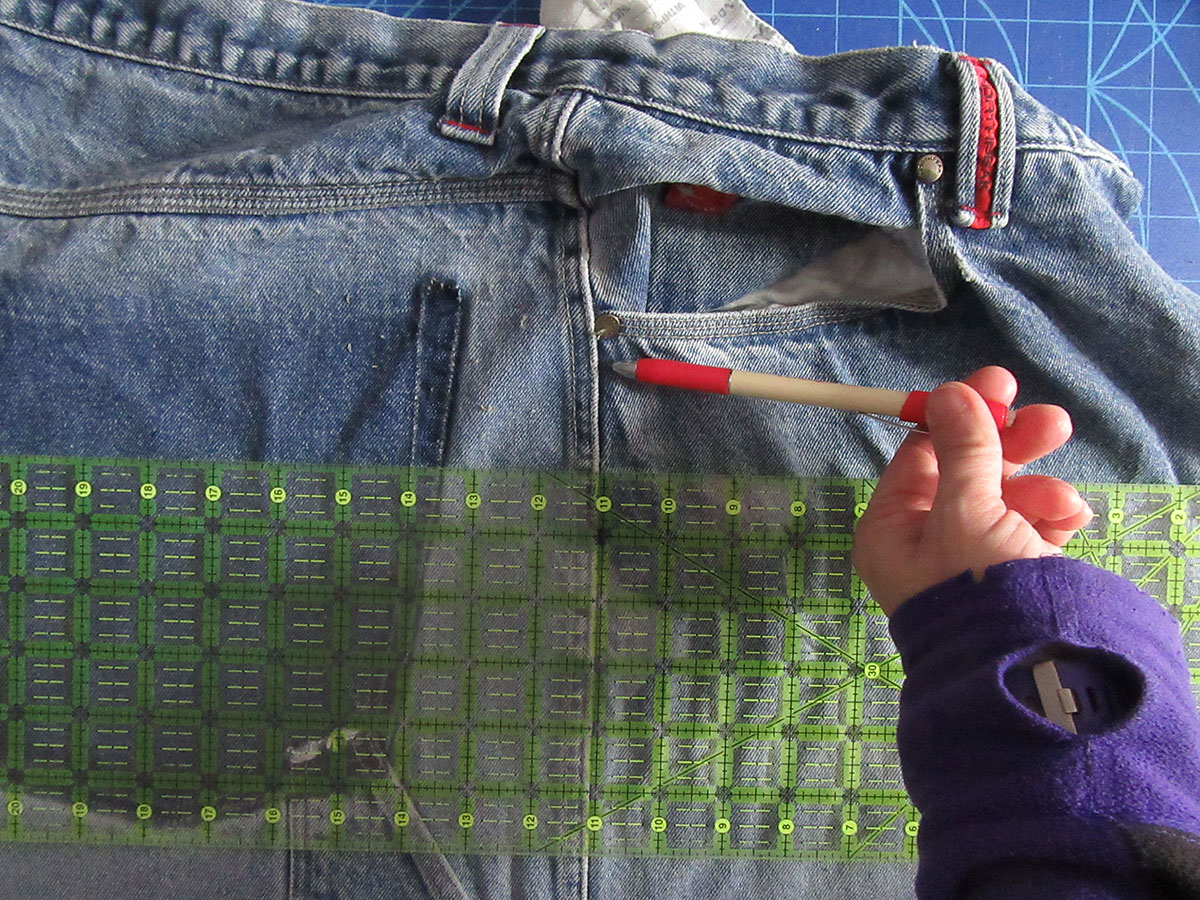
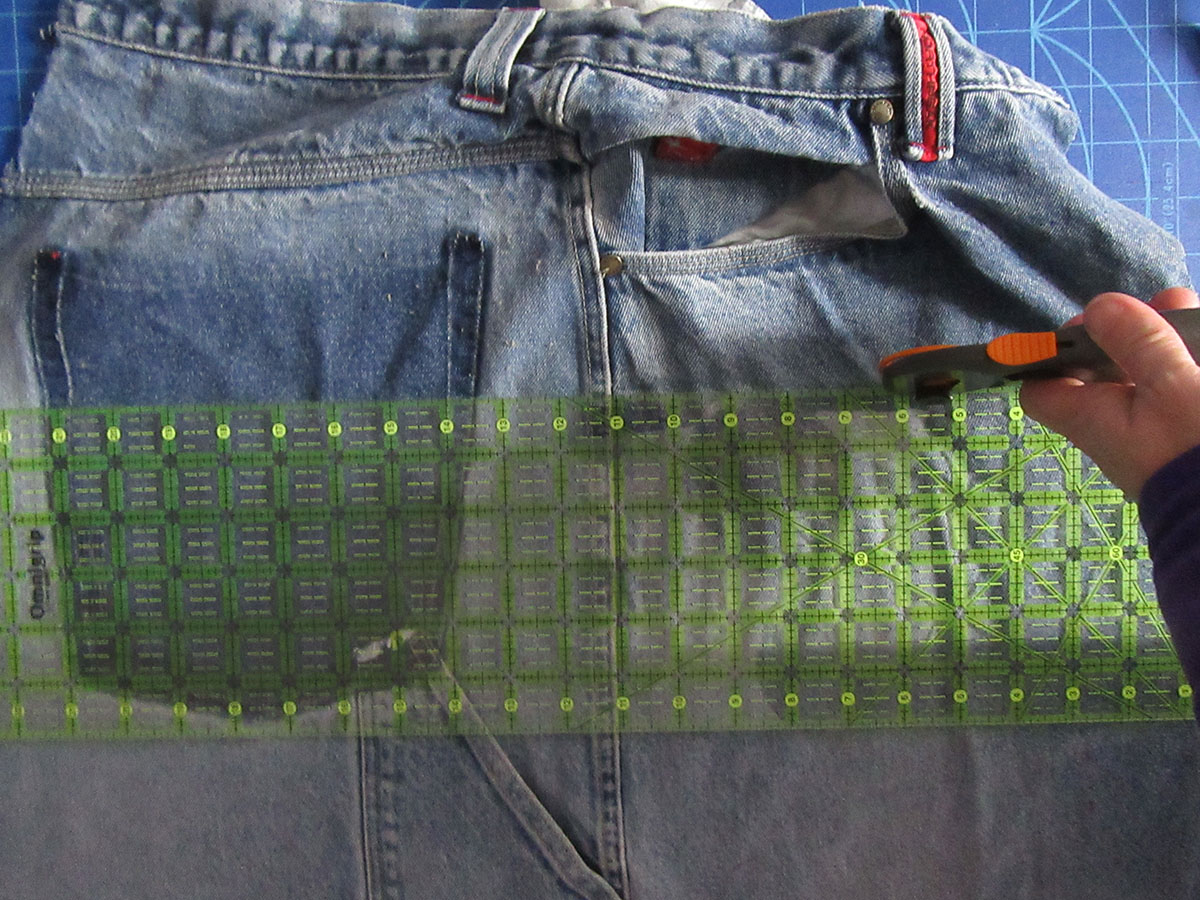
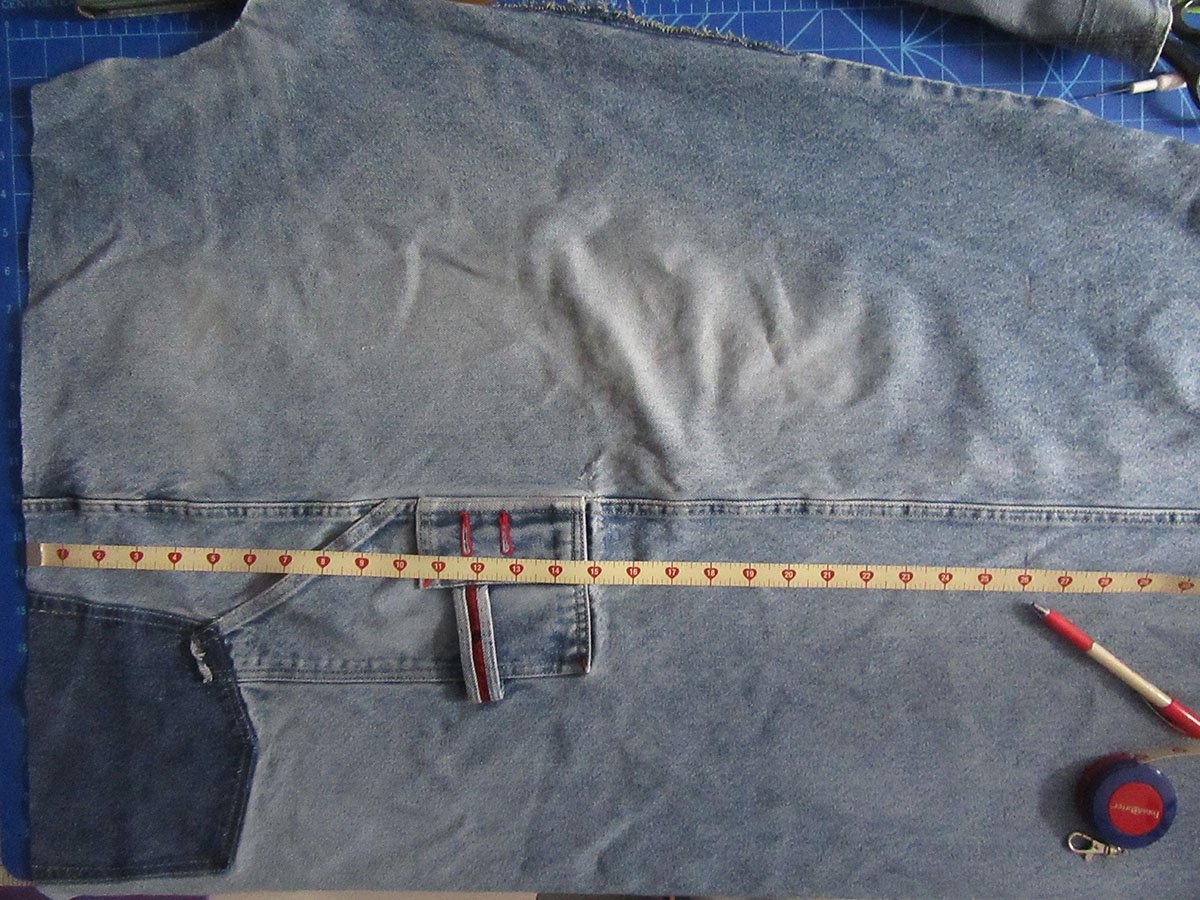
Place a long ruler approximately 1 inch below the front pocket and parallel to the side seam.
Step 4
Use a rotary cutter to cut off the top section of the jeans.
Step 5
Measure from this top straight line down the length of the jeans and mark a line at 26 inches. Use your rotary cutter and ruler and cut along this line.
Step 6
Place your ruler perpendicular to the side seam and make a mark 8 inches from both sides of the seam. Draw a line from the top to the bottom of the jeans at this mark. Make sure that you keep this line perpendicular to the top and bottom, or you will make a parallelogram, not a rectangle. Your jeans section should measure 26 inches by 16 inches. Cut off excess jeans along marked lines.
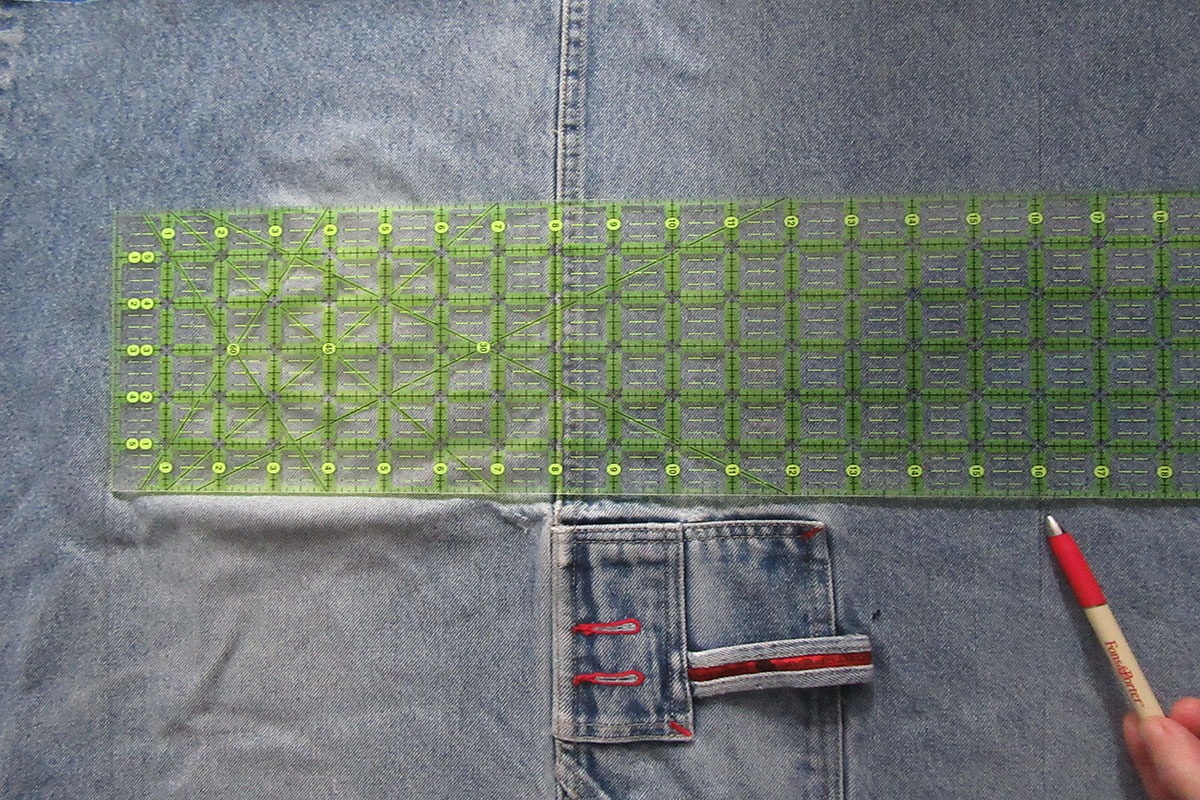
Step 7
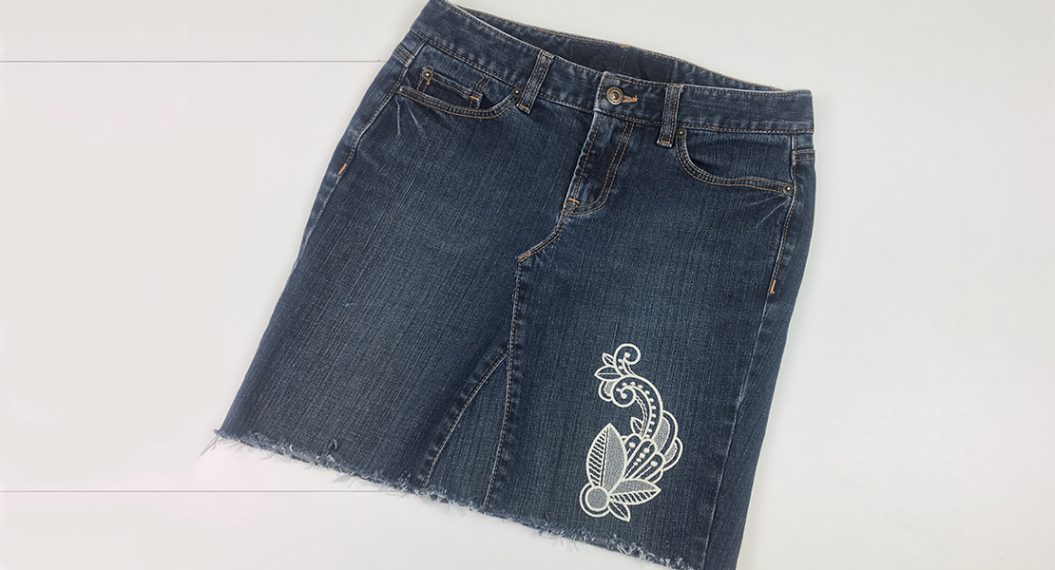
Position previously removed back pocket in desired location on rectangle cut in step 6. Make sure that it is at least 1 inch from any raw edges. Sew onto jeans.

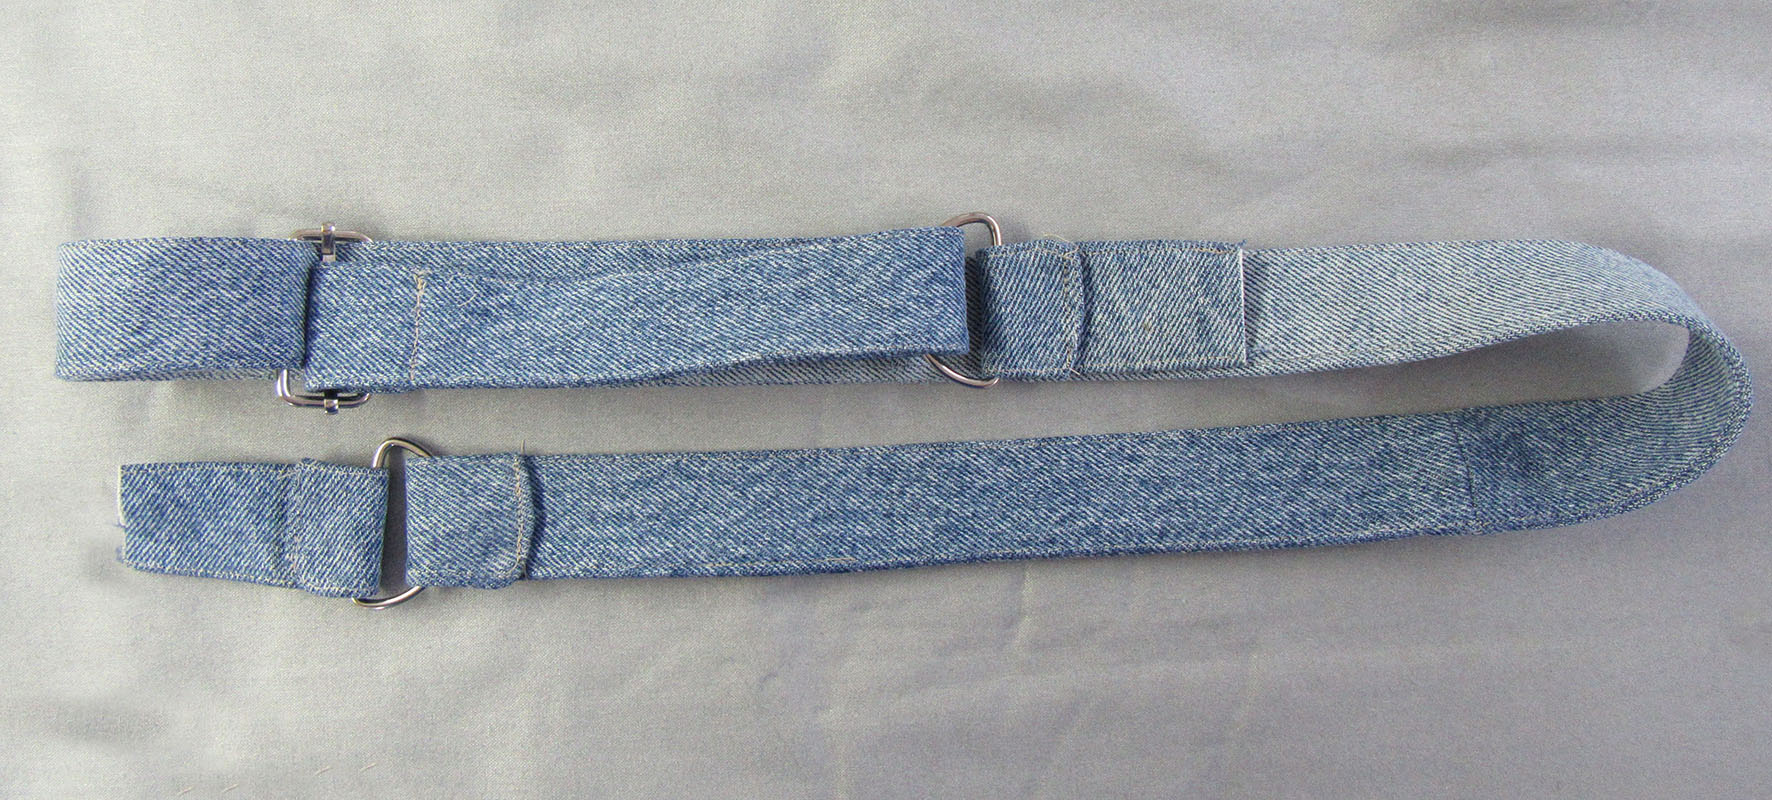
Strap Assembly
Step 1
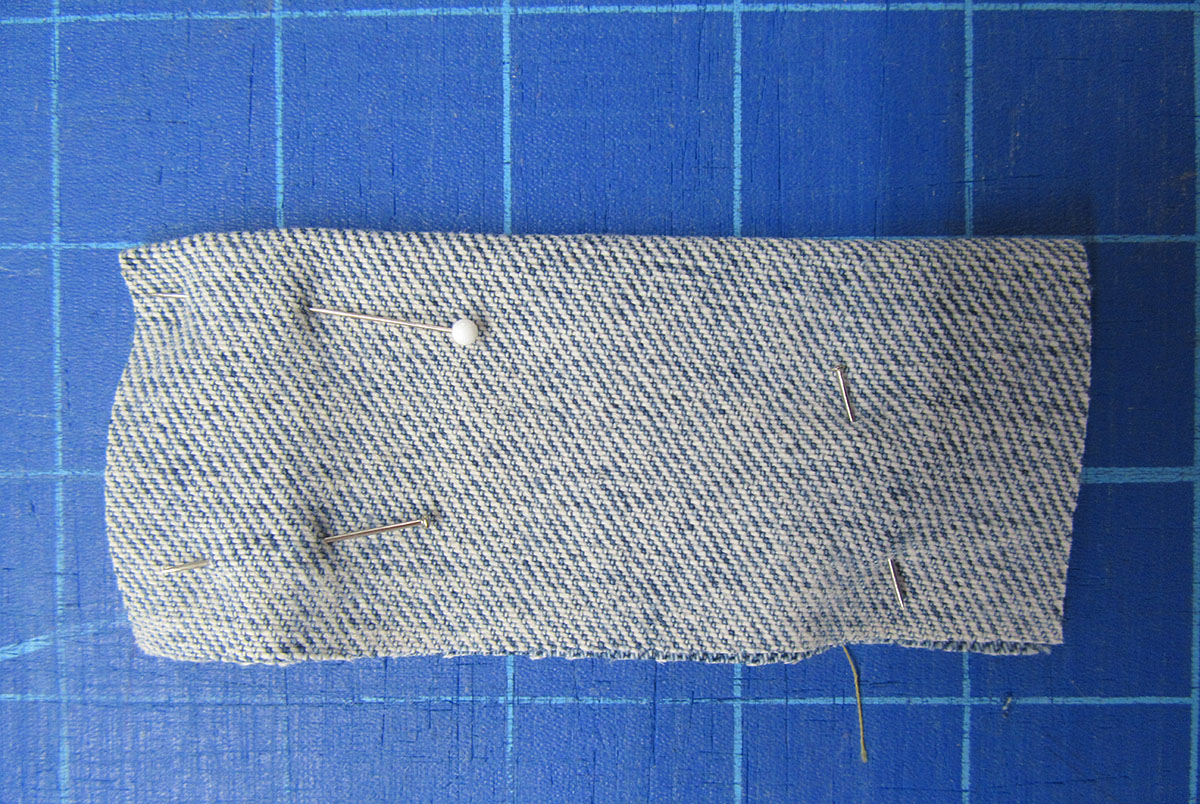
Cut along inseam of other jeans leg set aside in step one. From this leg section cut 2 pieces 3 ½ inches by 4 inches, 2 pieces 3 ½ inches by 22 ½ inches long, and one 5 ½ inch circle.
Step 2
Join 22 ½ inch by 3 ½ inch pieces together at short ends using a ½-inch seam allowance. Press seam allowance open.
Step 3
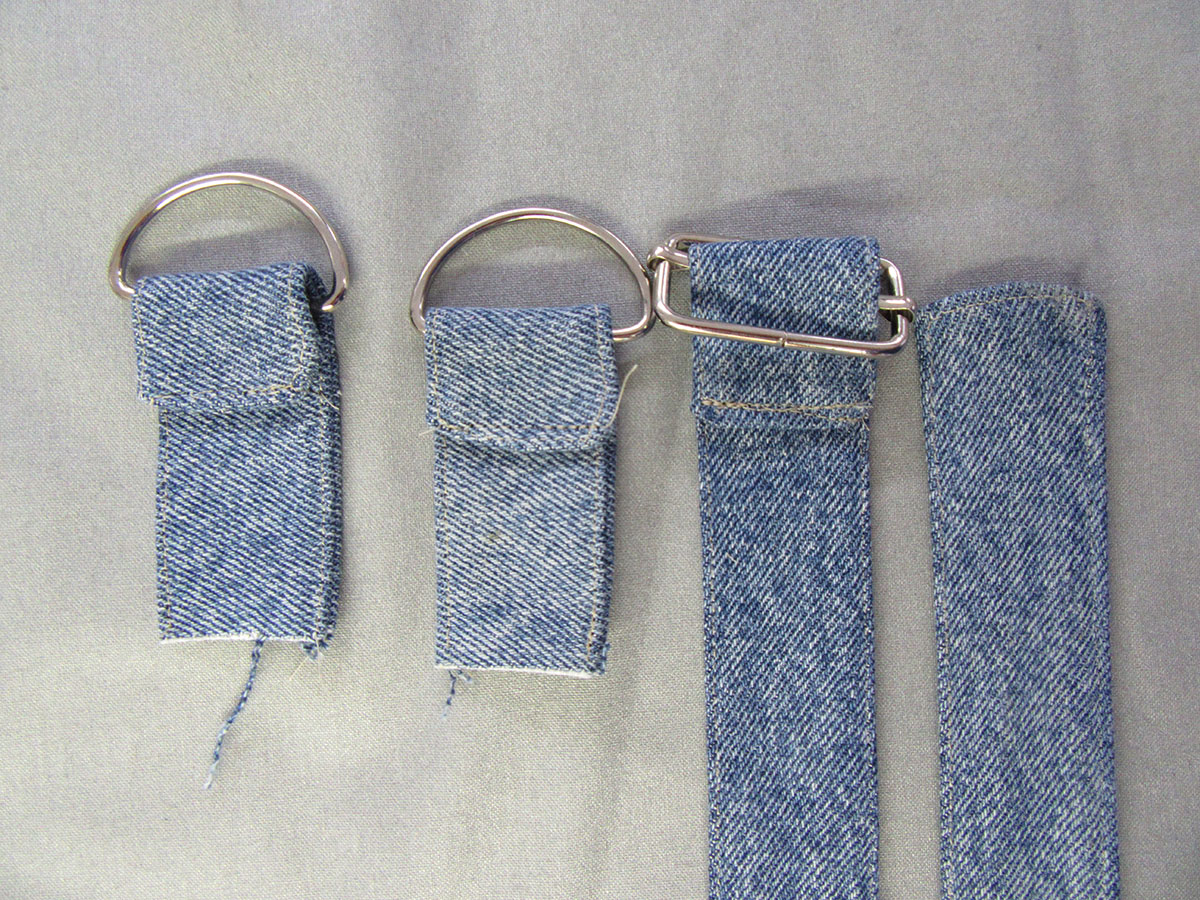
Fold one of the 3 ½ inch by 4-inch pieces right sides together bringing 4-inch sides together. Stitch up length and across short edge using a ½-inch seam allowance. Trim close to seam allowance, clip corners, and turn right side out. Top stitch along finished edges. Repeat with second 3 ½ inch by 4-inch piece.
Step 4
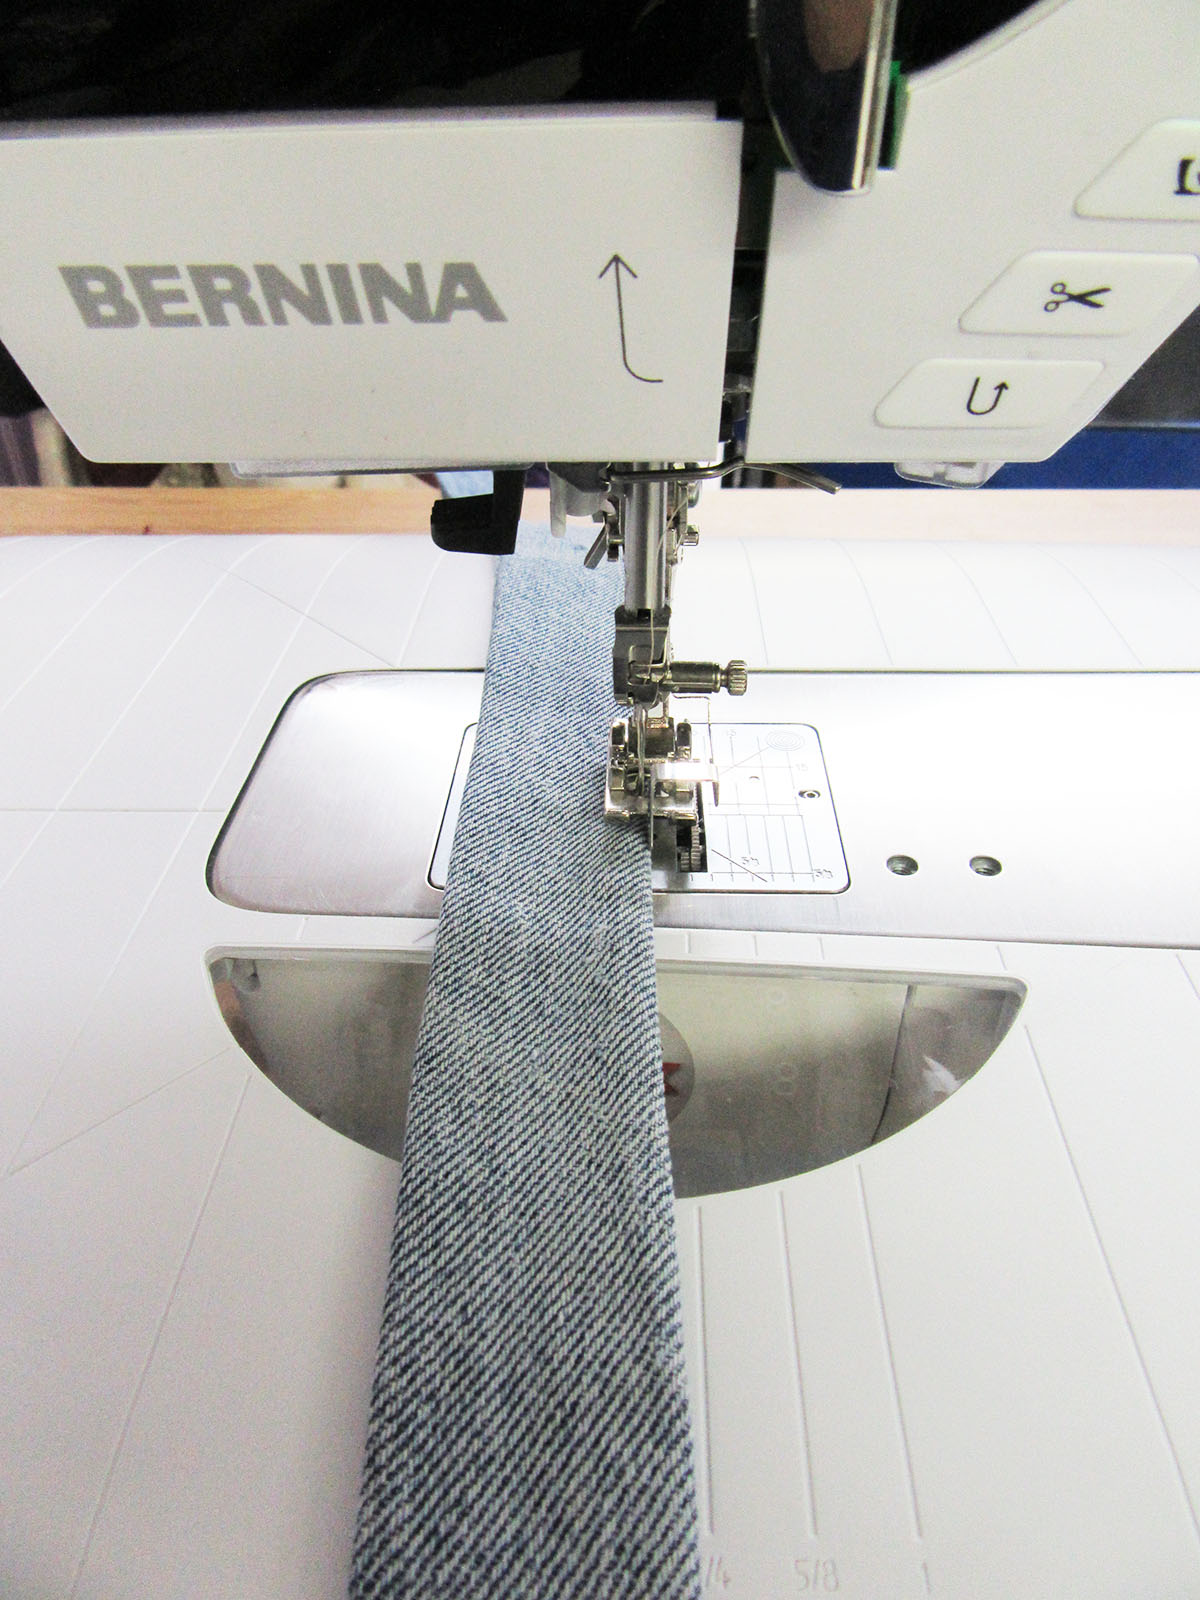
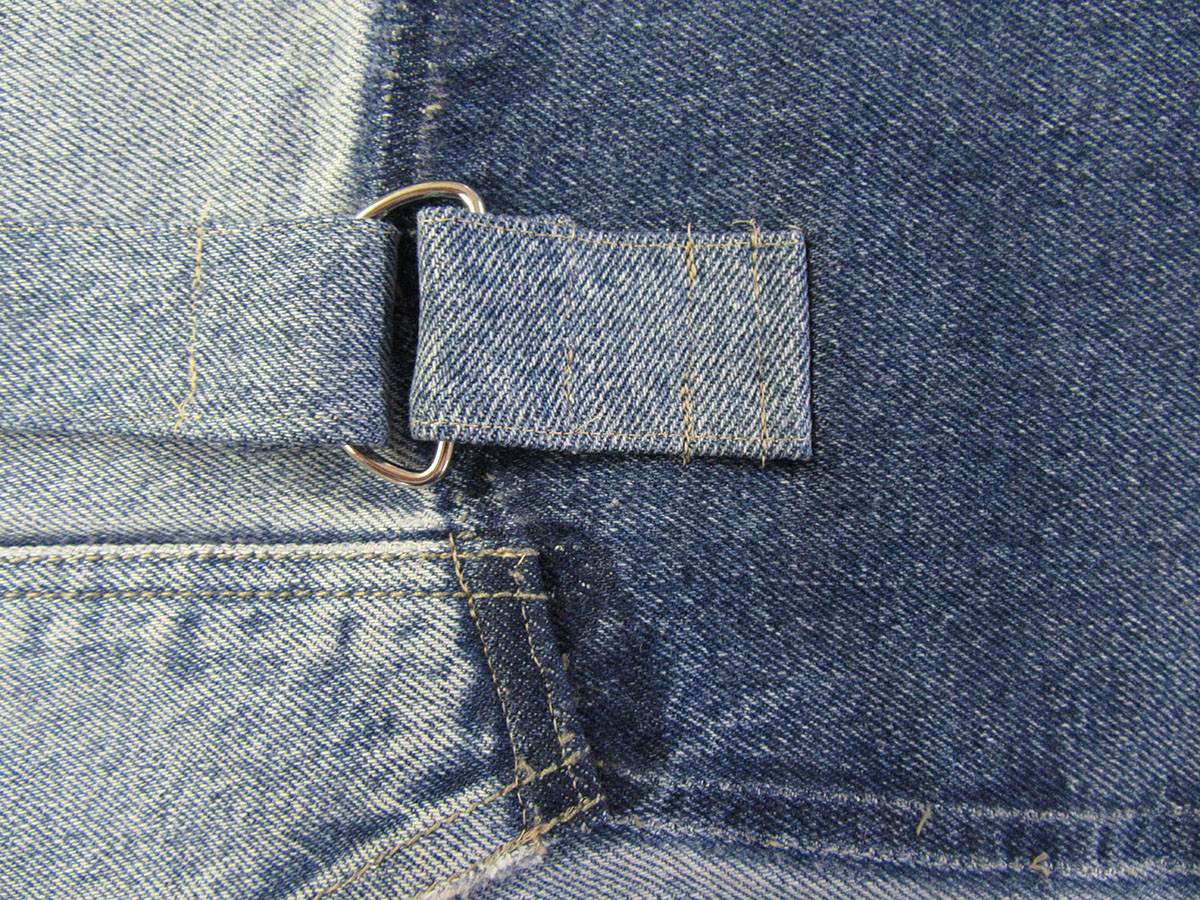
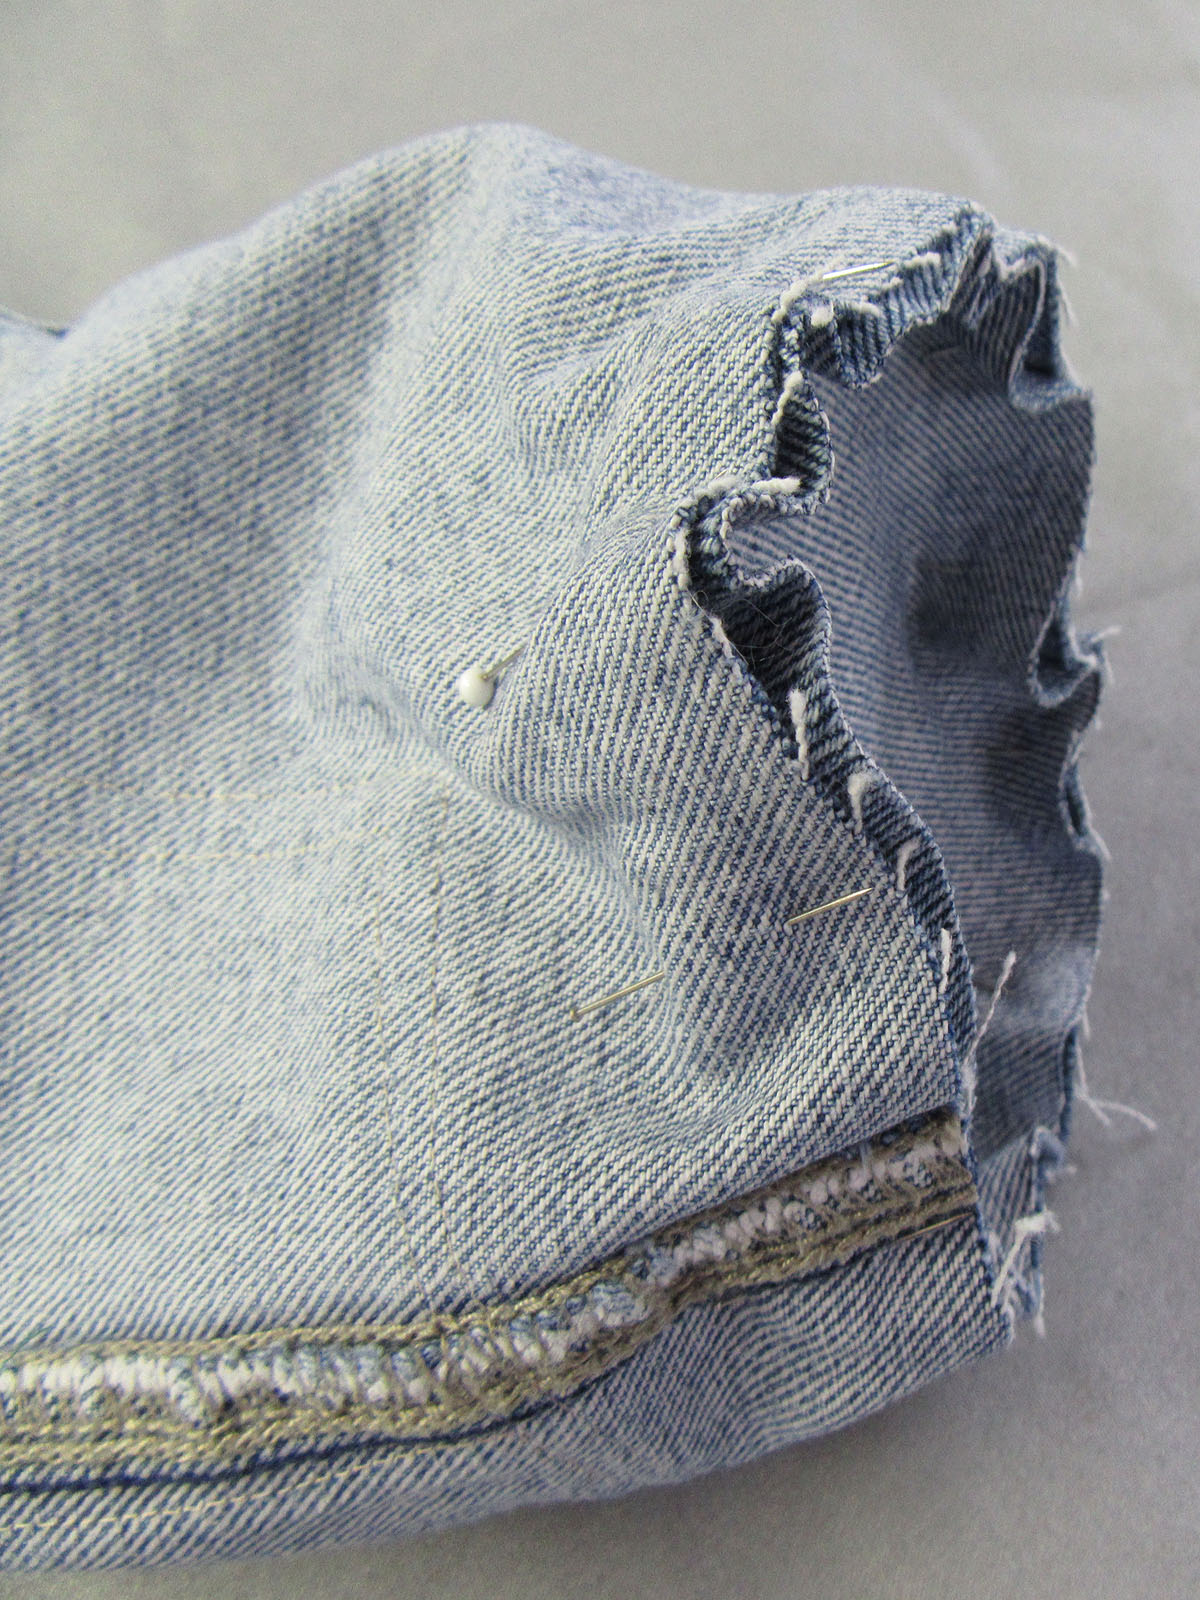
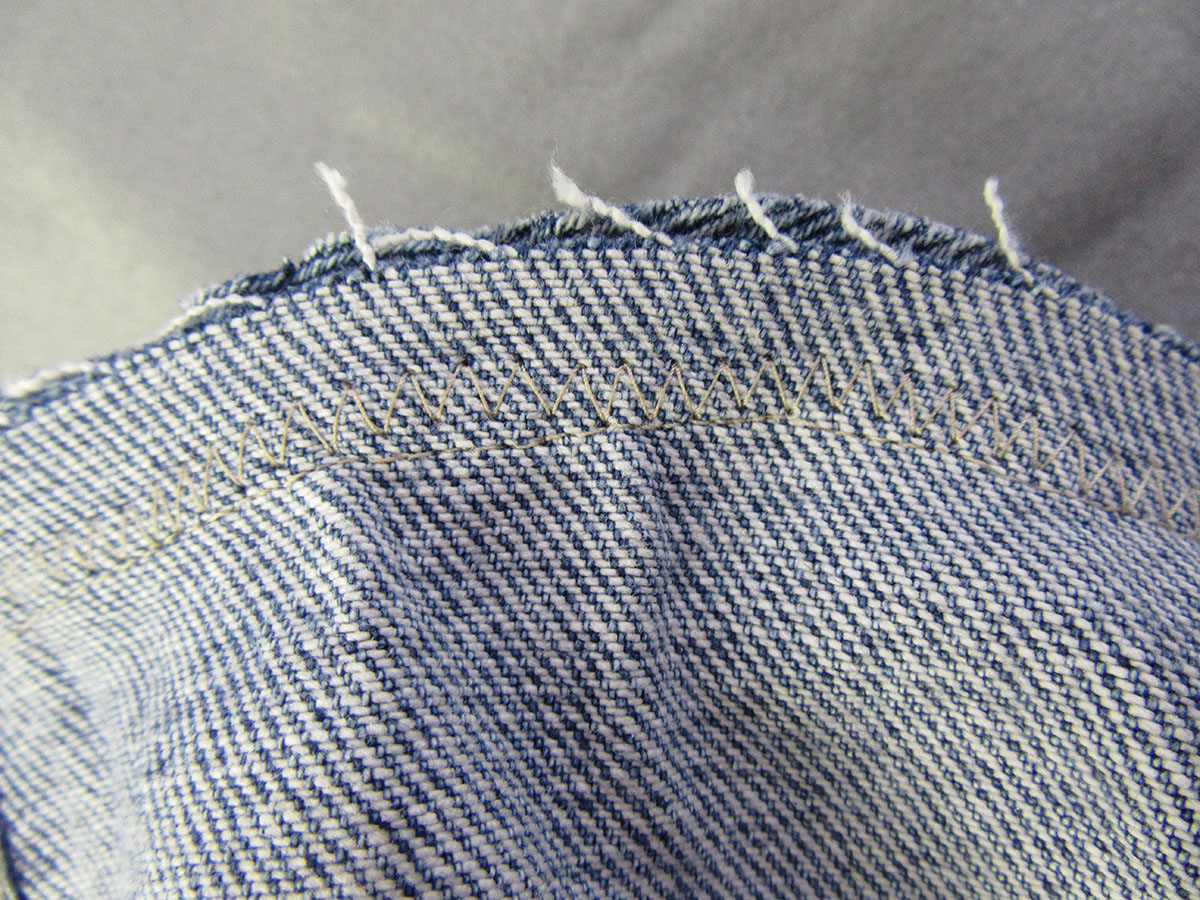
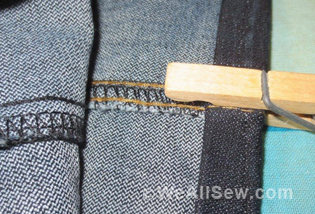
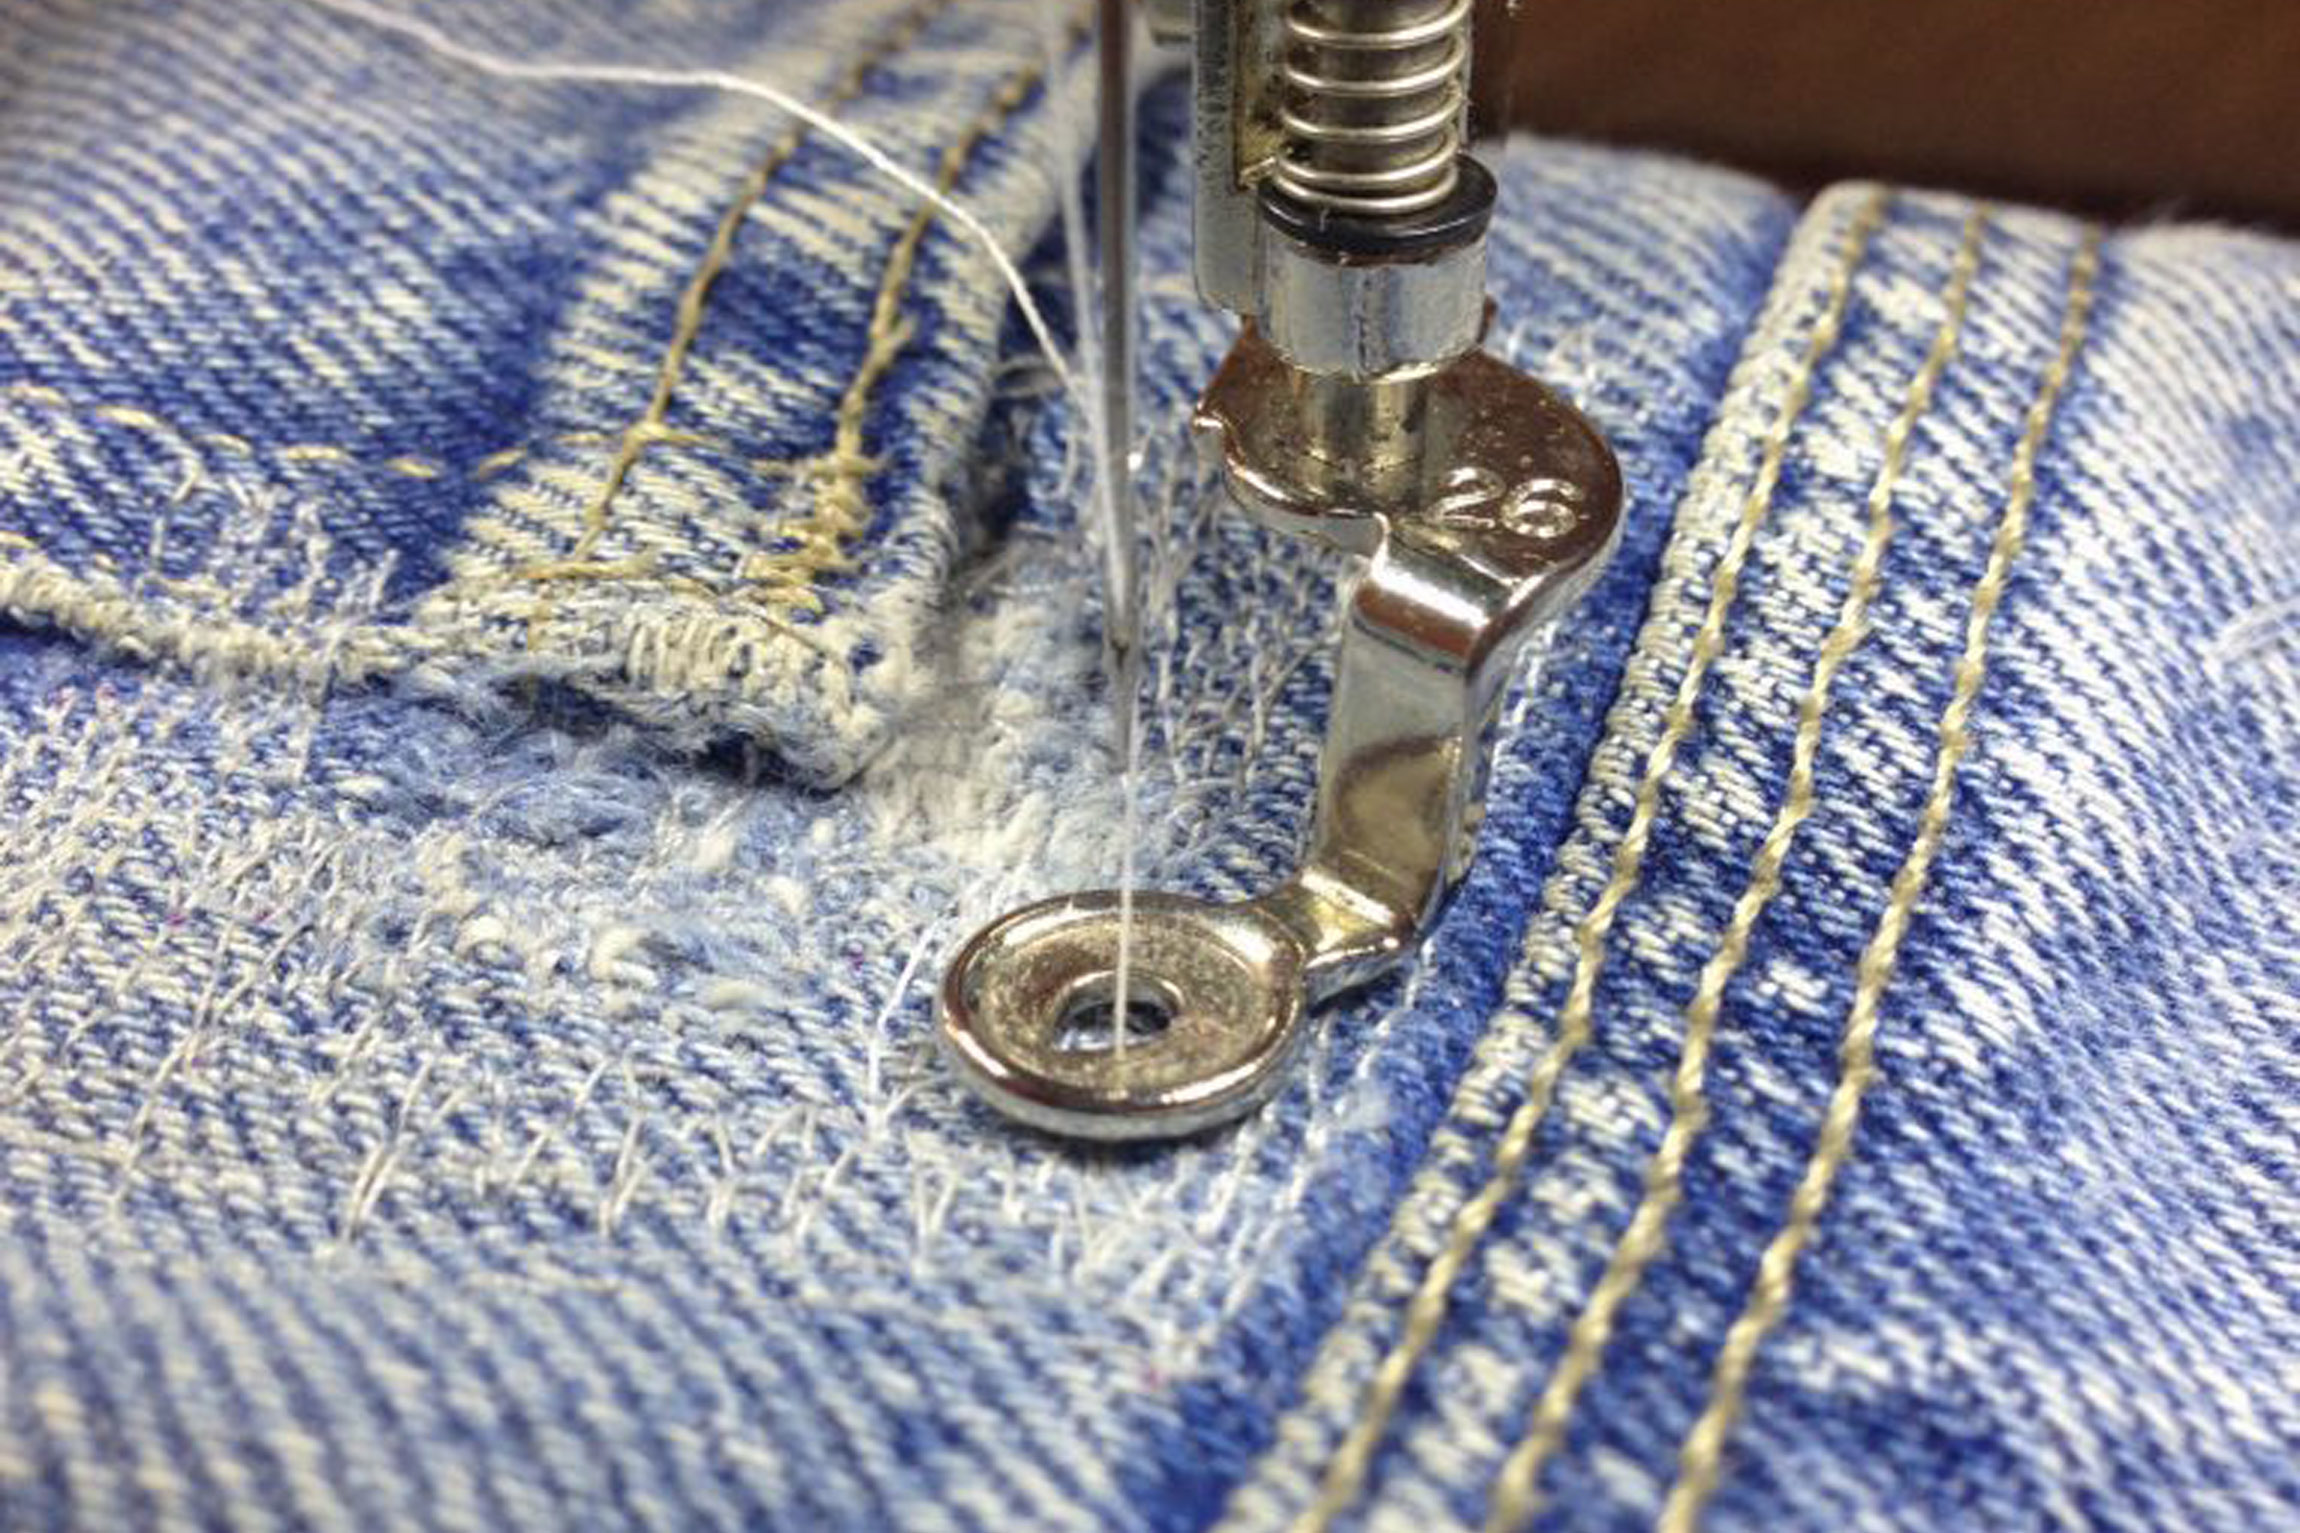
Right sides together fold long strip from step 2 in half matching raw edges of long sides. Stitch raw edges together using a ½-inch seam allowance. Leave open one short edge for turning. Trim close to seam allowance, clip corners, and turn right side out. Turn under open short edge. (See Picture 1) Top stitch along finished edges sewing closed turned under short end. (Picture 2)

Step 5
Fold the finished edge of one short strap section over a “D” ring and stitch to body of strap. Repeat with the second short strap section. Feed one finished edge of long strap through the slider and stitch to body of strap.
Step 6
Lay long strap folded side up on table and feed through one short strap “D” ring, placed fold side down. Continuing feeding long strap back through the slider.
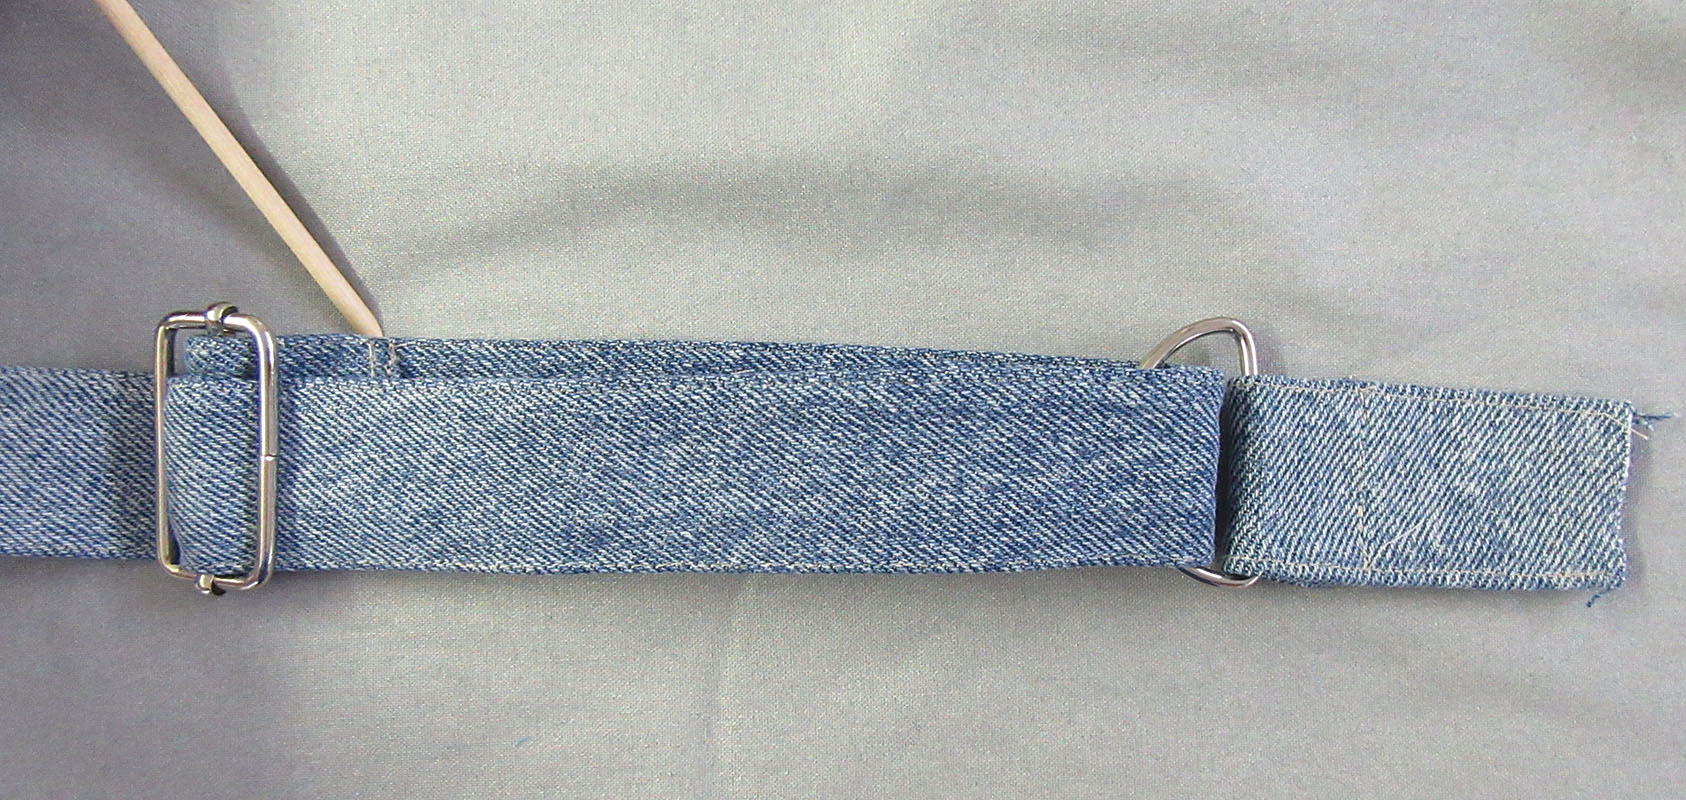
Step 7
Fold unattached finished edge of long strap over remaining short strap “D” ring and stitch to body of short strap. Both folds should face the same direction.
Join Strap to Bag
Step 1
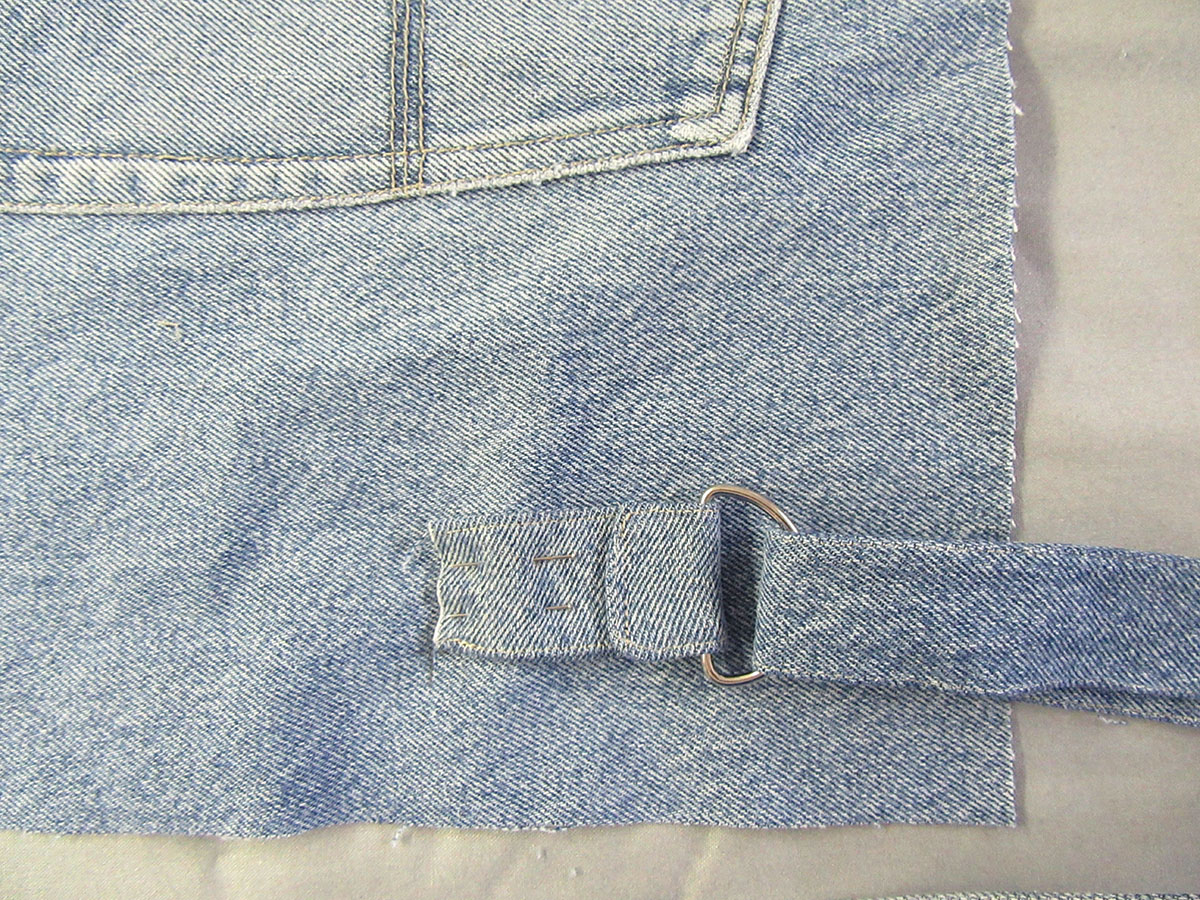
Make a mark 1 ½ inches from the long edge of the jeans rectangle and 6 inches down from the top (pockets will be facing up).
Step 2
Align one unfished short strap edge with this mark. Strap should be 1 ½ inches from the edge (Picture 1). Sew in place. Fold over and sew again close to first seam and then again ½ inch from folded edge. (Picture 2)
Step 3
On same side as step 1, measure in 1 ½ inches from side of bag and 6 inches up from the bottom of the bag, mark.
Step 4
Align one unfished short strap edge with this mark. Strap should be 1 ½ inches from the edge. Sew in place. Fold over and sew again close to first seam and then again ½ inch from folded edge. The same as in step 2.
Assembling Upcycled Jeans Yoga Bag
Step 1
Pin long raw edges of jeans rectangle together and stitch using a 5/8-inch seam allowance. Press open seam.

Step 2
Cut a 5 ½ inch circle from remaining jeans scraps. Pin to bottom of bag. (Openings of pockets should face away from pinned circle. Stitch using a 5/8-inch seam allowance.
Step 3
Zig-Zag close to seam stitched in step 2 to help secure bottom of bag.
Step 4
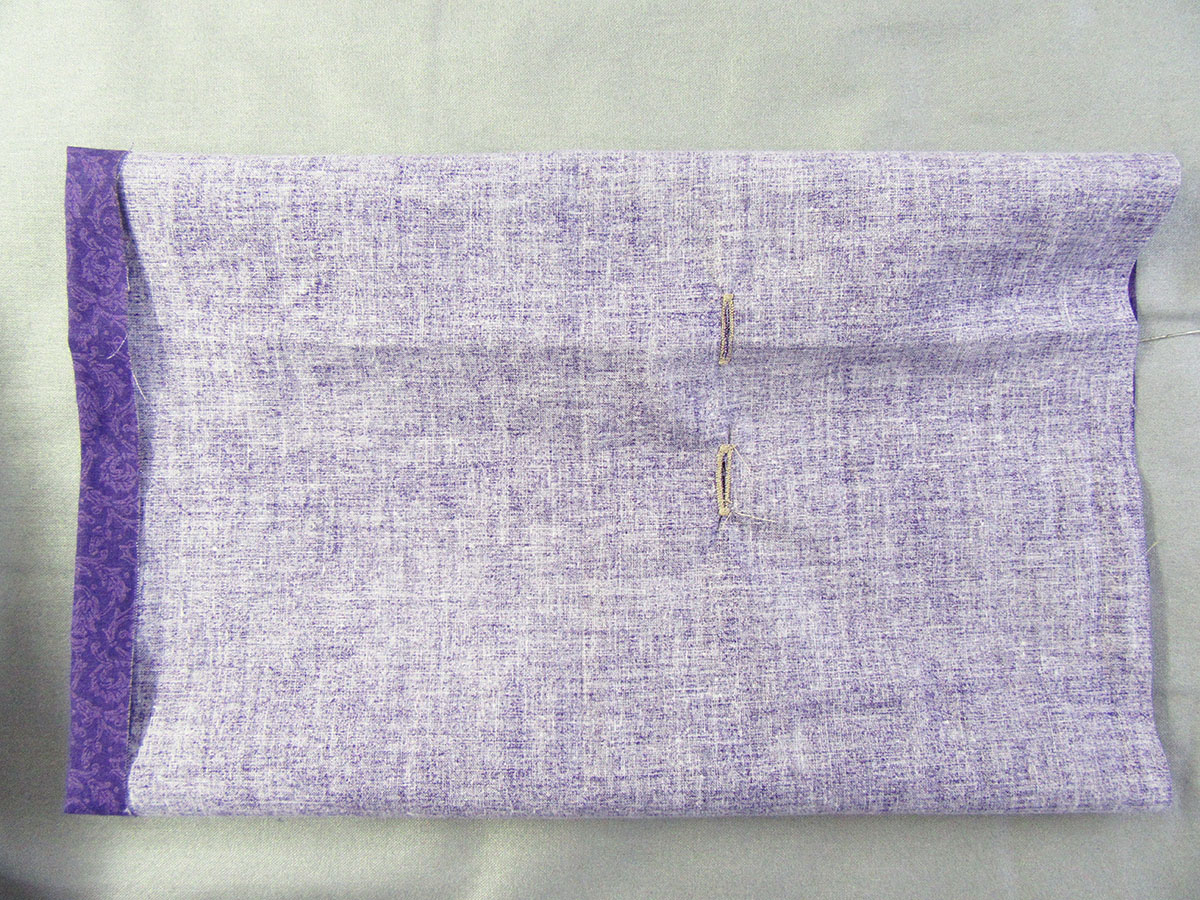
Cut out a 12-inch by 16-inch piece of your cotton fabric.
Step 5
Fold fabric from step 4 in half length-wise and then width-wise. Press to crease fabric along fold lines.
Step 6
Make a mark approximately ½ inch on either side of the crease that is the center of the sides that measure 16 inches, and approximately 1 inch down from the crease that is the center of the sides that are 12 inches.
Step 7
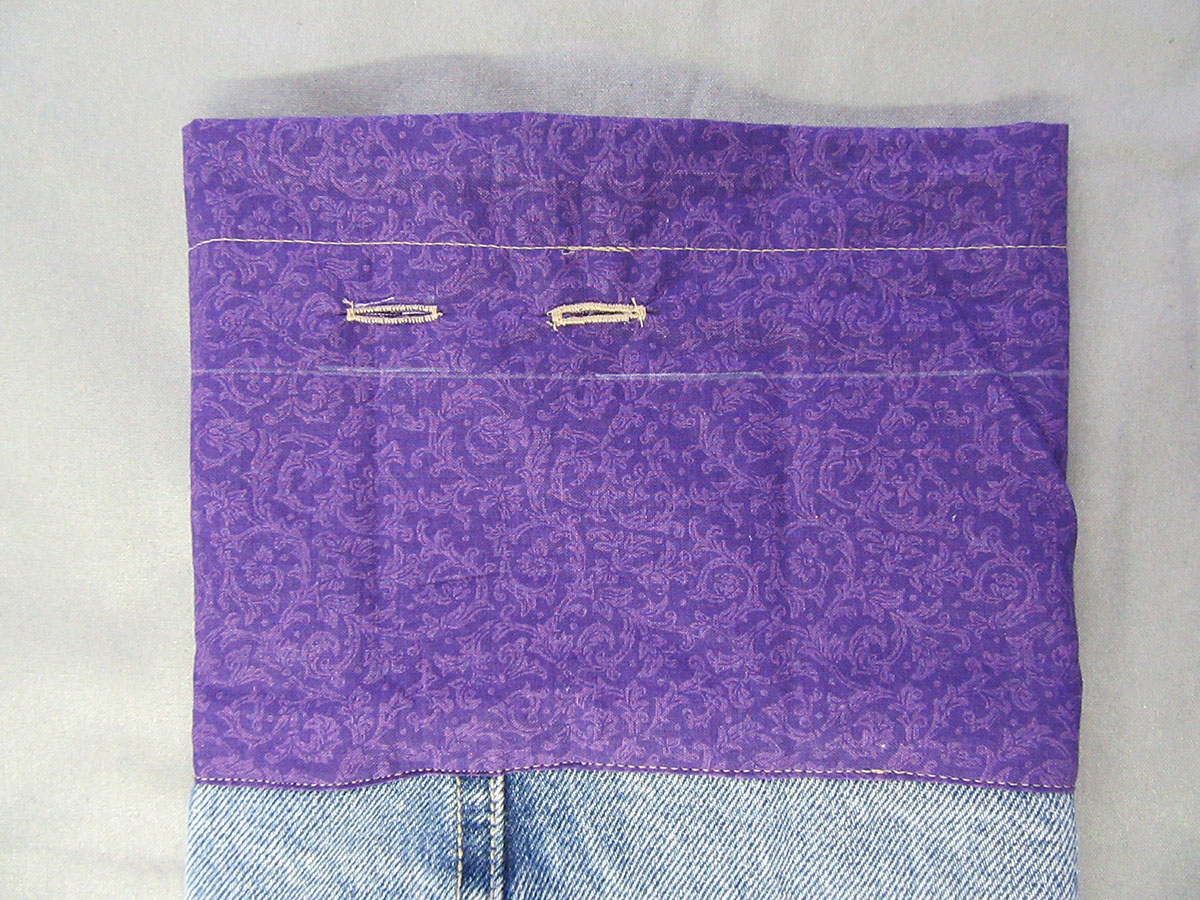
Sew a ½ inch buttonhole on each of these marks. Cut open buttonholes.
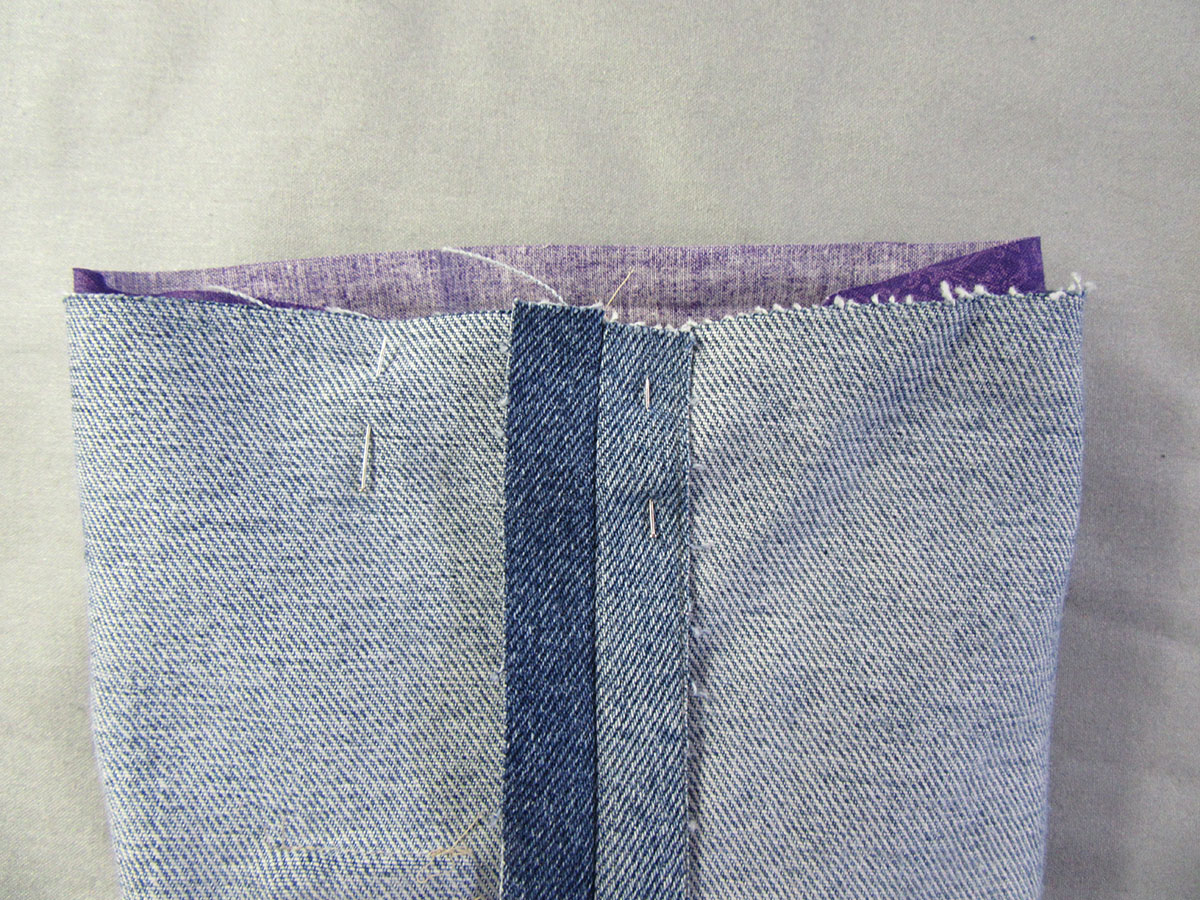
Step 8
Pin short sides together and stitch using a 5/8-inch seam allowance.
Step 9
Fold over edge that is farthest from the buttonholes 5/8 inch and press.
Step 10
Pin unpressed raw edge right sides together, matching seams, to raw edge of jeans bag assembled in previous section. Sew using a 5/8-inch seam allowance.
Step 11
Press seam towards cotton fabric.
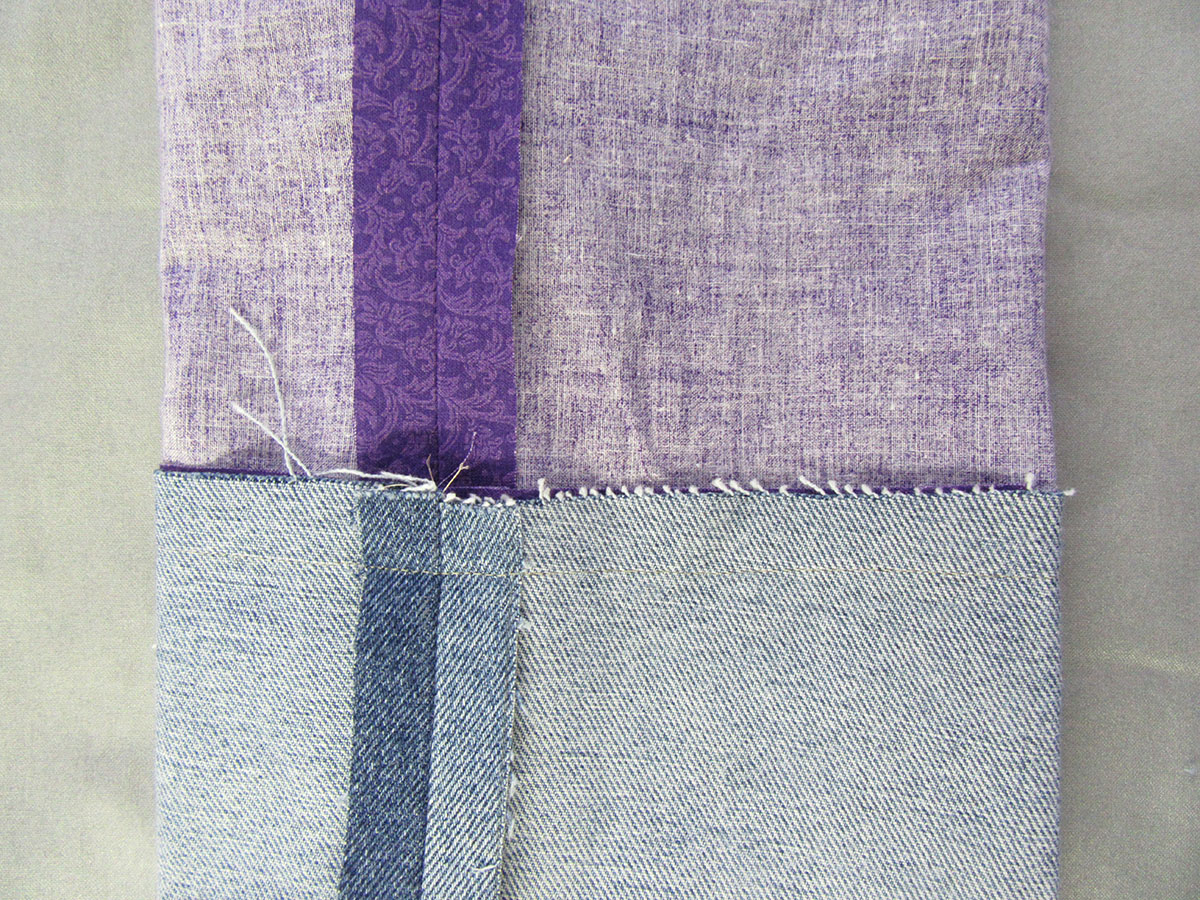
Step 12
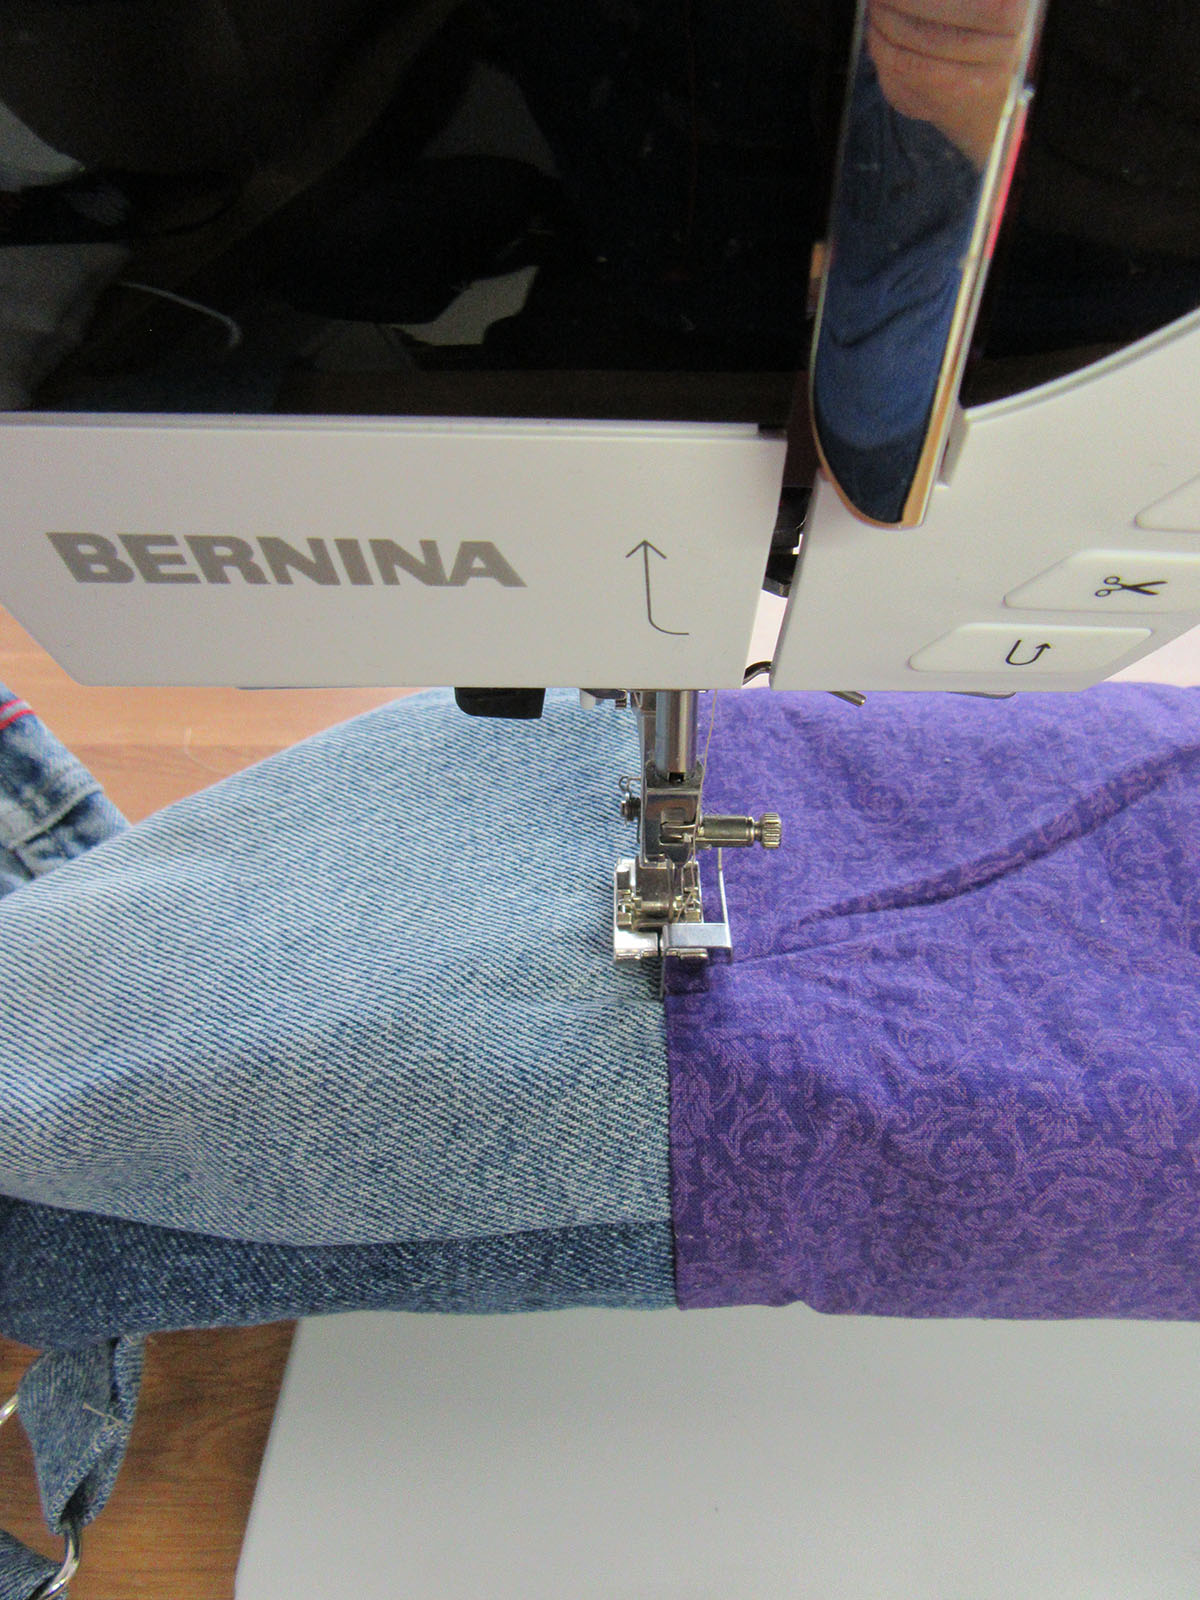
Fold along previous crease line used to find center for buttonholes and align turned under edge of cotton fabric with seam line on wrong side of jeans.
Step 13
Pin in place and from front side sew an 1/8 inch from seam line securing pinned fabric.
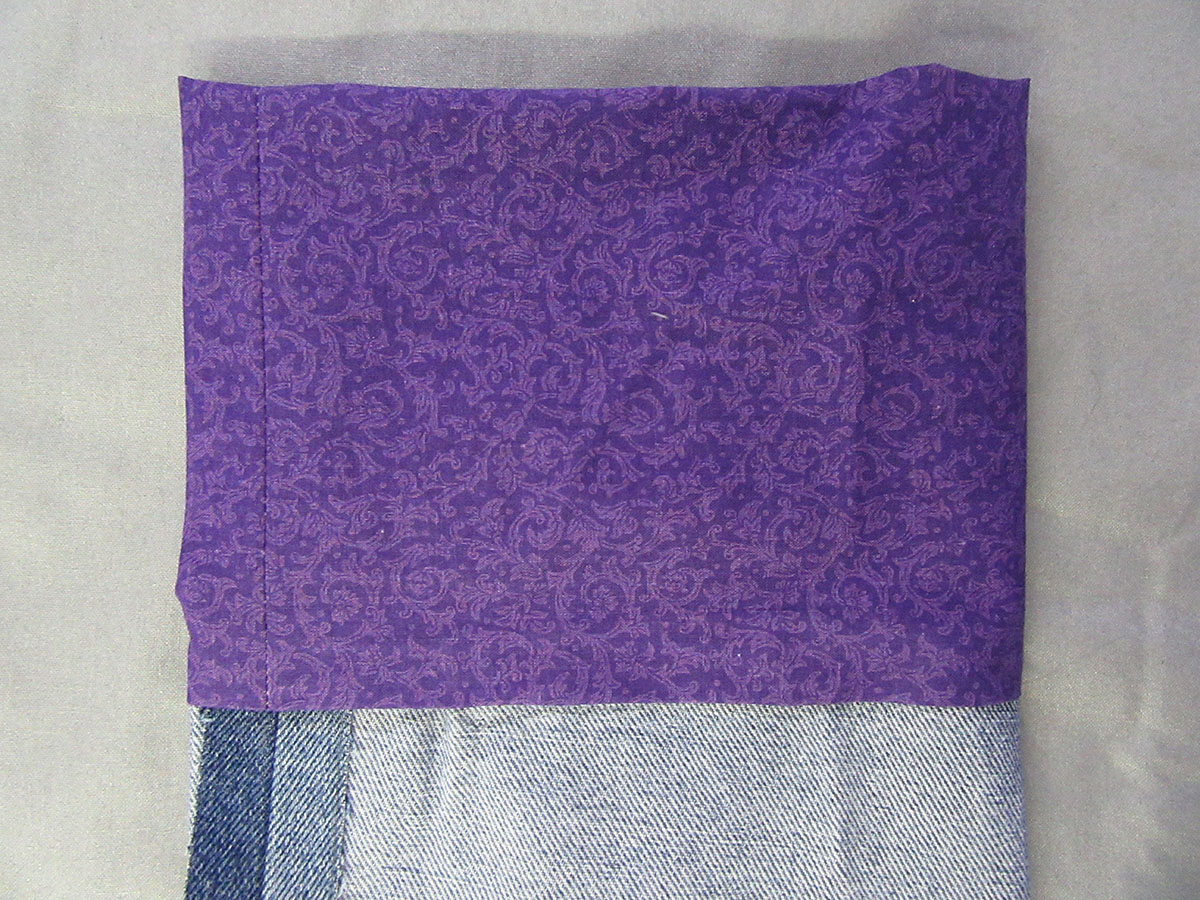
Step 14
Mark a line all the way around the bag ½ inch above and ½ below buttonholes to create a channel for the cording. Sew along both lines.
Step 15
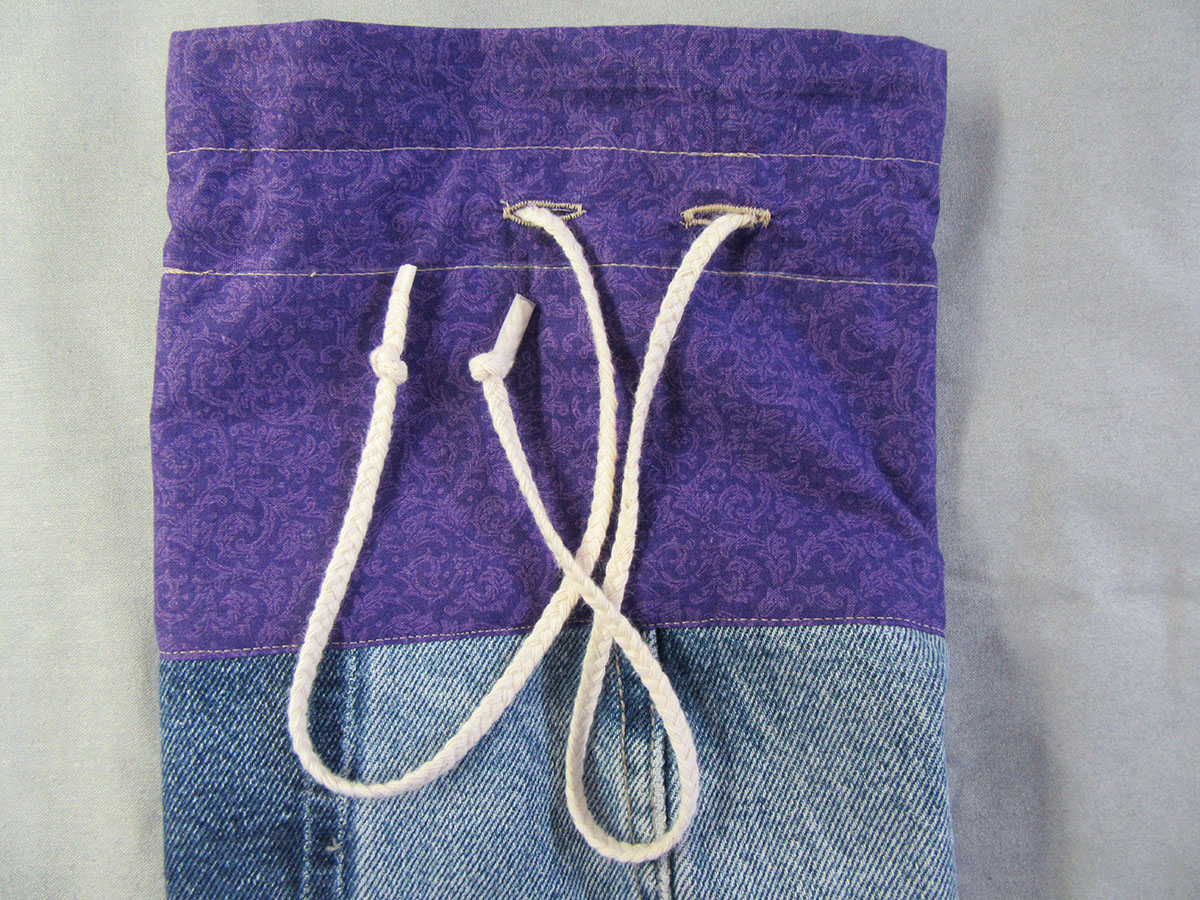
Insert cording through a buttonhole using a safety pin to feed it through the channel. After coming out the opposite buttonhole, tie a knot in each end of the cording to keep it from raveling.
Now that your bag is all ready to go make sure that you make time to take care of yourself with a weekly yoga class, or try one of these two poses during a sewing break to help keep you limber. (Always check with your doctor before starting any new exercise programs.)
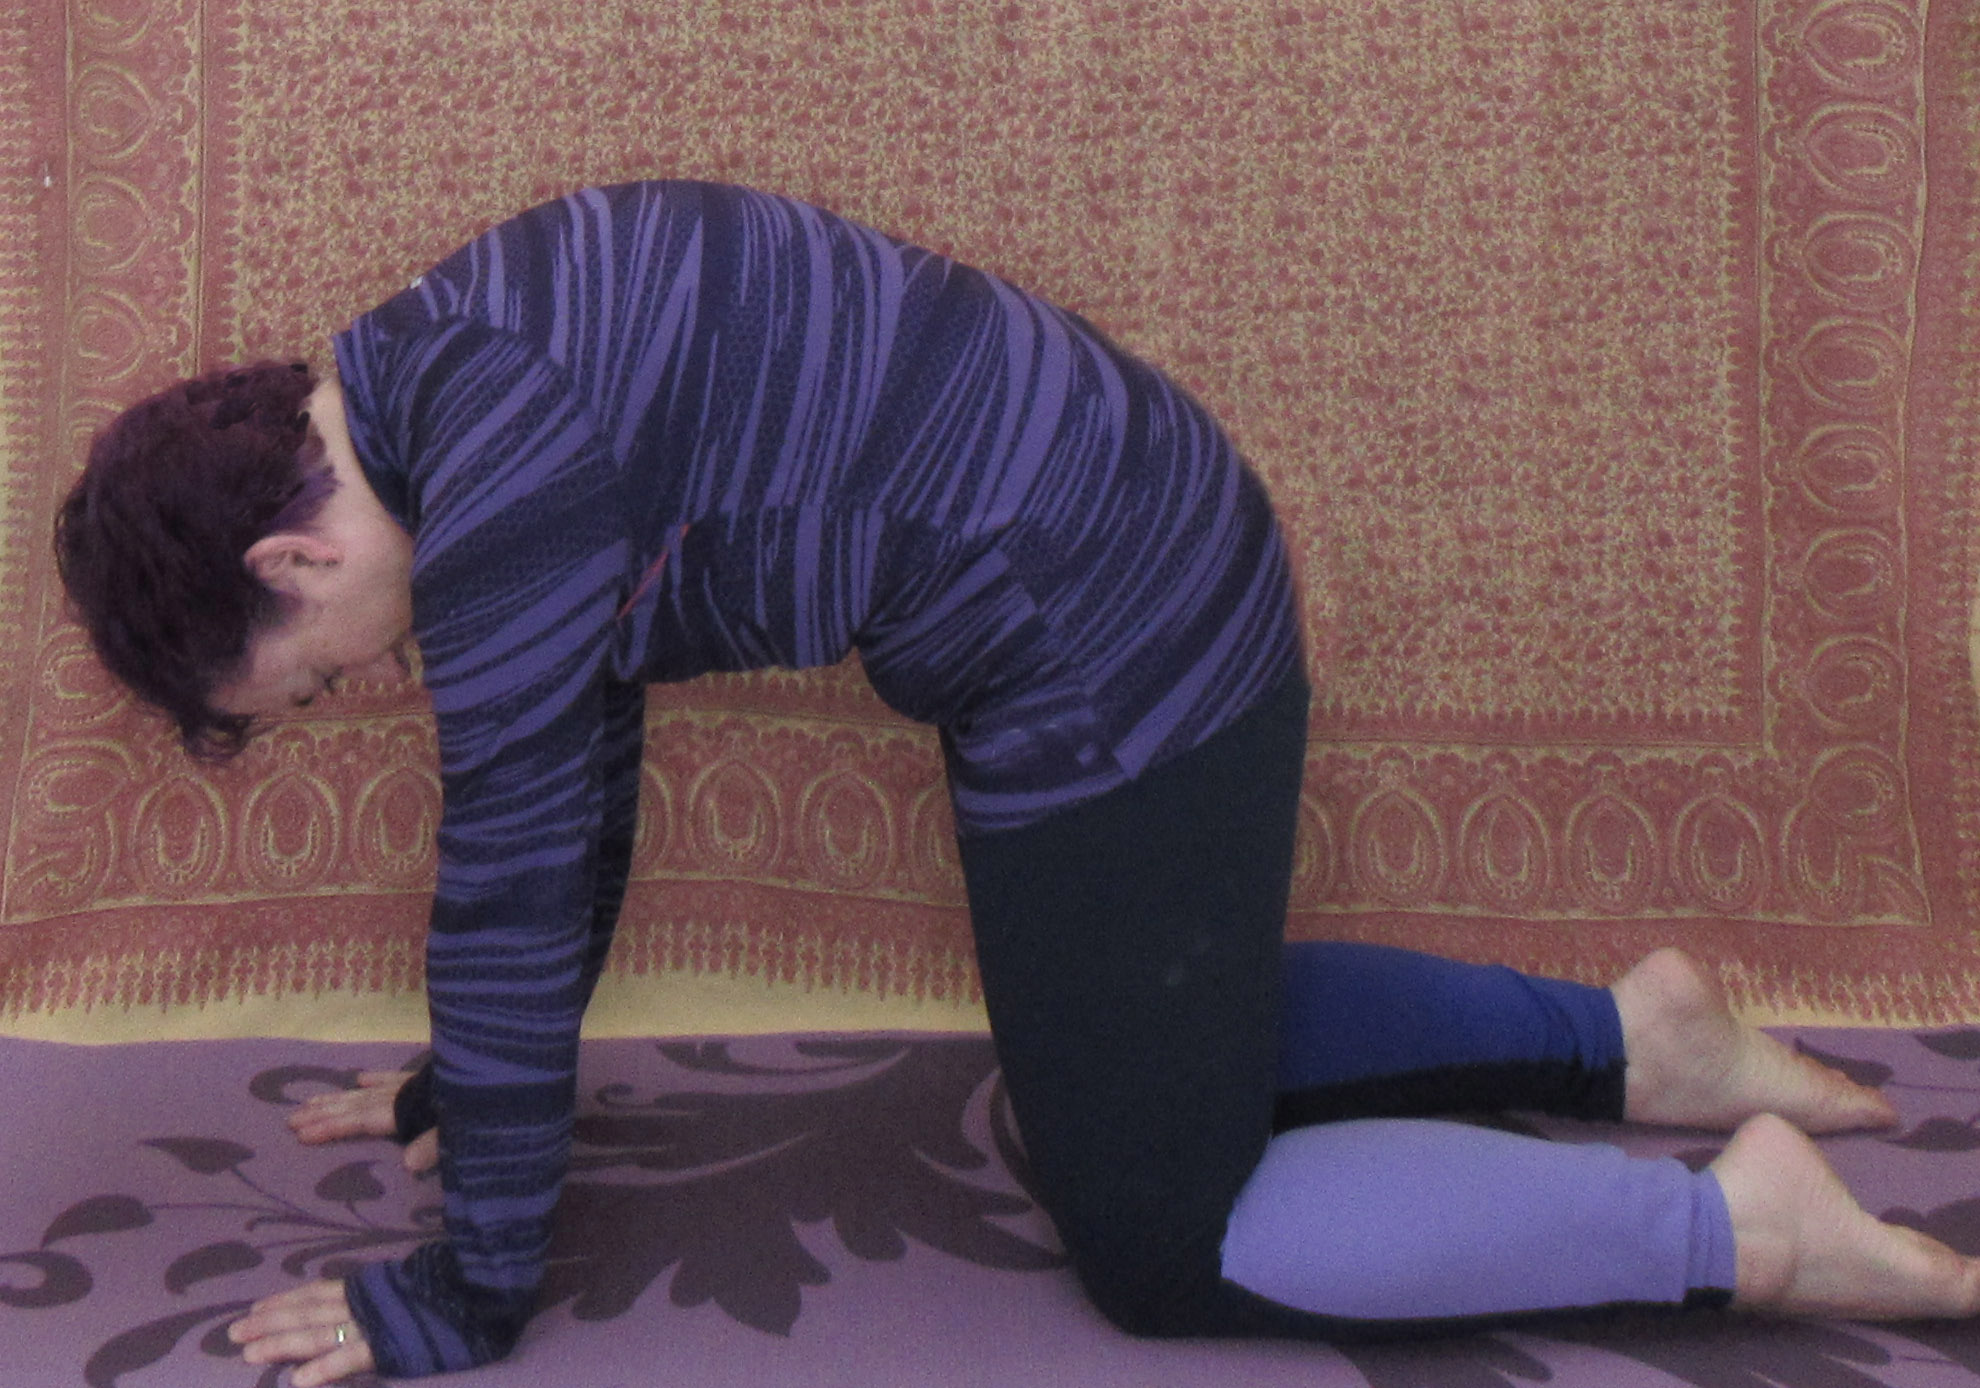
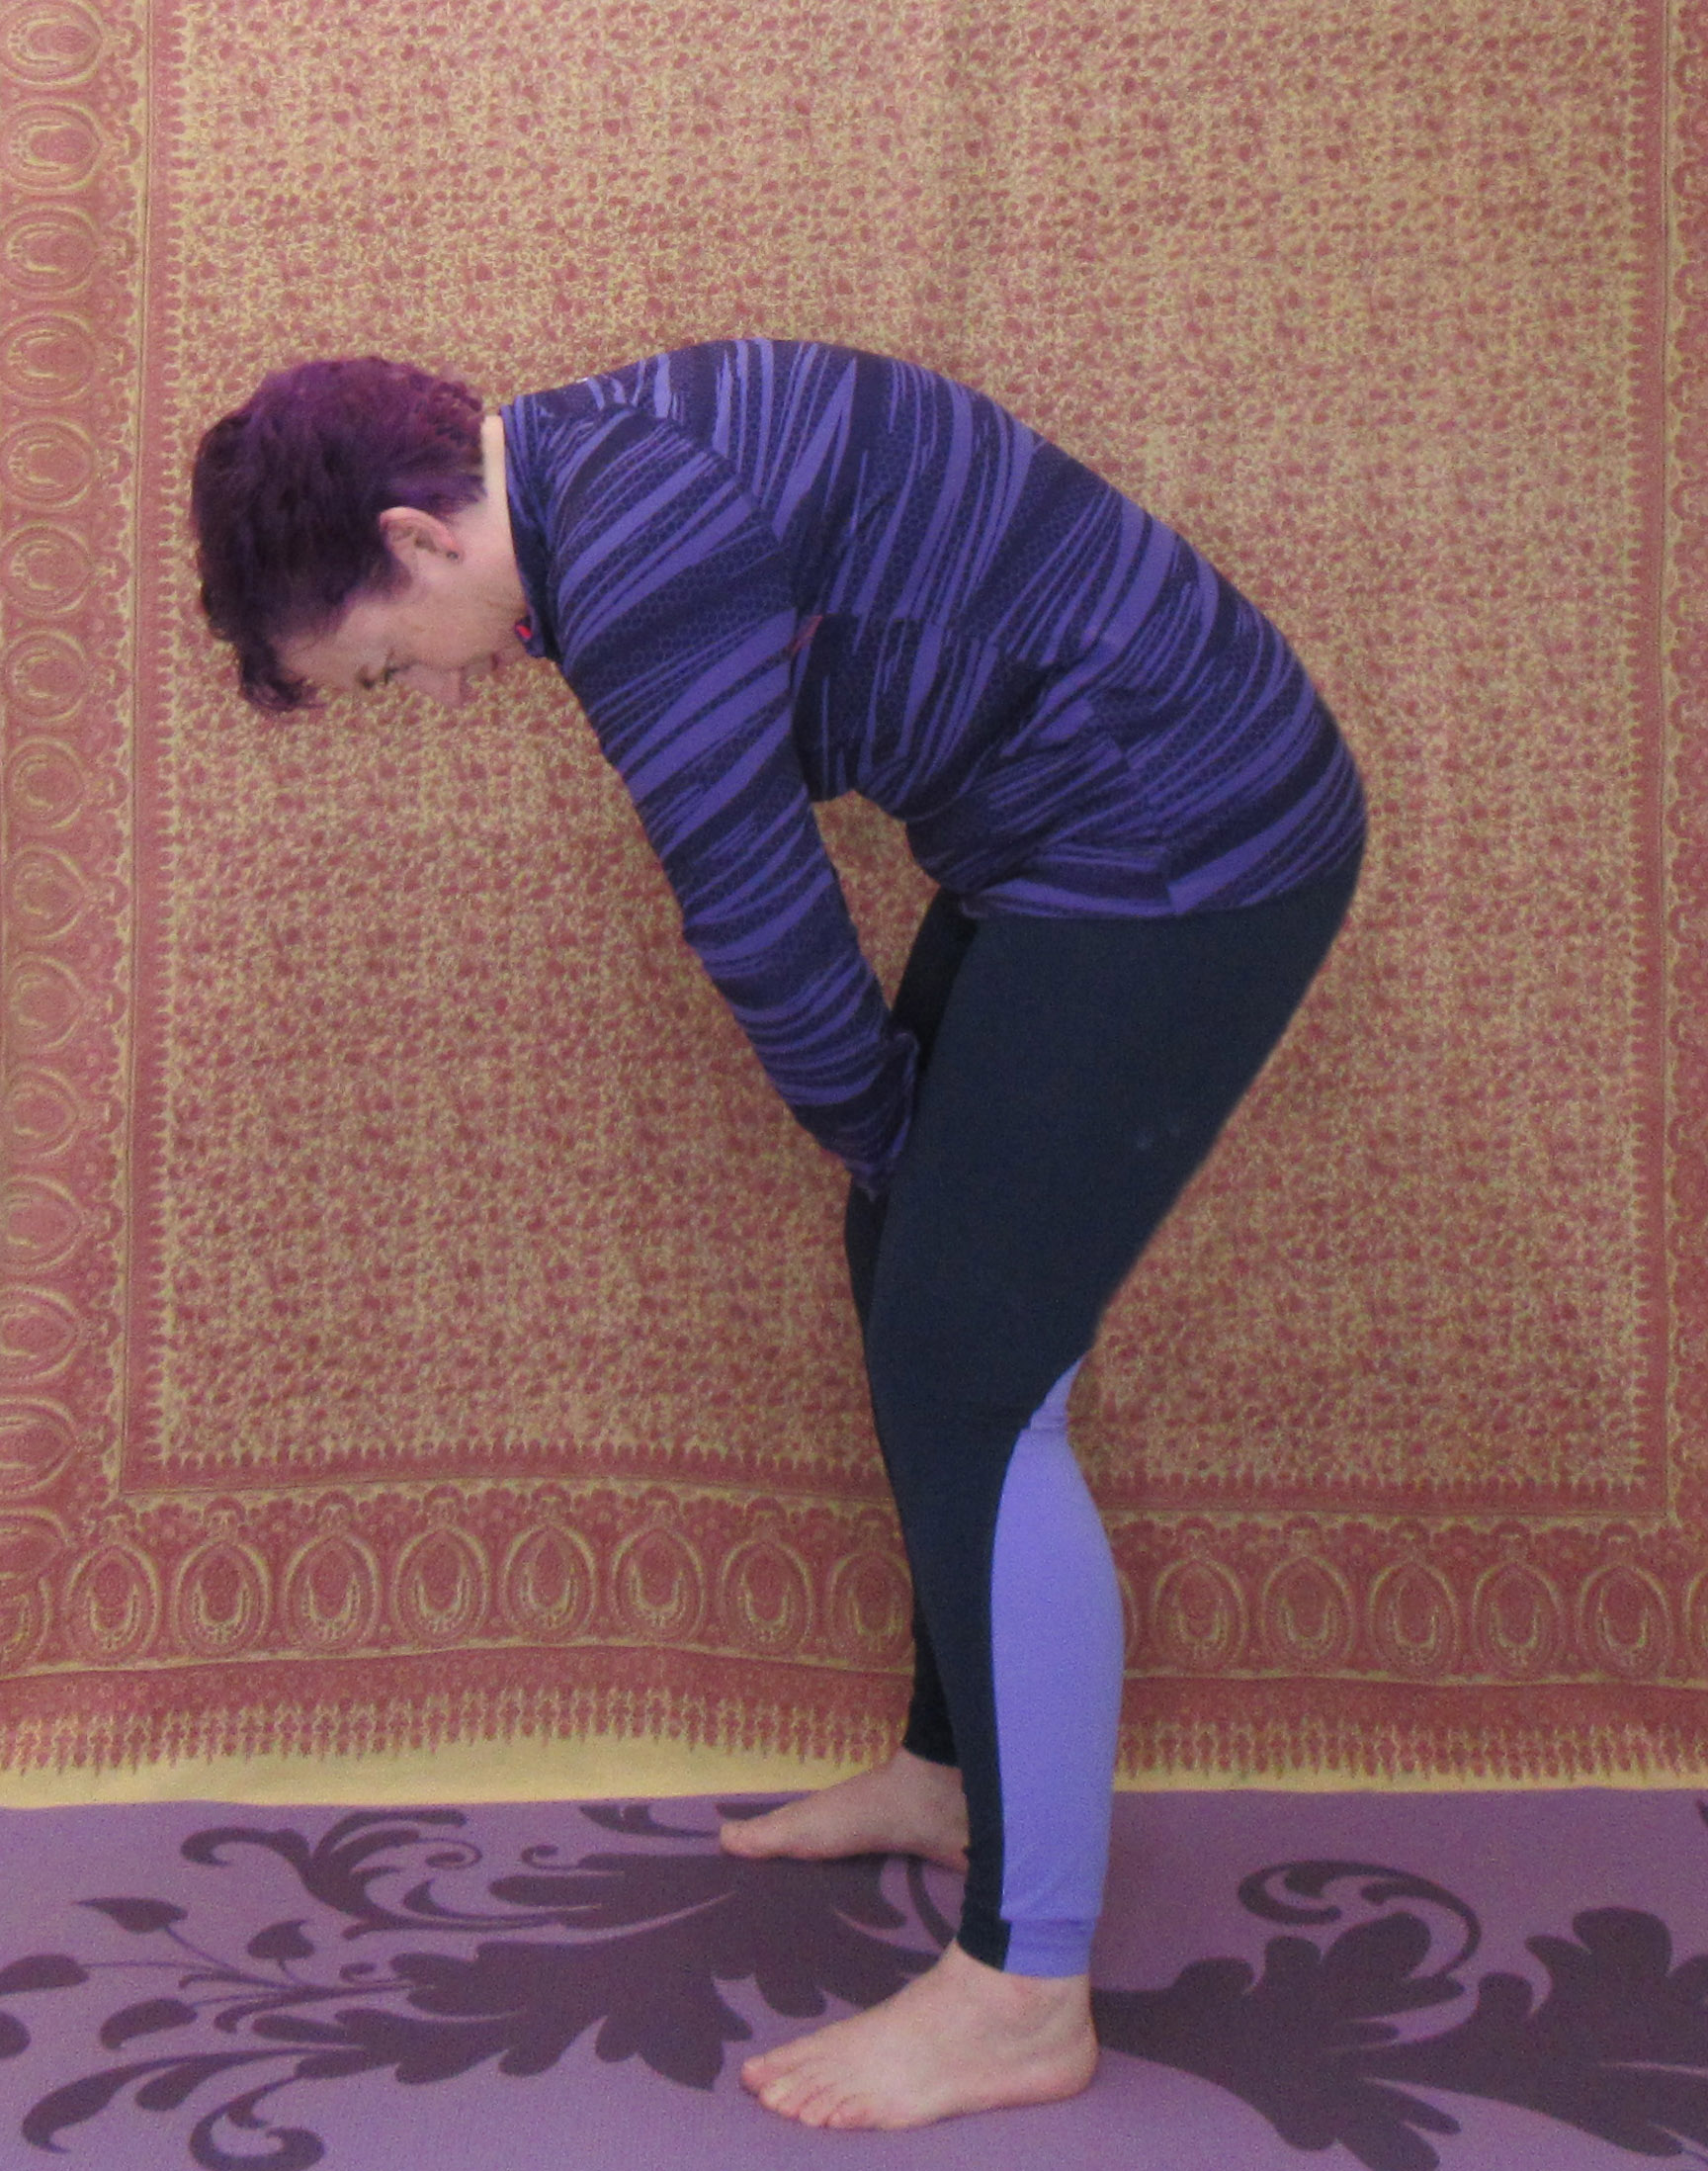
Cat Pose
This pose uses your core muscles and helps to tone the muscles around the spine. While in this pose, the idea is to work on making the spine more flexible. It also helps to release tension around the hips, lower back and neck. Generally done in combination with cow pose. Contraindications: Wrist, neck, or back injury, recent surgery.
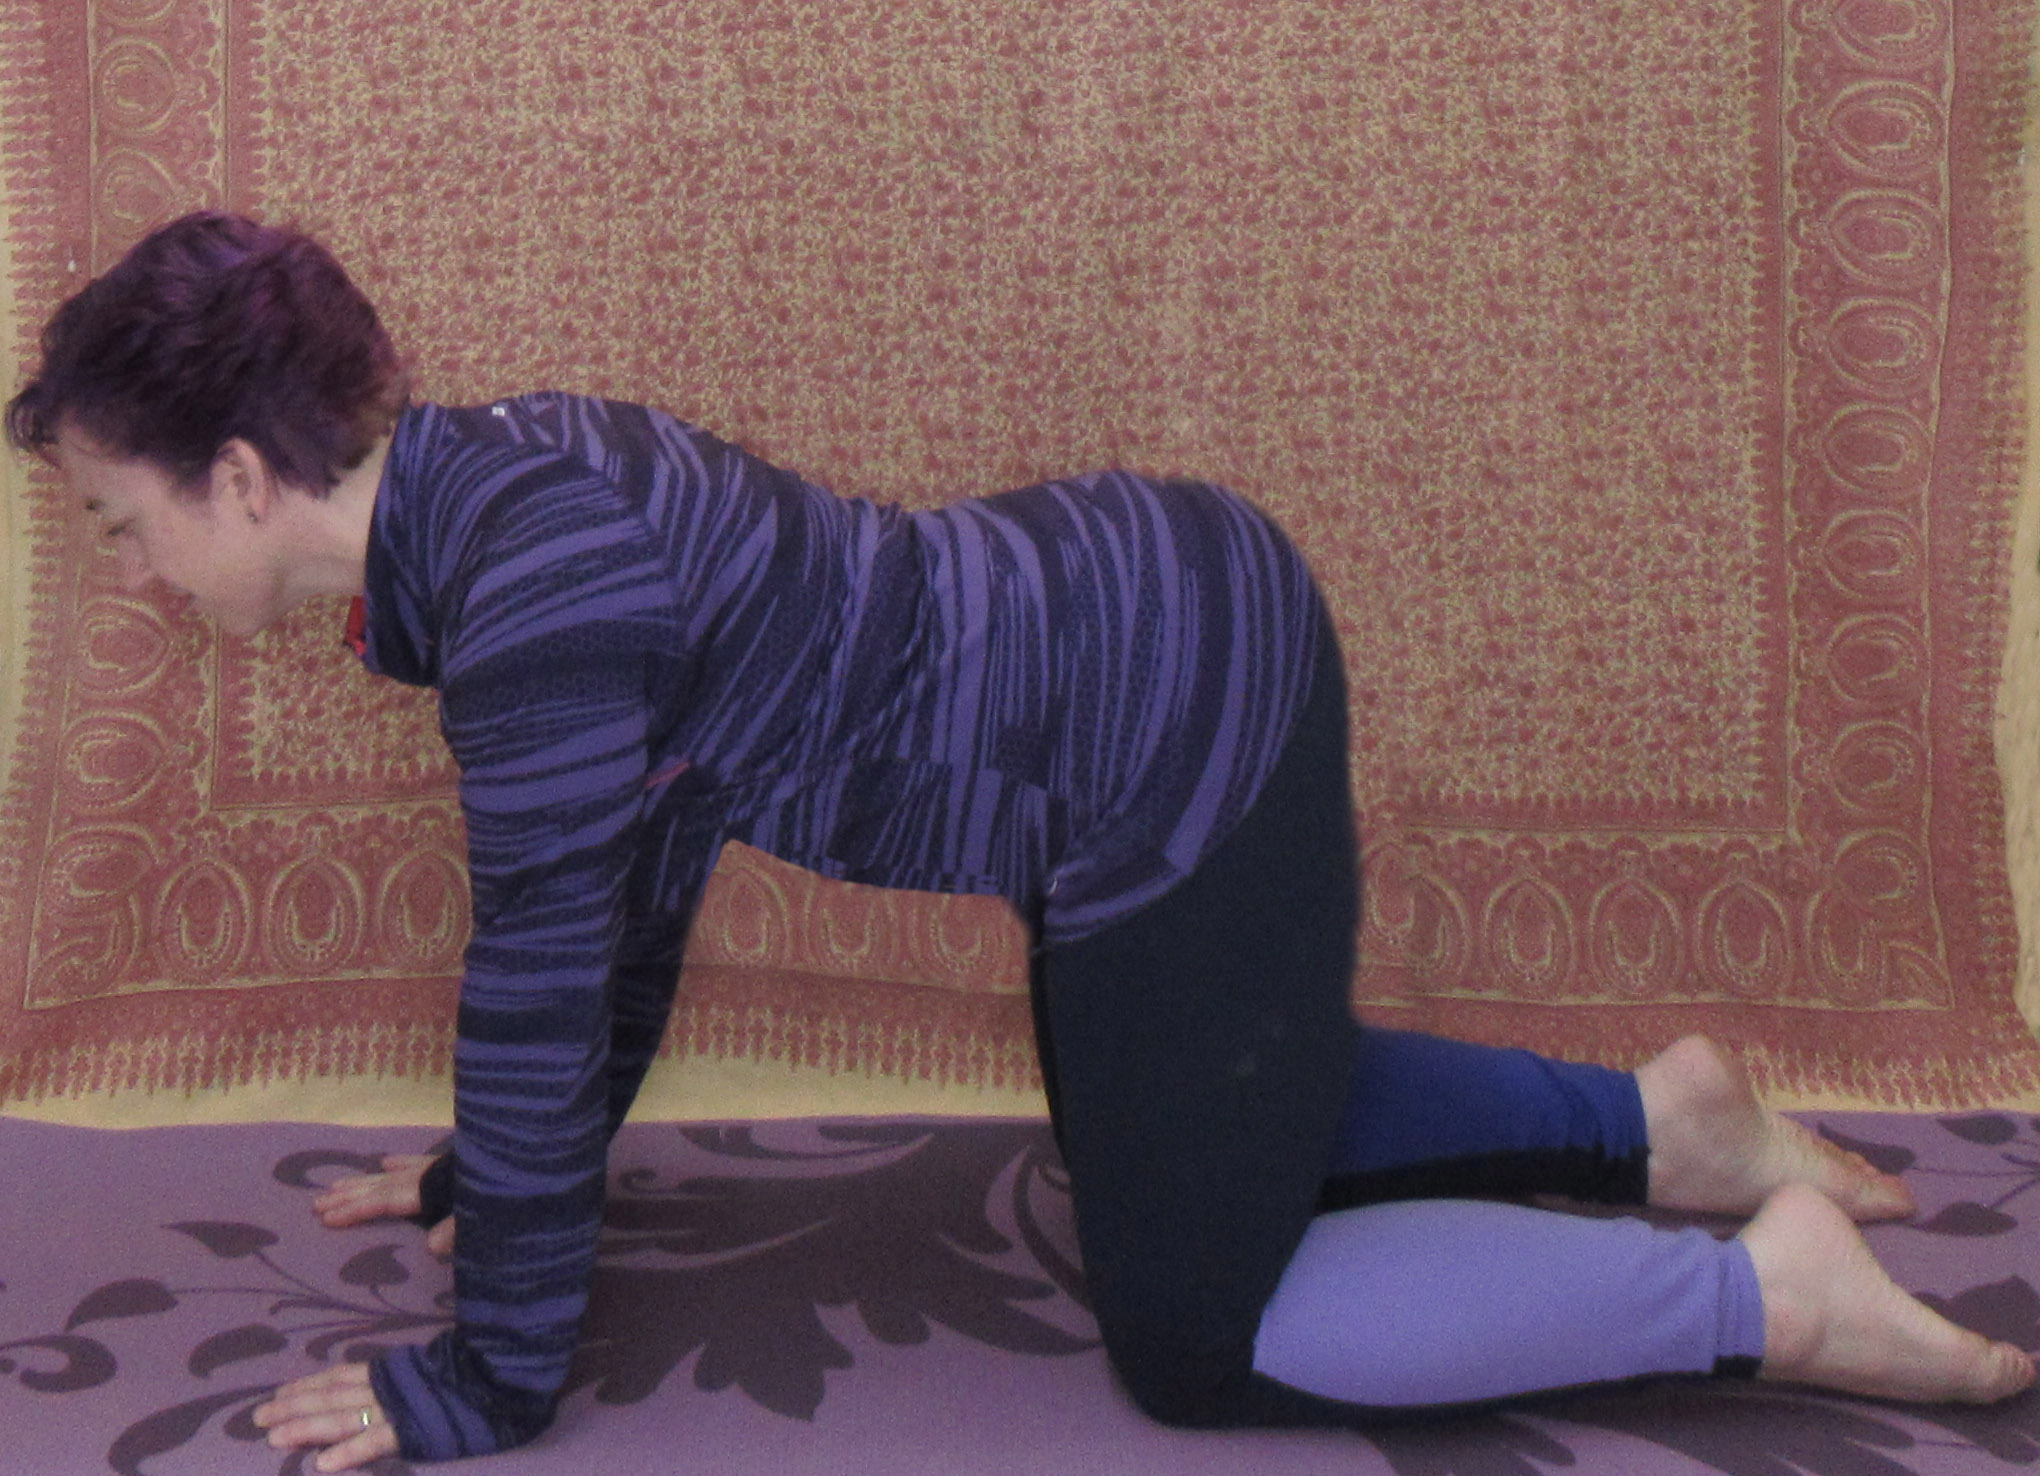
Start on your hands and knees. The starting position for cat pose is also called “tabletop pose.” Get on all fours with your wrists directly below your shoulders and your knees directly below
your hips. As you exhale, round your spine toward the ceiling. Release your head toward the floor, but don’t force your chin to your chest. Inhale, coming back to neutral “tabletop” position on
your hands and knees
If it is difficult for you to get on your hands and knees, or if putting weight on your wrists is painful, try modified cat pose. Standing upright, bend at the back, and grasp your inner thighs with your hands. While holding on to your thighs arch your back and let your head fall forward to avoid putting strain on your neck.
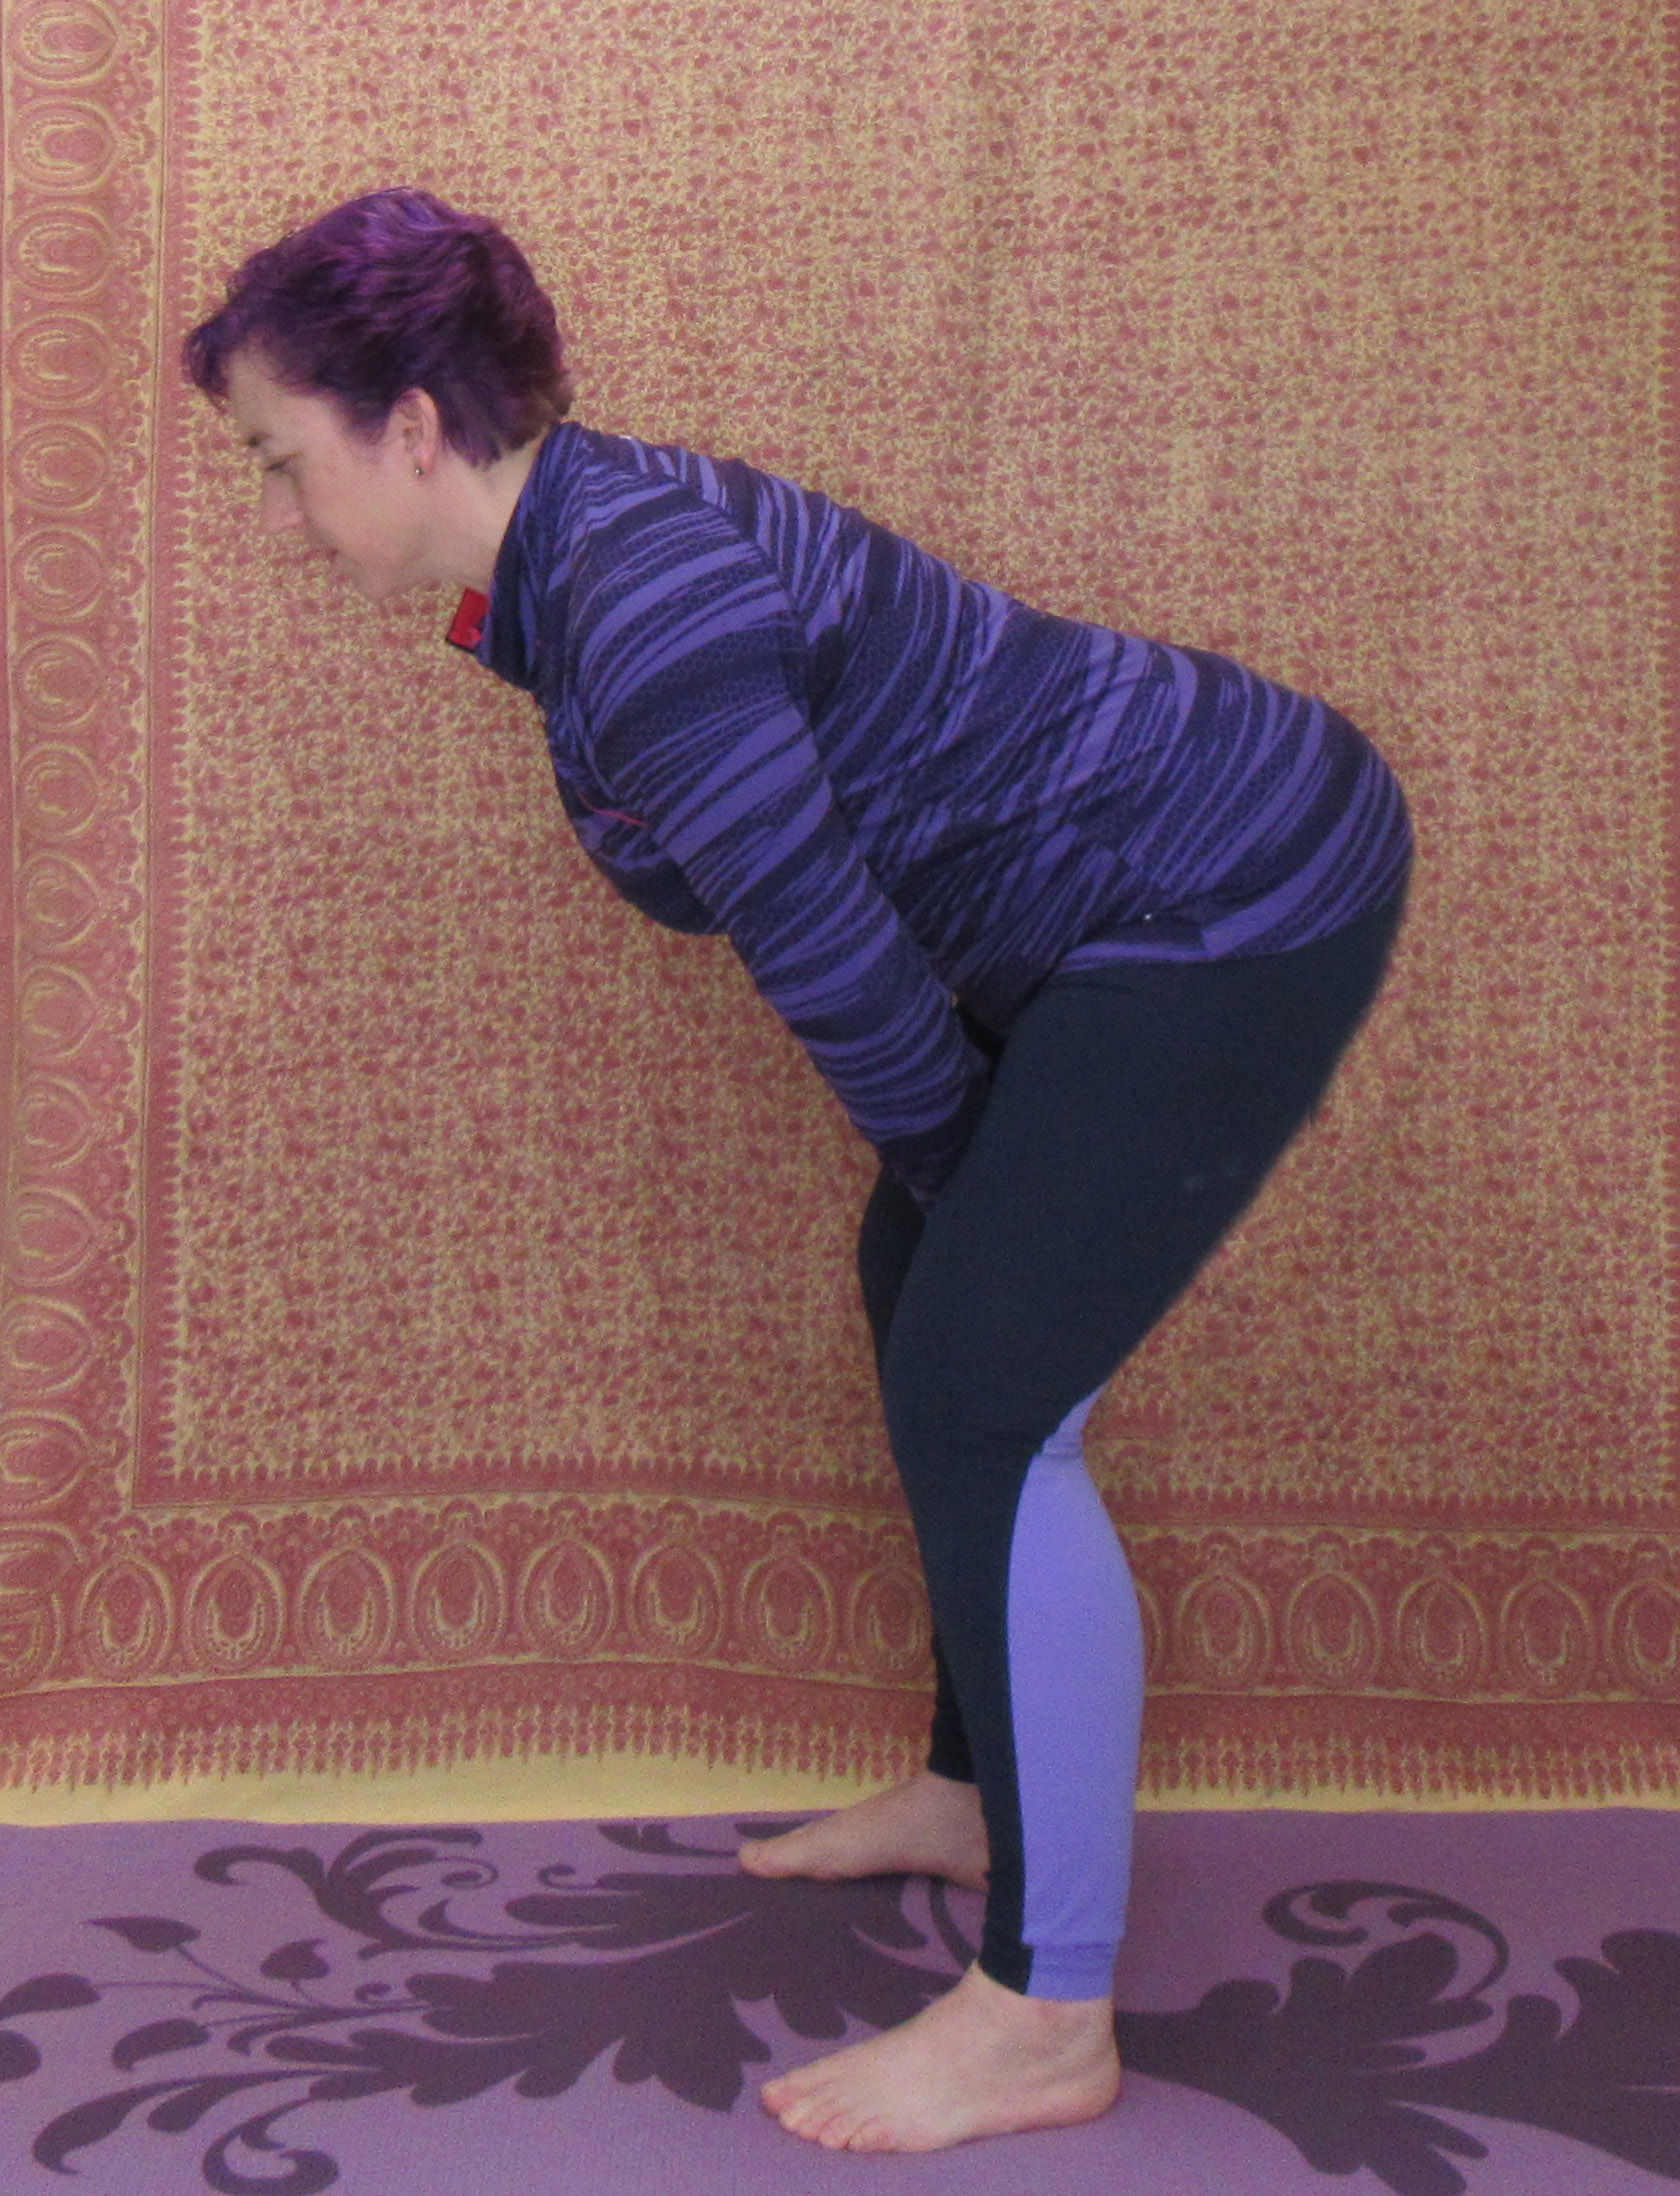
Cow Pose
Cow pose is a pose anyone can do to open the chest and promote spinal flexibility. It’s a great way to keep the spine mobile and teach the back to move with articulation or one vertebra at a time. Our natural tendencies are to move in large, more structured movements with our spines. This creates inflexibility in the back which can lead to injury. When Cow Pose is practiced regularly, it can help to lessen the chance of an injury.
Contraindications: Wrist, neck, or back injury, recent surgery.
Start on your hands and knees with hands directly under your shoulders and knees directly under your hips. With your spine in a “neutral” or long position, gently lift your head/shoulders and tailbone so your back gently curves downward. Look slightly upward with a relaxed neck and breathe gently. Inhale, coming back to neutral “tabletop” position on your hands and knees.
If it is difficult for you to get on your hands and knees, or if putting weight on your wrists is painful, try modified cow pose. Standing upright bend at the back and grasp your inner thighs with
your hands. While holding on to your thighs arch your shoulders up and back allowing your lower back to curve forward naturally. Be careful not to hyper-extend your neck. The focus should be on the curve of the lower back.


What you might also like


2 comments on “Upcycled Jeans Yoga Bag”
-
-
Thanks glad you liked it. We need to remember to always stop and stretch when sewing for long stretches.
Leave a Reply
You must be logged in to post a comment.

Nice tutorial. Upcyclng jeans is a great idea. Love the yoga poses at the end.