Quilt Safari, Part Two: Elli the Elephant
Good morning and hello to all Quilt Safari participants and, of course, a warm hello to all those who are still considering whether they want to jump into our jeep… yes there’s still room and we’re more than happy for everyone who wants to join us for this adventure. Today I welcome you with one of my personal favorite patterns.
We are sewing the “Elli the Elephant” quilt block.
First of all, I would like to thank everyone who has posted articles in the community section of the blog and on social media. Thank you for sharing your work with me and everyone else!
There is an African saying: “If you want to be fast, go alone, if you want to go far, go together! Could there be a more fitting motto for our quilt safari?”
Today We Continue Our Journey – We Are Sewing Elli the Elephant
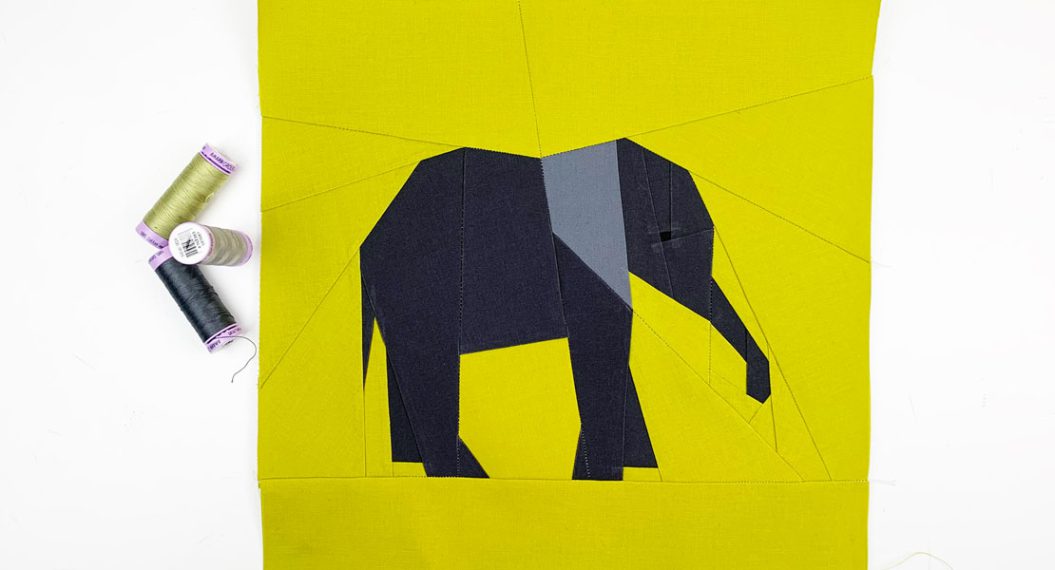
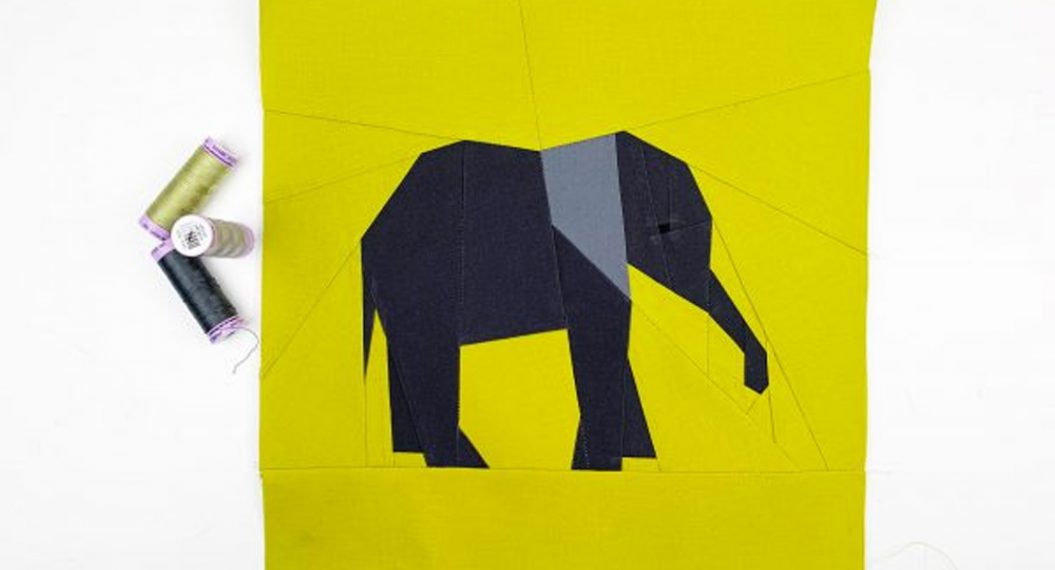
We’re moving on to the next block and will be sewing Elli the elephant quilt block pattern. Elli is one of my first patterns. I designed the block back in 2019 after a trip to Africa.
Elephants are such fascinating animals and I was surprised at how rough and bristly an elephant’s skin is. On reflection, of course, it does make sense, but I somehow had a different image in my head.
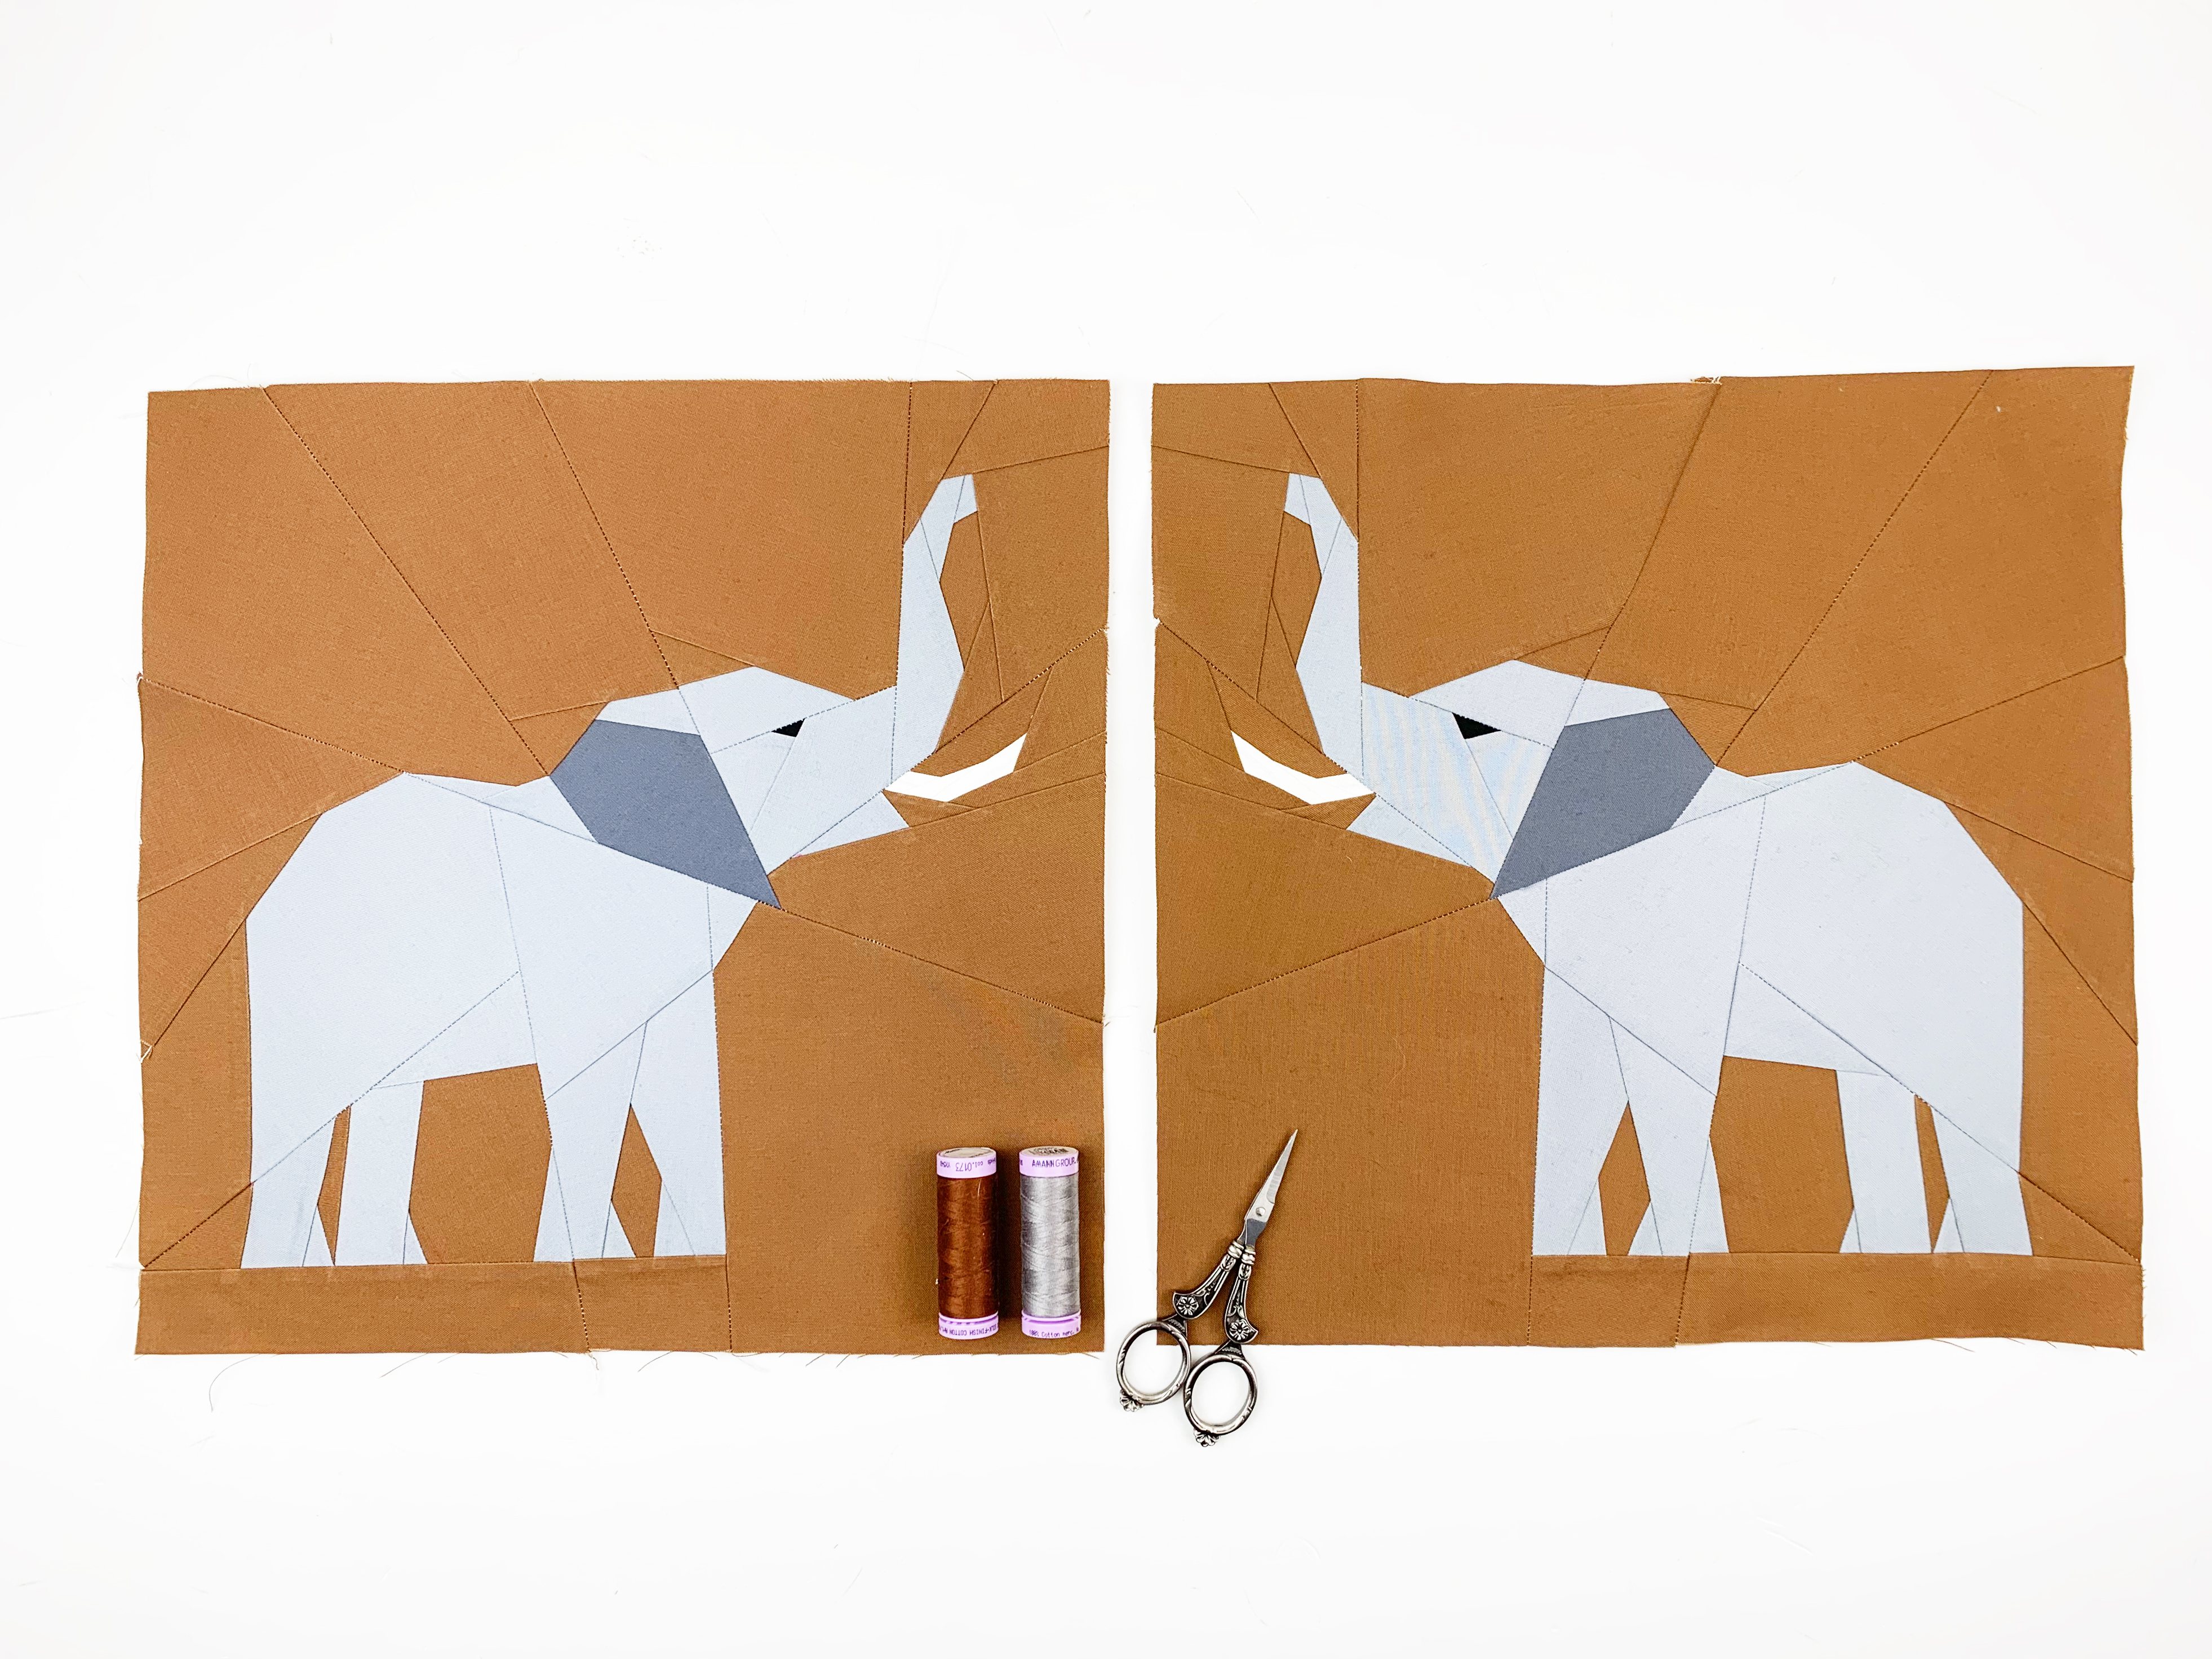
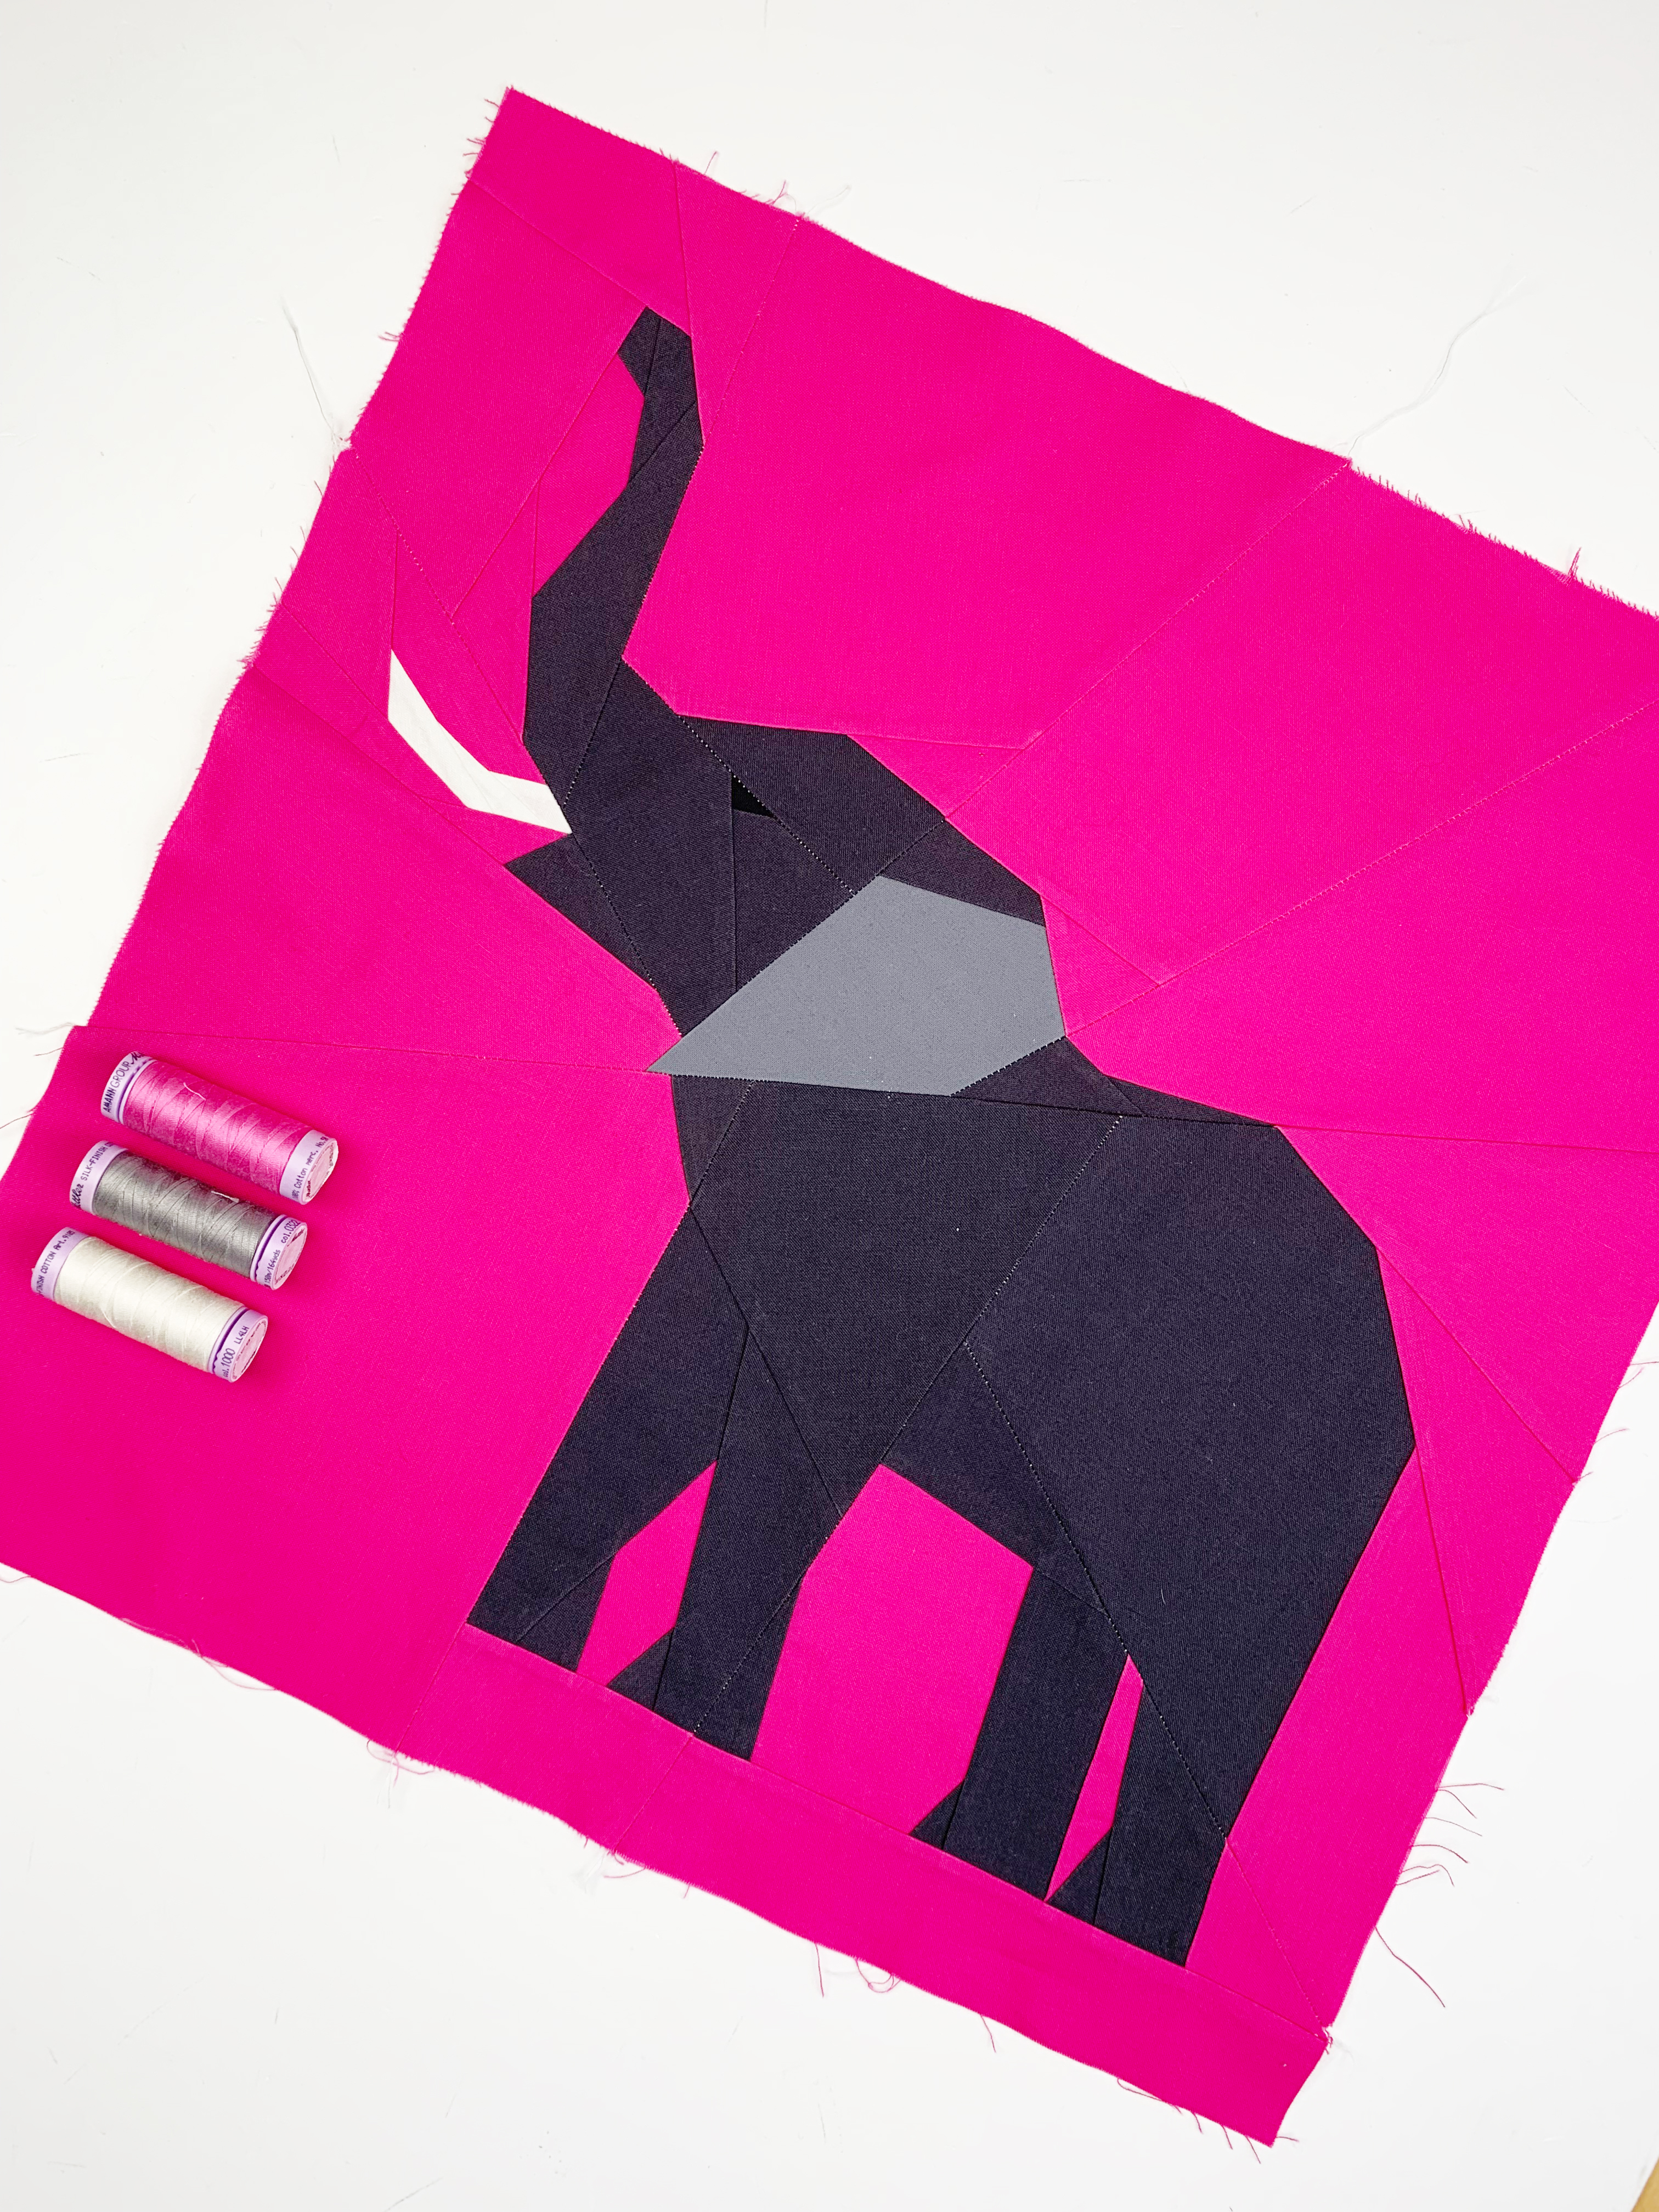
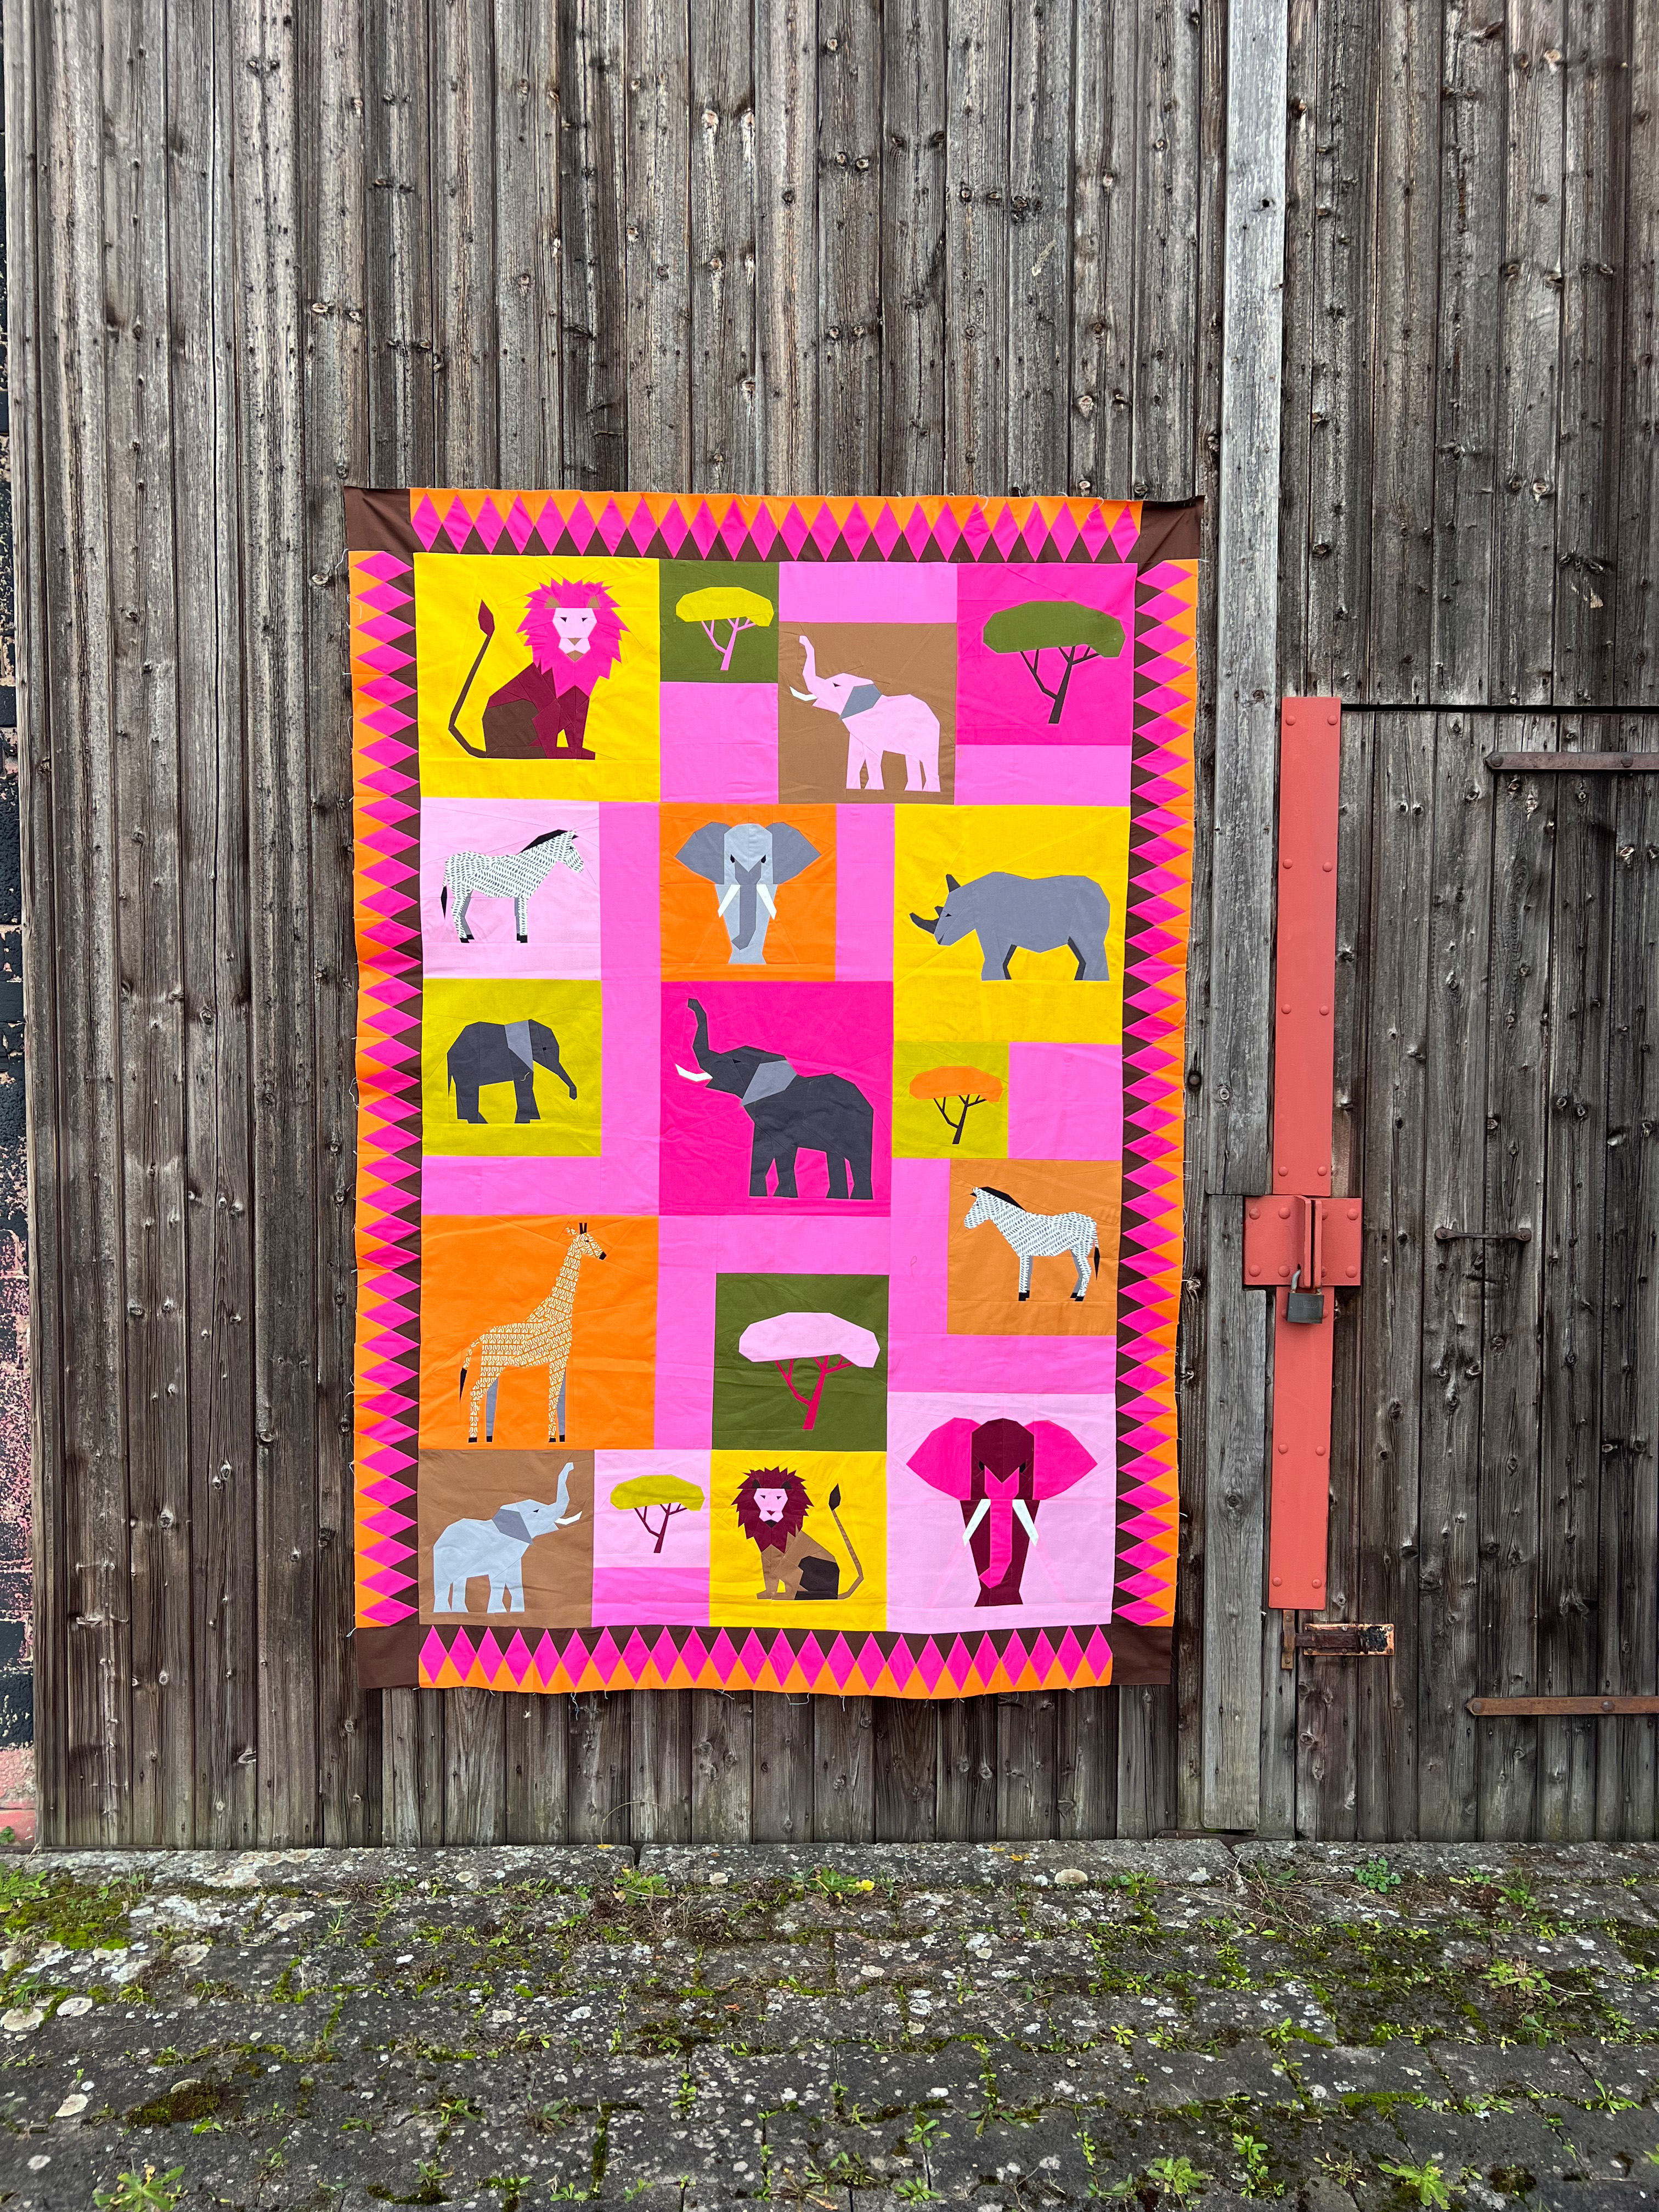
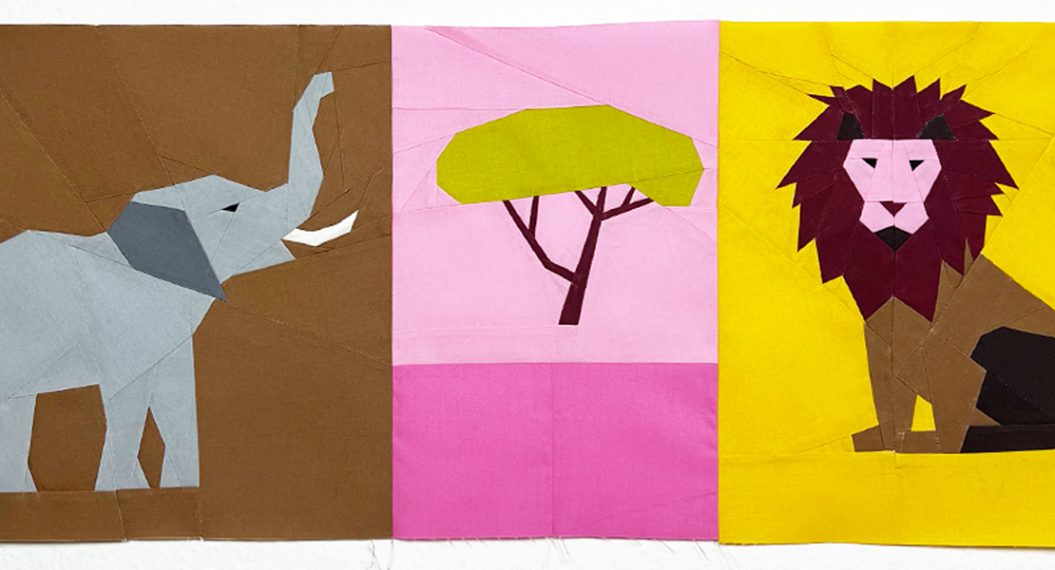
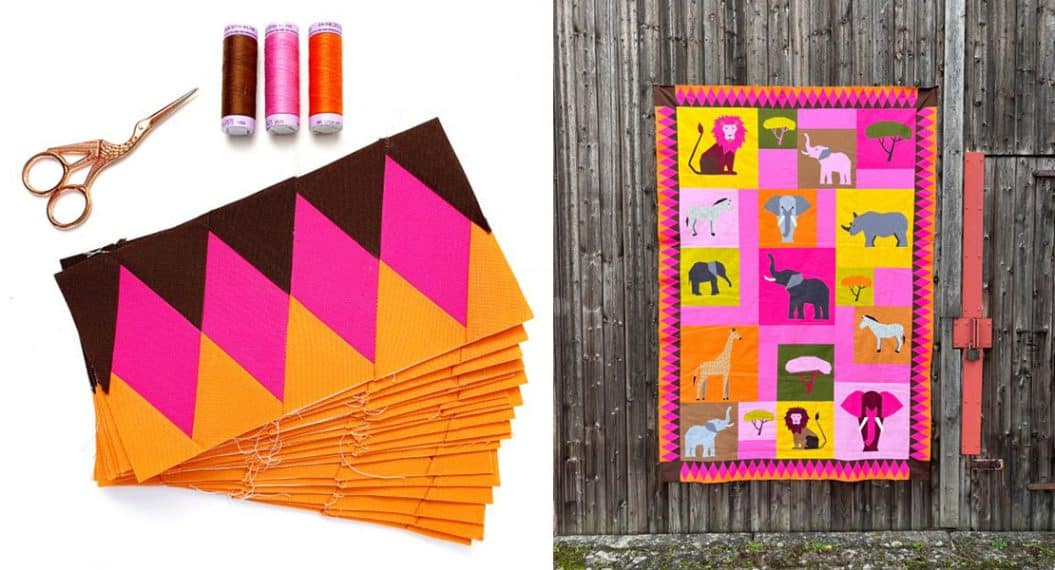
There are three “Elli the Elephant” quilt blocks in our safari quilt.
Two quilt blocks that are 12″ x 12″ in size and one block that is 16″ x 16″ in size. The latter is the “centerpiece” of the quilt.
The pattern is part of the safari quilt pattern collection, which you can find here in my store.
You can also sew Elli the Elephant quilt block pattern if you are not joining the quilt safari and just want to try out the FPP (foundation paper piecing) as a sewing technique, or you are in love with this elephant… I totally understand. For example, you want to sew a cushion cover or any other sewing project.
Every pattern of the Quilt Safari is available separately. The Elli the Elephant pattern is available for download here.
Are You New to the Quilt Safari?
Is this your first time reading about the Quilt Safari? No problem, you can always put on your khaki shorts and jump on the jeep! Together we will sew a wonderful quilt with FPP blocks with fantastic African animal designs.
All the instructions are published block by block on WeAllSew. You can find all the articles/ blog posts that have been published so far here.
The best way to start is to read my first Quilt Safari blog post, in which I summarize the most important information: Welcome to the BERNINA Quilt Safari.
There is no time pressure with the Quilt Safari. Basically, you can follow your own rhythm and travel comfortably through the savannah. There is only one date to keep in mind: If you want to participate in the final giveaway (and the prizes are amazing!) you have to show a photo of your finished quilt top on social media or in the community section of the blog by June 16, 2024.
The Fabrics for the Elephants
Below you will find my choice of fabrics for the different elephant quilt blocks. These are solid fabrics. I gave them color names, so you can easily assign them to the respective quilt blocks. As always in the Quilt Safari, you are free to work with your own fabrics.
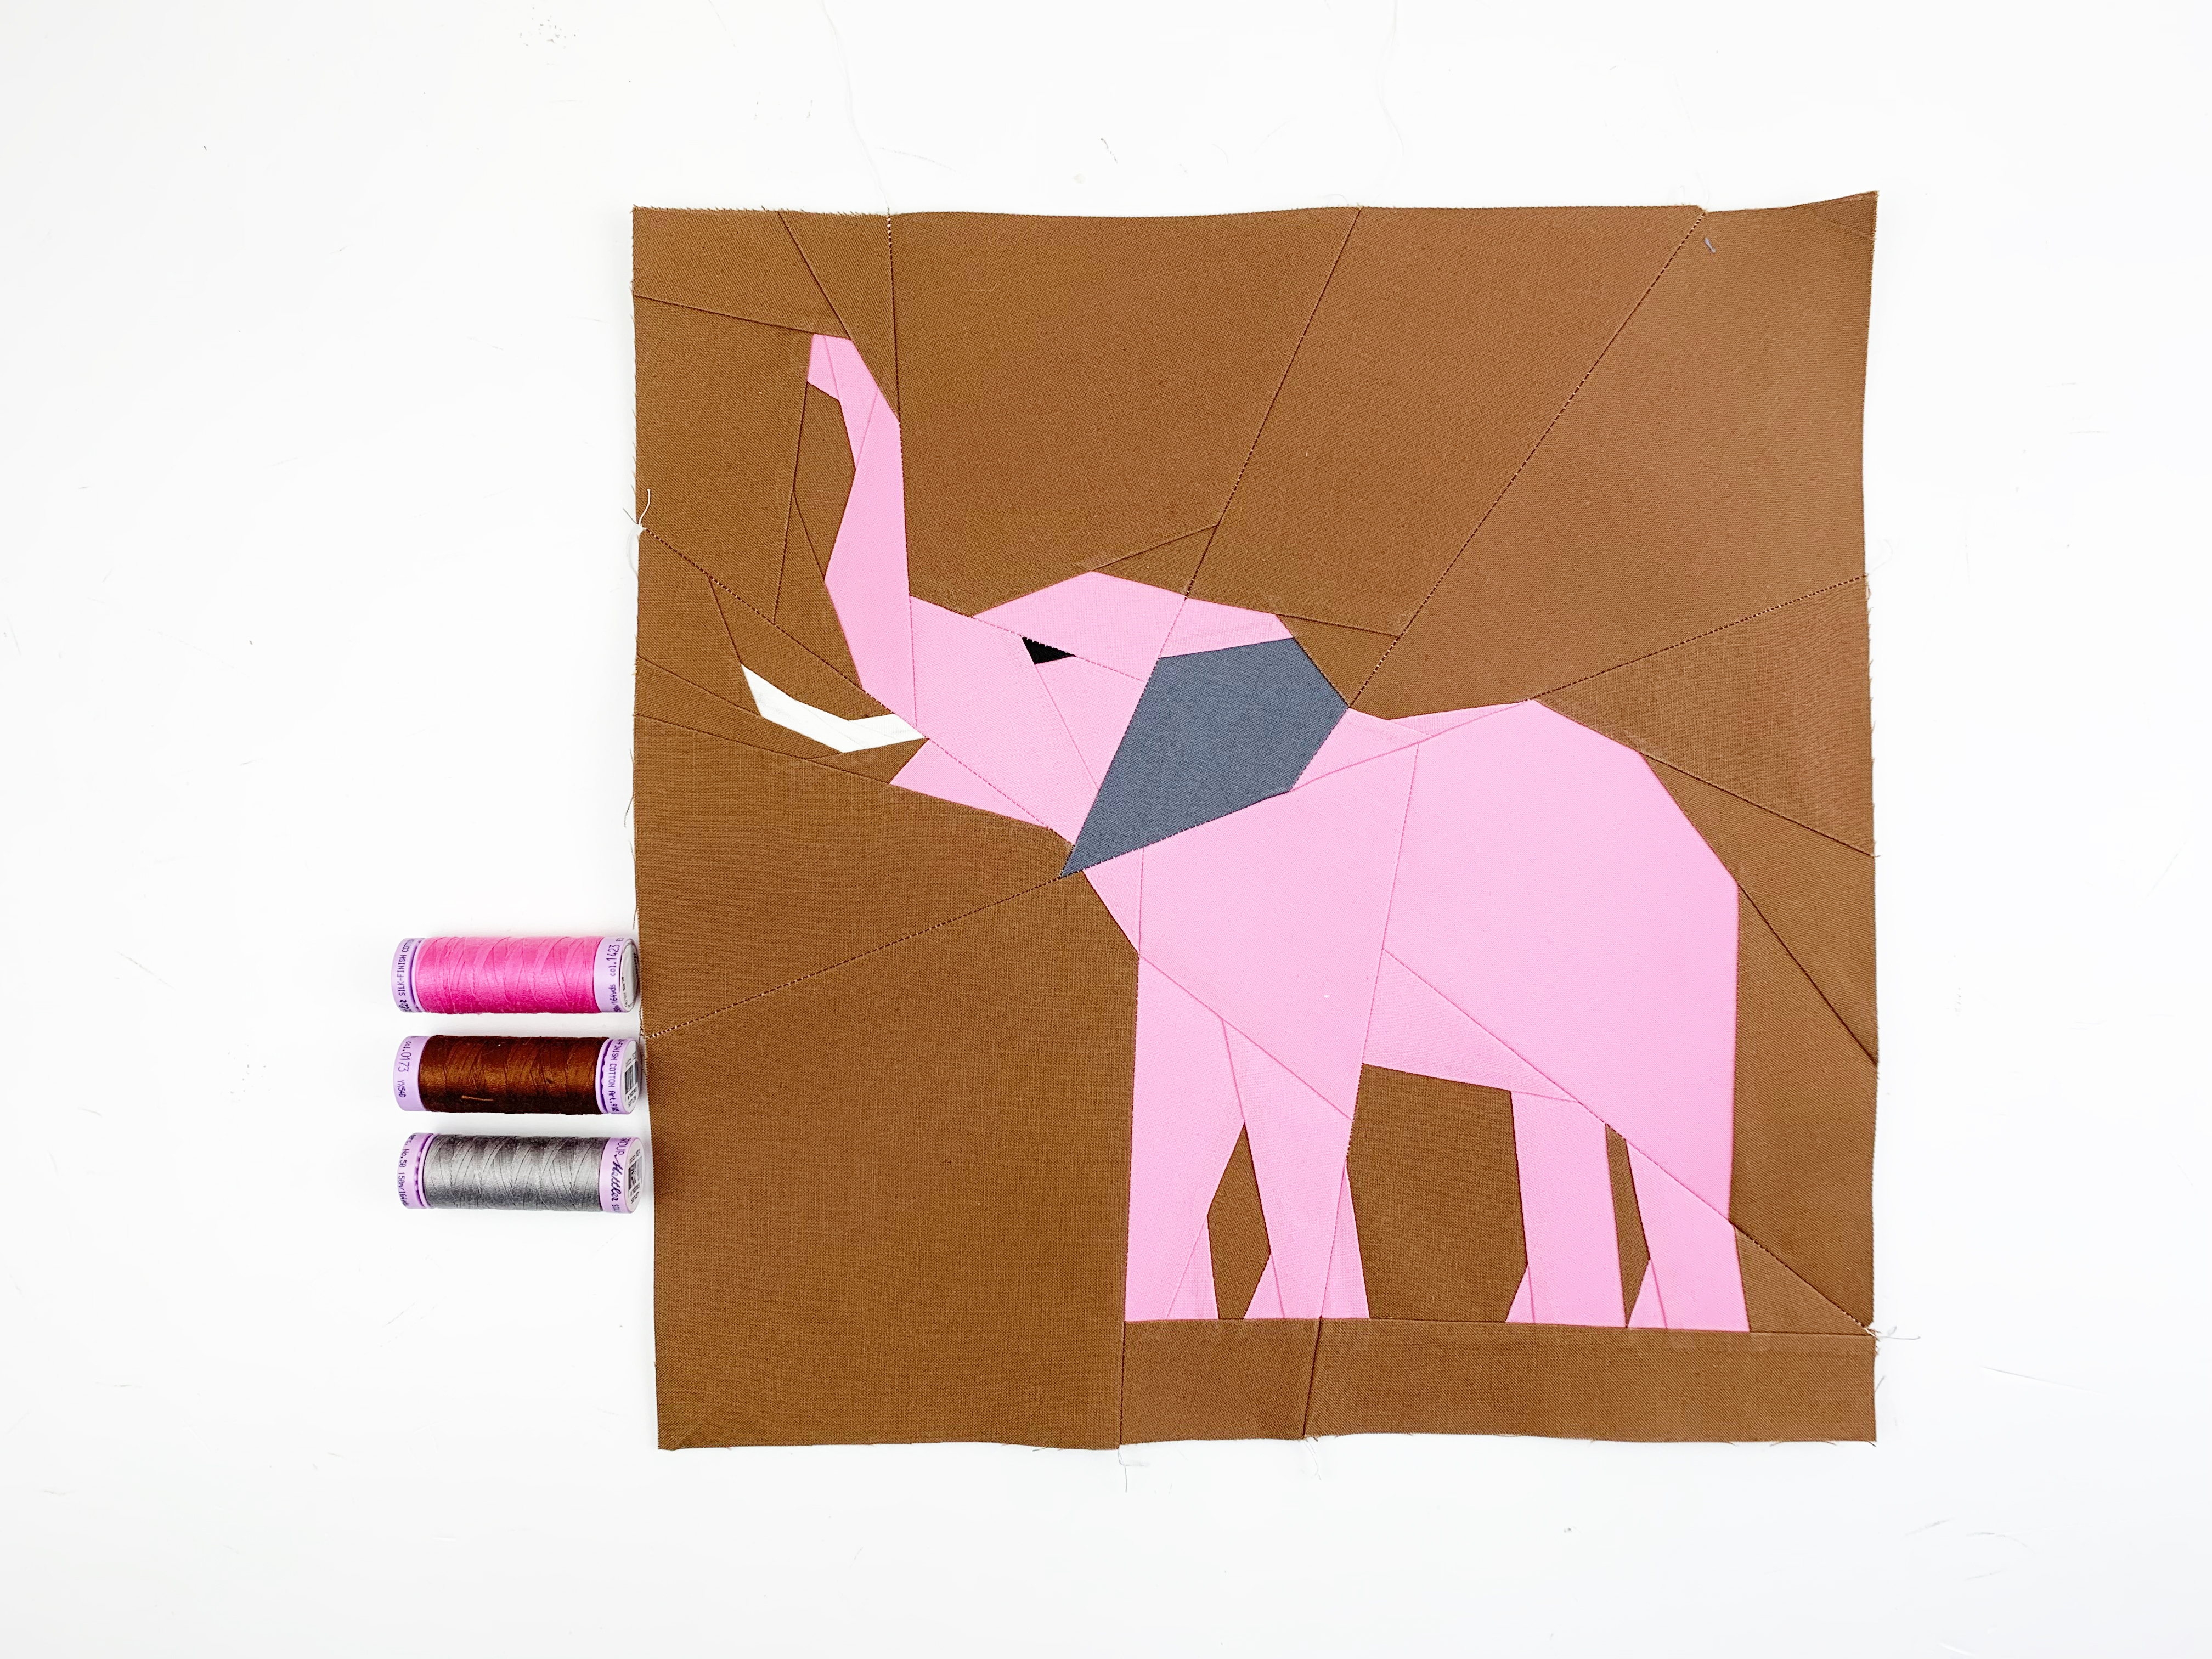
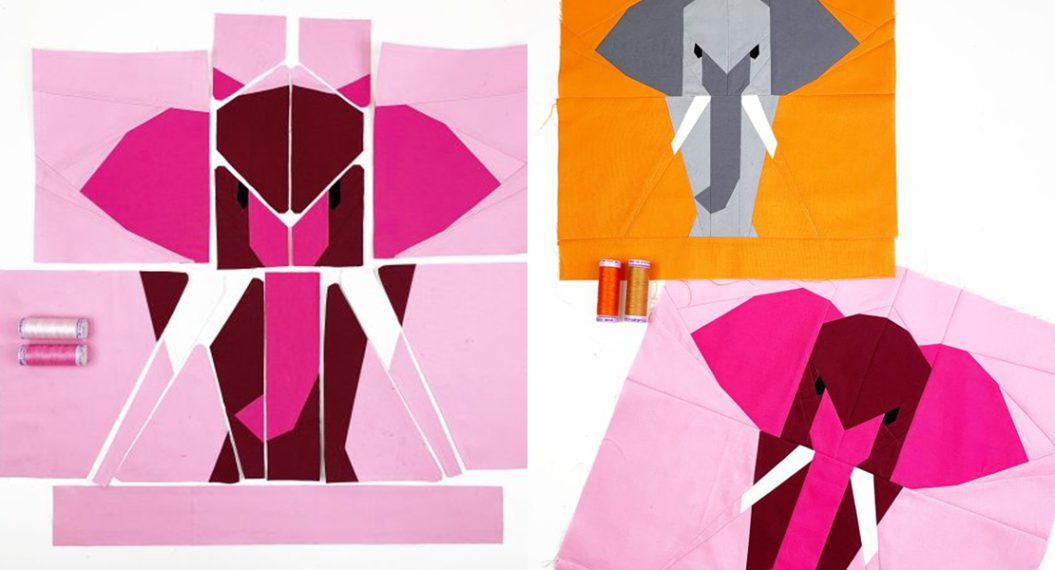
Elephant 1
(bottom left in the quilt) the finished elephant is facing right!
- Earth Brown (background)
- Light gray (elephant)
- Medium gray (ear)
- Eggshell (tusk)
- black (eye)
Elephant 2
(top right in the quilt – in pink): the finished elephant is facing left!
- Earth brown (background)
- light pink (elephant)
- Medium gray (ear)
- Eggshell (tusk)
- black (eye)
Elephant 3
(the large elephant in the center of the quilt)
- bright pink (background)
- Charcoal (elephant)
- Medium gray (ear)
- Eggshell (tusk)
- black (eye)
Sewing Instructions for Elli the Elephant
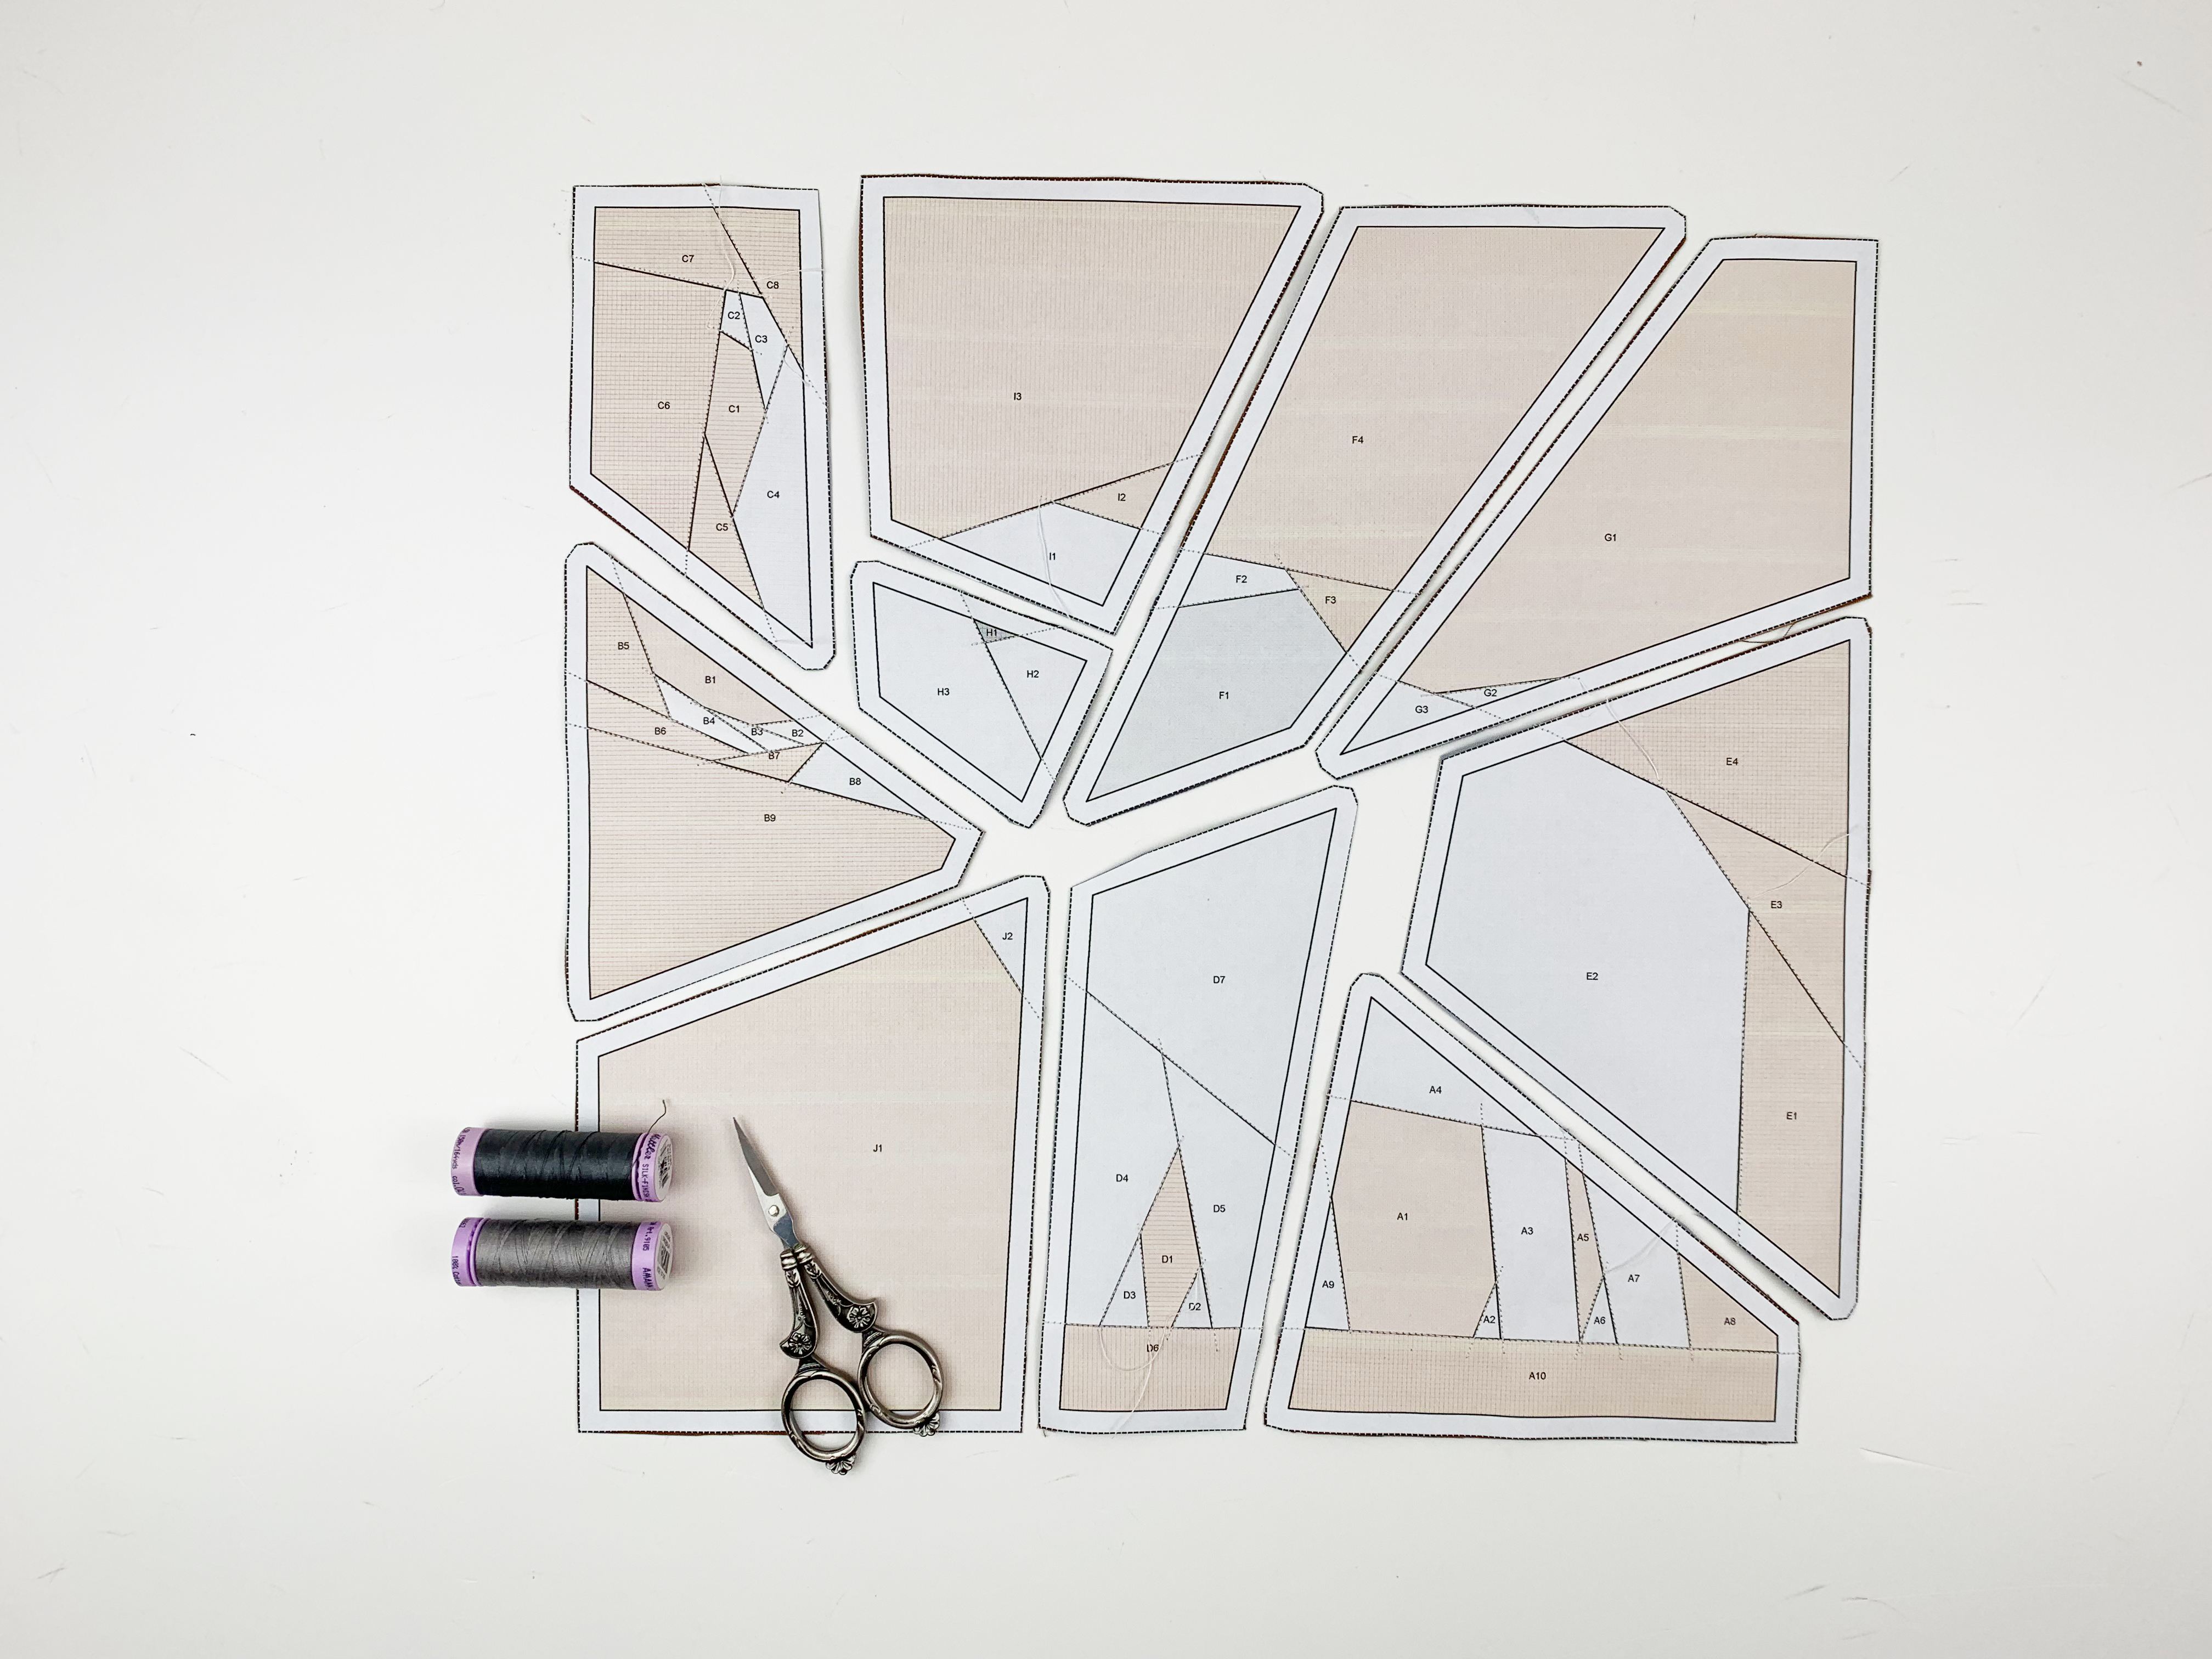
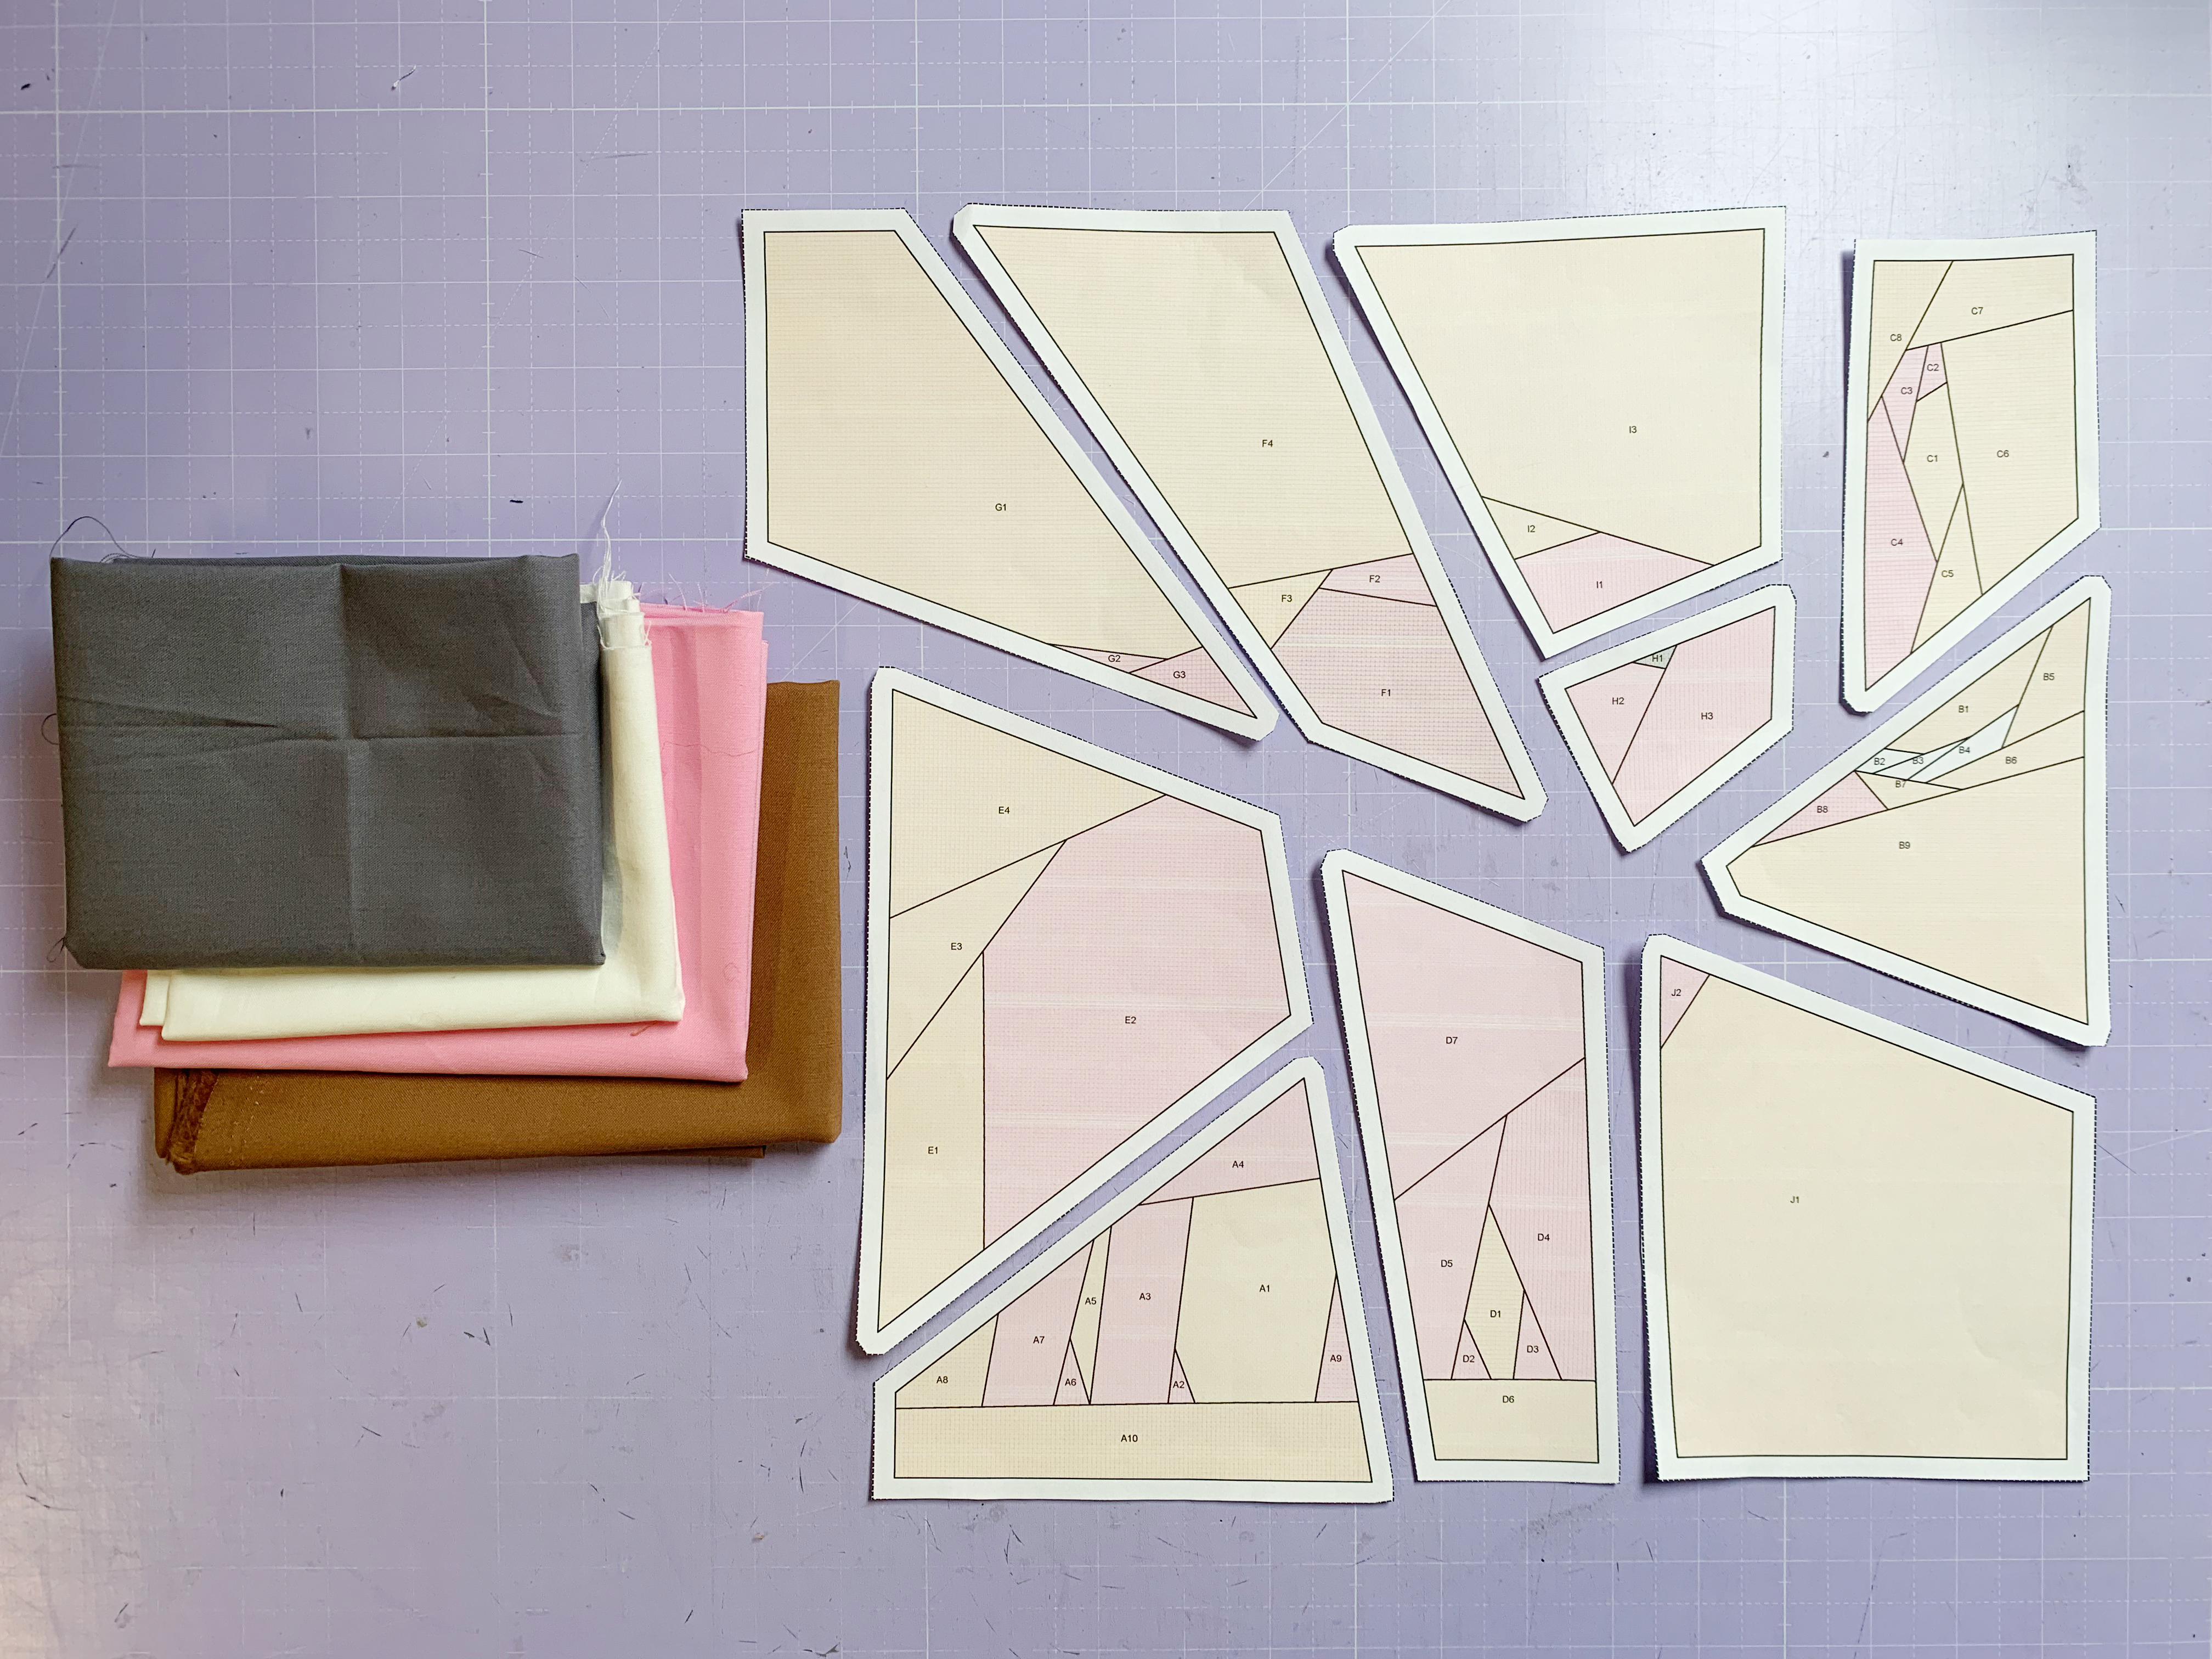
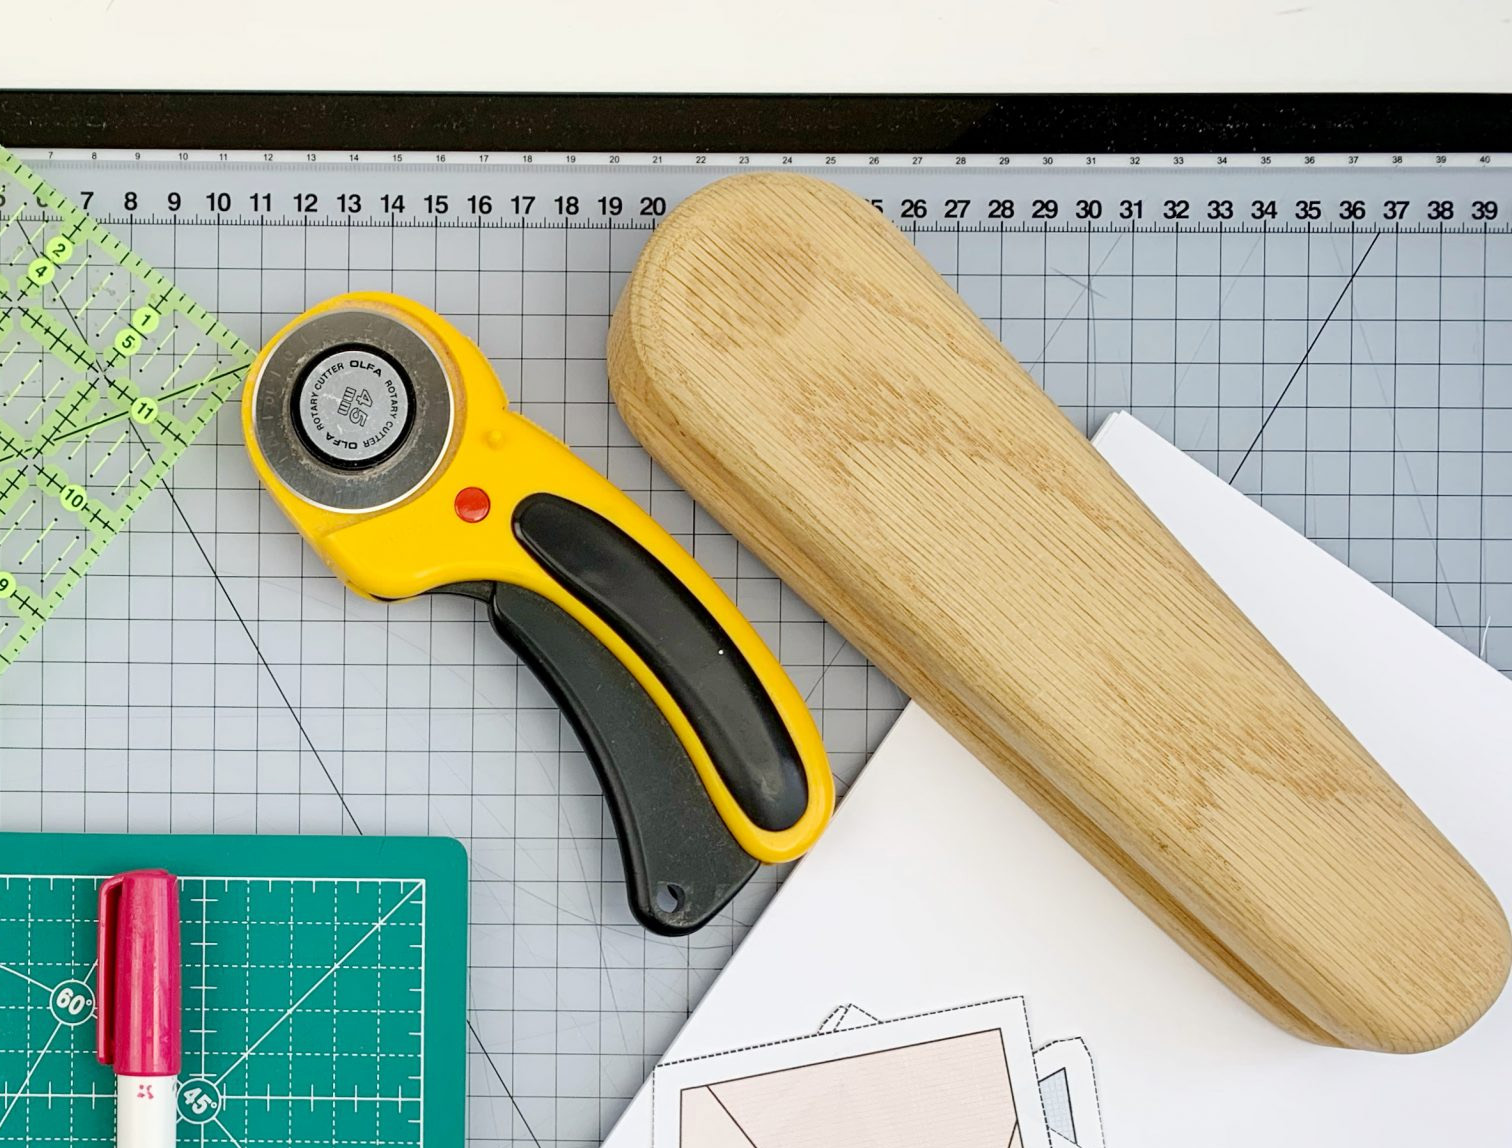
1. Print out the segments of the pattern. As with the border quilt block, only print out the parts of the pattern with letters and numbers, i.e. the individual segments of the pattern (see photo above).
Please pay attention to sewing the elephant in the correct direction. The top elephant in the quilt faces the left, and the bottom left elephant in the quilt faces the right! Both of these elephants are 12″x 12″ in size. The pattern pieces are labeled accordingly facing left and facing right. As the quilt block is created on the reverse side of the pattern, the finished quilt block is a mirror image of the individual segments! This means that if the segments of the elephant are facing right, the finished elephant will be facing left!
When making the quilt, I actually sewed the bottom elephant facing the wrong way .. not once, but twice, but don’t worry, the pattern pieces weren’t labeled then. 😅
They are labeled now, but it doesn’t hurt to double-check… twice.
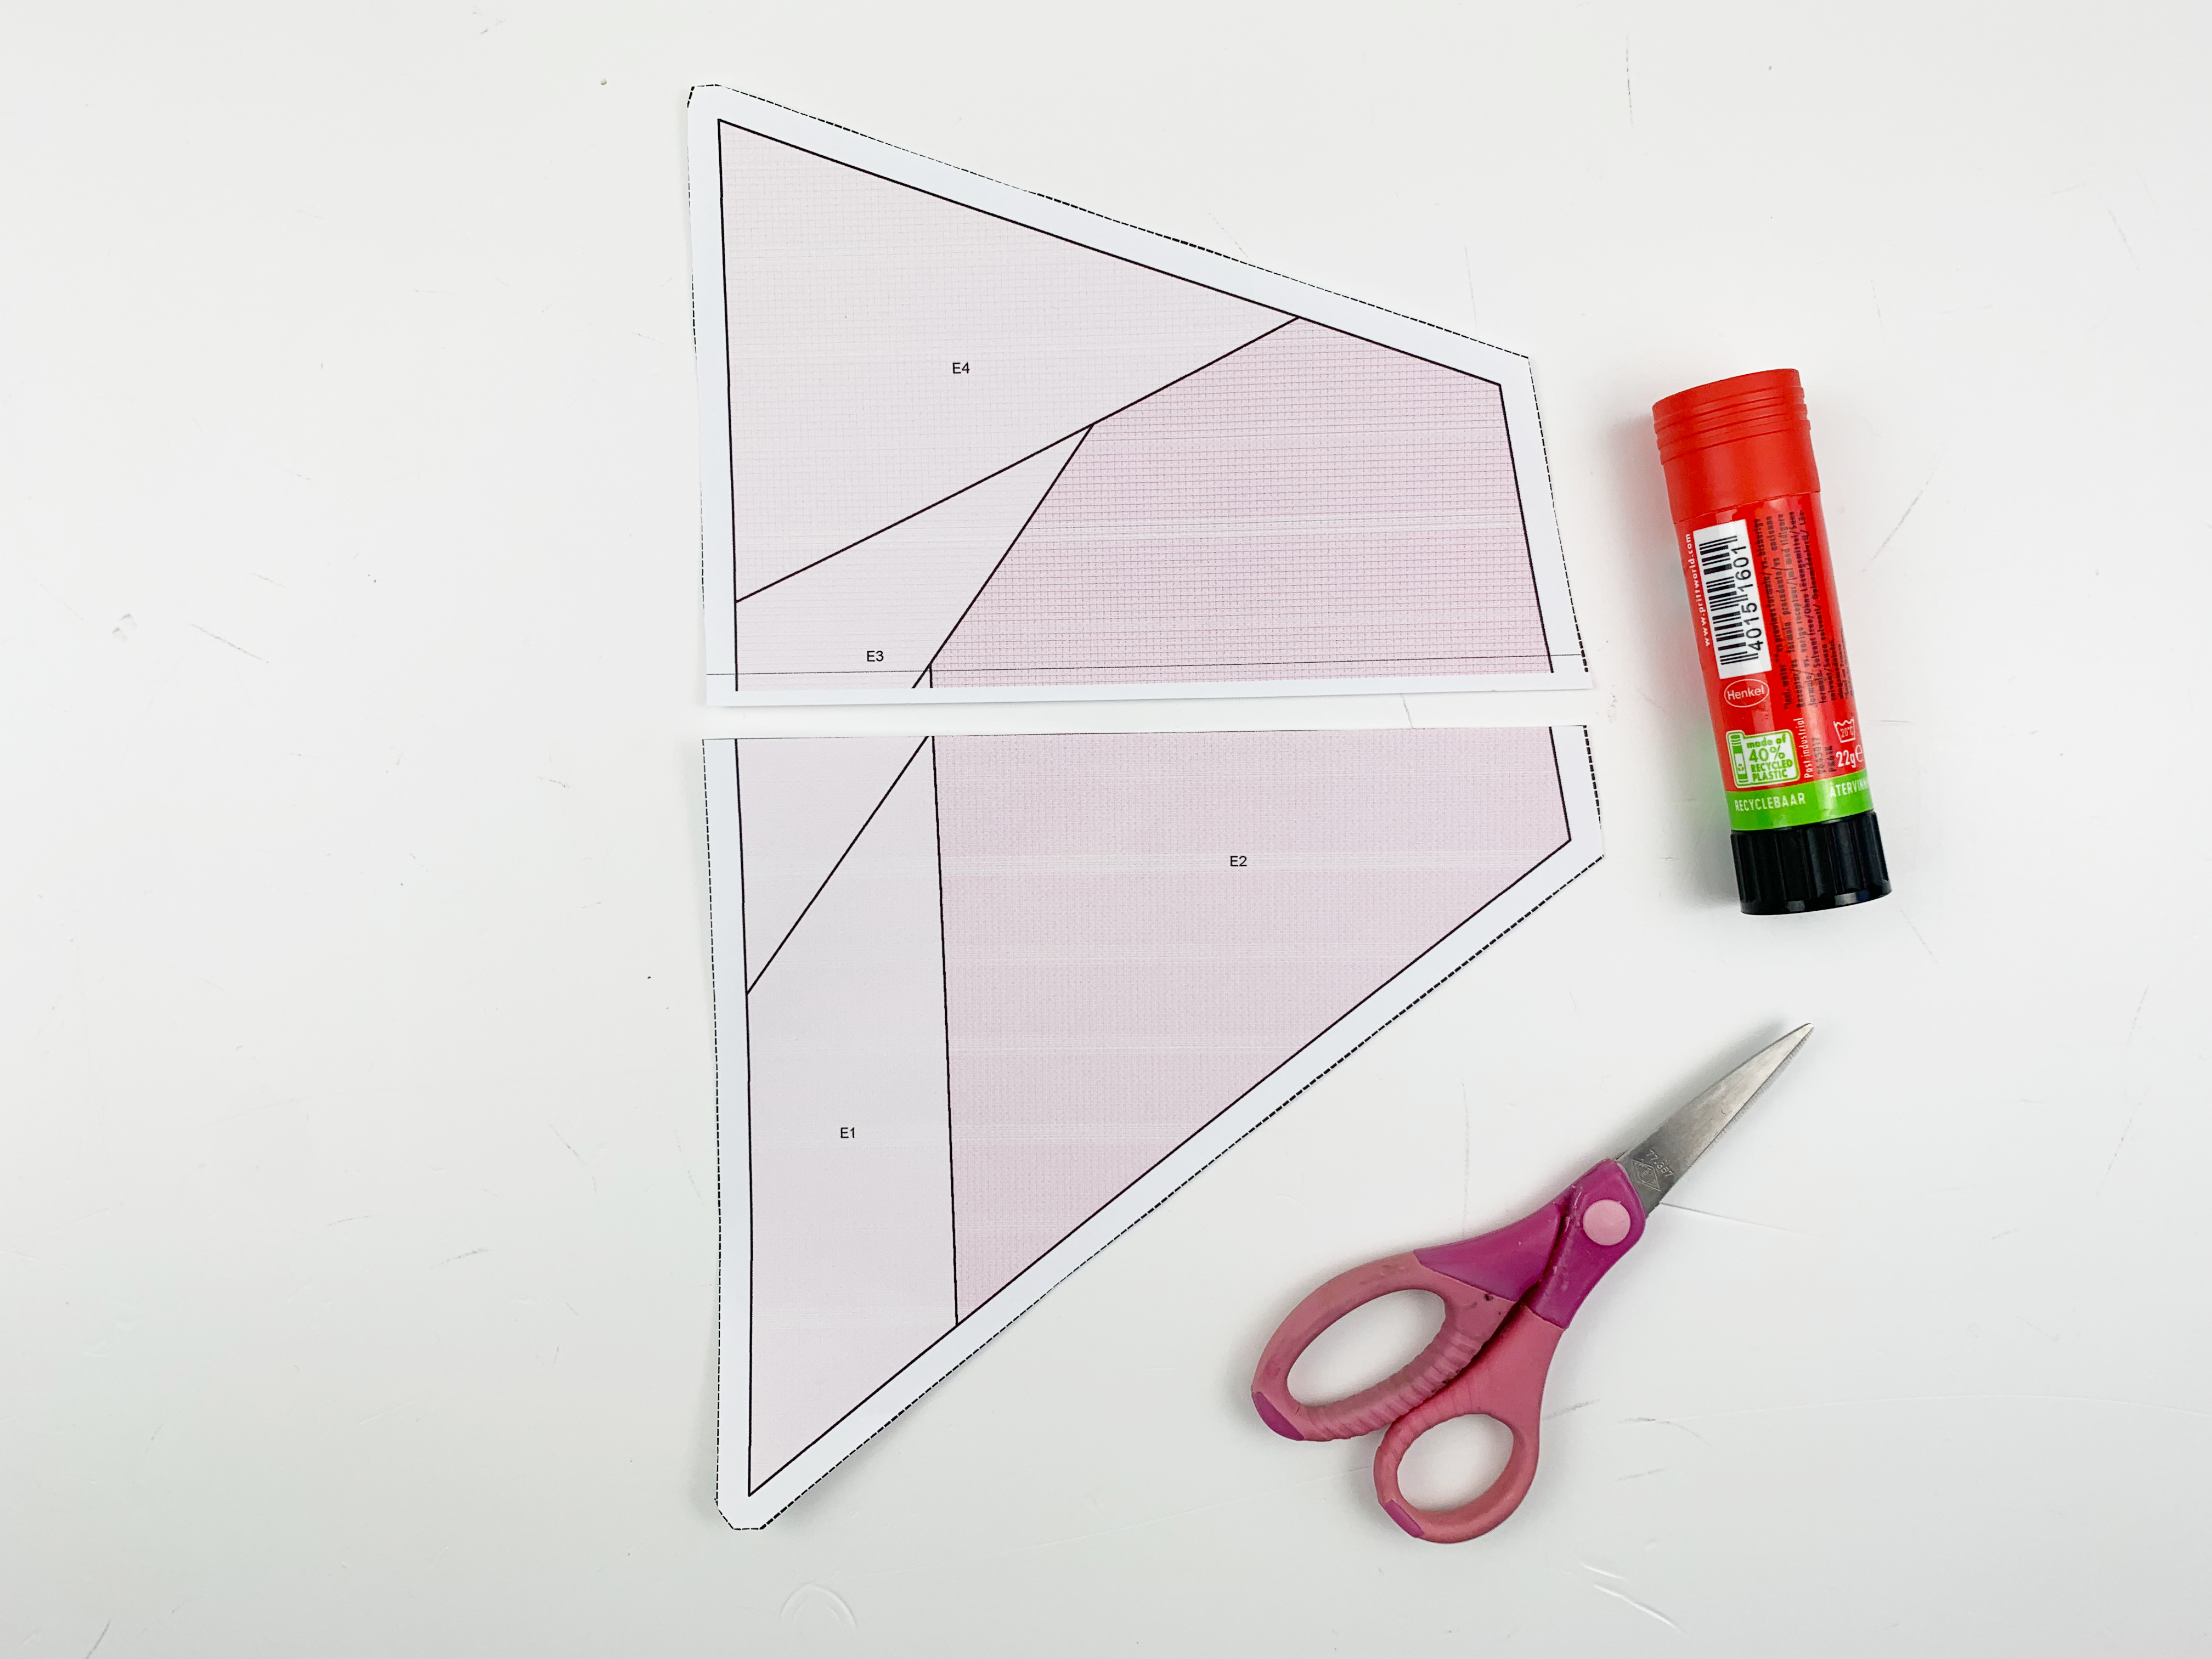
2. One segment of the large elephant in the center has to be glued because it does not fit on one page of paper. Please use craft glue for this, not scotch tape! As you have to iron the pattern a few times, scotch tape is not suitable at all. It can melt on the hot iron and stick. Unfortunately, I had to learn this the hard way, haha!
3. Now lay out your pattern pieces as shown in the photo above. I usually do this with all my patterns, because then I can see straight away whether I have all the pieces and whether everything fits. This is particularly useful here, as you can then see right away whether you have the right elephant facing the correct direction.
4. Sew the individual segments using the foundation paper piecing method.
Here is another video tutorial for paper piecing from our last quilt-along. Since the paper piecing method applies to all quilt blocks, it is certainly helpful to watch this video as well.
Video Tutorial
Assembling the Elephants

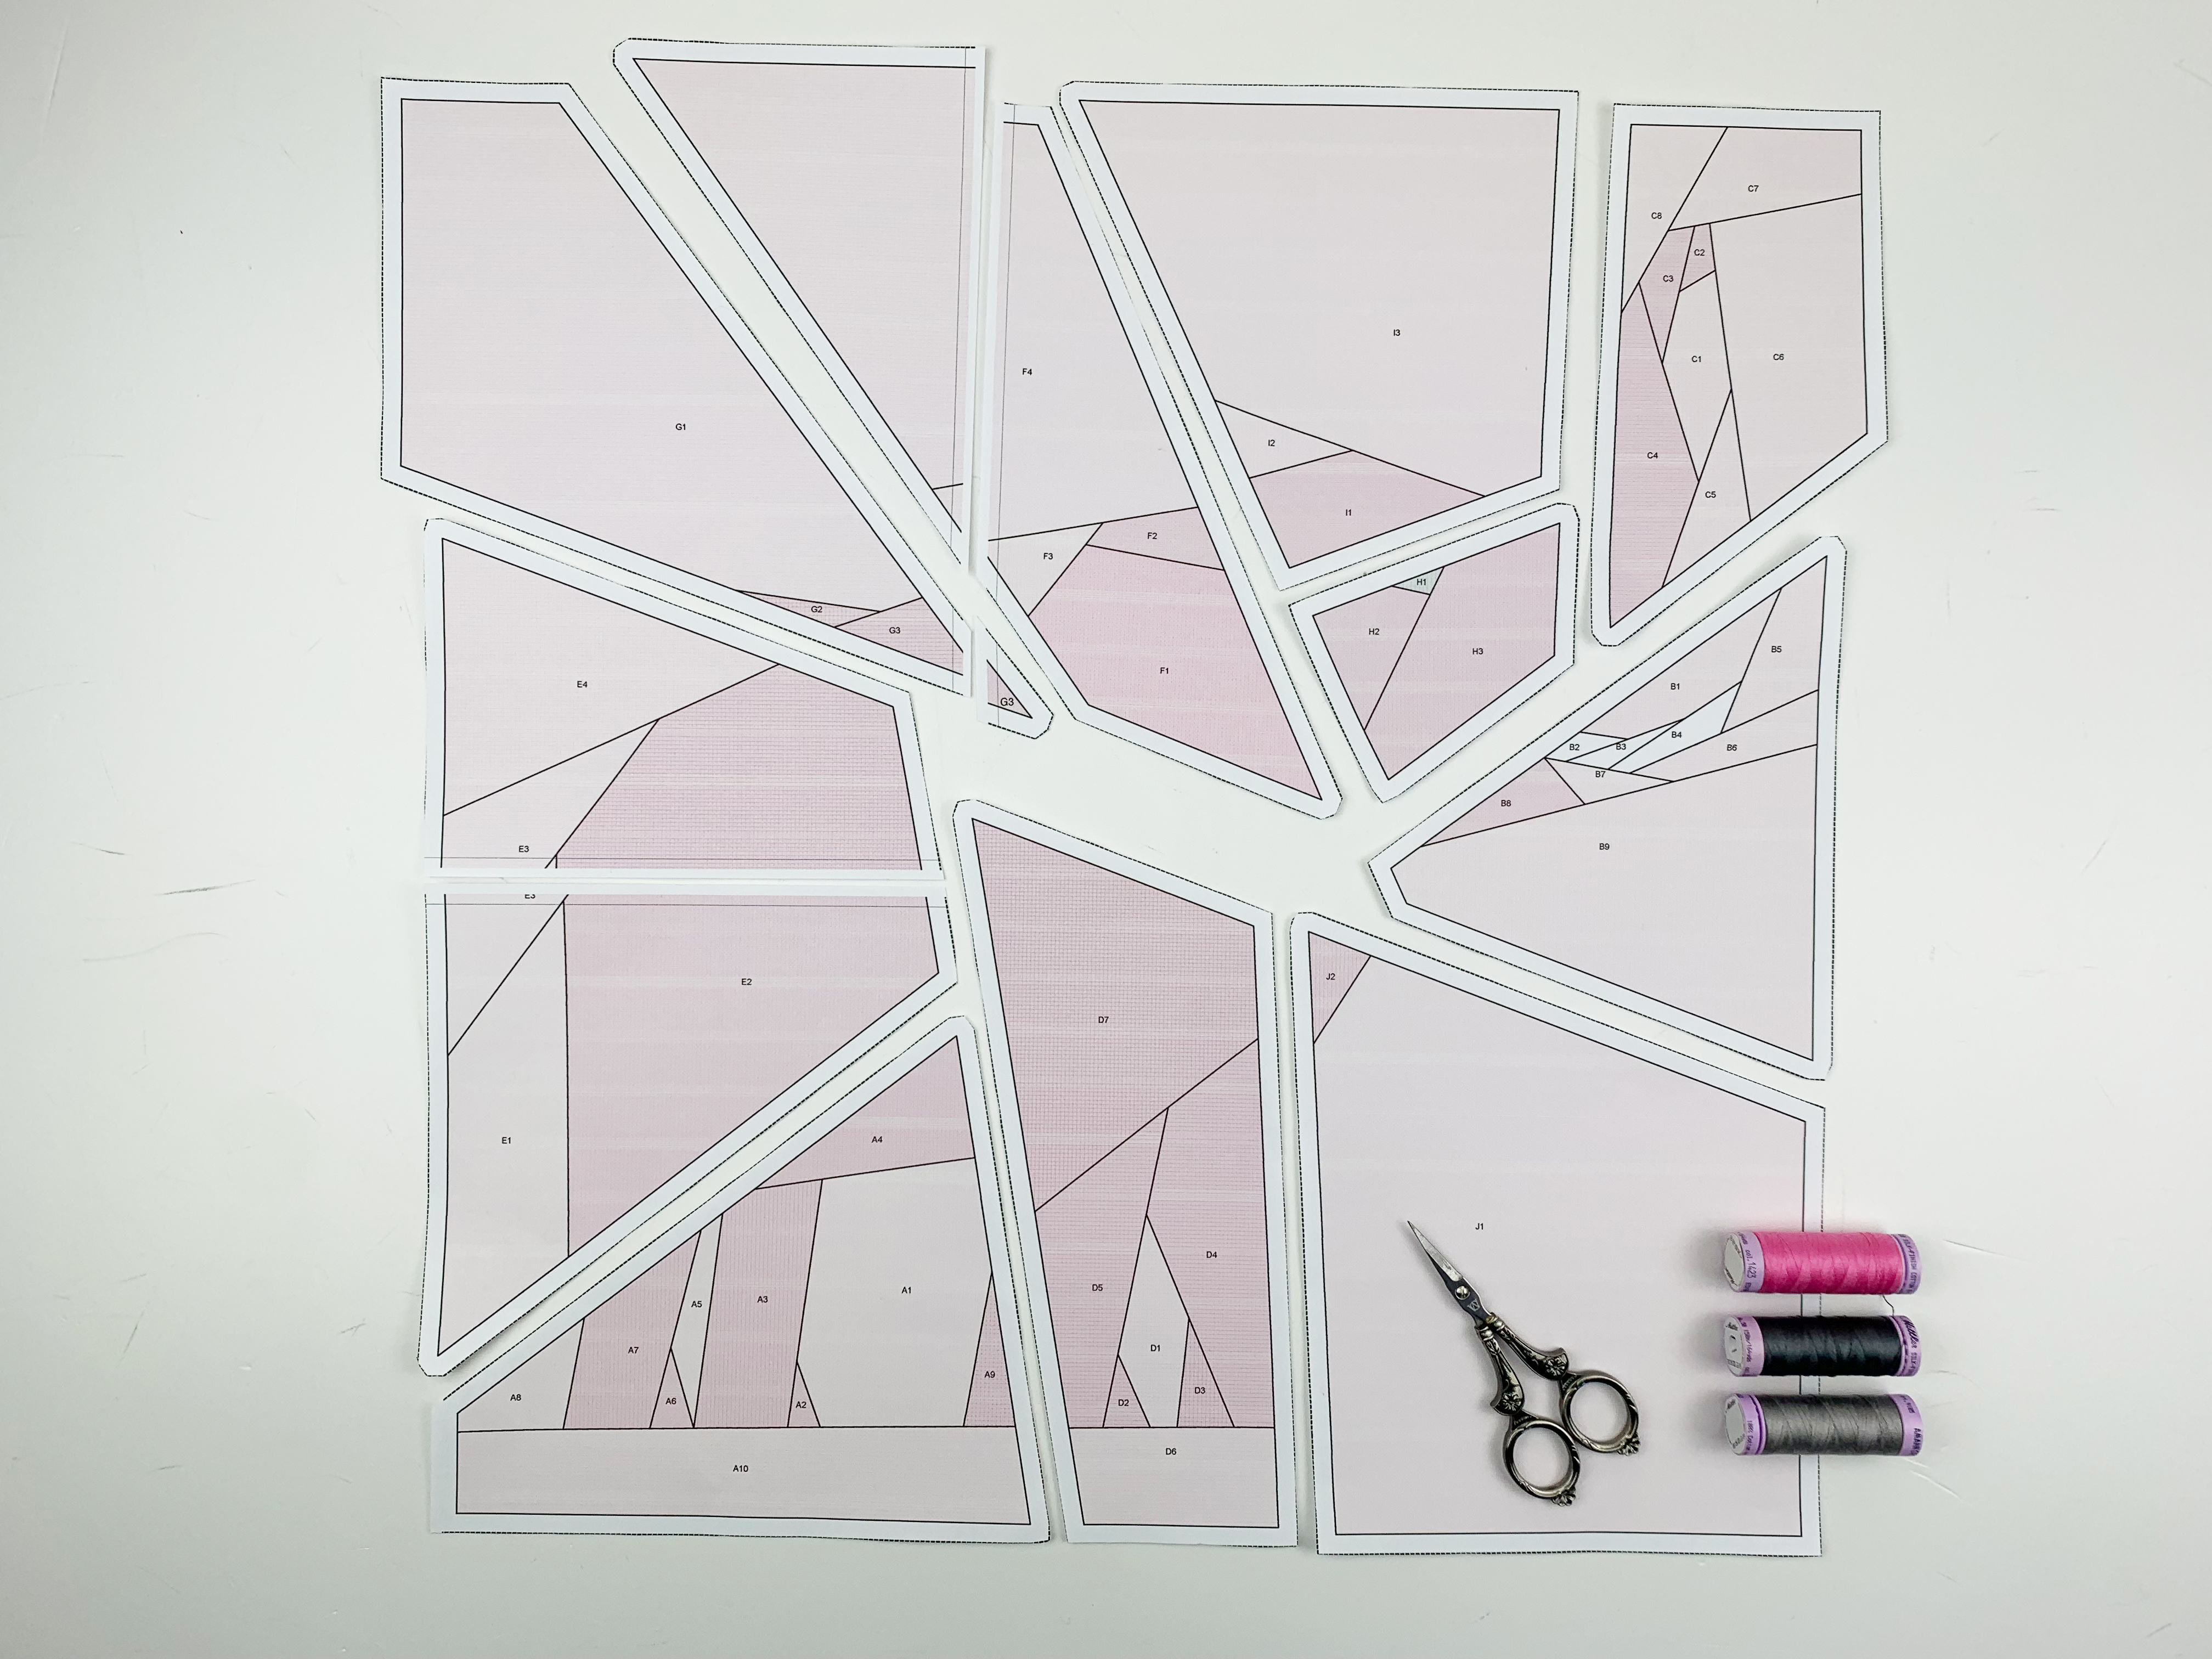
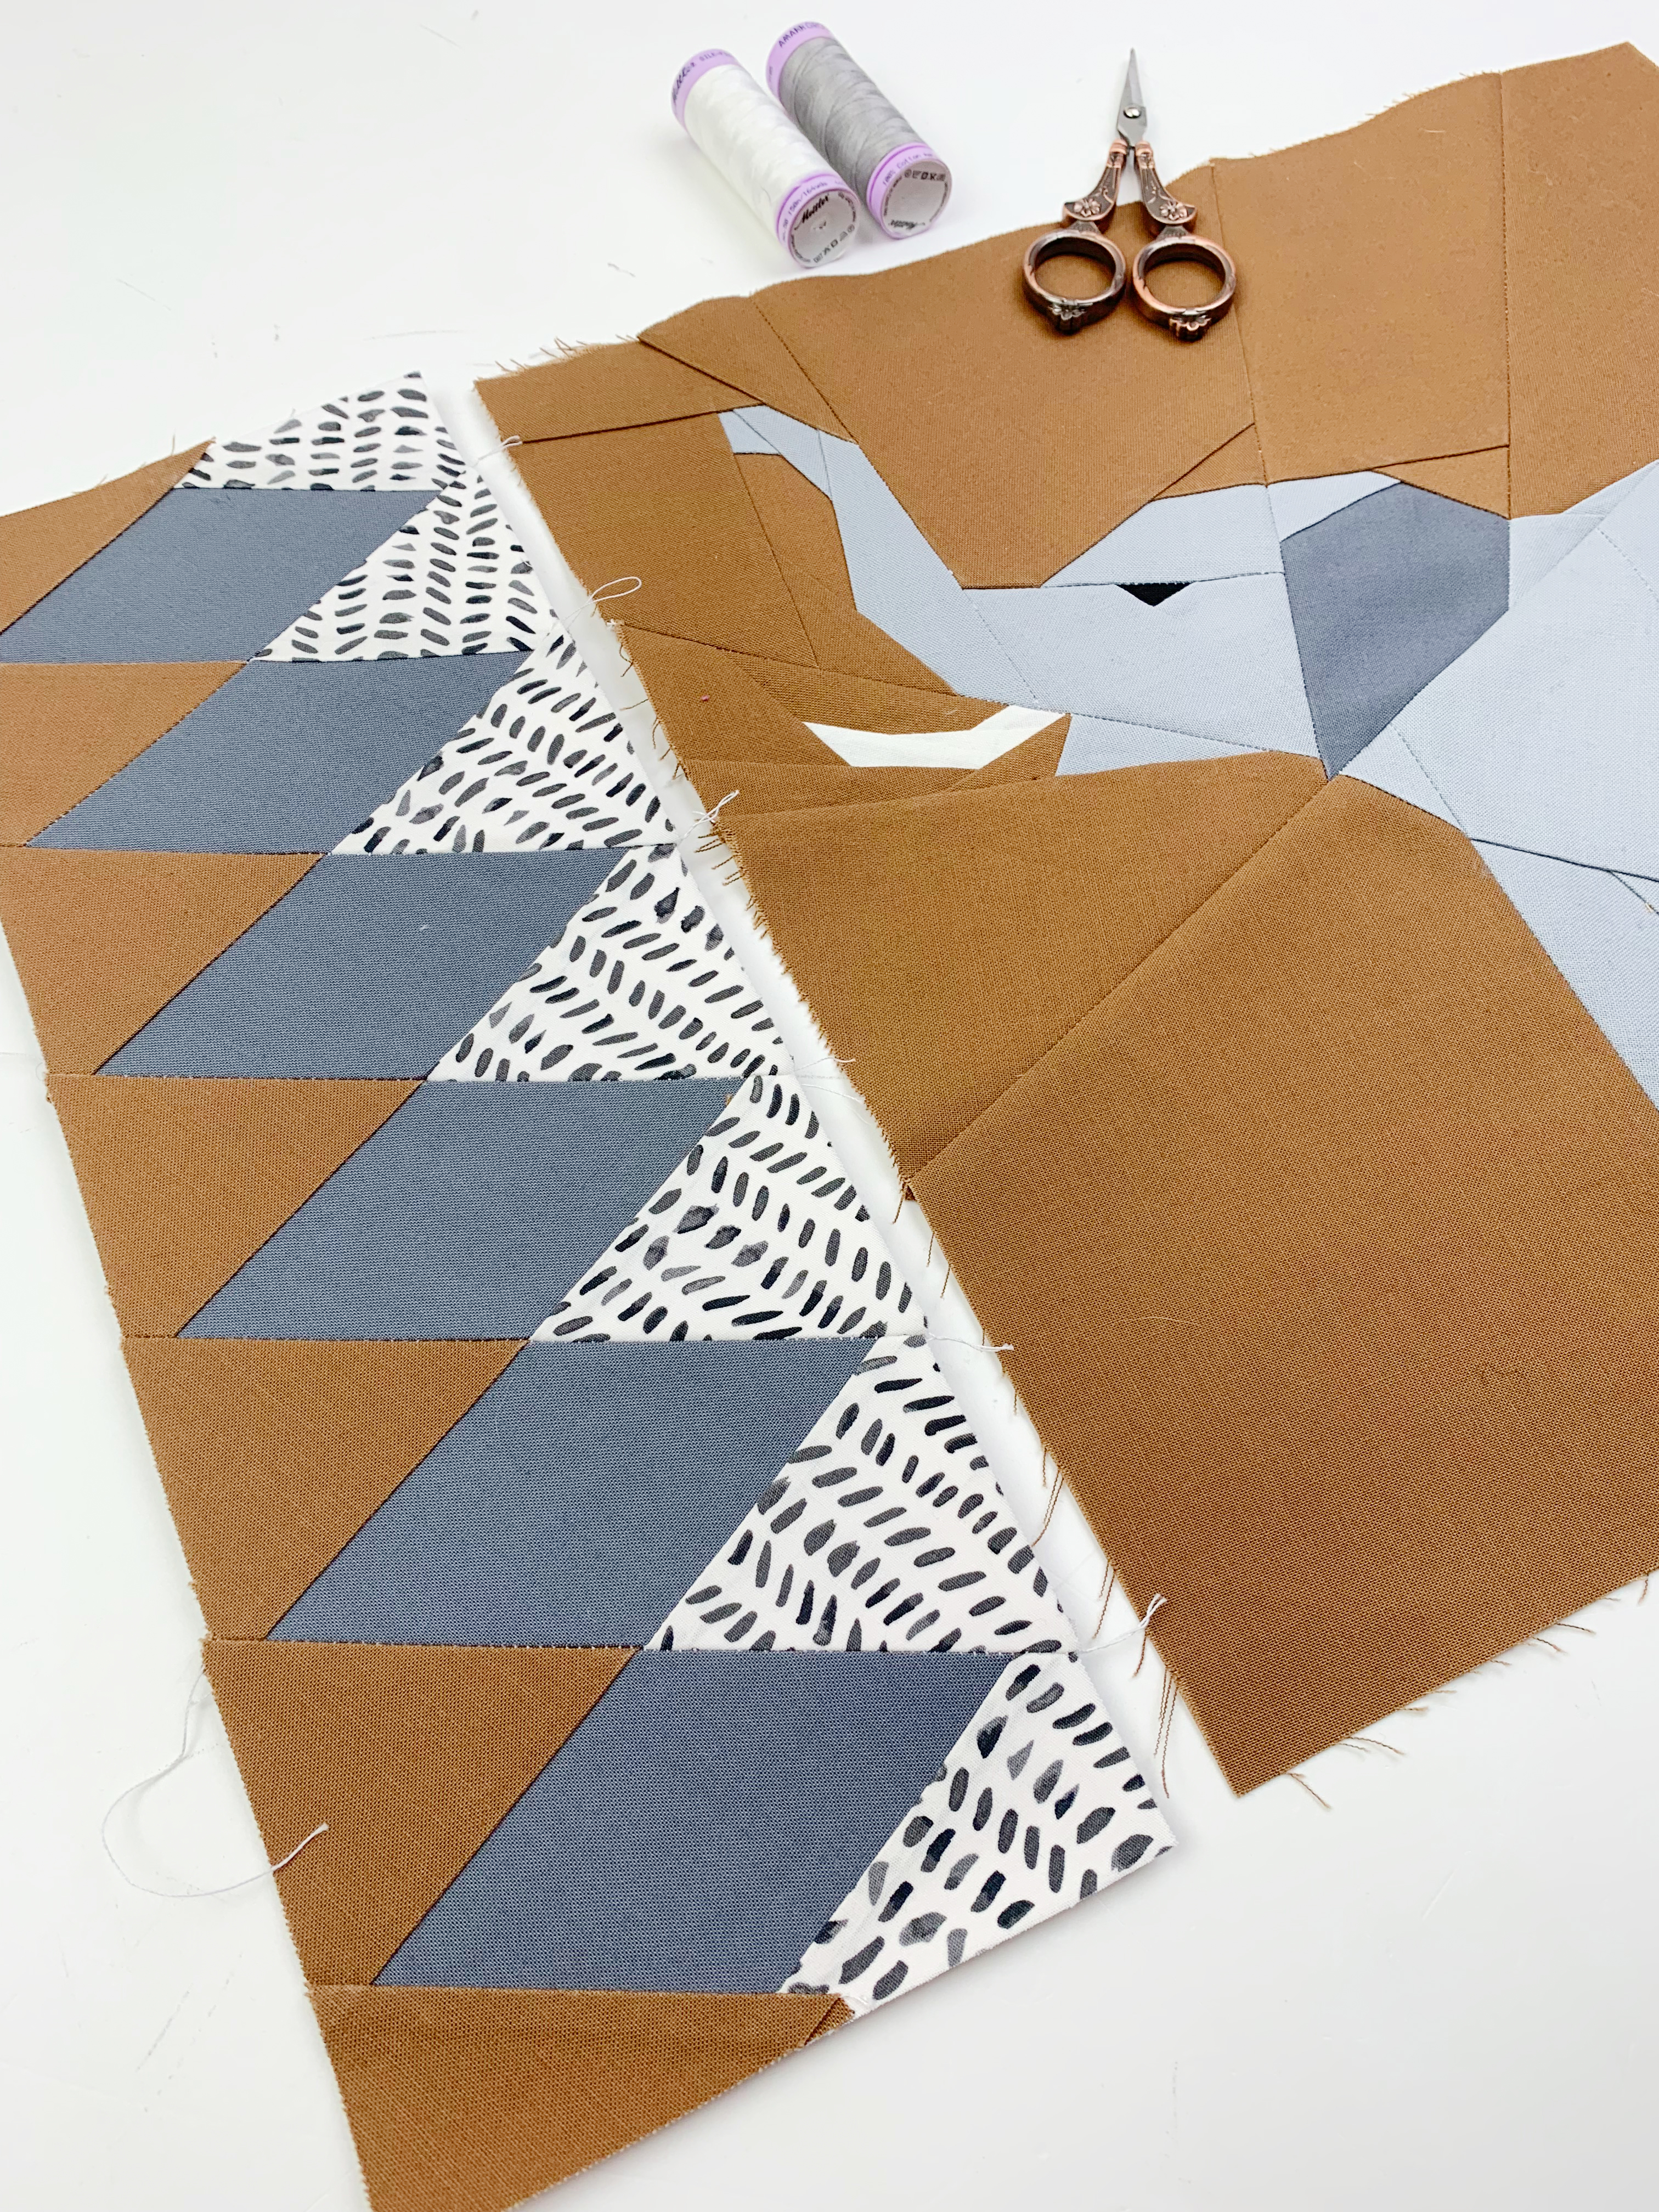
5. Above you can see all the finished segments of the elephant quilt block. I lay out the pieces again as shown in the overview.
6. Join the segments. The order of sewing them is mentioned in the pattern. As with the border block: When you have joined two segments, take out the paper from the seam allowance. This makes it easier to get flat seams. Then press the seam allowance open. If you have a Tailor’s Clapper, now is the perfect opportunity to bring it out to create nice flat seams.

I like to use the patchwork foot #97D on my BERNINA 770 QE PLUS Kaffe Edition to assemble the individual segments. Thanks to the 1/4″ markings on the sole of the foot, sewing segments together is so easy.
8. Great, the elephants are finished. You see, it’s much easier than you thought, isn’t it?
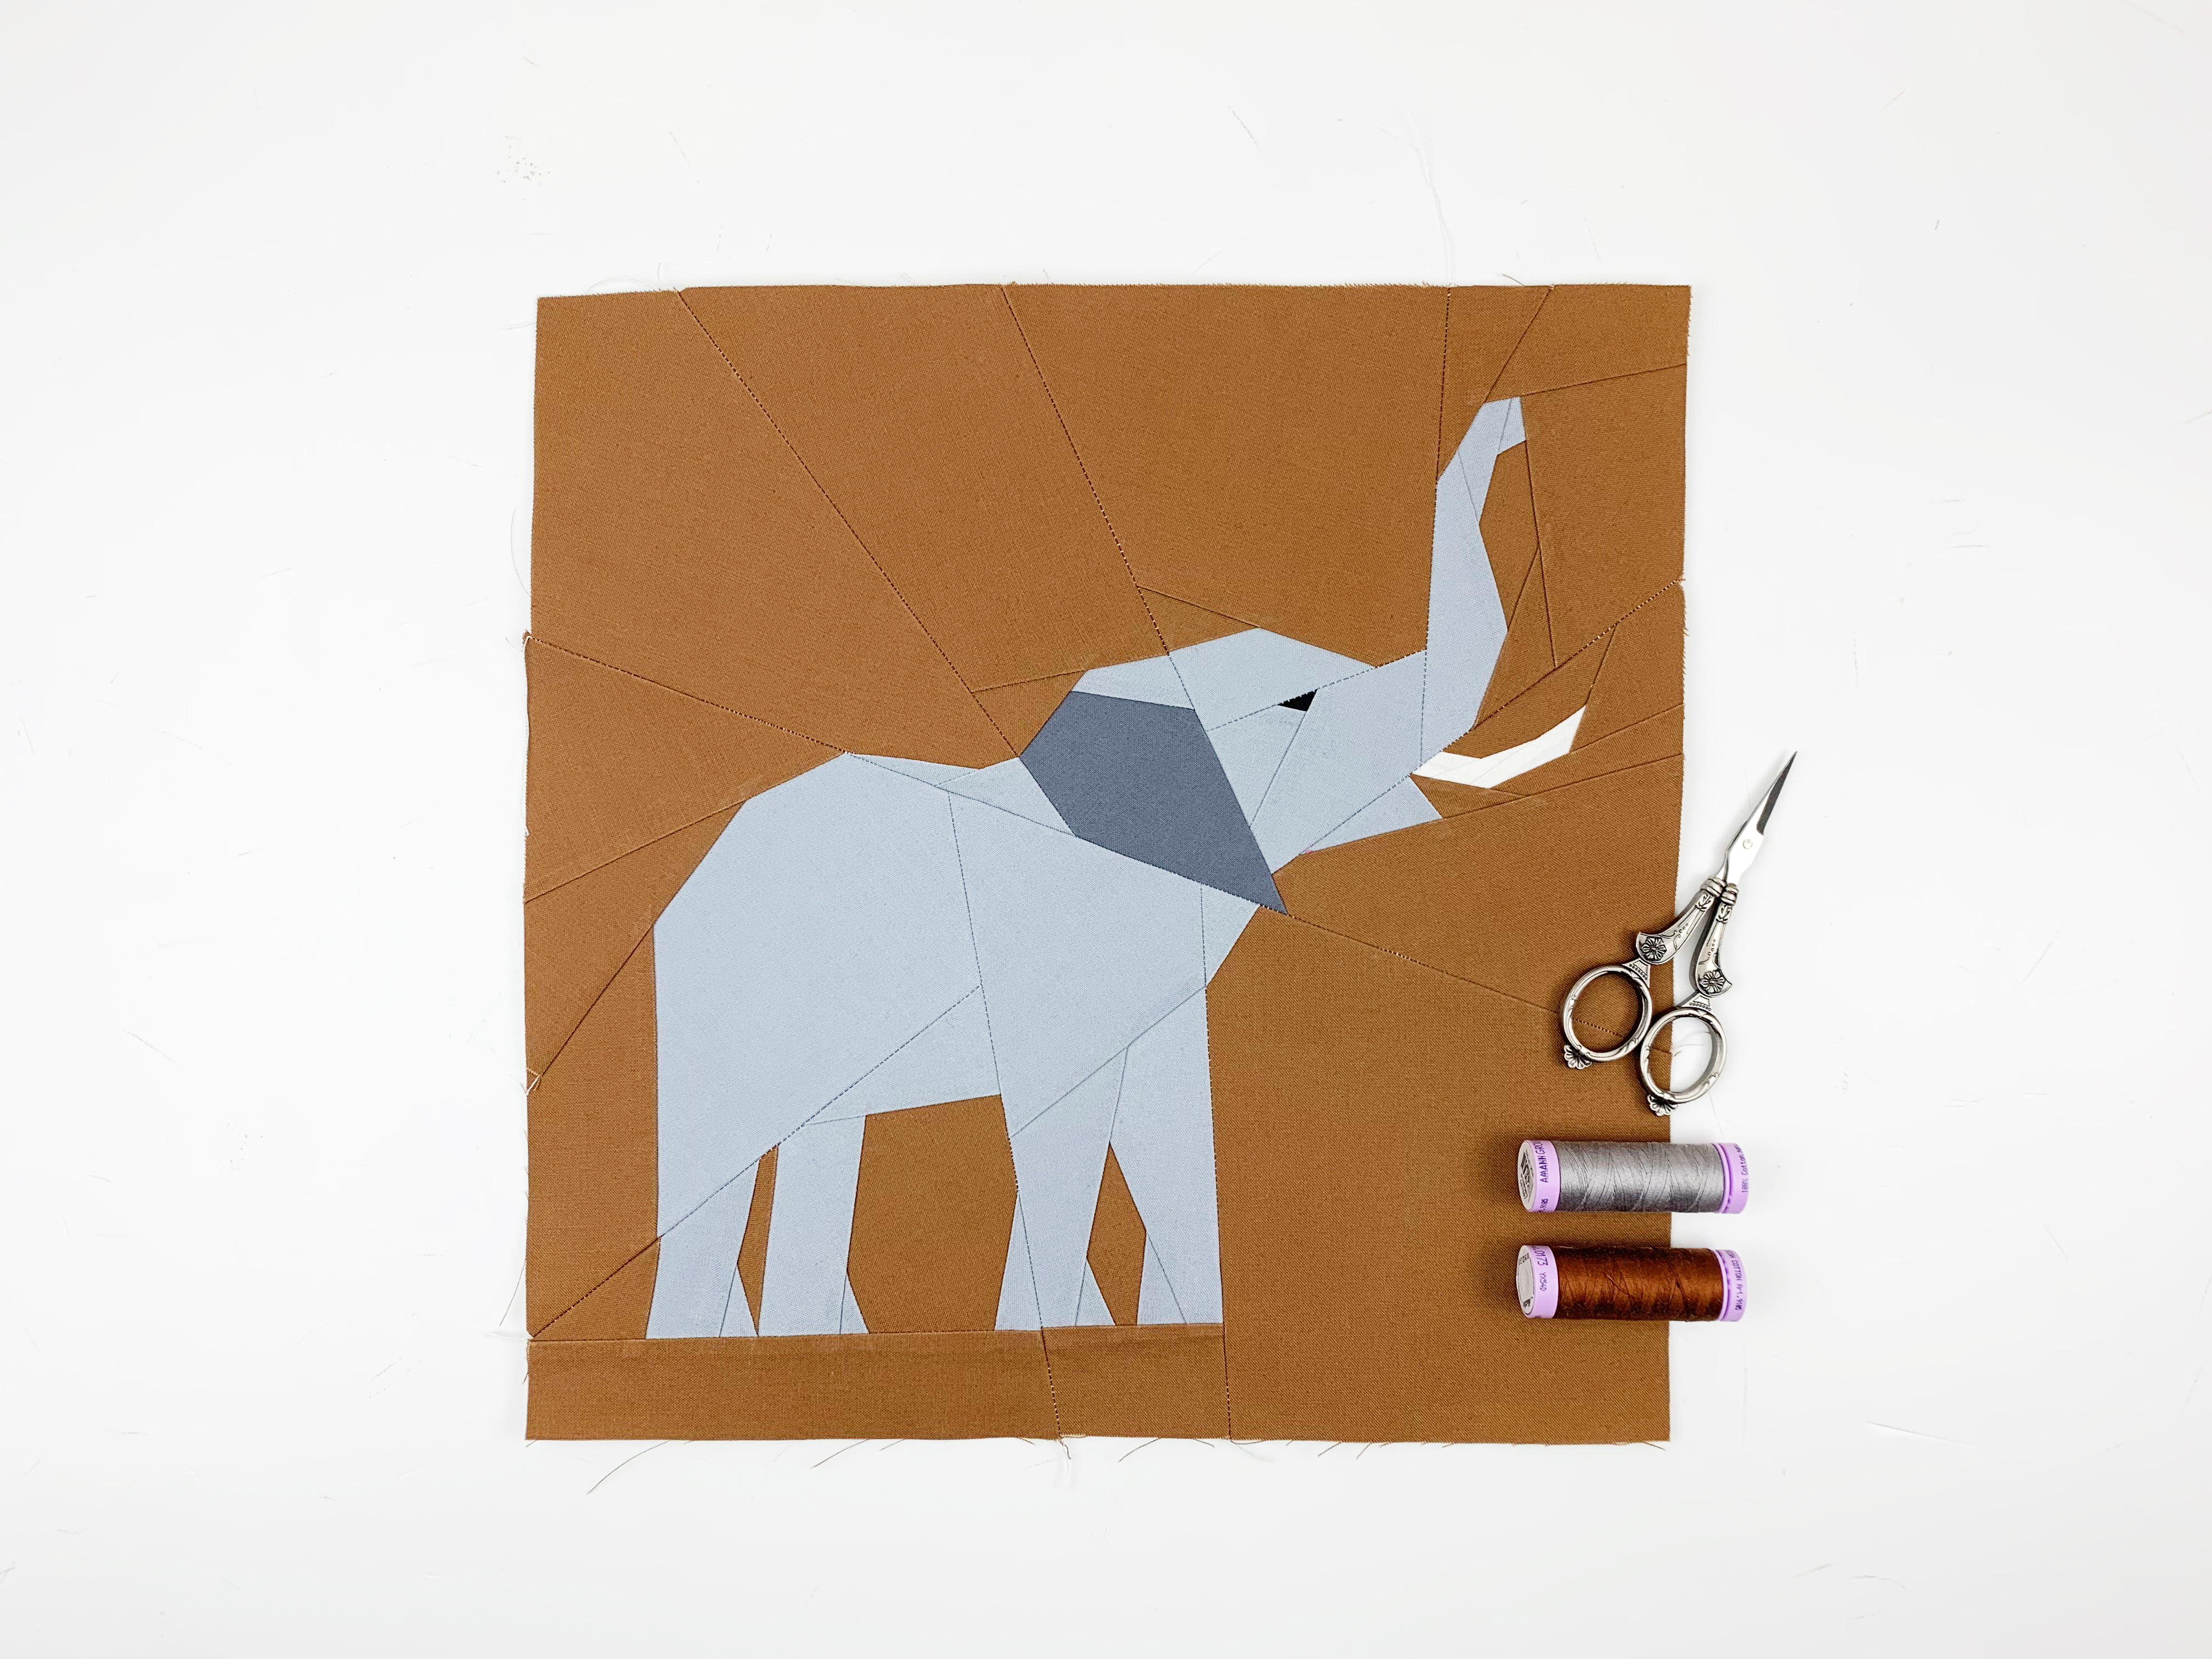
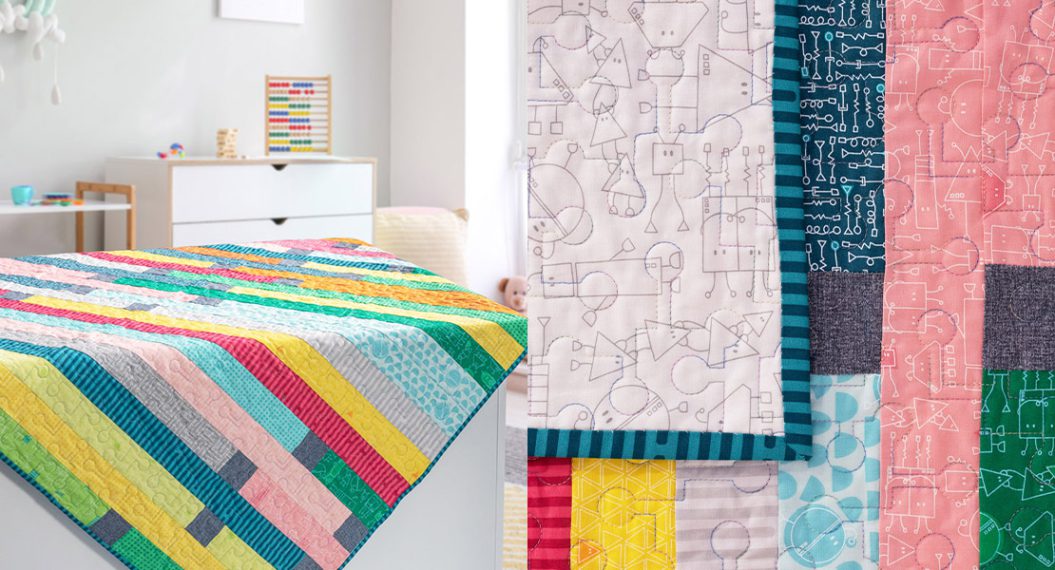
As I mentioned before, when I made this quilt, I sewed one of the elephant quilt blocks facing the wrong direction ….twice, which means my husband got a really nice cushion for his favorite chair.
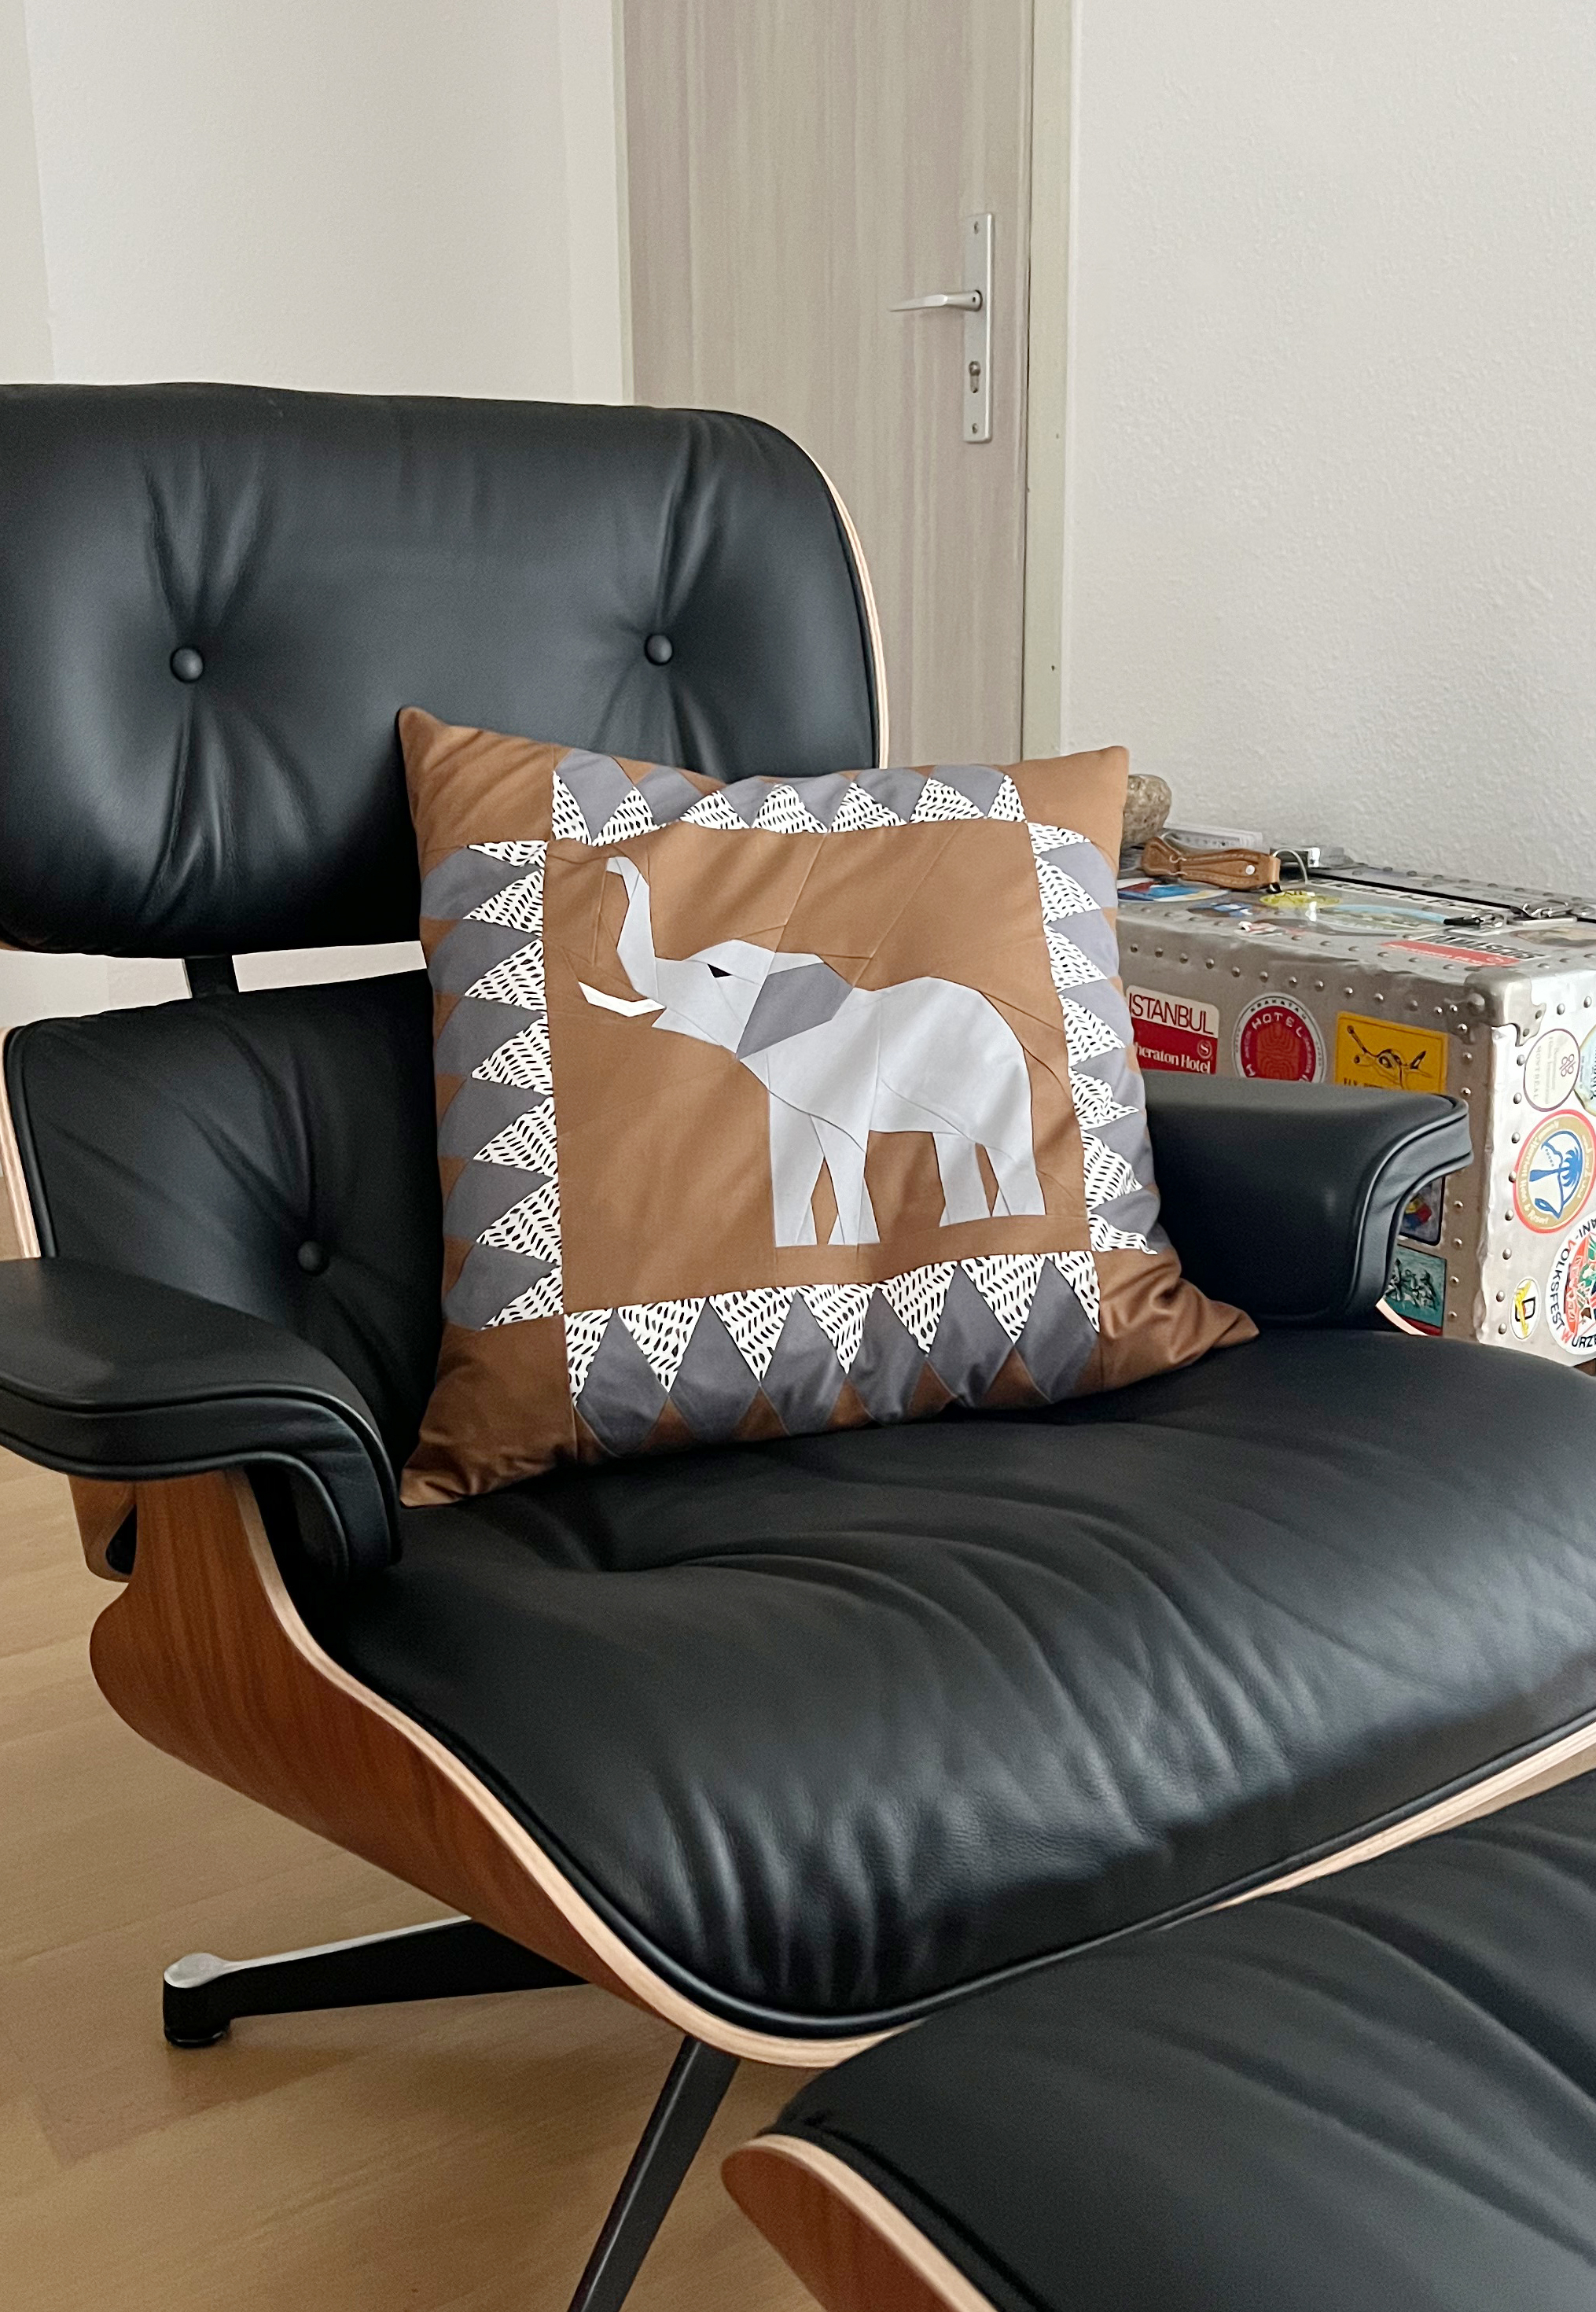
Short Sewing Instruction for the Elephant Cushion
Materials
- Earth brown (background, corner blocks, border)
- Light gray (elephant)
- Medium gray (ear)
- Eggshell (tusk)
- black (eye)
- black and white fabric (border)
- medium gray (border)
- Here is the fabric yardage (without pillow back) as a PDF file: Material Pillowcase
Sewing
1. First sew the quilt block for the center of the pillow, I used Elli the Elephant in the size 12 “x 12”.
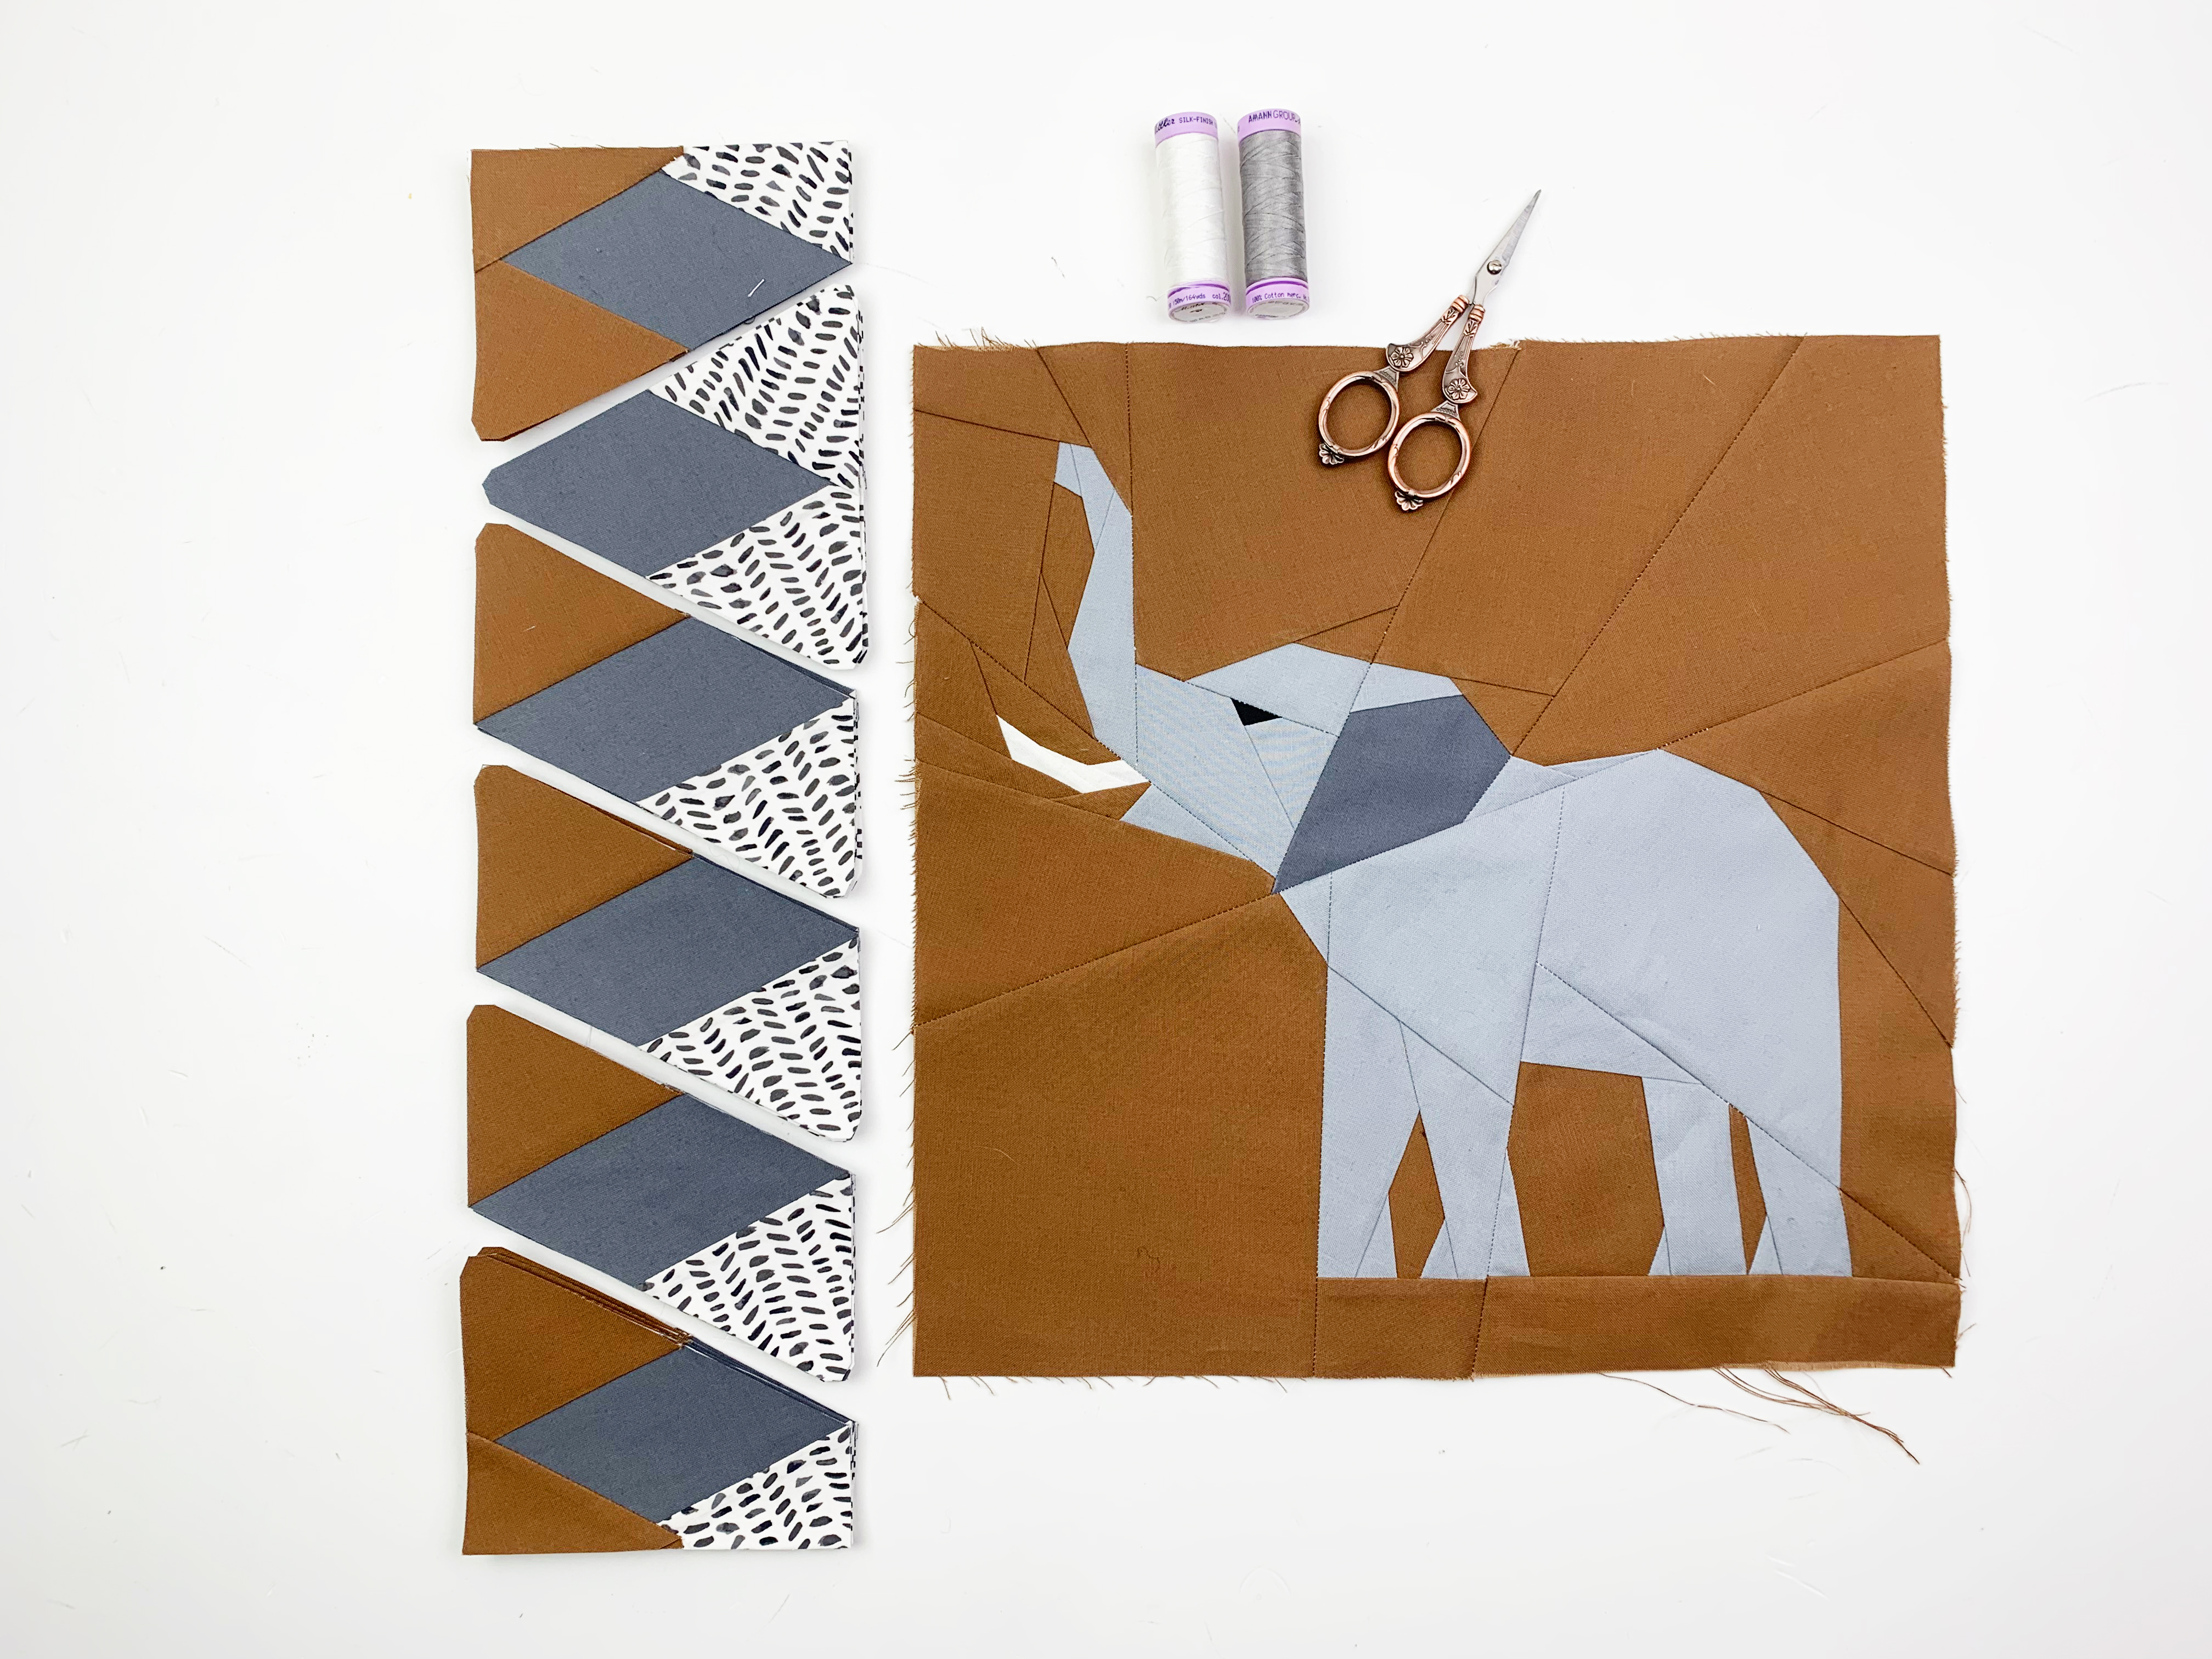
2. Sew 4 border quilt block in the size 12″x 4″ from the border quilt block pattern, or add segment B twice to the free diamond border quilt block for each side of the pillowcase.
3. Cut 4 x 4.5″ squares for the corner blocks of the cushion cover.
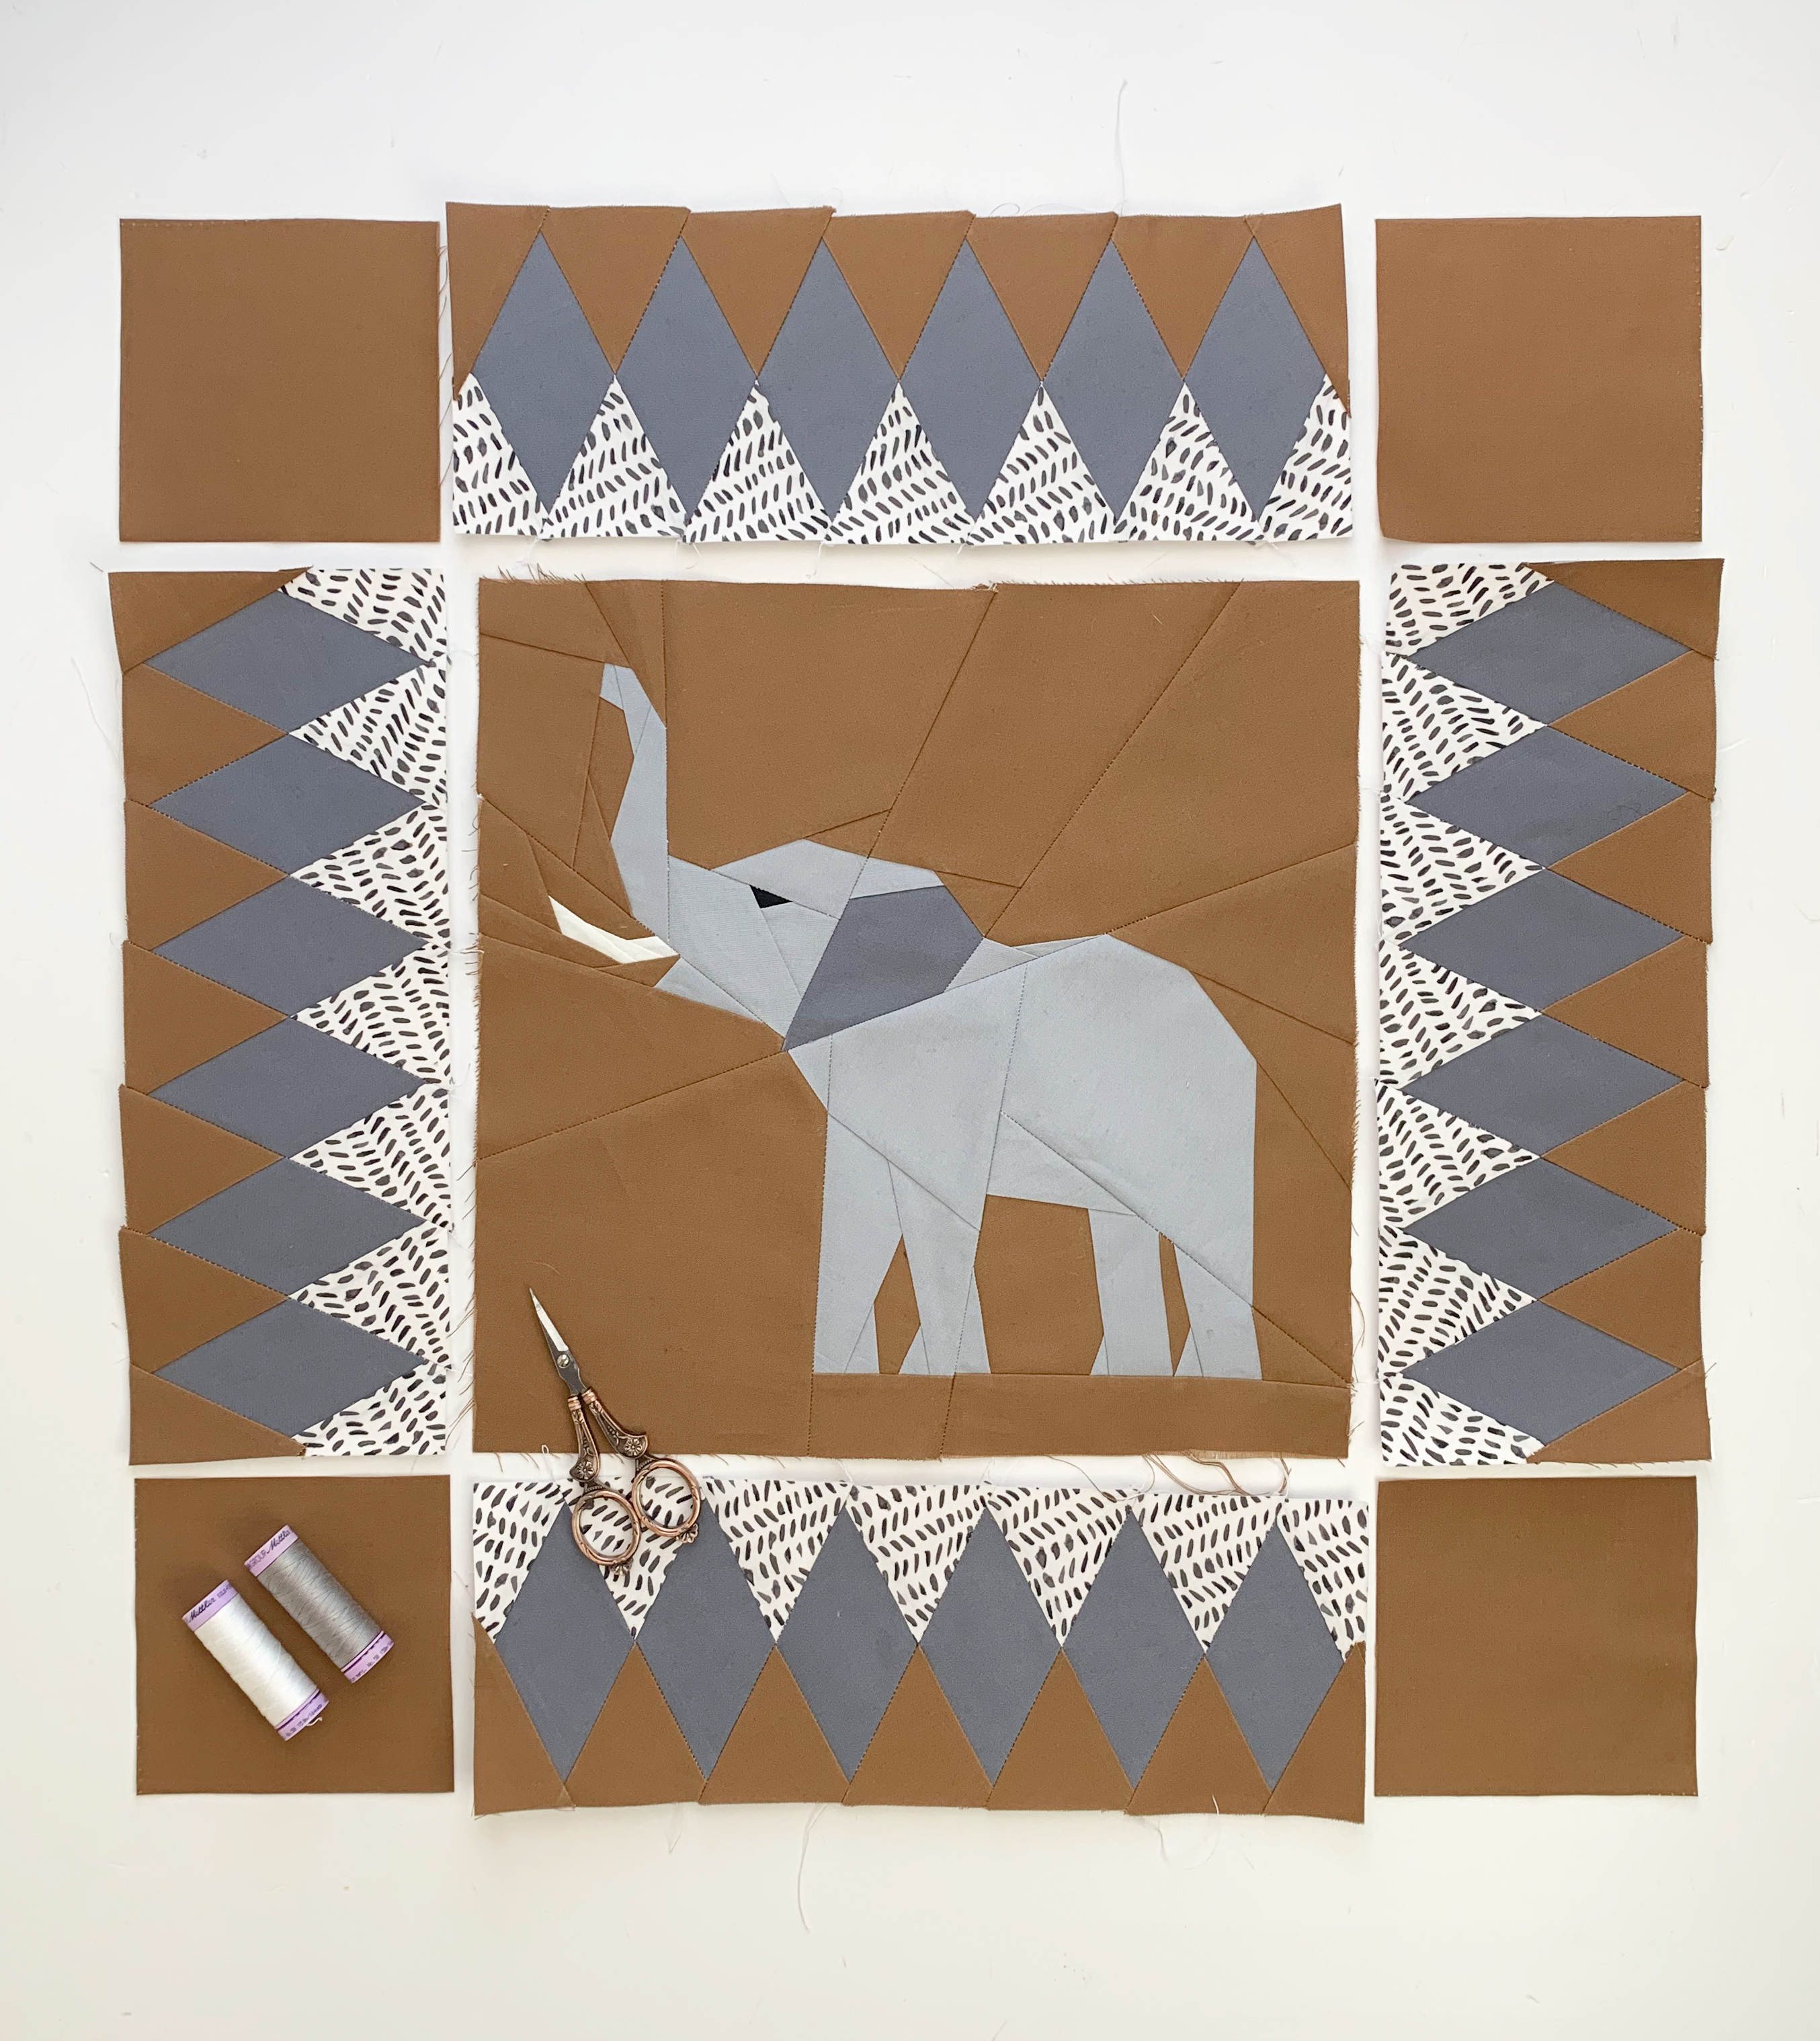
4. Sew the corner blocks to the right and left of the top and bottom diamond border blocks and then attach the side diamond border blocks to the elephant quilt block first, then add the top and bottom diamond border rows.

5. I have sewn an envelope closure for the back of the cushion cover. This means that only two pieces of fabric are sewn and placed on top of each other. This is a super simple and effective way of sewing a cushion cover closure. I have a detailed description here on my blog for this type of cushion backing.

Doesn’t the elephant cushion look lovely? I think I need some more cushion covers like this, what do you think?
Show Me Your Elephants!
How are you getting along? Are you cruising through the savannah? I hope the elephants turned out well. If you have any questions, please ask them in the comments.
I’m looking forward to seeing pictures of your blocks. Show them to me on social media or in the community section of the blog! Always use the hashtag #quiltsafari on Instagram. In the community section of the blog, don’t forget to select the “Quilt Safari” campaign.
See you next time,
warm sewing greetings,
Ingrid
PS:
🐘🐘🐘 One more note for all those who have purchased the pattern, there has been a mishap with the standing elephant regarding the printout… Please check your inbox or contact me at [email protected] if you have purchased the pattern but have NOT received an email from me.


