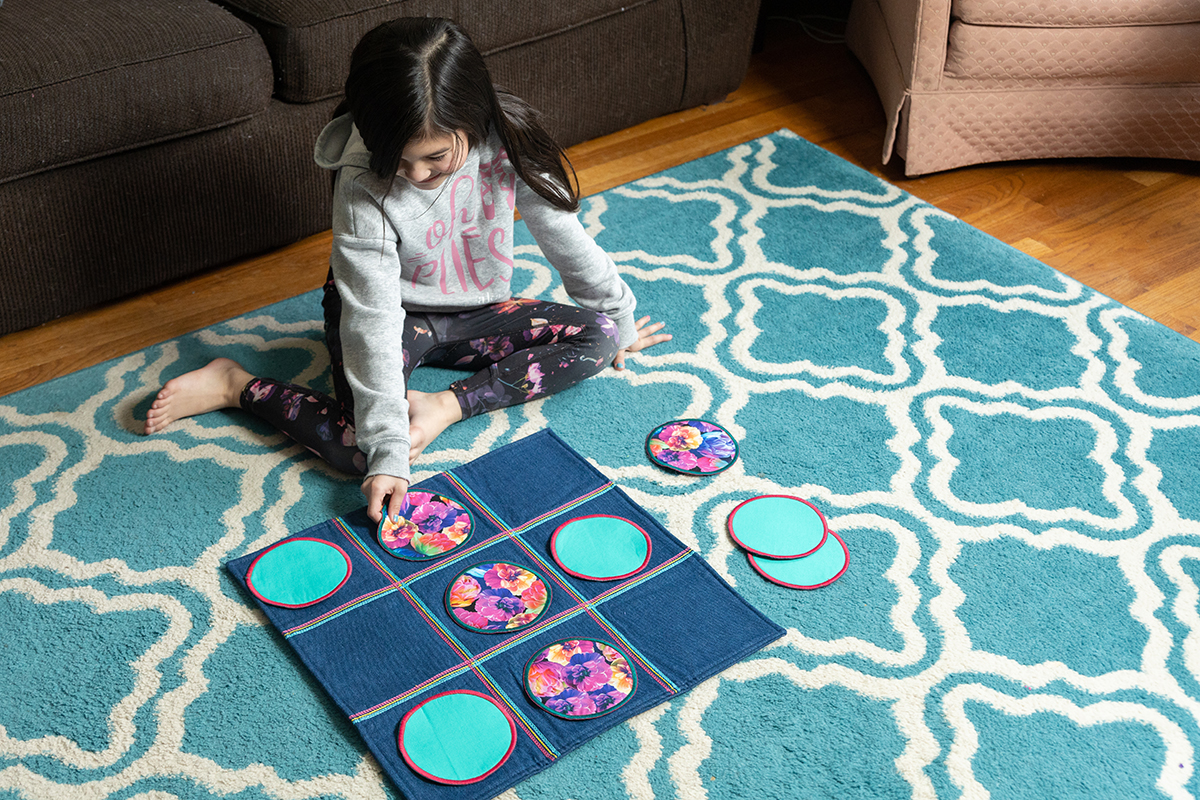
Tic-Tac-Toe on the Go, Part Two
Last time we were together, you learned how easy it was to serge circles, and you made nine game pieces for your Tic-Tac-Toe On the Go project. Today I’ll show you how to make the game board using cover- and chainstitches.
Note: You can substitute decorative sewing stitches if you don’t yet have an overlocker that will sew cover- and chainstitches.
Materials and Supplies
In addition to the supplies listed in Part One of this post, you will need the following:
- Coverstitch machine (I’m using the BERNINA L 890)

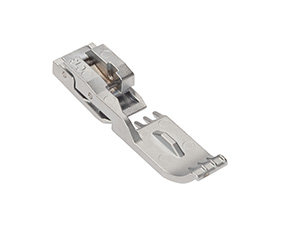
- Cover-/Chainstitch Foot #C13
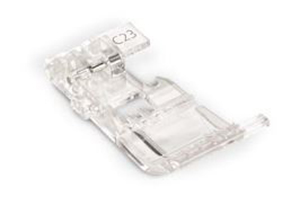
- Curve Foot #C23
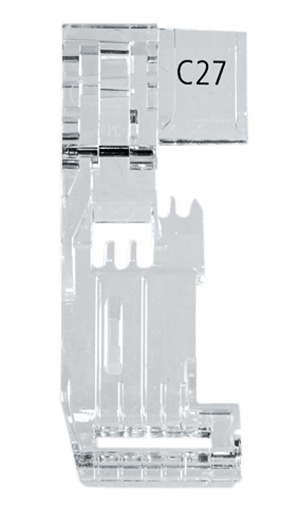
- Clear Foot #27
- Assorted decorative threads
- A compass (the kind for drawing circles, not the kind that tells you where you are!)
- Basic serger supplies
Use a 1/2″ seam allowance unless otherwise noted.
Making the Game Board
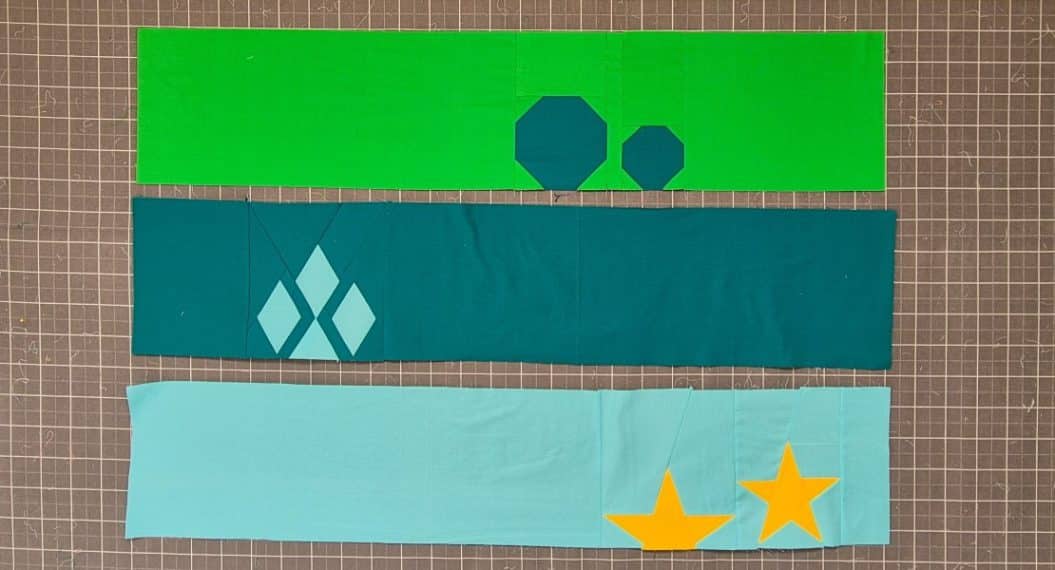
From the denim, cut two 21 1/2″ squares. Cut two 21″ squares from the Fusible Fleece.
Center and fuse the fleece to the wrong side of each piece of denim.
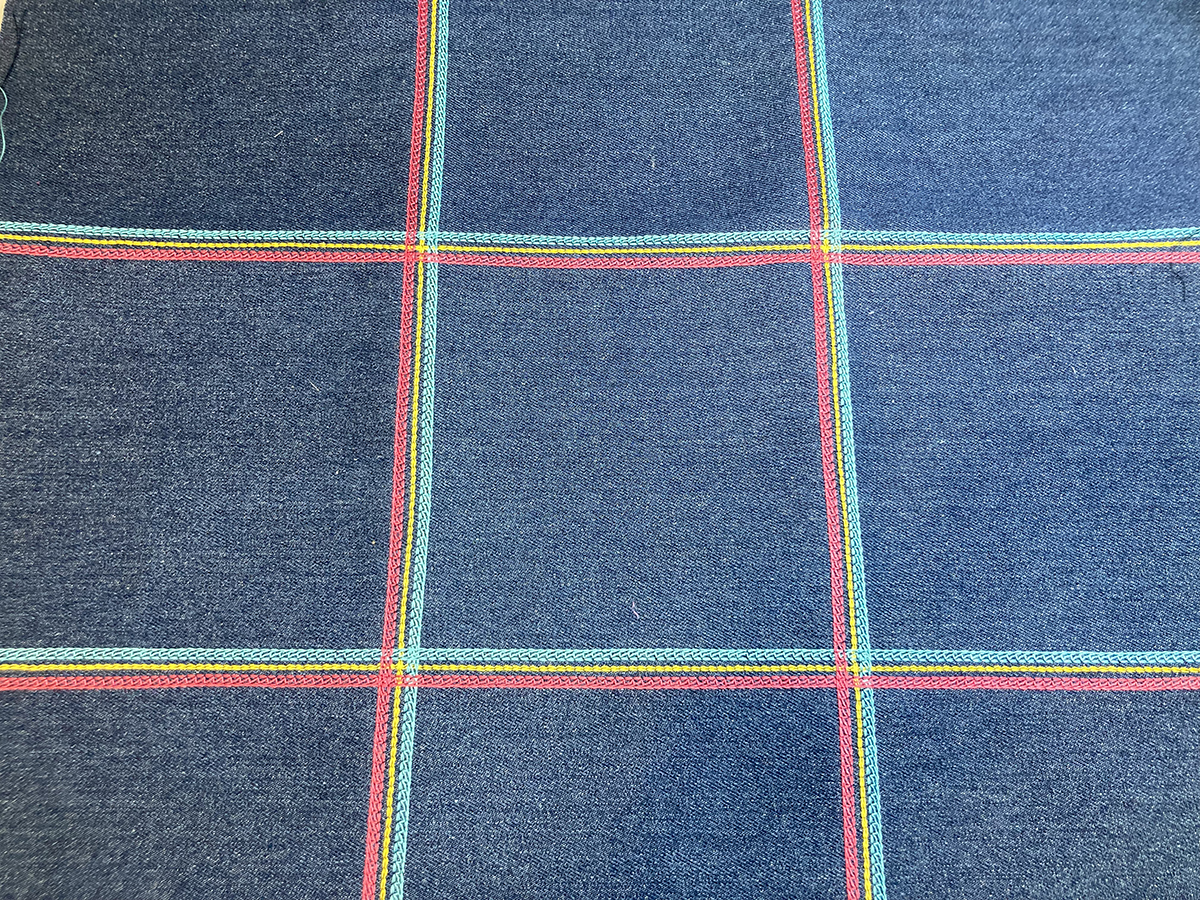
On the fleece side of one of the denim/fleece combinations, make two vertical lines each 7 1/2″ from the side edges. 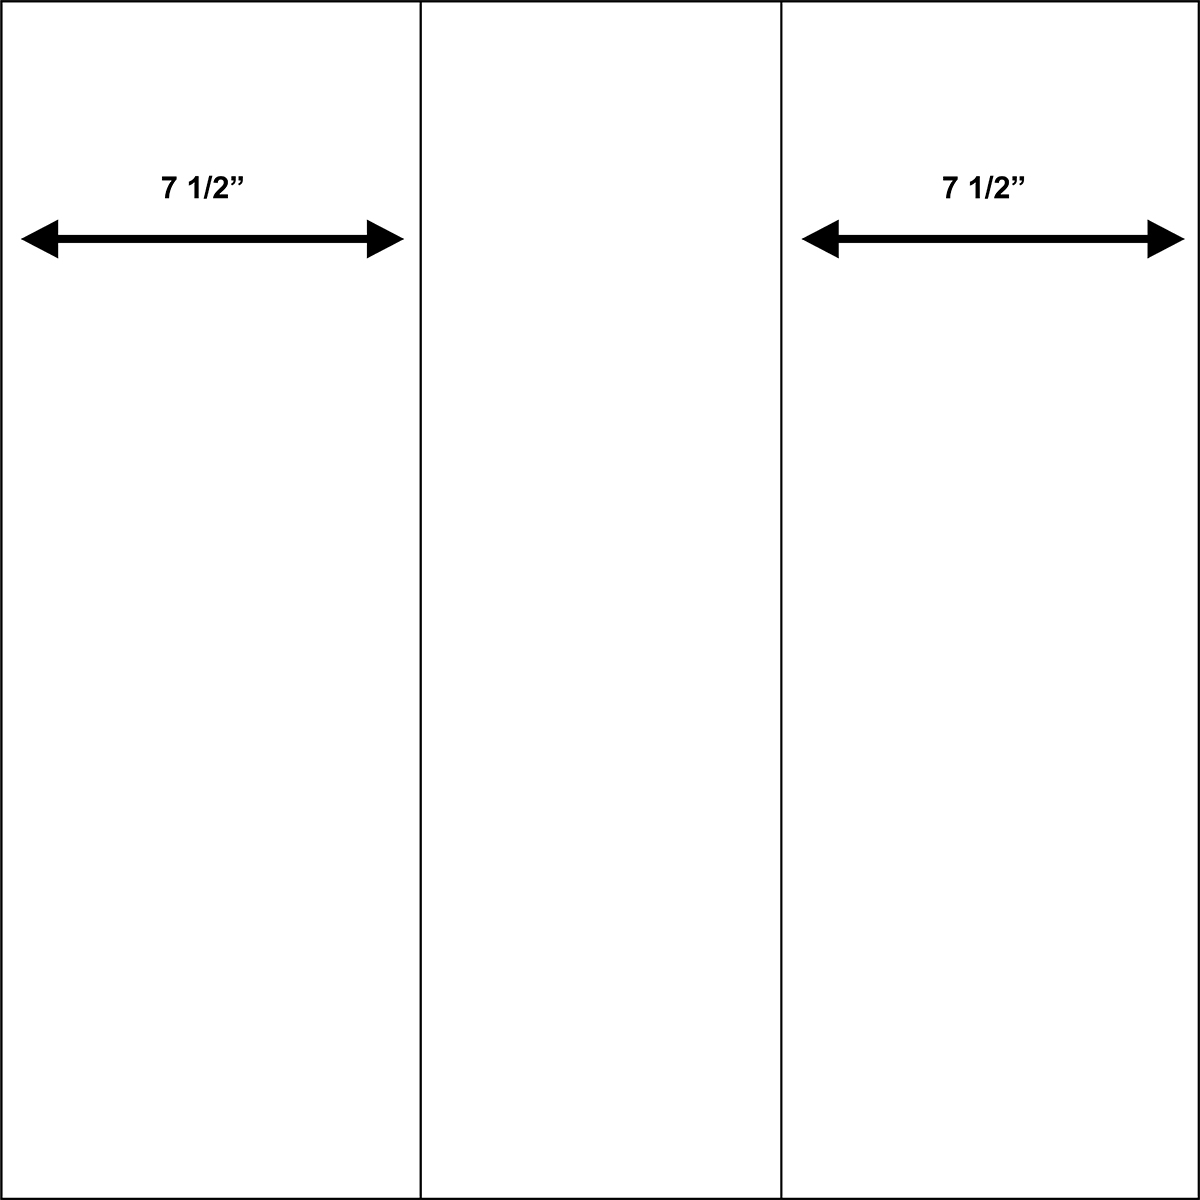
Add two horizontal lines 7 1/2″ from the top and bottom. The center square will measure 6 1/2″. 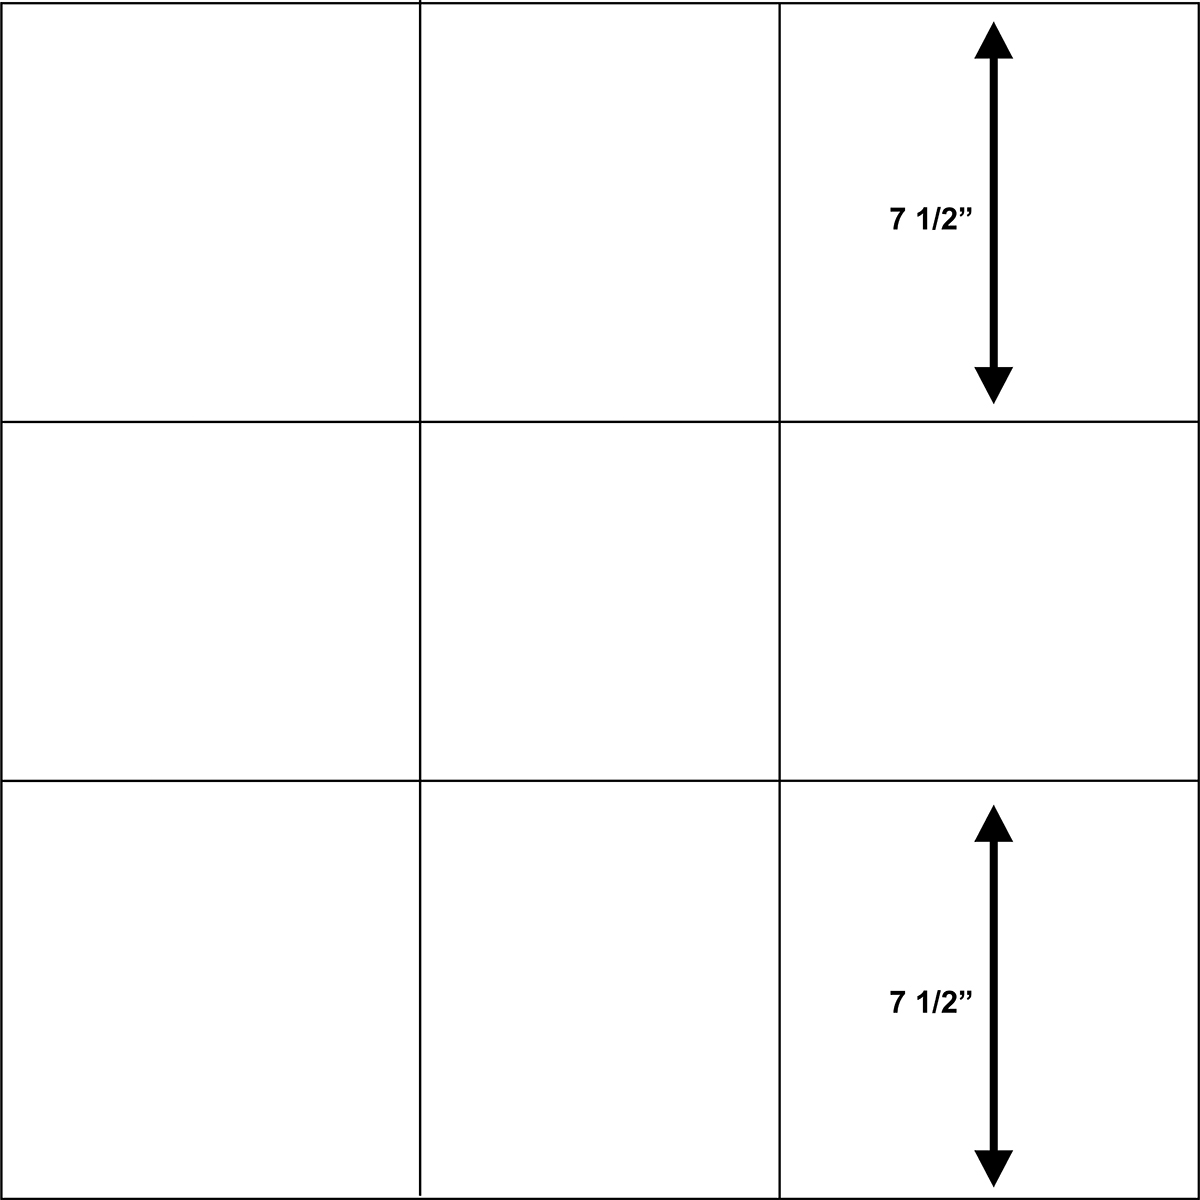
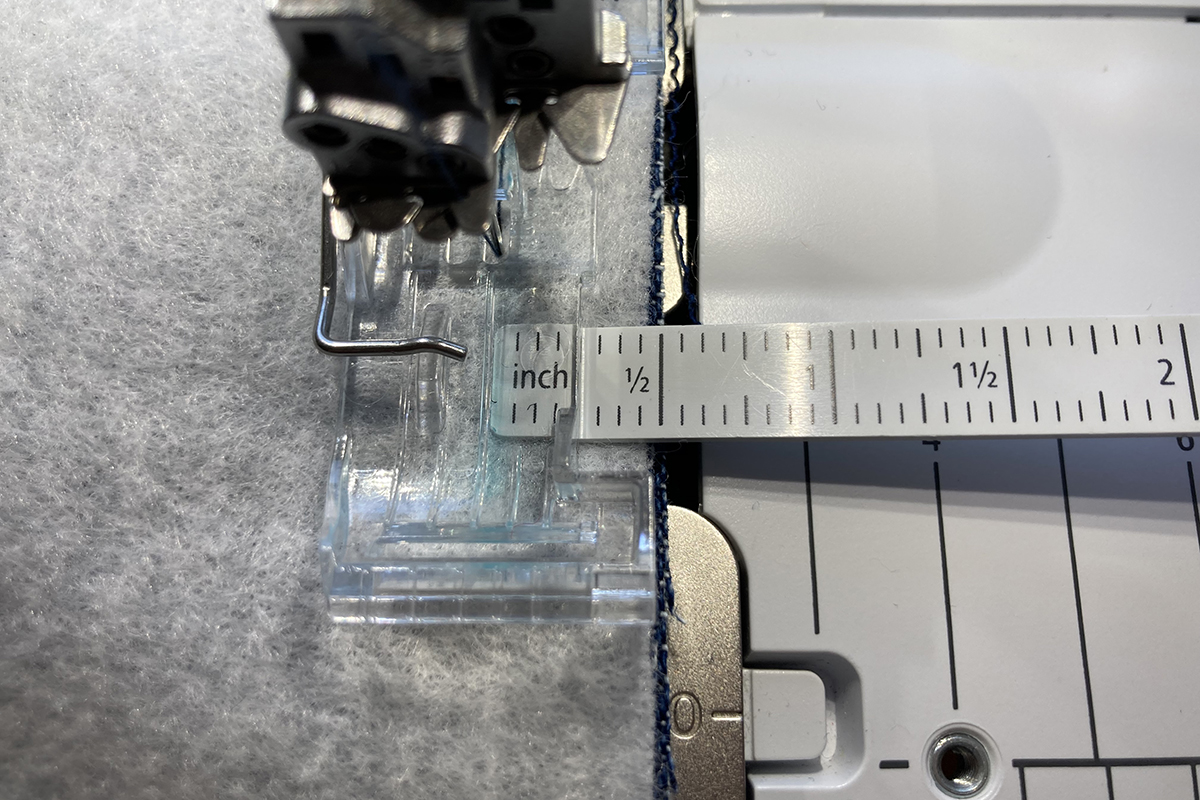
Set your machine for a 2-thread Chainstitch. I used Mettler Seracor in the needle to match the denim and yellow WonderFil 12-weight Spagetti in the chain looper. I increased the stitch length to 3.5. Stitch on the marked lines on the fleece, beginning and ending at the edges of the fabric using Clear Foot #27. Because this foot is transparent, it’s easy to see the marked lines. 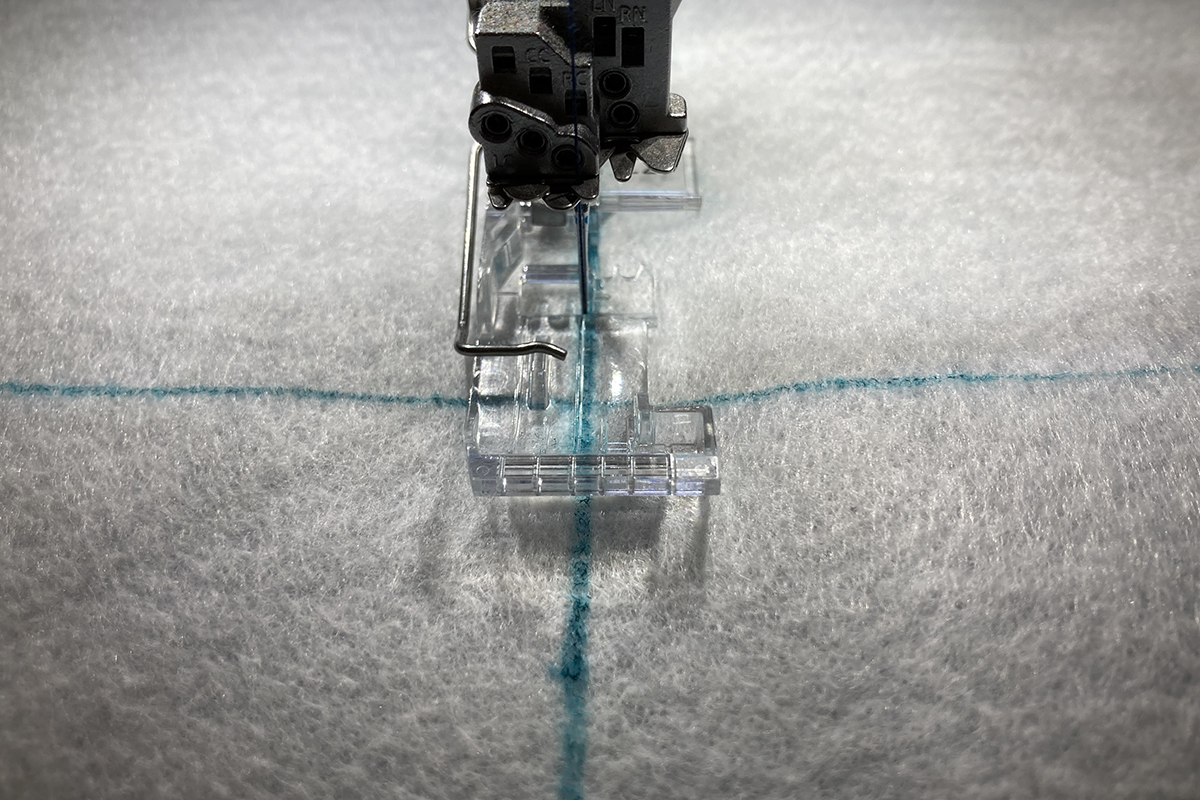
The yellow thread shows up nicely on the denim!
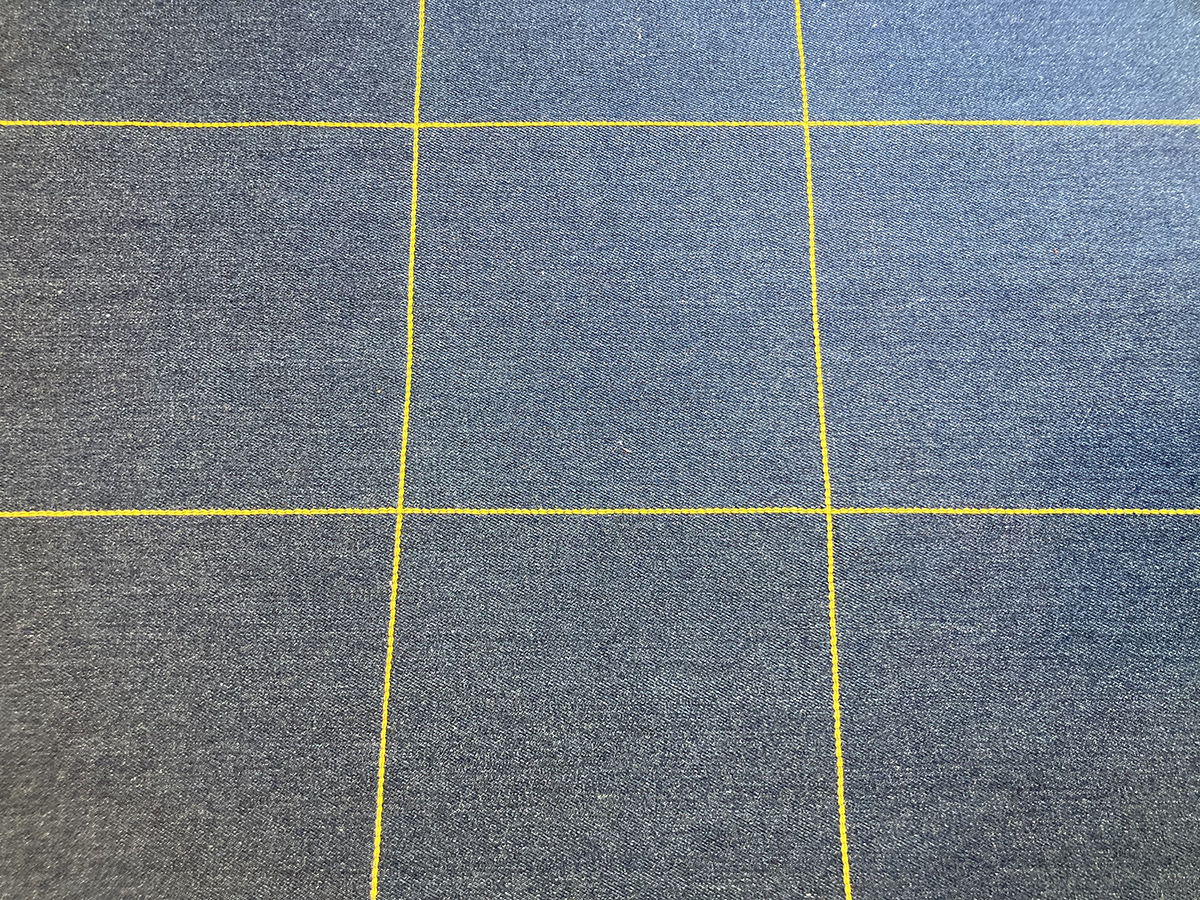
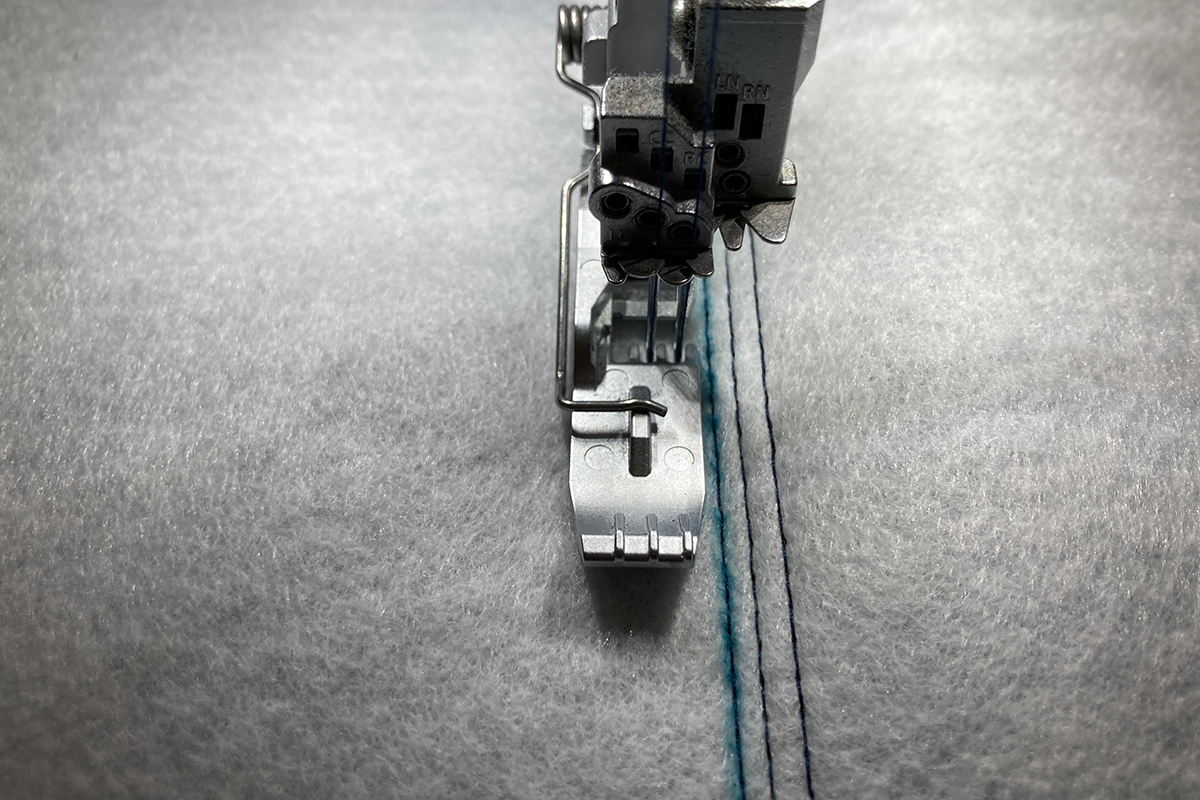
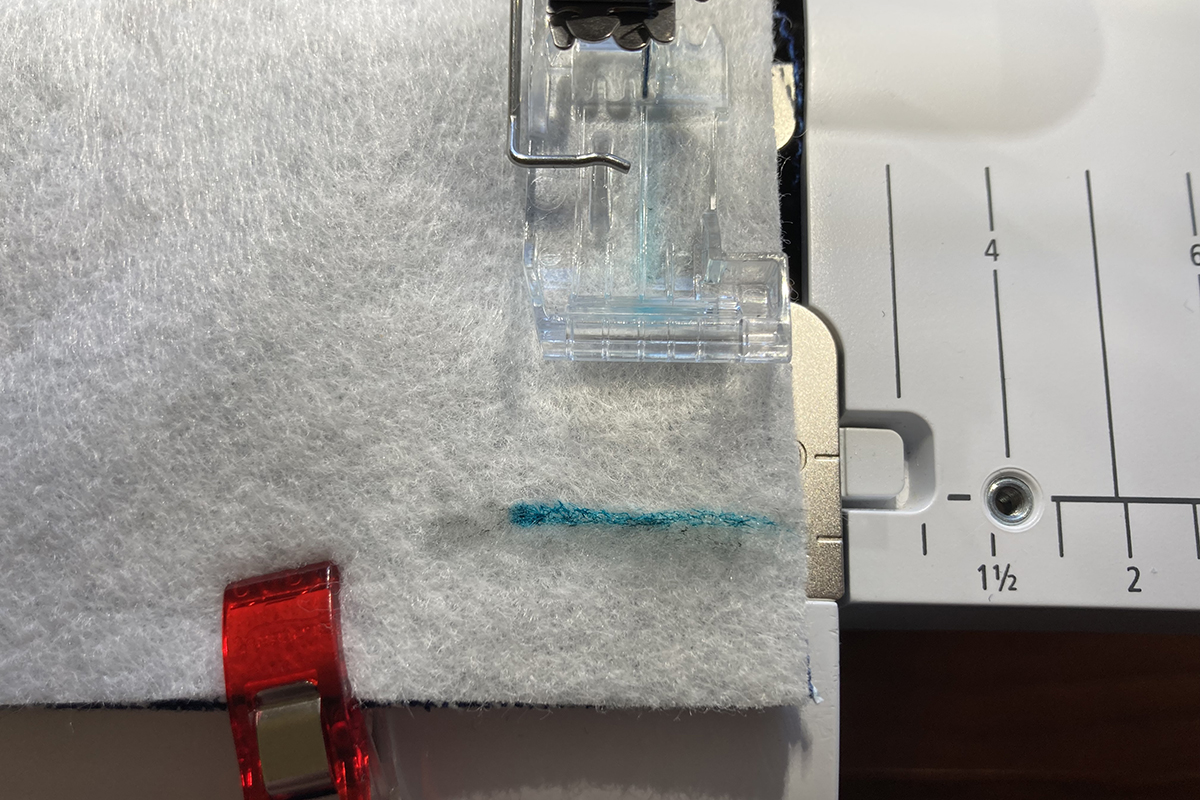
Let’s add some more color. Set your machine for a 3-thread Coverstitch 3 mm CC-RC and put a new thread color in your looper (I used light blue). Attach the Cover-/Chainstitch Foot #C13.
On the fleece side, align the right side of the foot with the left side of the previously stitched chainstitch and sew the narrow coverstitch. Stitch along one side of all the chainstitches in this manner. 
That’s starting to look pretty neat!
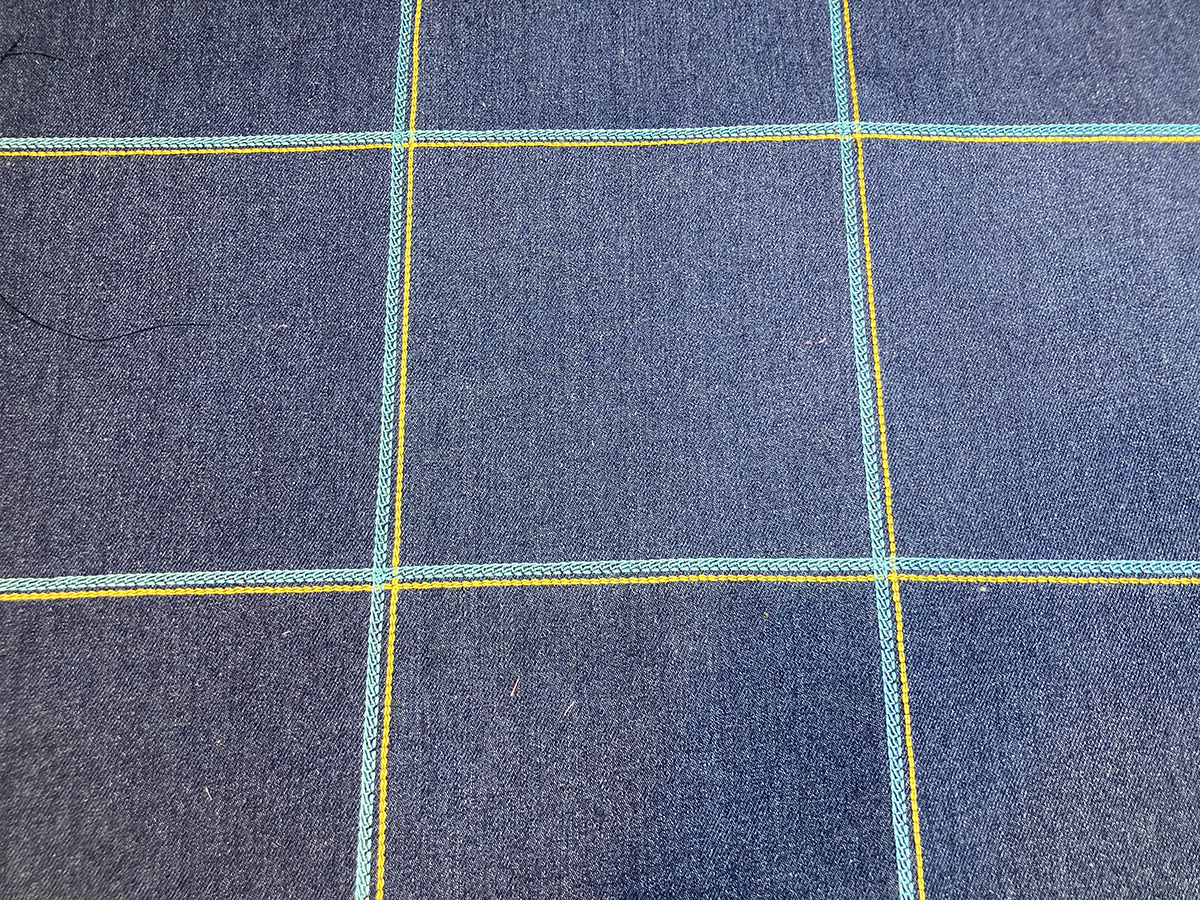
Change the looper thread again (I used pink). Now stitch the narrow coverstitch on the other side of all the chainstitches, guiding with the right edge of the foot as before. The L 890 has lots of space to the right of the needle to make it easy to guide the fabric through.
Wow! I love how these threads look on the denim!
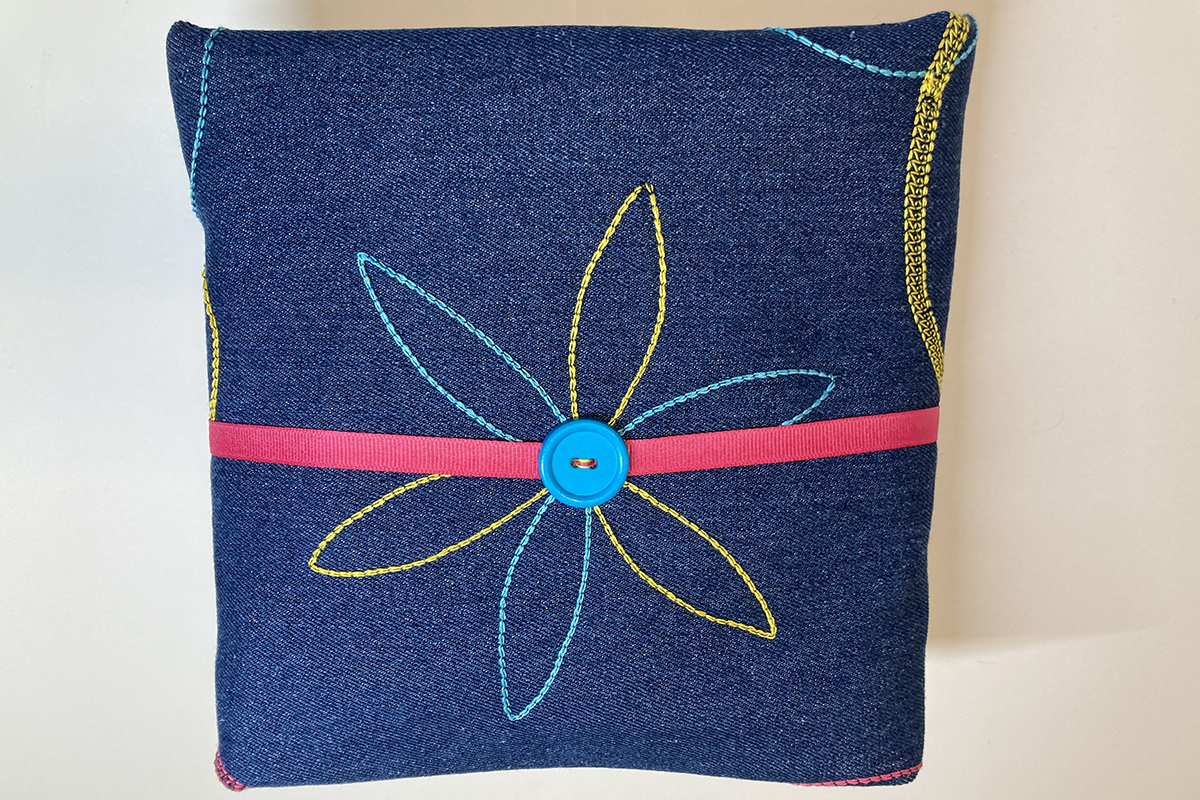
Now we are going to stitch circles on the other denim piece. The compass is a great tool for drawing circles and I decided to try something fancy. I confess that the first thing I did with my compass when I was in school was to draw flowers. Did you do that? I’m going to draw a flower in the center of the denim. If you have never done this before, let me show you how.
First, draw a 6″ circle with the compass in the center of the denim on the fleece side. (To set the compass to the right size, place the point on “0” on a ruler and the pencil on “3”. This is the radius and will give you a 6″ diameter circle. Just in case geometry class was longer ago than you care to remember!) 
Without adjusting it, place the point of the compass anywhere on the circle edge and place the pencil on the circle edge, as well. Draw from circle edge to circle edge, with the arc passing through the circle center.
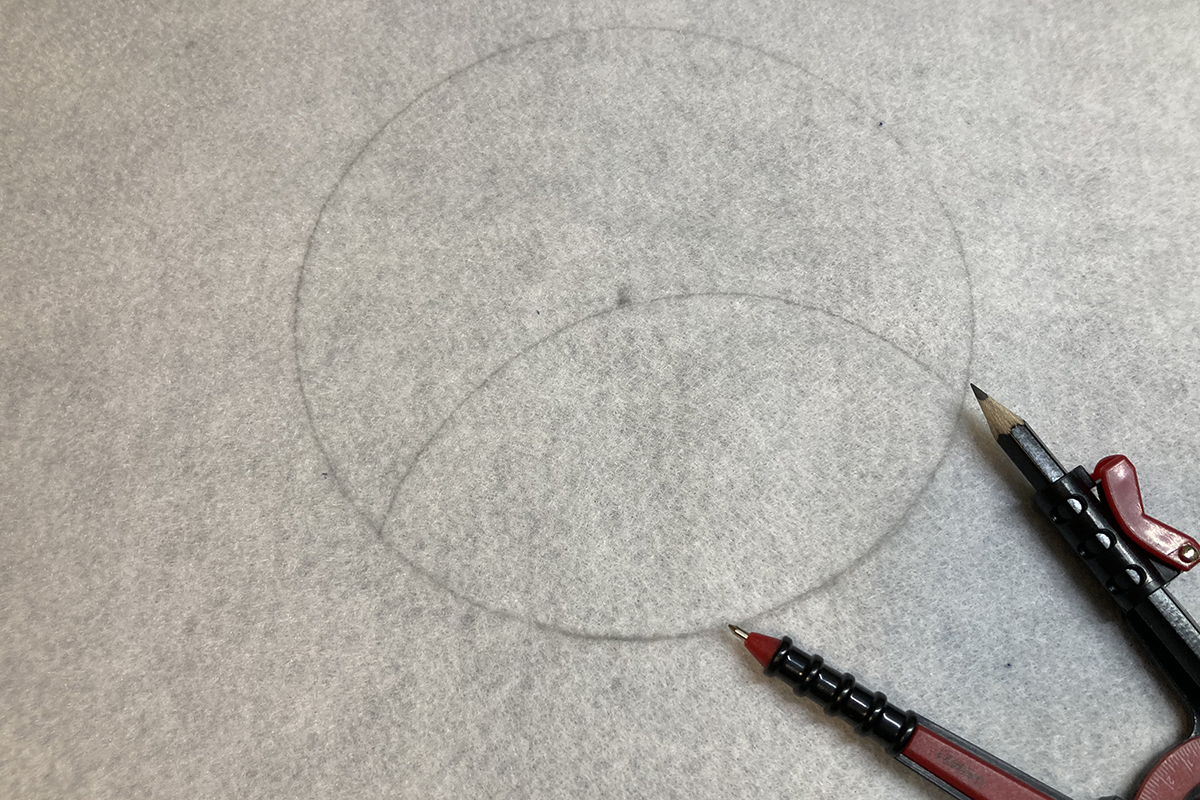
Then move the point to the intersection of the arc and the circle edge and repeat.
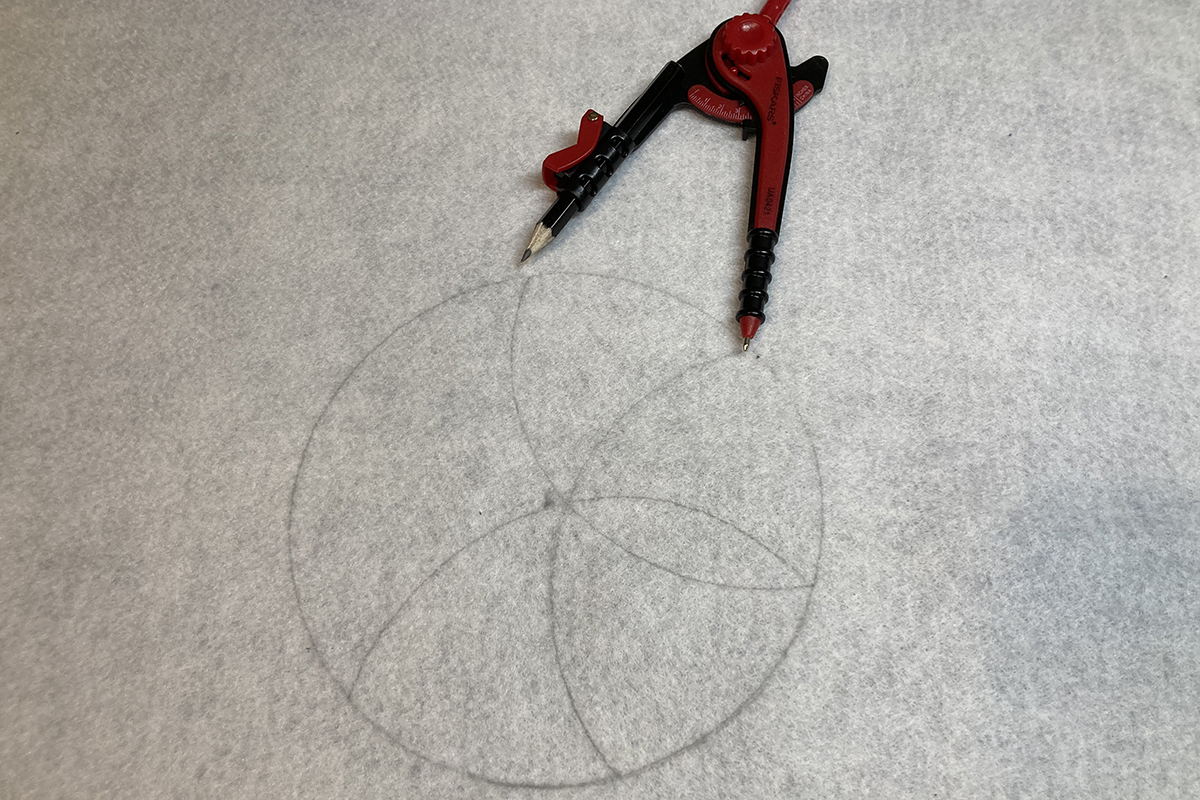
Continue drawing like this until all of your petals are connected. You want a light hand on your compass as you draw or else the adjustment will change. 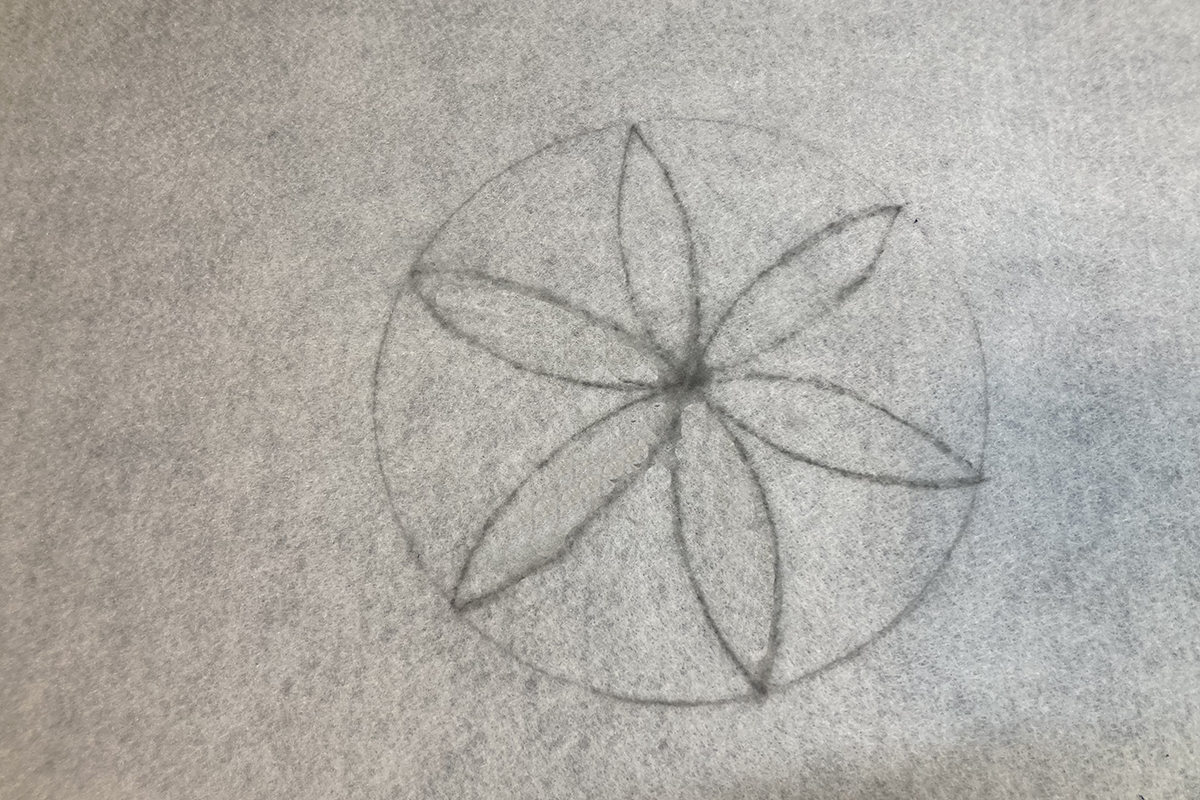
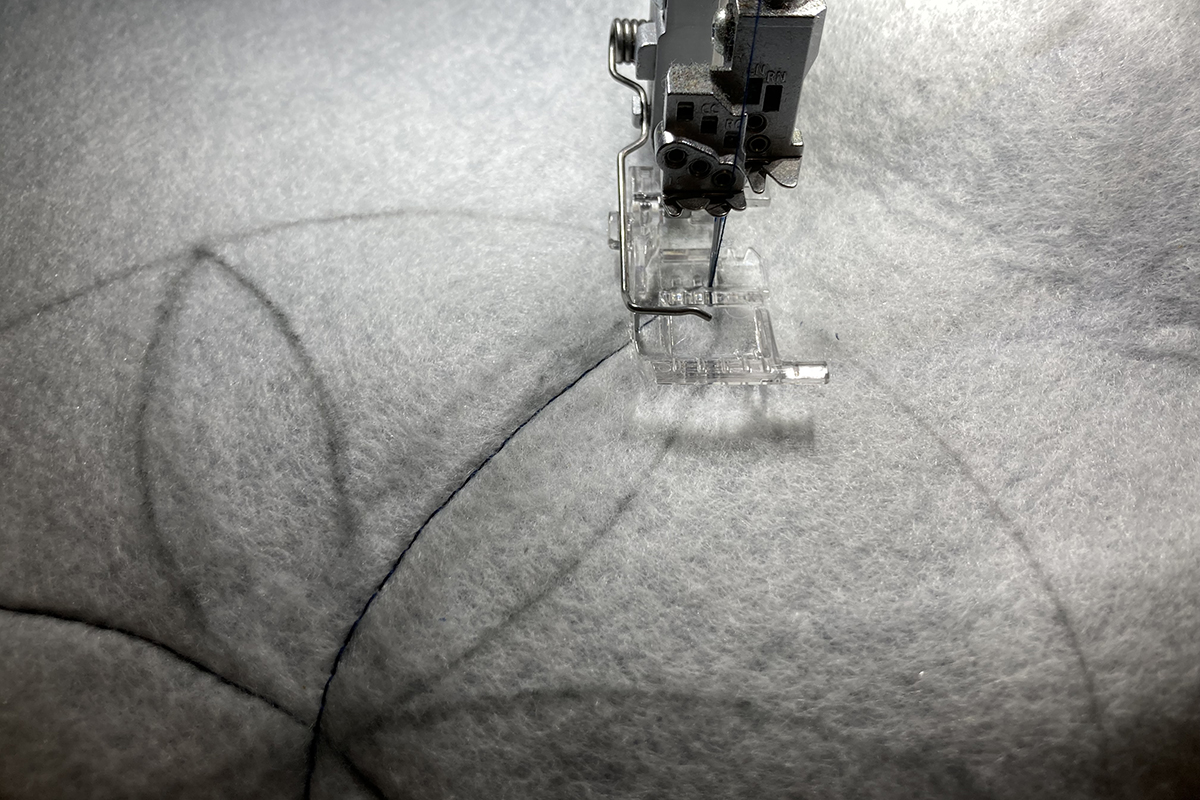
Attach the Curve Foot #C23. Because it’s clear and the front toe is shorter, stitching the flower will be a piece of cake!
Set the machine for a 2-thread Chainstitch RC with a stitch length of 3.5. Keep the serger thread in the needle and thread the looper with 12 weight thread. You will want a long tail to start, so stitch first on a piece of scrap fabric to bring up the looper thread.
Start at one of the points on the circle edge. Stop with the needle down at the next point and turn the fabric and continue stitching until you are back where you started. You will have sewn three petals.
I did my first set of petals in blue.
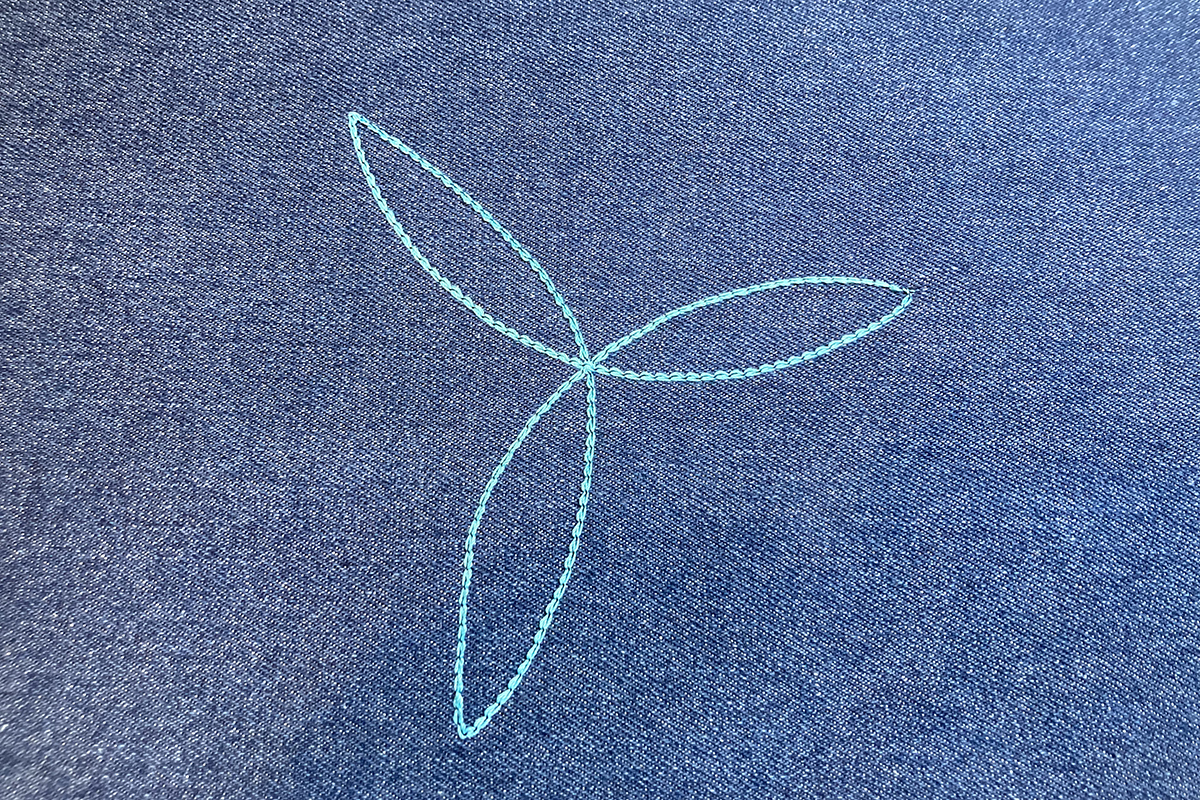
Then I changed the looper thread to yellow for the next three petals. Don’t stress if you go off of your drawn lines…this flower is blowing in the wind!
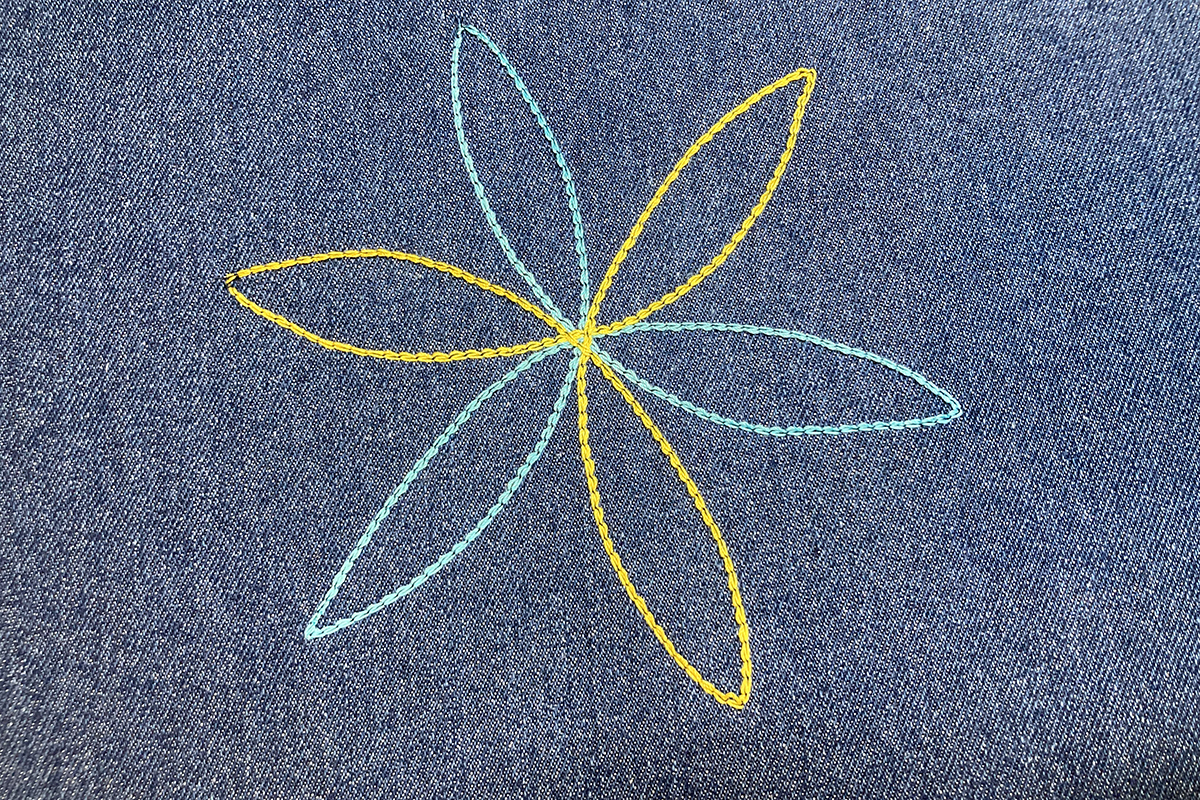
When you are done, use a large-eyed needle to bring all the thread tails to the fleece side. Tie a little knot and trim. That turned out very nicely!
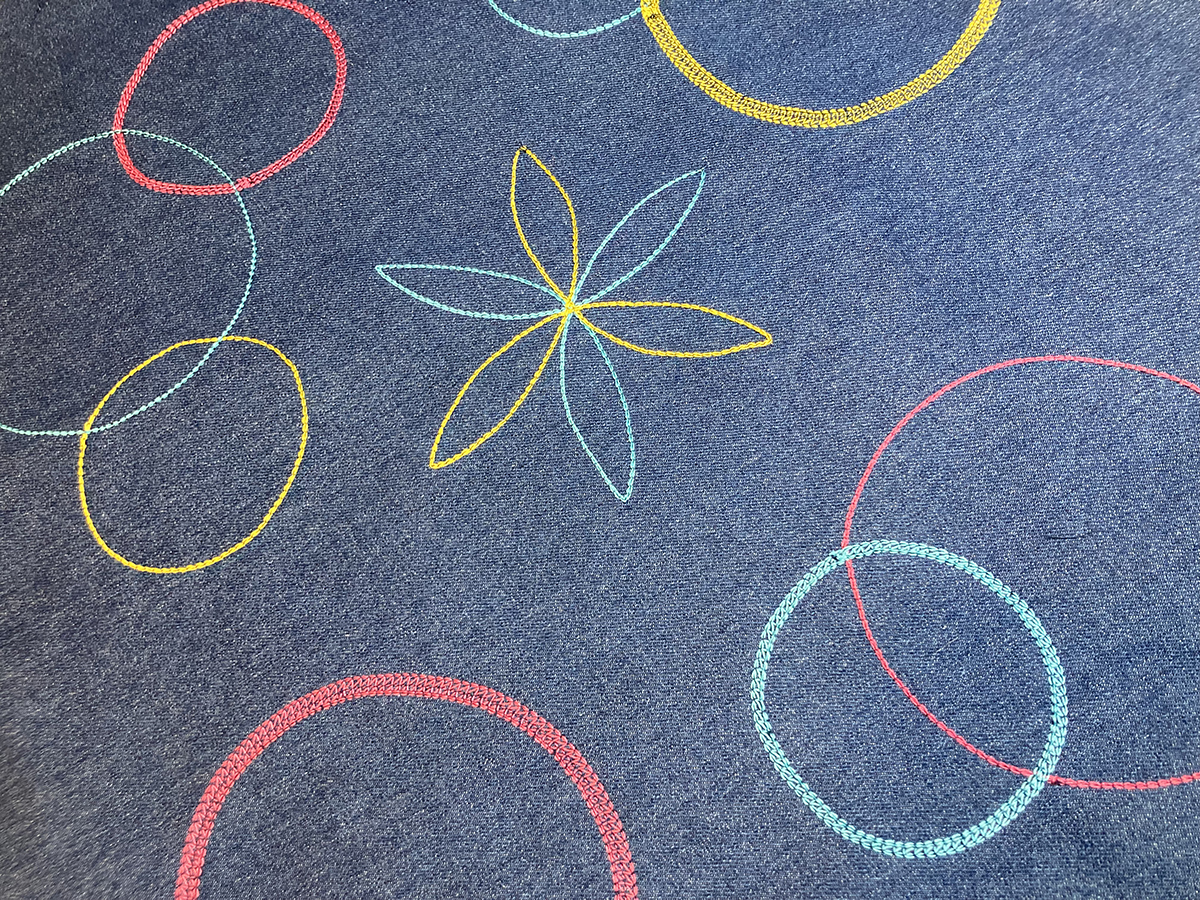
Now draw more circles on the fleece side of the fabric. Creating different sizes and some overlapping will make it interesting. I used different colors and stitches (2-thread Chainstitch, 3-thread Coverstitch Narrow and 4-thread Coverstitch Wide).
Wasn’t that fun!
Trim both denim pieces to 20 1/2″ square, making sure the center square and flower motif are centered.
Center the ribbon on the flower and hand sew a button through the ribbon and flower using 12 weight thread. This is going to be used as a closure for the game to contain the pieces. 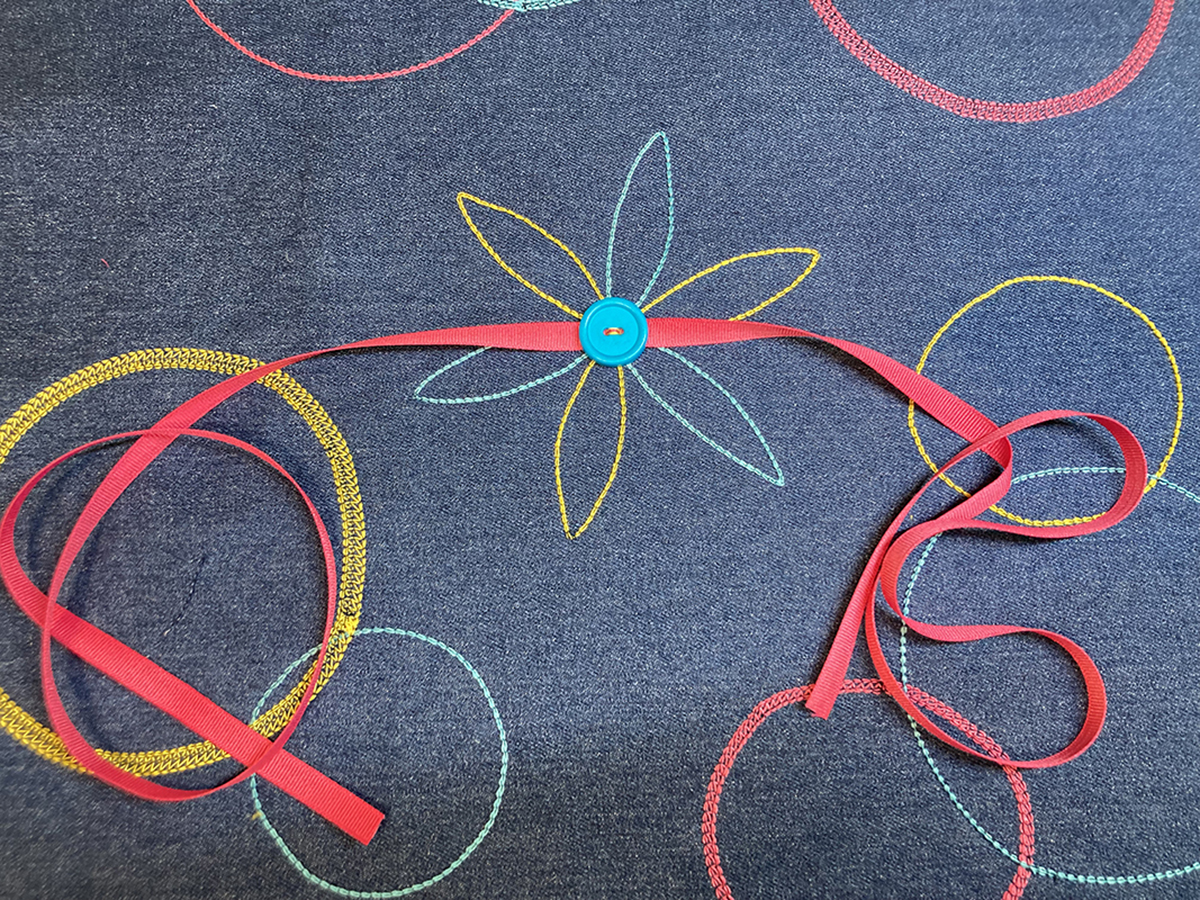
Layer the denim pieces right sides together and clip all around. Mark a 4-5″ opening for turning. Make sure that the ribbon ends are tucked well inside. 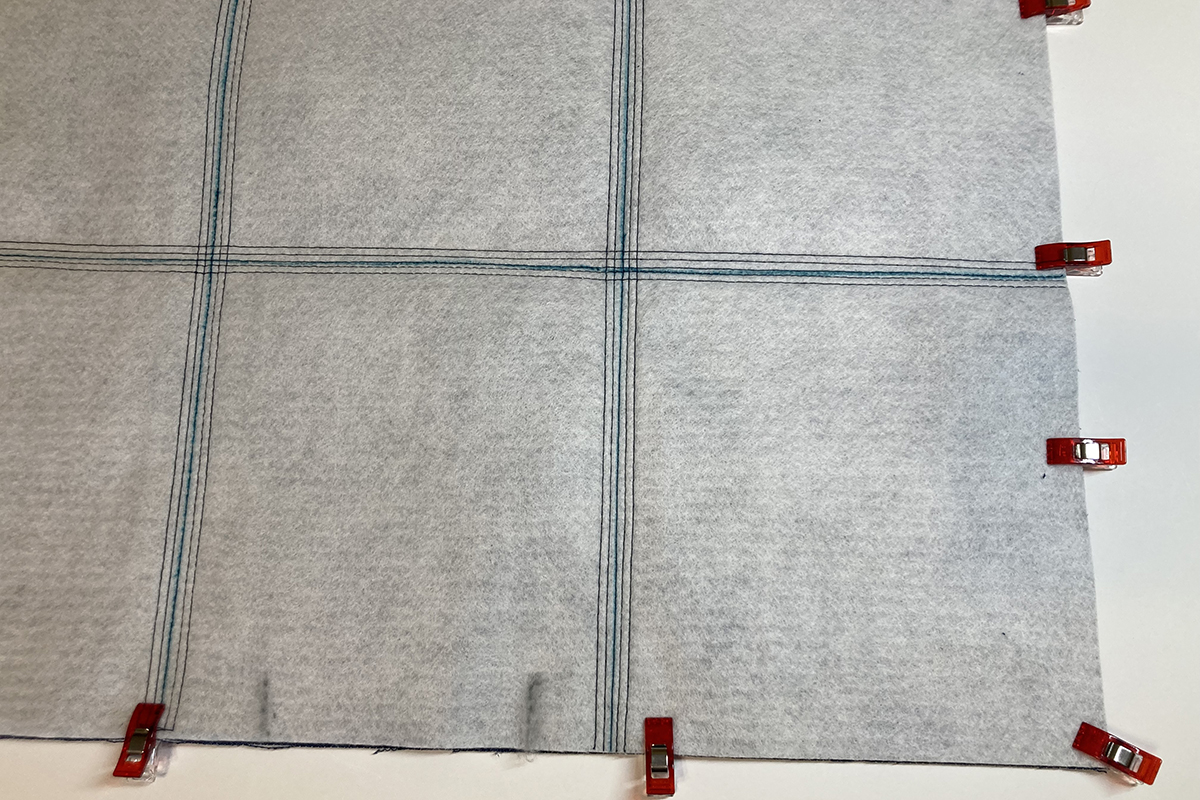
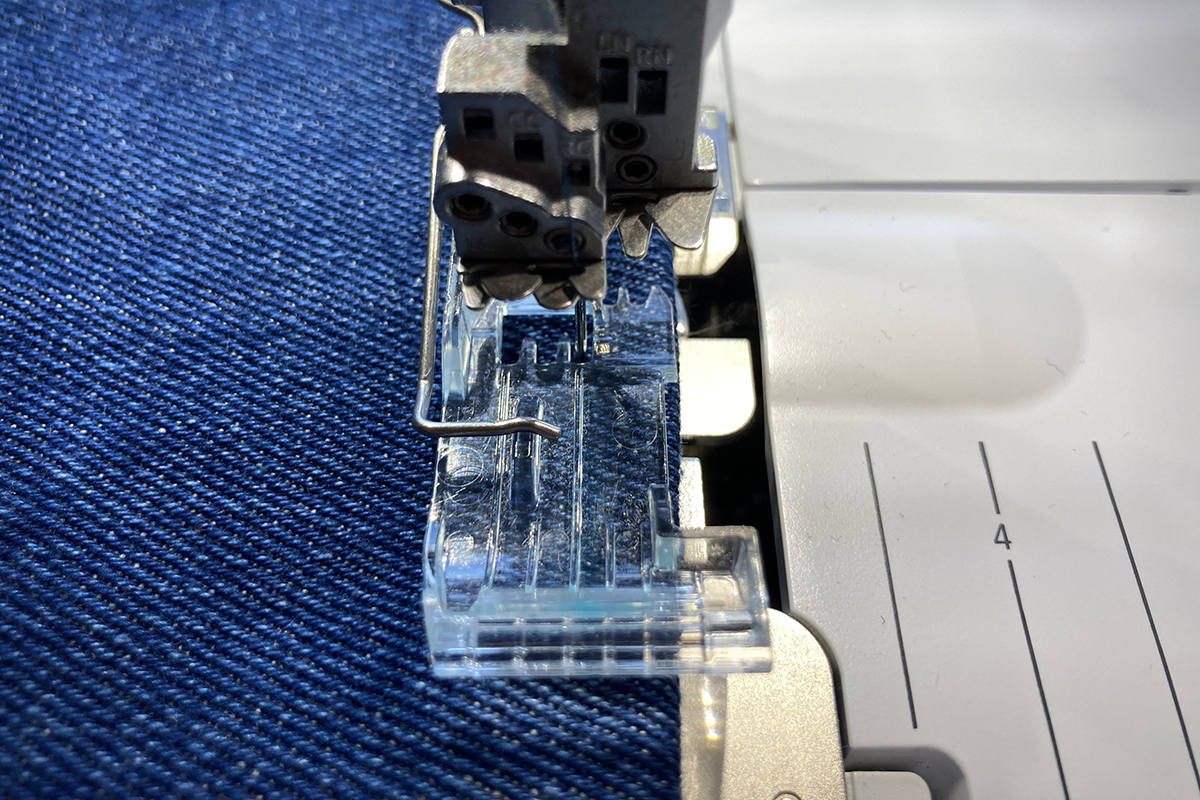
Using a 2-thread Chainstitch and the Clear Foot #27, stitch all around the square (except for the opening!) with a 1/2″ seam allowance. I used the RC needle, and the 1/2″ seam allowance was even with the right edge of the toe of the foot.
For accurate turning on the corners, I marked a line 1/2″ from the edge.
Clip the corners, turn and press well.
Topstitch around the entire square using the clear foot and the chainstitch. This time, guide along the right edge behind the front of the toe and increase the stitch length to 4. Not only does this give a nice finish, it closes the opening as well.
And you are done! Let’s play!
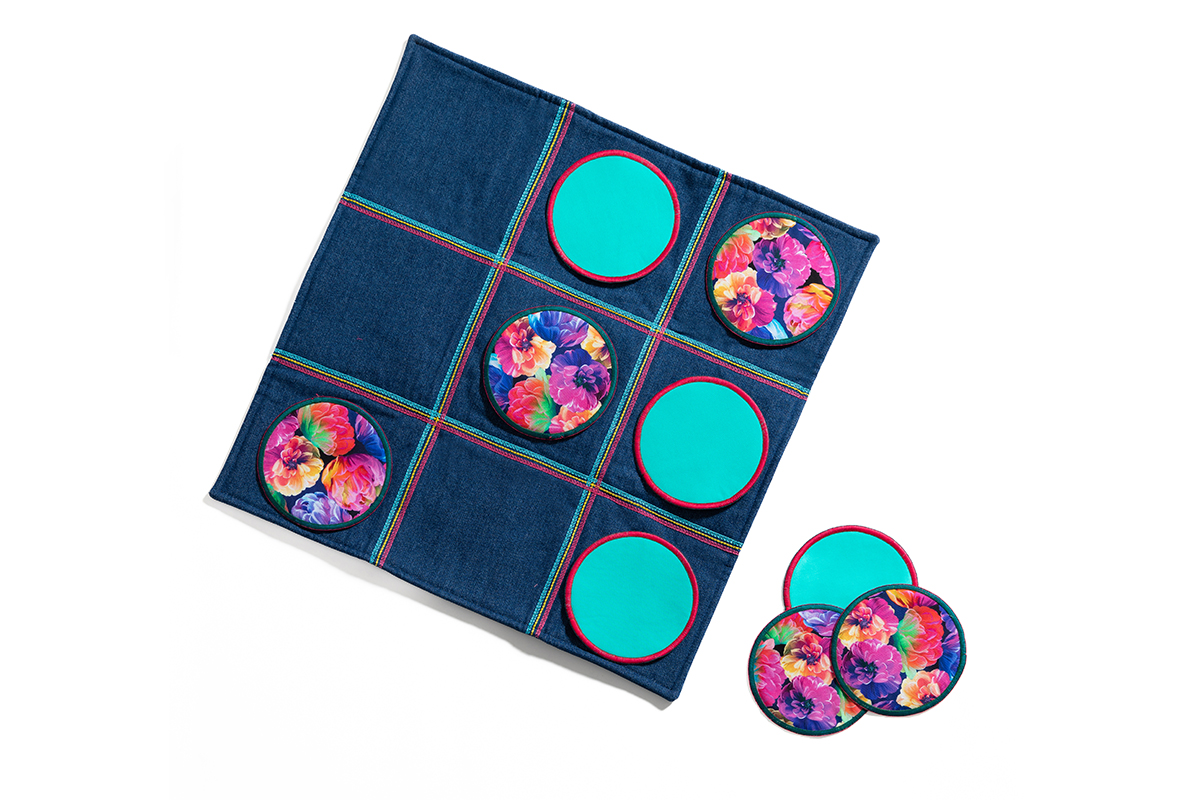
When the game is over (loser cleans up!), place the pieces on the center square and fold the denim to make a square package. Tie the bow and you are ready for play another day. 
I hope you had fun exploring some new ways to use your overlocker. Until next time, happy serging!