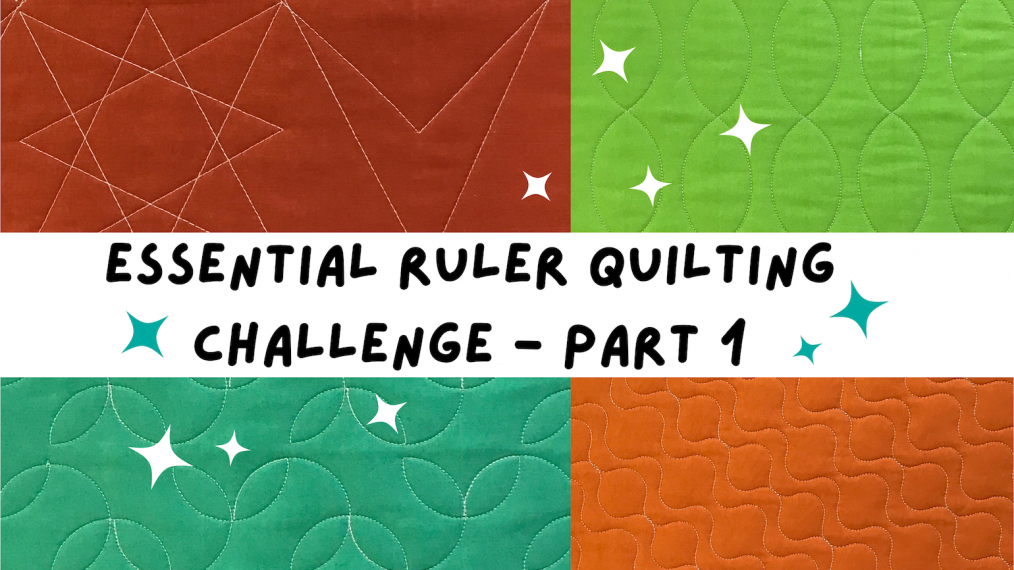
Computerized Quilting on the B 790 PRO, Part One
Have you ever quilted a project with your embroidery and quilting modules? I love computerized quilting with a Longarm, but don’t have one of those in my house (yet!). Ever since learning how to do computerized quilting on my B 790 PRO, I have finished so many more quilting projects! I can’t wait to show you how, too (especially since it’ll be fun to try during the Jump for Joy Quilt Along)!

If you are finding the Jump for Joy Quilt Along for the first time, feel free to join along right now whenever you are seeing this! There are so many great posts before this one for you to check out that will walk you through everything you need to get started.
- Jump for Joy Quilt Along, Part One, which includes the fabric requirements and cutting instructions.
- Jump for Joy Quilt Along, Part Two: Raw Edge Fusible Applique focuses on raw edge fusible applique.
- Jump for Joy Quilt Along, Part Three: Chain Block contains information about the popular Chain block and perfecting the quarter-inch seam.
- Jump for Joy Quilt Along, Part Four: Diamond Block which will help you piece the diamond blocks.
- Jump For Joy Quilt Along, Part Five: Assembly guides you through assembling the quilt.
When Nancy Scott asked me to join the Jump for Joy Quilt Along to talk about computerized quilting with the B 790 PRO, I was so excited! I really love finishing quilt tops using the module for a professional computerized quilting look.
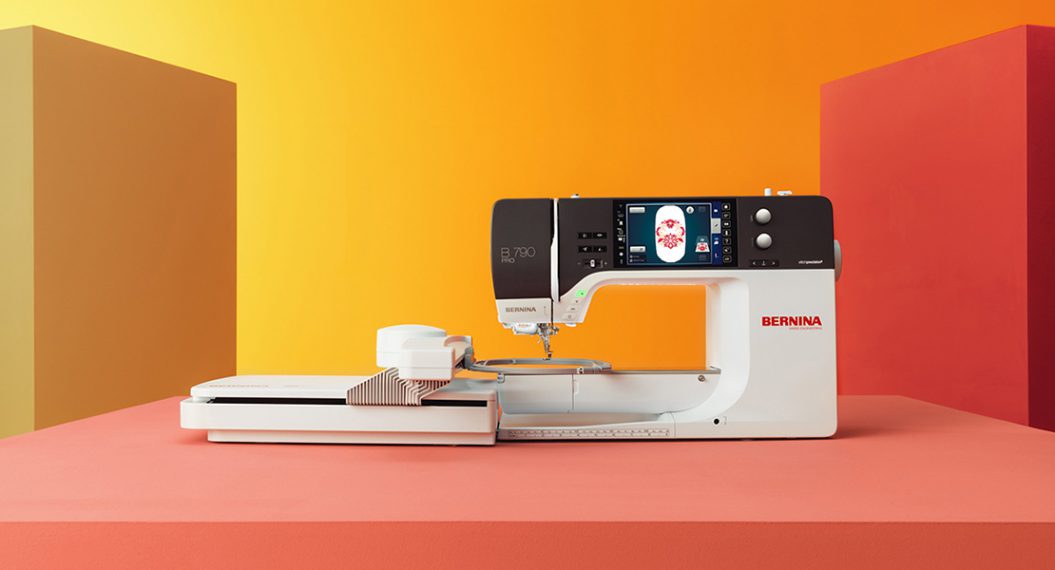
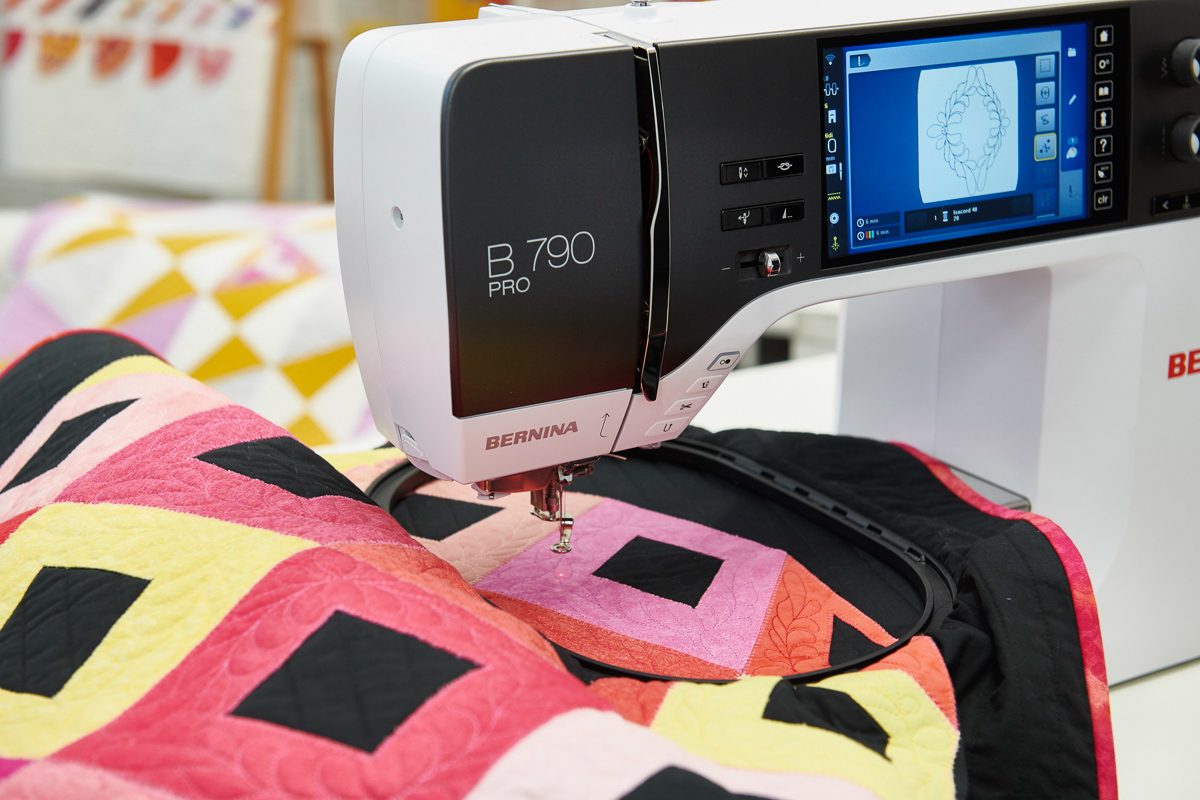
While any BERNINA or bernette machine with a quilting and embroidery module can do this technique, I’m excited to show you how the B 790 PRO is especially well suited for computerized quilting.
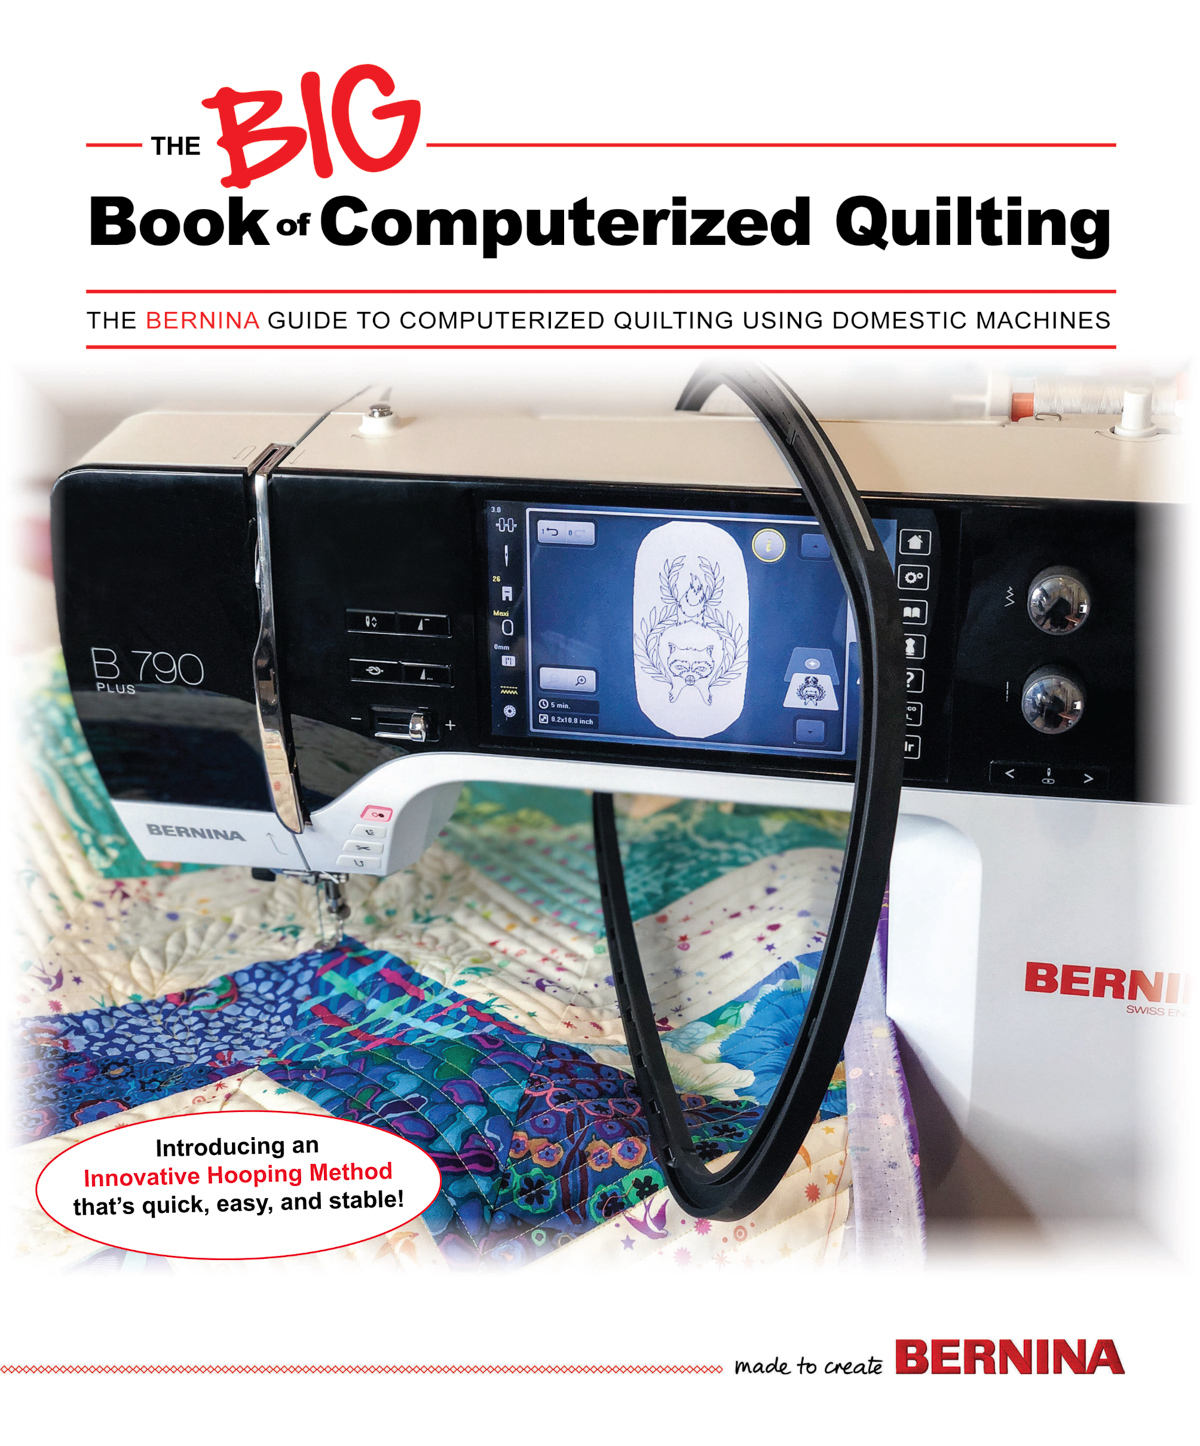
If you want to know more about computerized quilting (CQ) with your machine, check out the “Big Book of Computerized Quilting!” It’s got so many incredible tips and tricks to help you finish your quilts with your module.
Let’s quilt!
Materials for CQ the Jump for Joy Quilt
- B 790 PRO
- Drop-shaped Embroidery Foot #26L
- Open Embroidery Foot #20D
- Maxi Hoop
- Medium Clamp Hoop
- Three-sole Walking Foot with Seam Guide #50
- Jump for Joy quilt top
- Batting
- Quilt Back
- Quilting Needles 90/14
- Cotton thread
Step 1: Preparing to Quilt
Quilt Sandwich
When doing CQ, I give myself lots of extra batting and backing to assist in the hooping and placement of my designs. I like to give myself at least 4” on every side. It’s absolutely doable with less, but I’m the type who loves to give myself extra wiggle room to make everything easier. Check the section on clamp hoops if you’re adamant about giving yourself less than 8” extra length and width for batting and backing.
Basting
One of the most important steps in CQ is to thread baste your top in addition to the pin or spray basting you have done. Stitch both horizontally and vertically every 6-10 inches, depending on the size of your blocks, paying extra attention to the borders of your quilt to ensure they stay straight. This additional basting will help ensure our quilt stays square and that the layers stay together where we want them as we re-hoop our quilt top over and over again.
I don’t pay too much attention to where my basting is going; just enough to ensure I have done a good job keeping the quilt square. We will have to pull these basting stitches out as we set up our quilting module, so don’t make the stitches too small. I set the stitches somewhere between 4 mm & 6 mm. I like to be at 6 mm, but sometimes that doesn’t provide me the most accurate basting — make the call that’s right for you!
I like to use my Three-sole Walking Foot with Seam Guide #50 for basting quilts larger than baby size or quilts with thick batting. When basting something baby size or smaller, I will often use my dual feed and the Open Embroidery Foot #20D.
If you’re using the B 790 PRO like I am, don’t forget to turn on your laser! It’s a must when navigating the basting of your quilt! Plus, we will rely on it heavily when we start quilting, so we might as well have it on now.
Hoops
Another thing I’d love to talk about before we get started is the hoops you should use! You can use any BERNINA or bernette hoop for CQ. However, I definitely have my favorites.
The new BERNINA Clamp Hoops are made for impeccable computerized quilting! These square hoops were designed to accommodate quilt blocks and even come with an extra thick acrylic template to ensure perfect hooping of your quilt. The clamps make it easy to be sure your quilt is hooped securely.
The biggest advantage to these hoops is how much less extra batting and backing you need to use them with your CQ. They are my absolute go-to for corners and border motifs for this reason!
The clamp hoops are available in medium and small sizes to ensure that all 5, 7, and 8 Series machines can use these fantastic hoops.
Another great option for hoops when computerized quilting is the Midi, Maxi or Jumbo Twist Lock hoops. They are my favorite to use for the bulk of my computerized quilting, especially if I am doing edge-to-edge quilting and want need to re-hoop quickly as I move across a quilt.
When using these hoops, extra batting and backing is a must for navigating borders and corners.
Before doing CQ, you will prepare your machine and quilt sandwich just as you would for any other type of machine quilting:
- Press your quilt top and backing.
- Pin or spray baste your layers together.
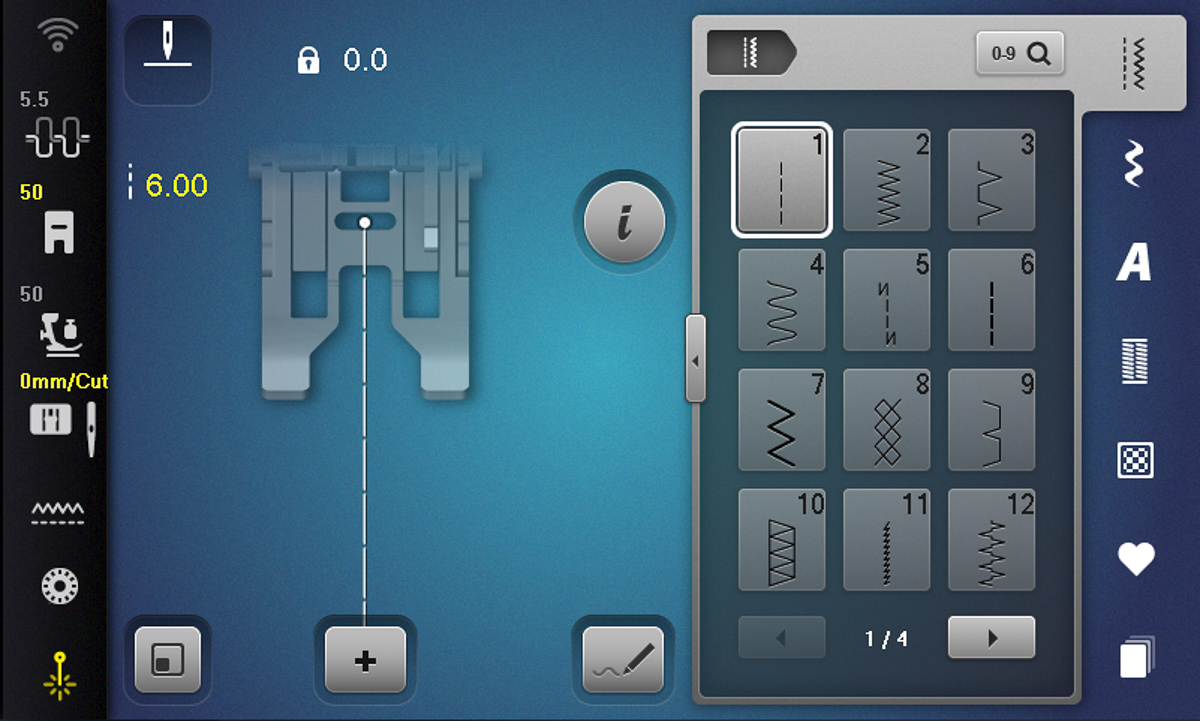
- Install a quilting needle in the machine (I like a 80/12 or 90/14 quilting needle).
- Thread the machine and wind a bobbin with 50 wt cotton thread.
Now that your quilt is basted, let’s get ready to quilt our first design.
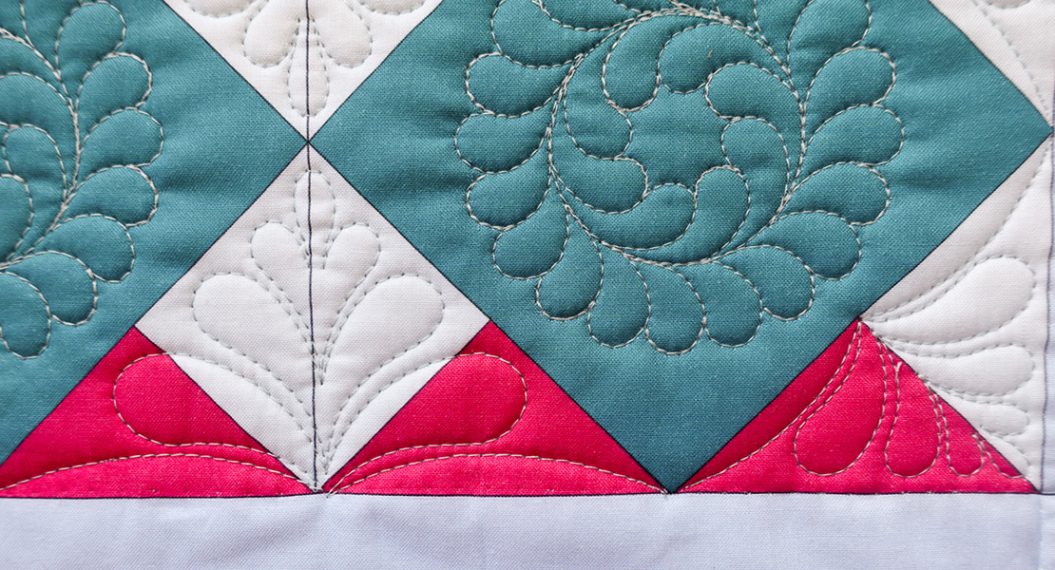
Step 2: Circle Gets the Square
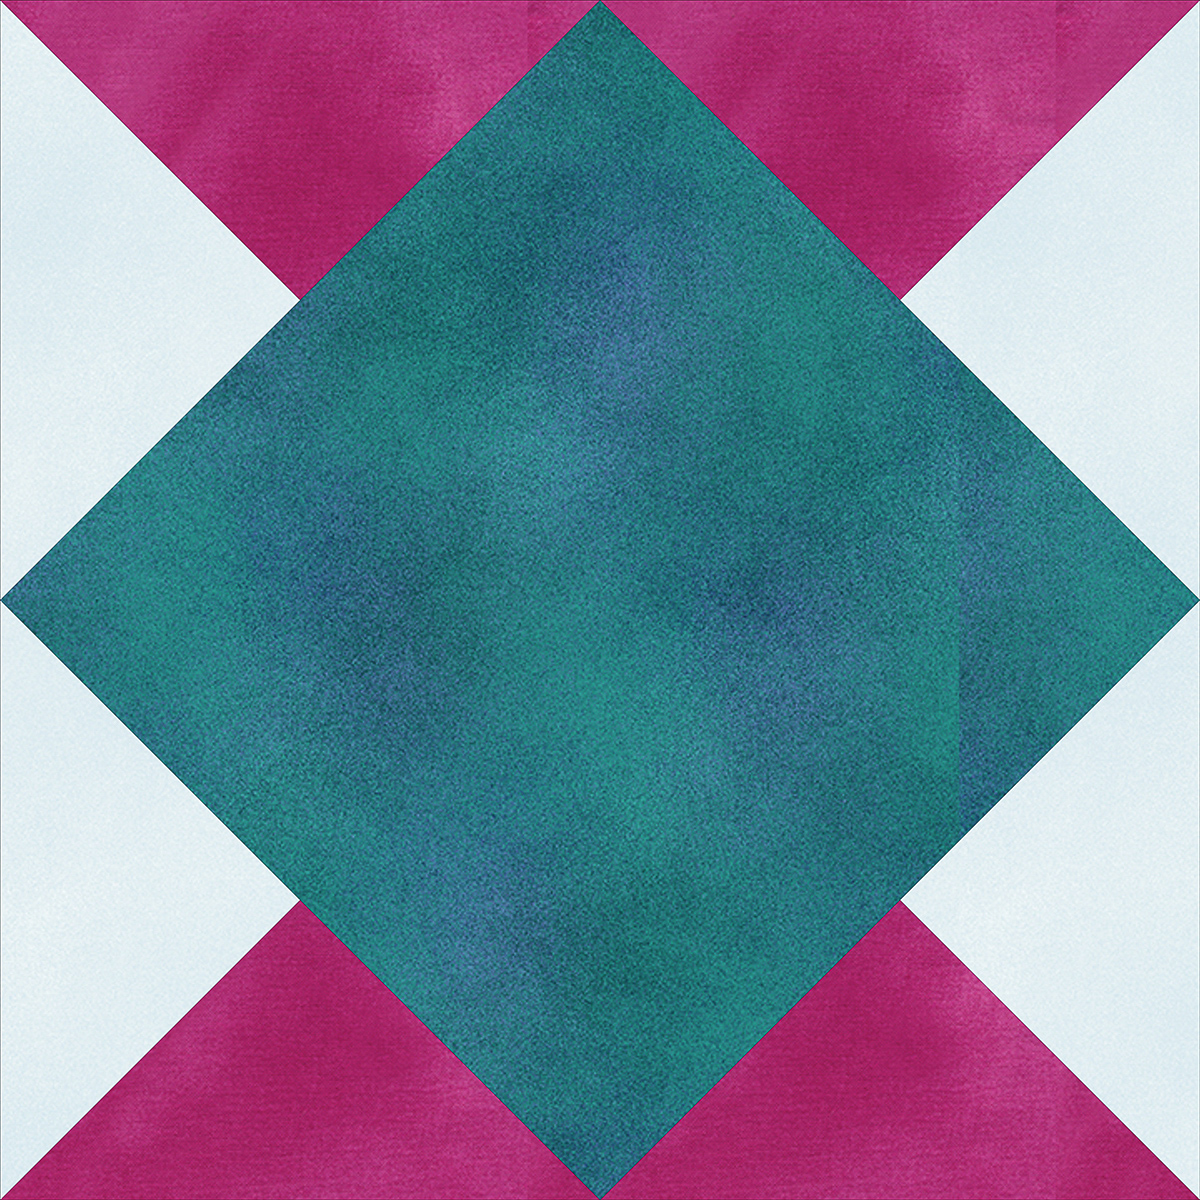
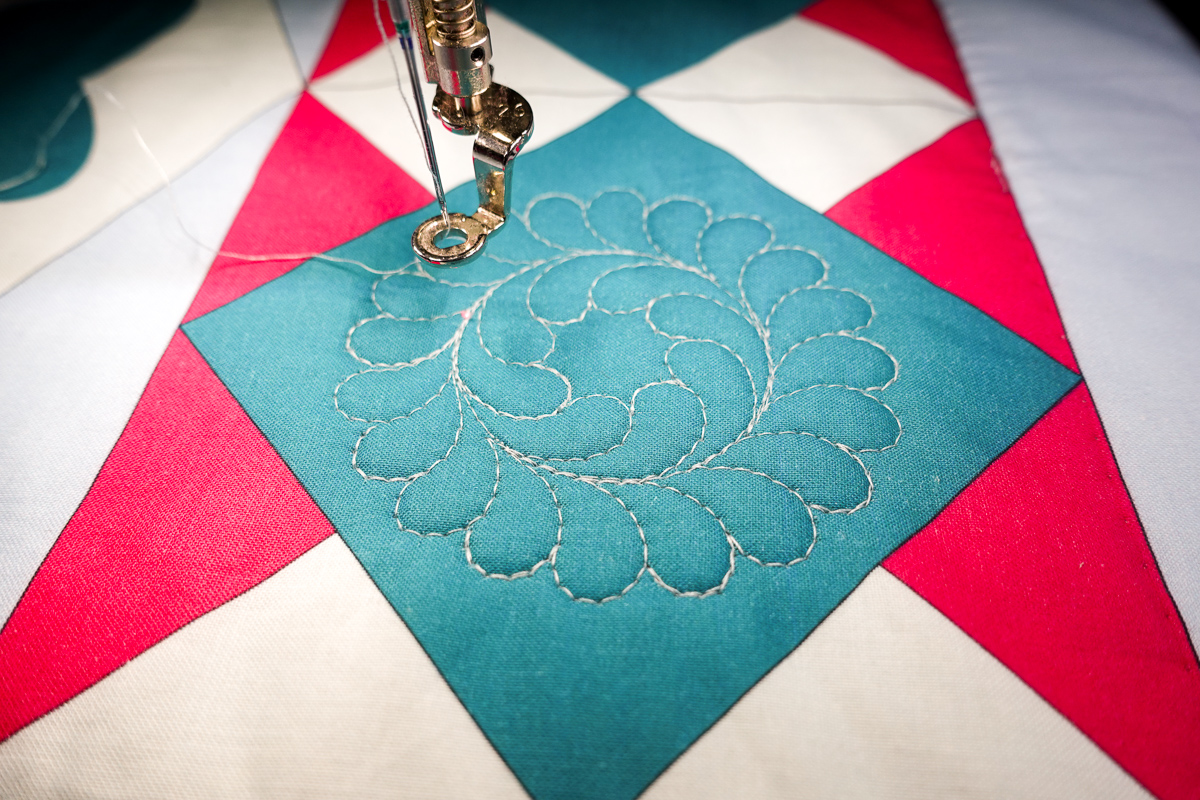
The first section we will focus on is the Diamond Block. Obviously, we could put a square quilting design in this block and it would look fantastic, but I’d like to show you how easily we can center a circular motif in the diamond.
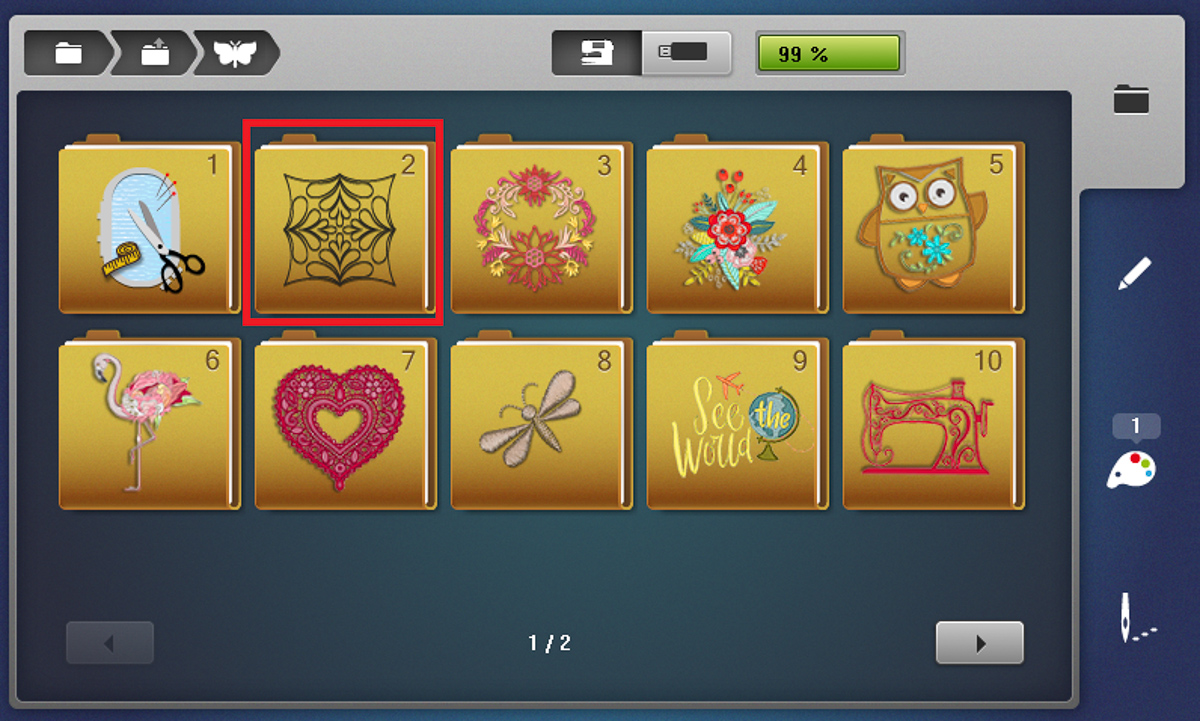
First, you may need to change to the embroidery side of the machine. Then, go to the designs folder,
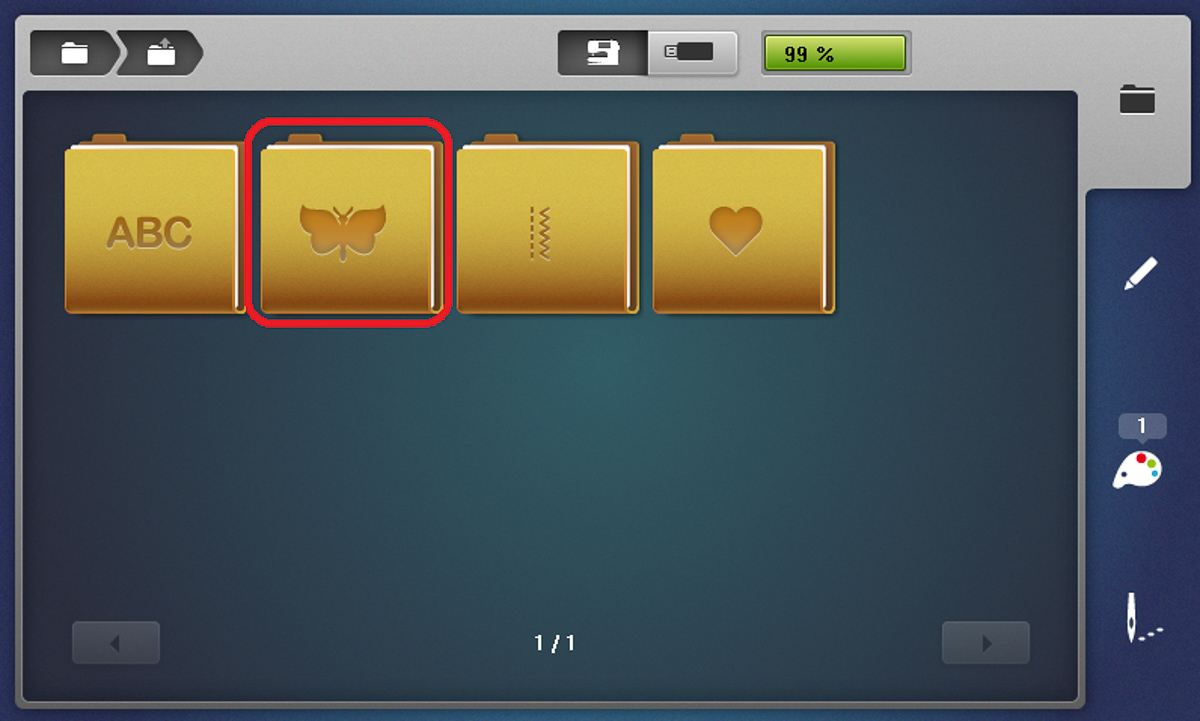
and choose the Quilting Designs Folder #2.
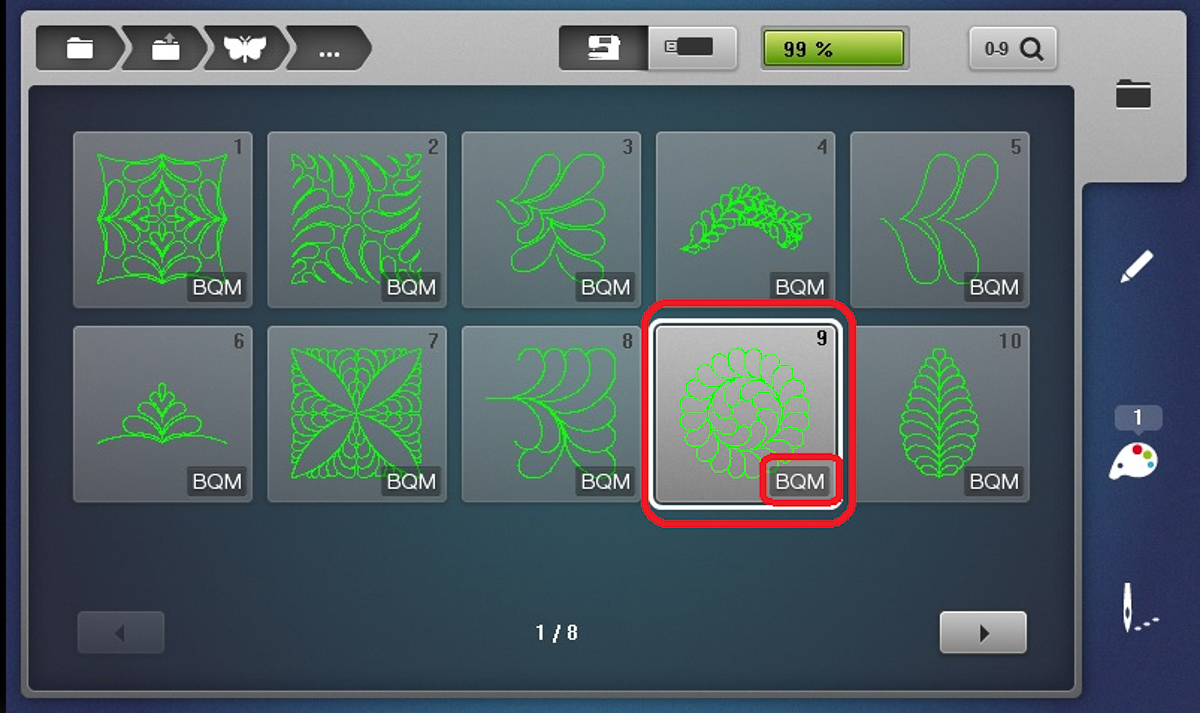
From there, select design number #9, a feathered circle. Notice how the design says “BQM”? That stands for “BERNINA Q-matic” and is a file type commonly used on the BERNINA Longarm! The B 790 PRO is currently the only BERNINA machine that can use this file type and this has some major advantages for our CQ, like being infinitely scalable and allowing us to set the stitches per inch.
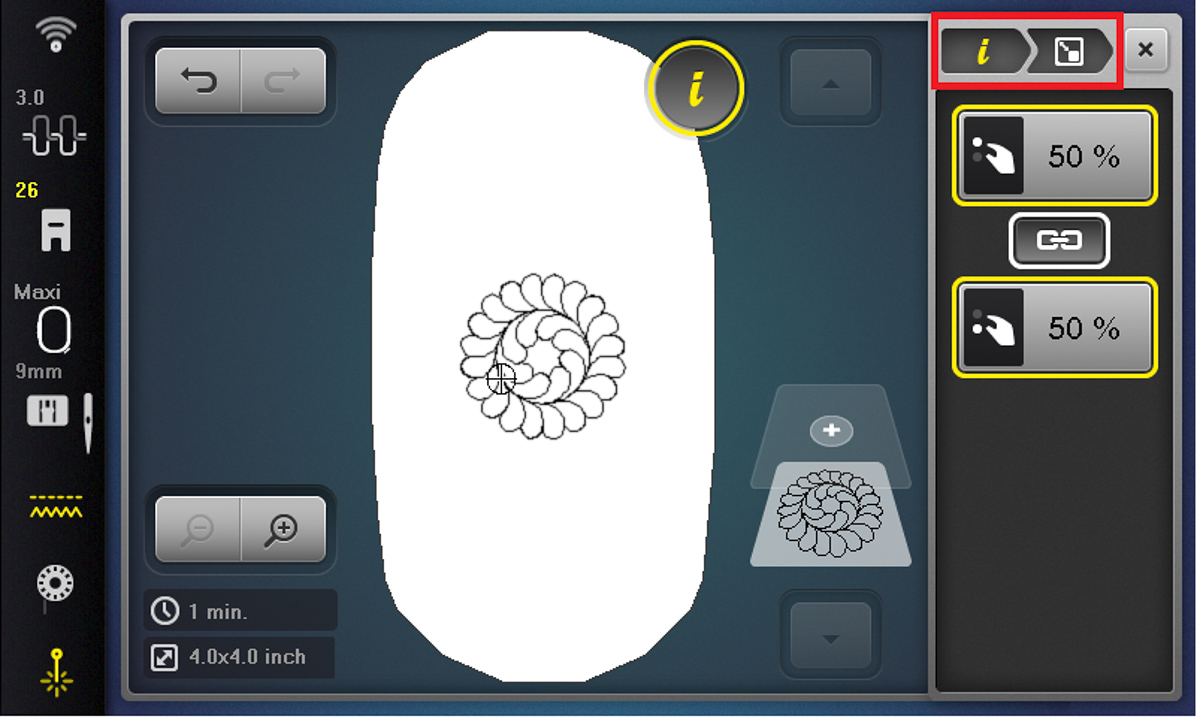
Once you tap the design, it should open up in the center of a medium clamp hoop. You can change to whatever hoop you are using with the hoop icon to the left of the screen.
I clicked the Information icon and chose the resize feature. If you need help remembering where these icons are, you can see the icons I chose in the file path (also known as “breadcrumbs”) at the top right of the screen. I resized to 50%, but you can eyeball it and decide what looks close. We will get it sized perfectly in the next step.
Remember, we can scale down this much because we are using a bqm file on the B 790 PRO. Scaling down this much on another machine or with a different file type won’t work like it does here.
This step is actually skippable! Pinpoint Placement can resize your design perfectly. I like to resize my motif a little bit before I work with it in Pinpoint Placement simply because I think it saves me some time. Try it both ways and see which you like more!
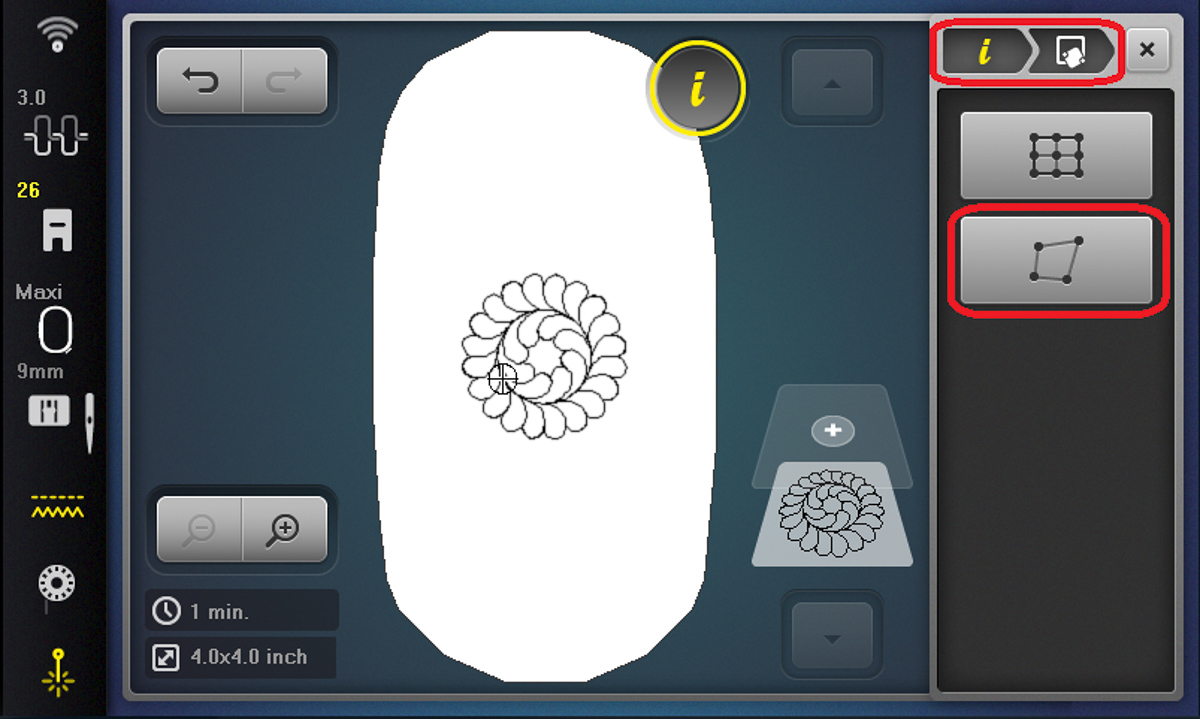
Next, we will go back into the Information icon menu using the bread crumbs and choose Pinpoint Placement.
Tap on the bottom icon to choose 4-point Pinpoint Placement. If you already have a hoop on your machine, then please remove it before hitting this icon. Remember to only put the hoop on the machine when the machine asks for it; this will save you a lot of unnecessary steps.
Also, you may have noticed I didn’t have us hoop the quilt before this. That wasn’t an oversight! Don’t hoop your quilt just yet. Put an empty hoop on the machine, or just the outer hoop, when the machine asks for it.
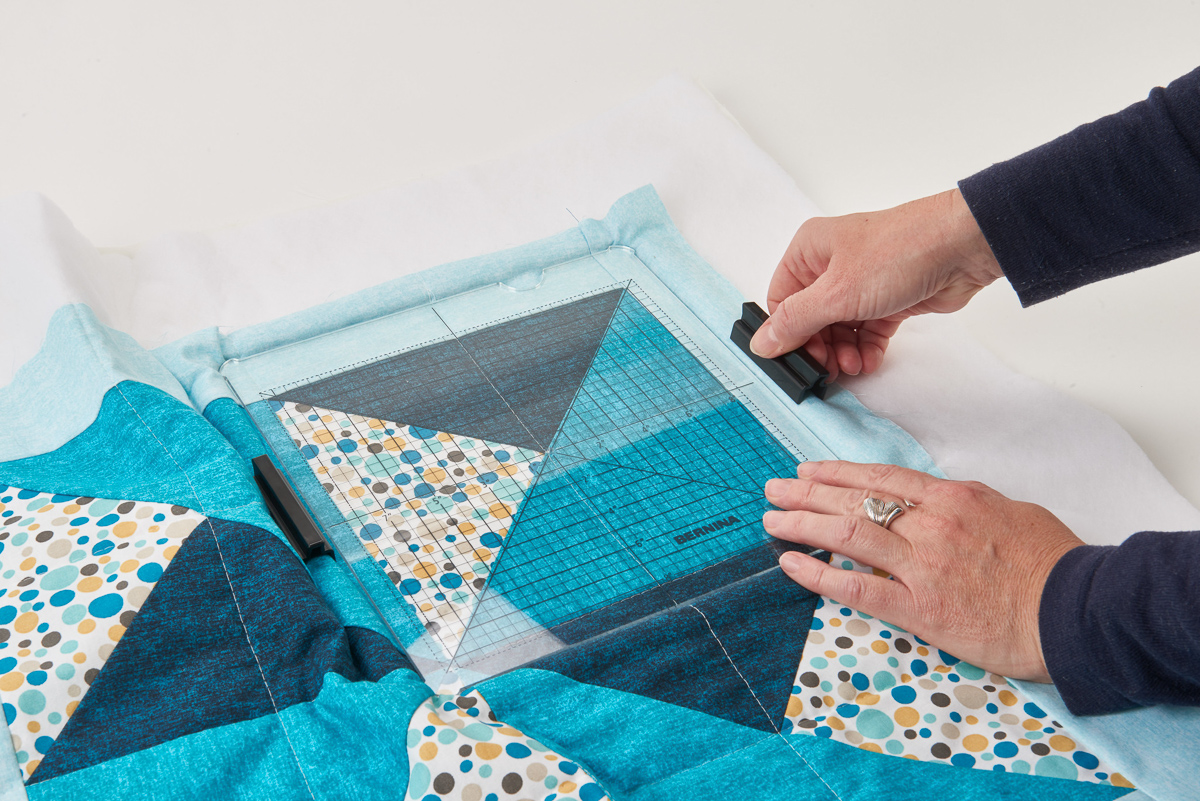
Before we use Pinpoint Placement, we first we need to hoop our quilt. Since we are CQ, we will do this the easy way and hoop on our machine! I love how quick this method is.
Start with just your outer hoop attached to the machine.

Bring the quilt under the needle and center the motif in the hoop. Be careful that your quilt is flat and none of the edges get caught under the hoop.
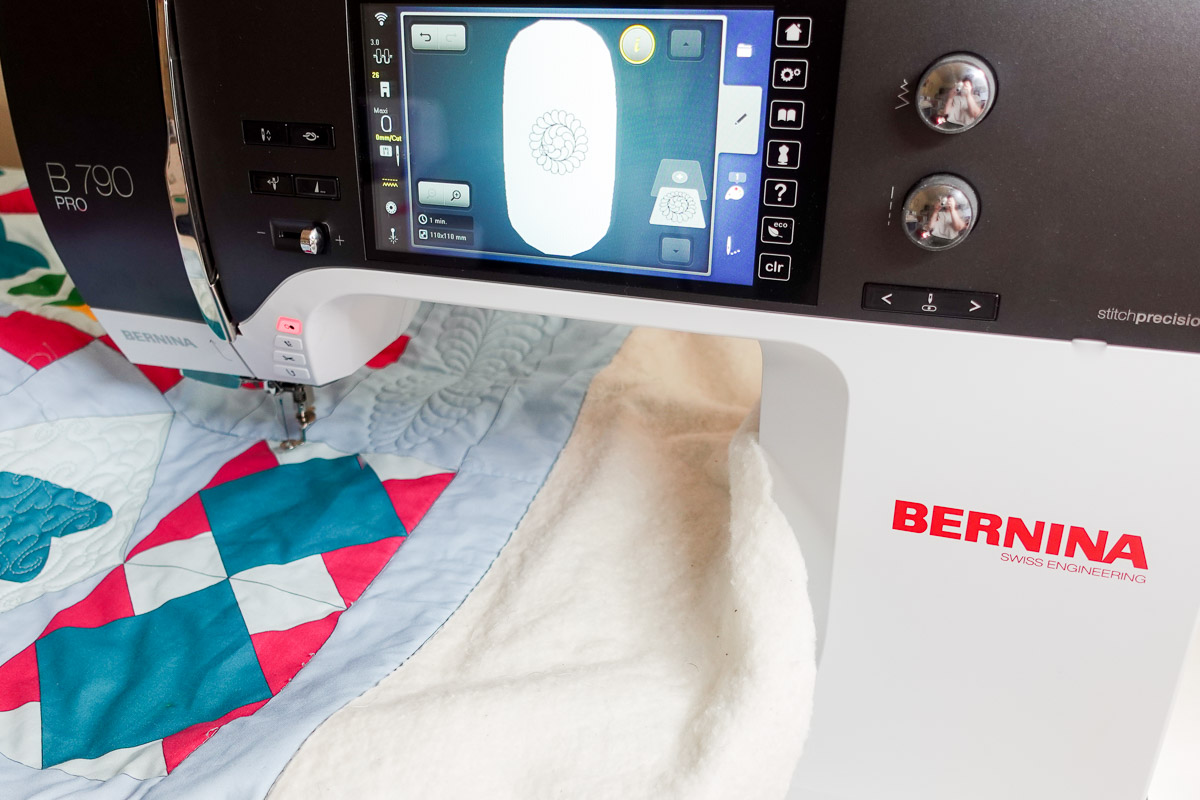
We can now slide the inner hoop under the needle, press it into place, and secure the twist lock. This method can be a little difficult with the lamp hoops, though I still use it more often than not.
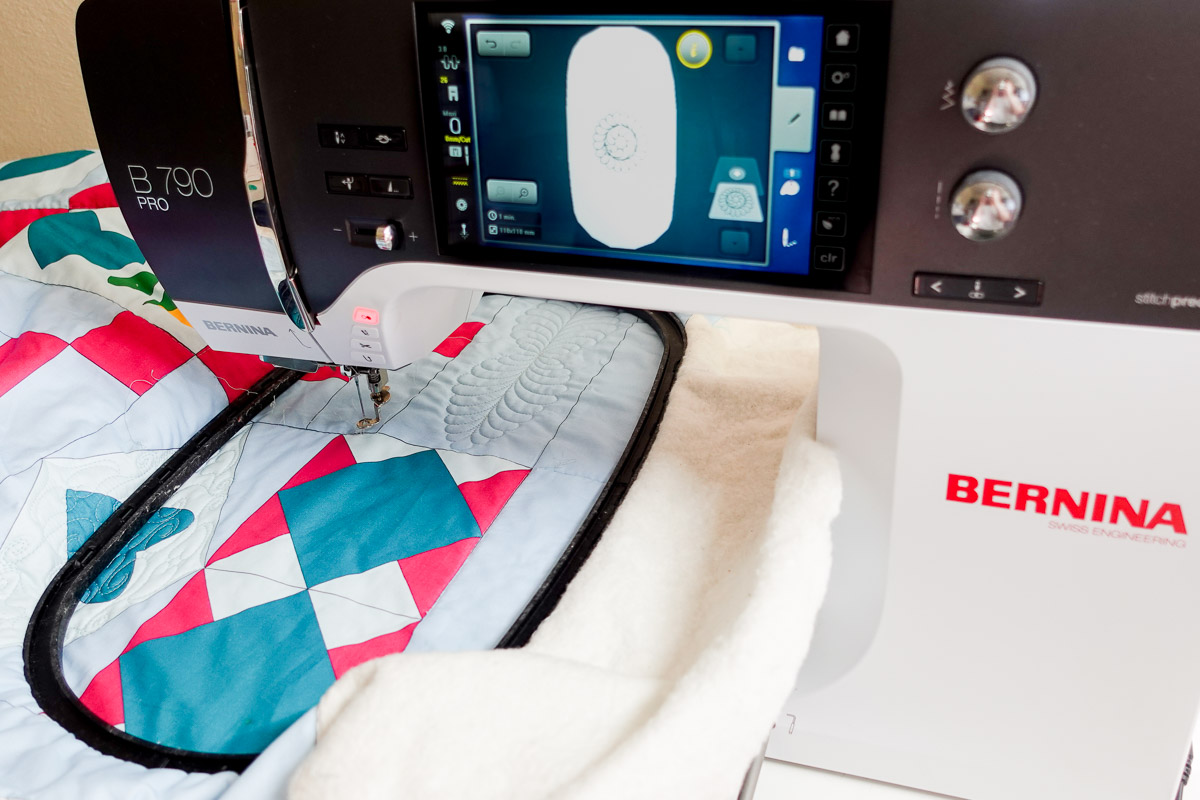
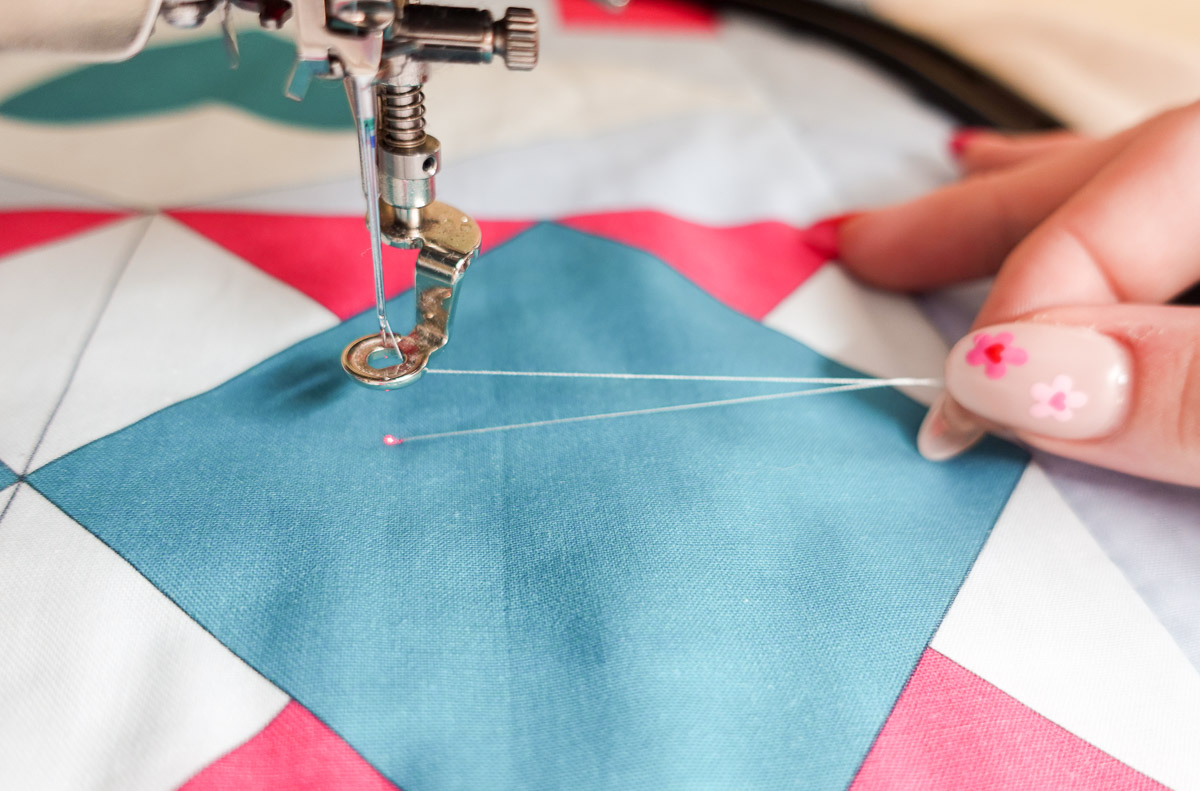
Once your quilt is hooped, and you see this screen, you are ready to use Pinpoint Placement. Make sure you have the laser on for this part! It makes Pinpoint Placement so easy!
You may need to clip away some of your basting stitches to see the whole diamond unencumbered.
Choose the bottom icon to select “Morph” — this means the design will bend and adjust based on the shape we are quilting.
Select the top right radio dot (noted with a “1” in the image), but watch out! The machine will move to that spot. We are going to work in a clockwise manner, as indicated by the numbers next to each dot.
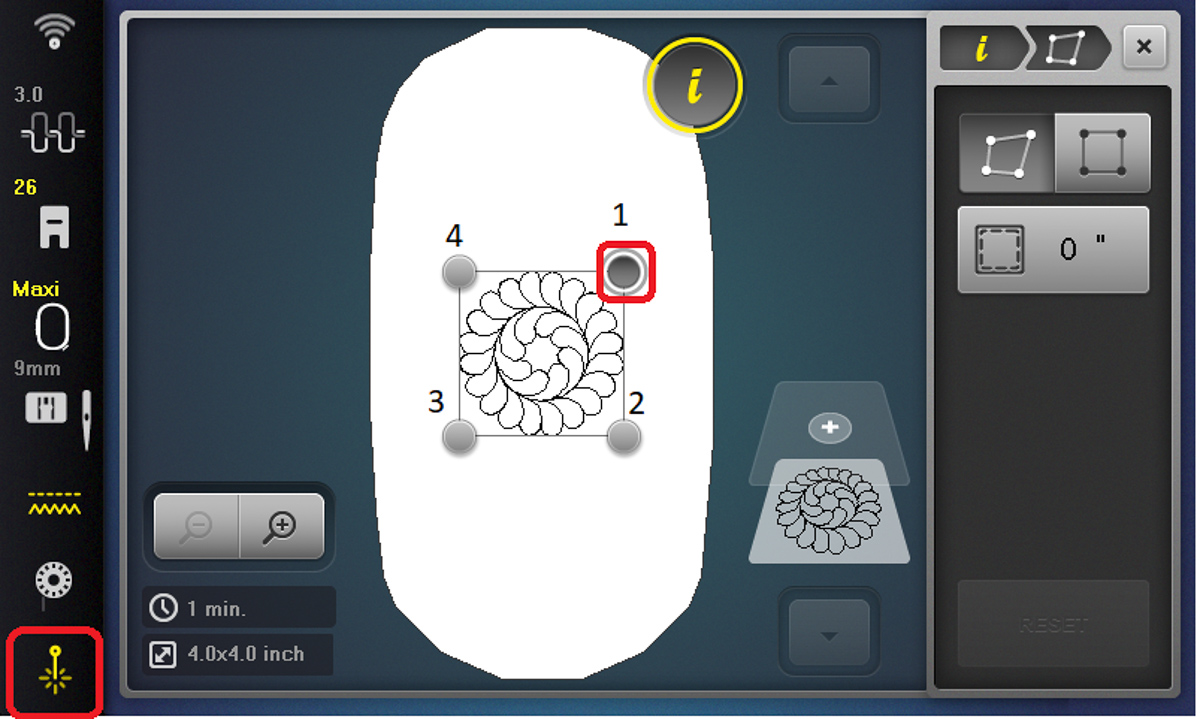
Using the multifunction knobs, move the hoop until the laser aligns with the right point on the diamond. Don’t be alarmed when your design bends and moves into weird shapes! It will all look great in the end.
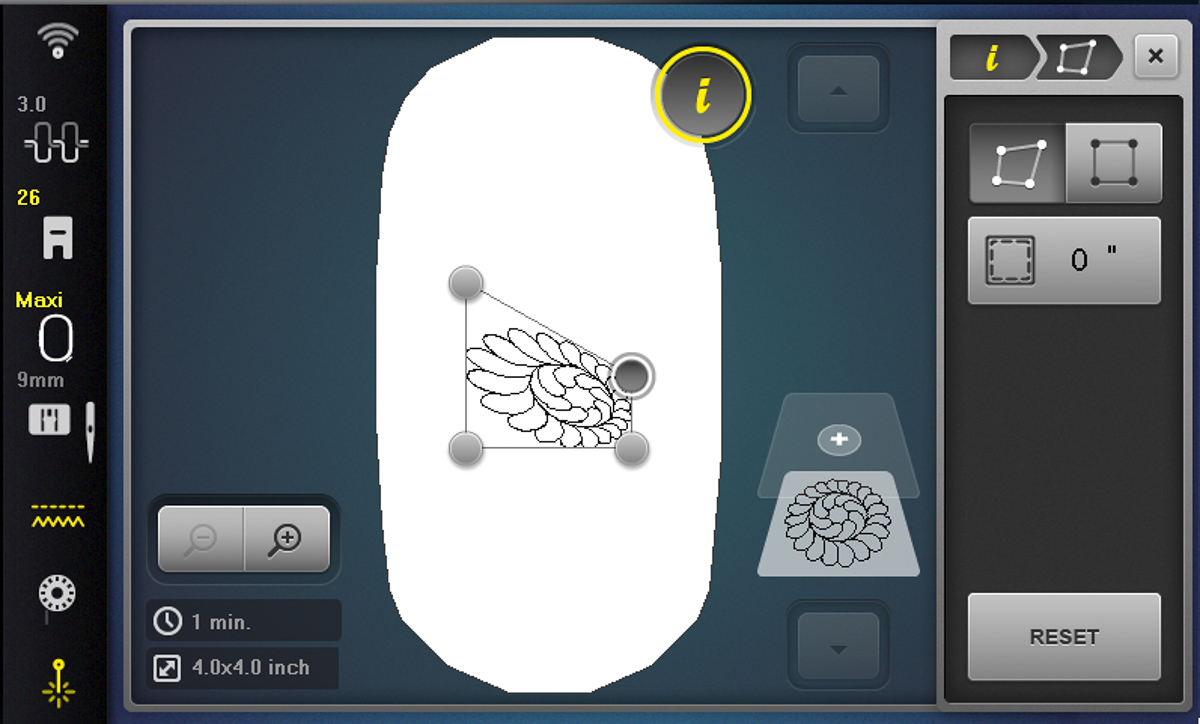
Repeat the process with each radio dot until every point is perfectly placed with each point of the diamond.
Notice how we don’t have to hit “set” with 4-point placement. This means we can keep editing and fine-tuning every point until each one is perfect.
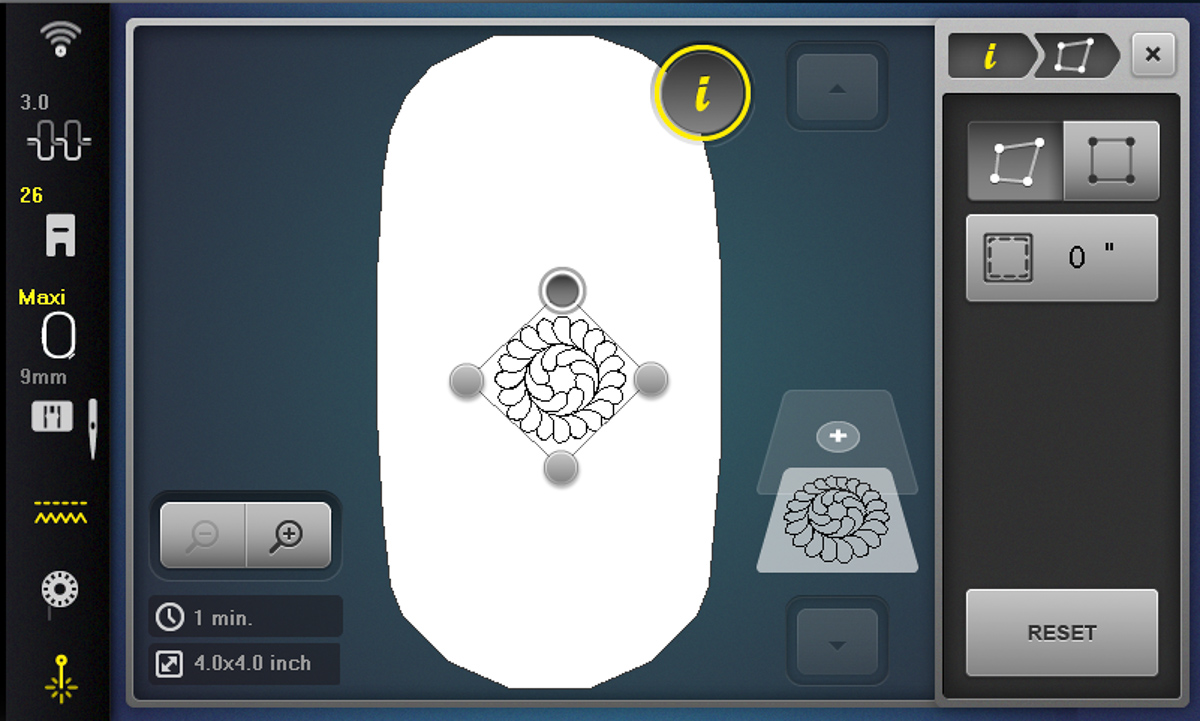
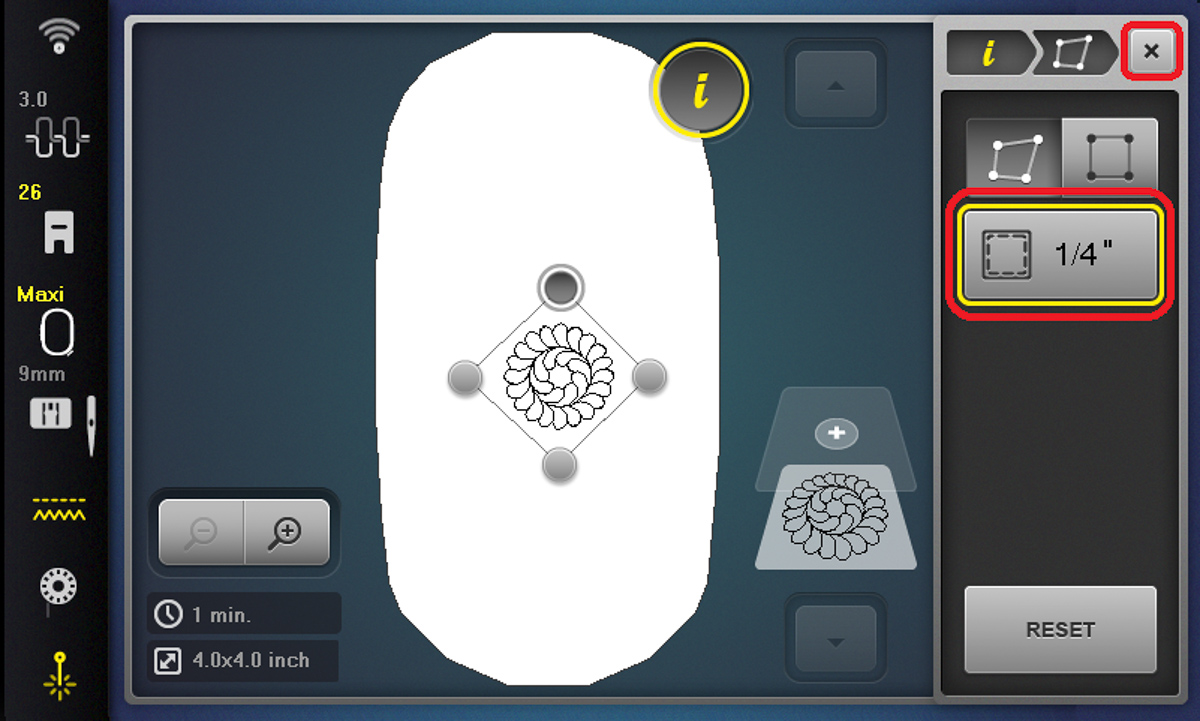
Once you’ve placed each point exactly how you want it, tap the Margin Spacing button. This icon will space your design within the space you set. We can go anywhere from 1/8”-1 1/2” in quarter-inch increments. Today, I chose 1/4” because I love the way it looks. Choose a spacing that looks best to you!
When finished, hit the “X” in the corner to close out of the Information icon.
Just about time to start quilting!
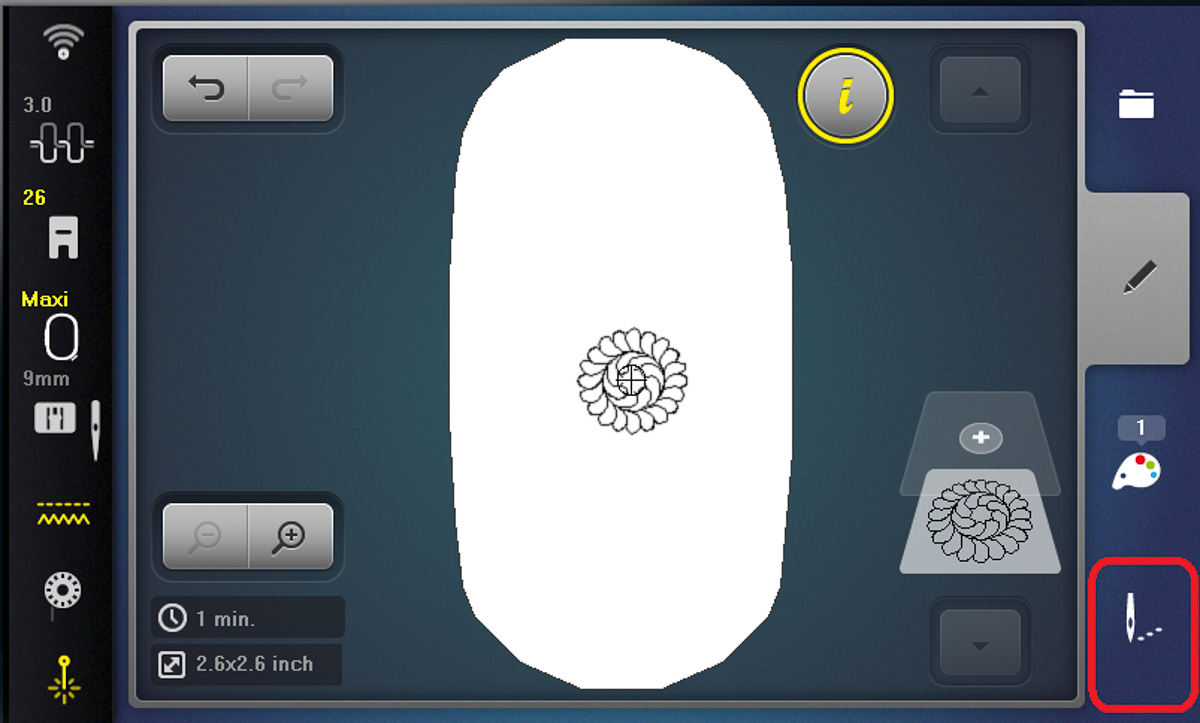
Select the Needle icon in the bottom right to go to the embroidery screen.
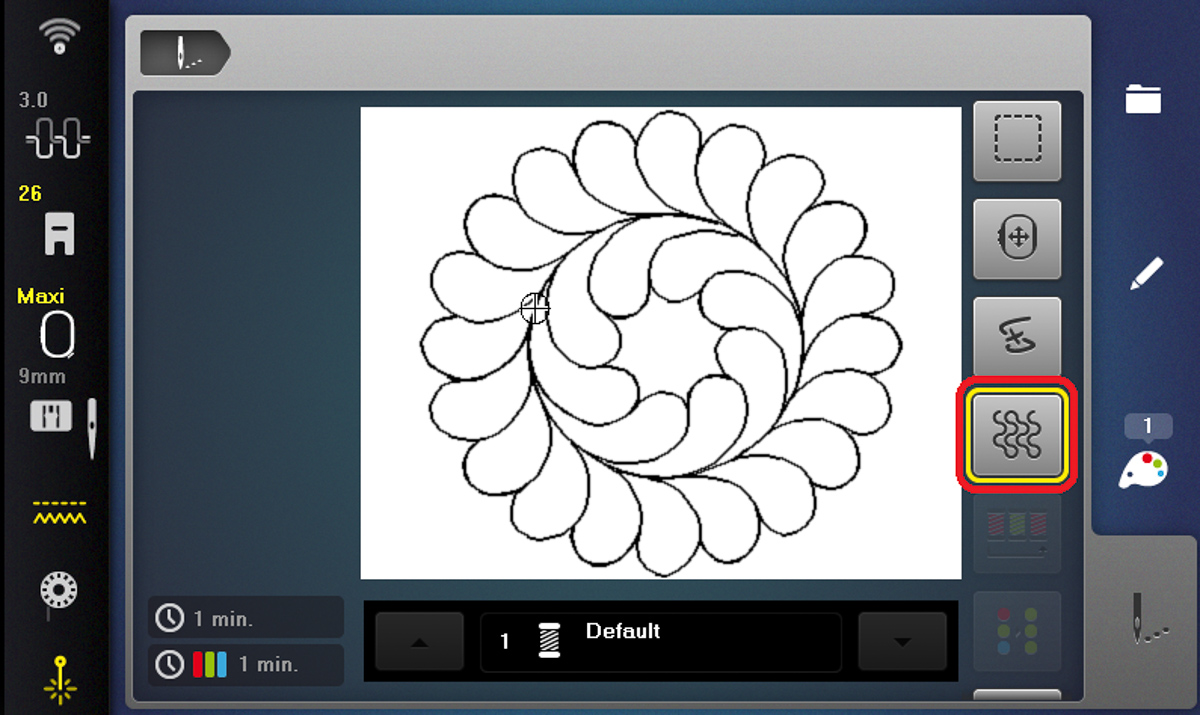
Then, select the Quilt Settings icon. This lets the machine know we aren’t embroidering this design; we are quilting it! It will turn off functions like Thread Away Mode and disable any additional tie on and tie offs.
Use the needle up/down function to bring up your bobbin thread to begin. Once your thread is up, hit the Start button and stitch your design.
Great job! Your first design is all stitched out and ready to go!
You can repeat this process across your Jump for Joy Quilt in any of the square, diamond, or rectangle areas where you want the design to morph into the space. Have fun playing with the margin feature to add more margin or skip it all together!
In Part Two of this series, I will cover three different ways to address the quilting of your Jump for Joy Quilt to help you practice more fun ways to CQ. Can’t wait to see how you finish your quilts!