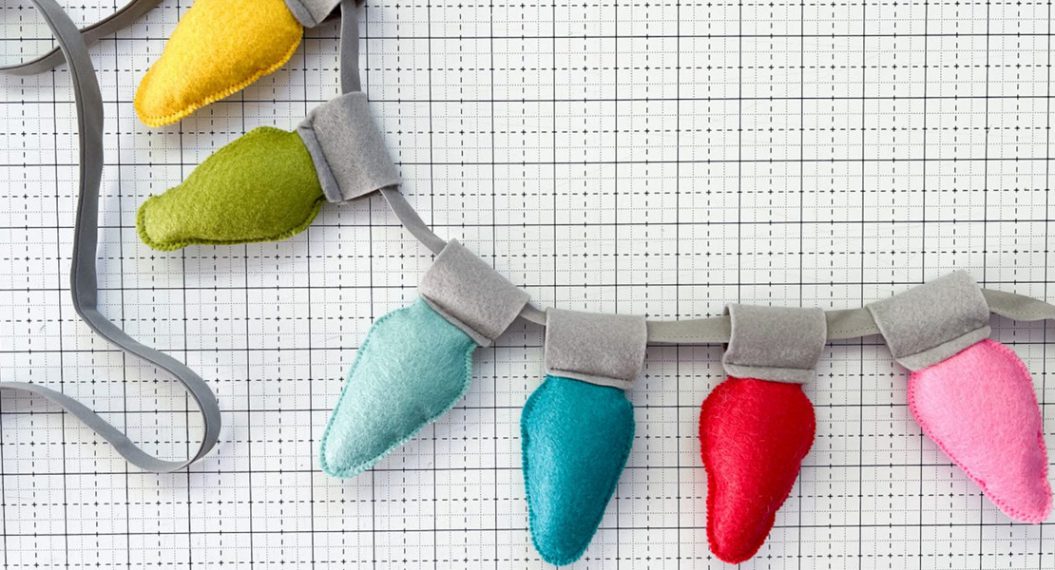
Winter Garland, Part One
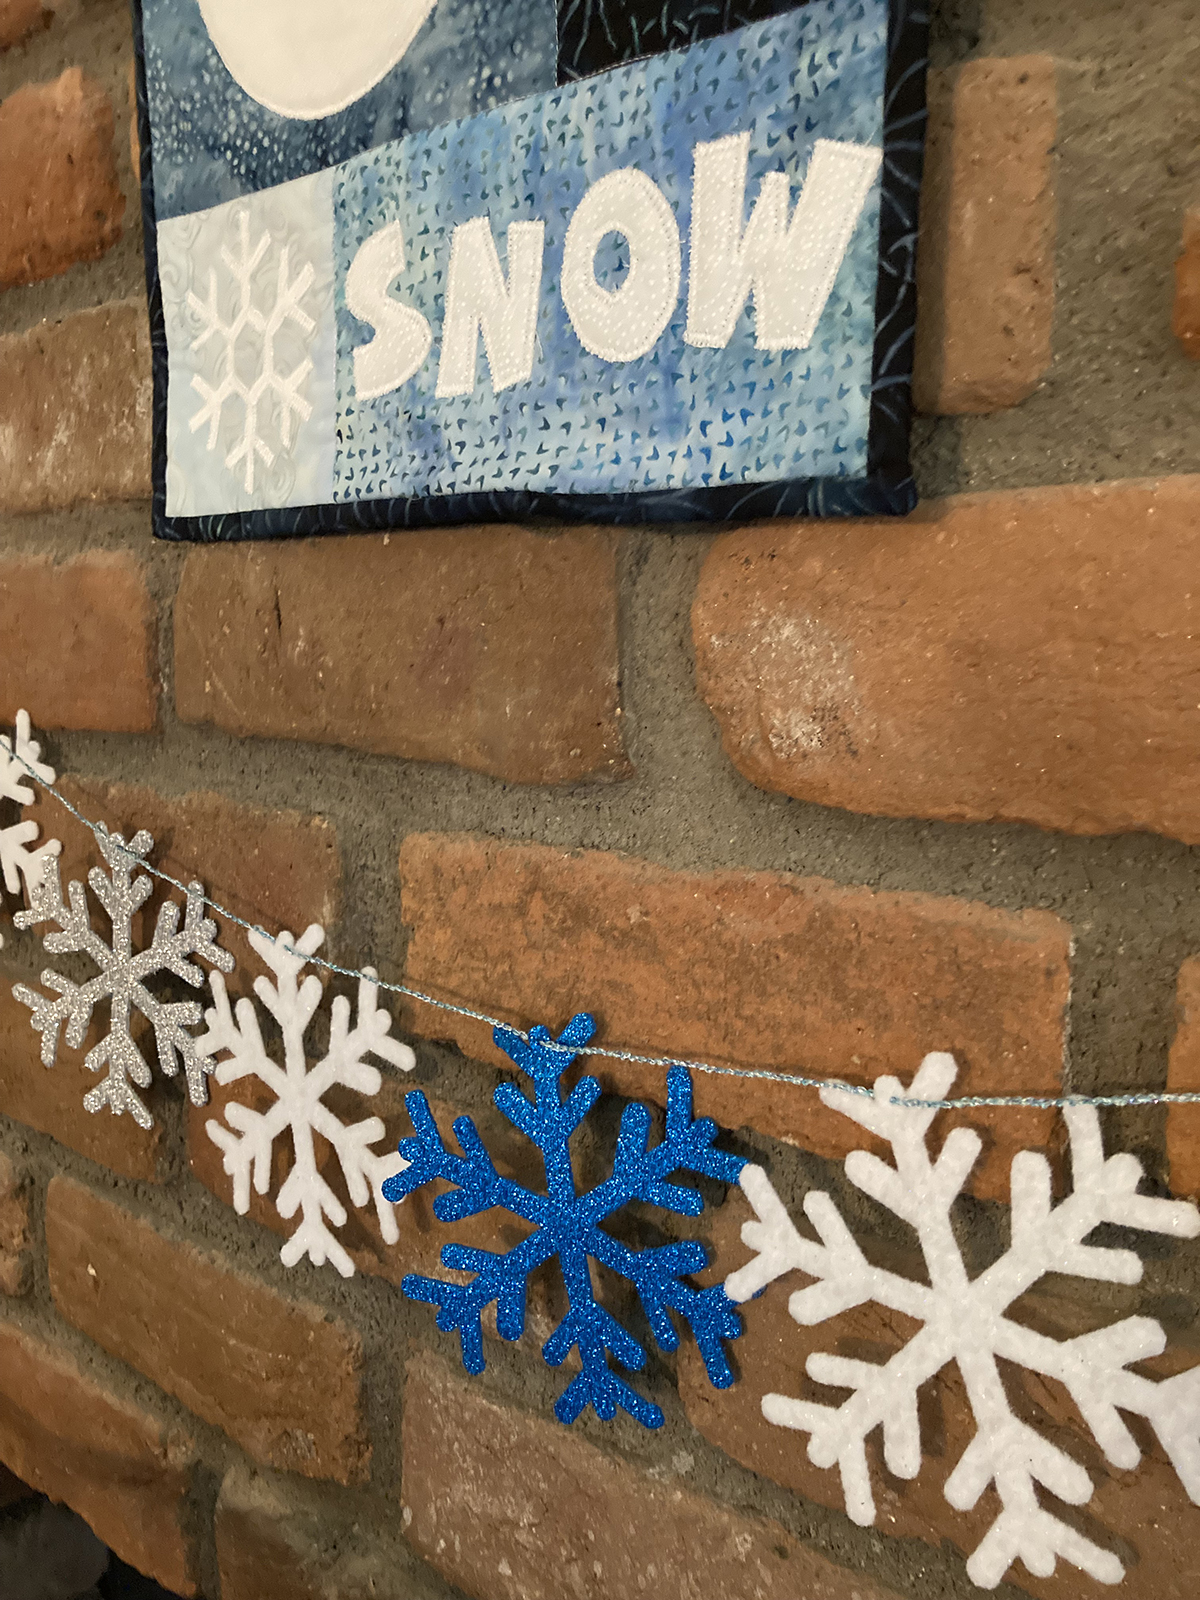
Winter in the desert where I live is a lovely thing…mild temperatures, sunny days, no snow to shovel. However, I don’t mind a little winter decoration. So how about a snowy garland to keep things cheerful looking during the long winter months? This is so easy to make using BERNINA Embroidery Software 9 (either Creator or DesignerPlus) and the CutWork Tool. Come back for Part 2 and I will share with you some overlocker techniques to create decorative cord for stringing together your snowflakes.
Materials and Supplies
- BERNINA Embroidery Software V9
- Embroidery Machine (I used the B 880 Plus)
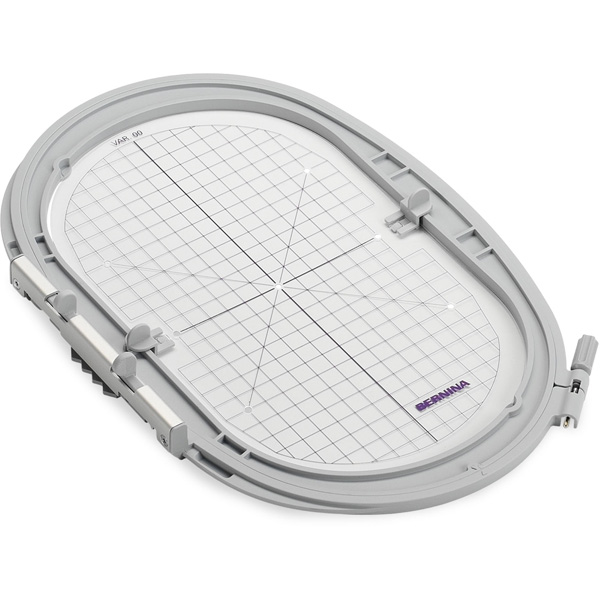
- Large Oval Embroidery Hoop
- Drop-shaped Embroidery Foot #26
- Cutwork Tool
- Echo Quilting and CutWork Foot #44C
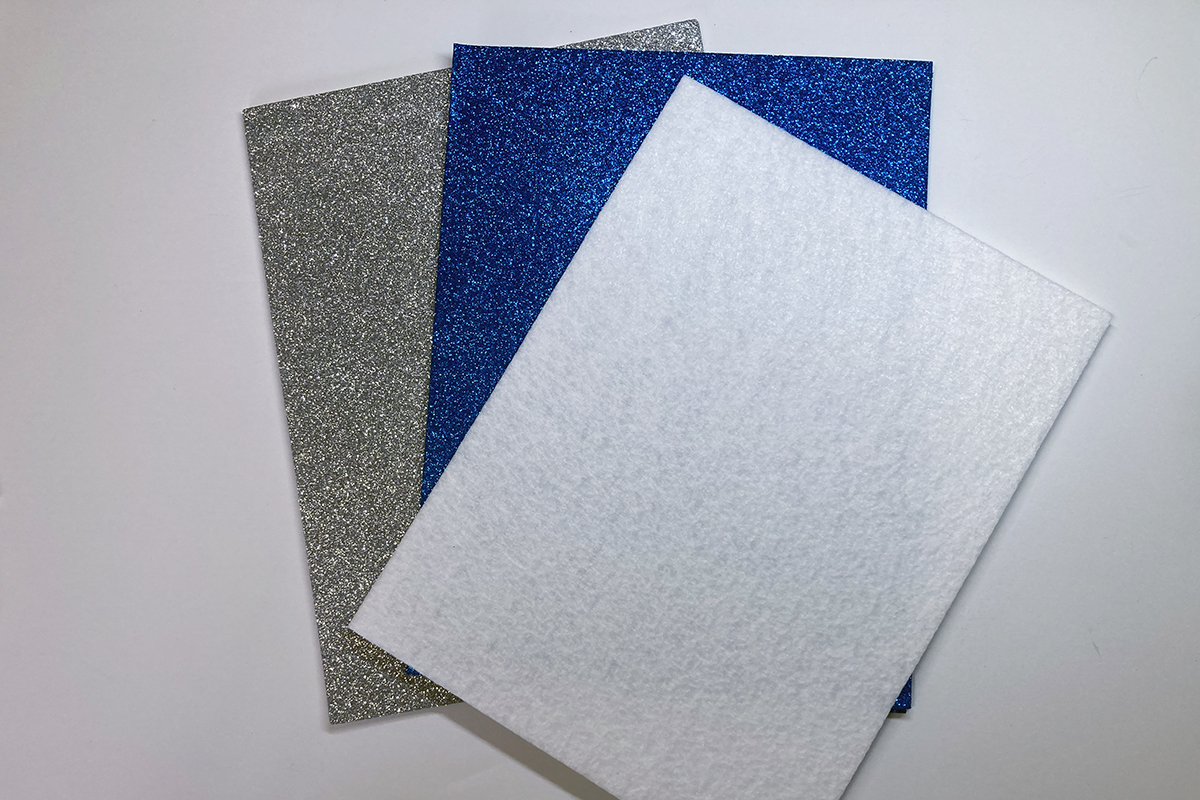
- Assorted firm materials to make the snowflakes, 6” square (I used 2 mm glitter foam sheets and sturdy felt sheets from my local craft store)
- OESD Heavy Weight Tear Away Stabilizer
- Isacord embroidery thread (it will not show)
- 80/12 embroidery needle
- Basic embroidery supplies
Digitizing the Cutwork Snowflake
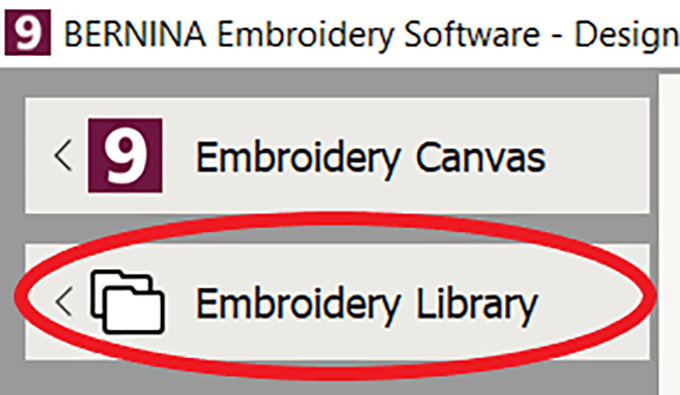
Open the software and from the home screen open Embroidery Library.
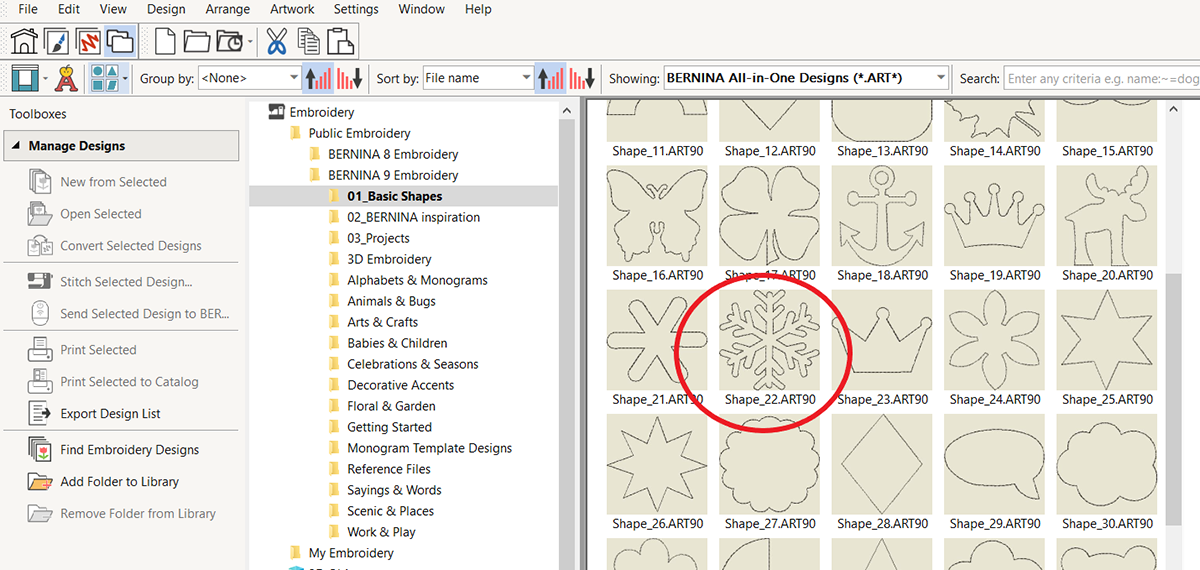
Click on the drop-down arrow next to Embroidery in the navigation tree. Then click on the drop-down arrow next to Public Embroidery. Finally, click on the drop-down arrow next to BERNINA 9 Embroidery. (Note: The drop-down arrows are visible when you hover your mouse to the left of the file names.) Select 01_Basic Shapes. Scroll down to Shape_22, the snowflake. Double click and it will open in Embroidery Canvas.
Right-click on the Show Hoop icon. Select the Large Oval Hoop and Foot #44C, the Echo Quilting and CutWork Foot. Click OK. 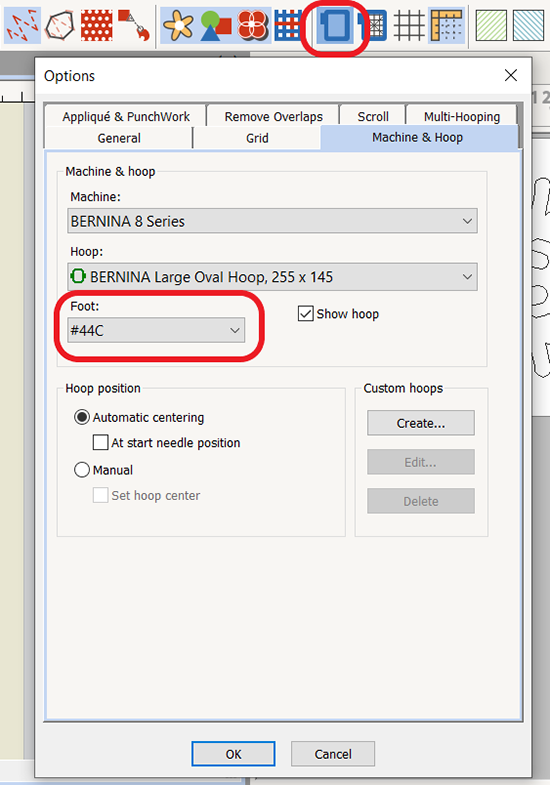
You will see a green line around the inside of the hoop that defines the stitching area using Foot #44C. The large sole of this foot glides with ease over the cutwork design and won’t catch on any cut edges that might poke up.

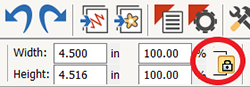
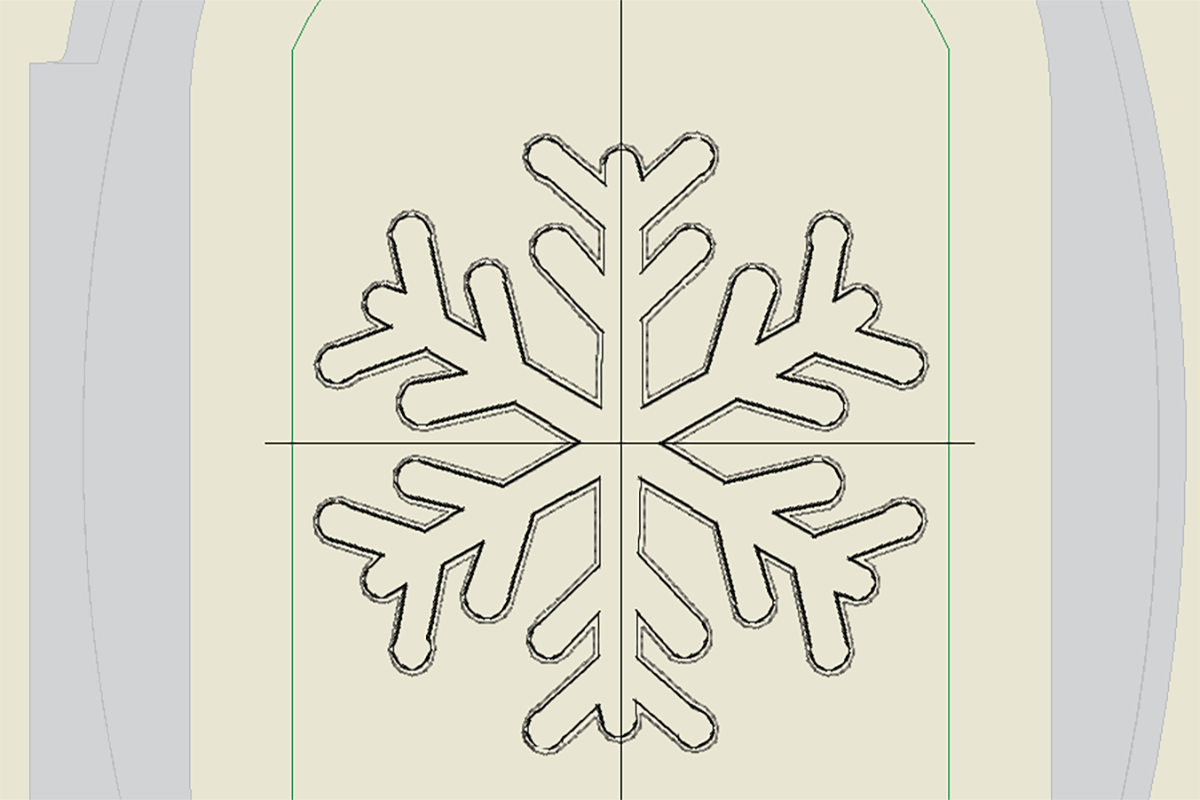
Select the design and resize it proportionally to a width of 4.5″. The height will be about 4.516″.
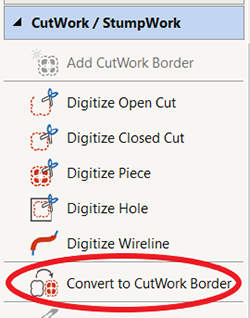
With the design selected, expand the CutWork/StumpWork Toolbox on the left-hand side of your screen. Select Convert to CutWork Border.
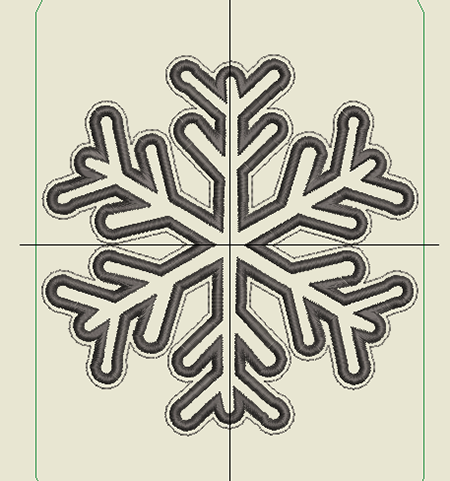
Your design now looks like this. Time for some fine-tuning. Select the design.
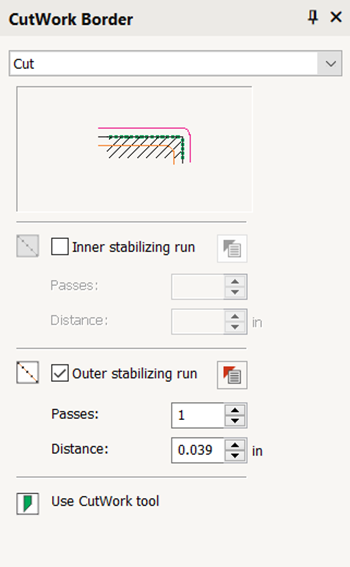
Click on the CutWork Border icon in the General Toolbar and the CutWork Border docker will open on the right-hand side of your screen.
![]()
In the dropdown menu of the docker, select Cut as the Border Type. This provides a cutting line without embroidery on the cut piece. Leave the Inner stabilizing run unchecked. Check Outer stabilizing run and leave the settings at the default.
Now your design looks like this.
If you do not see the cutwork lines on your design, click on Show Connectors in the View Toolbar.
![]()
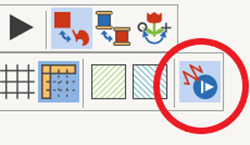
Click on Stitch Player. Watch the software stitch the outer stabilizing run. Then it will start cutting out the snowflake inside the stitched line.
That’s it for setting up. Make sure you save your design. I called mine “Cutwork Snowflake”. Now send your design to your machine using either the BERNINA Wi-Fi Device or a USB stick.
Cutting Out the Snowflake
I first decided to make my snowflakes out of some 2 mm glitter foam that I found at my local craft store. Further down the aisle I spied some sturdy felt that had a little bit of sparkle, so I tried that as well. You don’t want to use regular craft felt, as that will be a bit flimsy.
Tip: The sturdy felt had the feel of Peltex Ultra-Firm Sew-In stabilizer. I had some scraps of that and it worked, too!
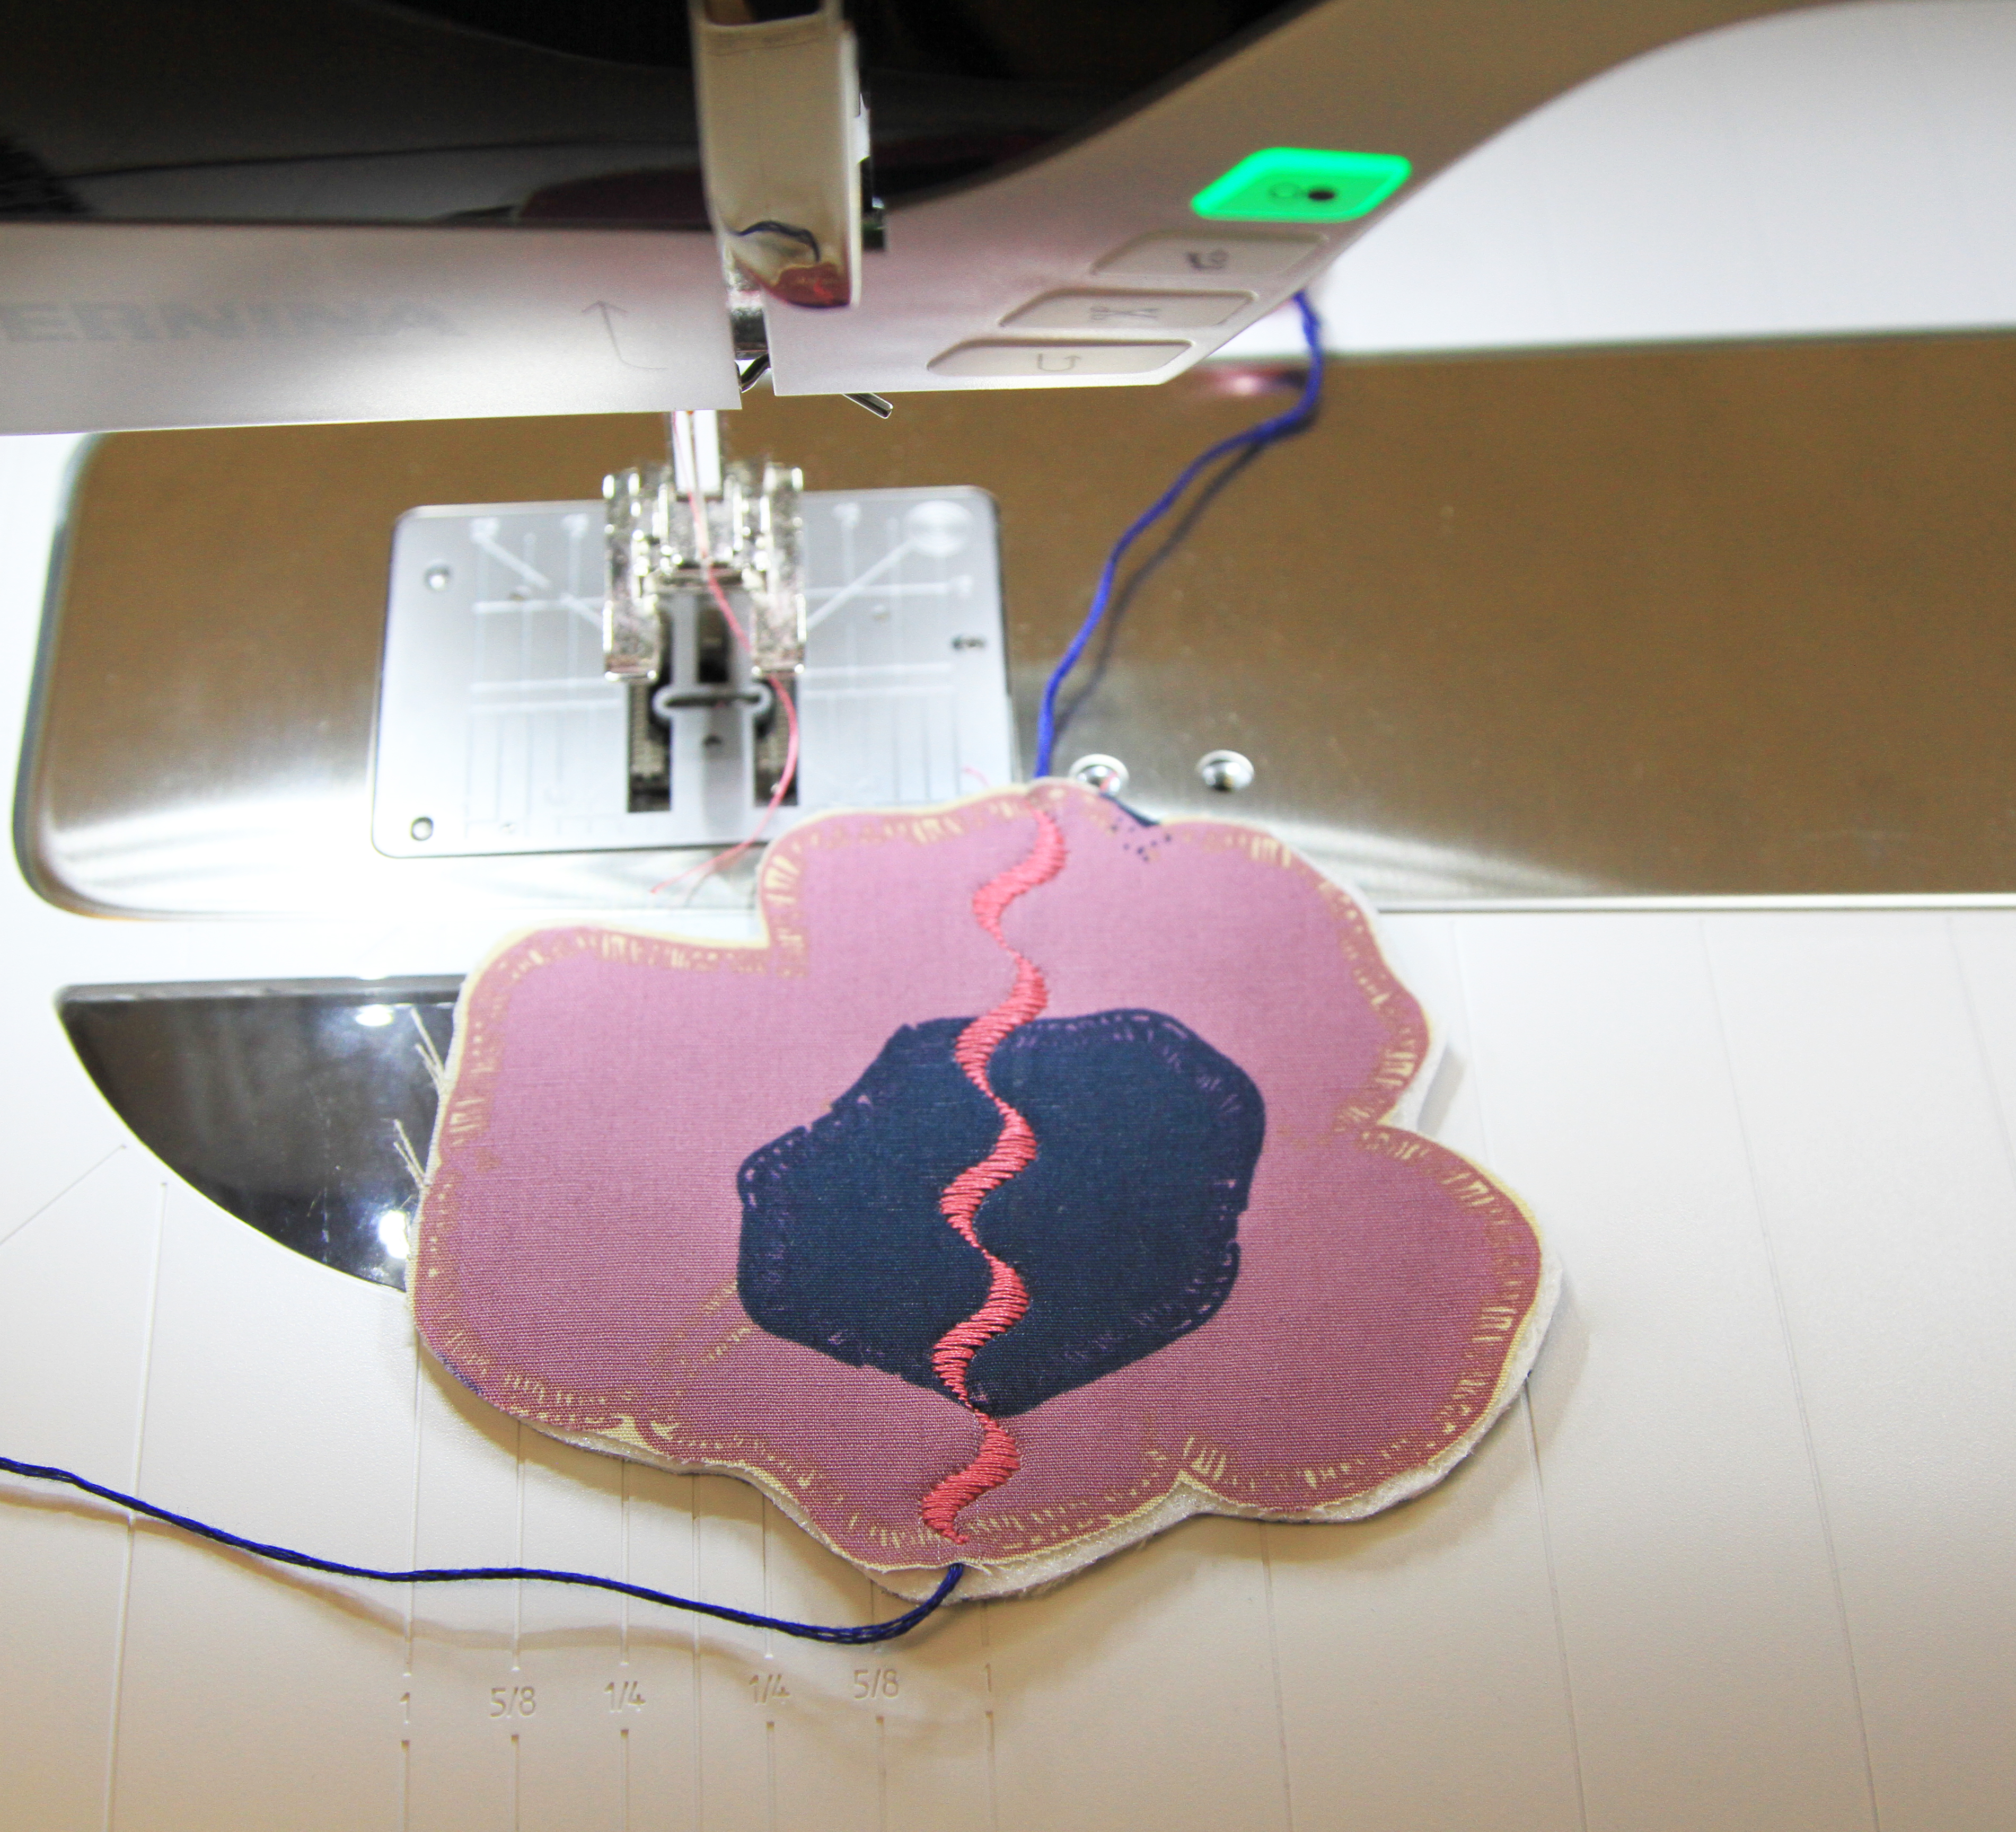
Cut one piece of OESD Heavy Weight Tear Away Stabilizer and hoop. I like this stabilizer because of its crispness and it works nicely with the CutWork Tool.
Thread your machine. The thread color doesn’t matter since it will not be on the finished project.
At the machine, open Settings>Embroidery. Select the Fabric Thickness icon and change the thickness to 7.5 mm. We are going to stitch through two layers of foam and this adjustment lets the machine know we are working on thicker material. It ensures that the embroidery hoop won’t move until the needle is out of the material. Due to the thickness of the materials, do not stack more than two layers at a time in the hoop.
![]()
Select the Stitch Plate Selection icon and choose the 0 mm/Cut Stitch Plate.
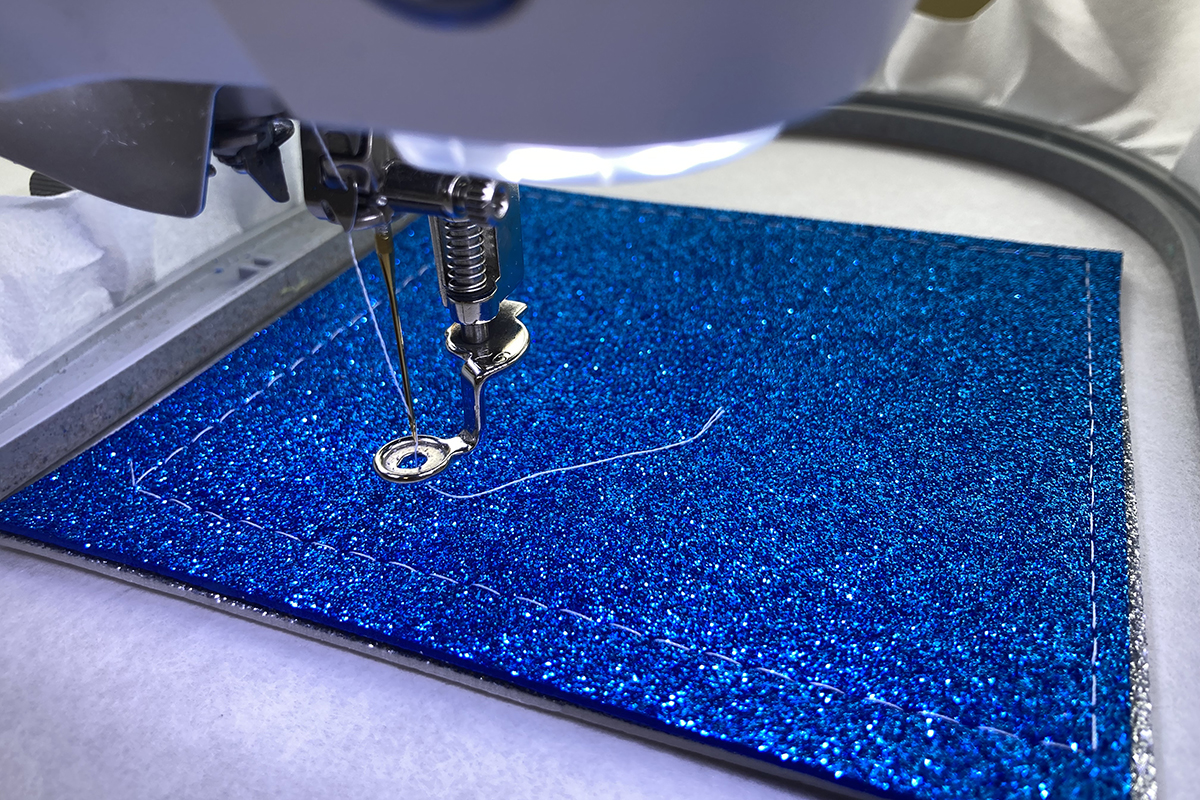
Then select the Presser Foot Indicator icon and choose the Drop-shaped Embroidery Foot #26. The smaller size of this foot allows you to stitch a complete basting box around the design, which we will set up next.

Now touch the needle icon in the lower right of your screen, Ready to Embroider. Touch the Basting Box icon one time. This places a basting box close to the design.
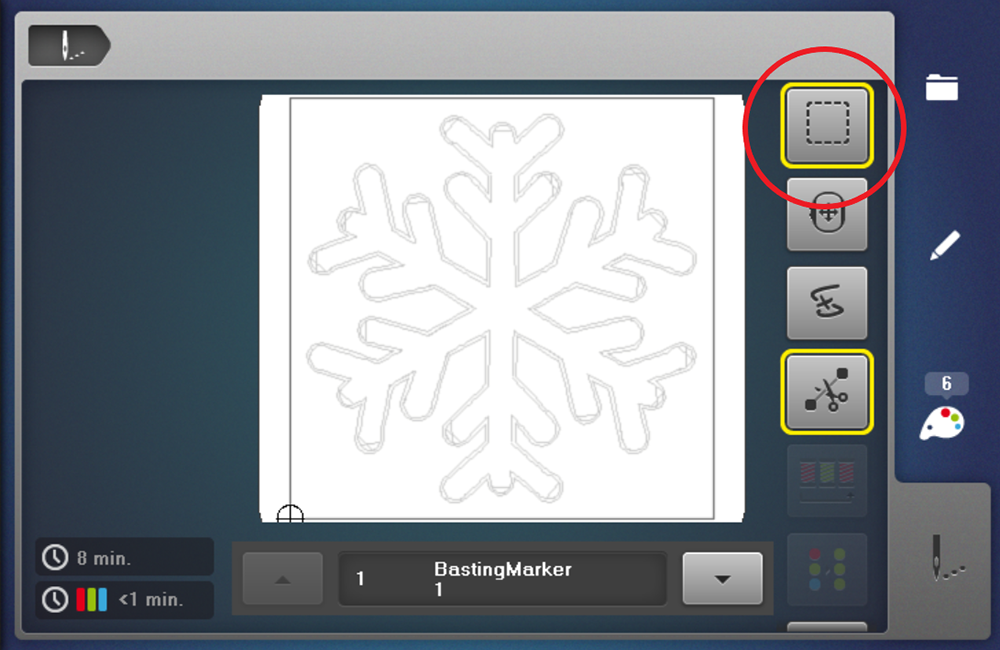
Stitch the basting box on the stabilizer only. This serves as a placement line for your foam.
Place two layers of foam covering the basting box. Stitch the basting box a second time to secure the foam to the stabilizer. To do this, you are going to scroll up in Color Information so that you are back to Color 1.
The next step is stitching the stabilizing run. Go ahead and change the foot to the Echo Quilting and Cutwork Foot #44C. Be sure to select the foot on the Presser Foot Indicator screen
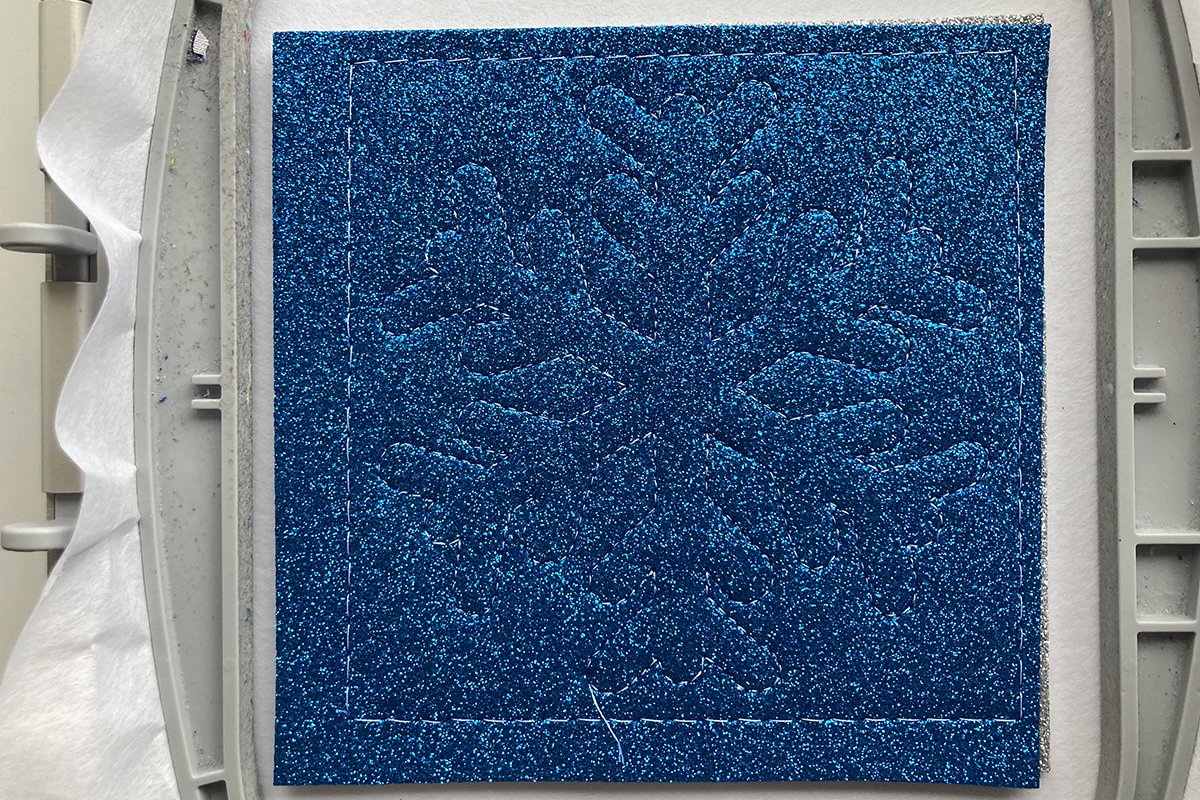
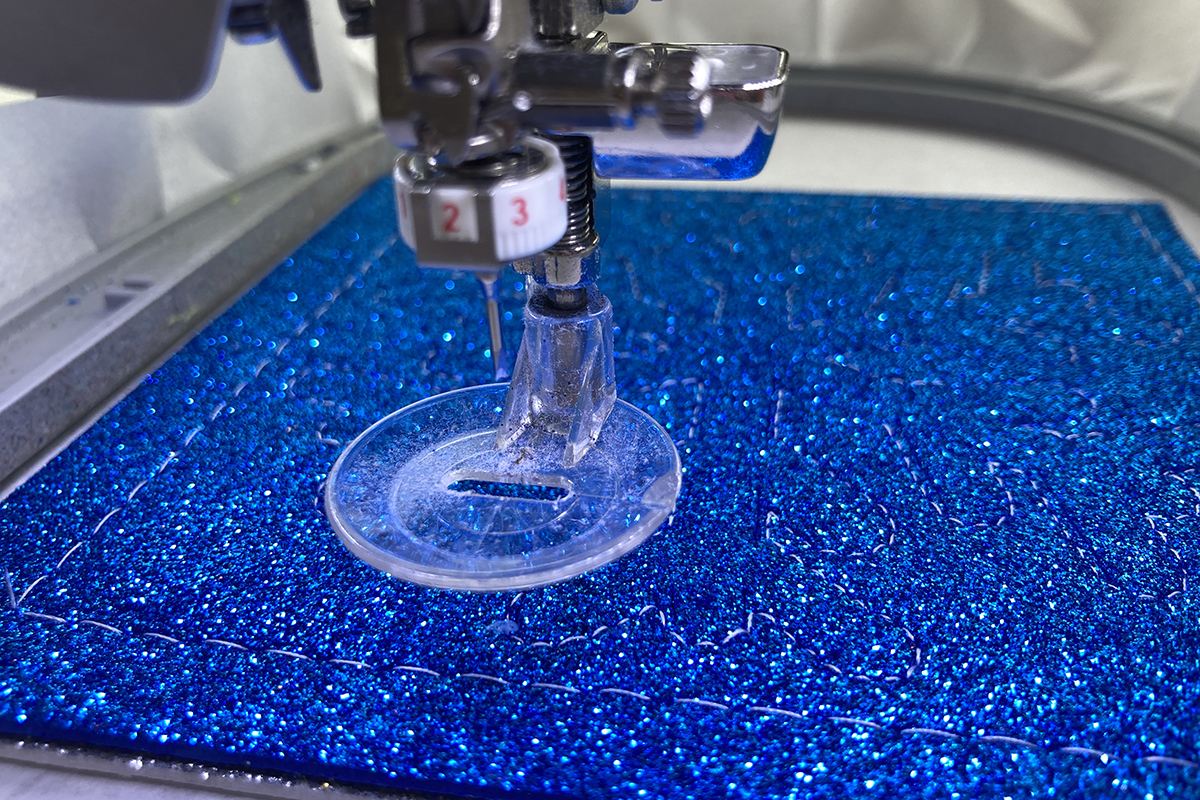
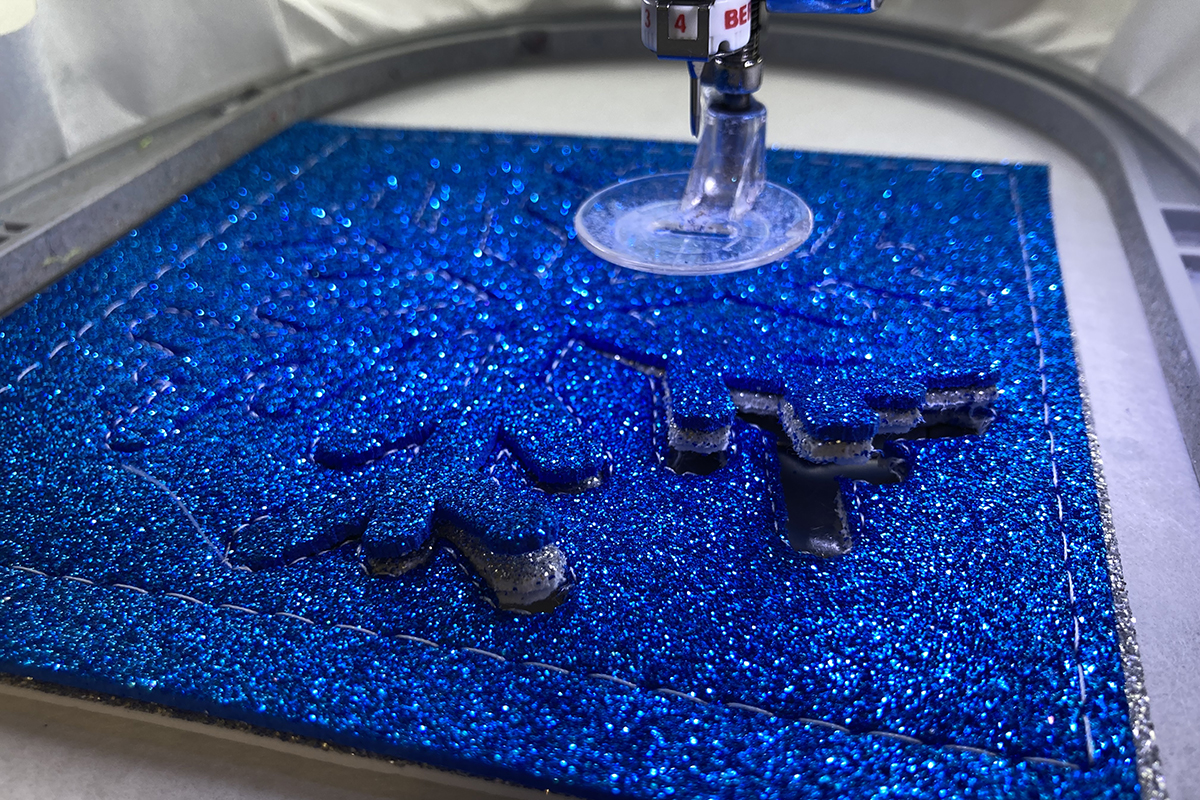
Now it’s time to cut! Remove the needle and insert the CutWork Tool starting in Position 1, as indicated on the screen of the machine. Then advance the numbers as directed by rotating the dial.
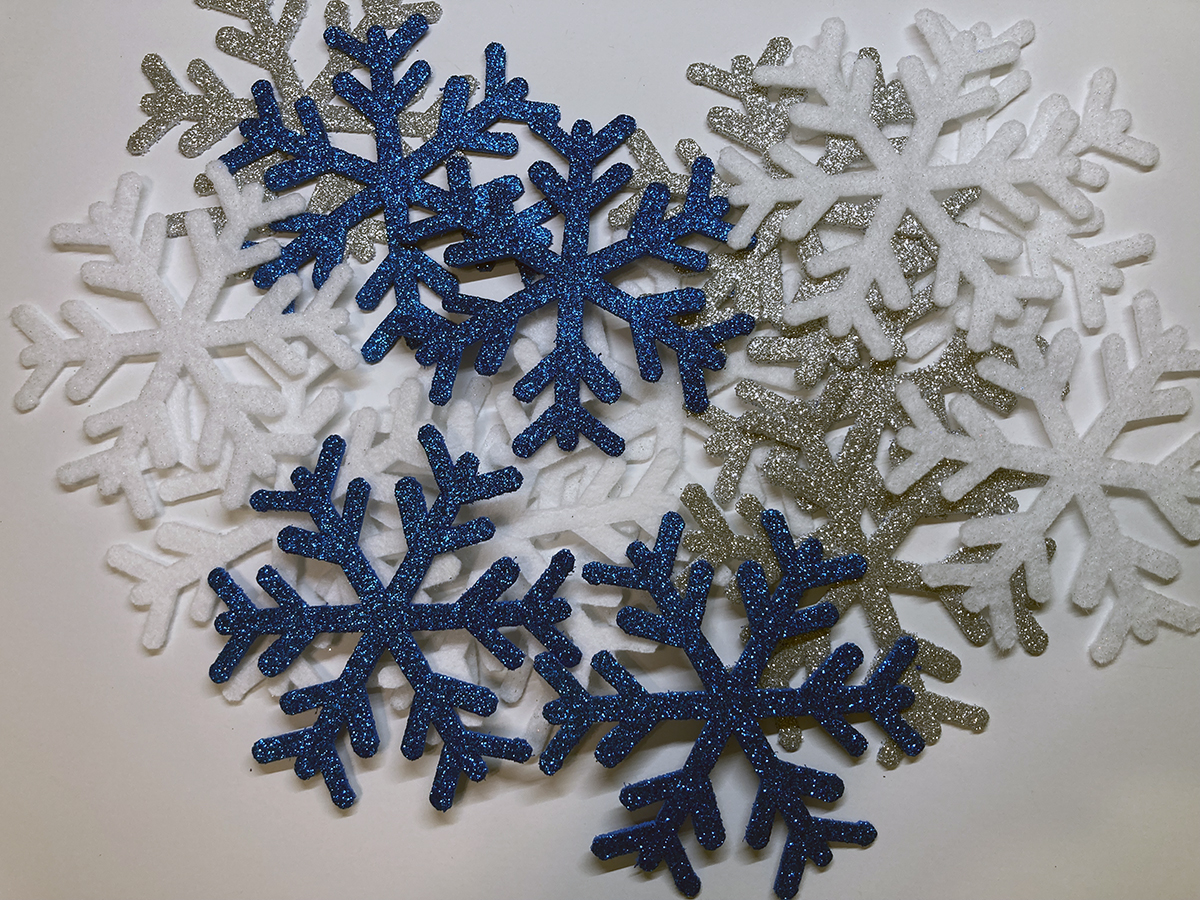
When the cutting is complete, remove the hoop and there are your snowflakes!
Make as many snowflakes as you desire for your garland.
Join me for Winter Garland, Part 2 to complete the project!
Used Products

What you might also like


2 comments on “Winter Garland, Part One”
-
-
I’m going to add the cutwork tool, etc. to my 2023 list of Bernina items to buy. Thanks for the inspiration!!
Leave a Reply
You must be logged in to post a comment.

THANK YOU for a wonderful tutorial on using the cut work tool. I’ve had my 880 Sterling for 7 years and never knew how to use the cut work tool. This is so much fun! I see many more snowflakes in my future! Merry Christmas!