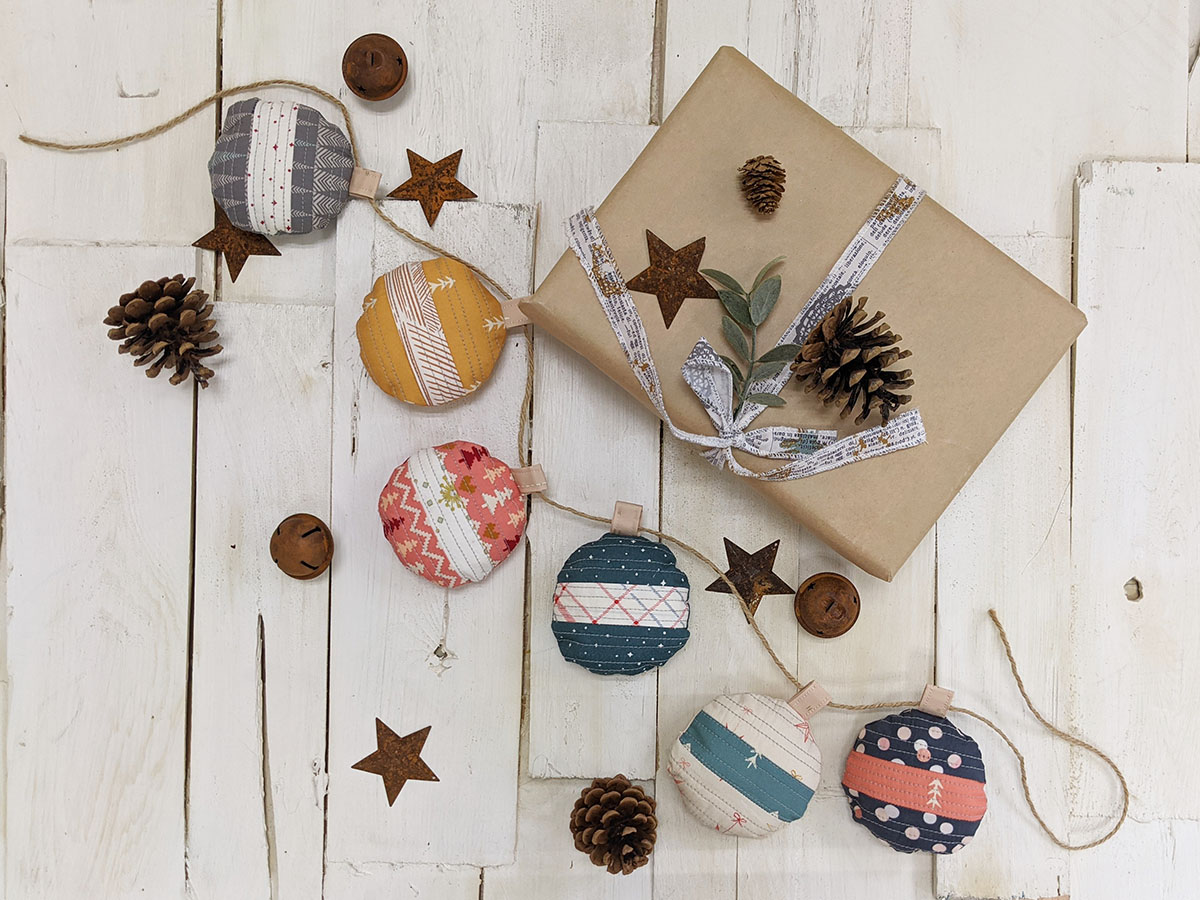
How to Make a Christmas Garland
Dear fellow makers,
We are days away from the magical month of December and it’s time for us makers to get to sewing for the holidays! In my home, my favorite thing to do to start the season is decorating our home with Christmas lights, filling the tables with sugar cookie candles, and starting on my sewing projects.
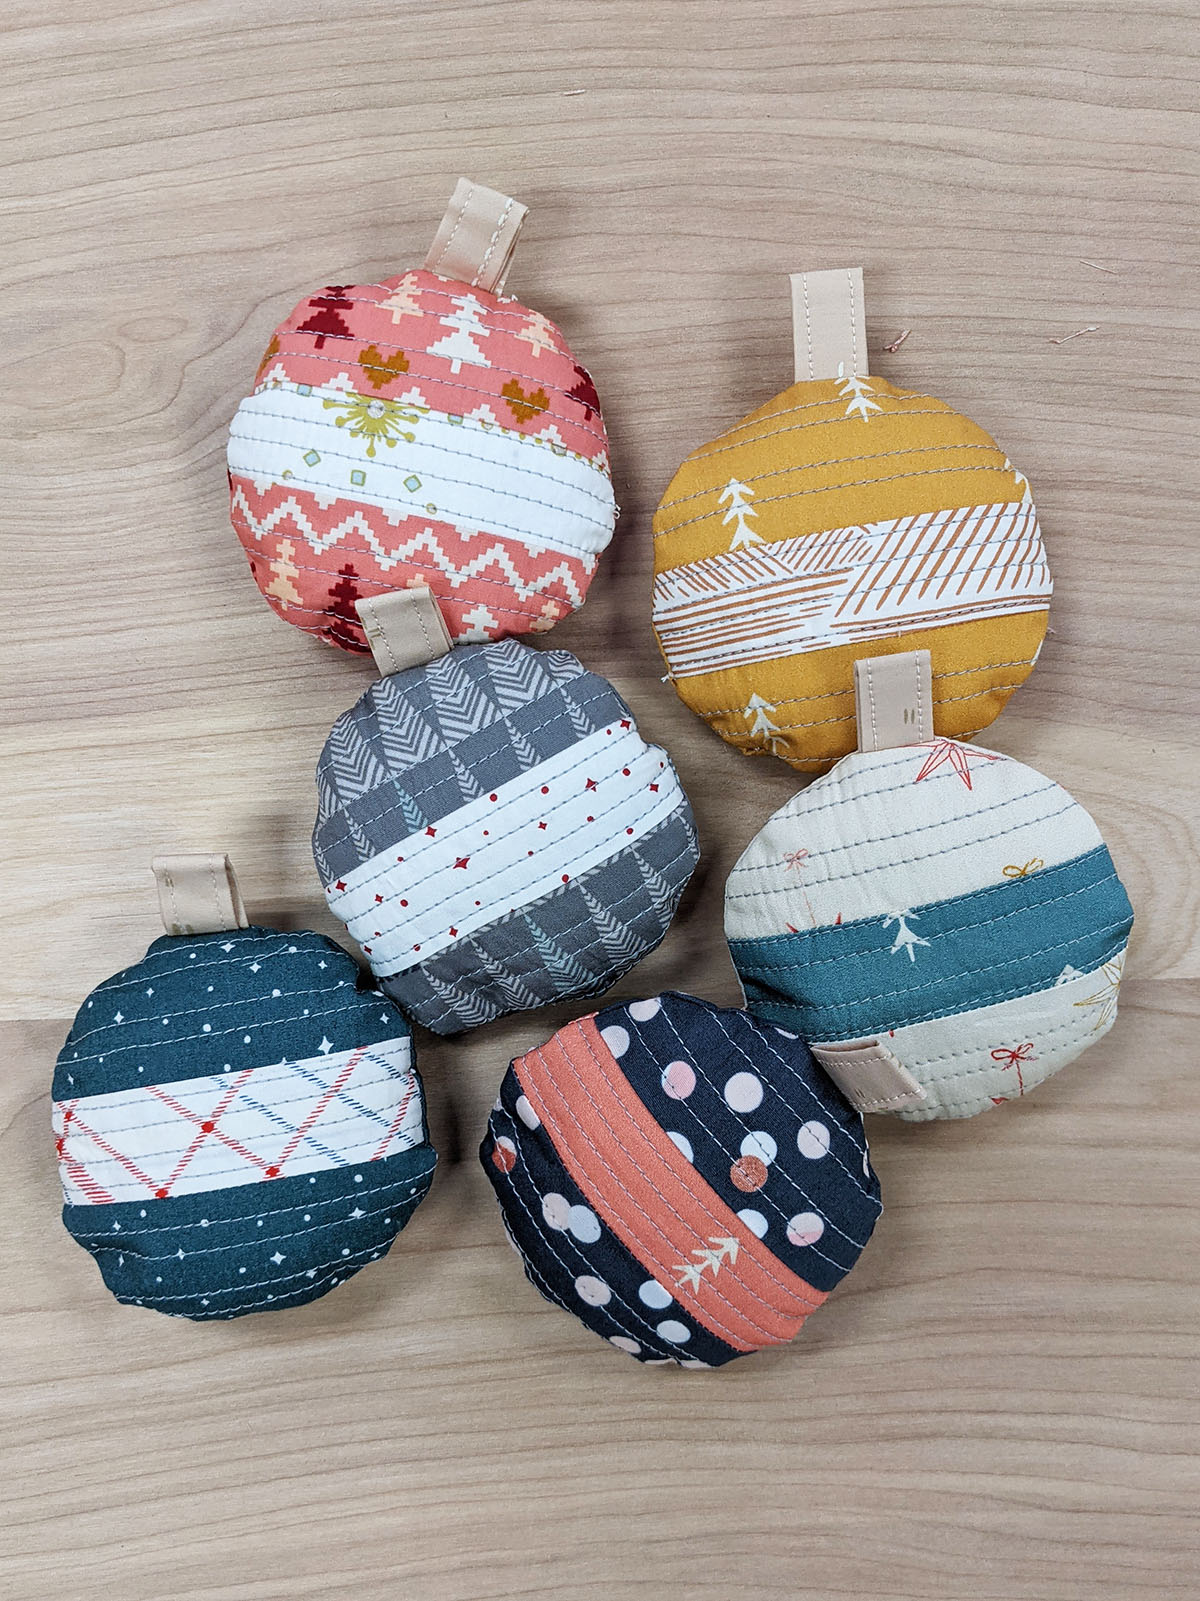
For this year, I decided to make a Christmas garland to bring out the holiday spirit. It’ll be so cute to hang anywhere in your home like a mantle, on your bed frame, and of course, your tree!
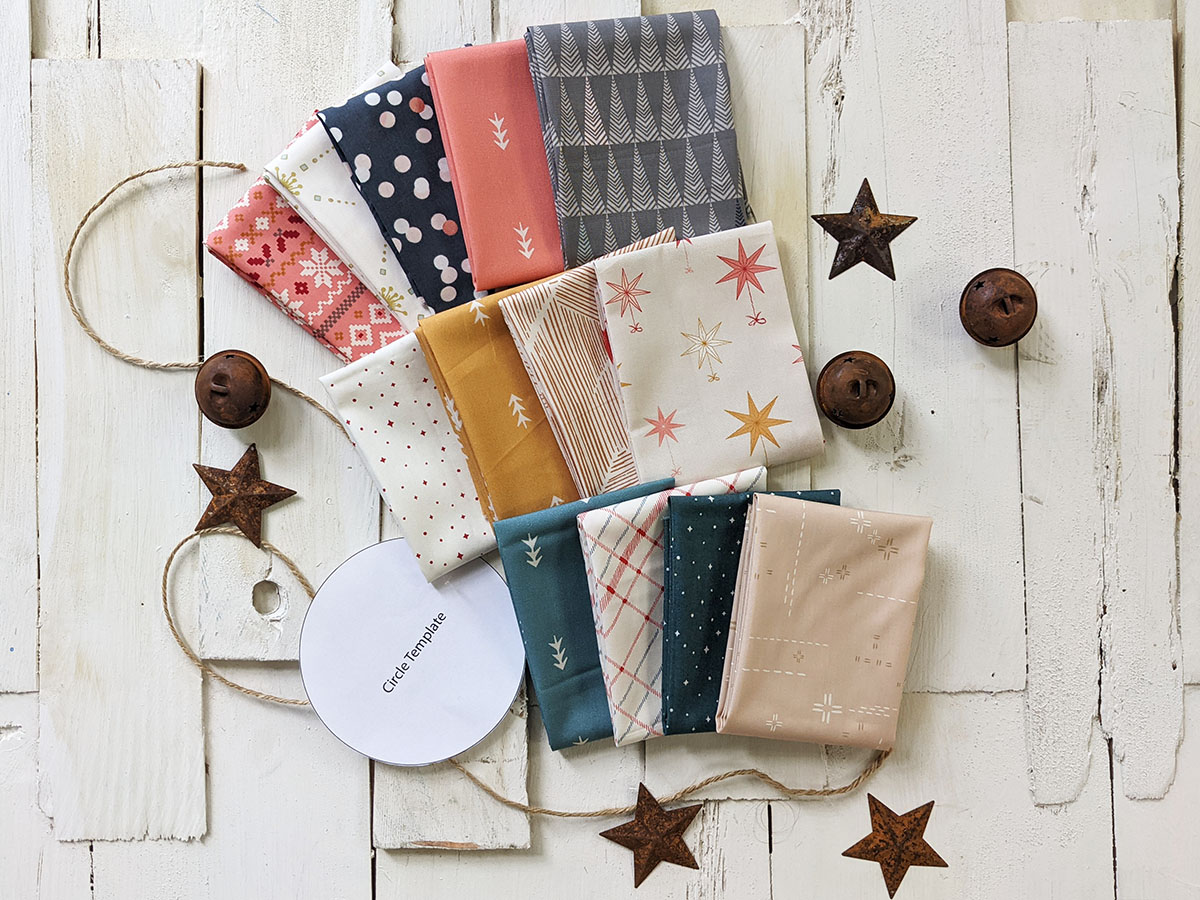
For this project, I gathered some festive prints like Maureen Cracknell’s Cozy and Magical fabric collection Warm & Cozy Candy, Simple Defoliage Sugar, Simple Defoliage Chai, Simple Defoliage Icicle, Let it Glow, and Untangled Scarves. Also from her Cozy & Joyful, Snowing Bright, and Snowing Night. I decided to mix it up by combining it with our Sparkle Fusions, Within Sparkler, Chads Sparkler, Tree Farm Sparkler, Trouvaille Routes Sparkler, and from our Decostitch Elements, Cafe Latte.
This project requires Fat Eighth of each fabric, you can mix and match, be creative with the quilting, and make as many garland ornaments to hang around the house.
Have fun making this project!
Materials to Make Christmas Garland
Fabric Requirements
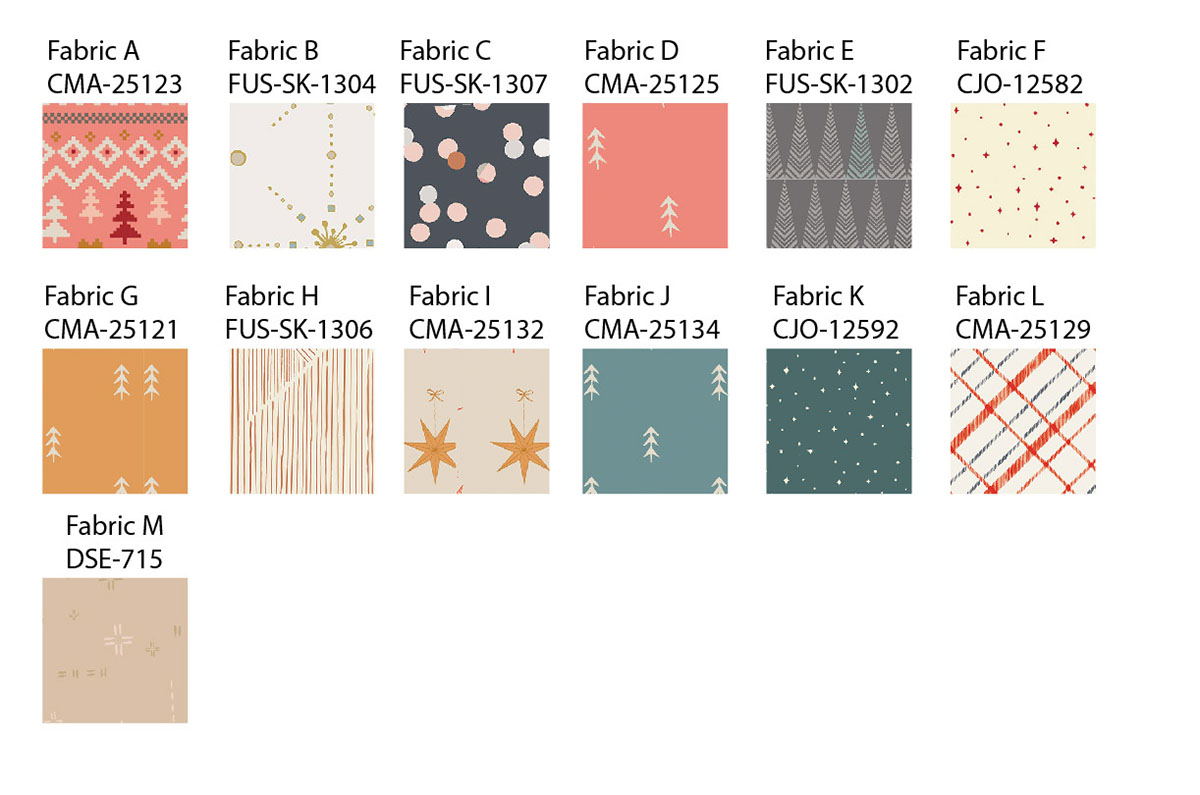
- Fabric A CMA-25123 Fat 8
- Fabric B FUS-SK-1304 Fat 8
- Fabric C FUS-SK-1307 Fat 8
- Fabric D CMA-25125 Fat 8
- Fabric E FUS-SK-1302 Fat 8
- Fabric F CJO-12582 Fat 8
- Fabric G CMA-25121 Fat 8
- Fabric H FUS-SK-1306 Fat 8
- Fabric I CMA-25132 Fat 8
- Fabric J CMA-25134 Fat 8
- Fabric K CJO-12592 Fat 8
- Fabric L CMA-25129 Fat 8
- Fabric M DSE-715 Fat 8
Additional Materials to Make Christmas Garland
- Six (6) 5” of batting
- Coordinating quilting thread
- Reverse Pattern Foot #1D
- Sewing needle
- Manila Cord (or cord of your choice)
- Pillow stuffing
- Circle Template

Steps to Make Christmas Garland
Step 1:
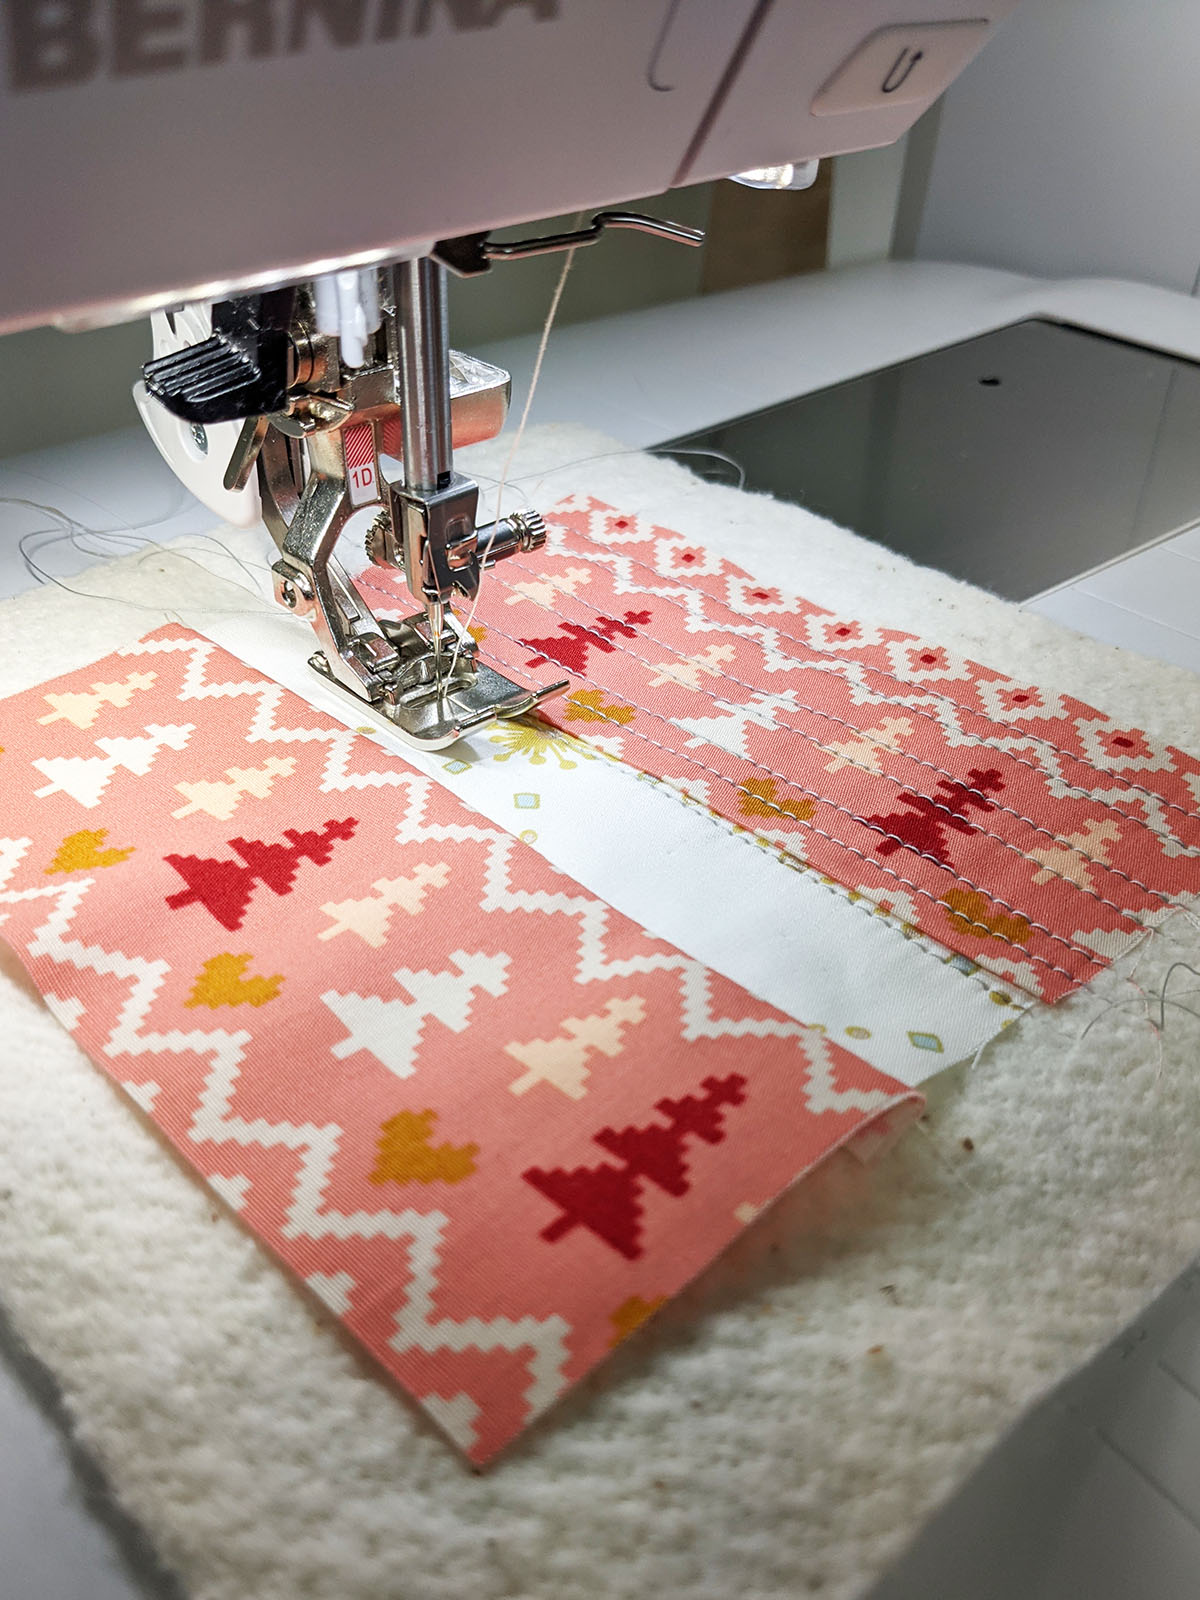
Start by taking two (2) 5’’ x 2 1/2’’ rectangles from fabric A and one (1) 5’’ x 1 1/2’’ rectangle from fabric B.
Join one rectangle from Fabric A one on top and one on the bottom of fabric B rectangle.

Step 2:
Take one (1) 5’’ square of batting and place your assembled piece on top of the batting.
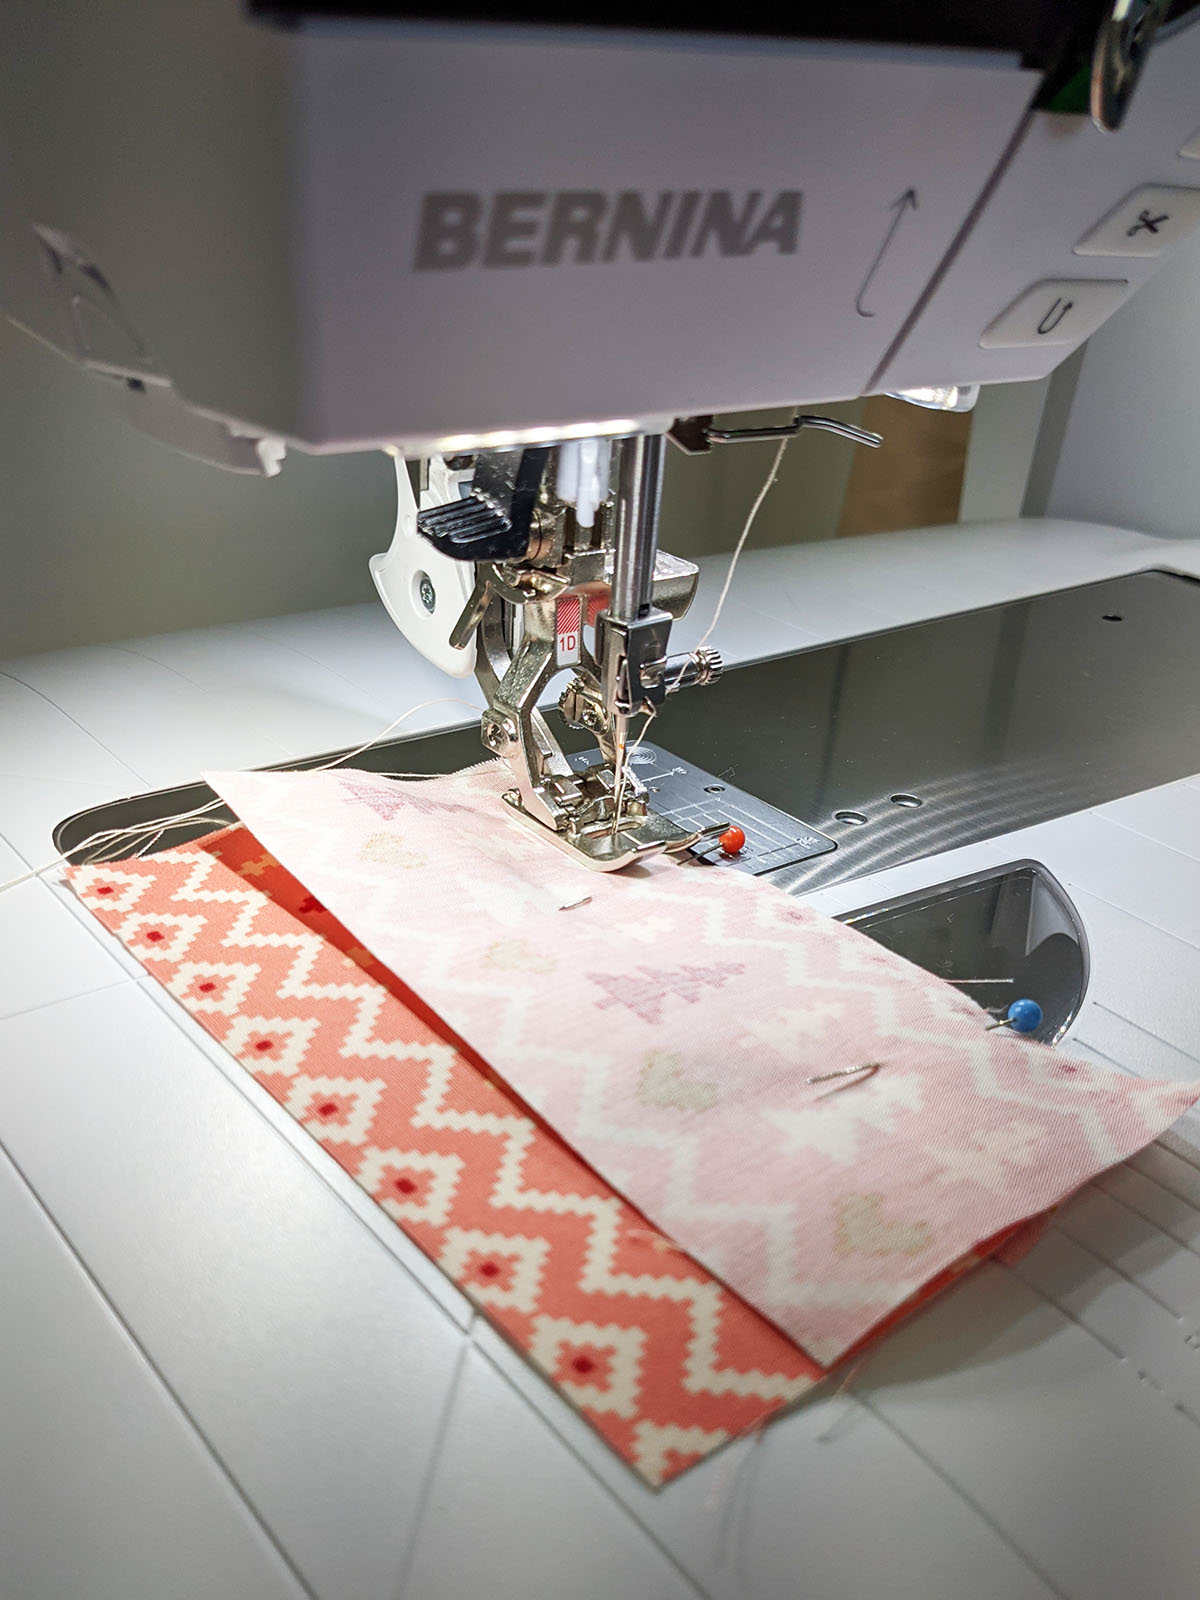
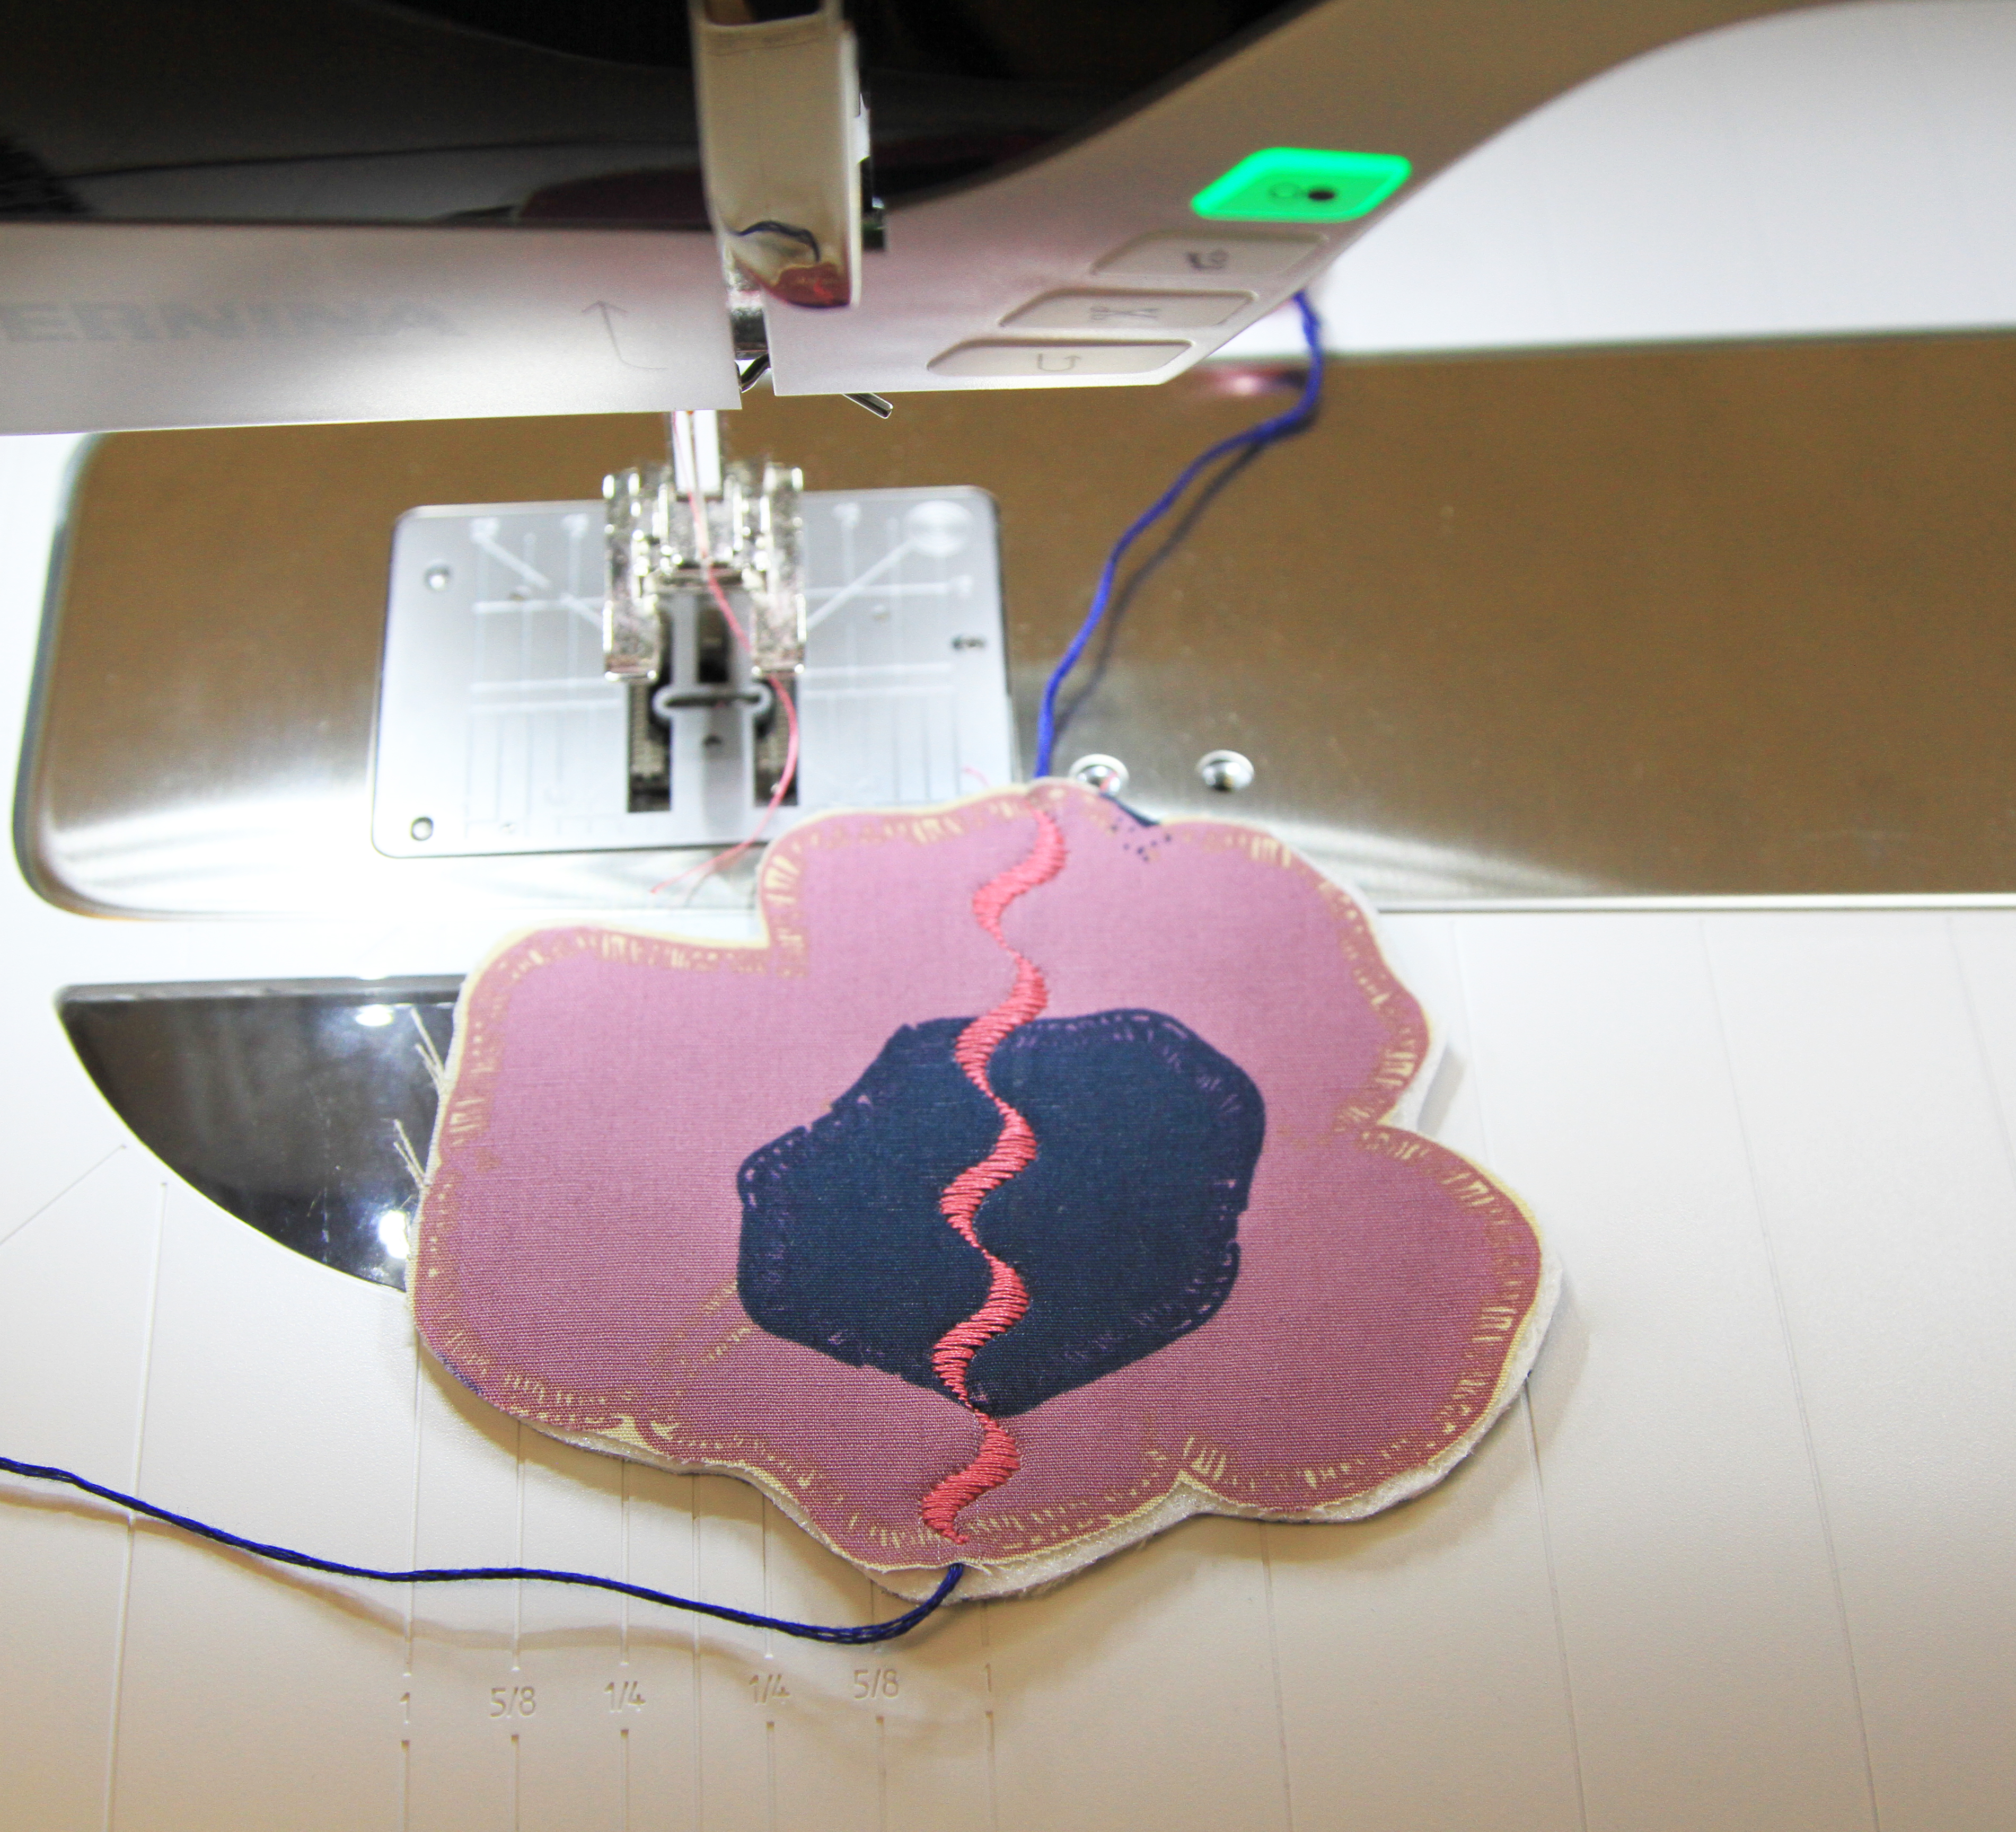
Have fun quilting any motifs or just straight lines since using the Reverse Pattern Foot #1D, I was able to make perfect stitch lines.

Step 3:
Take the circle template, trace the shape and cut.
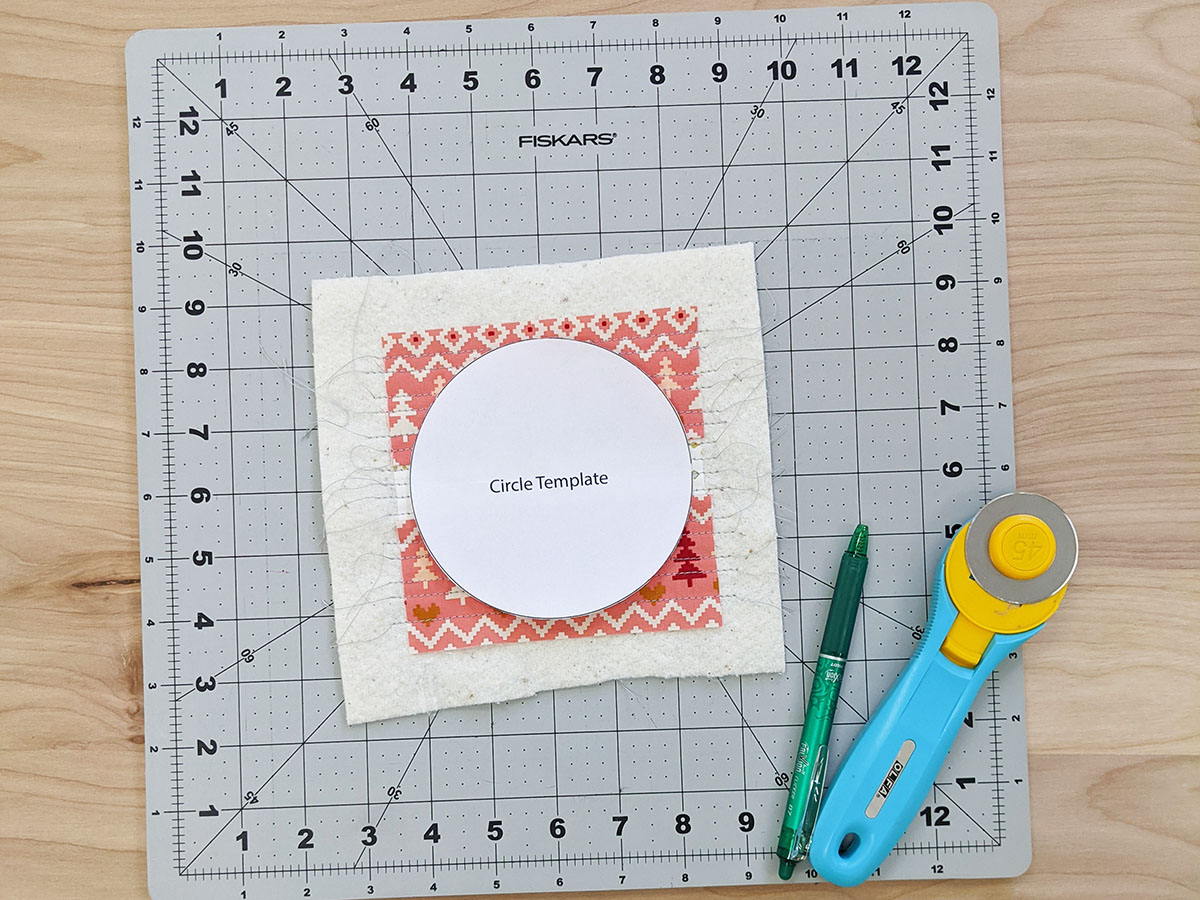
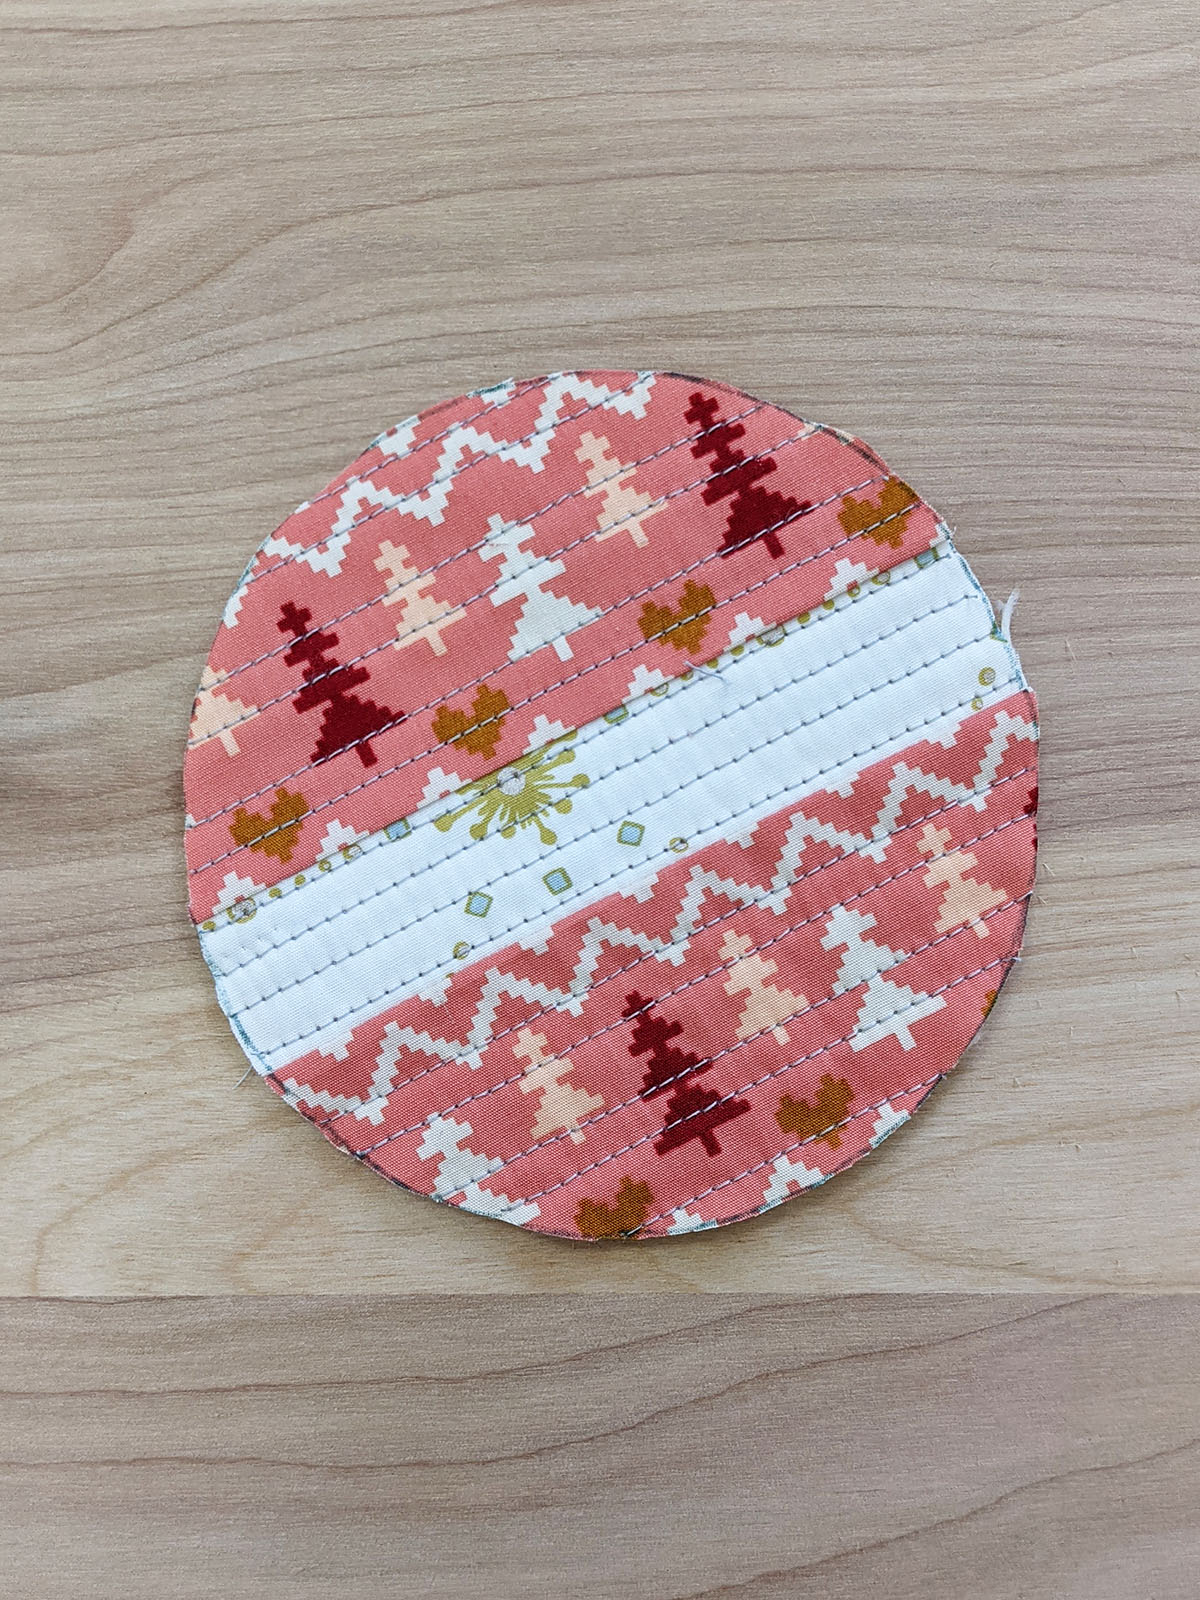
Repeat the same for the other fabrics pieces:

Step 4:
Take one 5’’ square from fabric A, trace the circle template and cut. This will be the back of the garland.
Step 5:
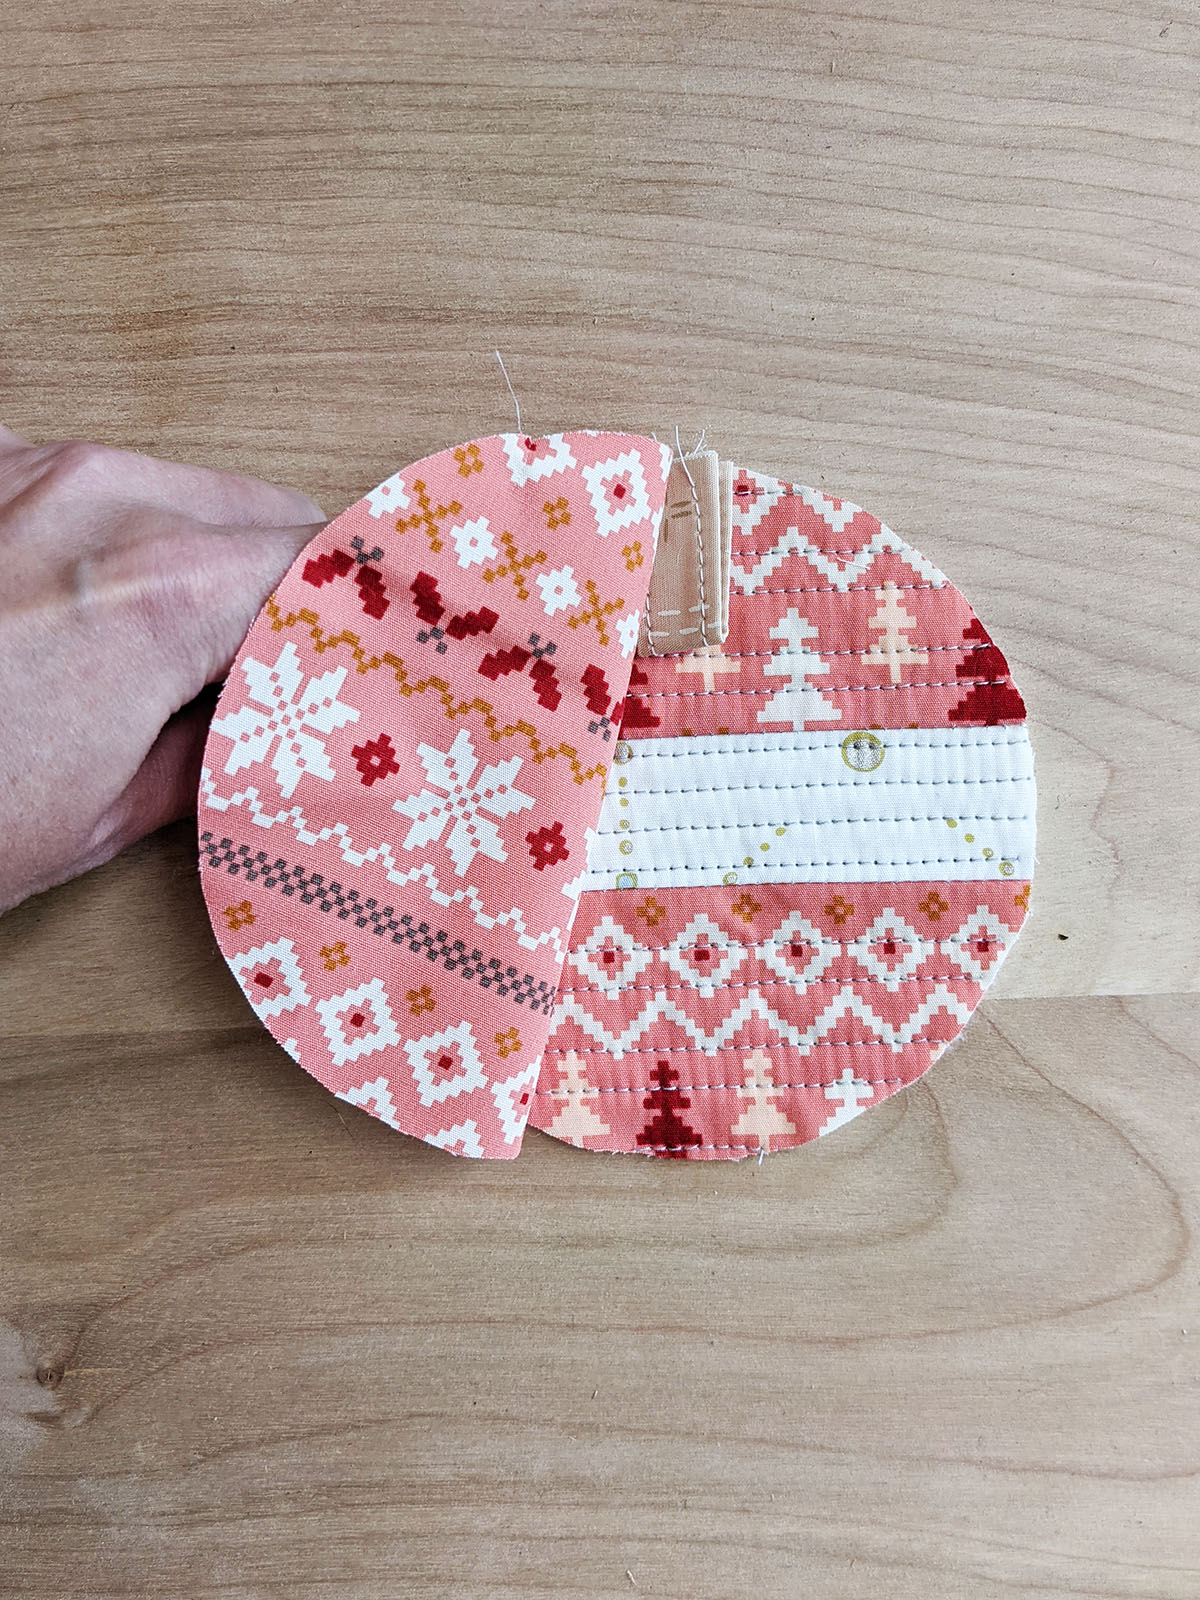
To create the small handles start by taking one (1) 2 1/2’’ square from fabric M and create your strap by folding the edges to the center and then fold in half.
Sew the edges with matching thread.
Now you have the back of the garland, the strap and your quilted garland.

Step 6:
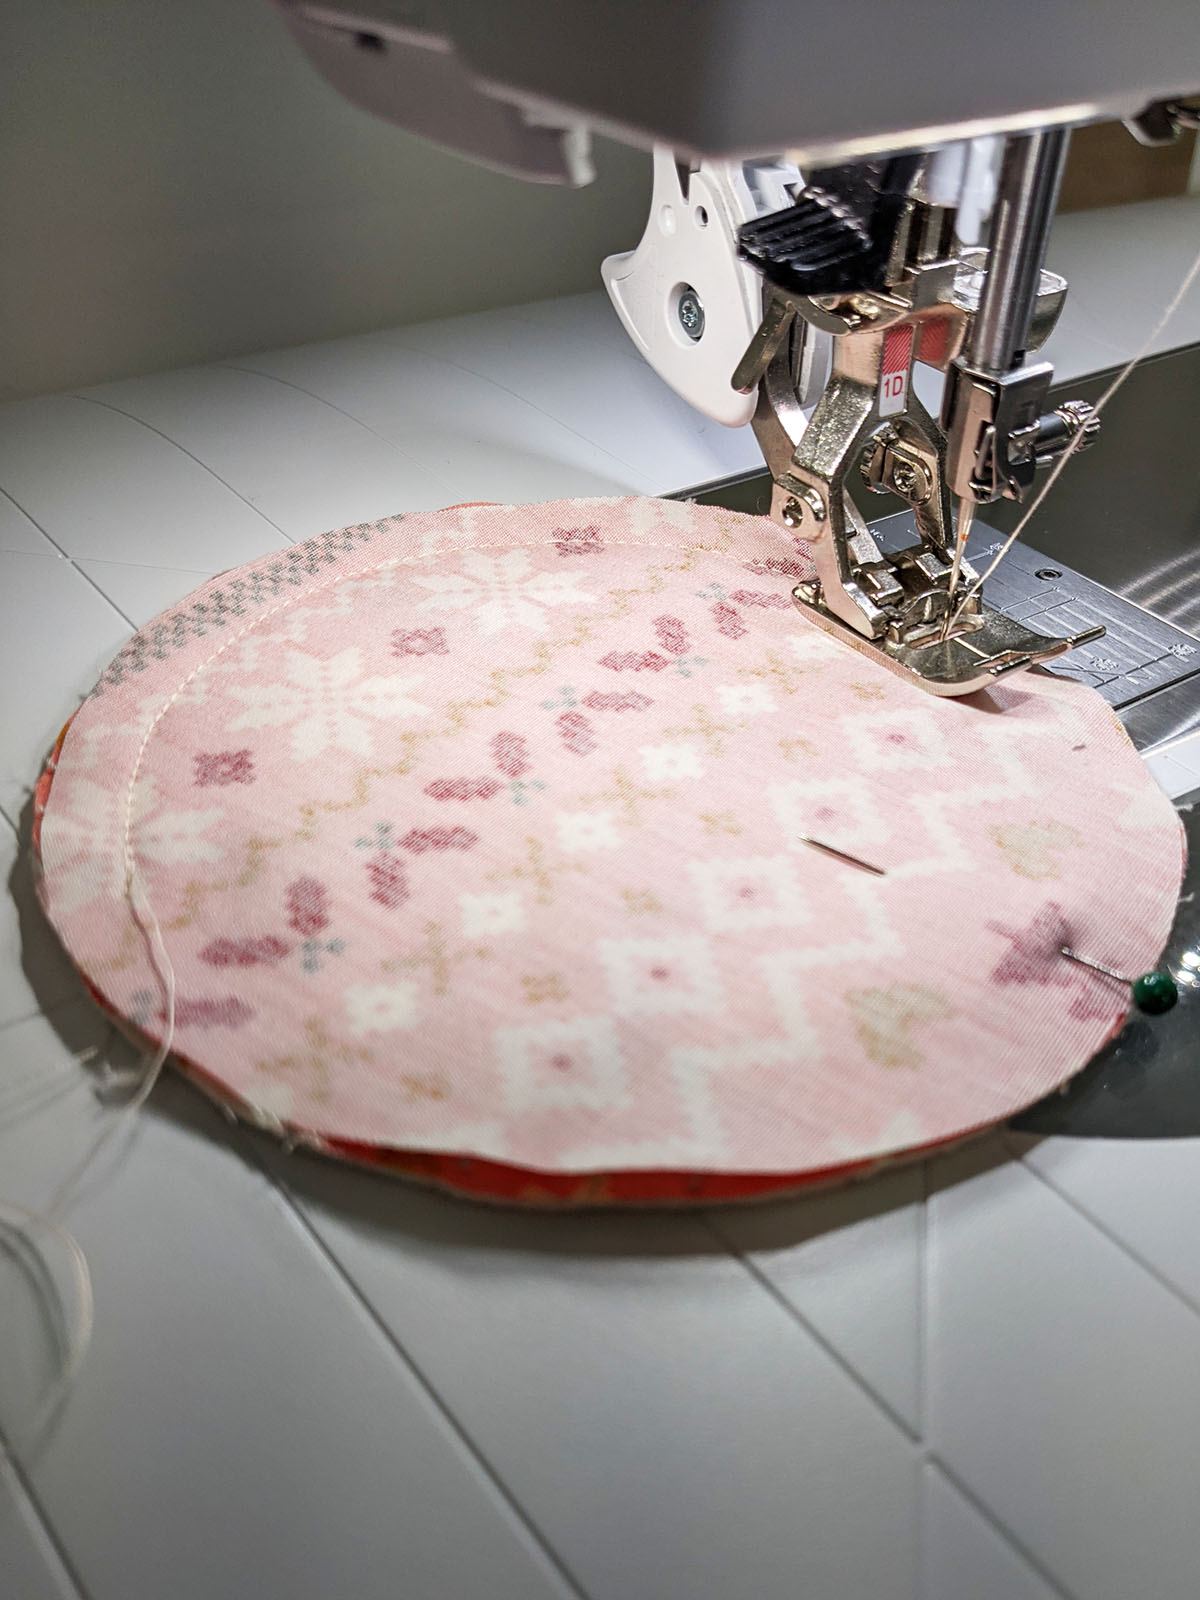
Take the strap, fold it in half and place it right on the edge of the right side of the ornament piece, making sure its centered. Then place the backing fabric wrong side facing up and pin all three pieces.
Step 7:
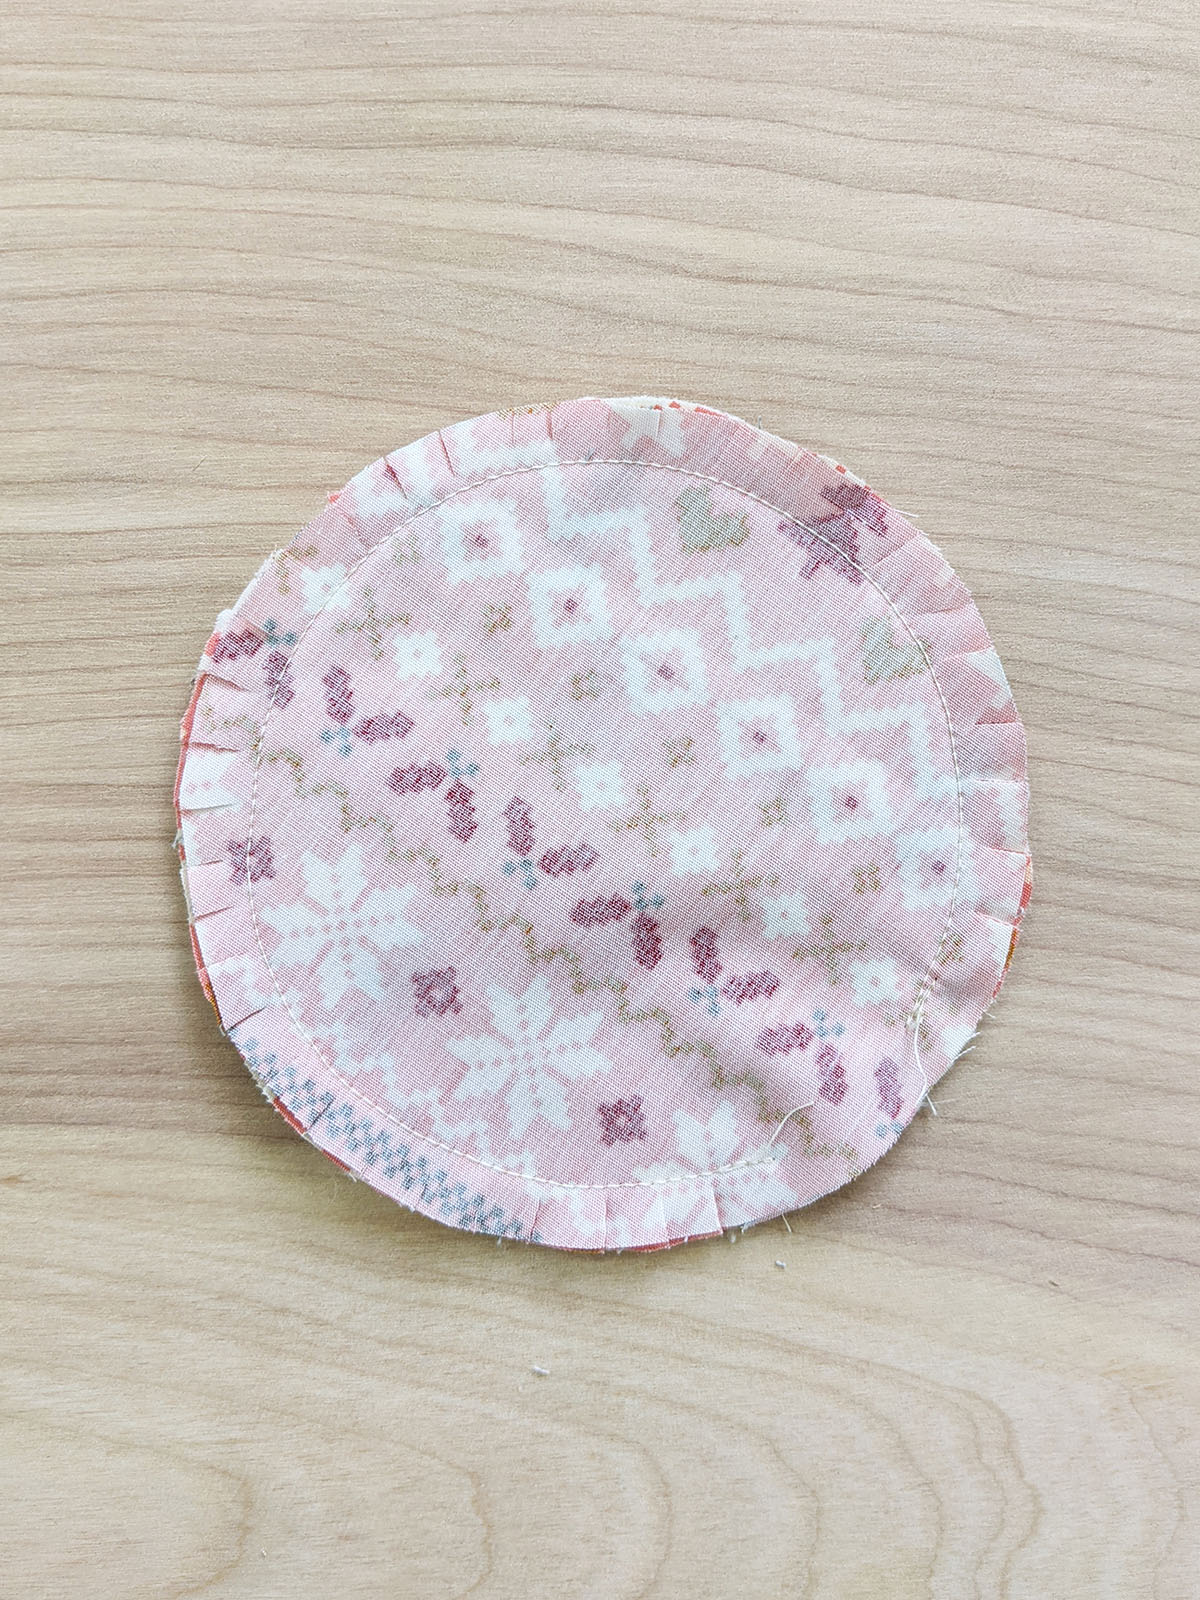
Sew all around the ornament piece leaving about 2” to 3” of opening in order to turn it inside out.
Step 8:
Now, grab a small pair of scissors and snip the seams all around, that way the fabric can ease and maintains that circle shape. Be careful not to clip the thread!.
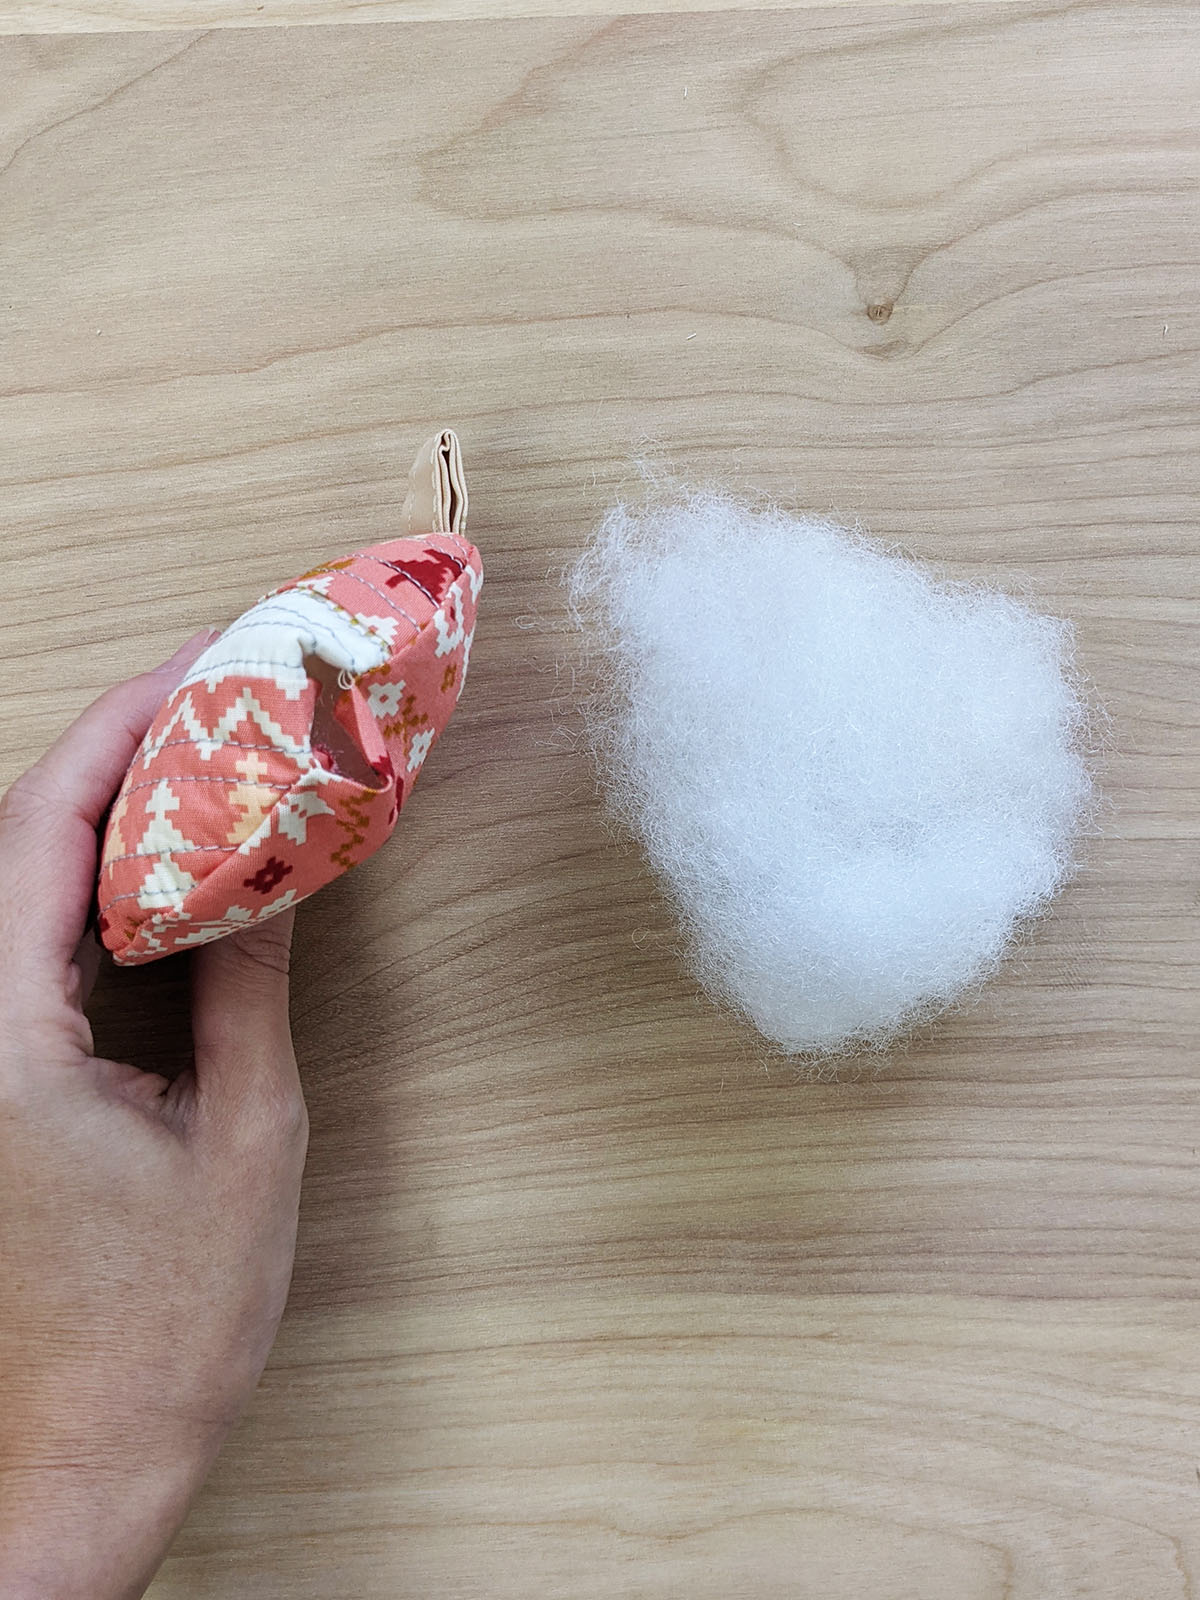
Step 9:
Turn the piece inside out and start filling it out with pillow stuffing.
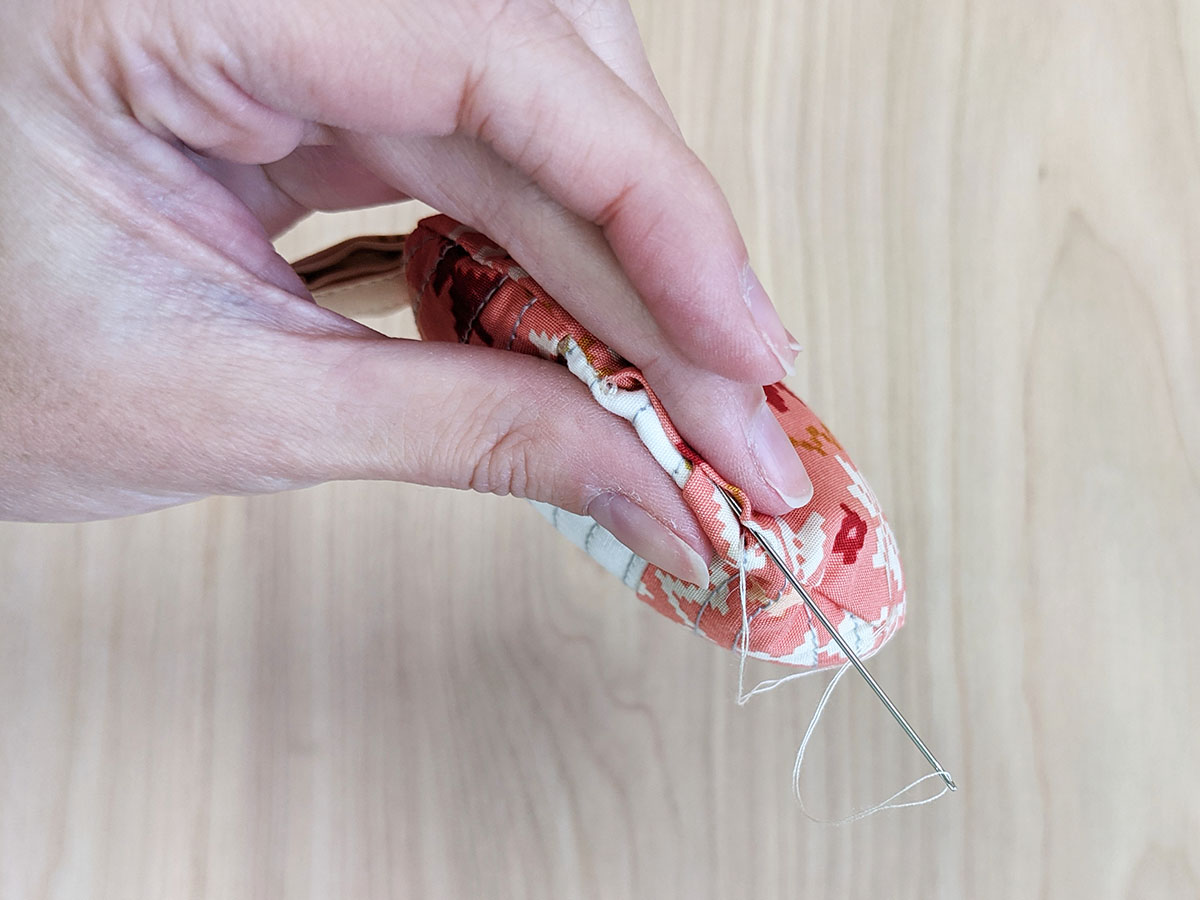
Step 10:
Hand stitch the opening.
And you’re done!! repeat the same instruction for the rest of the fabrics and feel free to make more fabric garlands!
Take your preferred cord and assemble your garland.
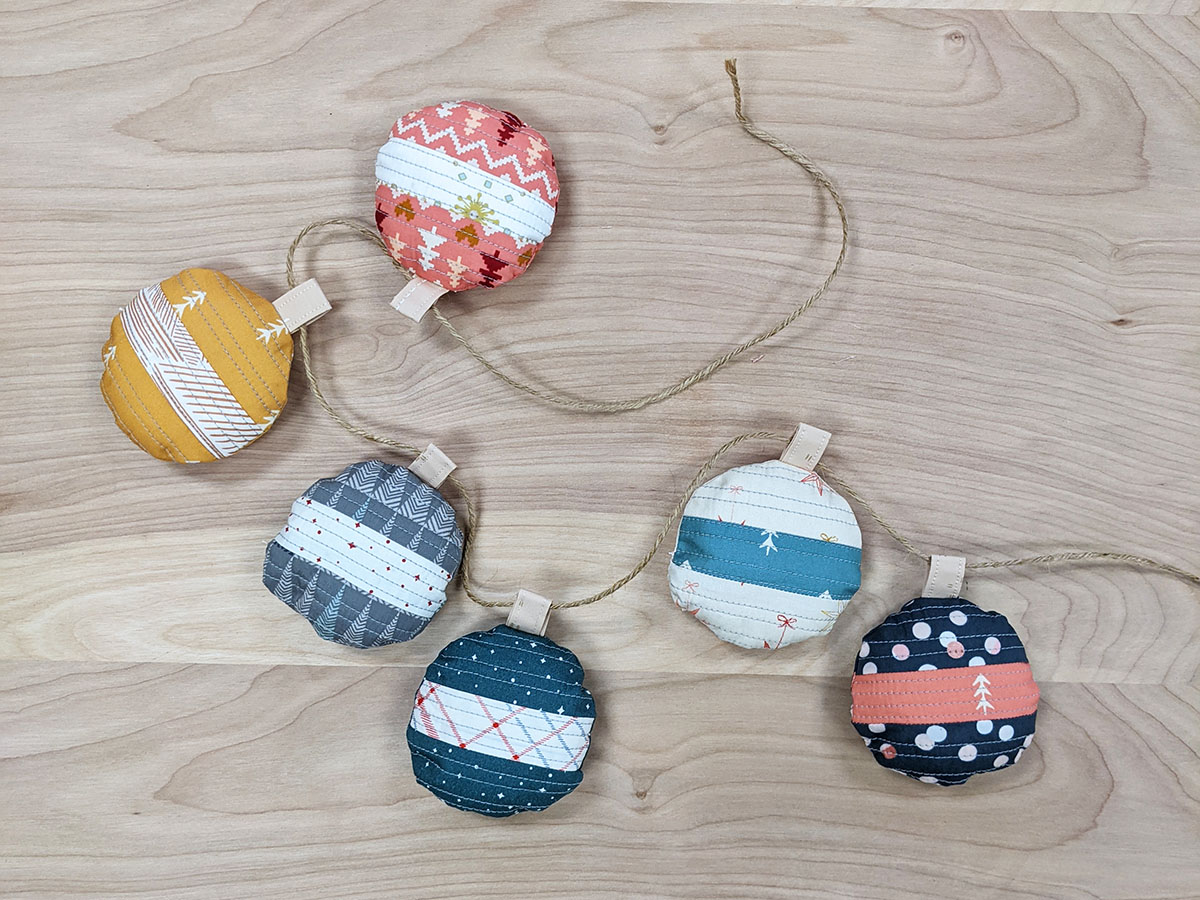
Enjoy decorating your house this Holiday!!

Used Products

What you might also like


One comment on “How to Make a Christmas Garland”
Leave a Reply
You must be logged in to post a comment.

This garland is so cute. I’m definitely going to make some for 2023.