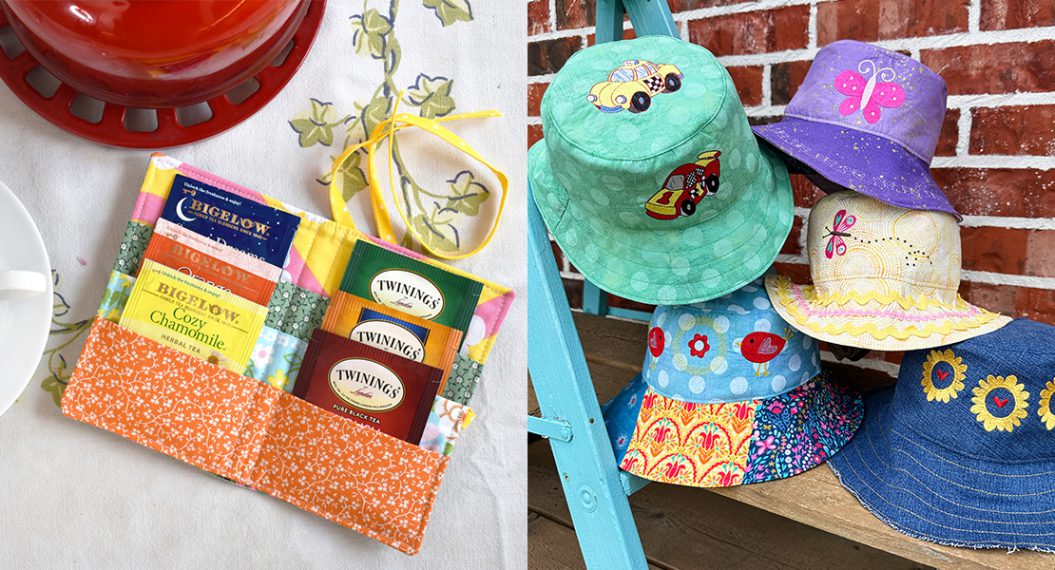
How to Make a Tea Wallet
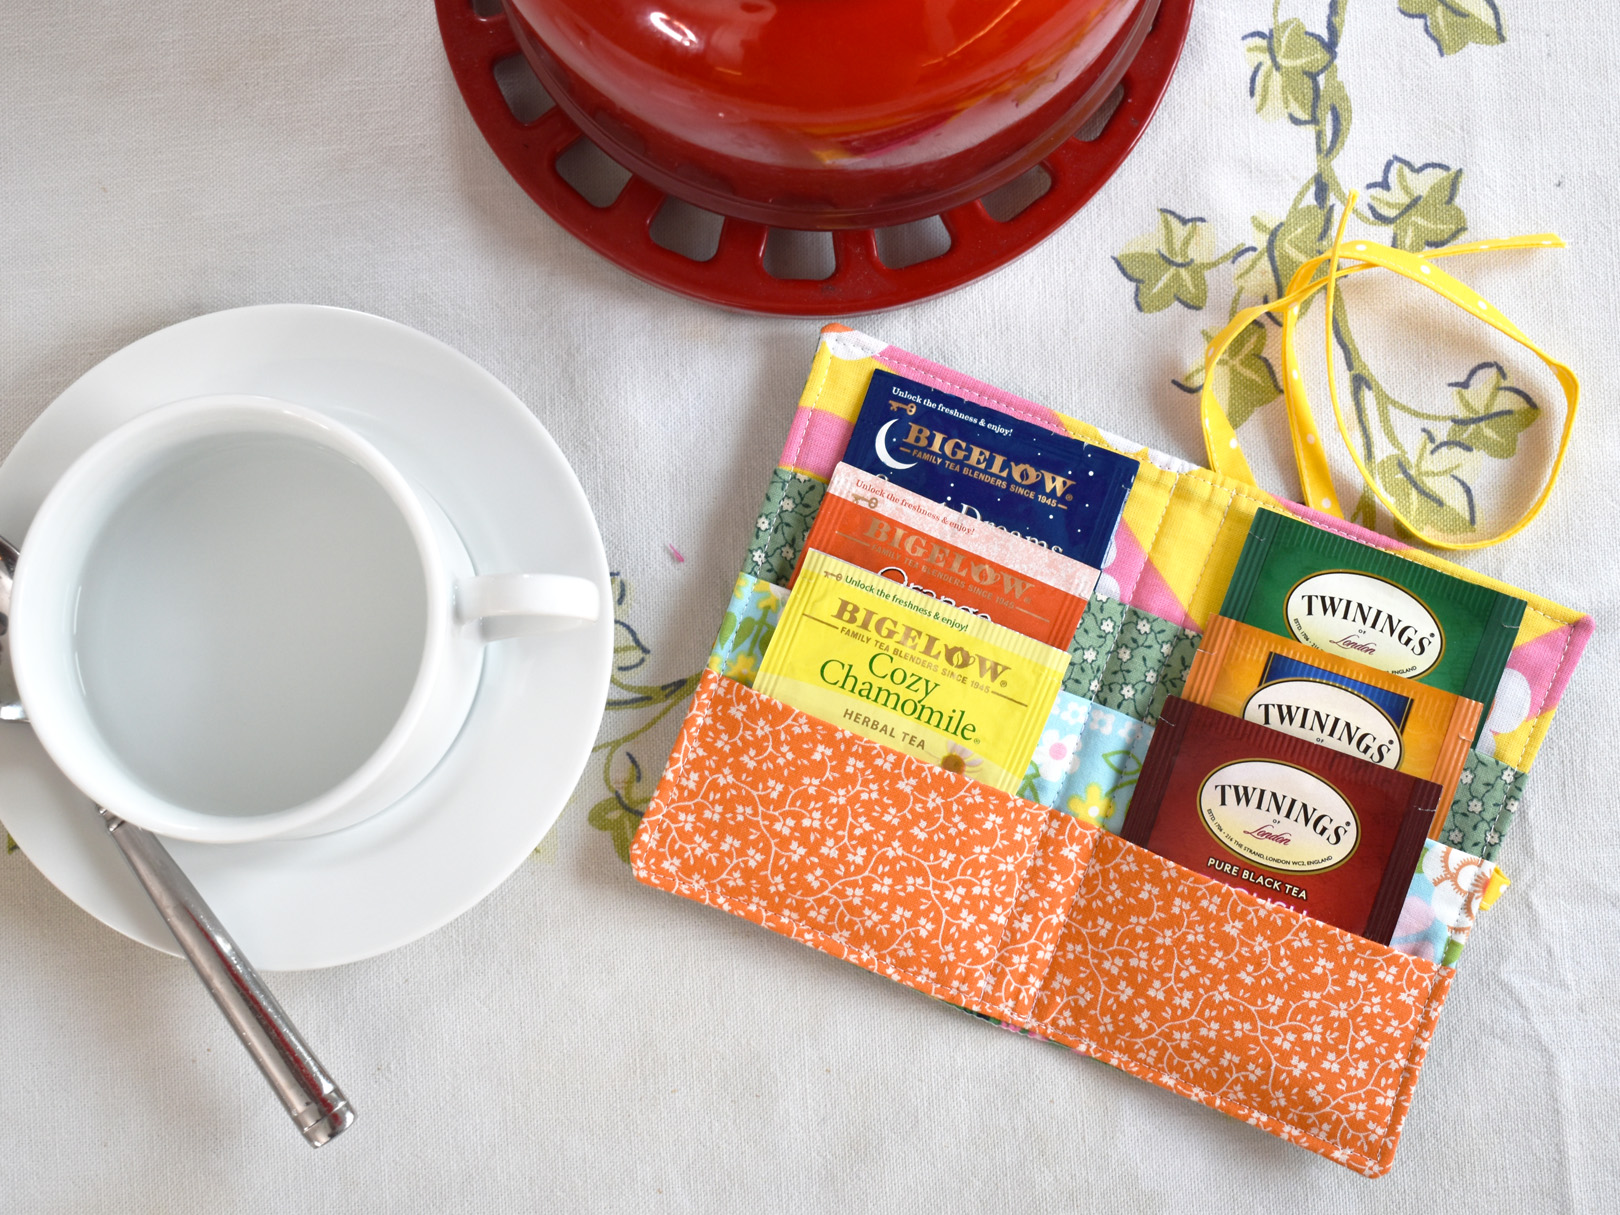
Learn to make a little tea wallet with scraps of fabric to go anywhere with a selection of your favorite teas! Not only is the tea wallet a great project for using up small scraps from your stash, but it also makes the perfect gift for anyone who loves tea (Mother’s Day, teacher appreciation, International Tea Day, or hostess gift).

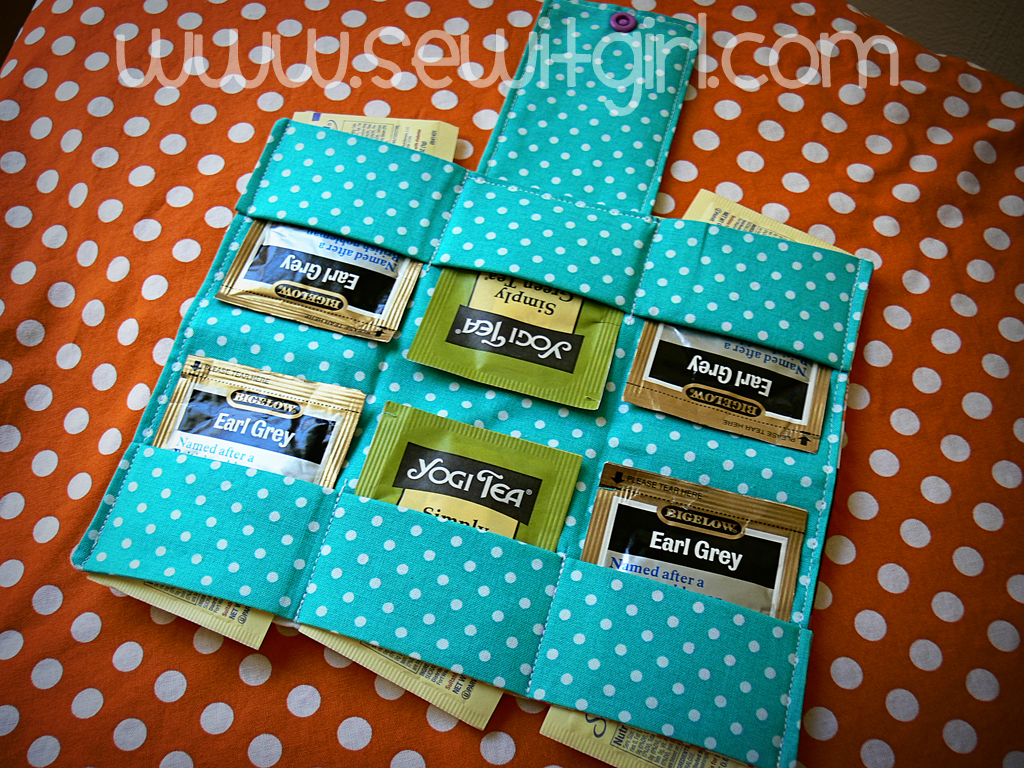
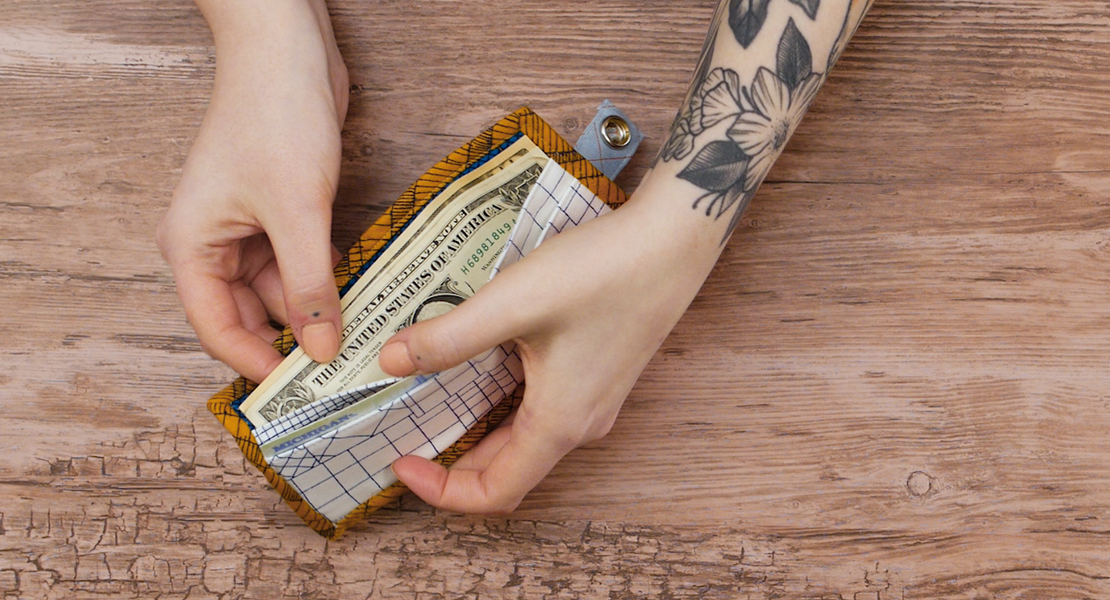
The Tea Wallet has 6 pockets perfectly sized to hold wrapped tea bags and folds up securely with a little bow to hold all the tea in place. When closed the Tea Wallet measures 3 1/2″ wide by 5 1/2″ tall by about 1/2″ thick. Grab some fabric scraps and basic sewing supplies to sew your own Tea Wallet with me!
Materials to Make a Tea Wallet
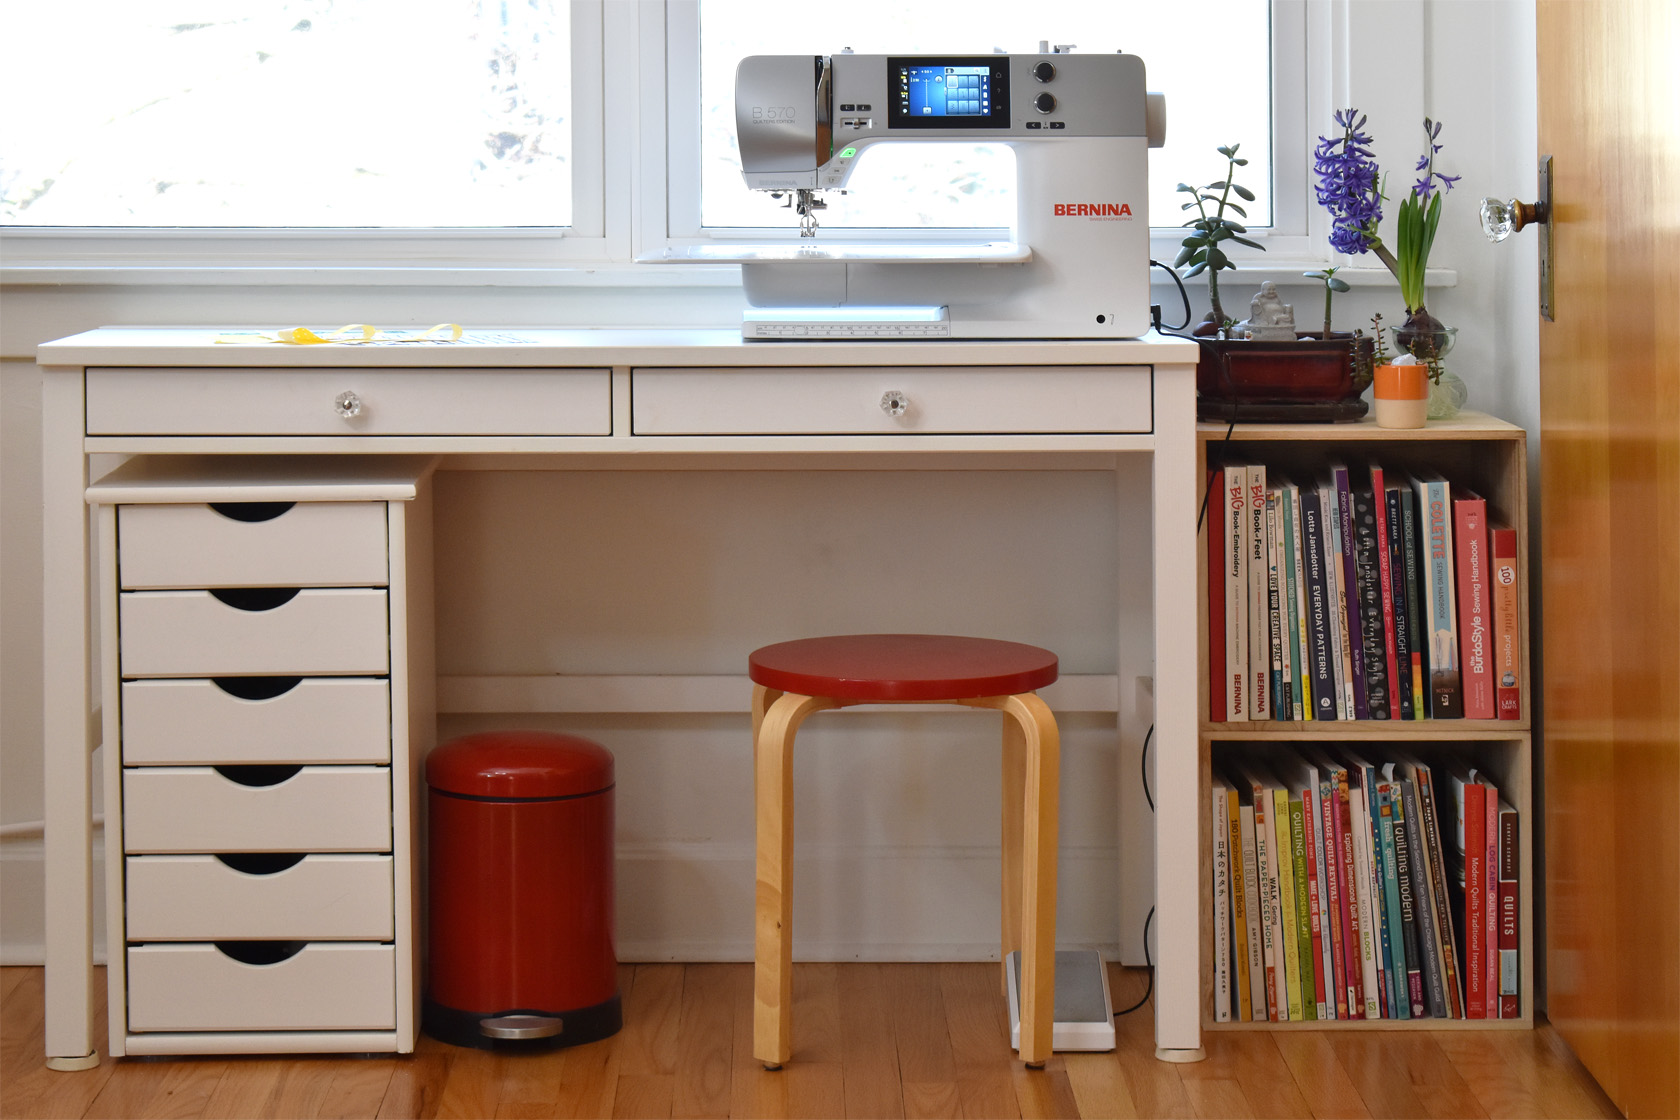
- Sewing Machine (I use a BERNINA 570 QE)
- Quarter-inch sewing foot (I use the Patchwork Foot #97D with Dual Feed)
- Straight stitch needle plate
- Sewing pins
- Coordinating all-purpose 100% polyester 40 wt thread
- Fabric scissors and thread snips
- Rotary cutter/ruler/cutting mat
- Iron/pressing surface
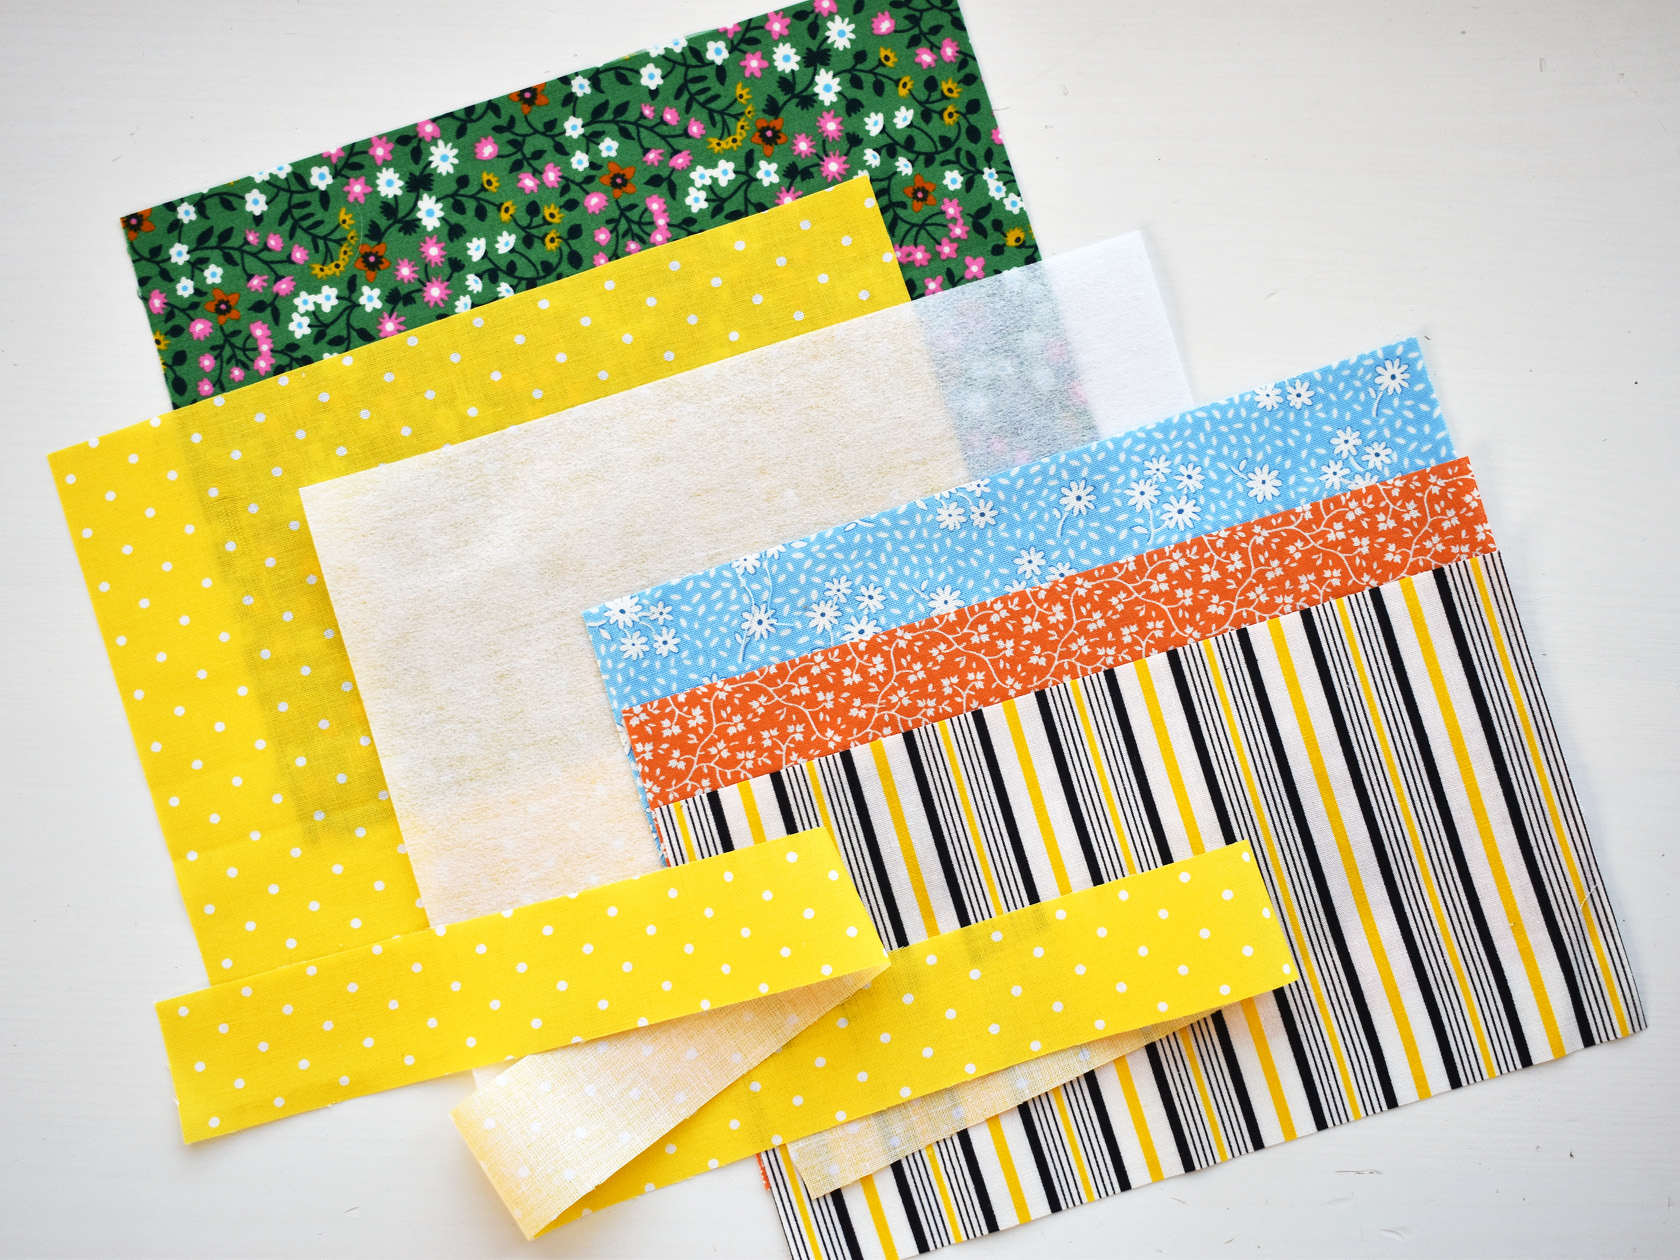
- Cut scraps of fabric (or ¼ yard cuts or fat quarters) to the following sizes:
- One 8″ x 6″ piece of fabric for front of wallet
- One 8″ x 6″ piece of fabric for back of wallet
- Three 8″ x 4 ½” pieces of fabric for wallet pockets
- One 24″ x 1 ½” piece of fabric for wallet tie
- One 8″ x 6″ piece of Pellon 808 Craft Fuse one-sided fusible craft interfacing
Begin by cutting all the fabrics and the interfacing to size according to the measurements in the Materials section above.
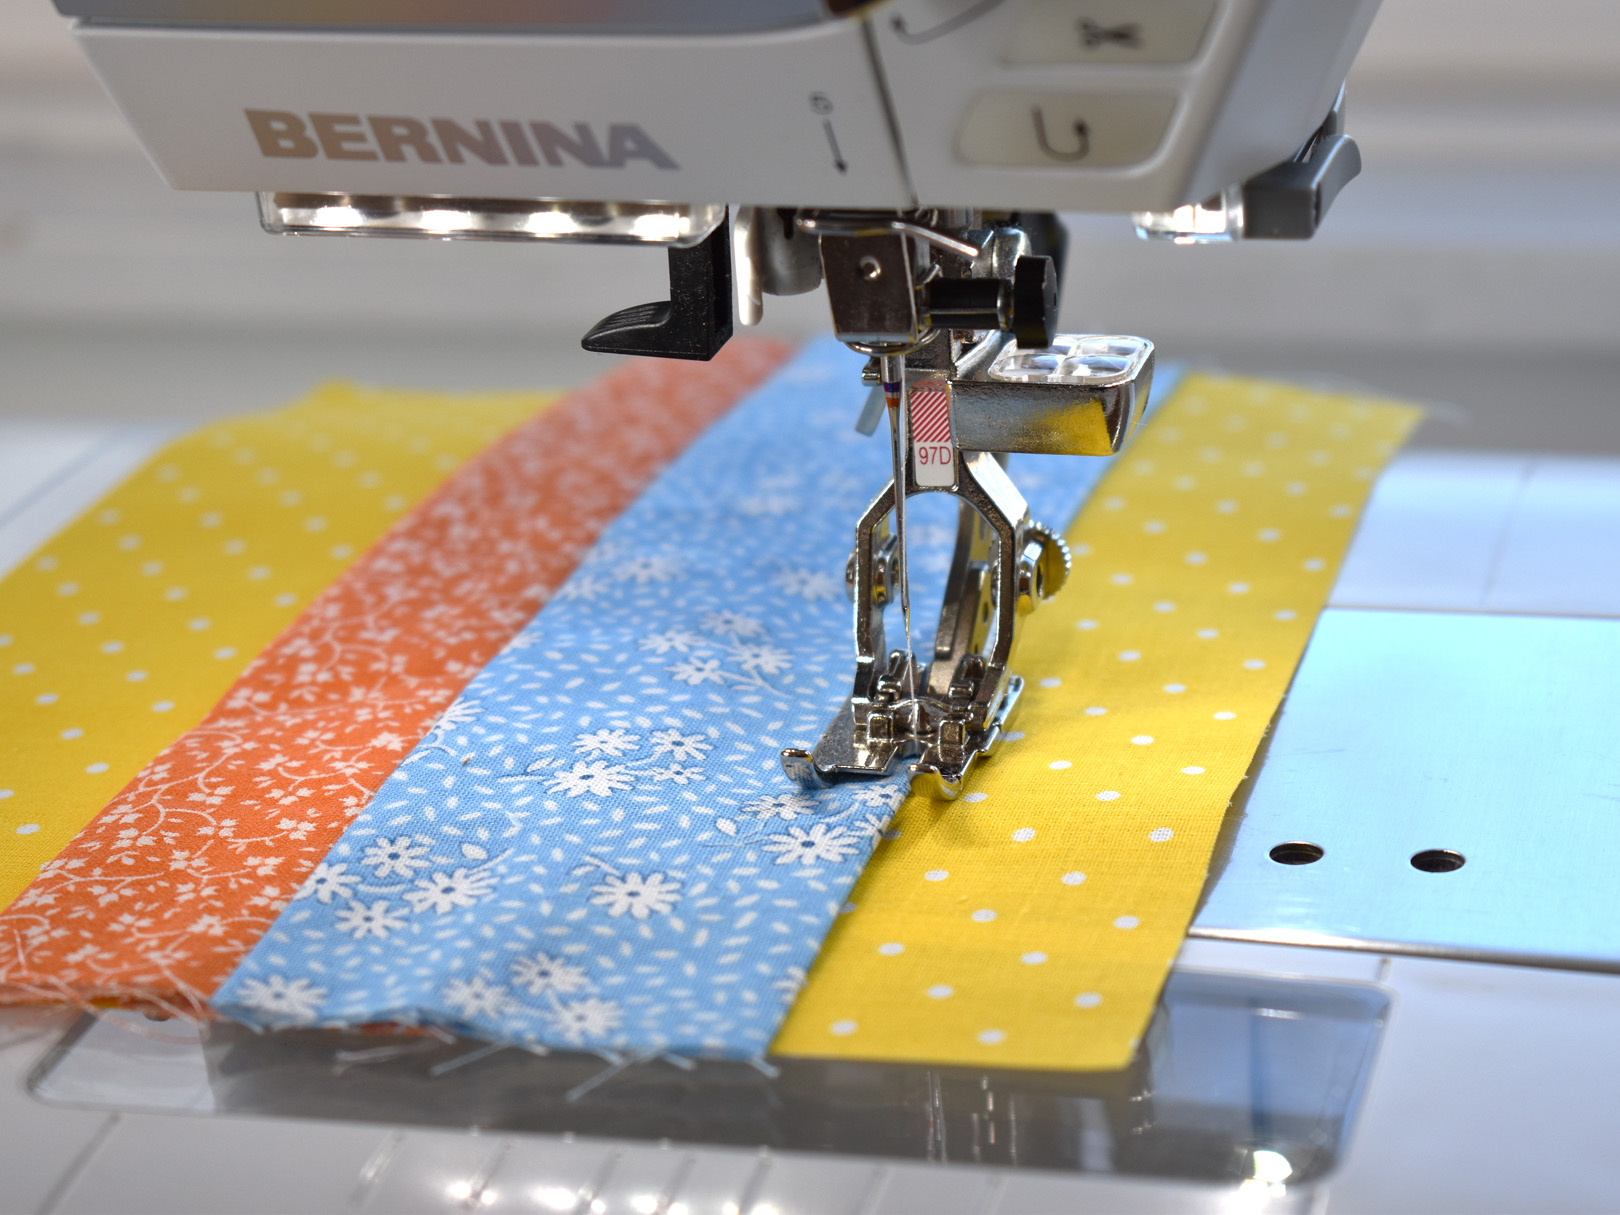
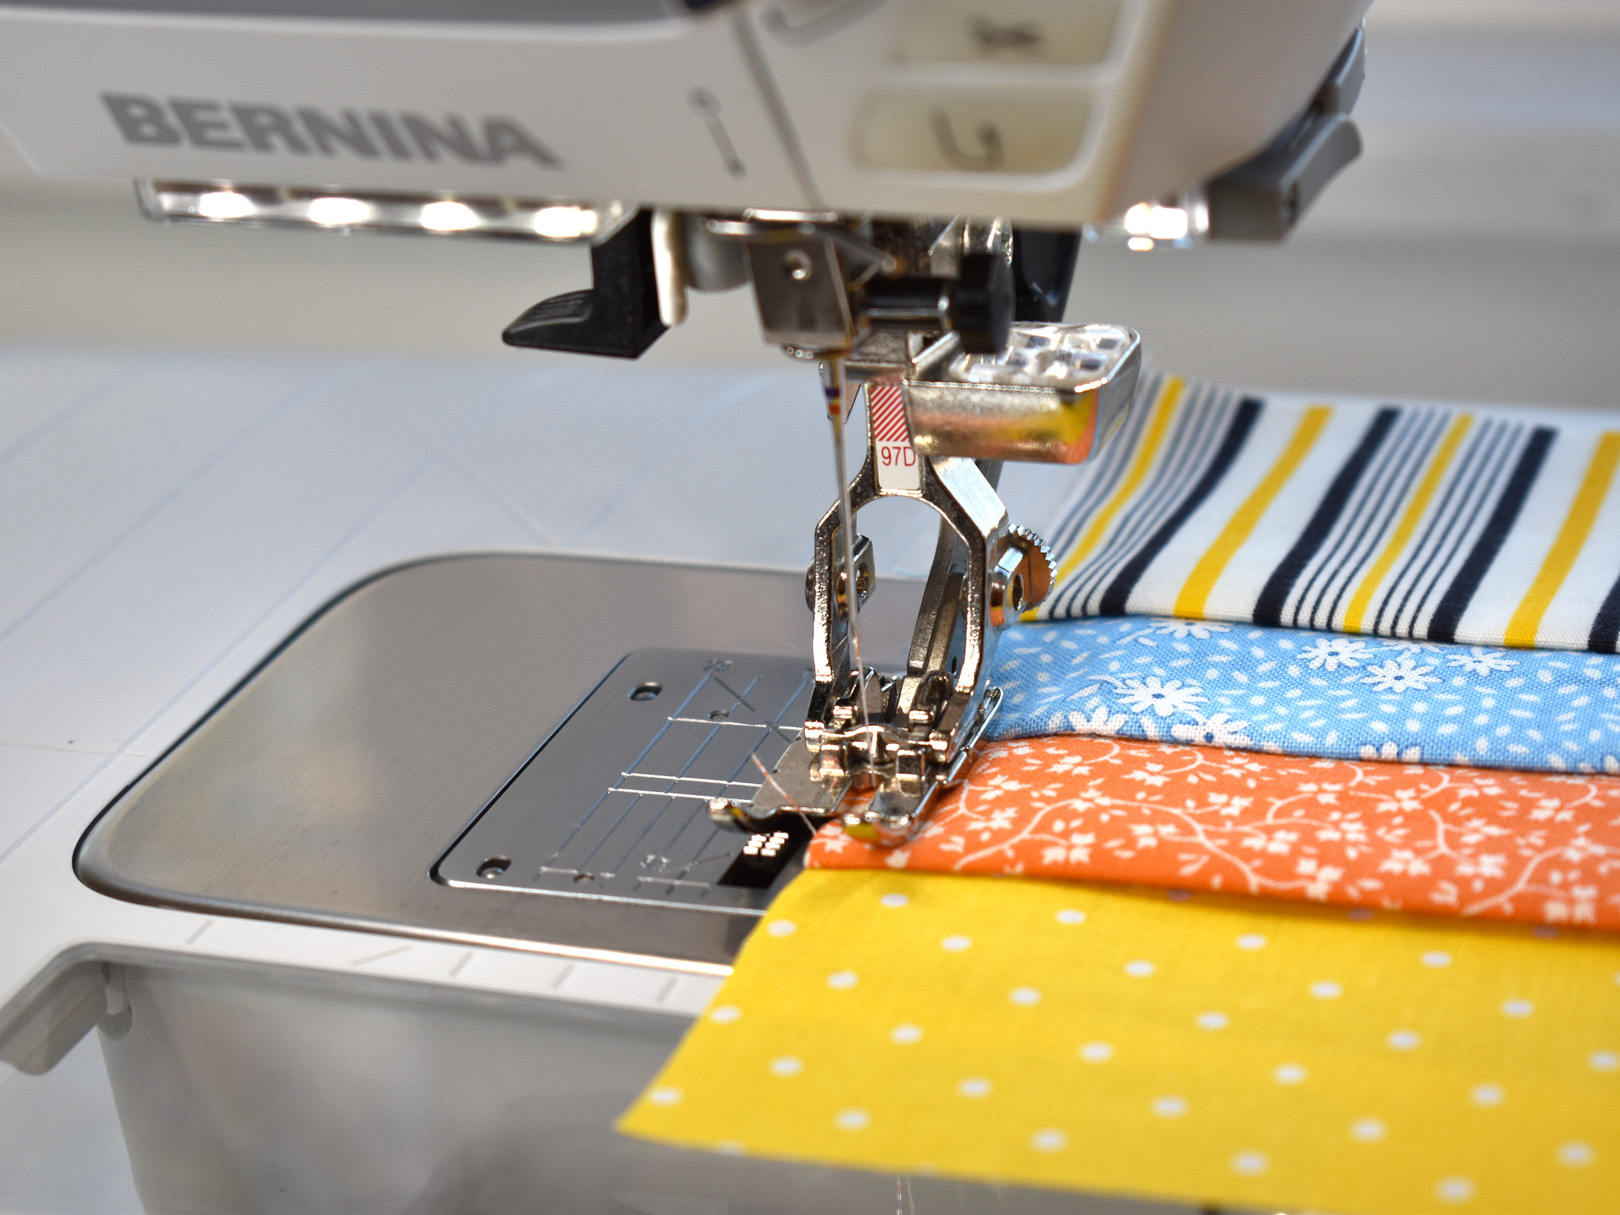
Set up the sewing machine for optimal straight stitching. Use a straight stitch needle plate and a patchwork foot (I use Patchwork Foot #97D with Dual Feed), and select a standard straight stitch about 2.5 mm in length.
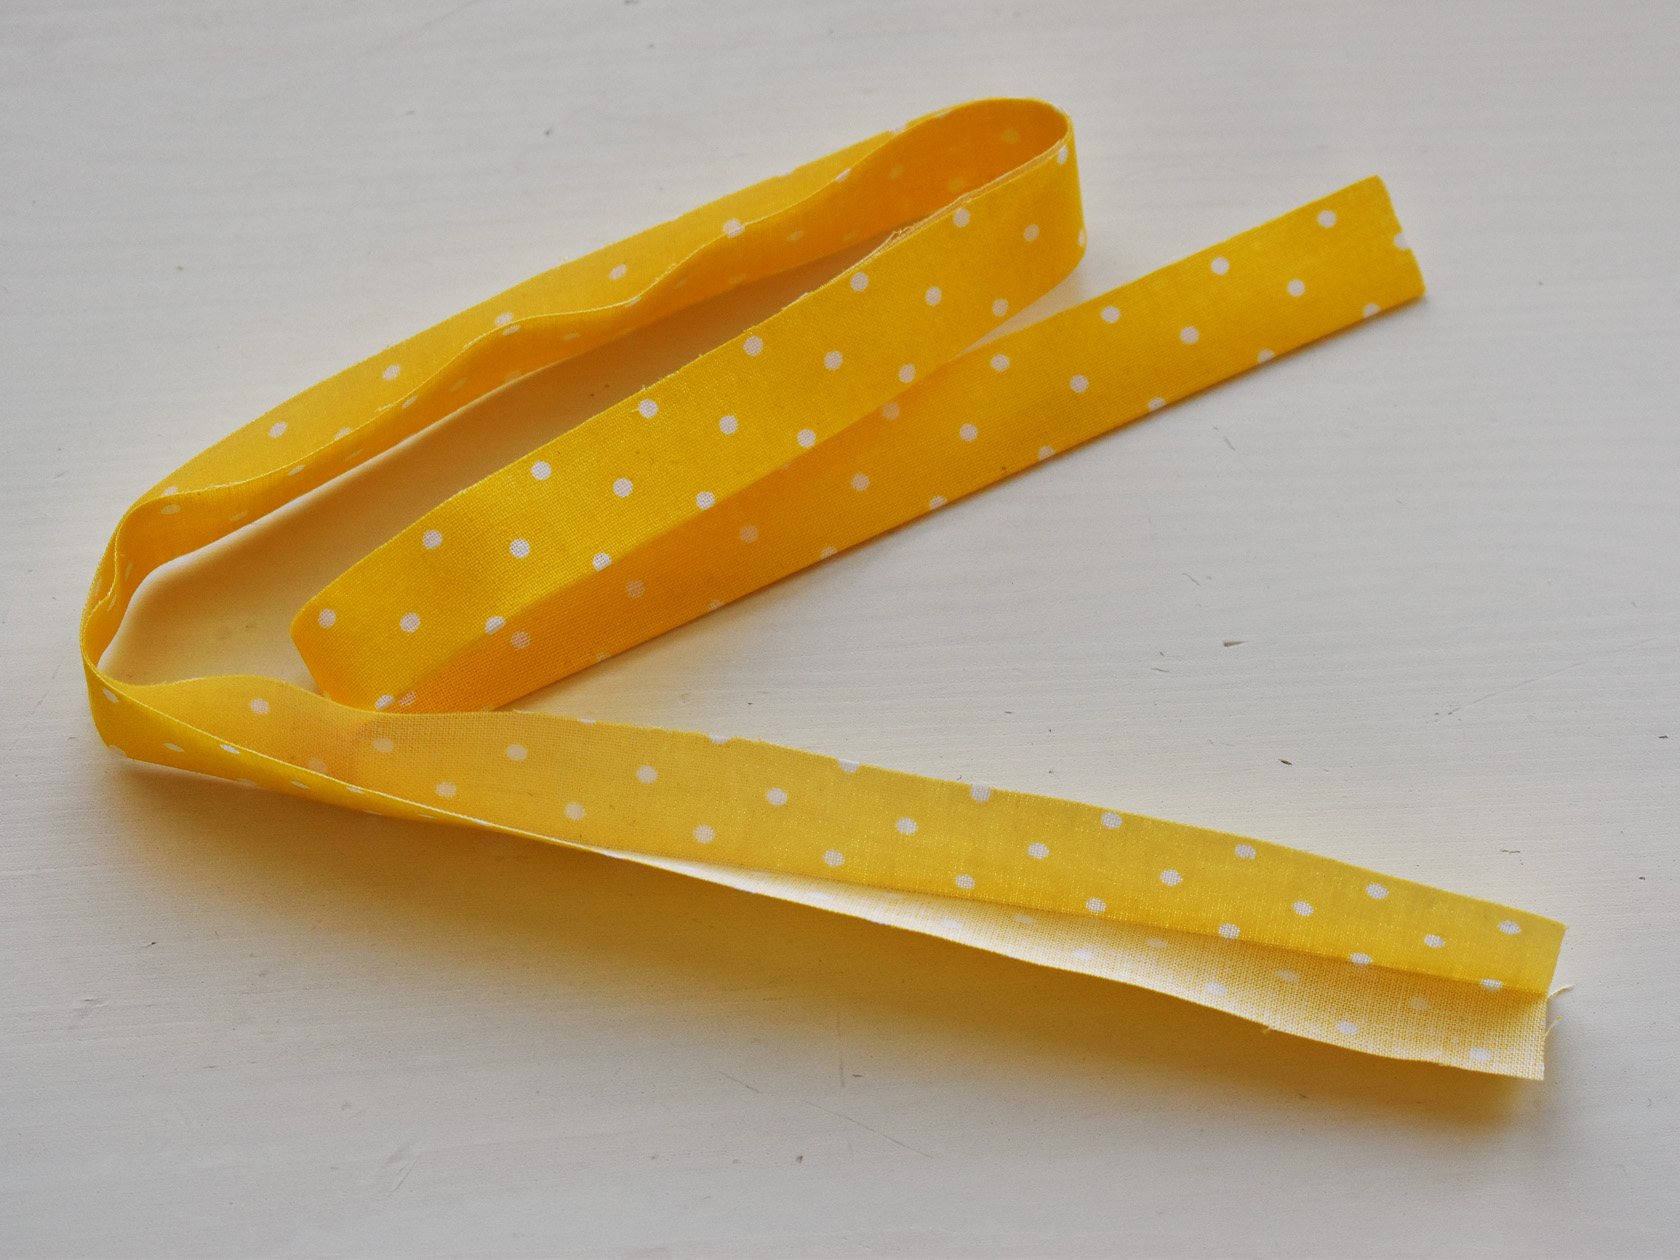
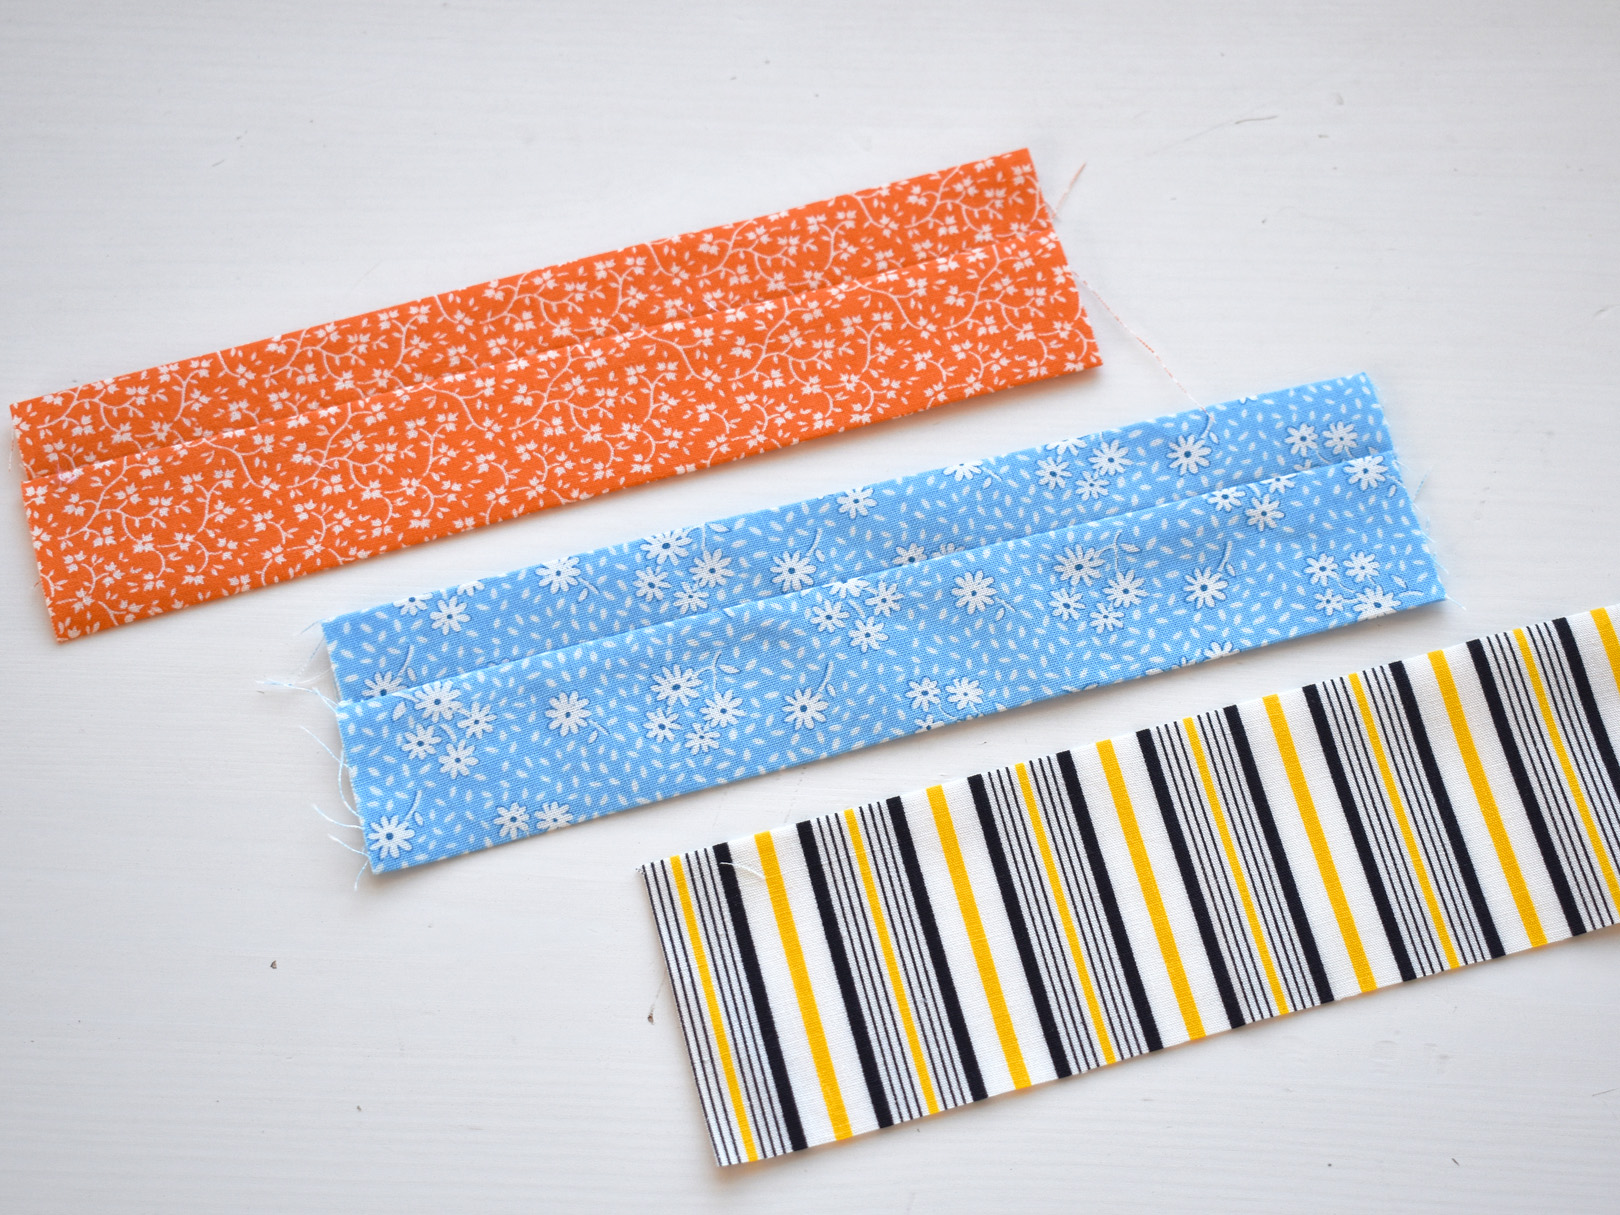
Begin by taking the long 24″ x 1 1/2″ strip and pressing it in half the long way, wrong sides together, to create a center crease.
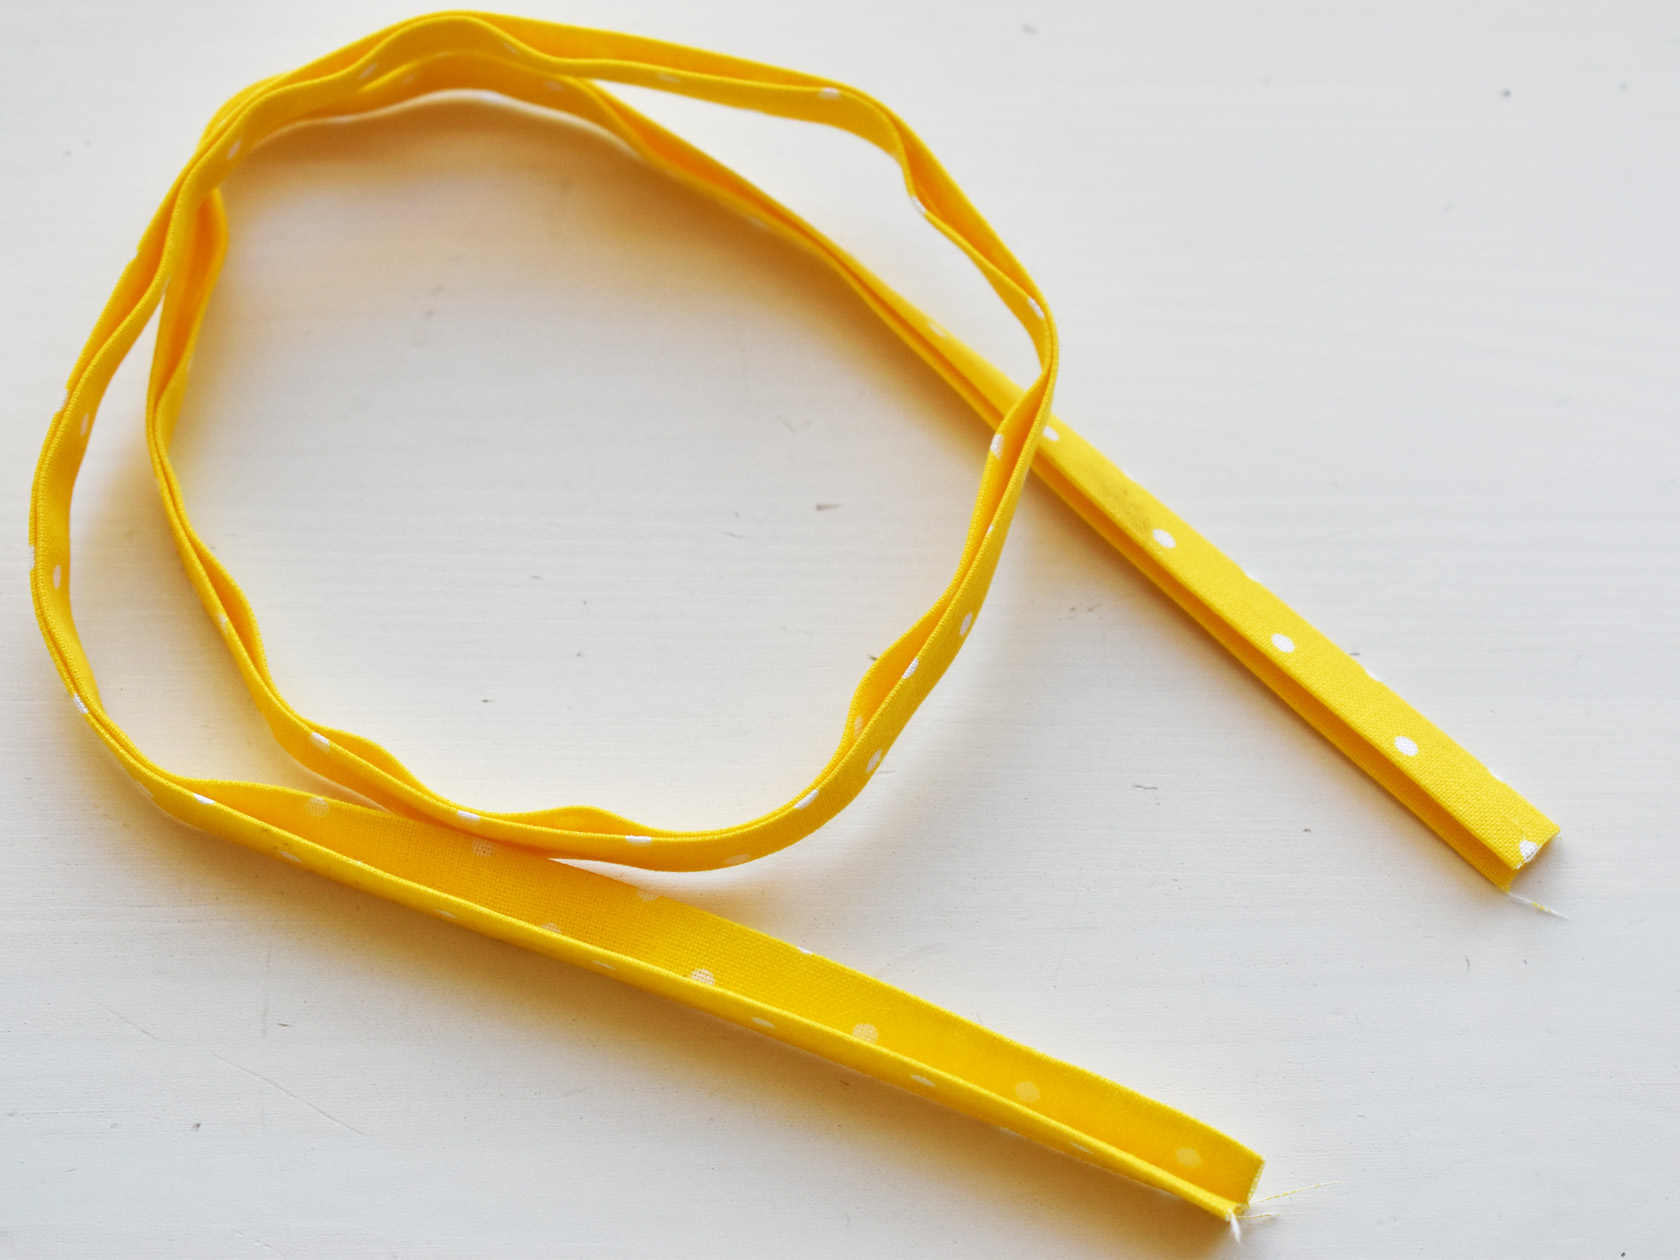
Next, fold each long, raw edge to the center crease and press the fold in place. Then fold the entire strip over, raw edges folded to the inside crease, and steam press the strip nice and flat.

Stitch the folded edge closed all the way down the strip. I use the markings on Patchwork Foot #97D to guide the strip through the foot at 1/8″ away from the needle.
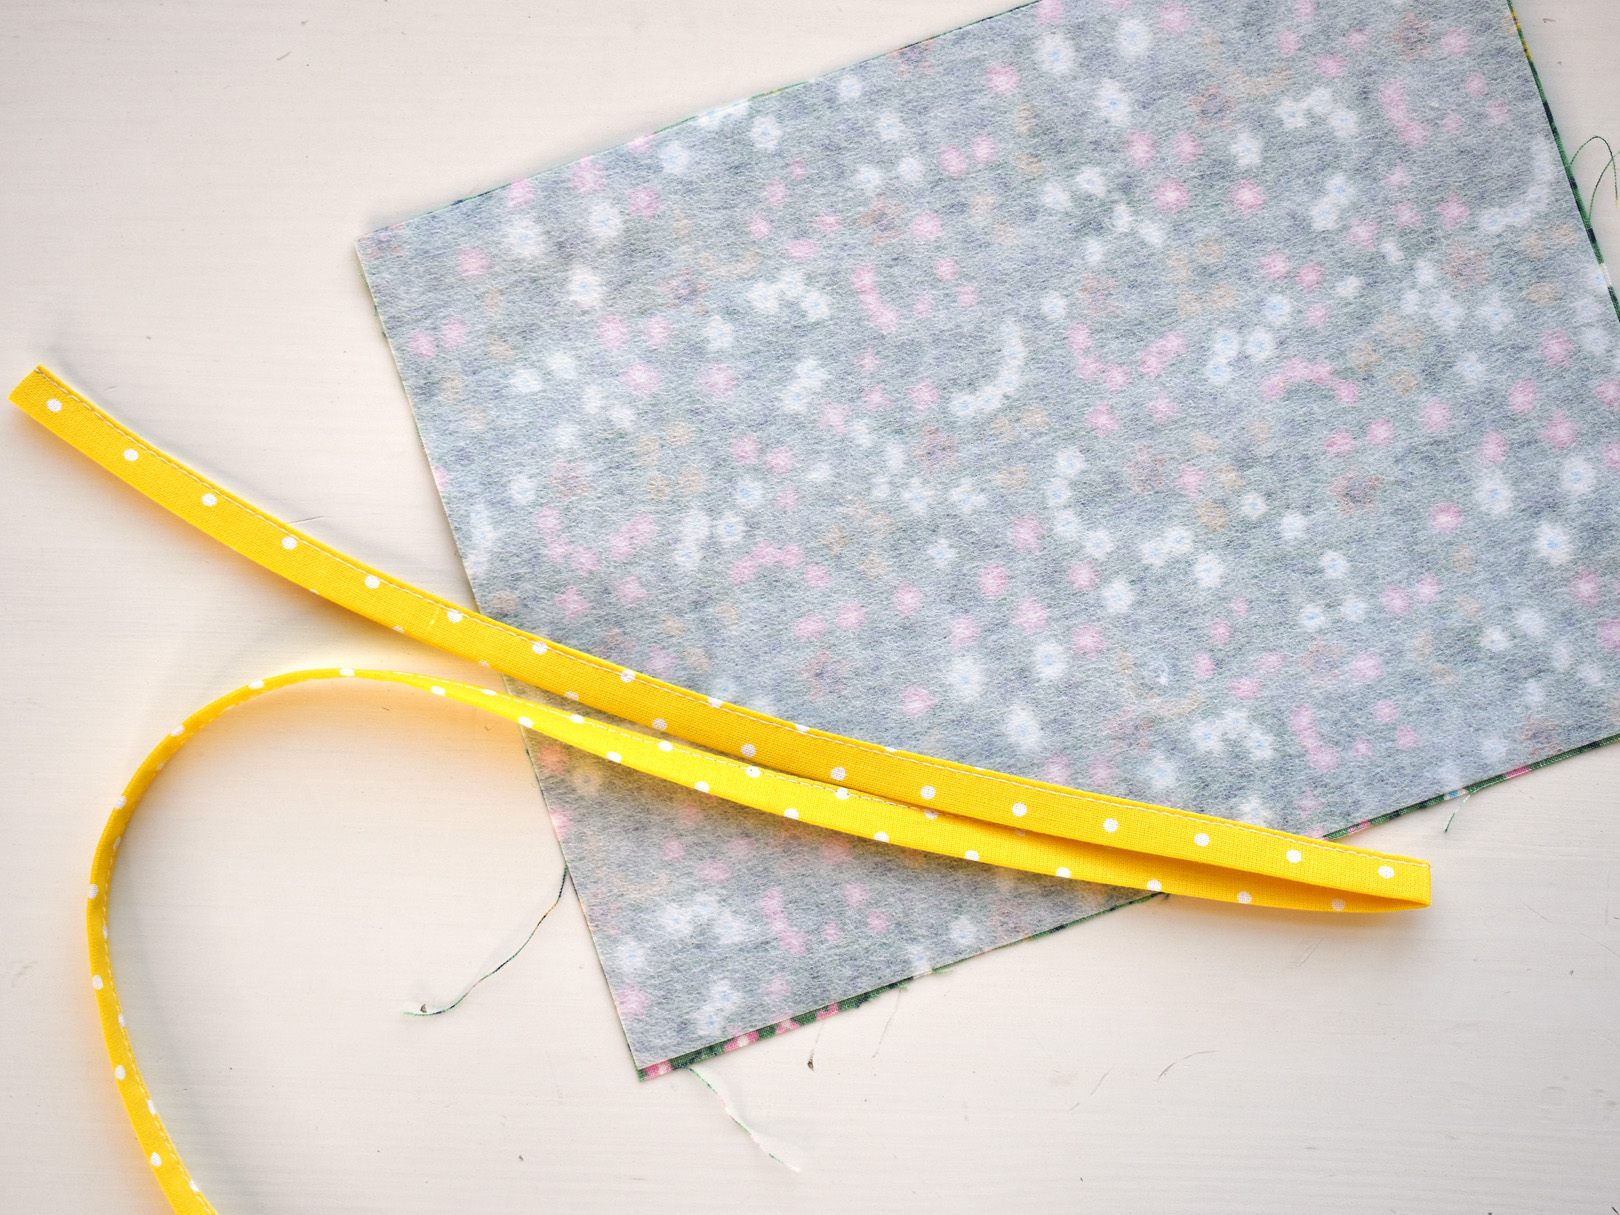
At the ironing board, fuse the craft interfacing to the back of the front wallet fabric. Then press a fold in the long strip 10″ over from one end. The strip will now have one shorter end and one longer end.
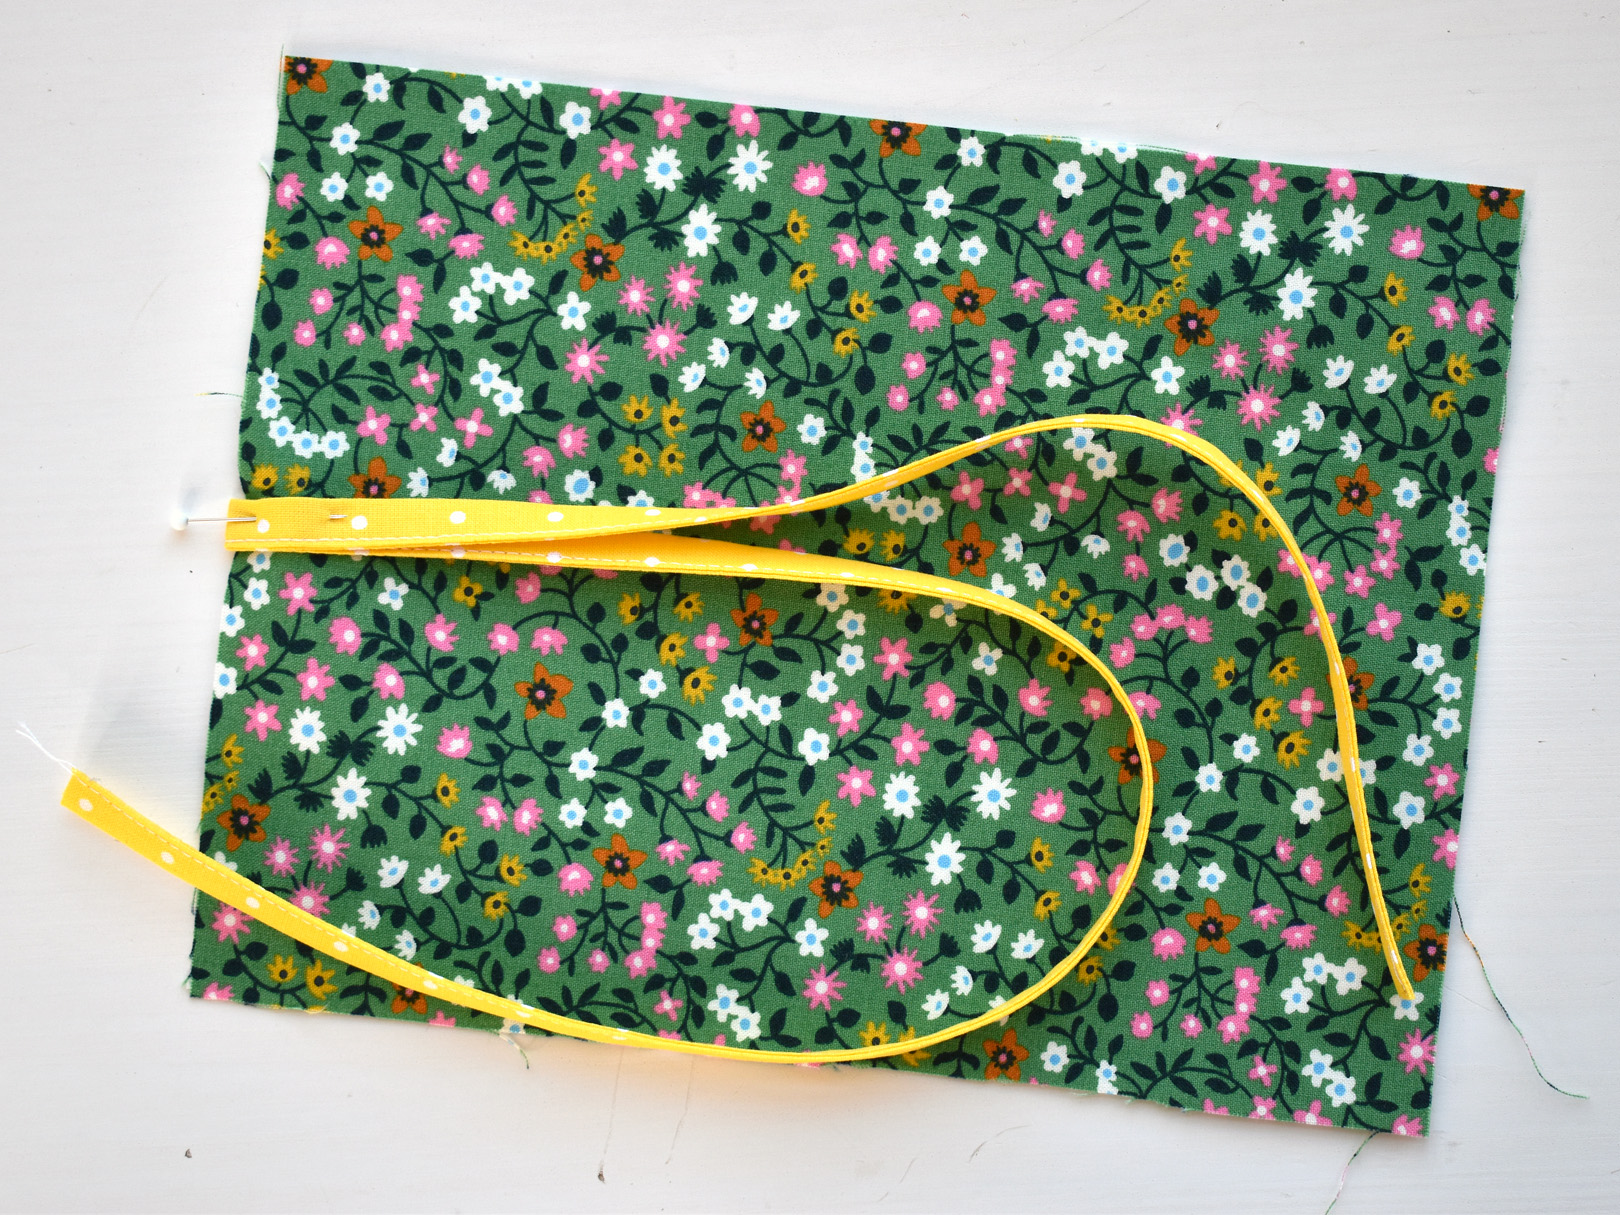
Flip the outer wallet piece, now fused with the craft interfacing, right side up on your work surface. If the print is directional (has a definite up or down design) make sure it is right side up. Pin the strip to the center of the left side, oriented so the longer piece of the strip is down and the shorter end is on top. Pin in place and set the top aside while you create the pockets for the inside of the wallet.
The three 8″ x 4 1/2″ pieces of fabric will create the inside pockets. The top and middle pockets will have a seam, the bottom pocket will not. Decide now on the order your pockets will be stacked, and put the bottom pocket aside.
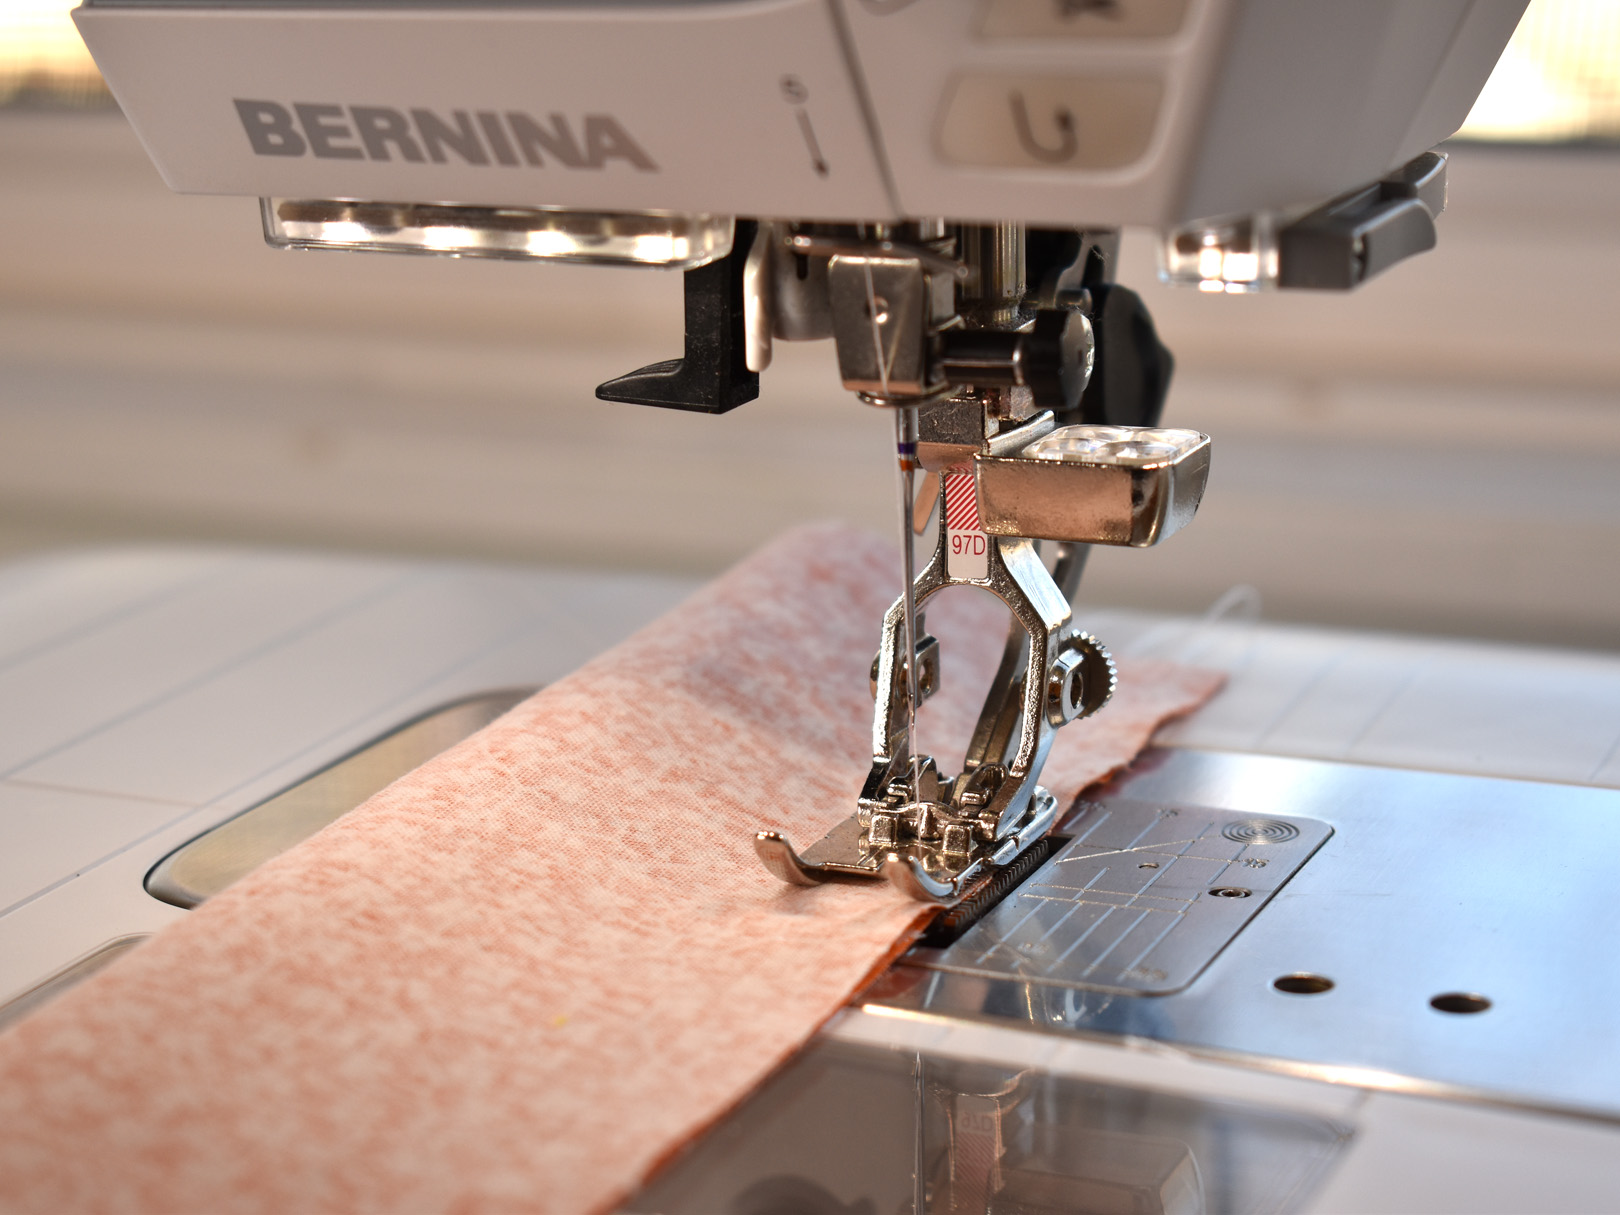
Grab the top and middle pockets, and fold each rectangle of fabric over to match the long edges, right sides together. Stitch a 1/4″ seam down the long edge, using the Patchwork Foot to help guide you.
Turn the top and middle pockets right side out and press flat with the seam side about 1/2″ from the top edge (the seam will be on the inside of the pocket and will not show). Fold the bottom pocket in half lengthwise, wrong sides together, and press flat.
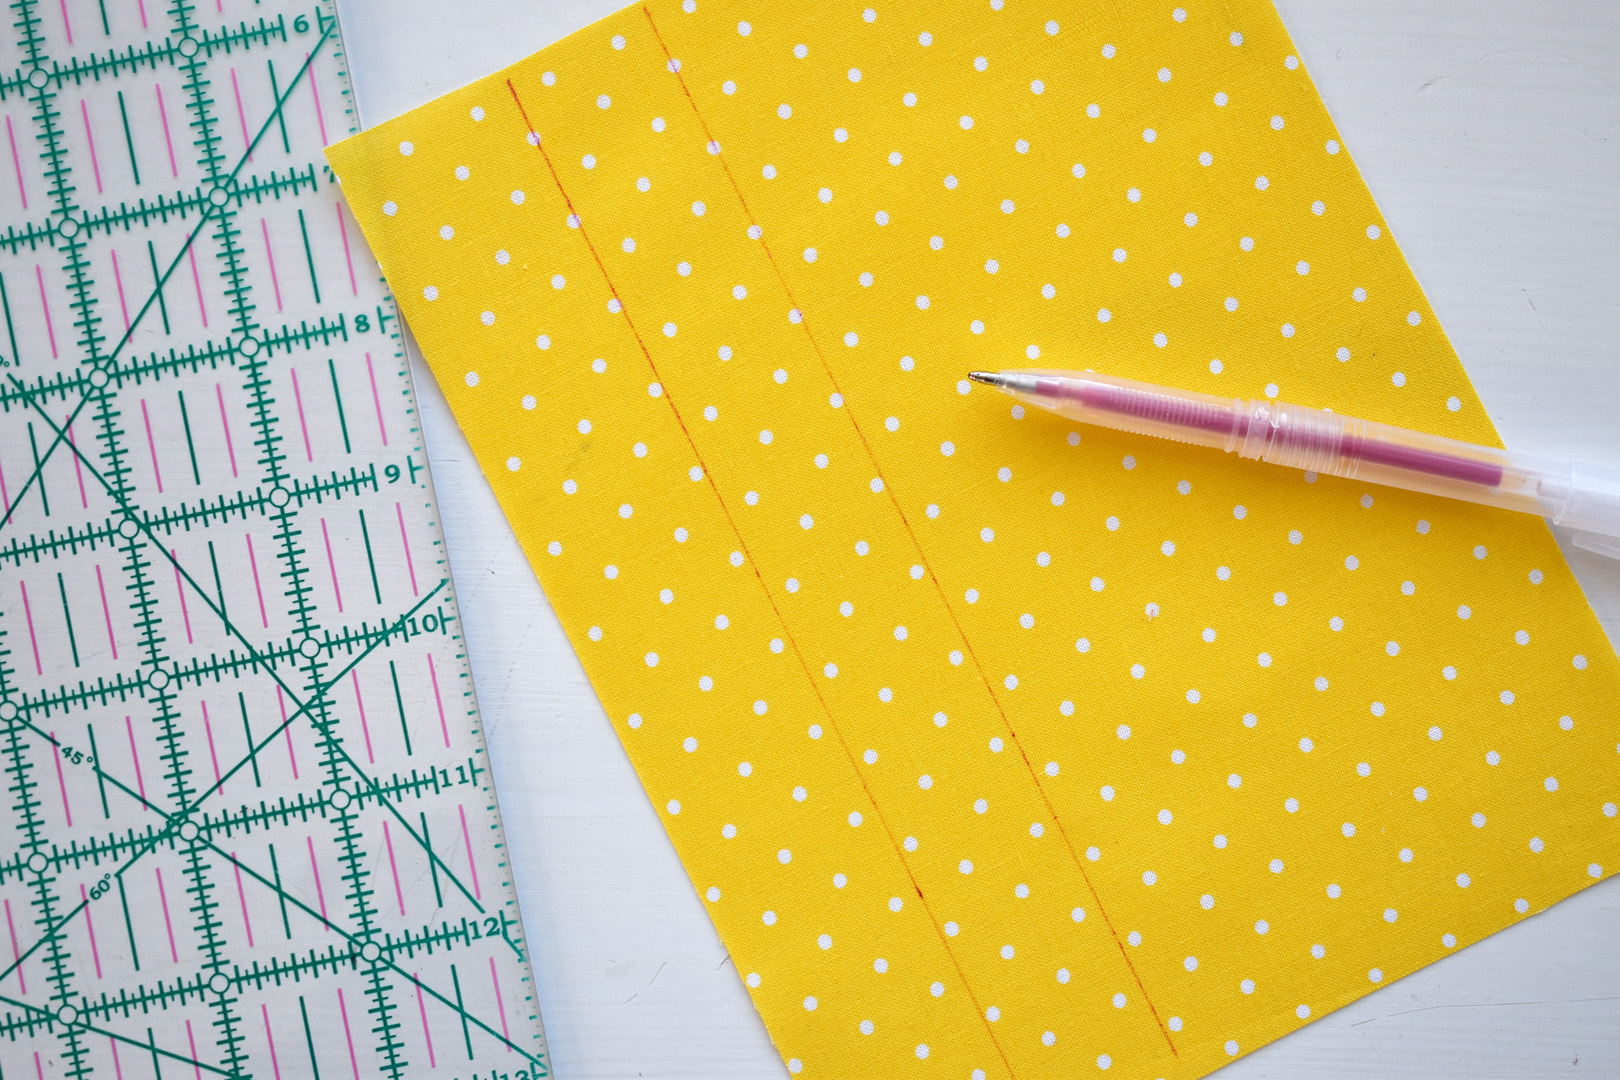
With a clear ruler and disappearing fabric pen or pencil, draw two marks on the back wallet piece of fabric; one mark 1 1/4″ from the bottom edge, and one mark 2 1/4″ from the bottom edge.
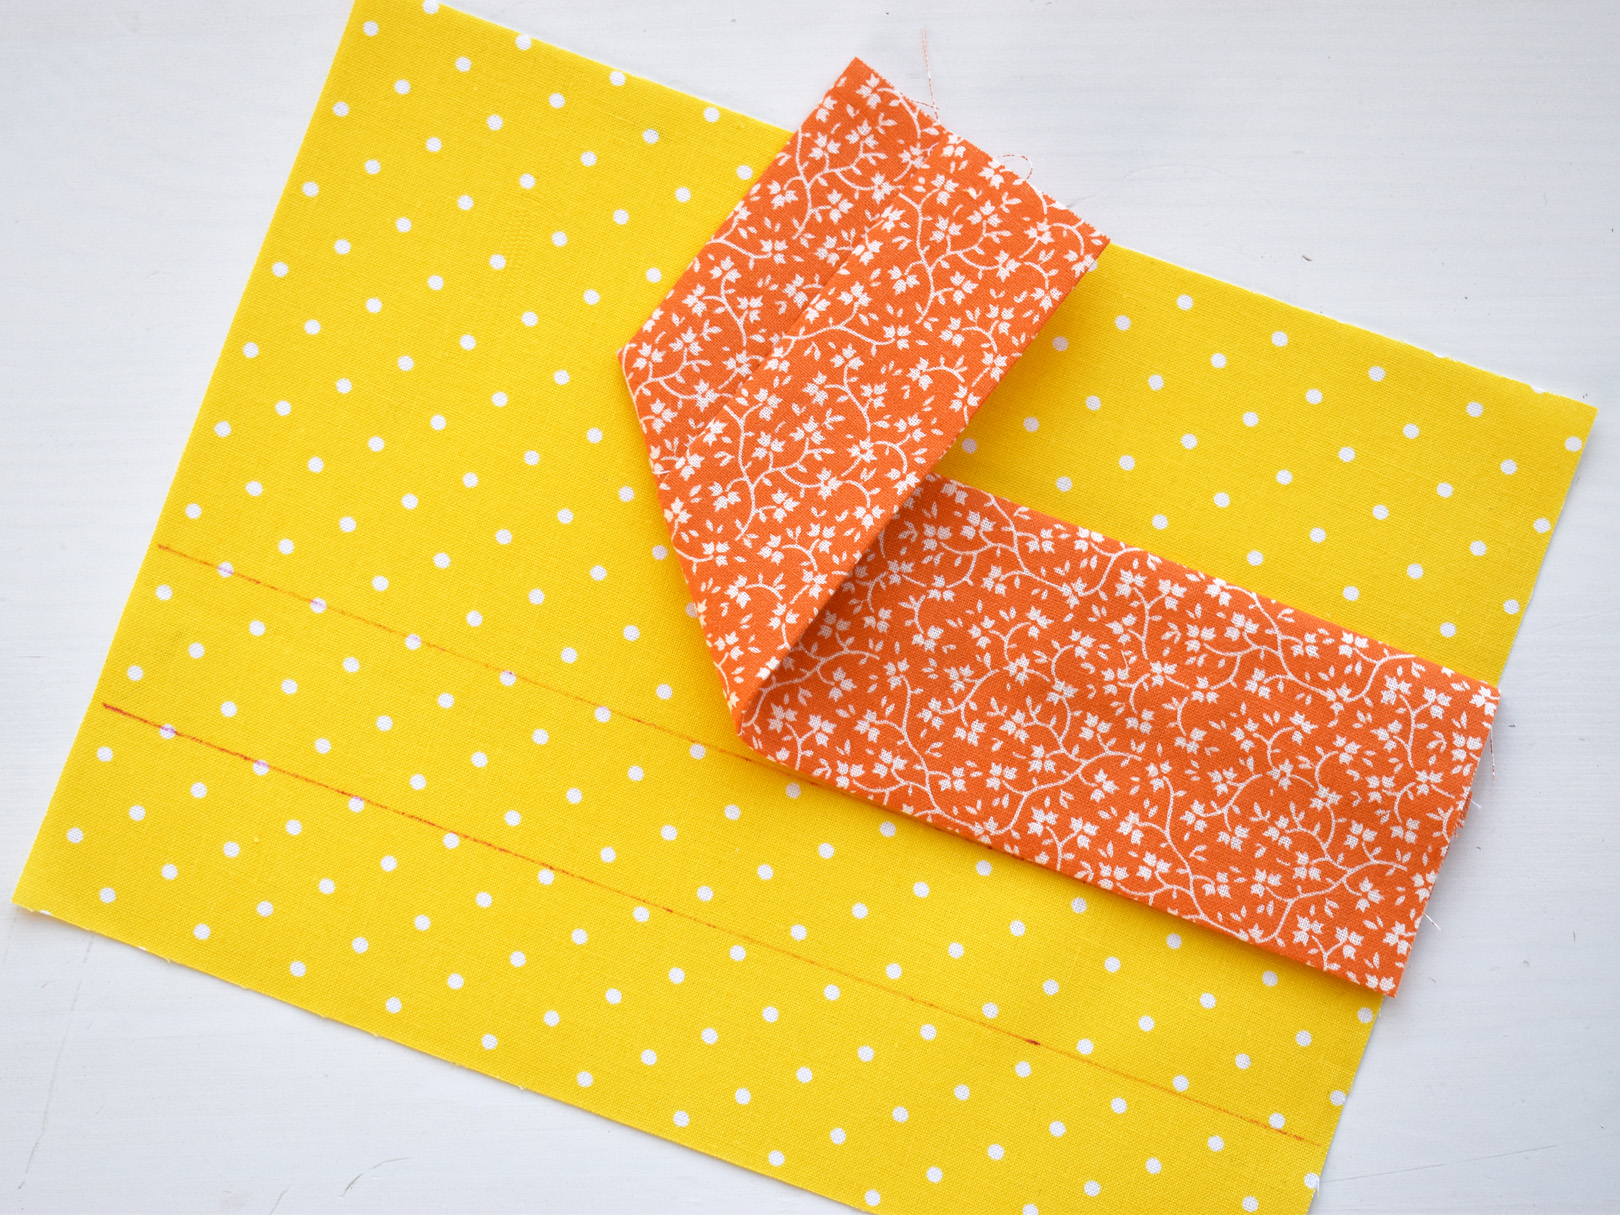
Place the bottom edge of the top pocket along the top line, seam side down. Pin in place if needed.
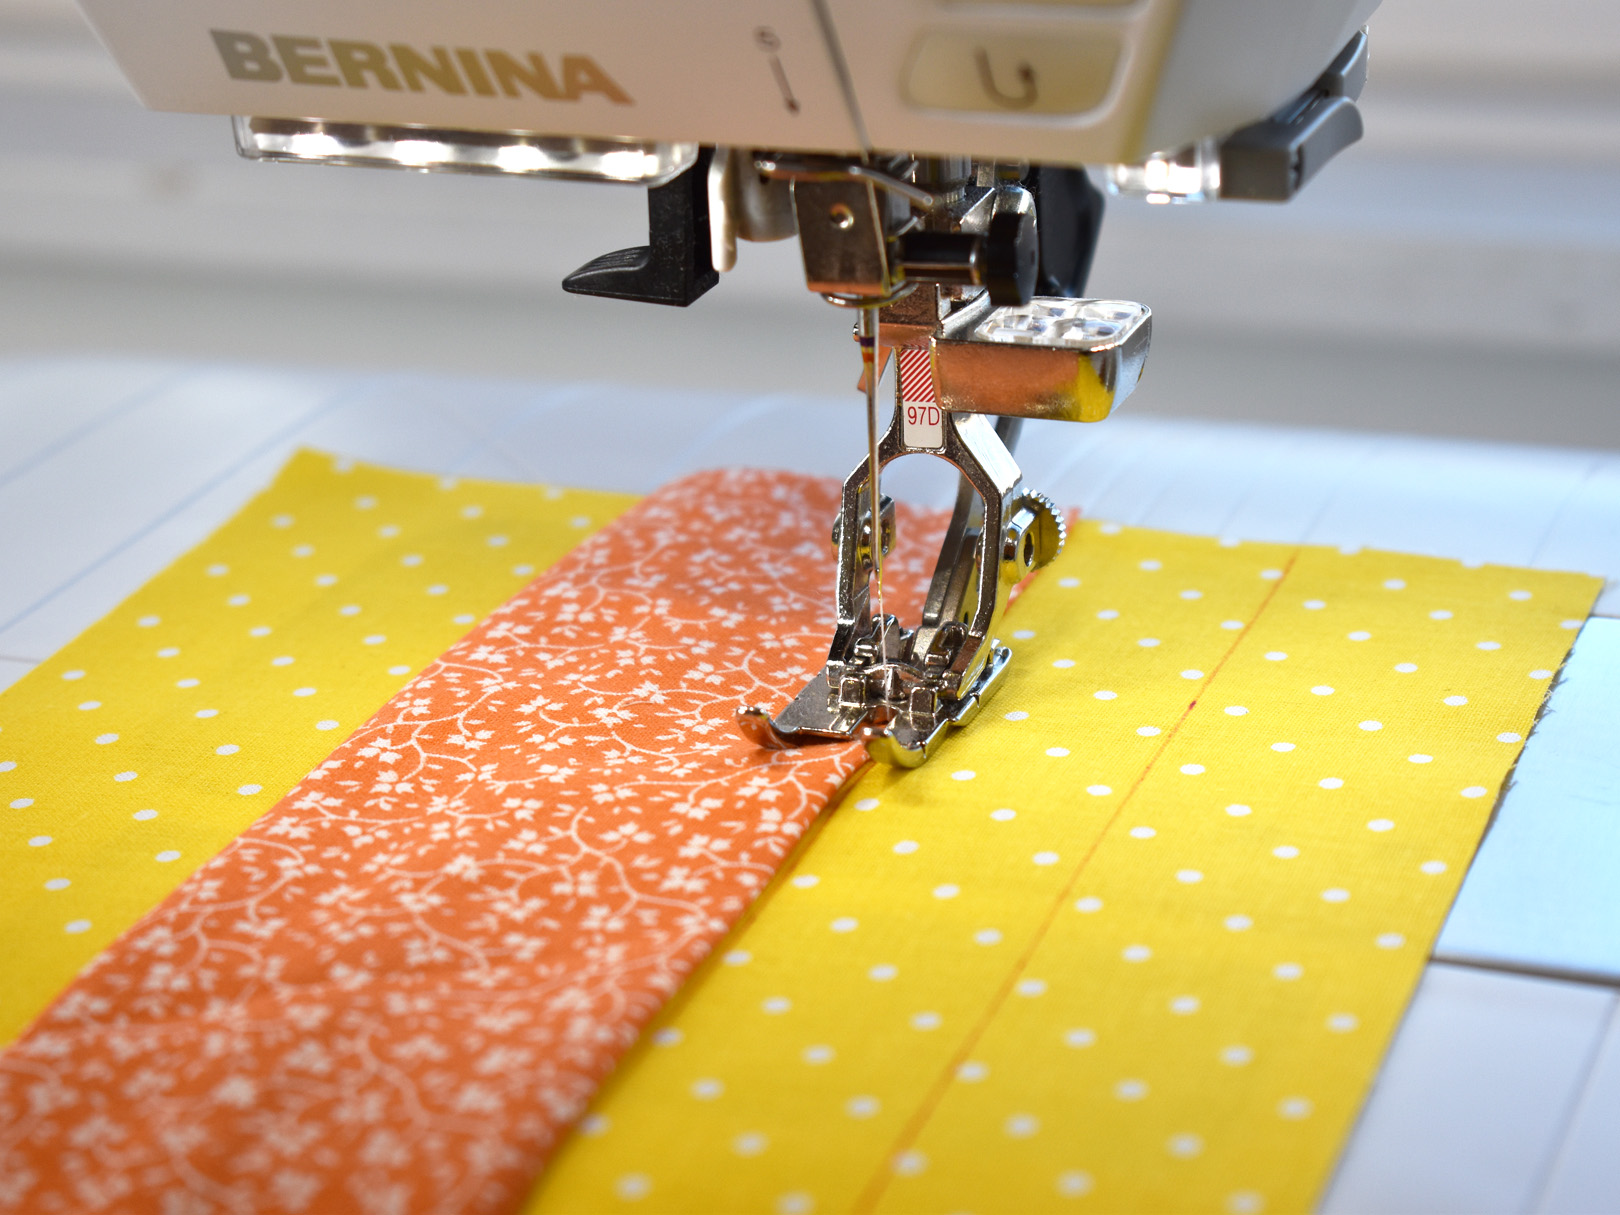
Stitch the bottom edge of the pocket about 1/8″ from the edge using the markings on the Patchwork Foot as a guide.
Repeat the same process for the middle pocket, lining the bottom edge of the pocket even with the next line marked on the fabric.

Match the last pocket with the bottom edge of the inside wallet, folded edge of the pocket facing up, and baste-stitch across the bottom edge through all layers close to the edge.
Baste stitch the side edges of the pockets down close to the edges, sewing from the bottom up to avoid puckers.
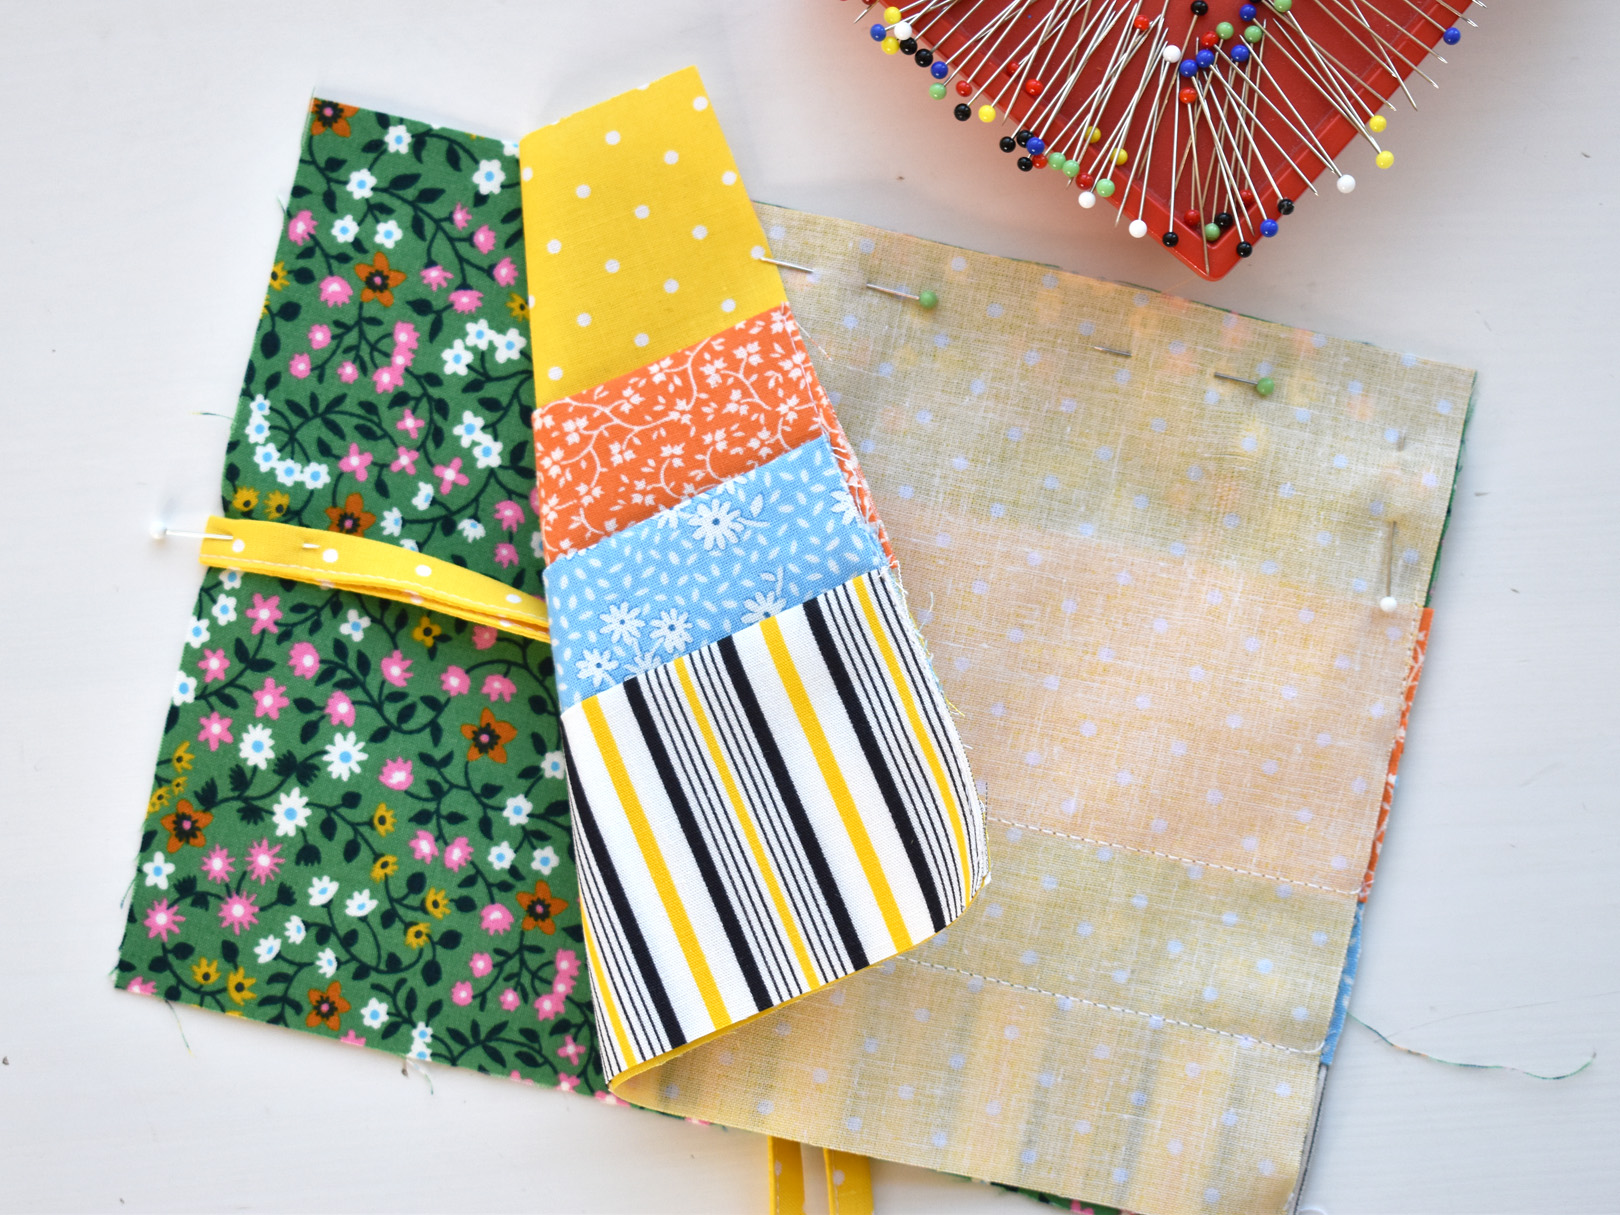
Now grab the outside wallet and place it on your workspace right side up with the pinned ties to the left. Pin the wallet back on top, pockets facing down, leaving an opening about 2 1/2″ to 3″ at the bottom.
Leave the tie ends hanging out the bottom opening so as not to accidentally sew them in the seam.
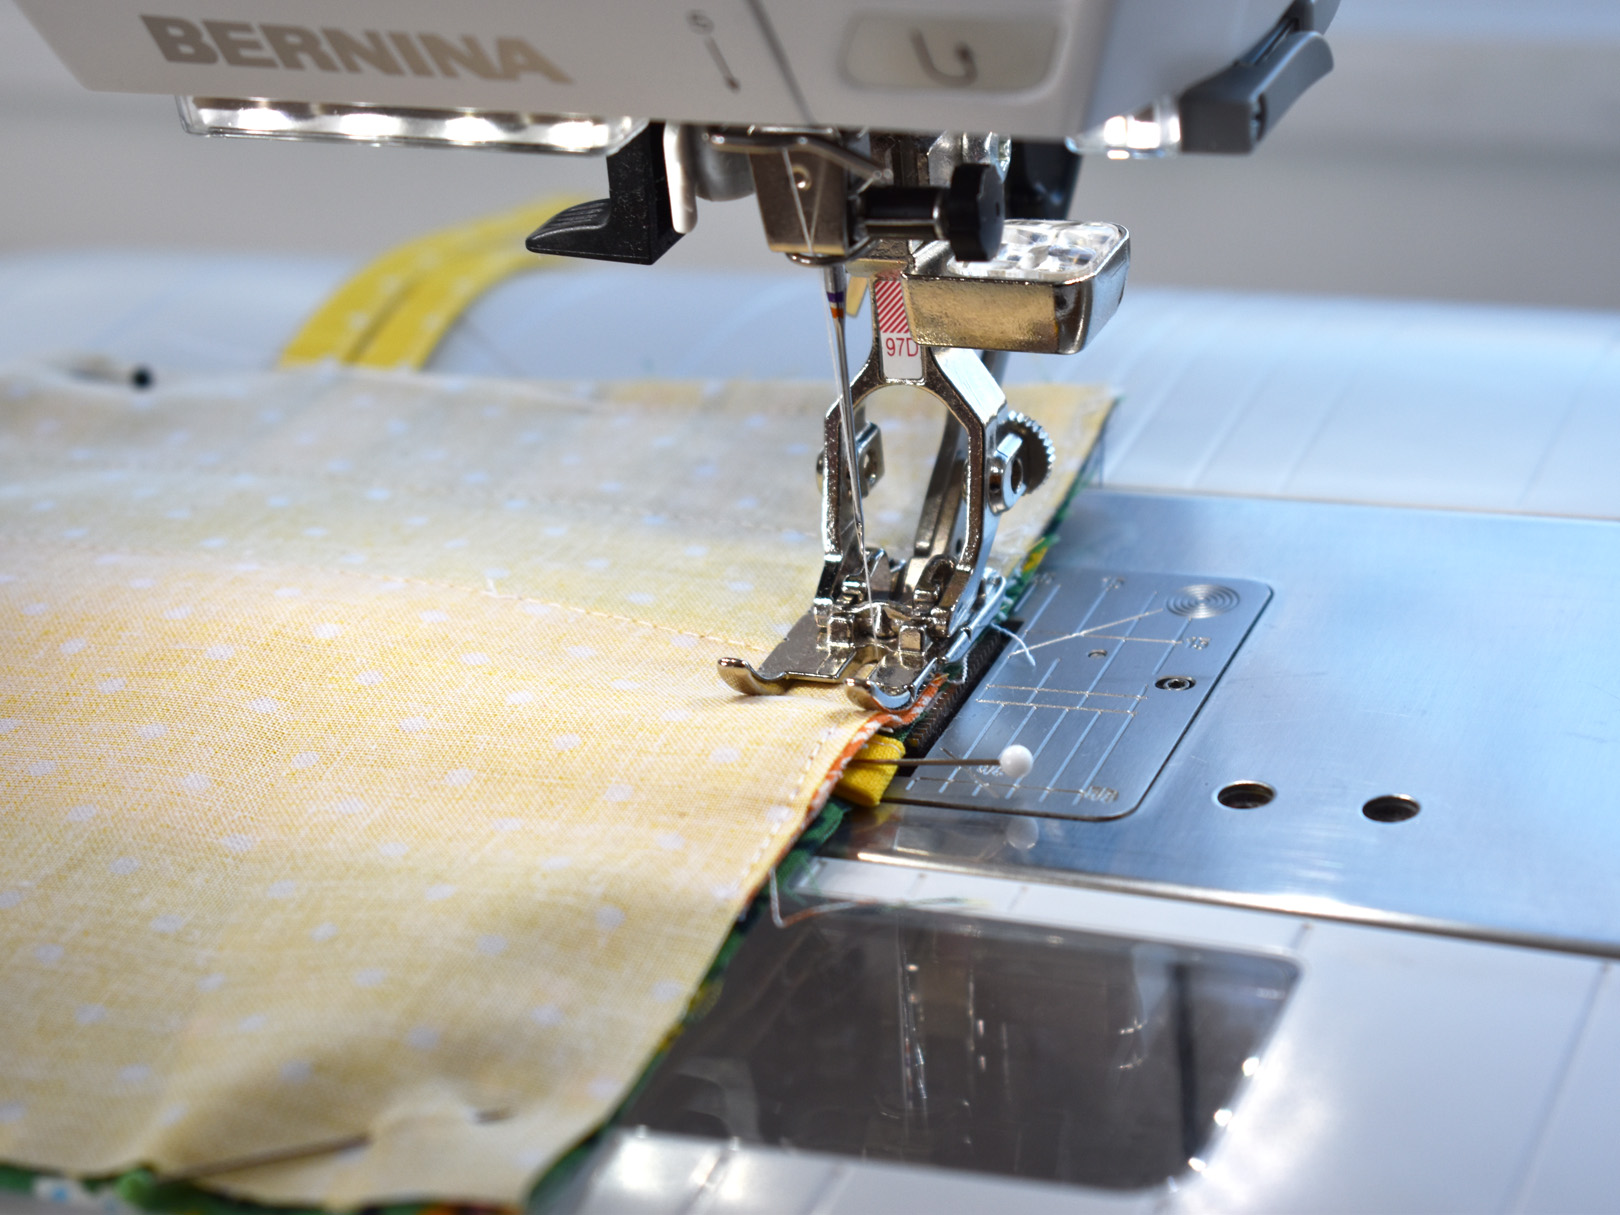
Stitch around the wallet with a 1/4″ seam, backstitching at each end of the opening. Be sure to stop and remove the pin holding the ties before you sew over it! Backstitch over the ties to create a strong seam.
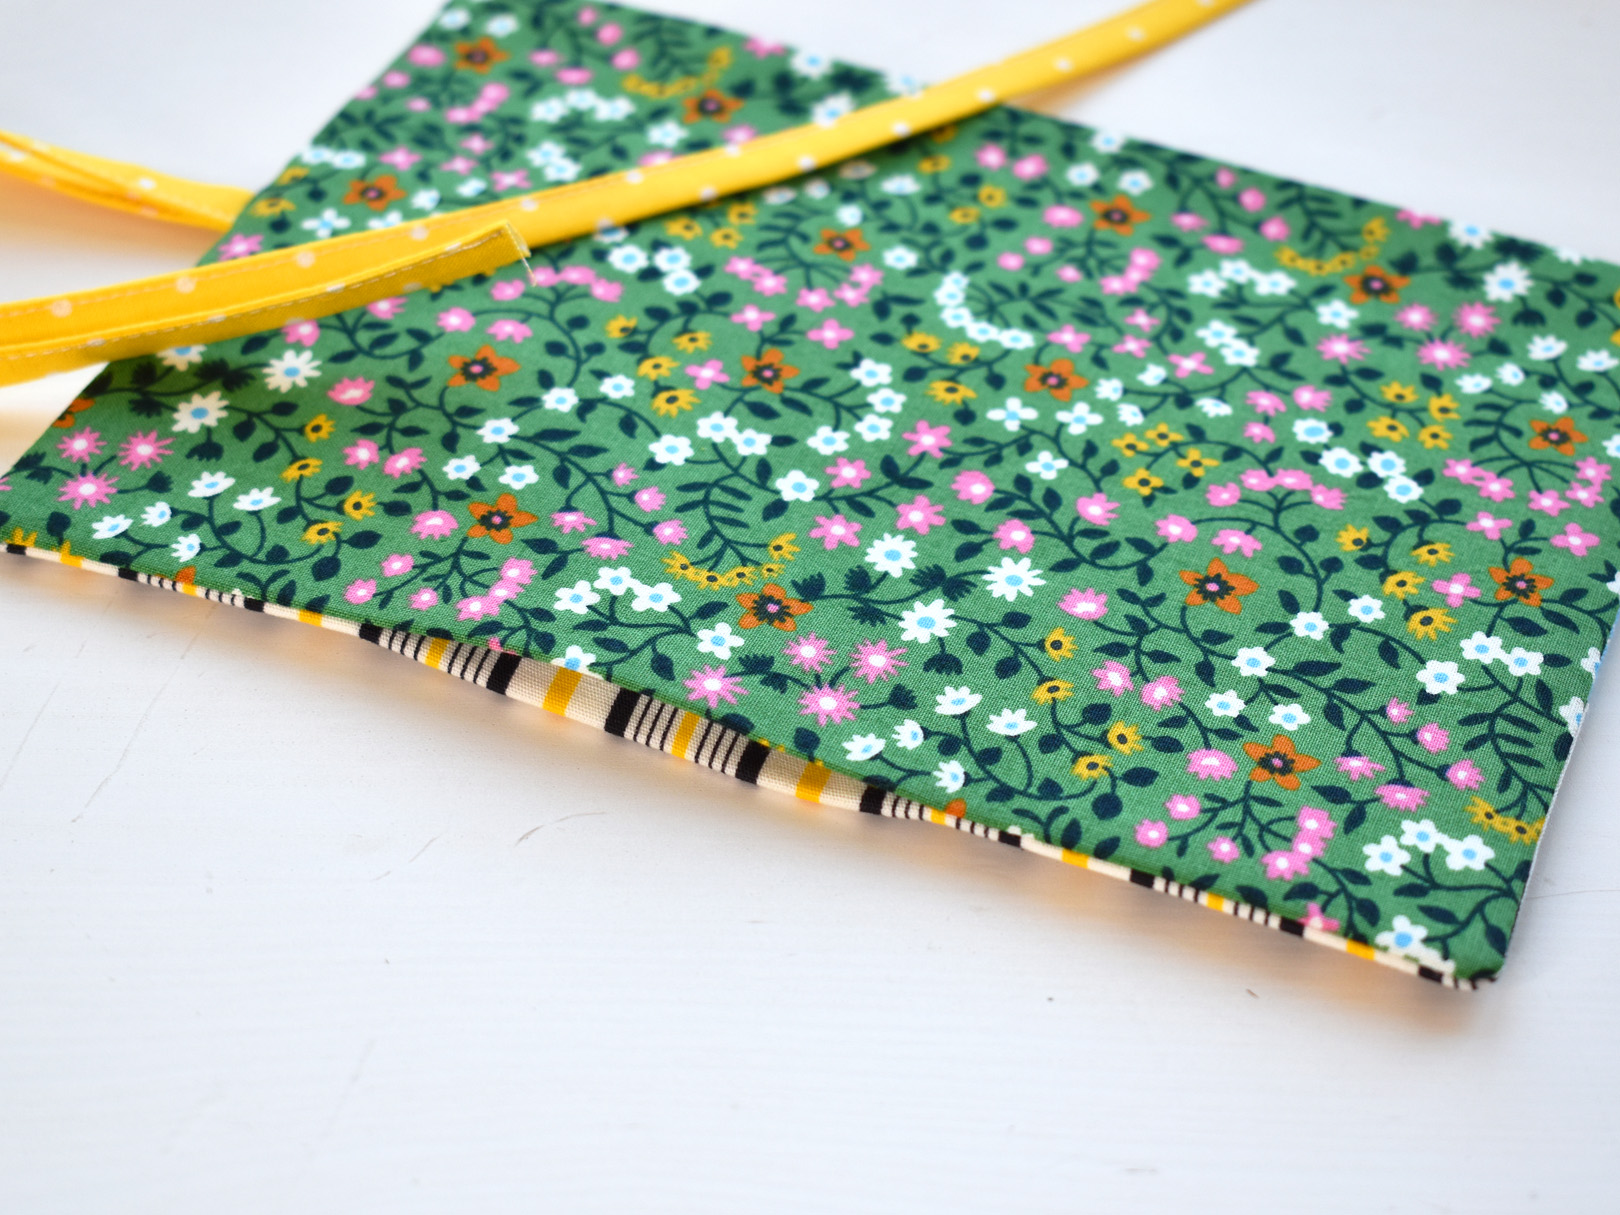
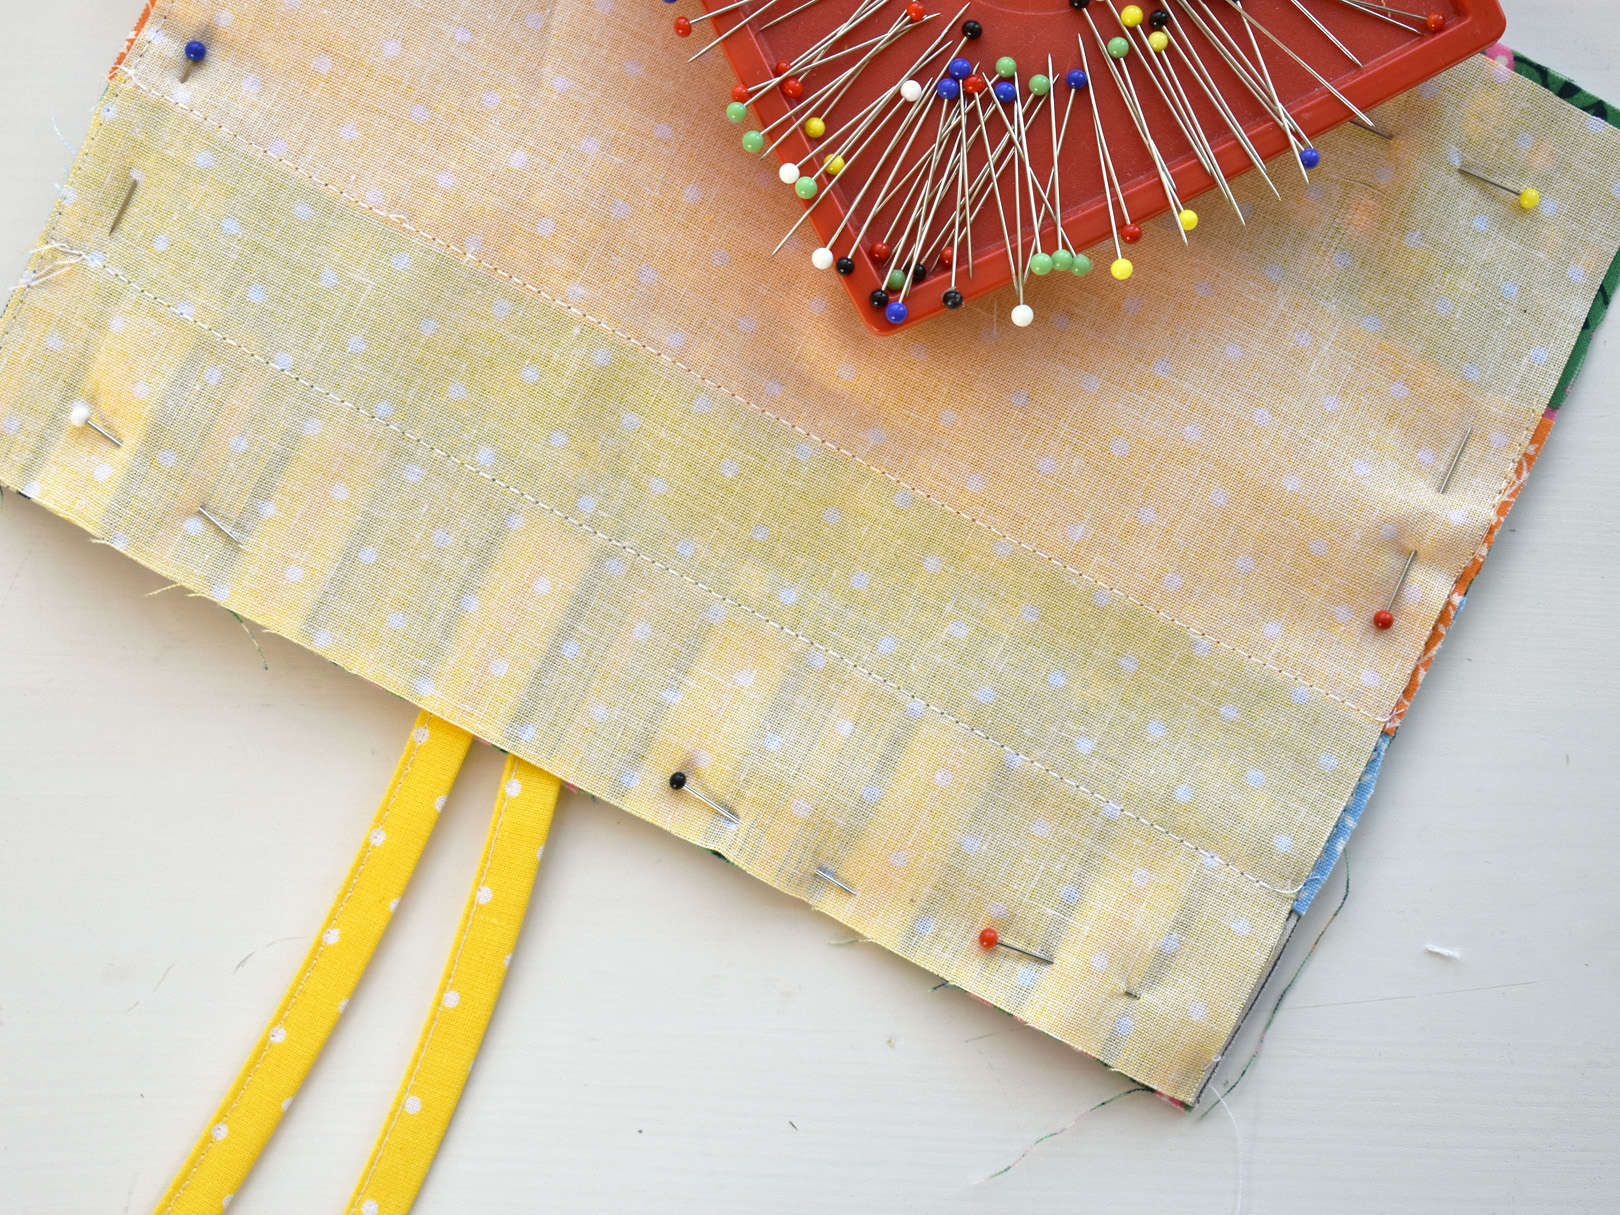
Clip the corners close to the stitching and turn the wallet inside out through the opening. Press the corners out gently with a point turner or blunt end of a chopstick. Press the fabric at the opening to the inside about 1/4″ even with the sewn edge.

Top stitch all around the edge of the wallet about 1/8″ from the edge. The top stitching will sew the opening closed.

Using a ruler and disappearing fabric pen or pencil, mark near the center of the wallet; measure 3 1/2″ over from each short edge and draw a line.

Top stitch along each line, backstitching at the top and bottom.
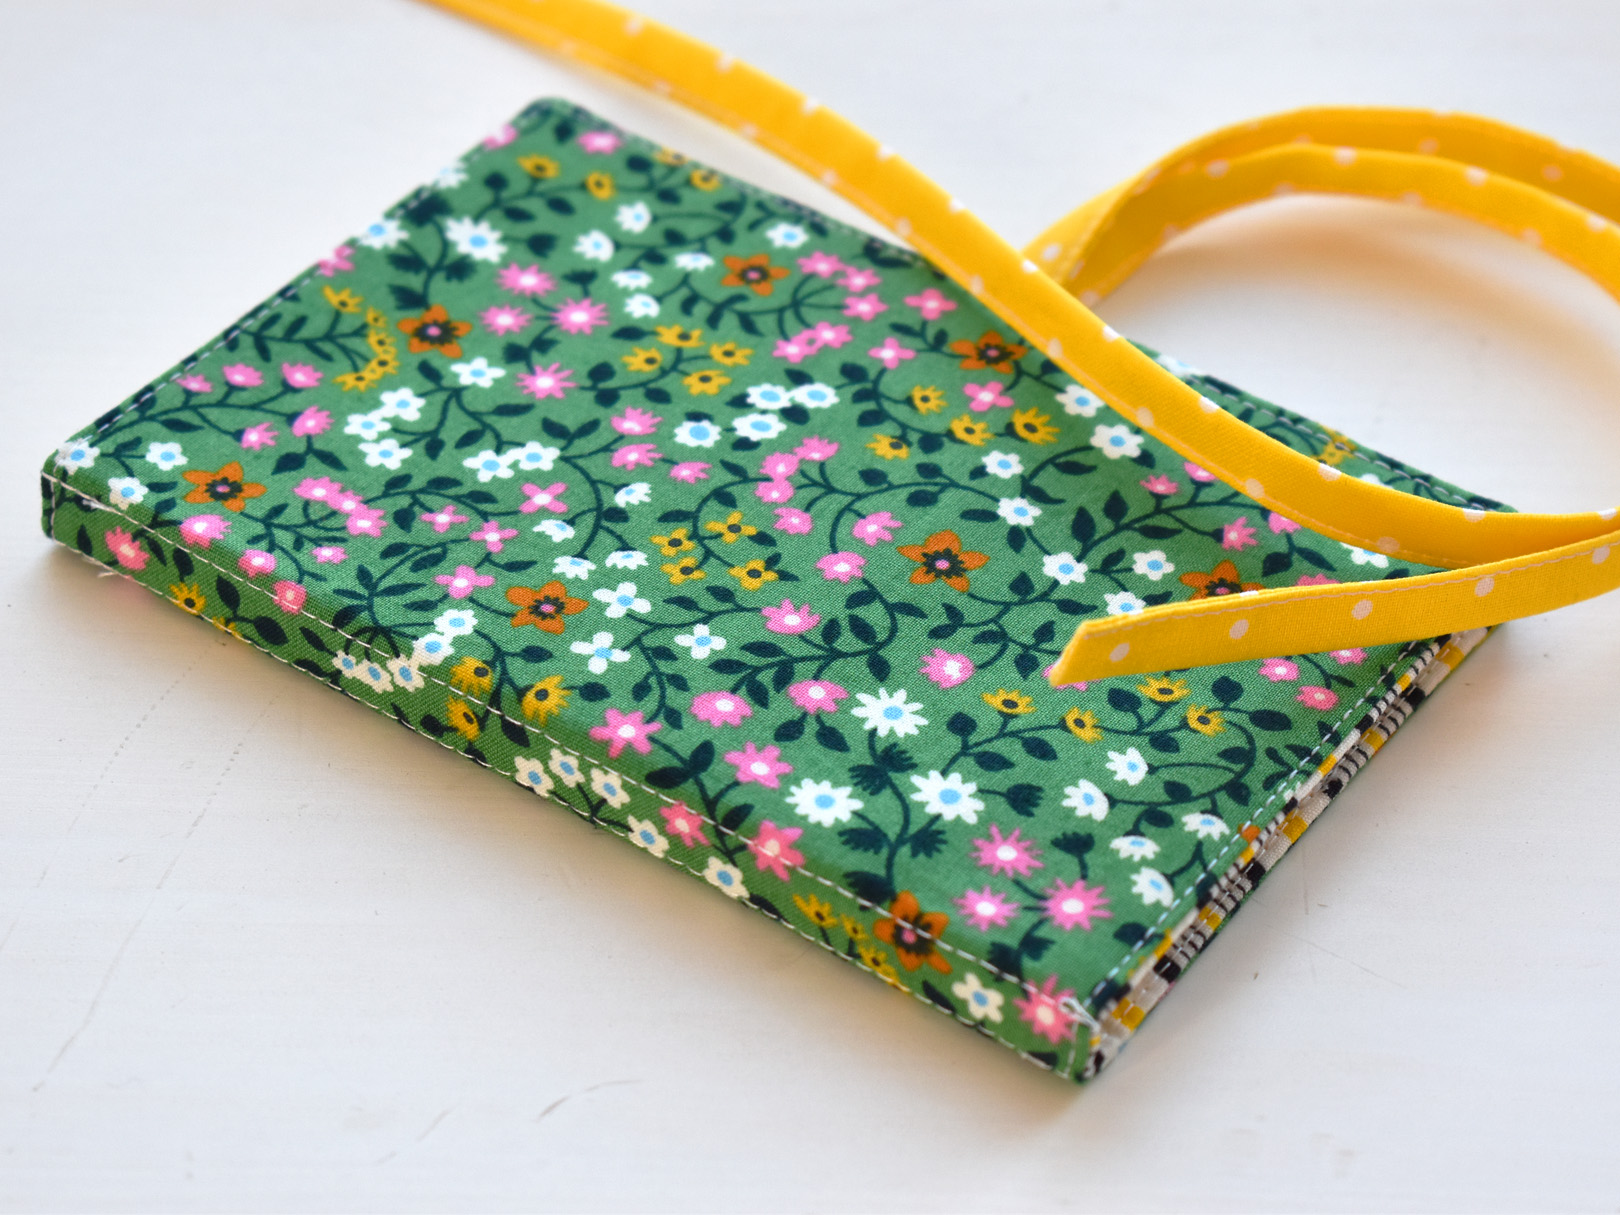
Fold the wallet over at each stitch line and press to create a crease.
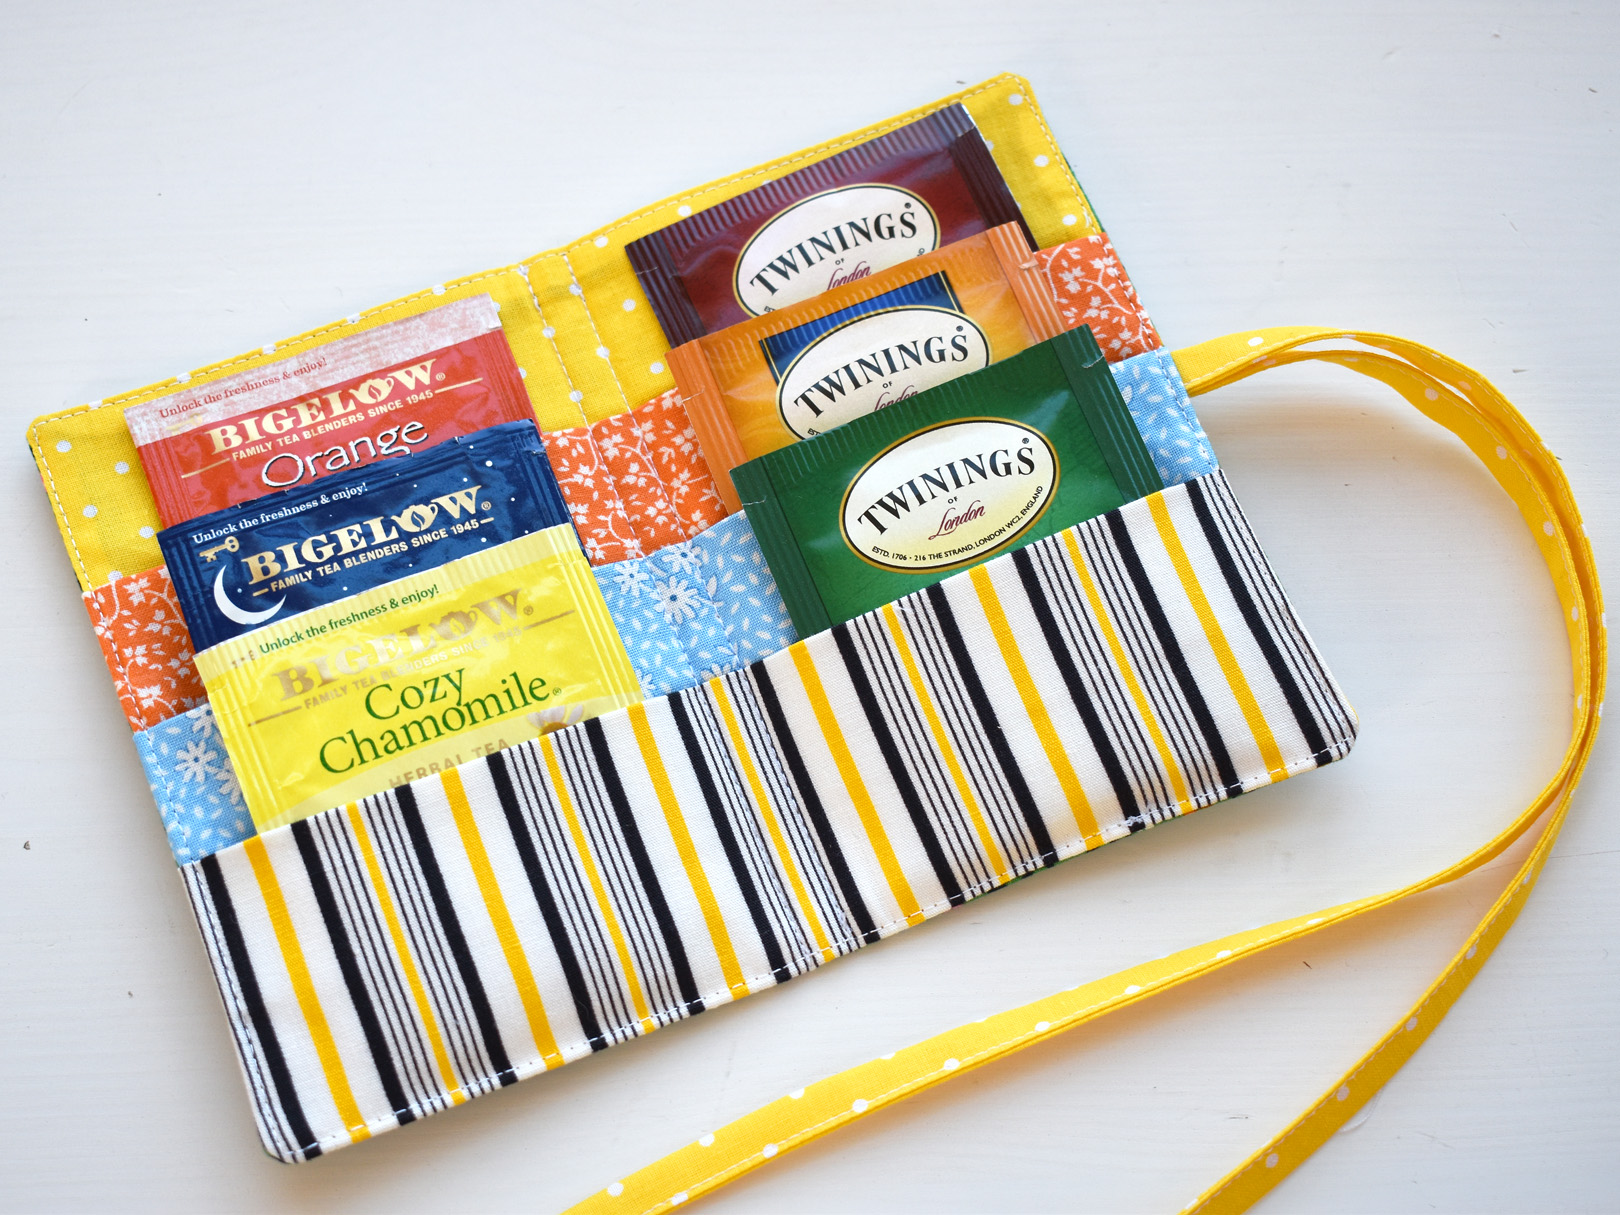
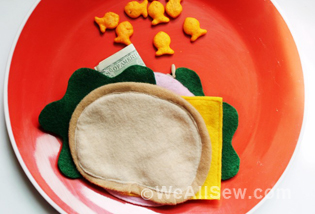
Fill with your favorite tea…
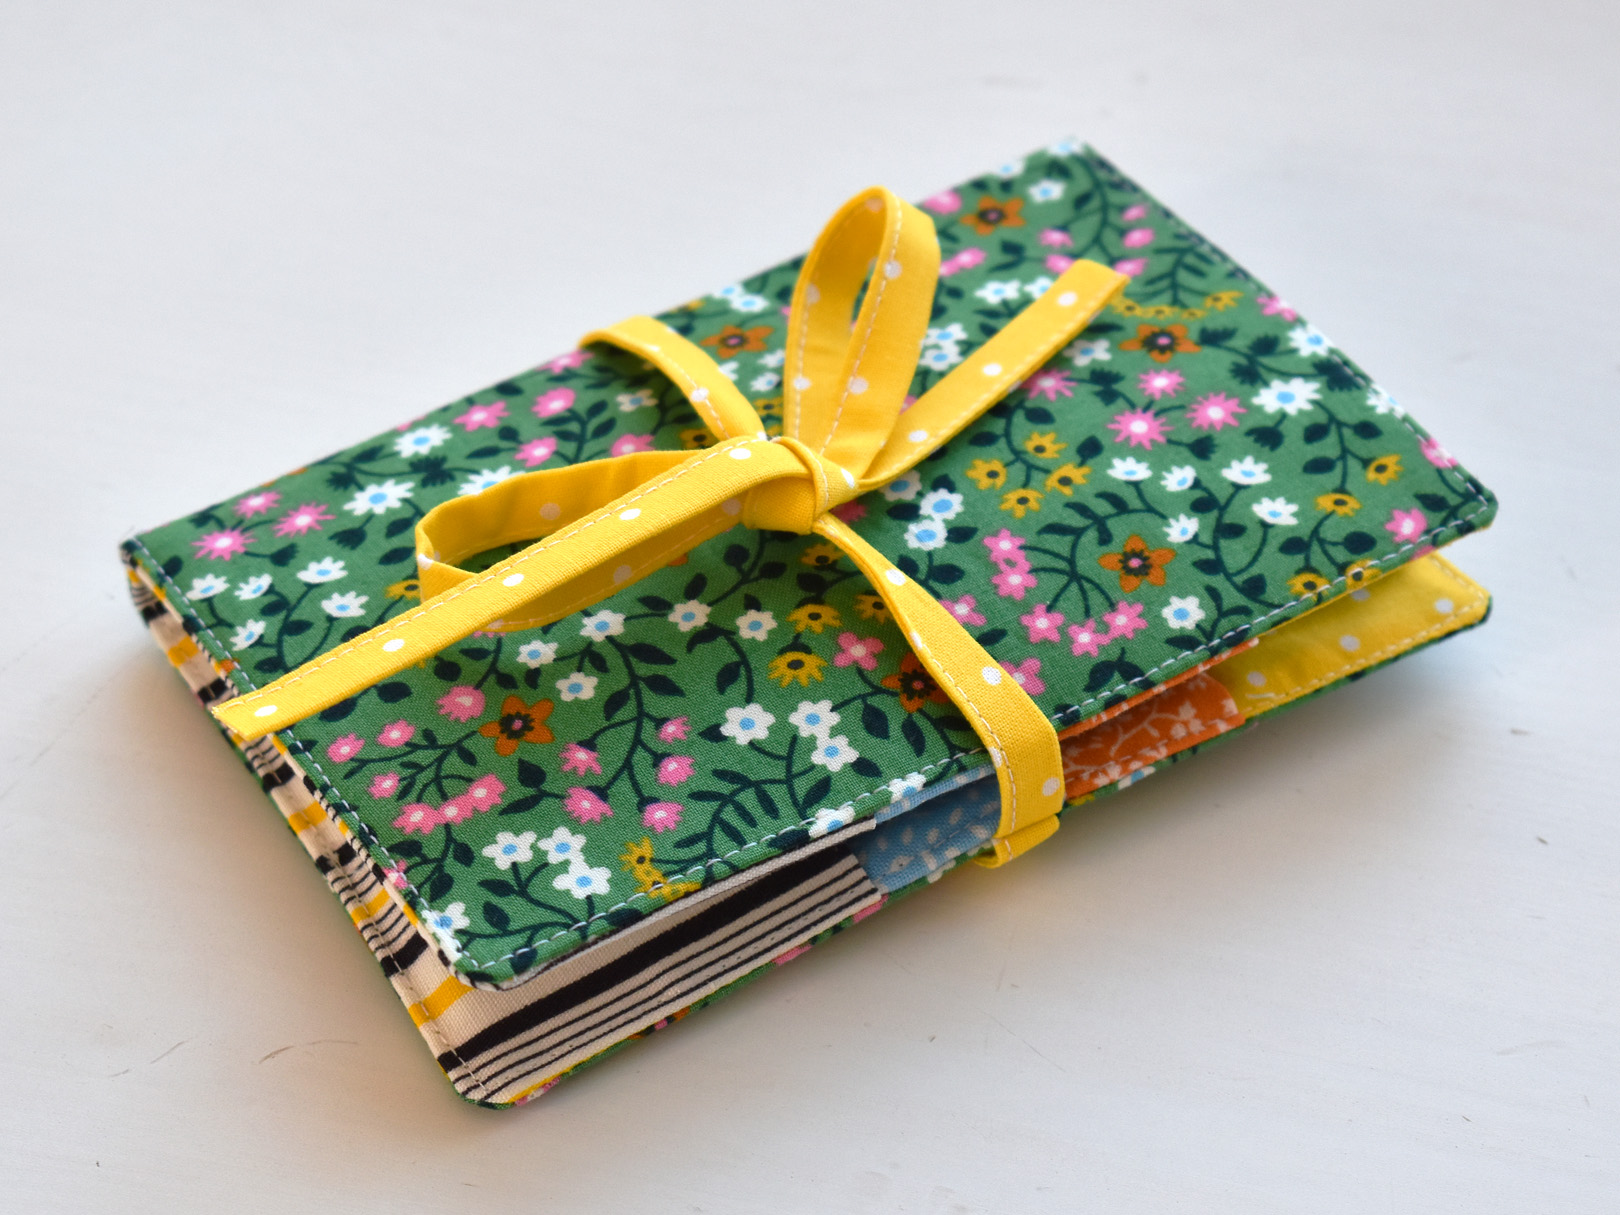
…and bring the long tie behind the wallet to secure it closed with a little bow.
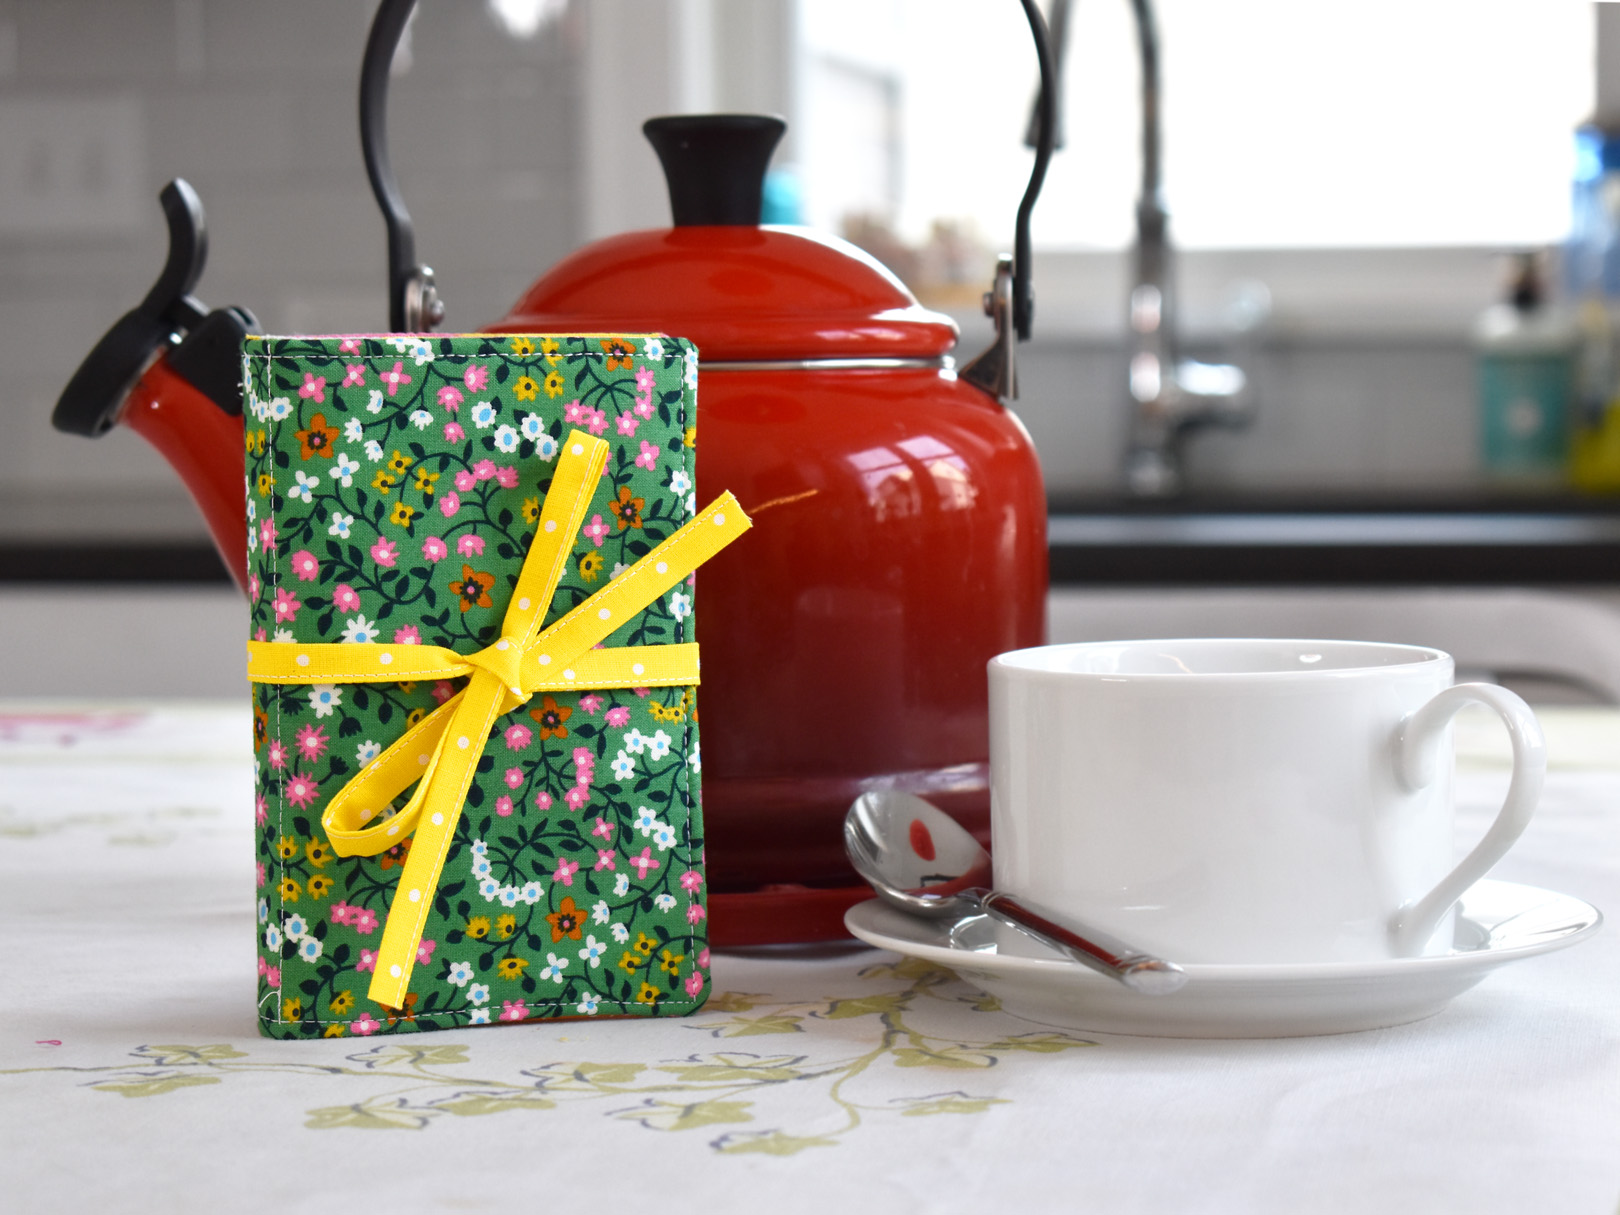
And enjoy!
Used Products


What you might also like


5 comments on “How to Make a Tea Wallet”
-
-
Hi @sewmyownclothes, thanks for checking out my project here at WeAllSew! I use the straight stitch needle plate to support precise stitch formation when sewing using a straight stitch. The smaller needle hole does a great job supporting the fabric when the needle penetrates to form a stitch. The straight stitch needle plate can help prevent thin fabrics from getting pulled down under the needle plate. Cheers! – Erika
-
-
This is a nice practical gift I will make soon for a friend. I am surprised, however, that the raw edges of the tie are left unfinished. Everything about the projects in the Bernina tutorials is usually so professional and finished, and this raw edge will become frayed and annoying quite quickly (and it’s distracting from the get-go!). Easy to miter or just turn it under and stitch it when the long side is stitched, right?
-
Hi @BLABFROMAB and thanks for checking out my project! I see you have an eye on the little ends of the tea wallet ties in my tutorial. There is very little fraying of the tie ends because the strip is folded over to be very narrow, and since I’ve made and gifted several 🧡 with no fraying issues this is how I chose to present my project in the WeAllSew tutorial.
You are absolutely free to finish the tie ends in your version of the tea wallet in whichever way you choose, and I hope you enjoy my project! Cheers!
-
-
I love this little wallet. I decided to put a button and tab with a button hole on it instead of a tie. Wish I could post a picture, it came out so cute! Thanks for the fun project!
Leave a Reply
You must be logged in to post a comment.

Excellent idea. I am always looking to use scraps. Can you tell me why or reference an article that explains why would I use a straight stitch plate when the 9 or 5.5.mm plate is so versatile?