How to Make a Felt Crown
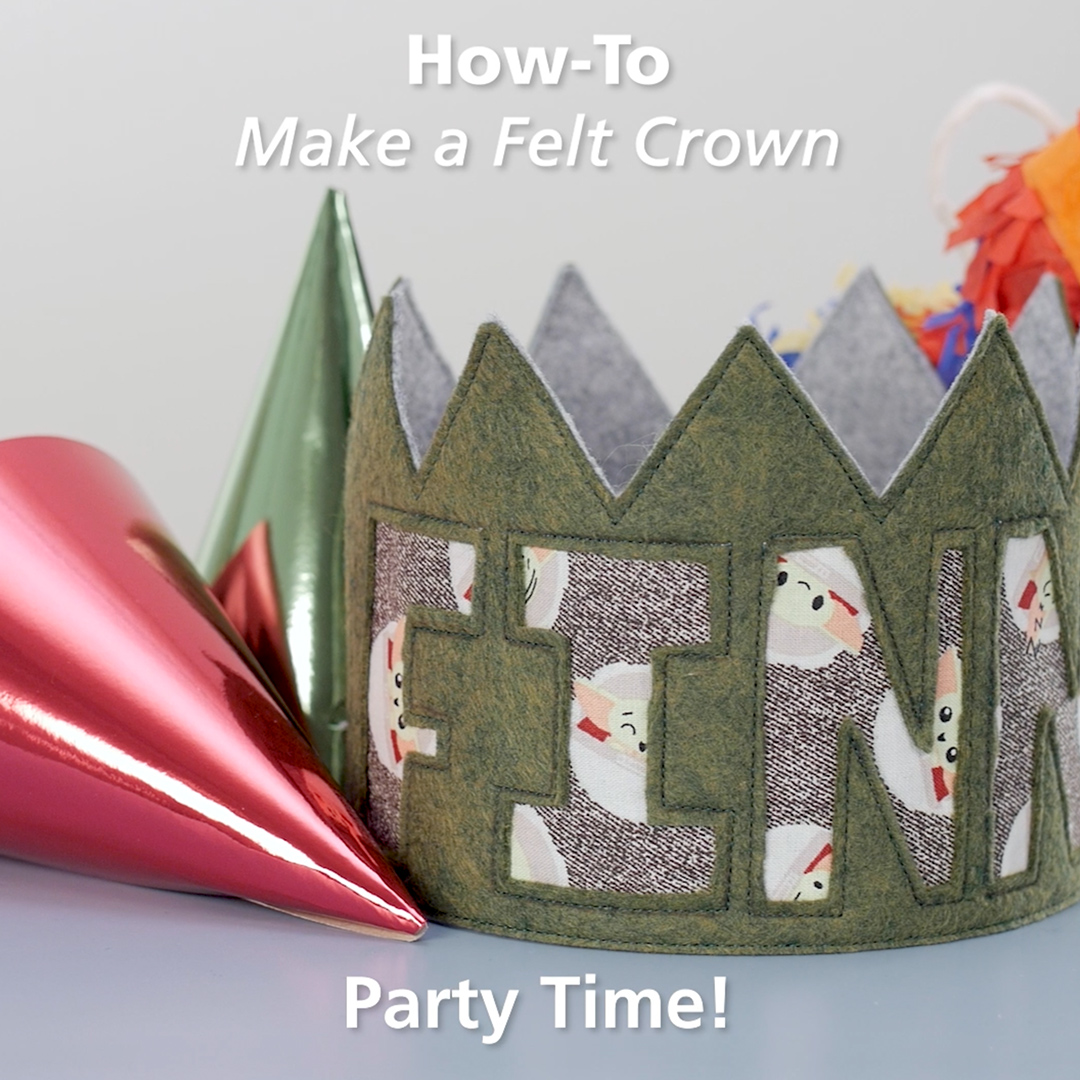
When you are responsible for a tiny human, being crafty can come in handy. I love spending time making an item for my child that I know he will enjoy. Imagination play is a great thing for young ones to participate in, and accessories can take it to the next level. A felt crown can be customized for any story play, name or occasion.
Materials to Sew a Felt Crown
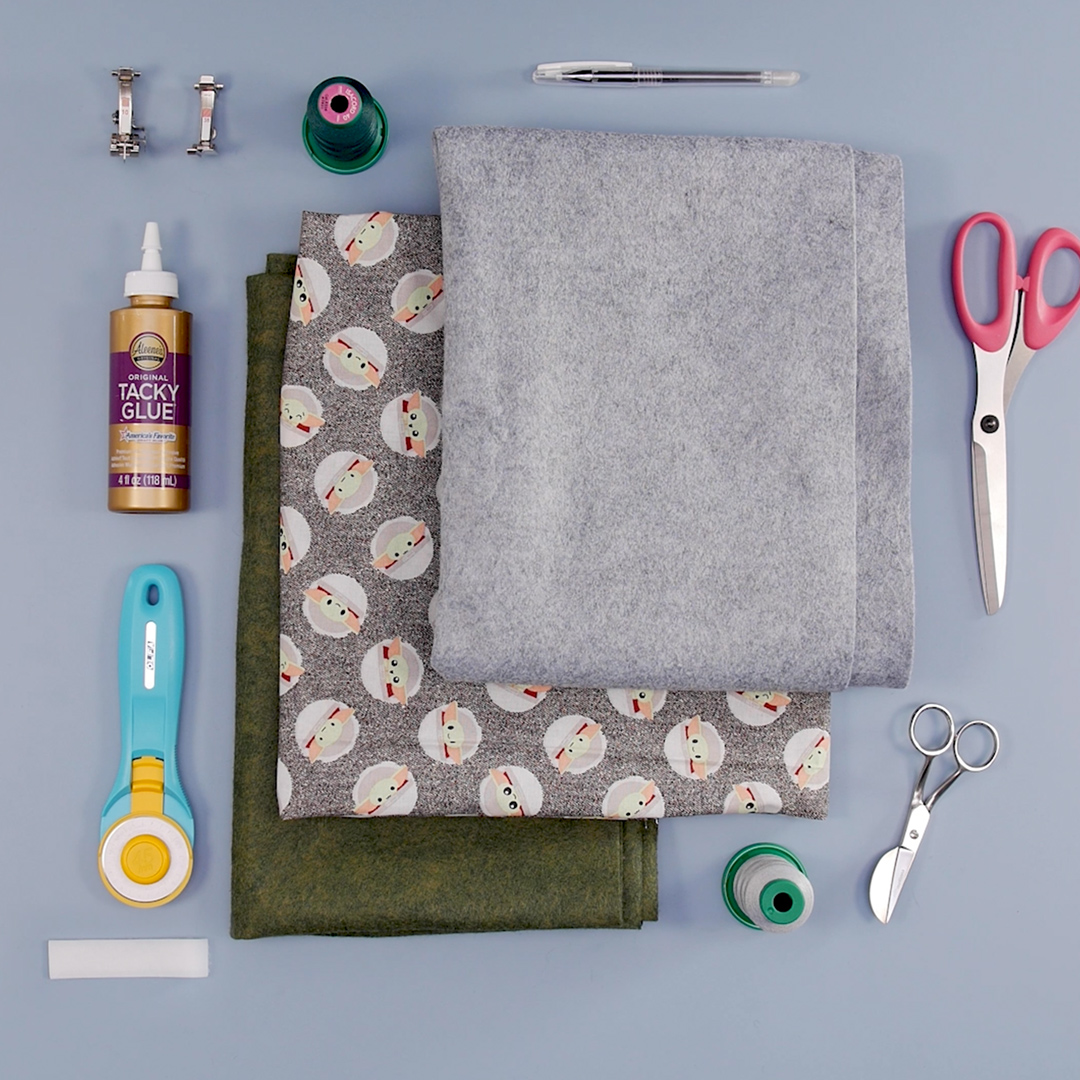
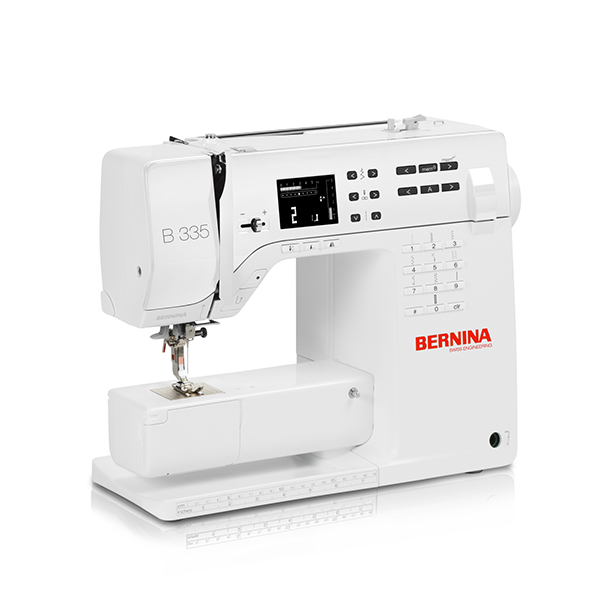
- BERNINA 335
- Edgestitch Foot #10
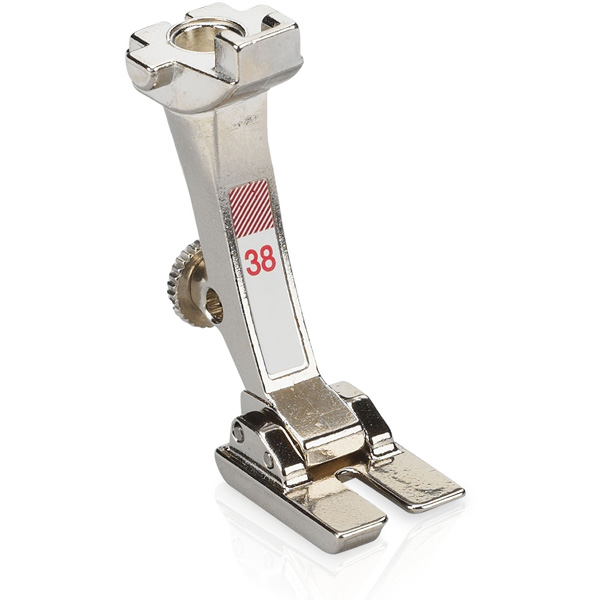
- Piping Foot #38
- Your choice of two felt colors
- 1 Fat Quarter, check your local BERNINA Dealer for fabric
- Hook and Loop Tape 3/4 in wide
- Isacord Thread to match your fabric
- Needle to match thread choice
- Shears
- Cutting mat
- Rotary cutter
- Small snips for Applique
- Aleene’s Tacky Glue 4oz
- Black Heat Away Pen
- 5mm Stitch plate
- Craft Knife with fresh blade
Steps to Sew a Felt Crown
Step 1: Measuring
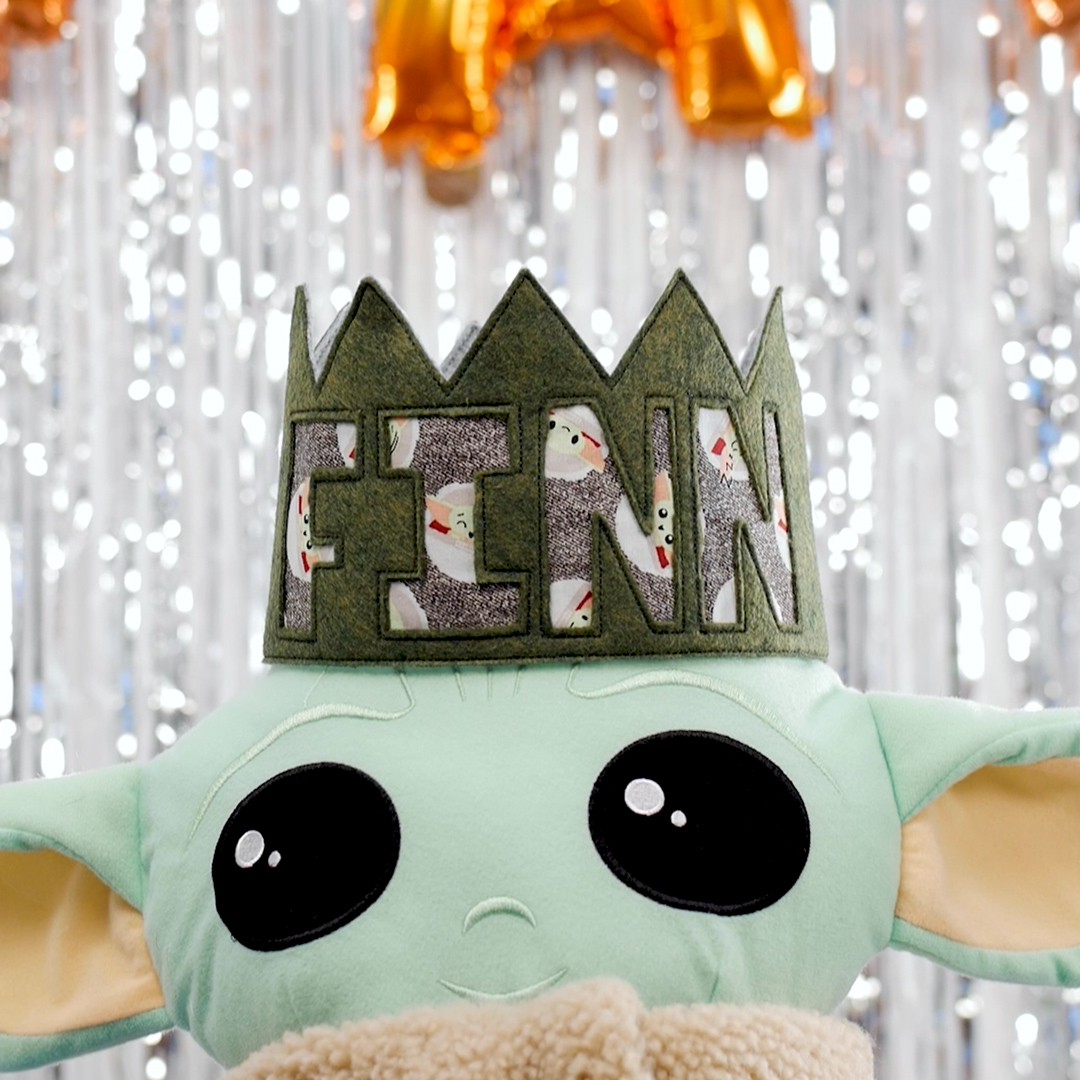
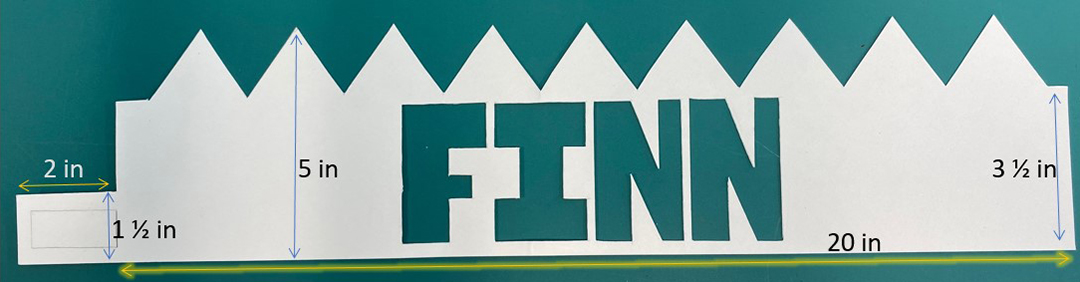
Measure the circumference around the head of the child/person you are wishing to make this crown for. My son’s head measured 20 inches. Take this measurement and add 2 inches to it for the bottom of the crown (the extra 2” will allow for the hook and loop tape tab).
Step 2: Making a template
To plan out the design I wanted, I made a paper template out of some scrap watercolor paper (for sturdiness/tracing) I had in my sewing room. I took my measurement of 22 inches (measurement + 2”) x 5 inches tall and made a rectangle to start with. I cut a tab at the left edge that was 2 inches wide and 1 ½” in height. Then decided I wanted my crown to have triangle points at the top. The top tips of the points is 5” tall. The inside “valley” is 3 1/2” tall. (See diagram below.) You will need to choose how many letters or shapes you want to fit across the front. My sons name has four letters, so I found the middle of the crown and then drew out the letters leaving about 1/8 in of space in between each letter. Next cut out the template with non-fabric scissors and a craft knife to cut out the letters/shapes.
Find your reverse applique cotton fabric (the fabric I am using has images of Grogu on it) and cut a rectangle that will be large enough to cover all your letters by at least 1/4 in on all sides, set this aside for now. Mine was 3 1/4 x 9 inches.
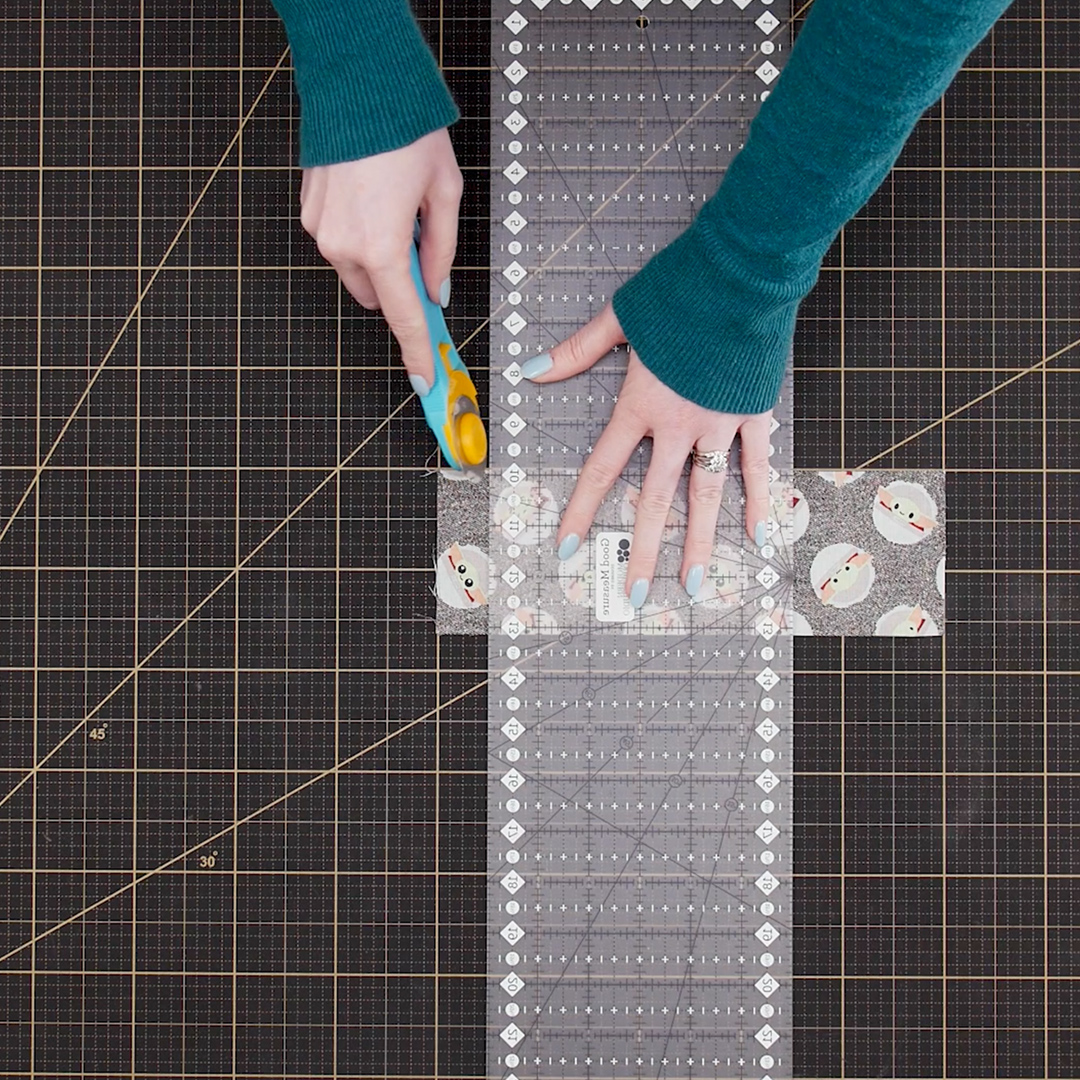
Now you can cut your felt pieces and your hook and loop tape. My felt pieces were 22 x 5 inches and my hook and loop tape is 1 3/4 inches.

Next, find your top layer of felt and your stencil and trace your outline with a black heat away pen and cut it around the outside.
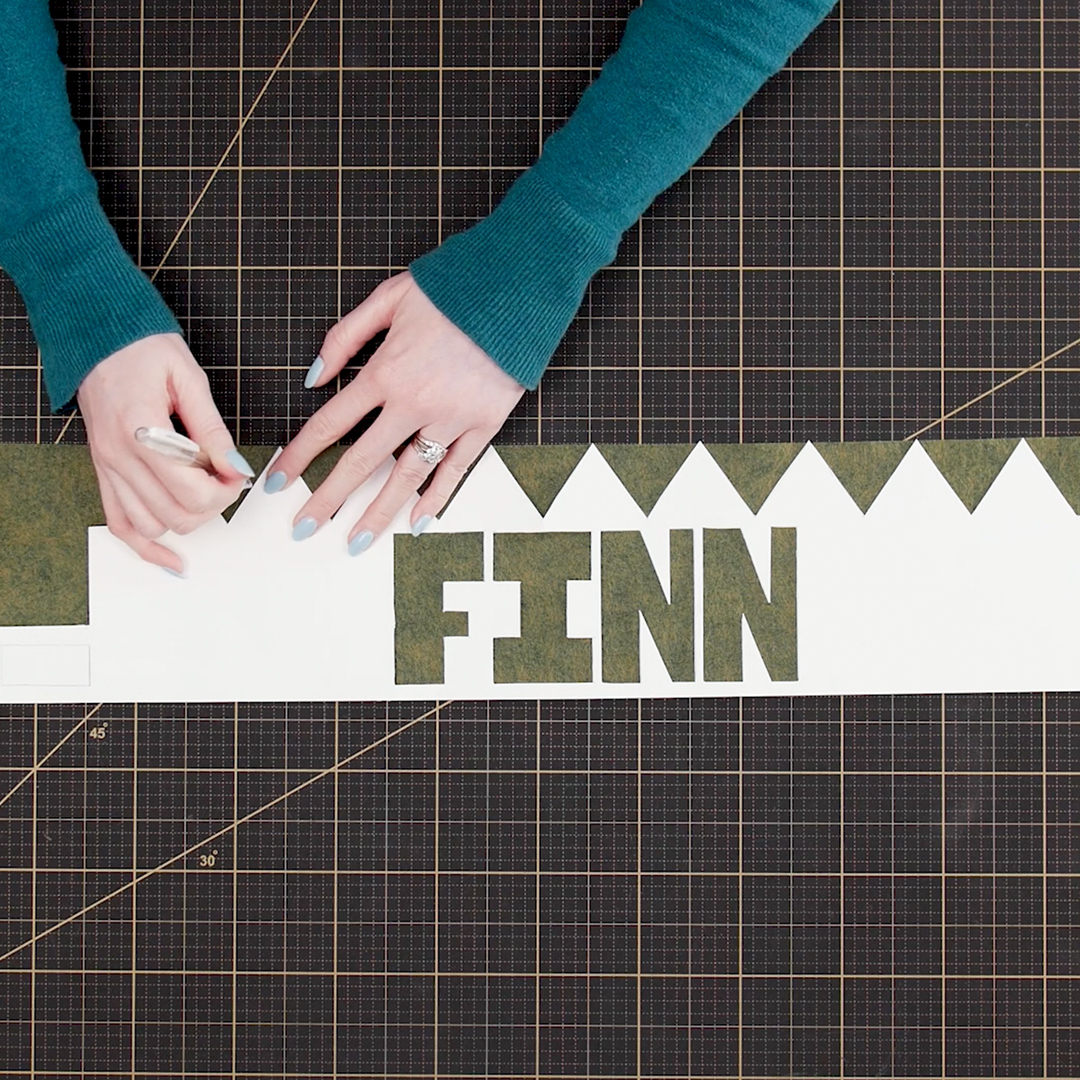
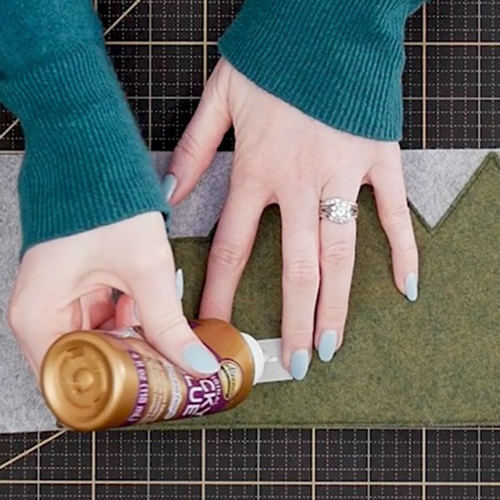
Find your base/back layer and lay that down first and find the middle along the bottom. Take your cotton applique fabric and place a few dabs of glue on the back and tack down to the base layer in the middle. Place a few more dabs of glue on the back of your top layer with your traced letters and complete your sandwich.
Step 3: Machine Set Up
You’ll need to set your machine up to sew, insert a new needle to match the thread you are using, I’m using Isacord. Attach Edgestitch Foot #10.
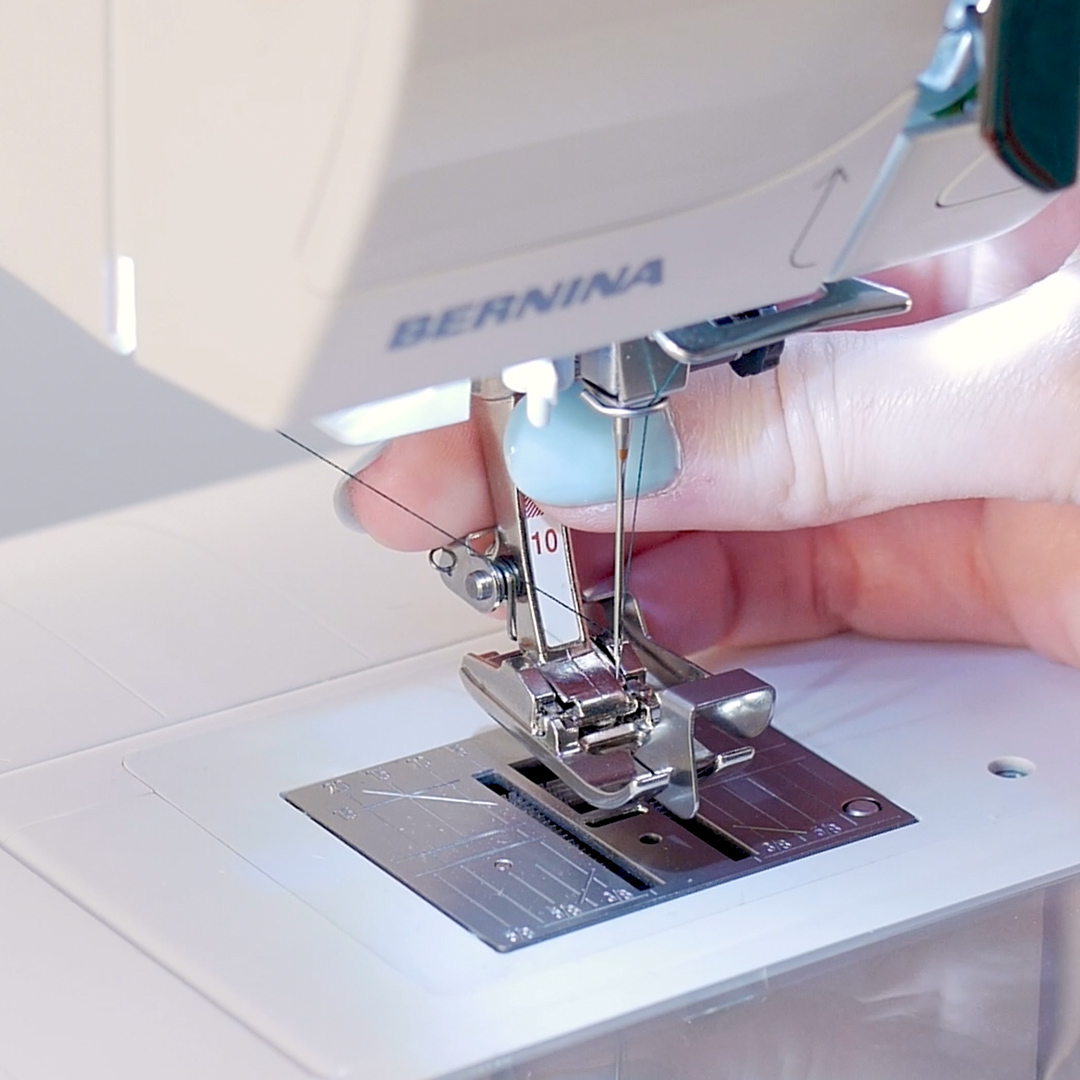
Move your Needle Position to the far left. Set your needle to Needle Stop Down.
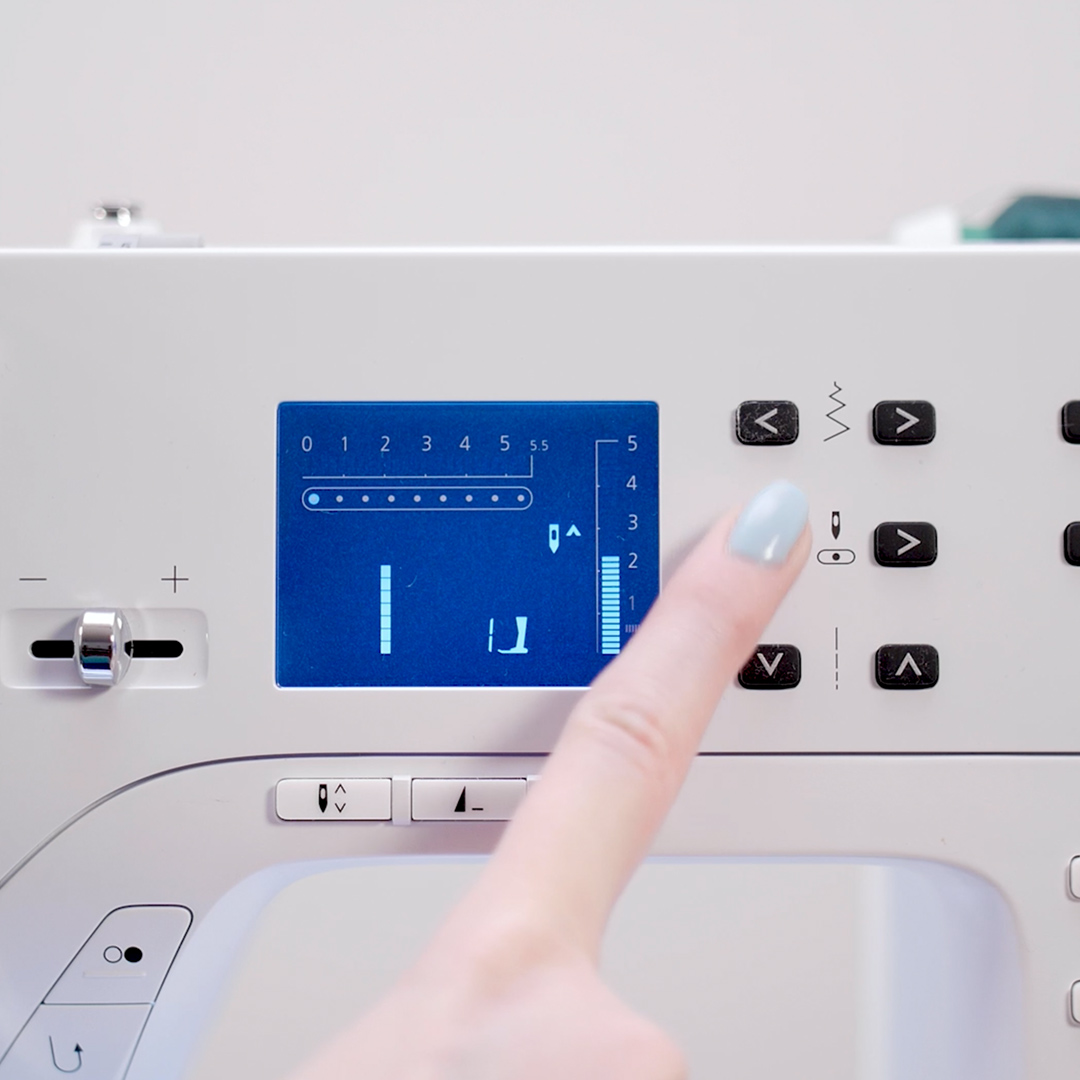
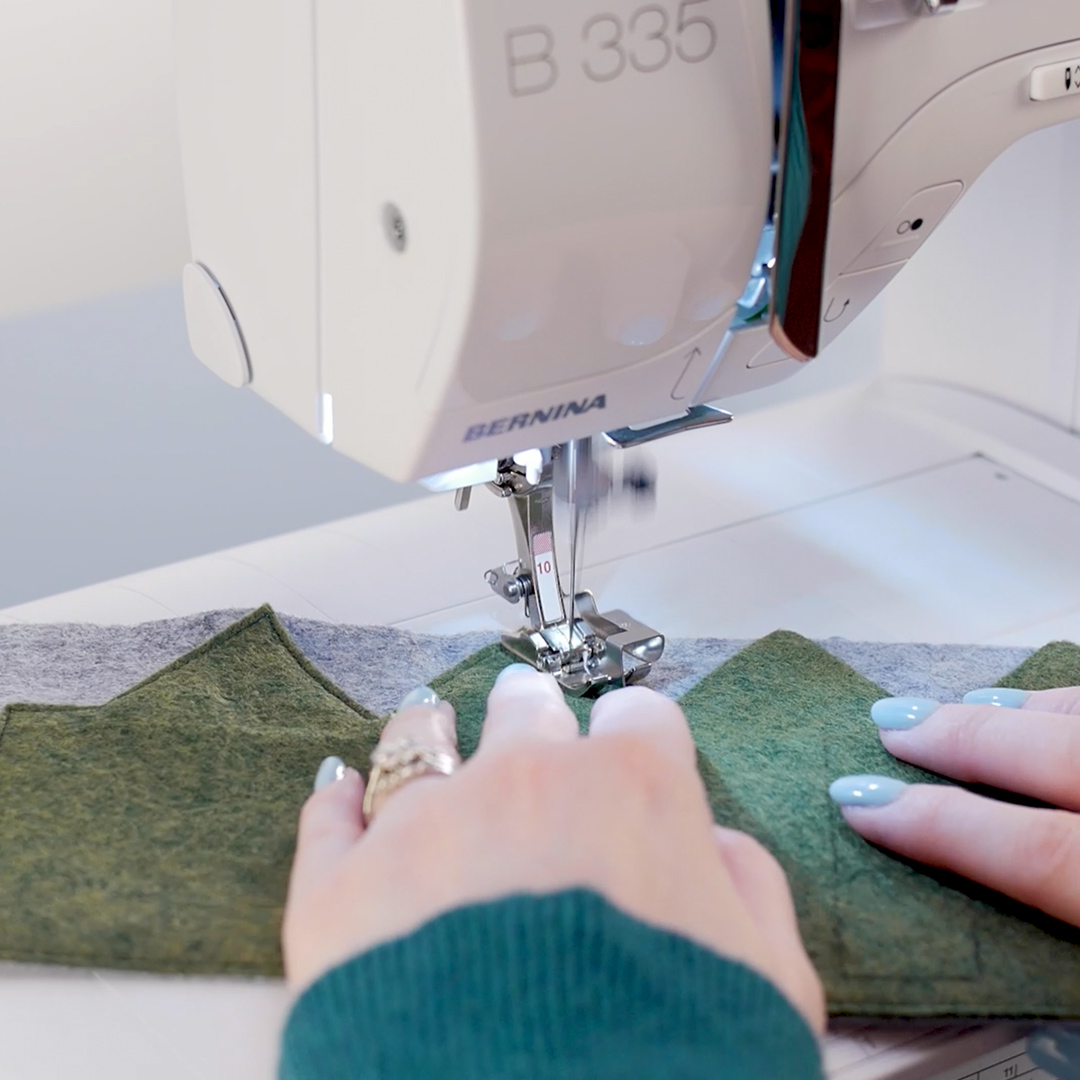
Using the guide on the foot, stitch around the outside of the green felt layer.
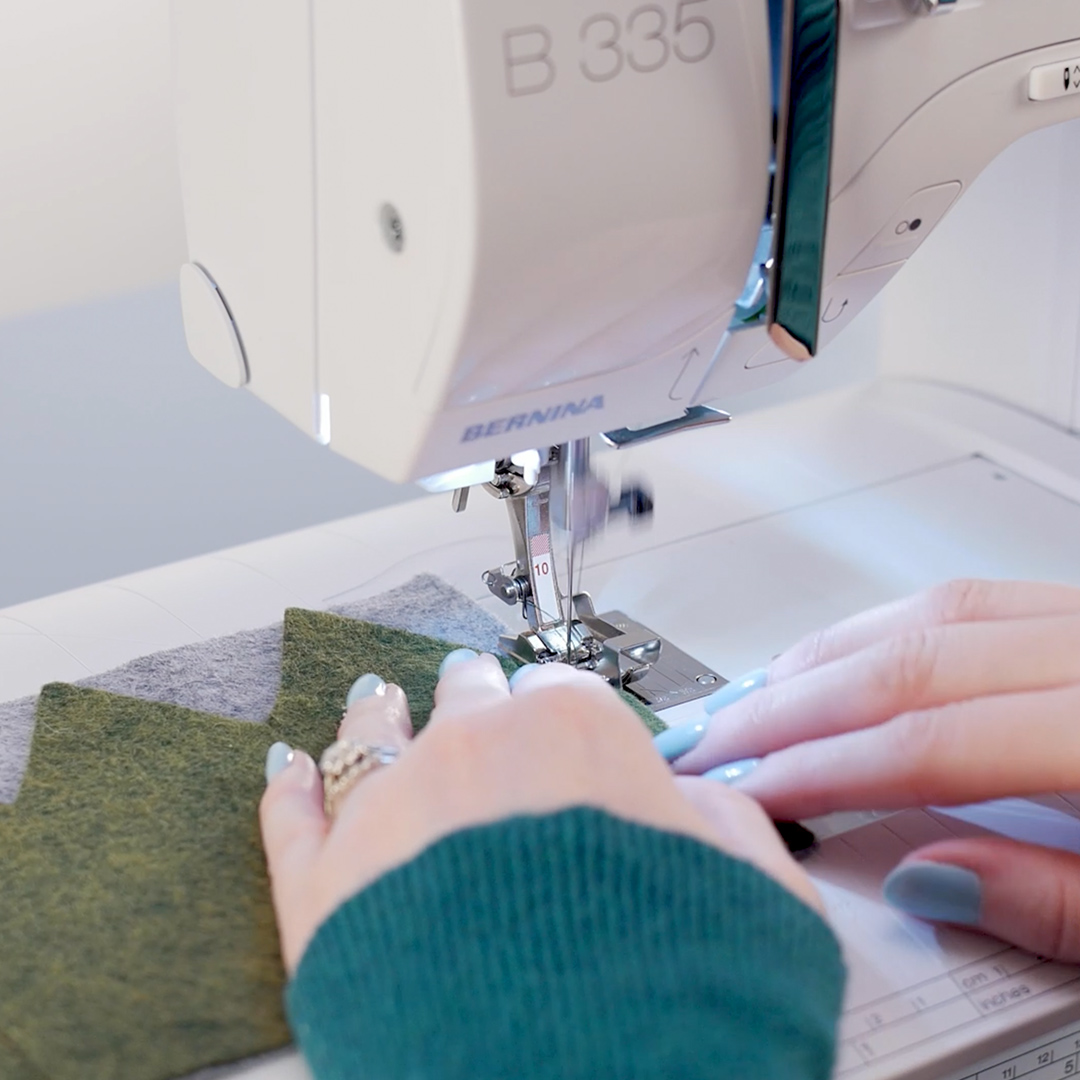
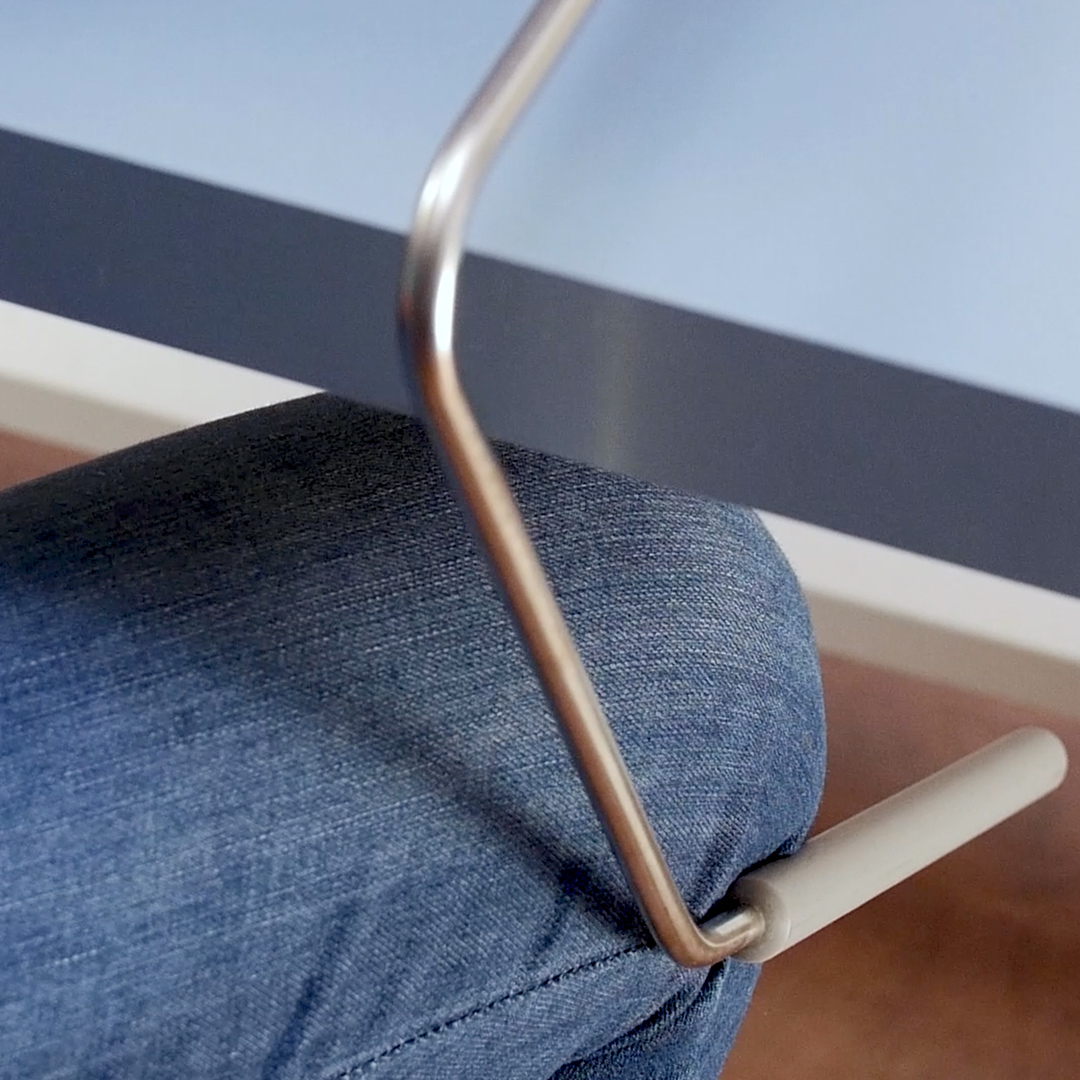
When you approach a corner, use the BERNINA Freehand System (FHS) to lift the presser foot and pivot the felt to turn the corner.
Continue to stitch around the entire crown. Once the outside is sewn, stitch on the traced lines of your name as well.
Take your hook and loop pieces and glue down the loop portion to the inside of the crown tab.
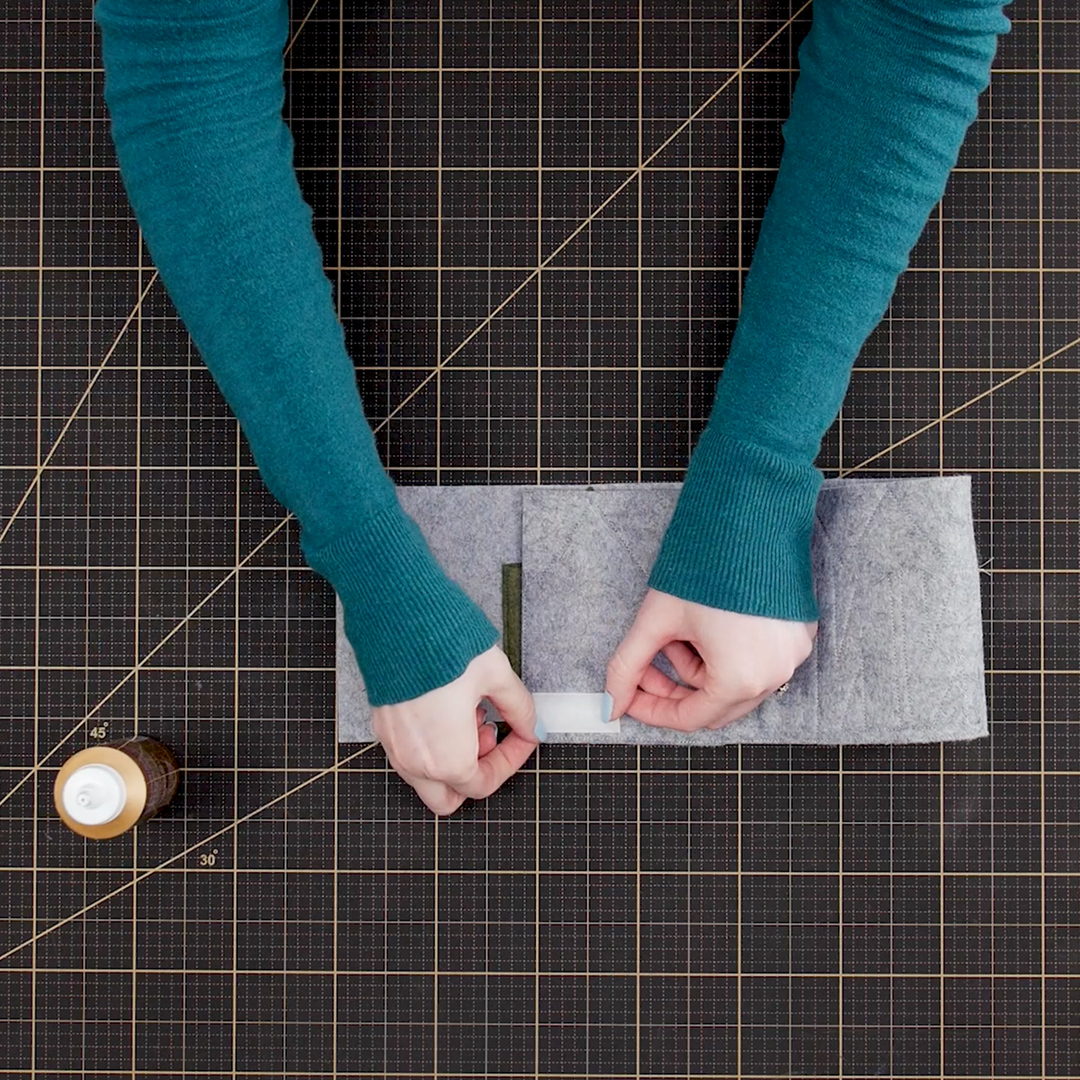
Glue the hook portion to the outside of the crown base.
Change out the Edgestitch Foot #10 and replace with the Piping Foot #38 to sew on the hook and loop tape. The uneven toes on the Piping Foot #38 work great to sew on hook and loop tape. Remember to use the FHS to pivot on the corners.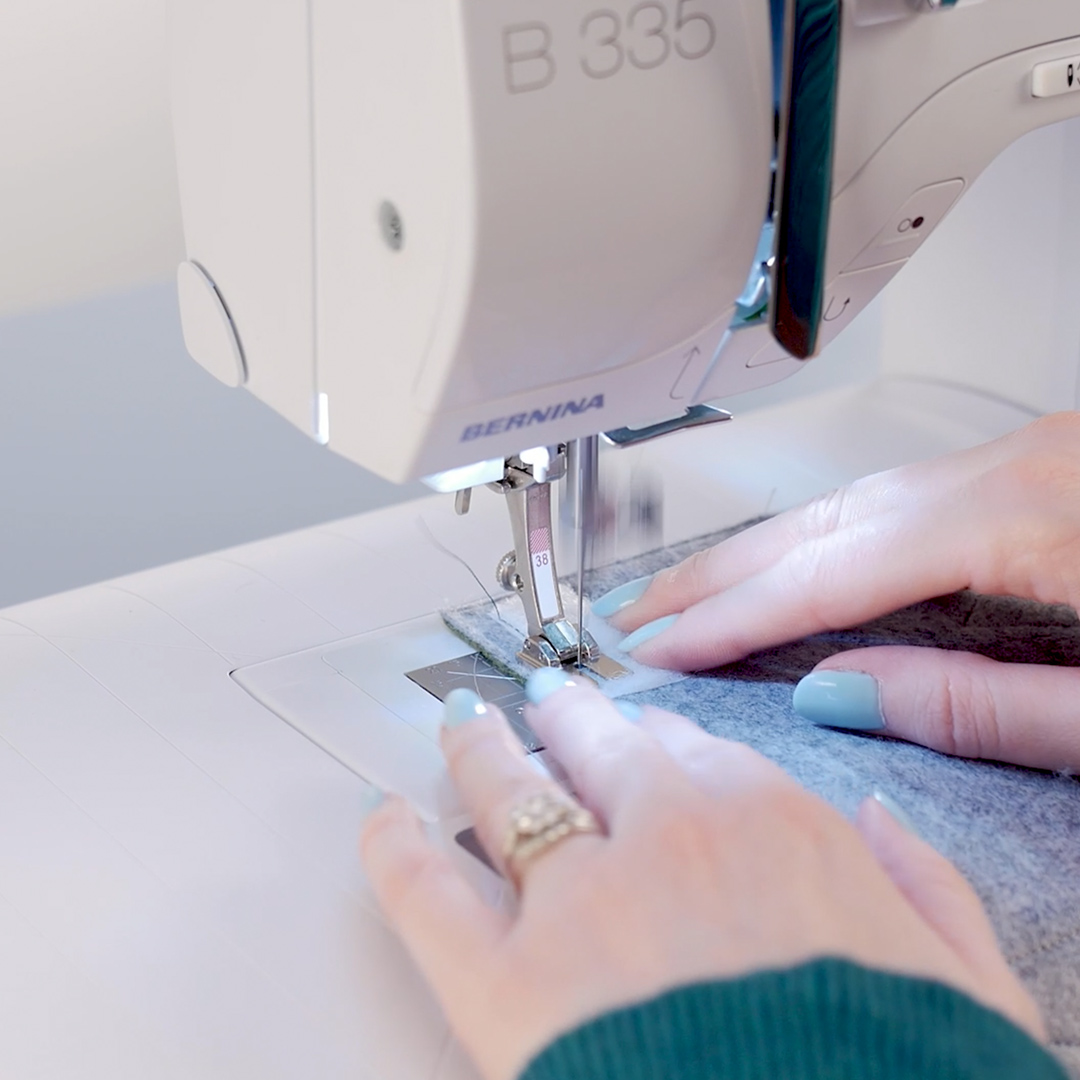
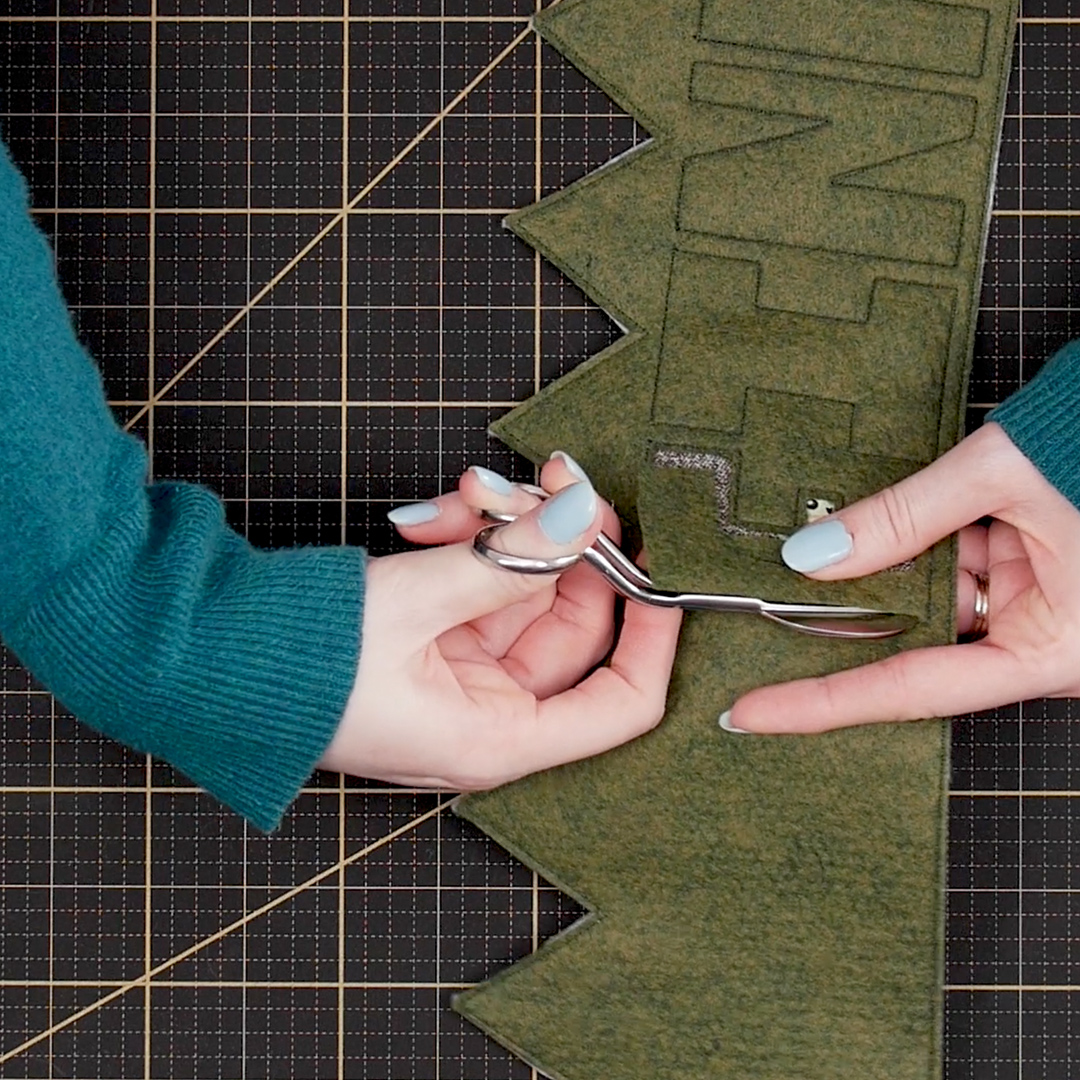
For the last few steps, you will need your shears and applique scissors.
First, trim down your backing felt to match the edge of the front fabric.
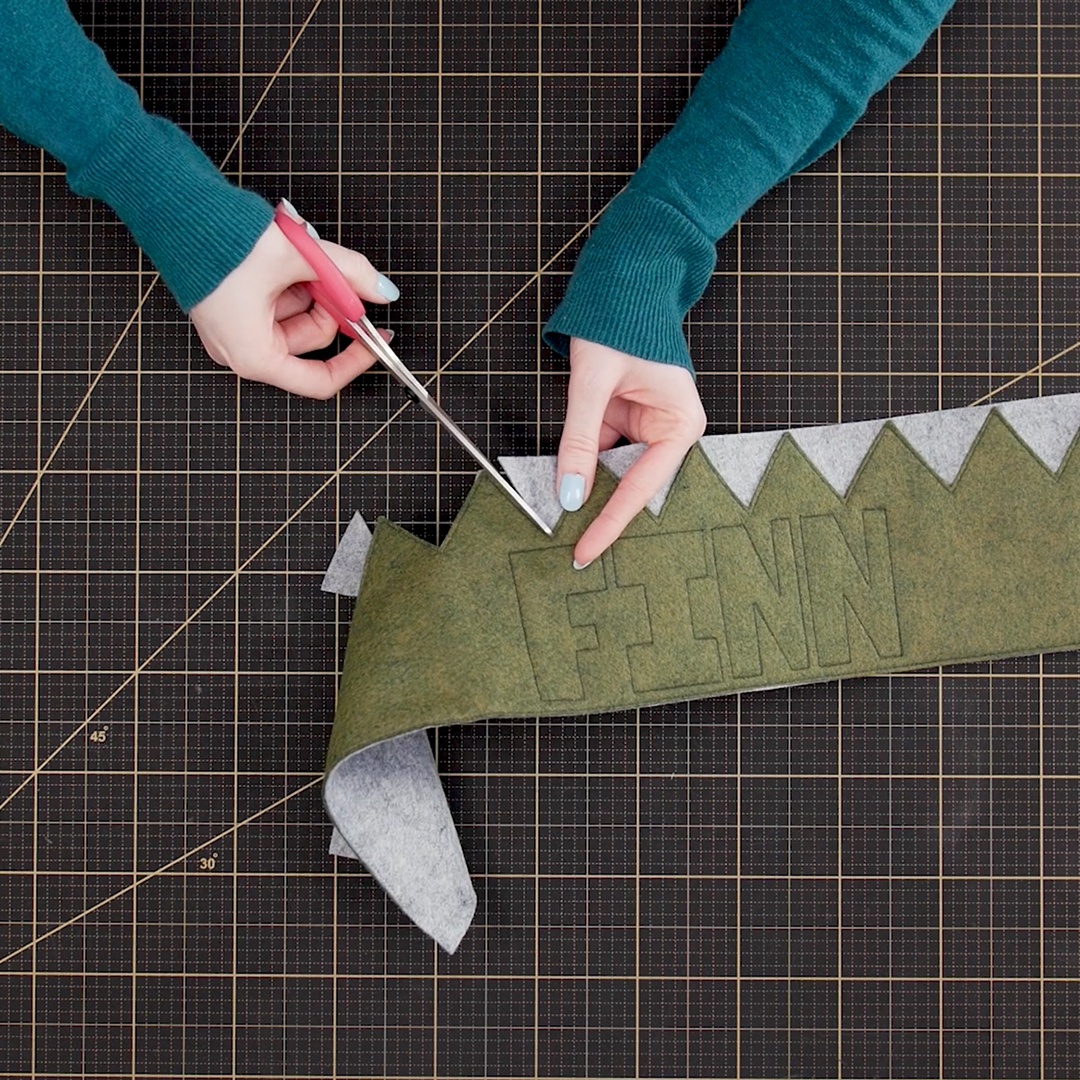
Lastly, very carefully trim away your green layer of felt inside the letters to reveal your cotton fabric. Leave about 1/ 16 of an inch of green felt from the stitching.
Our household is enthralled with Grogu, or widely known as “Baby Yoda.” Thinking my son would want a Baby Yoda-themed birthday party, I whipped up this felt crown to surprise him. He was so excited to see his party crown and had a wonderful birthday.