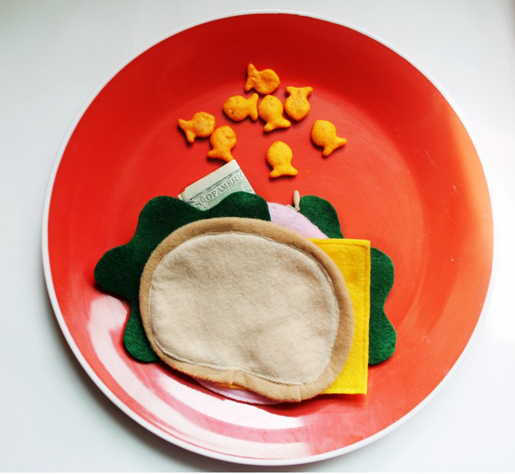
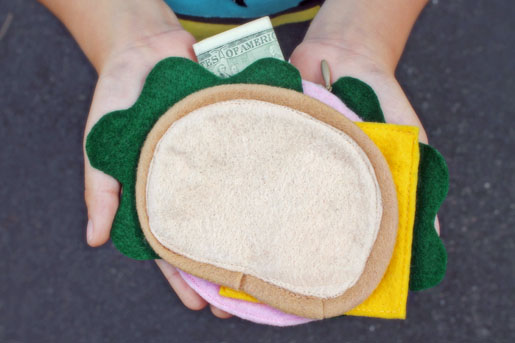
DIY Lunch Money Wallet
No napkins are required when you send your kids off to school with this sandwich. Instead of packing lunch, stow lunch money in this fun and easy bologna sandwich wallet!

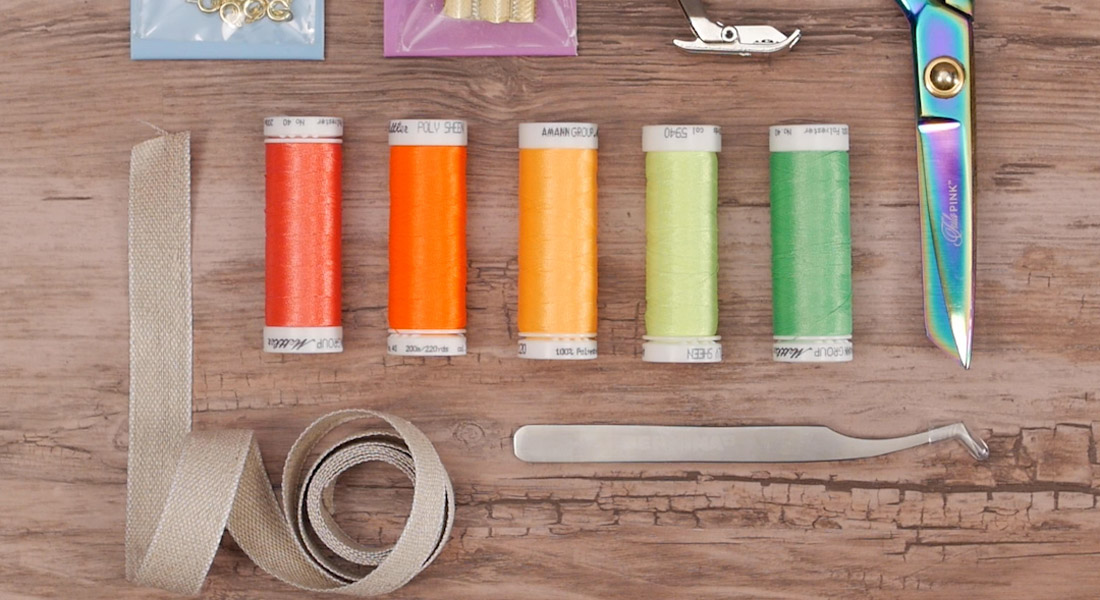
Supplies
- Felt sheets – 1 each of light beige, tan, yellow, green, and pink (or adjust colors as desired for brown rye bread, white cheese, etc.)
- 6″ invisible zipper in pale pink
- Coordinating threads
- edgestitch foot (such as BERNINA Edgestitch Foot #10)
- Invisible zipper foot (such as BERNINA Invisible Zipper Foot #35)
- Hand sewing needle
- Rotary cutter and mat
- Clear acrylic gridded ruler (quilters’ ruler)
- Good craft scissors (We’ll be cutting through paper, so don’t use your best sewing shears!)
Download sandwich templates HERE: Lunch_Money_Wallet_Templates_-_WeAllSew_121314.pdf
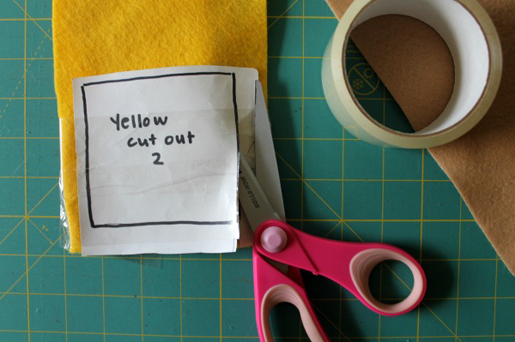
Step 1) Cut the felt pieces.
Start by tracing and cutting out the sandwich piece shapes provided in download.
Cut:
- 4 light beige bread pieces
- 2 pink bologna circles
- 2 green lettuce leaves
- 2 yellow cheese slices
Tip: Cut out the template with extra space around the edge. Use clear packing tape to hold the pattern piece in place on top. Cut your felt with sharp scissors for crisp, clean, and even edges.
Step 2) Make the zippered pouch.
Insert the invisible zipper between the two pink bologna circles using an invisible zipper foot. Refer to this YouTube video for complete instructions. (Alternatively, the zipper could be sewn in by hand, or hook-and-loop tape could be stitched to each side.)
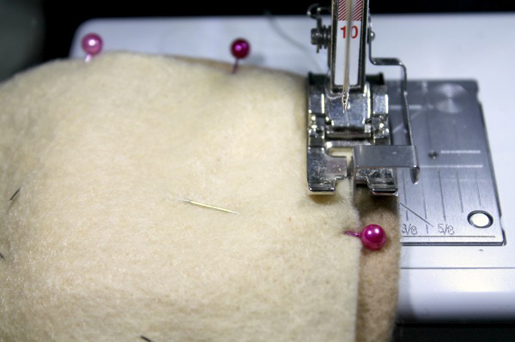
Attach the edgestitch foot to your sewing machine. We’ll be using this foot to construct most of the sandwich elements including the cheese, lettuce, and bologna money pouch.
With wrong sides together and the zipper closed, press the pink pouch and pin the edges together. Stitch close to the outside edge.
Tip: Use the edgestitch foot guide to help you stitch close to the edge without wavering. Place the edge of the felt against the guide, then adjust the needle position to sew 2-3 steps to the side. (For feet with an adjustable guide, move the guide out about 1/8″ and leave the needle in center position. Align the felt edges with the guide.)
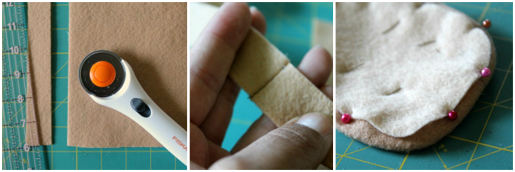
Step 3) Make the bread slices.
Use a rotary cutter, ruler, and mat to measure and cut 1″ x 11″ strips of beige felt. Sew two strips together at the short ends to create one long length of “bread crust.” Fold the strip in half lengthwise.
Secure the crust between twoo light beige bread pieces with pins before sewing into place with a straight stitch.
Step 4) Assemble the sandwich.
Assemble the sandwich pieces according to your preference, but be sure to place the change purse/bologna in the center.
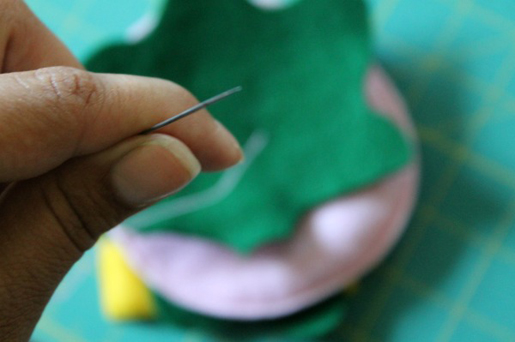
Sew the sandwich together by hand: Knot the end of the thread. Beginning on the inside right side of the bologna, pierce the needle through the layers of felt, making sure to catch the lettuce, cheese, and only one layer of the outer bread slice (we don’t want the stitches to be visible on the outside of the wallet). Work your needle back through the layers and tie off with a knot. Repeat for the left side.
Finished! Insert lunch money and send your little one off to school with the coolest money pouch in the lunchroom!


3 comments on “DIY Lunch Money Wallet”