How to Make a Pressing Ham
How do you feel about ironing? Is it something you love to do or dread doing? It may seem odd, but I am someone who actually enjoys ironing. For me, it symbolizes the starting and the ending of most of my projects because I usually start and end with pressing! However, there are a lot of times that I am pressing after each step. And as someone who makes a lot of garments, there are always curved, dimensional pieces involved. Because of this, a pressing ham is a staple in my sewing room. It is one of those notions that you do not think you need until you actually need it.
If you are in need of a pressing ham right now, you have come to the right place. This pattern is fast and easy to create and will help you continue on with your sewing projects after a perfect pressing.
You may also know a pressing ham as a tailor’s ham, as this notion is often used when pressing garments during construction. The ham replicates the dimensions of the body. Pressing hams are great to fill in curves to help create a flat seam, free of tucks or ripples. When you cannot get that perfect press, you may just be needing a pressing ham to fill in the empty space.
Supplies to Make a Pressing Ham
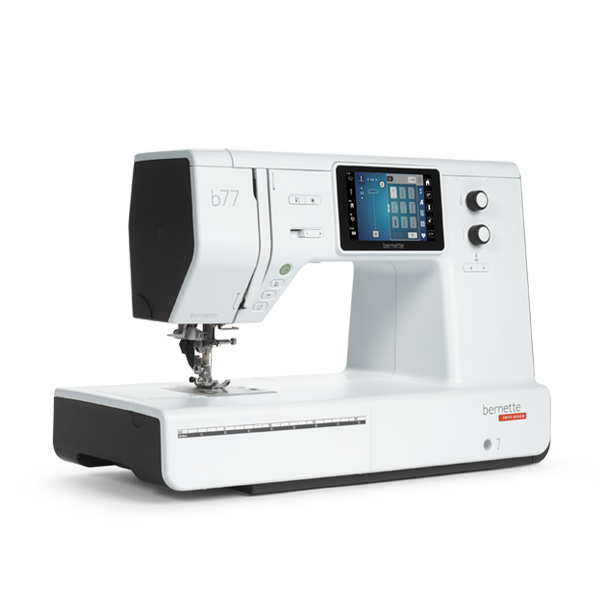
- bernette 77
- Pressing ham pattern template
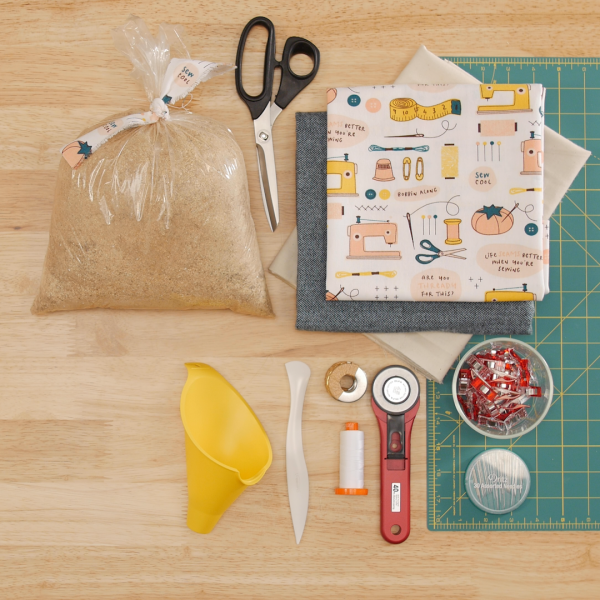
- ¼ yard of wool
- ¼ yard of cotton canvas
- ¼ yard of muslin
- cotton thread
- Size 80 Microtex needle
- Hand sewing needle
- Rotary cutter
- Pattern weights
- Wonder Clips
- Point 2 Point Turner
- Sawdust
- Funnel
- Iron & pressing mat
- Scissors
- Snips

Components of the Pattern
- The exterior has two sides. One side is wool for thicker fabrics. The other side is cotton canvas. This is used for lighter, smoother fabrics. Both materials will hold up to the heat from the iron.
- The pressing ham has muslin lining that will prevent the sawdust from seeping through the weave of the exterior fabrics.
- There are two long sides that angle in towards the bottom, creating a smaller curve.
- The top of the ham has a bigger curve for bigger pieces, and the bottom has a smaller round end.
Creating the Pressing Ham
Start by picking out the wool and cotton canvas fabrics. Find a fun print so you smile every time you iron. Press the fabric in preparation for cutting.
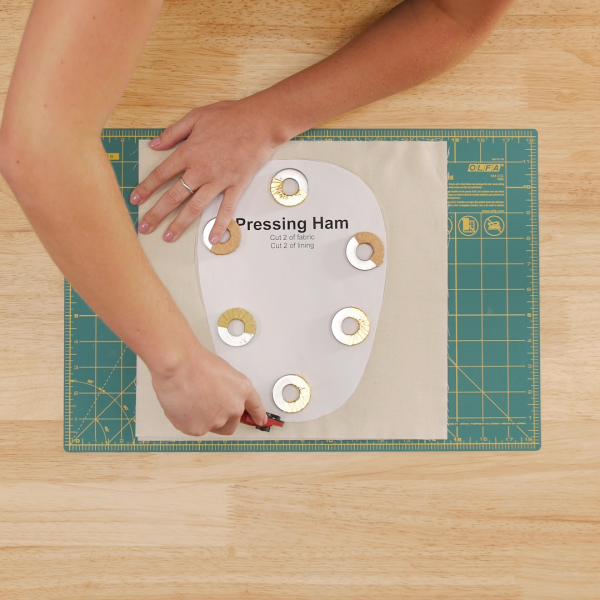
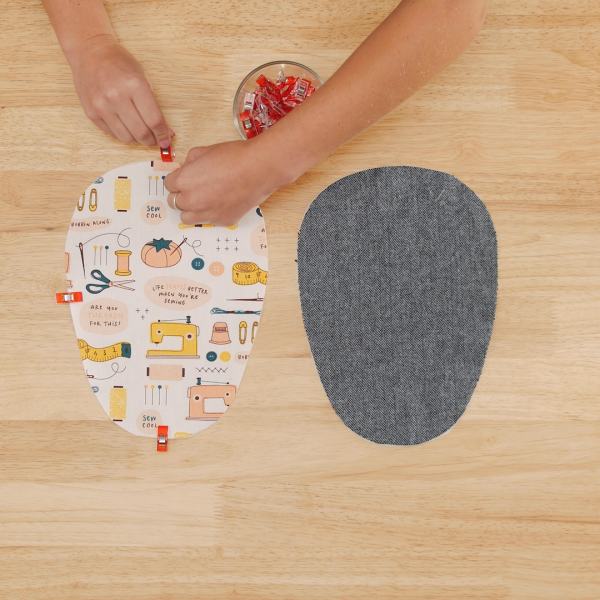
Print and cut out the pattern. This pattern requires two pieces to be cut of the exterior fabric and two to be cut of the lining, or muslin. Fold the muslin in half, place the pattern on top, and hold in place with pattern weights. Cutting curves is no small feat, but using a rotary cutter will help achieve smooth curves. Repeat with the exterior fabric, cutting one piece from the wool and one piece from the cotton canvas.
In preparation for sewing, layer one piece of exterior fabric with one piece of muslin, wrong sides together. Align the edges, and hold in place with a few Wonder Clips or pins.
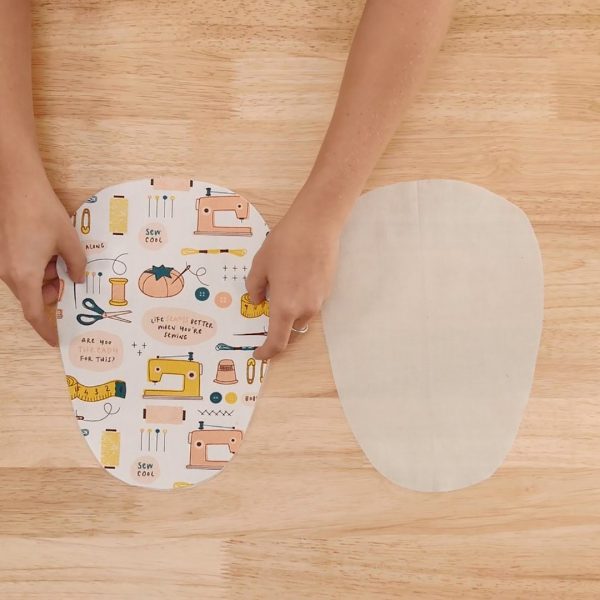
Repeat with the other exterior piece and lining piece.
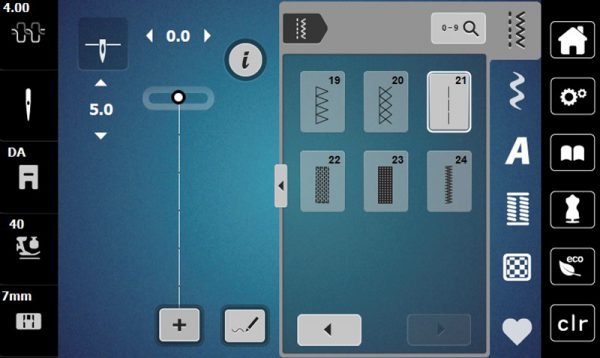
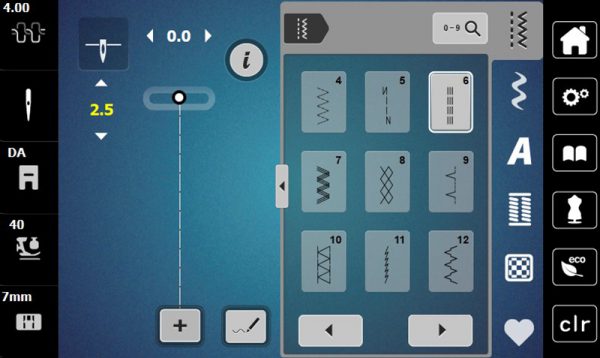
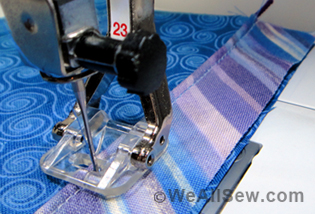
The bernette 77 has become one of my go-to sewing machines lately, and it is perfect for this project. On screen, select Basting Stitch #21. Since there are quite a few layers of material to the pressing ham, basting each side together first will better keep the layers aligned later on in the project.
Stitch all the way around the pieces with a ¼” seam allowance.
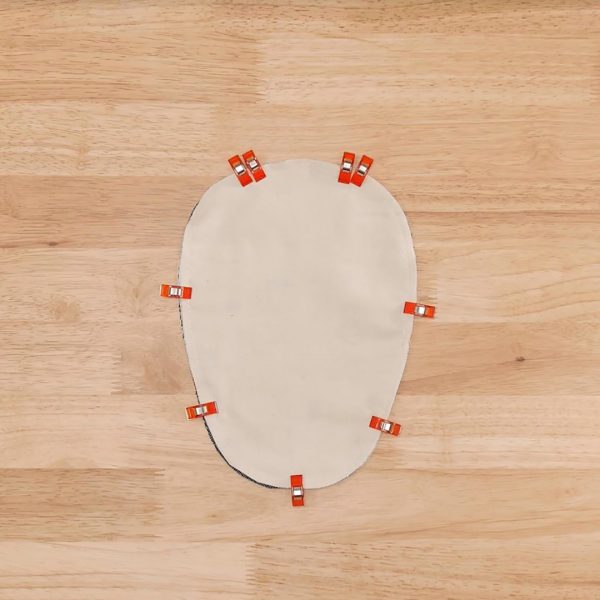
Once both sides are basted, layer them right sides together. The wool and cotton canvas should be touching. Clip the two sides together with Wonder Clips. Leave a 3” opening at the top of the ham (longer curved end). I use double clips to mark my start and endpoints.
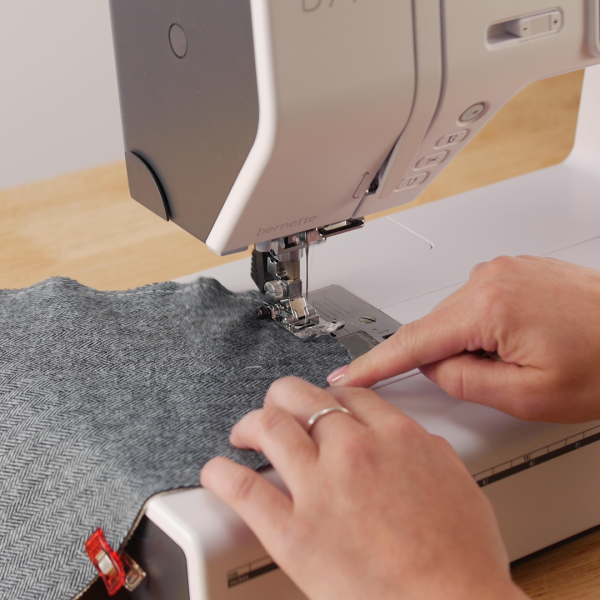
Back at the b 77, select Triple Stitch #6. Use the bottom knob on the front of the machine to decrease the stitch length to 2.5. The triple stitch is ideal for this step because it is stronger than the traditional straight stitch, and will hold up better through each use of the pressing ham. Decreasing the stitch length will prevent any sawdust from seeping through the seam.
Stitch this seam with a ½” seam allowance. I use the markings on the stitch plate to maintain a perfect ½”. Begin stitching at the first marked spot on the top of the ham, and secure the stitch.
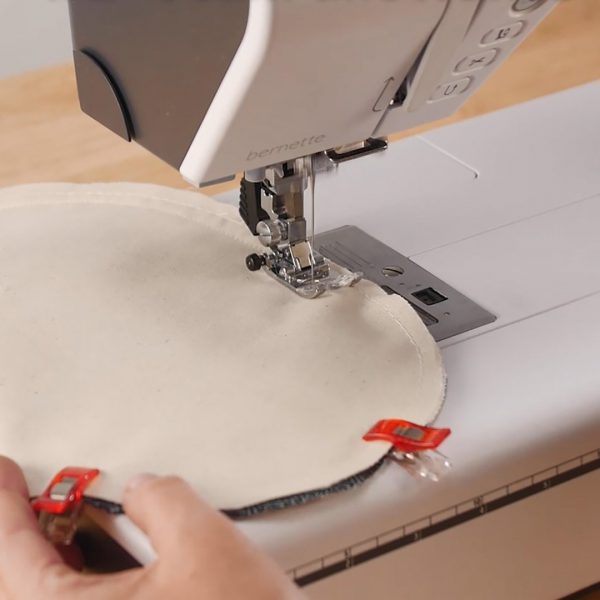
One of my favorite features on the b 77 is the Automatic Thread Cutter. Once you get back to the double Wonder Clips at the top, simply touch the button on the front of the machine and remove the project once the machine automatically raises the presser foot. All threads are cut for you!
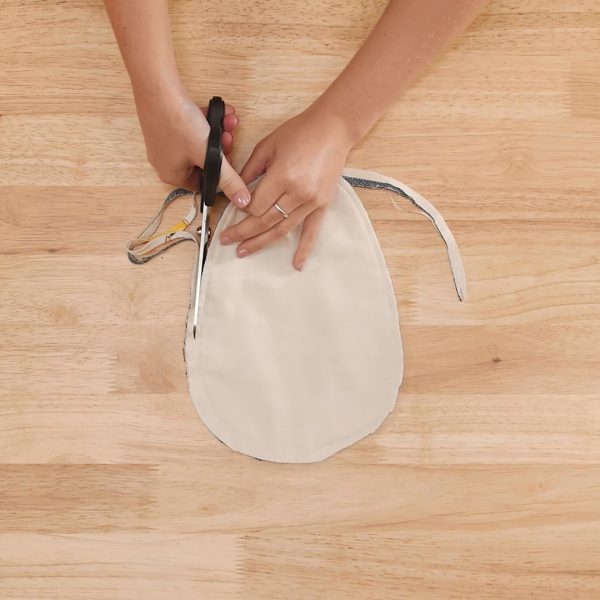
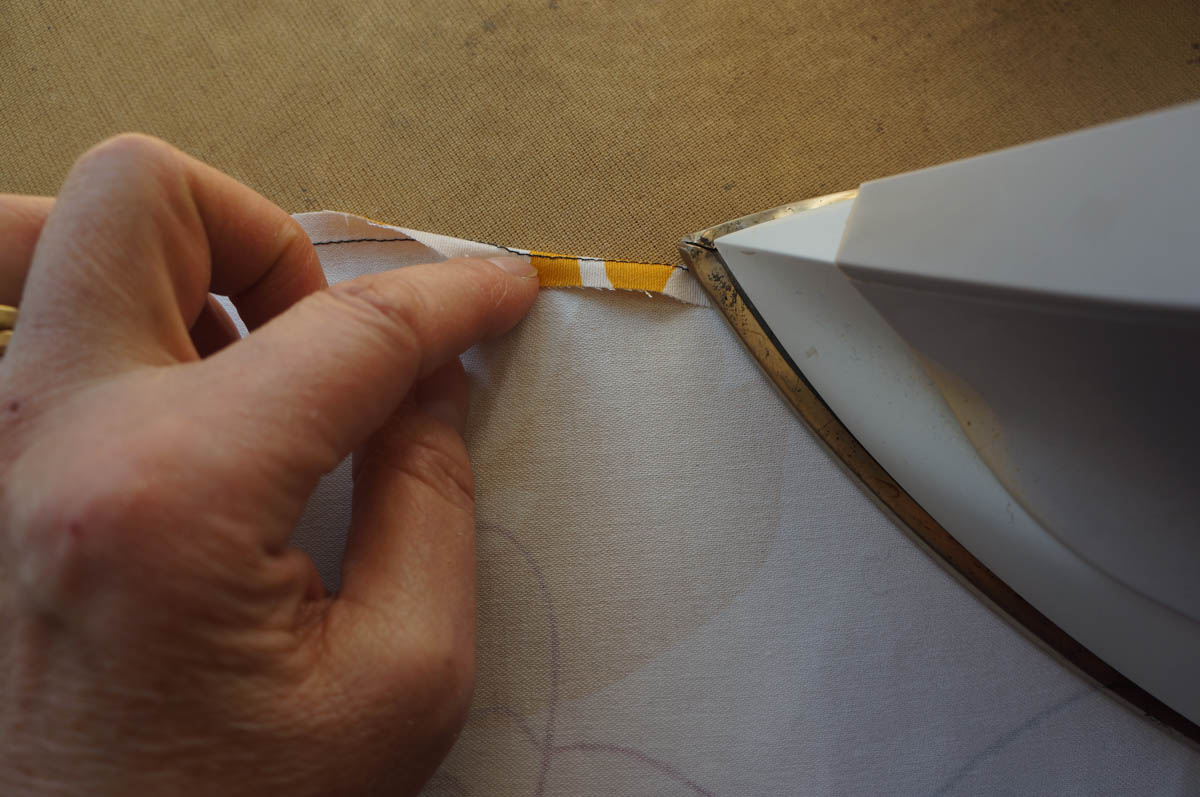
Before turning the ham right side out, trim the seam allowance in half around the entire piece. Use the basting from the beginning as a guide, carefully trimming this stitch away. Clip the curves at the top and bottom, snipping into the seam allowance every ½”. Finally, flip the ham right side out.
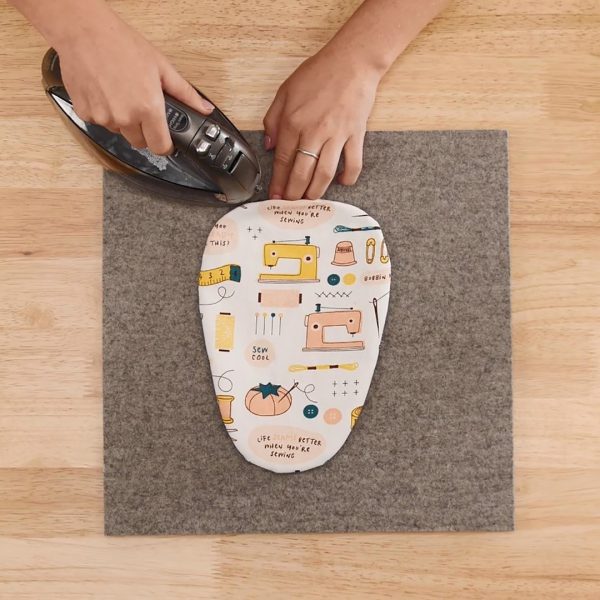
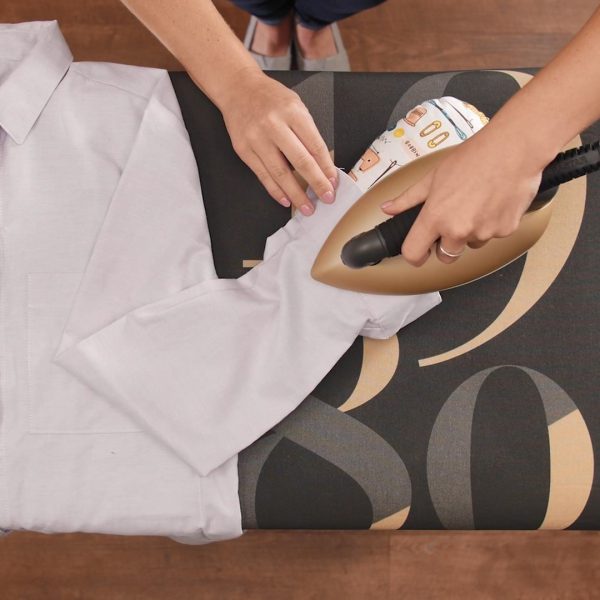
The next step is important. After filling up the pressing ham, it may be difficult to close. Pressing the ½” seam allowance first should make it easier. Ironically enough, it is helpful use an iron for this, along with a Point 2 Point Turner to fully push out the curves.
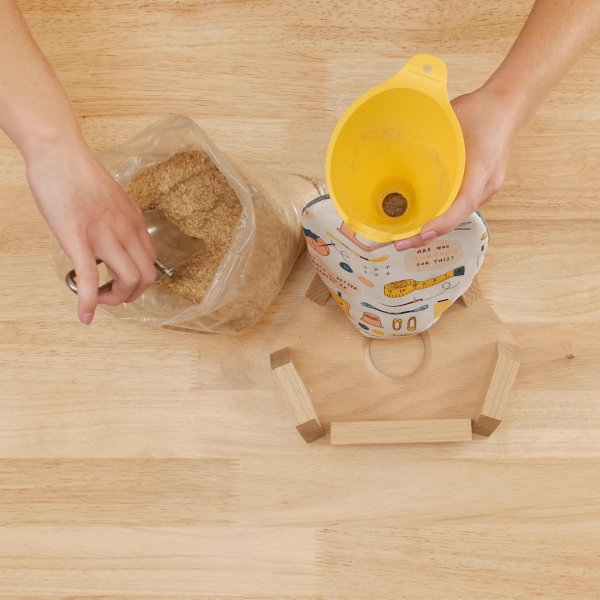
Time for everyone’s favorite step – stuffing the pressing ham with sawdust! I chose sawdust because it can pack down well and adds good weight to the ham. It is typically available at the local lumber, home improvement, or hardware store where wood is cut to size. The employees at my local store looked at me a little funny when I asked for leftover sawdust, but I got it in bulk! While at the store, be sure to pick up a small funnel to help with the filling. I used a simple oil funnel, along with a trowel. Use a wooden skewer to help move the sawdust down. After scooping in a small amount of sawdust, prop the ham up so both hands are free for stuffing. Fill until the ham is completely full, then keep filling a bit more. It should be slightly over stuffed.
The last step is to hand stitch the opening shut. Then it is time to put your pressing ham to good use with the next sewing project!
Used Products
What you might also like


6 comments on “How to Make a Pressing Ham”
-
-
I think sand could be used, but there is a risk that it might seep through depending on the weave of your fabric. It might be easier to fill the ham though!
-
-
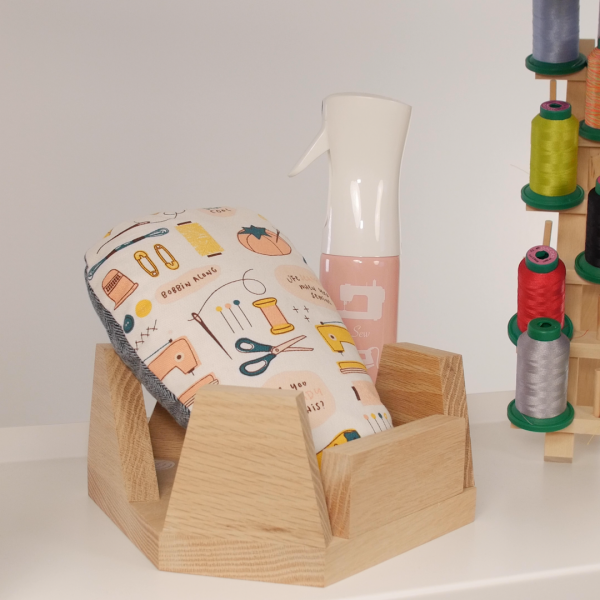
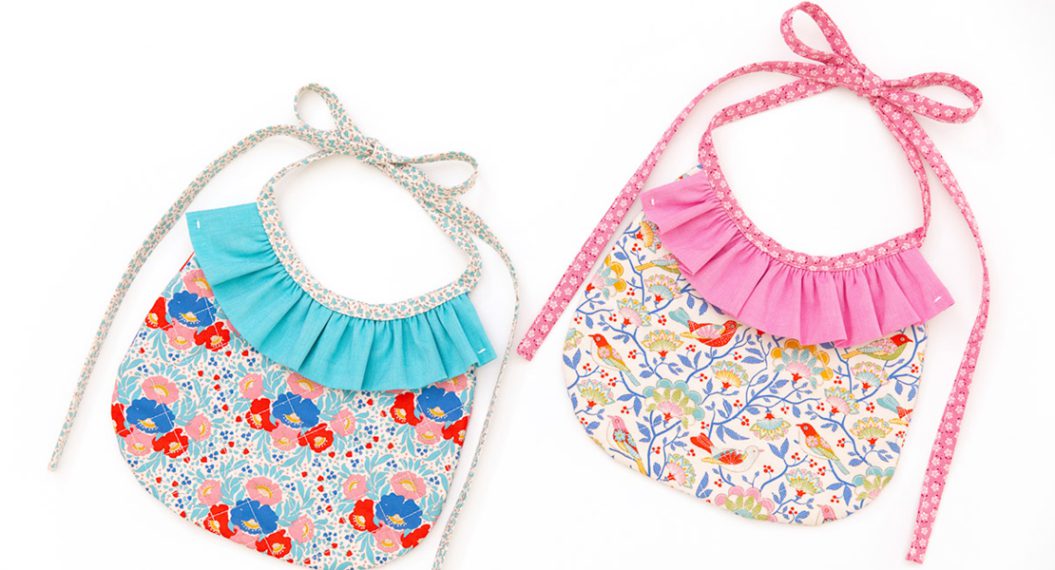
I would also like instructions for the pressing ham holder shown in the photos. Is it 6 sides?
-
I do not have instructions for the holder, but one can be purchased online or at your local craft store. It is a 5-sided holder like this one here: https://www.amazon.com/Jacksons-Woodworks-Tailors-Ham-Holder/dp/B07694RH8X
-
-
Do you have a link to where I could buy the fabric with the sewing notions on it? I LOVE it!!
-
I found it at JoAnn’s. It’s called Sewing Machines and Tape Cotton Canvas Home Decor Fabric.
-
Leave a Reply
You must be logged in to post a comment.

Rather than sawdust, can fine sand be used as the stuffing?