How to Sew a Professional Pillow, Part One
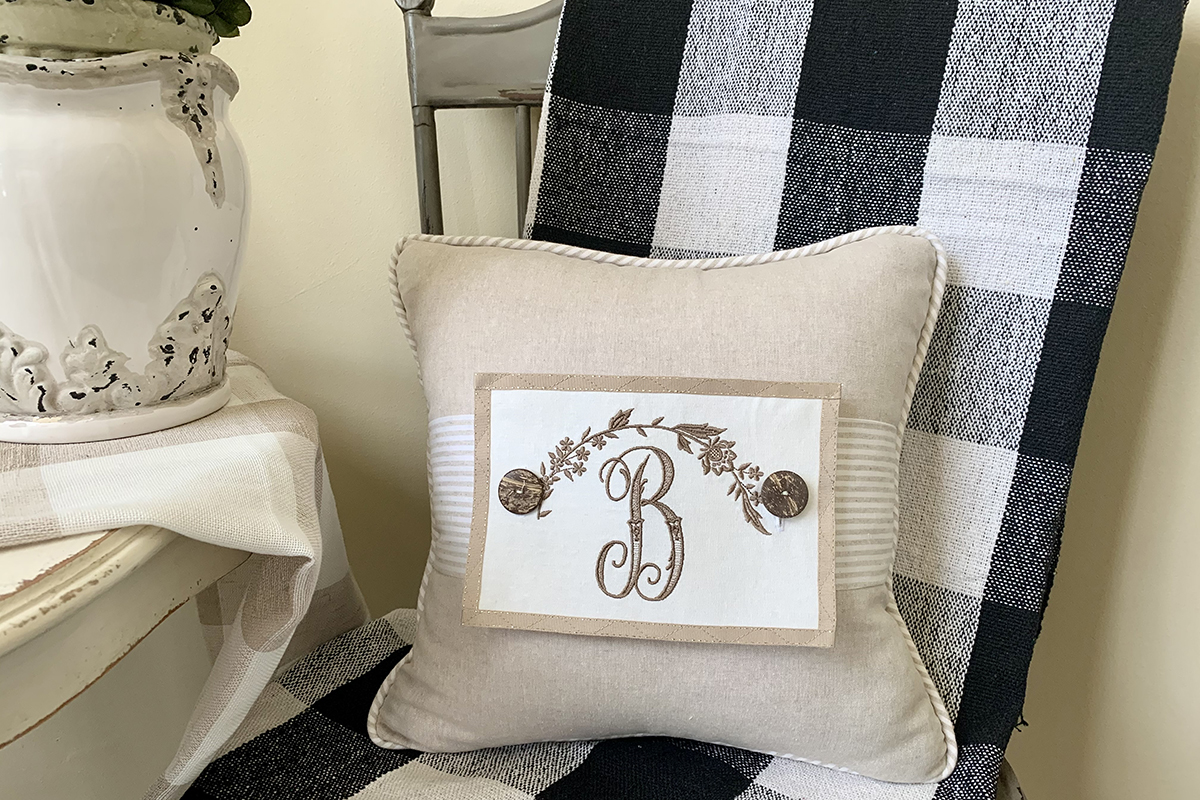
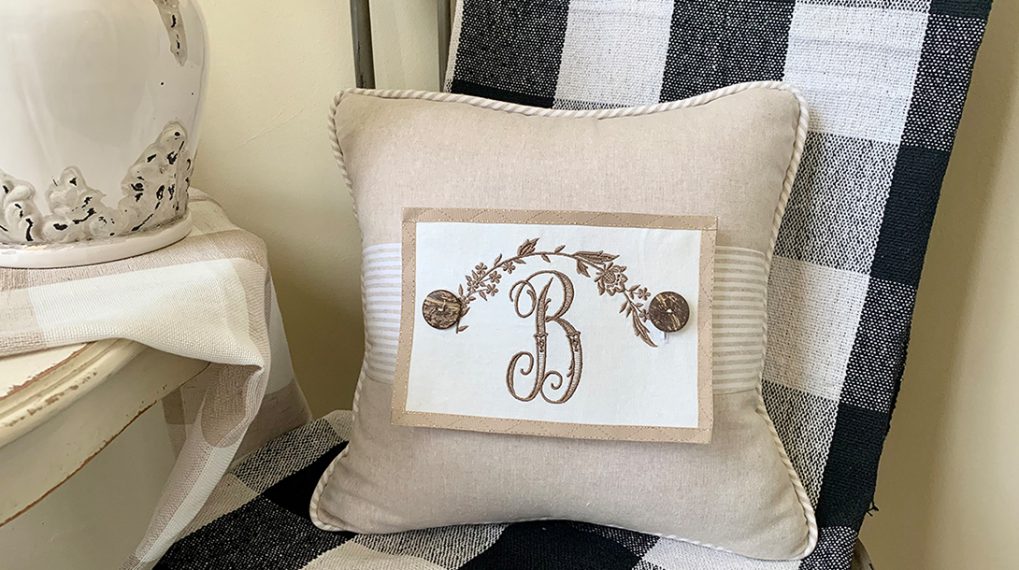
The BERNINA Community Studio online lesson is about constructing your own professional-looking pillow with perfect piping. Take this pillow one step forward by using buttons to add a seasonal embroidered patch in part 2.
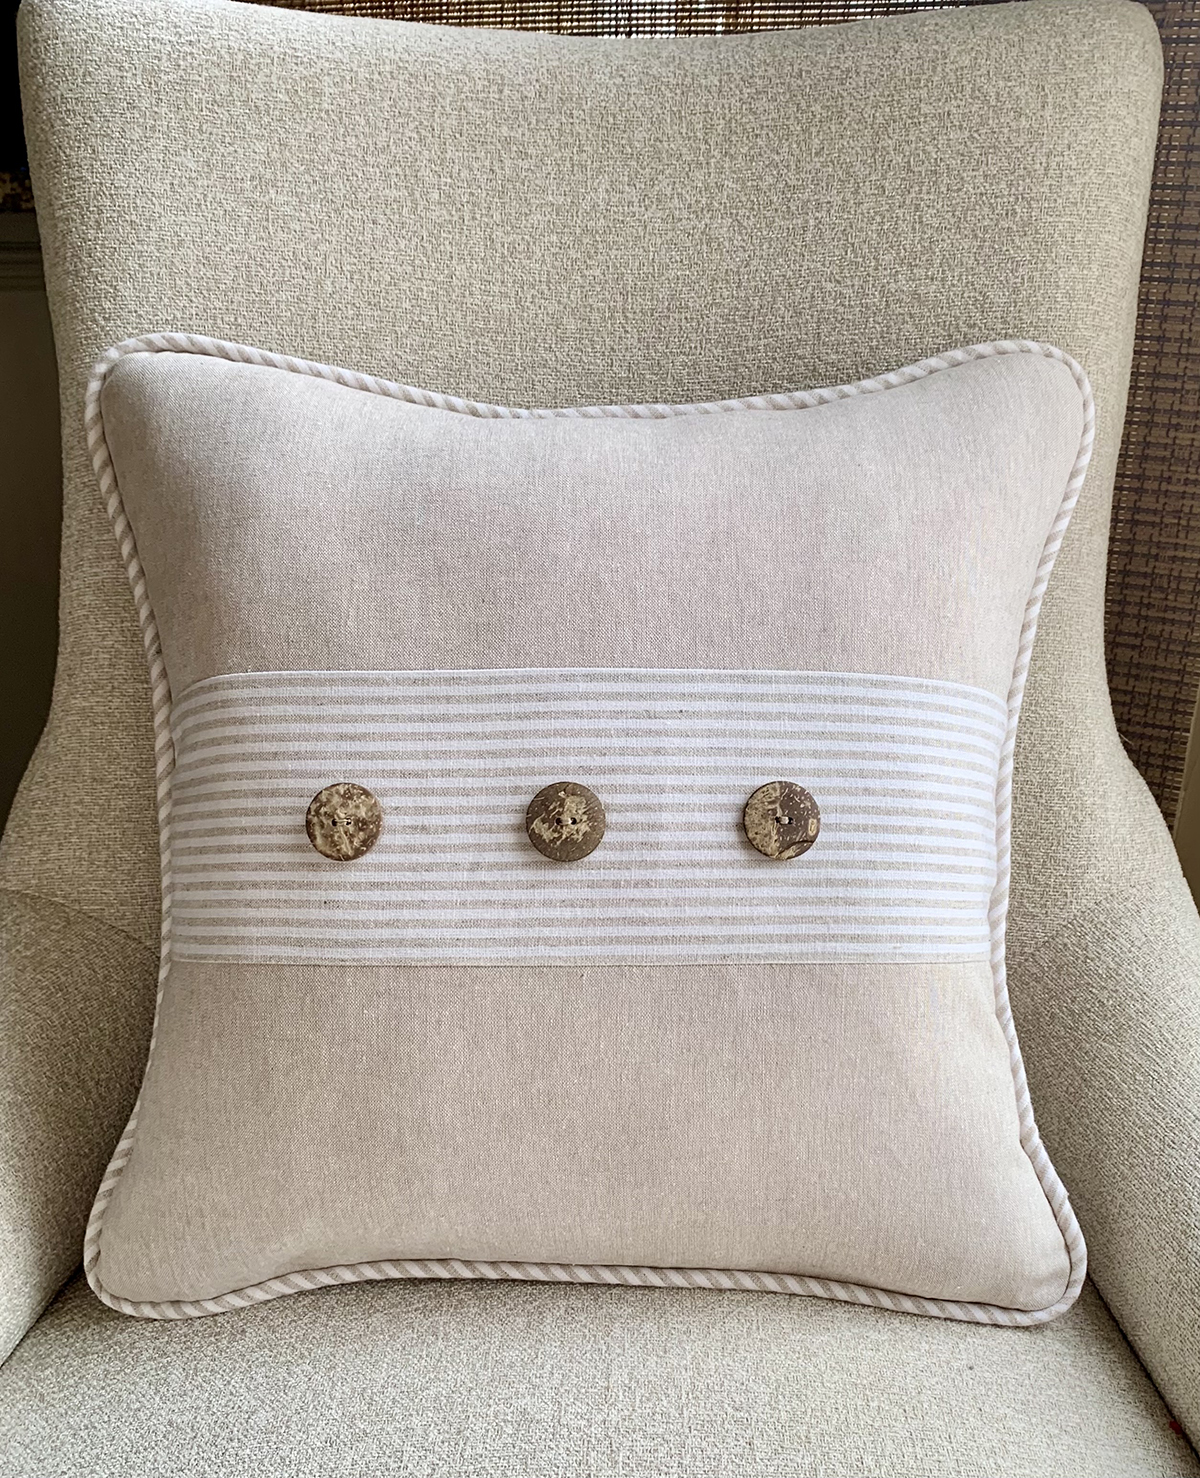
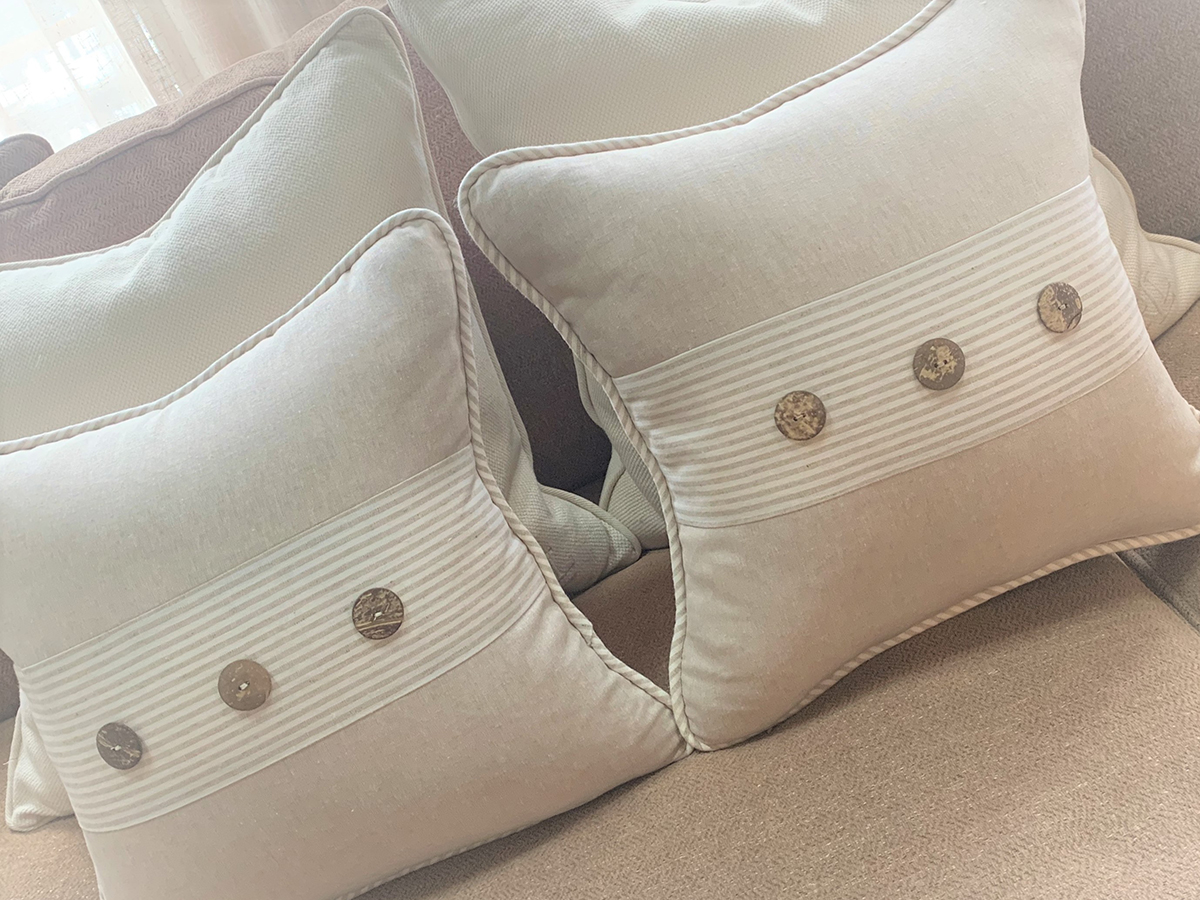
Stop looking for the perfect pillow and make your own! Learn how to construct a home decor pillow, add piping, and insert a zipper. After you make this one, you can use your new sewing skills to make many more in your favorite fabrics and custom sizes!
Materials for Sewing a Professional Pillow
- BERNINA 770 QE
- Reverse Pattern Foot #1/1C/1D
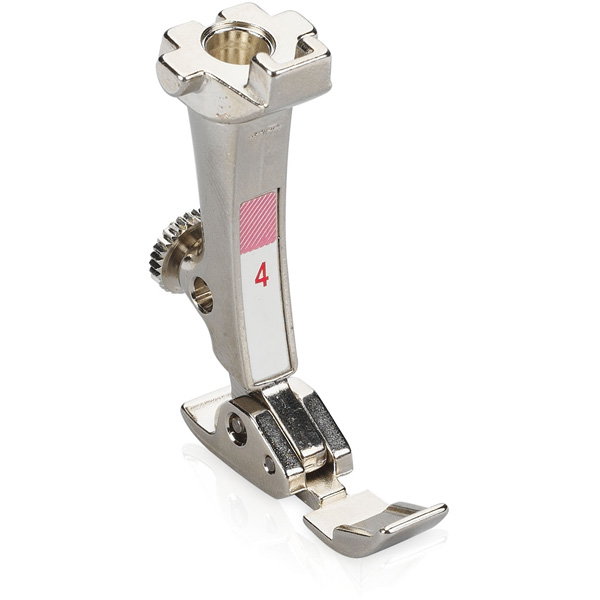
- Zipper Foot #4/4D
- Bulky Overlock Foot #12/12C
- Button Sew-On Foot #18
- Reverse Pattern Foot with Clear Sole #34/34C
Fabric
- 3/4 yard main cotton or cotton-blend canvas
- 3/4 yard contrasting cotton or cotton-blend canvas
Notions
- Thread
- 14” invisible zipper
- 1/4” piping cord filler – 74” long
- 20” pillow form
- (3) wood buttons
- 1/4” double-sided fusible tape
- Pins
- Wonder Clips by Clover
- Diagonal seam tape
- Temporary marker
- Stiletto

Steps to Make a Professional Pillow
Step 1: Prepare Fabric
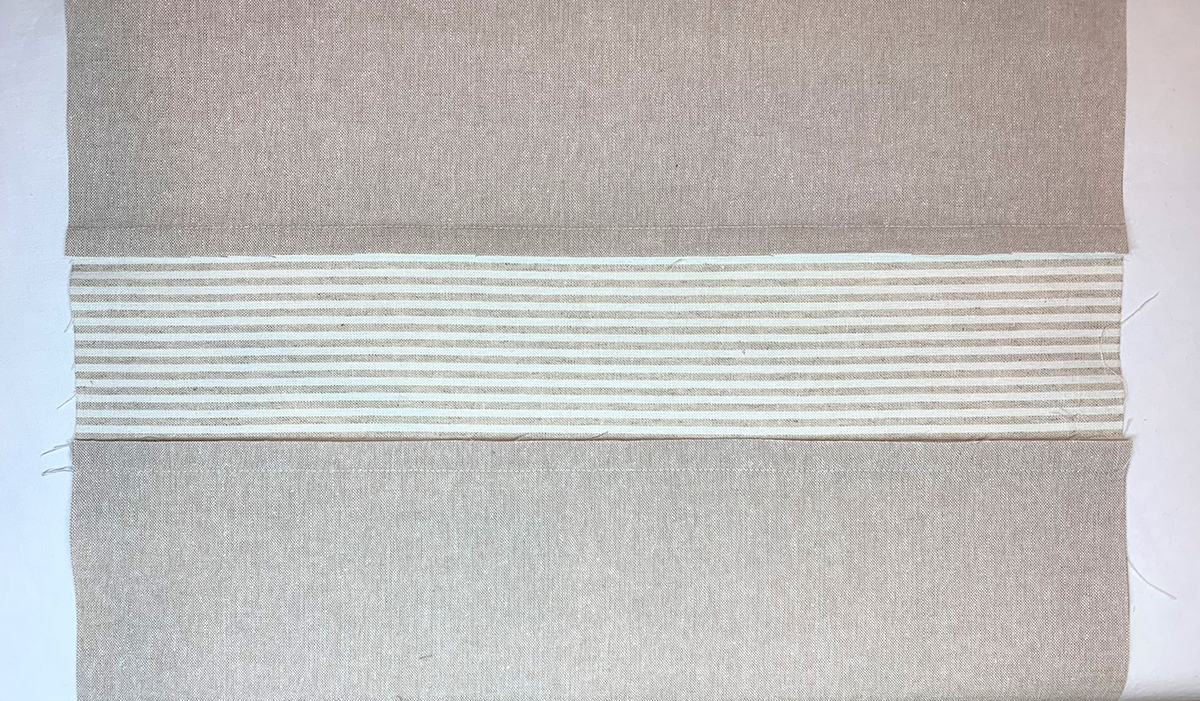
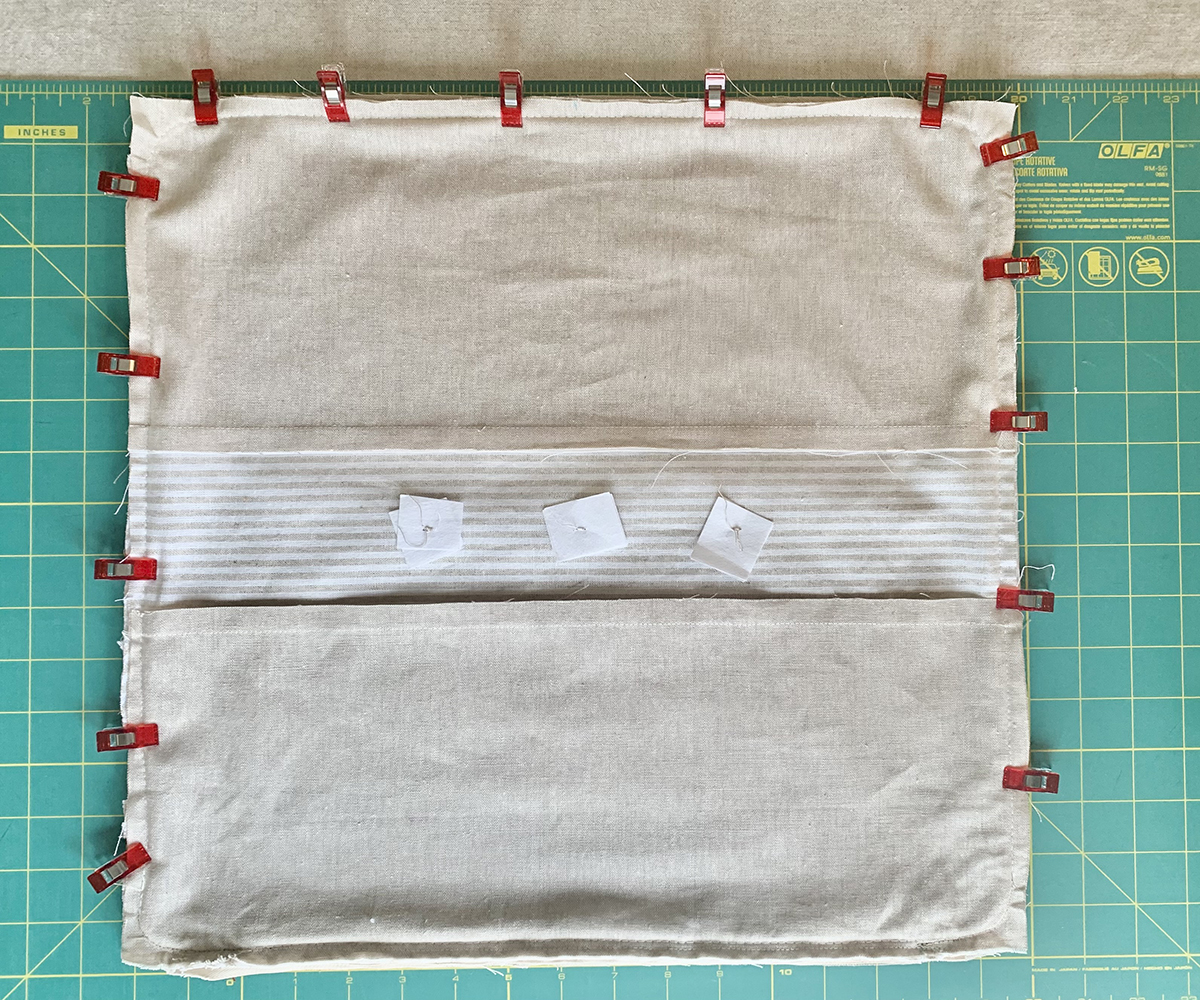
Main fabric:
- Cut 2: 7” x 17” rectangles for the pillow front
- Cut 1: 17” square for the pillow back
Contrasting fabric:
- Cut 1: 5” x 17” rectangle for the pillow front
- Cut piping strips: 1 1/2” wide strips to create 74” of total length
Tip: Strips may be cut on the bias or straight of grain—cutting on the bias makes it easier to apply to rounded corners and the fabric is less likely to look puckered around the cording.
Step 2: Make Pillow Front
Gather the three rectangular fabric pieces for the pillow front. Piece the pillow front by pinning the two solid pieces lengthwise along opposite sides of the contrasting piece. Sew 1/2” seam allowances with your Reverse Pattern Foot #1/1C/1D. Press seam allowances toward the center.
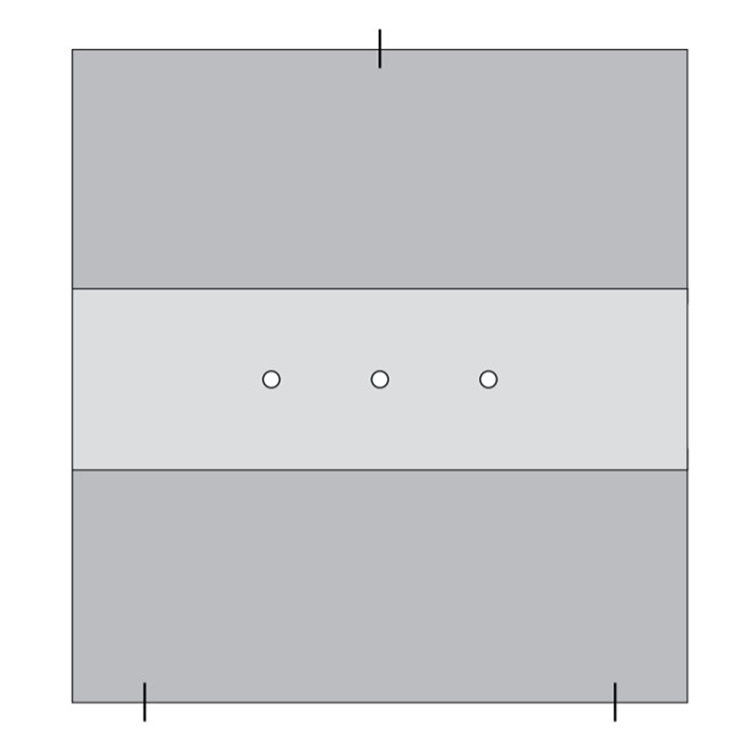
Next, mark both the pillow front and pillow back with three marks each – 2” from either side on the bottom and in the center at the top. This will help with placement later. We also need to determine button placement. Make a mark at center of pillow front. Then, with a ruler, mark 3” on each side of the center mark. You will have three button placement marks in a row.
Step 3: Making and Sewing Piping
Now we need to sew our piping strips together to make one continuous strip that equals 74” in length.
Note: For this piping, ideally you want to cut bias strips. Cutting on the bias will prevent puckers and creases in the piping. Strips that are cut on the straight of grain will work on projects without many curves, but will be less forgiving.
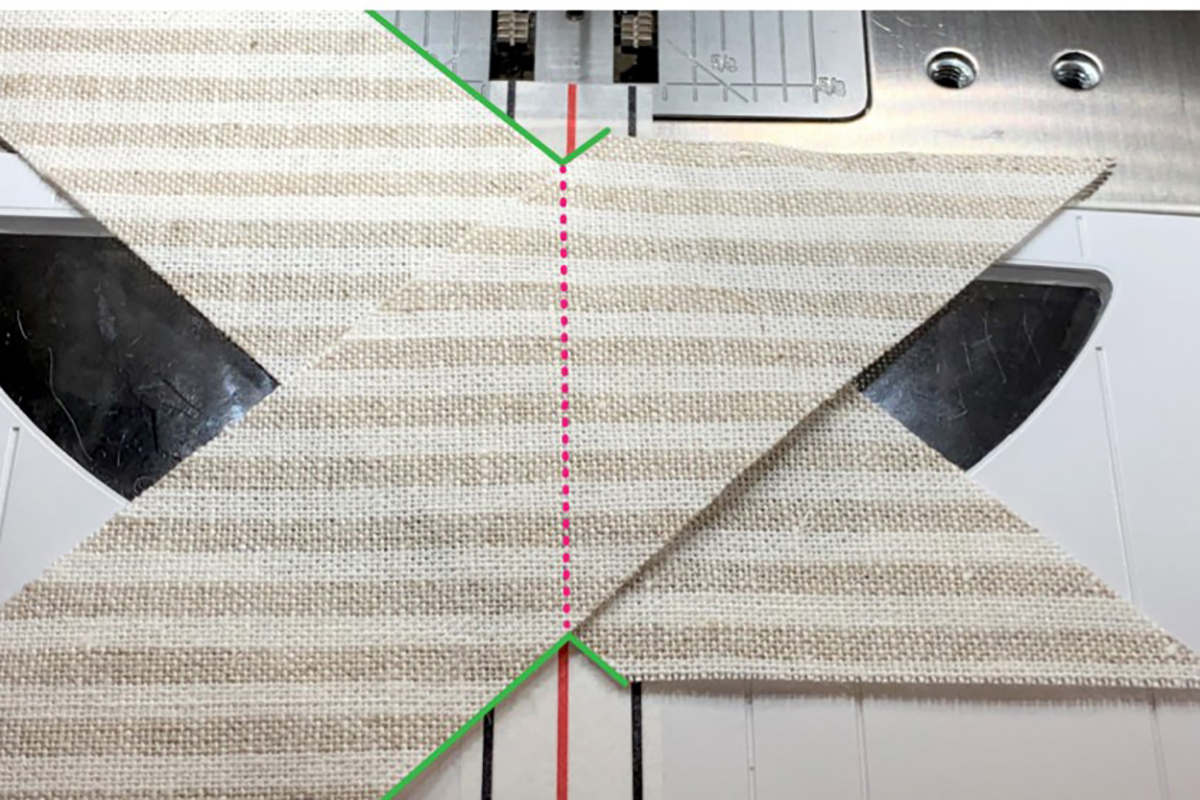
Sewing continuous strips together is easy with the use of diagonal seam tape.
There are three lines on the tape. Align the center red line so it is in front of the needle but not on the feed dog. Place the black lines on top of the 1/4” marks on your stitch plate.
Place two fabric strips right sides together. Center the “valley” on the red line and sew keeping the “mountain” centered on the red line.
Sew the strips together using Reverse Pattern Foot with Clear Sole #34/34C.
After you sew all the strips together, grade seam allowances down to 1/4” and press seams open. This will reduce bulk in the piping.
Attach Bulky Overlock Foot #12/12C.
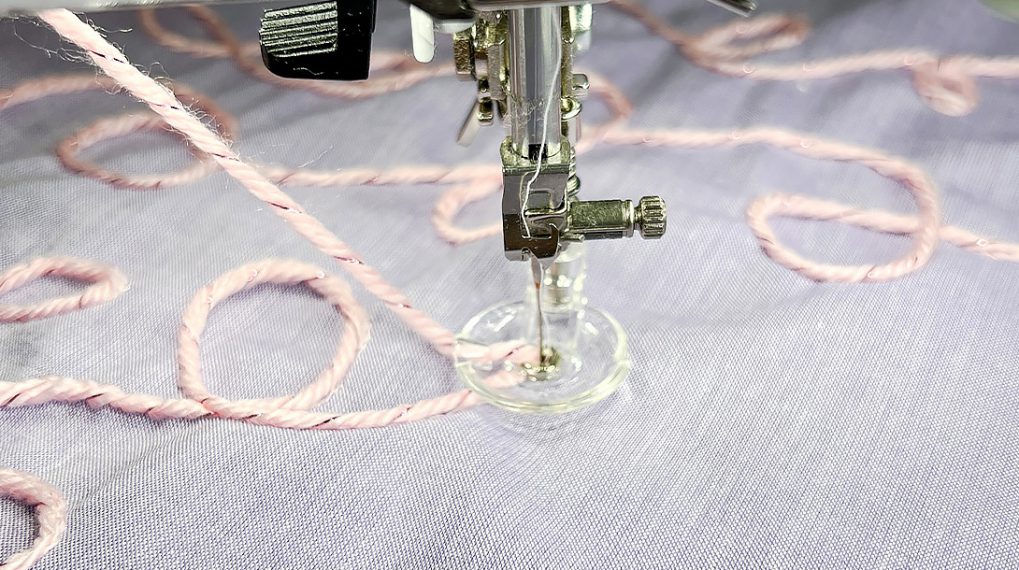
Fold piping strip in half and place cord inside the strip to form the piping. Hold the cord in place with Wonder Clips.
Place in groove in the sole of the foot. Keep straight stitch selected and change needle position to 4 or -4, depending on which direction the raw edge is facing.
Use your handwheel to check needle placement. The needle should land right next to the cord.
Sew the piping, leaving a few inches of fabric unstitched at end. If it helps, use stiletto or Wonder Clips to keep filler in place as you sew.
Aligning raw edges, use Wonder Clips to pin piping around the perimeter of the pillow top, leaving 3” of piping at beginning unclipped. I usually start on the right side towards the bottom where the join will be least noticeable.
At the corners, snip seam allowance so piping lays flat and stretches smoothly. Make sure not to snip into the stitching!
To sew on the piping, use the Bulky Overlock Foot #1212C again but this time change straight stitch length to a basting stitch of 5 mm.
Leaving 3” at beginning unsewn, sew around the pillow and stop when you reach about 5” from beginning.

To join piping ends, first cut ending tail about three fingers width over beginning tail.

Cut excess piping cord so that the beginning and ending butt up together. Fold end of tail at an angle and fold around the beginning section of piping to join. Finish stitching down.

Tip: Press and steam so raw edges of piping are on wrong side as if the pillow was finished without back piece. This will help achieve that professional look!
Adding the Invisible Zipper
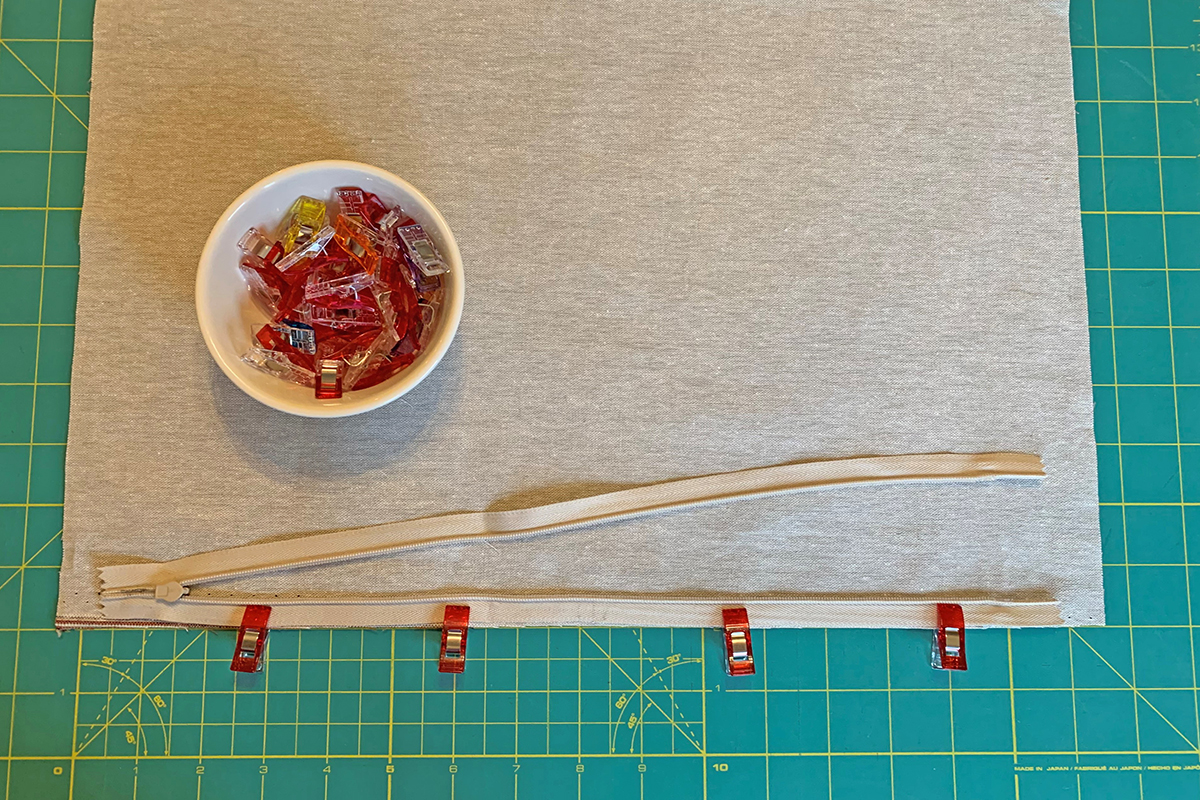
Unzip the zipper. Place one side of the zipper tape along bottom side of pillow back with right sides together.
We are using an invisible zipper, so the teeth are visible on the back side of the zipper. You can pin, use Wonder Clips or 1/4” fusible tape to secure.
Line up zipper tape with raw edge of fabric. Again, make sure they are right sides together.
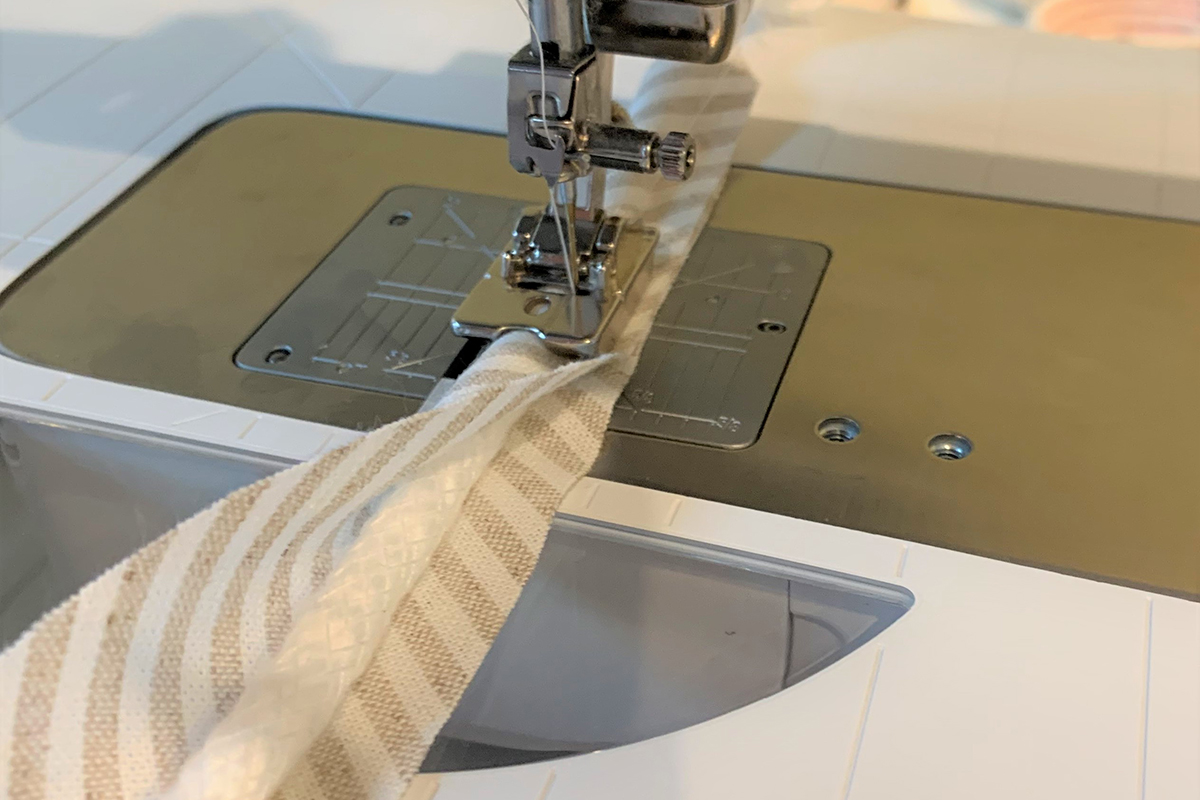
Attach Zipper Foot #4/4D. Select Straight Stitch #1 and move needle positon to -5. Sew with zipper coils butted up against the side of zipper foot.
Close the zipper. Using washable tape or pins/ clips, line up remaining zipper tape along bottom of the pillow front keeping the zipper tape lined up with raw edge of fabric.
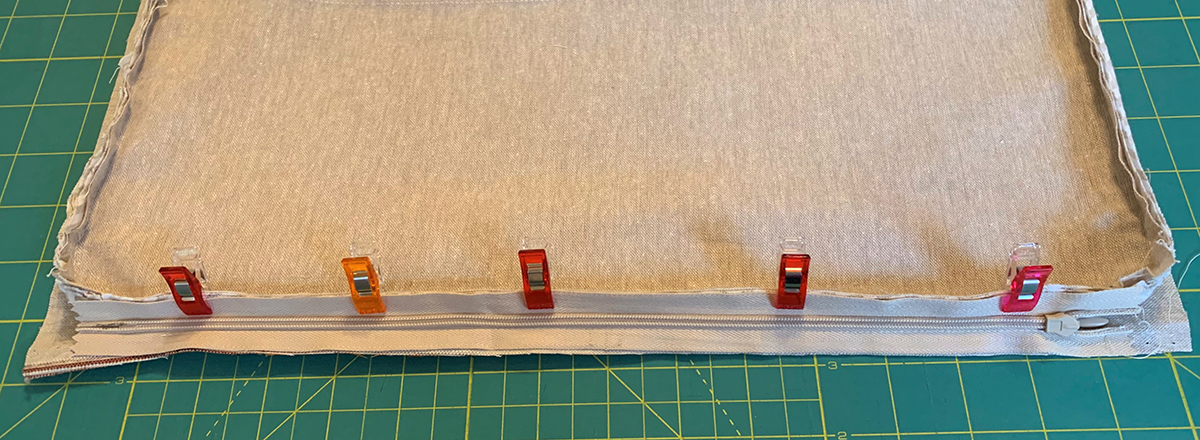
Open the zipper. Sew with foot butted up against the coils. It’s a little trickier with the piping attached.
Securing Buttons
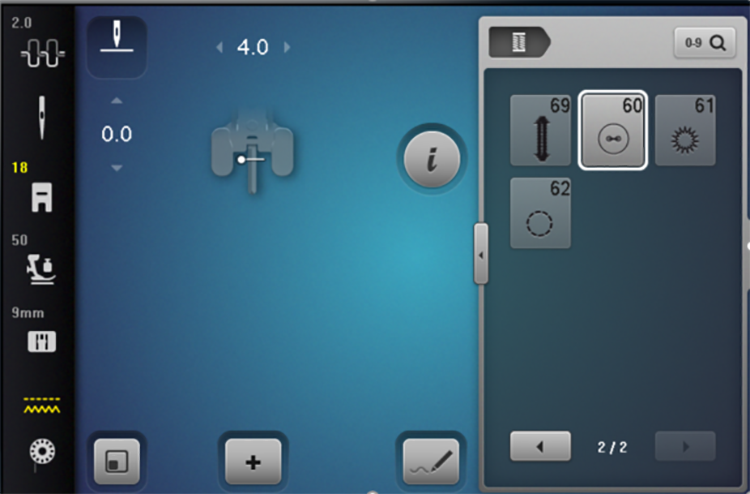
Select the Buttonhole Program on your machine.
Then select Button Sew-on Program #60. Attach Button Sew-on Foot #18. Lower the feed dog.
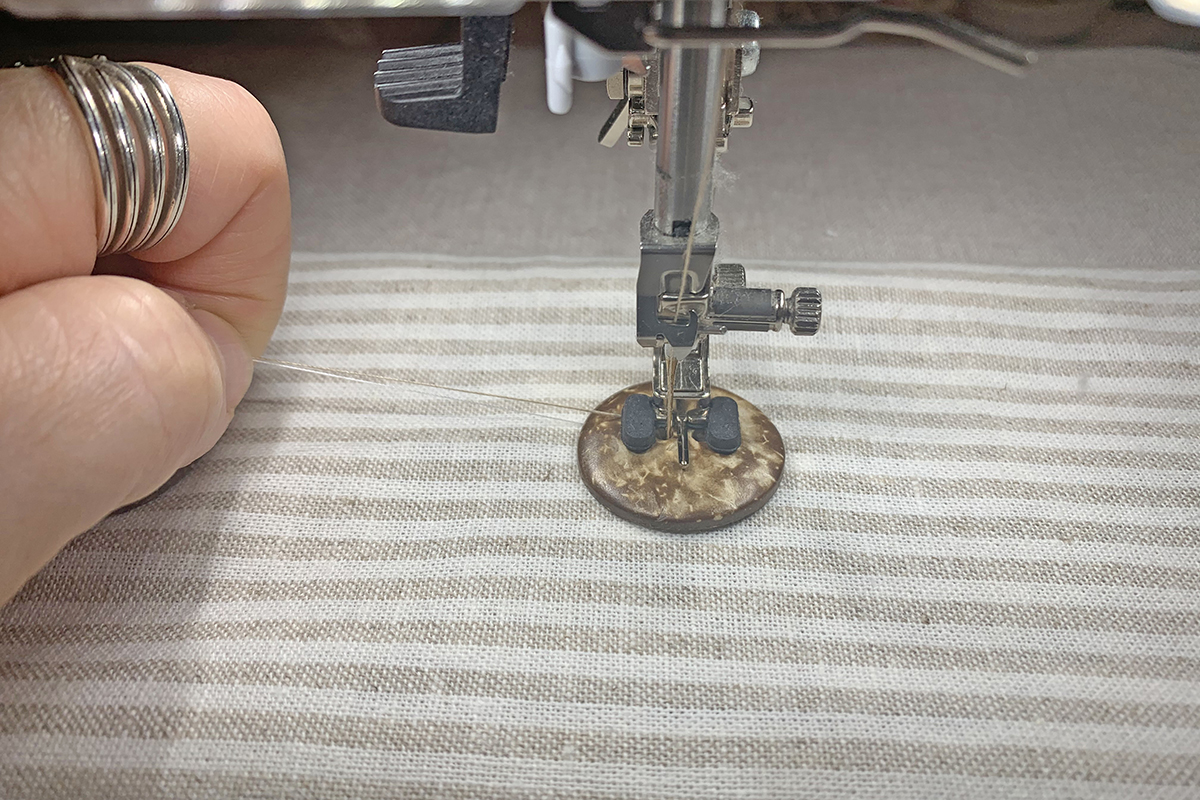
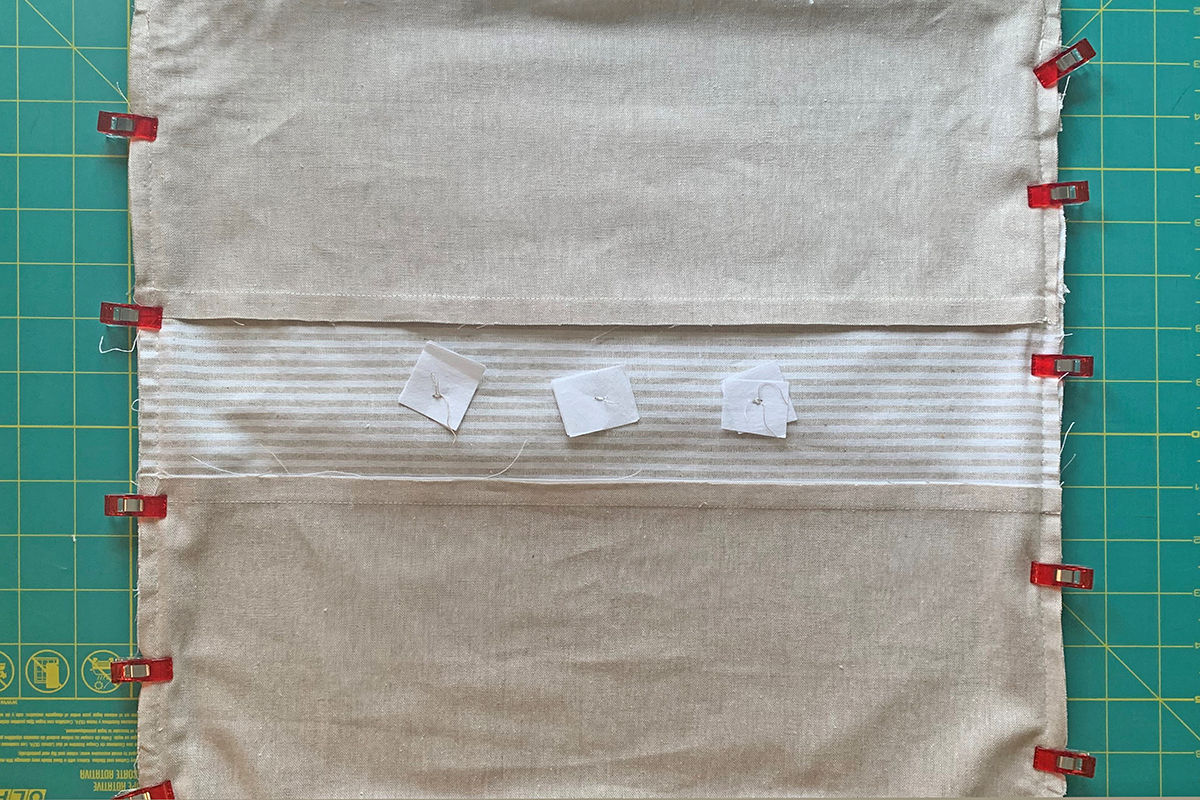
If you are using larger buttons, you might want to add stabilizer on the back. I secured a square of stabilizer slightly larger than the button with a dab of temporary glue.
Place the pillow top under the presser foot, centering the center marking and bring up the bobbin thread.
Place your first button on the center mark you made earlier and lower the foot so that the nonslip rubber coverings are on either side of the holes. Use your handwheel to check placement and ensure that your needle passes through both holes smoothly.
Holding onto the top and bobbin thread, stitch. Repeat for other buttons.
If you are using four-hole buttons, sew on the front two holes first, then slightly lift foot with Free Hand System and slide button toward you until you see the next two holes.
Putting It All Together
Place pillow front on top of pillow back right sides together, matching top and bottom marks made in beginning.
Open zipper halfway. Pin or Wonder Clip starting at the bottom left at the 2” mark you made earlier. Work around the pillow and end at the 2” mark on the bottom right.
Note: Make sure there is not a metal crimp at the zipper end that you might sew over and break the needle.
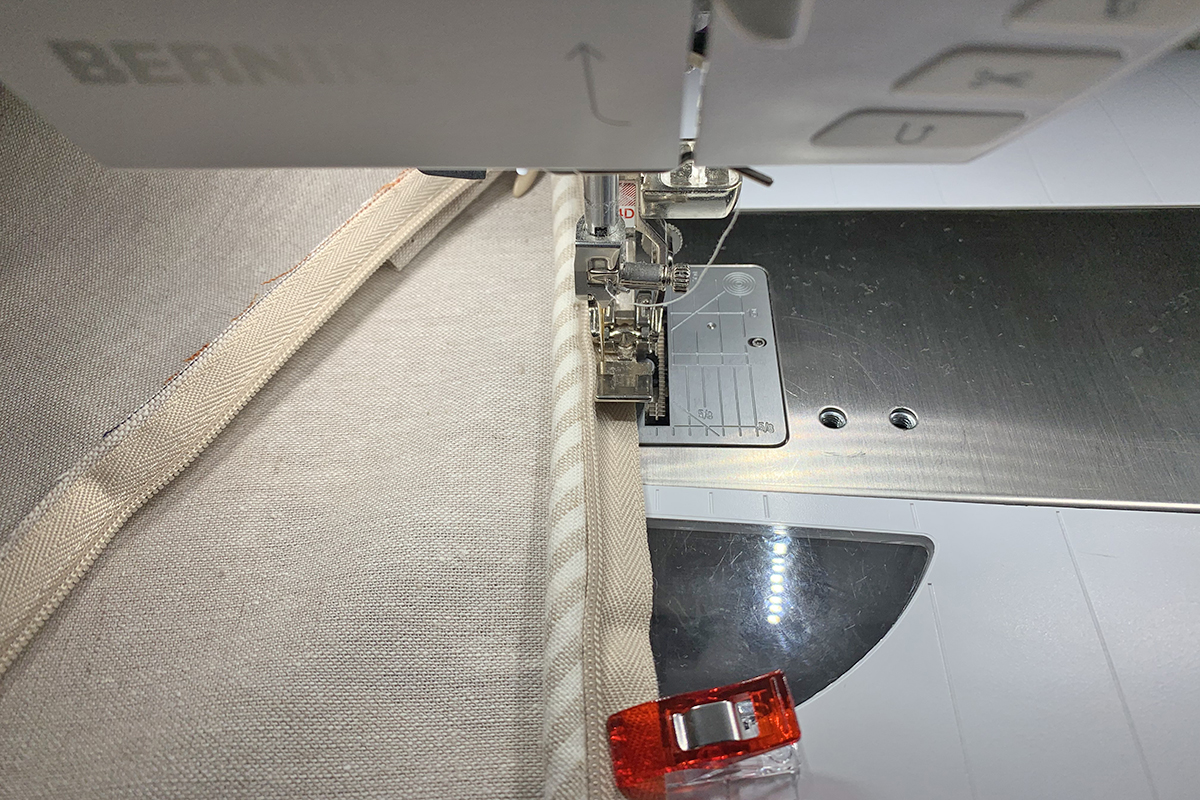
Attach Bulky Overlock Foot #12/12C and raise feed dog.
Place project under needle with piping on top for tighter, neater finish. Change stitch length to 3 mm. Adjust needle position one position closer to piping. Lower hand wheel to check needle placement.
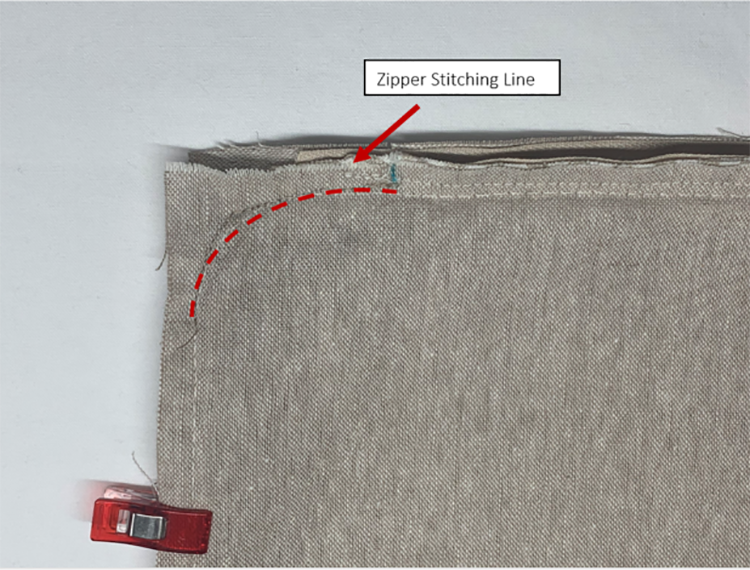
Now, ensure that all four sides are aligned and not skewed. To do this, first sew the bottom corners on either side of the zipper. For a starting point, look for the zipper stitching line we made earlier and overlap about 1”, taking a few extra backstitches. Use the Free Hand System to slowly pivot at the corners.
Check that the remaining sides are still aligned. If they are, sew the remaining three sides. If not, realign the front and back repositioning the clips slightly.
Sew using a stiletto to keep the piping in place and tight.
Note: If you are feeling confident, you can sew the sides together in one pass. But when sewing in zippers and piping, there is a lot of bulk that can throw off alignment quickly.
Turn corners right side out one at a time to check stitching. If any corners look wonky or you didn’t quite catch the entire seam allowance, re-stitch. No one will see it!
Clip excess fabric at corners.
Turn pillow right side out. Iron. Add a pillow form that is at least 2” larger than pillow dimensions, like a 20” pillow form.
Tip: Pillows look better with more stuffing. Insert extra stuffing into corners to give them more structure.
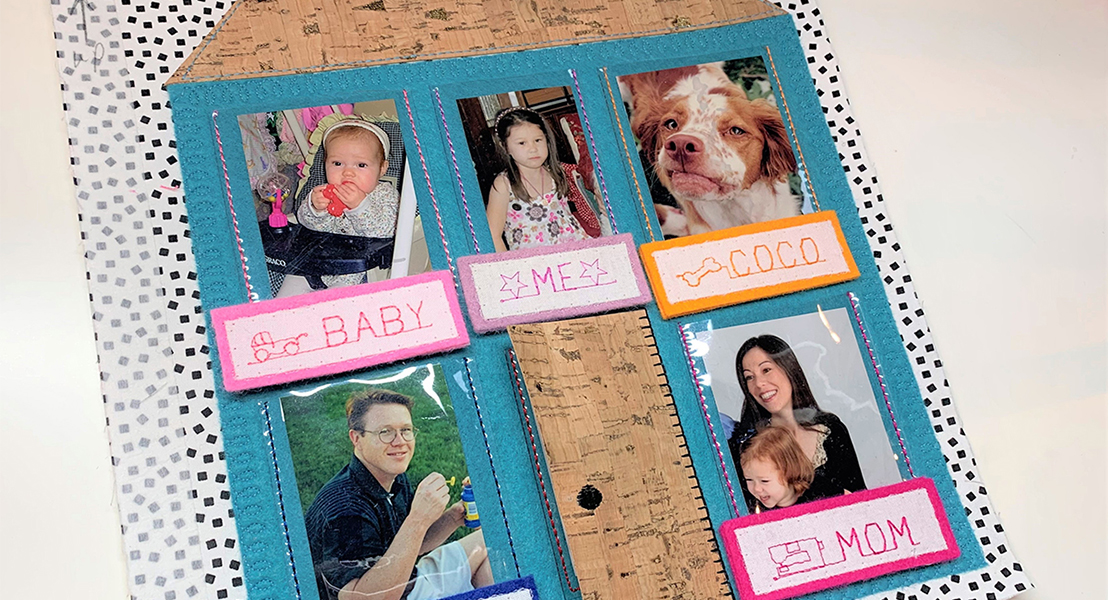
Want to take this pillow even further? Watch for the Professional Pillow Part 2-Panel. I will show you how to use your embroidery machine to embroider some beautiful seasonal panels that can be buttoned to these pillows! You can also choose to monogram the panel.
Used Products


What you might also like


2 comments on “How to Sew a Professional Pillow, Part One”
-
-
Sorry, meant the #35 Invisible Zipper Foot!
Leave a Reply
You must be logged in to post a comment.

Excellent tutorial. Since I am a visual learner, having a camera on both sides or one above, would be very helpful for when your hands have to manipulate the fabric etc. Also, why did you use the 4A zipper foot and not the 5 hidden zipper foot? Just curious? Again, great tutorial.
Thank you!