Sew a Custom Quilted Tamarack Jacket, Part One
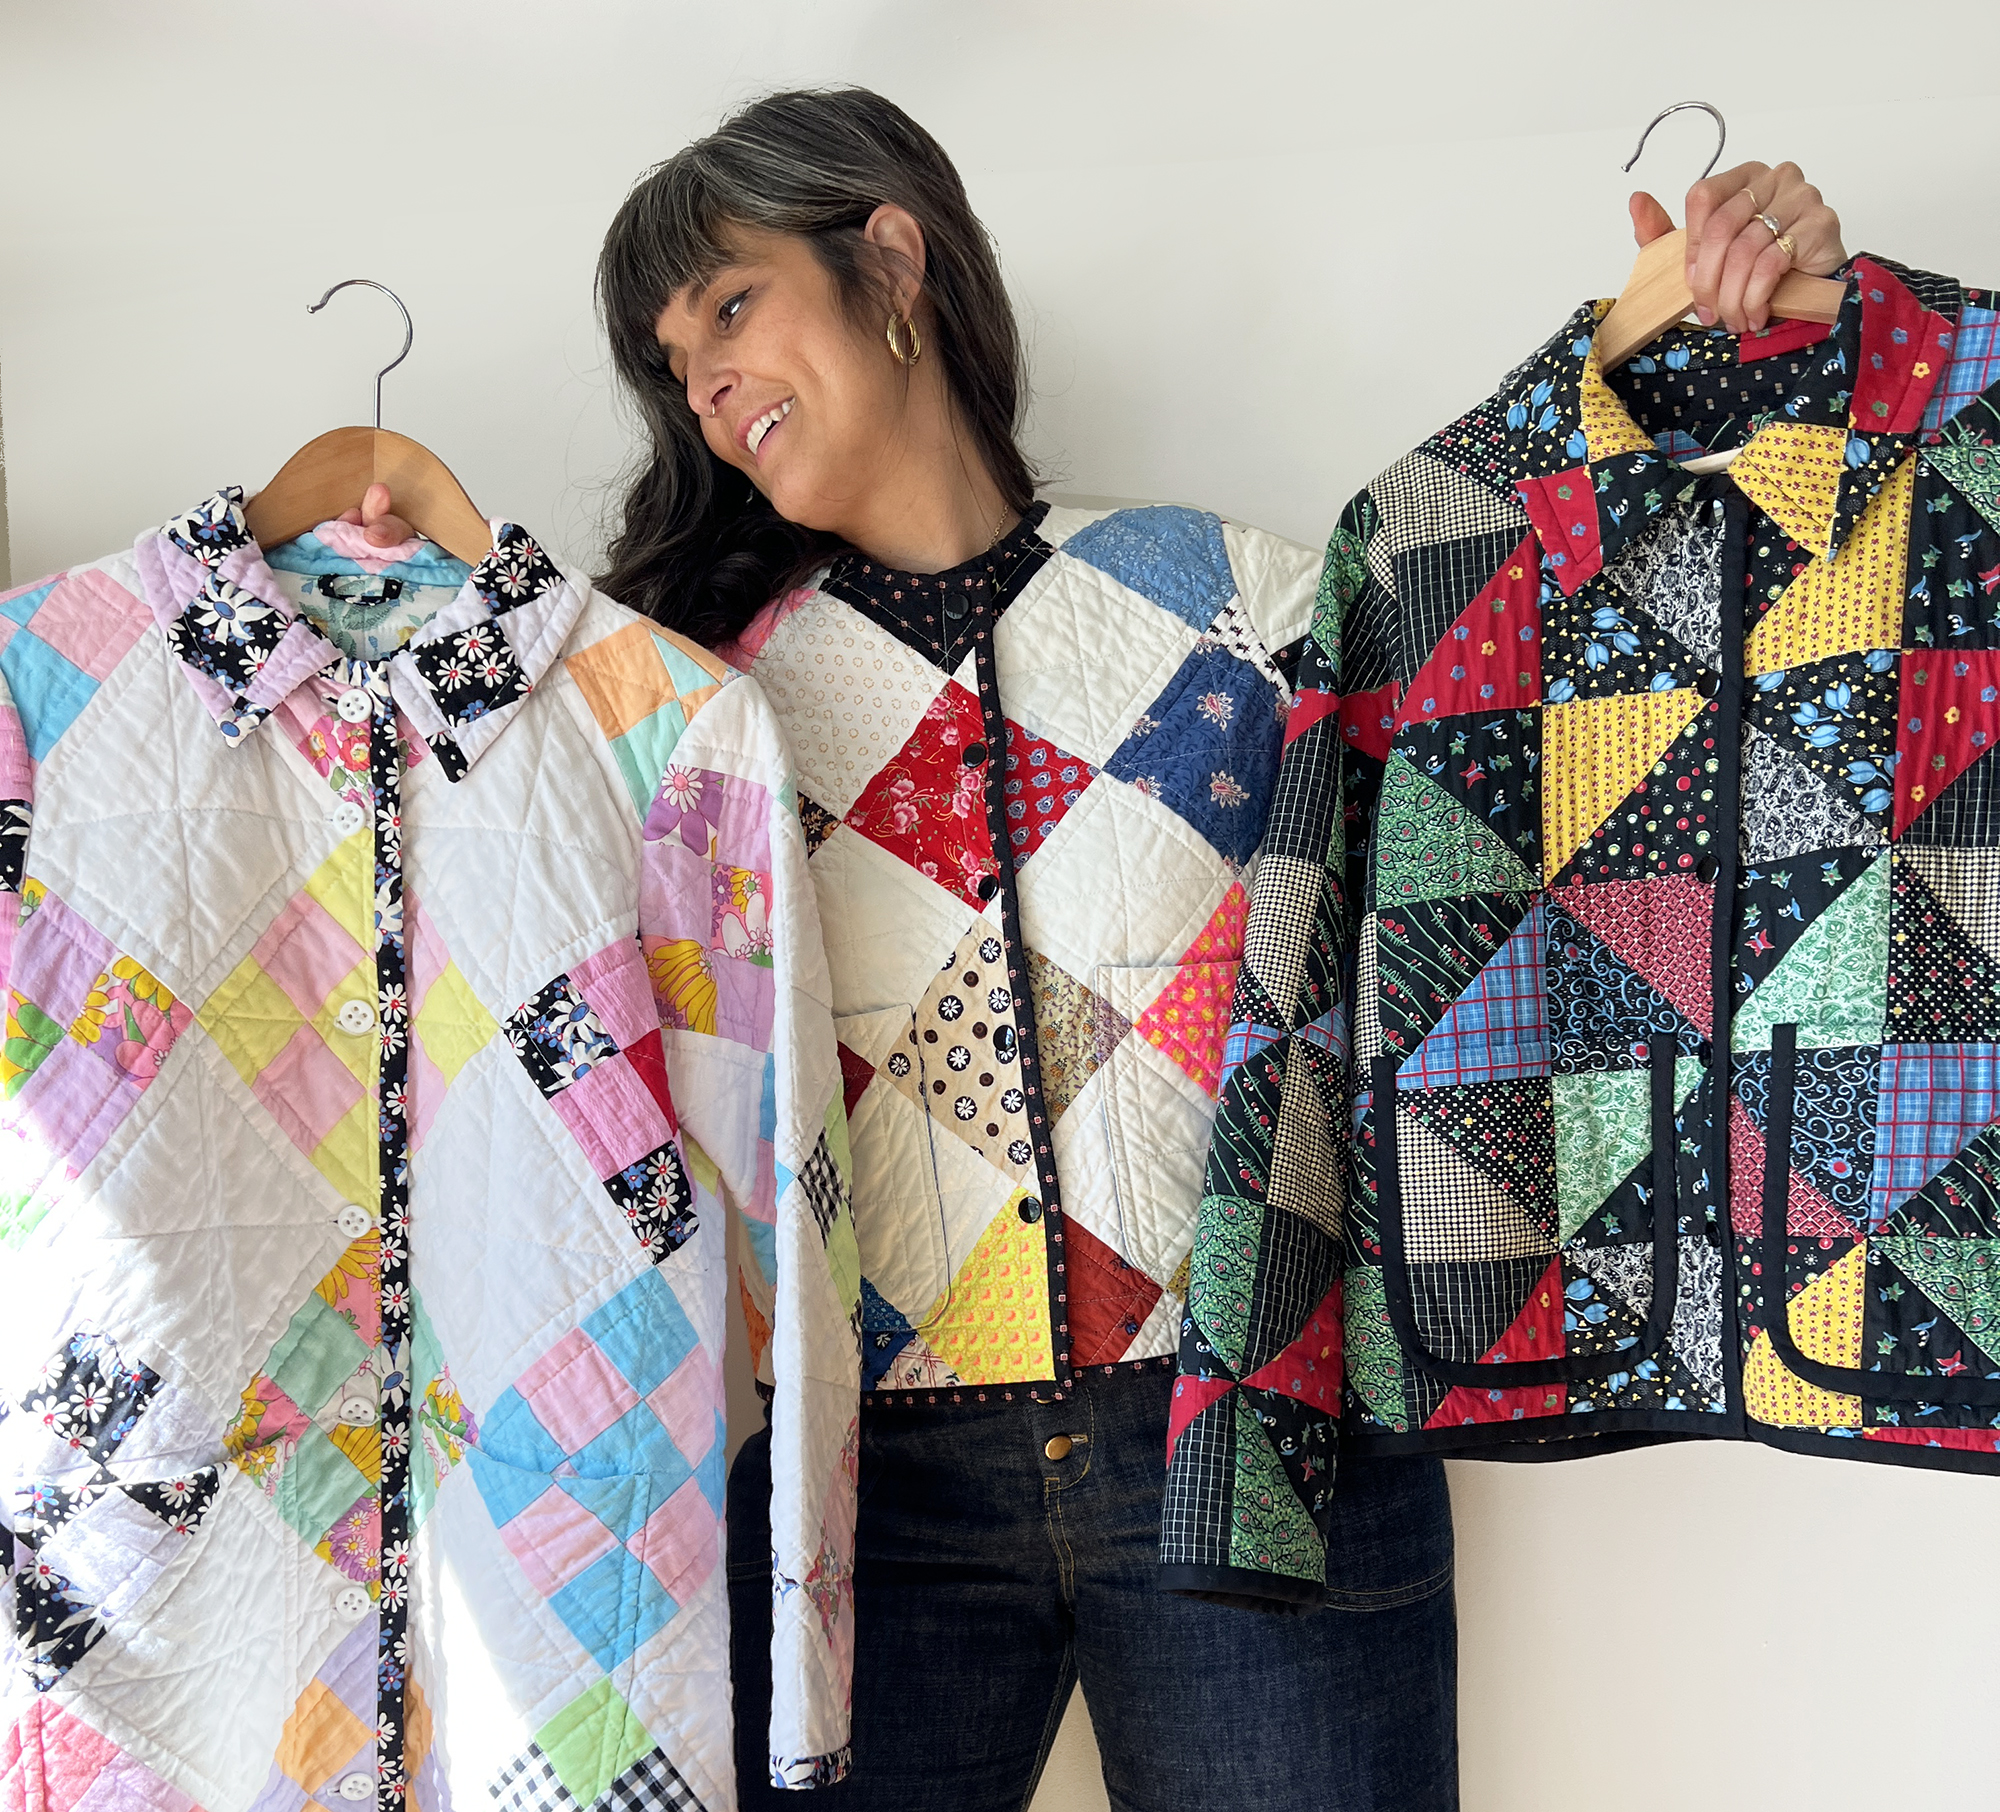
Hi everyone! I’m Martha from Buried Diamond. Welcome to the first of three installments of a quilted Tamarack Jacket sew along! I’m going to walk you through all the steps involved in creating the perfect cozy layering piece for fall. If you’re a quilter who is new to garment sewing, or a garment sewist curious about patchwork, this project has something new for anyone to learn.
In this series, I’ll break down this project into weekly assignments, and share with you some of my favorite tips & tricks to creating this type of garment. The result will be your own one-of-a-kind jacket!
Together we’ll sew Grainline Studio’s Tamarack Jacket pattern, with a few simple modifications both to the style and finishing techniques. Follow along with me for a simple checkerboard-on-point design, or get as complex as you like with the piecing.
NOTE: For this sew-along, I will assume you have basic knowledge of quilting (such as cutting, piecing, and applying bias binding) as well as basic garment construction knowledge. All steps will be explained or shown, and you can always ask me a question in the comments if you need a little help with a technique. I am here to help!
Project Details
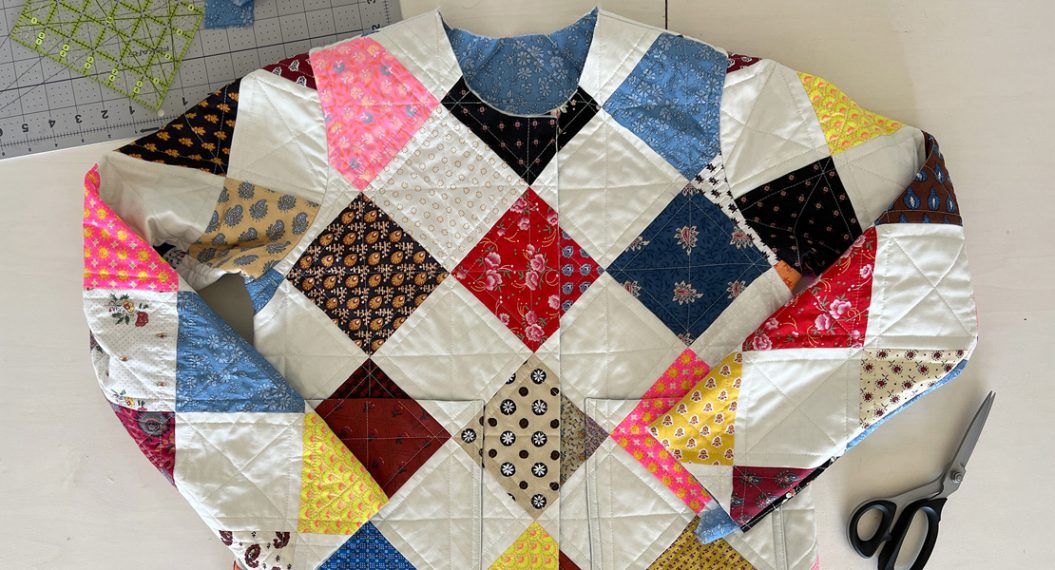
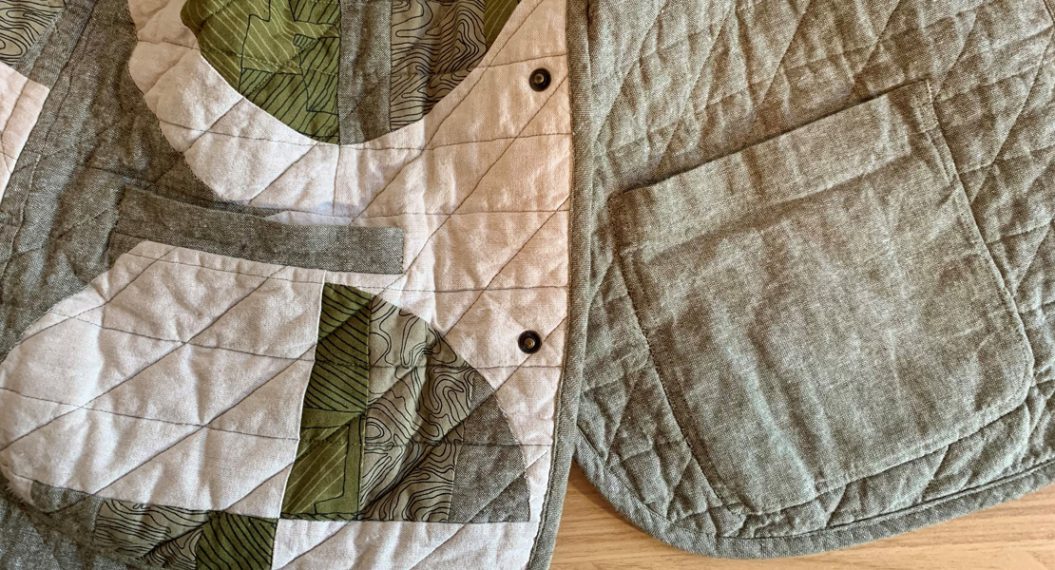
I’m making this jacket with a simple checkerboard patchwork, set on point (so the squares are positioned at a 45º angle). To add a professional touch to the jacket, I will show you how to make your patchwork pattern continue uninterrupted across the two front pieces of your jacket when it is buttoned.
If you want to sew along with a different patchwork design, you totally can! Just jump in when we get to garment construction. Alternatively, if wearing patchwork feels too wild for your personal style, think about treating this jacket as a blank slate for quilting designs, and use a solid color or whole cloth printed fabric.
Gathering Materials
Here’s what you will need this week, along with the basics you keep in your sewing room:
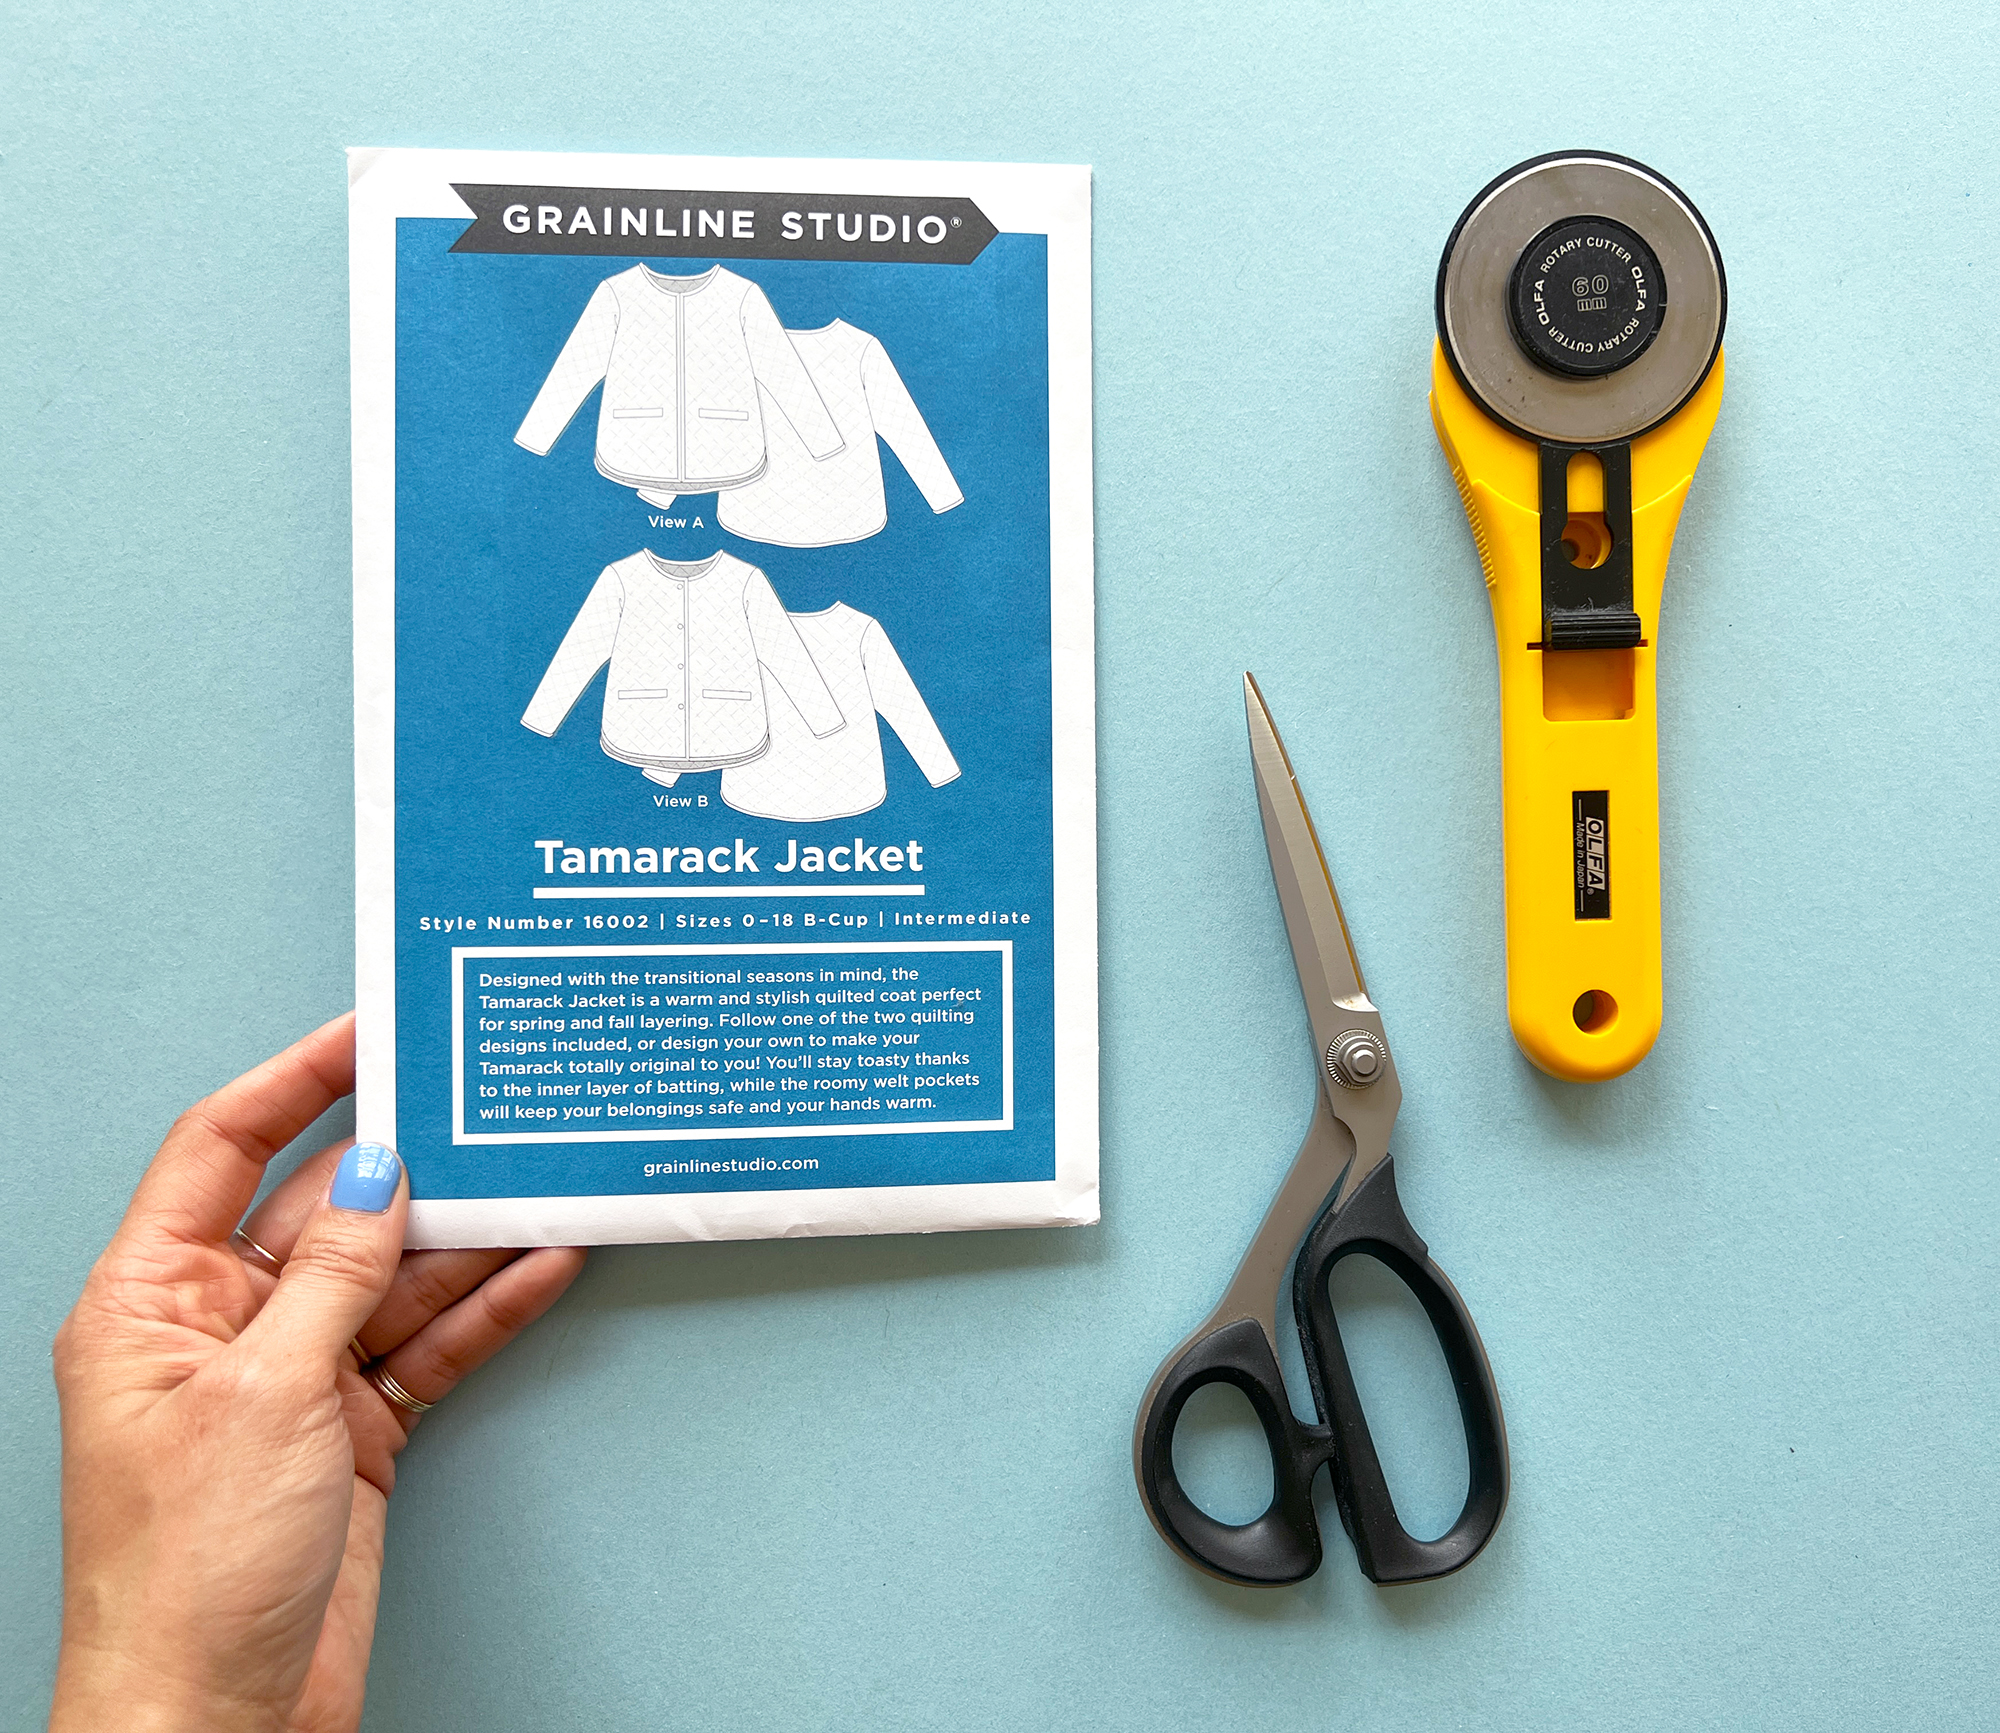
- Tamarack Jacket sewing pattern in your size range
- Tracing paper and tracing tools (pencil, rulers)
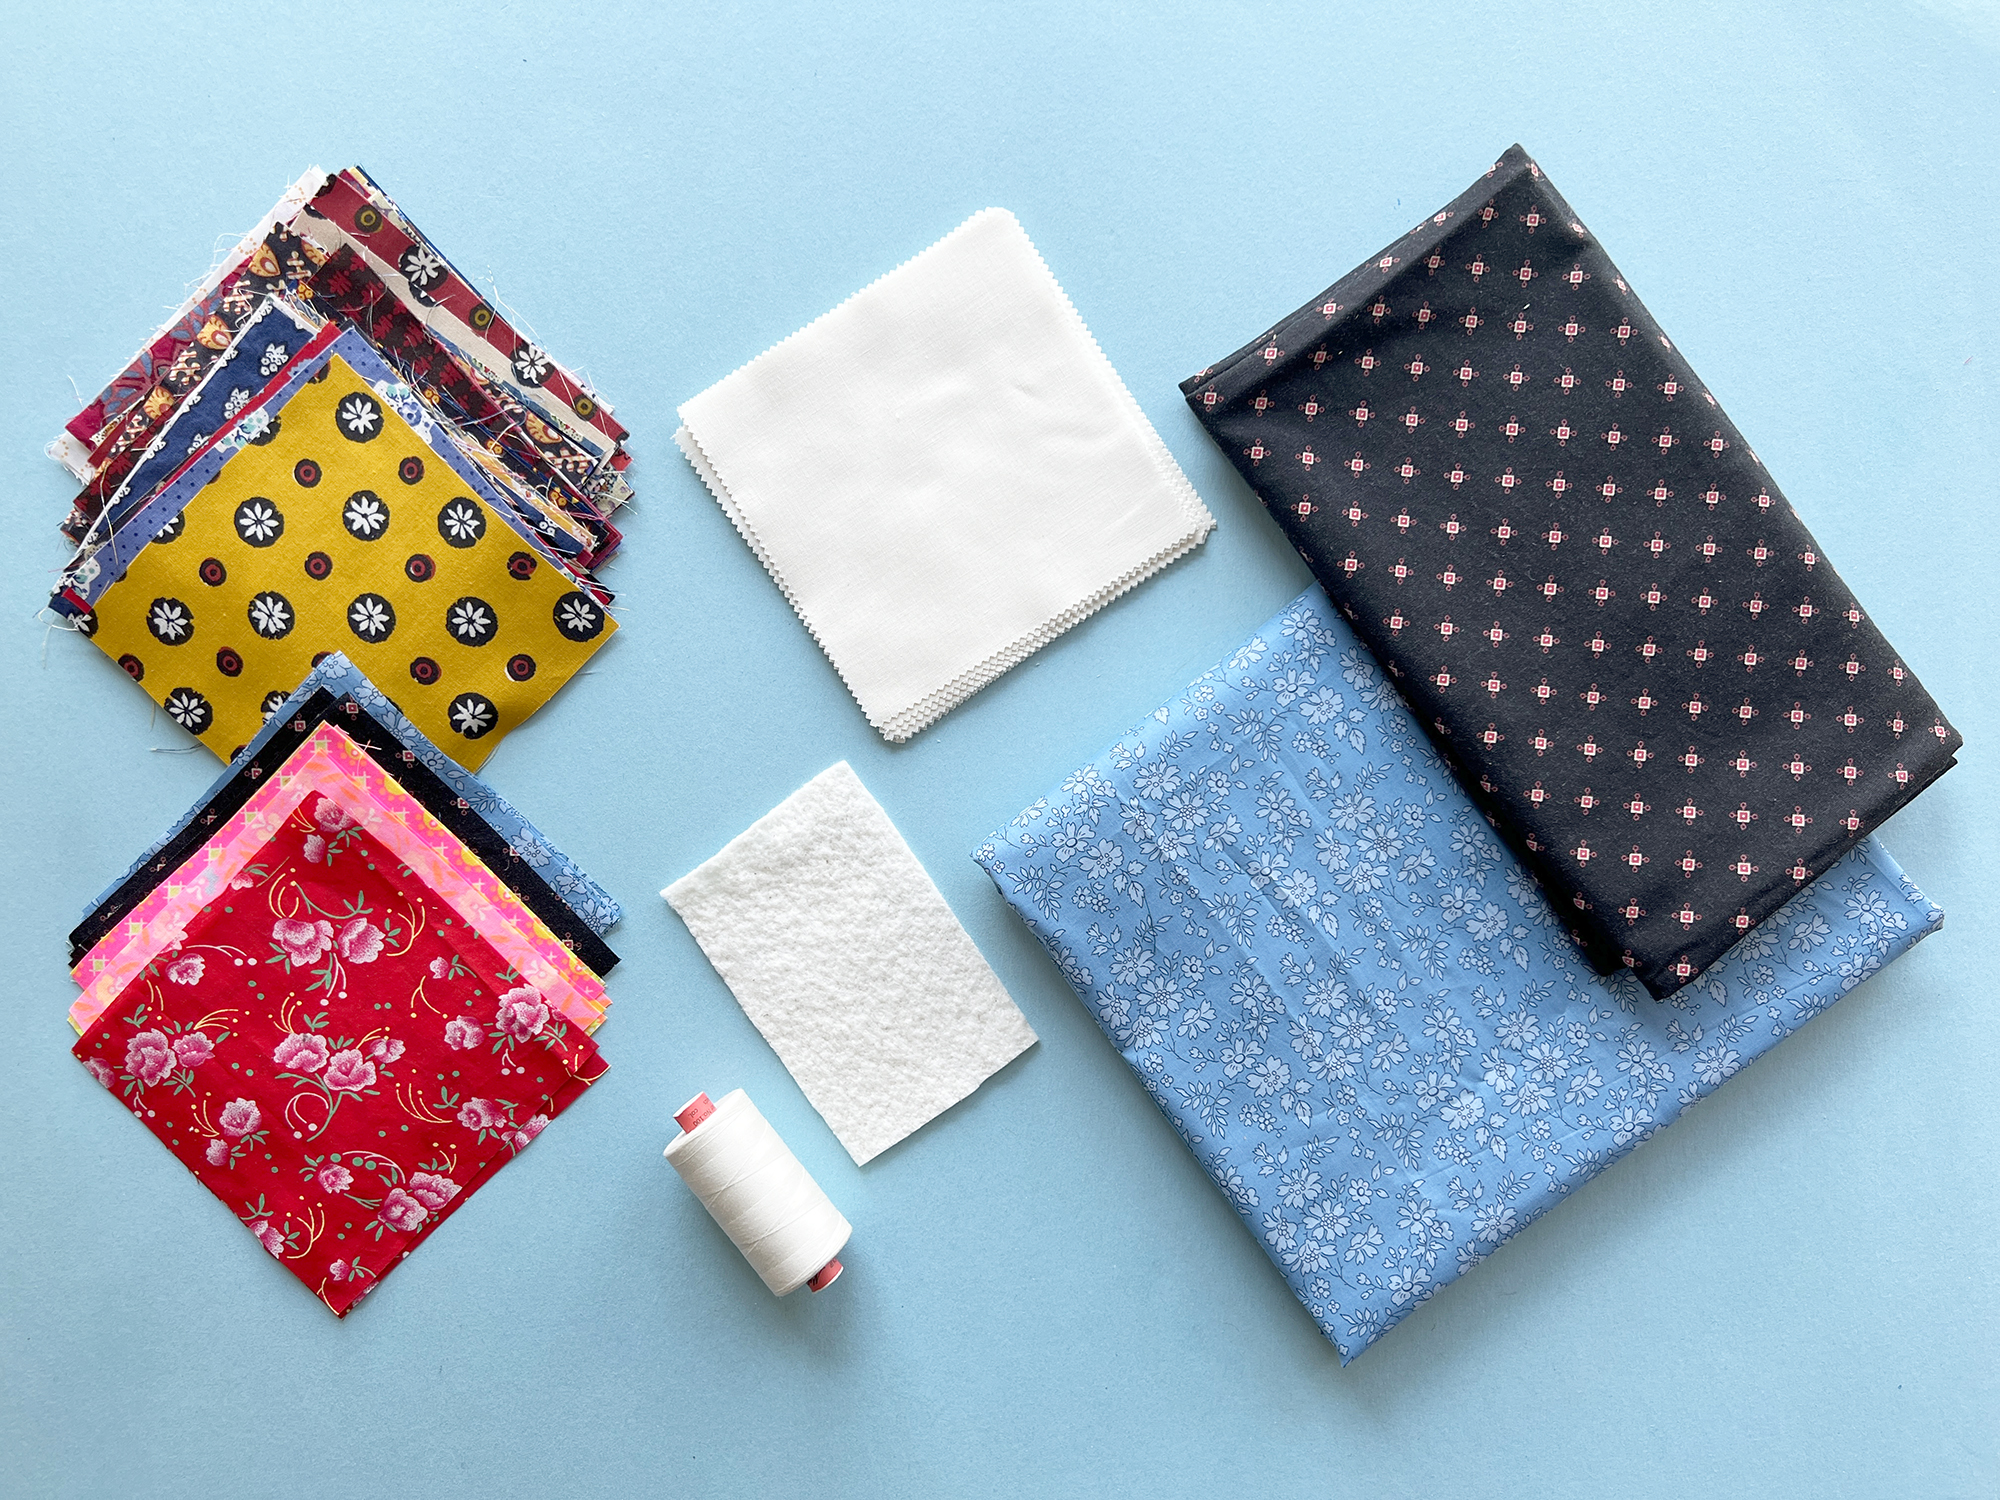
- 1 charm pack (5″ squares) in an assortment of prints. I am supplementing my charm pack with fabrics from my stash, as well as a few squares of my lining and binding fabrics.
- 1 charm pack in a solid background color. I have supplemented this with some scraps, as well. Depending on your jacket size, you will need more or less fabrics.
- Coordinating thread for piecing – I am using Mettler Metrosene for piecing and quilting.
- Lining fabric – follow the size chart on the sewing pattern envelope for the required amount for your size. For the finishing technique I will show you, you’ll need about ¼ yard more lining fabric than called for.
- Batting – I’m using Warm & Natural in twin size (you won’t use it all for this project).

Tools & Supplies
I will be sewing this on my beloved BERNINA 735. In addition to my typical sewing tools like scissors and an iron, I’ll be using Patchwork foot #37 and Walking Foot #50.
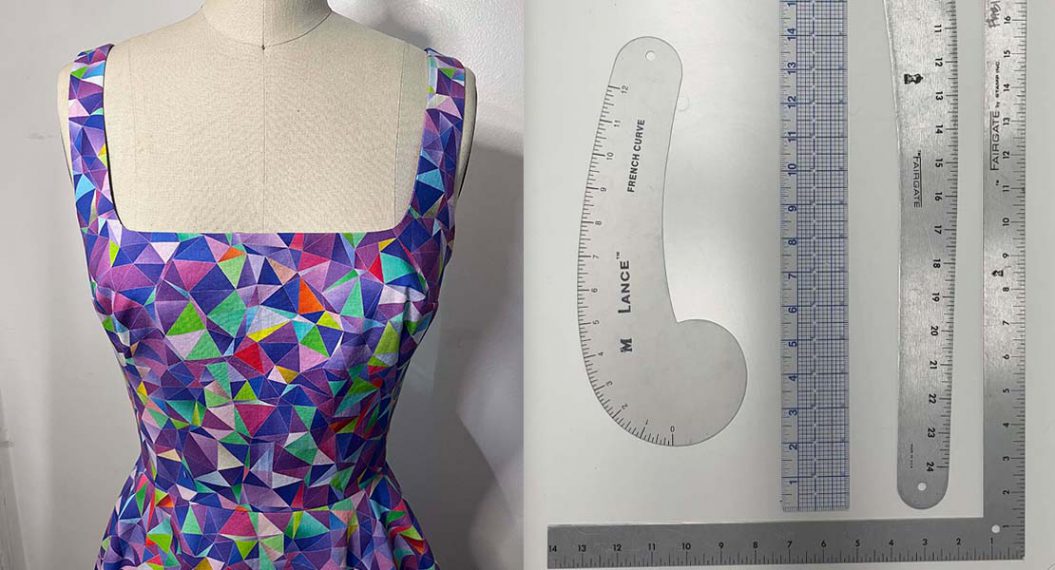
Selecting Your Size
Let’s get started with pattern prep. Take your body measurements and compare them to the size chart on the pattern envelope. I have sewn this pattern in a few sizes, both for myself and as gifts. I find the size chart to be accurate. When selecting a size, consider how much wearing ease you want, or how many layers you prefer to wear under your jacket.
Tracing the Pattern
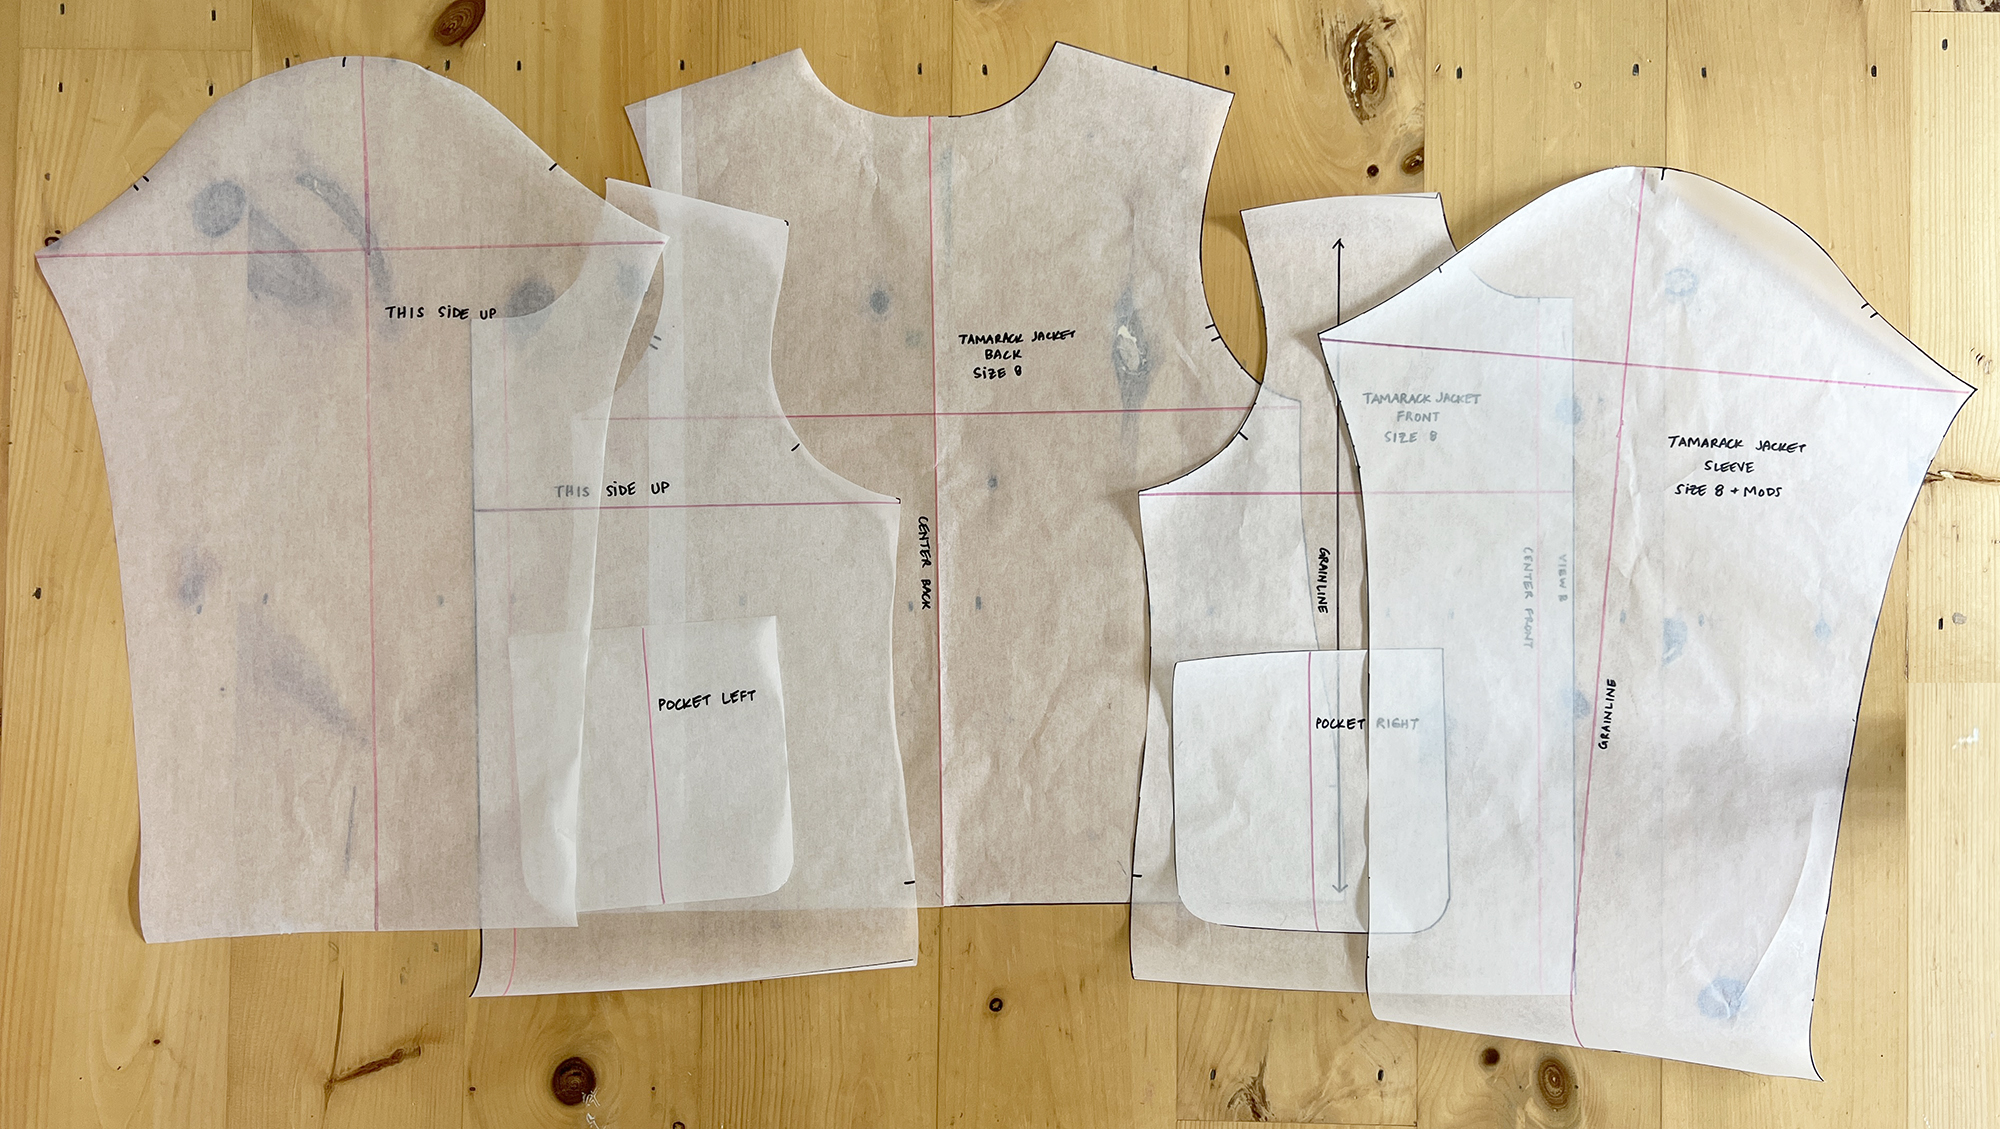
I highly recommend tracing your pattern, so you can preserve the original version. Furthermore, I recommend tracing off a whole jacket Back (as opposed to a half piece), 2 sleeves, and 2 jacket Fronts. While this might seem like extra work, you don’t need every marking on your duplicate piece. We will be sewing View B, so make sure that is what you trace when you get to the jacket Front pieces.
Once the pieces are traced, I will make my design modifications to the tissue.
Design Modifications
I am modifying the pattern slightly to suit my preferences. Nothing drastic, but here are photos to help you make the same changes if you would like to do so.
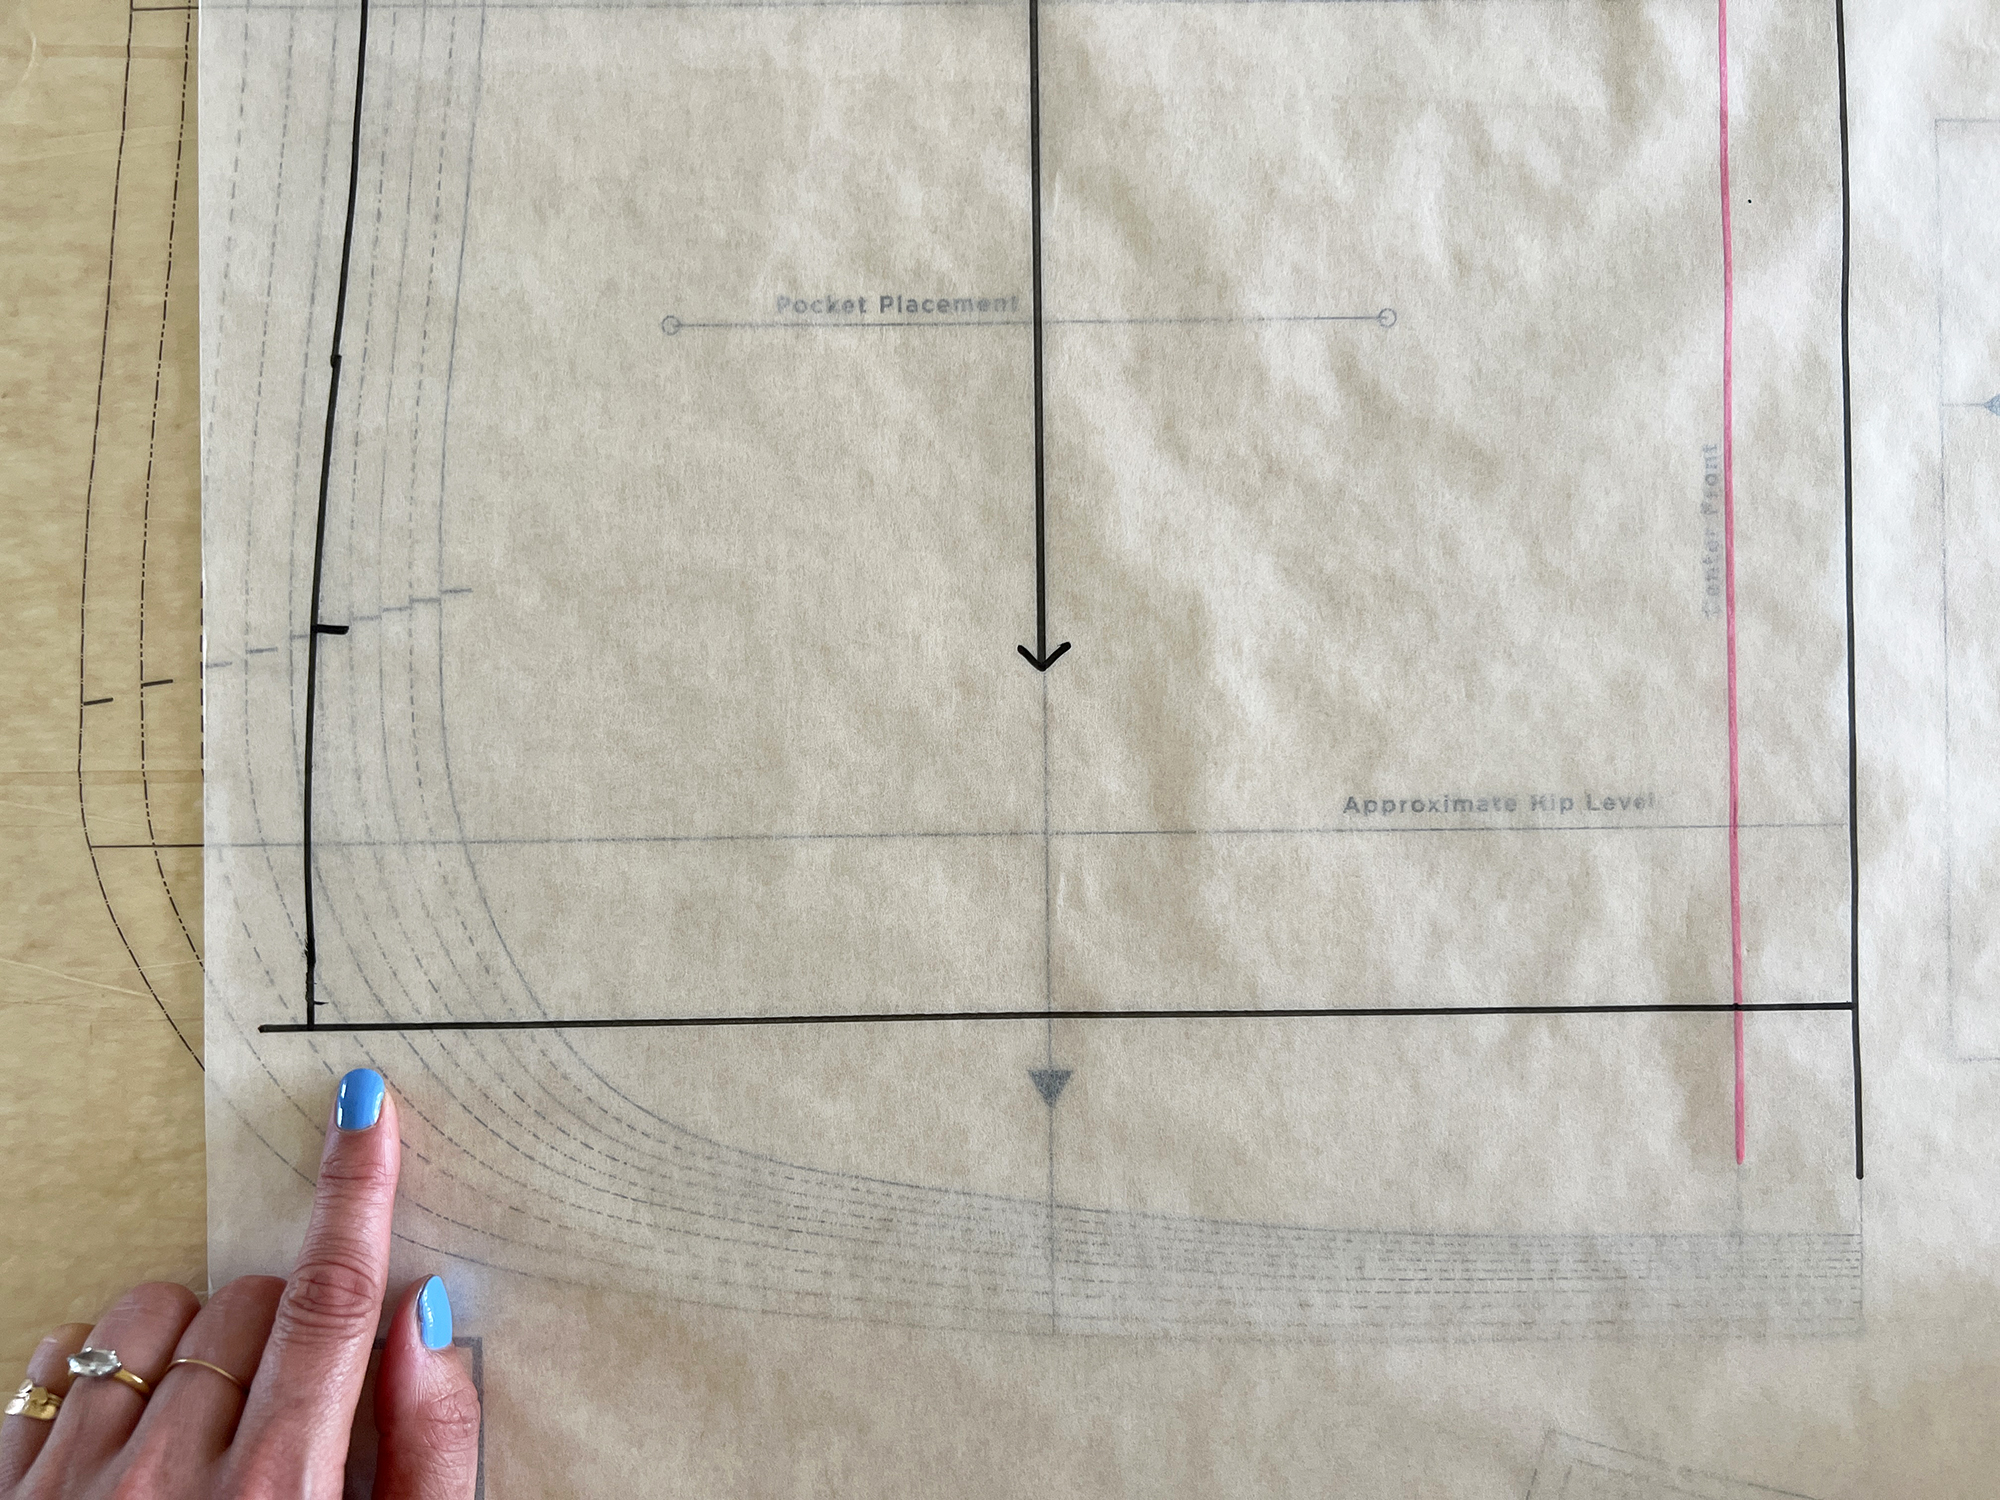
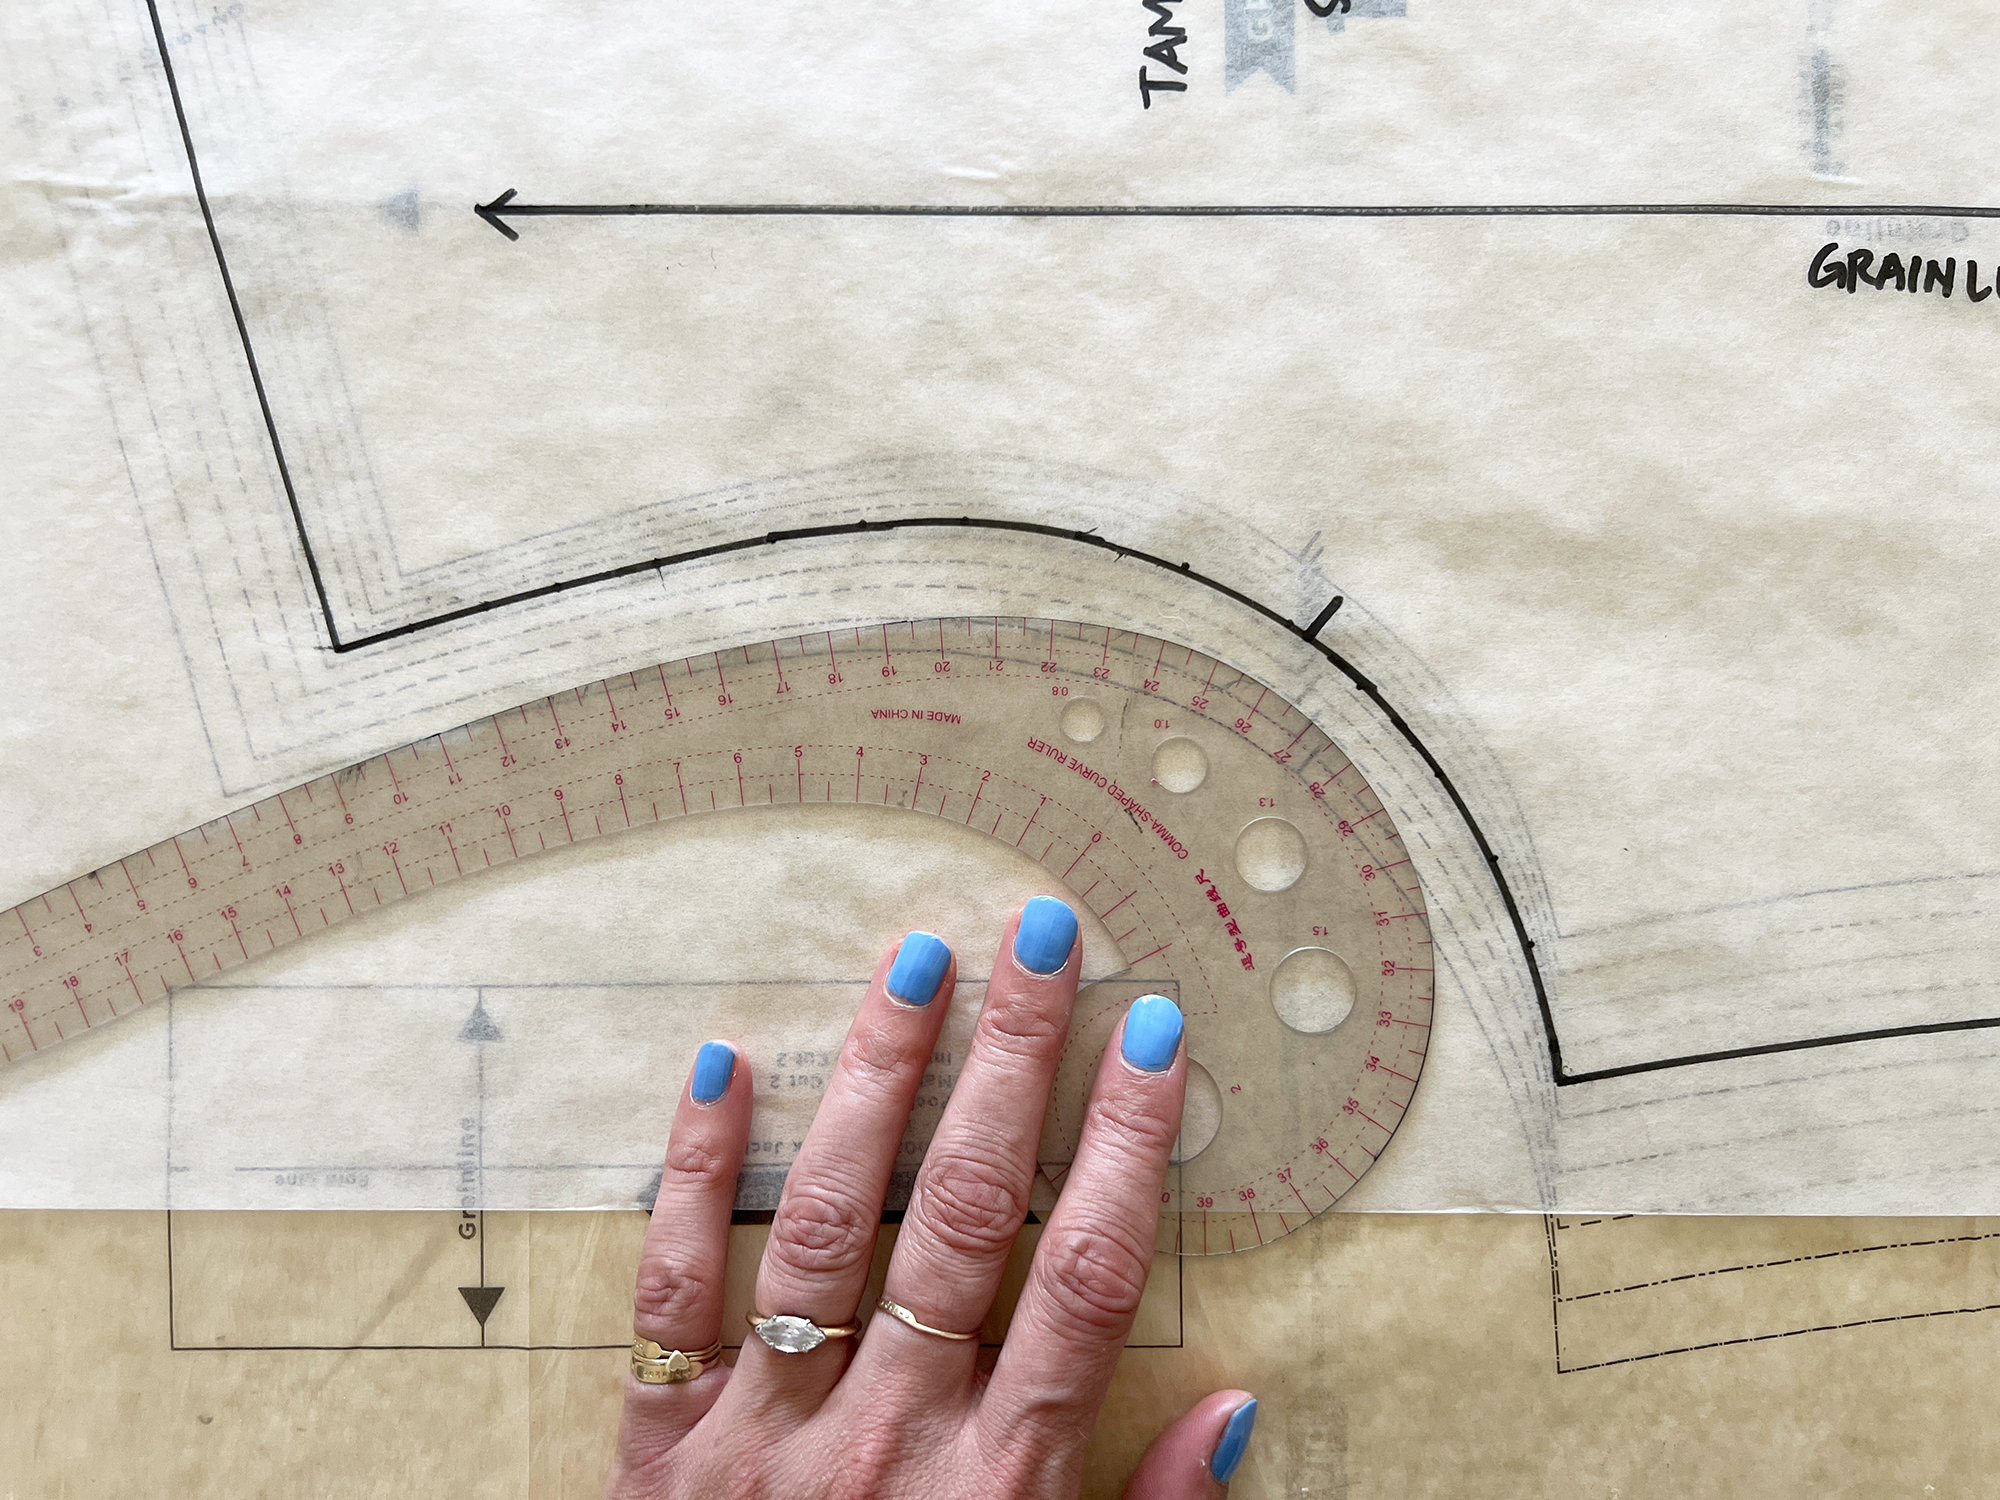
- I have straightened the hemline and eliminated the curve at the side seams. I have shortened the jacket; my version is 1.5″ longer than the “Approximate Hip Level” marking on the pattern tissue.
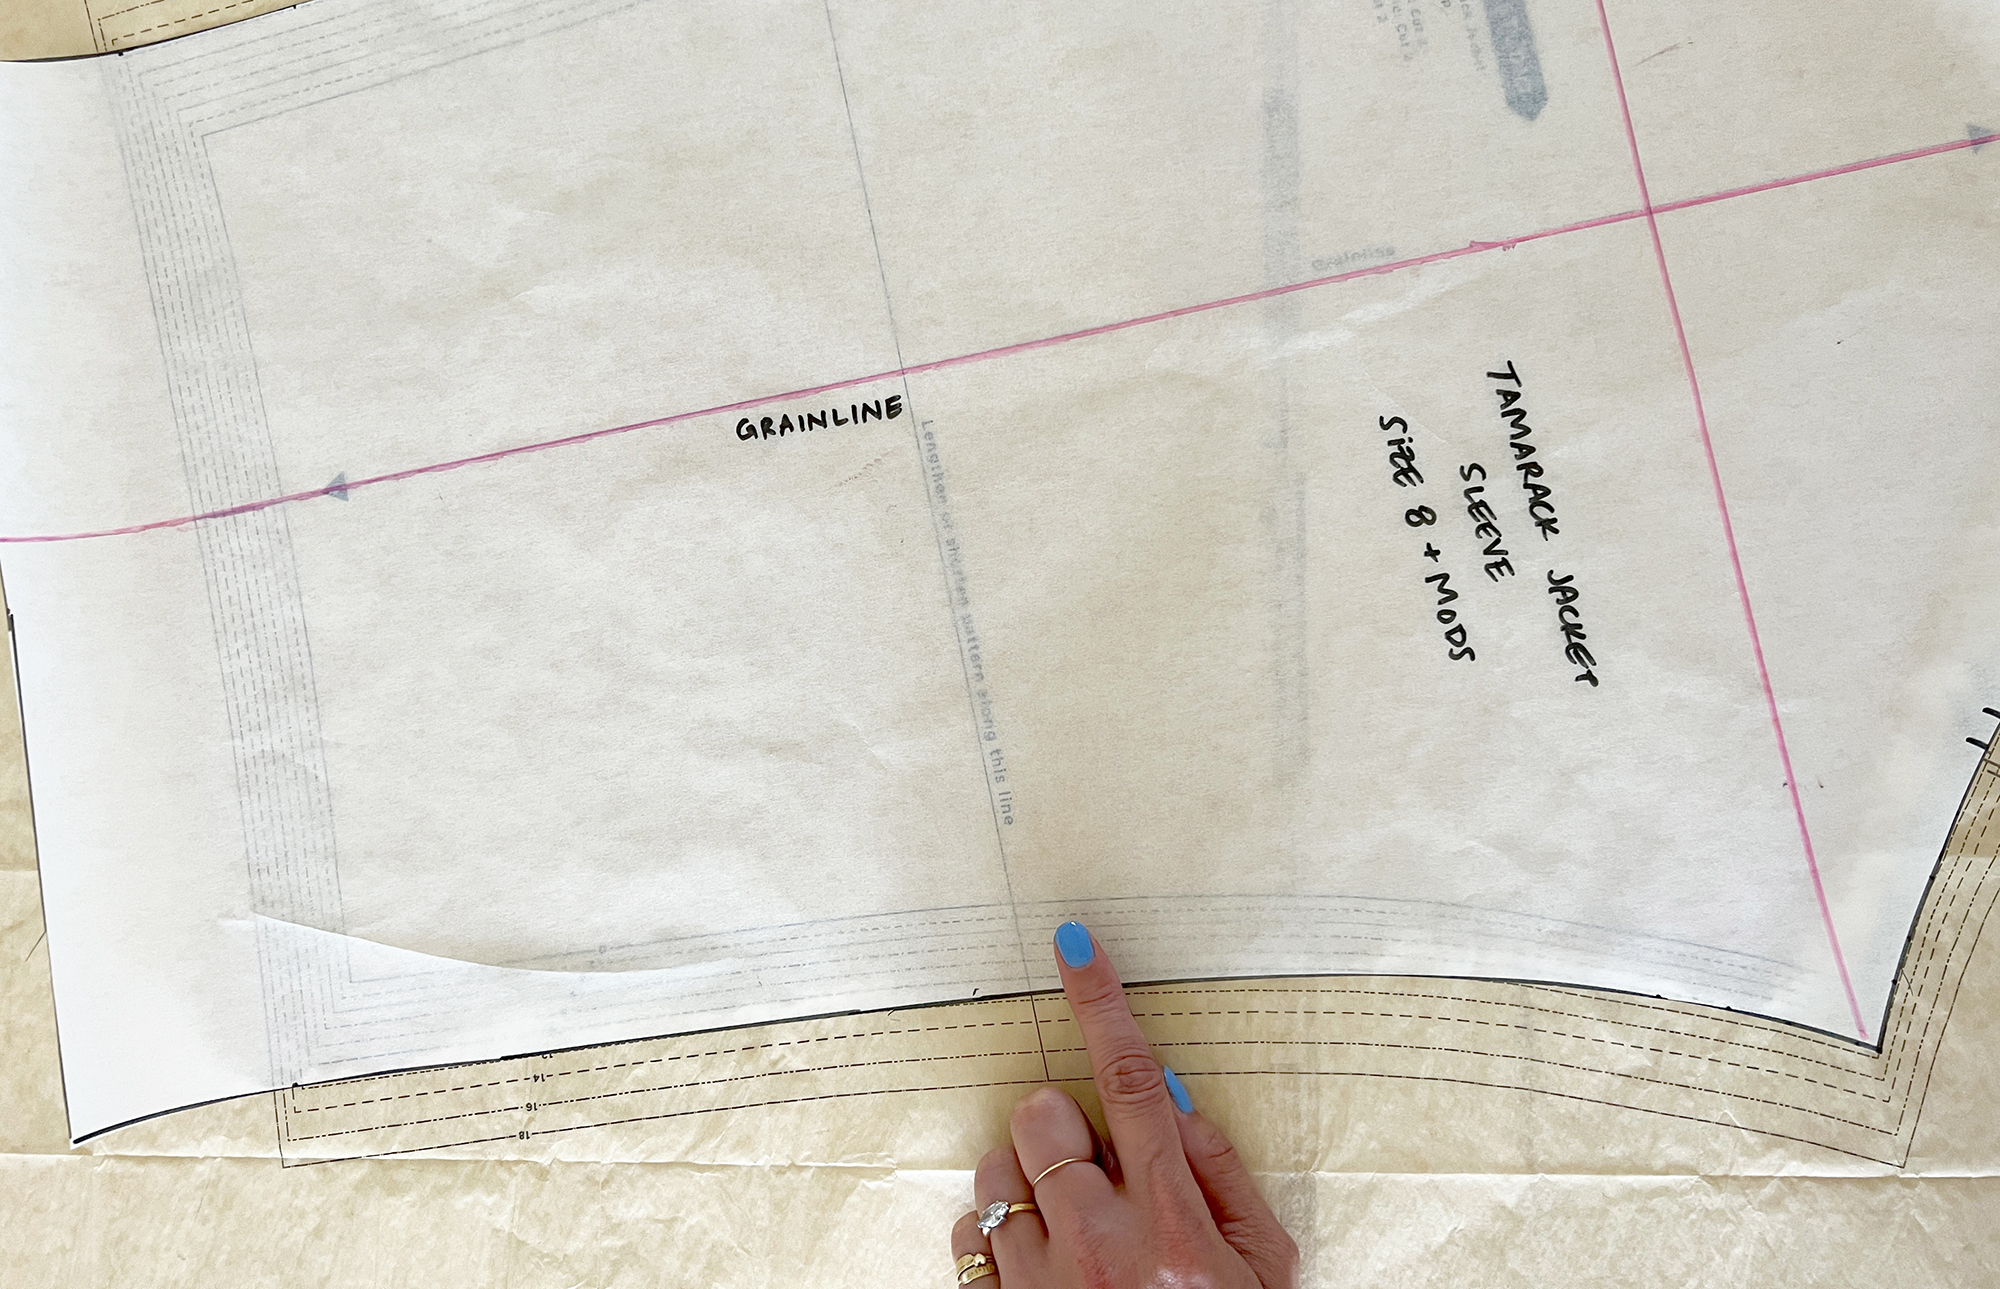 I added width and length to the sleeve. I have graded the sleeve from size 8 out to size 12, and lengthened the sleeve by 2.5”. I prefer a boxier sleeve, because I like to layer over sweaters.
- Eliminating welt pockets – I’m replacing them with patch pockets, but using the pocket bag pattern piece that comes with the pattern.
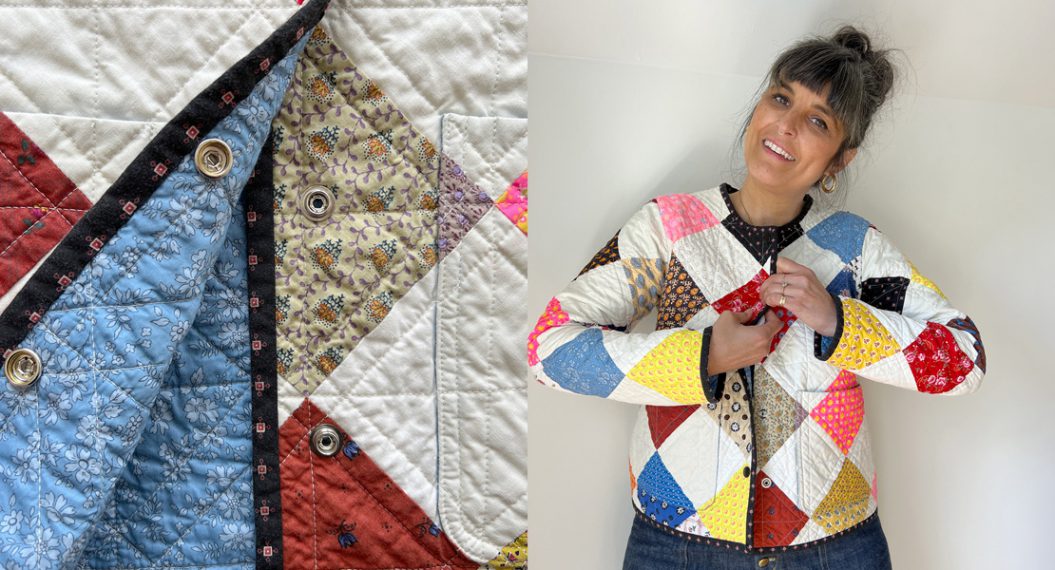
- Instead of bias binding interior seams, I’ll show you a technique to make seams lay flatter with less bulk. With this technique, you can wear your jacket inside out, or even make it reversible.
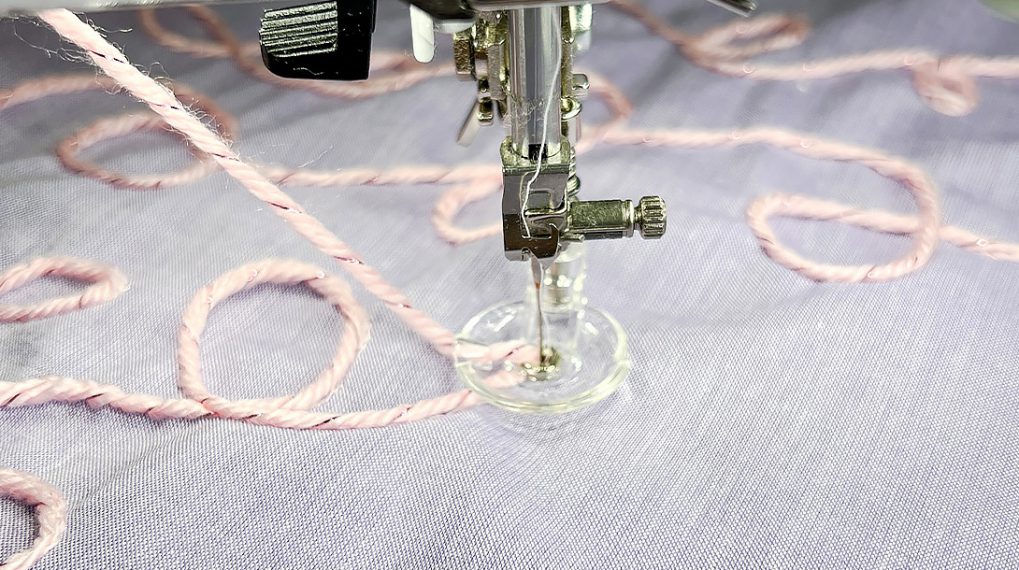
Marking for Patchwork Placement
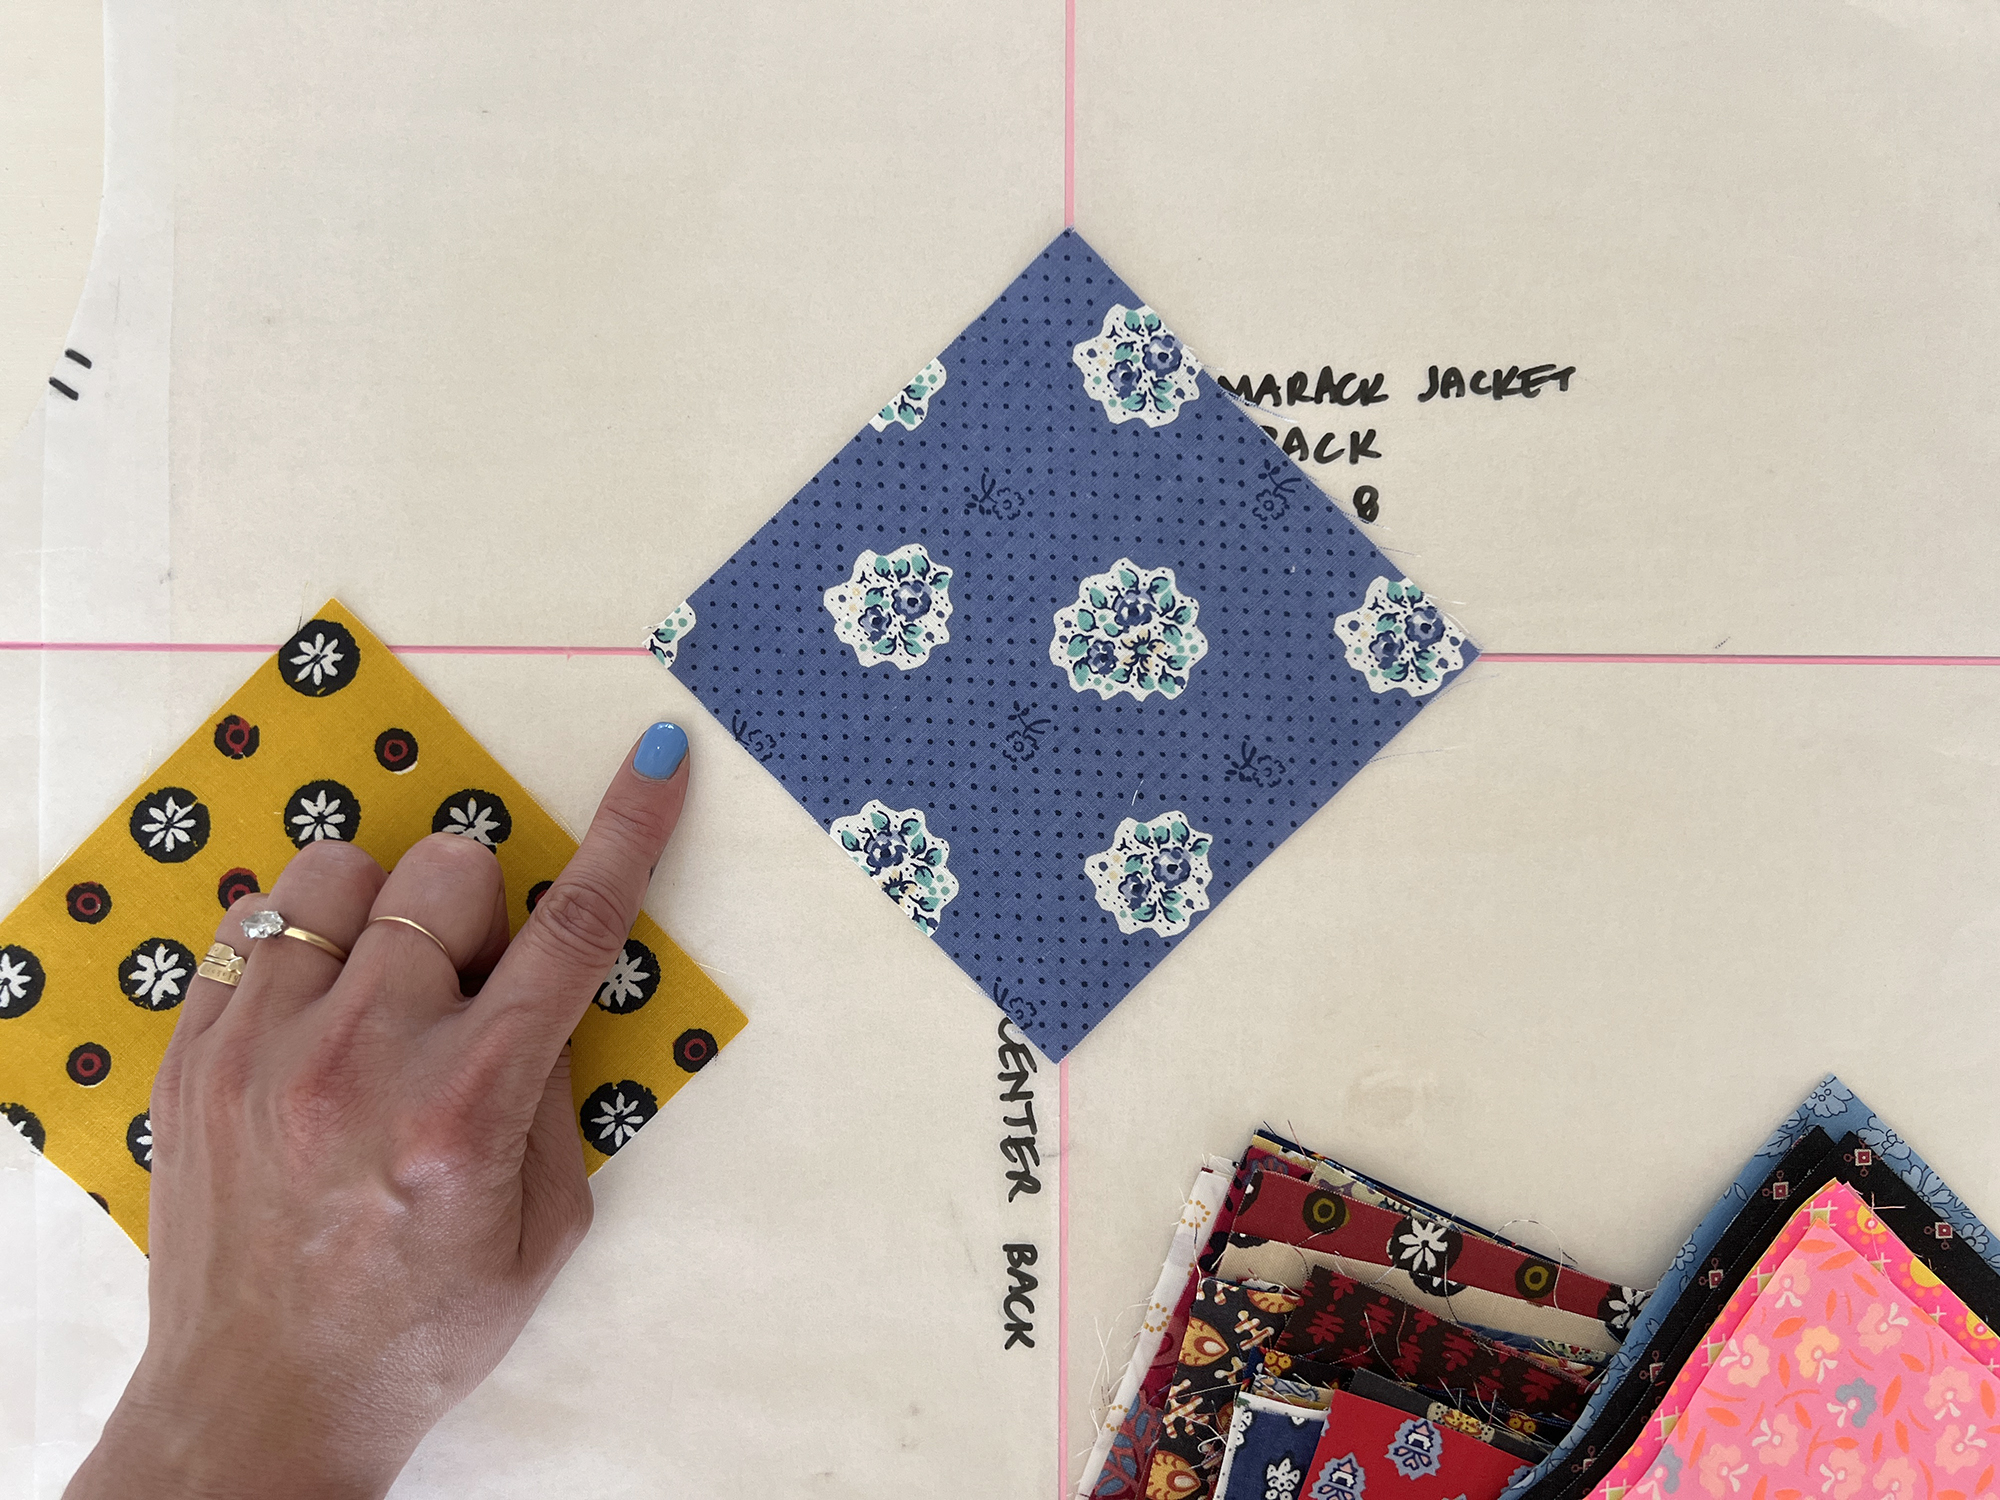
I will mark the pattern with a pink marker in a few places to aid in placing the patchwork design. Adding these lines helps you plan things out so that the jacket has uninterrupted patchwork across the center front when the jacket is closed; additionally, the motifs will be at the same level around the whole circumference of the jacket.
My guides are in pink. The patchwork points will align with these guides.
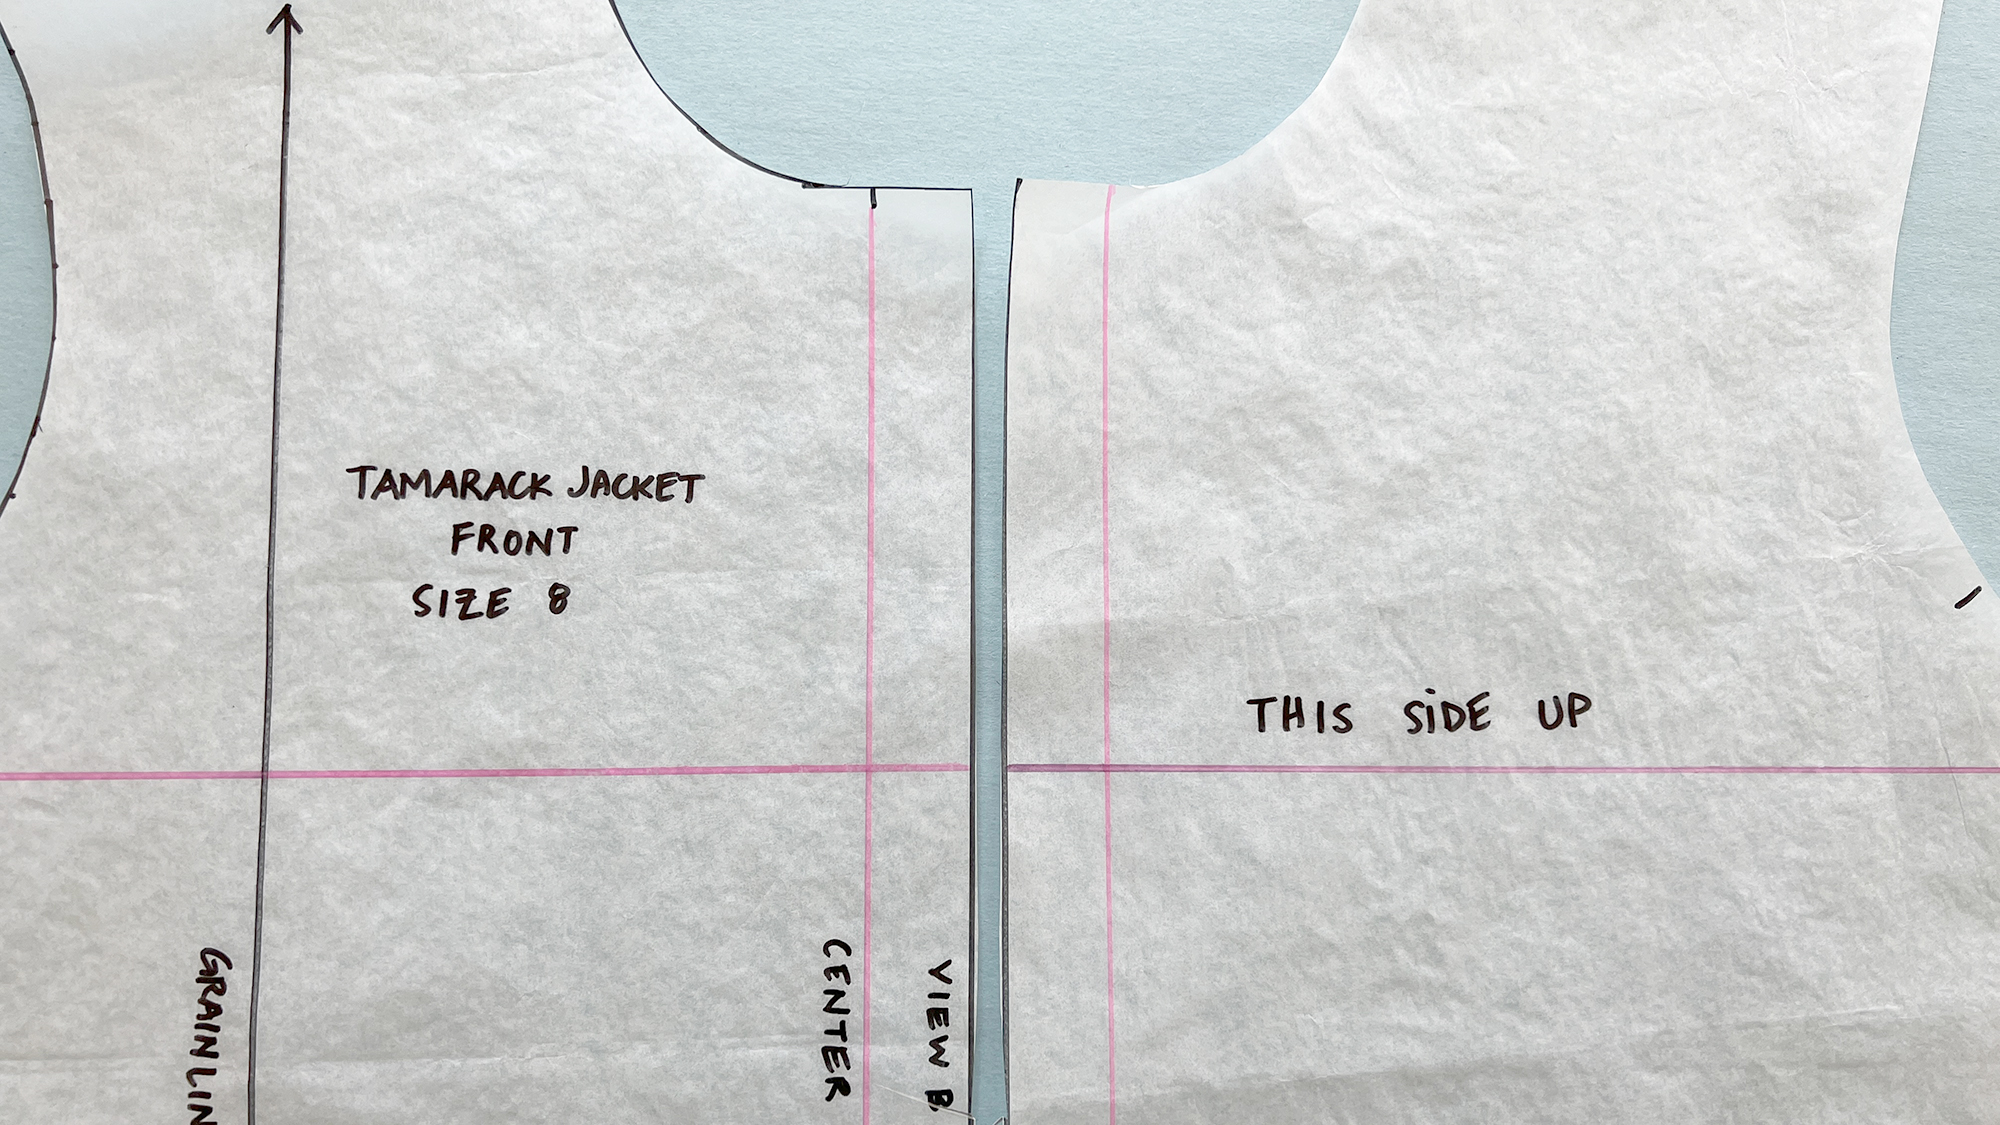
For the patchwork to match across the front of the jacket, even when the jacket is close, the design must overlap. Here you can see both of my jacket Front pieces, with Center Front marked in pink.
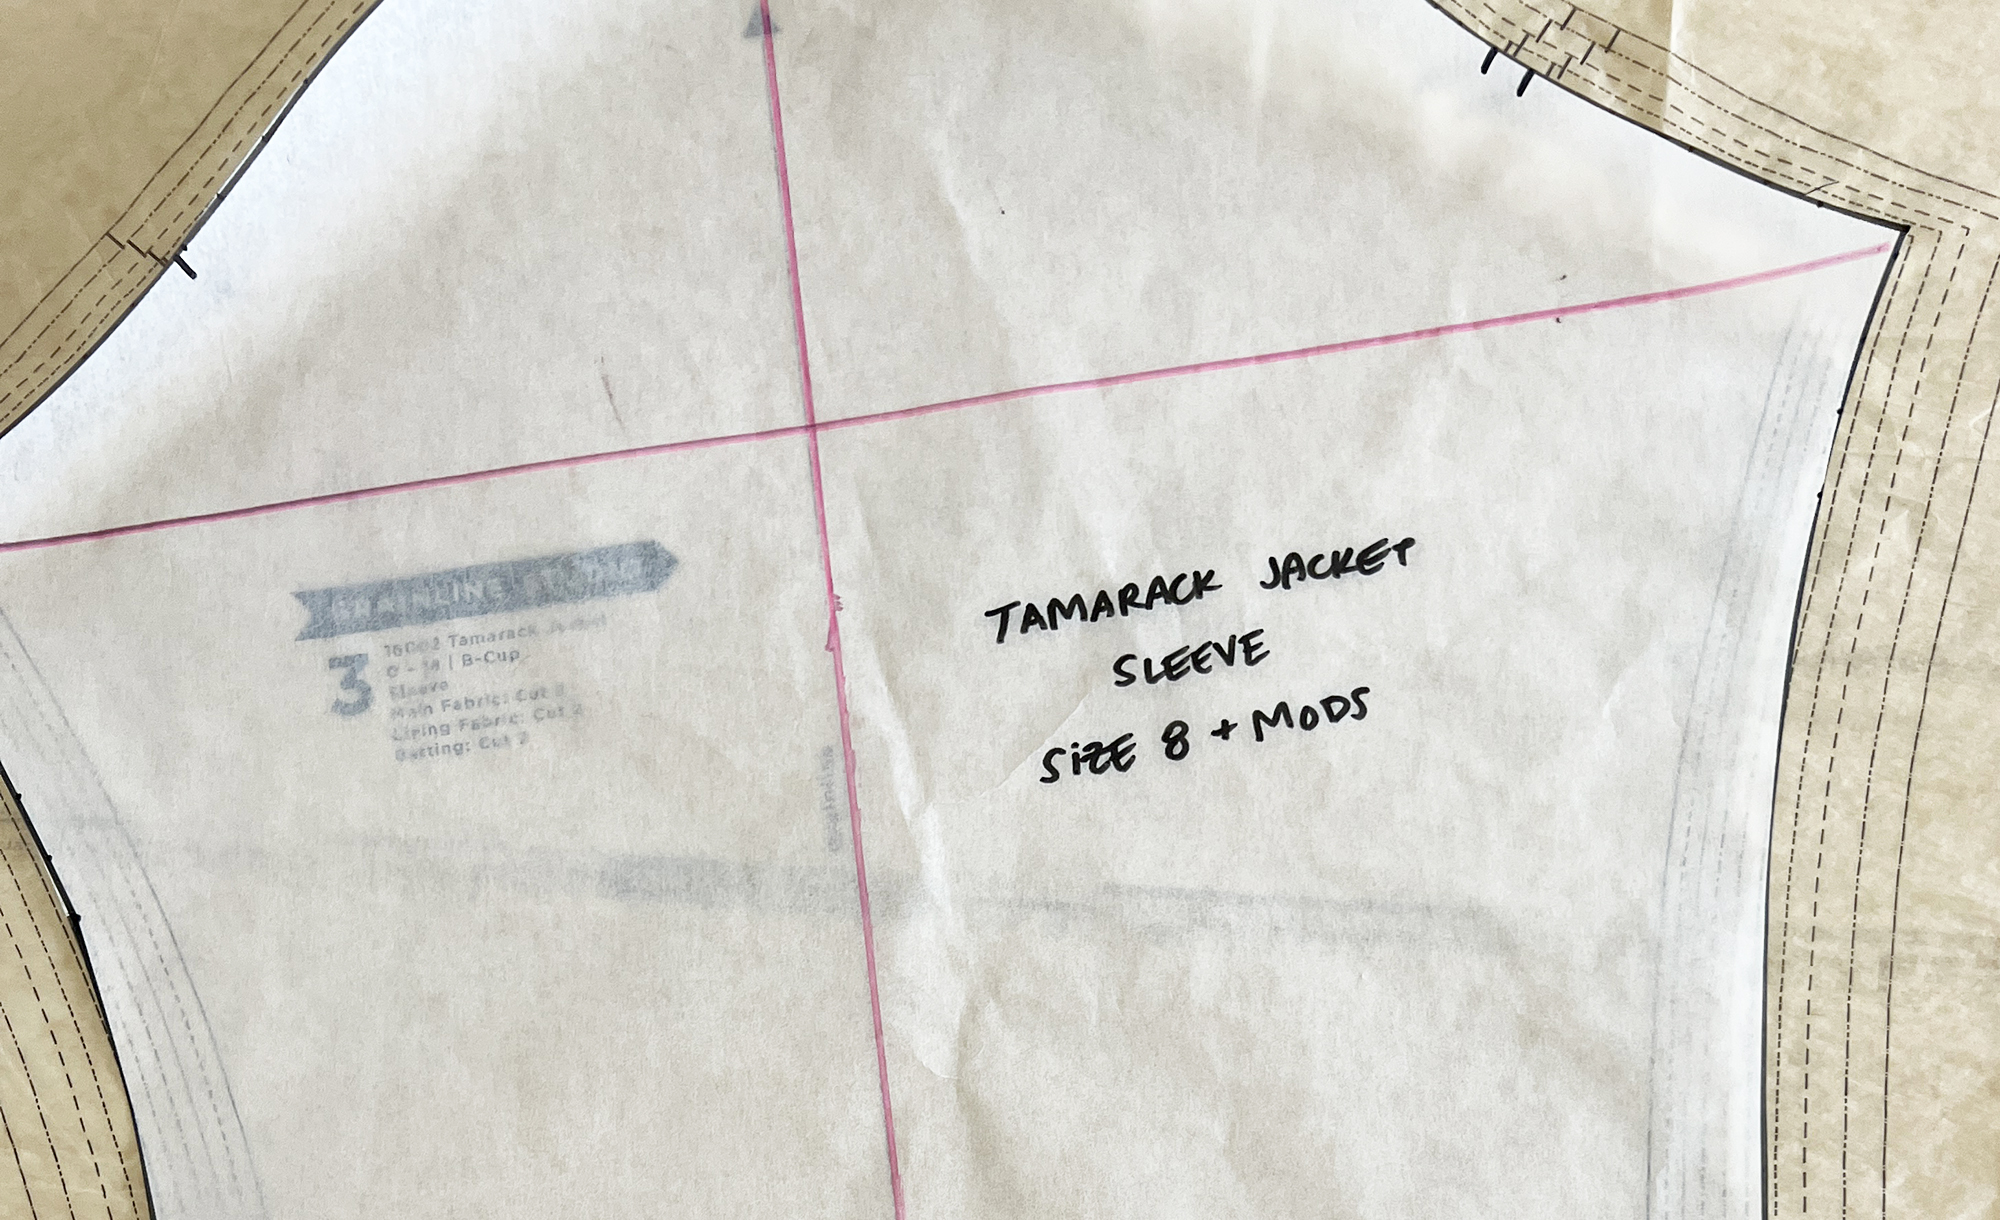
Starting at the shoulder notch on the sleeve, draw a line parallel to the grain line. Then add a perpendicular line, horizontal across the sleeve. My line is 1/4″ below the armscye.
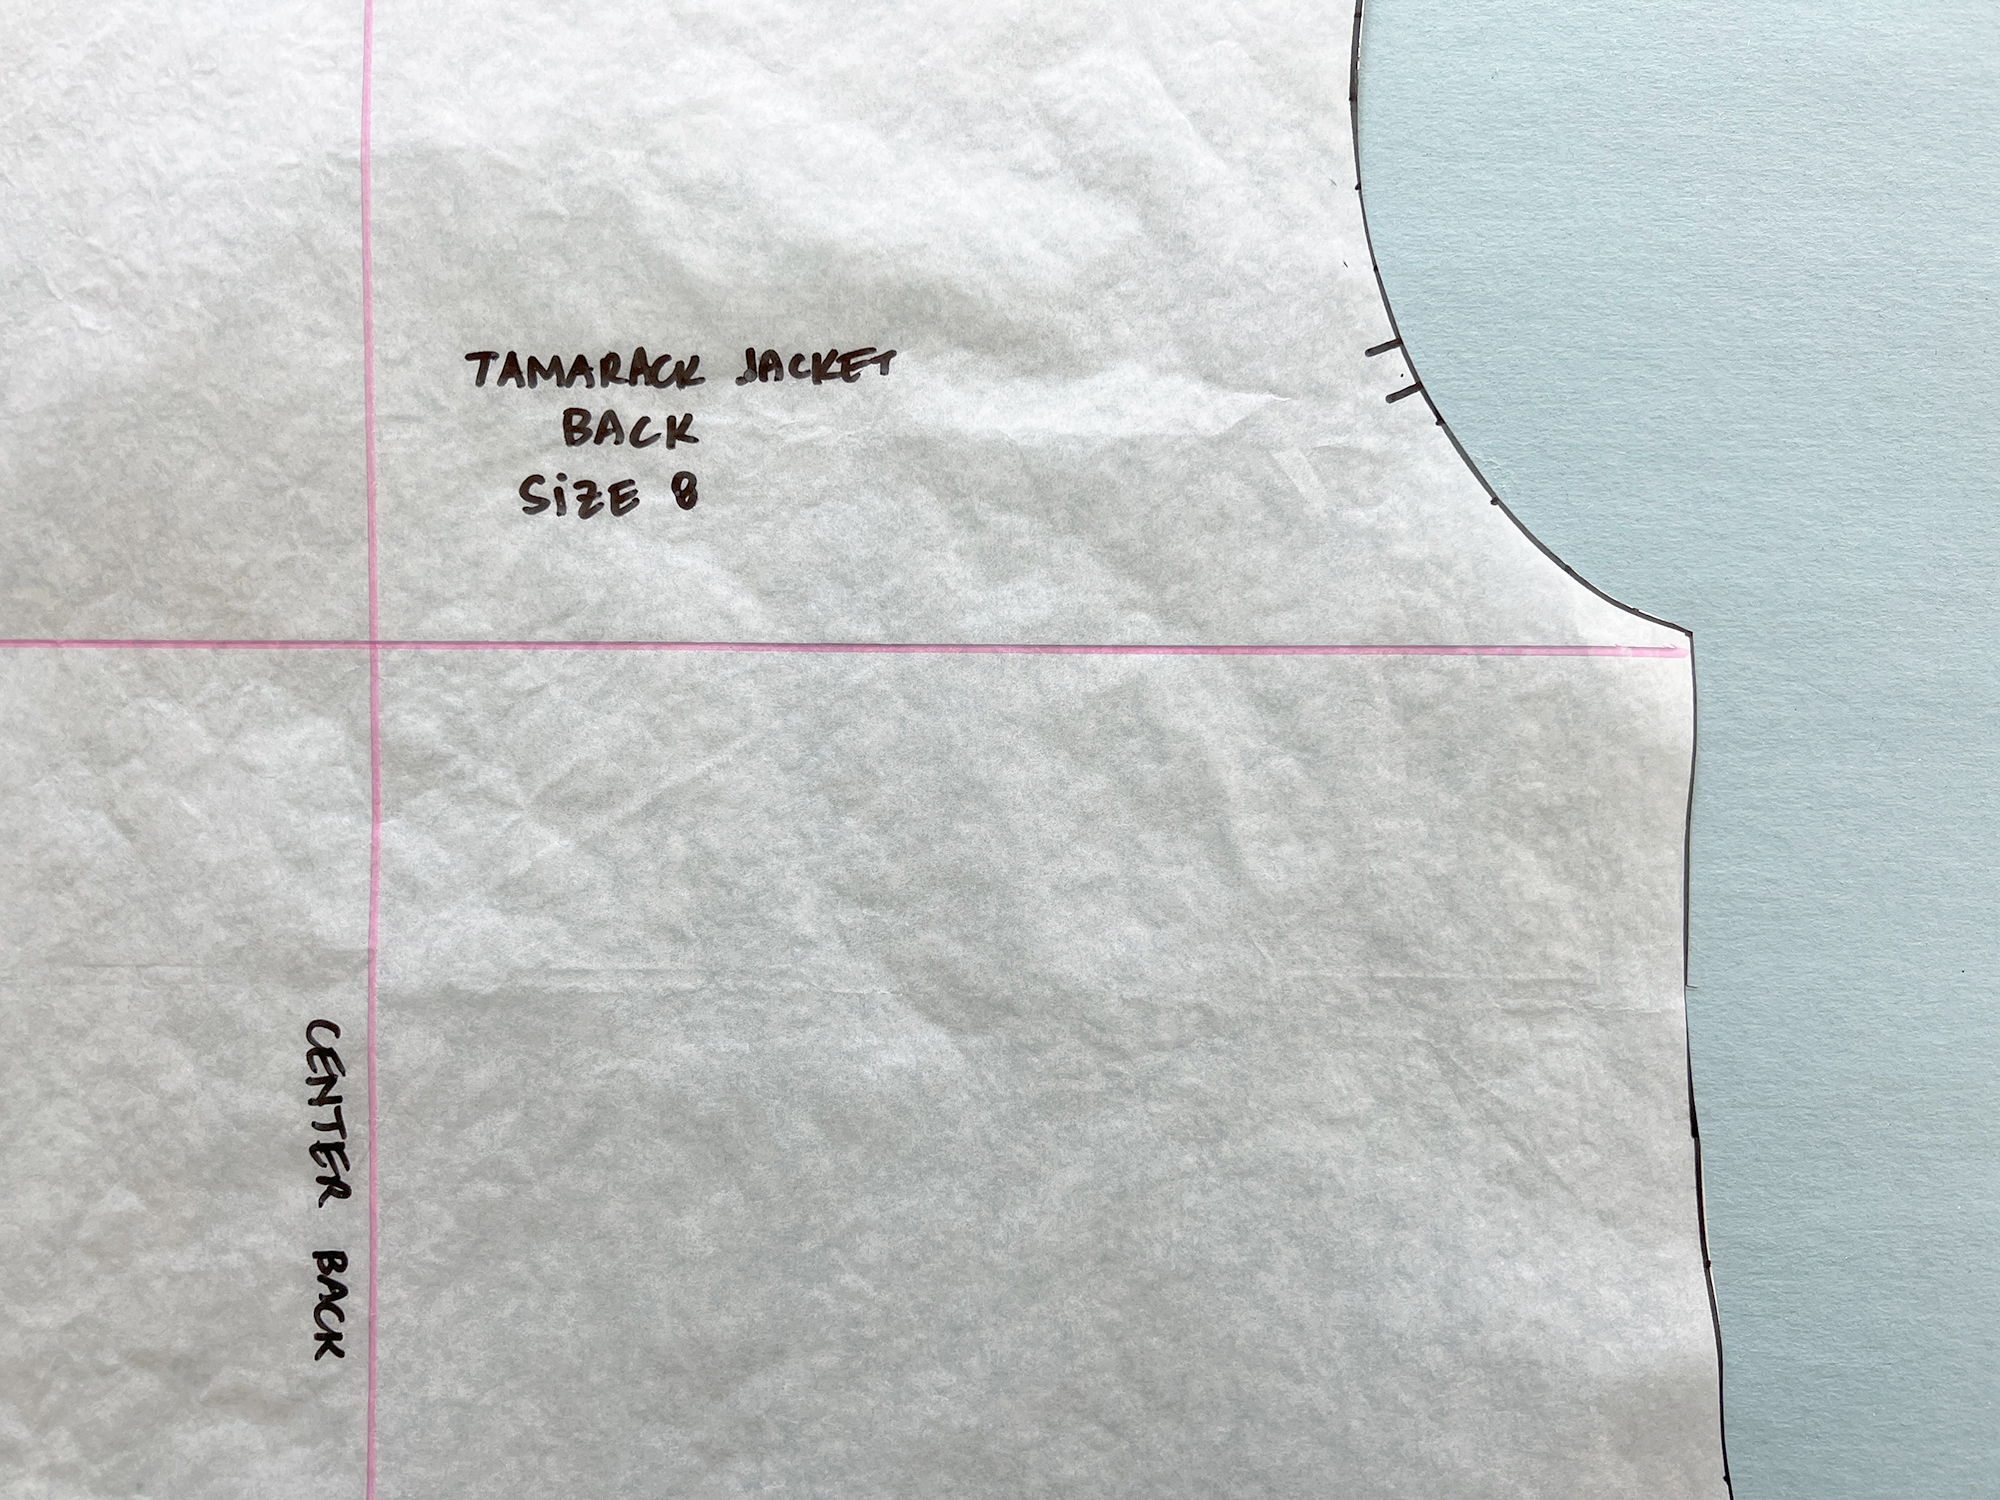
On the Back pattern piece, mark the Center Back: fold your Back pattern piece in half, creating a crease, then use a ruler to draw this line. Add a perpendicular line, again 1/4″ below the armscye.
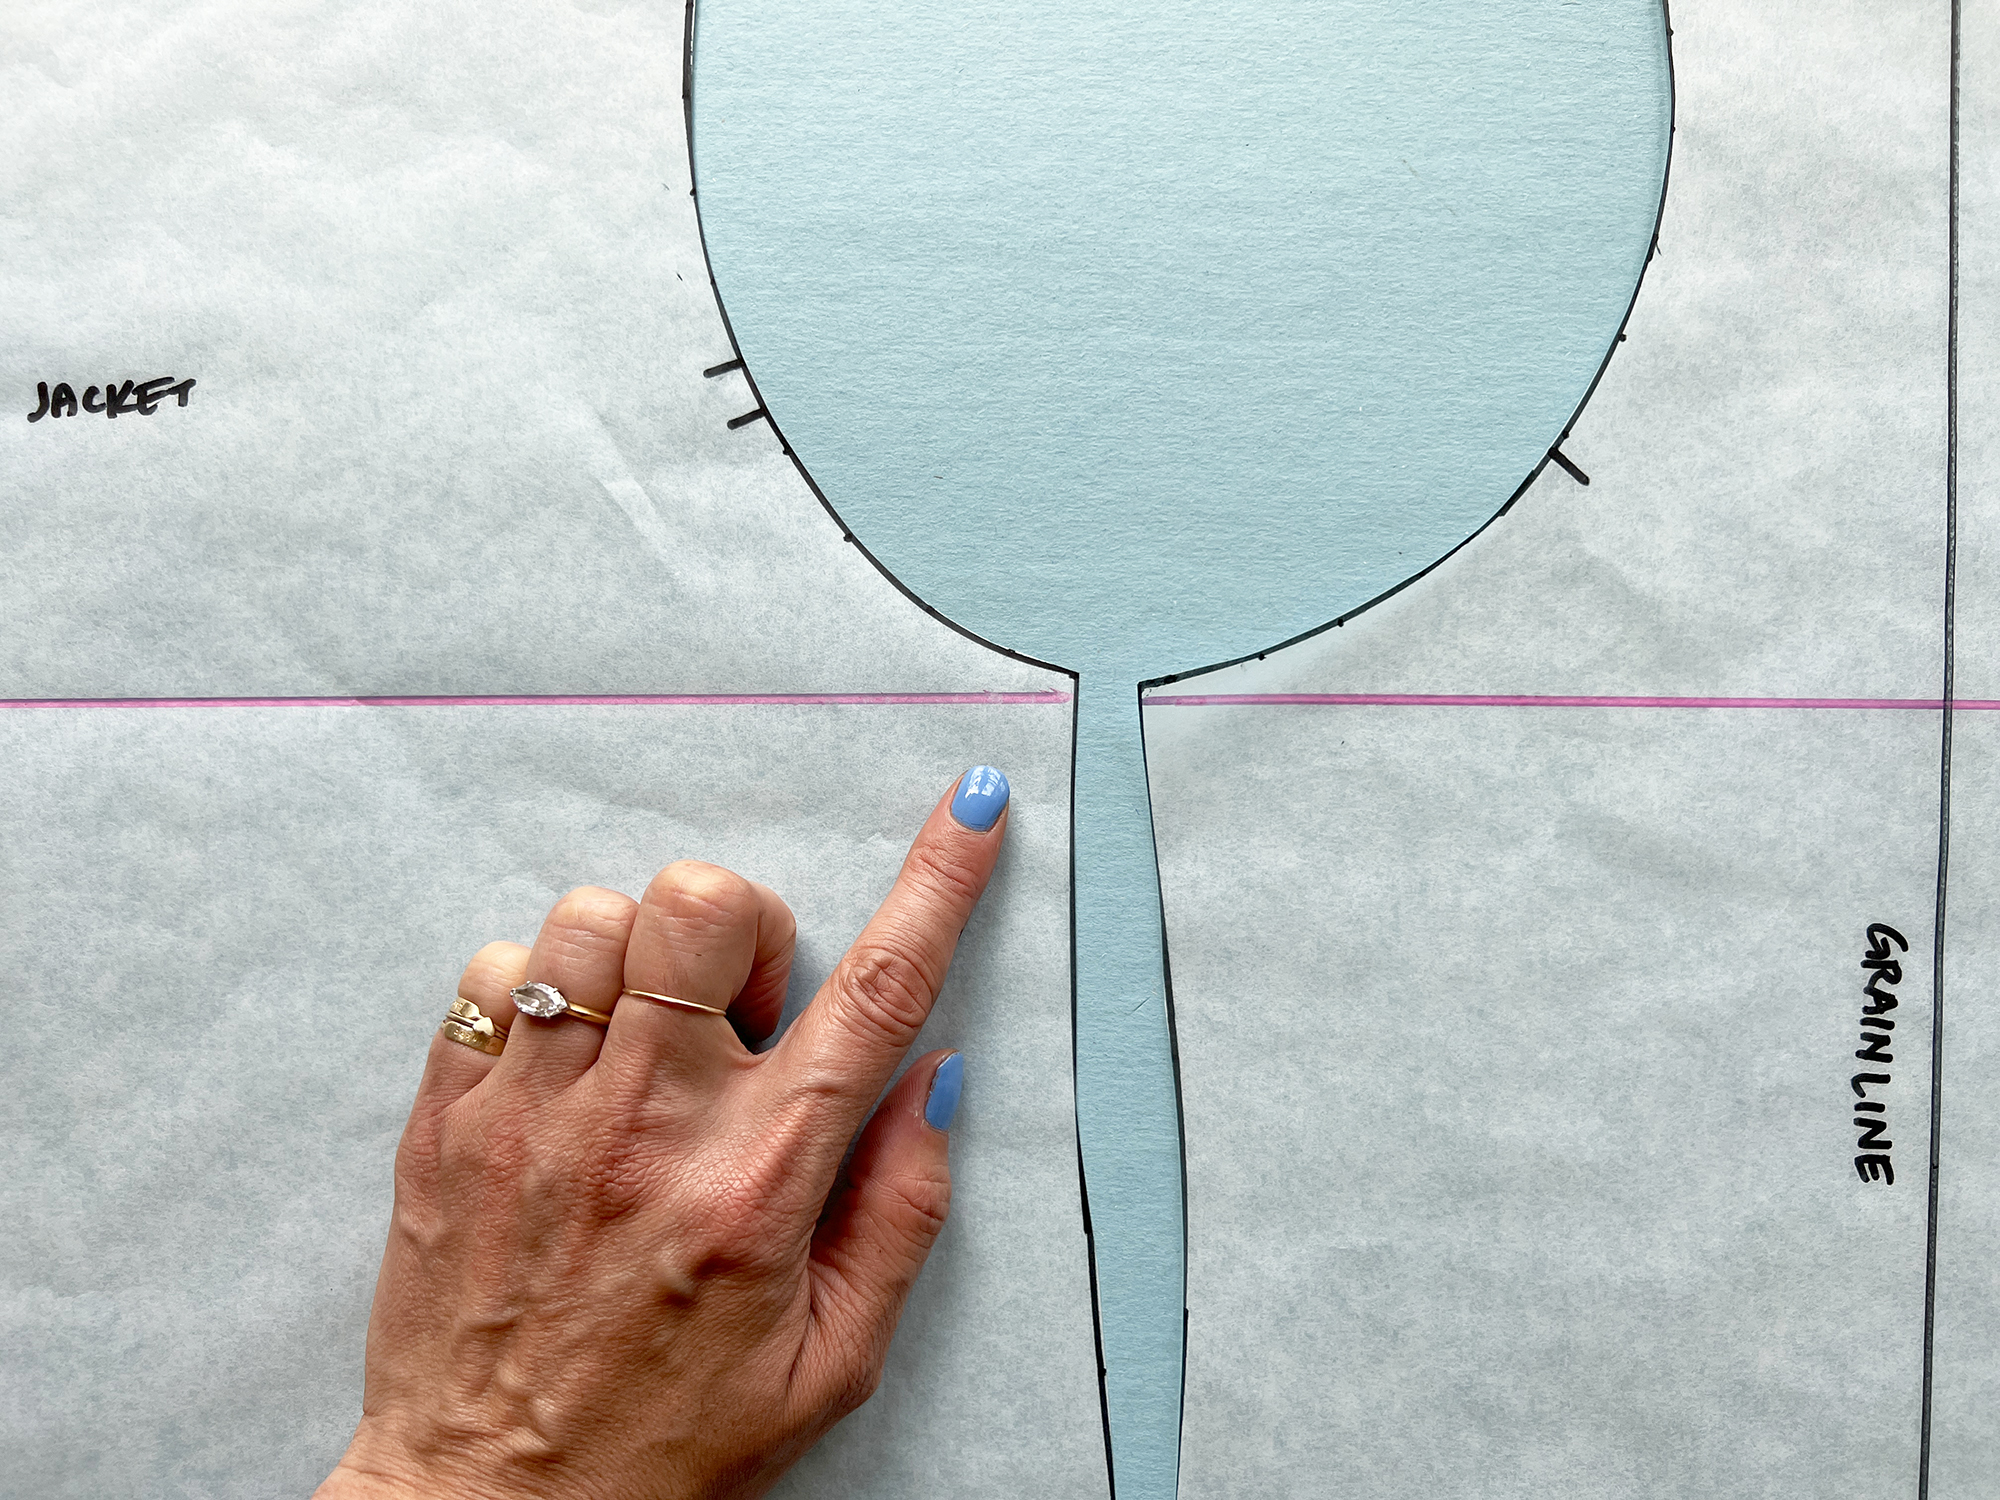
On all pattern pieces, I have drawn a horizontal line ¼” below the bottom of the armhole. It’s purpose is to keep the patchwork level around the circumference of the body. You’ll see what I mean when we start laying out our fabrics.
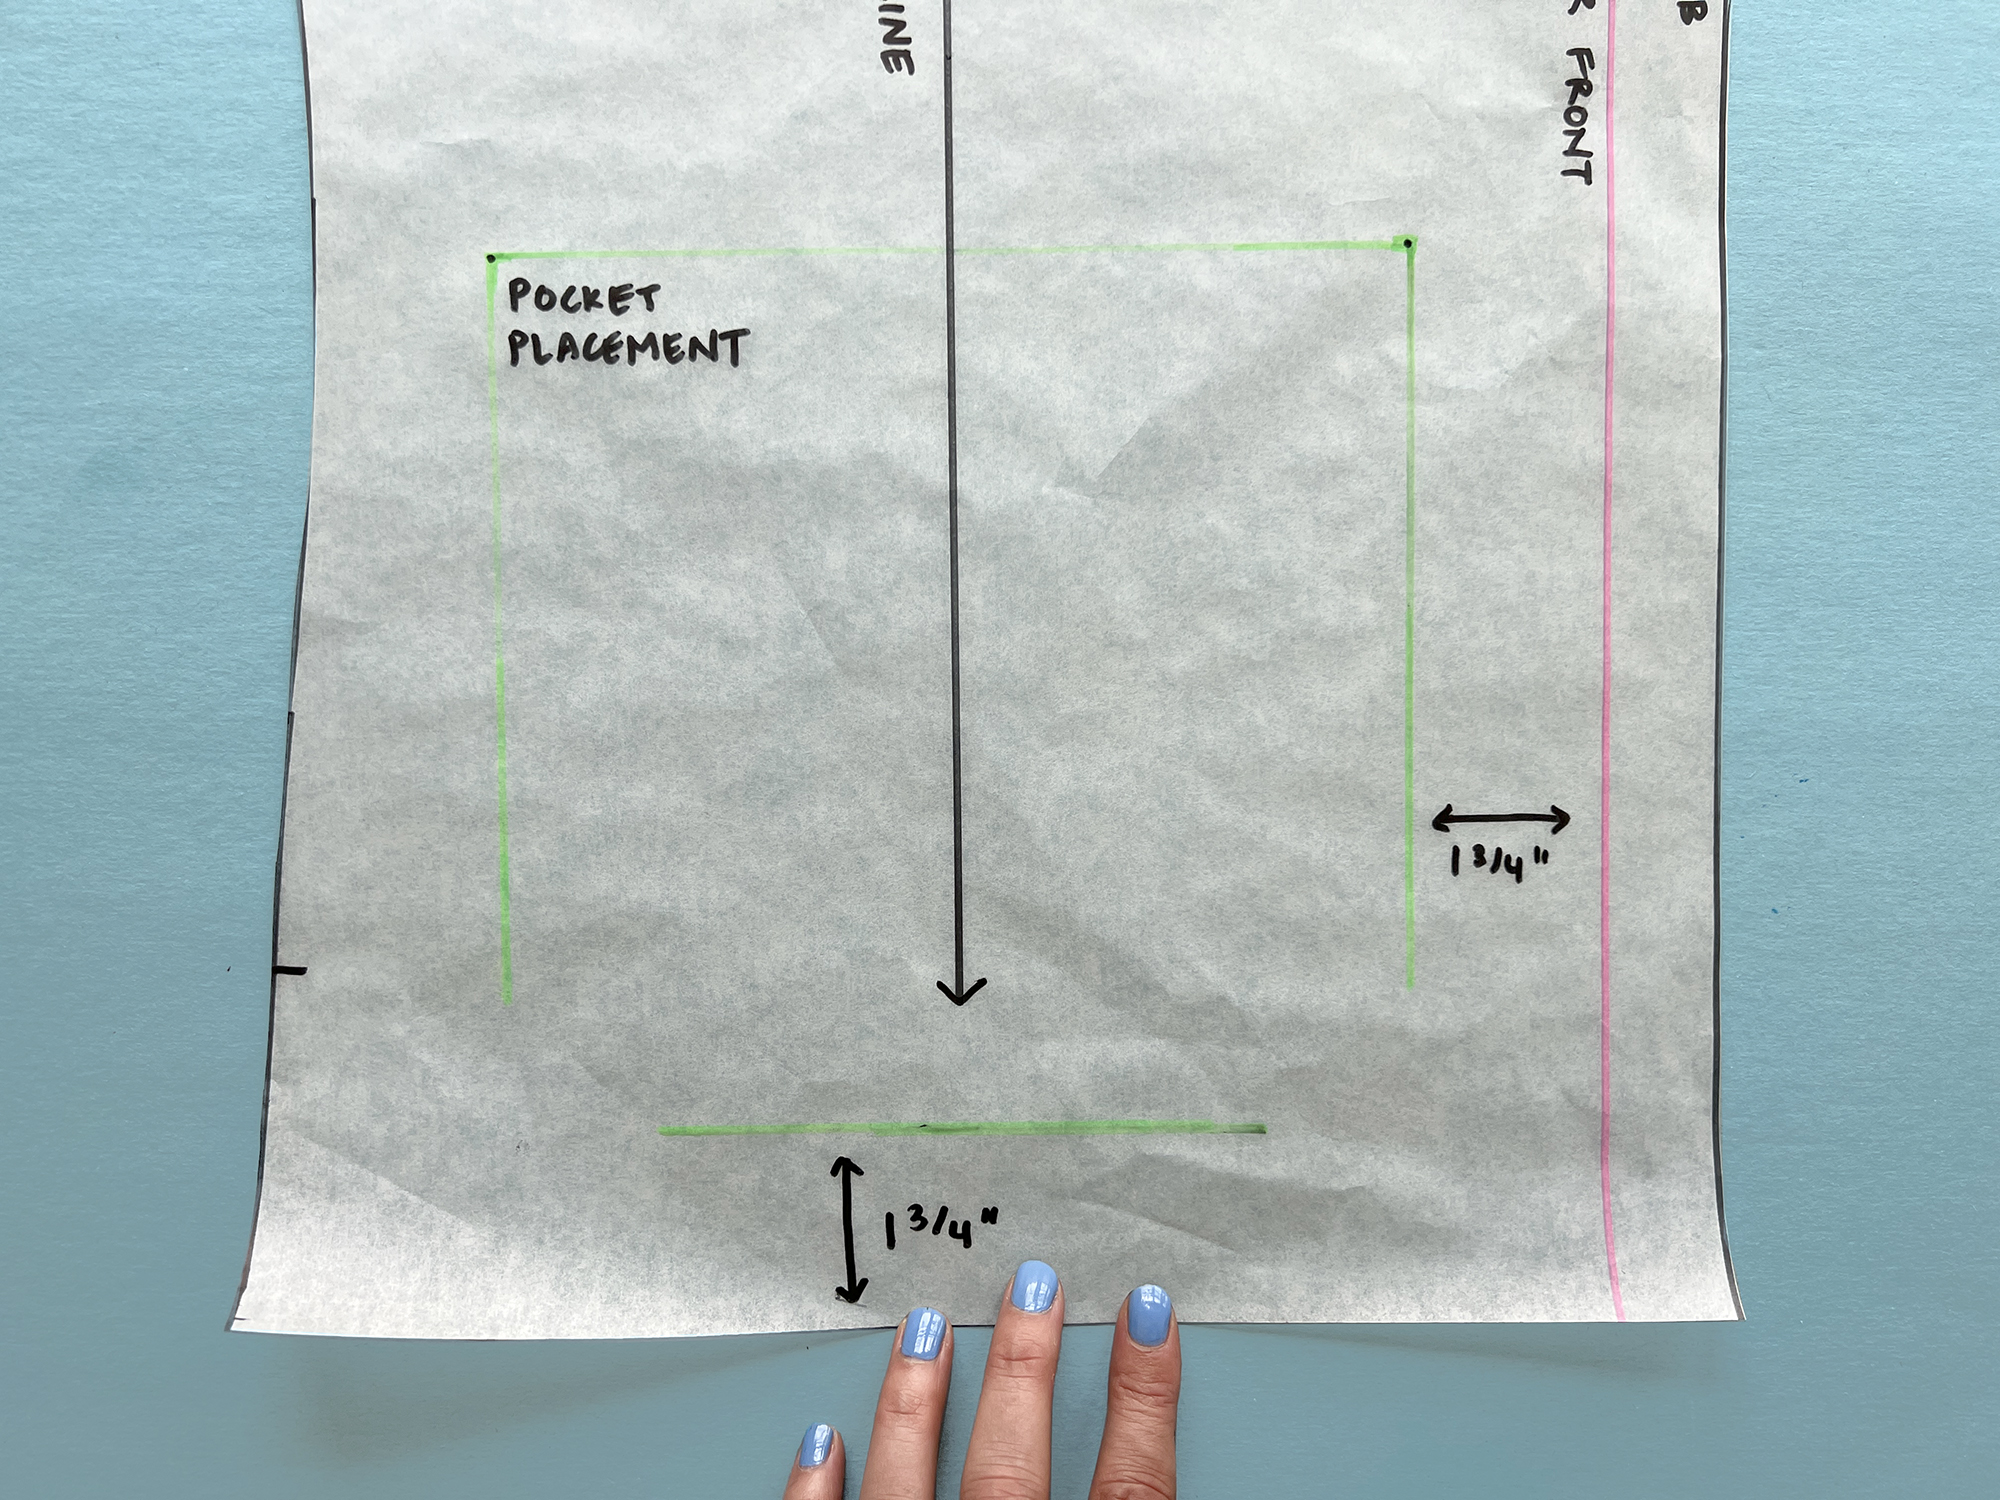
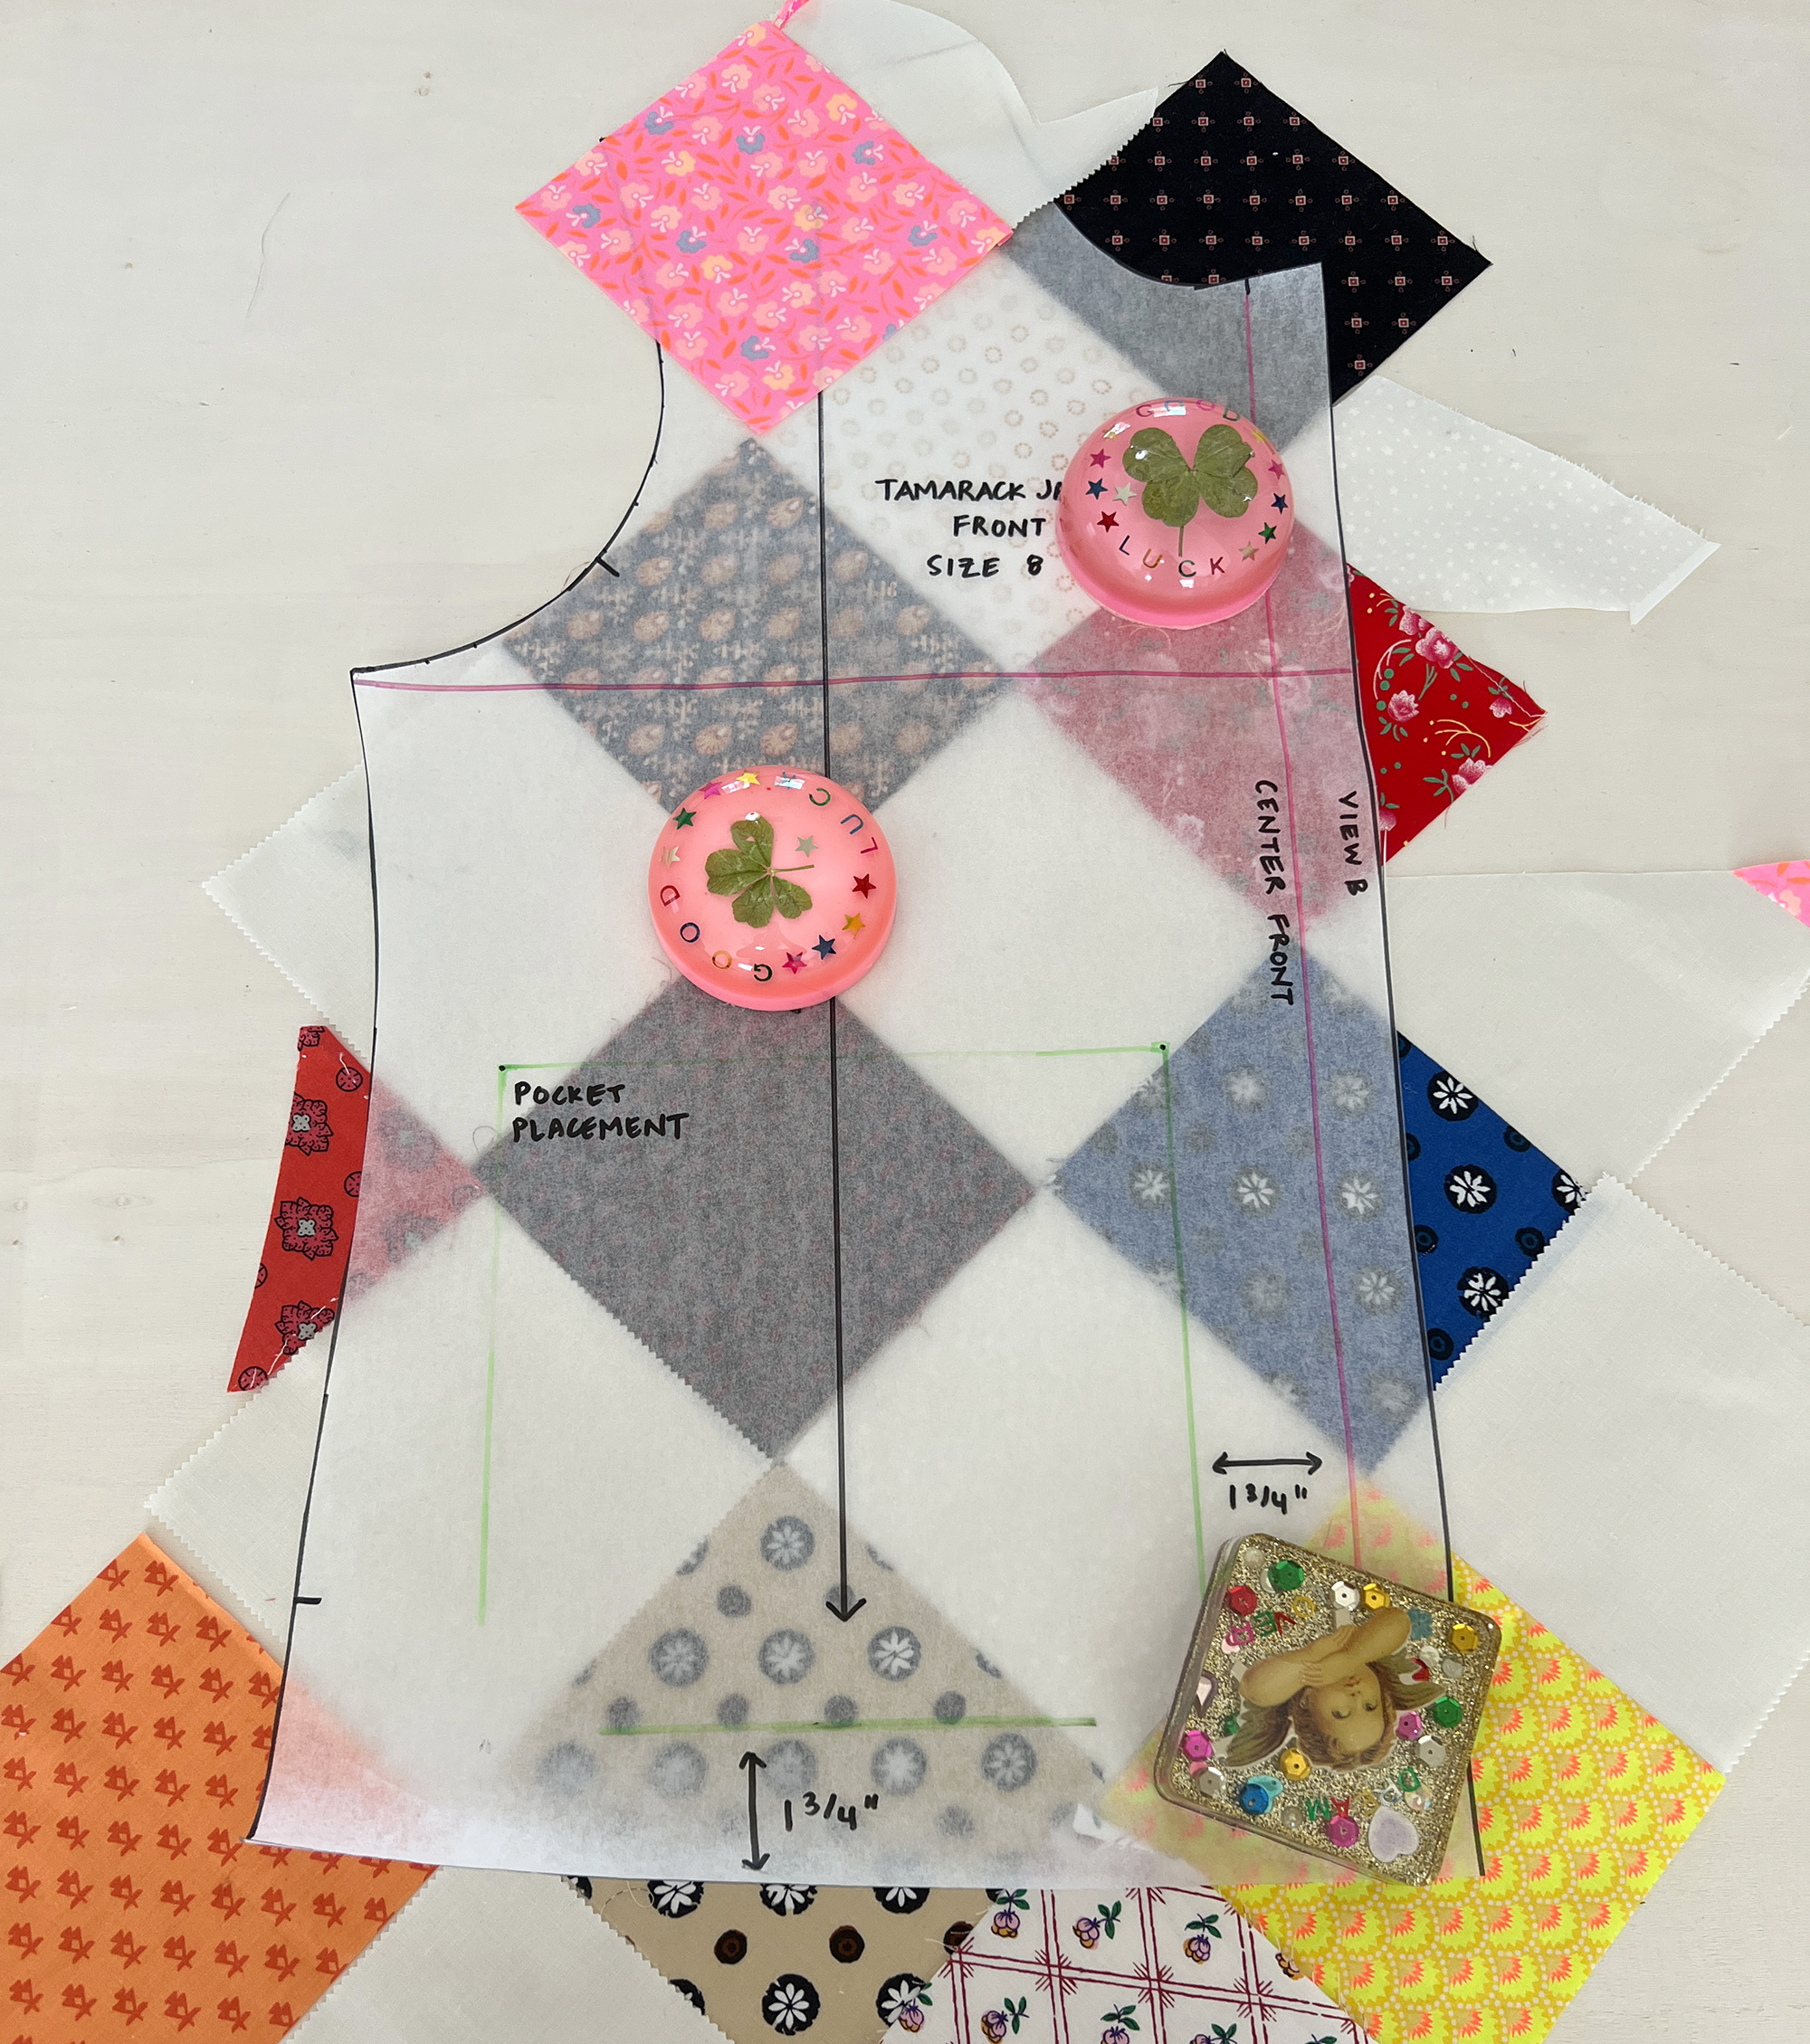
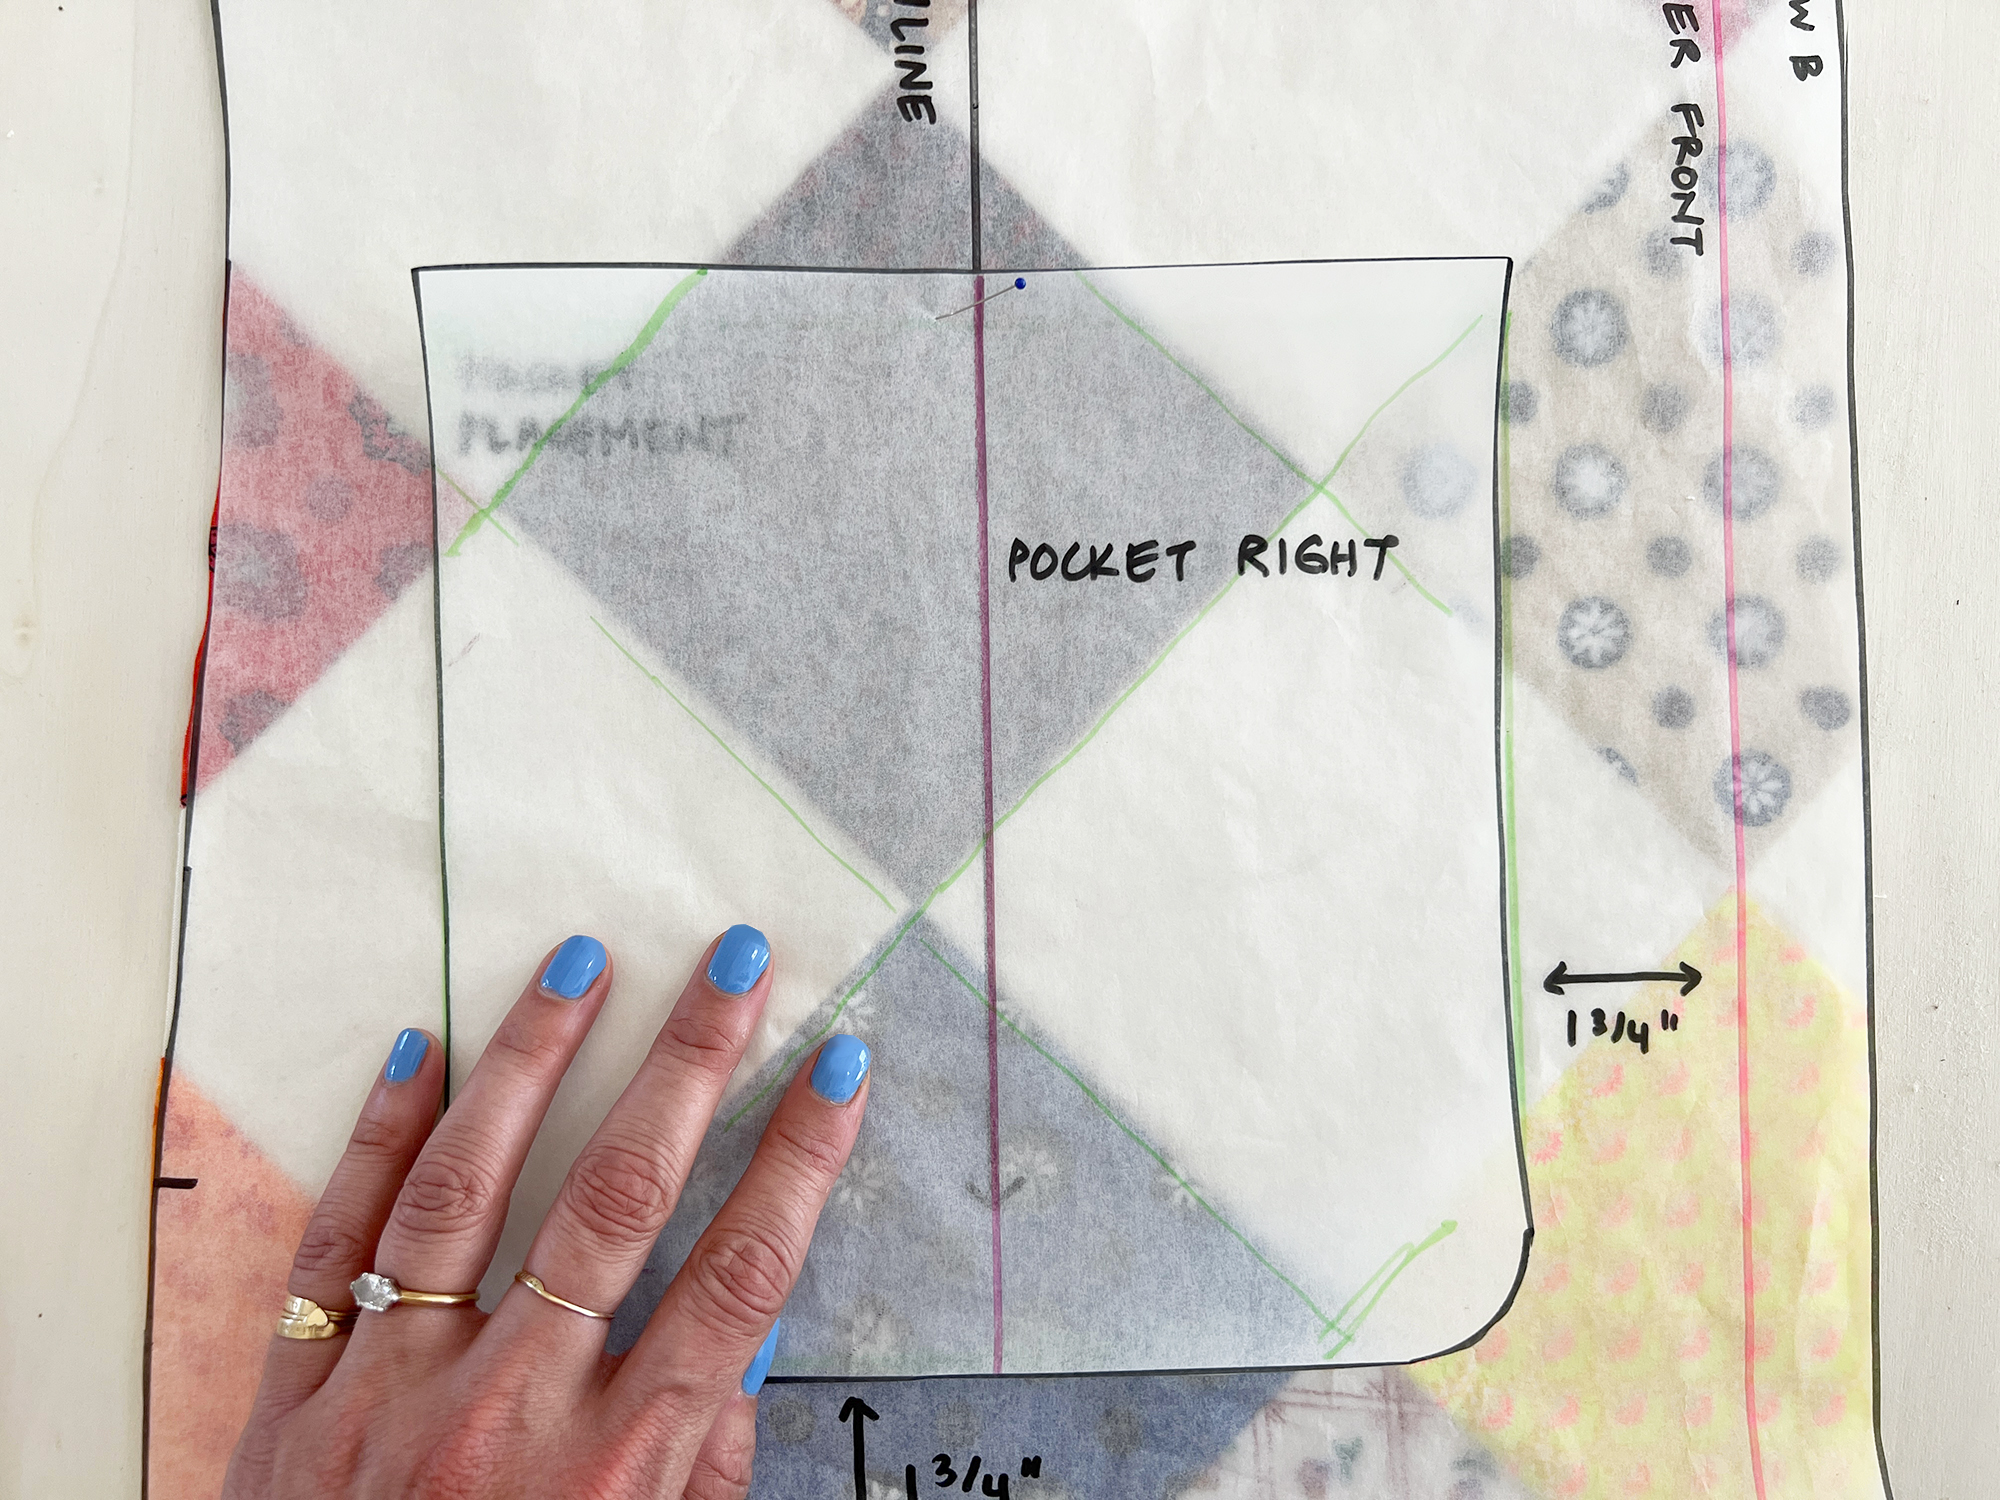
For the patch pocket, we will use the pocket bag pattern piece. It is nice shape and size! I have marked patch pocket placement in green. I am placing the pockets 1.75” from Center front, and 1.75” from the bottom edge of the jacket.
The pattern is prepared, so now it’s time to work with fabric!
Plan Your Patchwork
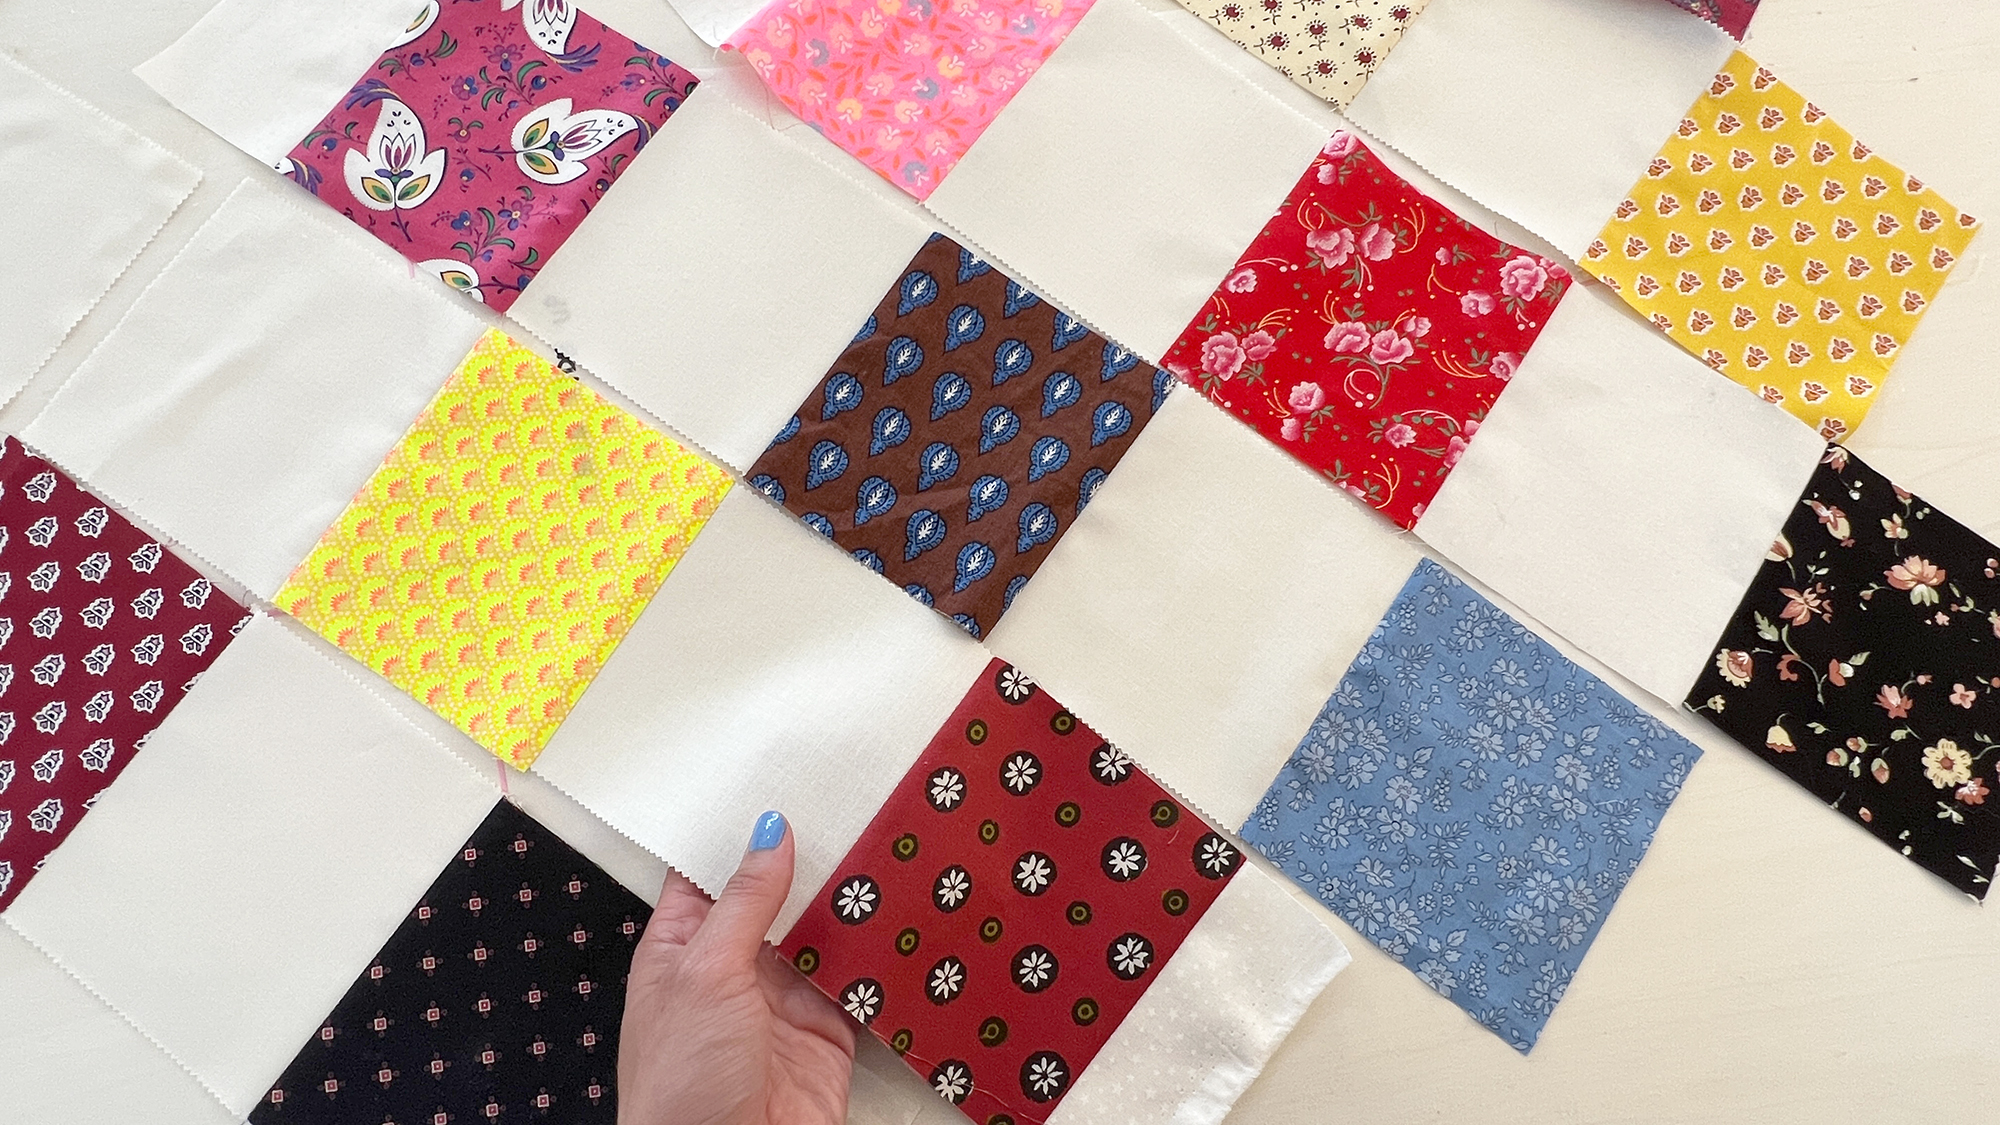
Now for some fun! Let’s lay out the patchwork design. Have all your pattern pieces available, and begin laying out your fabrics, shuffling colors and prints until you like the distribution of fabrics.
As you work, periodically compare your fabric placements to your pattern pieces. Check that your patchwork will be at least as big as the pattern pieces – keeping in mind that once sewn together, the patchwork will be smaller due to the uptake of seam allowances.
Add triangles or scraps of your solid fabric to the end of your rows as needed. Since this isn’t a quilt, the excess fabric will be cut away, so those end pieces can be odd-shaped scraps. I will sometimes cut excess fabric off of one area, and add it to another place that needs a little extra – my goal is to leave as few scraps as possible!

PLAN AHEAD: If you want your patch pockets to look invisible on your jacket fronts, plan the patchwork placement with your pockets in mind – you can put a fabric you don’t mind getting hidden behind the patch pocket, or use a duplicate print both behind the pocket and on the pocket. I tend to save my pockets for the end and cobble them together, but advanced planning is always wise!
Sew Your Patchwork
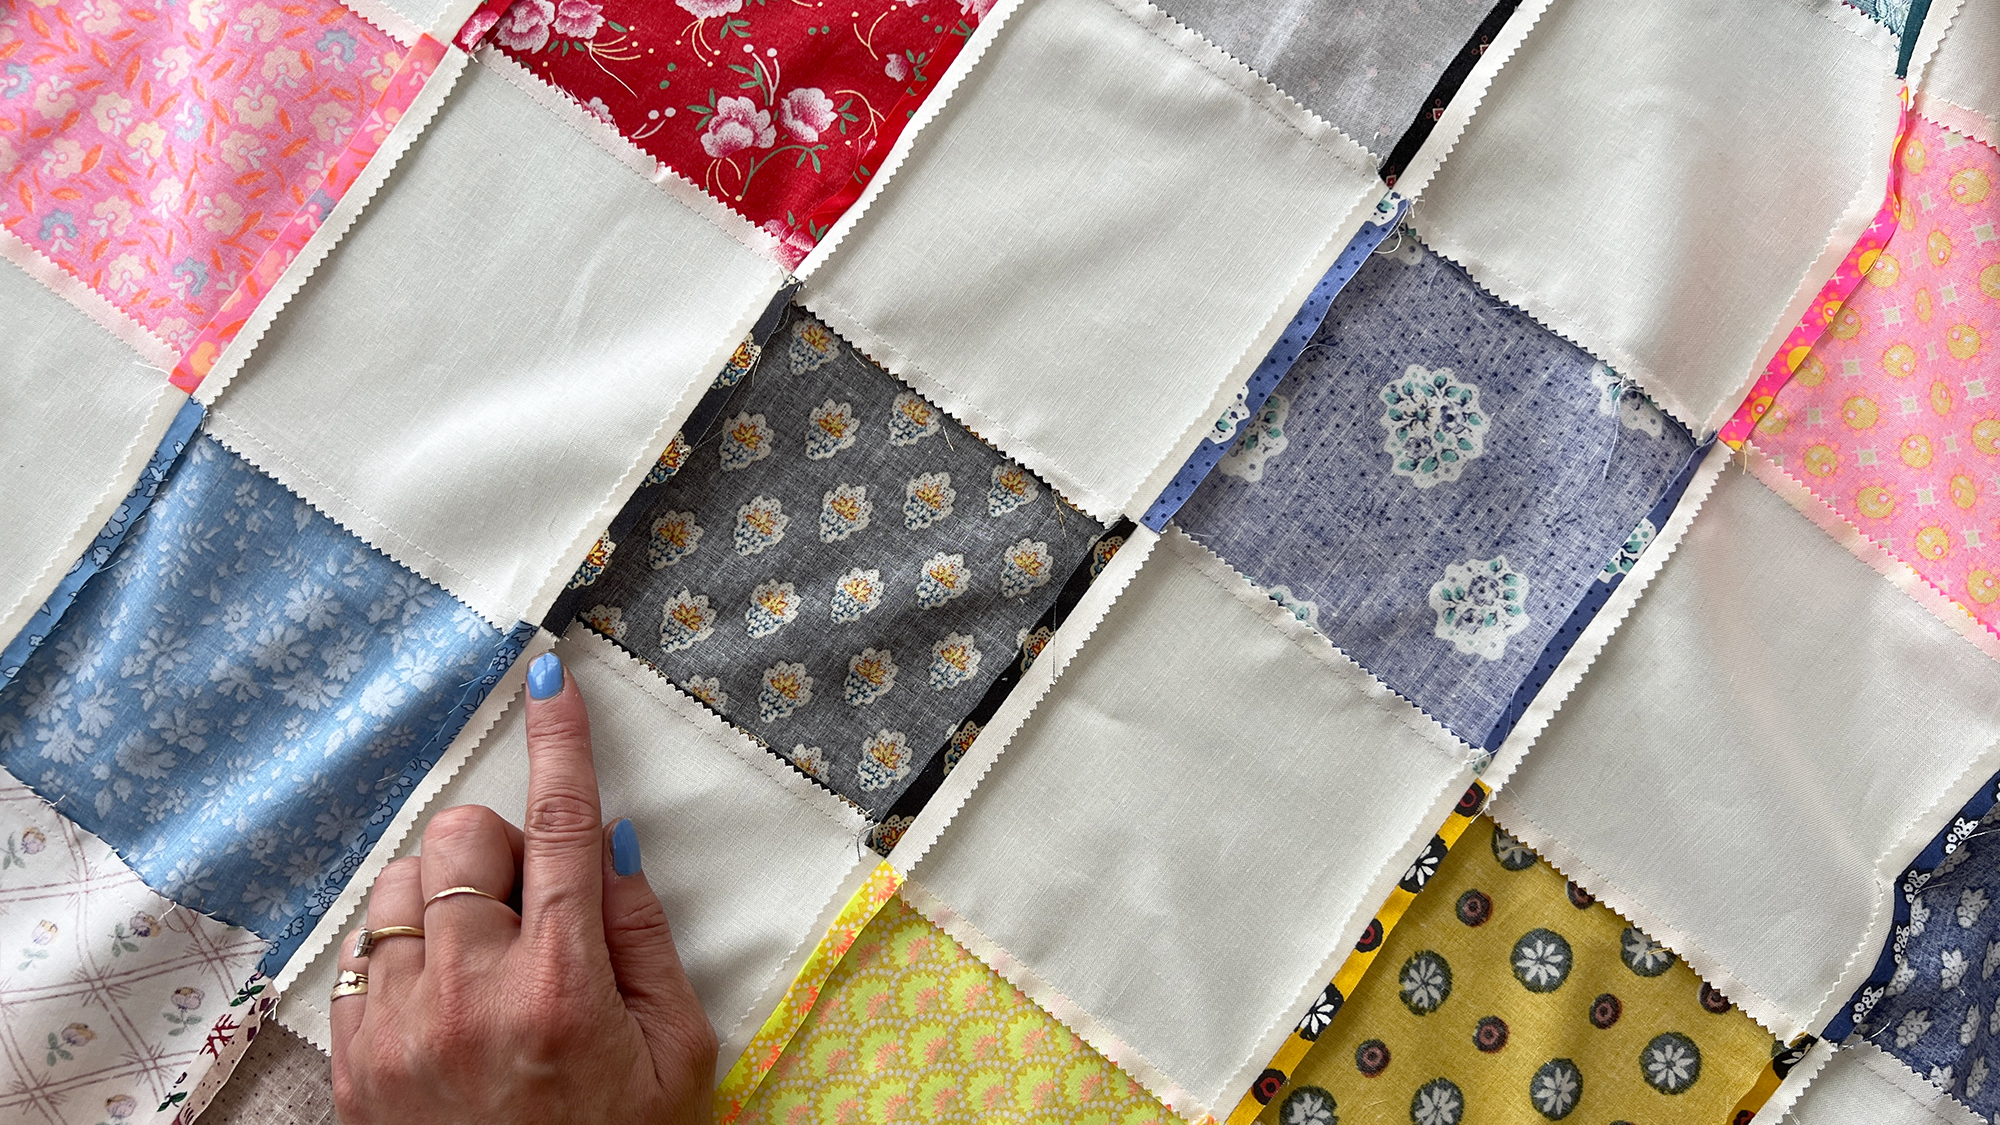
Once you are happy with the placement of your fabrics, begin sewing them together. Use patchwork foot #37 to piece with a ¼” seam allowance. Press seams towards the printed fabric (away from your background fabric).
Nest seams and pin as needed to make sharp corners. Sew the long strips together. Press long seams open.
Pocket Patchwork
See how I can see the patchwork arrangement through the tissue? I will use this to determine my pocket patchwork. I like to have the fabrics on the pockets placed to mimic the fabric under them. This way, when attached, the pockets “melt” into the jacket.
If you would like your pockets to stand out, just switch up the placement of fabrics in the patchwork on the pocket pieces!
Double Check
Again, check your work to make sure the finished patchwork is big enough for your pattern pieces. To do so, lay your pattern tissue on top of the patchwork as shown. Your fabric should be slightly larger than your pattern pieces on all sides. If you find a little corner of your patchwork isn’t quite big enough, go ahead and add a scrap there.
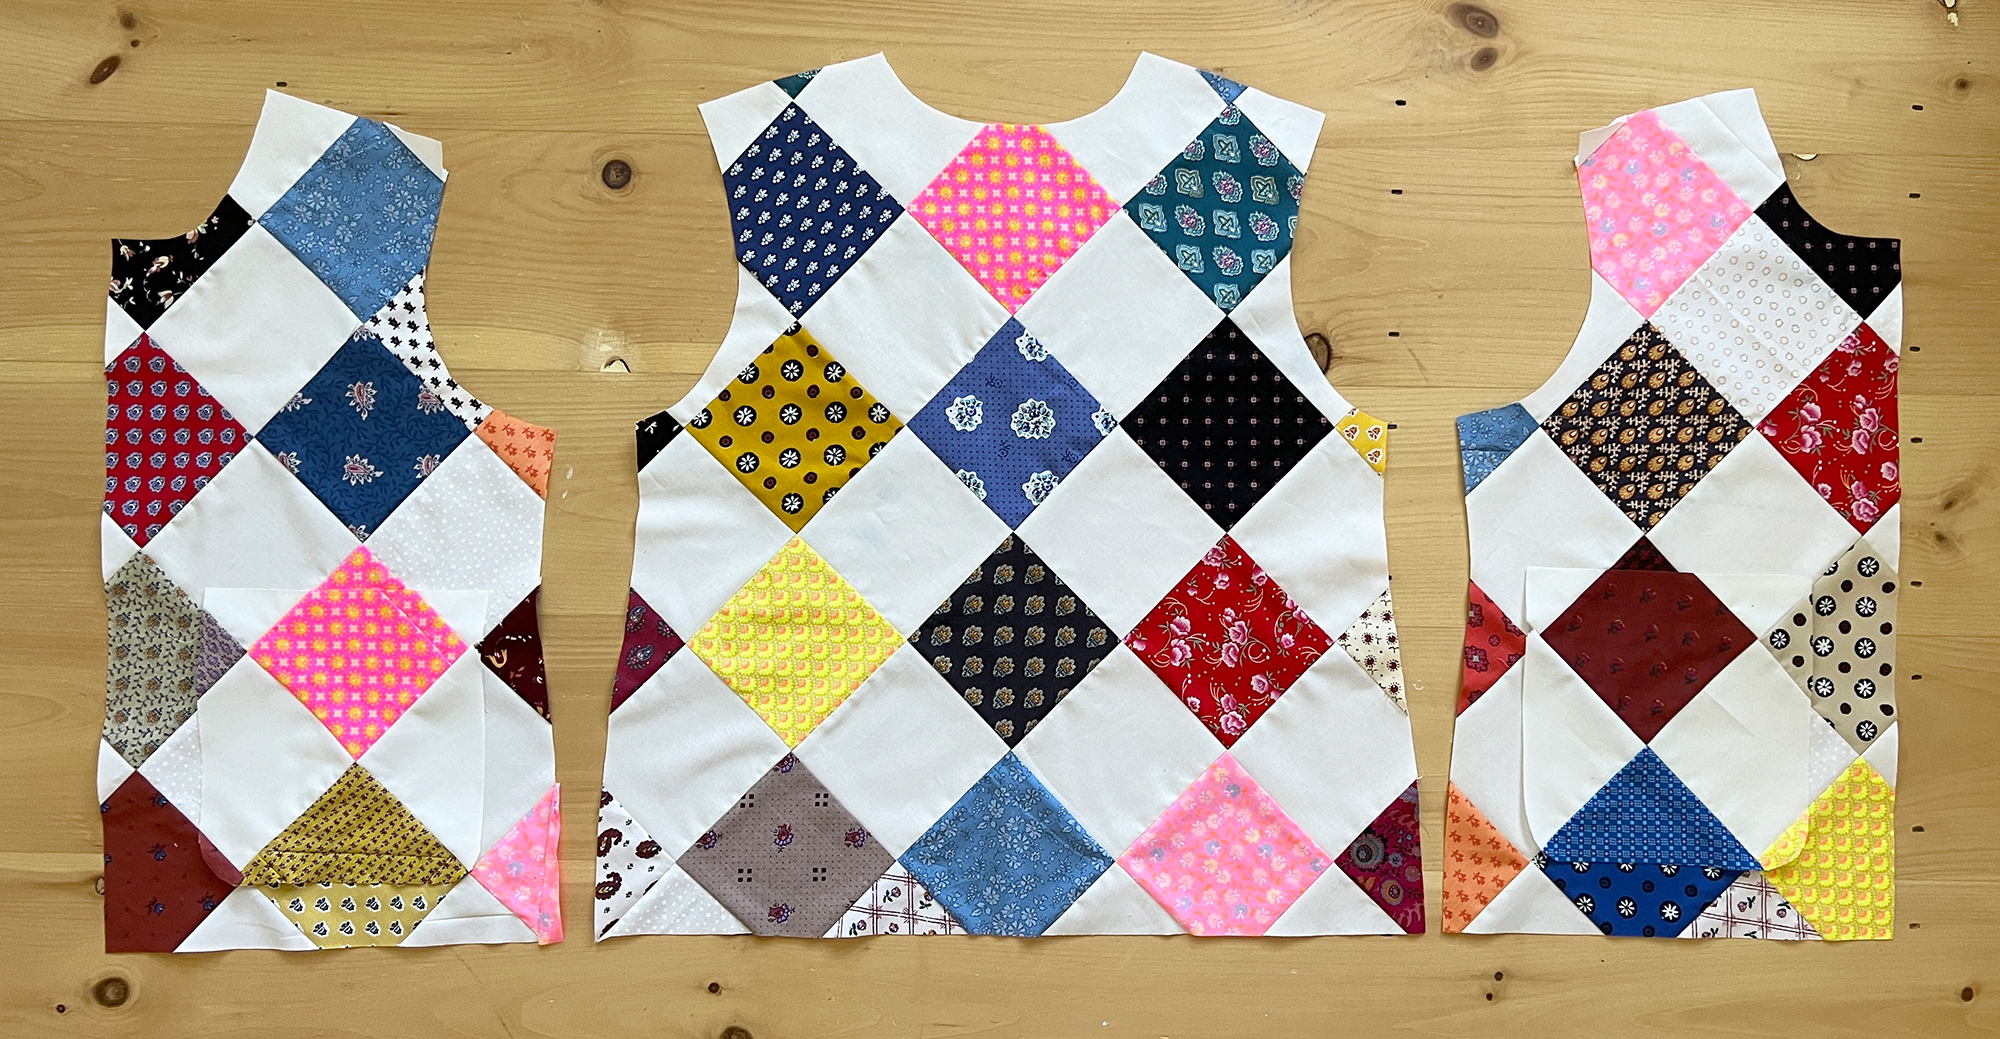
At this point, you should have quilt tops for the jacket fronts, back, and sleeves (5 pieces total). You may now cut them out in the shape of the pattern tissue.
Prepare Batting & Lining
Let’s prepare the batting and lining. If you are a quilter, this is a familiar process. For this jacket project, the pieces are relatively small and manageable compared to a bed quilt, but the steps are the same.
- Prepare your lining fabric, batting, and patchwork fabric. Iron any wrinkles, all materials should be smooth to prevent ripples when quilting.
- Lay your pattern tissue pieces on your lining fabric. Match grain lines. Cut out the pieces.
- Repeat step 2 with your batting.
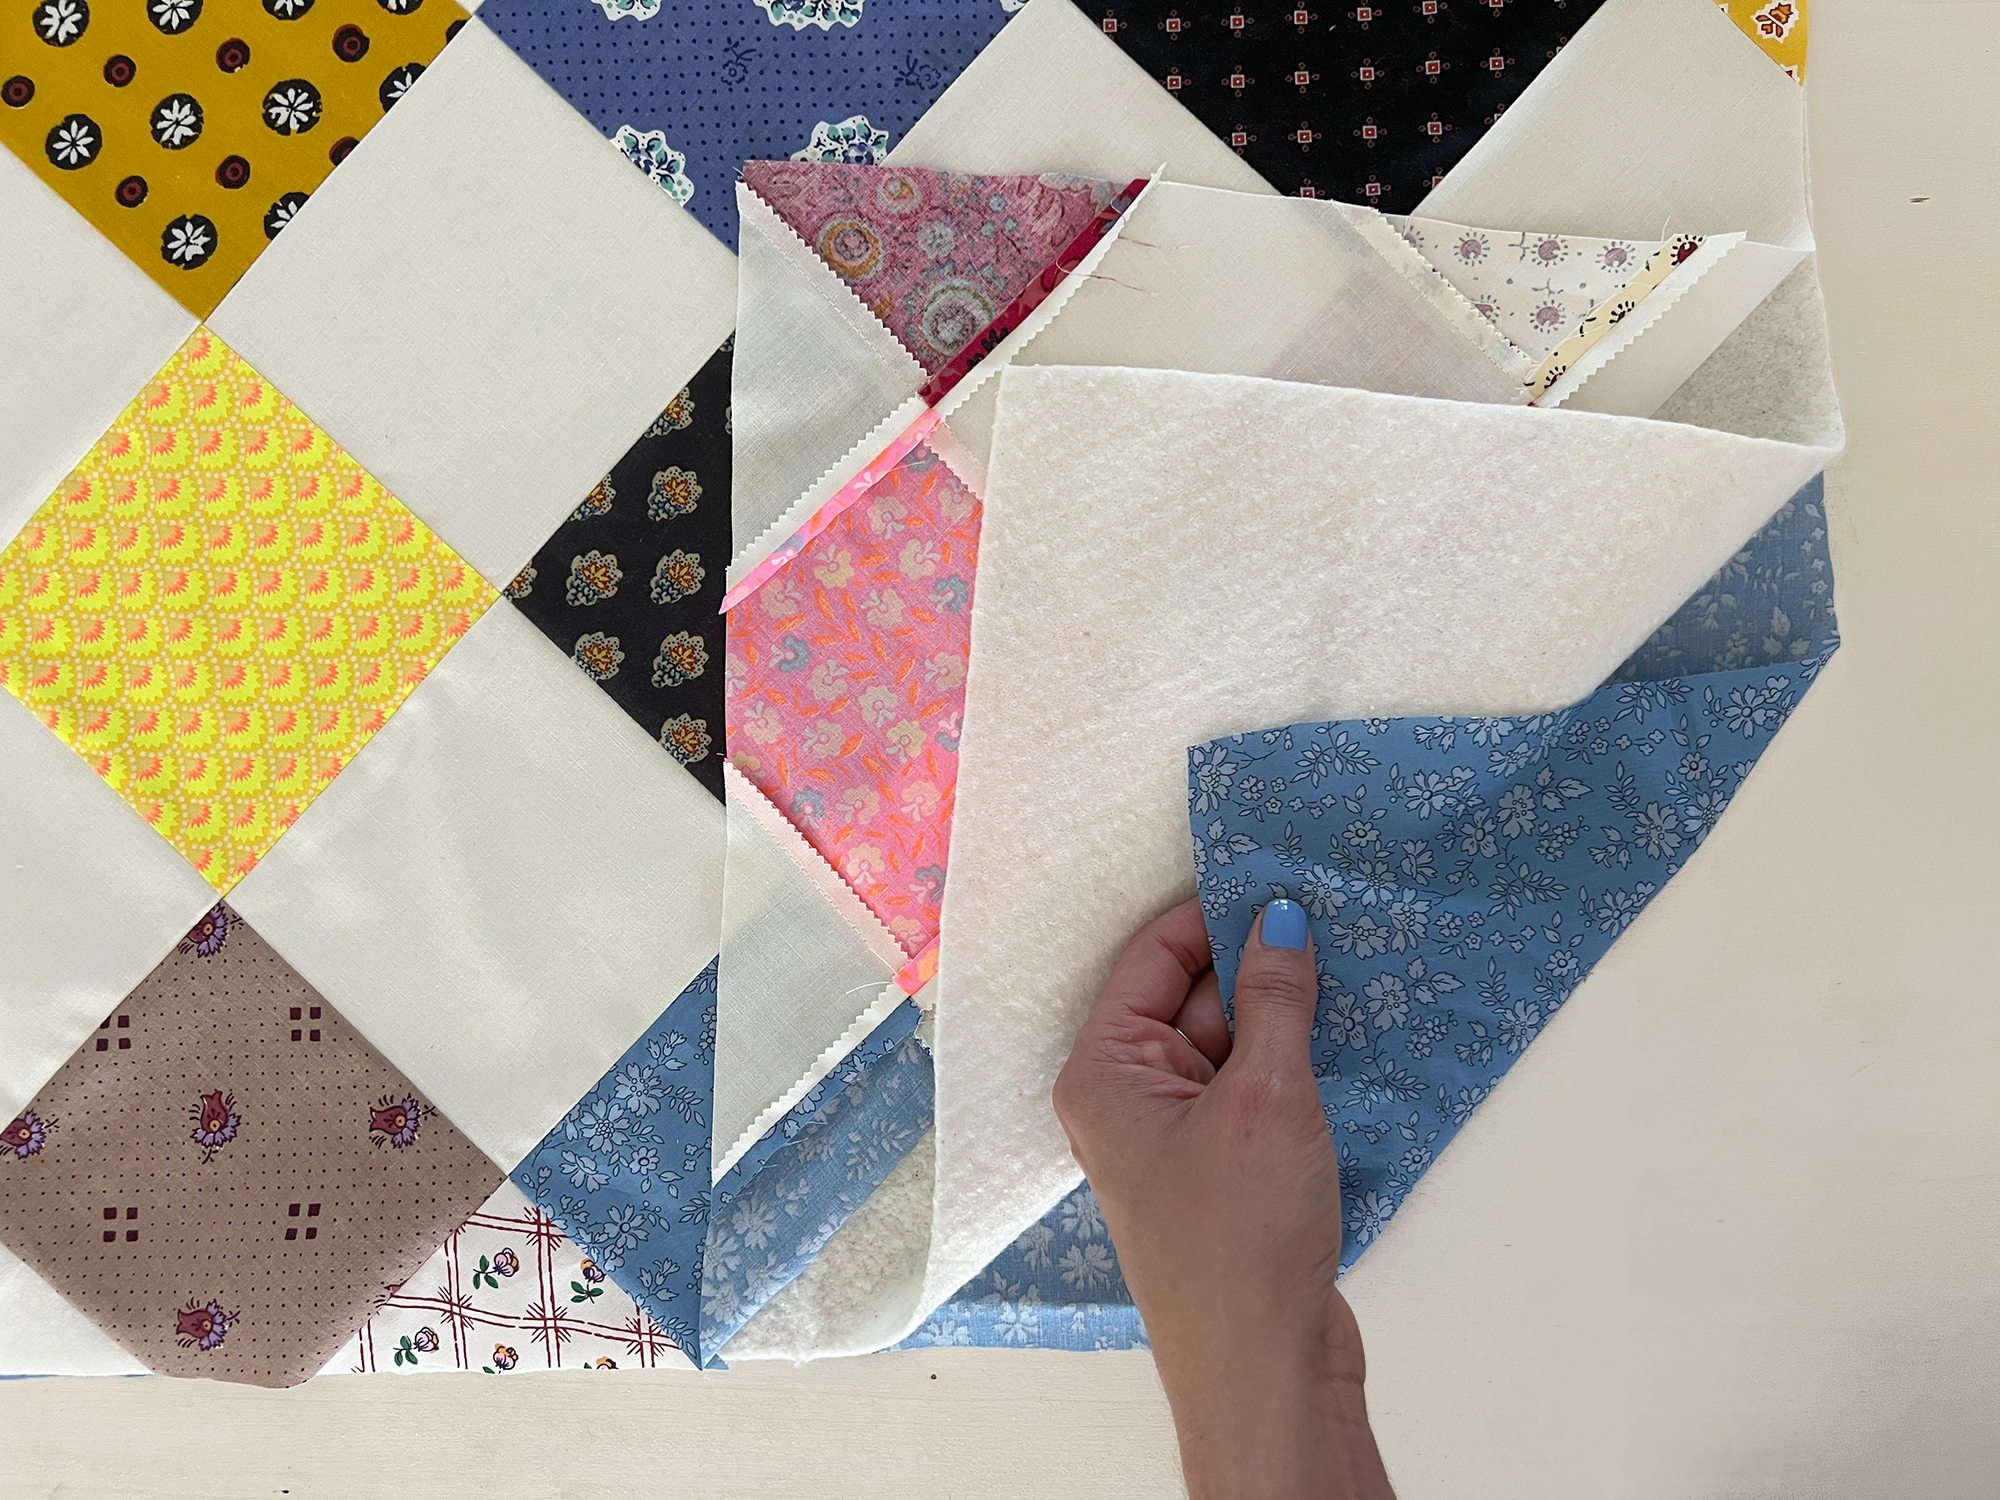
Make a Quilt Sandwich
- Lay out these lining fabric pieces, wrong side up.
- Lay your quilt batting on top of the lining fabric.
- Place your patchwork fabric on top of the batting, right side up. You should now have a “quilt sandwich”, one the following pattern pieces: 2 jacket fronts, 2 sleeves, 1 jacket back. We will work on the patch pockets later.
- Take your time to align grainlines, and check that all edges of the sandwich match up.
- Hit pause and wait for the next post in this series!
NOTE: Cut out your pocket pieces in lining and batting, but don’t make a quilt sandwich with them yet! They will be assembled in a different way next week.
Whew! We just did a lot! I hope you had fun, I know I did. Next week we will pin the sandwich, quilt it, make pockets, and begin garment construction. I’d love to see what you have made so far, so if you’re sewing along, tag me on Instagram so I can cheer you on!
So I will meet you back here, and in the meantime, if you have questions about any of the steps covered today, just leave a comment down below and I’ll do my best to help.
Happy Sewing!
Martha


What you might also like


9 comments on “Sew a Custom Quilted Tamarack Jacket, Part One”
-
-
I always match my needle to my project, so a Microtex could be a good match for parts of your project, like if you’re piecing finer fabric such as cotton lawn. I used size 80/12 needles for piecing, quilting, and construction, but I changed out to a fresh needle several times. Especially after quilting, you’ll want a sharp one for construction. I’m excited for you to make one!
-
-
How/where do you get the pattern? TIA
-
I used the Tamarack Jacket sewing pattern from Grainline Studio. You can purchase it from them directly, or from your local sewing shop.
-
-
any pattern suggestions for a plus sized jacket? like 1X or 2X size?
-
I have heard great things about Muna and Broad patterns! Their Grainger Coat pattern is fully size inclusive and the samples look really nice. While the neckline is different from the Tamarack, you could easily modify it to have a higher neckline by filling in that area on your pattern tissue and creating the neckline shape you prefer.
-
-
Hello Martha,
Very good tutorial with good pictures to demonstrate the steps. I have made a few garments that were pre quilted and some quilted for that particular project. I have found that the quilting tends to shrink up the fabric. For that reason, I make a quilted piece 2” larger on all sides and then cut out the pattern pieces. -
How do I order the pattern for the jacket. It won’t let me select it and order.
-
Hi! Thanks for your interest in the pattern. We recommend reaching out to your local BERNINA Dealer—they may already have it available or be able to order it for you.
-
Leave a Reply
You must be logged in to post a comment.

Hi Martha-
Great post!
Question, what type of sewing needles did you use for this? Will microtex work or should I use a universal needle? I’m using 100% cotton fabric for both sides in addition to the the lightweight cotton batting.