Sew a Custom Quilted Tamarack Jacket, Part Three

Hi everyone! It’s Martha from Buried Diamond again, and I am back with the third and final installment of our Custom Quilted Tamarack sew-along. The last two weeks have been jam-packed; this week we can slow down a bit and finish our jackets. This week, we are going to apply bias binding around all edges of the jacket and apply closures.
If you missed my previous posts in this series, here is the first installment, and the second. As always, if you have any questions as you work, drop me a comment below and I will do my best to help you!
Tools & Supplies
In addition to your favorite pins, cutting tools, and basic notions, here are a few items I’m using this week to make things easier. Linked tools were kindly supplied to me by Brewer Sewing:
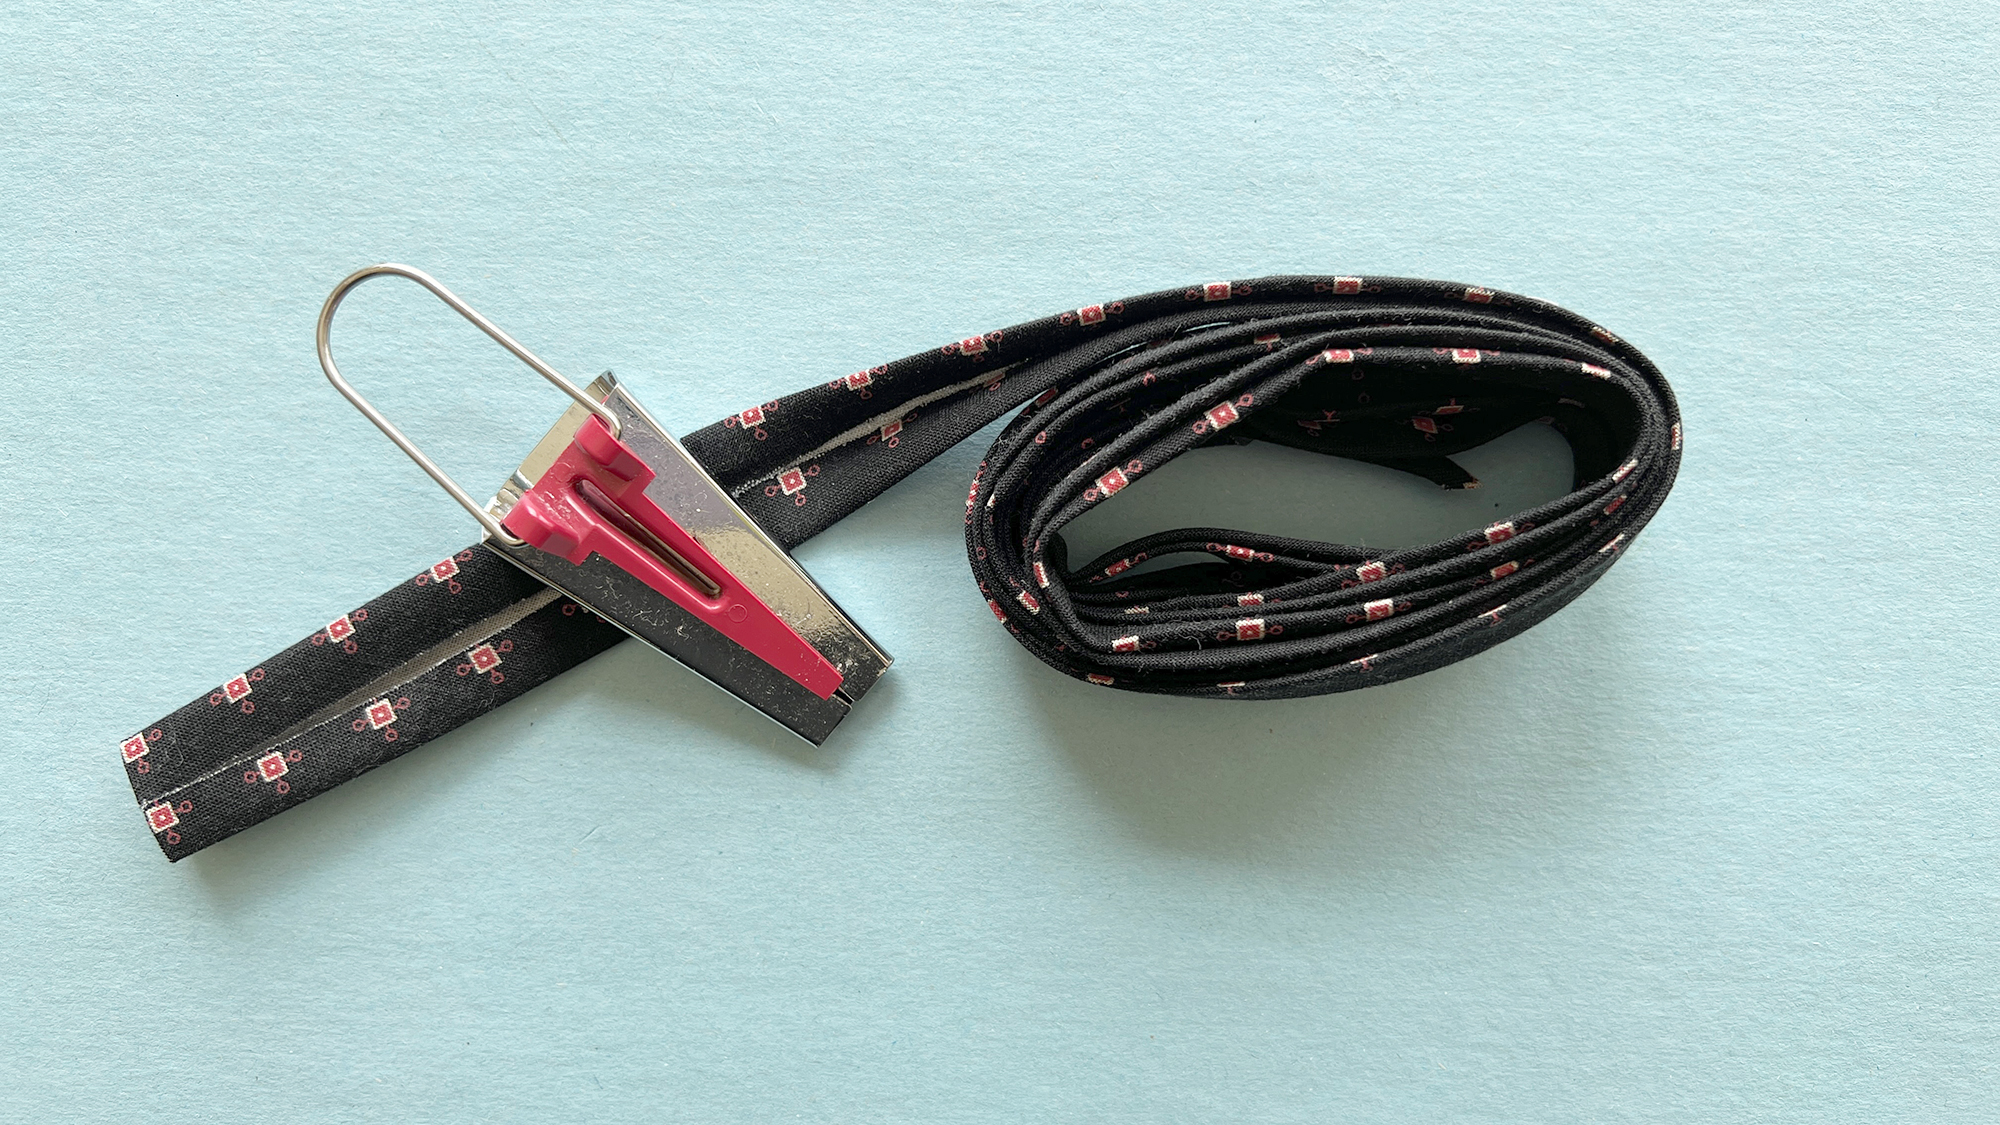
- Bias binding maker
- Wonder clips
- Hand sewing needle (optional)
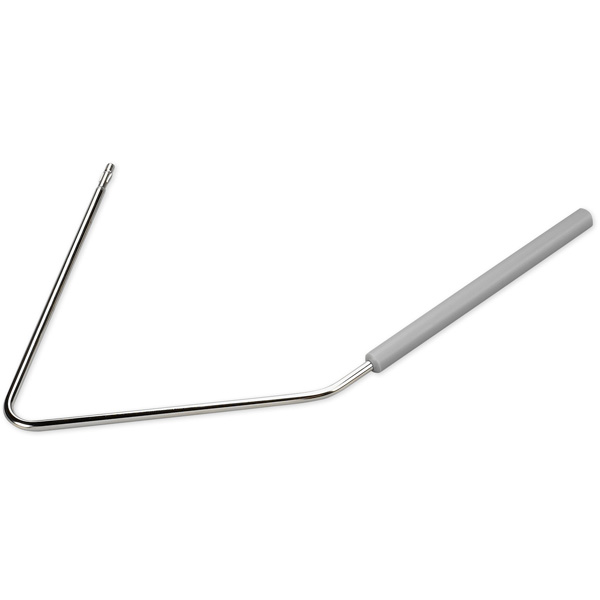
- Expanding sewing gauge (optional)
- Dritz Heavy Duty Snaps
- Dritz snap setting tool
NOTE: If you prefer to use buttons instead of snaps, just follow along until we get to setting the snaps. You’ll make gorgeous BERNINA buttonholes and sewing buttons instead of hammering snaps.
Bind All Edges
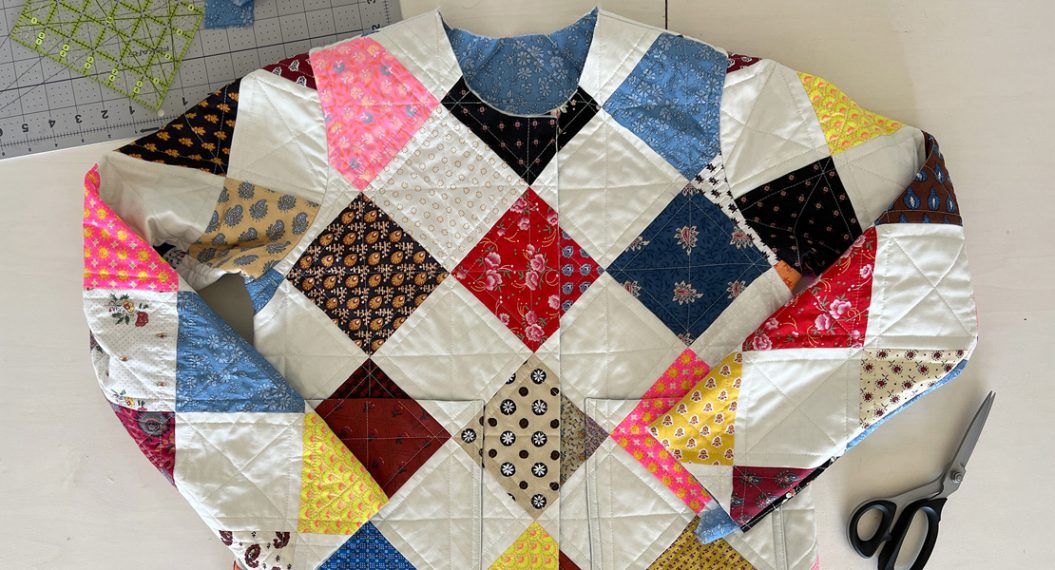
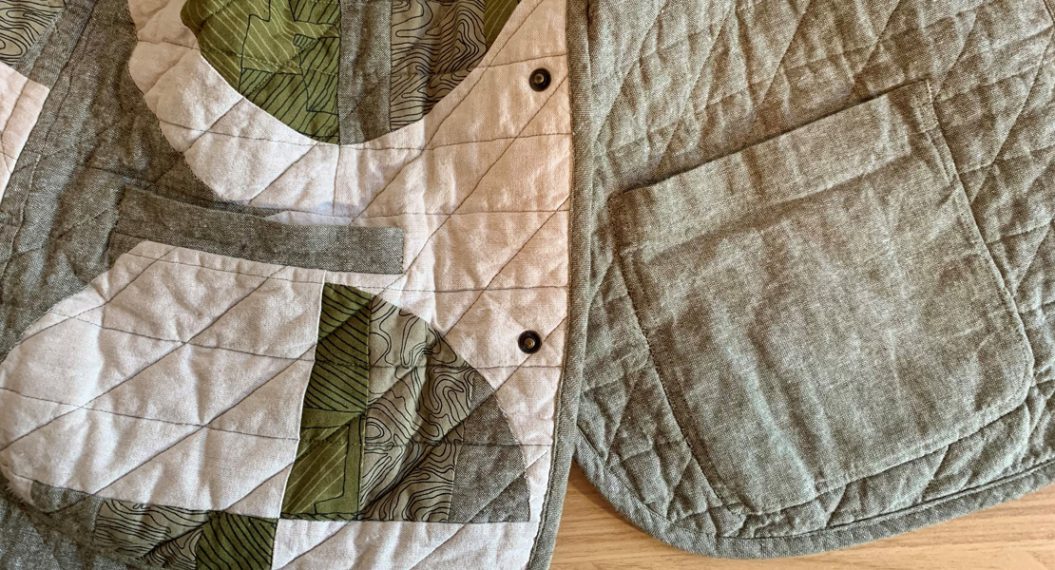
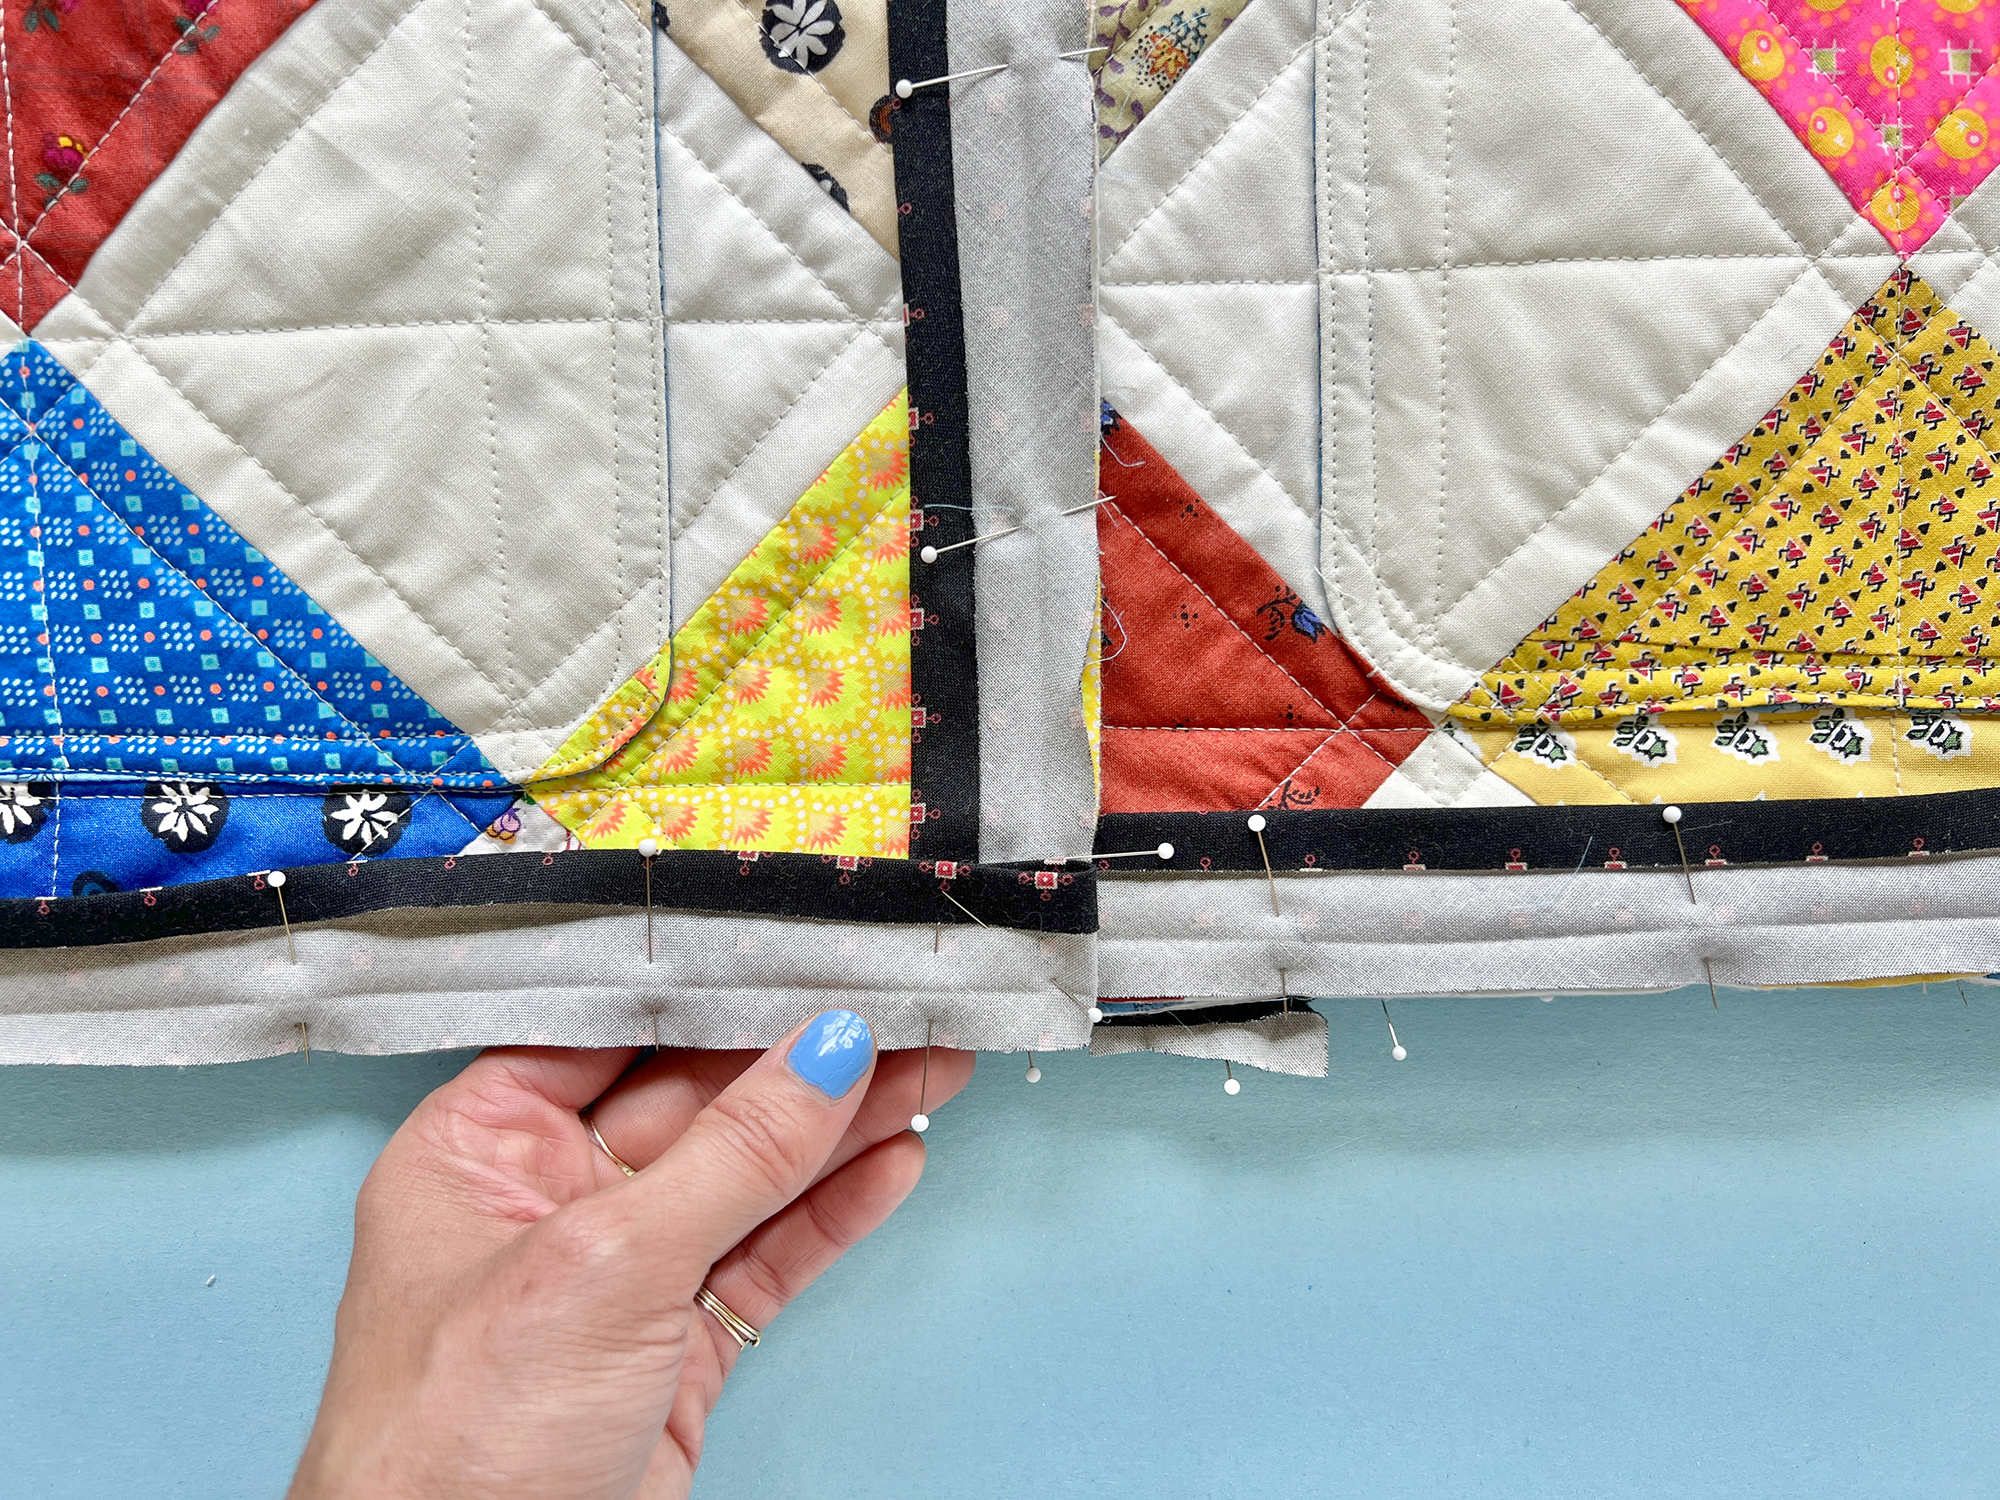
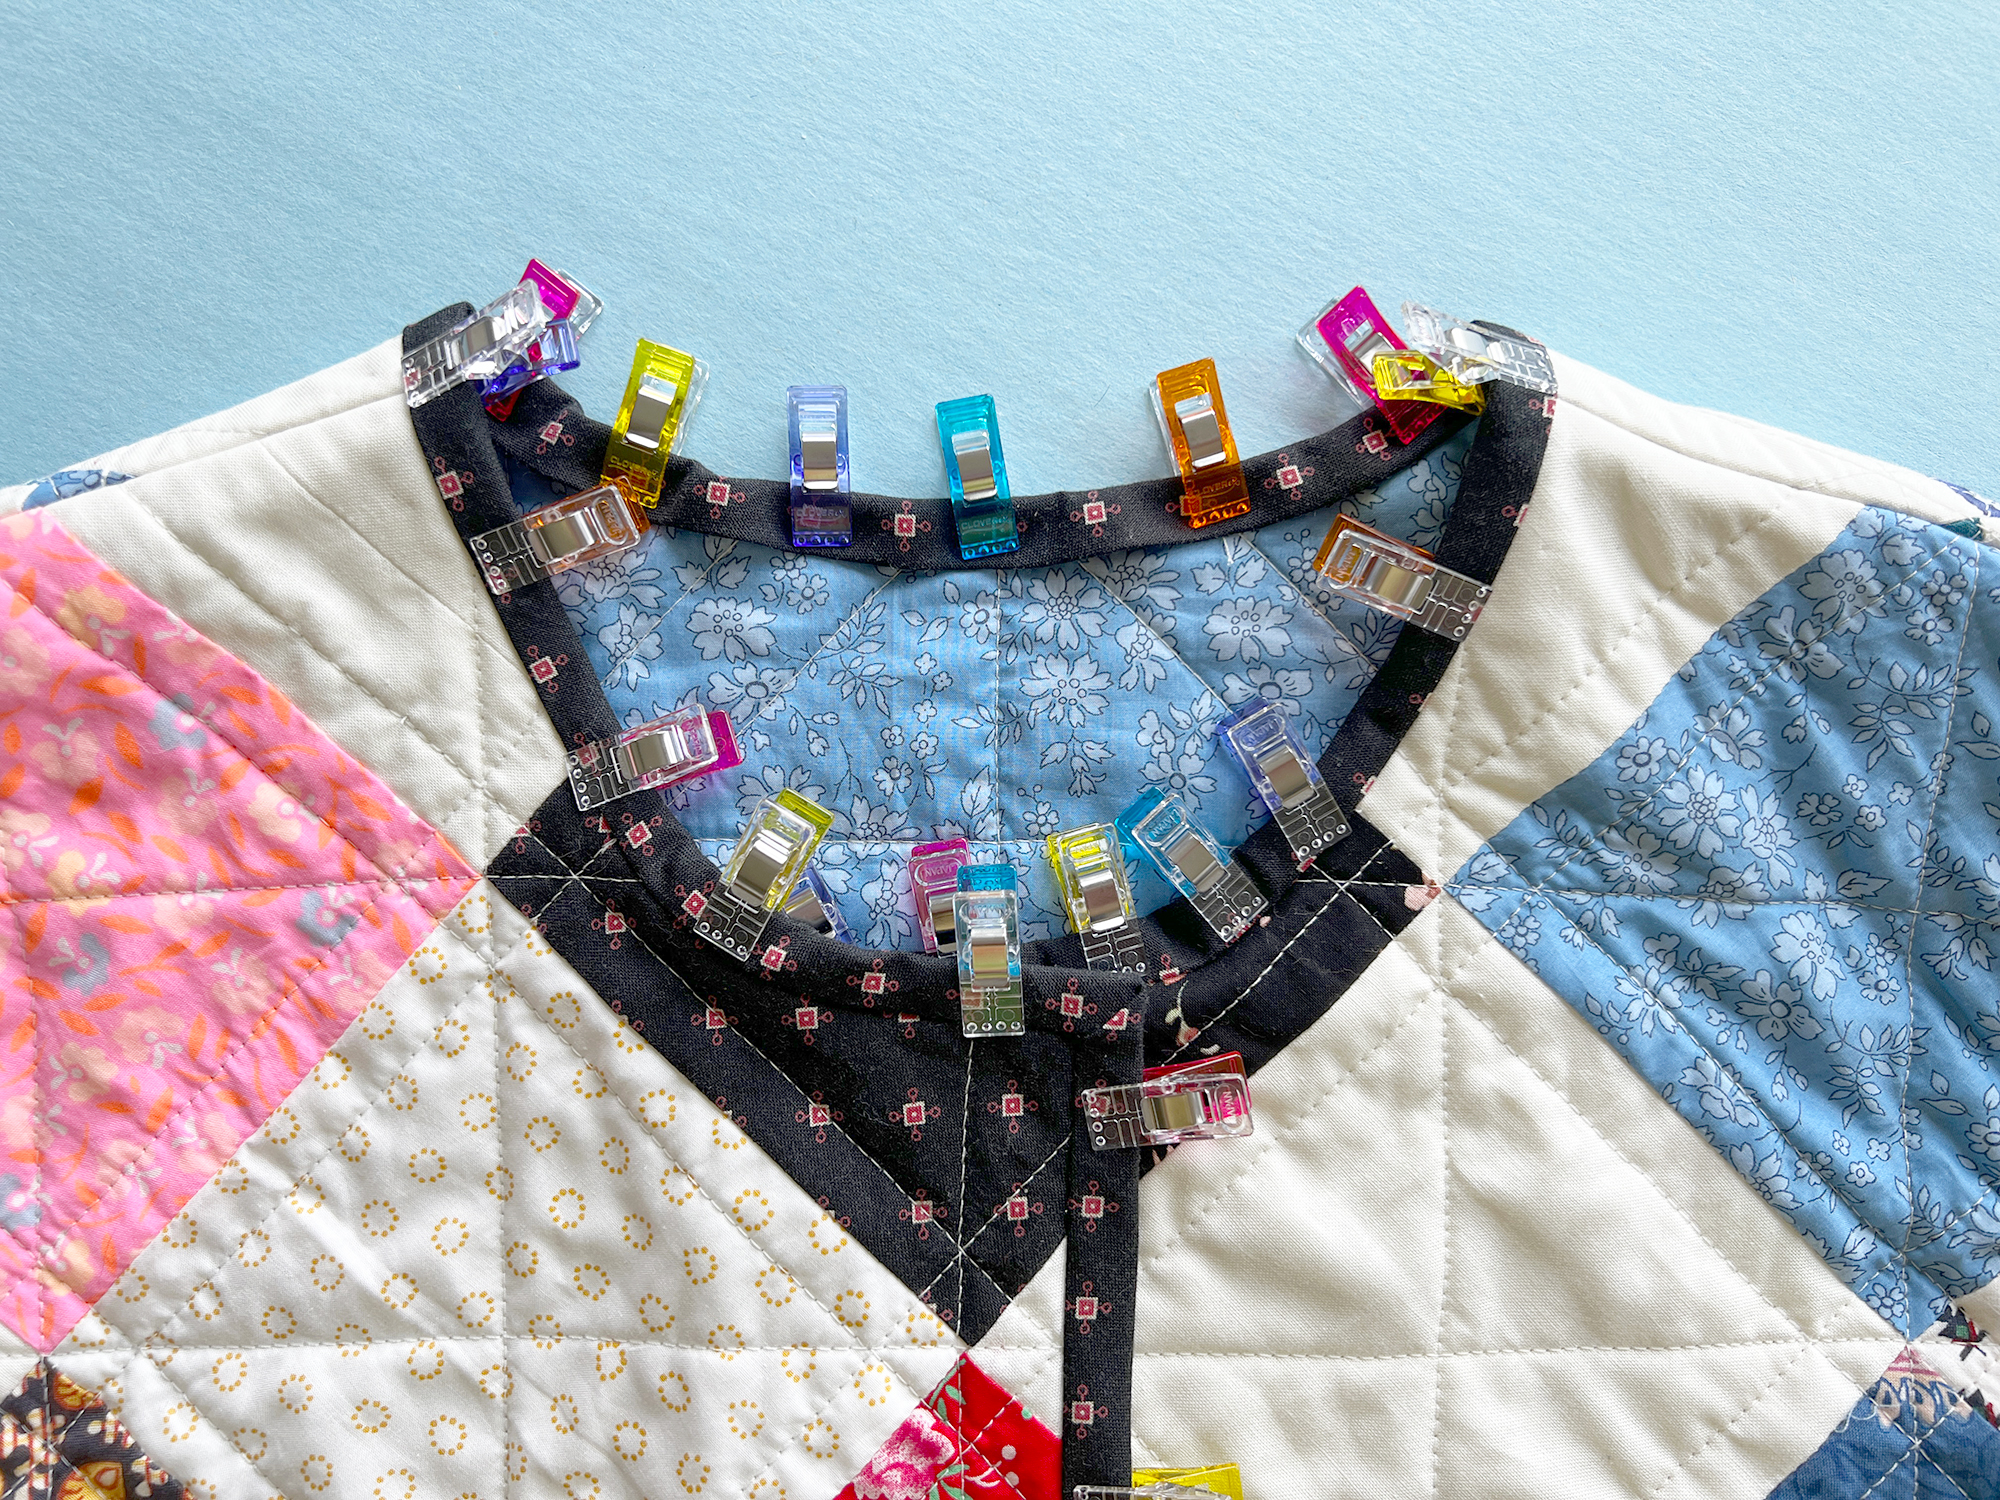
Aren’t you pleased with how your jacket looks? It’s only going to get better when you add the bias binding along all edges. This is the same process used for binding a quilt. You must use bias binding for a smooth curve around the neckline.
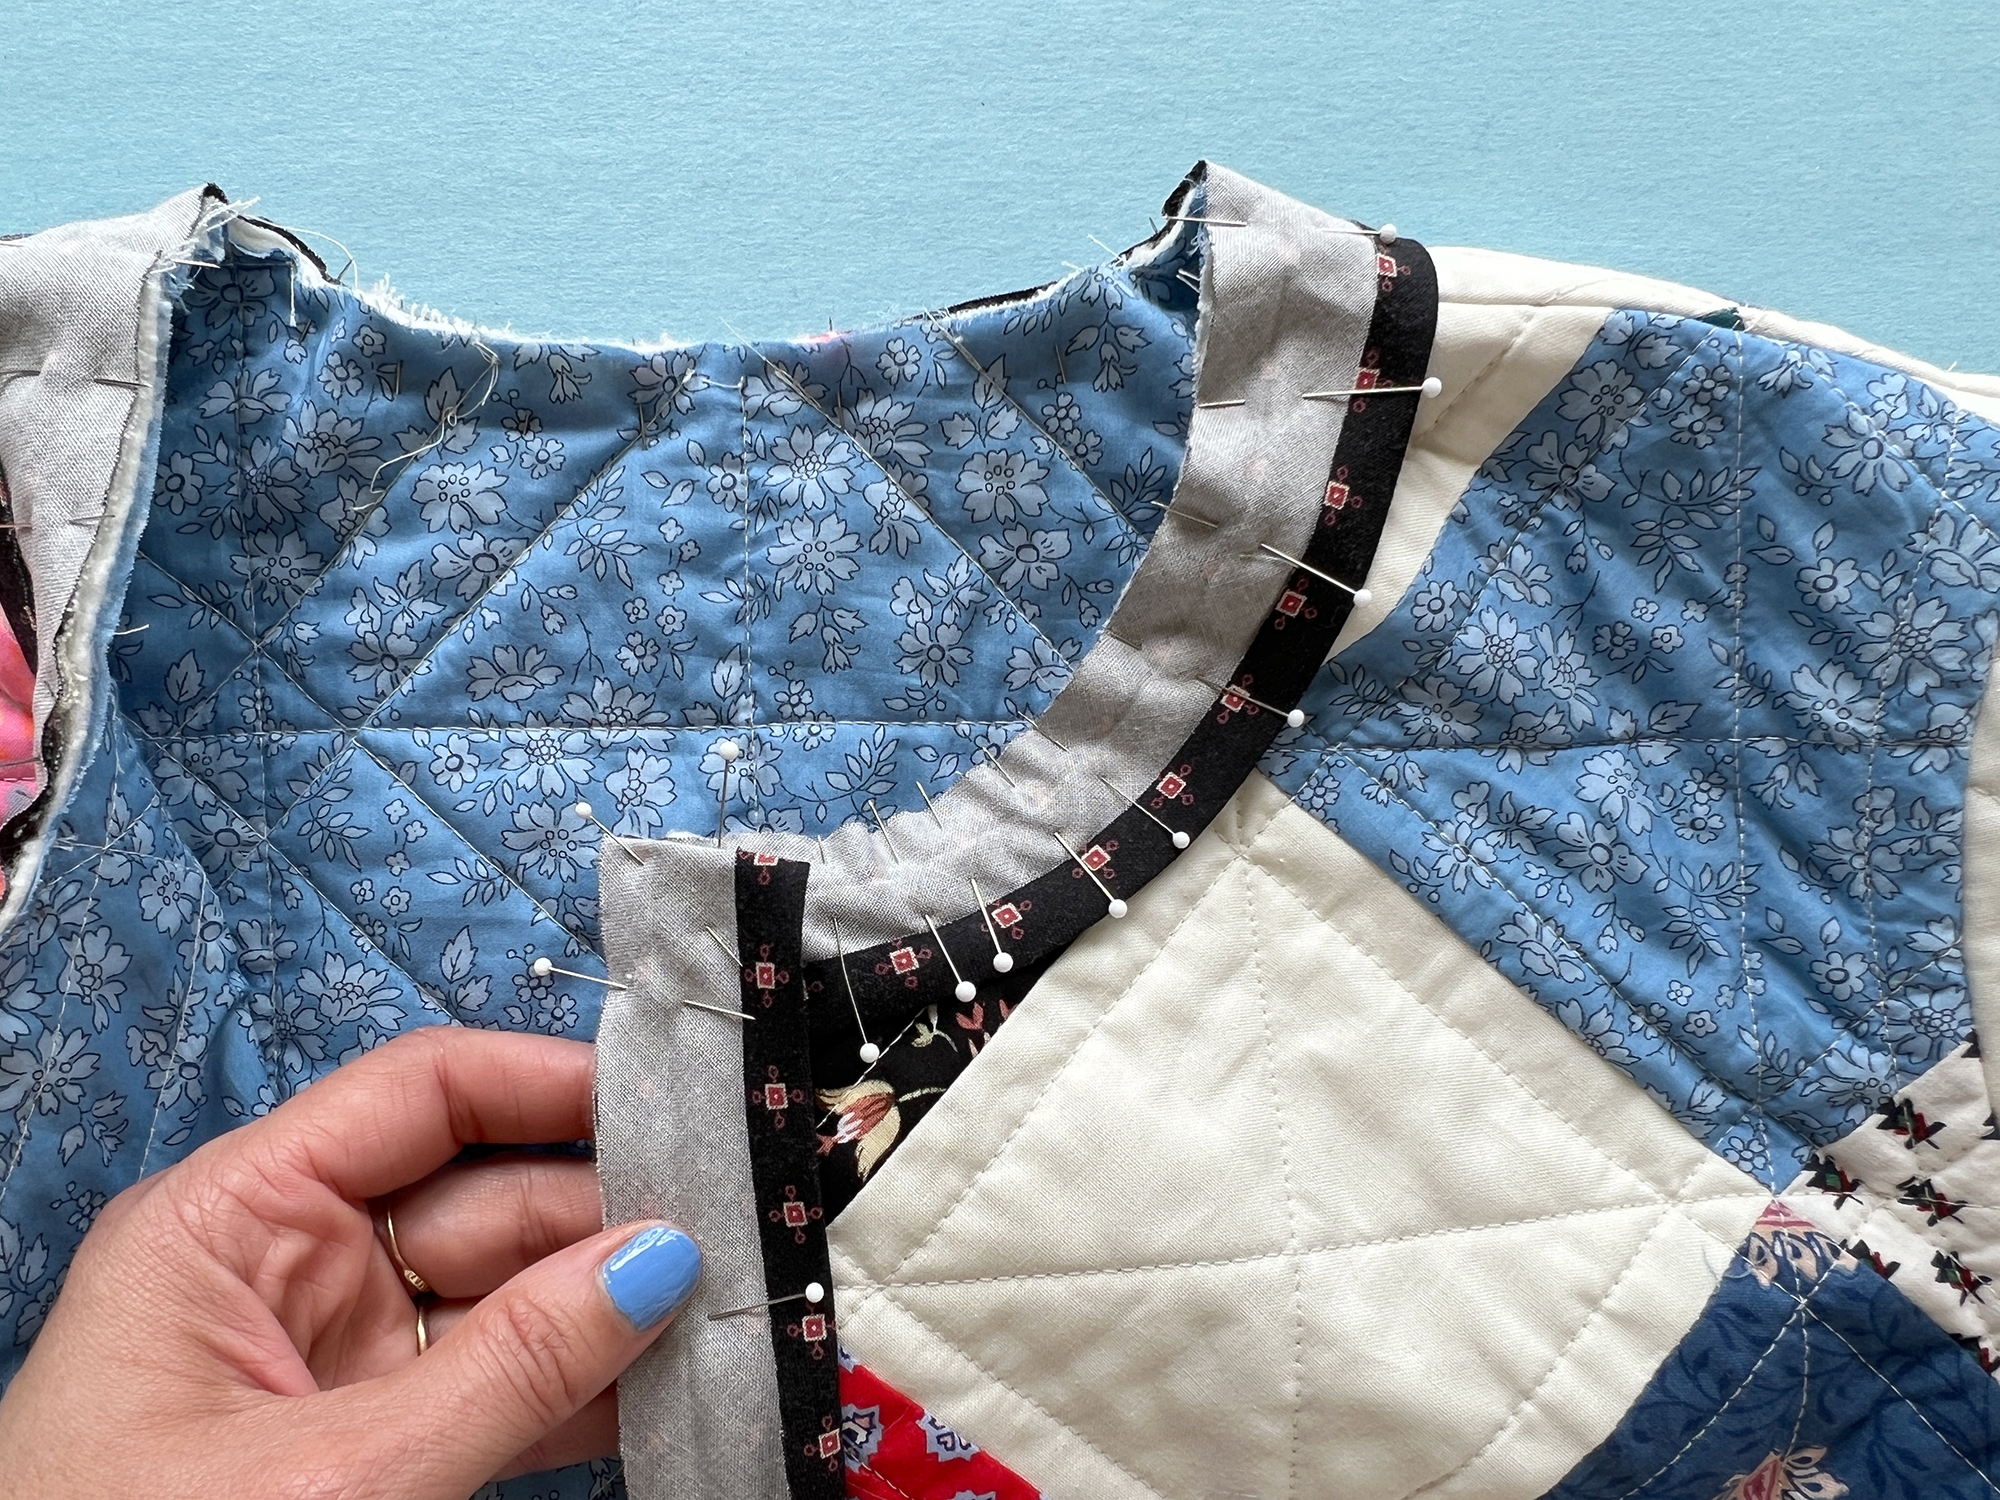
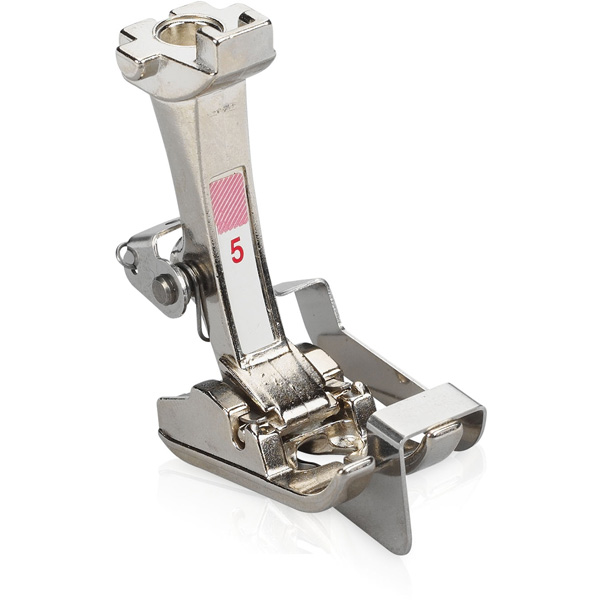
Open your bias tape up, and pin into place on the outside of your jacket. Take care to miter the corners and follow the curve of the neckline. Stitch into place using your Walking Foot #50.
Repeat these steps for the body of the jacket and both sleeves.
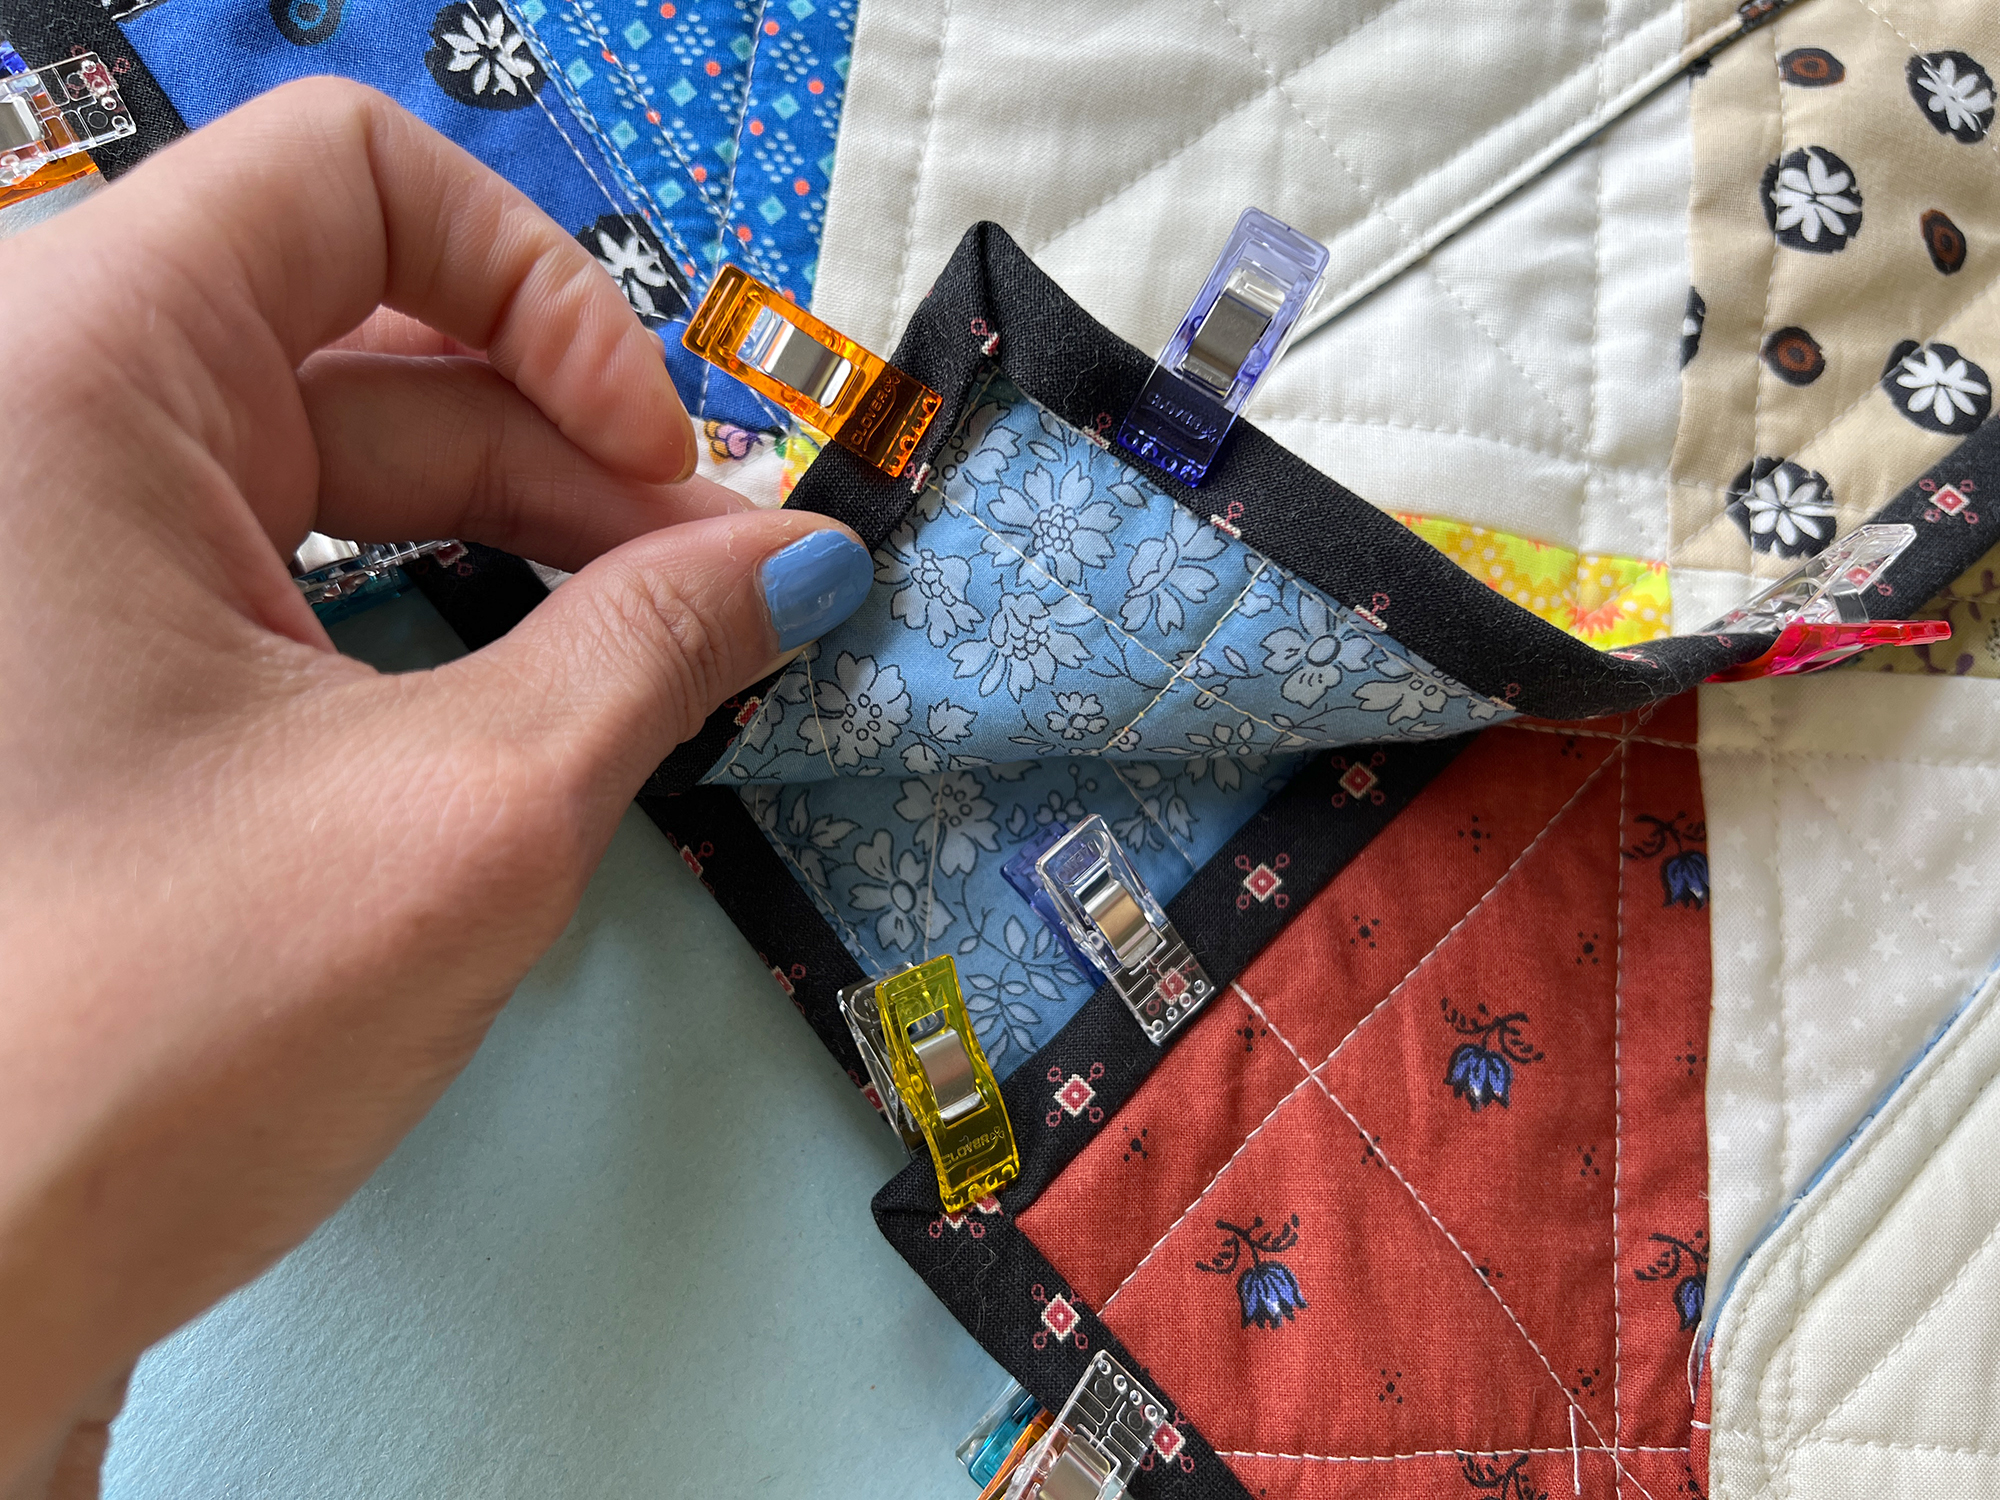
Complete the Binding
After you stitch down your binding, fold it over to the inside of your jacket. Once again, take some extra time to miter the corners and smooth out the neckline curve. At this time, I switch from pins to Magic Clips. I like how they hold things in place and can quickly be repositioned as I nudge things into place.
I will hand slip stitch down the binding on the inside of my jacket, but you can absolutely stitch it by machine. I hand sew because towards the end of a project, I like to hold things in my hands, and I’ve always enjoyed hand sewing. But I have also done this step by machine with great results, so follow your own personal preference!
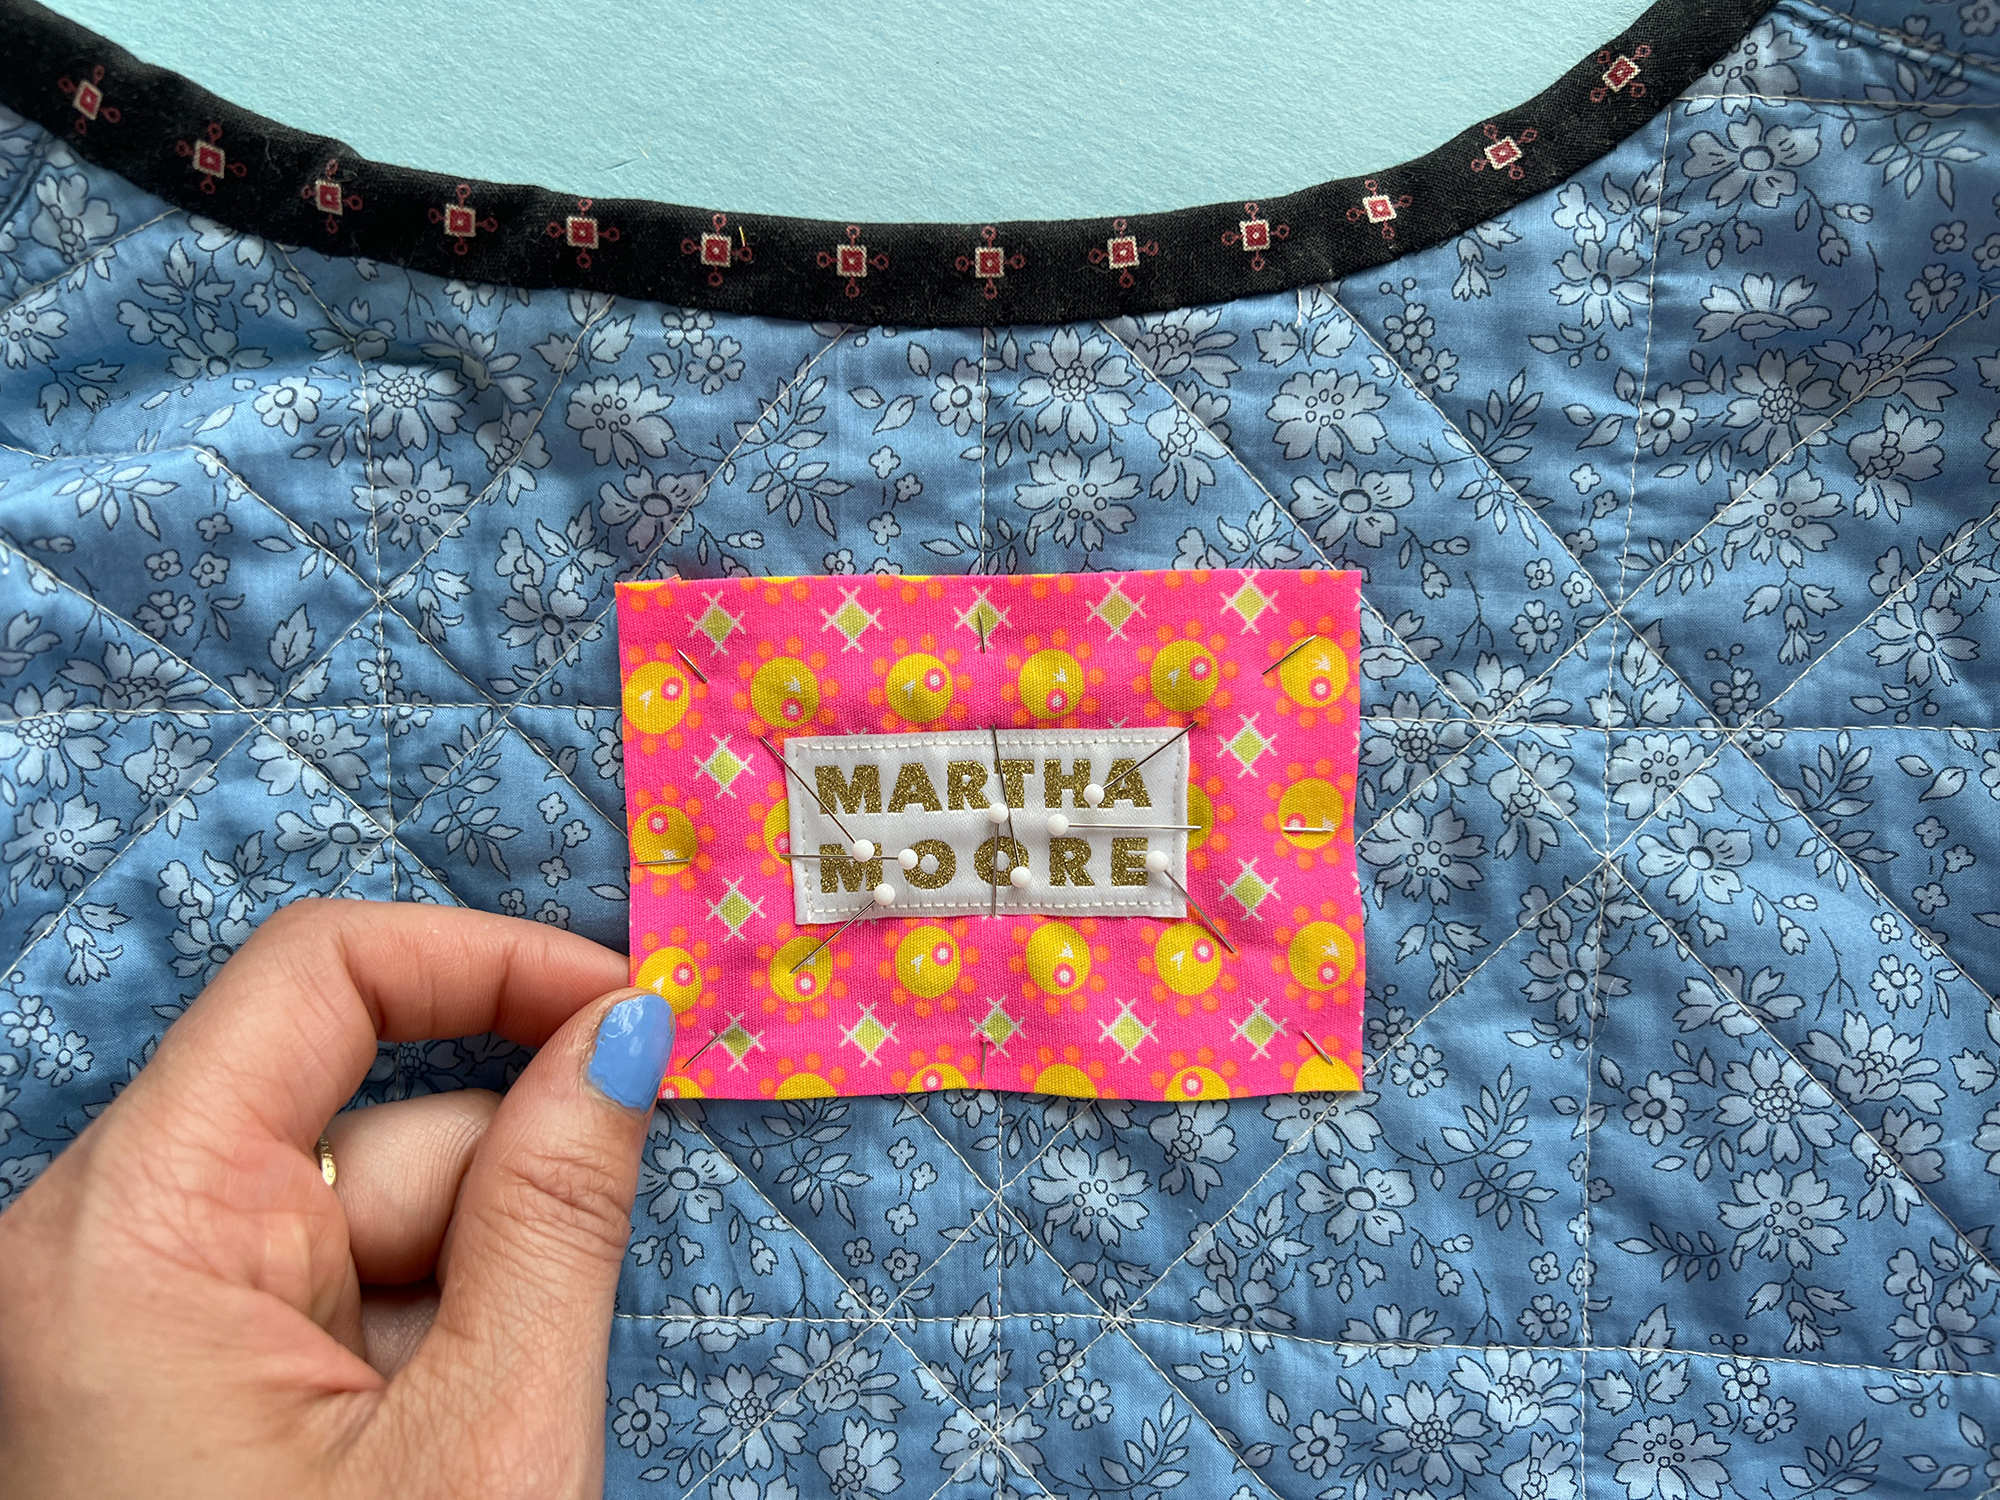
Adding a Label
Do you have custom labels for your garments or quilts? I had some made a few years ago, and I especially enjoy adding them to coats and jackets. I have sewn my label onto a scrap of fabric, and now is the time to stitch it inside the jacket.
If you don’t have custom labels, you can make yourself one using the font stitches on your machine. Or better yet, if you have embroidery capabilities, you can stitch up something even more customized!
Wash Your Jacket
To crinkle, or not to crinkle, that is the question. Some people prefer their quilted jackets to remain flat and crisp, and others, like myself, live for the crinkles that occur after laundering. The choice is yours!
I prefer to launder my jacket before applying closures. Whether I’m using buttons or snaps, I want the fabric to shrink before I make buttonholes or hammer snaps into place. Buttonholes are especially prone to getting distorted if you sew them before laundering a quilted jacket, so take that into consideration.
Adding Closures
As I mentioned above, I will be using Dritz Heavy Duty snaps as the closures of my jacket. If you are using buttons, you’ll follow the same steps until it is time to install the snaps.
Lay your jacket on a flat surface, with the jacket closed. Match Center Fronts – the jacket fronts will overlap. You can then decide on the spacing of your closures.
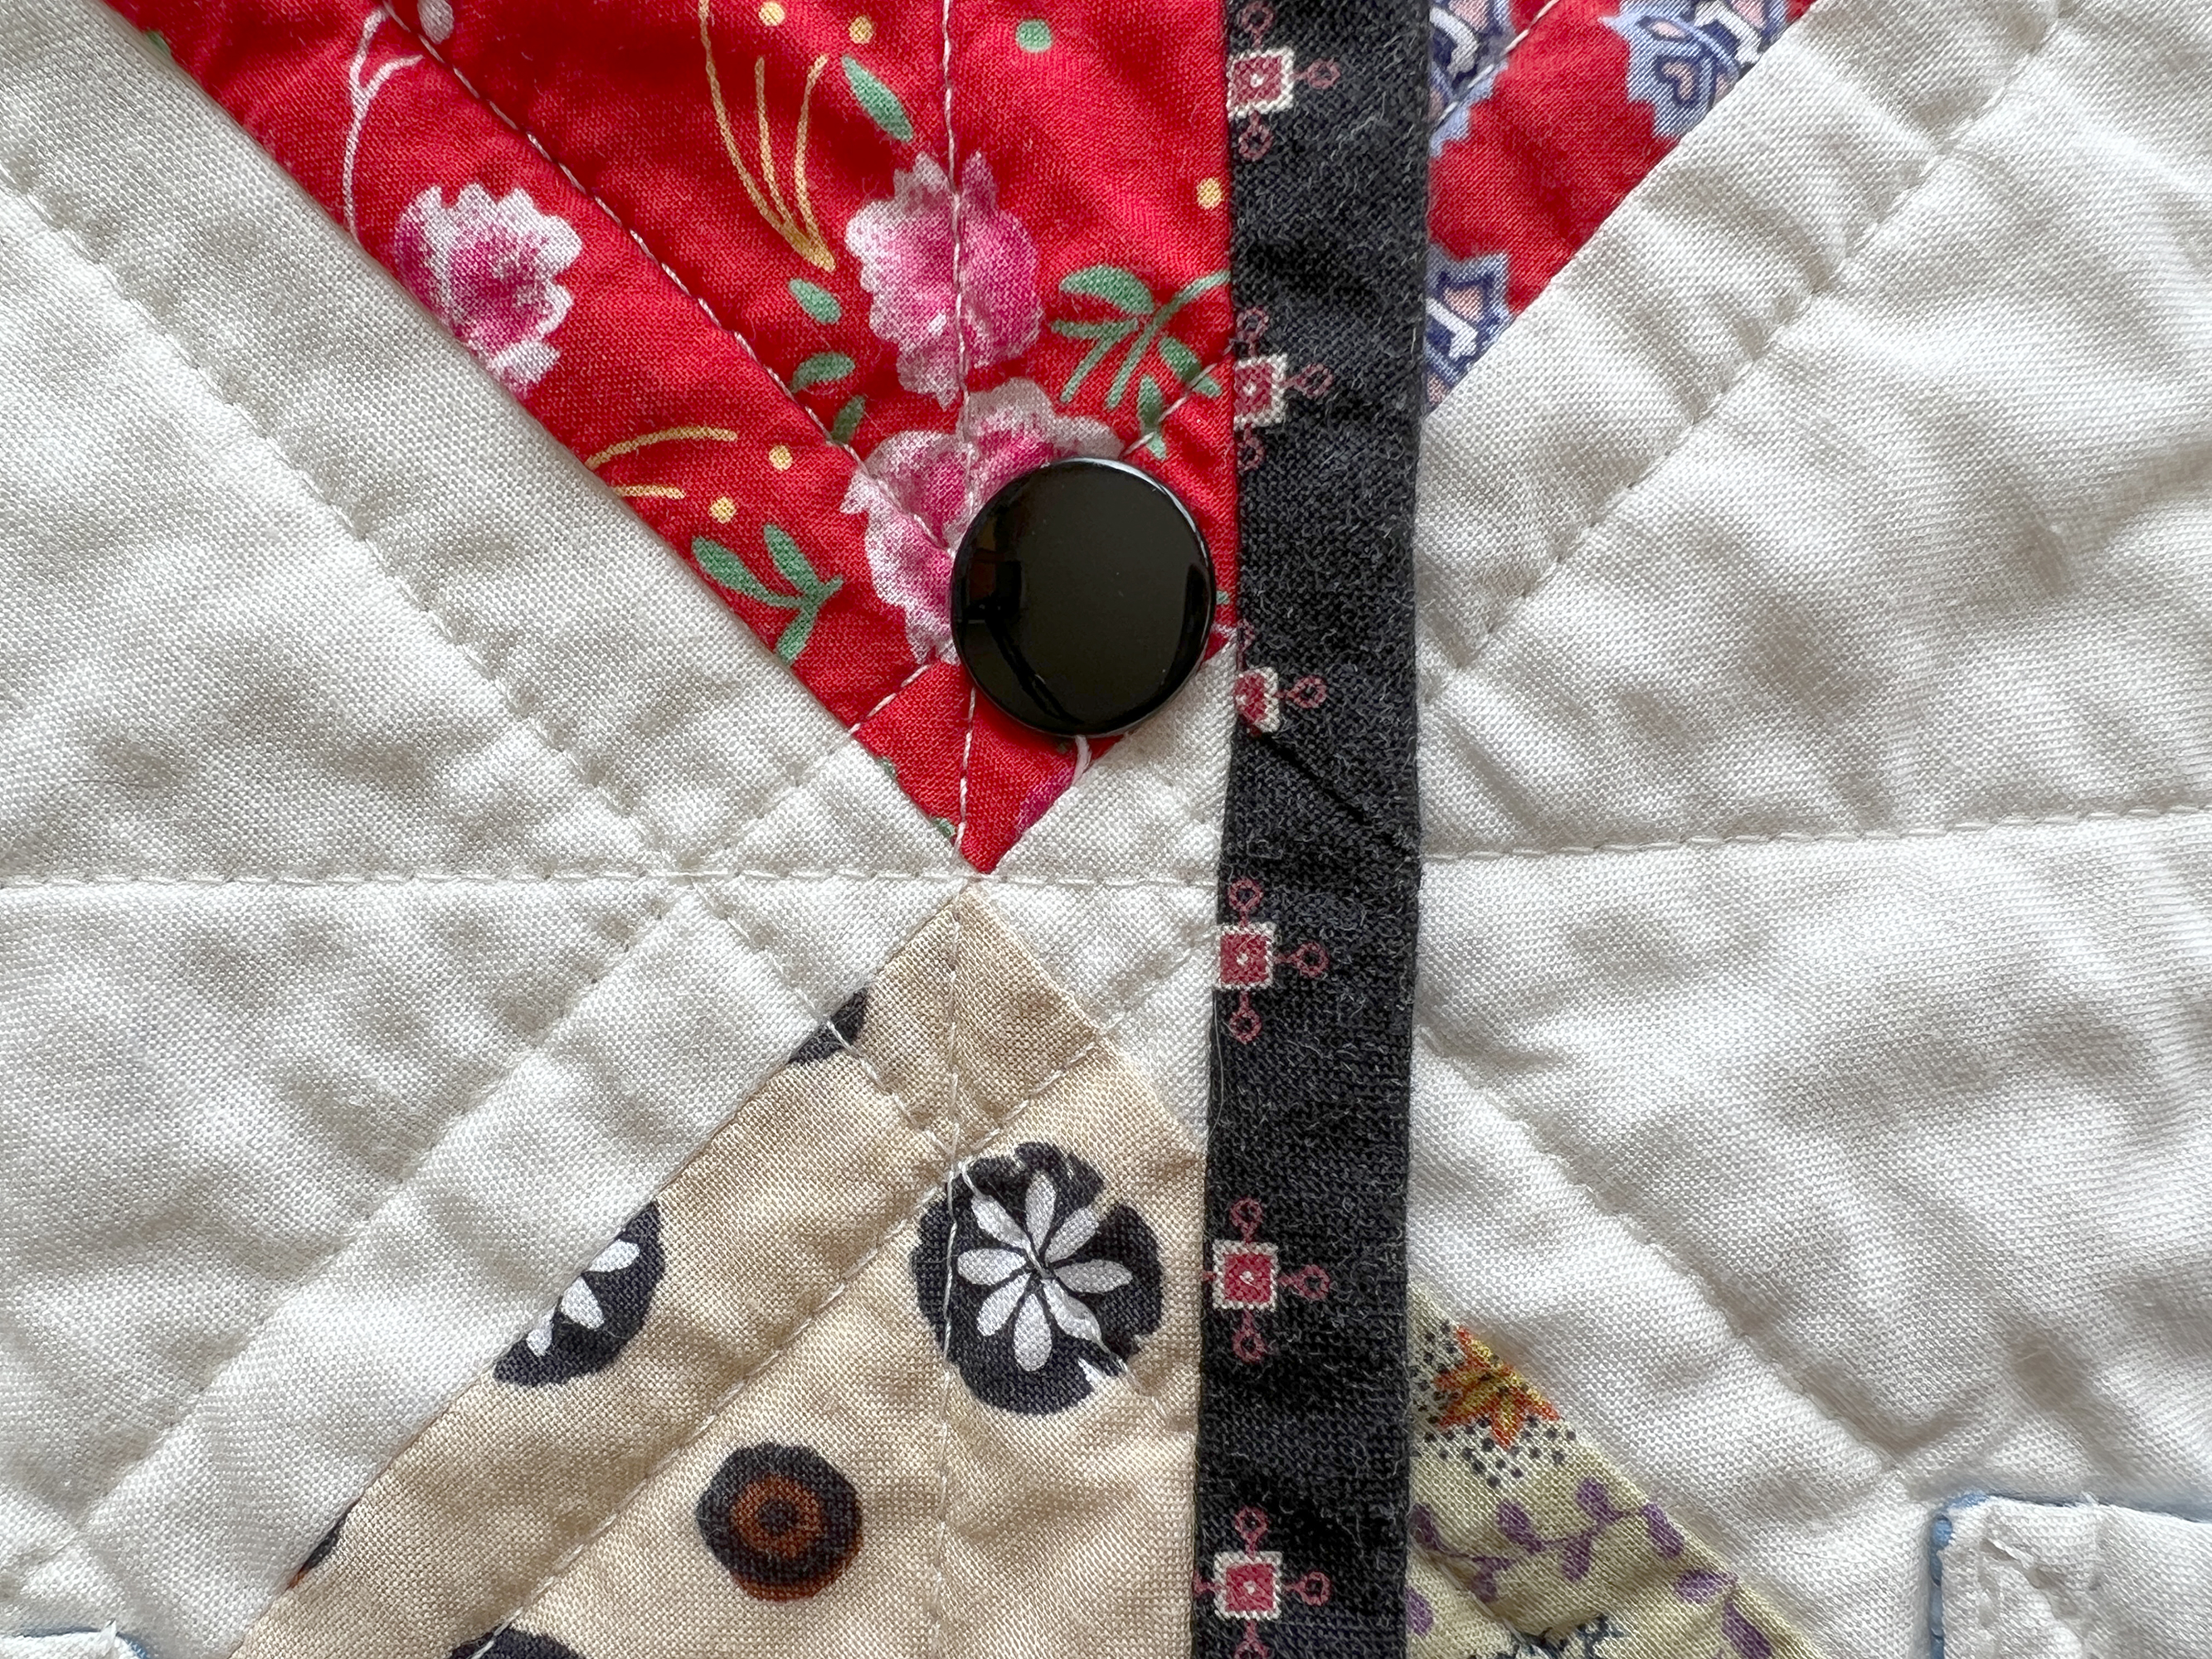
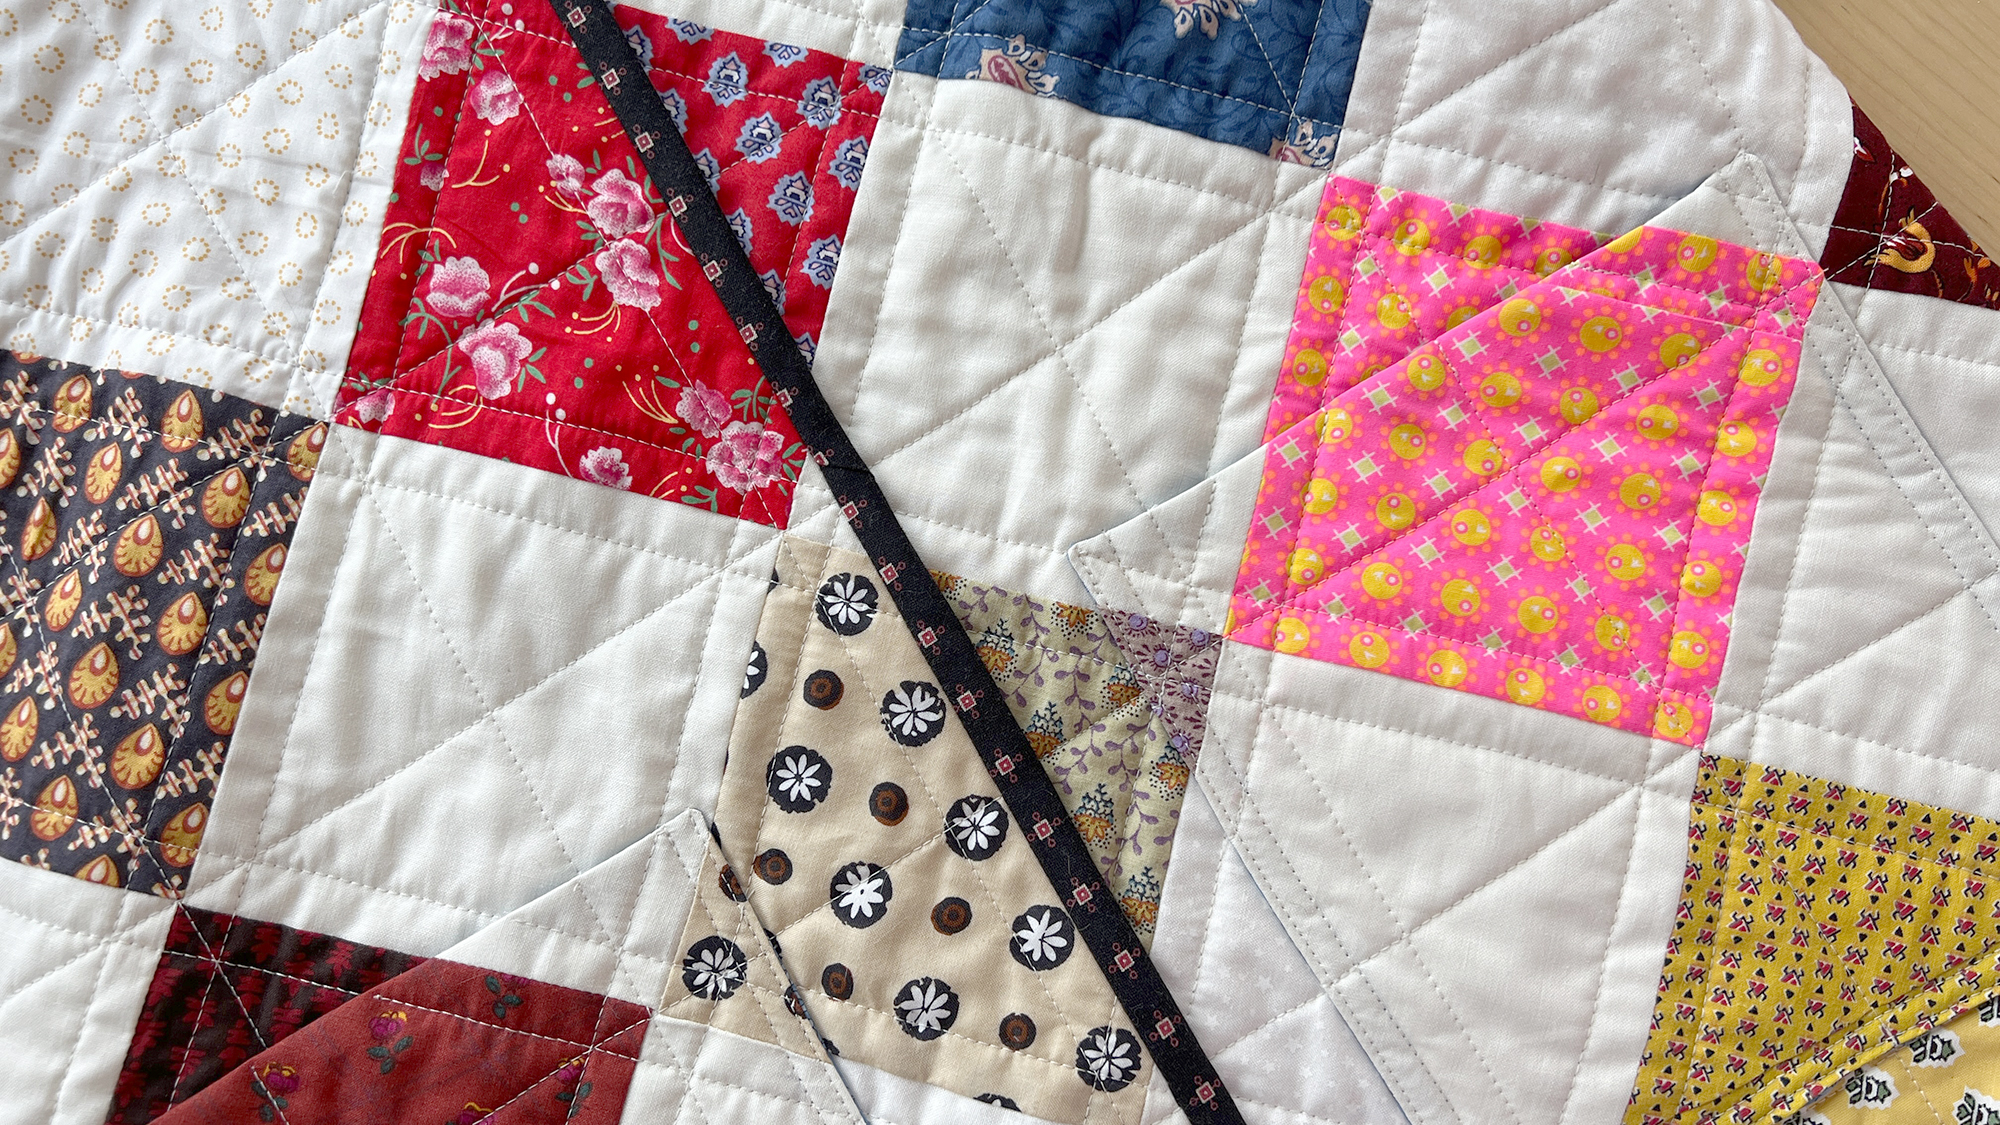
NOTE: There are a few special considerations when adding snaps or buttons to a quilted jacket. It may be tempting to place closures at the intersections where four corners meet, but this is a vulnerable spot. Since you will be making a hole in your fabric, it is best to avoid cutting stitching, which could then come undone. I place my snaps in areas without stitching.
Adding Snaps
Once you have determined placement, follow the instructions on the back of the snap setting tool package for how to install the snaps. You should have an extra snap or two in the package. Make a practice snap! Then, when it’s time to install them on your jacket, take your time and make sure you have the correct components for each side.
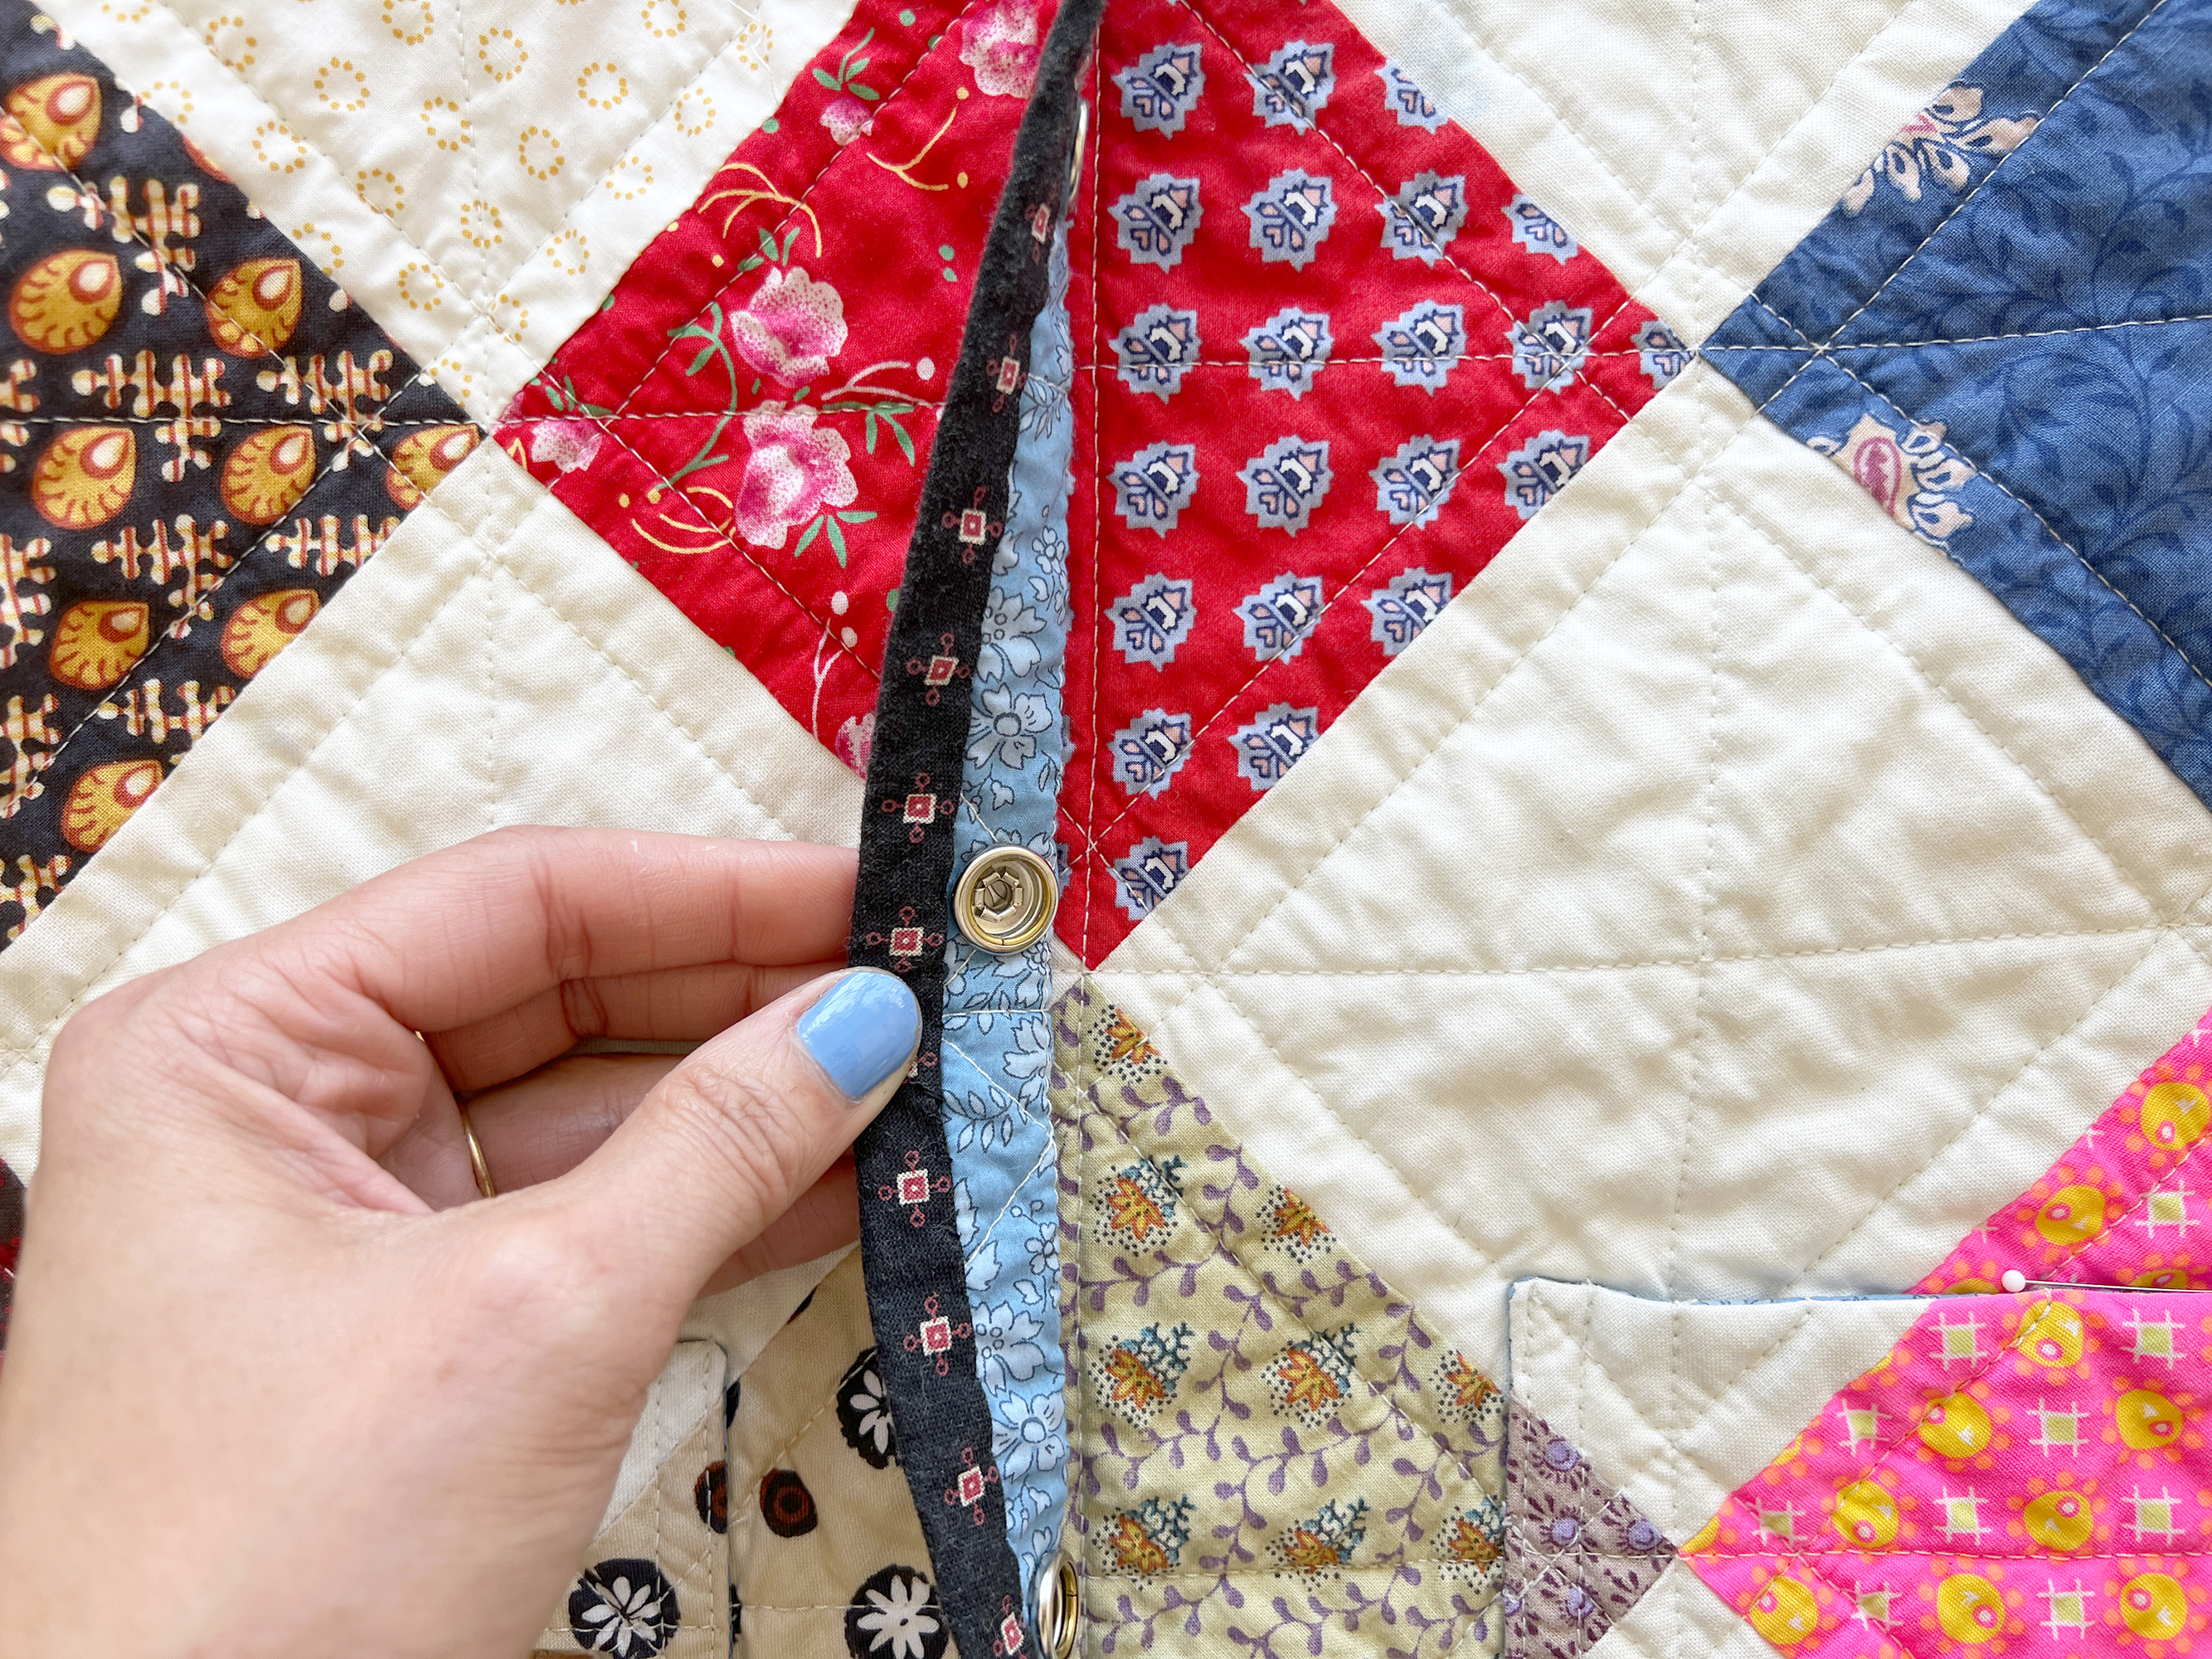
Once I have all the front snaps installed, I lay the jacket flat again, in the closed position. I rub chalk on the ring shown above (just chalk, not the waxy tailor’s chalk). I make sure all my patchwork squares are aligned, and then press down onto the other side of the jacket. The chalk marking is faint but you can then mark the center of that circle with a pin, or a more visible marking too. This will be the correct placement for the back components of the snap.
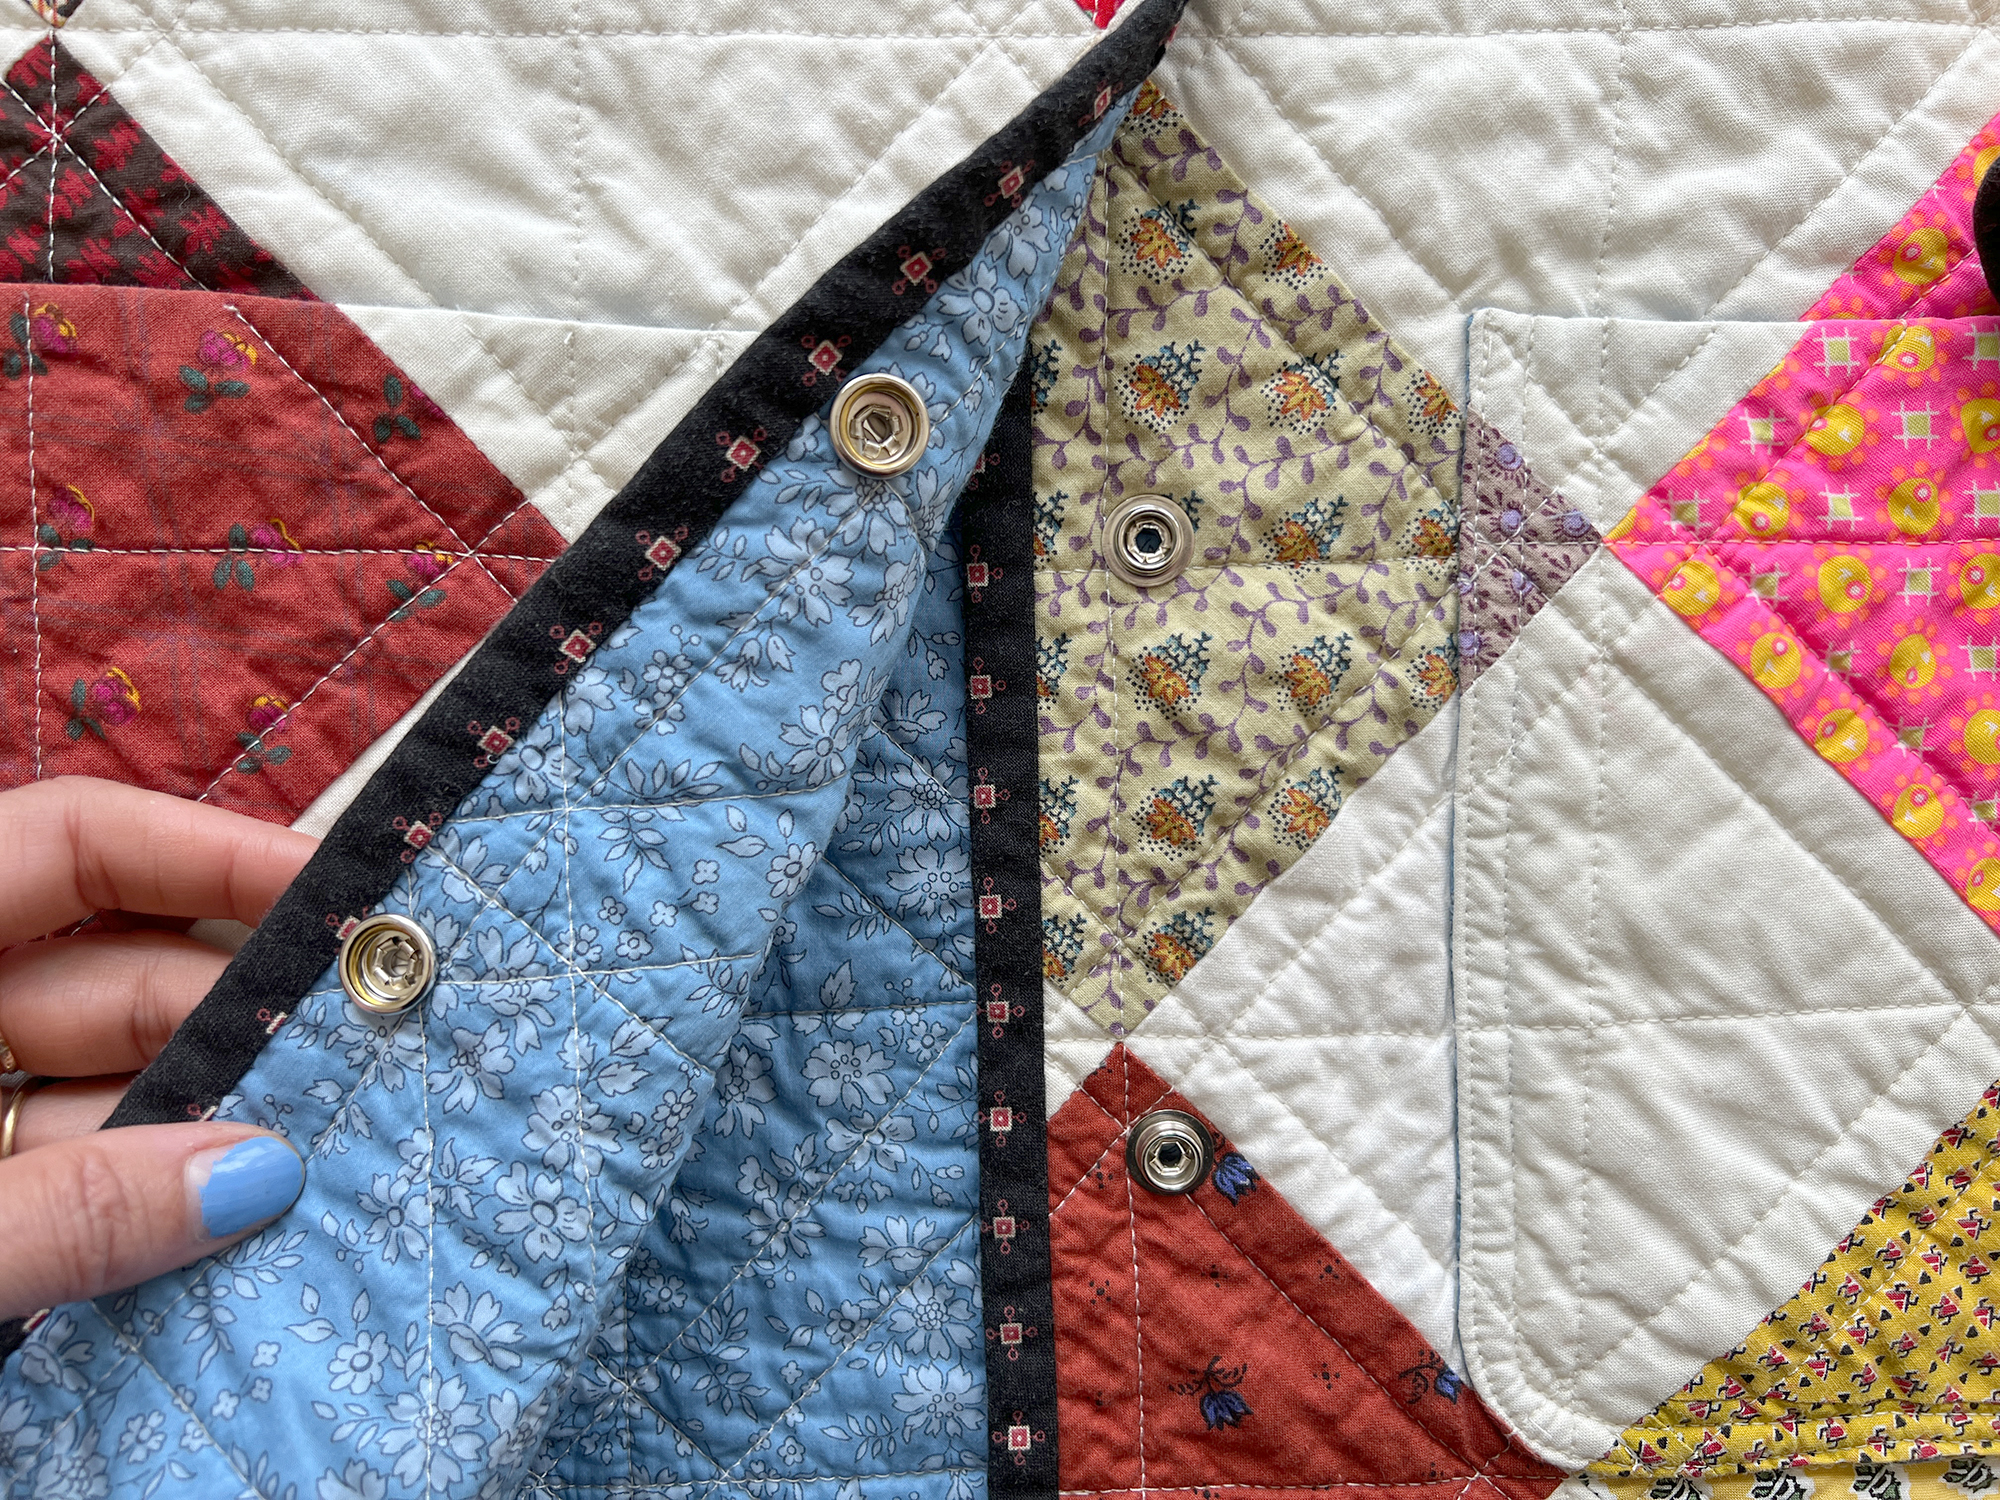
Both sides of the snaps are set. Do you know what this means!?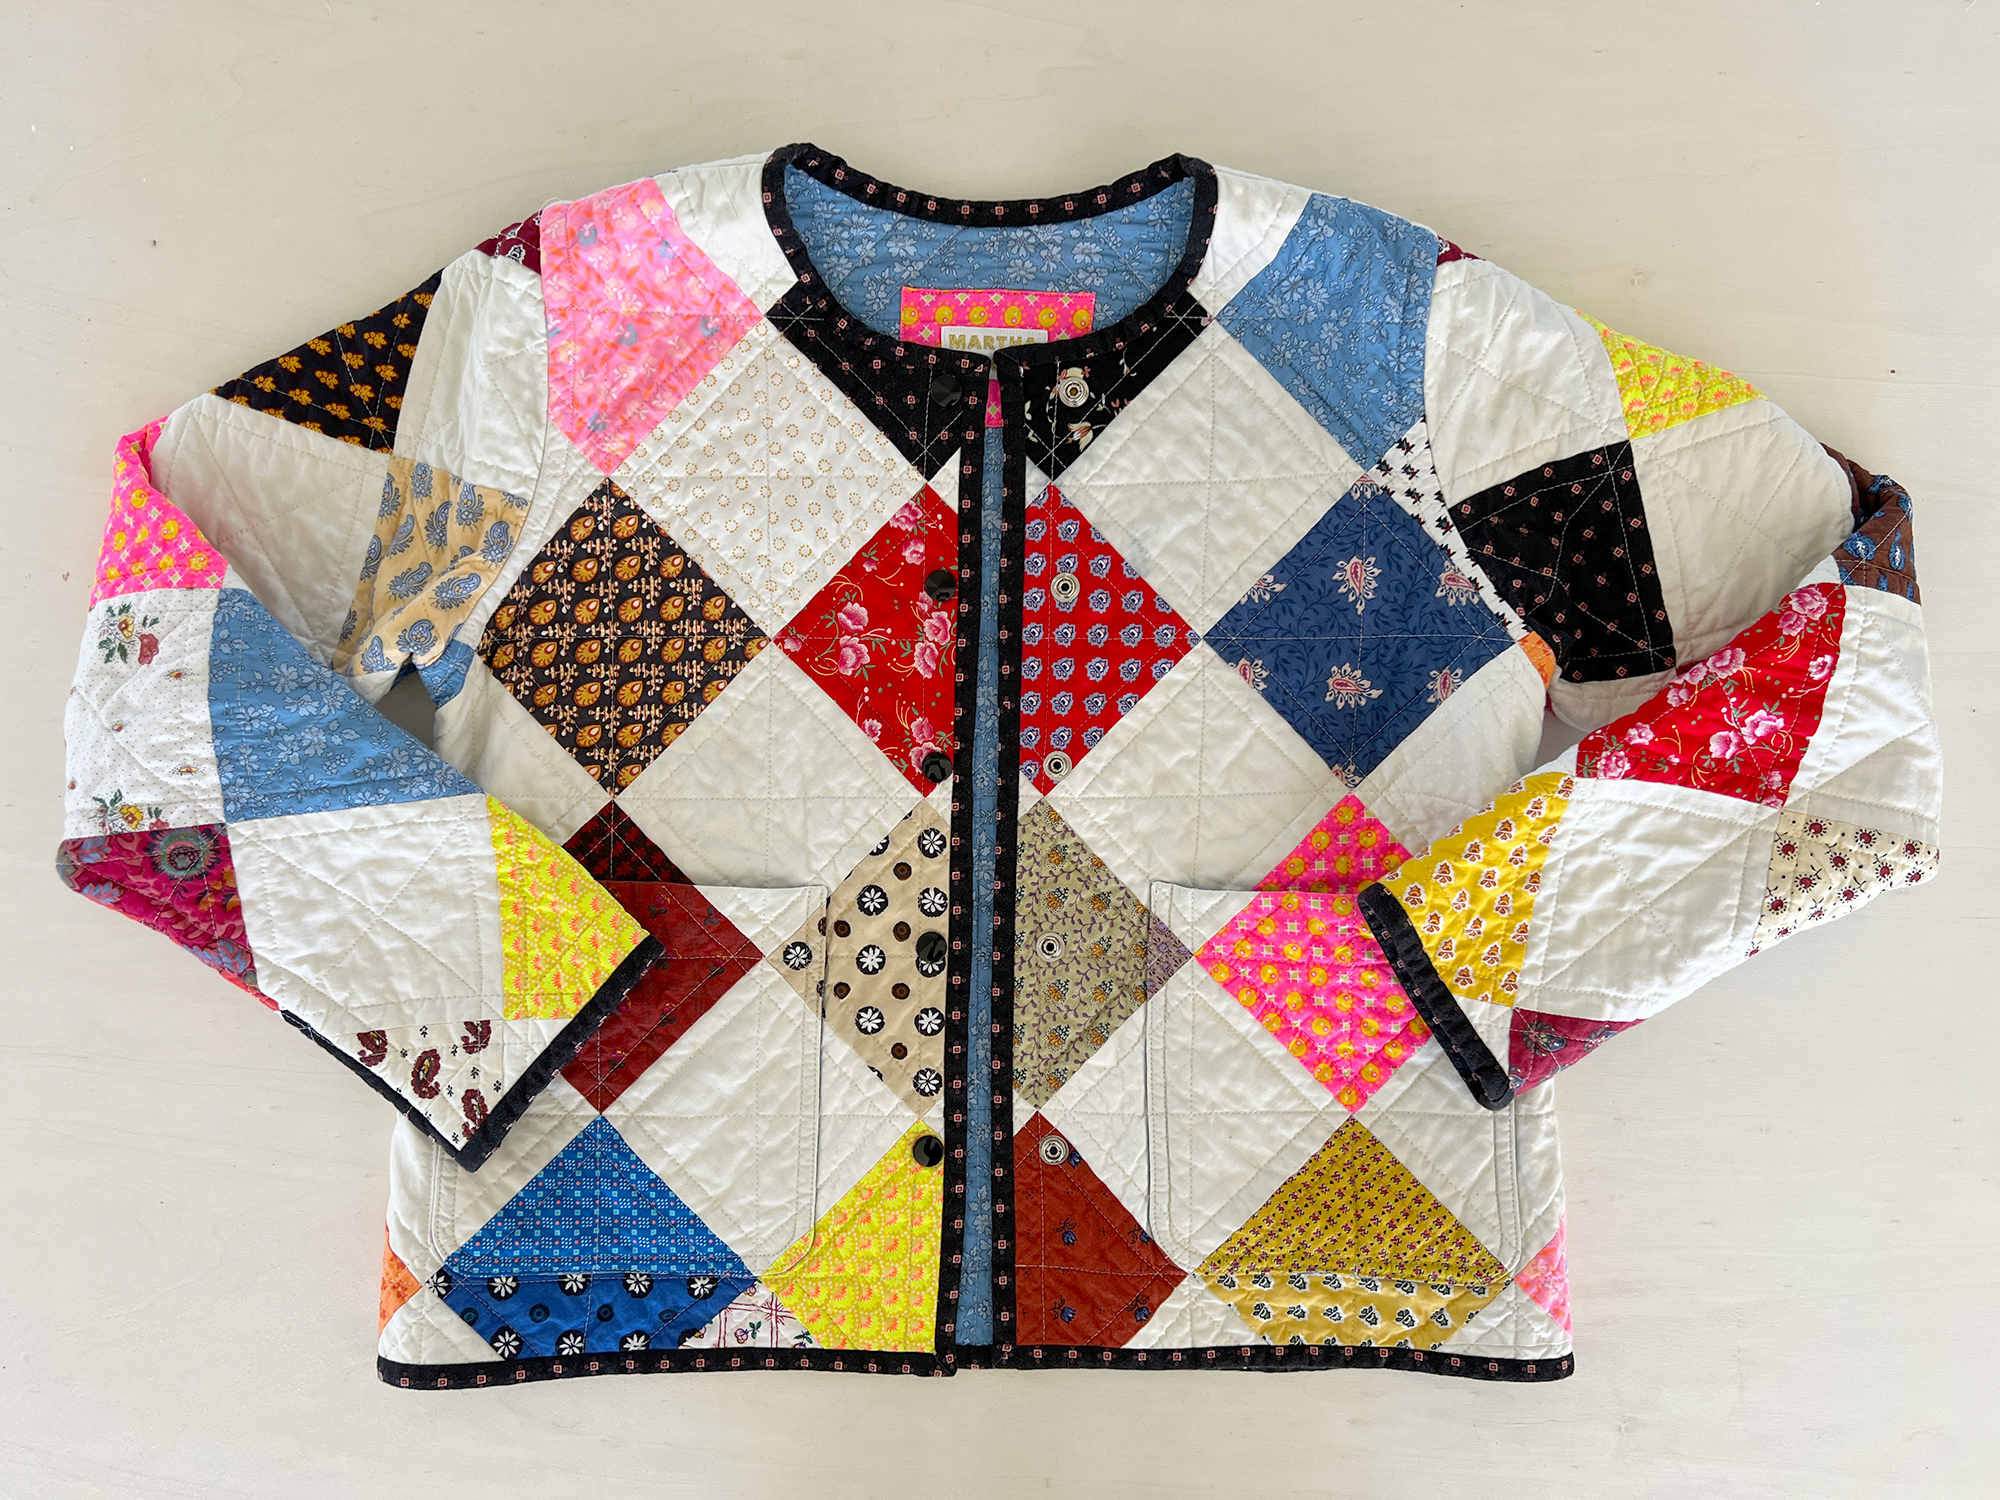
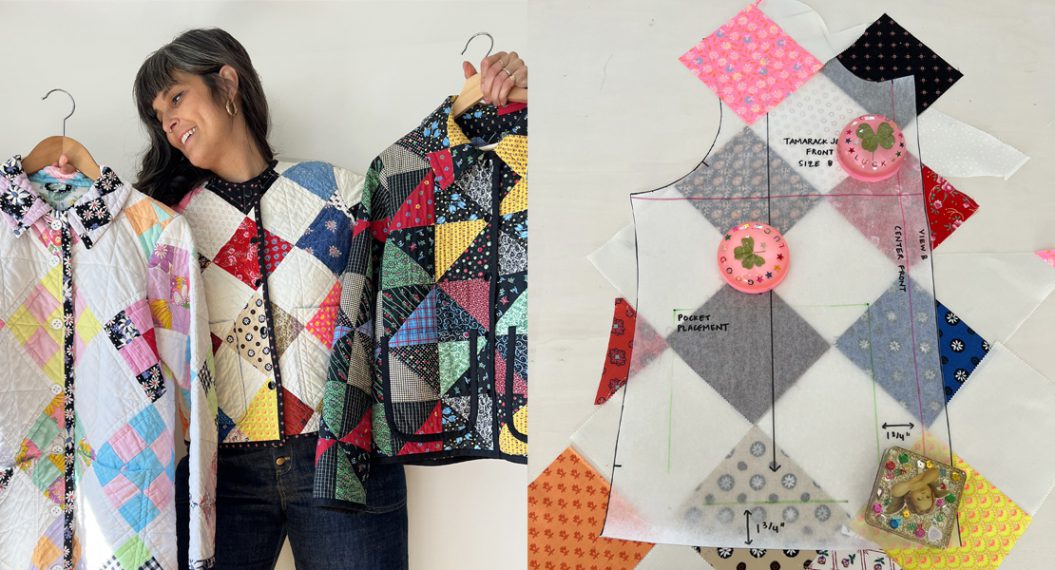
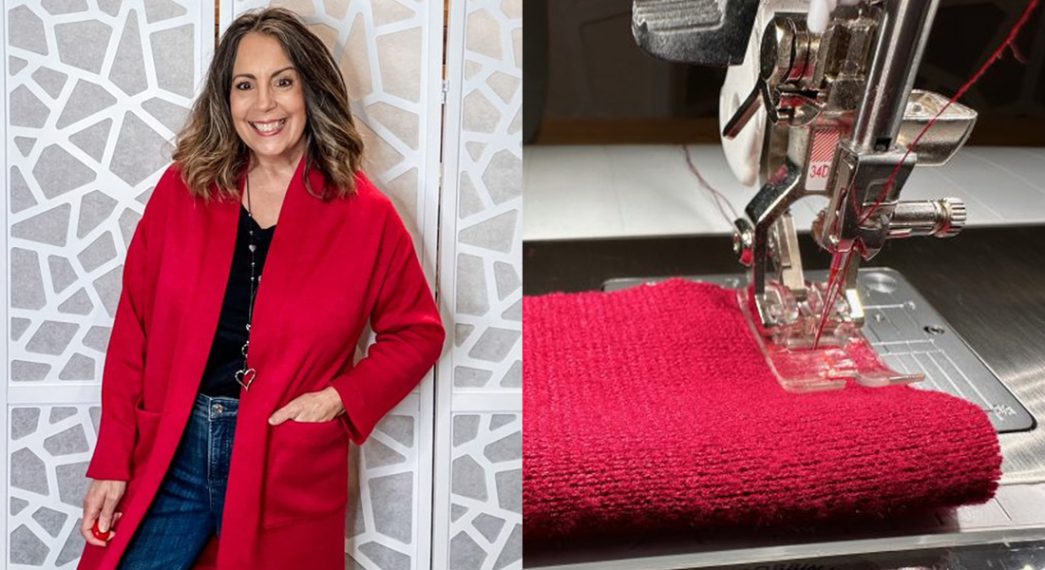
You’ve finished your jacket!! What a thrill!
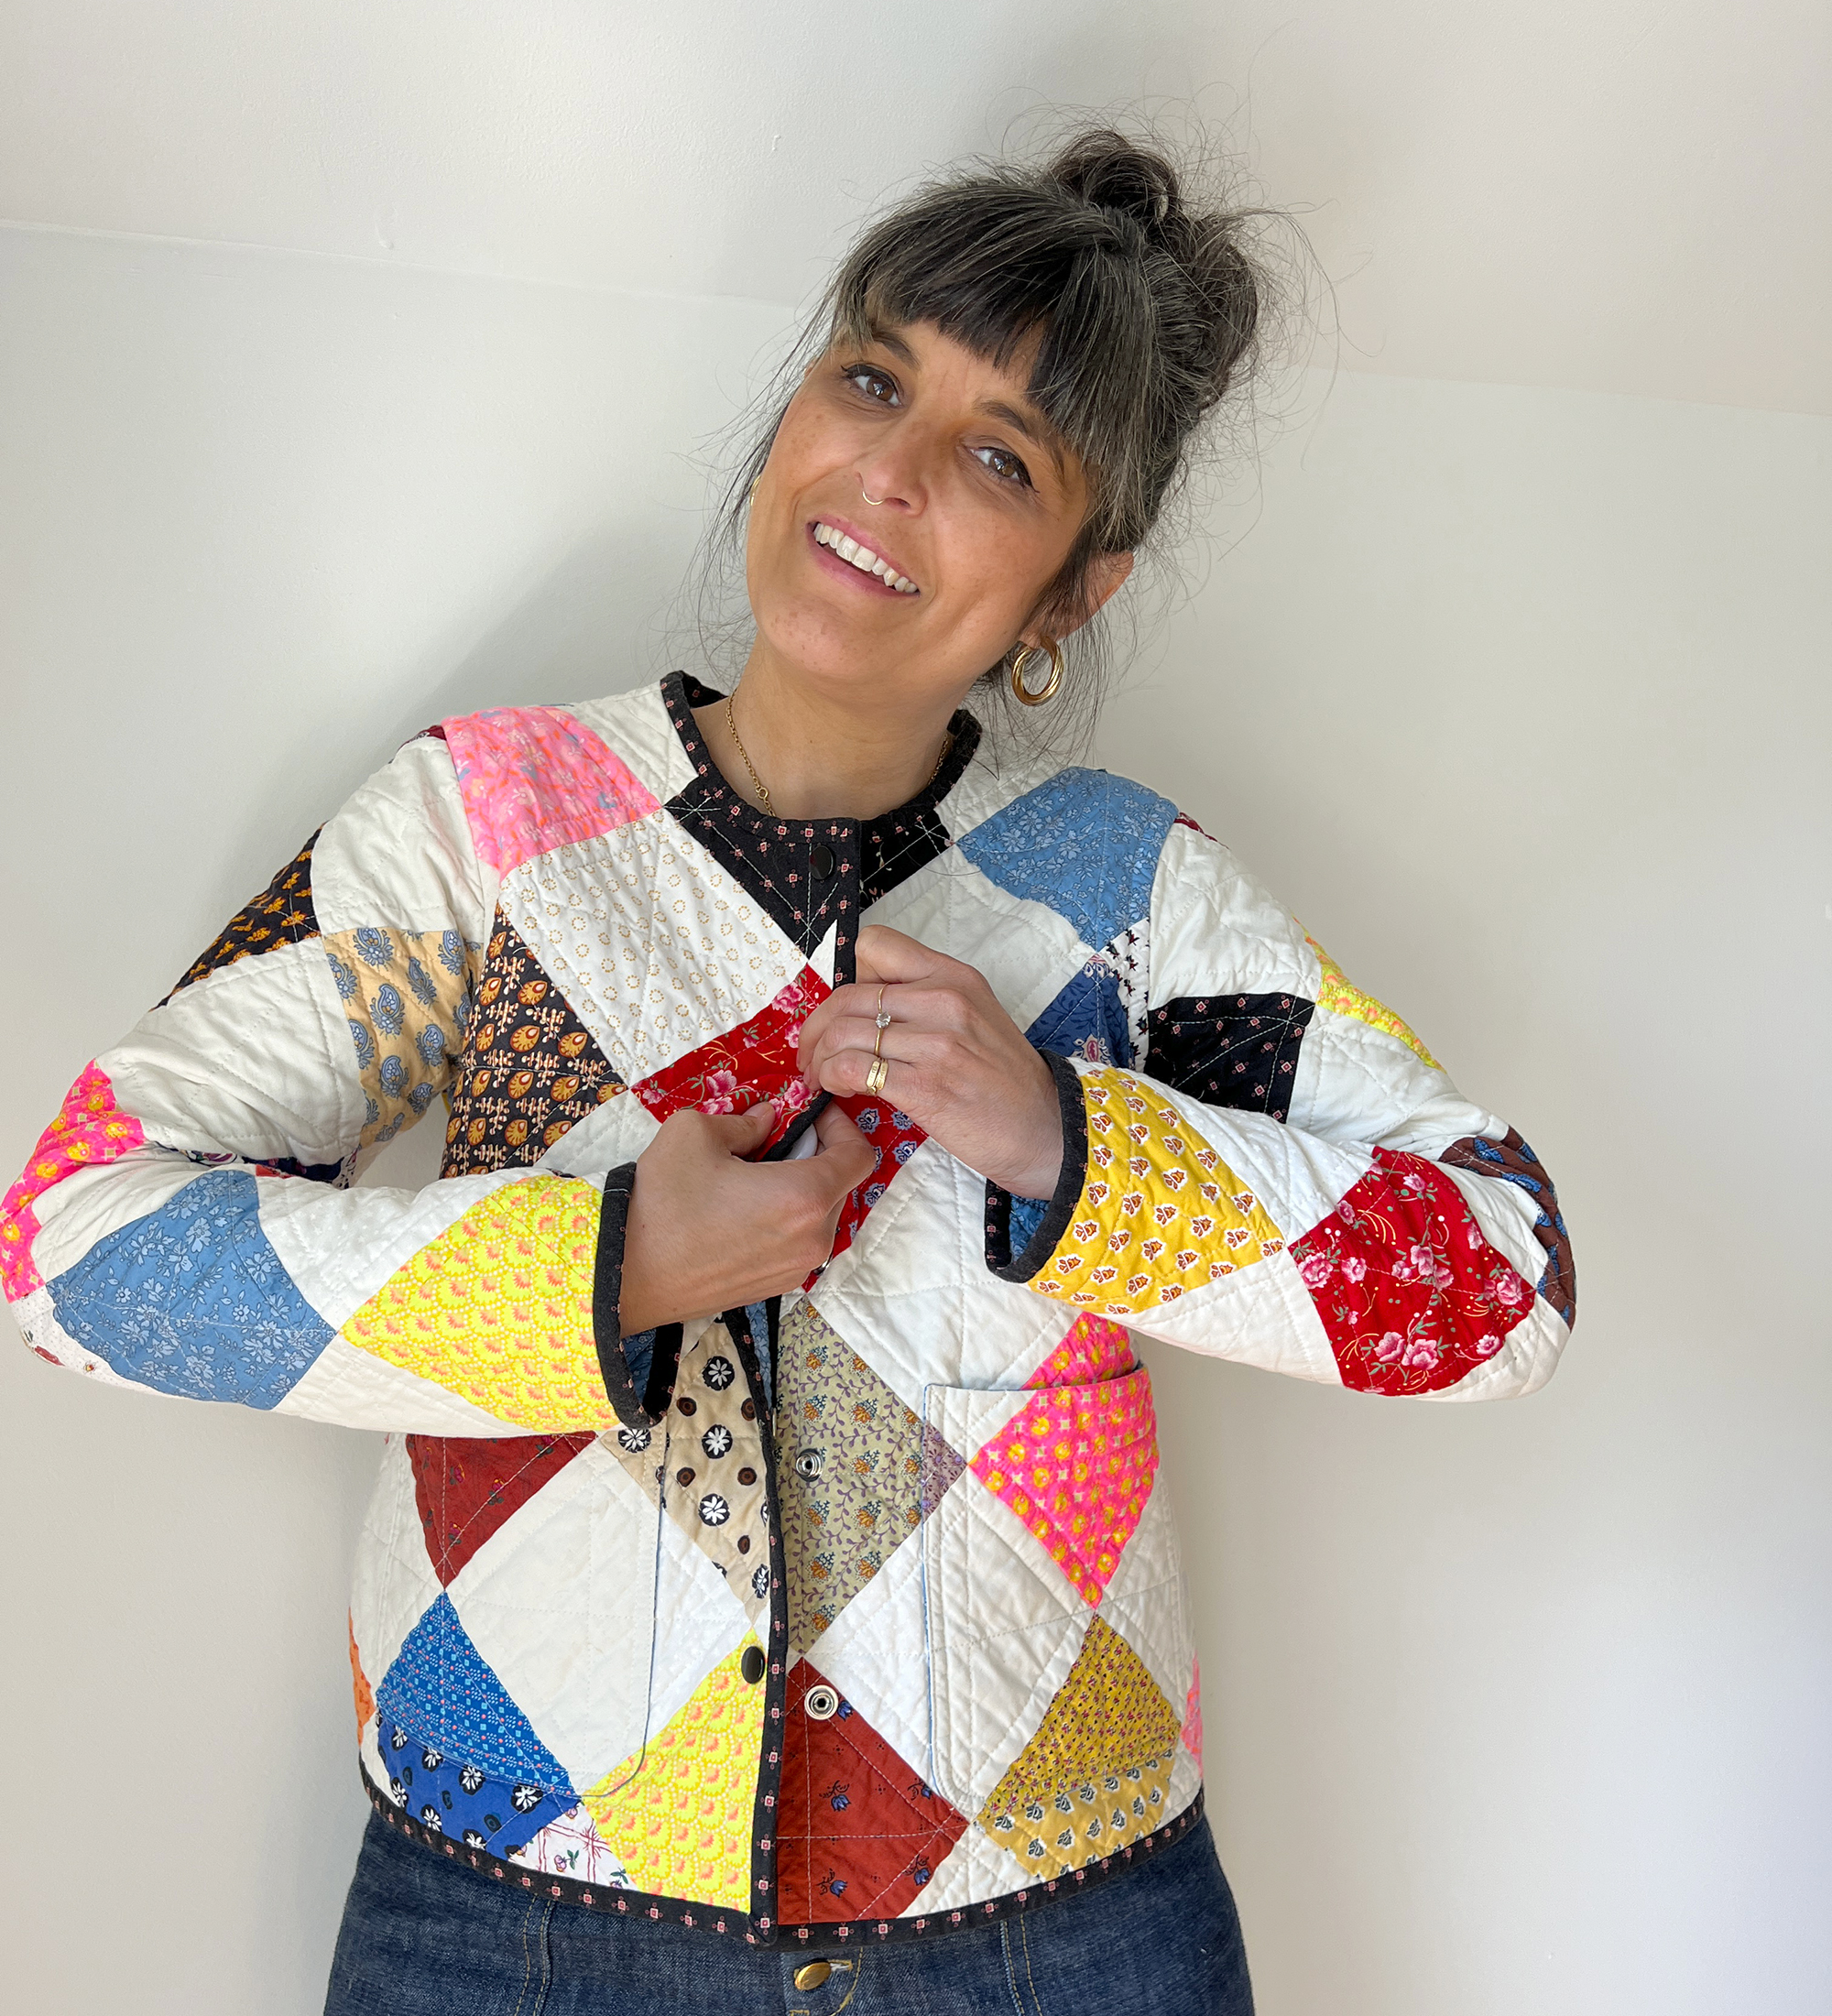
Take a moment to slip on your jacket, snap it closed, and put your hands in your pockets. How cozy is that!?
I know this sew-along moved at a fast clip, so if you need extra time to catch up, take as long as you need. Regardless of when you finish sewing your jacket, I’d absolutely love to see it, so please tag me on Instagram along with #WeAllSew. It’s such a joy to sew with others, IRL or online, so thank you for joining me!
XO, Martha