Style Arc Como Knit Cardi, Part Three
Welcome to Part Three of the Como Knit Cardi Sew Along, the one where the cardigan is finished.
In Part One we discussed the pattern, sizing, ease, fabric suggestions, stitches and seam finishes, and went over the supplies needed for the sew-along.
Next, in Part Two, the pattern pieces were cut out, the pocket placement and darts marked and sewn, and the back yoke and back of the cardigan were sewn together.
In this post – Part Three – the neckband will be stitched, sewn to the cardigan and topstitched. The final step will be to hem the cardigan.
 Hello everyone! It’s Sharon from Sharon Sews. You can connect with me on YouTube, Instagram and Facebook, where I share sewing tips, projects, reviews, and fashion sewing ideas.
Prepare the Neck and Front Bands
Notice that the upper corners (the shoulder seam) of the front band, as well as all four corners of the back neck band are labeled with the letter “A”. They will be sewn together matching the “A”s.
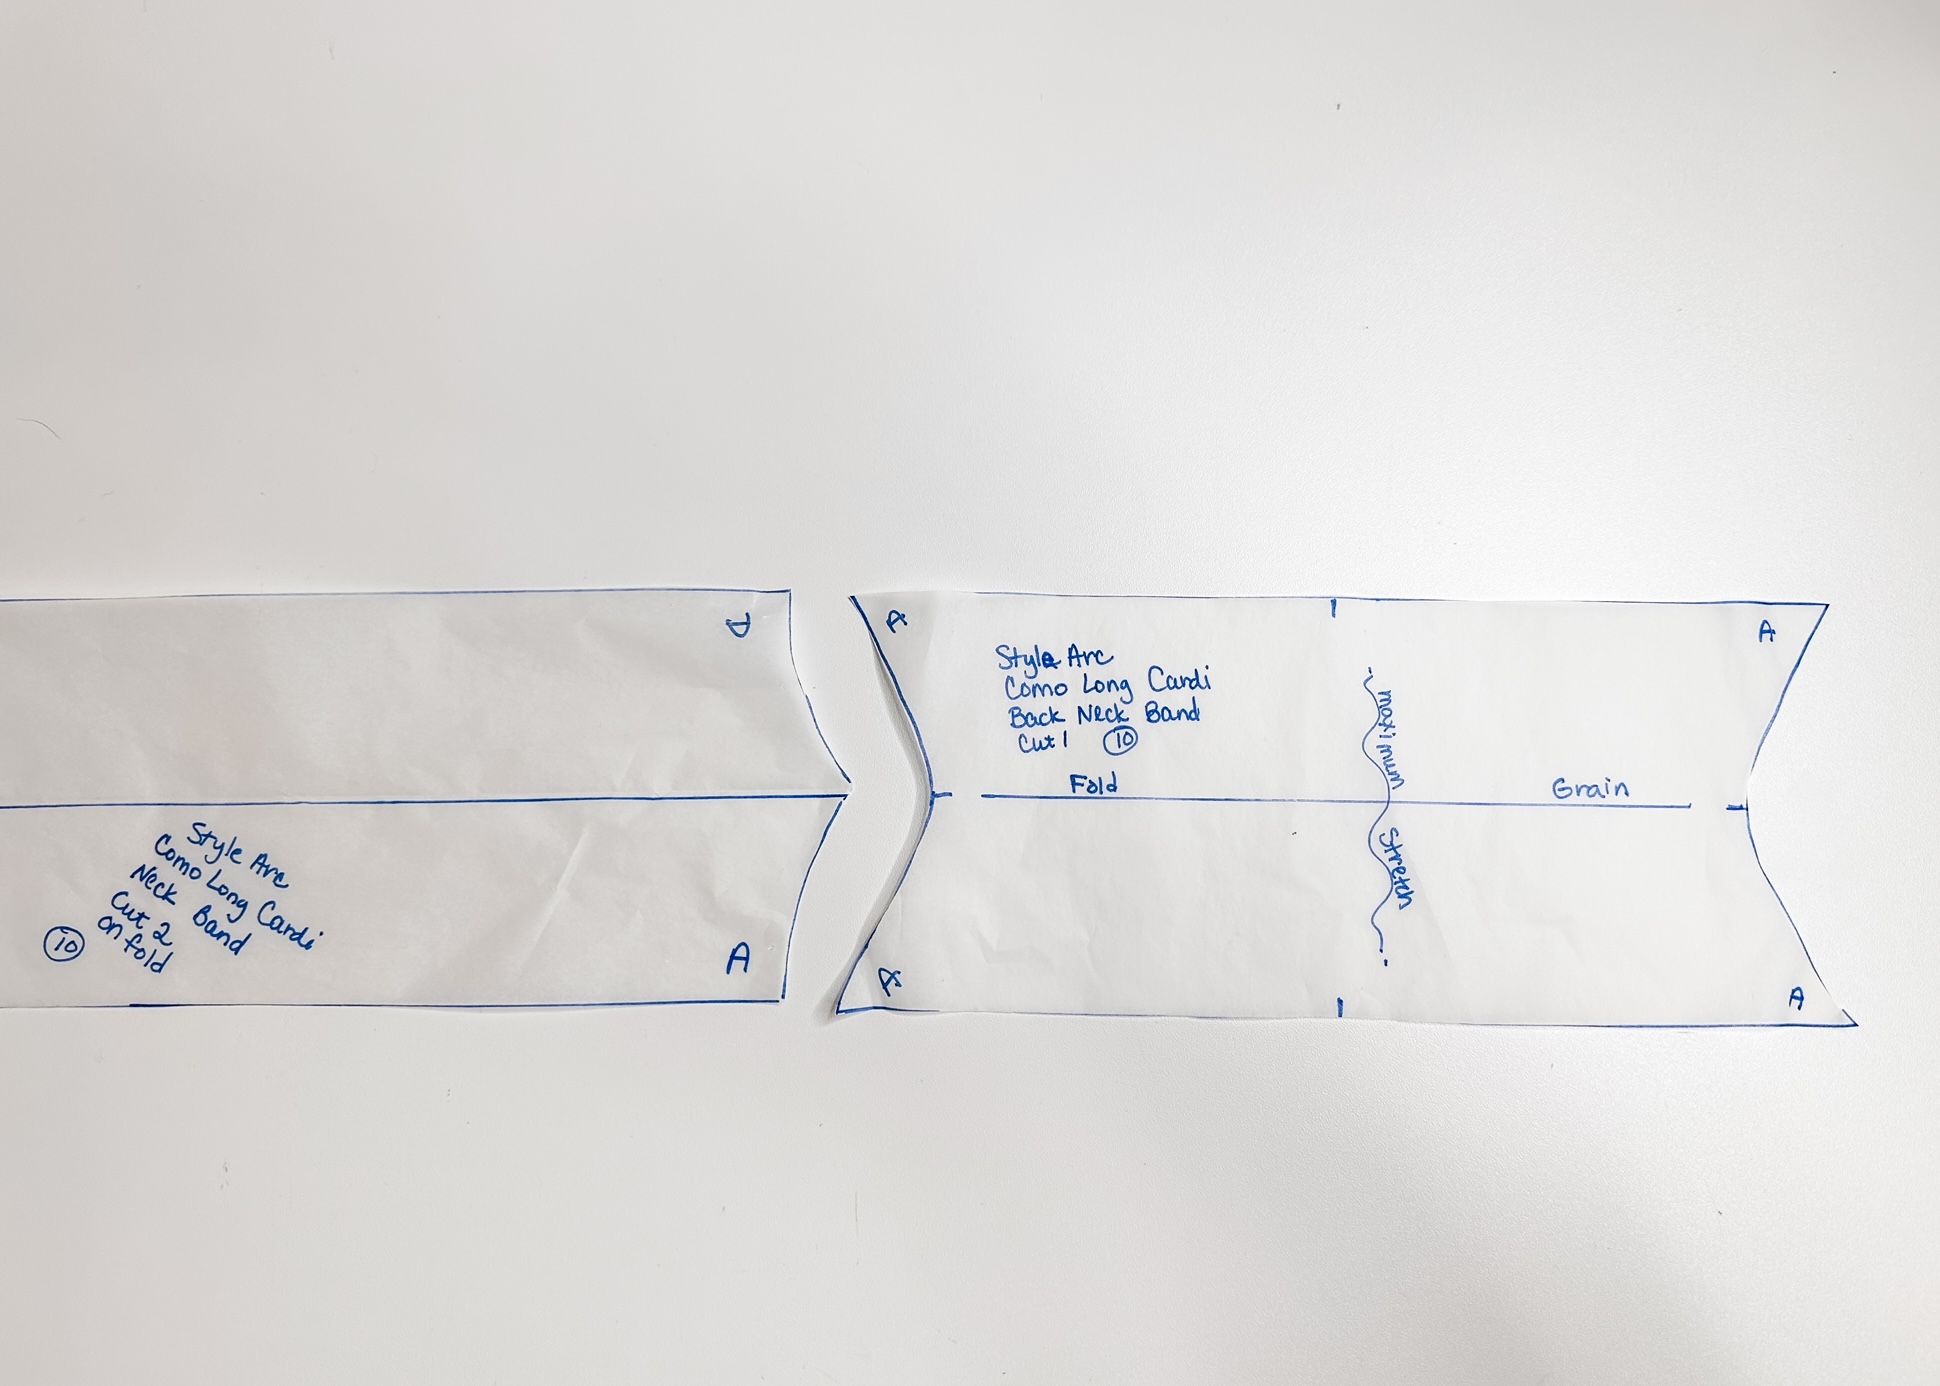
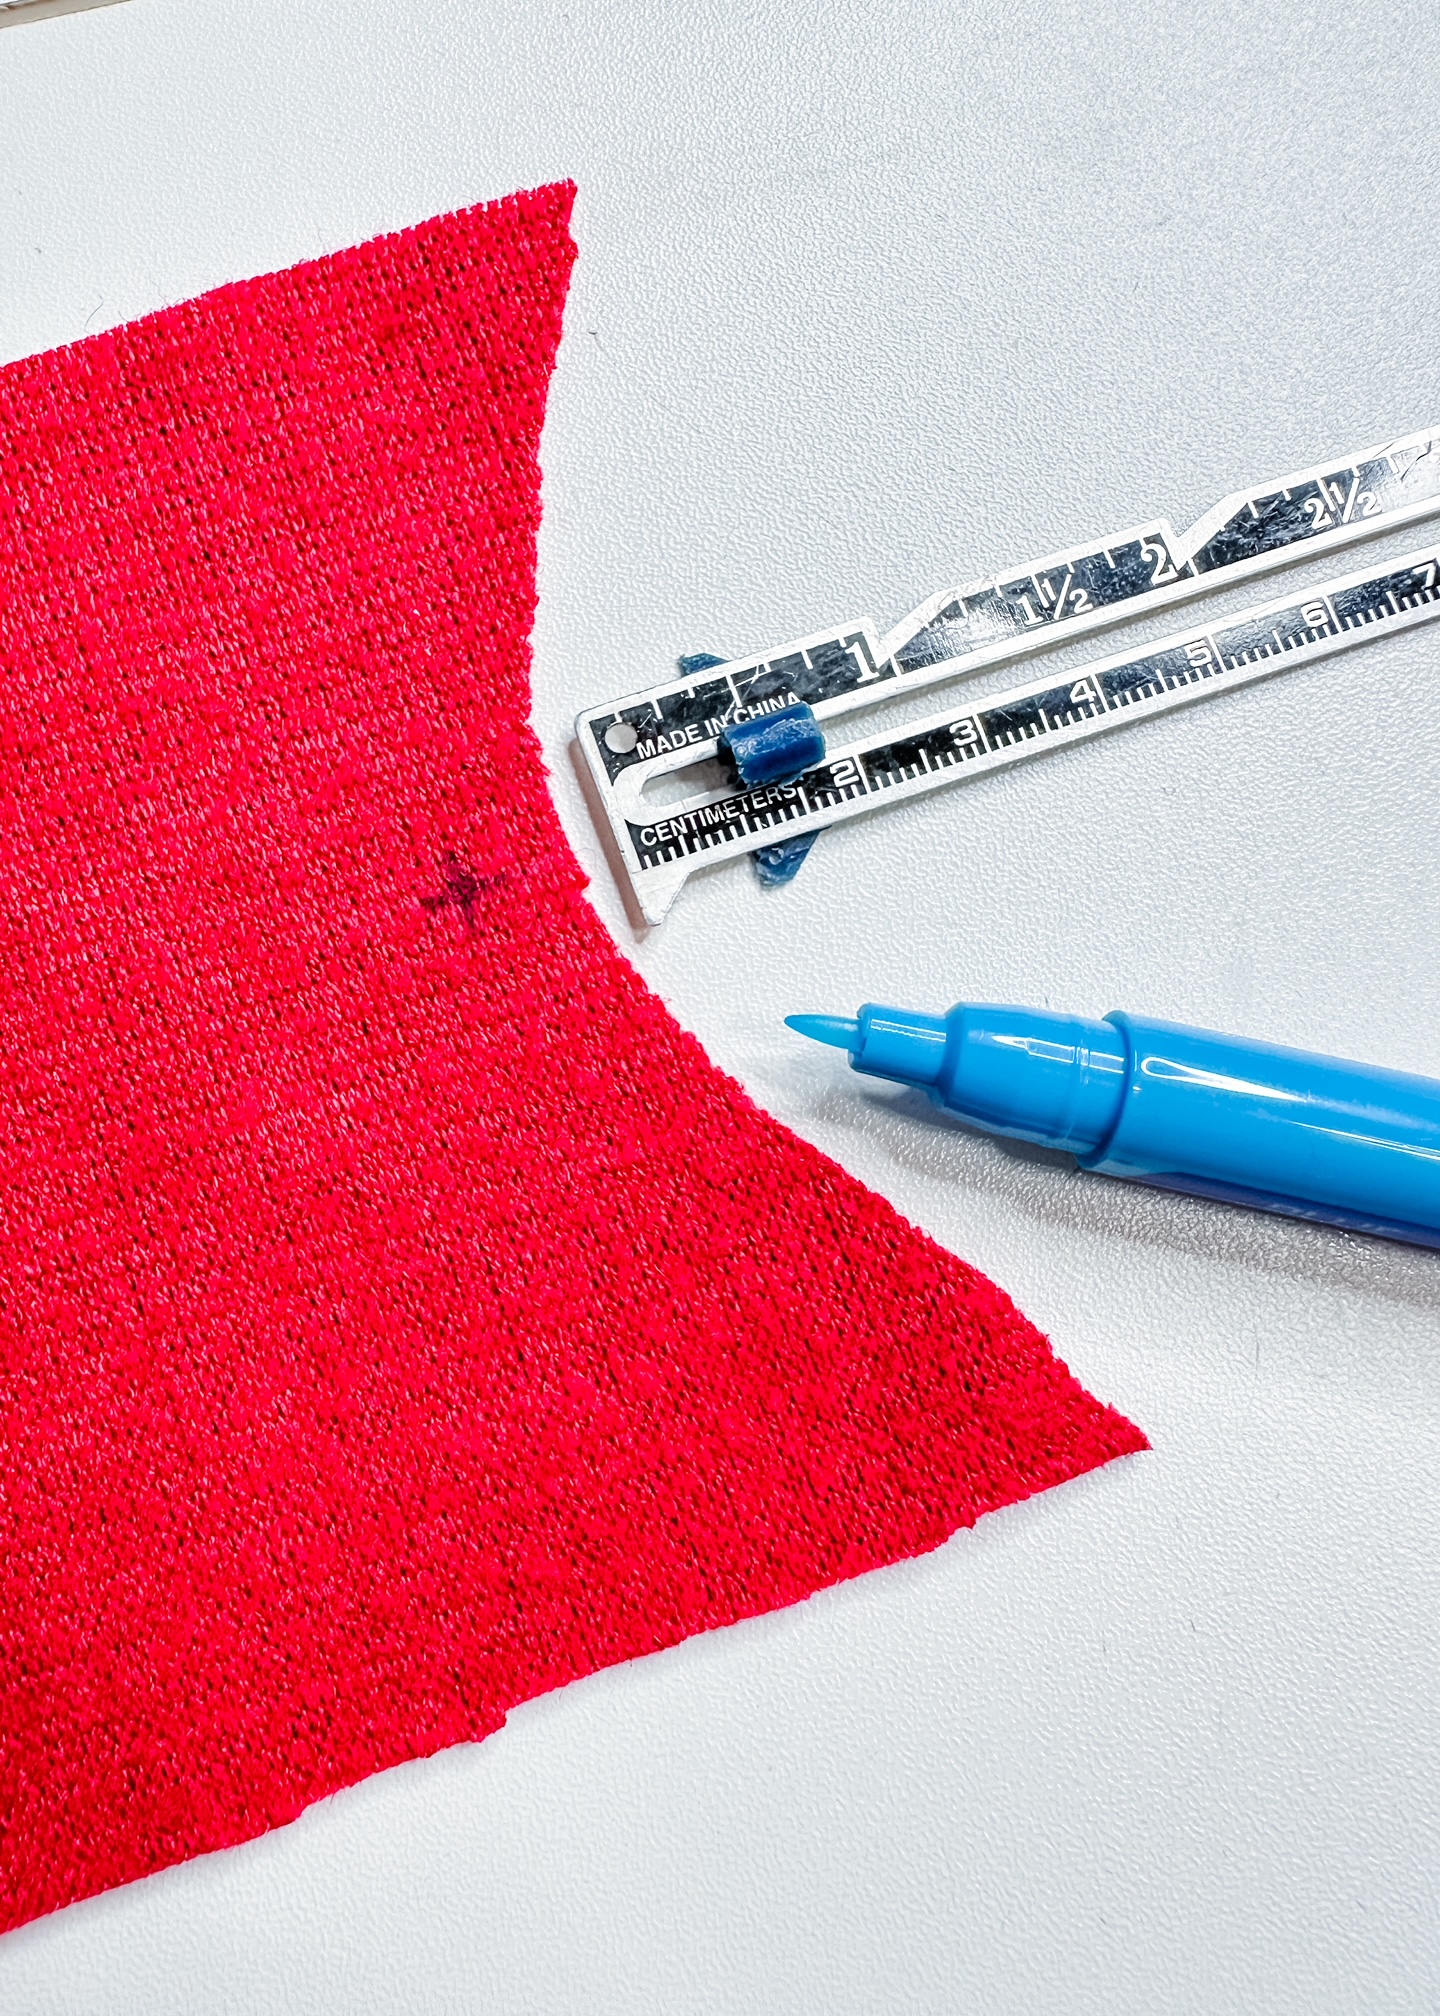
I like to make a mark on the neck band to help match to the point on the front band. Using a removable marking tool, make a mark 3/8″ from the edge in the center of the back neck band on the wrong side of the fabric.
With right sides facing, pin the neck band to the shoulder seam of the front bands, matching the letters “A”. It won’t be flat when it’s pinned, and that’s okay.
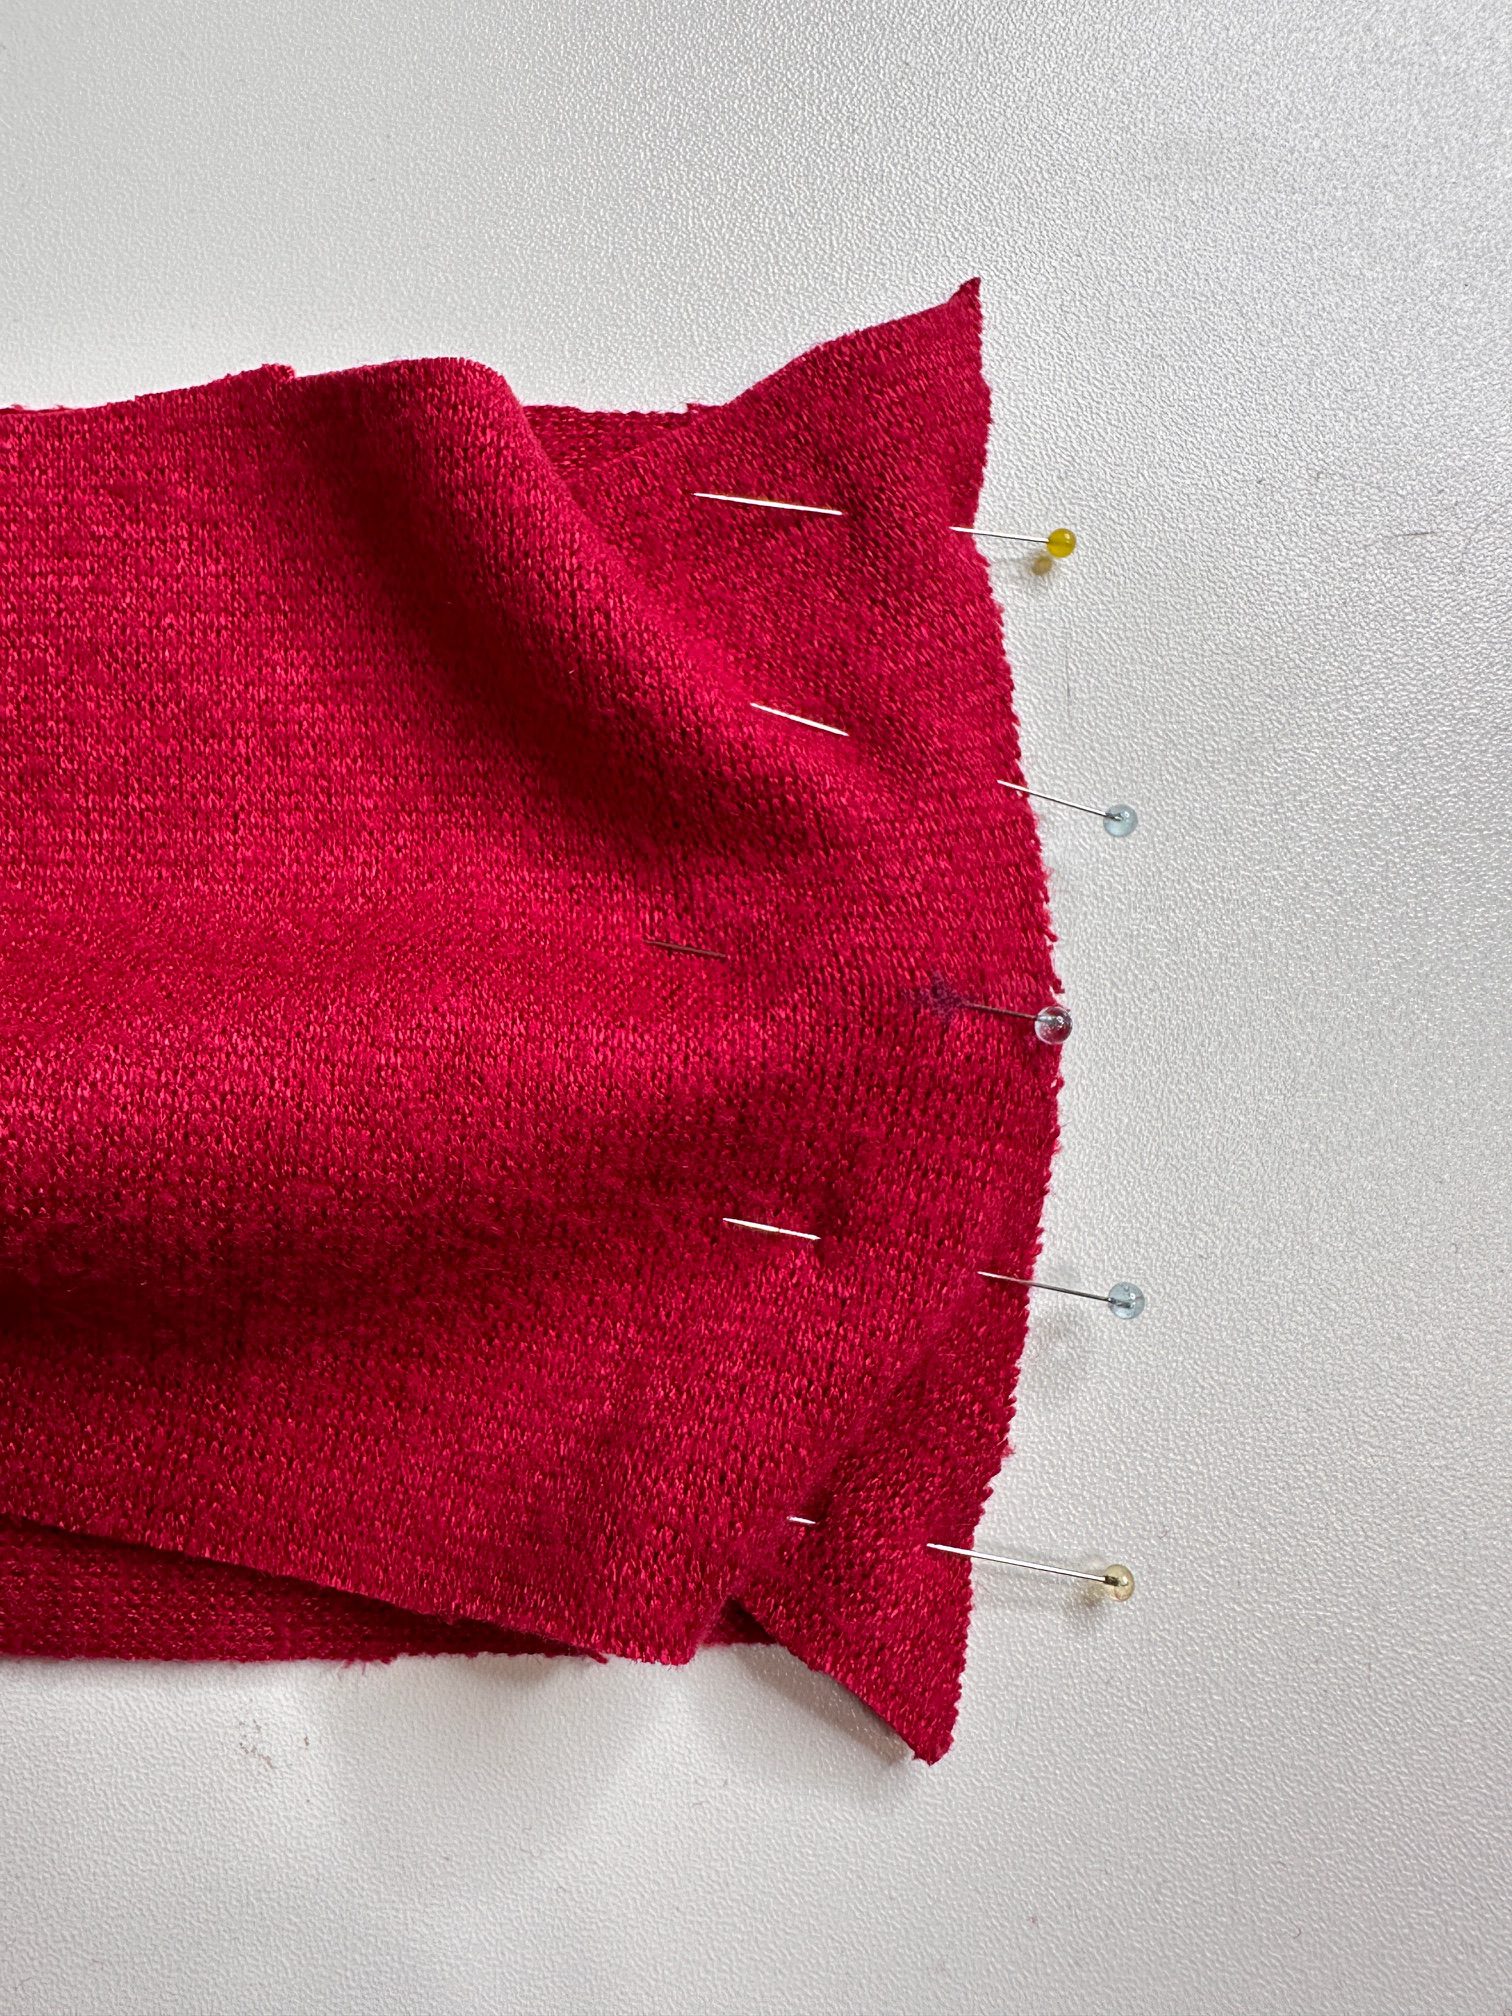
Using a 3/8″ seam allowance, stitch to the dot, pivot slightly, and continue stitching the seam. Be sure to back stitch at the beginning and end. Sew both shoulder seams.
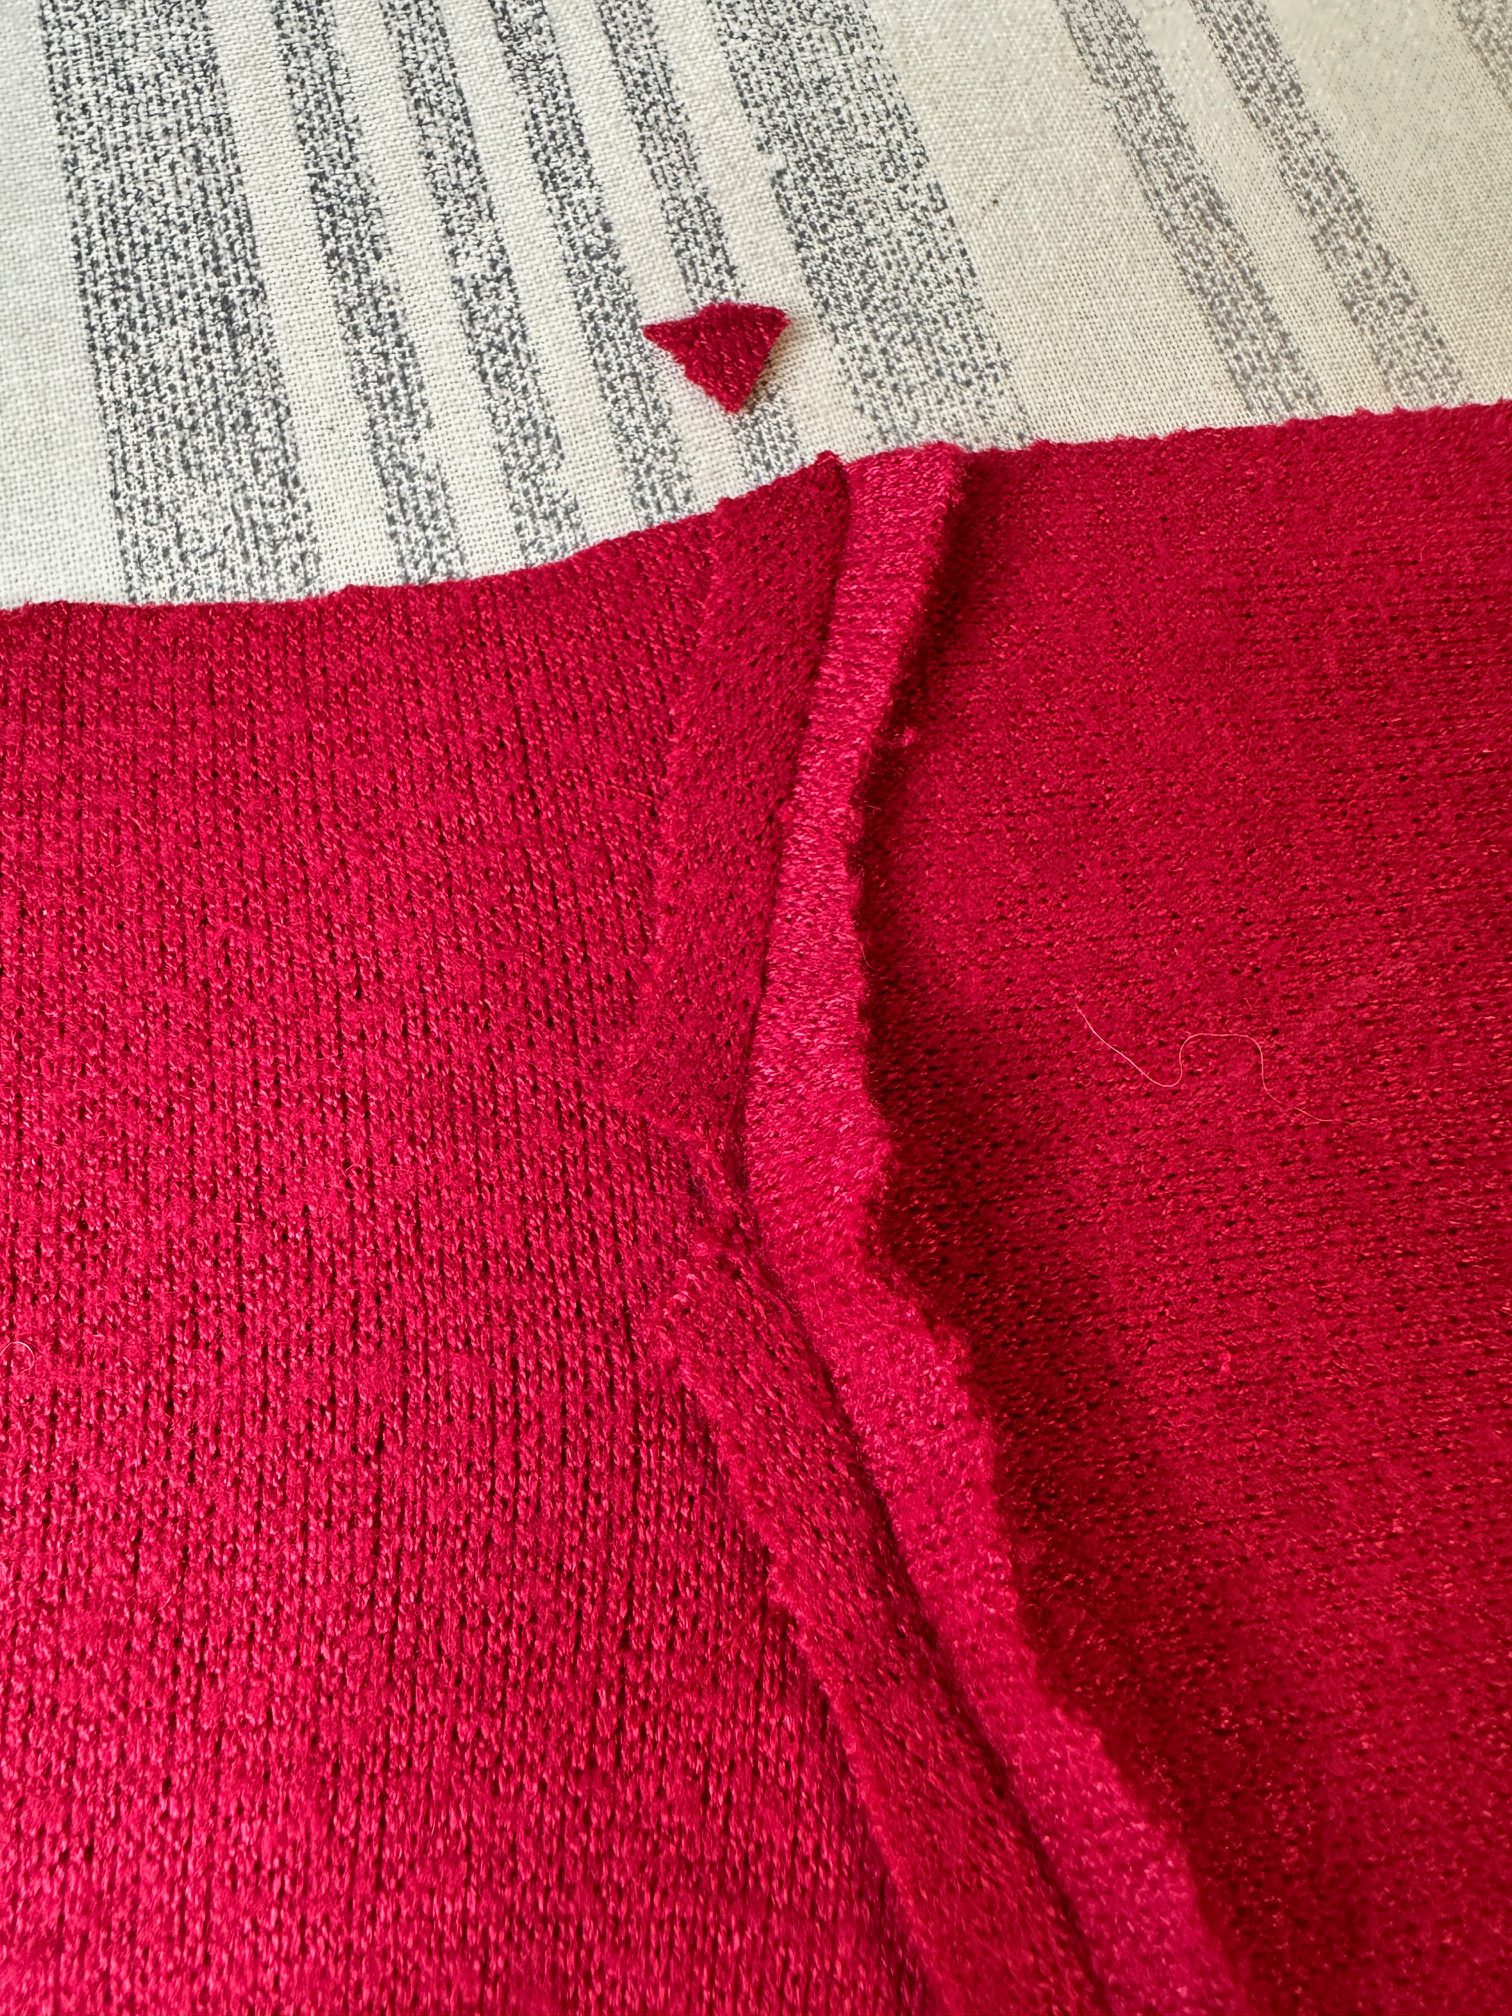
Once both seams are sewn, carefully clip to the stitching at the center, press the seams open and clip off the little triangles at the end of each seam.
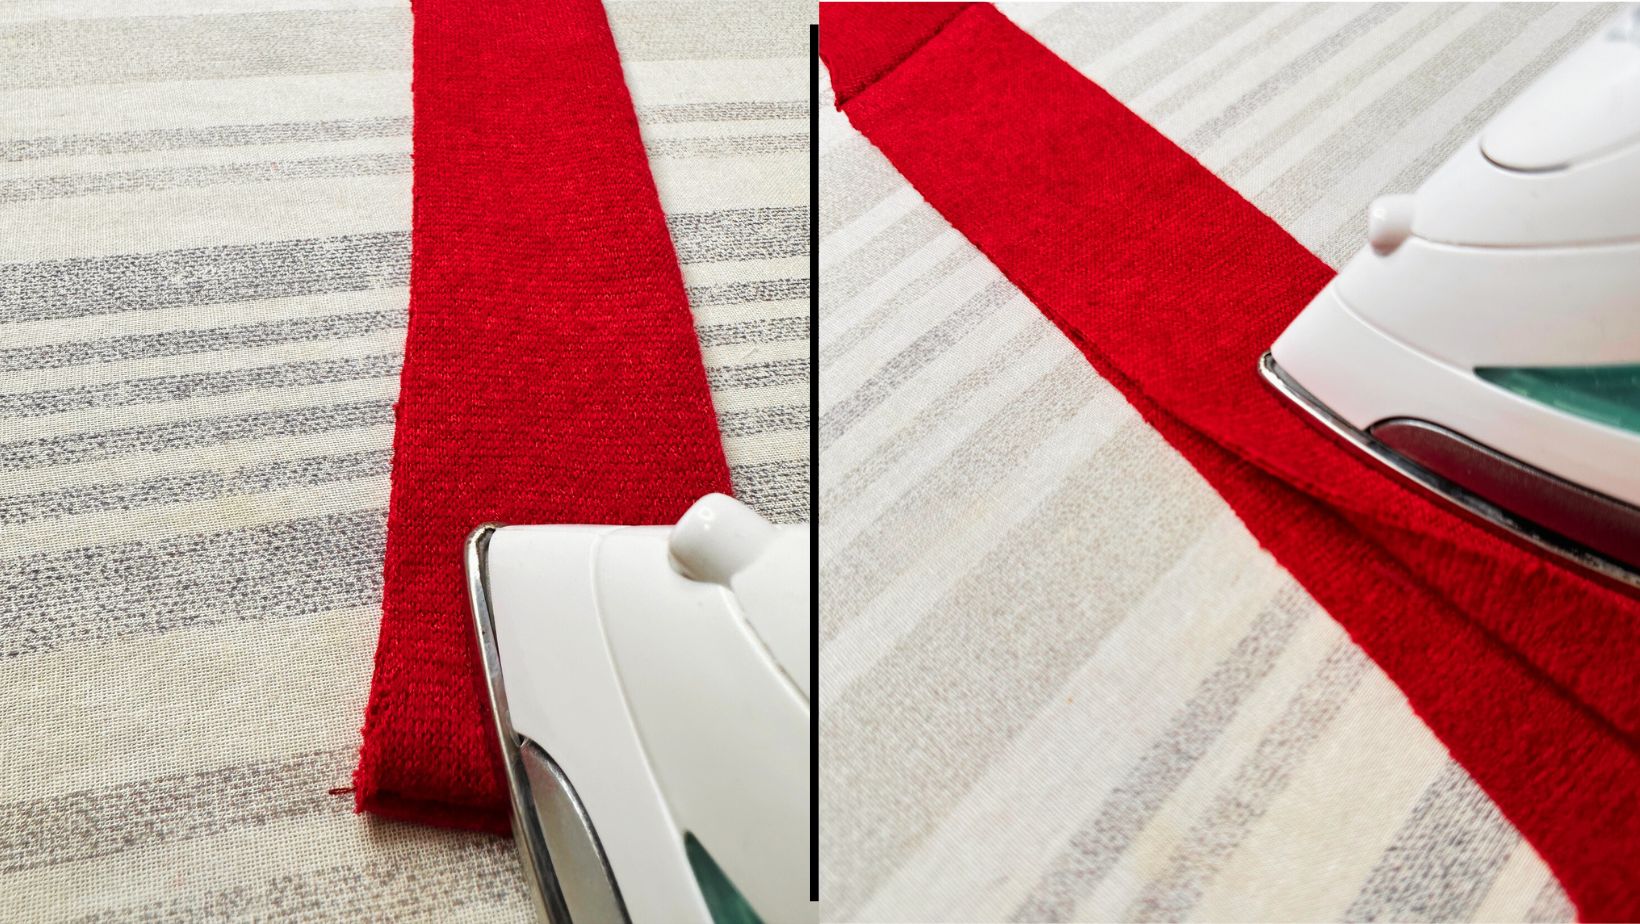
Fold the bottom edge of the front band with right sides together and stitch across the bottom from the raw edge to the fold using a 3/8″ seam allowance.
Trim the corner, turn right side out, and press. Continue to press the band in half with wrong sides facing.
Baste the raw edges together just shy of 3/8″ from the raw edge. This will hold the band together when you pin it to the cardigan.
Sew the Band to the Cardigan
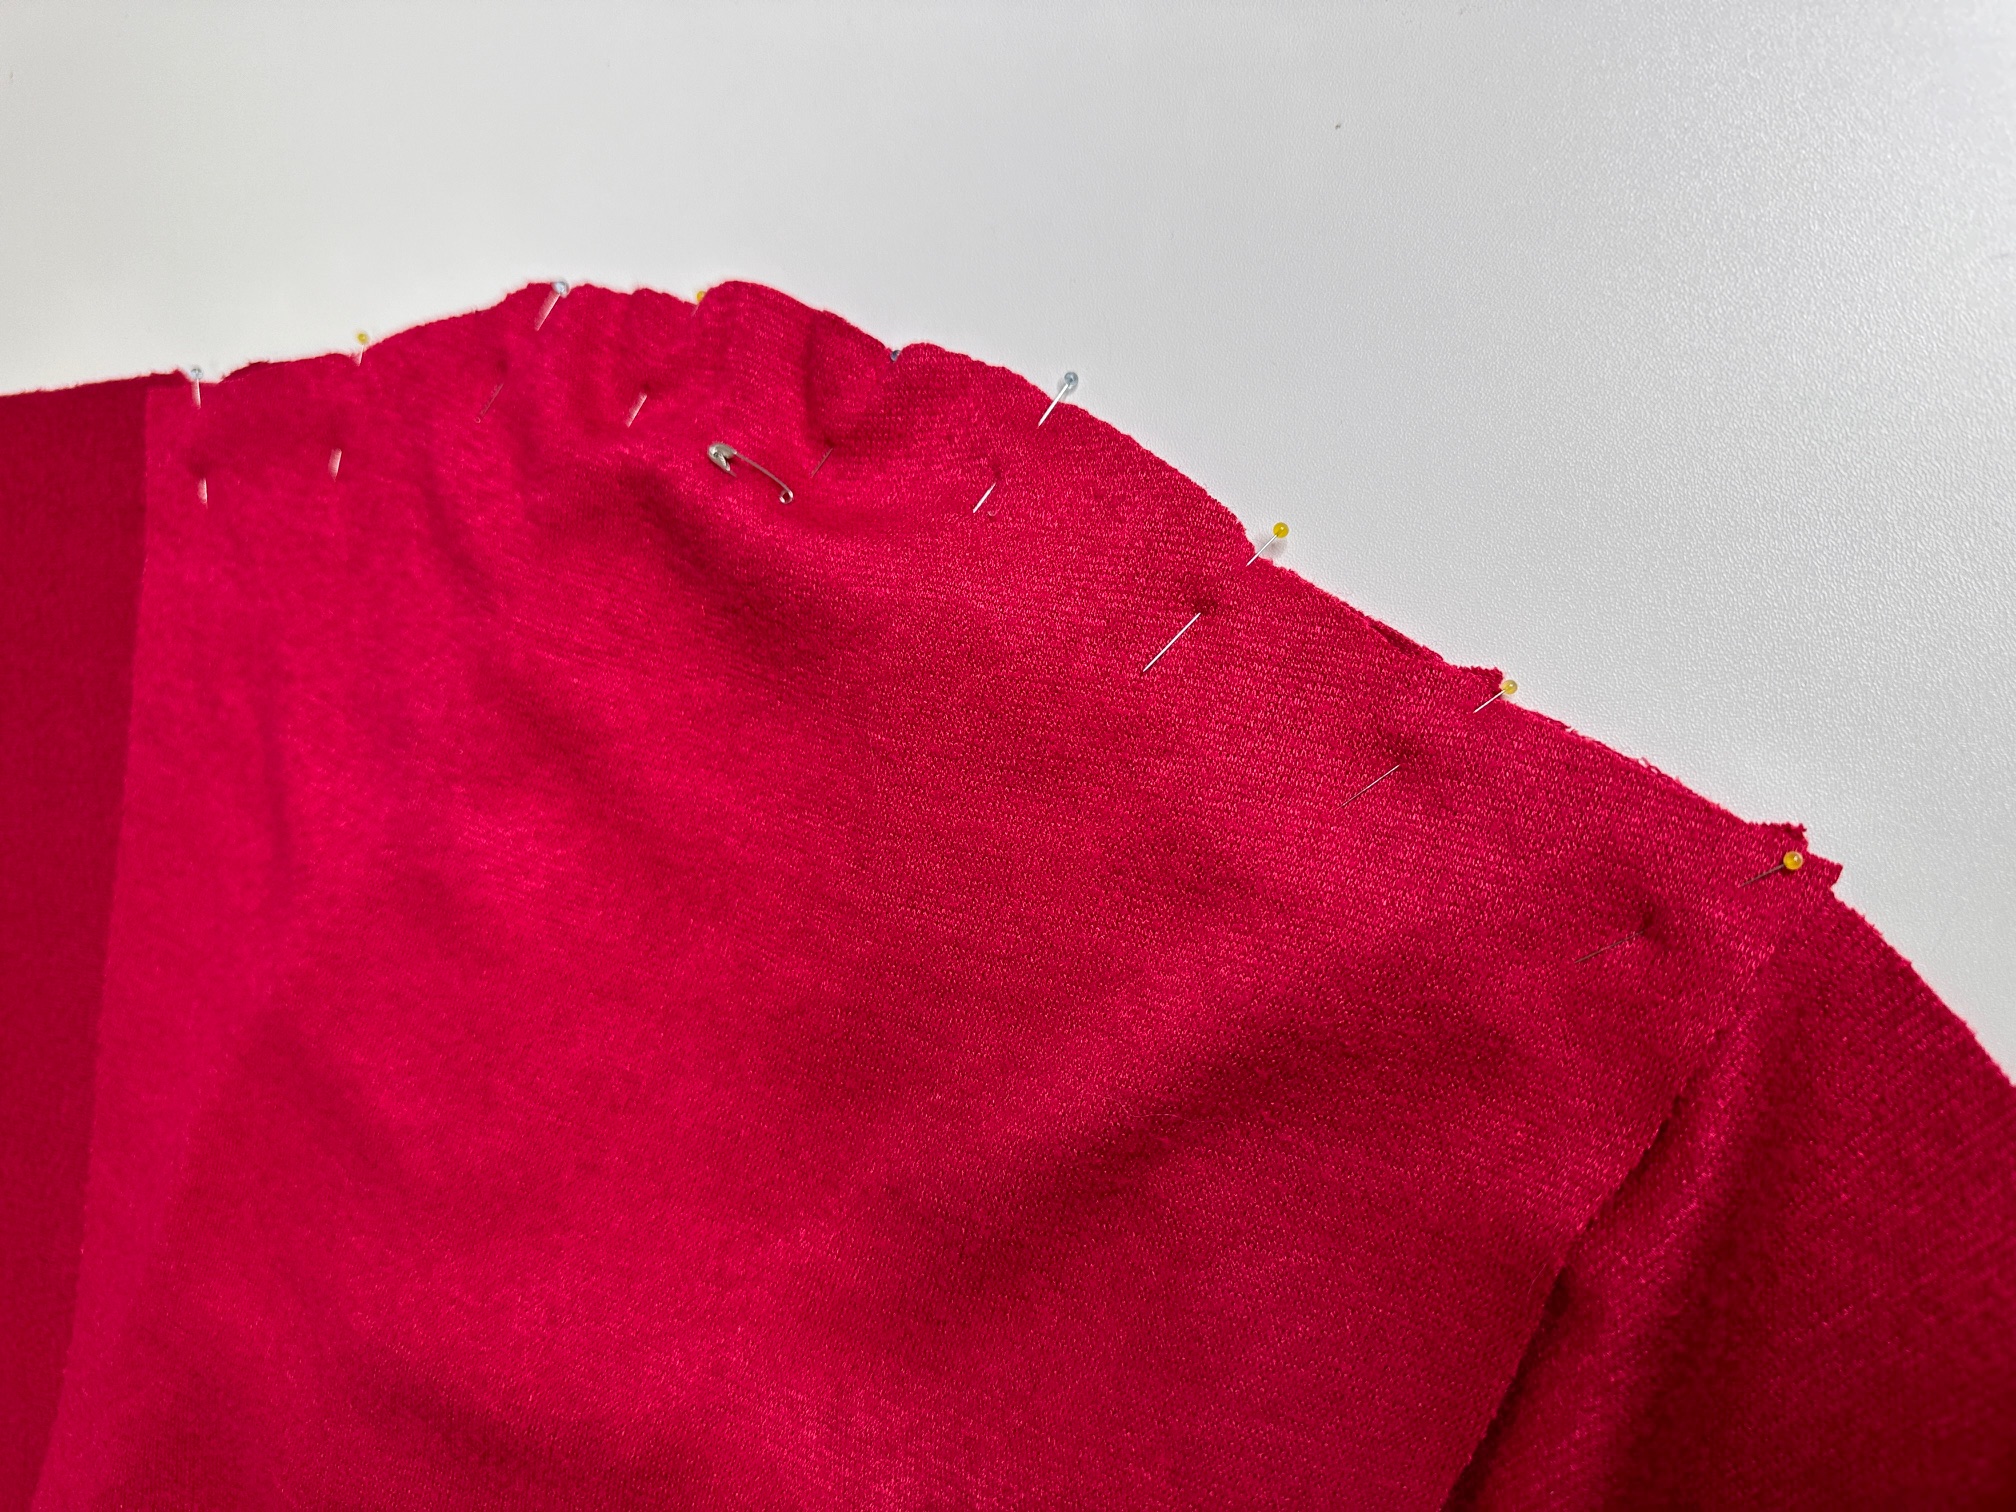
With right sides together, pin the band to the front edge and neckline of the cardigan. Match the shoulder seams of the band to the shoulder darts on the cardigan and all other notches.
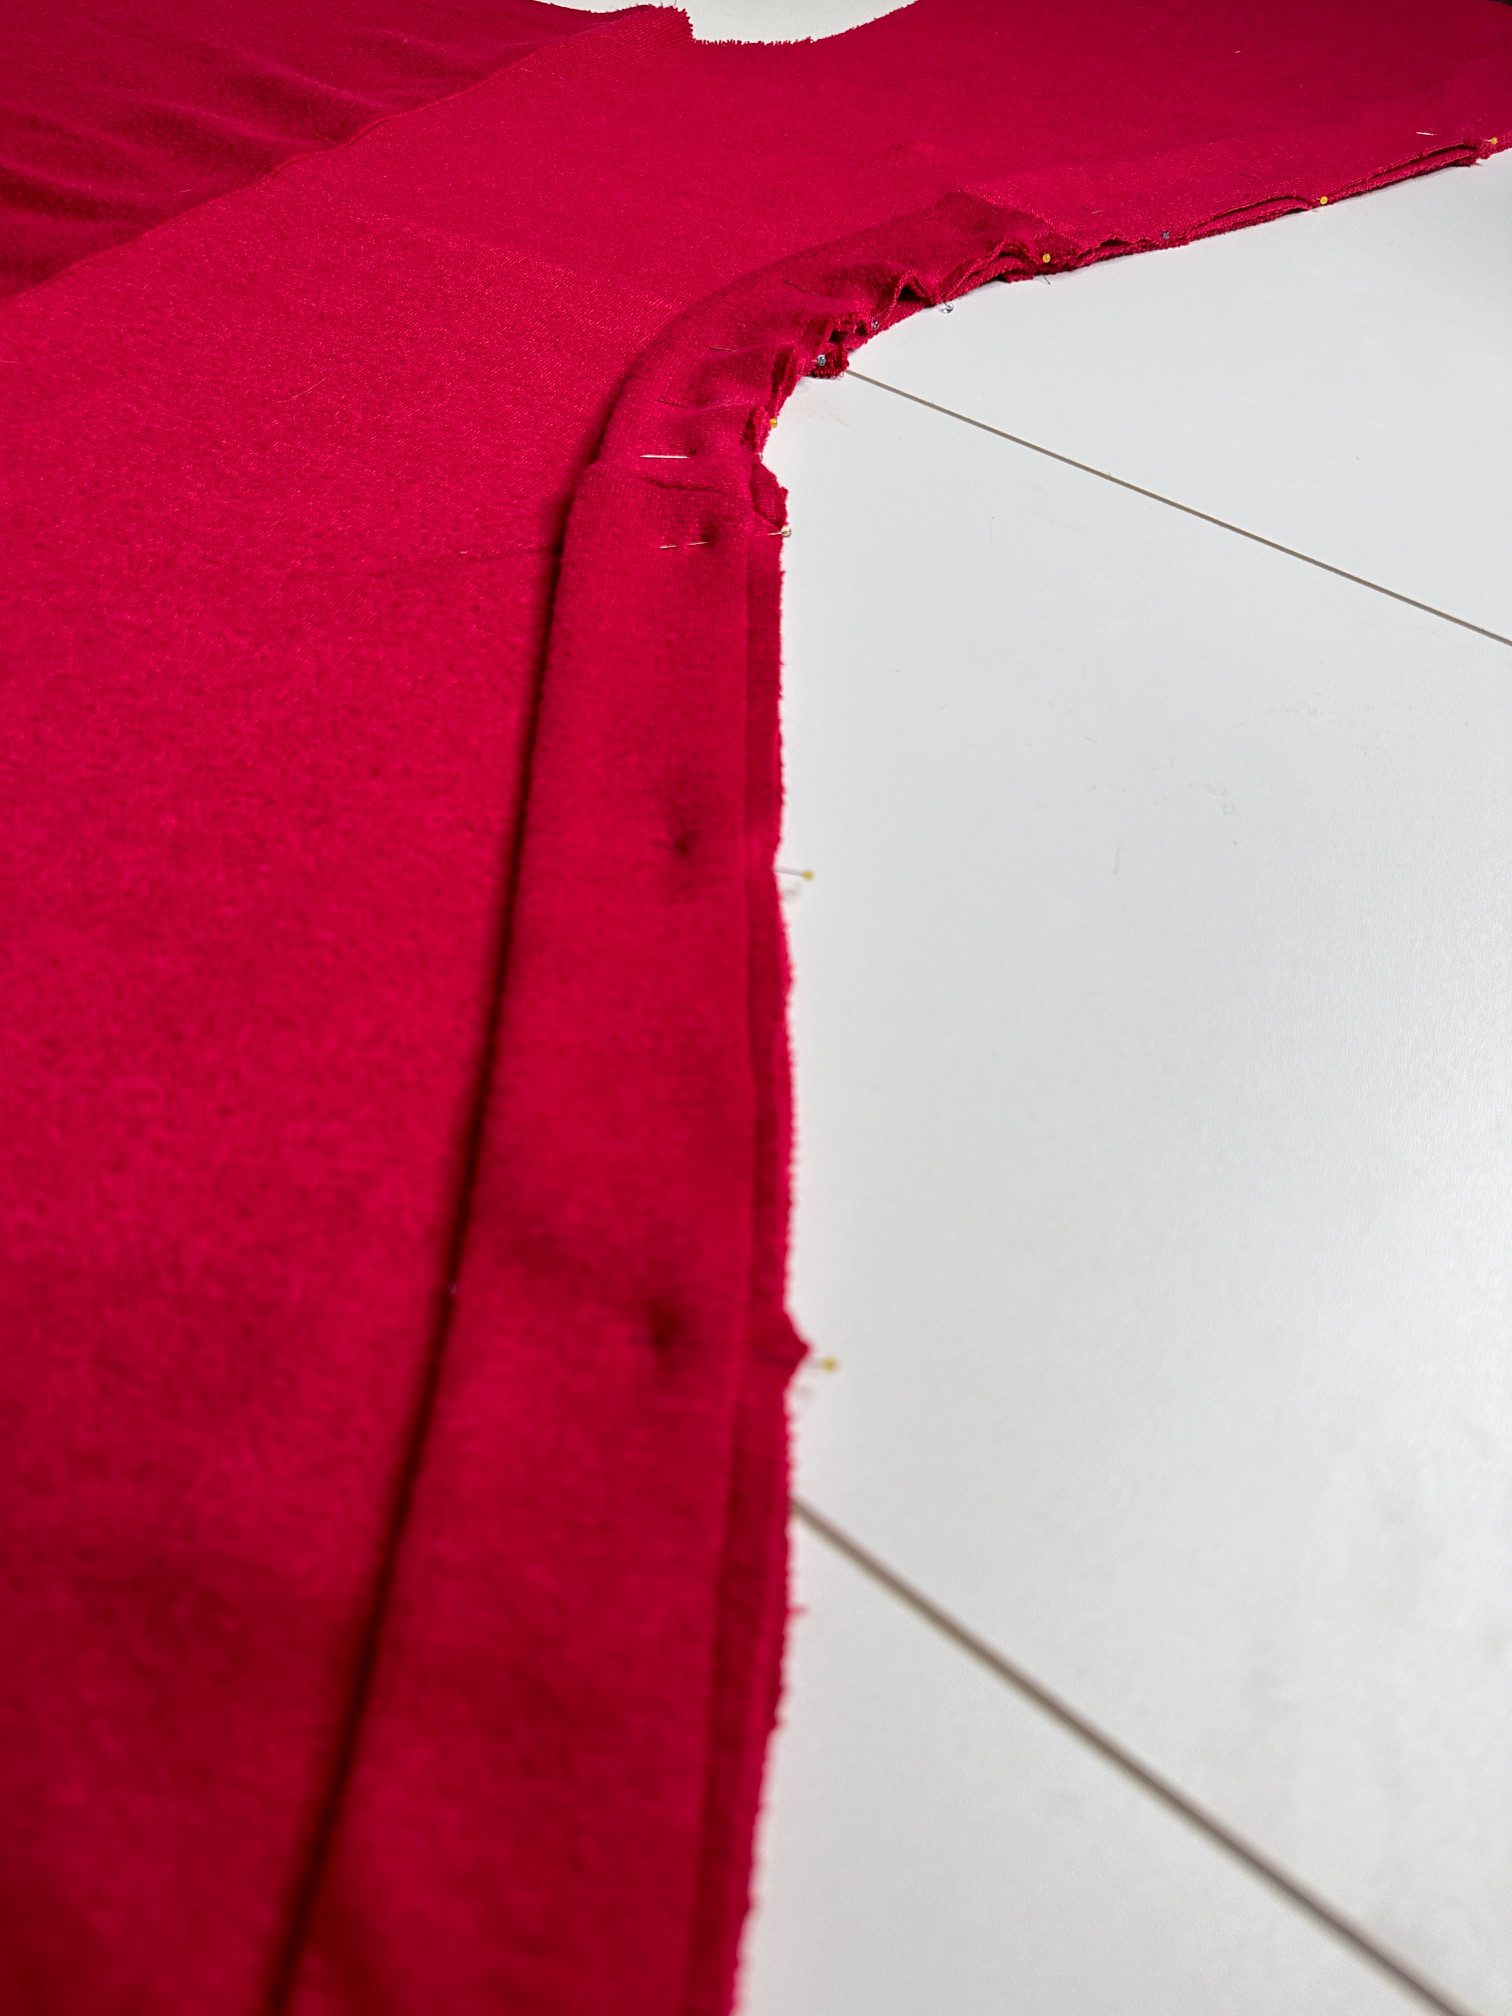
The finished bottom of the band will match the hem fold line notch on the cardigan. Fold the front hem up over the front band making sure the folded edge of the hem is snug against the bottom of the front band.
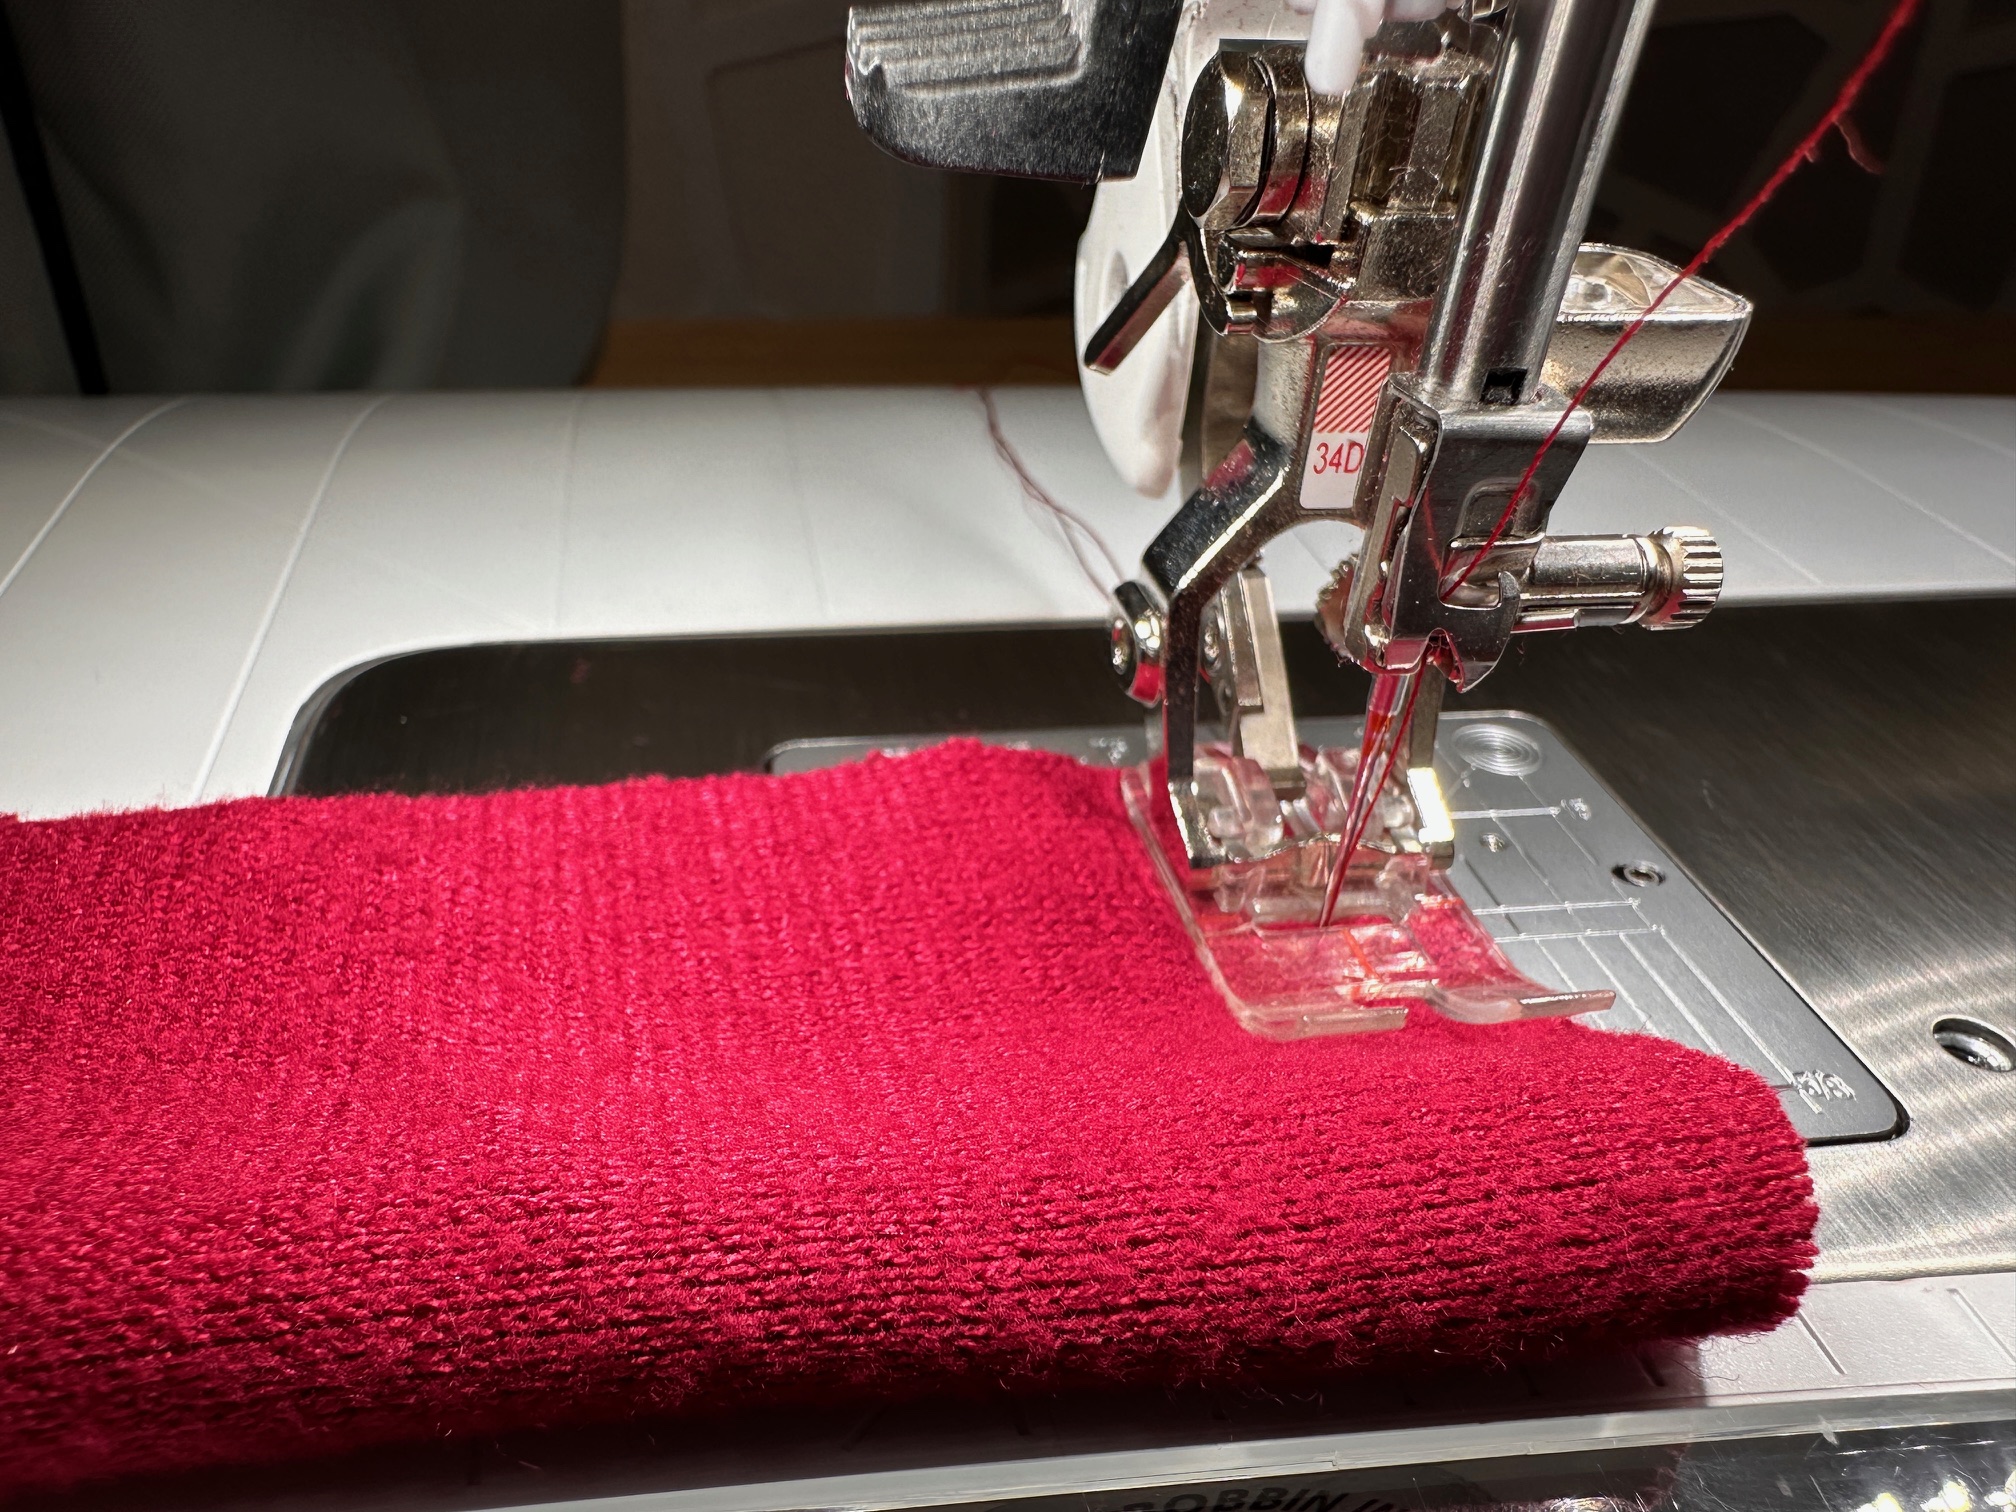
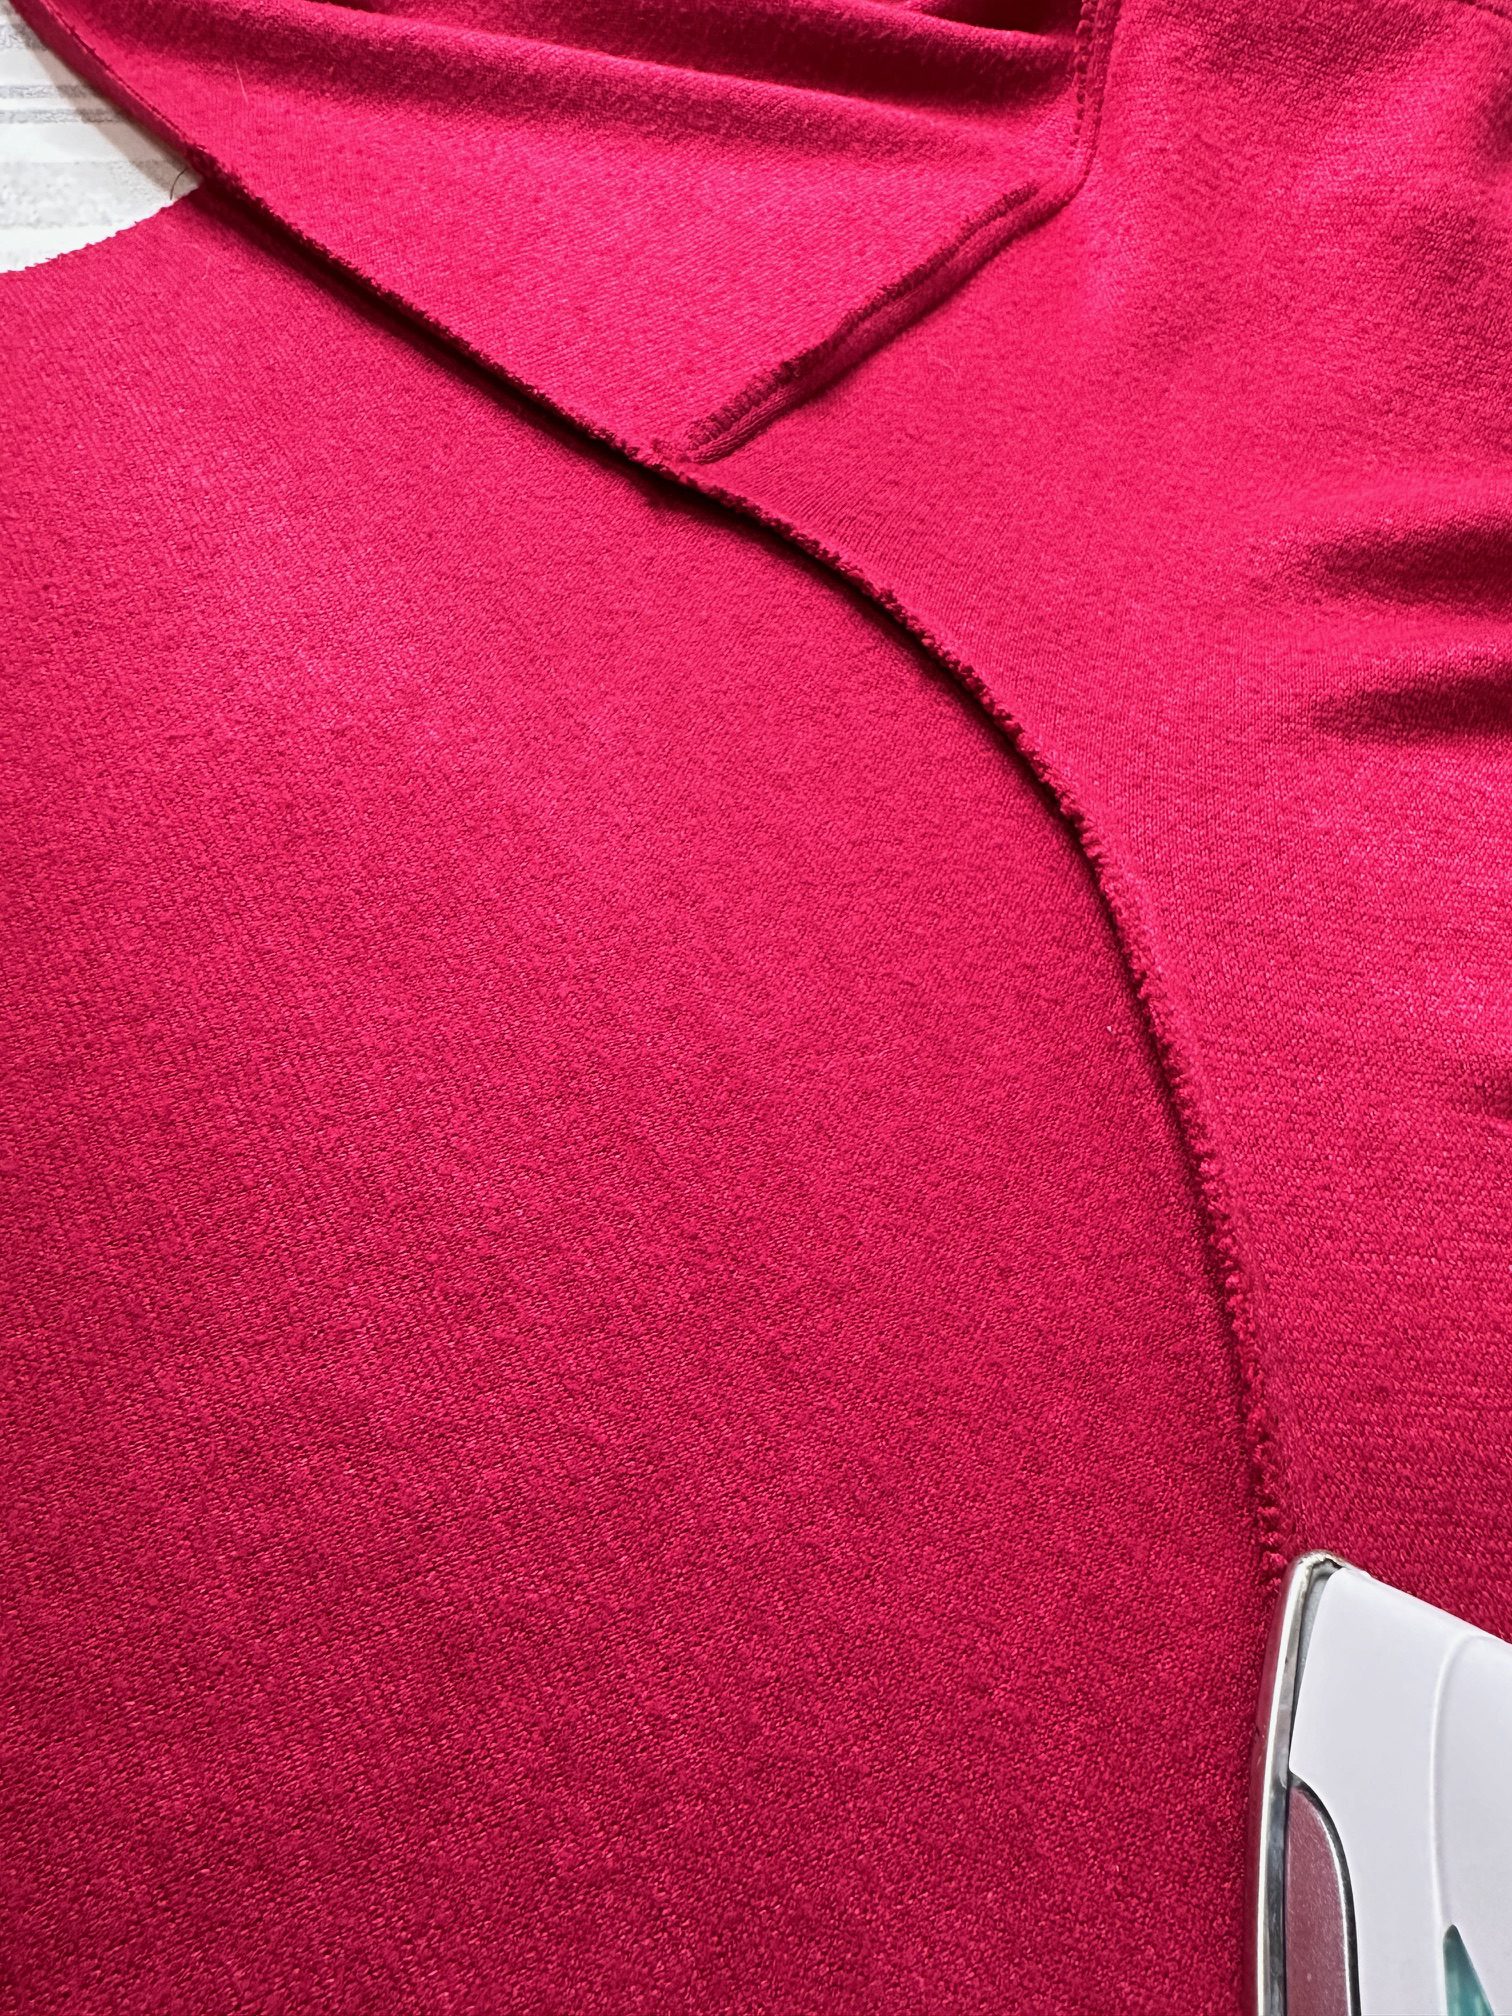
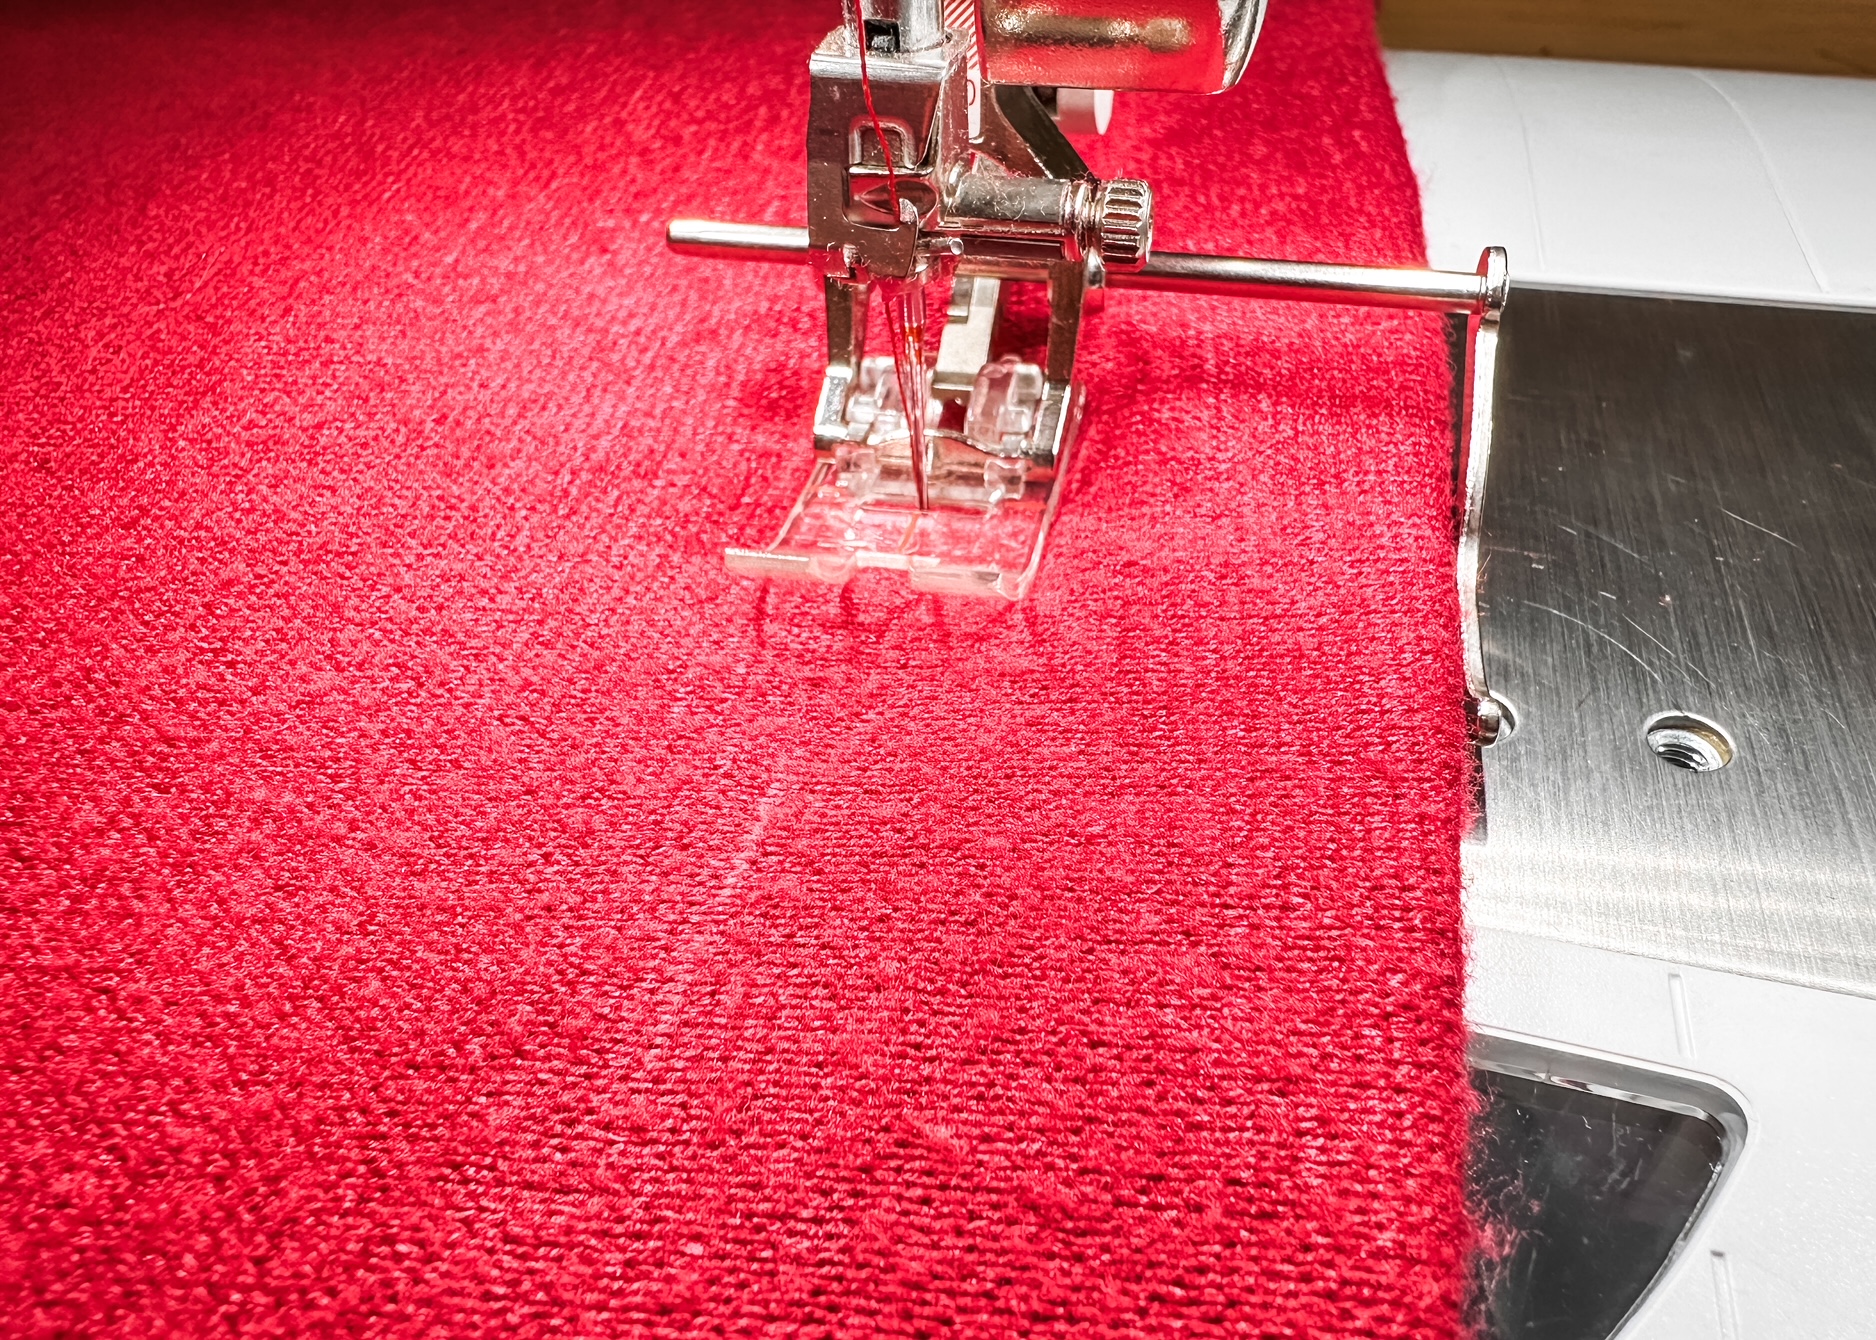
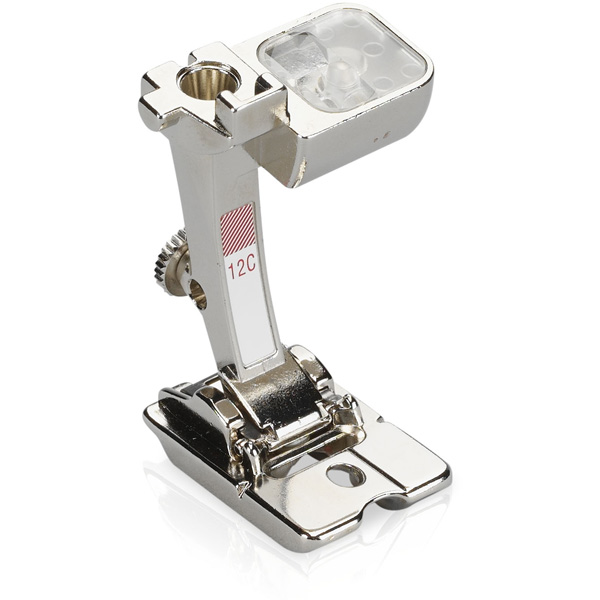
Stitch the band to the cardigan using a 3/8″ seam allowance. Finish the seam if desired. Because there are three layers of fabric, and my sweater knit was a bit bulky, I used the Bulky Overlock Foot #12 combined with the #20 stitch on my BERNINA 770 QE PLUS. Press the seam toward the body of the cardigan.

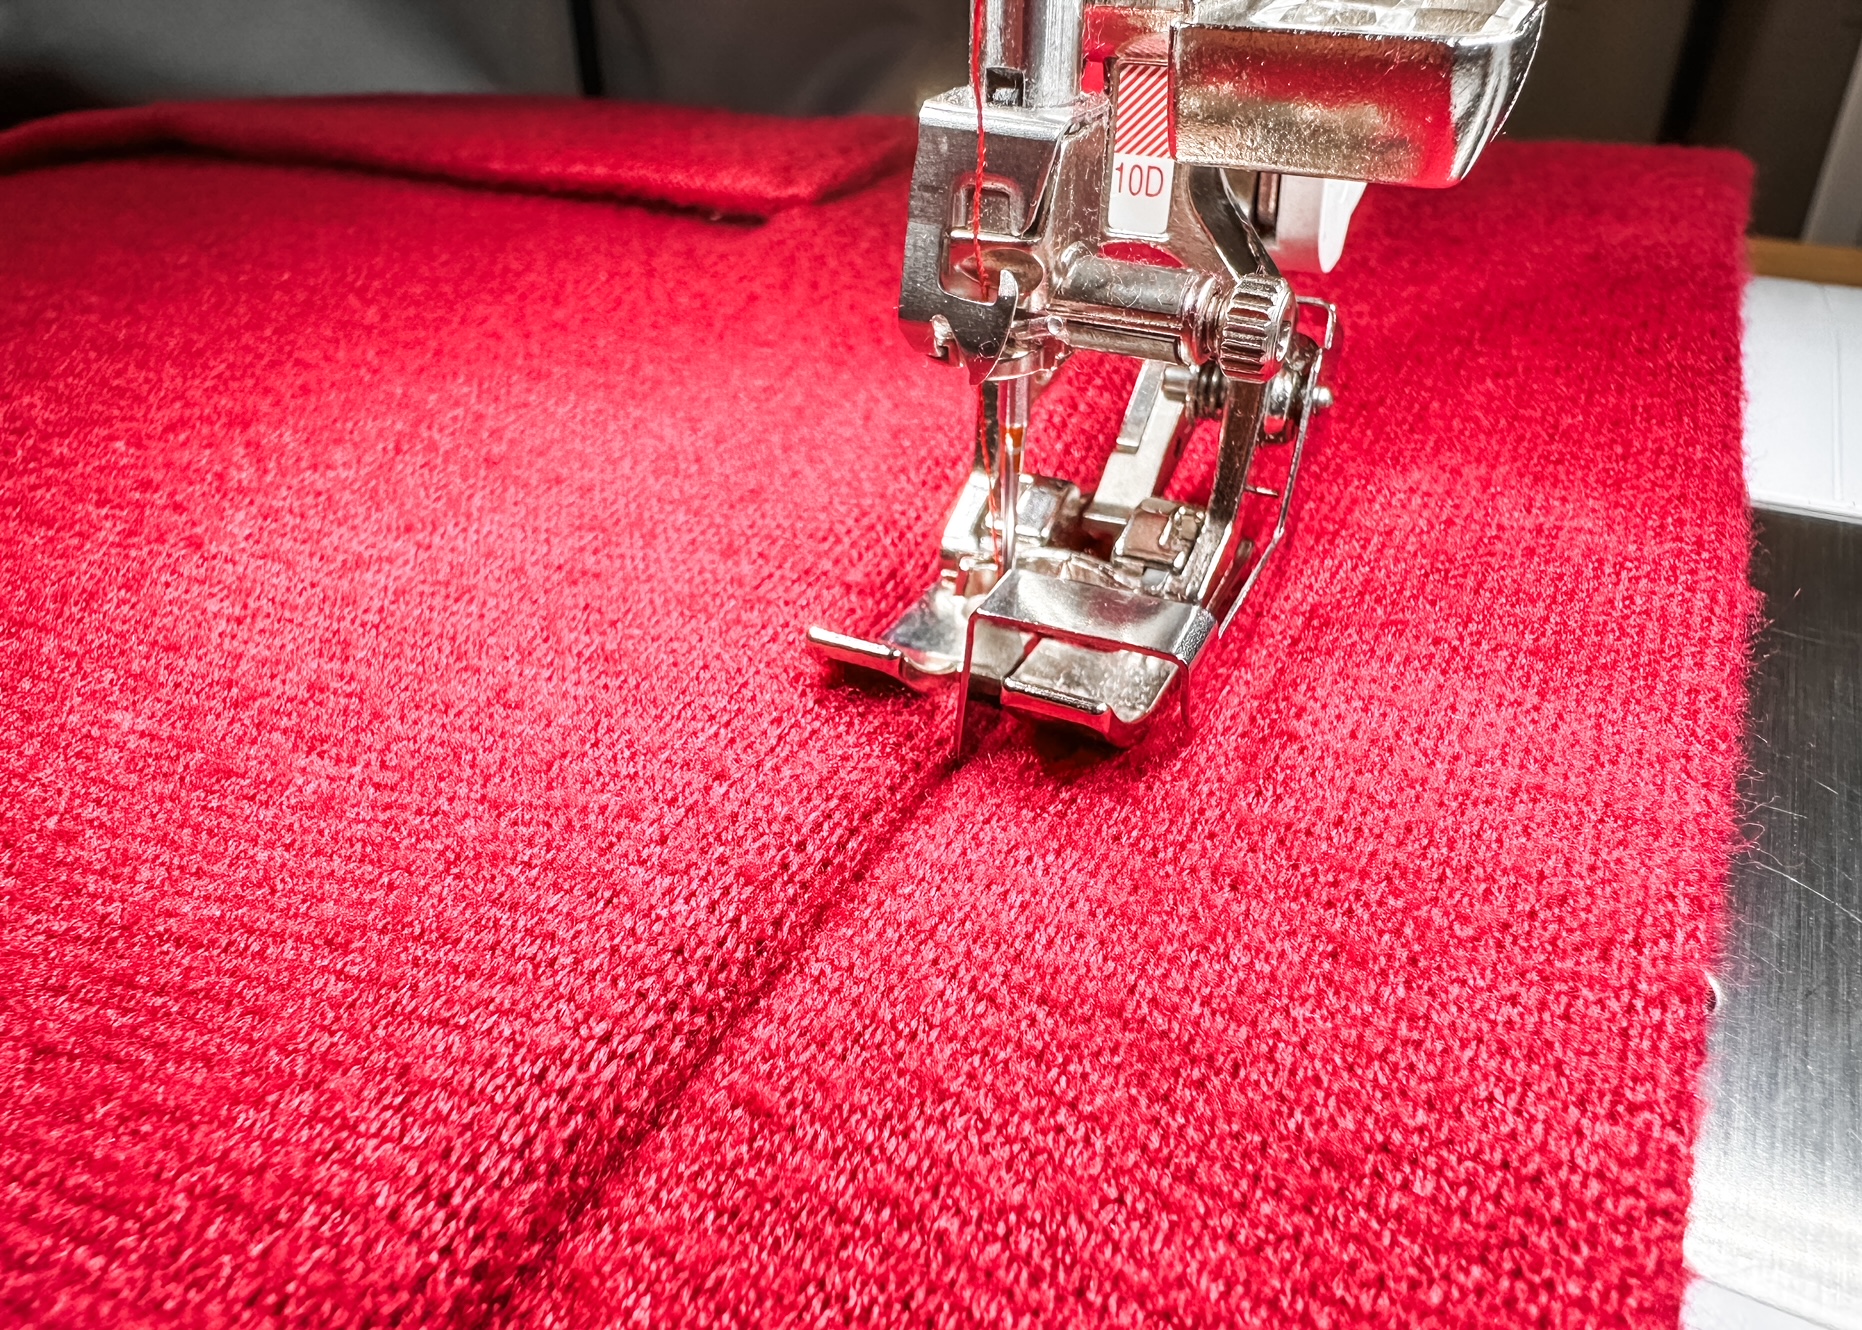
Attach the EdgeStitch Foot #10D to topstitch the band seam to the cardigan. On the right side of the fabric, align the guide with the seam attaching the band to the cardigan. Set the needle position to -5 so the stitches will be on the cardigan and not the band. Stitch from the lower edge of one side of the cardigan, ending at the other lower edge of the cardigan.
Sew the Sleeves
This is when the sleeve placement notches I mentioned in Part 1 will be important. With right sides together, pin the sleeves to the cardigan. Match the start of the front sleeve to the notch marked “Start Front Sleeve”. Continue matching the notches, ending with the notch marked “Back Sleeve”. Notice I still have my safety pin attached indicating the wrong side of the fabric.
Stitch using a 3/8″ seam allowance, finish seam as desired, and press seam towards the sleeve.
Stitch the Side Seams
With right sides together, match the sleeve seam and notches along the sides of the cardigan and pin. Using a 3/8″ seam allowance sew the side seam. Start at the hemline of the cardigan, sew up to the underarm, pivot and continue sewing to the sleeve hem. Finish seam as desired and press toward the back of the cardigan.

Hem the Como Knit Cardi
Finish the lower edge of the cardigan. If your knit doesn’t ravel you can leave it unfinished. Make a small clip in the seam at the fold line for the hem and press the hem portion of the seam toward the front. This will help with some of the bulk at that side seam. Apply Steam-A-Seam at the bottom edge of the hem on the wrong side of the fabric.
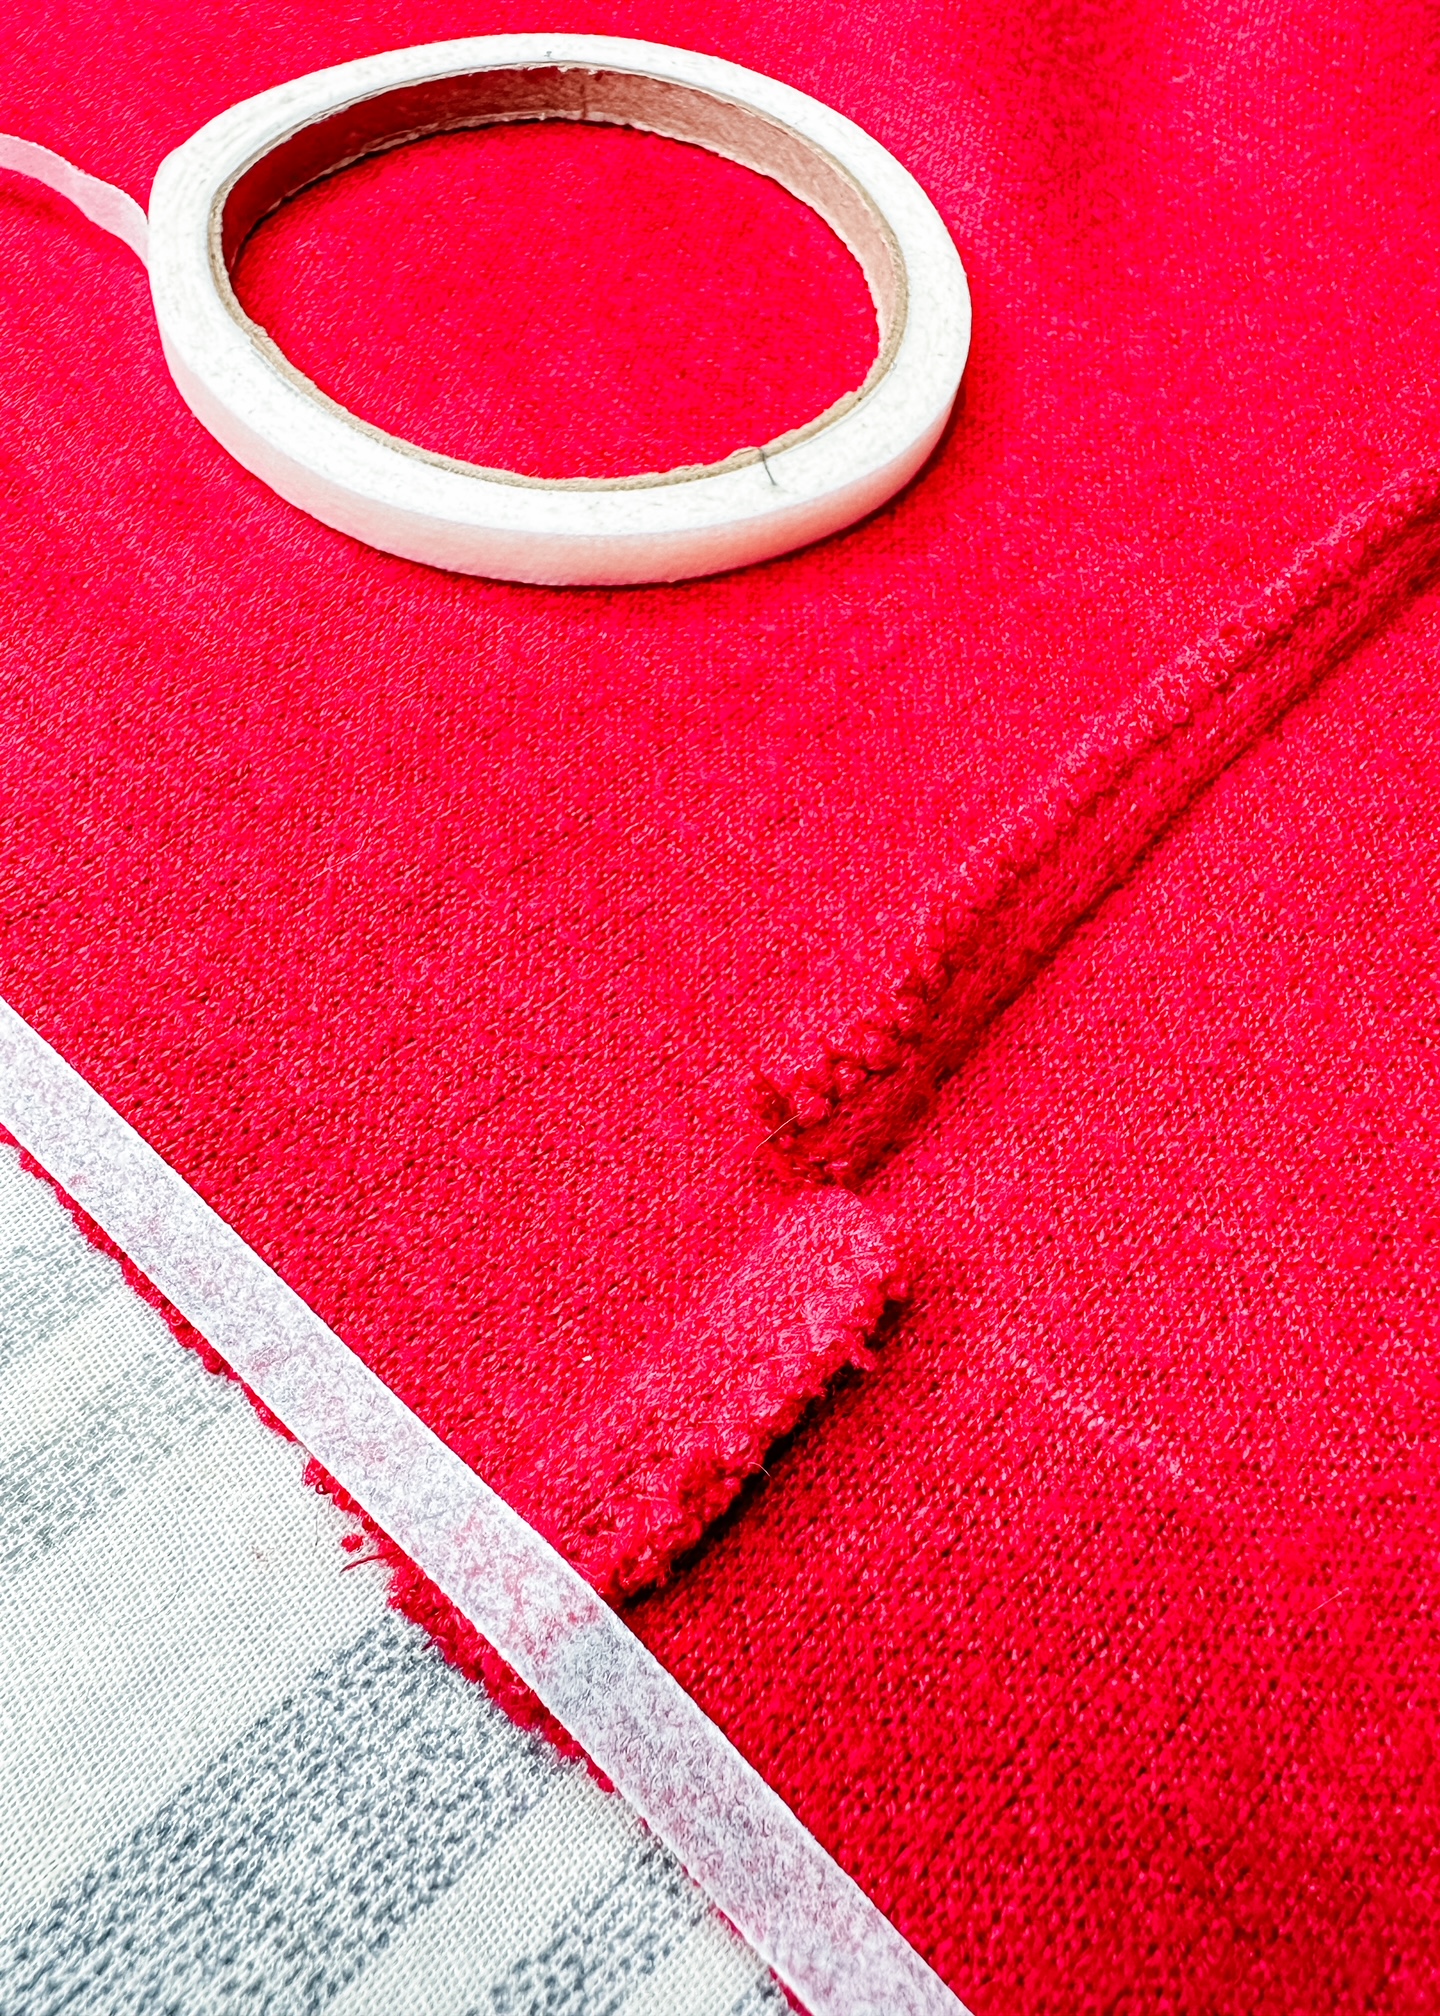
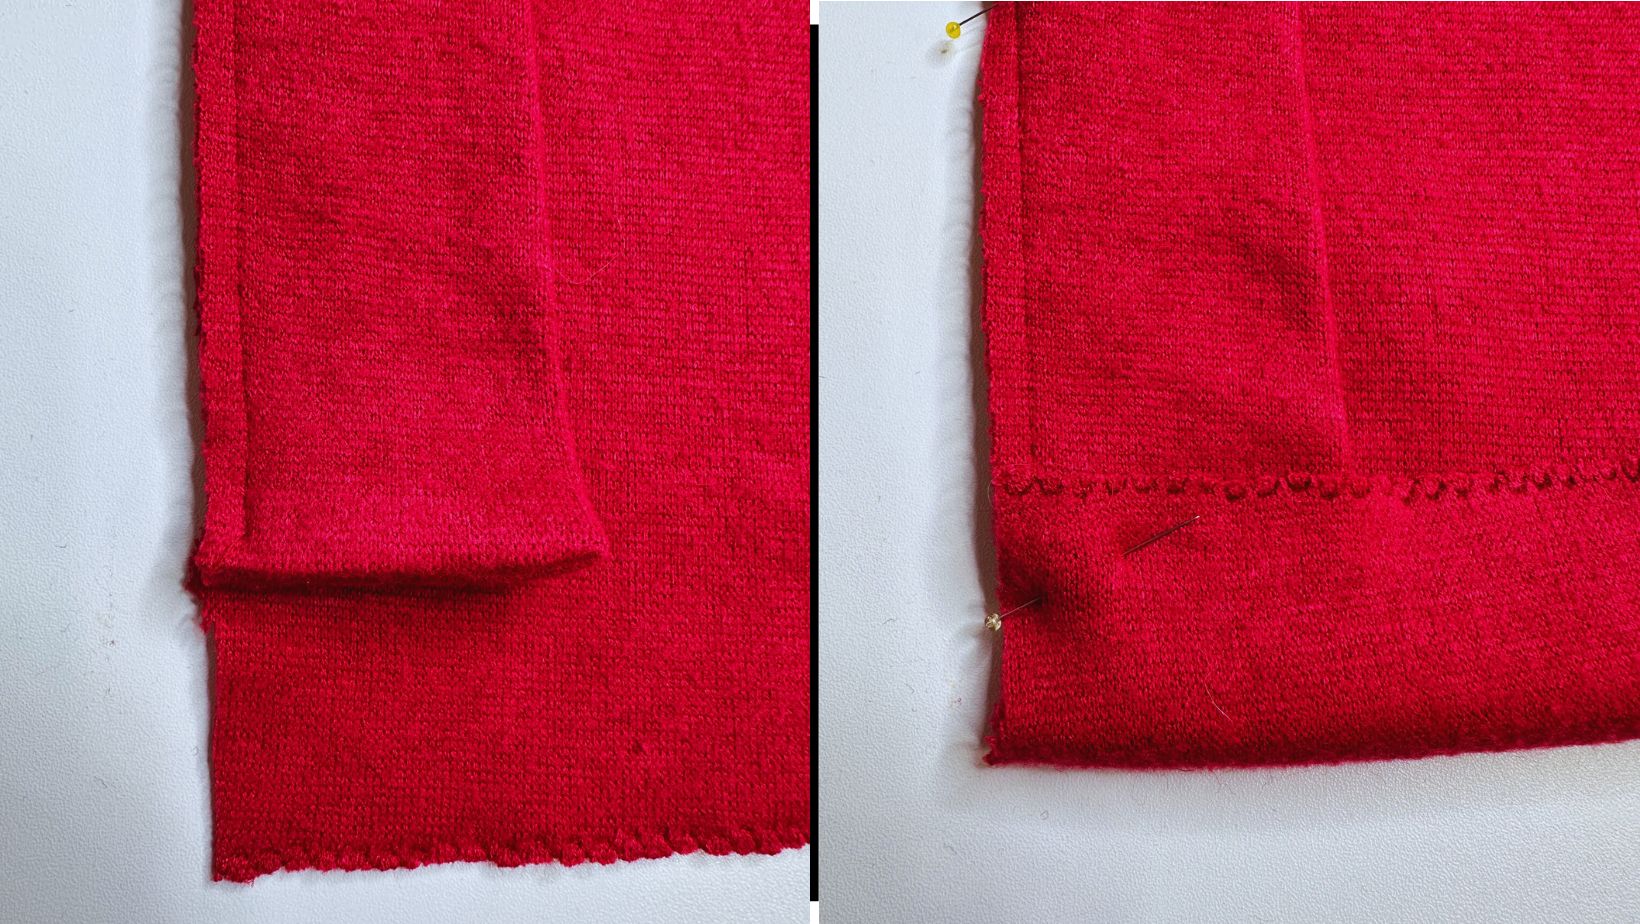
Remove the tape portion of the Steam-A-Seam, fold the hem up and press in place. Stitch the hem from the right side of the garment. You can lightly mark the stitch line on the right side of the fabric, or use a seam guide. The seam guide is an easy way to make sure the stitching is equal distance from the hem. Just attach it to your foot, set the distance and sew keeping the hem edge of the fabric against the guide.
Apply Steam-A-Seam to the inside of the bottom edge of each sleeve. Remove the tape portion of the Steam-A-Seam, fold the sleeve hems up and press in place. Stitch the sleeve hems from the right side of the garment.
You’ve completed your Como Knit Cardi! Wear it proudly and shout to the world that you sewed it yourself. Now you know we want to see your fabulous make, so be sure to take a picture and tag me (@TheSharonSews) and BERNINA (@BERNINAUSA) on Instagram.
Used Products


What you might also like


3 comments on “Style Arc Como Knit Cardi, Part Three”
-
-
Hi!
No, not at all. It will depend on the fabric you are using. The red knit that I used was quite beefy and did not need any interfacing. I chose not to use interfacing on the purple cardi as I wanted a soft, drapey look but lightweight interfacing on the front and neck band would’ve been appropriate.Hope that helps! Let me know if you have other questions.
-
Thanks Sharon. I’ve finished. I feel the interfacing added strength so the detail didn’t get lost. I made the cordial cardigan from Style Arc.
-
Leave a Reply
You must be logged in to post a comment.

Hi Sharon, is it a mistake to add a lightweight interfacing to the front/neck band?