How to Make a Temperature Quilt, Part Three

Learn how to make a simple temperature quilt that chronicles daily high temperatures throughout the period of a year. In Part 1, learn more about temperature quilts and how to plan to make this simple version that chronicles high temperatures daily through the period of a year. In Part 2, learn how to assemble the blocks together and prepare the quilt top for basting. In Part 3, learn how to baste, quilt, and bind the temperature quilt.
If you have a preferred method for basting your quilts, go for it! I prefer pin basting on a tabletop, and will show this process step-by-step here.
Prepare the Backing and Batting to Make a Temperature Quilt
You will need a piece of backing fabric at least 4″ – 6″ wider than the quilt top. The finished top should measure about 56 1/2″ wide by 62 – 63″ long, which will require backing fabric 61-63″ wide and 66-68″ long. You may choose to purchase one piece of wide quilt backing and cut it to size or choose to piece together a backing from two pieces of 45″ wide fabric. Press the backing well to remove any wrinkles or set all seams flat. Roughly cut batting to the same size as backing.

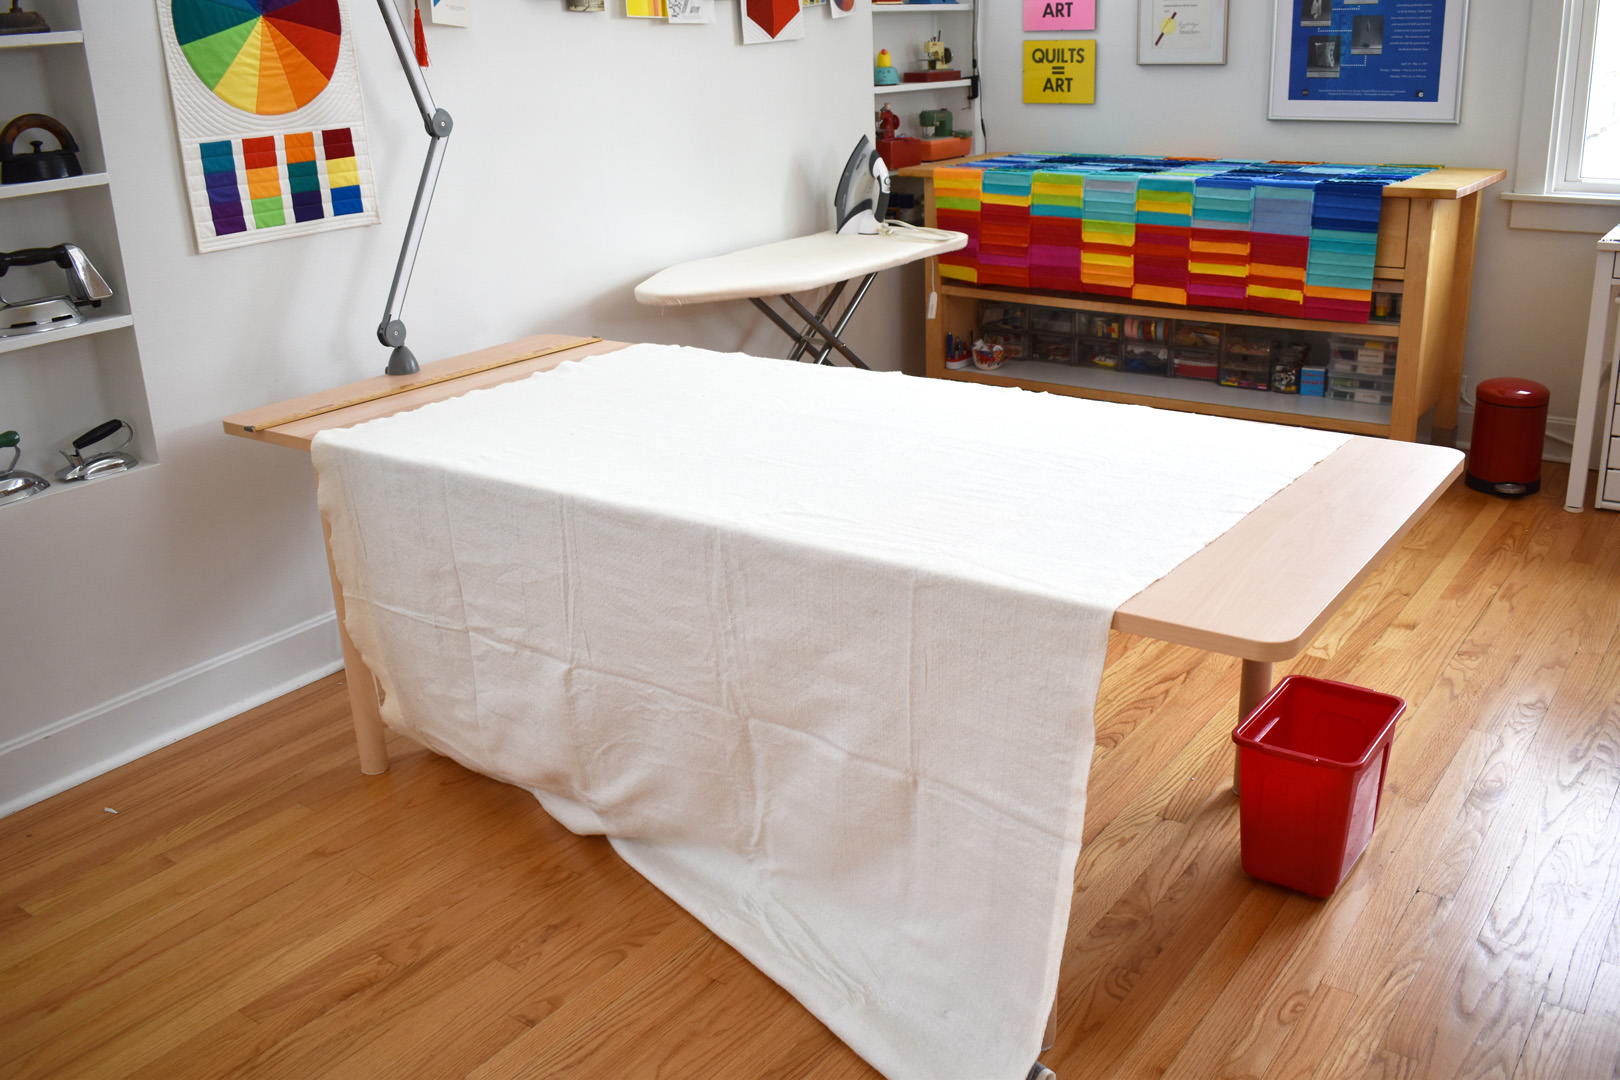
I use a table to baste the quilt. I have the freshly pressed quilt top and batting nearby. First, I smooth out the quilt backing on the table top.

I lay out the batting and fit it to the backing, moving both back and forth on the tabletop to make sure the batting isn’t set crooked or wonky on the backing. Then I gently move both batting and backing to one side and begin securing the backing fabric to the tabletop with blue painter’s tape.
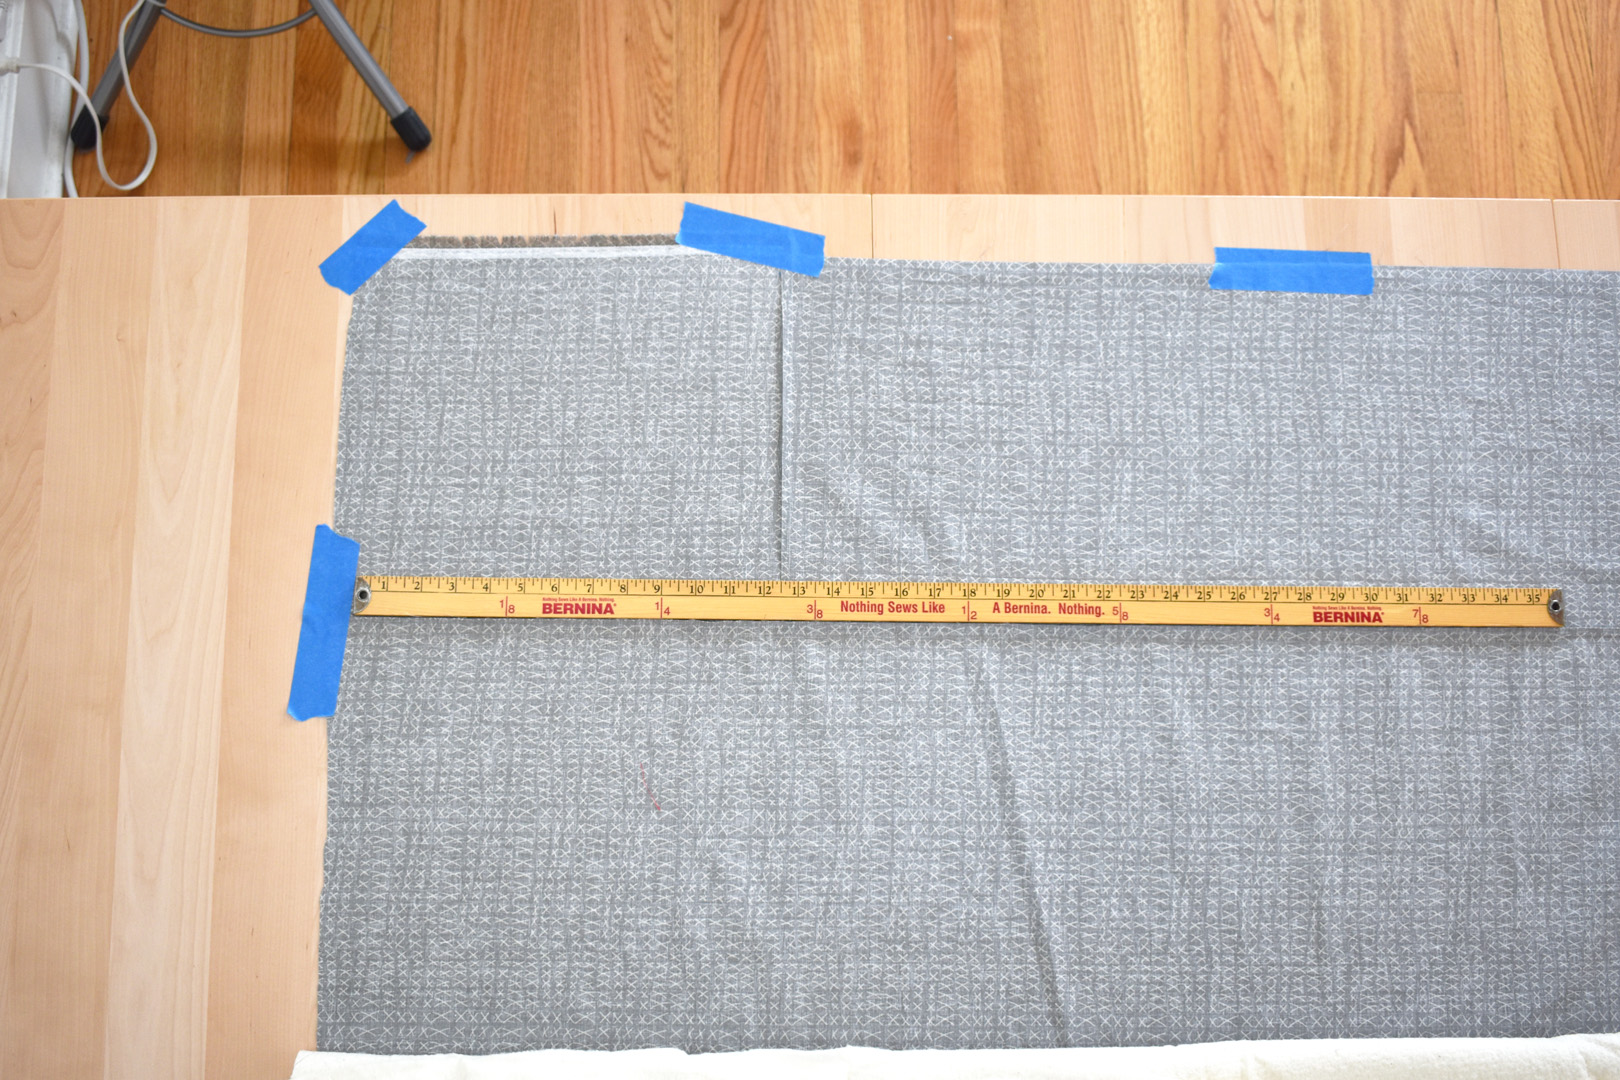
Carefully fold back the batting to start securing the backing fabric to the table with blue painter’s tape. This keeps the backing from shifting or puckering during the basting process. If you have a seam in your backing, use a long ruler or yardstick to make sure you are securing the backing to the table with straight seams.
Once the backing is firmly secured on the top and sides to the table, carefully fold back the batting and smooth out all the wrinkles. Begin in the middle of the table, pushing out the batting to all sides.
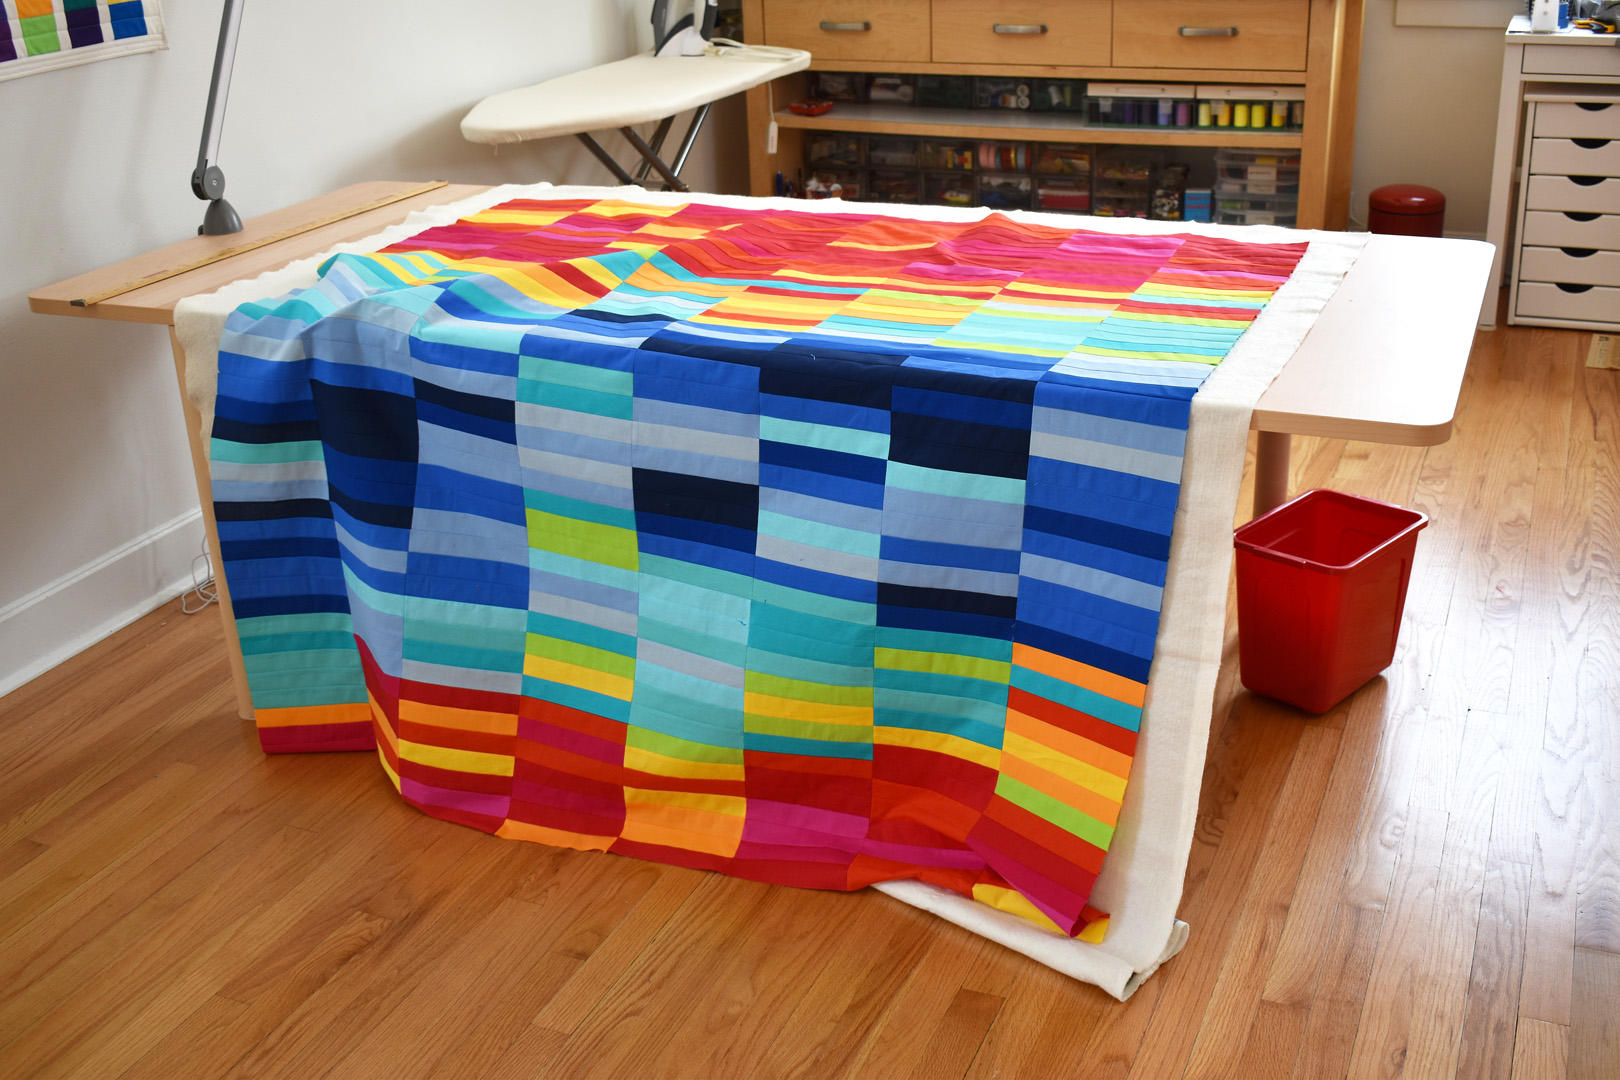
Add the quilt top on top of the batting, and be mindful that the top is centered on the backing. There’s nothing worse than basting an entire quilt only to flip it over later to discover some of the backing hasn’t fully covered the quilt top! Smooth out the quilt top with your hands, working from the center to the edges.
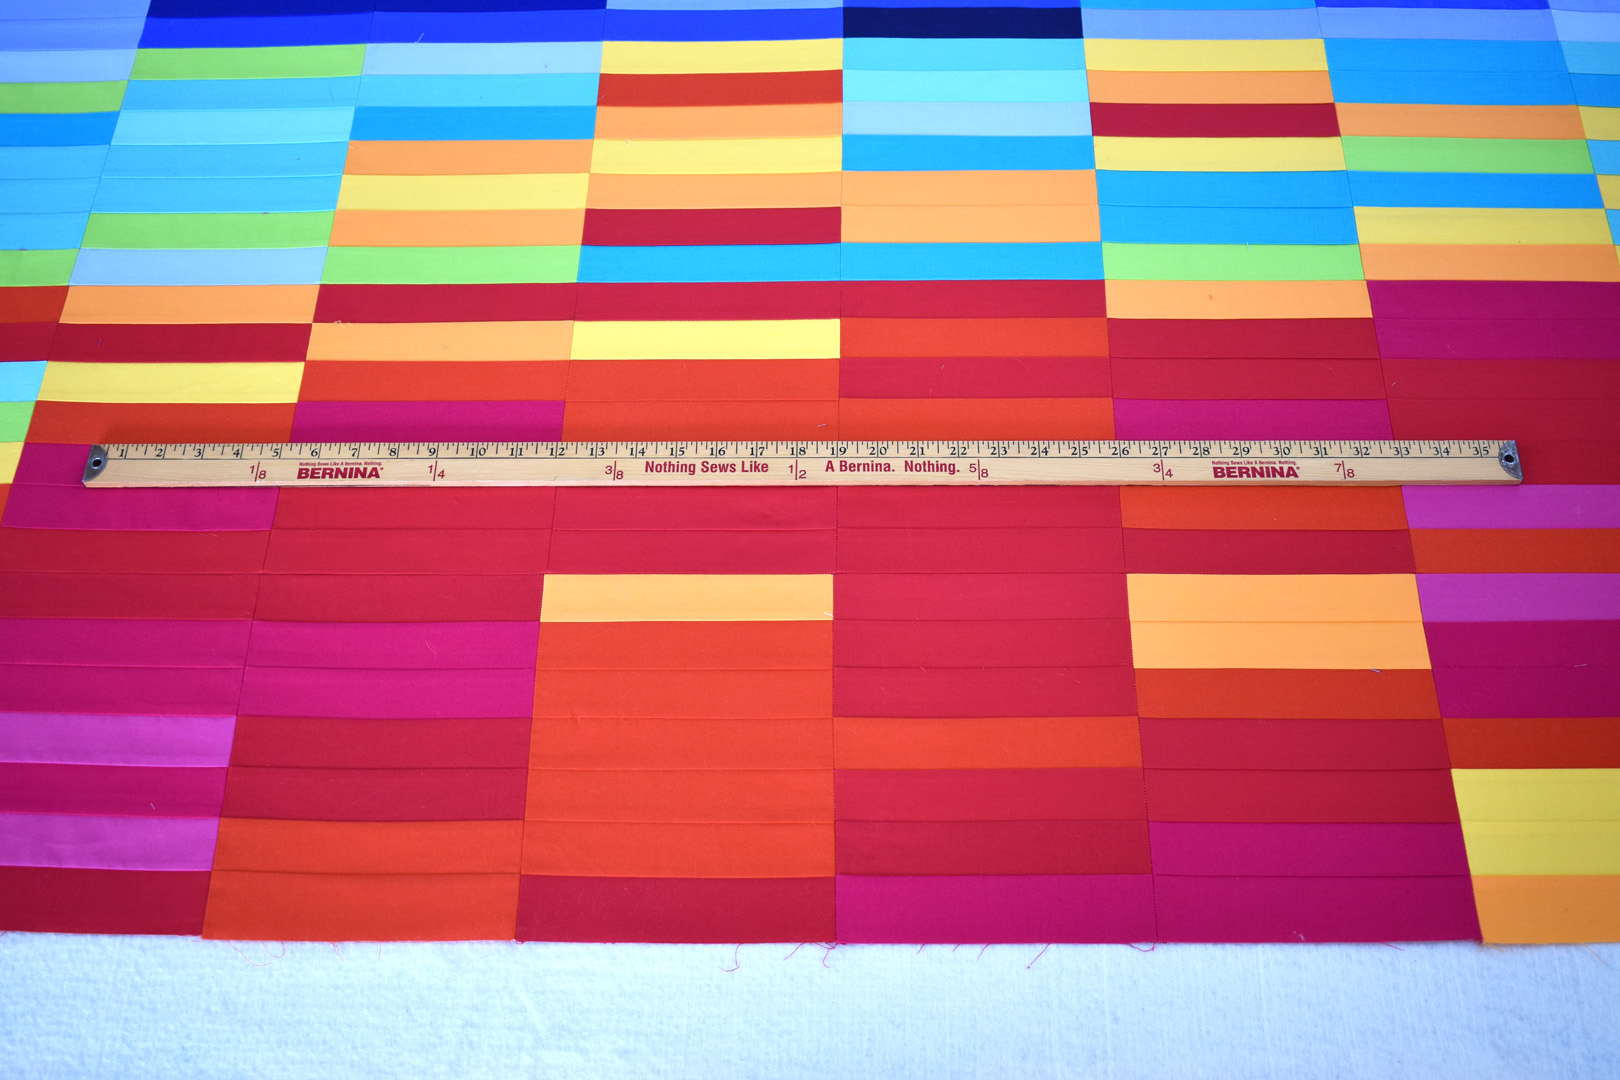
Use your ruler to make sure that the patchwork seams in the top are straight. You will find that gently moving your hands against the top in one direction or the other will begin to move the seams.

Then use the ruler to check all the vertical seams in the quilt, moving a little bit here and there if needed.

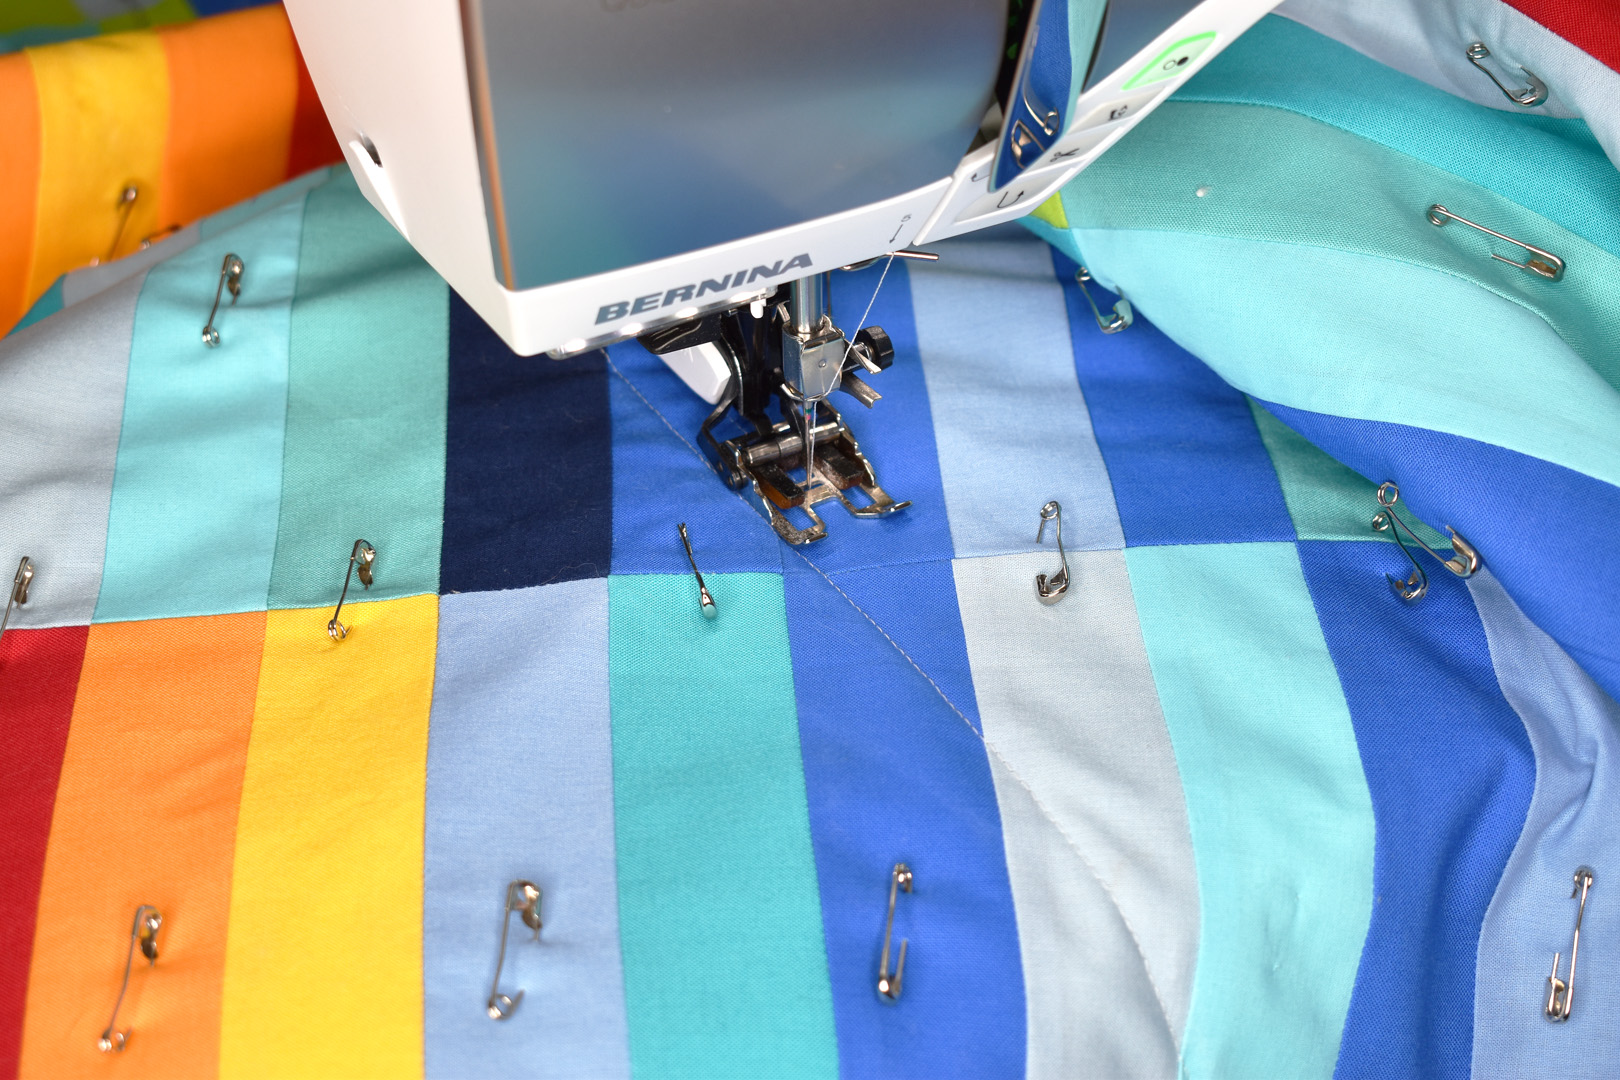
When the top is perfectly set on the quilt sandwich, it’s time to start pinning. Completely baste the section of the quilt that is currently on the table. When basted, carefully remove the blue painter’s tape from the edges of the backing and move the quilt sandwich down. Leave about 3-4″ of basted quilt on the leading edge of the table.
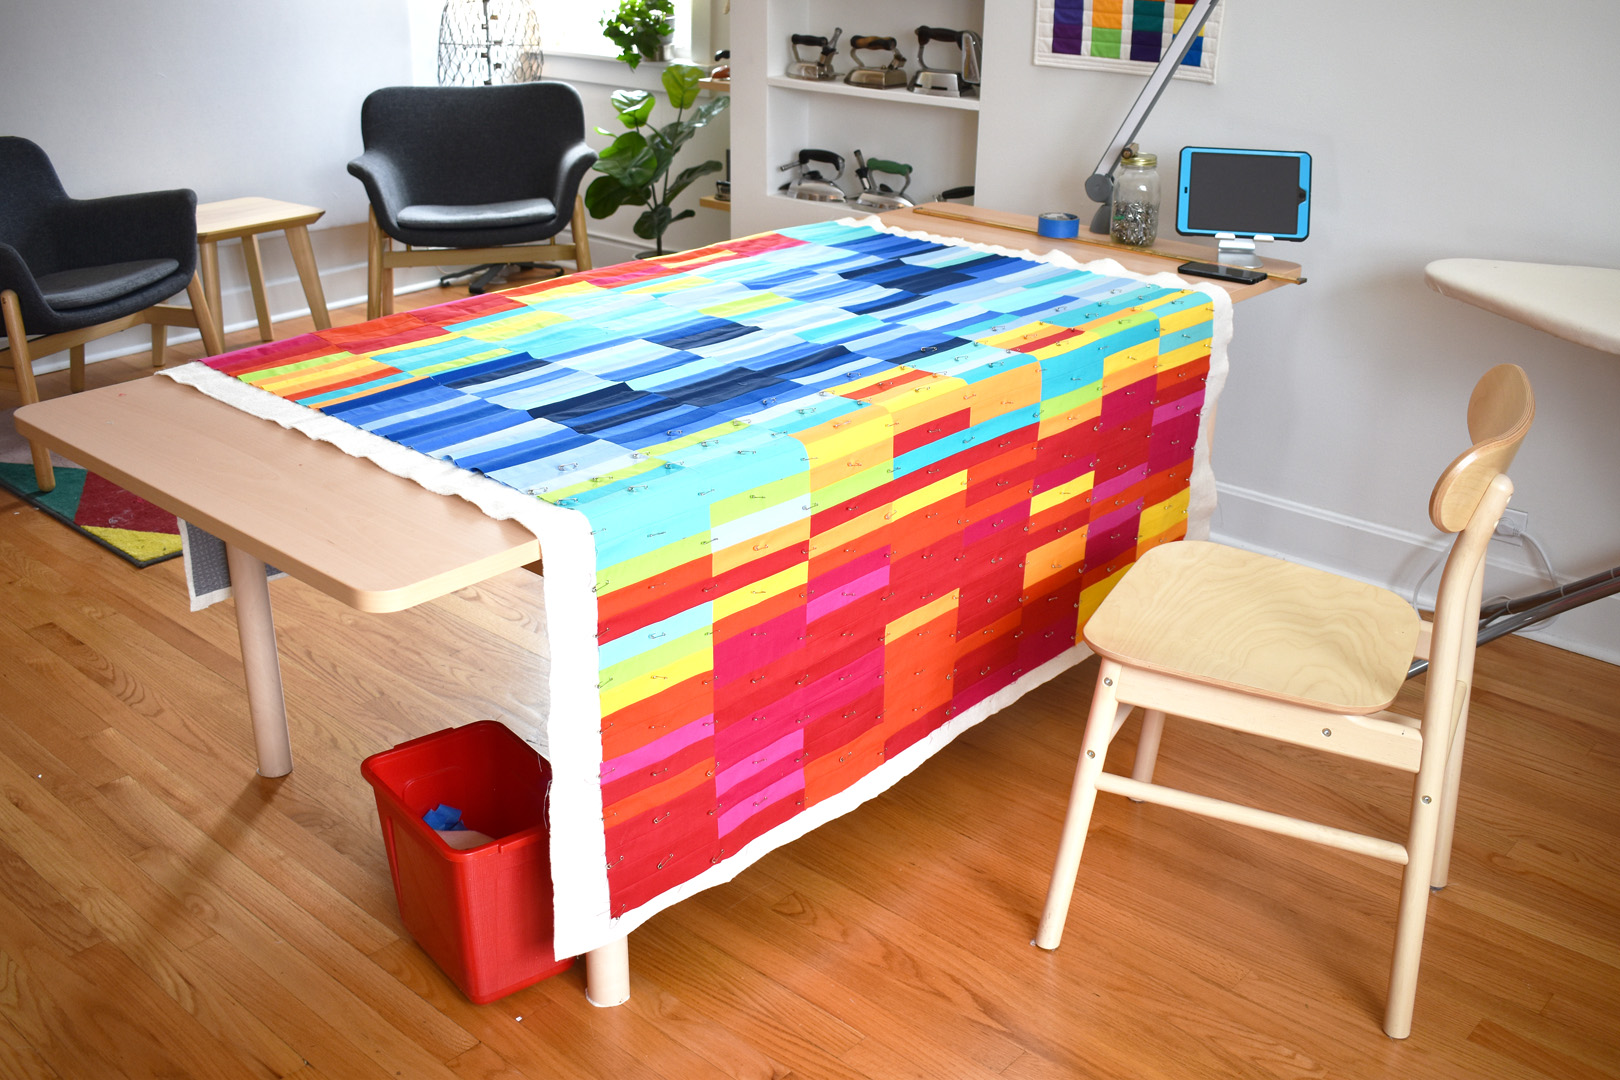
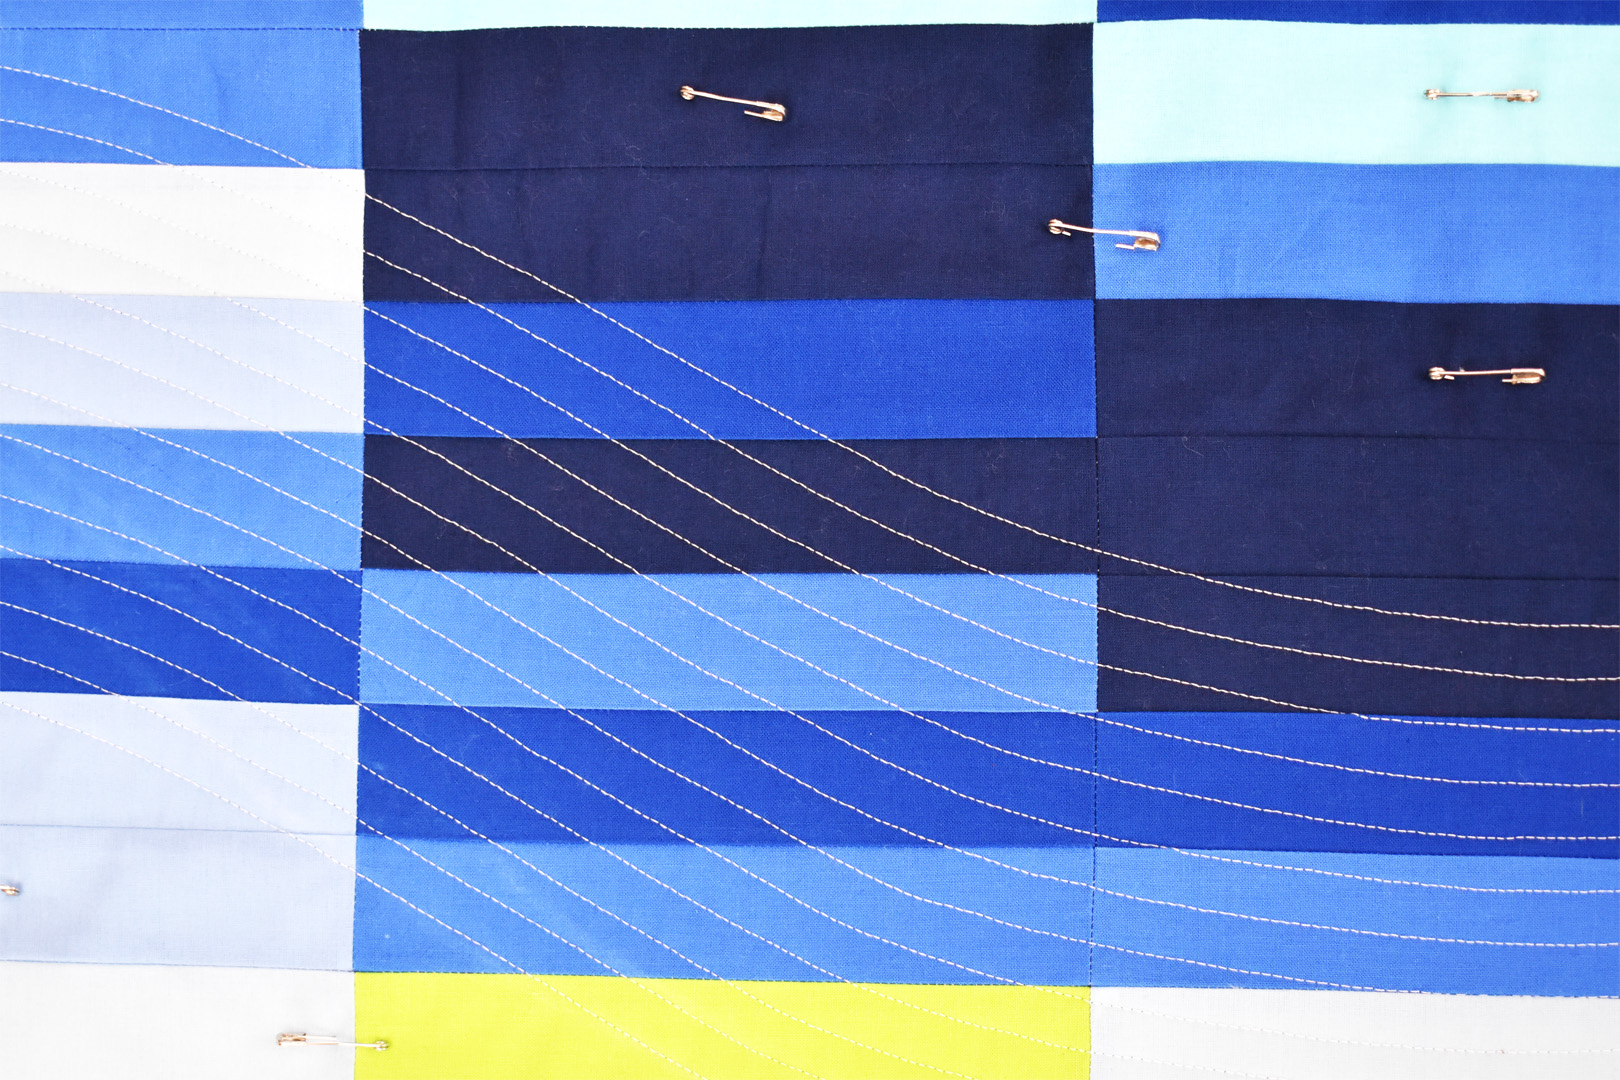
Here’s my table in mid-basting. You can see I keep the blue tape, ruler, and pins on the table top. Before moving on, tape the edges of the backing under the currently basted section of quilt to the tabletop.

You can barely see the blue painter’s tape there peeking out under the batting in the photo above. This step is important to anchor the quilt sandwich together during these next steps. Carefully roll back the un-basted section of quilt top to reveal the batting.

Fold the batting back to reveal the backing. Using the blue painter’s tape, secure the backing to the table. Use your hands to smooth out the backing well, as any wrinkles in the backing will become puckers later.
Continue with same steps above for smoothing out the batting, then the quilt top, and basting this section. When basted, move on in the same way to finish basting the last section of the quilt.
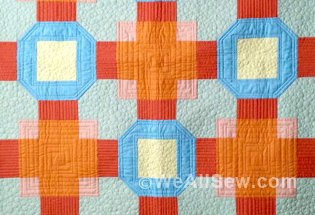
How to Add Quilting to Make a Simple Temperature Quilt
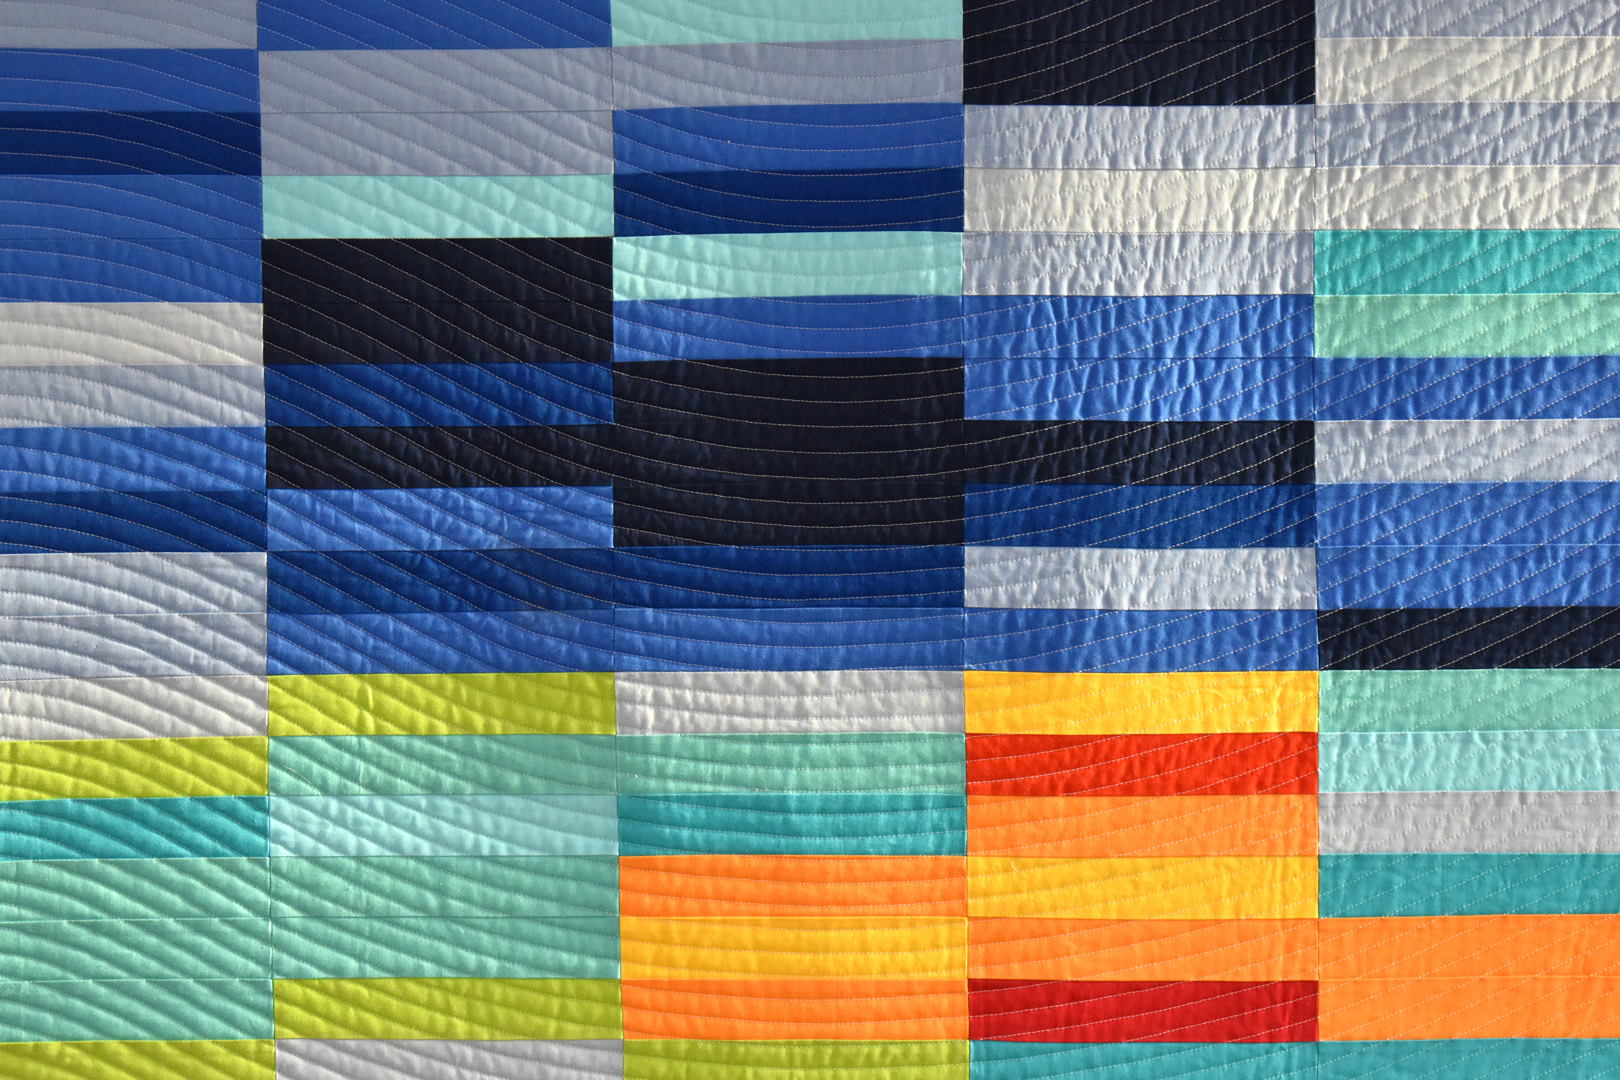
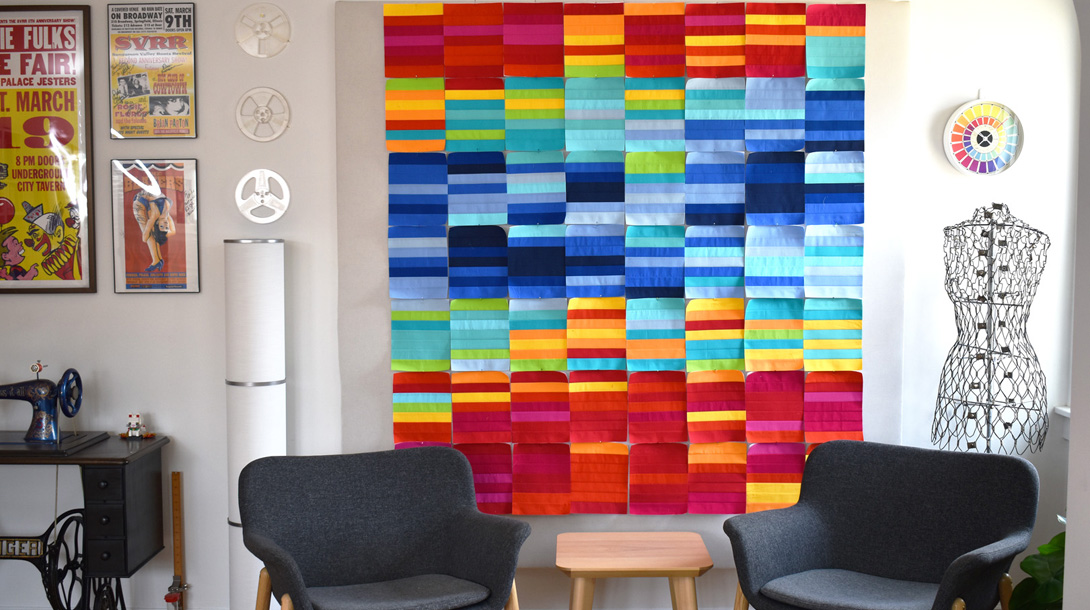
I added straight line quilting in a simple wave pattern to mimic the ups and downs in temperature throughout the year. This quilt lends itself to virtually any type of quilting stitches, from simple stitch-in-the-ditch quilting to a basic all-over FMQ pattern. The choice is yours! Read on to see step-by-step how I created this simple wave pattern in straight line quilting.

I used a tailor’s chalk that wipes away easily from fabric to free-hand draw a simple wave in the center of the quilt. To do this, I marked the middle of the quilt with blue painter’s tape seen in the photo above. Then I gently and very lightly marked a simple wave, dipping down and rising up, across the quilt top. When I saw a shape that looked good, I marked it darkly with chalk. This will be the starting line for the straight line quilting.
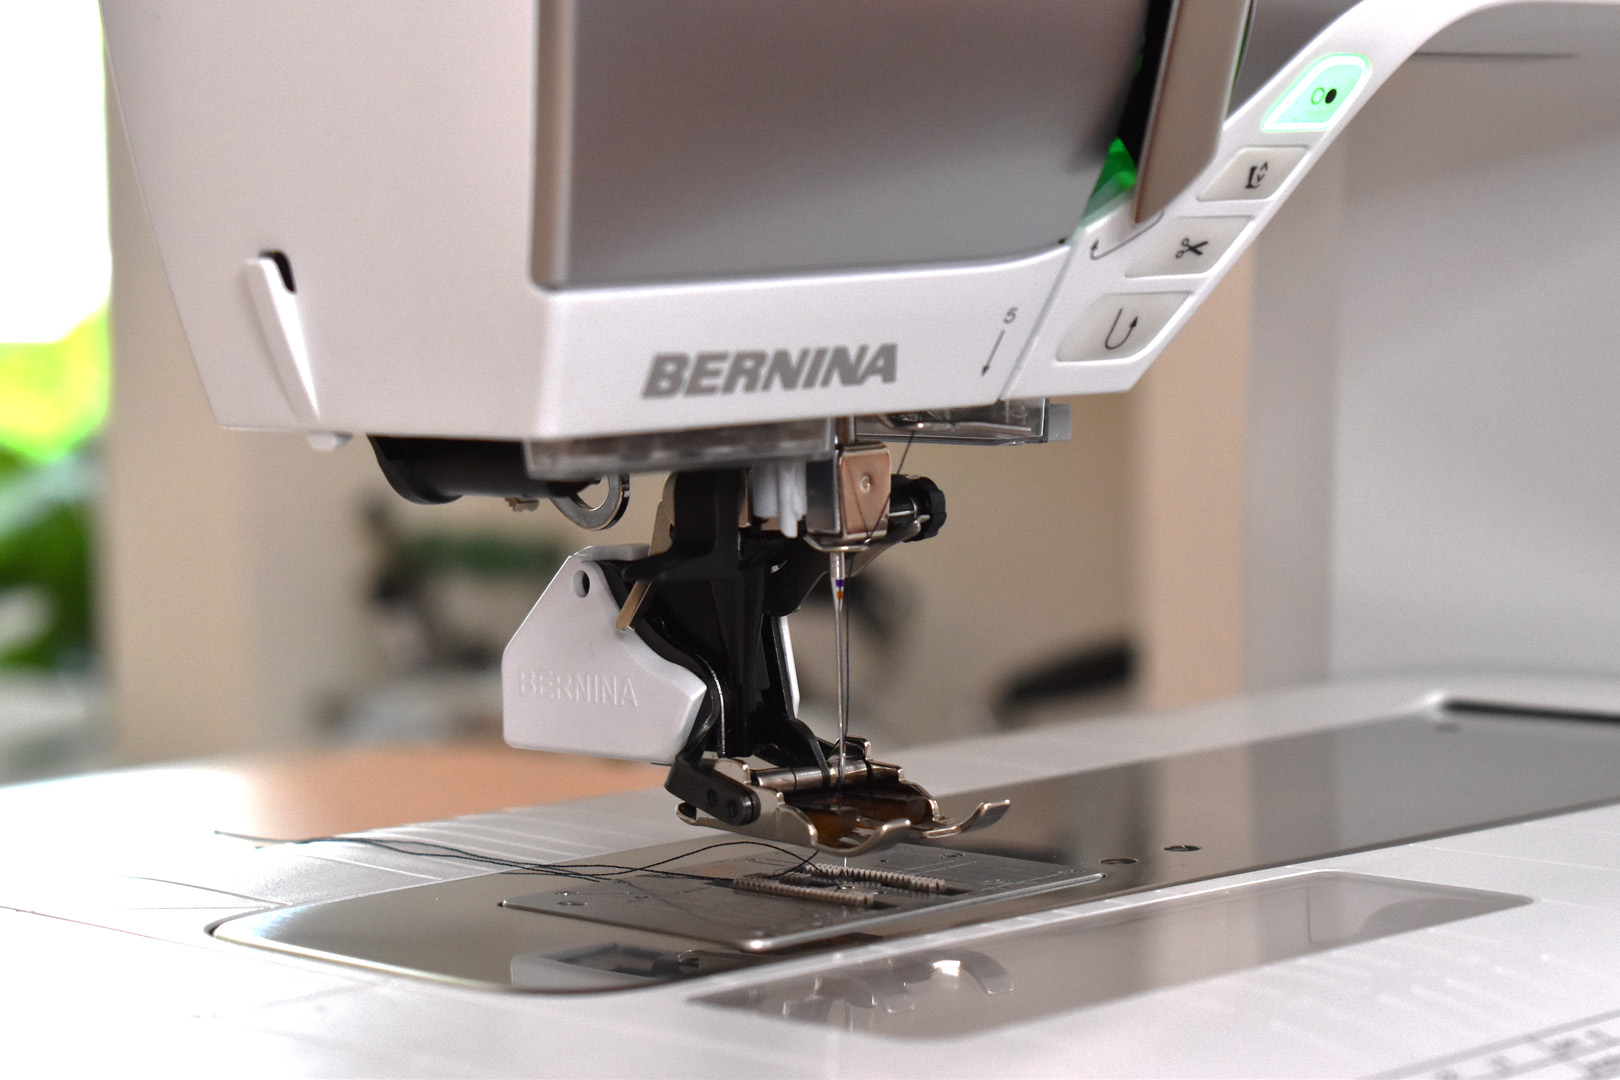
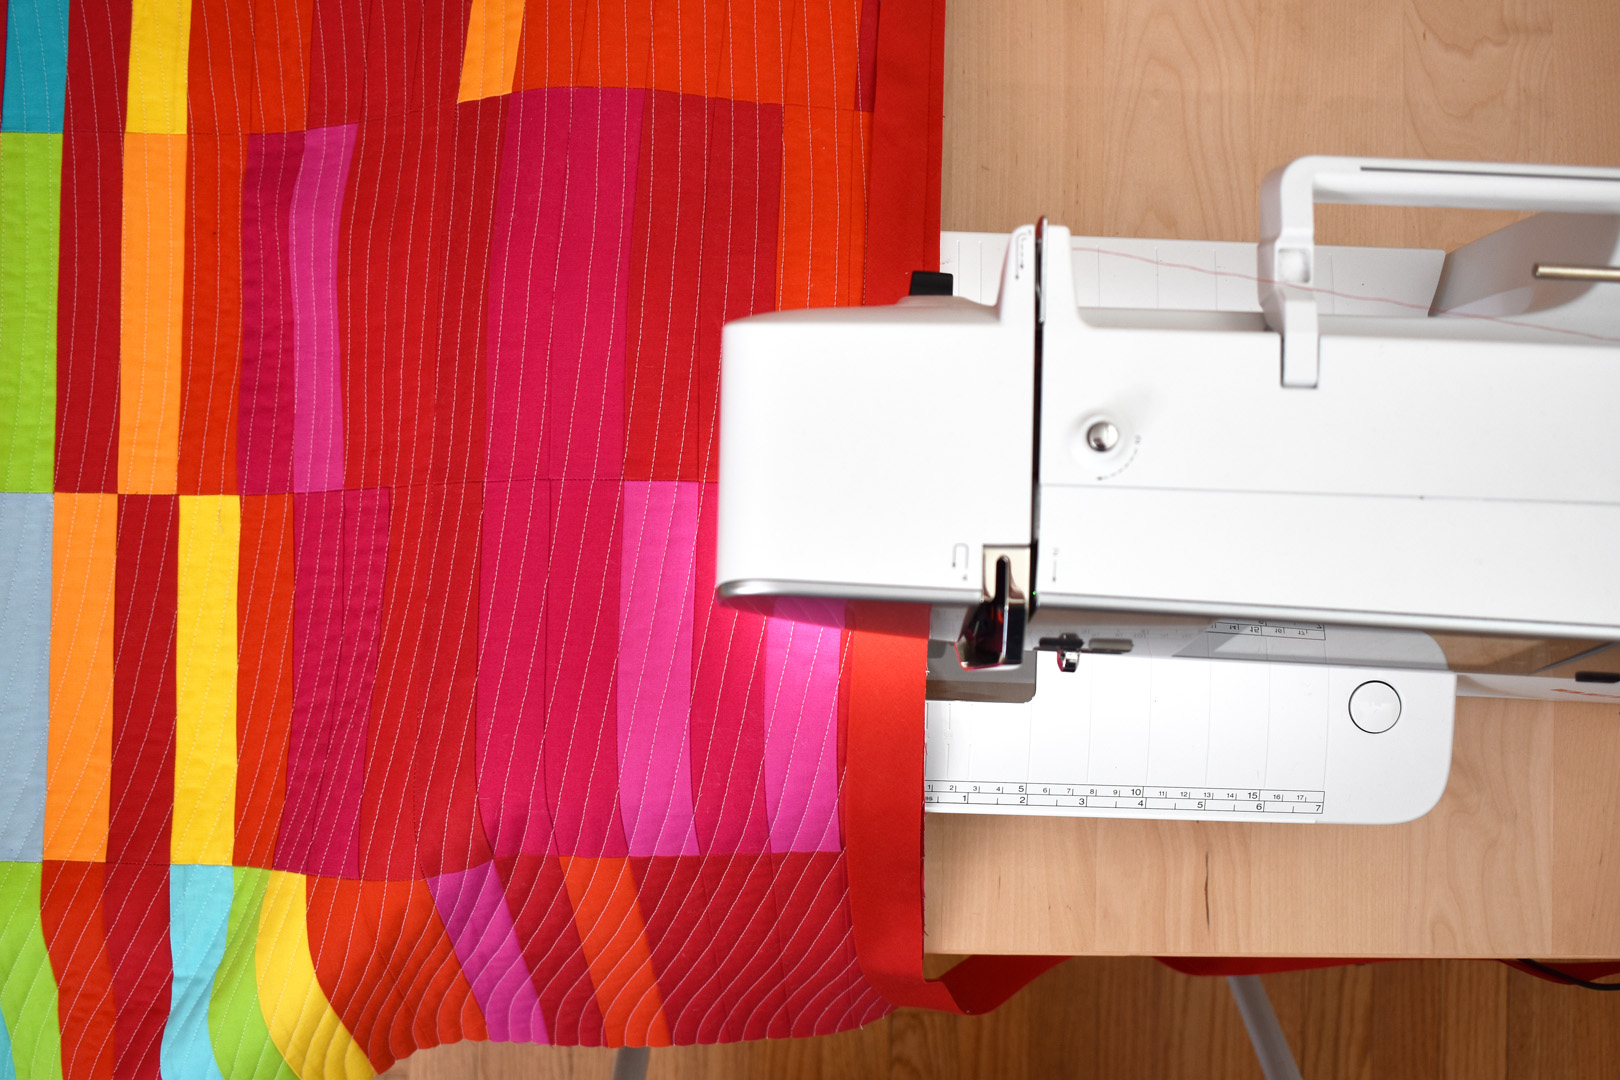
Set up your sewing machine with Walking Foot #50, a straight stitch needle plate, and quilting needle (I am using a size 80 needle). Thread your machine with quilting thread of choice, I use 100% polyester Isacord embroidery thread for quilting; it’s smooth, has a bit of sheen, and is strong. I guarantee this quilt becomes a couch-favorite and will be snuggled, smooshed, and washed often! I like the strength and durability of polyester thread for quilts that will be much-loved.
Begin by stitching on the chalk line, following the line with the needle. Once stitched, use the center line of stitching to follow with the edge of Walking Foot #50. The edge of the BERNINA Walking Foot is exactly 1/2″ from the needle, so by following the previous line of stitching with the edge of your foot, you are creating perfectly spaced 1/2″ lines of quilting.
After making a few lines of stitching you will see the wave pattern appear. Continue quilting both sides of the quilt until fully quilted.
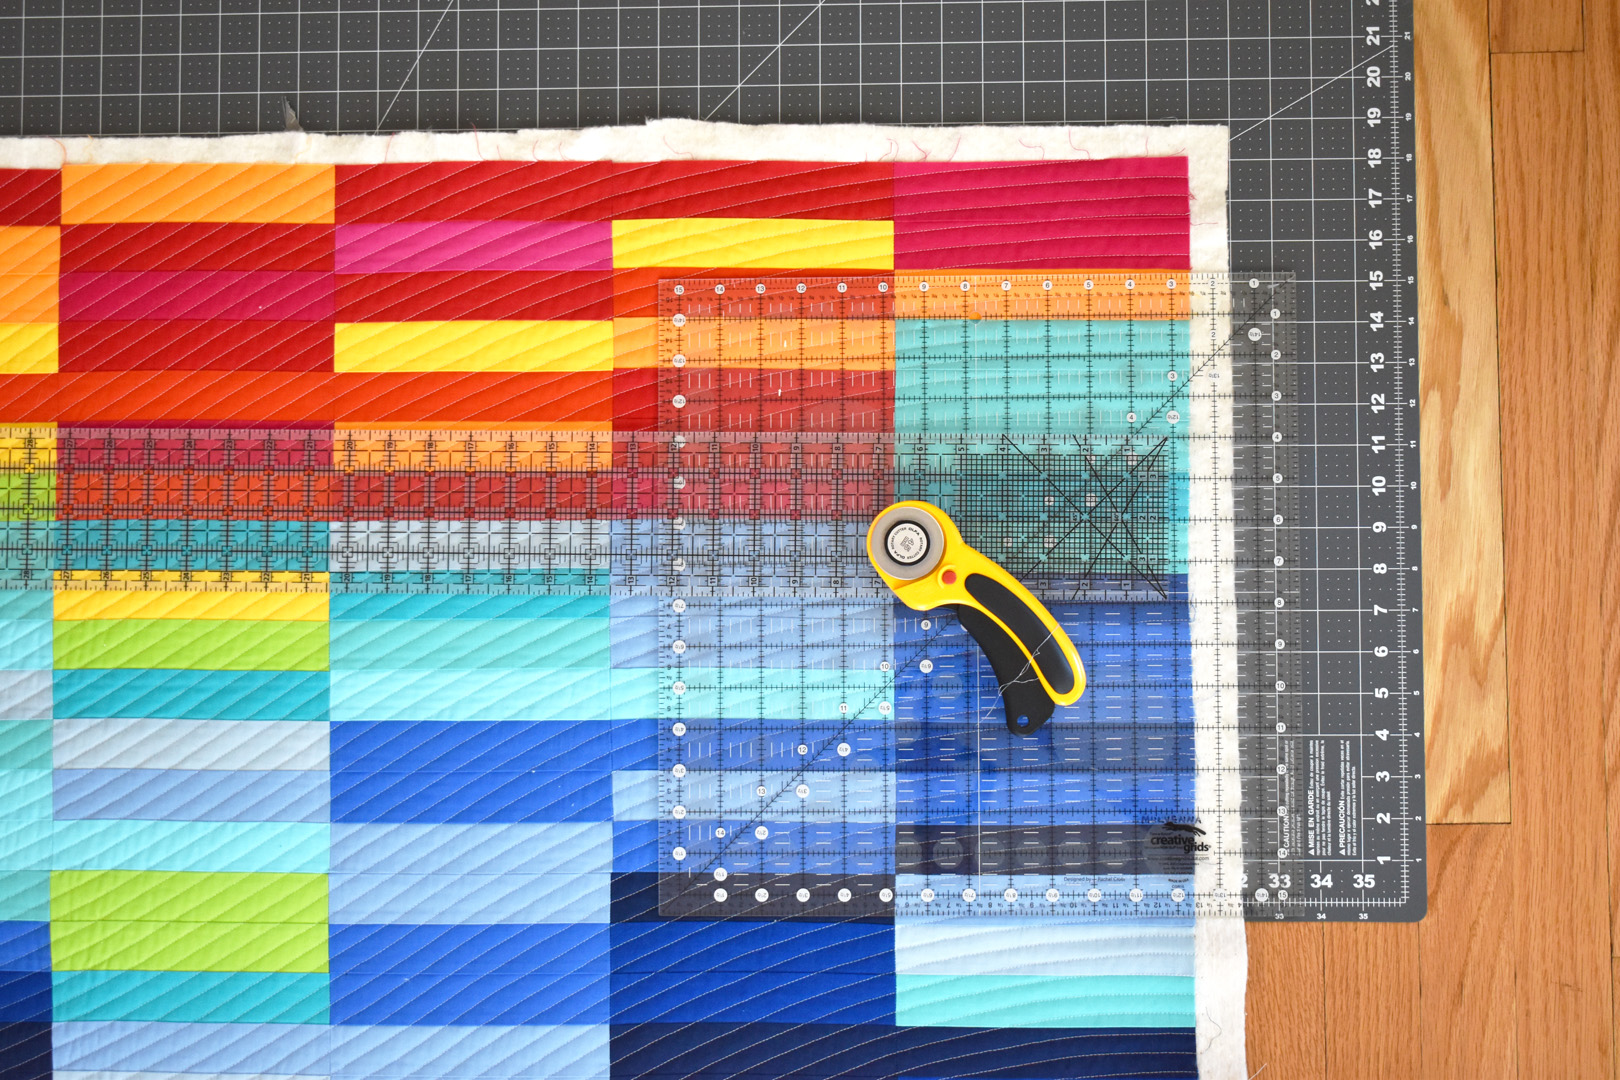
Trim the edges of the quilt using a large cutting mat, ruler and rotary cutter.
Create binding to finish the edges of the quilt. I chose a red color that appears often throughout the quilt. You will need a minimum of 240 inches, or 6 2/3 yards of 2 1/2″ wide double fold binding for this quilt. Need help learning how to create and sew the binding? Use this double-fold binding tutorial from here on WeAllSew.

Sew the binding to the edges of the quilt with a 1/4″ seam using Walking Foot #50.
Follow the directions in the tutorial for mitering the corners of the binding, and connecting the edges of the binding.
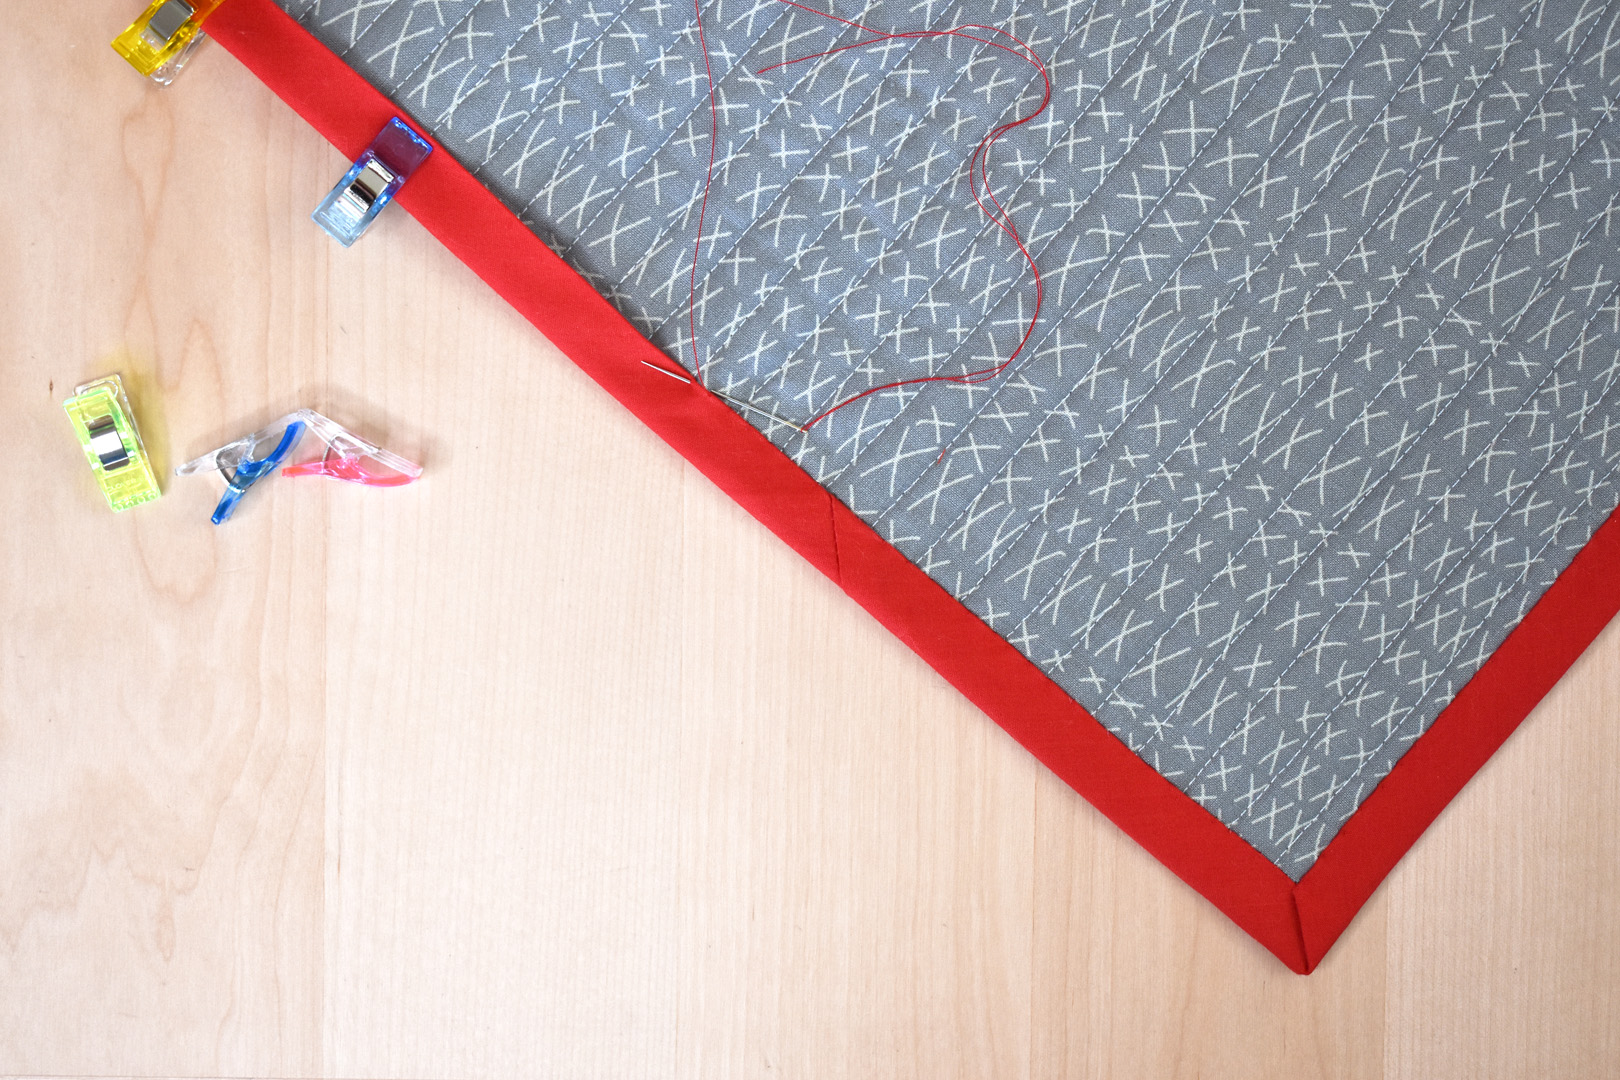
Fold the binding to the backside of the quilt and finish with hand stitching.
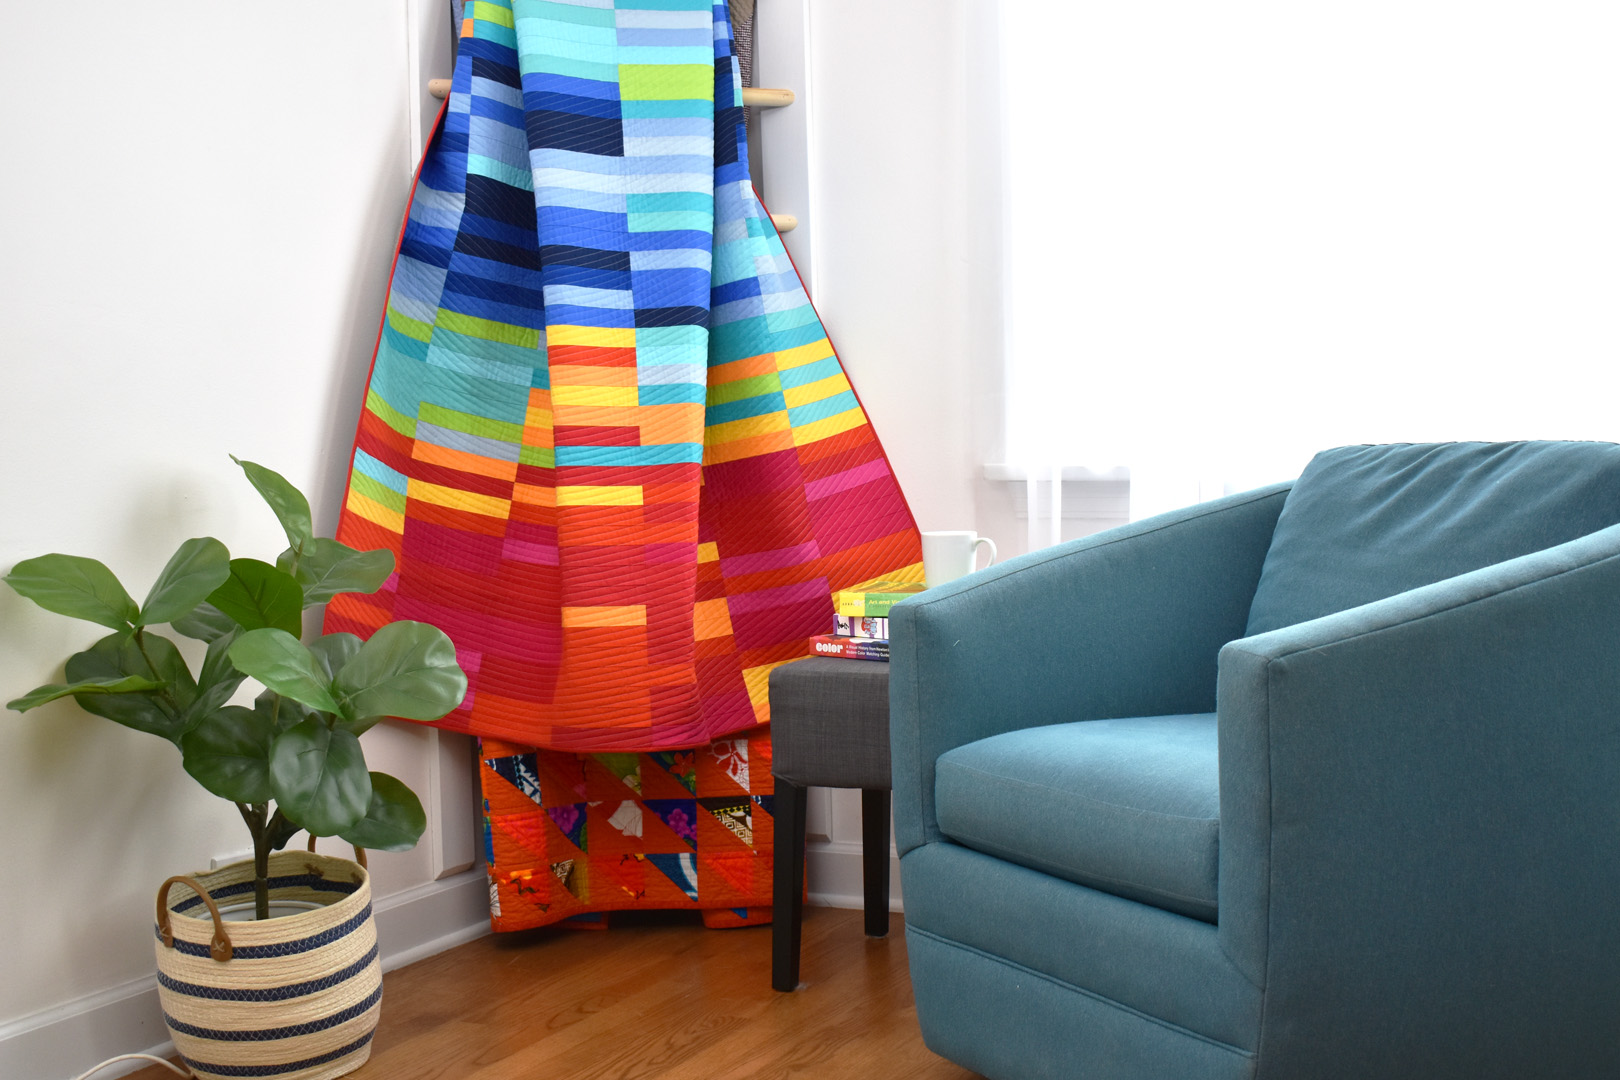
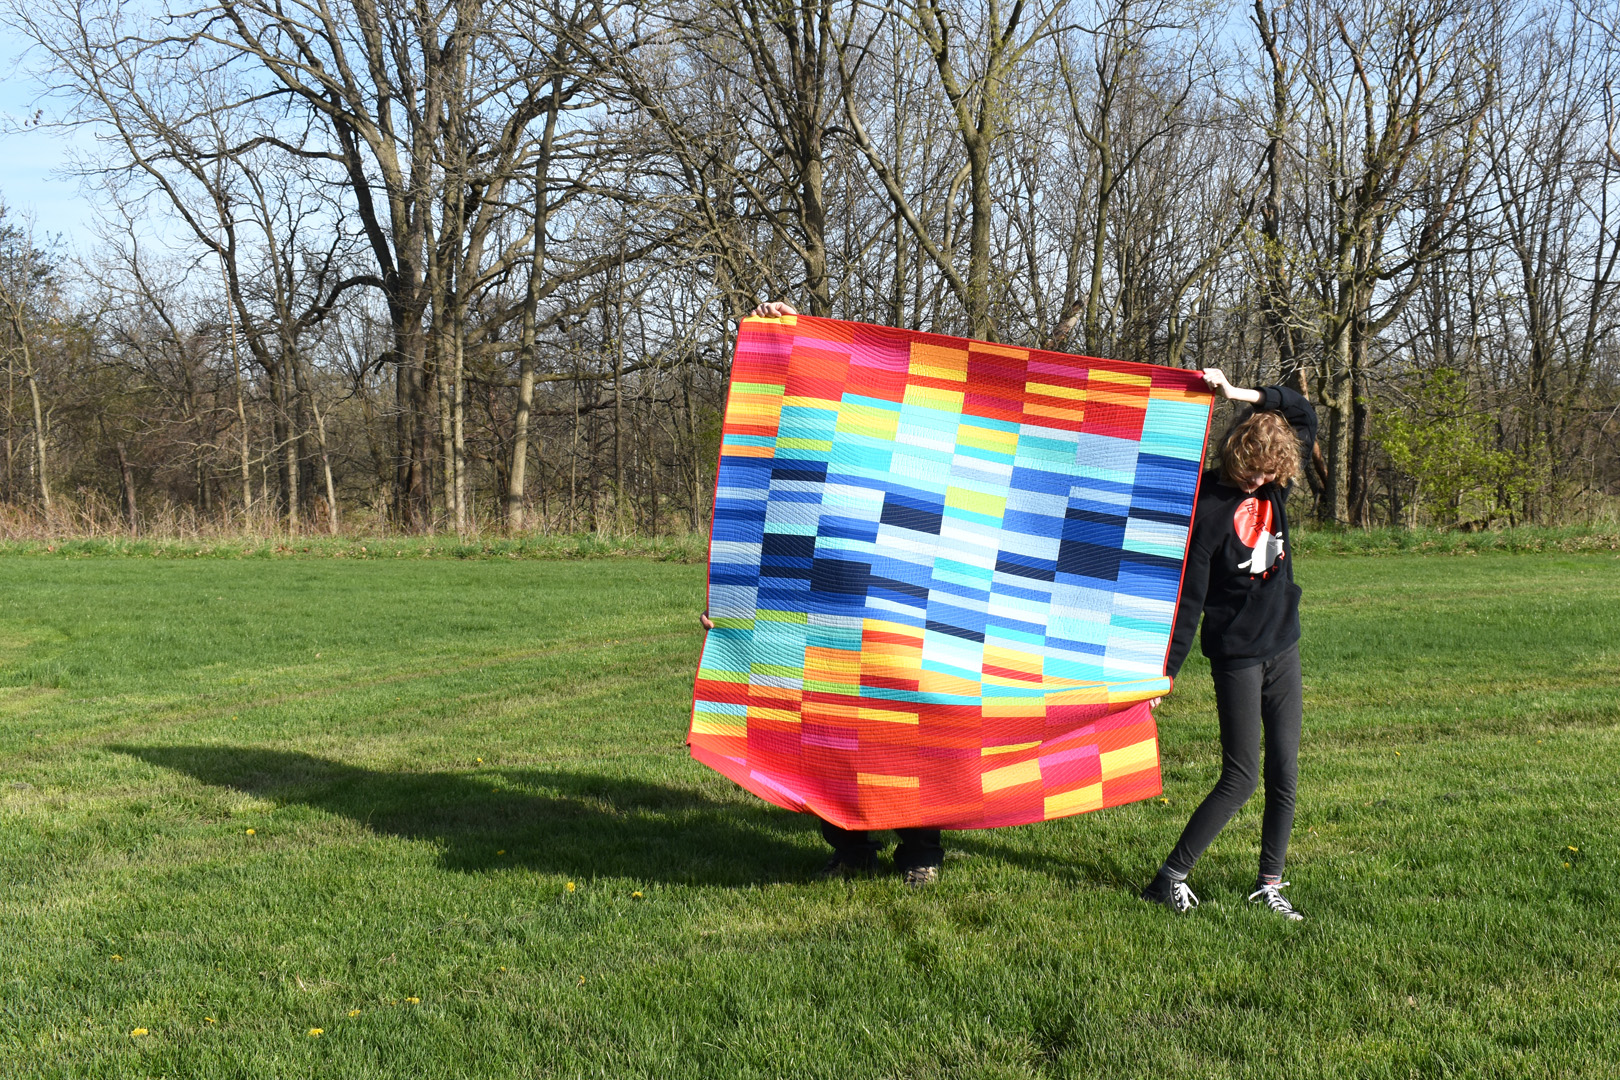
Display your quilt and enjoy the memories!