How to Make a Star Crossed Quilt Top
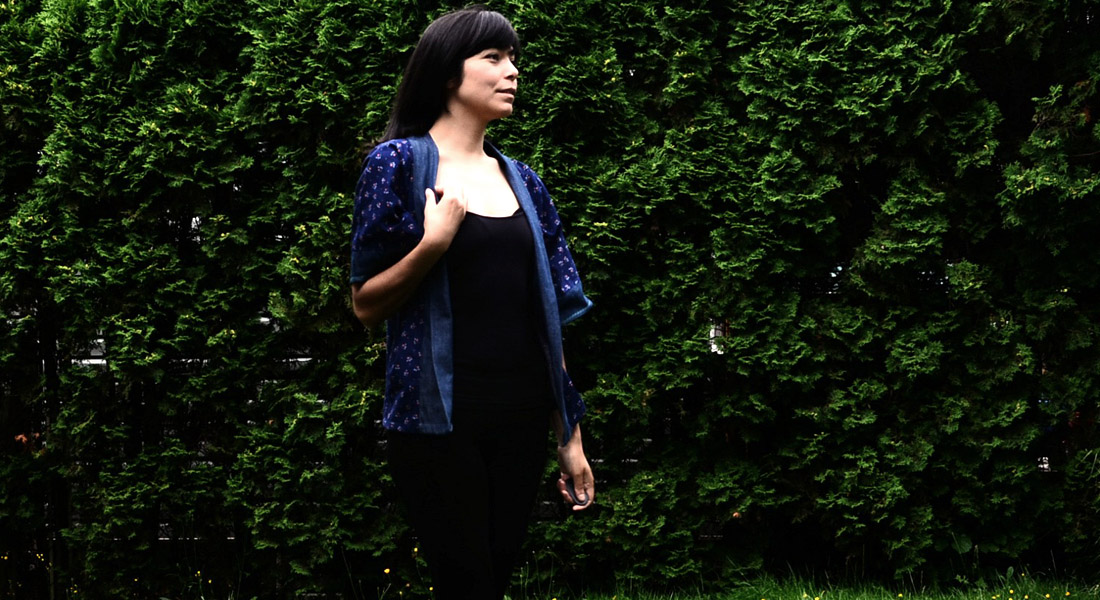
Welcome! My name is Mandy Leins, and I am a quilter, BERNINA Ambassador, an author with Stash Books and Craftsy instructor. I blog over at Mandalei Quilts where you can find links to my other projects and social media.
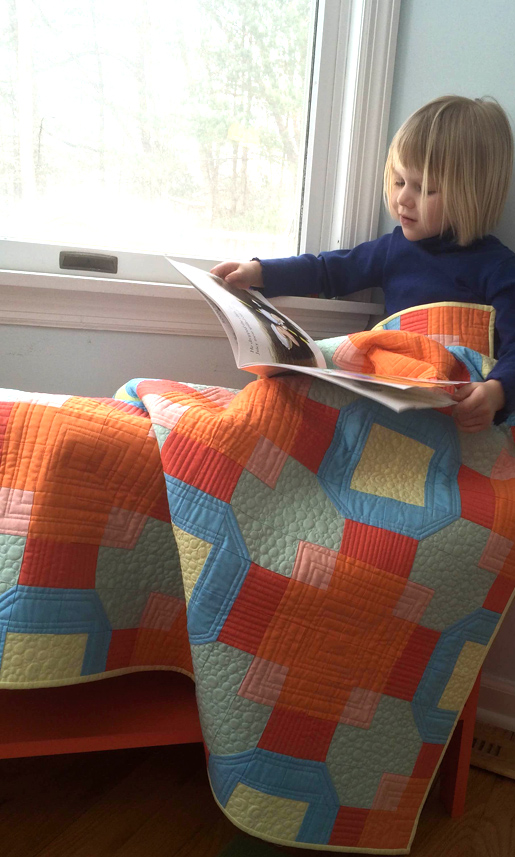
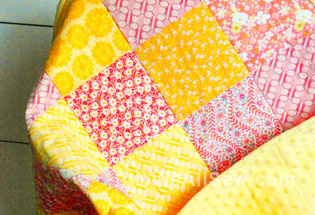
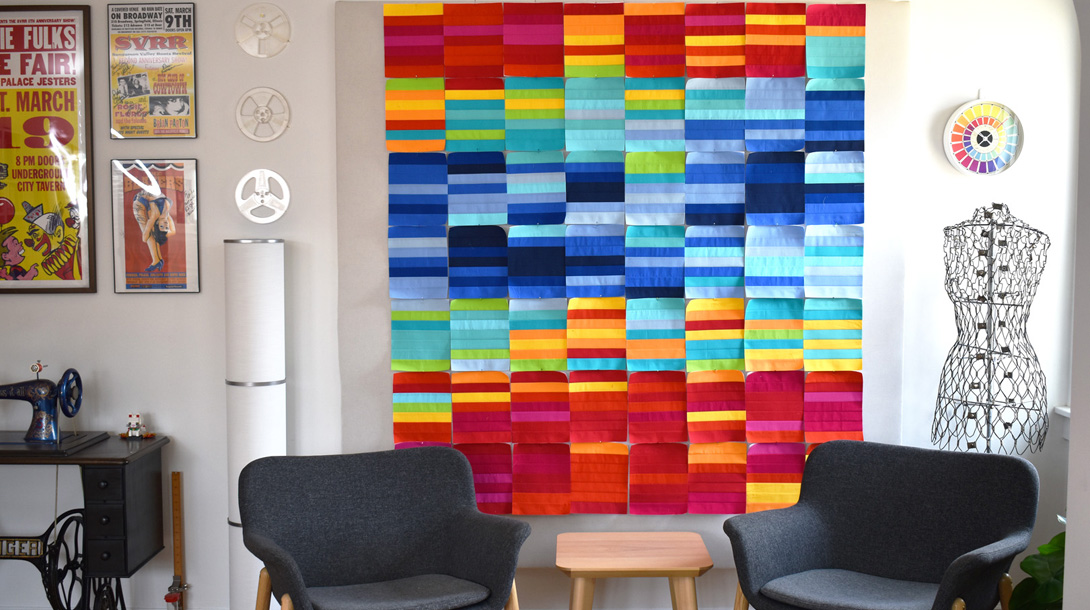
I’d like to share my pattern for a sweet little quilt “Star Crossed”. Being raised in a different climate than where I am now in upstate New York, winter always makes me a little homesick for warmer seasons and lively colors. For “Star Crossed”, I wanted something full of light colors that gave a warm feeling when you looked at it. To bring out the interesting pattern formations, I also knew I needed a variety of colors that would work well together. Don’t let the complex look of this quilt fool you: it’s a single block that’s quick and easy to make! The real fun comes from playing with your favorite color variations.
While some people seem to have a knack for picking color, sometimes it can feel a bit overwhelming with all the choices out there. Knowing a little bit about the color wheel and some of the basic color schemes can help in these situations, and so I’ve included a quick little discussion on how to use a color wheel, and one of my favorite color tools.
To begin, it is necessary to understand how a color wheel works, and what the different vocabulary words for color mean. This is a basic color wheel; the colors are in color order, and looped around to form a circle.

Here are a few vocabulary words to learn:
Primary: These colors are those that cannot be made by mixing any of the other colors in the wheel: red, yellow, and blue.
Secondary: These colors are those that are an even combination of two primary colors, such as the orange in between the primary colors red and yellow.
Tertiary: These colors are a combination of a primary color and a secondary color, such as the reddish orange in between the primary red and the secondary orange.
Hue: This term is interchangeable with the word “color.”
Saturation: This refers to the intensity of a color. If I was painting, how much or how little gray I added would determine how saturated it would be.
Value: This is how light or how dark a color appears.
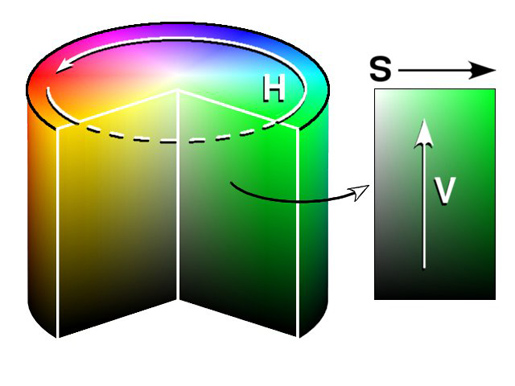
In the image above, “H” denotes the change of hue, or color. “S” denotes saturation, or how intense a color is, and “V” denotes the value, or how light or dark a color is. In my quilt, I chose lighter values of the colors, but they are still saturated because they are not muted by grey.
You may have heard the following phrases before when talking about color schemes: monochromatic, analagous, complementray, split complementary, triadic, and tetradic.
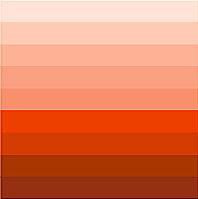
A monochromatic color scheme uses a single color from the color wheel that is varied in value and saturation.
A complementary color scheme uses two colors that are opposite each other on the color wheel. In the case of this color wheel, if I chose one of the oranges, I would draw a straight line directly across the circle to find the blues that is its opposite.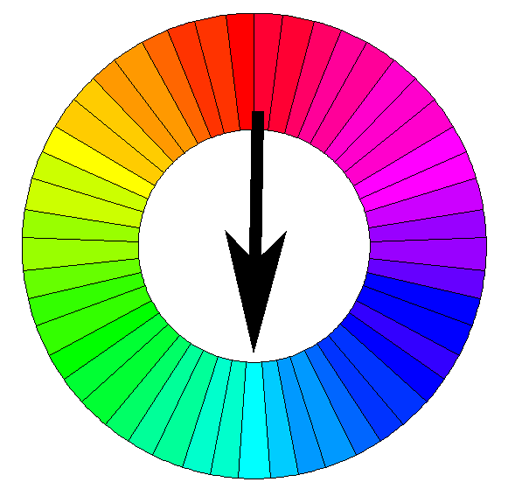
An analogous color scheme is when you pick a color on the wheel and use the neighbors on either side of it. For example, if I picked orange on this color wheel, its neighbors are yellow and red, and I would compose my quilt using those colors. In the image below, the largest dot is my main choice, and the analagous colors are smaller dots.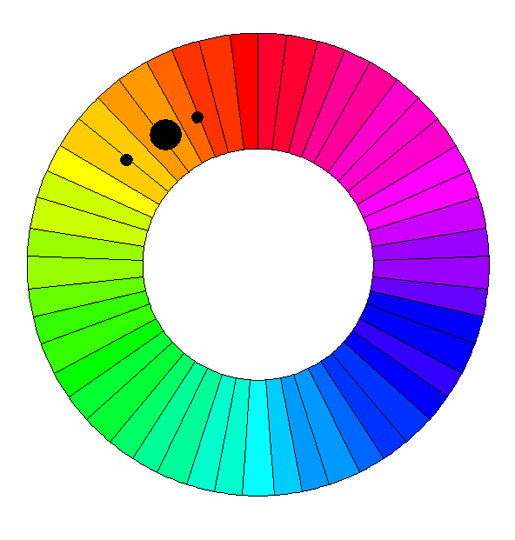
The more difficult (and interesting, I think) color schemes are combining some of these ideas.
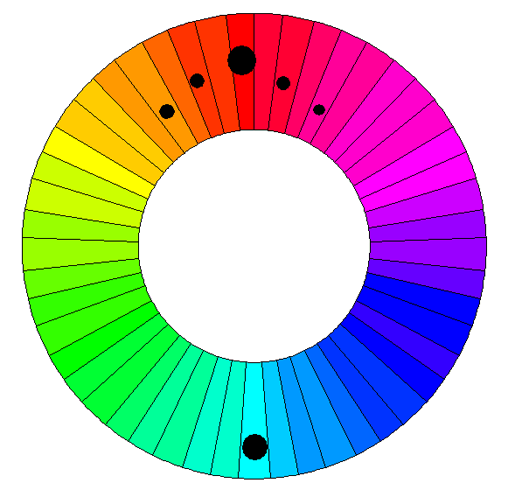
A split complimentary color scheme is done by first choosing two complementary colors, such as red and aqua, the largest dots on the color wheel below. The next step is to decide which of those colors you will use to “branch out”. Let’s say I want the red to be the primary color. To form a split complementary color scheme, I would use the aqua, the red, and the neighboring colors on either side of the red indicated by the smaller dots.
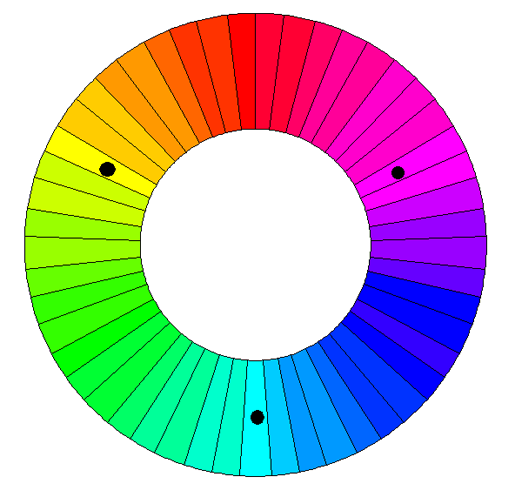
A triadic color scheme is formed by using three colors spaced evenly across the color wheel. If you drew lines from dot to dot on the image below, you would form a traingle. To the eye, this is a balanced color composition, and is less “harsh” than a simple complementary color choice.
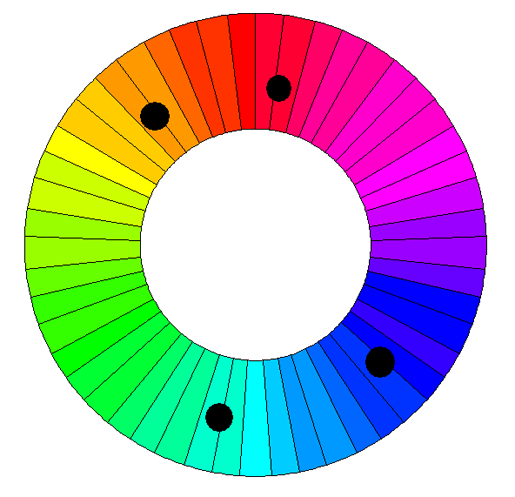
And finally, the last color composition is the tetradic color scheme, also called the double complementary color scheme. This is formed by choosing four colors in two complementary pairs. In the image below, my complementary pairs are the red and blue-green and the orange and blue. When working with this color scheme, it can be more complicated to find a combination that is pleasing to the eye. I have found that, if all the colors are equally weighted, your eye may not travel across the quilt as much. For that reason, I tend to pick one color and emphasize that, and use the complementary color more sparingly.
For “Star Crossed”, I mostly used the tetradic color scheme. My main colors were lighter values of oranges and reds, and my complementary colors, the blue and aqua, were used as the less dominant complementary colors. I chose to break out of the mold a little, though, and added a bright yellow to give the sense of a sheer overlay of color.
I hope this brief description helps you as you think about color for your own quilts! I promised I would share my favorite tool for working with color, Joen Wolfrom’s 3-in-1 Color Tool, published by C&T Publishing. Not only does it have a full description of the topics I discussed above, but it is a deck of color cards that can help guide you to find colors that work well together. To use it, you find the color that is a closest match to your fabric, and she provides the colors that coordinate with it, which you can then use to compare with the fabric options you have. I have one for home and one I always carry it with me when I am going to fabric shops!
*To win your own 3-in-1 Color Tool, leave a comment below answering the following question:
What is your favorite color combination?
And now, how to make a Star Crossed Quilt!
Finished quilt: 40 1/2″ x 40 1/2″ 16 blocks, unfinished size 10 1/2” x 10 1/2″
Fabric requirements Assumes fabric is 40” width of fabric (WOF), and 1/4” seam allowances.
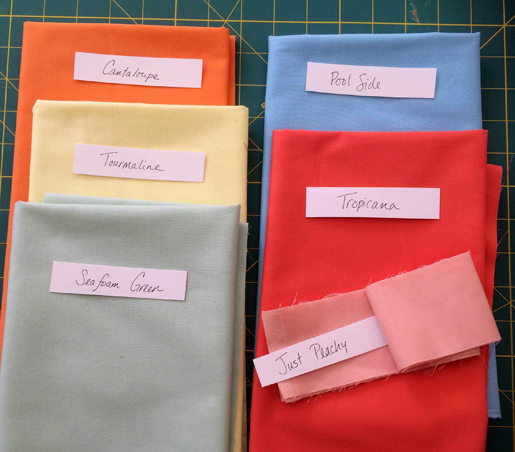
Materials
- Cantaloupe fabric: 1/2 yard
- Tourmaline fabric: 1/4 yard
- SeaFoam Green fabric: 1/2 yard
- Poolside fabric: 5/8 yard
- Just Peachy fabric: 1/4 yard
- Tropicana fabric: 3/8 yard
- Batting: 48” x 48”
- Backing fabric: 3 1/4 yards
- Binding fabric: 1/3 yard
Cutting Instructions
Cantaloupe fabric: Cut 2 strips 2 1/2” x WOF. Cut 2 strips 4 1/2” x WOF.
Tourmaline fabric : Cut 2 strips 2 1/2” x WOF.
Seafoam Green fabric: Cut 4 strips 2 1/2” x WOF. From two strips, subcut 32 squares 2 1/2” x 2 1/2”. Cut 2 strips 3 3/8” x WOF. Subcut 16 squares 3 ⅜” x 3 3/8”.
Poolside fabric: Cut 2 strips 2 1/2” x WOF . Cut 1 strip 6 1/2” x WOF. Subcut 16 rectangles 2 1/2” x 6 1/2”. Cut 2 strips 3 ⅜” x WOF. Subcut 16 squares 3 ⅜” x 3 ⅜”.
Just Peachy fabric: Cut 2 strips 2 1/2” x WOF.
Tropicana fabric: Cut 4 strips 2 1/2” x WOF.
Piecing Instructions
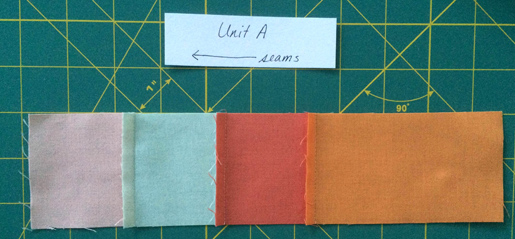
1. To one 4 1/2″ x WOF strip of Cantaloupe, sew one 2 1/2” x WOF strip of Tropicana, one strip of Seafoam Green 2 1/2” x WOF, and one 2 1/2″ x WOF strip of Just Peachy long edges to long edges, as shown, pressing all seams away from the wide orange strip. Subcut the combined strips into 16 rectangles 2 1/2” x 10 1/2”. This will be UNIT A.
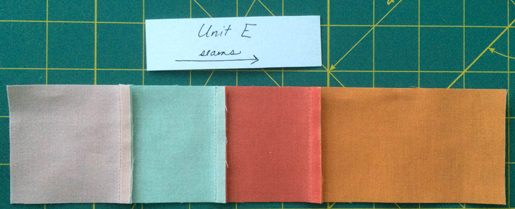
2. Repeat step 1, pressing all seams toward the wide orange strip. Subcut the combined strips into 16 rectangles 2 1/2” x 10 1/2”. This will be UNIT E.
3. To one 2 1/2” x WOF strip of Cantaloupe, sew one 2 1/2” strip of Tourmaline, and one 2 1/2” strip of Poolside.
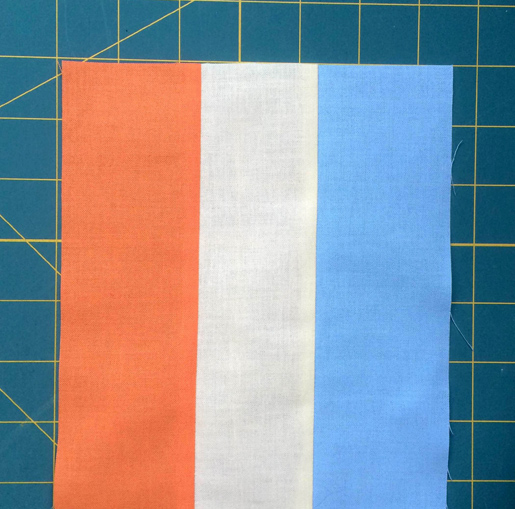
Press all seams toward the orange strip. Subcut the combined strips into 16 rectangles 2 1/2” x 6 1/2”. This will be part of UNIT B.
4. To one 2 1/2” x WOF strip of Cantaloupe, sew one 2 1/2” strip of Tourmaline, and one 2 1/2” strip of Poolside, as shown, pressing away from the orange strip. Subcut the combined strips into 16 rectangles 2 1/2” x 6 1/2”. This Will be Part of UNIT D.
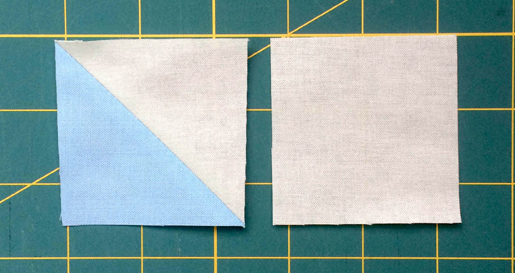
5. To make the half-square triangle blocks (HSTs): place one 3 3/8″ x WOF of Poolside exactly over one 3 3/8 strip Green. Cut 3 3/8″ squares.
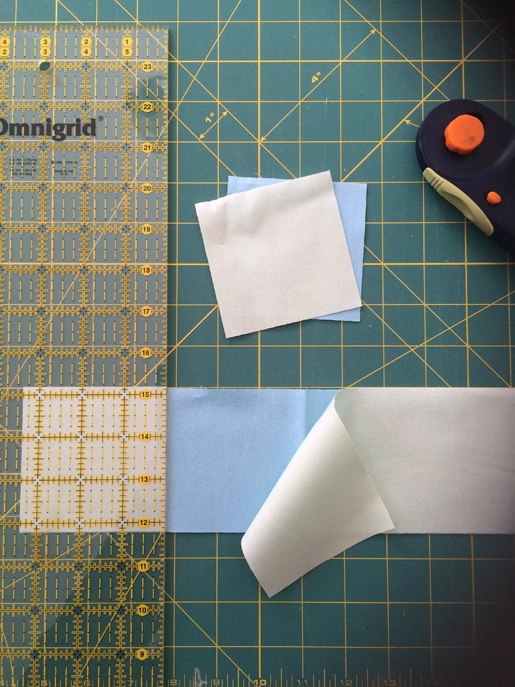
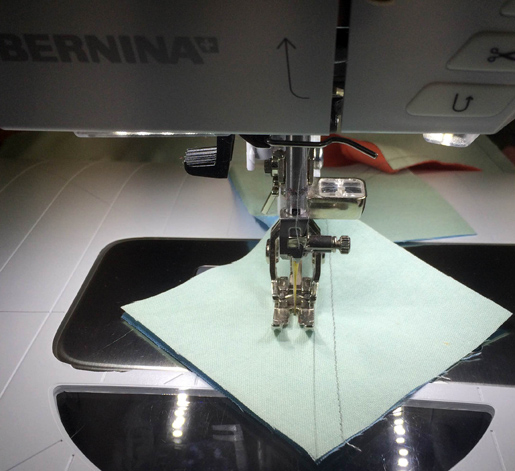
Draw a line across one diagonal. Sew a 1/4” seam using the drawn line as your guide (seam lines shown as dotted lines).
Cut each square on the previously marked diagonal line, and press seams open. Trim to 2 1/2” as necessary. Make 32 HSTs.
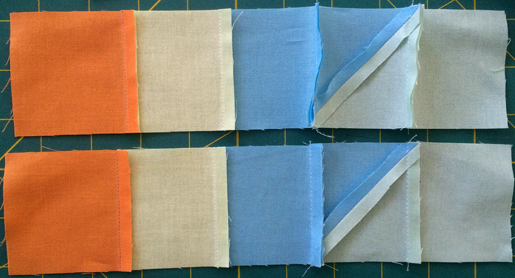
6. Sew one HST to one 2 1/2” Seafoam Green square, as shown. Make 32.
Divide the 32 units into two groups of 16. Do not press the seam allowance just yet.
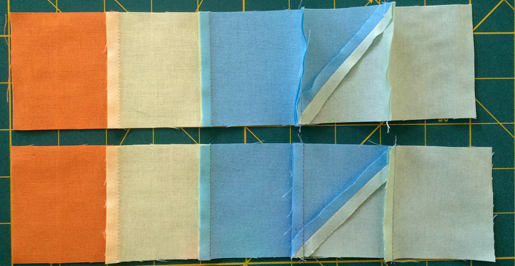
7. To finish Units B and D, sew the HST units to your previously sewn strips, so that they look like this:

Note that I pressed the seams using the previously pressed seams from before as my guide. UNIT B has the seams pressed toward the orange, and UNIT D has the seams pressed away from the orange.
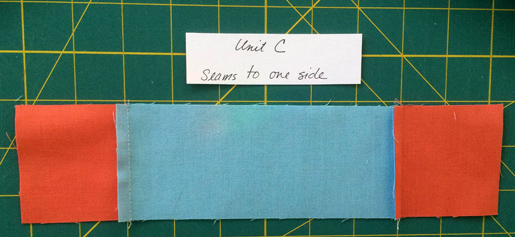
To make Unit C 9. To either end of the 2 1/2” x 6 1/2” rectangle of Poolside, sew a 2 1/2” square of Tropicana. Press seams to one side.
Assembling the Block Lay out the Units as shown, and sew together. All the seams except the HST will nest together. Pay special attention to the orientation of the seams, since that is all that distinguishes some of the units from each other.
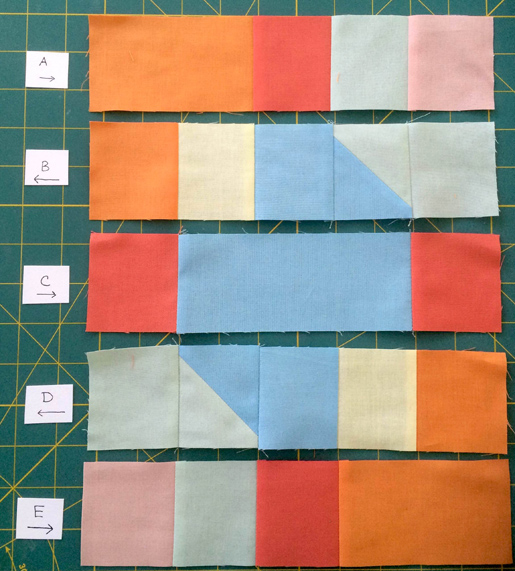
To press the block, first orient it with Unit A at the top, and press all seams toward Unit A.
Laying Out the Top
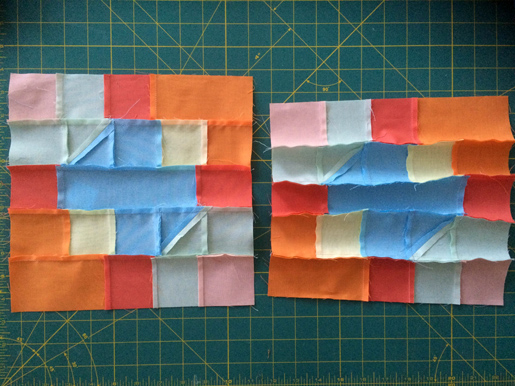
Lay out the quilt in 4 rows of 4. Even rows begin with the blue and yellow lozenge shape pointing up and left, and odd rows begin with the lozenge shape pointing up and right.
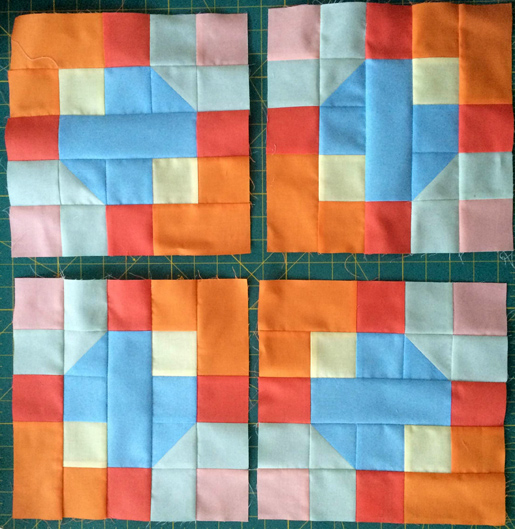
So that all the seams nest (and they do, I promise!) you may need to spin the blocks until they fit properly.
Assembling the Top
1. Working row by row, sew the blocks together.
2. Press seams of odd rows to the right, and even rows to the left.
3. Sew all four rows together, pressing seams as desired.
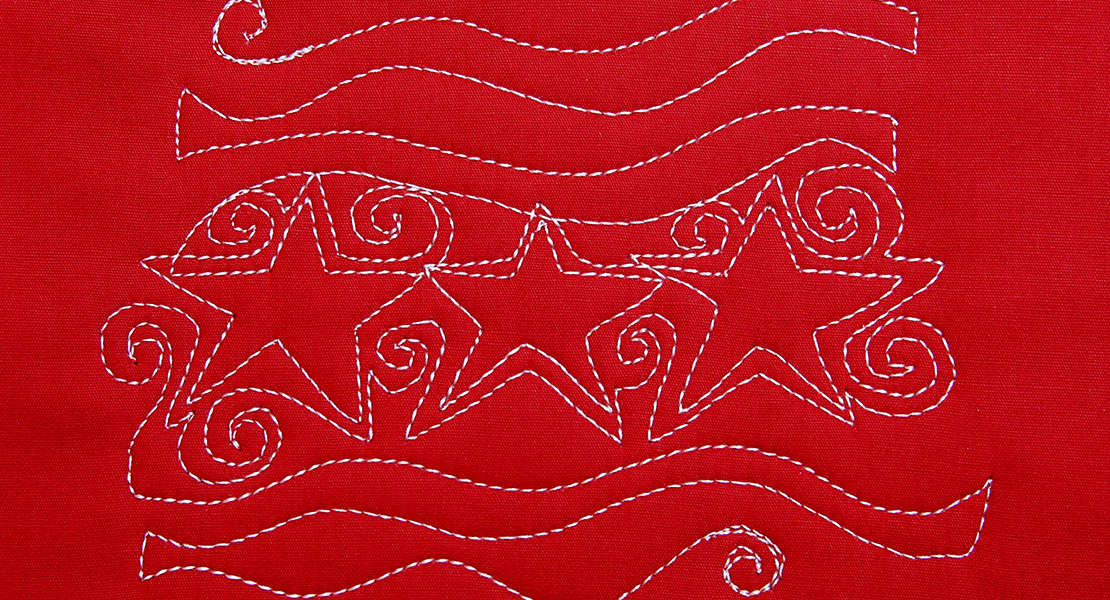
Congratulations! You can now finish your top. Layer your backing, batting and top, then baste using your preferred method (pins, spray, or hand basting). If you choose to do some more detailed quilting emphasizing secondary designs over the top, consider a puffier batt such as wool, which makes for interesting textures when quilted. You can see a sample of a quilt with double wool batts on my blog here and here. After your quilting is finished, bind using your favorite method.
*Sweepstakes Rules: Open to residents of the 50 United States and the District of Columbia. One comment per fan. Comment must be submitted to the WeAllSew.com blog by , March 19, 11:59 p.m. Central Time. Winner will be chosen randomly. Winner will be notified by email and will have 48 hours to contact us at [email protected] to claim the prize; winner will be announced on WeAllSew about one week after contest ends.


What you might also like


30 comments on “How to Make a Star Crossed Quilt Top”
-
-
how do you keep red-dyed fabric from running on neighboring white fabric in the washer/spin cycle?
-
-
My favorite colors? The next ones I see. I love color!
-
Purple and whatever looks good to me that day!!
-
Lately my favorite color combination is red and aqua, simply spectaular!
-
I am currently in love with bright green and deep plum. Planning a design that will incorproate these with gray and white.
-
all the greens!
-
A have many favorite color combinations. One of those is blue and orange, complementary
-
Maybe it is an age thing, but I too love purple, as others here have also posted.
-
Either monochromatic blues or analogous blue or green families.
-
My favorite color combinations are the neutrals.
-
Great tutorial. Making uncommon color combinations can make for interesting work, thanks for the assistance
-
I tend to gravitate towards using a lot of blue in my quilts. So, I change out the other colors I use depending on my mood. My favorite combo is blue and green.
-
Excellent, informative tutorial on color. Thank you! Which colors do I love? Anything in my stash that plays well together.
-
I like blue and purple, blue and green or black and white. Love how your quilt turned out. Thanks for the tutorial, very informative.
-
Love turquoise and red witha dash of cream and lime!
-
I like the colors purple and green together.
-
Love the saturated colors and contrast
-
One of my favorite color combinations is pink and gray.
-
Red and white is my favorite colored quilt
-
how do you keep red-dyed fabric from running on neighboring white fabric in the washer/spin cycle? thank you
-
-
I love blues and purples with a splash of green.
-
My favorite color combination is purple and orange!
-
my favourite colours are shades of cornflower blue with a clear soft yellow
-
Analogous combinations in the blue and purple colors.
-
Magenta, purple, golden yellow, and turquoise are my favorite color combinations. Thanks for the tutorial. The quilt is gorgeous.
-
Thanks so much for this color tutorial! I have such a hard time figuring it out on my own?. My favorite colors are blues and greens.
-
Thanks so much for the color class! I love to use complementary colors, they pop out! Right now I love aqua and reds together. 🙂
-
Excellent and comprehensive color theory explanation! Many thanks!
My favorite color combos now are rainbow colors of varying hues with white.
Leave a Reply
You must be logged in to post a comment.

My favorite complimentary colors are green and red. I love how the colors change with the addition of white or black. Thank you for the informative tutorial; color can be overwhelming, but breaking it down into small bits makes choosing colors less stressful. BTW-your quilt is fantastic!