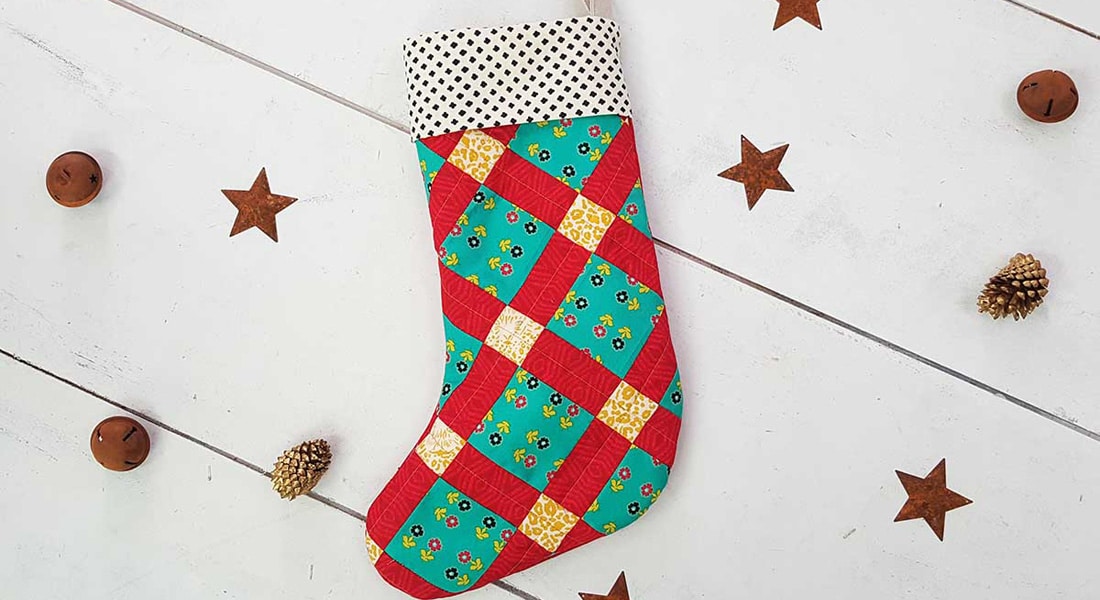
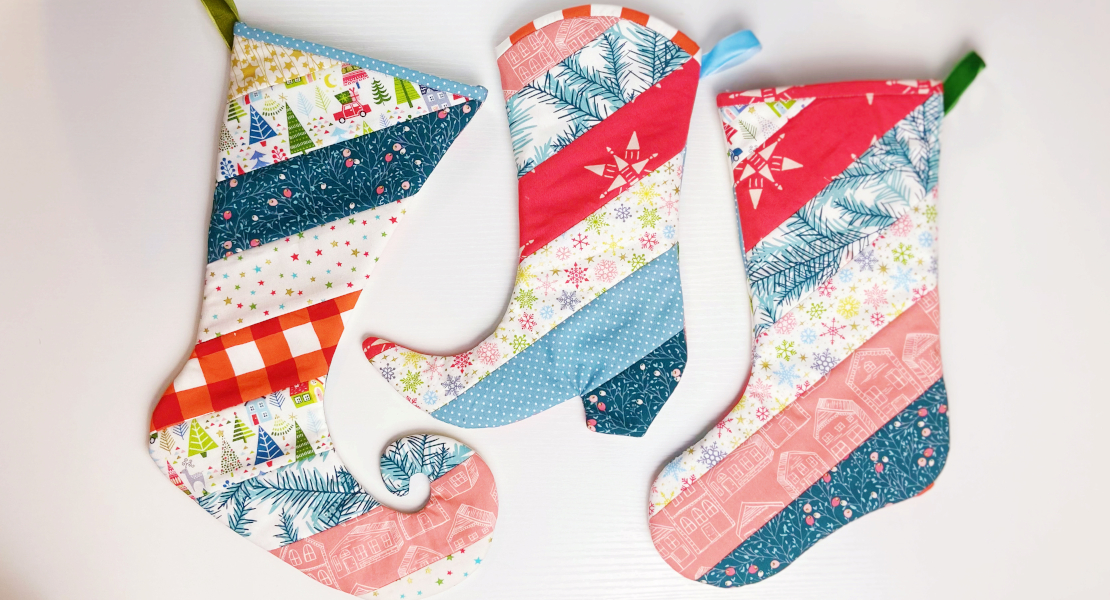
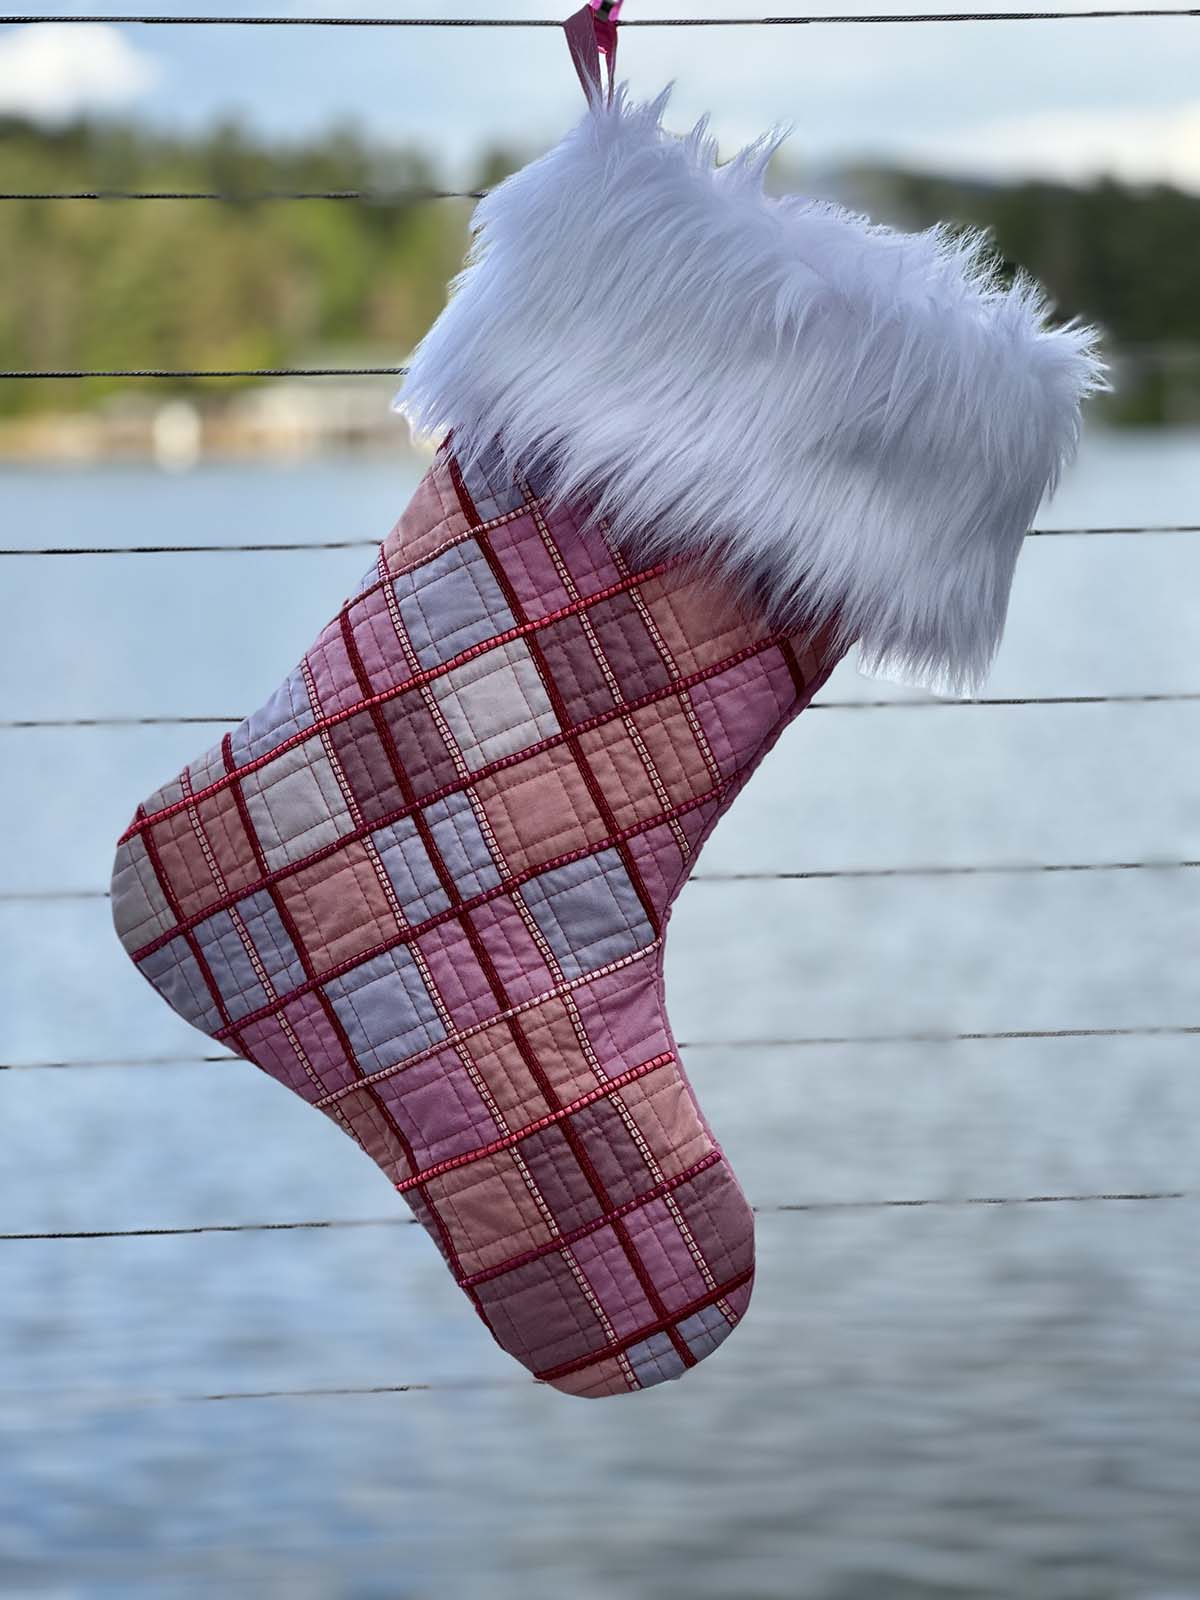
Creating a Christmas Stocking with Couching & Faux Fur Trim
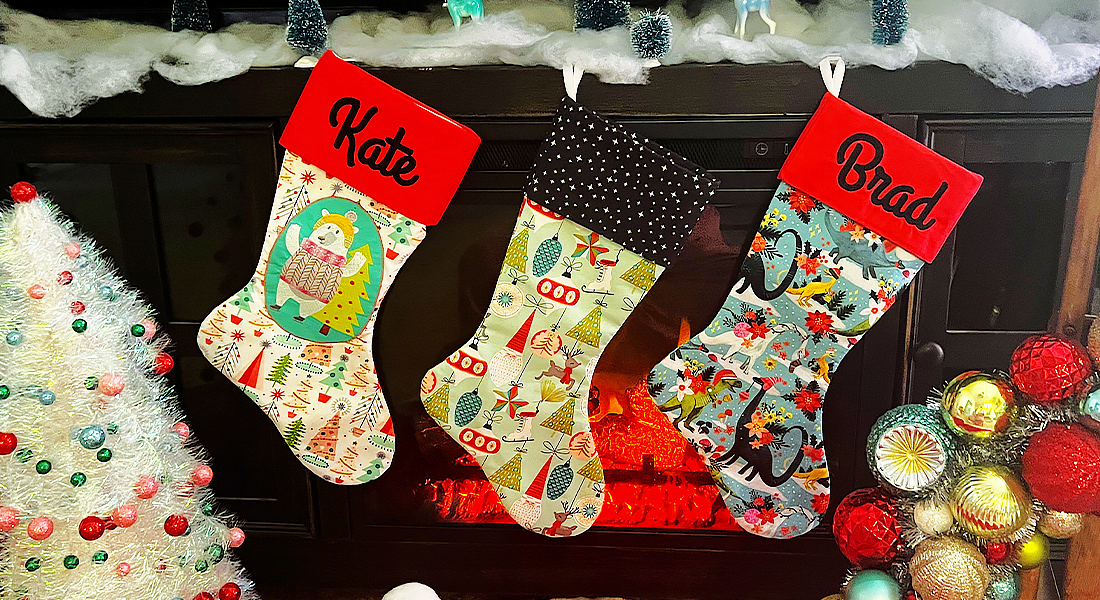
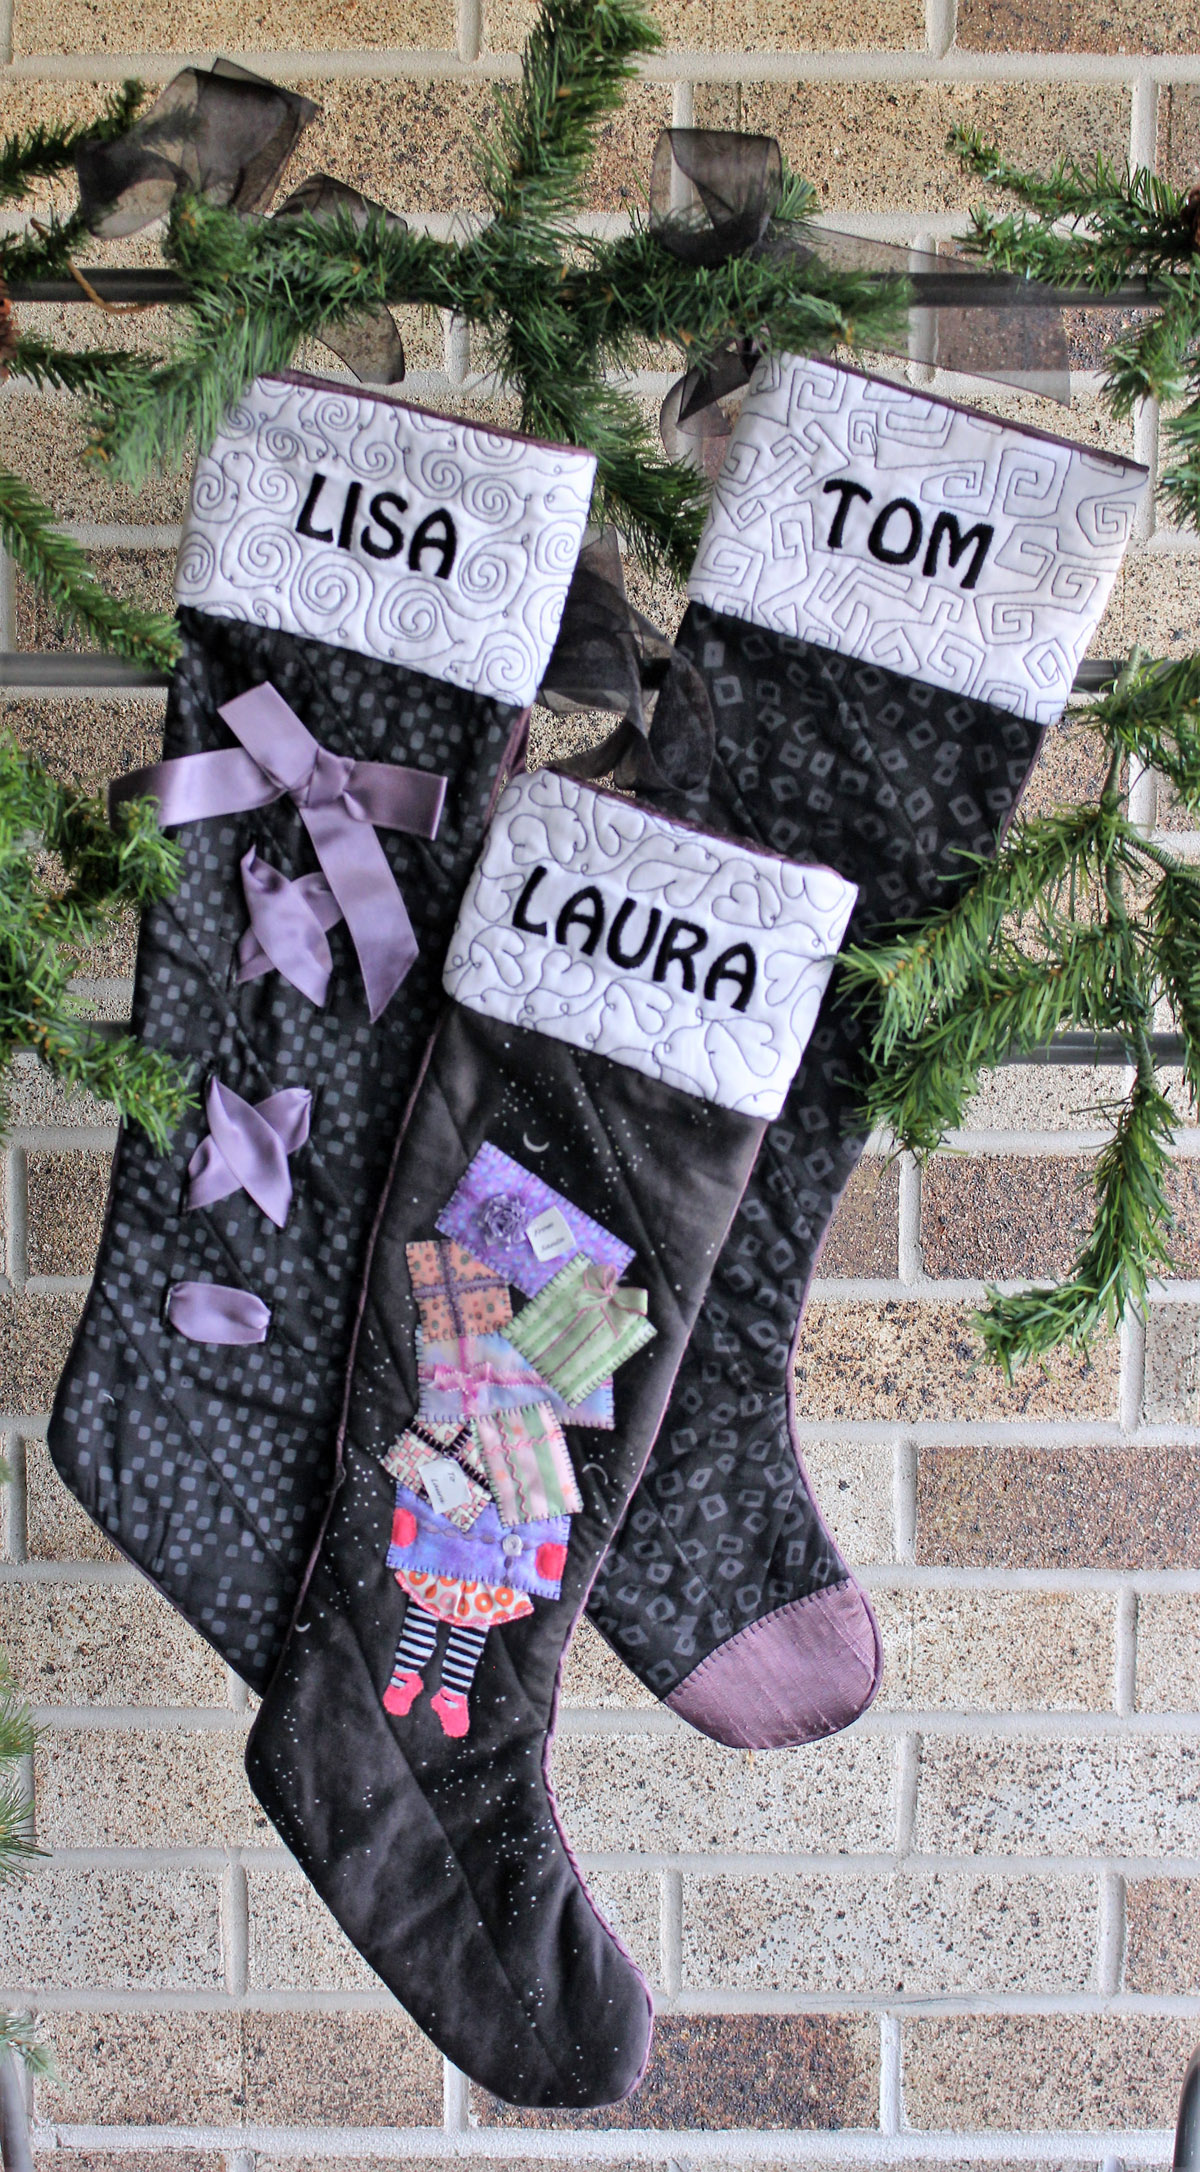
You’ve decked out the tree. What’s next? Few decorations herald the Christmas Season more than stockings hanging on the mantle. Do you have matching stockings for the entire family, or does each family member get a stocking unique to their personality? Either way, this Couched Christmas Stocking with Faux Fur Trim is a statement piece sure to jazz up your holiday decor.
Christmas Stocking Features
- Optional patchwork front
- Quilted front and back so it hangs beautifully on your mantle (or anywhere else!)
- Couching with ribbon, braid, or cord to embellish or create a design
- Finished interior seams so your stocking can last a lifetime
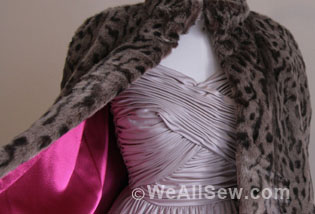
- Faux fur cuff for added texture and glam!
Feel free to pick and choose which features you want to include to make this stocking unique for yourself or someone you love!
Materials & Supplies
Fabric for the Stocking
- Front of Stocking: 2/3 yard of fabric if you choose to create a wholecloth stocking with couching trim OR 78 squares measuring 2-1/2″ x 2-1/2″ if you are making a patchwork front
- 2/3 yard of fabric for the stocking back
- 2/3 yard of fabric for the Stocking lining
- 12″ x 12″ square of faux fur for trim
- 80″ of 2-1/2″ bias cut binding coordinating with the stocking lining
- 24″ of 2-1/2″ strip of binding coordinating with the faux fur (cut on either straight-of-grain or bias)
- 6″ long piece of sturdy 1/2″ wide ribbon or a finished fabric tab of the same measurements
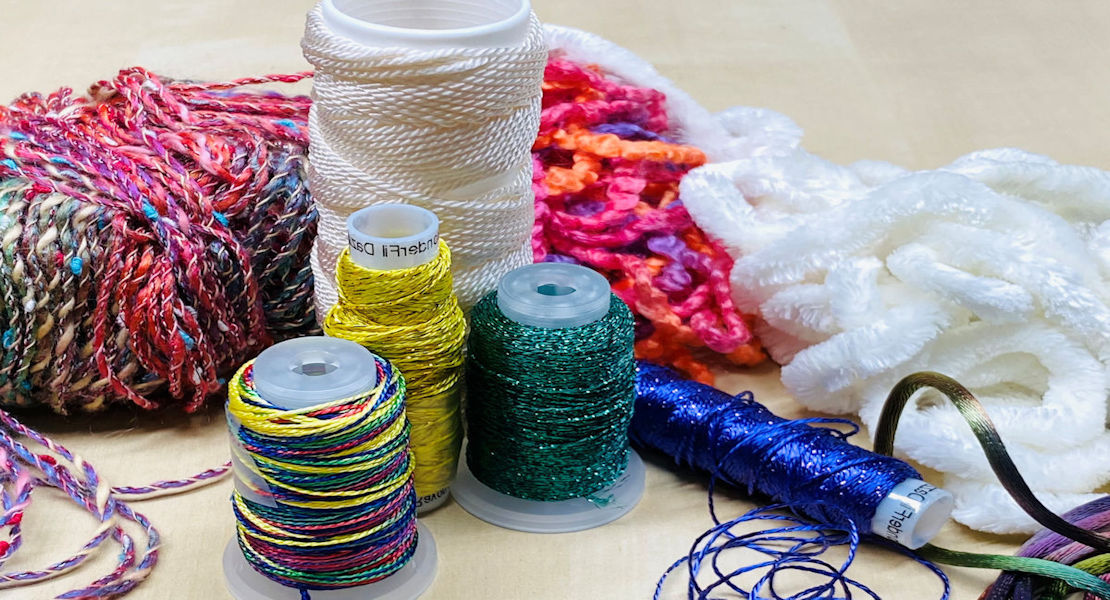
Couching Trim for the Stocking
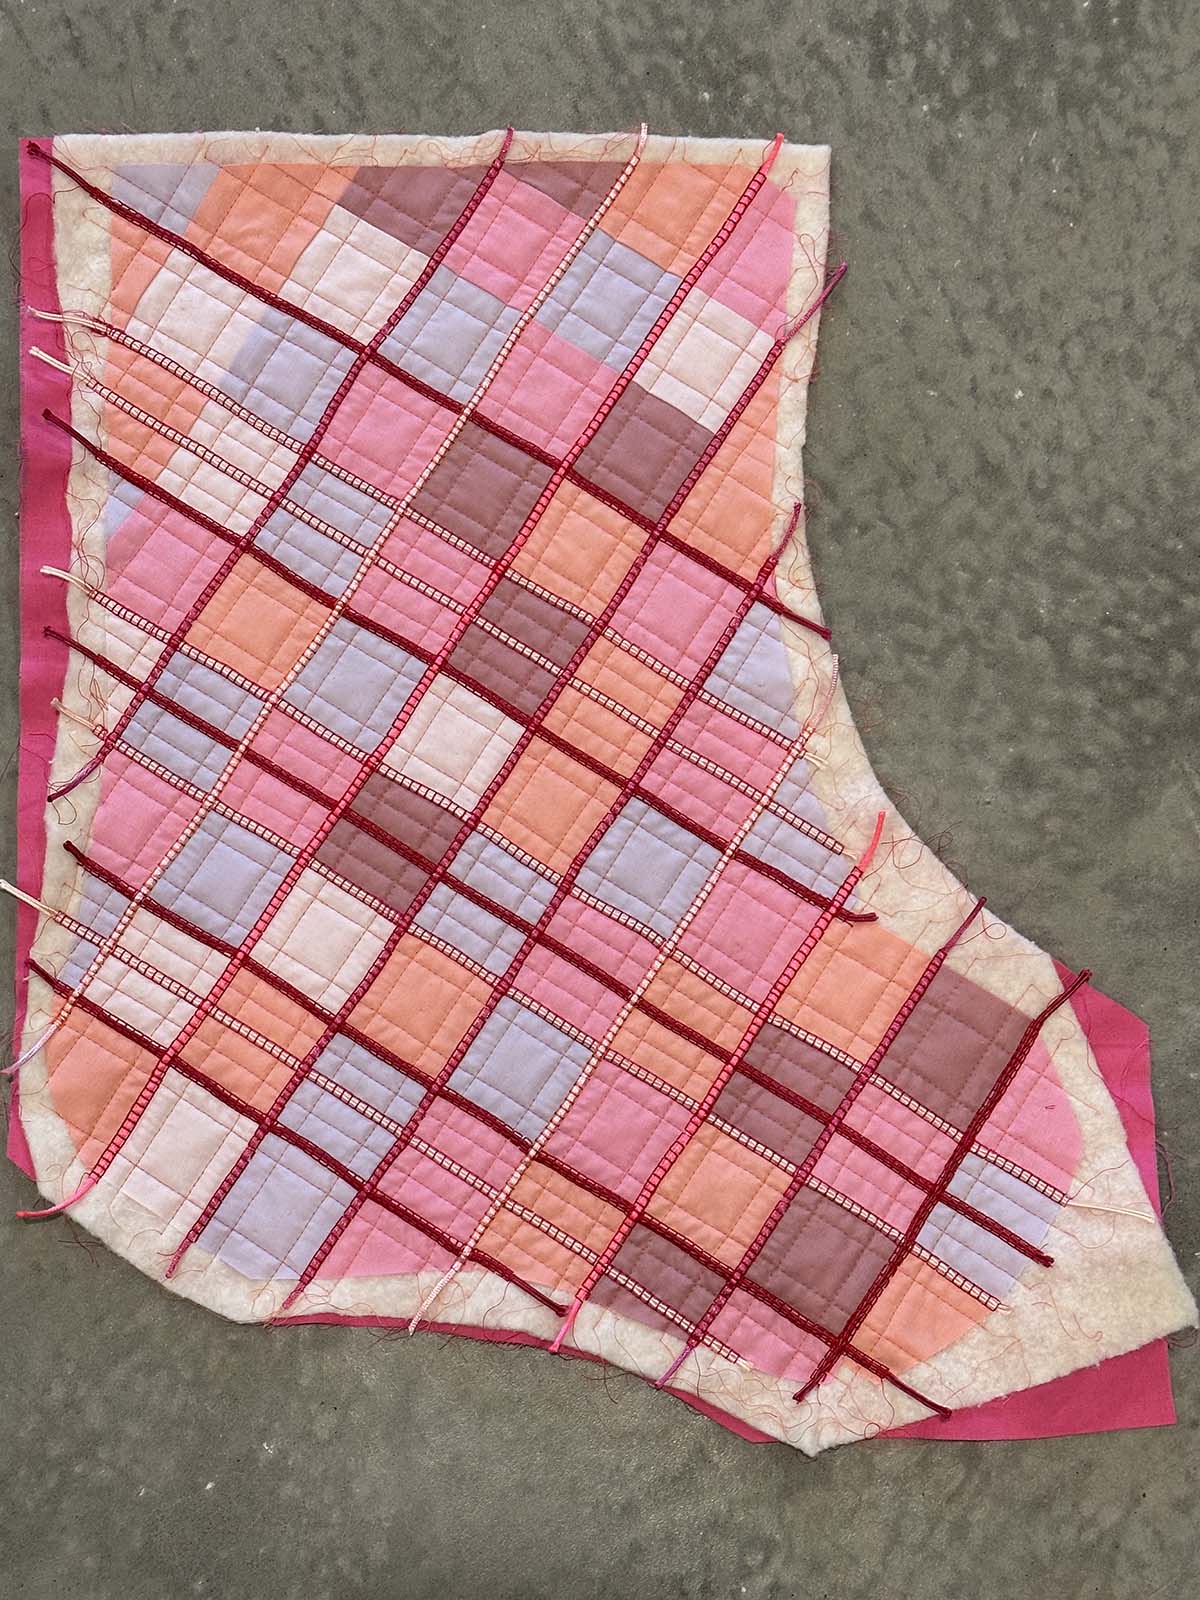
- The amount of trim you require for your stocking will vary depending on how many lines you wish to add. The trim is done in a 2″ grid for the stocking pictured, with three additional lines added at 1″ intervals. Approximately 180″ of cord and braid were used for this design, plus extra to do practice stitching.
- If you plan to couch in one direction, you can select cords or ribbons of any thickness. If you plan to couch in two directions, like the example in this post, choose a thin ribbon or braid for the first direction of couching and save thicker braids or cords for the second.
- Using a mix of ribbons and cords adds interest to this example’s overall design. I used five braids and cords to add color and texture.
Thread
- Blending thread for piecing the optional patchwork front and assembling the stocking
- Coordinating or contrasting thread for quilting
- Coordinating or contrasting thread for couching
Batting
- Two batting scraps measuring approximately 18″ x 22″
Stocking Template
- Print the template below or use your favorite Christmas Stocking Pattern or Template.

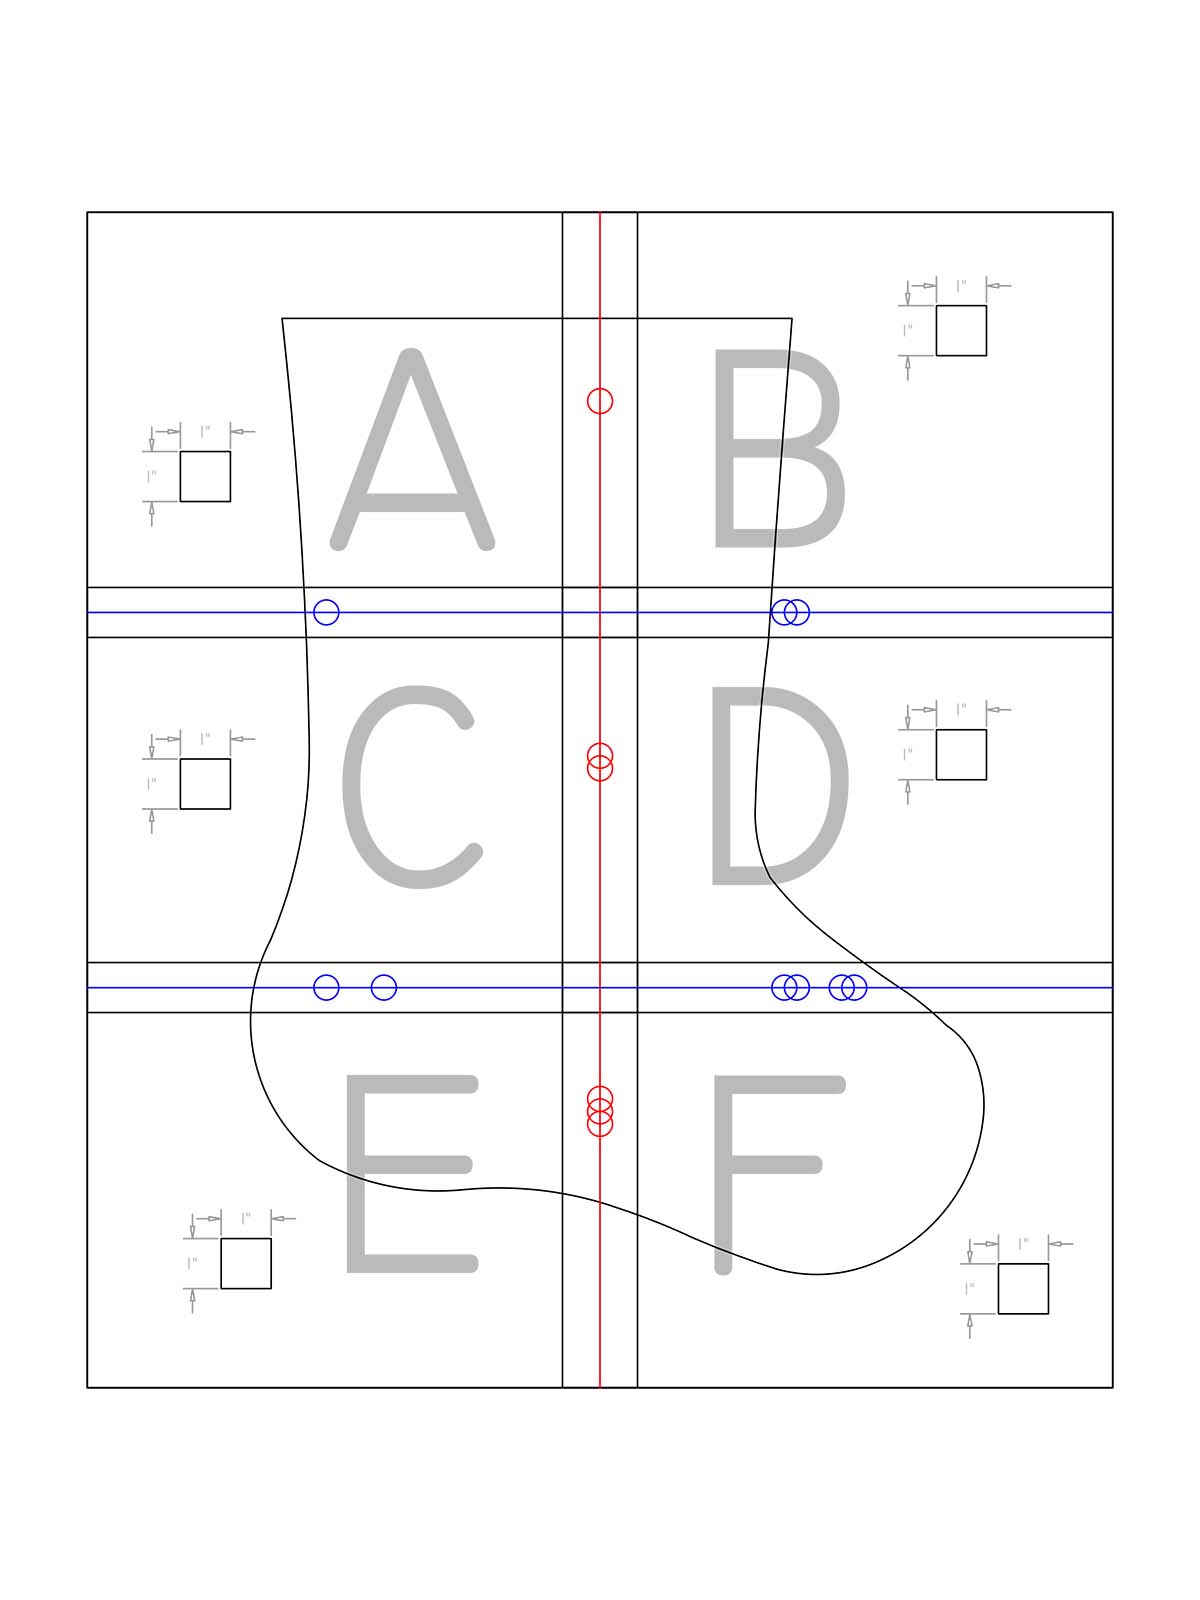
Assembling the Template
- Print the template at 100% scale or “actual size.” Measure the 1″ square on each template page to ensure the templates are printed to the correct size.
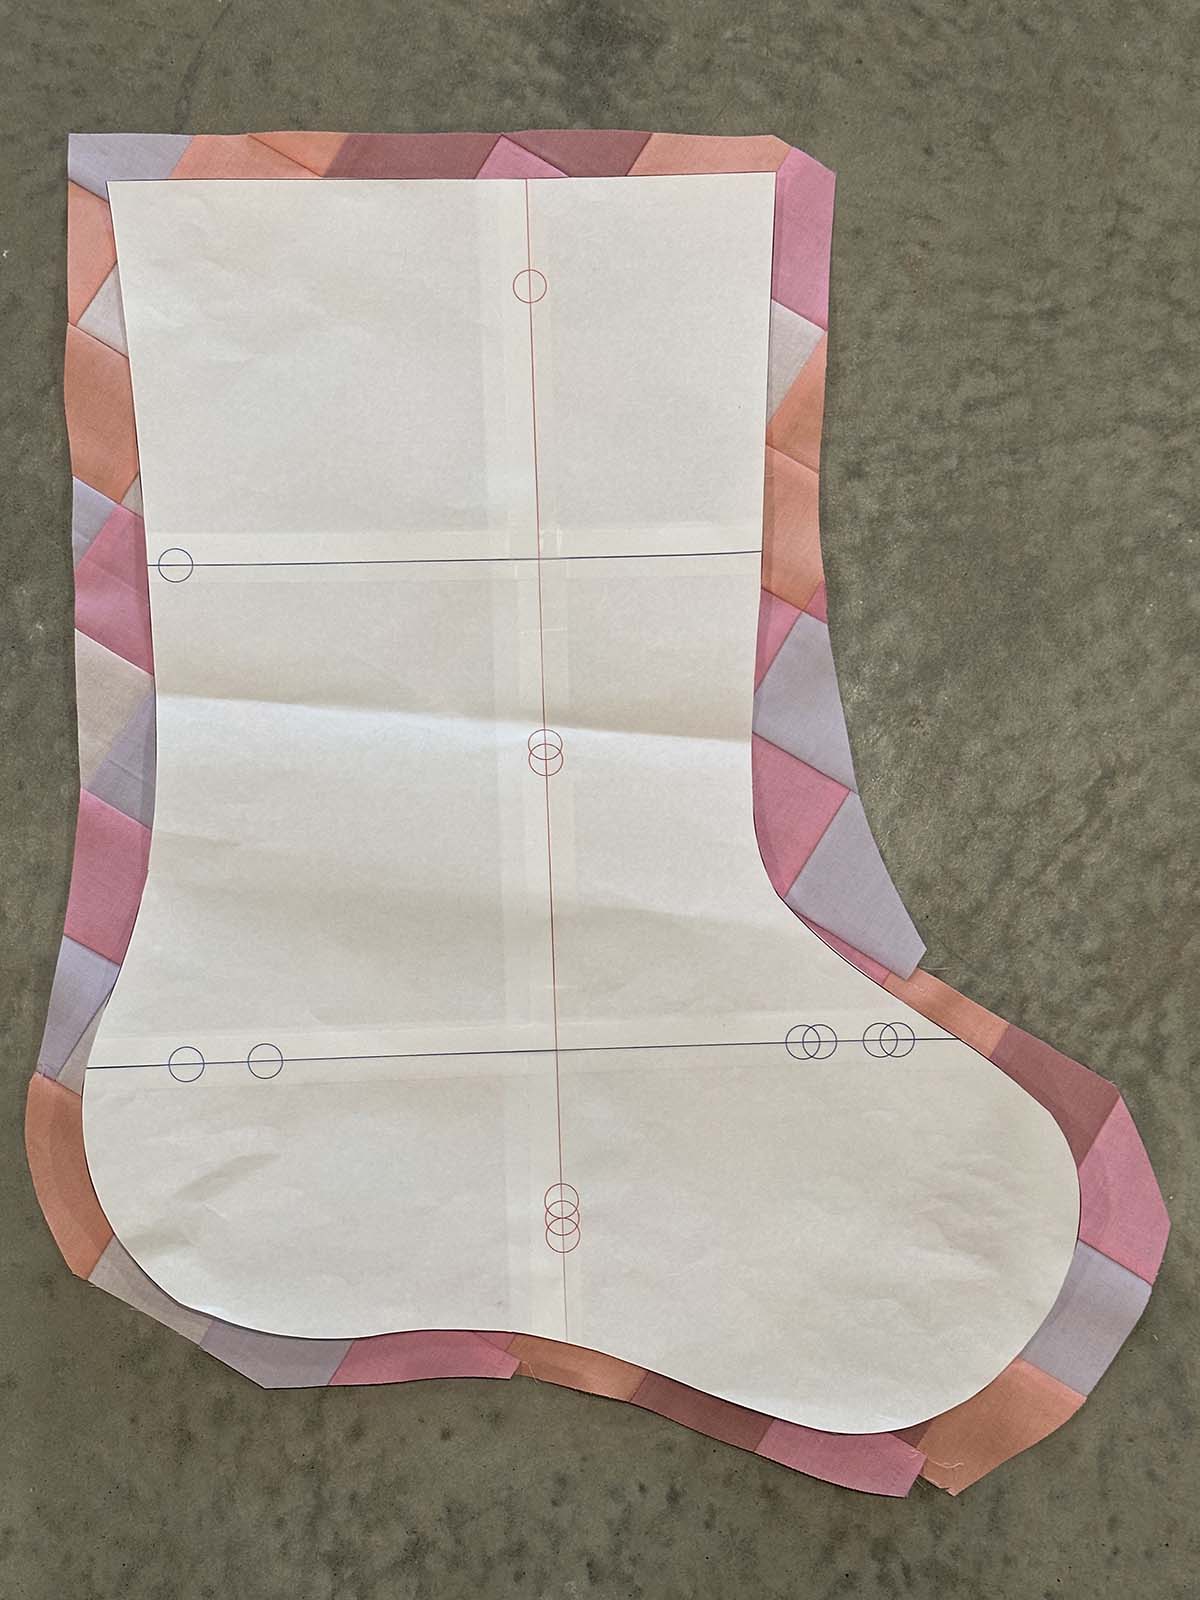
- Trim the right side of templates A, C, and E red line
- Trim the top side of templates C, D, E, and F to the blue line
- Arrange the template pages as shown below. Align the circle registration marks on the red and blue lines, then tape or glue the pages together to create your stocking template.
Instructions to Sew a Christmas Stocking with Couching & Faux Fur Trim
Step 1: Piece the Stocking Front
Note: If you use a wholecloth stocking front, please skip this step and go to step 2. You can also strip-piece or use squares of any size to piece the front of your Christmas Stocking.
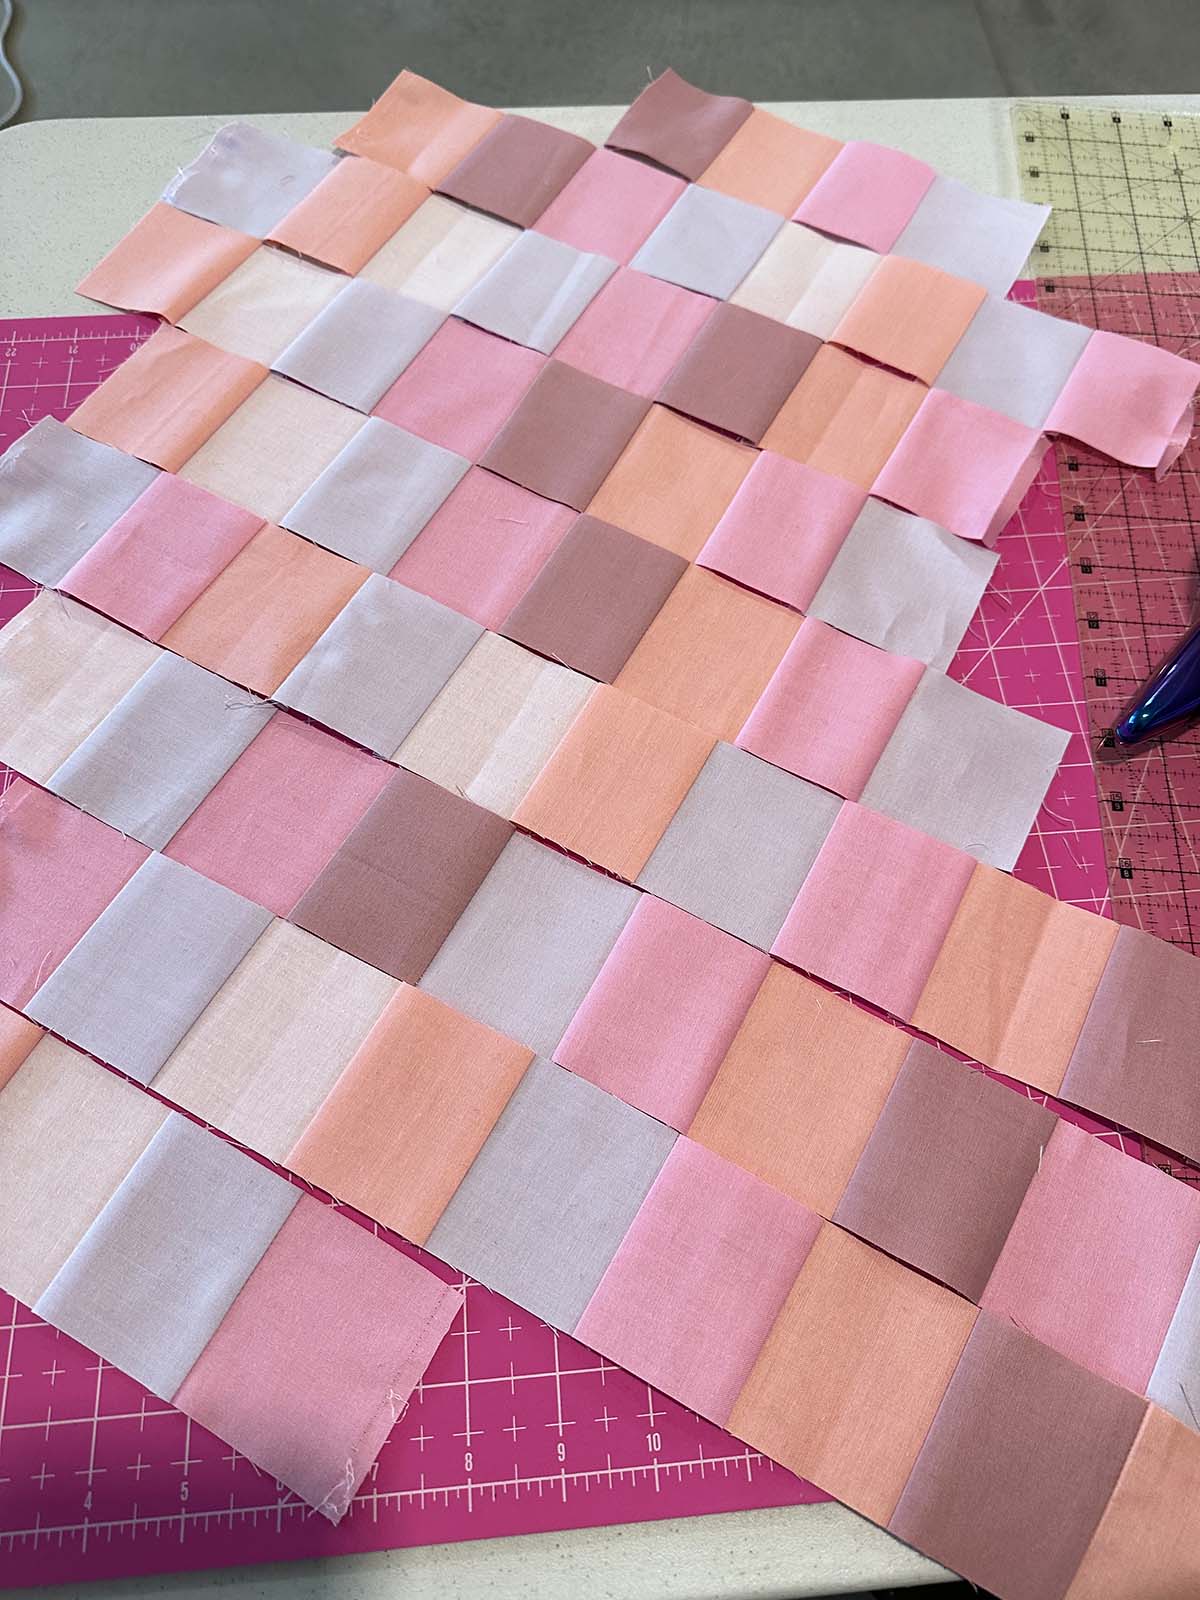
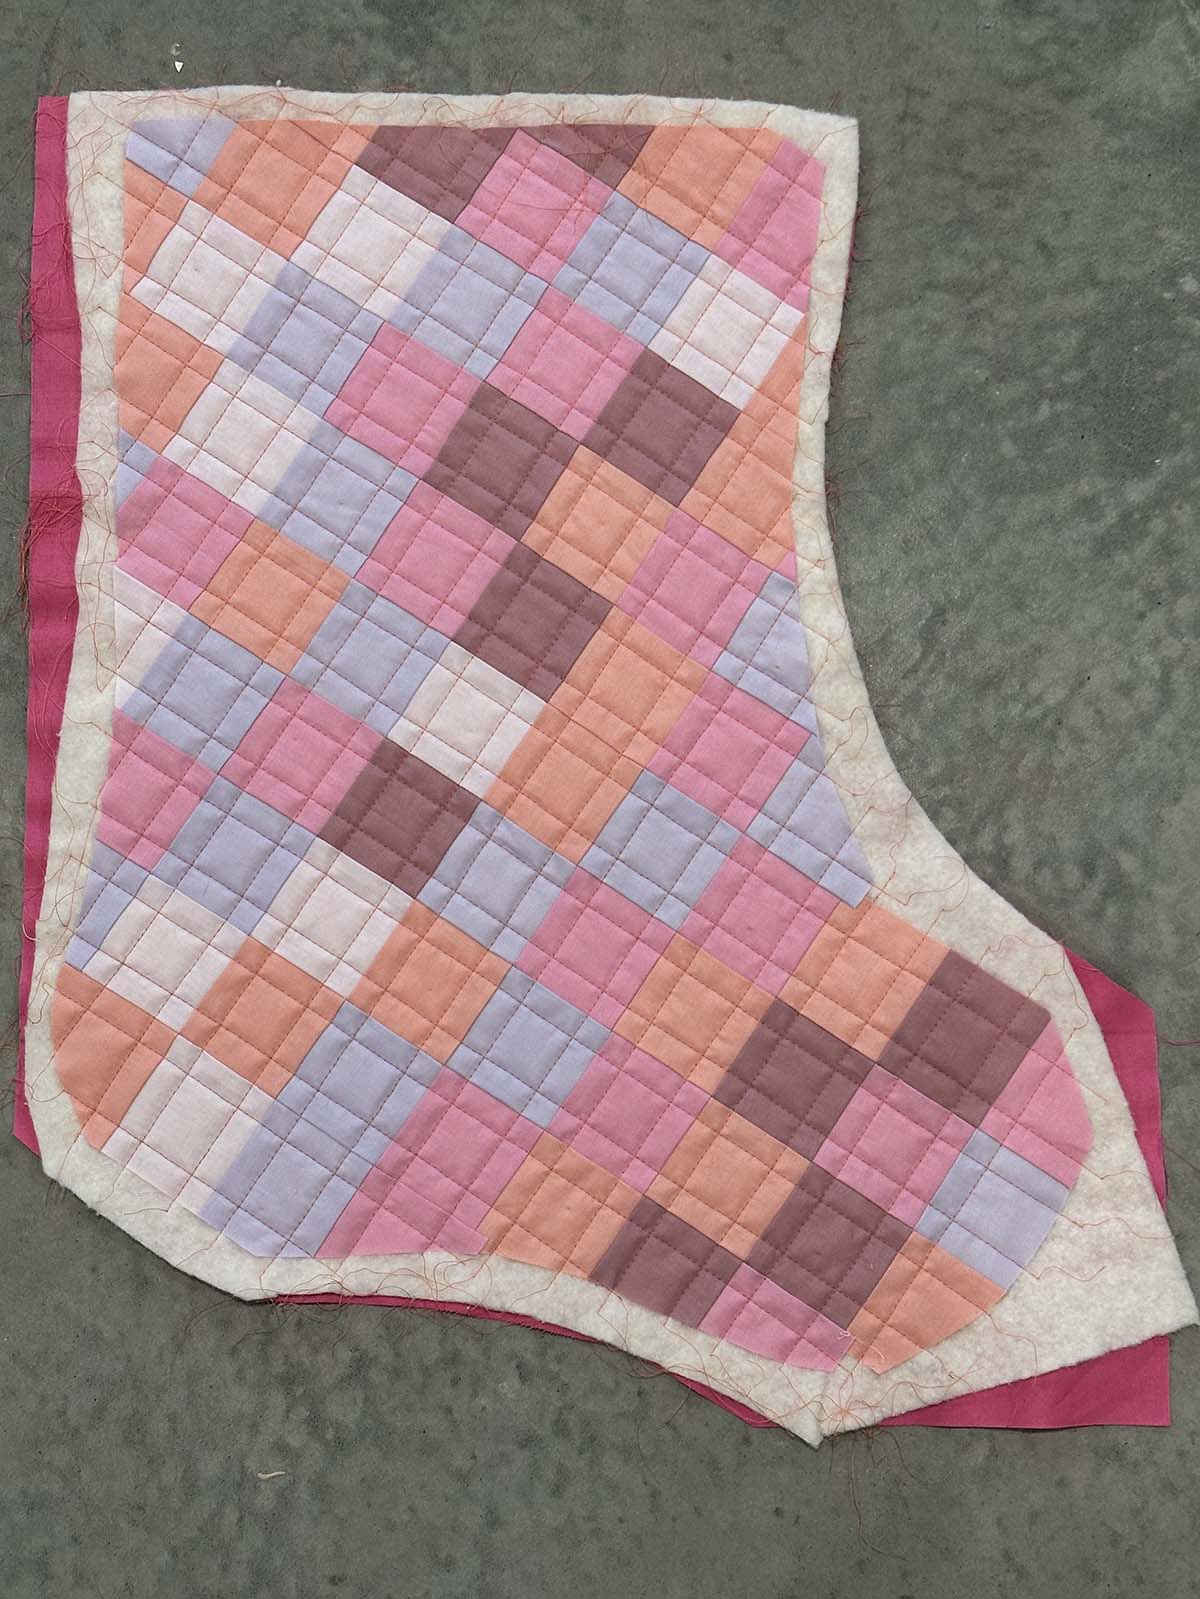
Arrange the Patchwork Design for the Stocking Front
Arrange the squares as follows, with row one on the diagonal at the top right of the stocking.
- Row 1: 3 Squares
- Row 2: 5 Squares
- Row 3: 7 Squares
- Row 4: 11 Squares
- Row 5: 12 Squares
- Row 6: 11 Squares
- Row 7: 10 Squares
- Row 8: 9 Squares
- Row 9: 6 Squares
- Row 10: 4 Squares
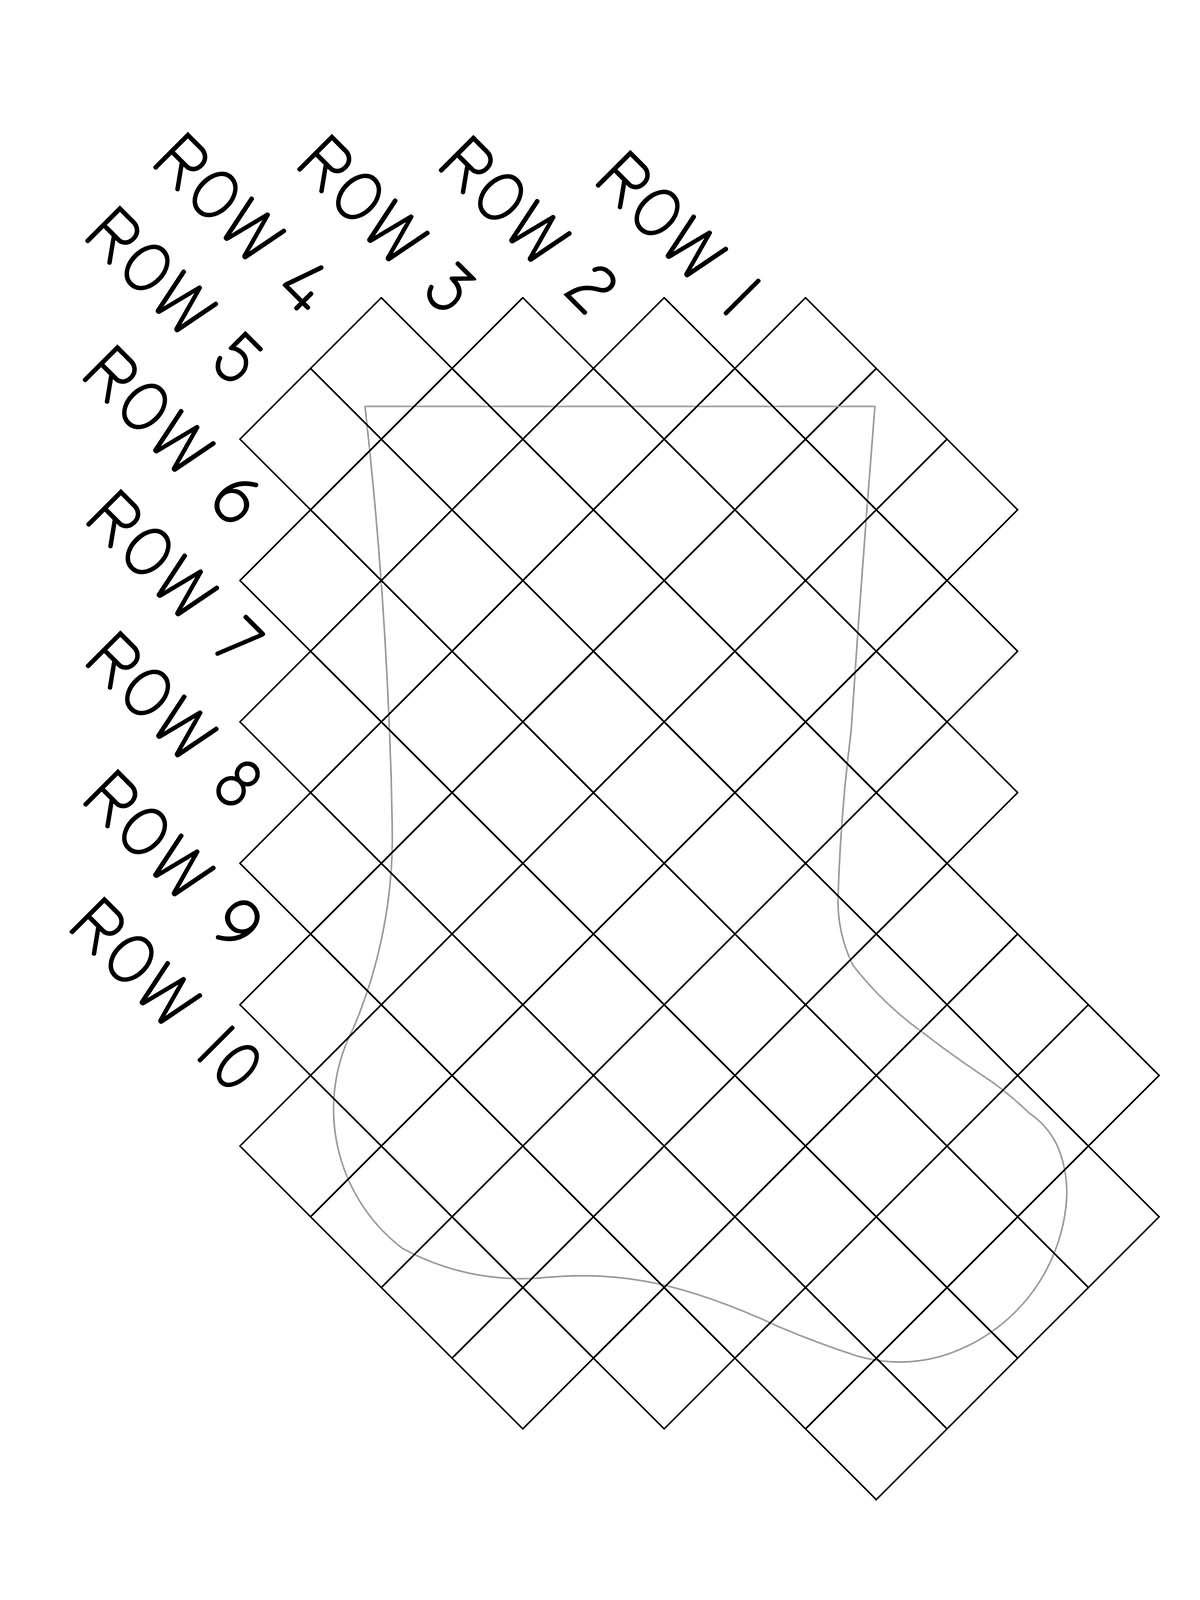
If you have some squares of the same color touching each other, don’t worry. The couching will break up the sections of the overall design.
Piecing the Stocking Front
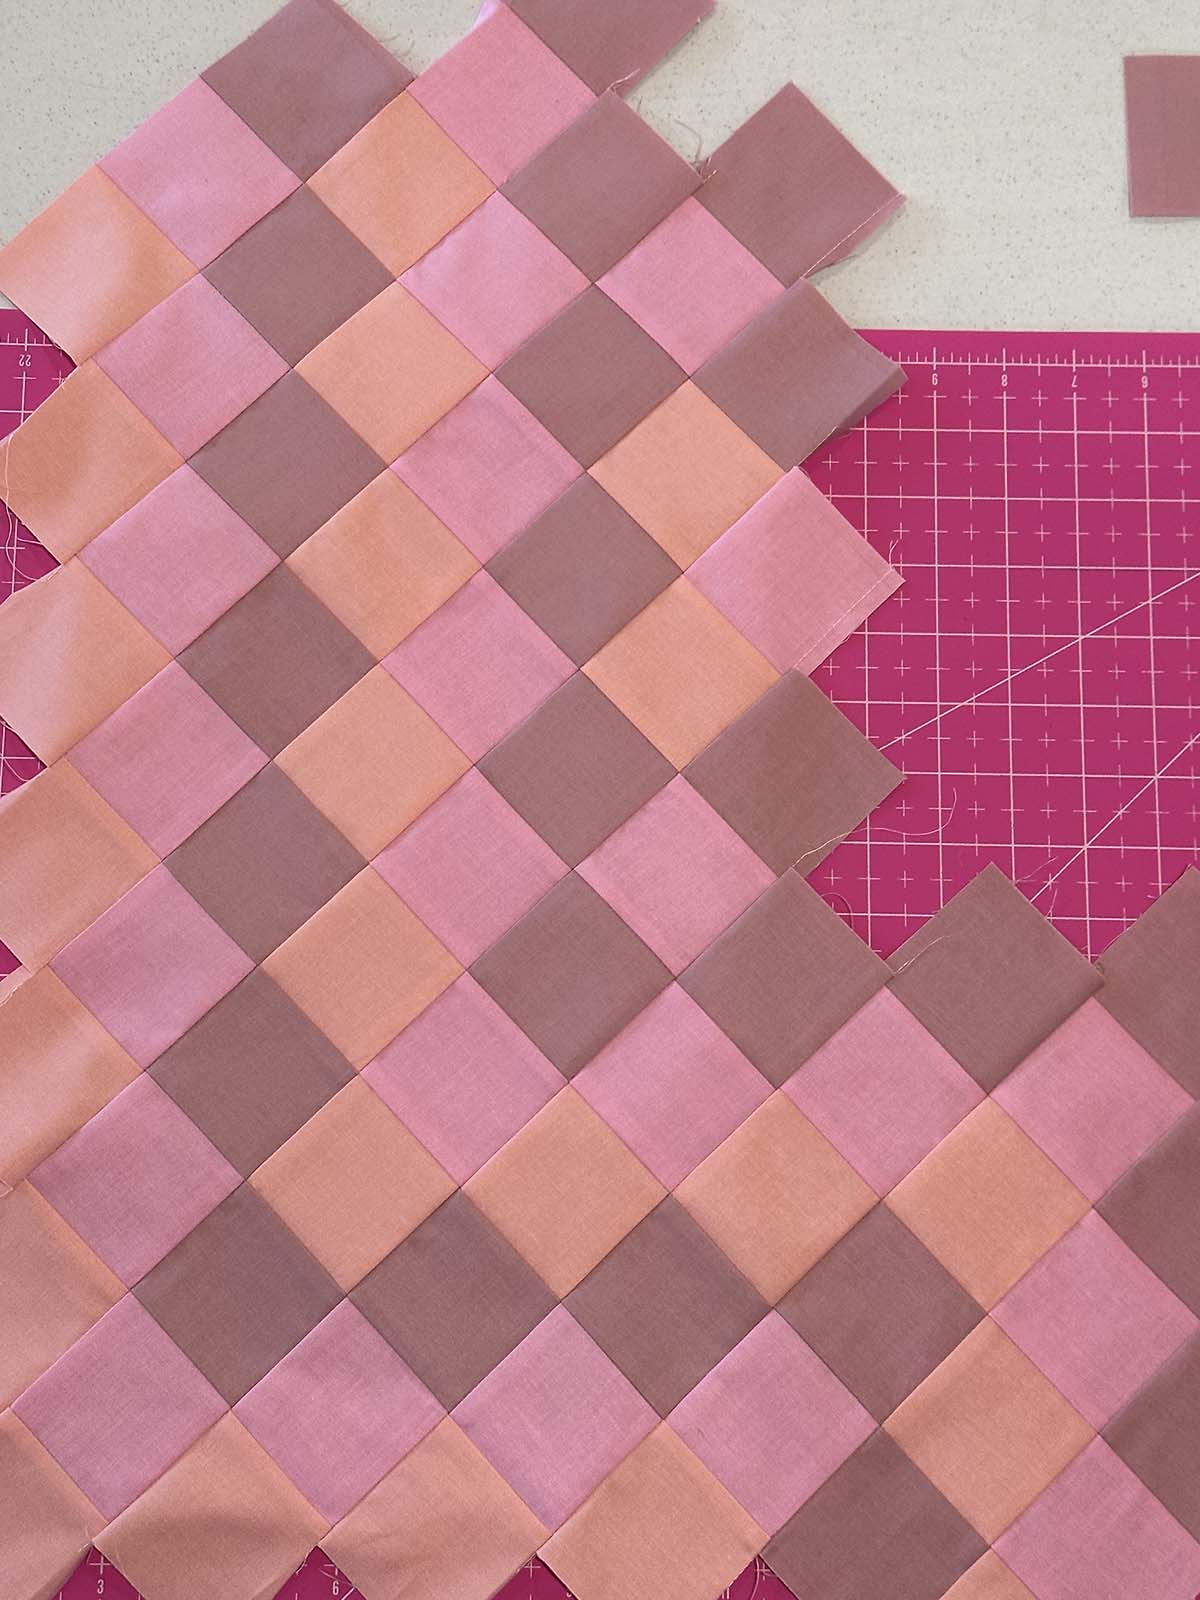
Piece the squares into strips, pressing the seam allowances to the side or open as desired. If pressing the seam allowances to the side, alternate the direction between rows to allow seam allowances to nest.
Piece the strips together and press the seam allowances open or to the side as desired.
Trim the Patchwork for the Stocking Front
Place the template or pattern over the patchwork to ensure you have pieced a large enough section to construct the stocking. Leave a generous amount of extra space around the template, and trim the jagged edges of the patchwork to make it easier to handle during the quilting and couching processes.
It is essential to leave this extra fabric around the edges of the template since quilting and couching tend to shrink the overall size of your stocking pieces slightly.
Step 2: Preparing the Stocking Front and Stocking Back for Quilting
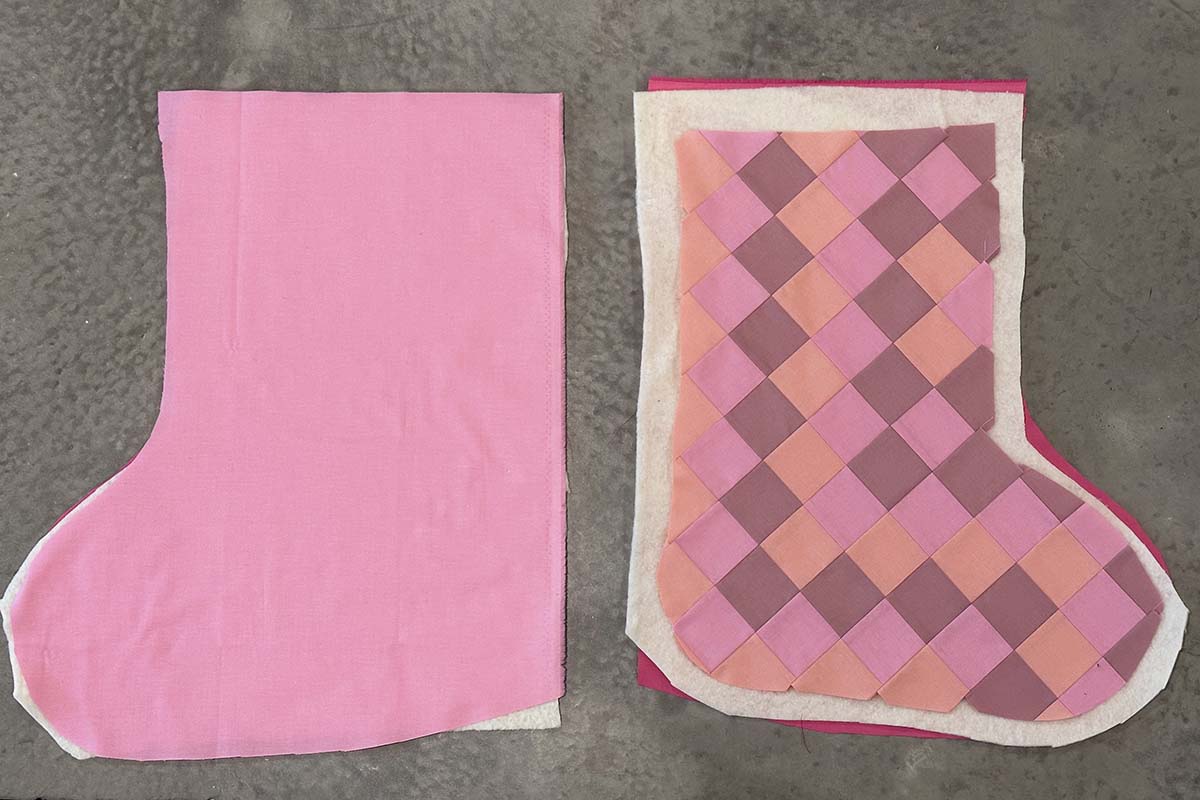
Cut the back of a patchwork stocking.
Cut the back of the stocking. Place the top/right side of the front piece right sides together with the stocking back, then cut the back to approximately the same size. Remember that both the front and the back of the stocking should be about 1″ larger than the template on all sides. This gives you leeway if the pieces shrink slightly during quilting and couching.
Cut the front and back of a wholecloth stocking.
If you are creating a wholecloth stocking. Cut the front and back fabrics right sides together at least 1″ larger than the template on all sides. The cutting does not need to be exact, but you need this extra fabric in case the quilting and couching cause the pieces to shrink slightly.
Cut the batting and lining fabric for the stocking front and back.
Cut the batting and stocking lining pieces approximately 2″ larger on all sides from the finished template size. This will be about 1″ larger on all sides than your current stocking front and back.
Arrange the Stocking Layers
Place the Stocking lining fabrics right side down on a solid surface for basting. The front and back shapes should mirror one another. Use masking tape to secure the lining fabrics.
Place the batting pieces on top of the lining fabrics.
Complete the quilt sandwiches with the outer stocking fabric right sides up on top of the batting.
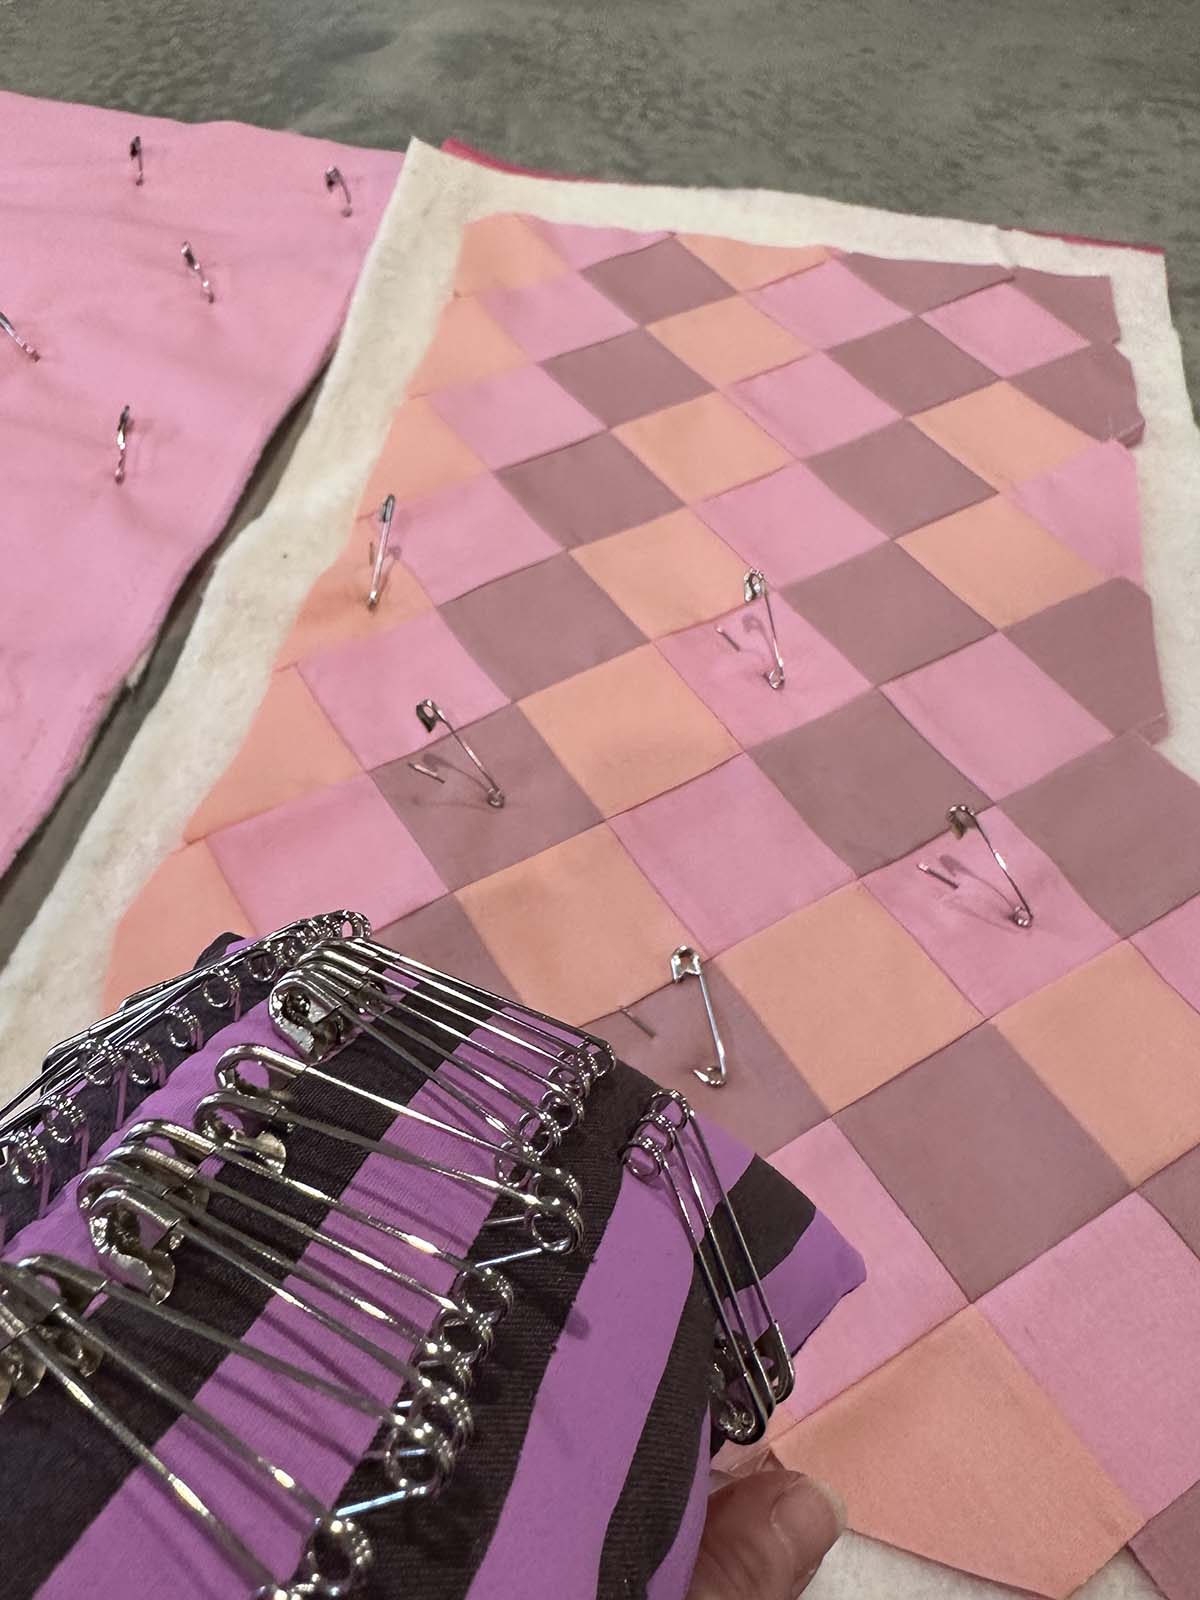
Pin Baste the Layers of the Stocking
Use safety pins to pin the three layers of each section together. Start in the center and work outward to the edges. Space the pins so you can place your flat palm between them. Try not to leave much more space, or your layers may shift.
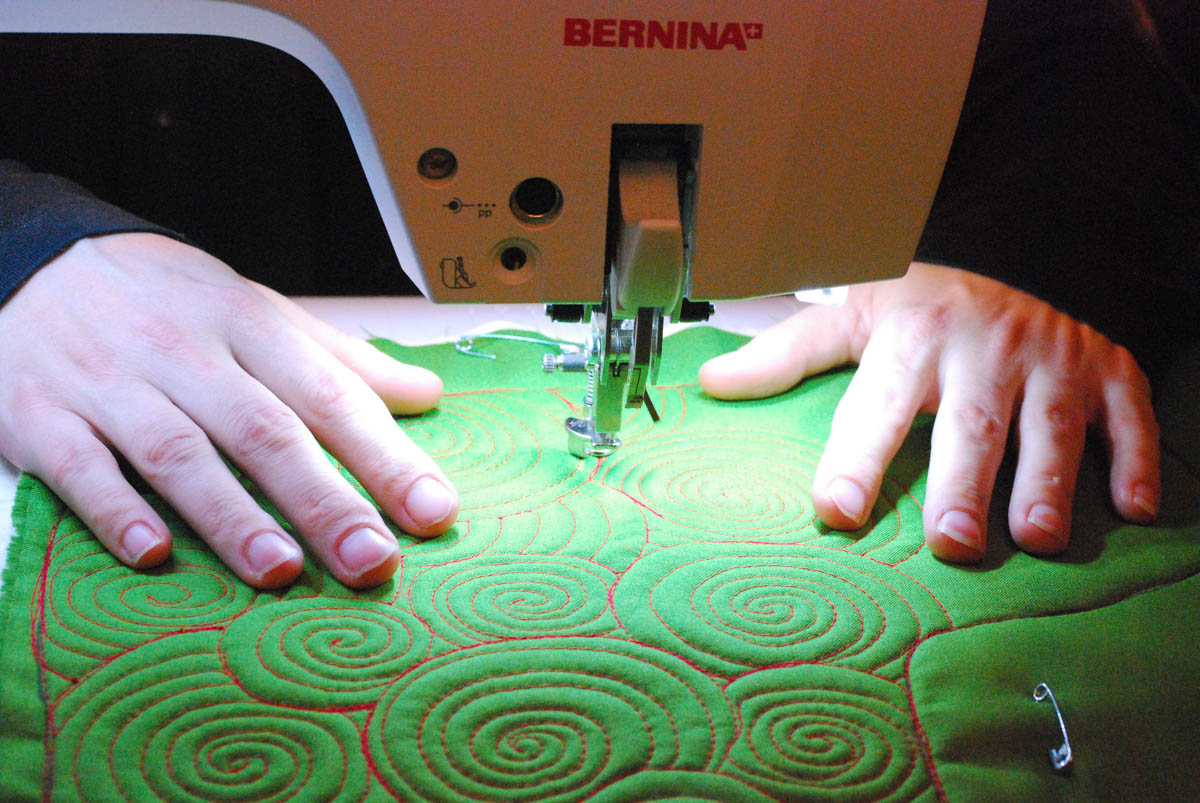
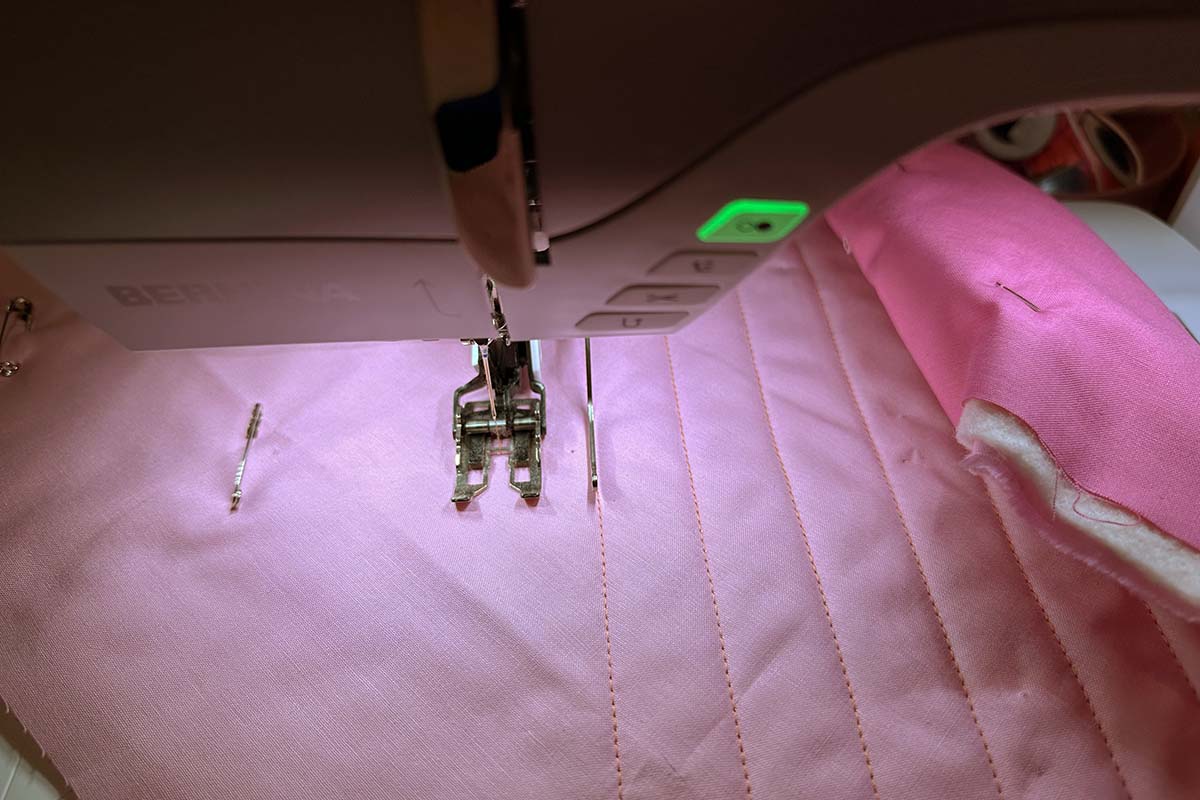
Step 3: Quilt the Christmas Stocking Front
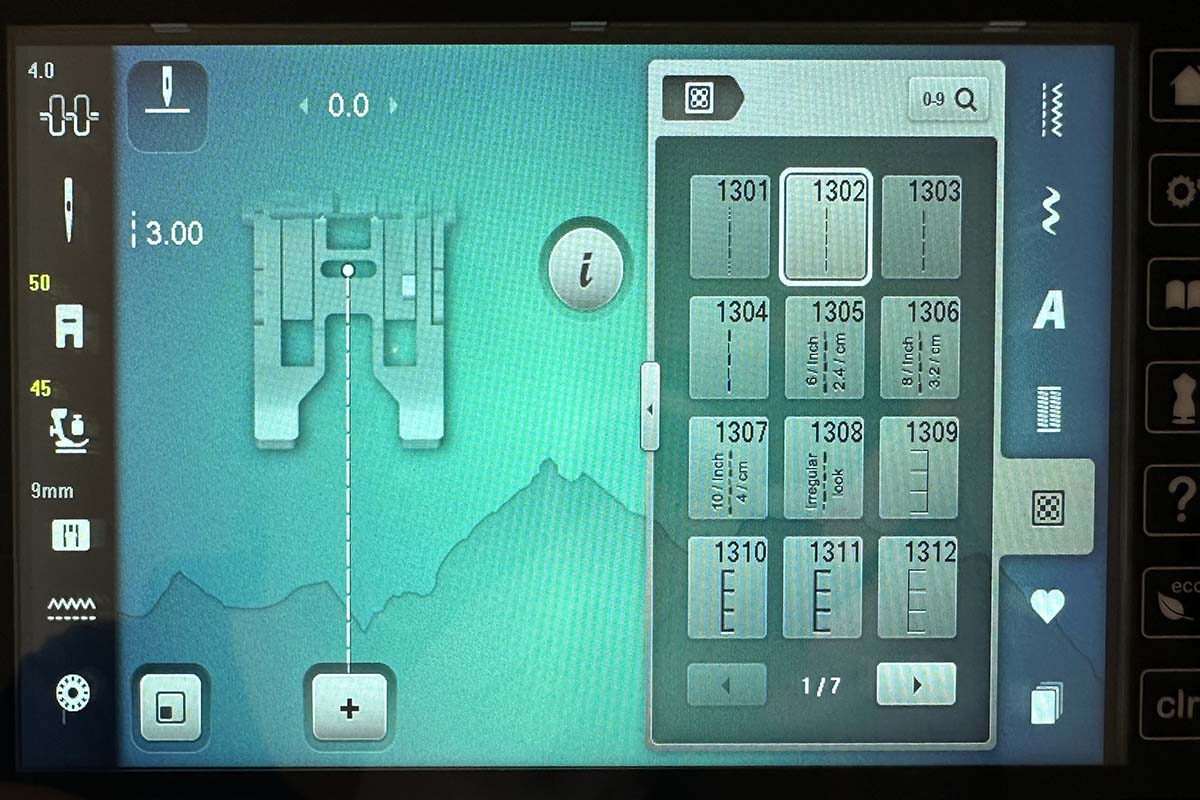
Set up your machine for walking foot quilting
Quilt the stocking front using the BERNINA Three-Sole Walking Foot. Apply the walking foot to the machine and select foot #50 from the presser foot menu. On the BERNINA 770QE PLUS, select stitch 1302. On machines without this stitch option, adjust your stitch length to 3.00 and the machine tension to 4.0. Reduce the presser foot pressure to 45. Do a test line of stitching on a practice quilt sandwich and make any necessary adjustments before quilting on your final project.
Have a Quilting Plan for Your Stocking
Plan your quilting lines to work with the intended couching design. I planned to quilt along each pieced seam for this patchwork stocking, so I did not quilt in the ditch along those seams. Instead, I aligned the walking foot edge along the pieced seam to quilt 1/2″ away from that pieced line.
For a project of this size, start on one end of the quilt sandwich and move across the project from right to left. Remove the safety pins as you quilt.
If you are constructing a wholecloth stocking, you can mark your quilting lines like I quilt the stocking back in the next step.
Do not skip the quilting process.
I discourage you from skipping this step and going directly to the couching portion of this project. Quilting holds the three layers of the stocking in place and prevents any shifting that could happen if you went directly to couching, since that process does not allow you to have the dual-feed engaged.

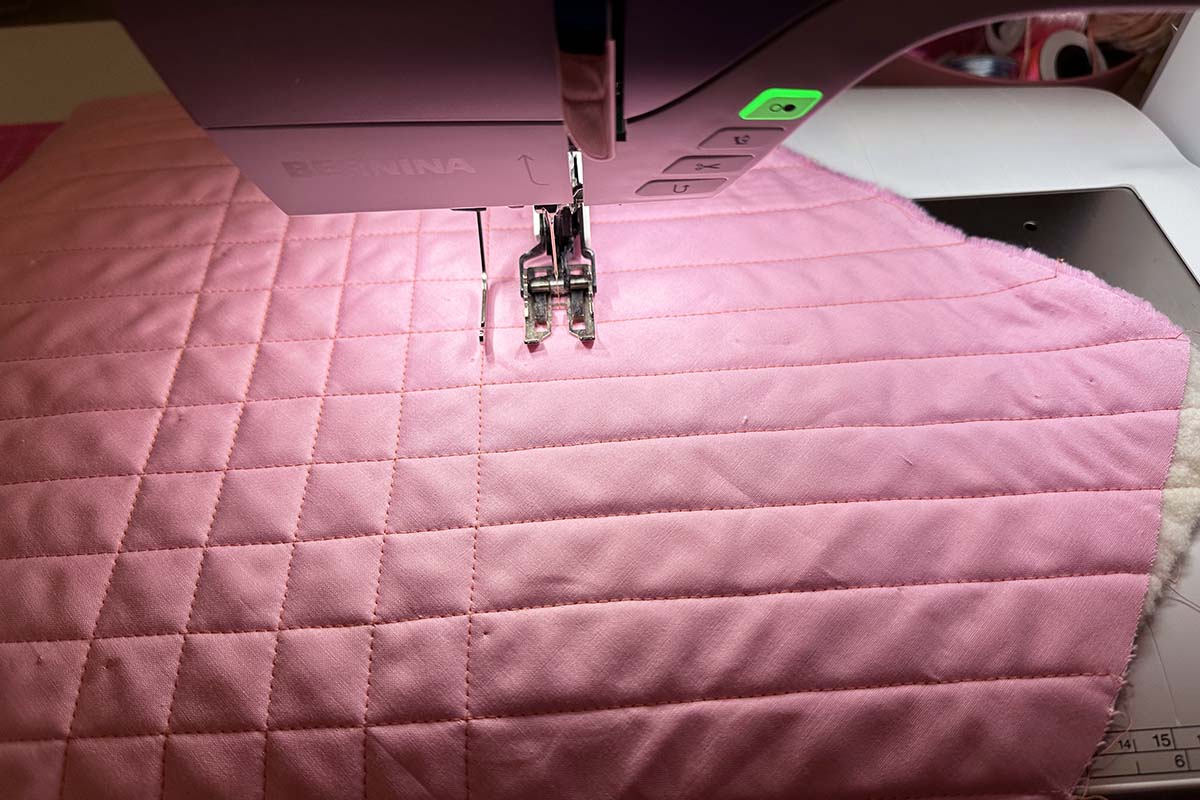
Once the quilting is complete in one direction, rotate the quilt sandwich and quilt in the second direction.
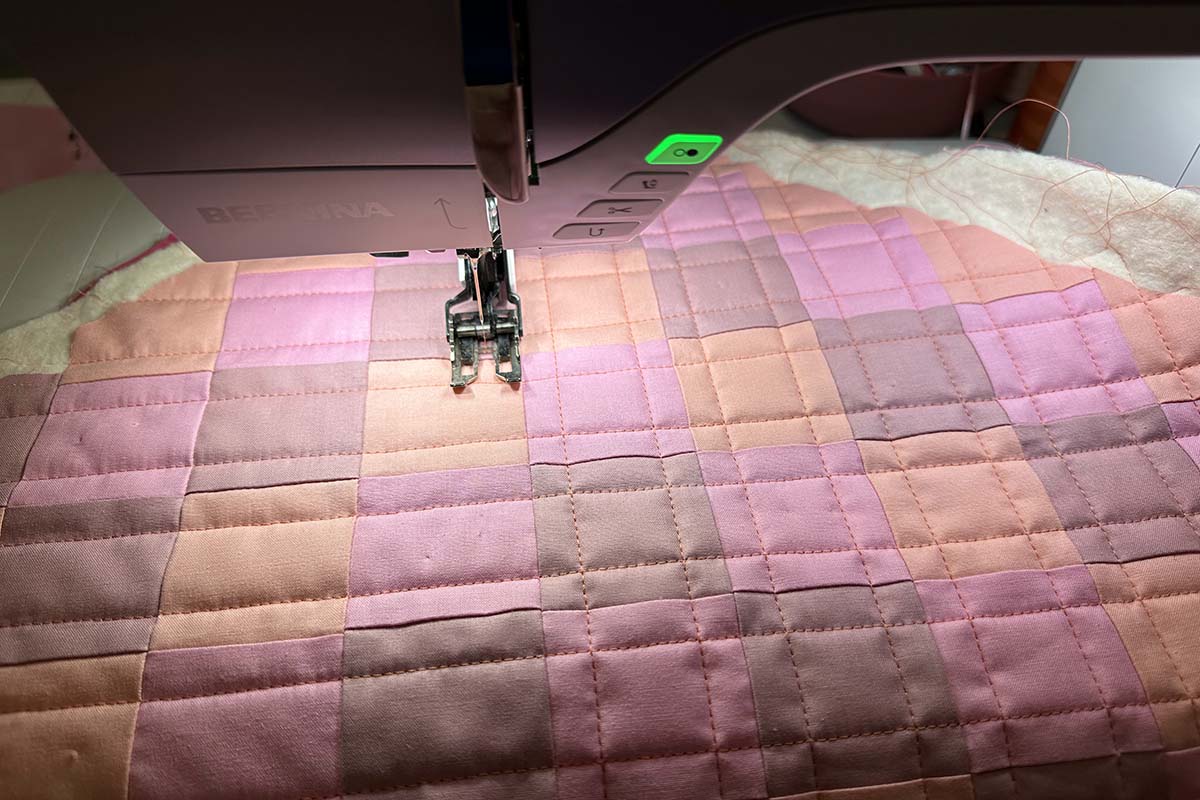
The quilting design for my stocking resulted in a 1″ grid centered on each patchwork square. This distance between quilting lines prevents most shifting when you remove the walking foot to complete the couching process.
Choosing a Quilting Thread
For this design, I used 50-weight cotton quilting thread in a color that blended with the patchwork piecing. If you would like to add more emphasis to your quilting stitches, consider using a contrasting and/or a heavier-weight thread.
Step 4: Quilt the Christmas Stocking Back
Marking the First Quilting Lines
The diagonal 1″ grid quilting motif continues on the back of this Christmas Stocking. Since I selected a solid fabric without piecing for the stocking back, I needed to mark my quilting lines. 1″ wide masking tape is the perfect tool. I laid a strip down the center of the stocking in the appropriate direction using a rotary cutting ruler edge as a guide. Since the tape is 1″ wide, I stitched the first two quilting lines on either side of the tape.
Spacing the Quilting Lines
When creating a small project, additional lines of quilting can easily be spaced by using the spacing attachment included with the BERNINA Walking Foot. Since I placed the first lines of stitching in the center of the stocking back, I switched the spacing bars halfway through quilting to quilt to both the left and right sides of the original lines.
After the quilting is complete in the first direction, rotate the piece, mark the first lines with a row of tape, and then quilt the second set of lines to complete the grid.
Step 5: Couch the Christmas Stocking Front
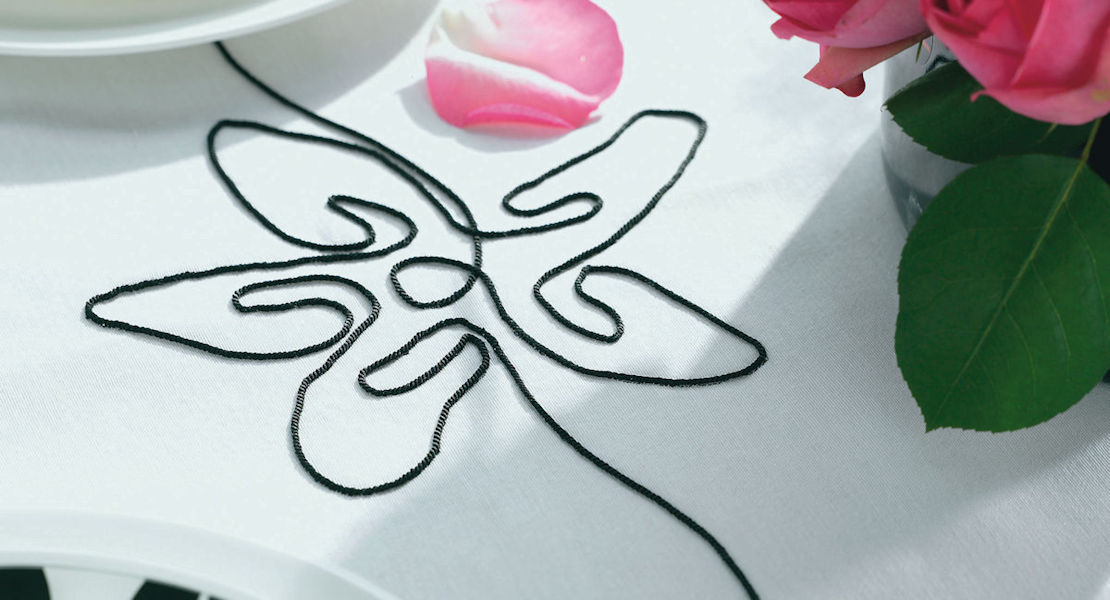
What is Couching?
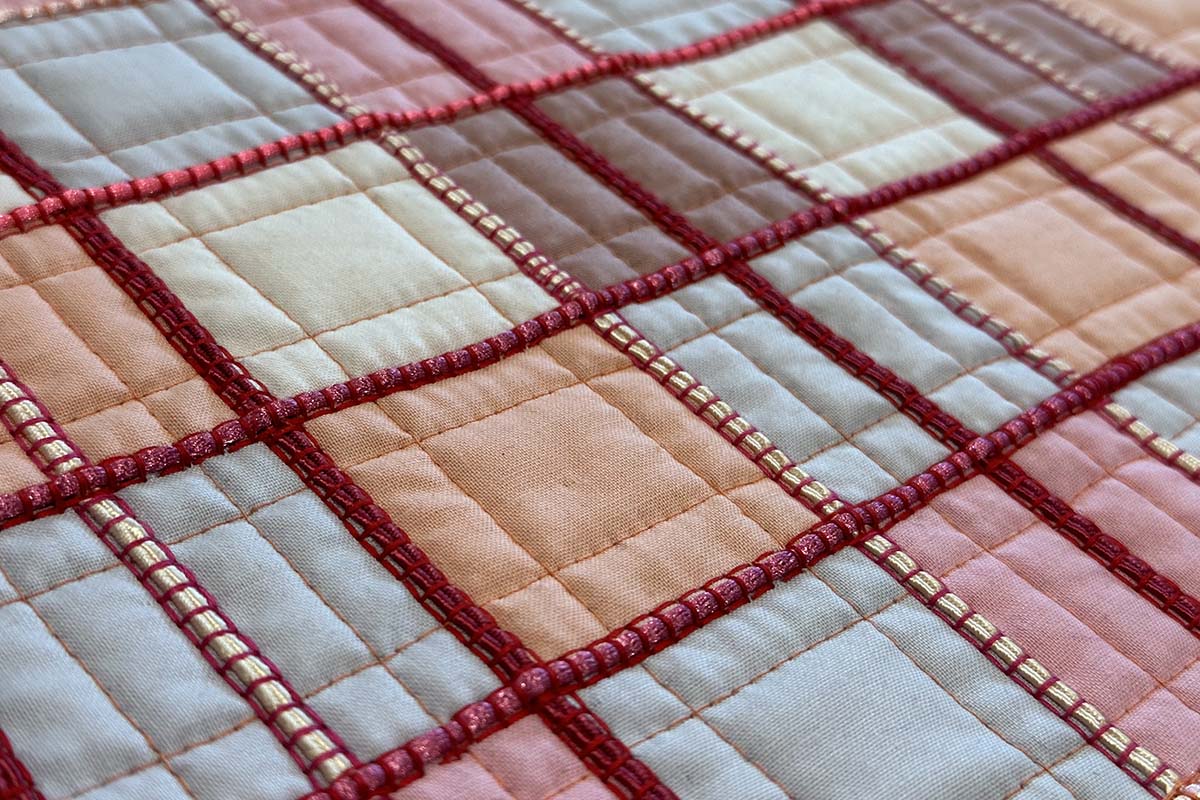
Couching is the process of stitching one fiber, cord, or ribbon in place with stitches over it. This technique allows you to incorporate threads, yarns, ribbons, or cords too thick to run through your sewing machine. Because this technique uses two components, the couched material and the thread doing the couching, you have two opportunities to incorporate color and texture. The thread you use can blend with the couched material, but I selected contrasting 40-weight threads for this design to develop additional color and texture.
Machine Set-Up for Couching
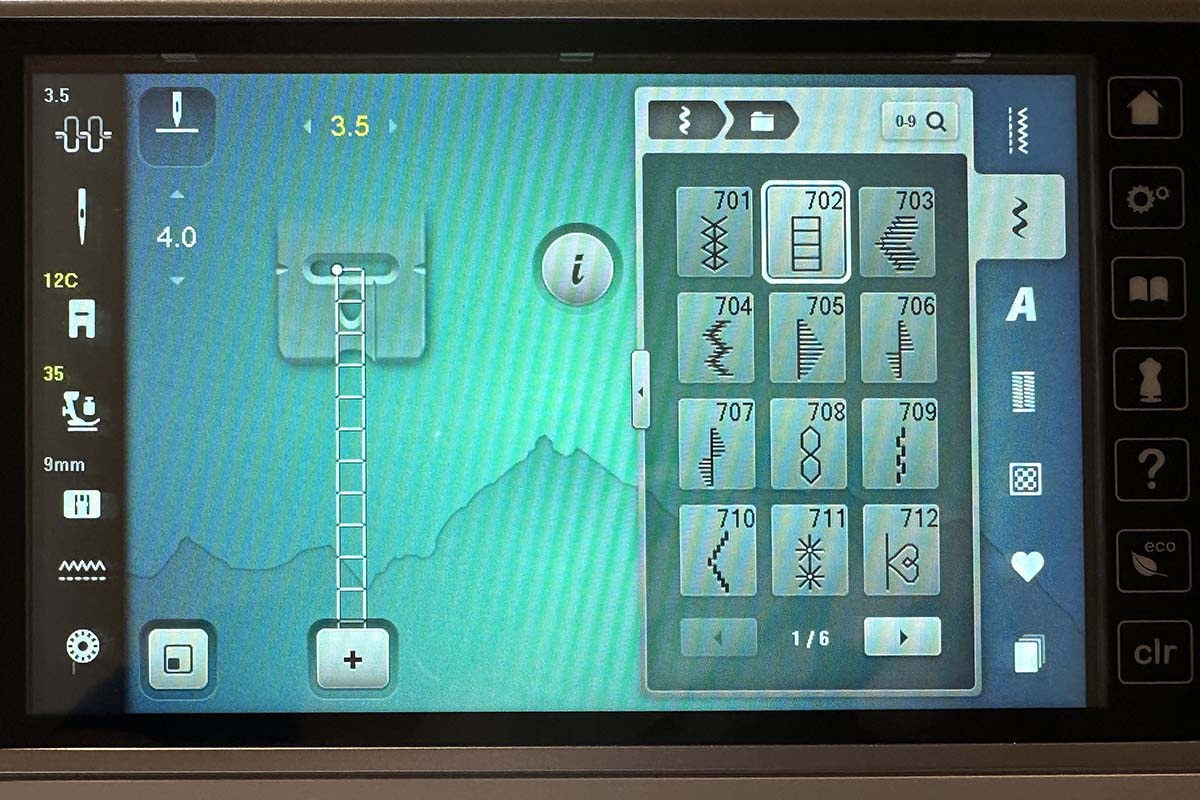
This is a great time to pull out a practice quilt sandwich to experiment with stitching possibilities. The simplest form of couching is done with a zigzag stitch, but contemporary machines offer vast selections of decorative stitches that create added interest in your couched designs. When selecting a stitch, look for motifs wide enough to go over the cord you are couching but won’t puncture it.
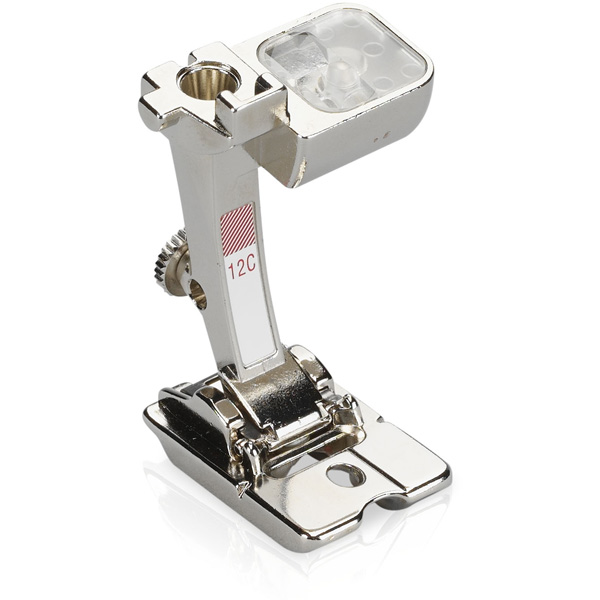
I selected stitch 702 on the BERNINA 770 QE PLUS for this stocking. While I used this stitch consistently throughout the couching process, I adjusted the stitch width when I changed the type of braid or cord I used. I also used the Bulky Overlock #12C Foot and reduced the presser foot pressure to 35 while couching with this stitch.
Couching the Christmas Stocking
The Bulky Overlock Foot has an opening in the front of the presser foot to feed your braid or cord through as you sew. If you plan to couch in two directions, select a flat braid or ribbon for the first to make it easier to sew over when you stitch in the second direction. If all of your couching goes the same way with no overlap, you can use materials of any thickness that still work with the presser foot.
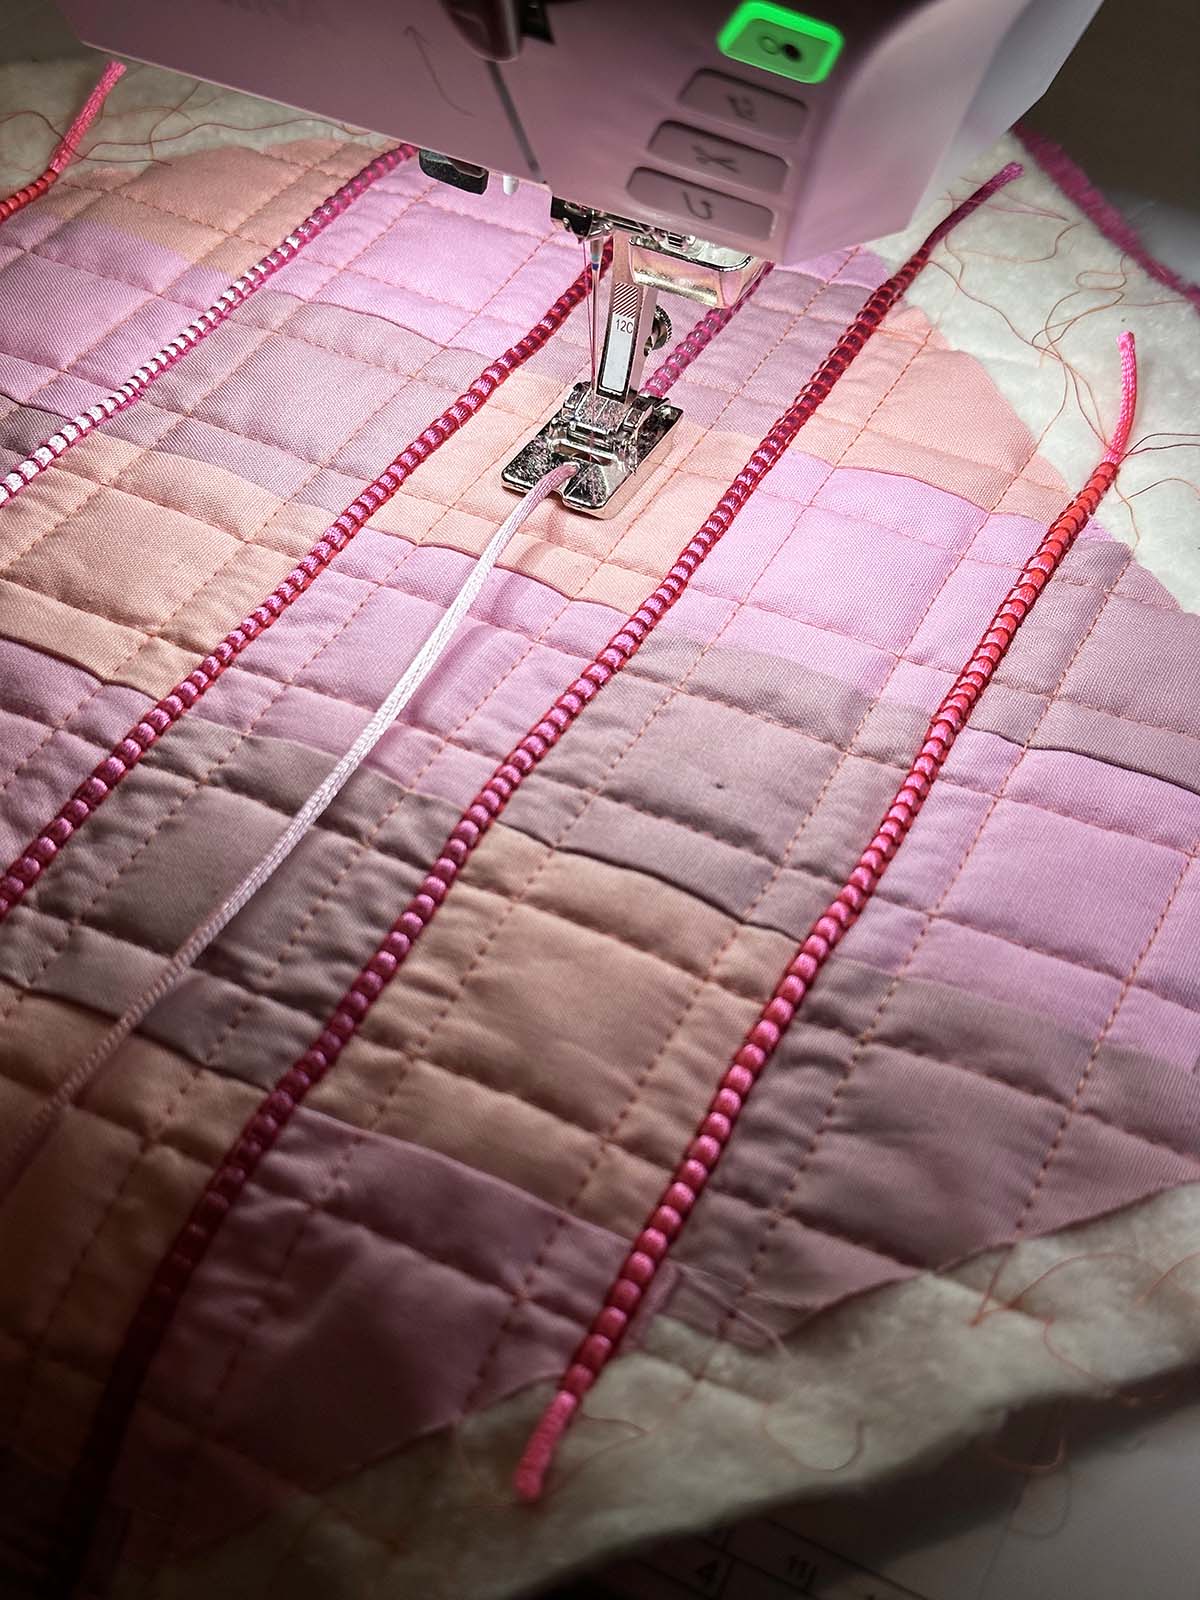
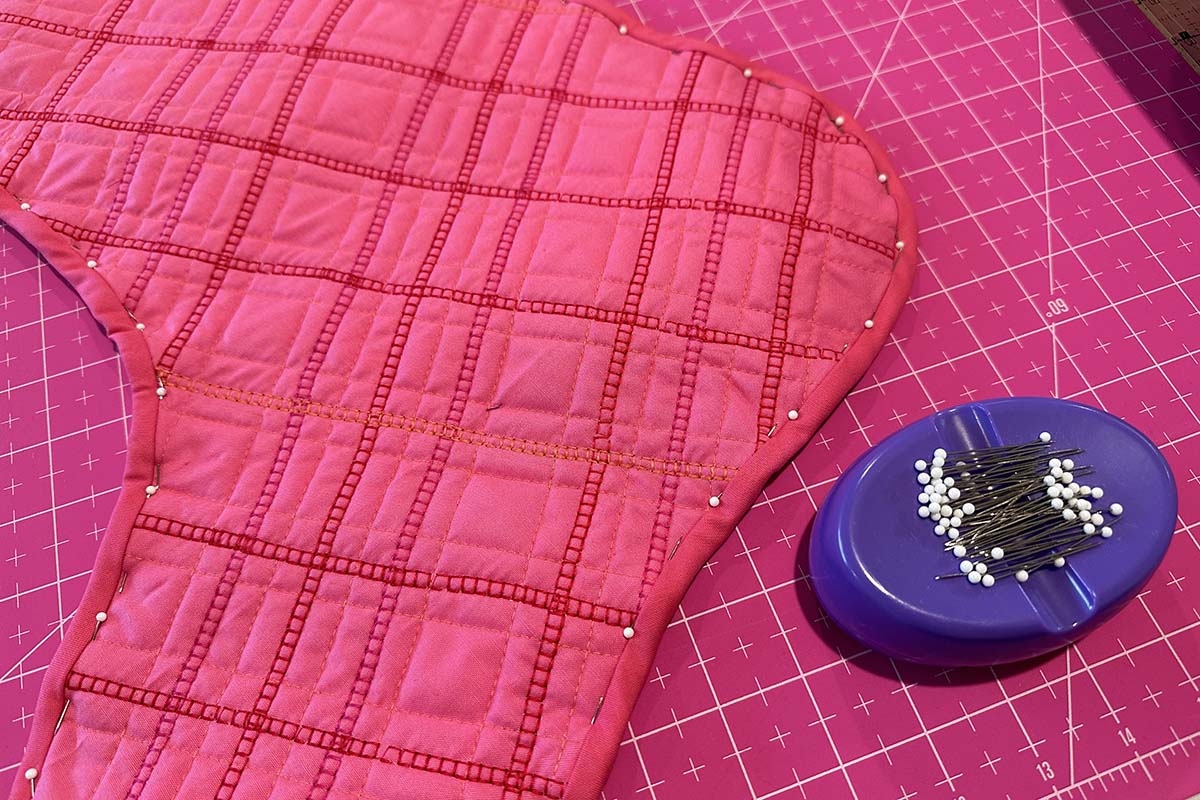
For my couching design, I focused primarily on the seam lines of the patchwork and then added a few decorative lines down the middle of some squares. Remember that the top of the stocking will get covered by a cuff, so you don’t need to couch to the top of the stocking.
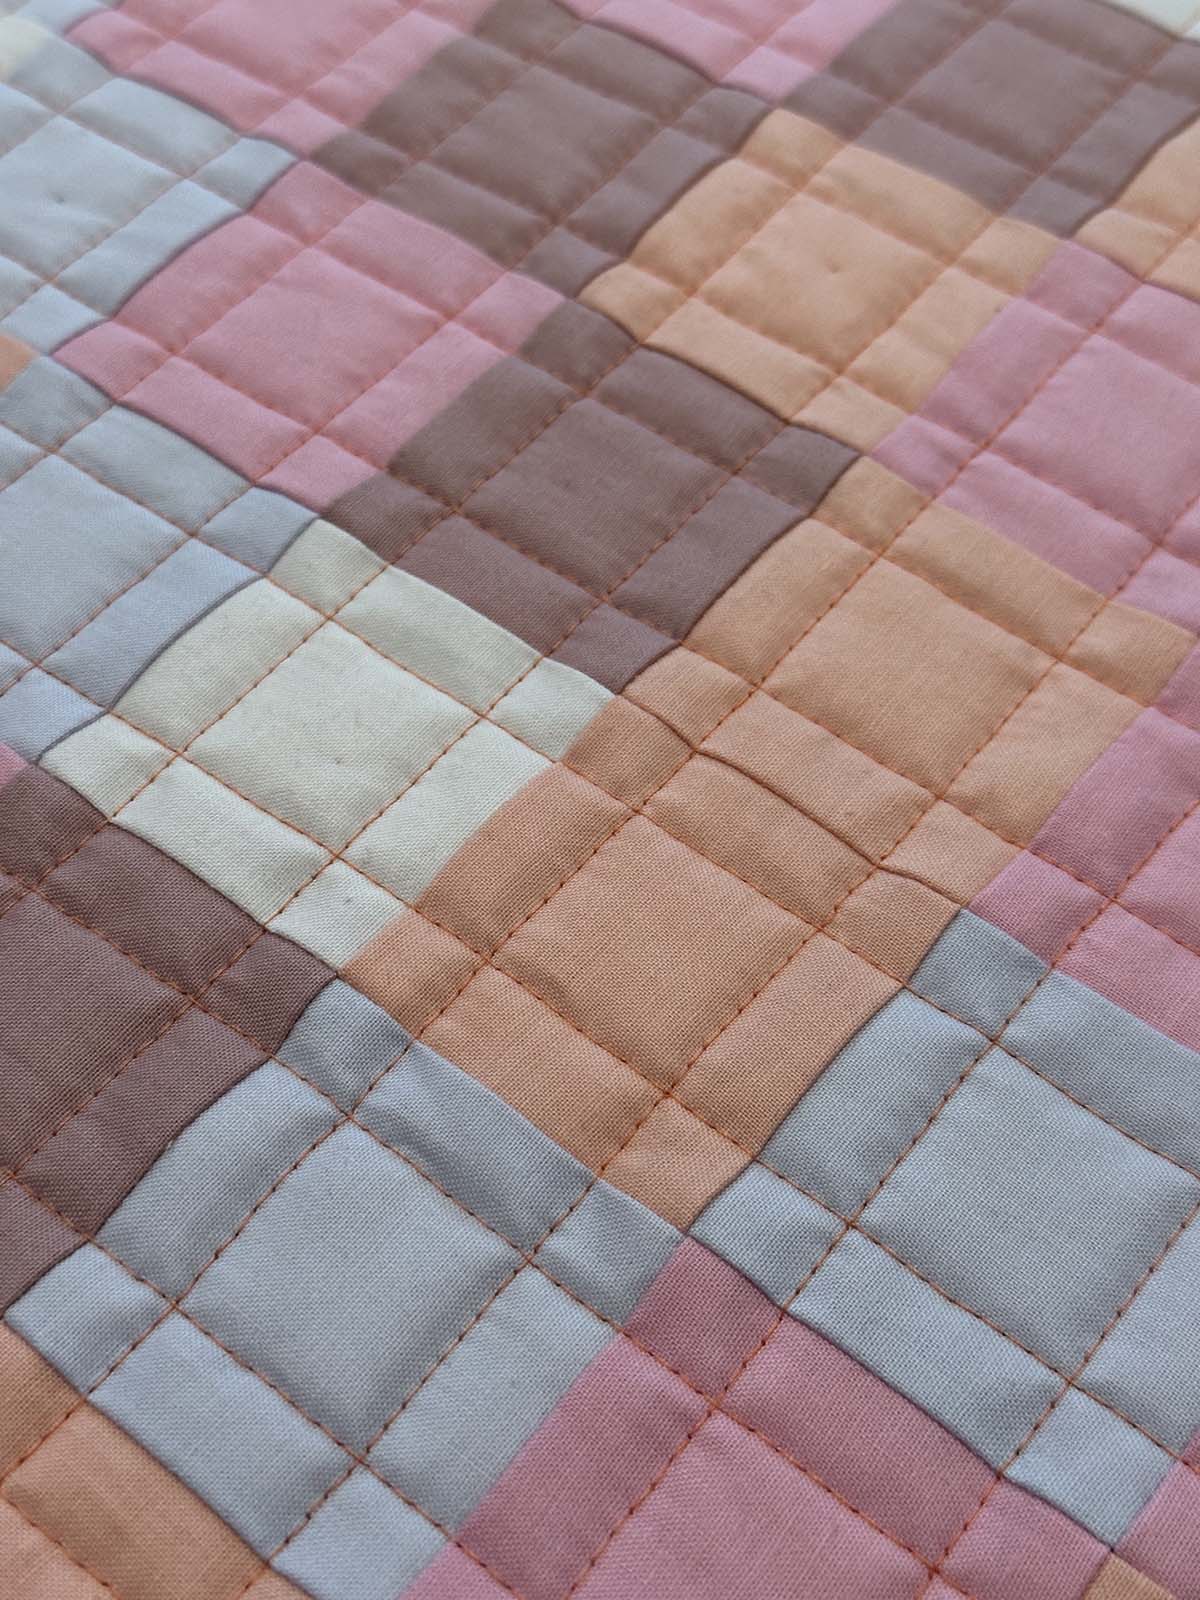
In the detail view, you can see how I used a thinner braid when stitching in the first direction and a thicker cord in the second direction. This particular stitch, paired with contrasting thread, creates a bead-like effect with the cording.
Step 6: Assemble the Body of the Christmas Stocking
Cut the Stocking Pieces
Now that the quilting and couching processes are complete, you can use the provided template or your chosen stocking pattern to do the final precise cut of the stocking front and back.
Assemble the Stocking
Place the stocking front and back pieces right sides together. Stitch using a 1/4″ seam if desired, or wait to stitch simultaneously with the binding strip.
Finishing the Interior Seam
Finishing the interior edge of the stocking with bias binding is optional, but doing this step improves the longevity of the stocking and helps keep little fingers from getting caught on any threads that may come loose over the years. It looks good too!
Prepare the Bias Binding Strip
Fold and press the bias binding strip that coordinates with the stocking lining in half lengthwise.
Stitching the Binding and Stocking Edge
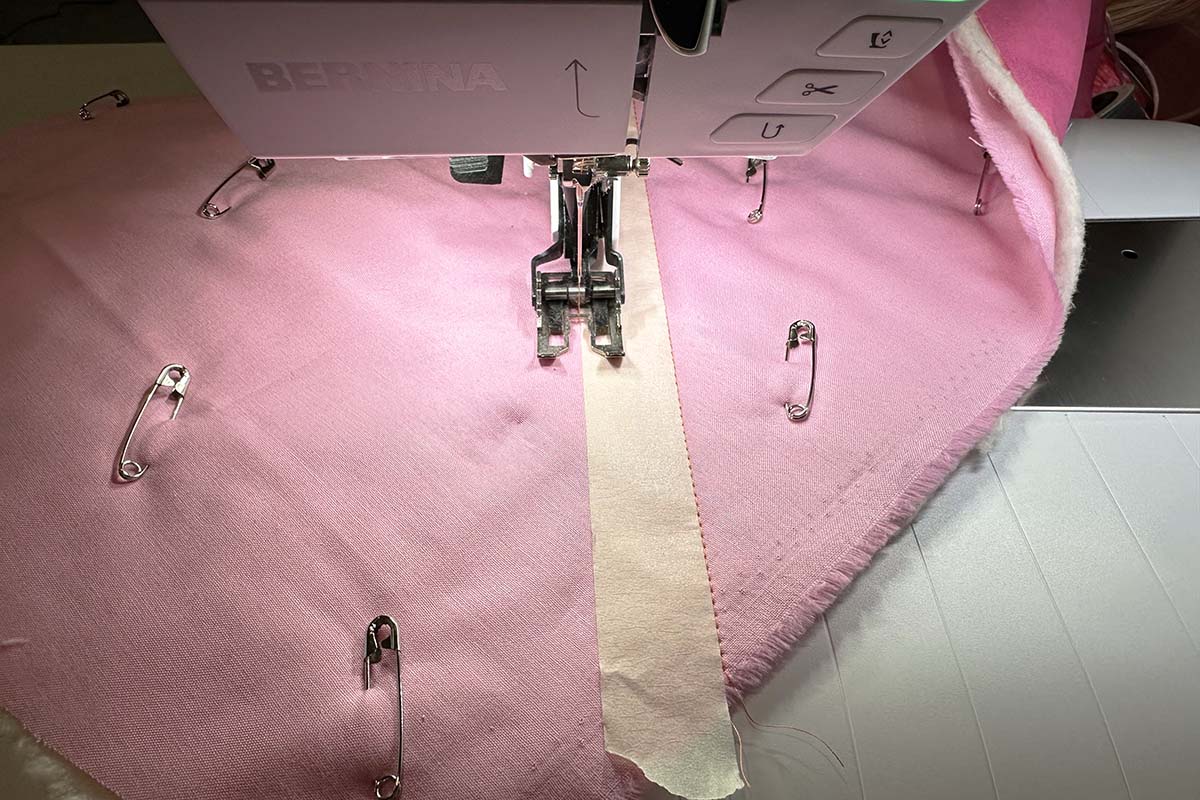
Position the bias strip around the stocking, except for the top, that will be left open. Align the raw edges of the bias binding with the cut edges of the stocking and pin all the layers together. Since the binding strip is cut on the bias, you will be able to ease it around the curves of the stocking.
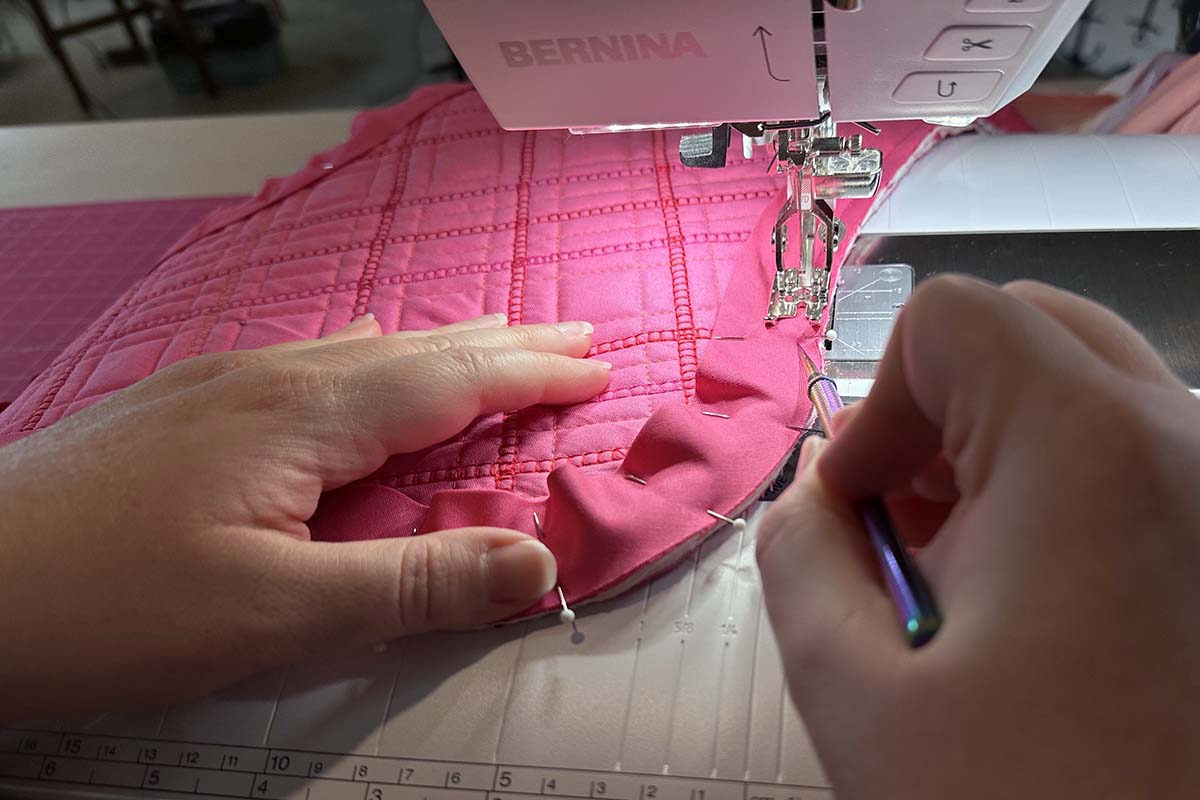
Using a straight stitch and the #97D Patchwork Foot with the dual feed engaged, stitch around the stocking using a 1/4″ seam allowance and leaving the top open. Since you are sewing several layers, a stiletto is helpful to keep everything smooth as you sew.
Finishing the Interior Binding
Turn the folded edge of the bias binding to the back of the stocking and pin or glue it in place. I pin the binding parallel to the edge and in the seam ditch, where I will position the final stitching.
Using the #10D Edgestitch Foot with the Dual Feed engaged, stitch in the ditch around the bound edges of the stocking to secure the binding in place, removing pins as you sew.

Step 7: Add the Faux Fur Cuff to the Christmas Stocking
Determining the Size of the Cuff
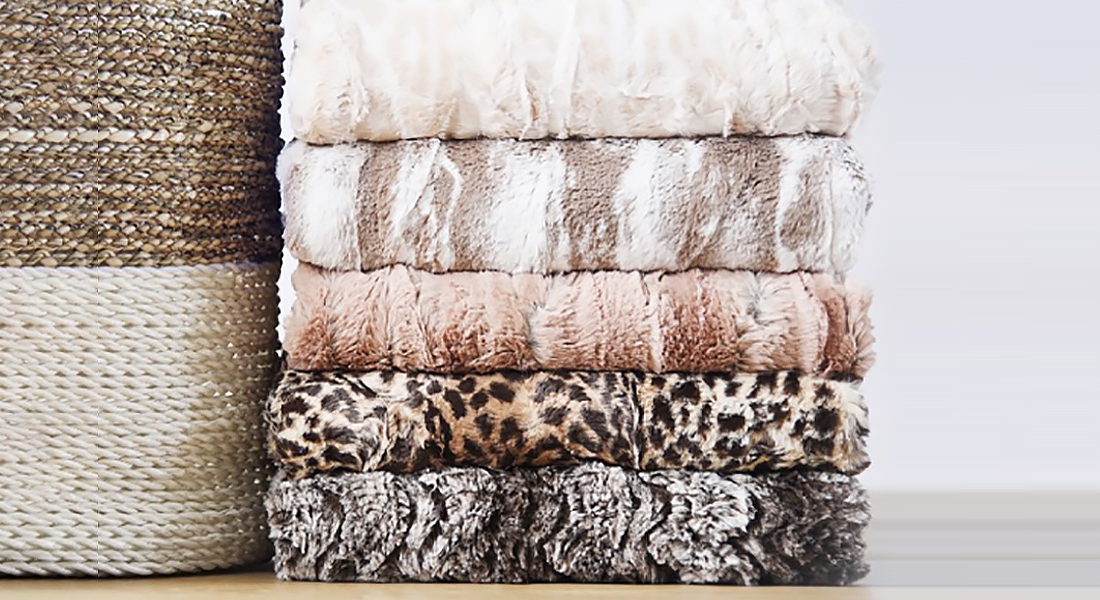
Faux fur is frequently found in 12″ squares, a great size for a single stocking. You will cut the stocking cuff in two pieces from this size square. Measure the top of the stocking template to determine the width of the cuff rectangle. For the template provided, this measurement is 10-1/4″.
When deciding the length of the stocking cuff, consider the length of the faux fur. Longer fur may mean you want to cut the cuff slightly shorter than you would if using shorter fur.
I am using 2″ long fur for this stocking, so I cut my cuff 5″ long. A quarter-inch seam allowance is needed at the top and bottom, so the finished cuff will be 4-1/2″ plus the length of the fur that extends down.
If you use the provided template and similar fur, the cutting measurement for the cuff is 10-1/4″ x 5″.
Cutting the Fur
There are two essential things to remember when cutting faux fur:
- When cutting faux fur, ensure the fur’s nap goes in the desired direction. If you stroke it from the top of the stocking down, you will want the fur to lay smoothly for a stocking cuff.
- Only cut the backing fabric of the fur, not the fur itself. When appropriately cut through the backing only, you can hide seams and keep the fur looking natural. Use small scissors or a blade to snip through the backing material carefully. This isn’t a fast process, but the result is worth it.
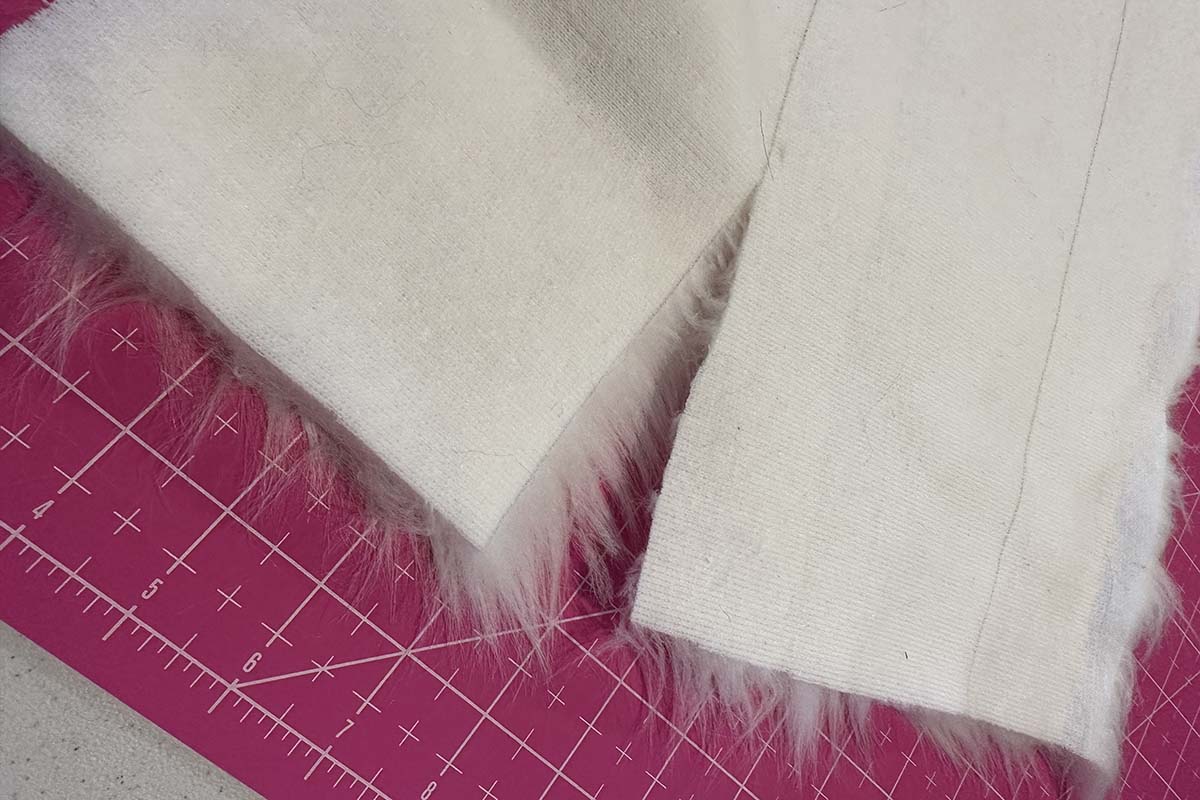
Seaming the Fur Together
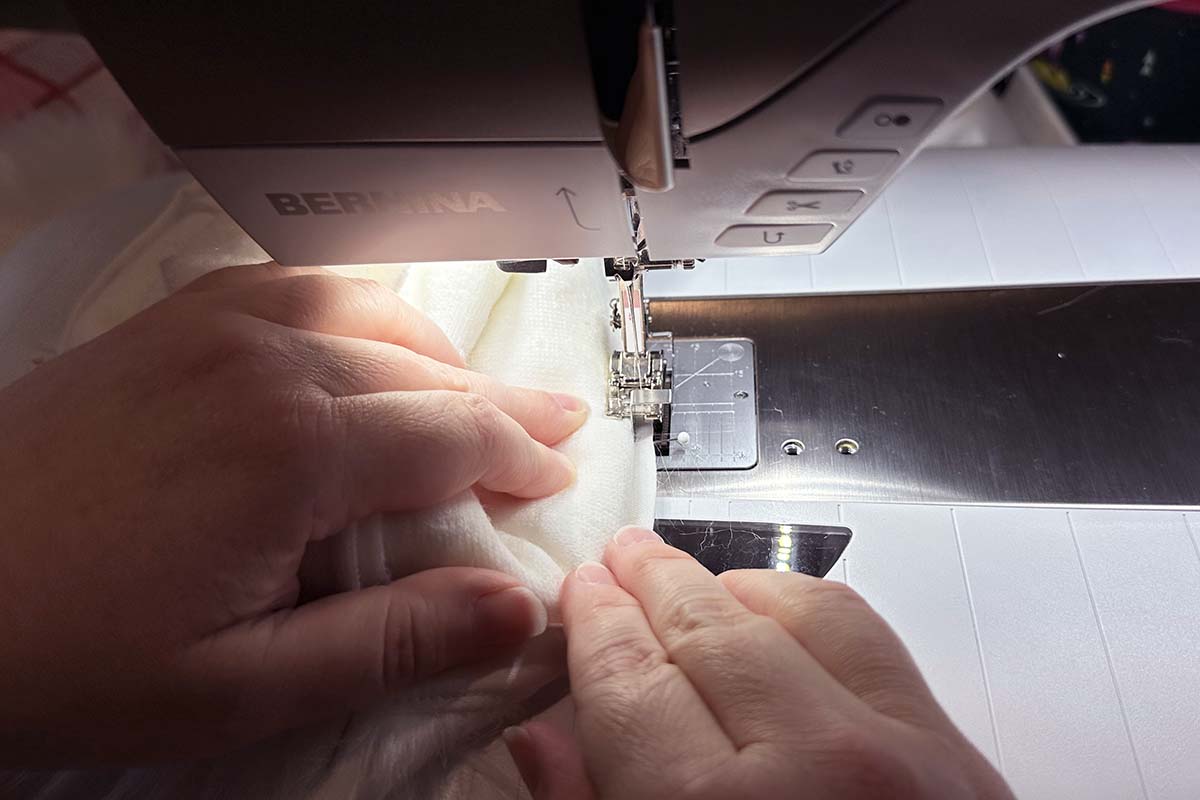
When stitching faux fur, pin carefully, ensuring there is little to no fur sticking out of the seam allowance. By pushing the fur’s nap inward toward the piece’s main body, your seam will end up well hidden within the fur.
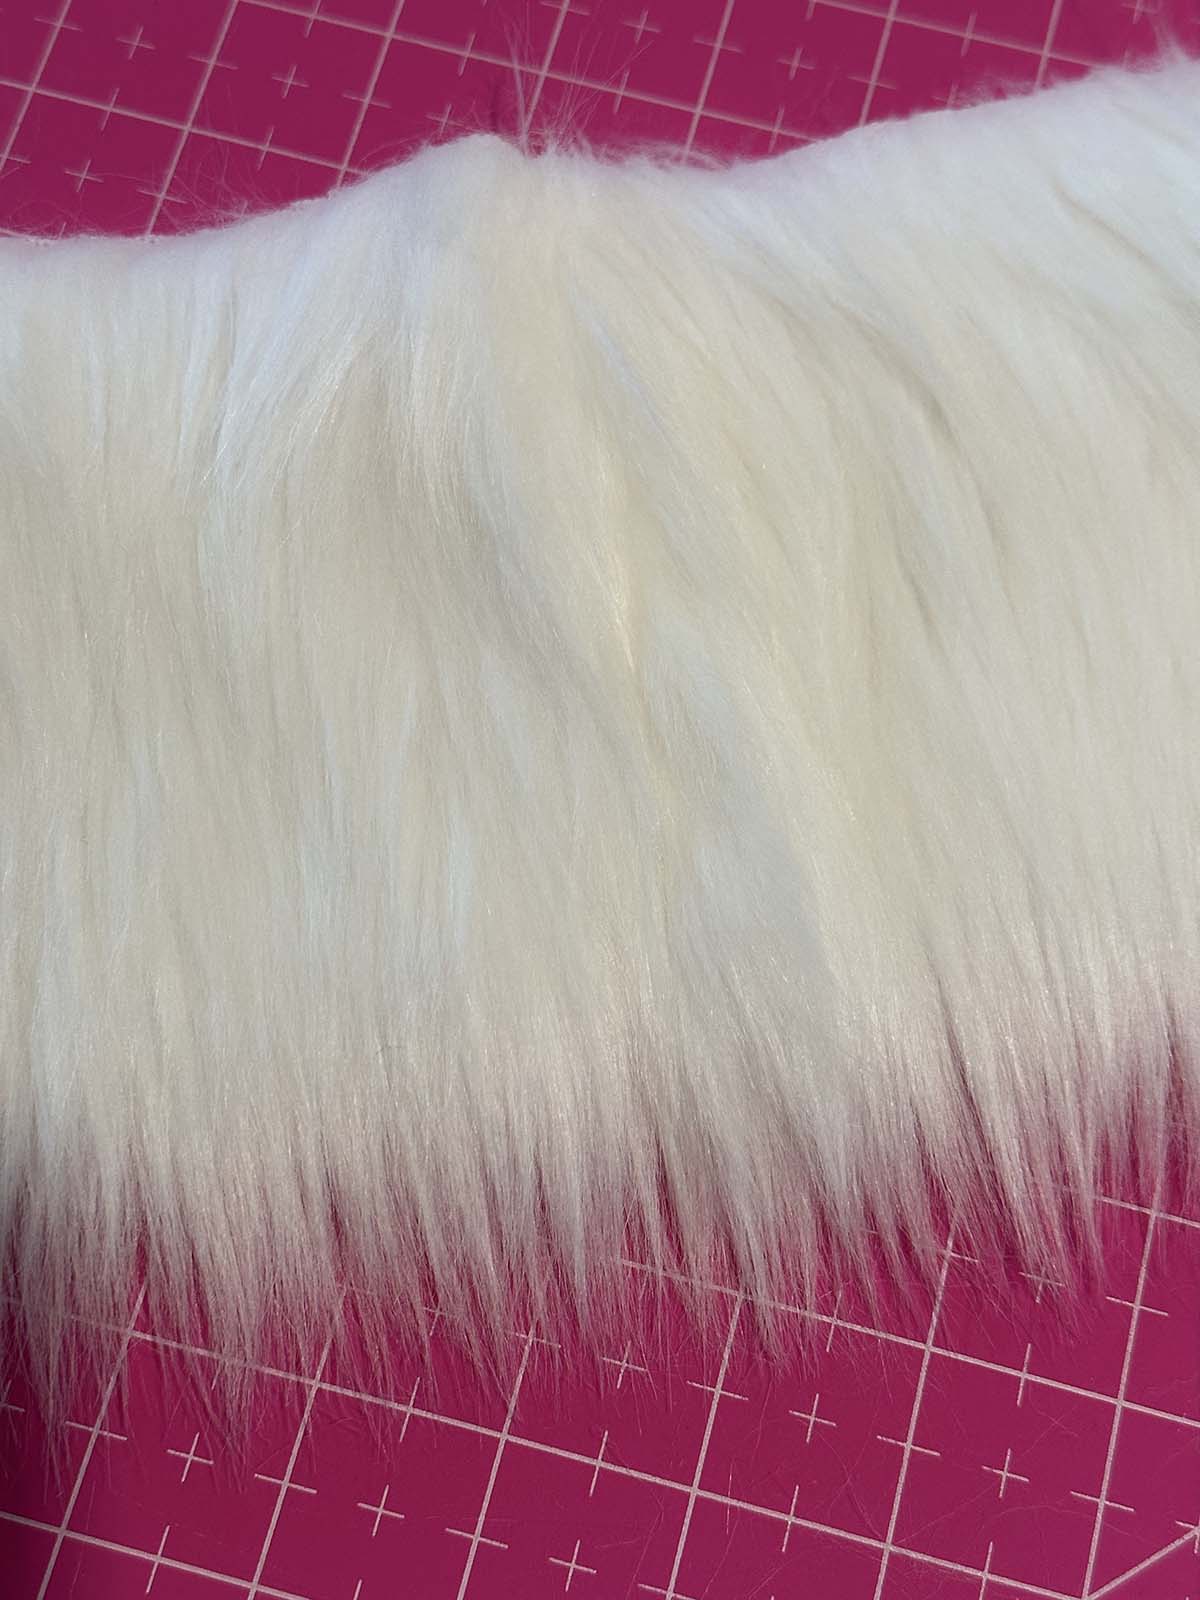
Use a straight stitch and a quarter-inch seam allowance to stitch one set of short cuff ends together. Due to the fur’s thickness, you may need to reduce the presser foot pressure slightly to make the seaming easier. I used a presser foot pressure of 45 with my fur. You will now have a long, narrow rectangle of faux fur. Finger press the seam open. Heat is unnecessary to press this seam, which may alter the faux fur’s texture. Do you see how the seam disappears into the fur?
Finish the Bottom of the Faux Fur Cuff
Attach the fabric strip to the Cuff
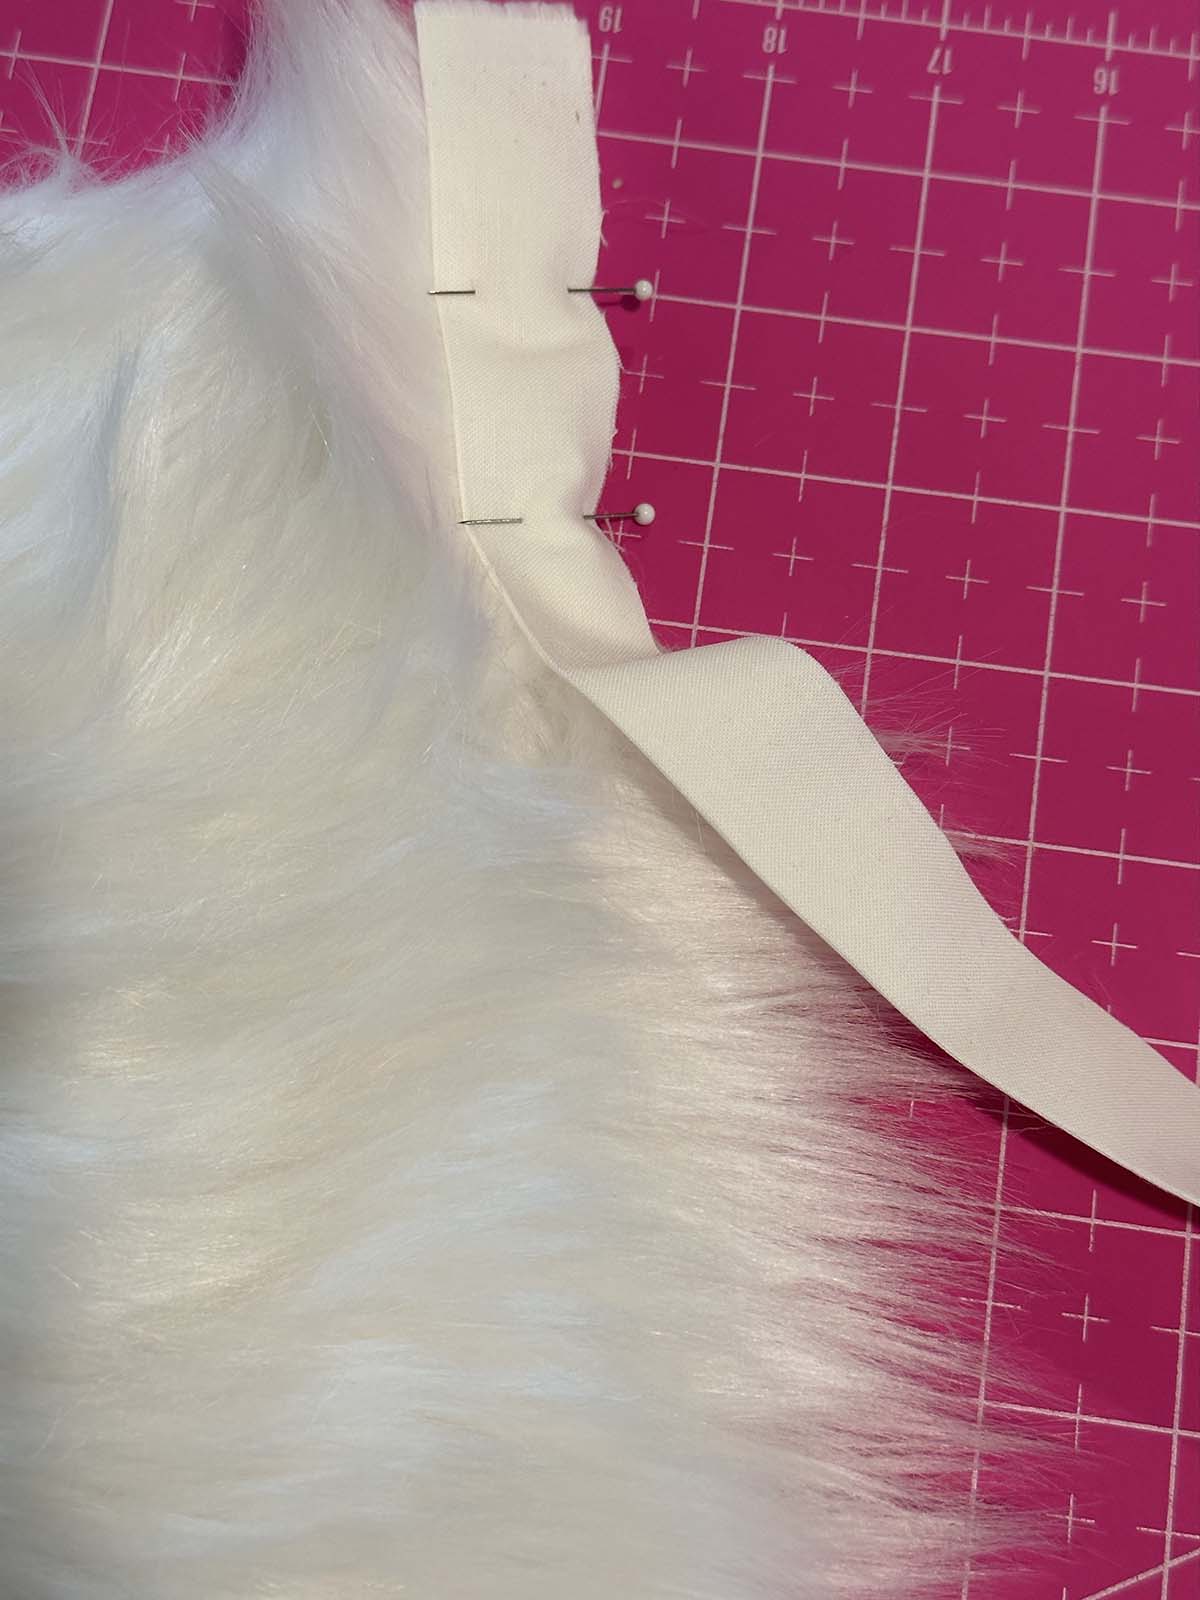
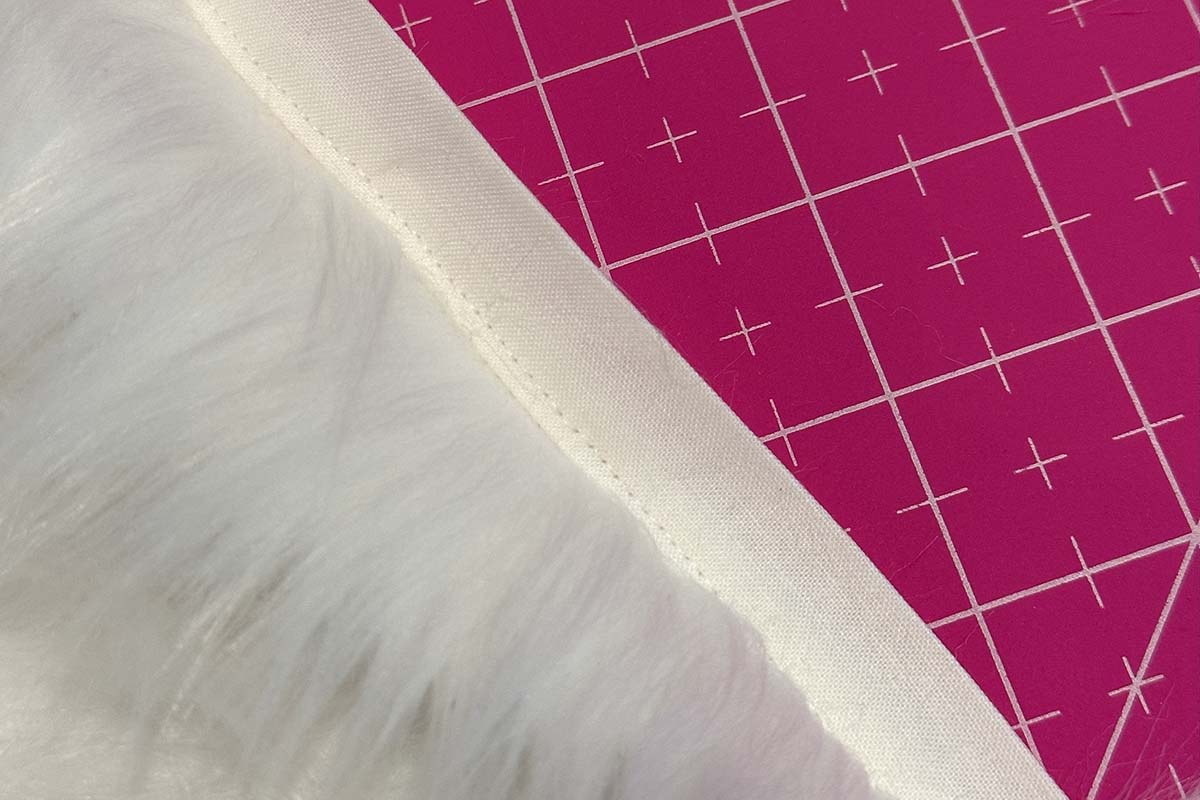
Fold the strip of fabric that coordinates with the faux fur trim in half lengthwise and press.
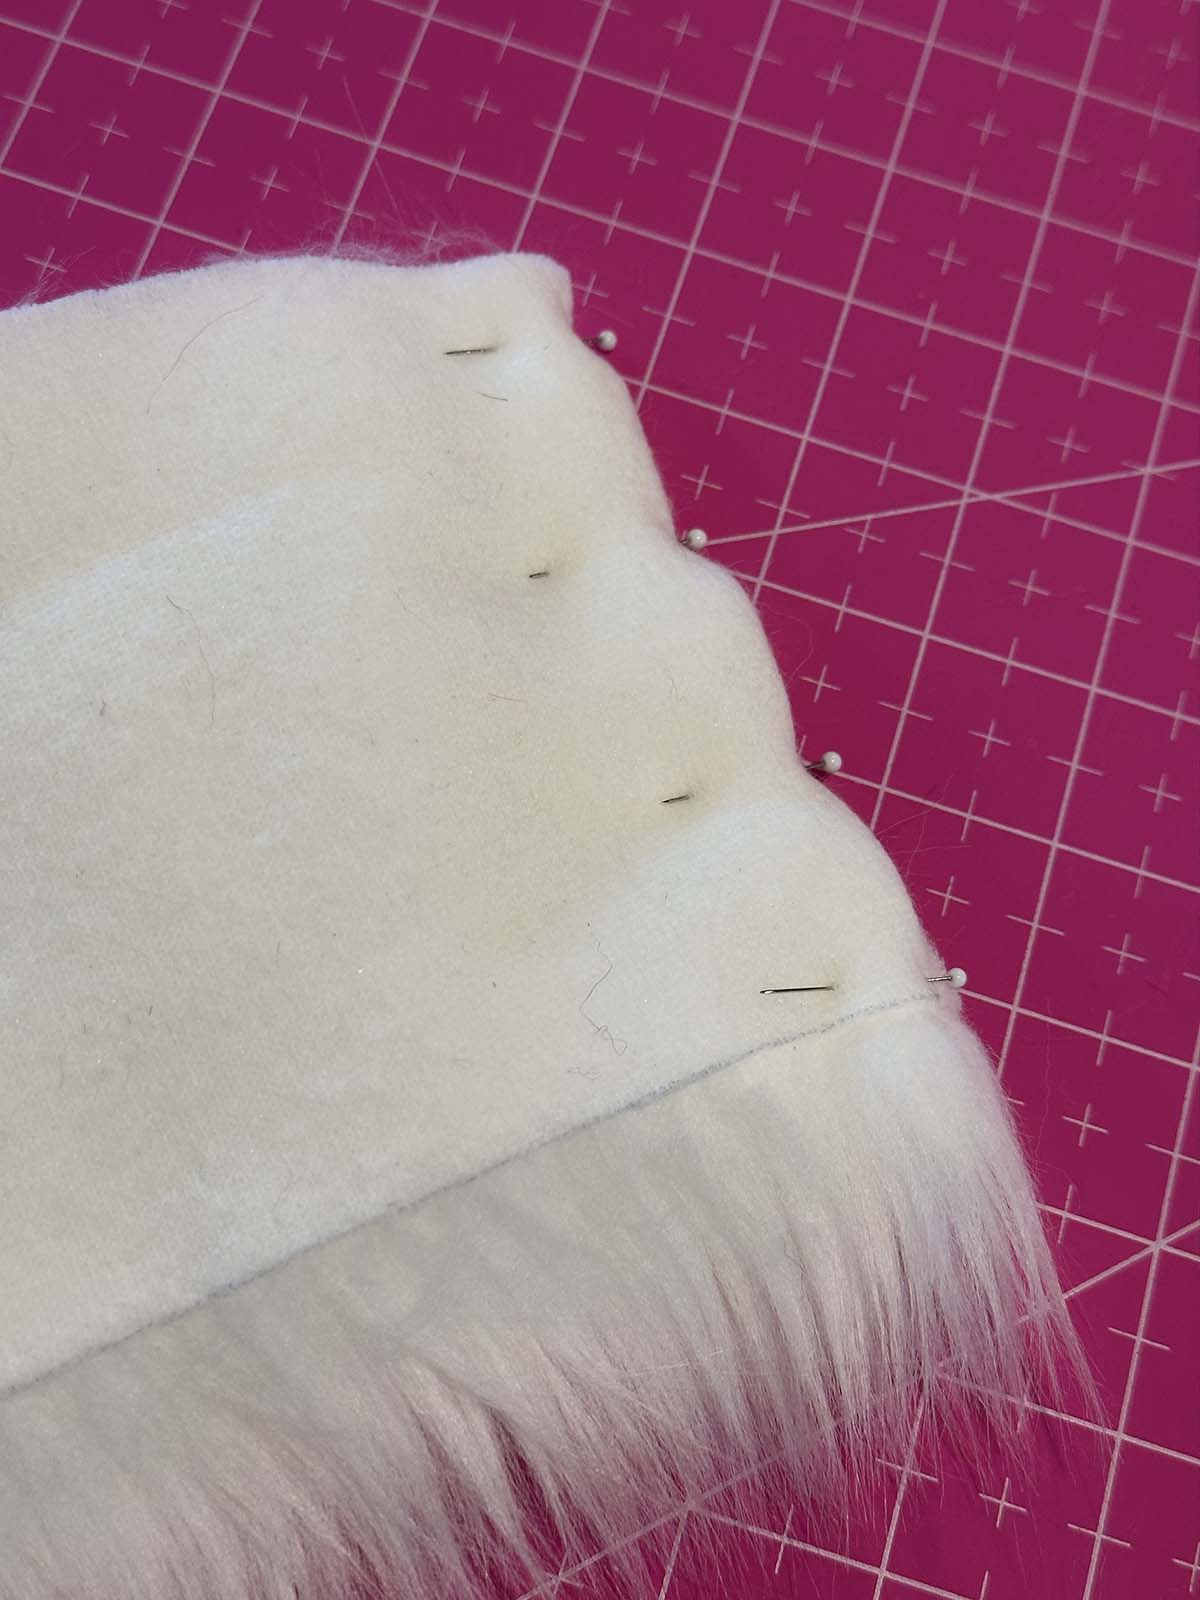
Along the bottom of the faux fur strip, align the raw edges of the fabric strip with the raw edge of the faux fur backing material. Push the nap of the fur back towards the main body of the faux fur fabric as you pin it, making sure no fur is sticking out from the seam allowance. At the bottom of the cuff, the fur will want to stick out, but pushing it back ensures that it will lay naturally when the cuff is complete.
Use a straight stitch and a quarter-inch seam allowance to secure the fabric strip to the faux fur.
Understitch the Fabric Strip
Understitching is a technique that stitches through the right side of a facing or lining, in this case, the fabric strip we just added, the seam allowances of that piece, and the main fabric. This process encourages the seam to turn neatly to the back of the main fabric. Since we cannot use heat to press the faux fur, this step helps the bottom hem to lay smoothly.
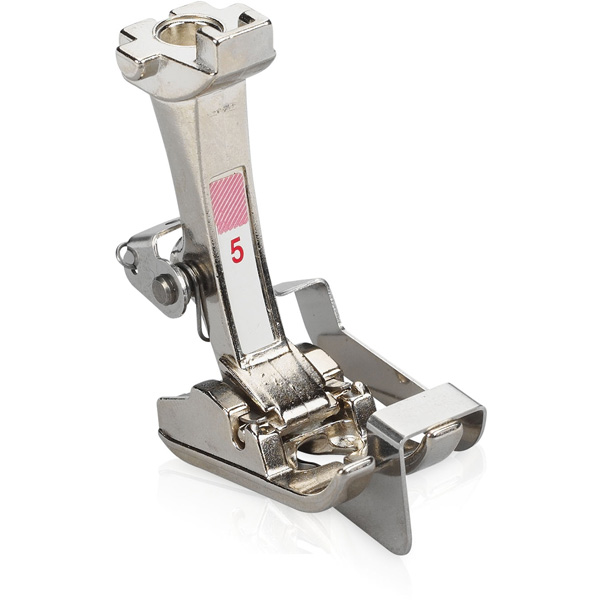
To set the machine up for understitching, install the #5 Blindstitch Foot and move the machine needle to the right. Adjust the presser foot pressure as needed. For the fur I used, 40 was the appropriate setting.
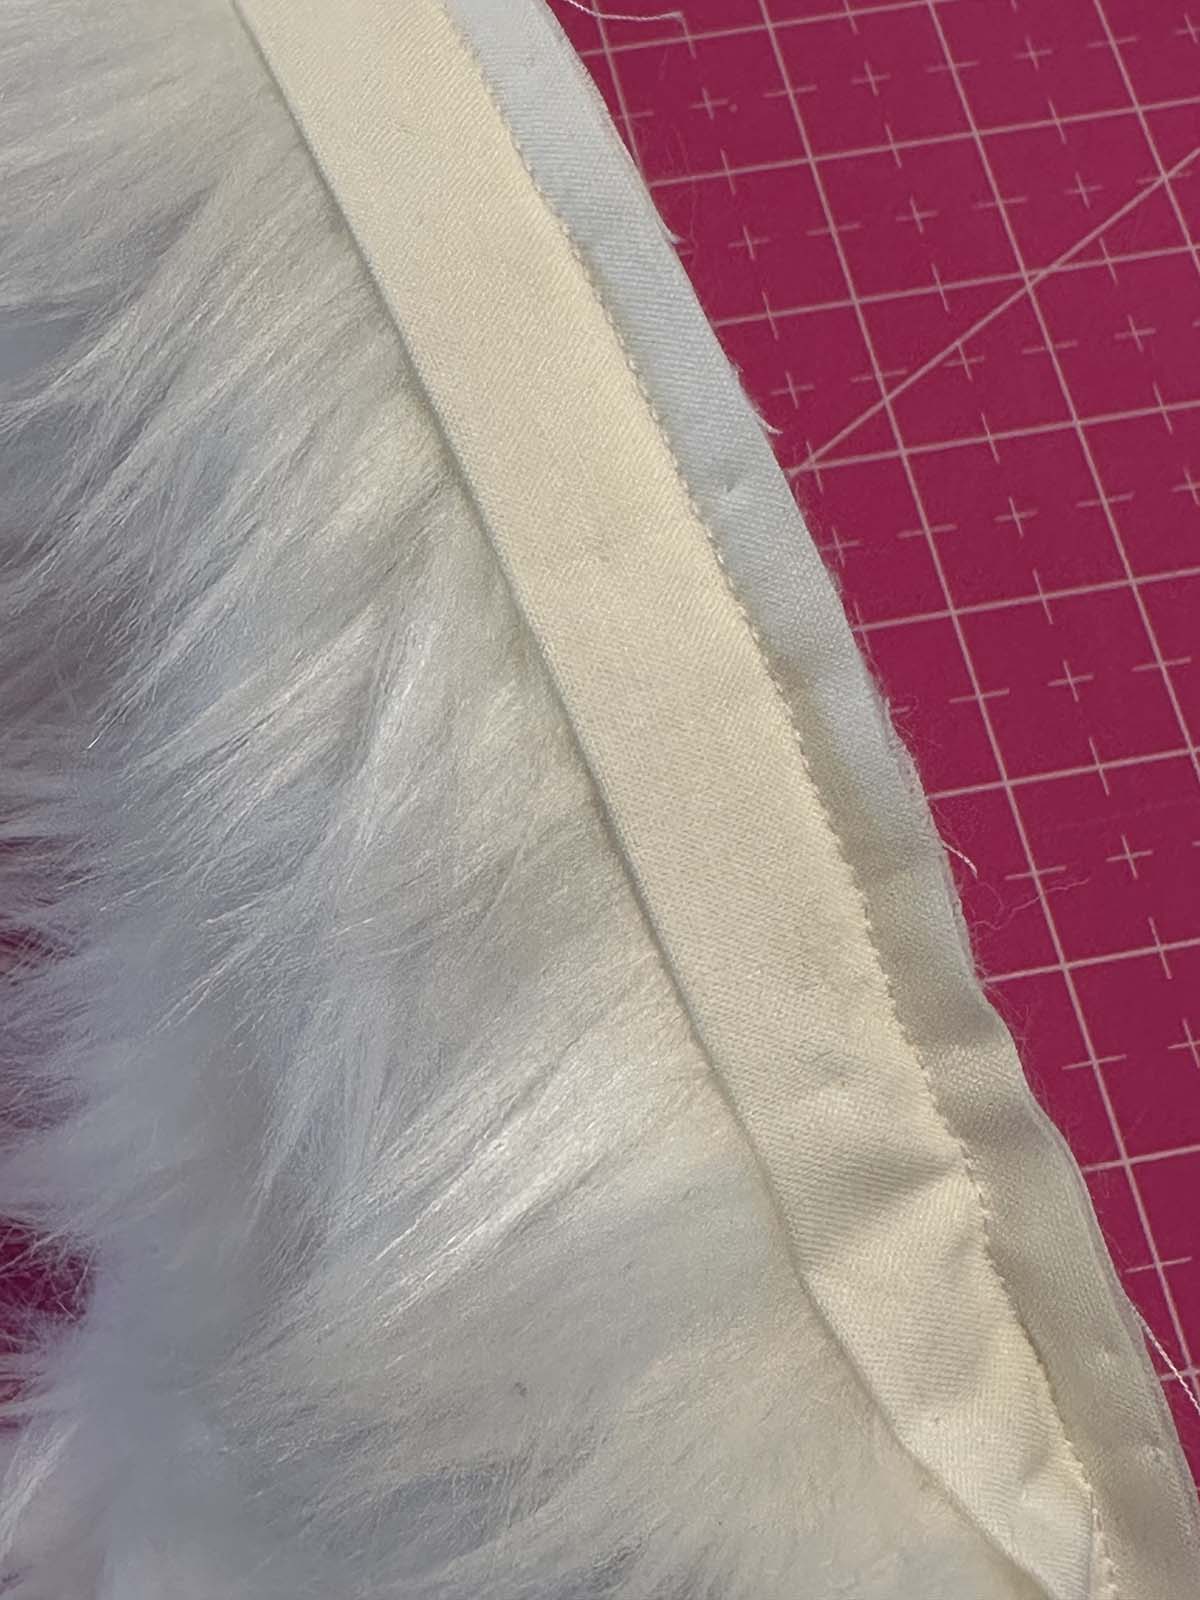
With the guide on the foot in the previous seam line, stitch the fabric strip, the strip’s seam allowance, and the seam allowance of the faux fur together.
The understitching seam line is visible on the fabric strip. This entire strip will now fold under to create the hem of the cuff.
Seam the other short end of the cuff together to form a tube using the same process described earlier.
Hem the Cuff
Depending on the overall thickness of the faux fur, you may use a hand running or whip stitch to secure the fabric band to the faux fur backing or a machine-stitched option.
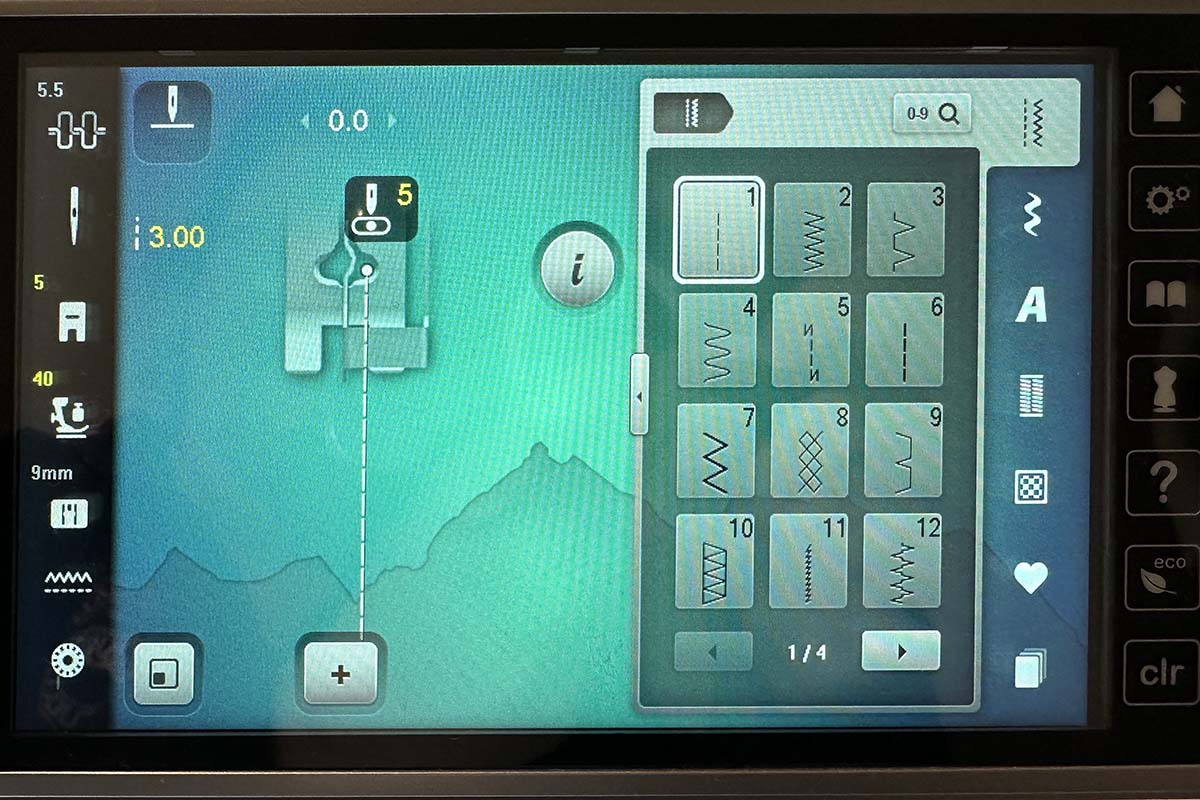
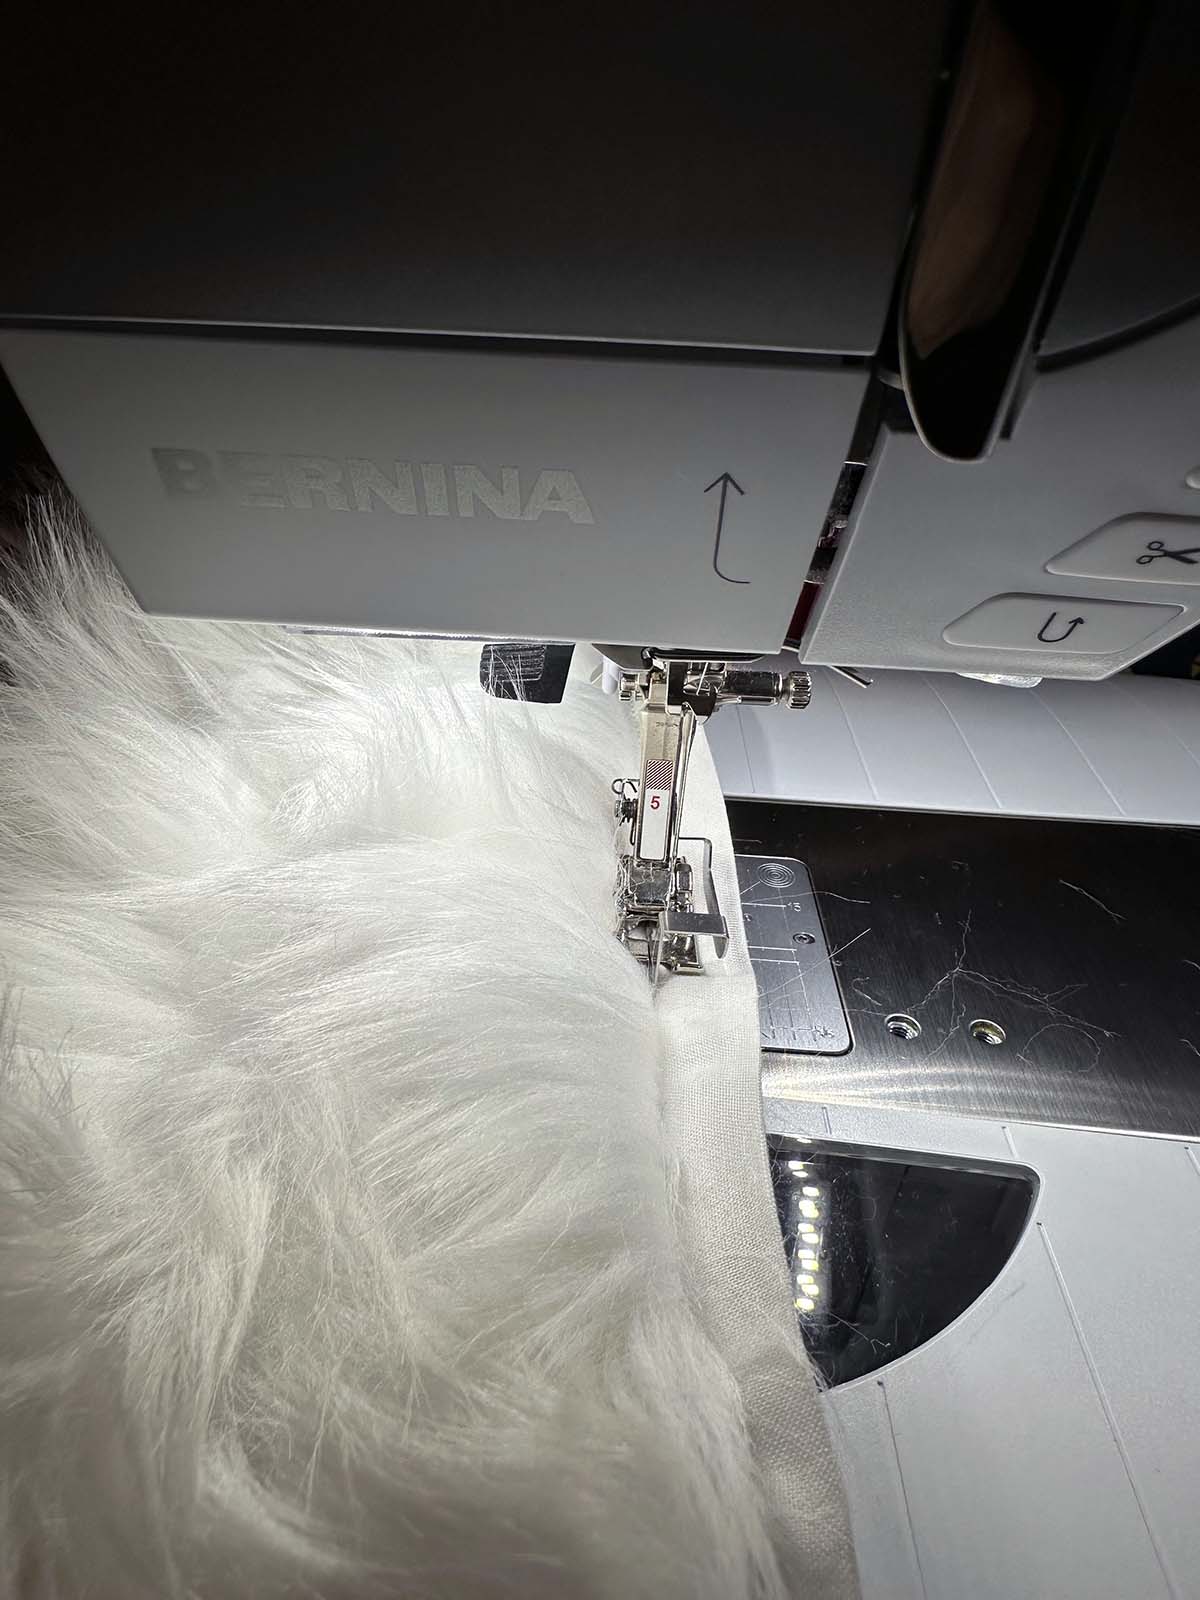
If you machine stitch the hem band in place, keep the #5 presser foot on the machine and change the stitch to number 3.
Working from the back of the fur, arrange the material so the edge of the fabric band is to the right and closest to the bed of the machine. Fold the faux fur to the left of the guide on the presser foot so a double layer of fabric is to that side. As you stitch, several straight stitches will fall on the fabric band, followed by a zigzag stitch that will catch the fold of the faux fur backing. This stitch will not catch the faux fur or be visible on the completed cuff.
Step 8: Finishing the Couched Christmas Stocking with Faux Fur Trim
Add the Cuff and Hanging Loop
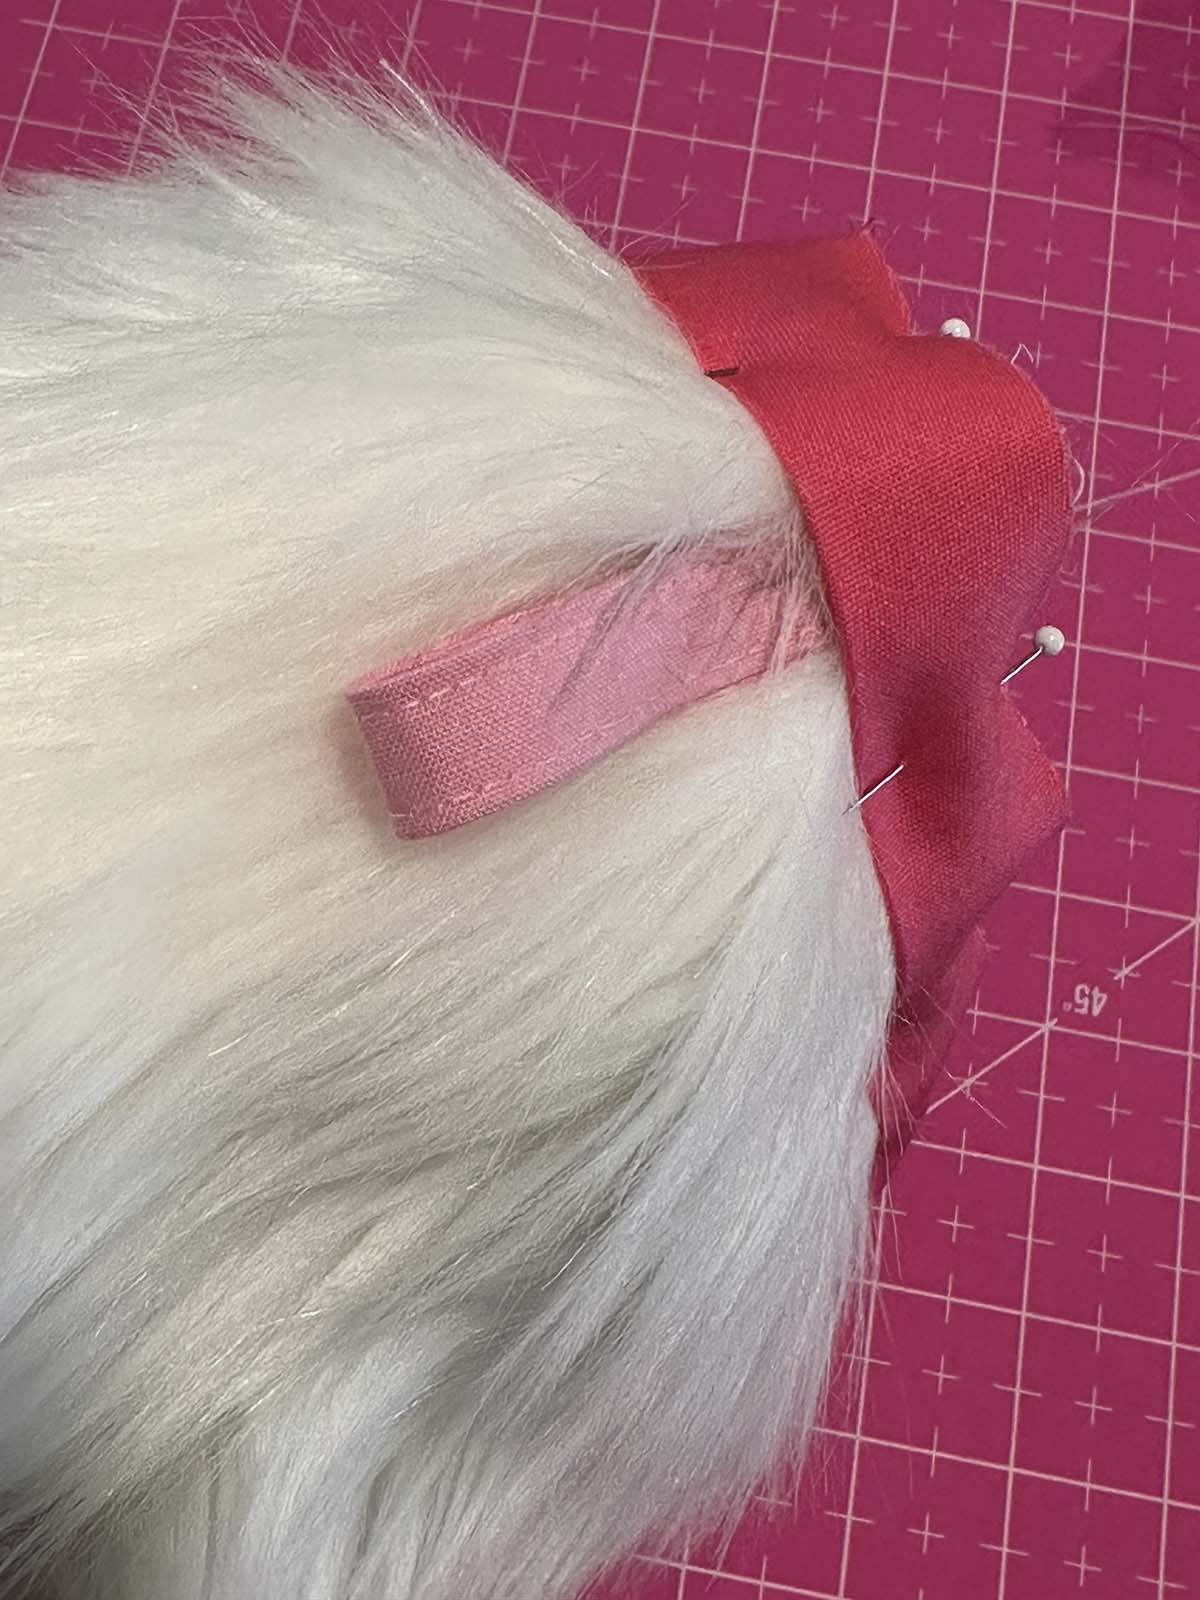
Position the faux fur cuff around the top of the stocking with the faux fur backing lying against the outside of the body of the finished stocking. Position the seams of the cuff near, but not directly on, the seams of the stocking body to reduce bulk.
Fold the piece of sturdy ribbon or fabric tab in half lengthwise to create a hanging loop and position it on the left side seam of the stocking. The raw edges of the loop should align with the raw edges of the stocking and cuff top.
If desired, baste the stocking top, cuff, and hanging loop in place using a quarter-inch or less seam allowance.
Create a Bias Tape Facing for the Top Edge of the Stocking
Using the remaining bias binding from finishing the interior stocking seams, create a loop to finish the top edge of the stocking. If not already pressed in half, fold the 2-1/2 wide strip in half lengthwise and press. To determine the length of the bias strip needed to finish the stocking top, measure the stocking top, double that measurement, then add 1/2″ to accommodate a quarter-inch seam allowance.
(Seam-to-seam measurement of the stocking top x 2) + 1/2″
Using the template provided, the cutting measurement should be 19-3/4″ to create a finished loop of 19-1/4″.
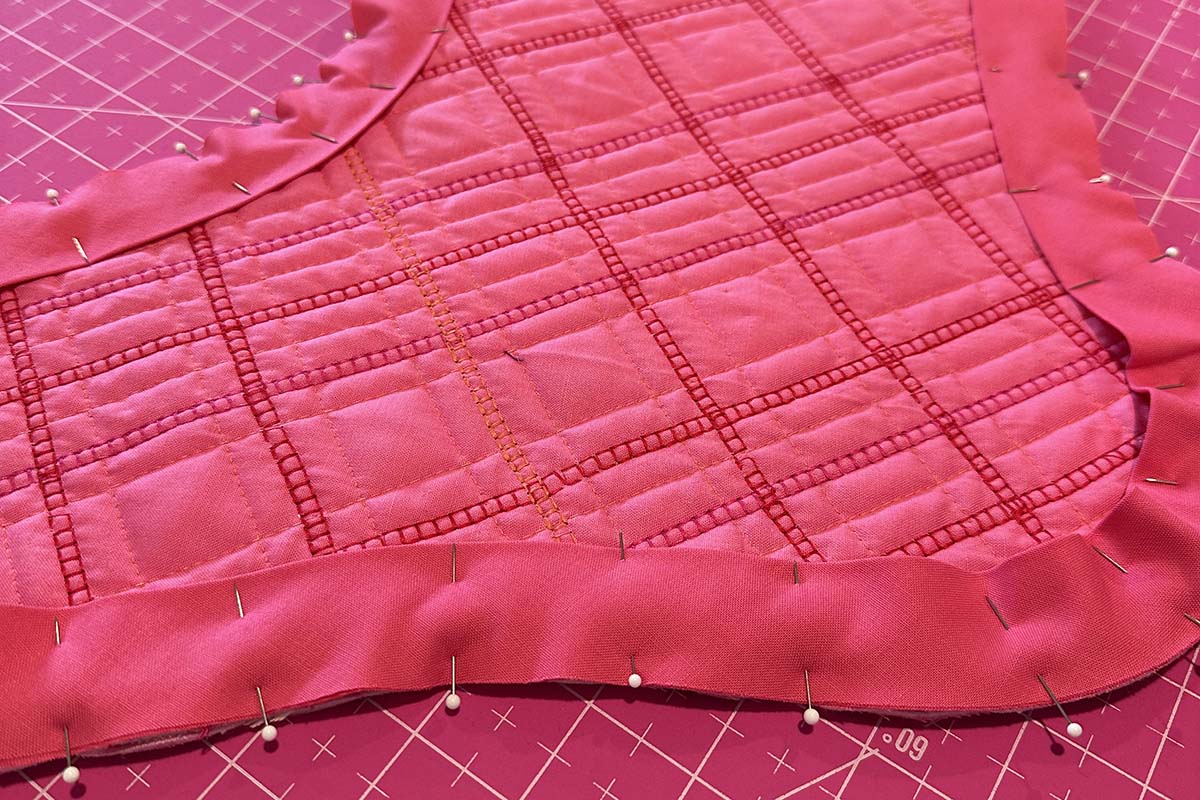
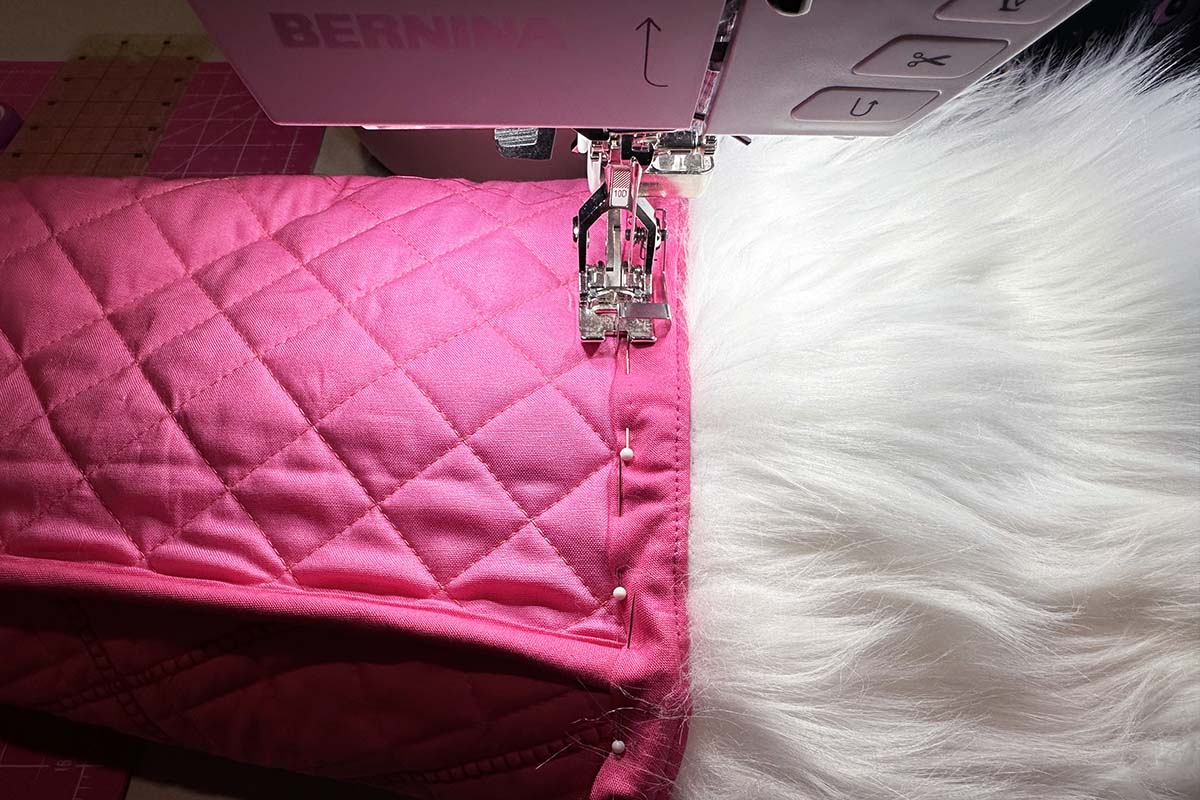
Align the raw edges of the bias facing with the raw edges of the stocking and cuff. Pin the layers in place. When working with multiple layers of fabric, particularly when the layers have different amounts of stretch, pin first on two opposite sides. Next, pin halfway between these pins, and continue to pin at the halfway points until you have enough pins to stitch the seam. This process allows you to ease fabrics when a small amount of variation occurs between the layers.
Stitch the facing band in place, then understitch the facing as described in the directions to hem the cuff.
Turn the stocking inside out with the cuff extended and topstitch down the edge of the facing band using the #10D Edgestitch Foot, and the needle moved to the right. This stitching goes all the way through to the outside of the stocking but is covered by the faux fur cuff.
Turn the stocking right side out, and flip the faux fur cuff down into position. Your Christmas Stocking is ready for Santa to fill with goodies for years to come!