Draping a Custom Dress, Part Three: Pattern Development
In this part of my series, I will guide you through the process of draping a bodice on the Dress Form. We will cut our muslin into sections for draping on the form. During the tutorial, you will hear me call out a few measurements I am using. The way I came up with these measurements was by simply measuring the areas I will be draping on. For example, For my front bodice, I measured the length from the shoulder seam down to the waistline of my dress form. I added a few more inches in length at the top and bottom to be able to have room to drape and manipulate my muslin into the front bodice.
Repeat this process for as many pieces that will make up your design. If you have a larger piece that will have inner connecting seams, go ahead and only worry about draping the entire larger piece and then you can add the extra seams during flat pattern making. There is no need to drape individual panels that make up a larger piece. If there are curves in those areas then in that case it may be the better choice to drape the panels individually.
The Process of Draping the Bodice
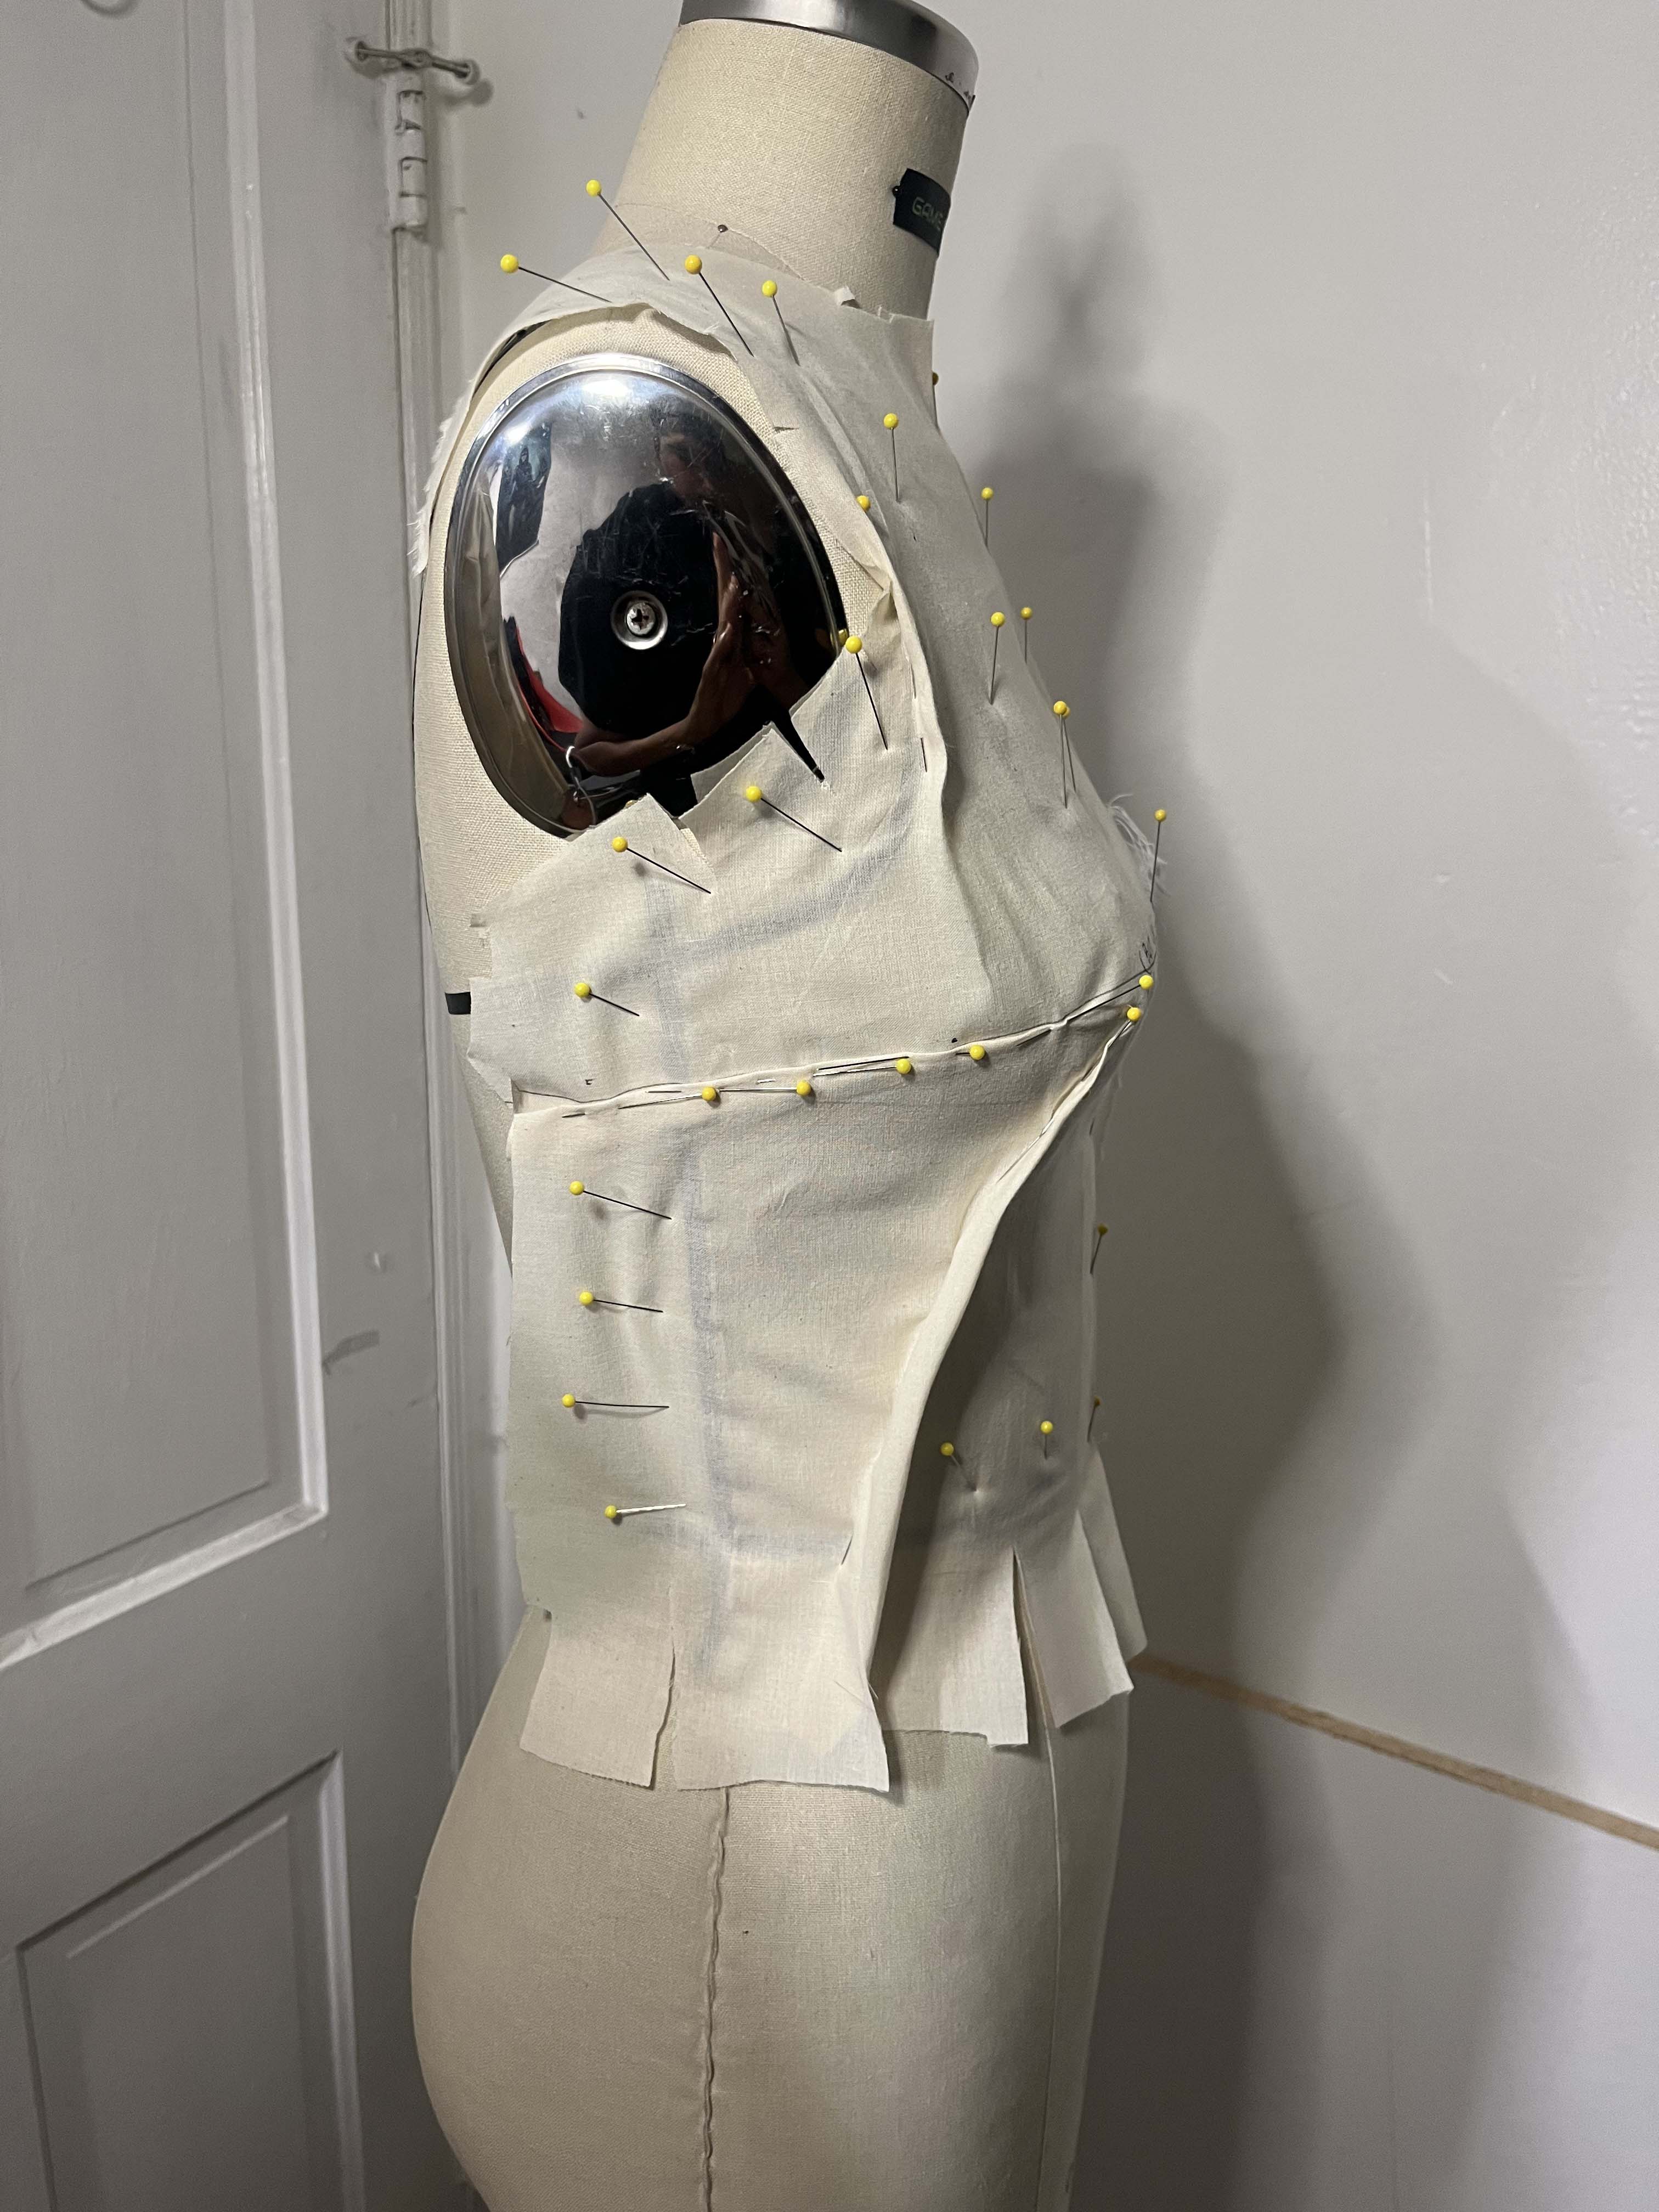
You must pay close attention to the curves that are found on the front while in the process of draping a front bodice. In case you haven’t guessed it, the front is the most difficult to fit because of these curves. Take your time while draping your own design. Make certain that your center front line is not shifting while draping darts. This may cause the bust to be too tight, which entails a bust adjustment when transferring the drape to paper.
Transferring to Paper after The Process of Draping
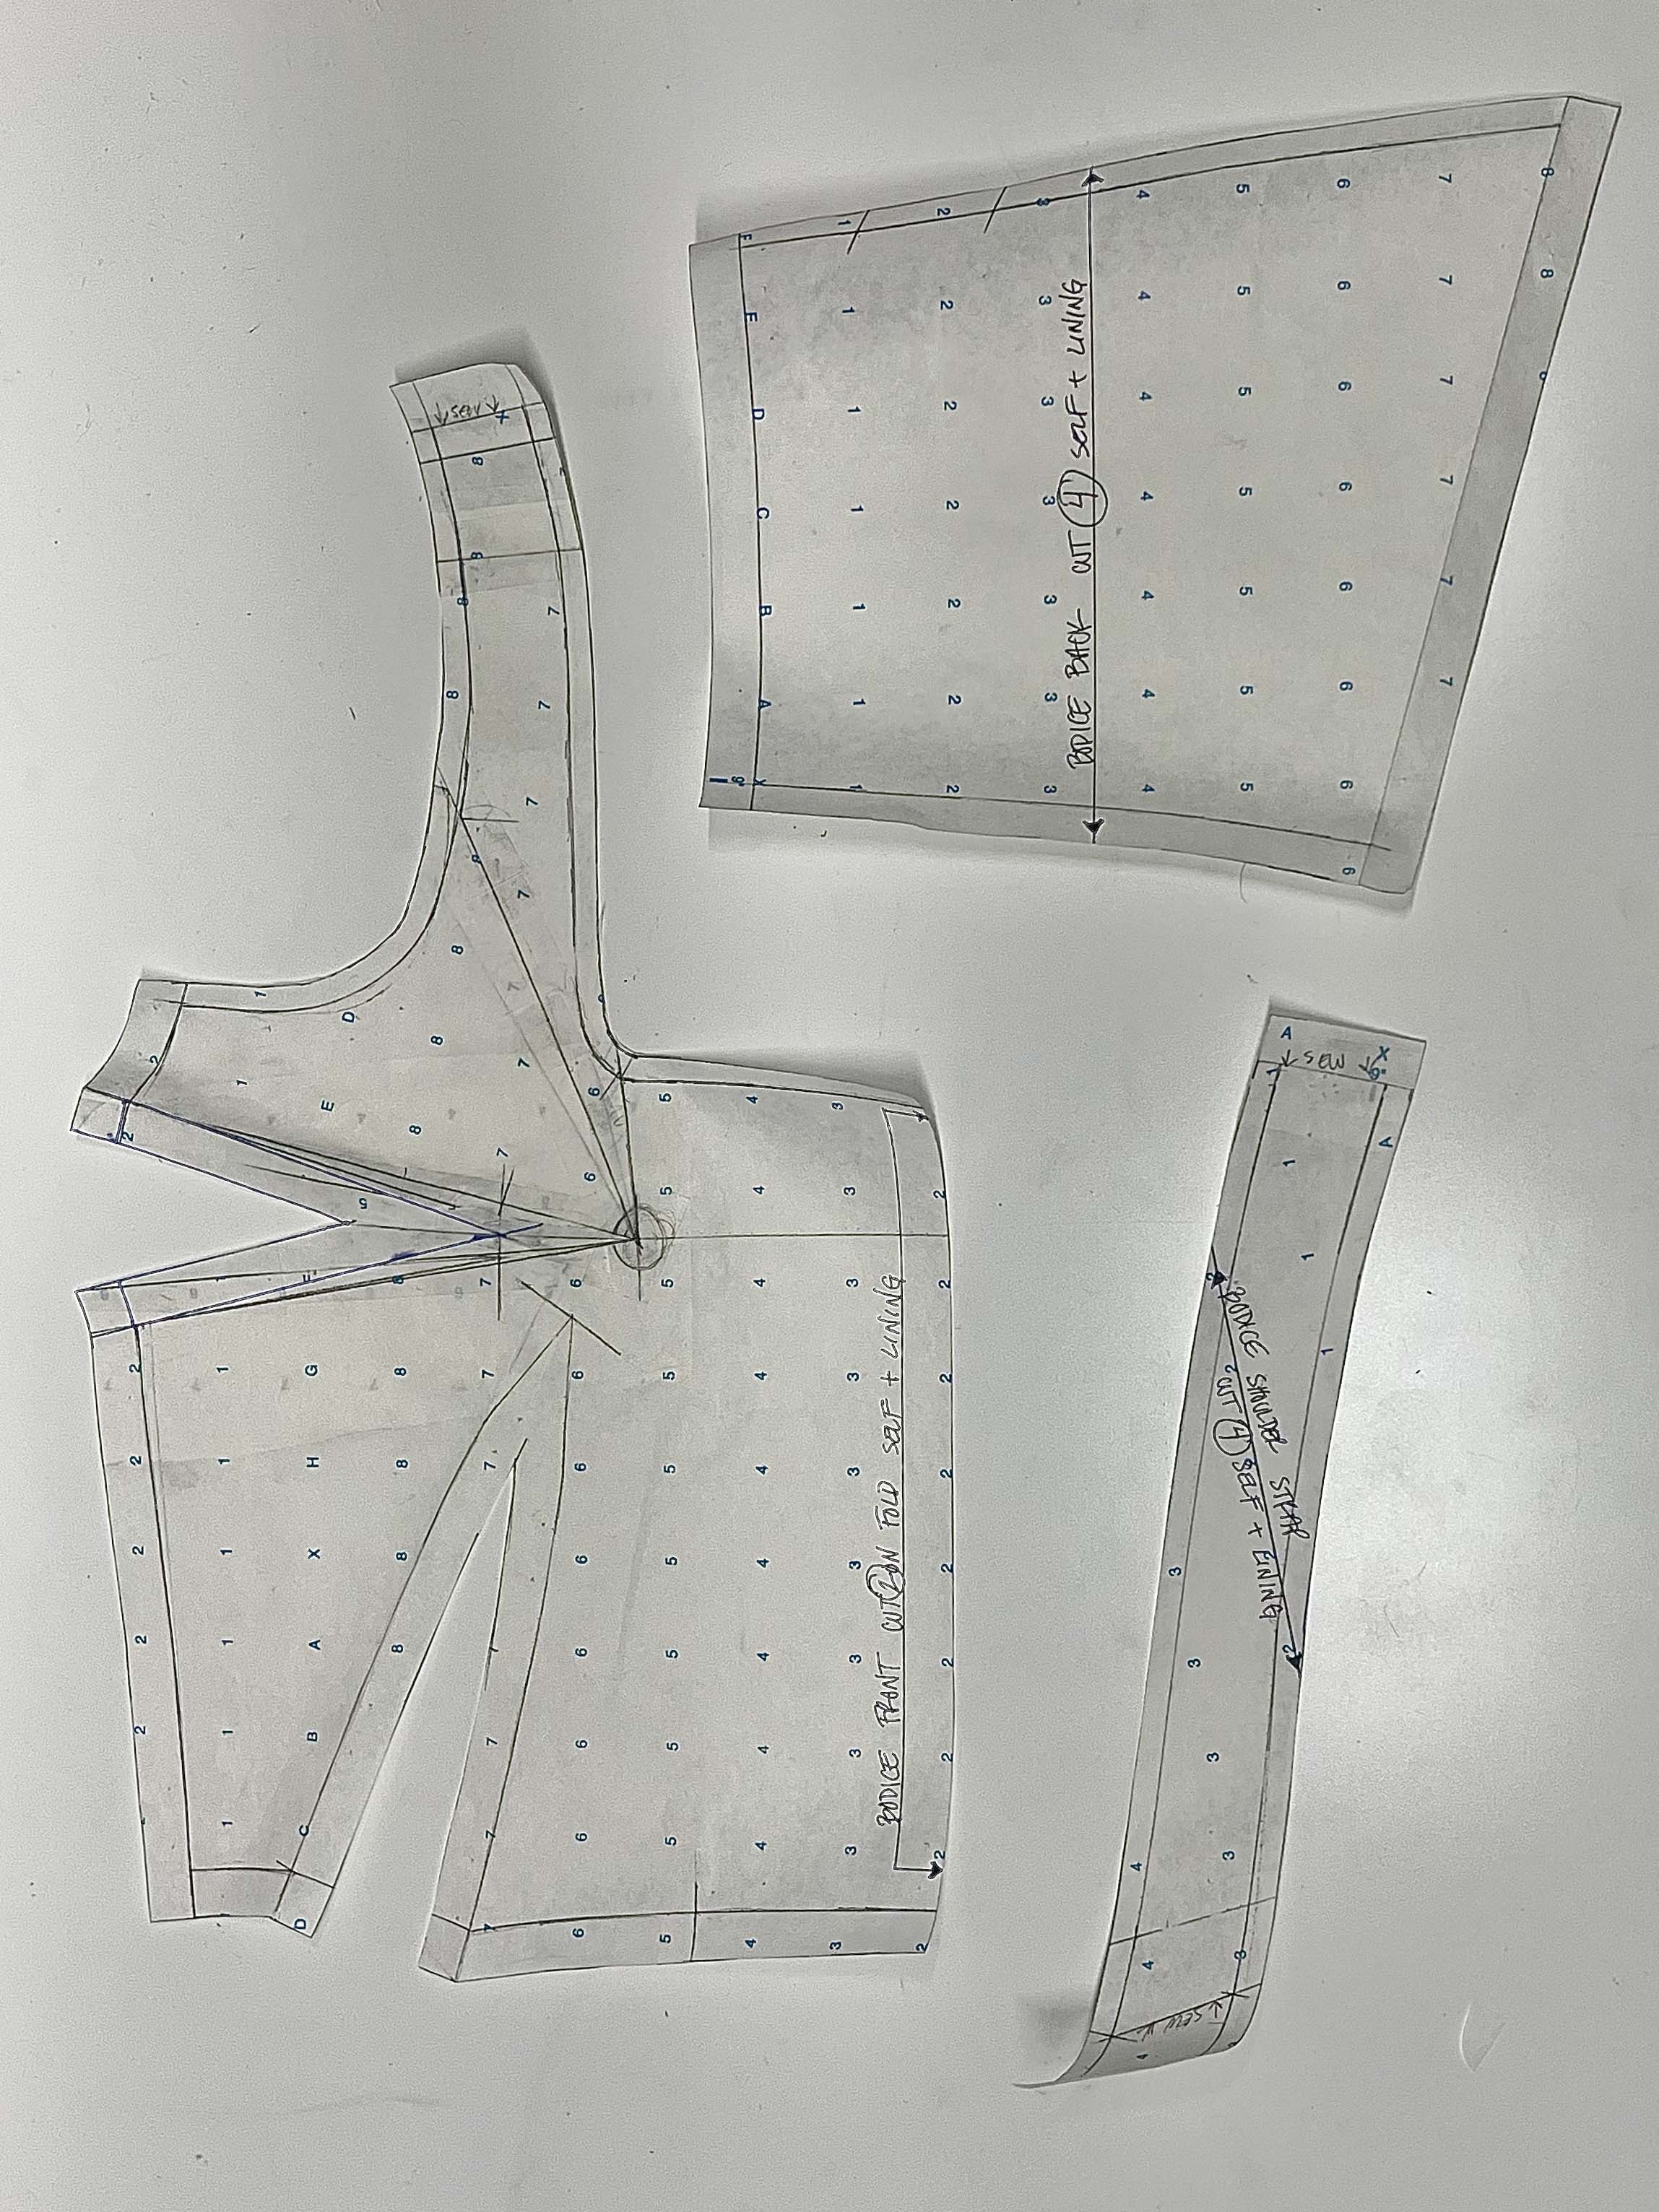
Transferring the bodice drape to paper means you have a reusable pattern to make your design as many times as you want. Again, we will go through the process of transferring the trued drape onto paper. Be sure to label your pieces with grainlines, names, cut amounts, and of what fabrics they require to be cut from. You will also need any notches that help you match up your correctly during construction. Being accurate and clear in your markings will make prototyping easier on you.
Skirt Patterns
After going through the process of draping, I drafted my skirt patterns. For my skirt patterns, I drafted them using the Slash and Spread method. Below you will find a guide on how I drafted my skirt. It is not quite a full-circle skirt but this is what I prefer when working with skirts such as this. You can do exactly as I have for the skirt or do your own thing. Draping a skirt is definitely possible as well!
Front Skirt Draft
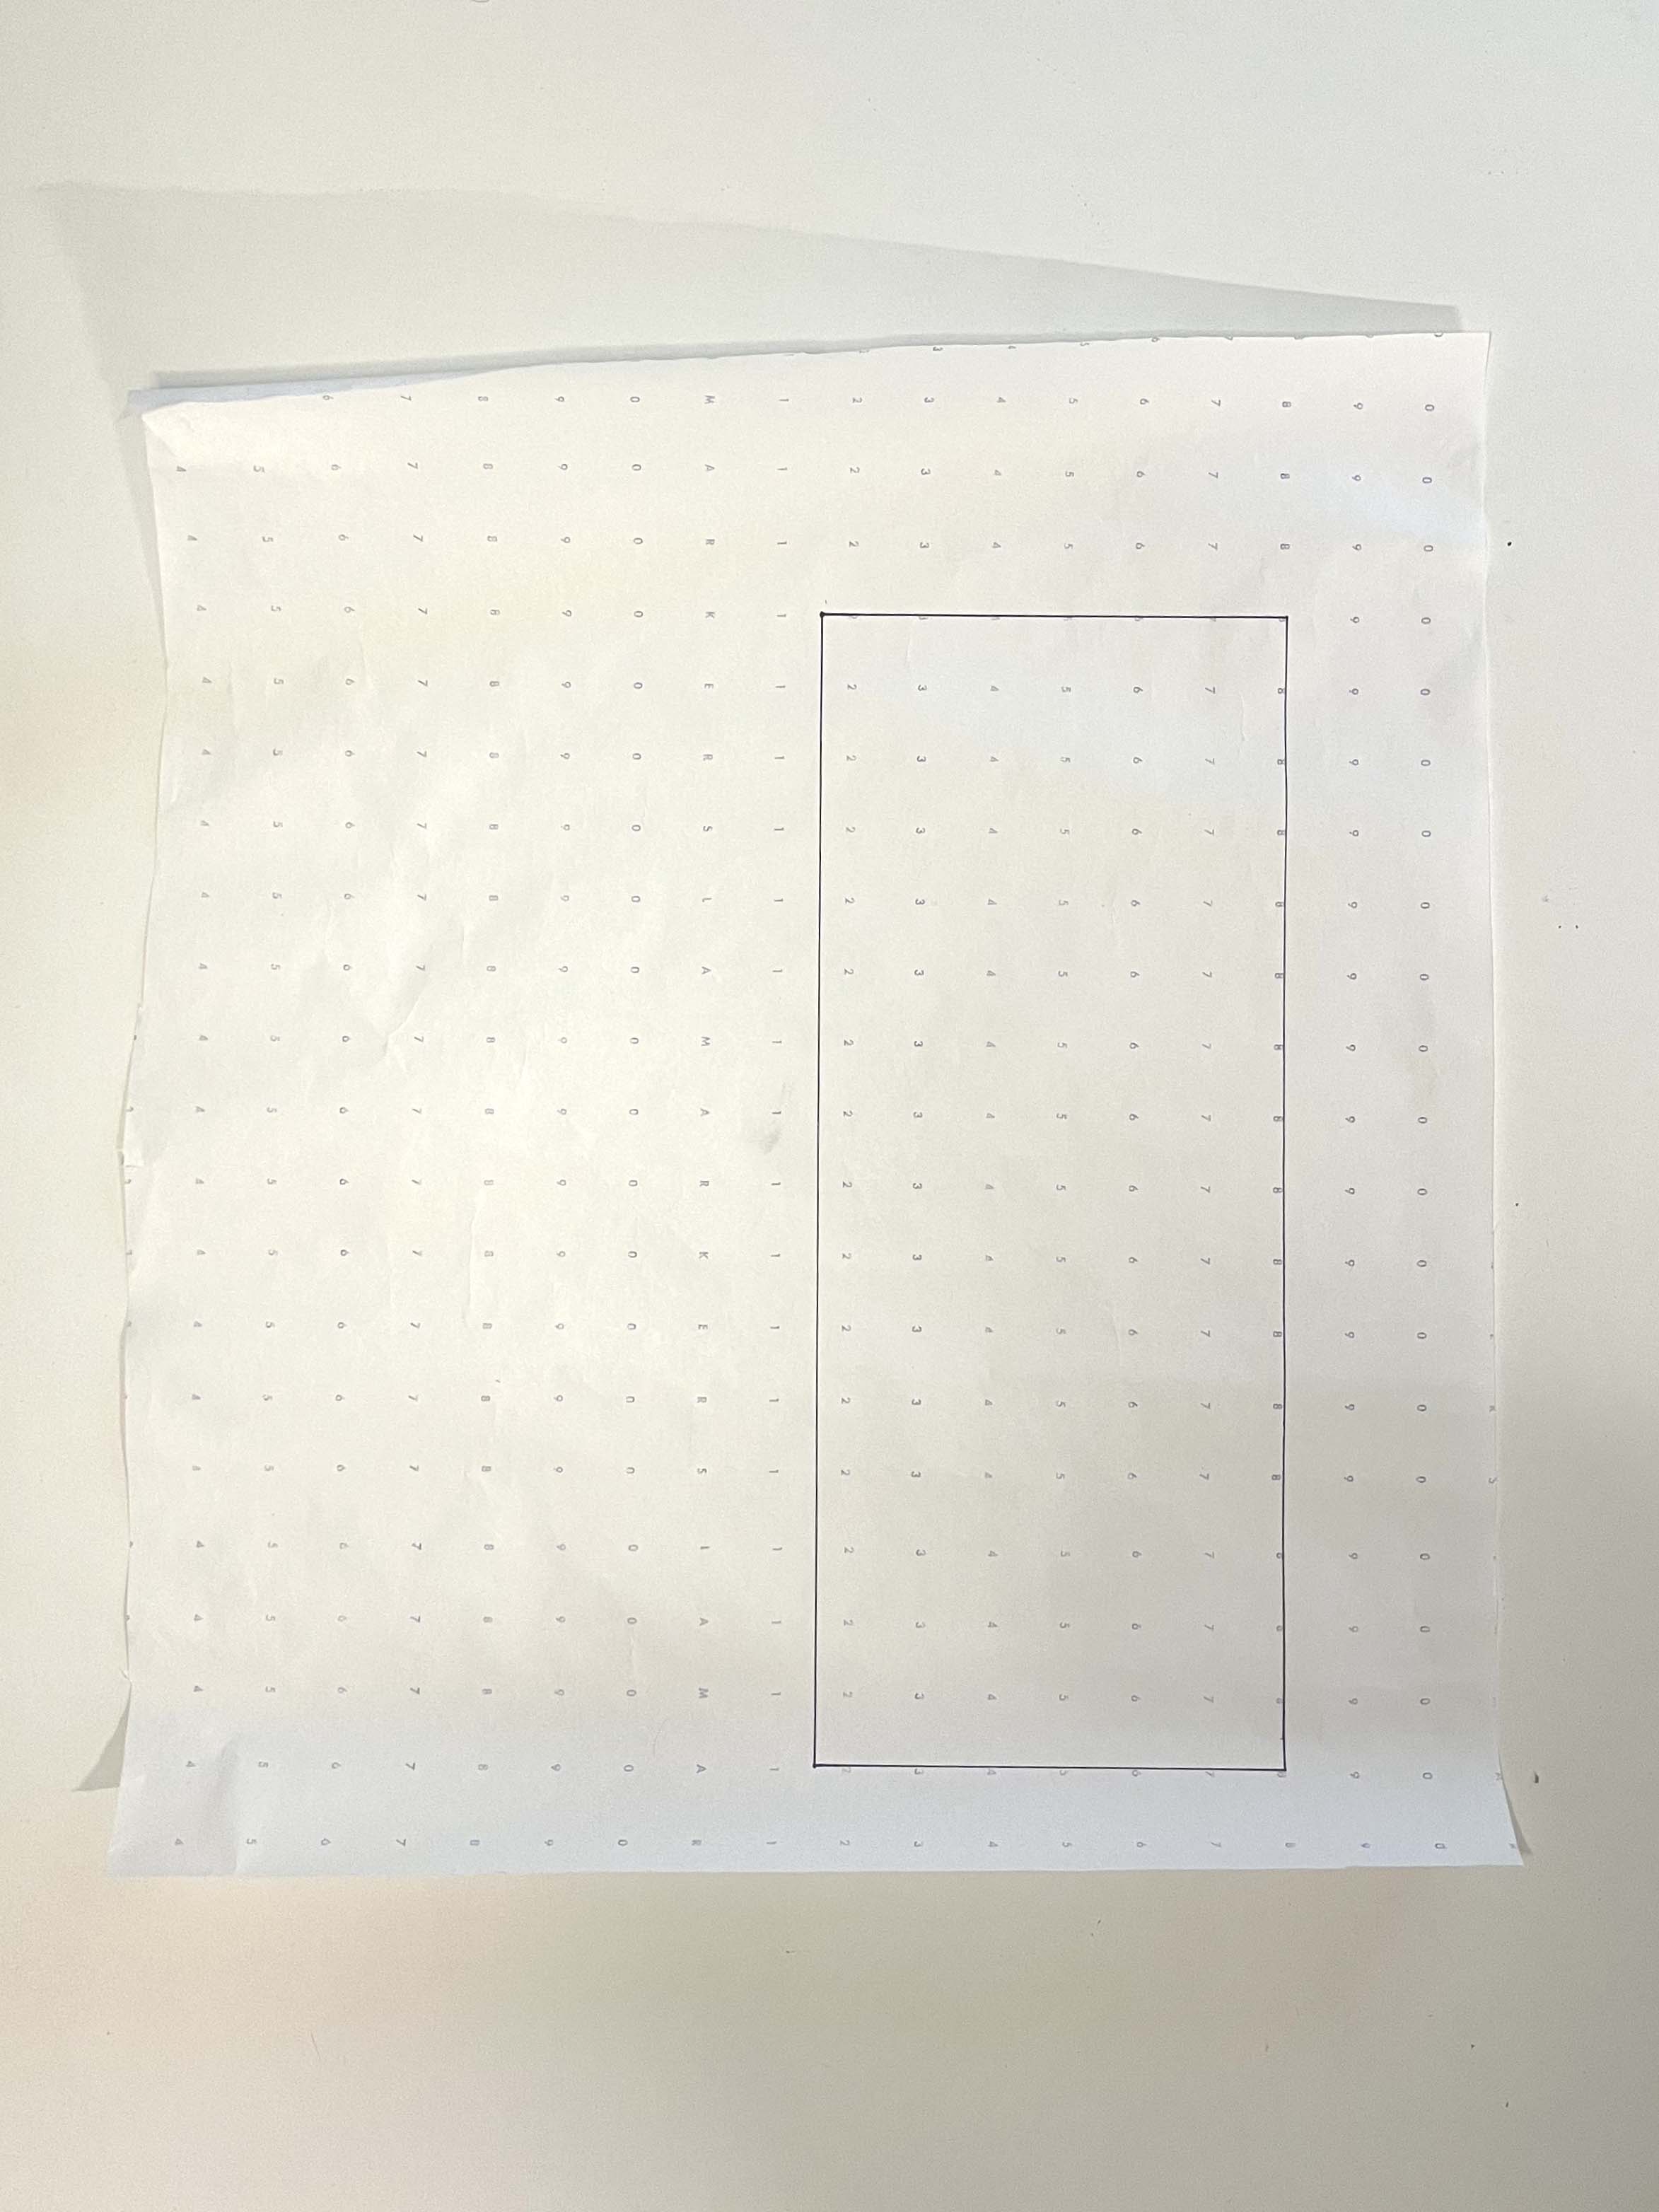
Draw a rectangle. The shorter sides at the top and bottom represent the waistline measurement of the Front Bodice. Measure your own bodice pattern on paper excluding any darts or princess seams you may have. The lines on the outside will simply connect to create the rectangle shape.
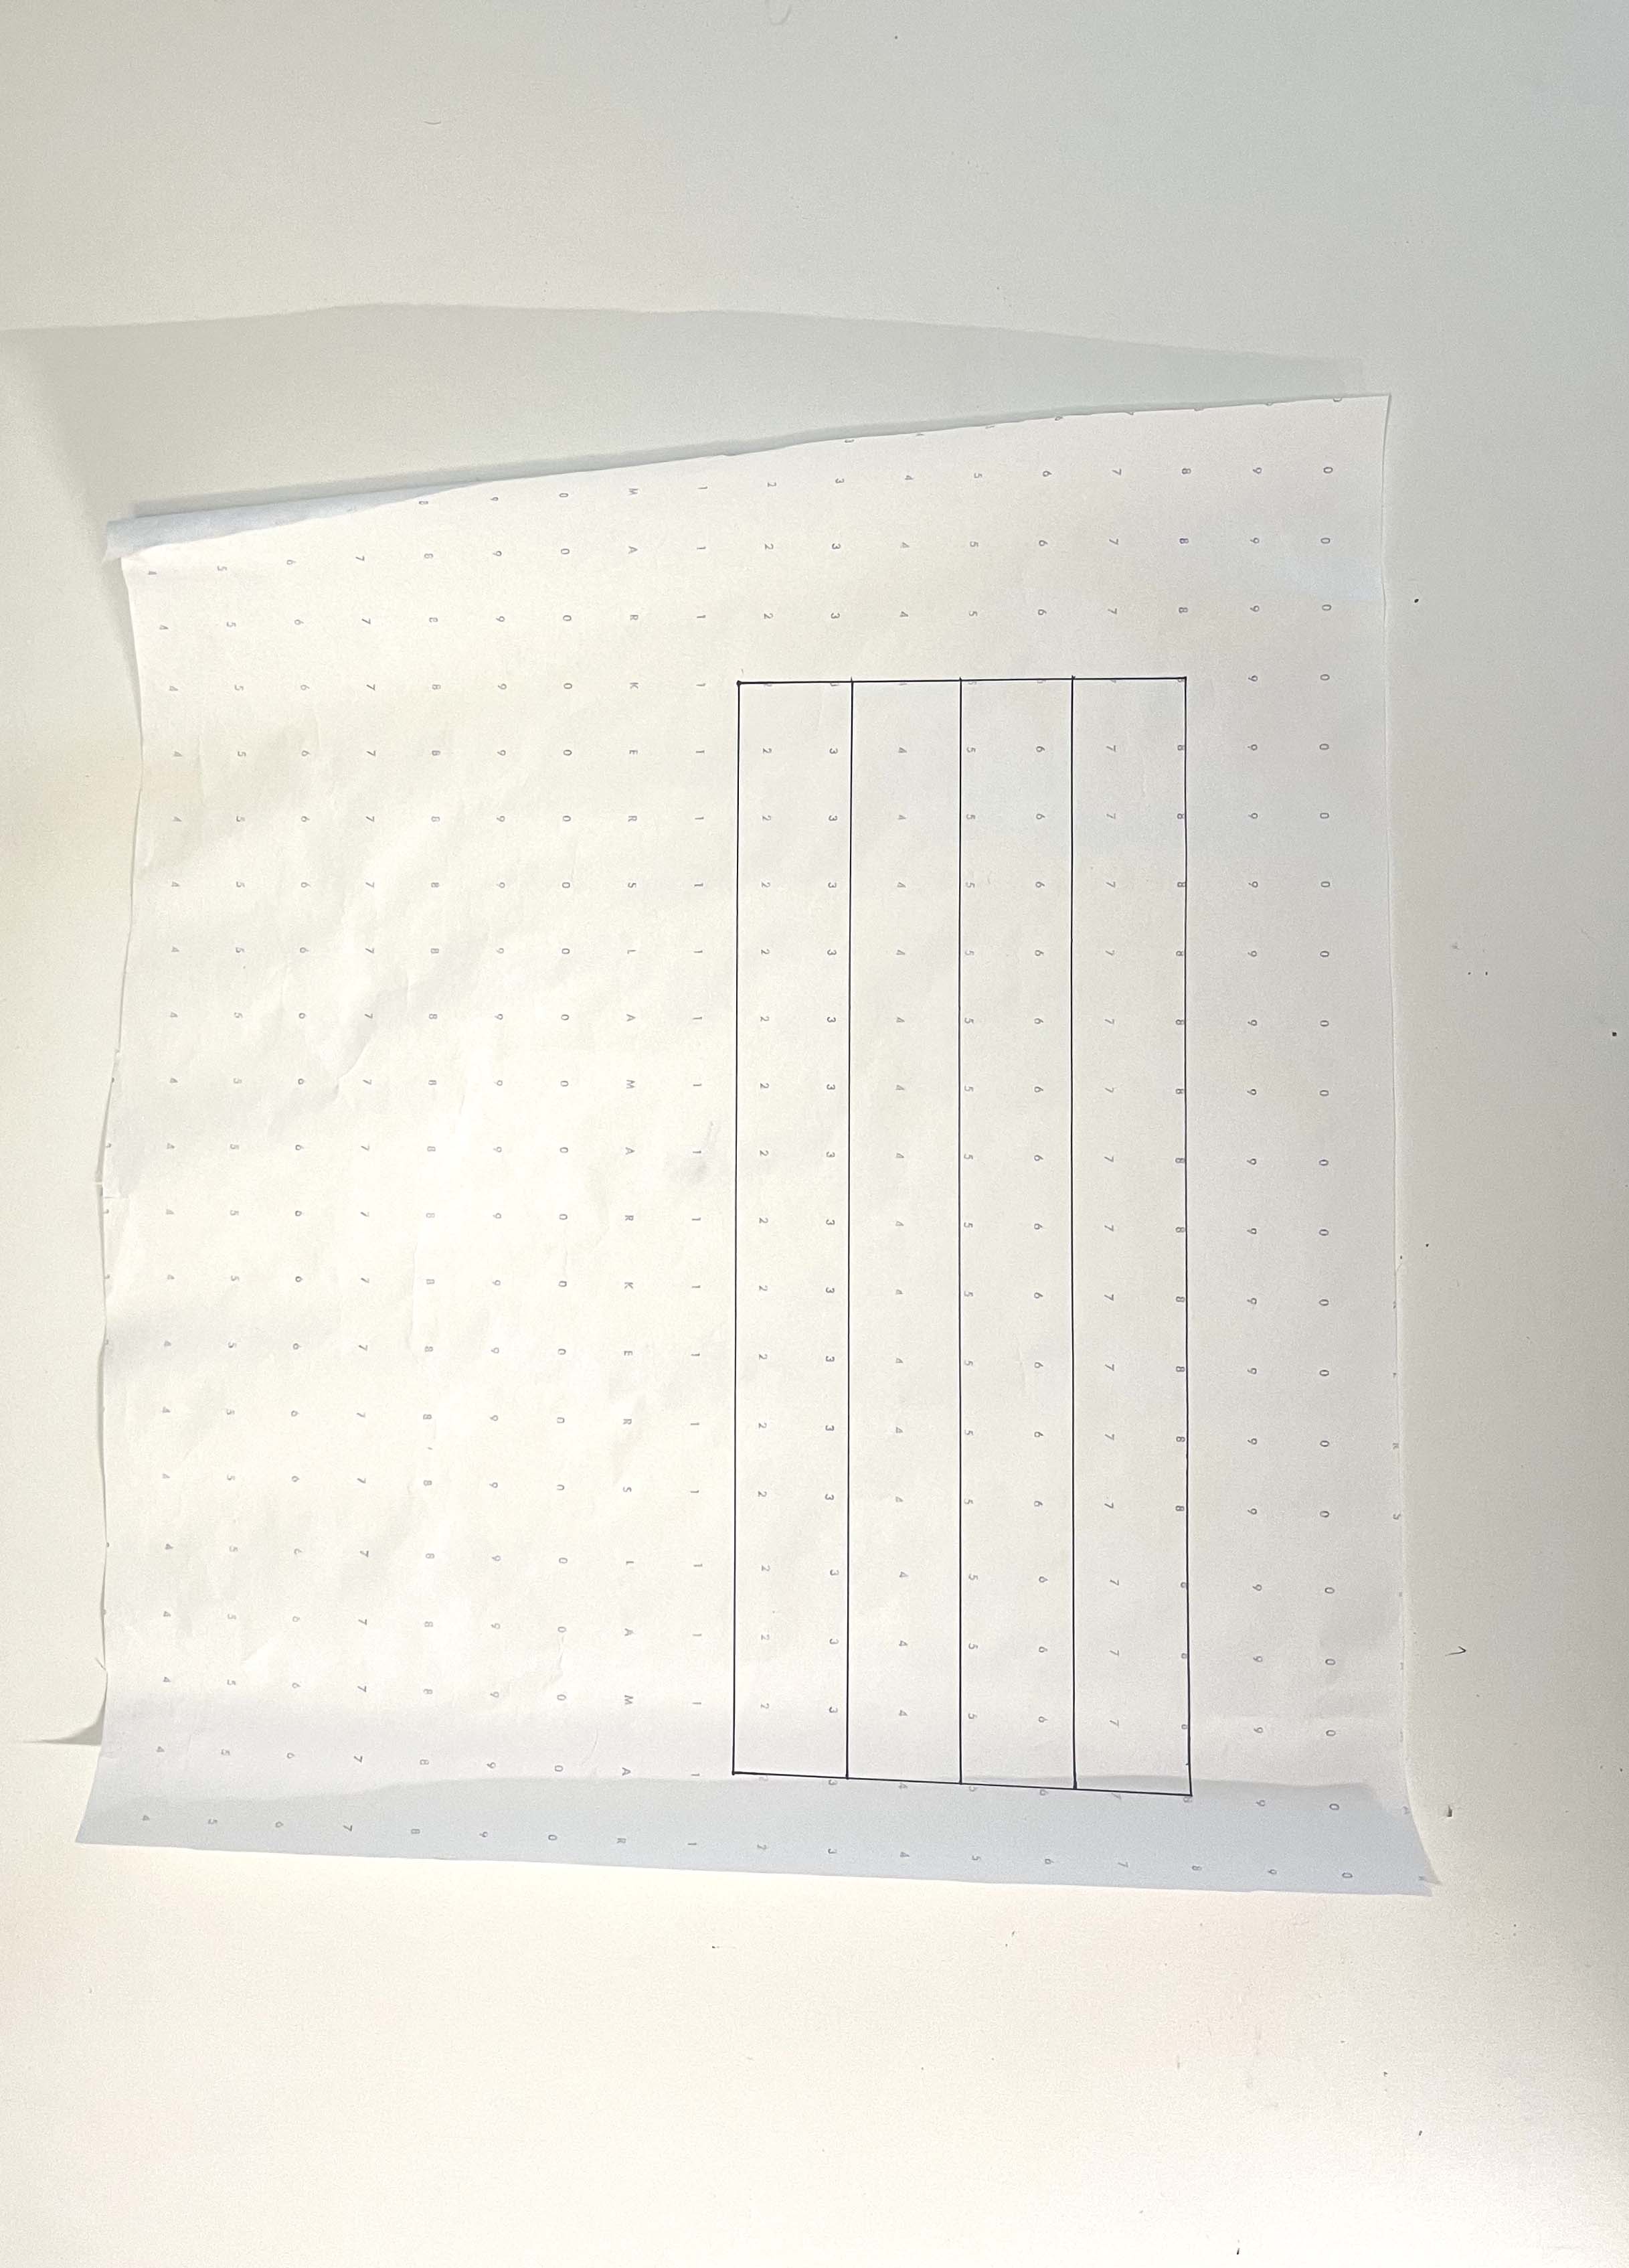
Divide the Rectangle into 4 parts and draw lines to represent this. We are going to slash up each lines starting at the bottom and going up to but not through the top line. The top line represents the waistline seam that will get stitched onto the bodice waistline.
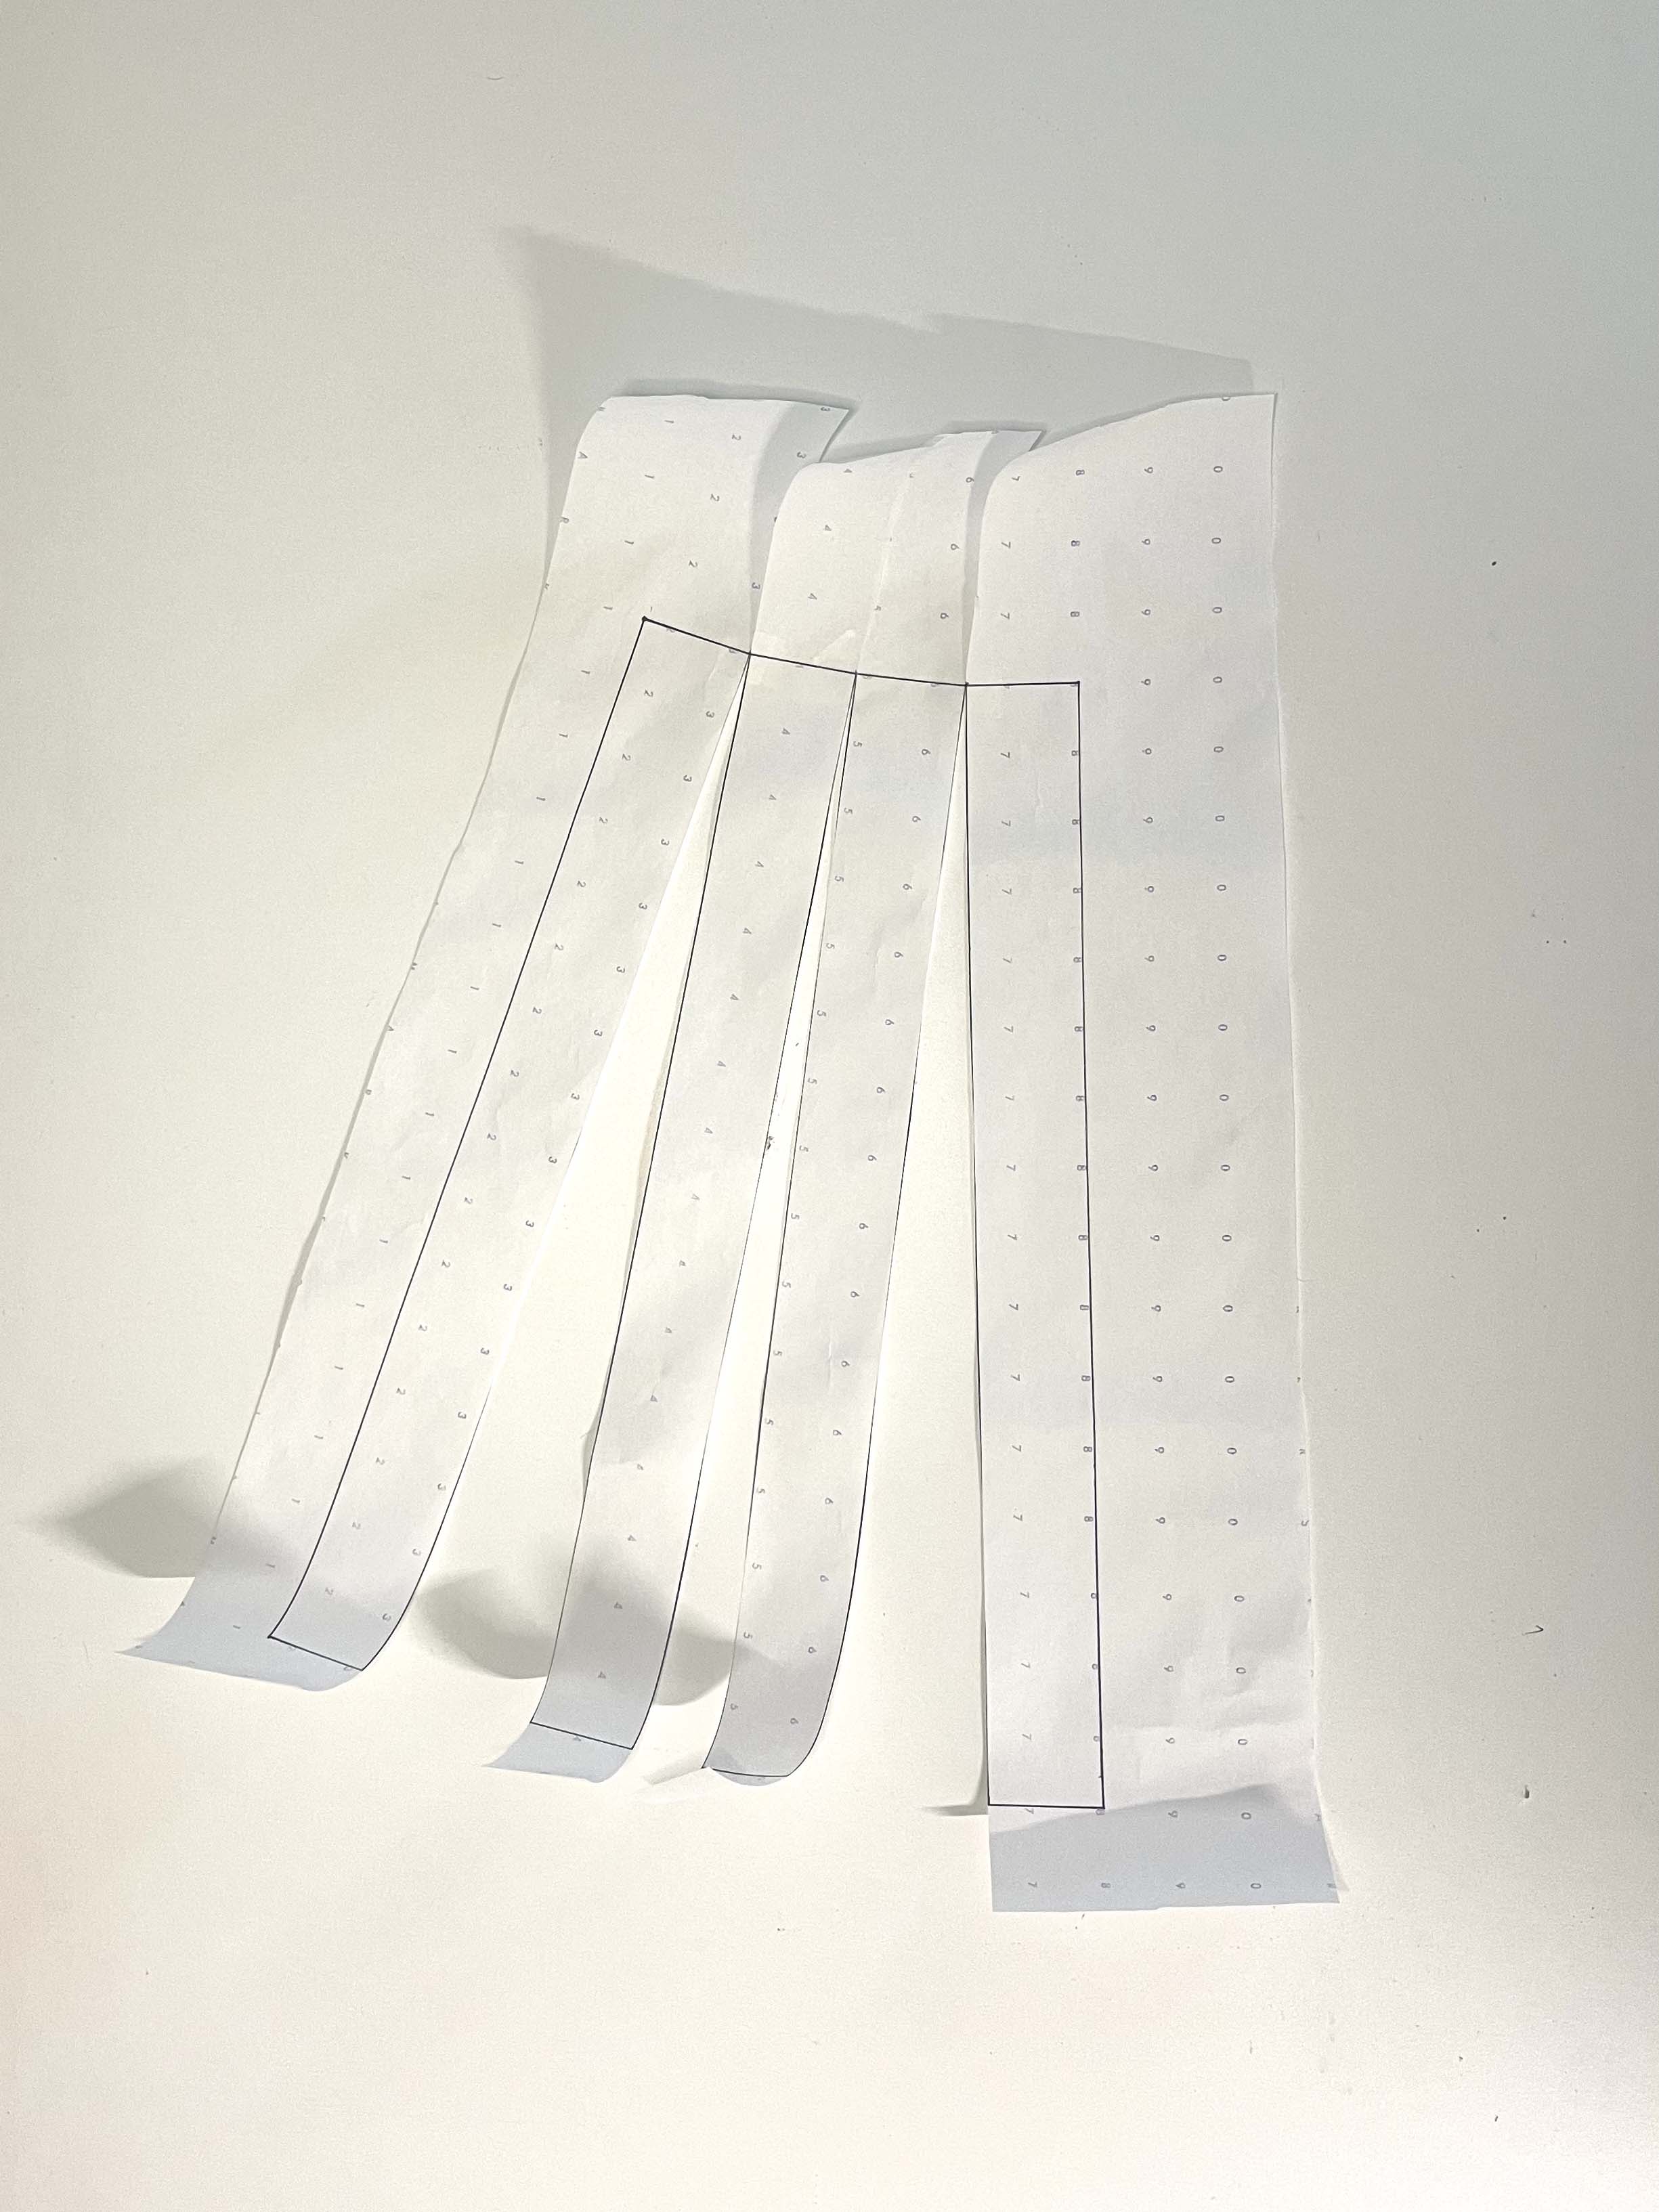
Take your paper scissors and cut/slash all the way up to but not through the top line that represent the waistline. Keep the line that represents Center Front straight. That piece remains stationary and does not get moved/opened. You can start thinking about how much fullness you would like in your skirt.
Place extra paper underneath your original pattern like so. You want to spread each section apart until you like the look of it. You do not necessarily have to spread them all at even distances but you can if you desire. Adding or taking away from the fullness later is an option after you sew up a fit sample.
Finishing the Front Draft
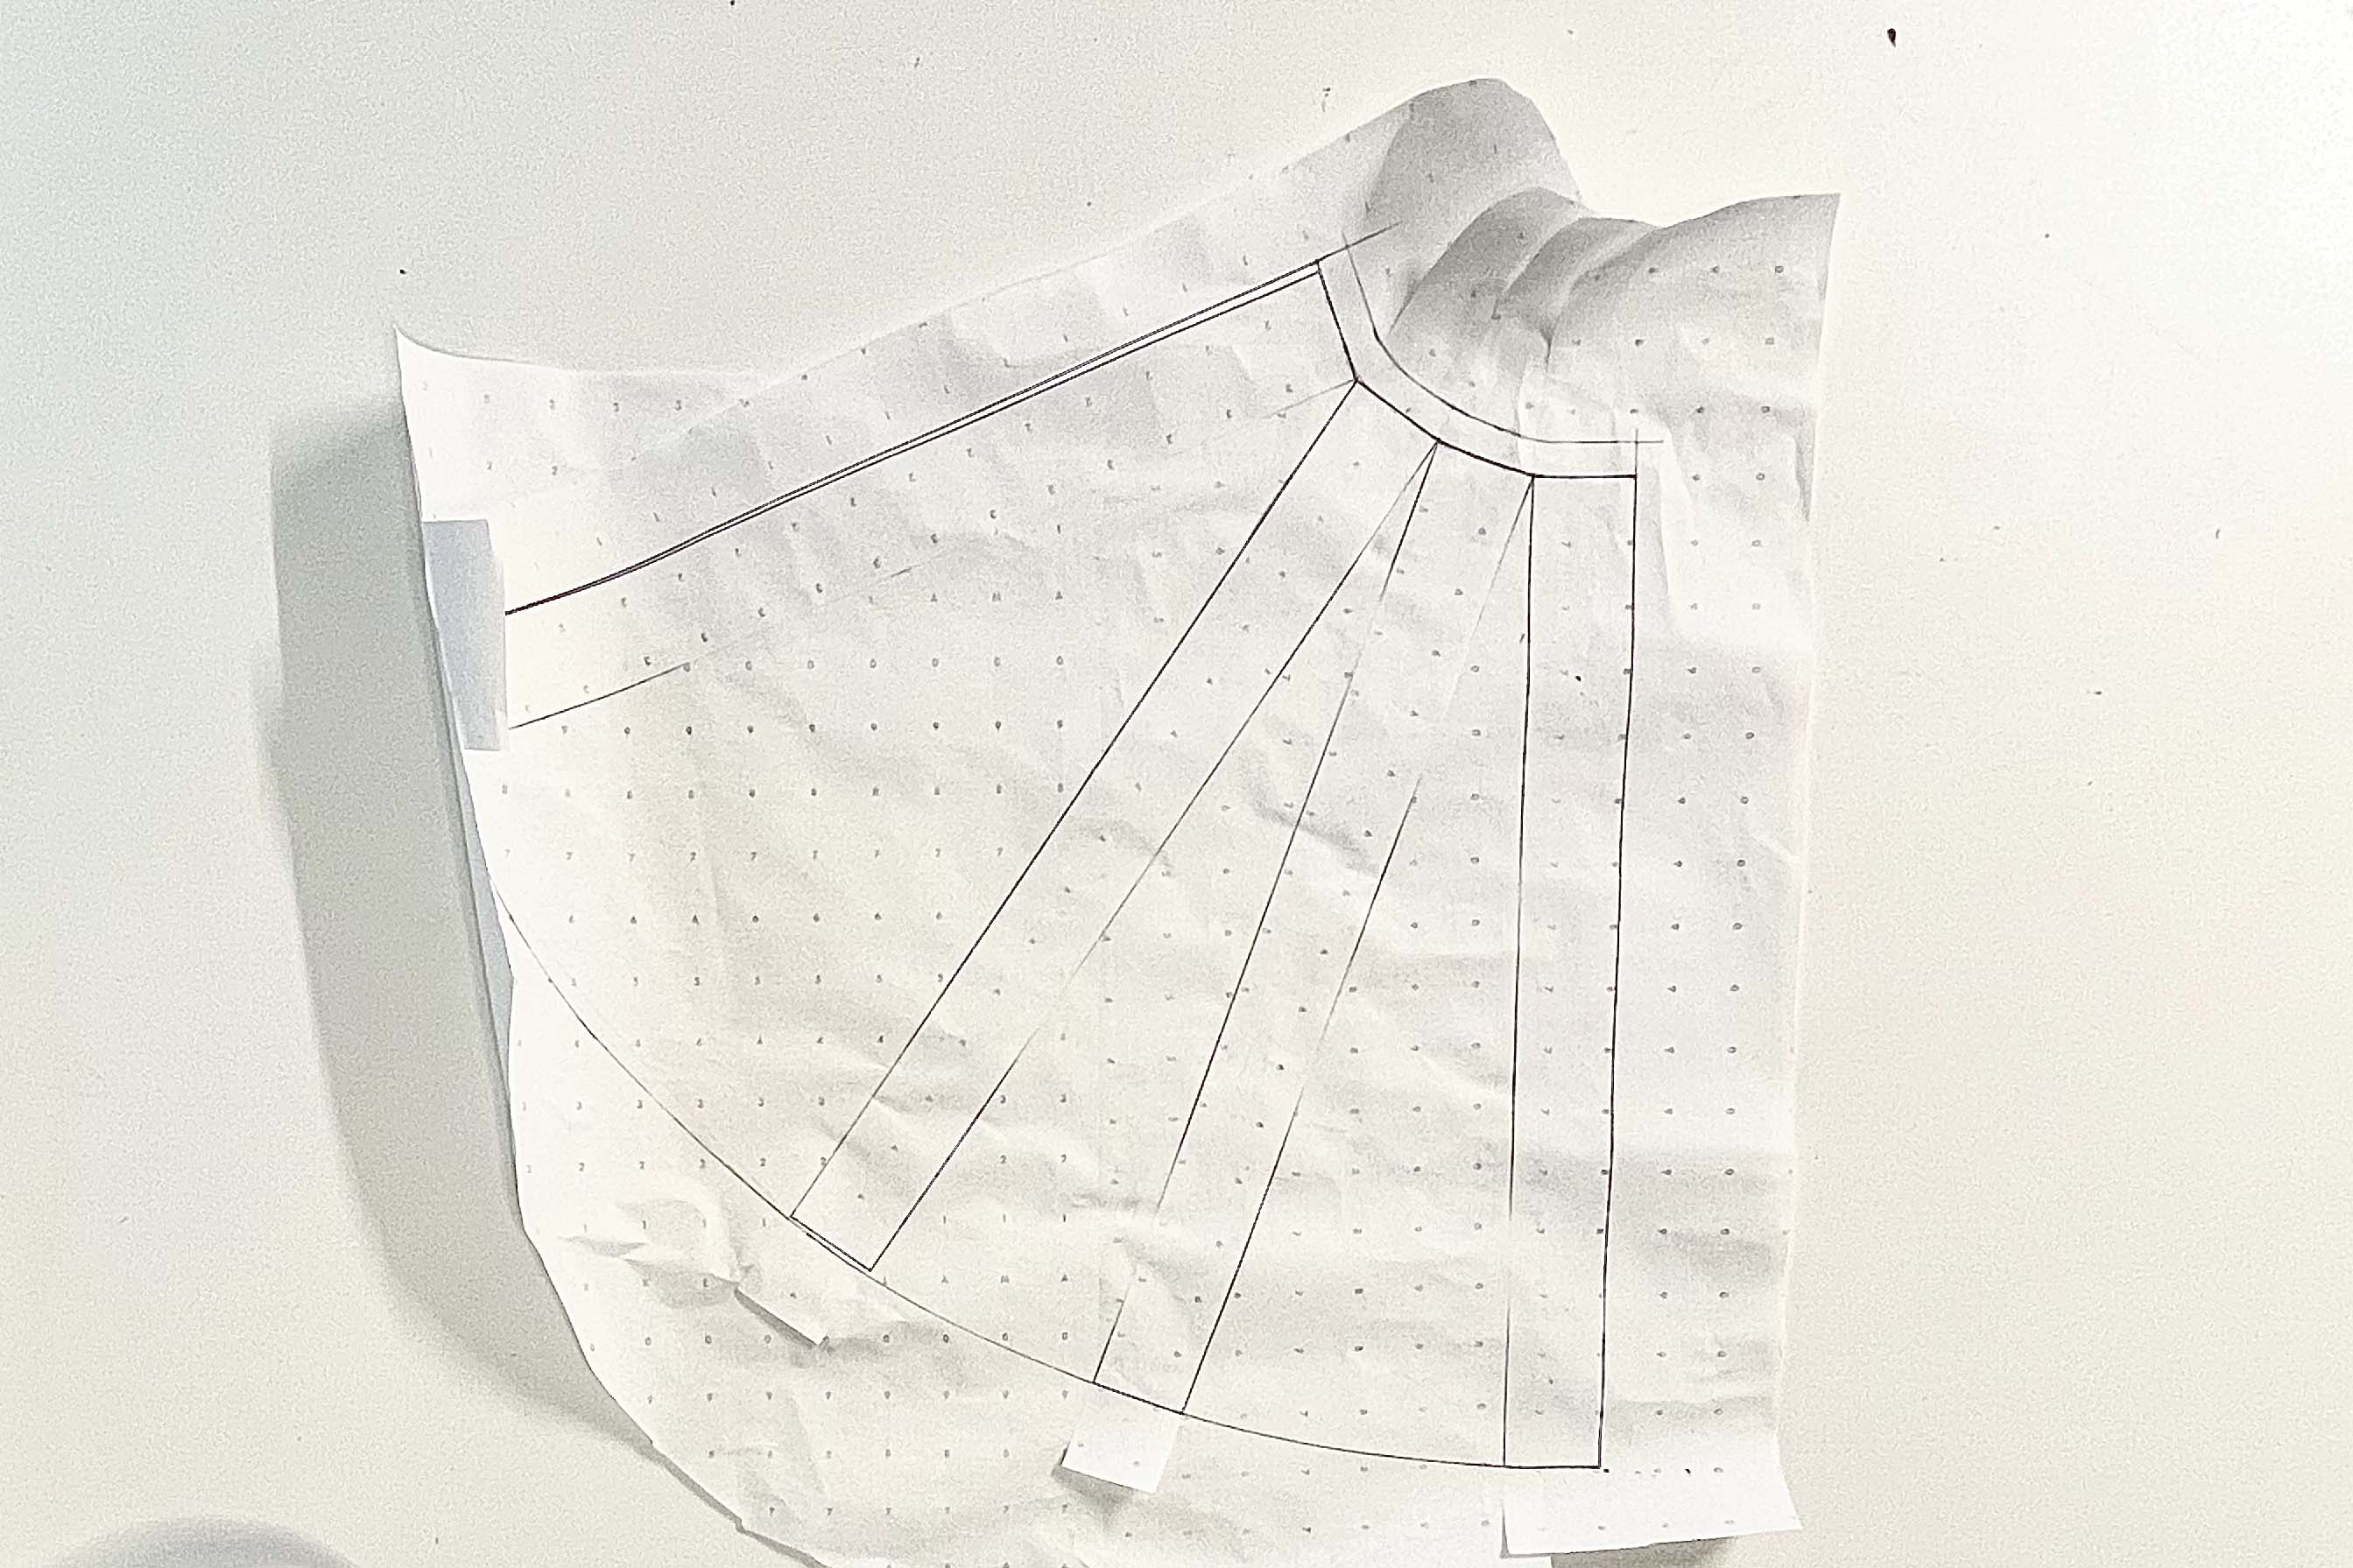
After achieving the desired look, tape down the areas that are spread open take your hip curve ruler, and tru the bottom hemline as I already have here. Then remeasure the waistline at the top to ensure that measurement still represents the waistline measurement of your Front Bodice. I had to add 1/8 inch to my skirt at the waist to make them match up. After this, I redrew my side seam to the hemline and added 1/2 inch seam allowance to the waistline.
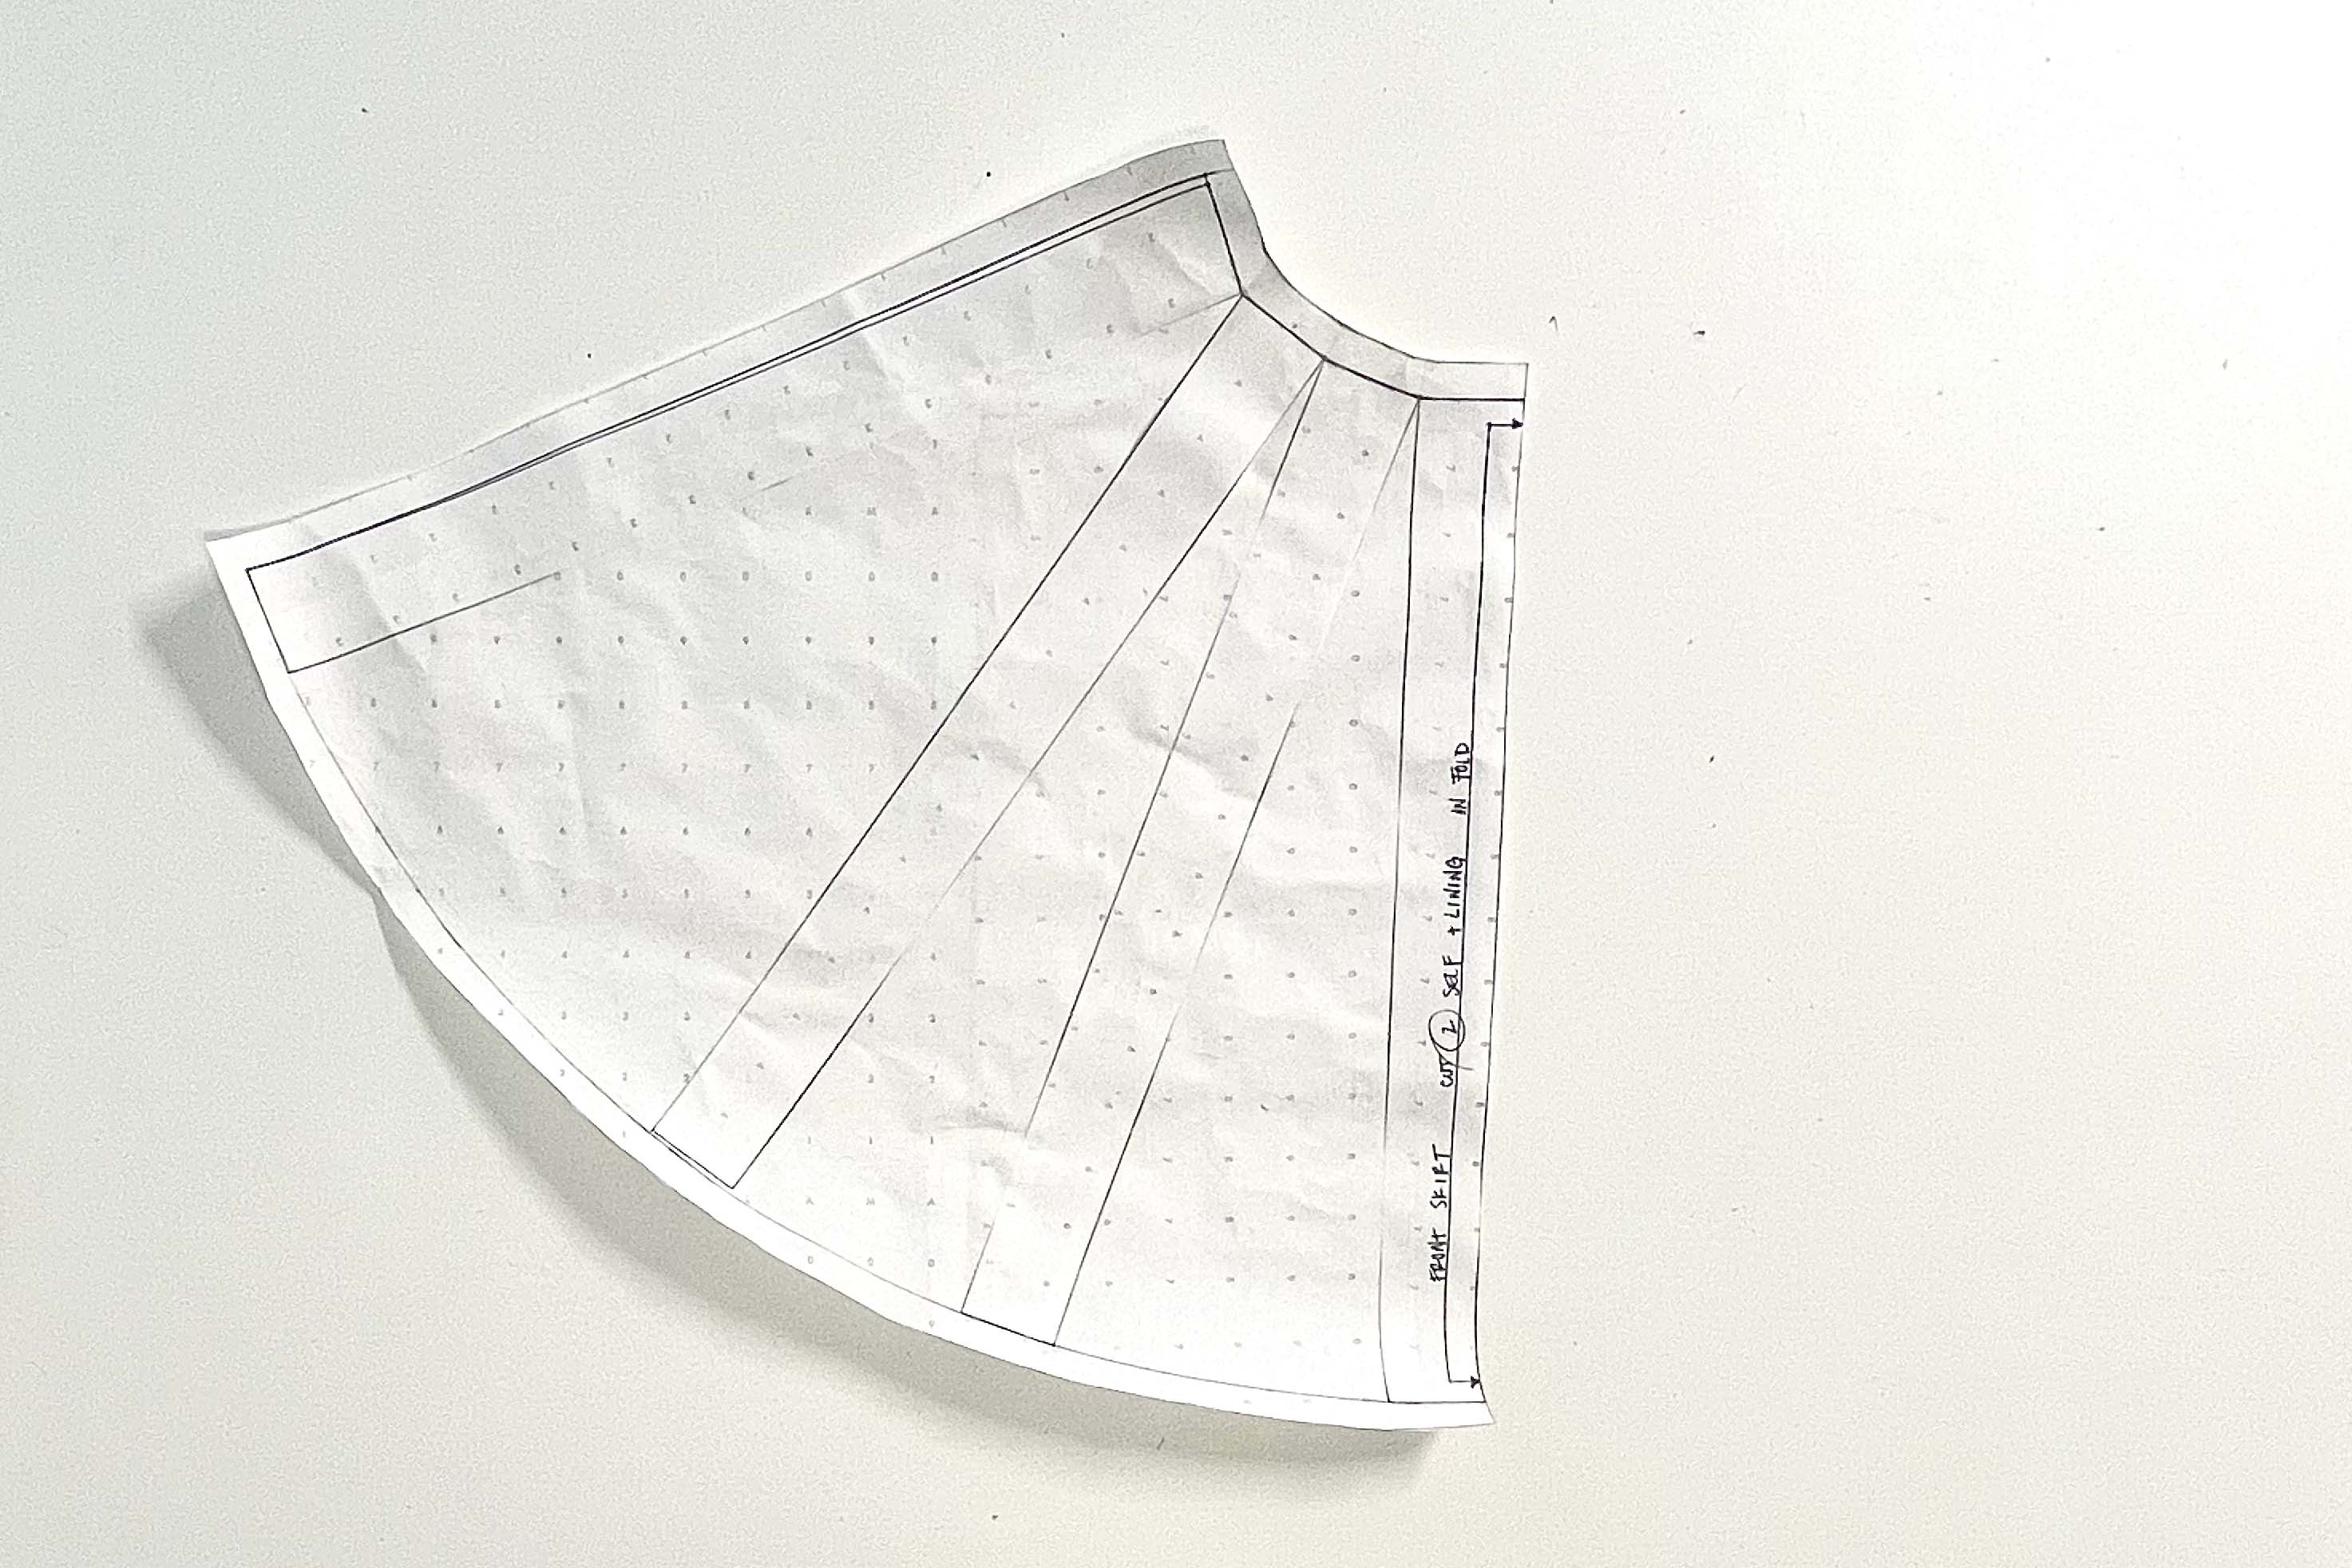
Add the seam allowance to the side seam and hemline. The hem allowance is dependent on the method you plan to use to finish it off. I plan to use a bias tape finish so 1/2 inch works very well. If your skirt has a Center Front Seam, go ahead and add it now. This completes the front draft of my skirt.
The Back Skirt
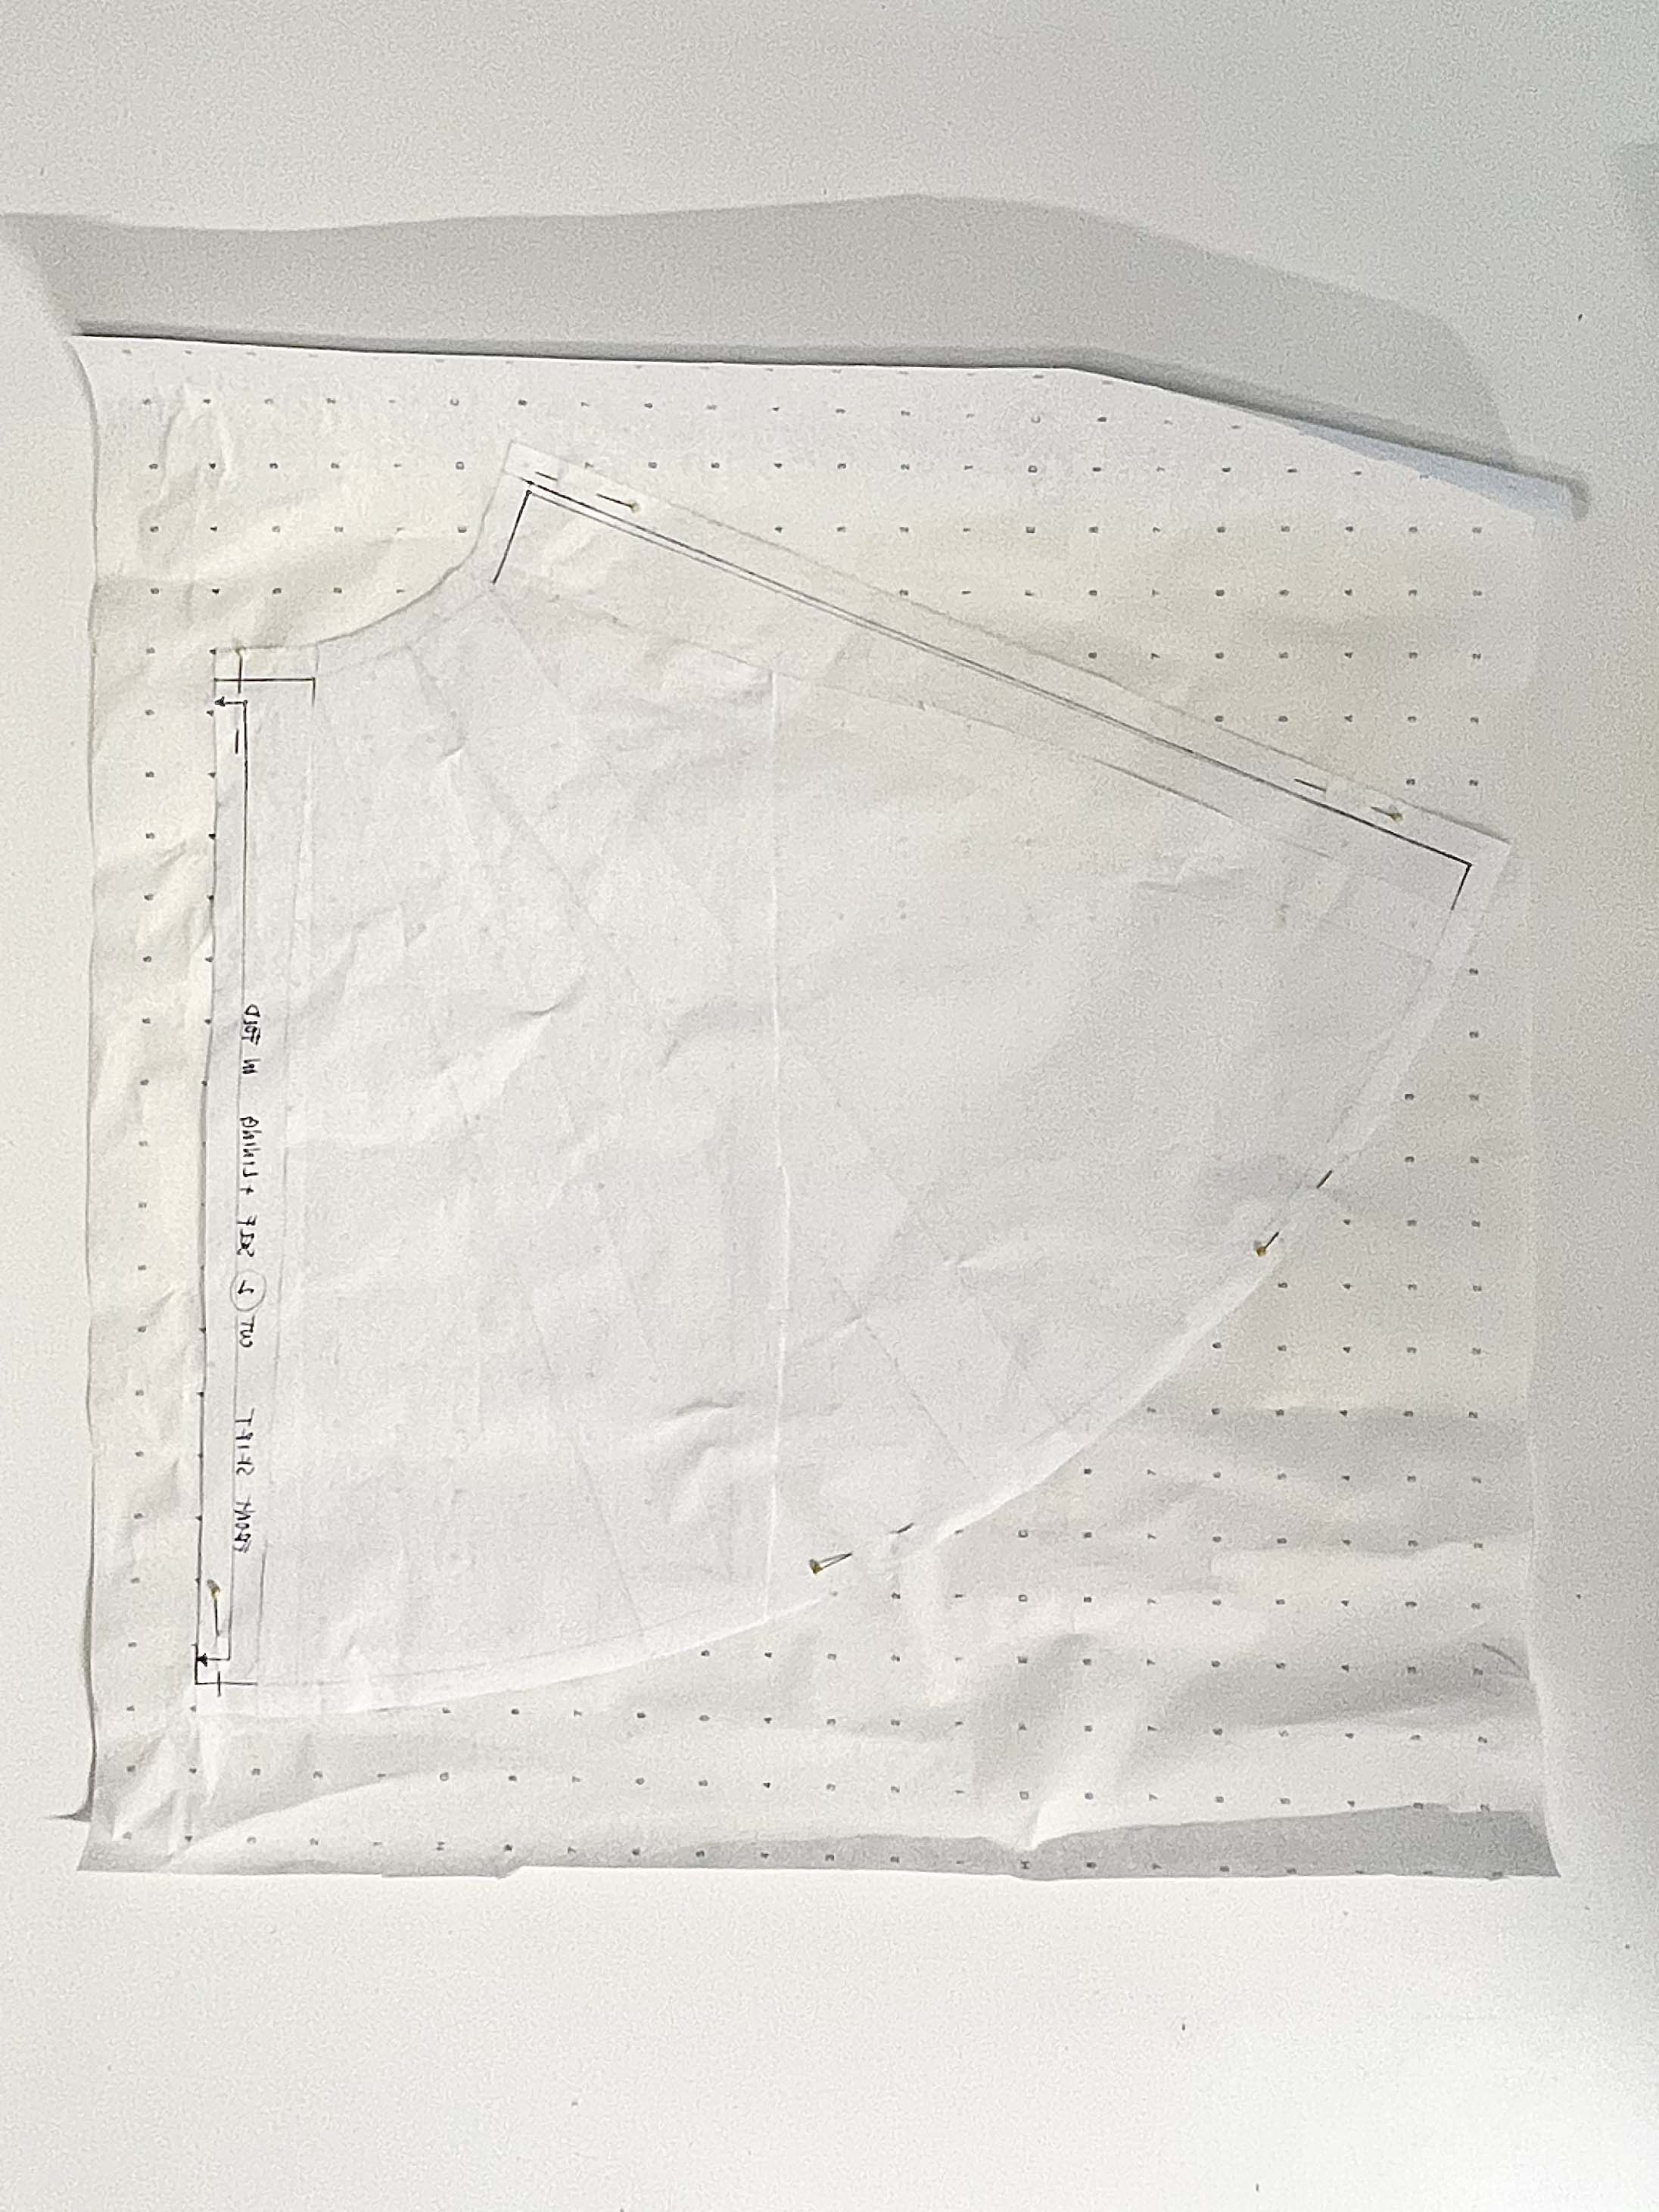
The back skirt draft in this instance is pretty simple. I flipped my front skirt over and traced it over to create the back skirt. Tracing off the front to create a back skirt pattern does NOT always work like this. Since there is plenty of fullness to work with; using the front does work.
The only extra steps for the back are to add double notches to the Center Back seam that represent your zipper placement. As well as to keep you from forgetting where the Center Back of the back skirt is. Lastly, measure the back bodice waistline and make sure the back skirt waistline is the seam measurement. This completes the back skirt draft.
Used Products

What you might also like


3 comments on “Draping a Custom Dress, Part Three: Pattern Development”
-
-
Hi, Cindy! Thank you for letting us know, we apologize for this inconvenience. The videos have been updated! Happy stitching!
-
Thanks!!!!!!!
-
-
Leave a Reply
You must be logged in to post a comment.

Hello! The videos are not complete. They get cut off before 1 minute. It happened on the 2 previous posts also.