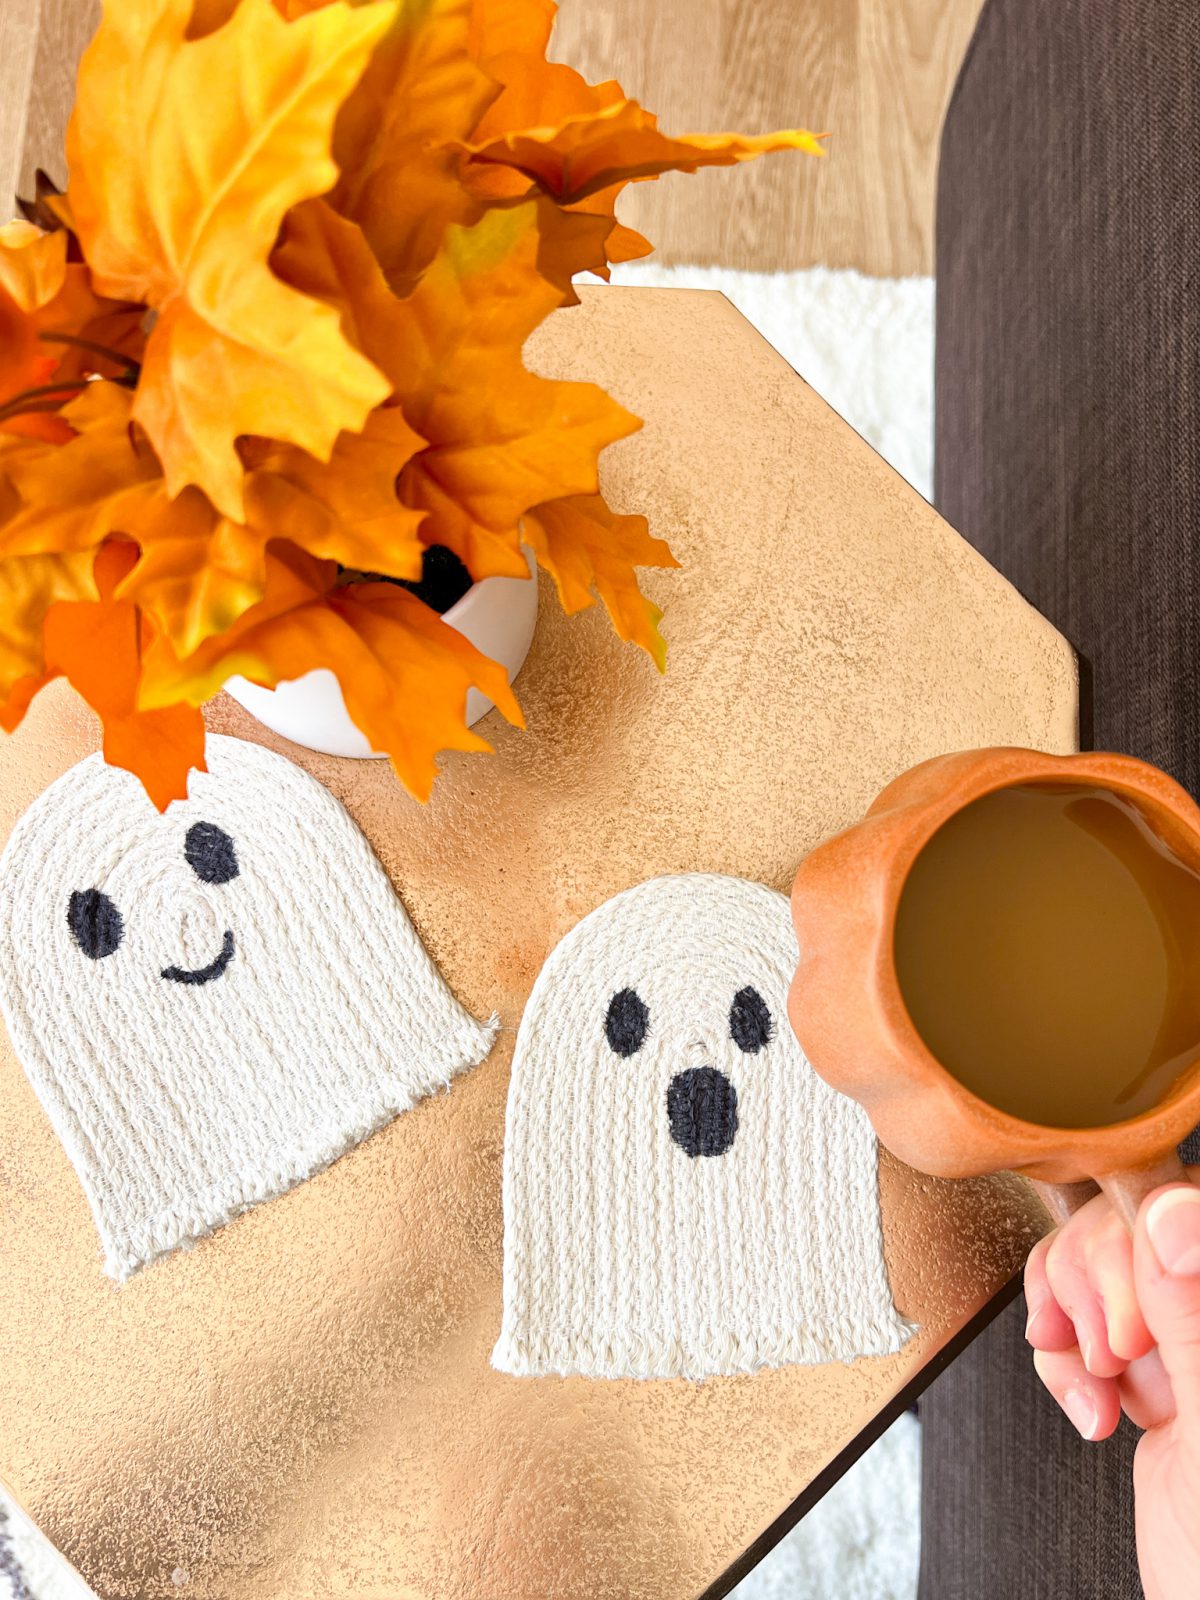
Ghosters Rope Coaster Tutorial
Hi friends, It’s Nicole from Modern Handcraft and I am excited to share my first tutorial here on WeAllSew as a new BERNINA Ambassador! Halloween is one of my favorite holidays to decorate for and as soon as decorations start showing up in stores I am ready! A fun and quick project featuring one of my favorite spooky characters will be the perfect spot for those warm mugs of apple cider, follow along and learn how to make your own set of Ghosters Rope Coasters.
This project is a great introduction into sewing with cotton cording, and using a zigzag stitch. These would also make a cute addition to a hostess gift with a bottle of wine or cider for any parties you attend this season!
Materials to sew a set of Ghosters Rope Coasters
- BERNINA B770 QE PLUS
- BERNINA Reverse Pattern Foot #1C
- 1/4″ Cotton Cording
- Coordinating thread – cream or white (glow in the dark would add a fun touch)
- Black permanent marker
- Ruler
- Heavy Duty scissors or rotary blade
- Seam ripper
Instructions to make a set of Ghosters Rope Coasters
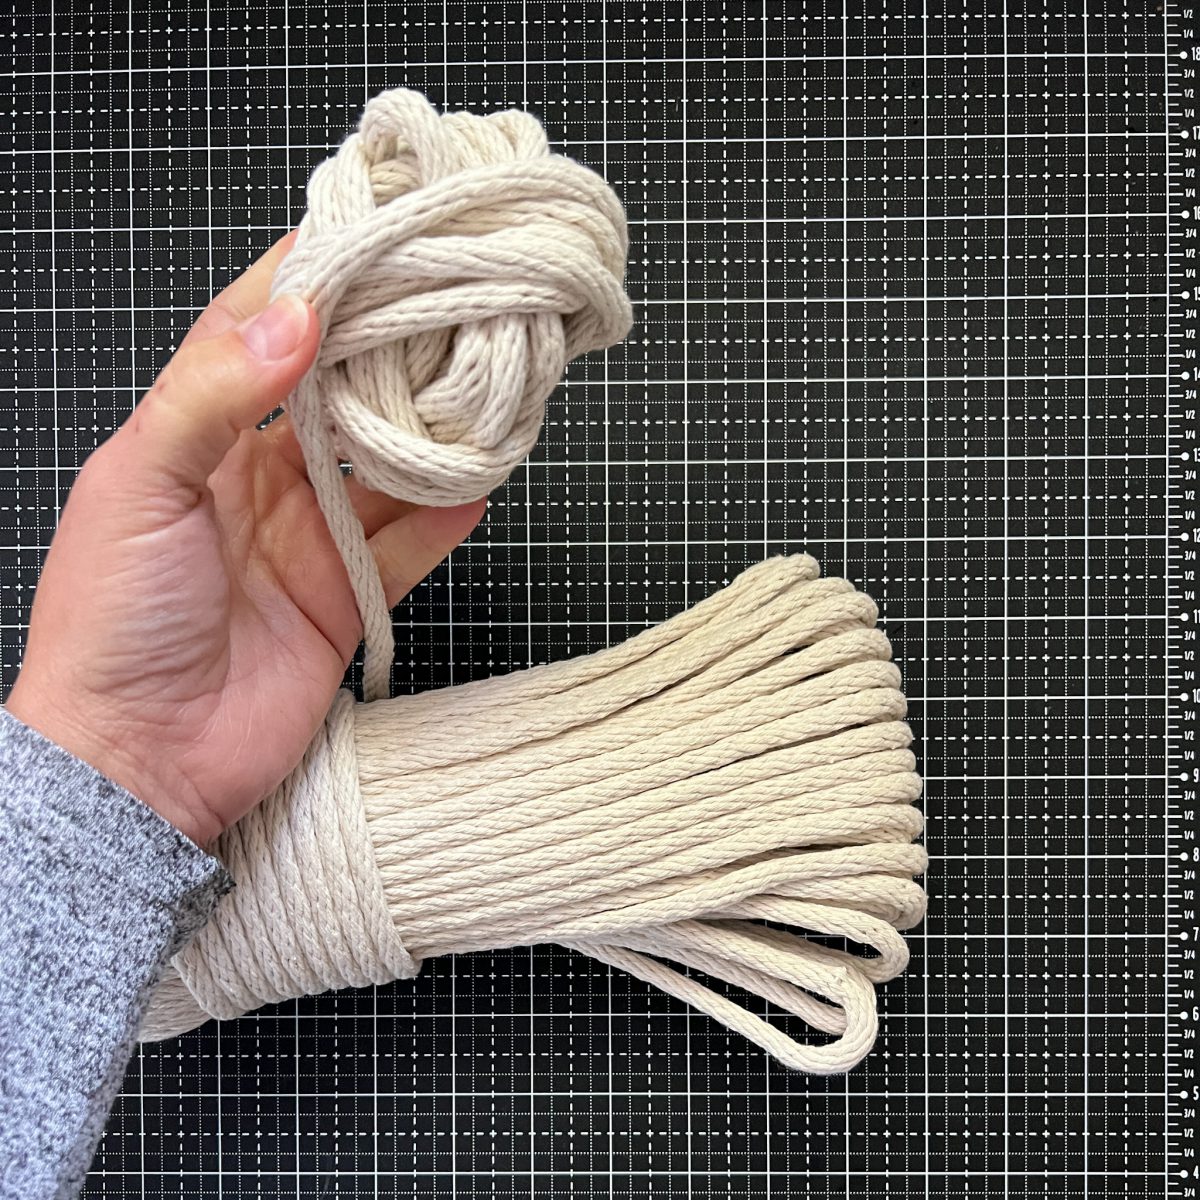
Step 1: Preparing Your Cotton Cording
I am using a bundle of cotton cording that measures 1/4″ wide and a length of 100′, when you unwrap your cotton cording from the packaging it comes in a nicely wound bundle. This seems like it’s ready to go, but once that initial unraveling happens, it becomes a tangled mess.
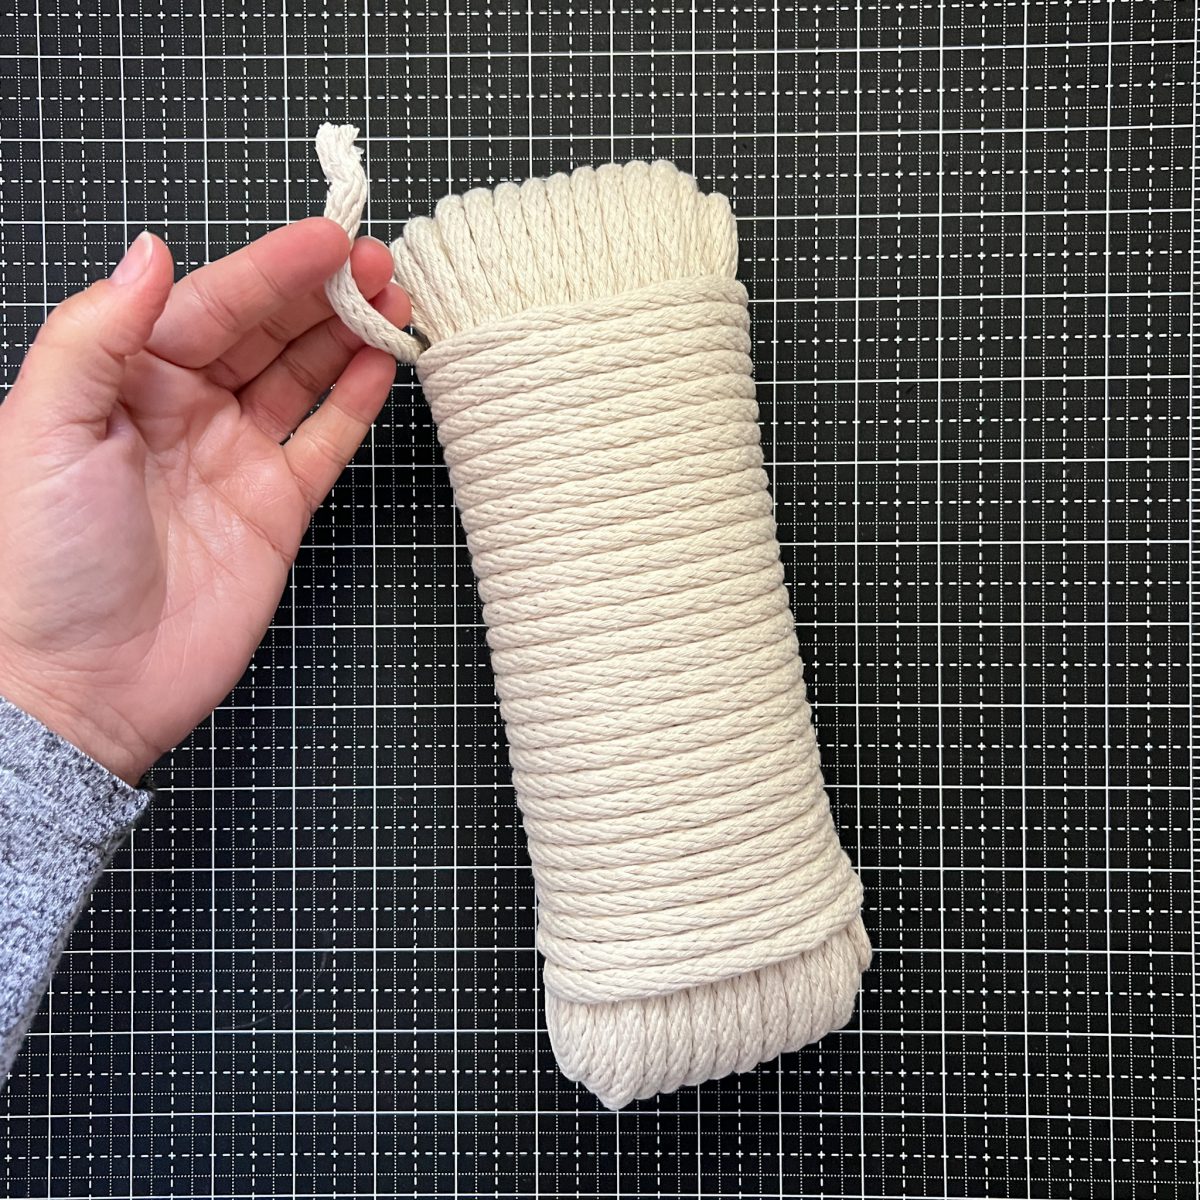
I like to begin all of my rope projects by winding my cording into a nice ball, that way you will not have any issues getting tangled up at your machine. Once wound, trim the end of your rope for a nice clean edge.
Step 2: Machine Settings
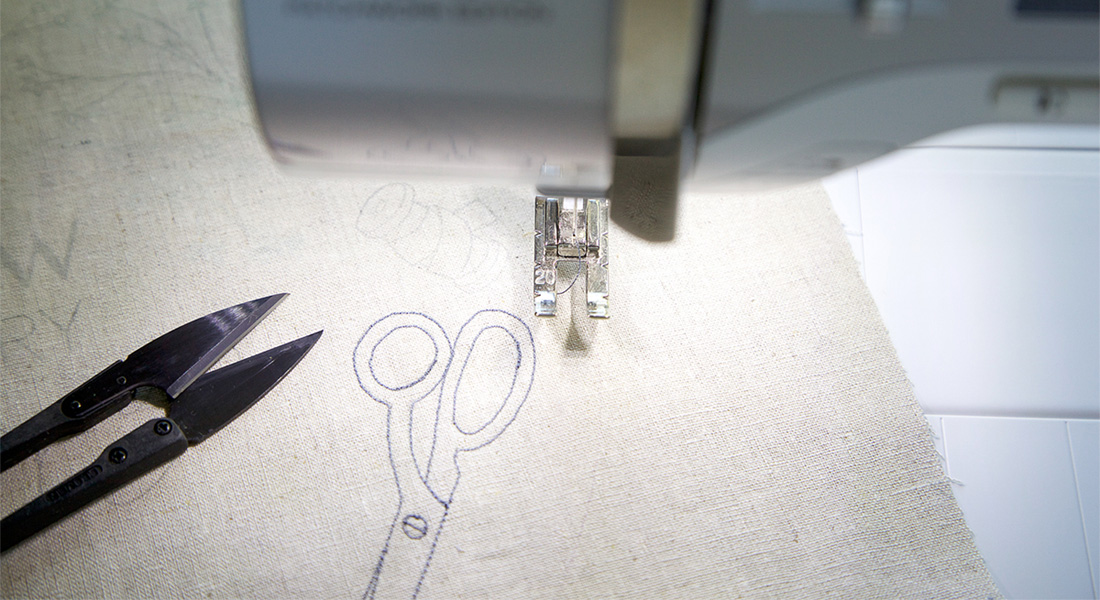
You will be using two different stitches on this project, a zigzag stitch and a straight stitch. I chose the foot #1C for this project. It’s an all-purpose foot that works for straight stitching as well as decorative stitches and allows me to use a wider width.
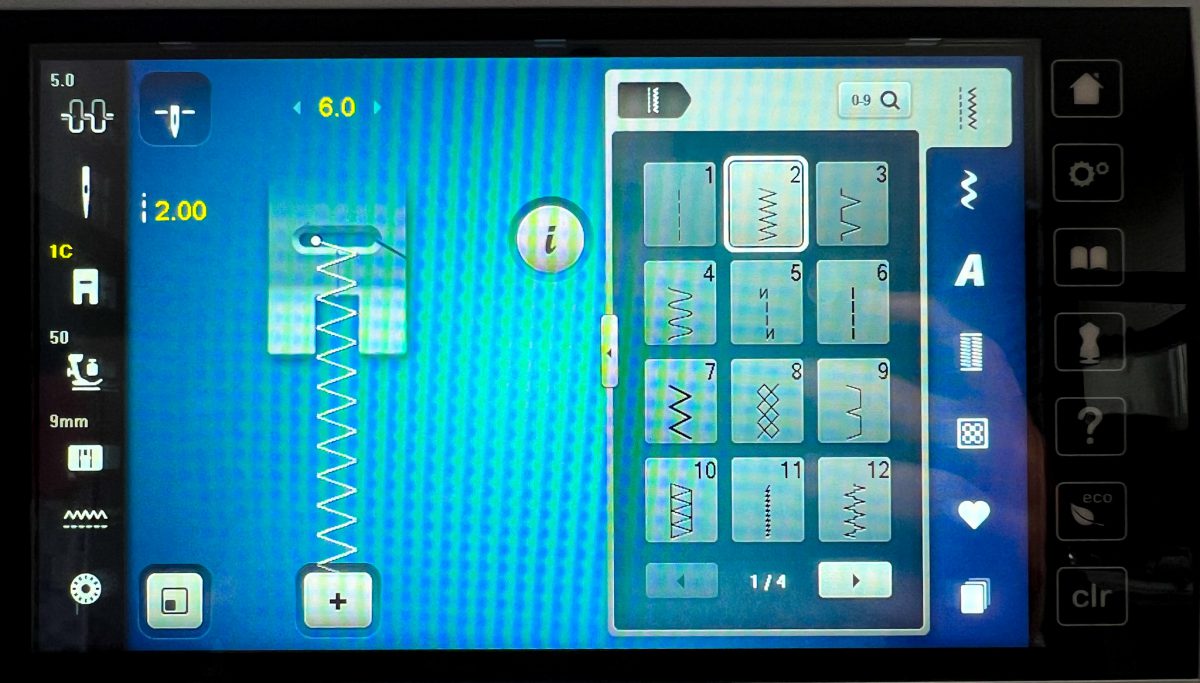
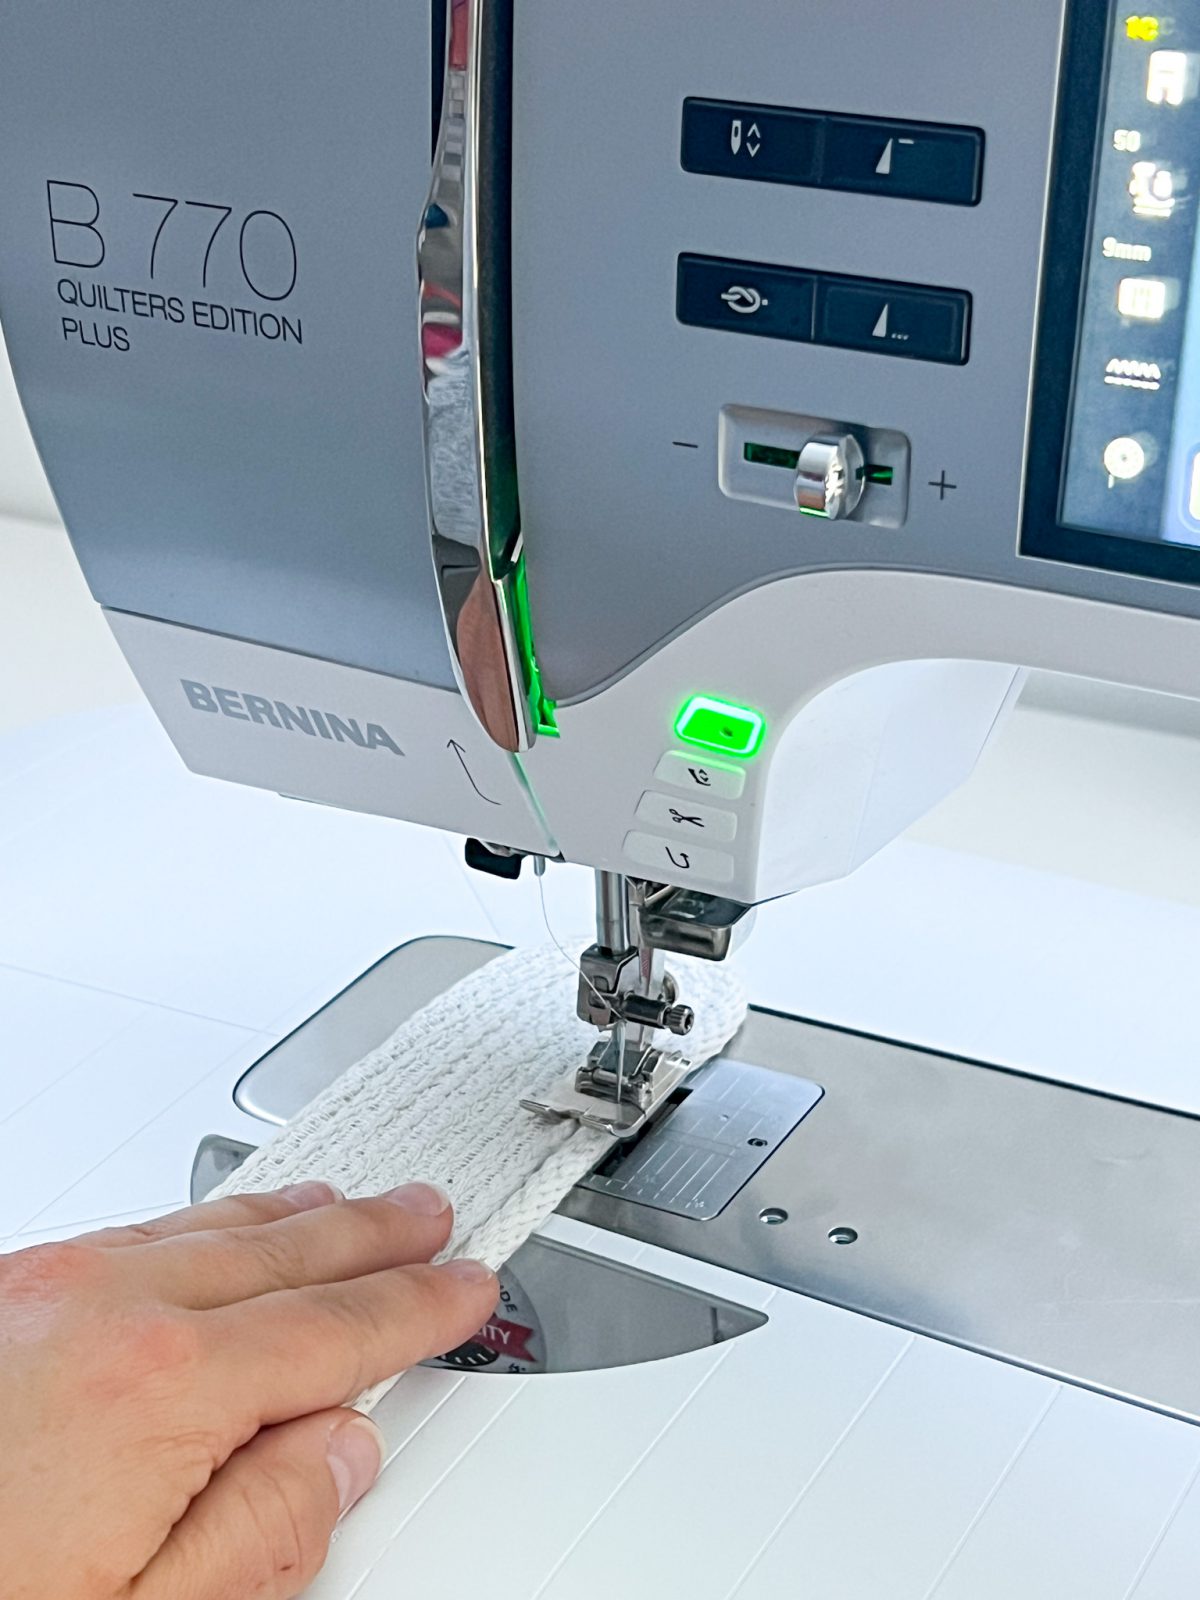
Stitch: Zigzag, option 2 / width 6.0 / stitch length 2 / needle down
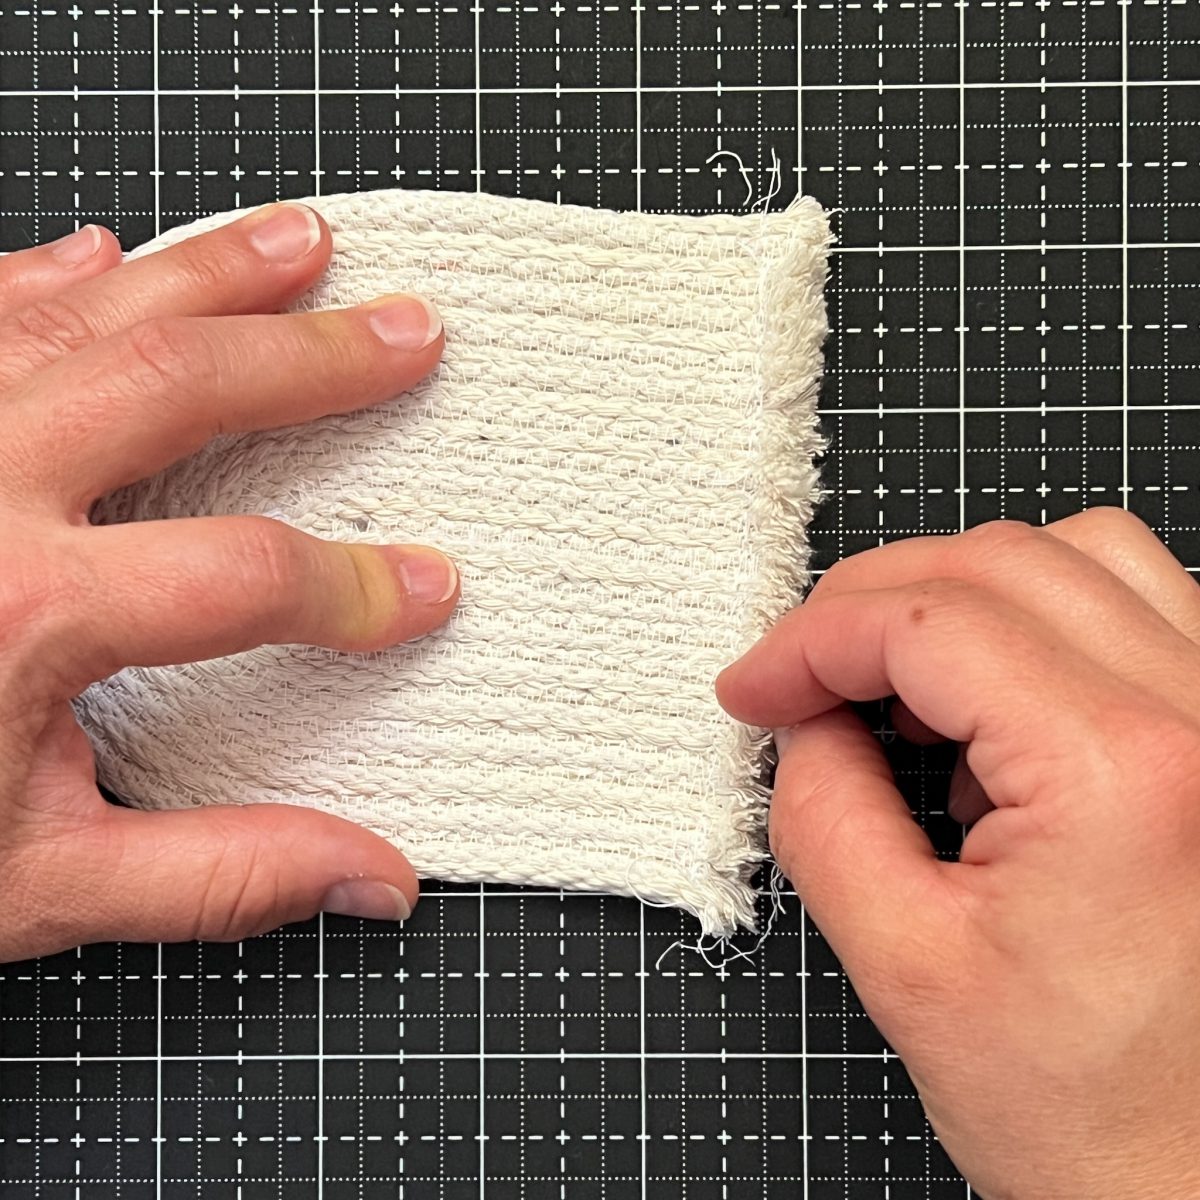
Step 3: Zigzag Stitching Your Oval Shape
Begin by measuring out 7″ of cording on your machine table or using a ruler.
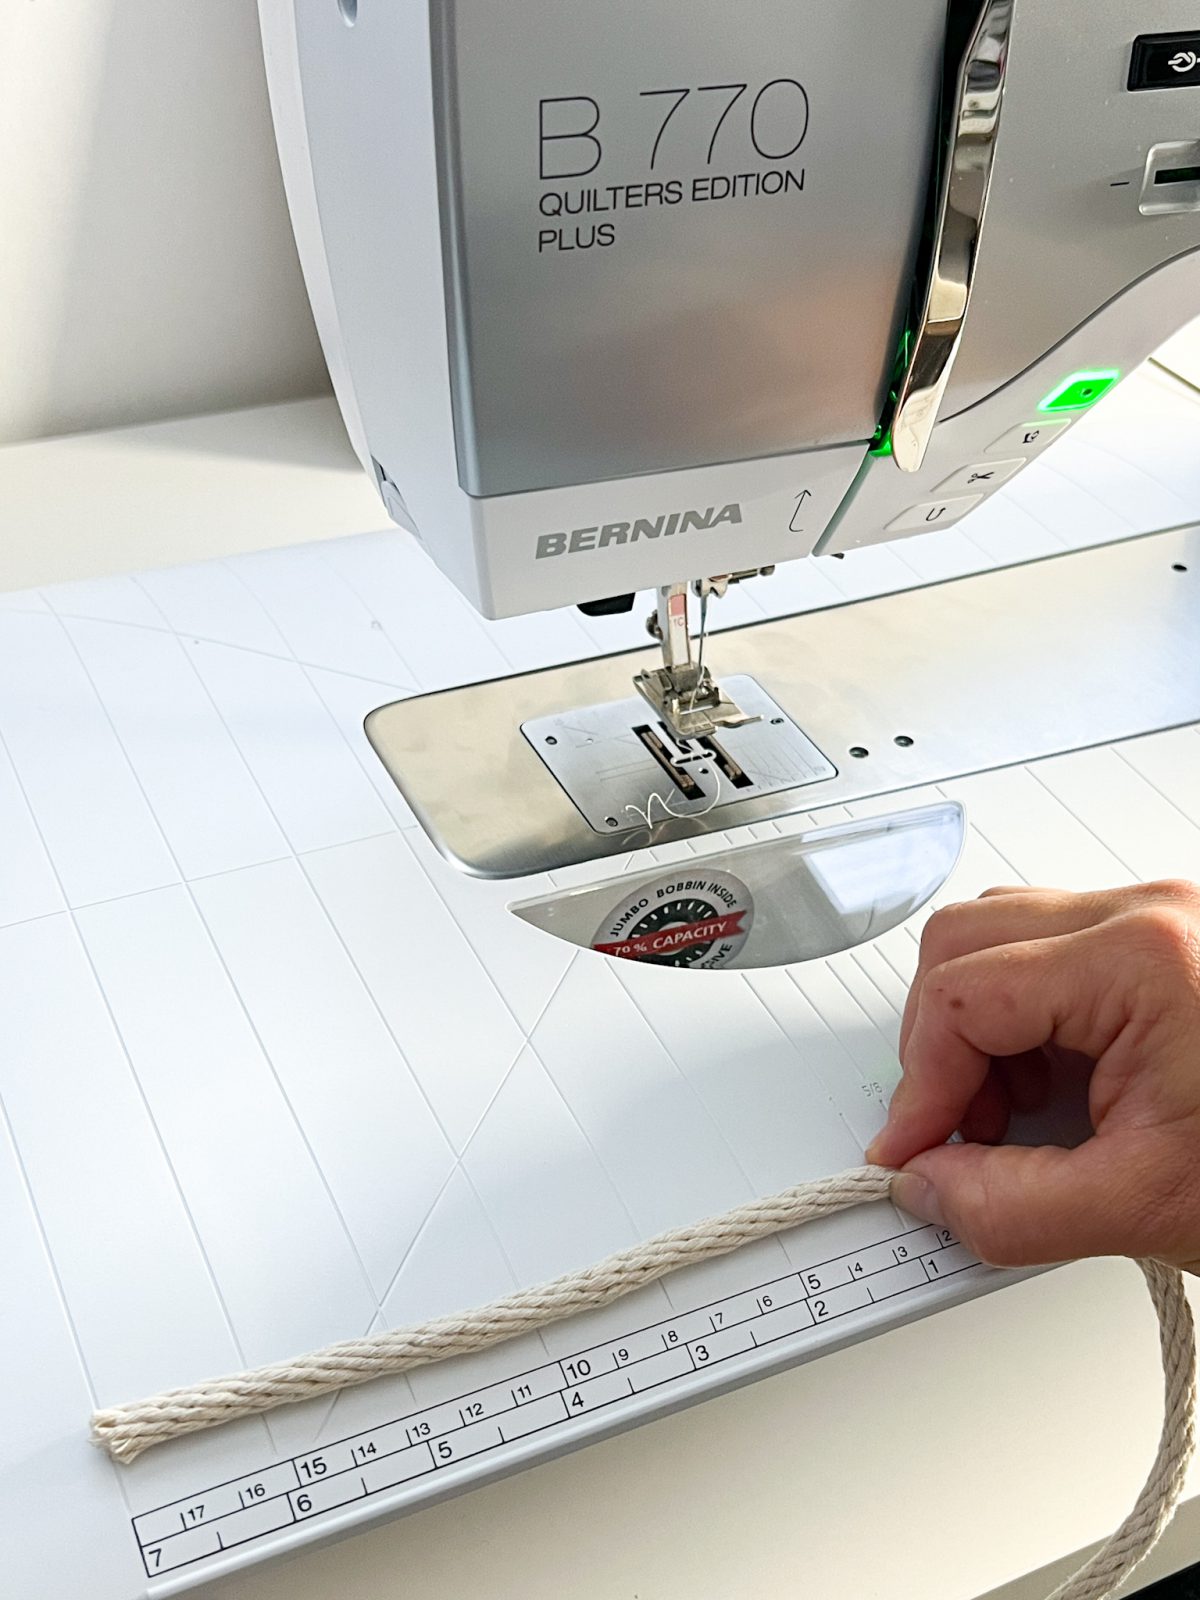
Fold your cording at the 7″ measurement, this is where you will begin zigzag stitching.
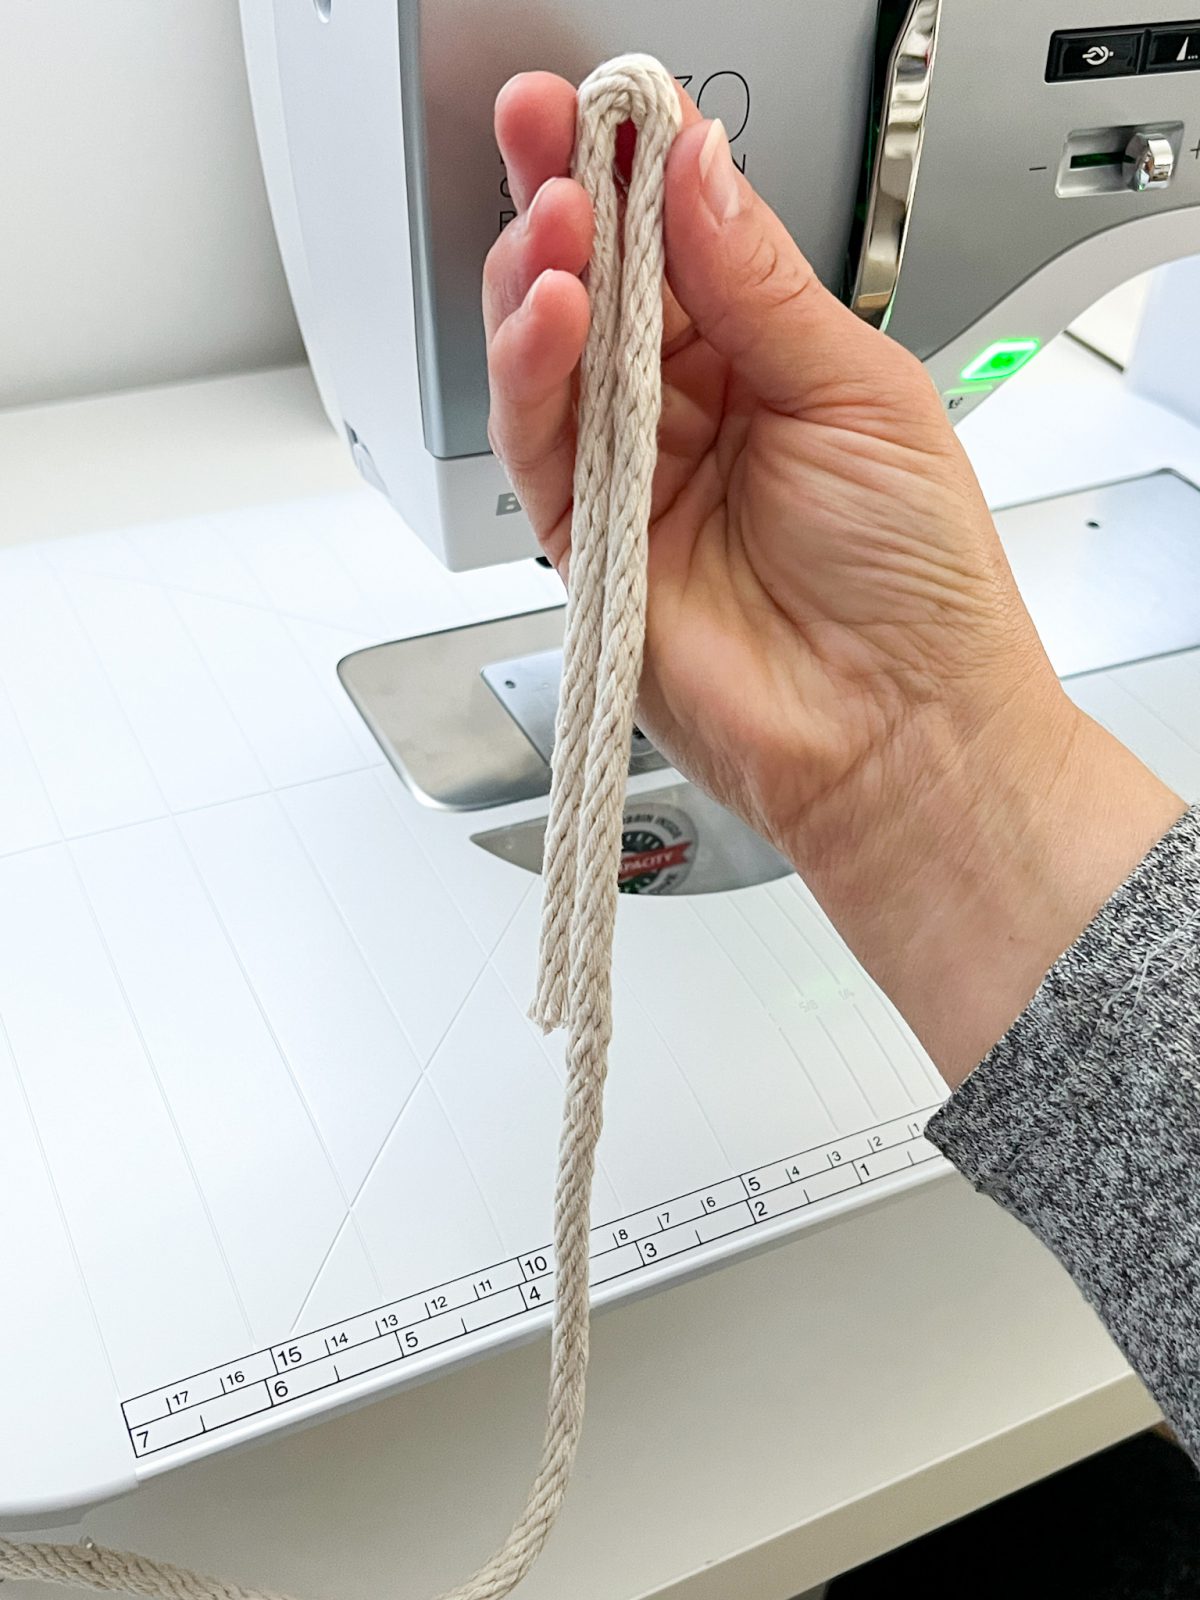
Lower your presser foot down onto the folded end of your cording. Make sure that your needle is in down position and begin zigzag stitching. Sometimes it is hard for your cording to make the initial movement under your presser foot, a seam ripper works well for grabbing one side of the cording to move it through.
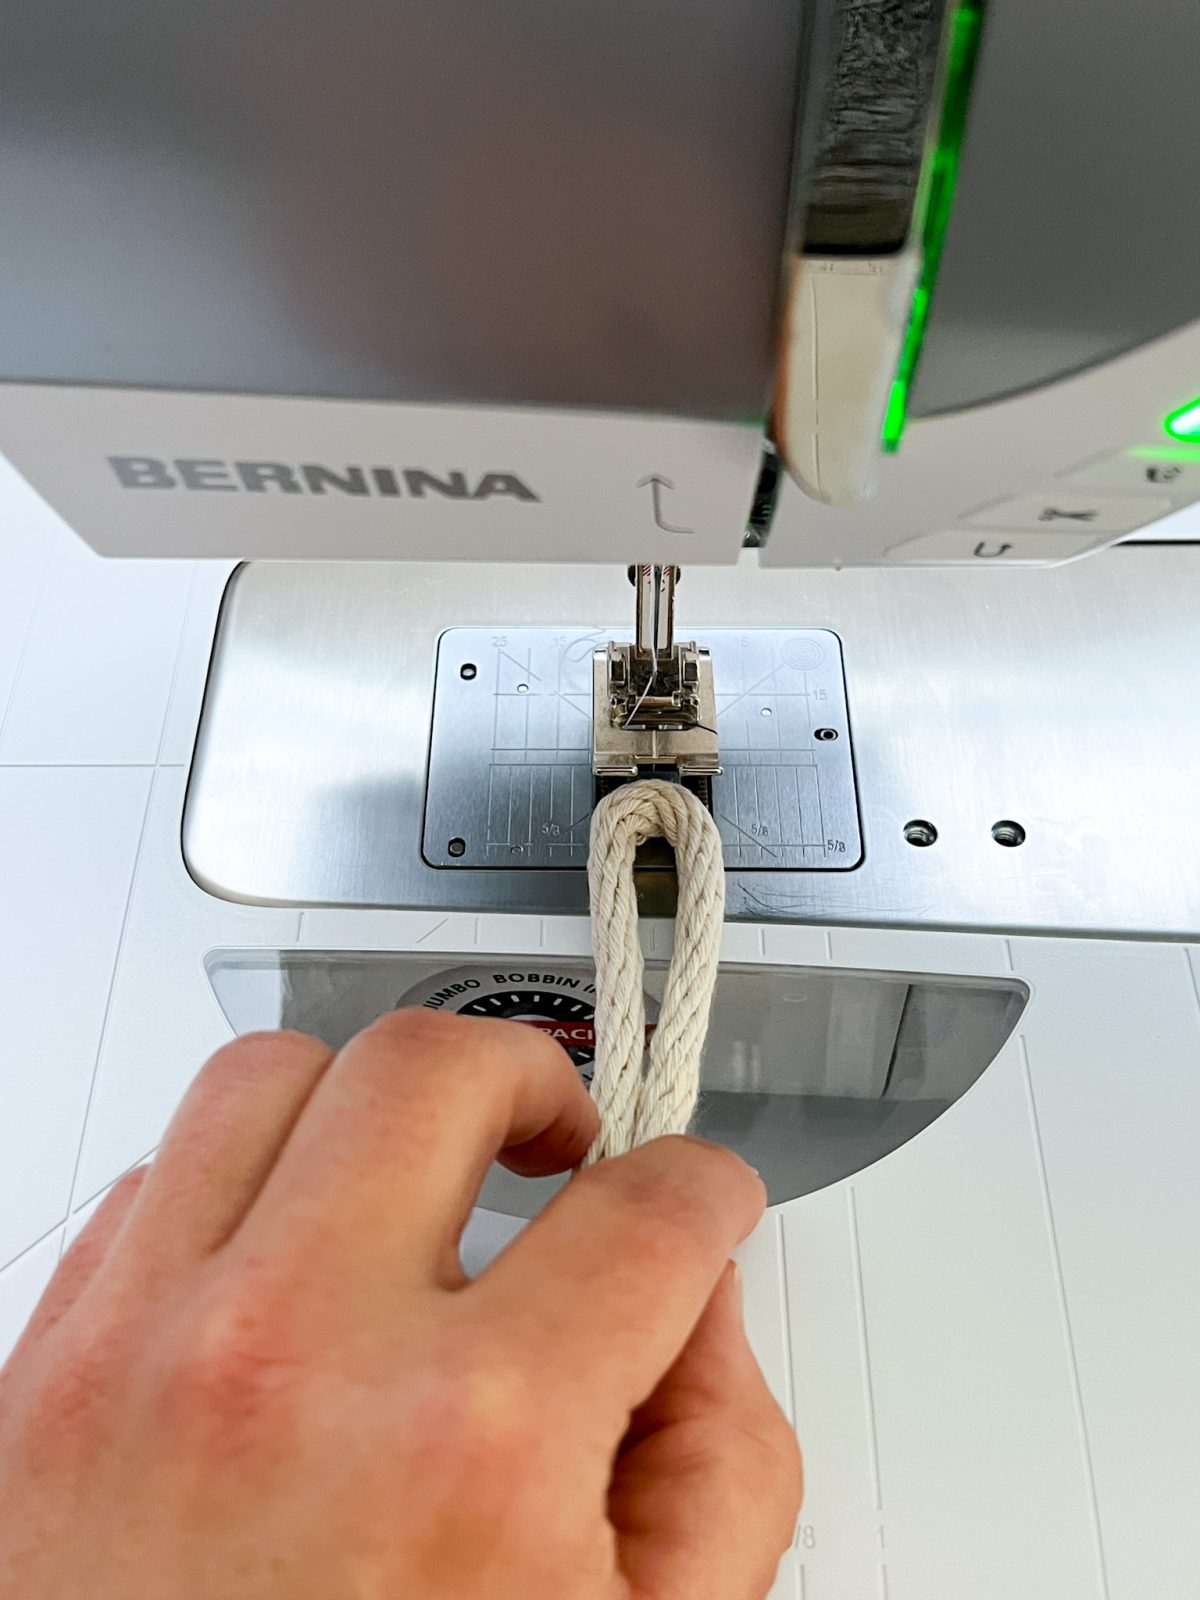
As you make it to the end, use your knee lift to lift your presser foot while stitching around to the next cording section to stitch.
Continue zigzag stitching around and around until the width of your oval shape is around 4″ and the length is around 10″.
End your stitches around the middle of your oval shape and trim off any extra cording. There is no need to backstitch at this point.

Step 4: Cutting Oval Shape and Securing Edges
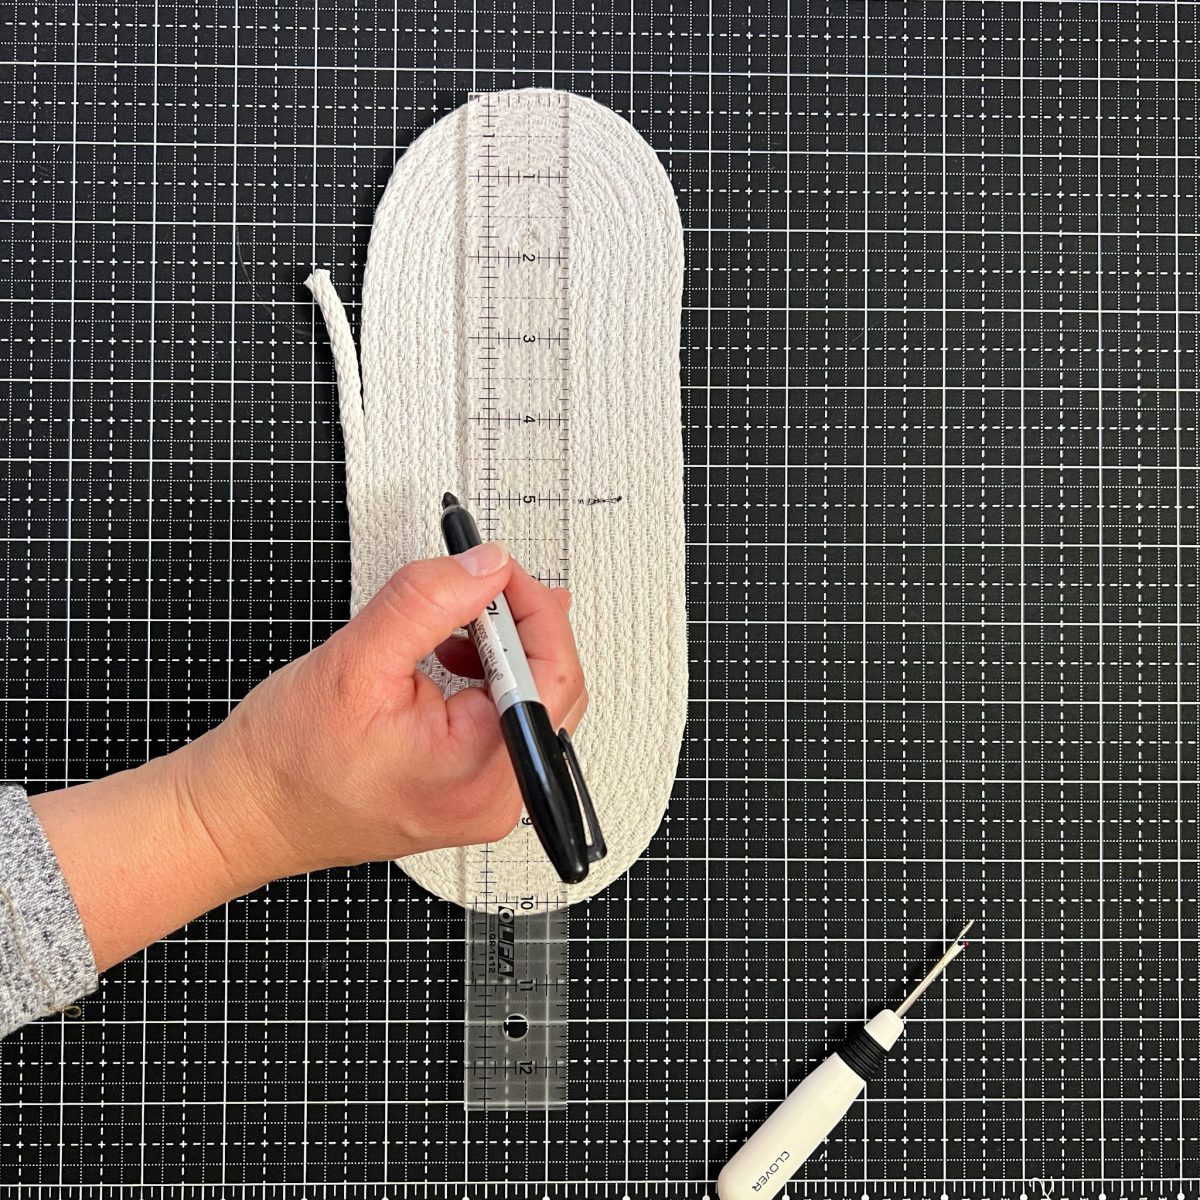
At your cutting mat, take a ruler and find and mark the middle point of your oval shape.
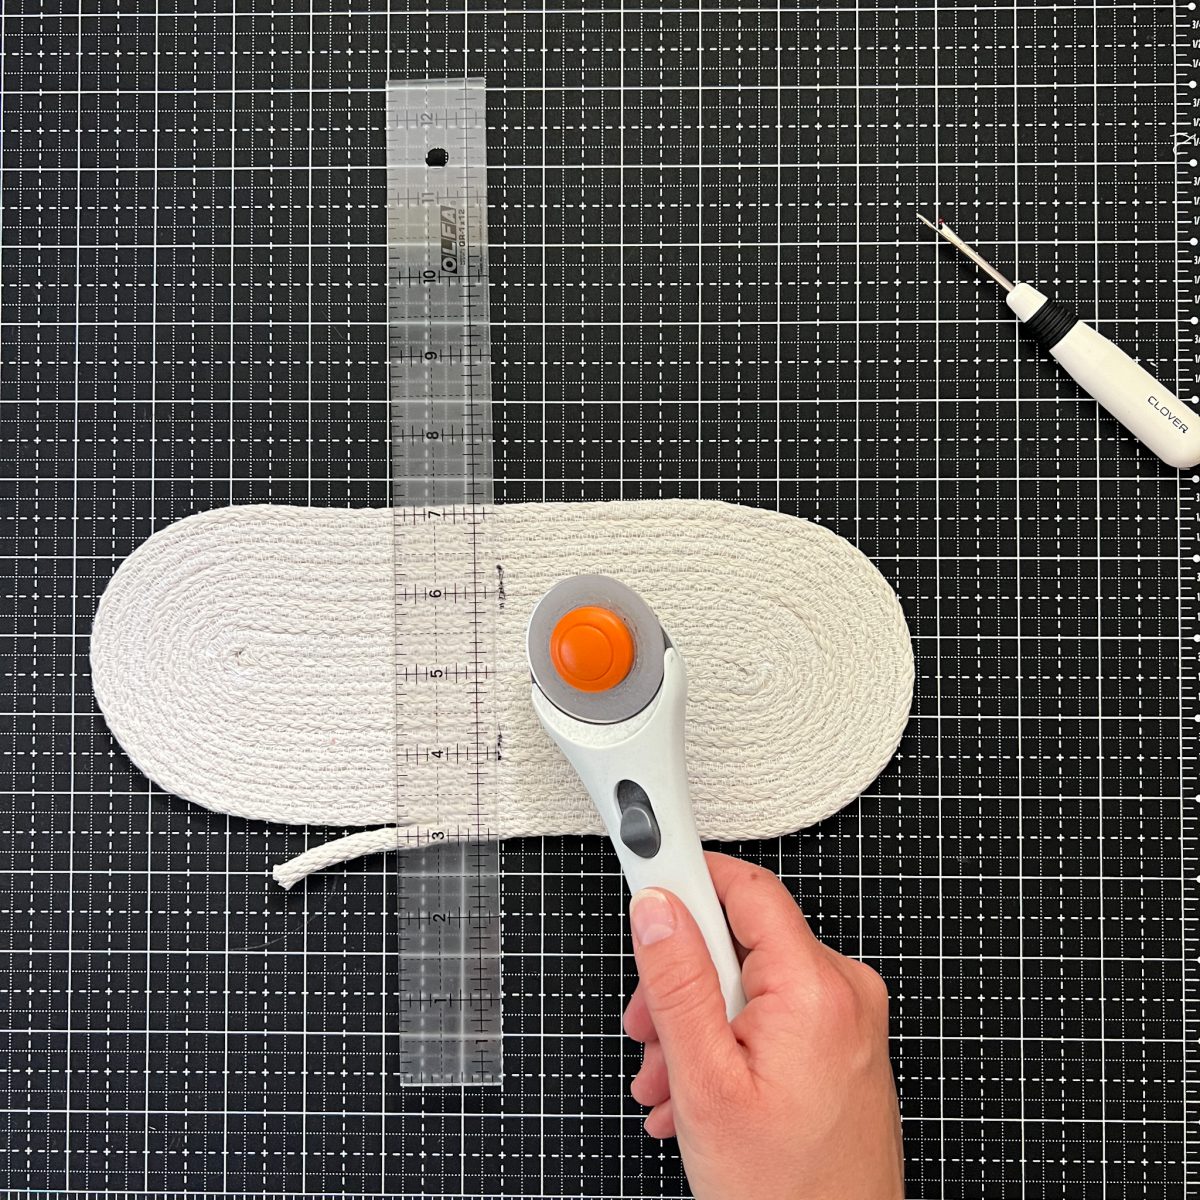
Using a ruler and rotary cutter or heavy-duty scissors, carefully cut your rope oval in half along your marked line.
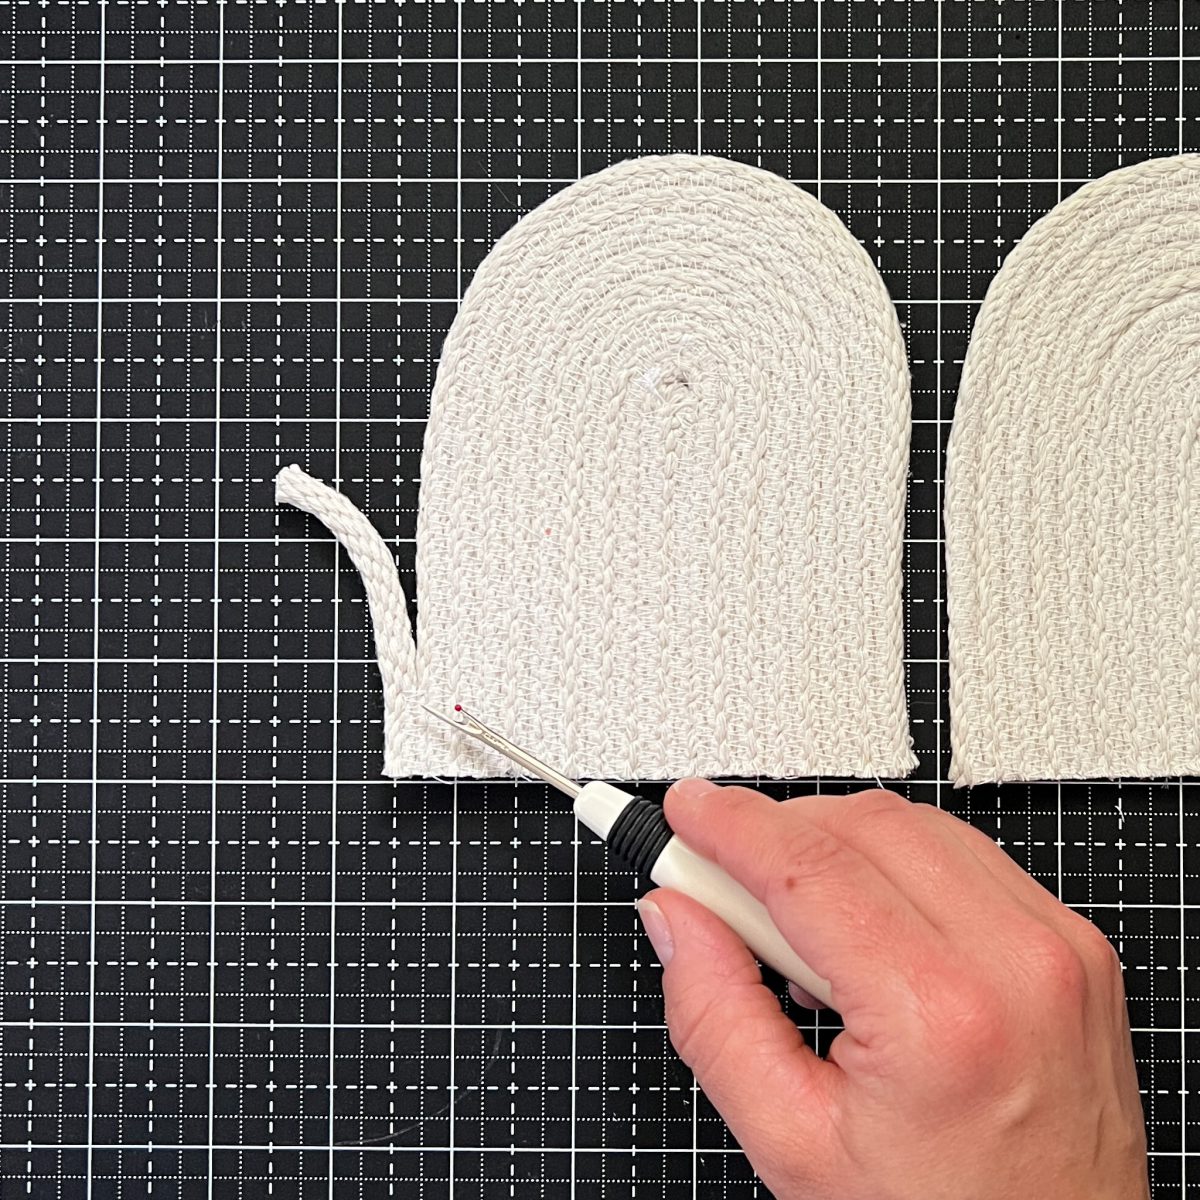
Using your seam ripper, cut through the zigzag stitching connecting the end tail of the cording. Remove this tail piece.
Back at your machine, using a straight stitch – stitch length 2. Stitch a straight line .5″ from the cut end of your half-oval shapes. Tip – if you would like a larger frayed end increase the straight line stitch distance from the raw edge.

Using your seam ripper, remove the zigzag stitches from just above your straight line stitch to the end of your raw edges, repeat for every row of zigzag stitching.

Using your rotary blade or scissors, trim away any loose threads that now hang off the end of your half oval.
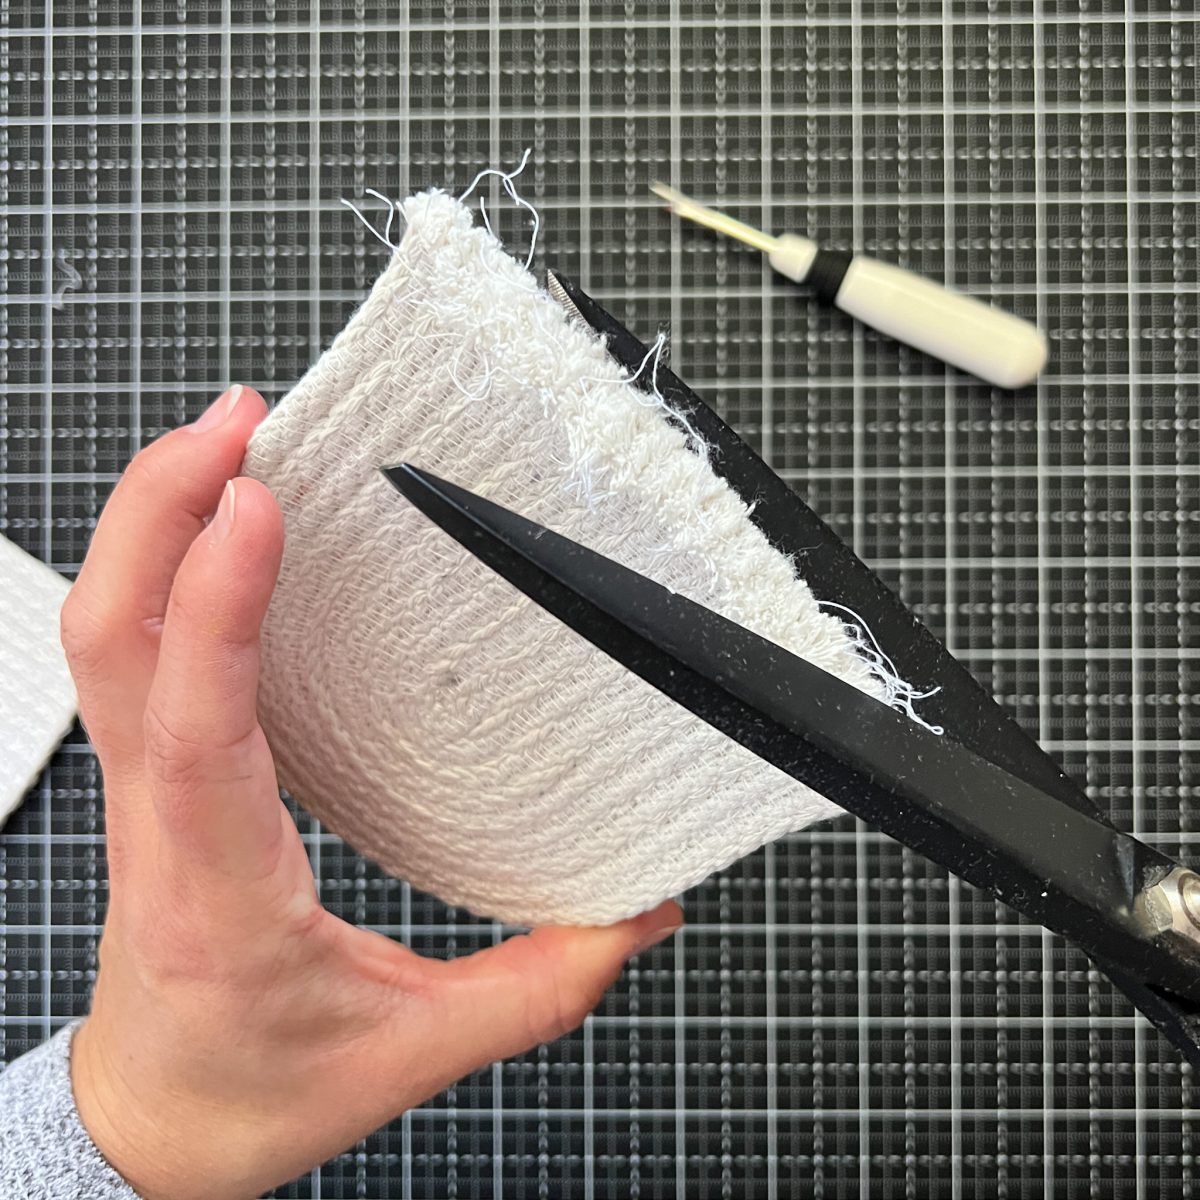
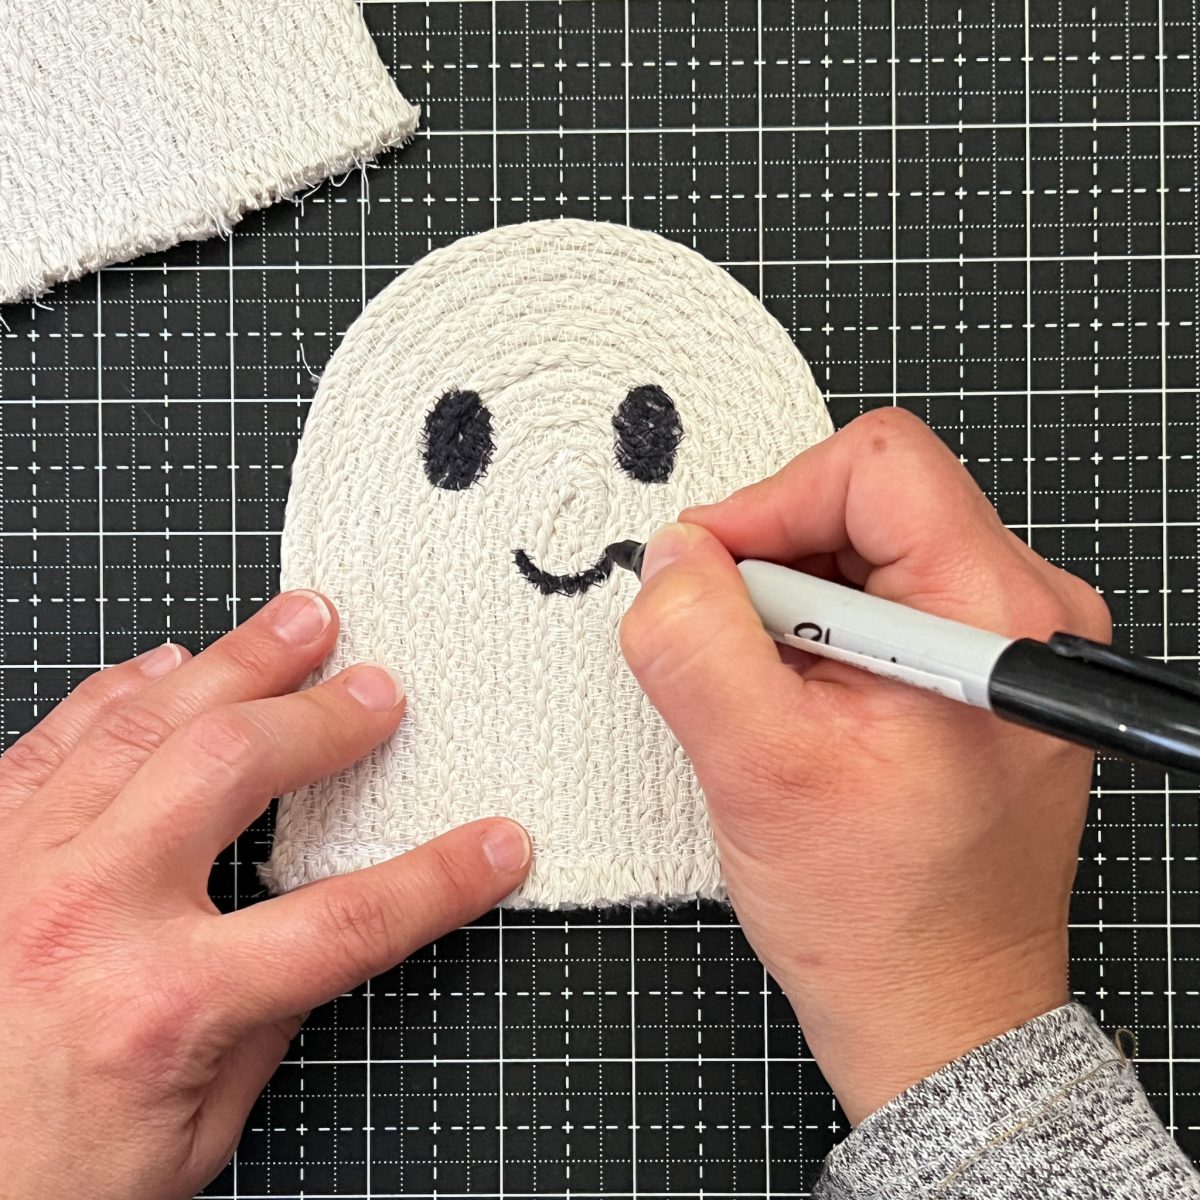
Use your fingers to fray the raw edges of your cording. Trim any additional loose threads.
Using a permanent black marker, get creative and make your own ghost faces!
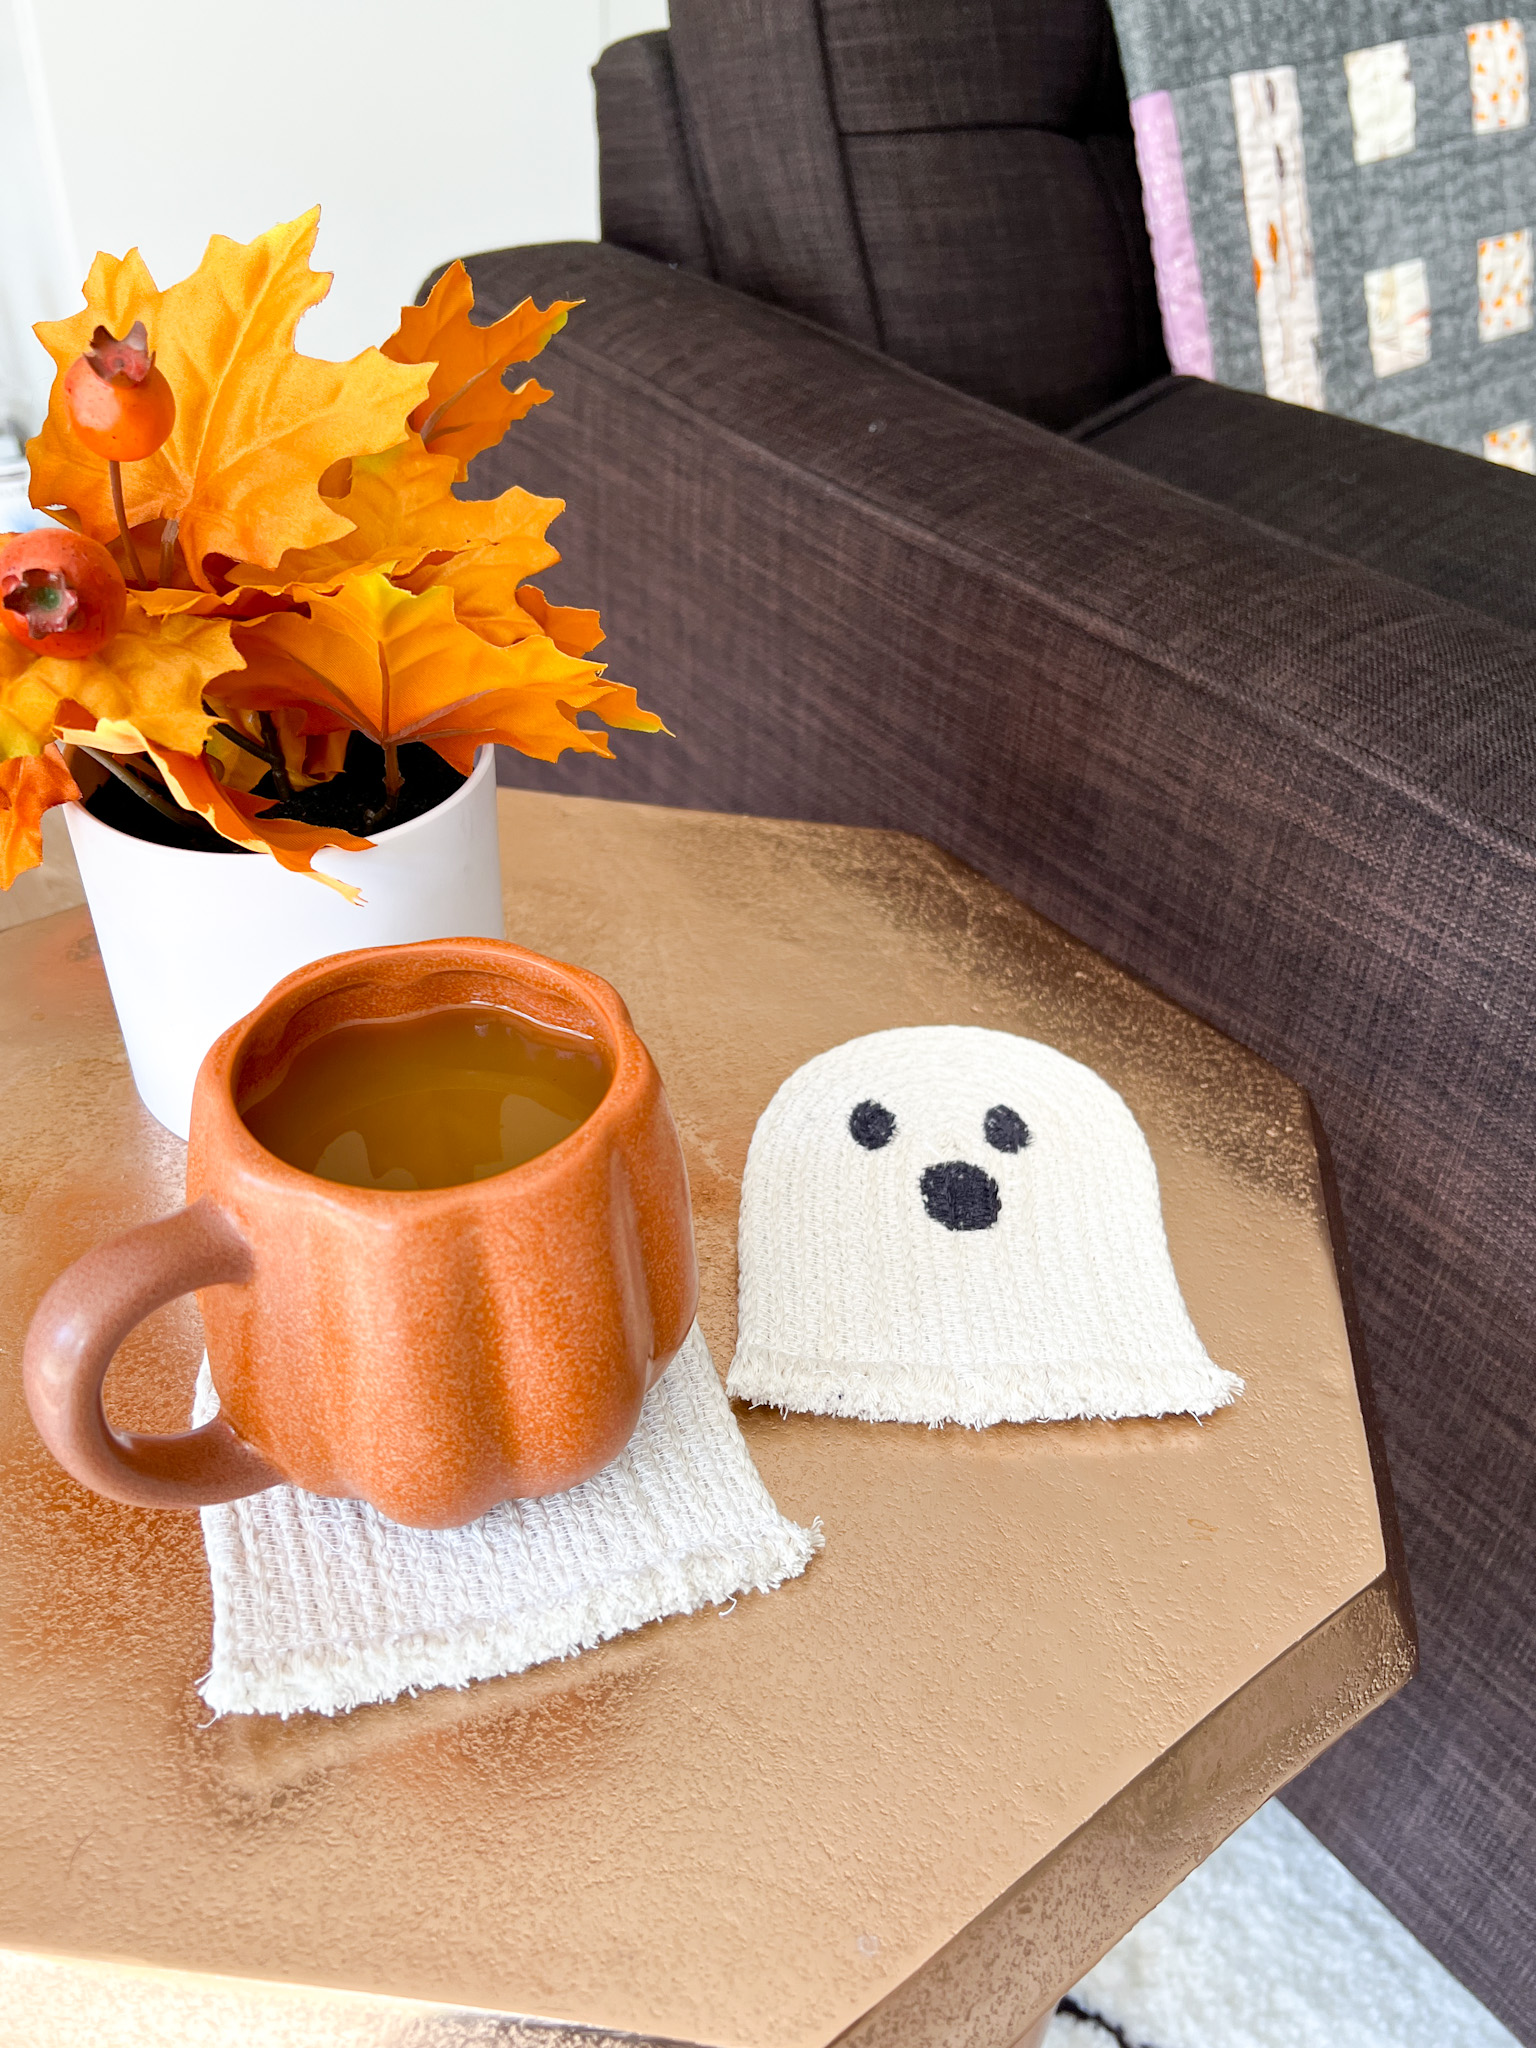
Now you have a fun set of Ghosters to decorate your side tables for those mugs of hot cocoa and cider.
Used Products


What you might also like


7 comments on “Ghosters Rope Coaster Tutorial”
-
-
Very cute. How much rope should I pull from the 100’ skein to make one ghost?
-
Is cord you used all cotton? Or would polyester work? I’m finding clothesline cord is seasonal:-(
-
These are so cute! I ordered a 1000′ foot roll of all cotton cording from Knot and Rope supply since I plan to make more of these and lots of baskets for holiday gifts.
-
Mountain thread company has rope (colored too) that you can order for these projects!
-
-
What size needle?
-
This is a follow-up posting.
I made 4 pairs of ghosts from 100’ of 1/4” cotton craft cord. (It was all I could find locally.)
Be sure when you begin that the short 7” is on your left. It works the other way, but it becomes more difficult to go round the ends when the bulk is on the right.
I used a size 90 needle.
A great afternoon project.
Leave a Reply
You must be logged in to post a comment.

Too cute plan on making as soon as I purchase cord :-))