Doable Dresden, Part Three: Finishing the Dresden Center
Completing the traditional piecing techniques used in part one, followed by a variety of appliqué choices in part two brings this project to the third and final step, finishing the center. Modern fusible materials and machine stitching will speed us to the finish line with a Fused Turned Edge Appliqué or a Fused Raw Edge Appliqué option.

Materials for Finishing Dresden Center
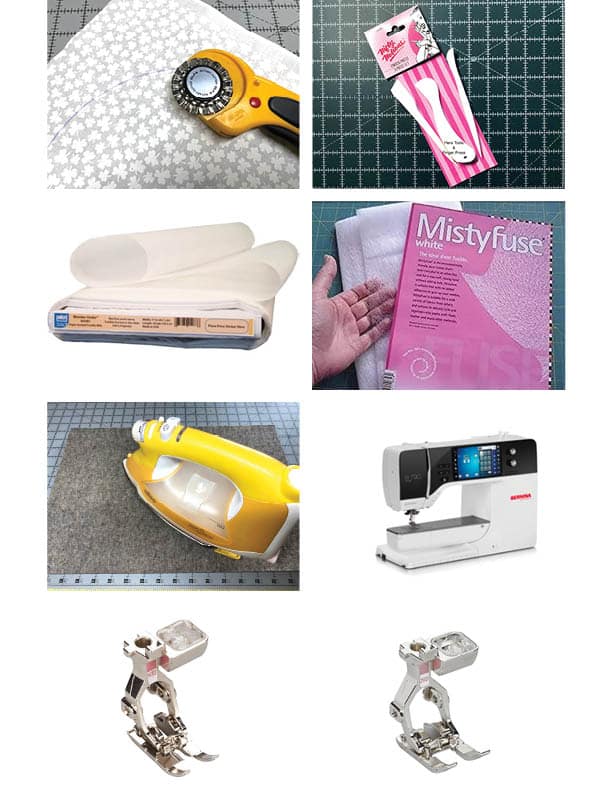
- Pellon 807 Wonder-Web
- Fabric Marker
- Rotary Cutter with Pinking Blade & Cutting Mat
- Hera Tool
- Iron and Ironing Mat
- Misty Fuse
- Silicone Sheet or Parchment Paper
- Sewing Machine with 1/4″ Foot & Open Embroidery Foot
Fused Turned Edge Appliqué
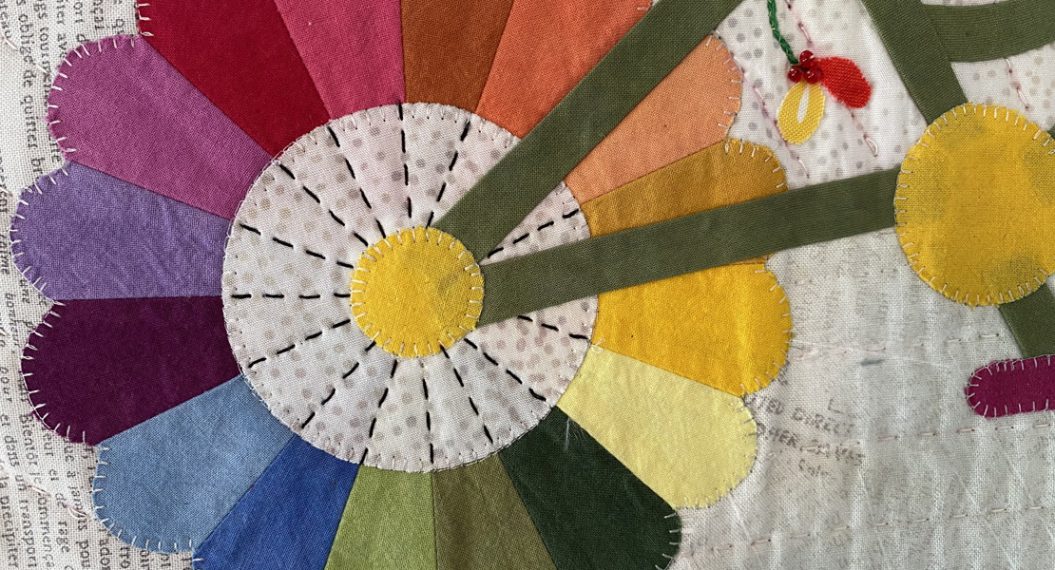
A traditional method of Turned Edge Appliqué involves hand stitching with tiny stitches. Fused Turned Edge Appliqué combines the smooth finished edge of traditional with the speed and accuracy of machine stitching. Dresden block in this example has a large center opening created with 10-degree wedges. This method works for all sizes of Dresden blocks created with a wide assortment of wedge sizes.
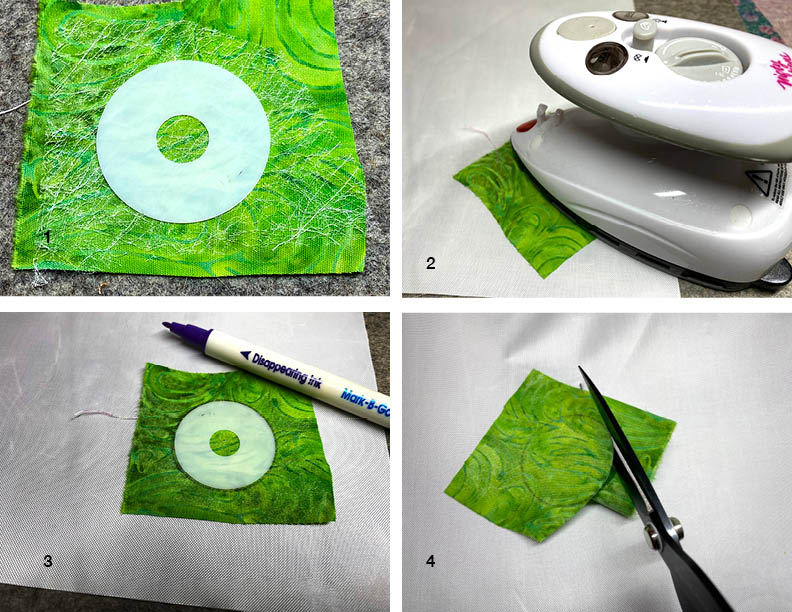
Stitching the Center Circle and Fusible
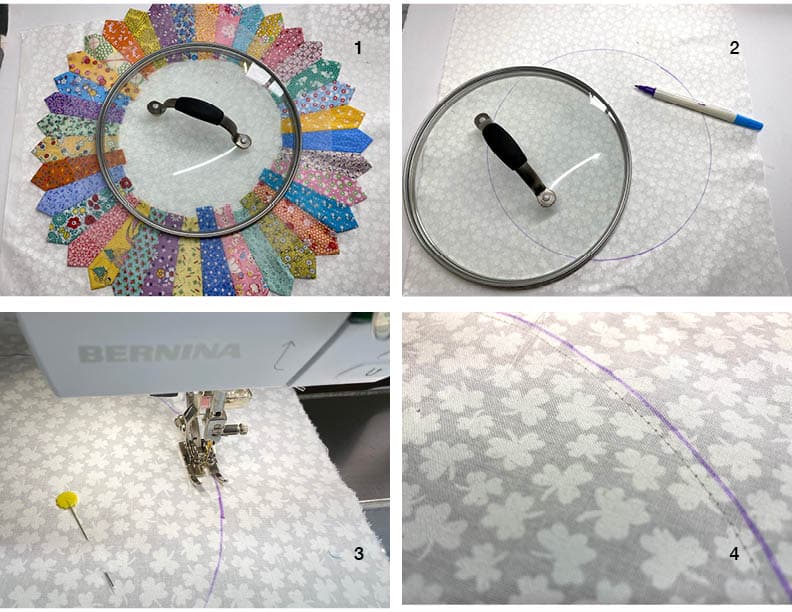
- To determine the size of the Dresden Block center, use something round that will cover the raw edges of the wedges. I used a glass cover to a pasta pot with the added benefit of being able to see the edges clearly however any round object will work. The circle should be about 3/8 inch larger than the wedges.
- Use a fabric marker to draw a perfect circle on the WRONG side of the fabric selected for the Dresden center.
- Cut a piece of Pellon 807 Wonder-Web approximately 1 inch wider than the circle. Place Wonder Under on the RIGHT side of the fabric. Secure with pins. With a 1/4 inch foot as a guide, stitch just inside the drawn circle. Note that the stitching is not on the line.
- Stitch completely around the circle, overlapping stitches to secure.
- NOTE: Pellon 807 is strong enough for the manipulation required for this technique, thin enough to not add bulk to the project, is easily available and doesn’t gum the needle during stitching or quilting.
Preparing Center Circle for Fusing
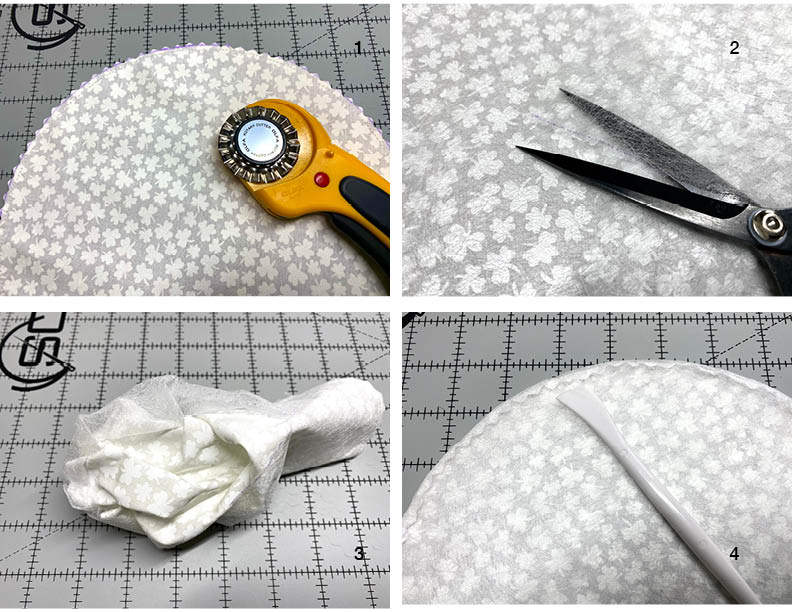
Curved seams turn smoothly if they are trimmed and wedged. Wedging is cutting tiny triangles in the seam allowance which, when done carefully, takes a great deal of time. When done quickly, it often leads to cuts in the seam line that then need to be repaired. Cutting carefully just outside the marked line with a Pinking Rotary Blade provides even wedges in the seam allowance.
- Use a pair of pointed scissors, open a 4-inch slash in the Pellon 807 Wonder-Web in the center of the circle. Cut only through the webbing using care to not cut the fabric. Due to the fine nature of this webbing is difficult to photograph…the top blade is shown under the webbing and the bottom blade is not.
- Turn the circle right side out through the slash using care.
- Gently use the curved edge of the Hera Tool to smooth and finger press the edge.
Fusing Center Circle to Dresden
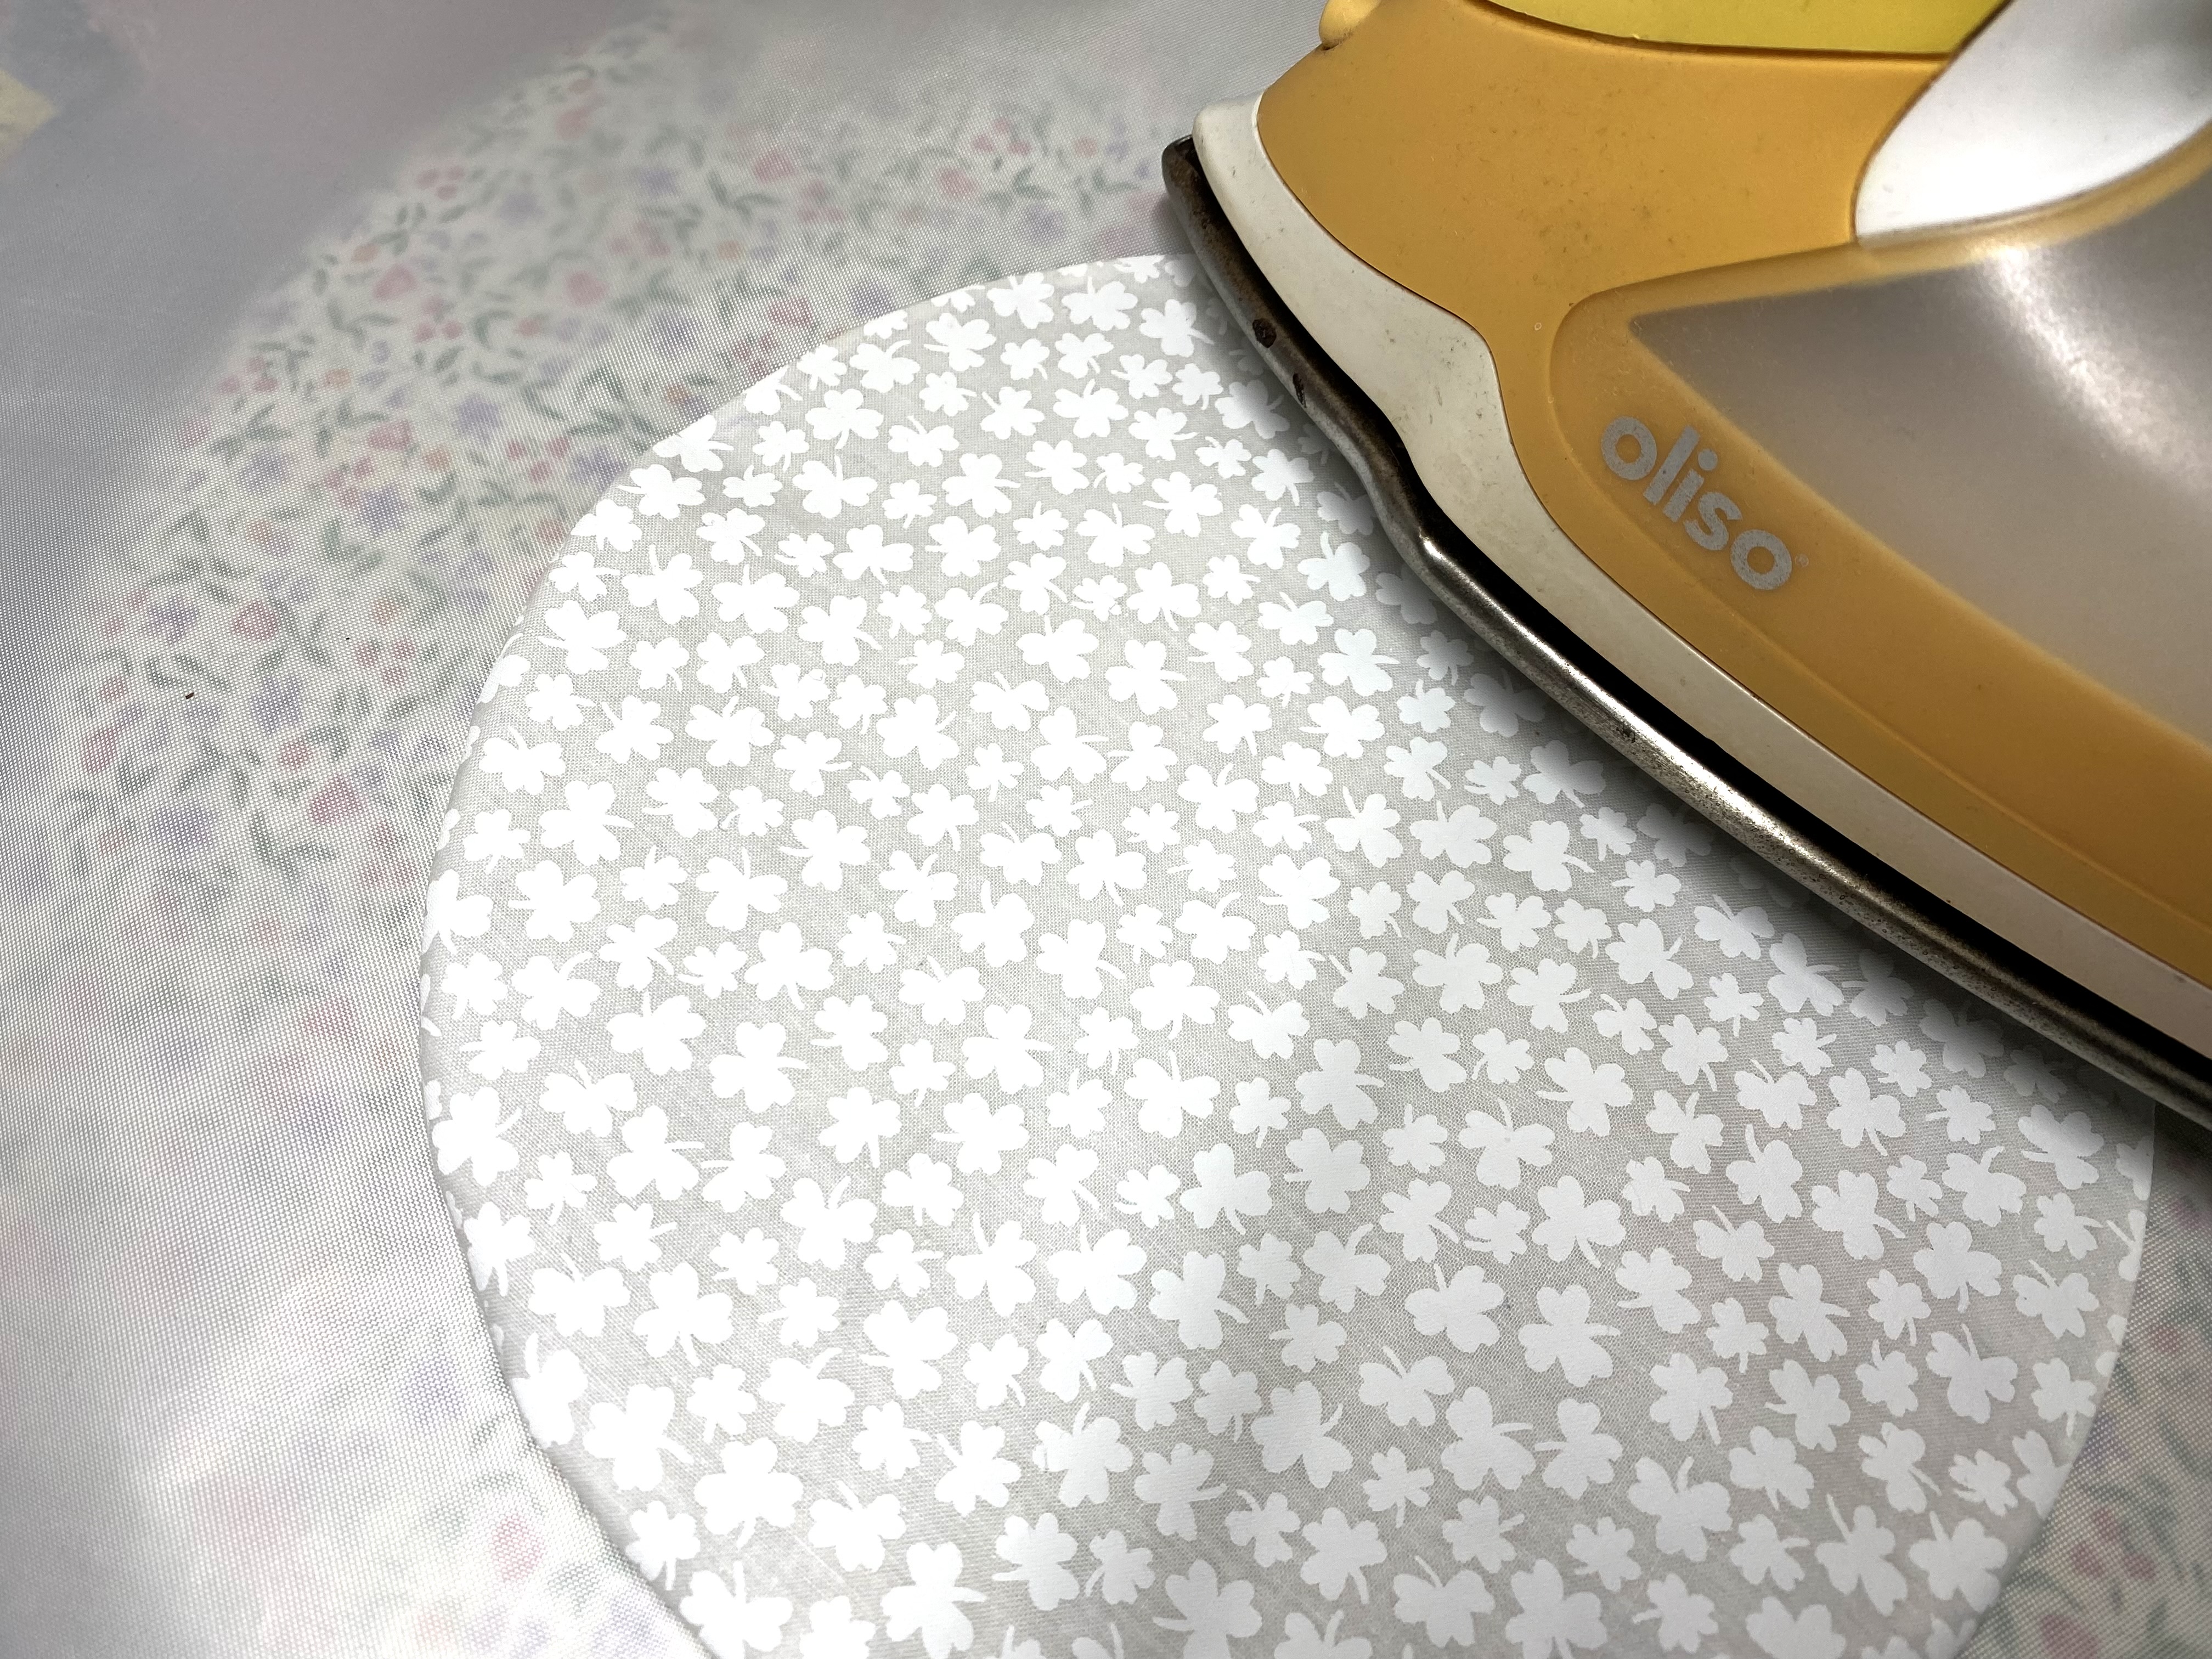
Using a silicone sheet or parchment paper on the ironing surface, carefully press center. Allow to cool before peeling from heat-resistant sheet.
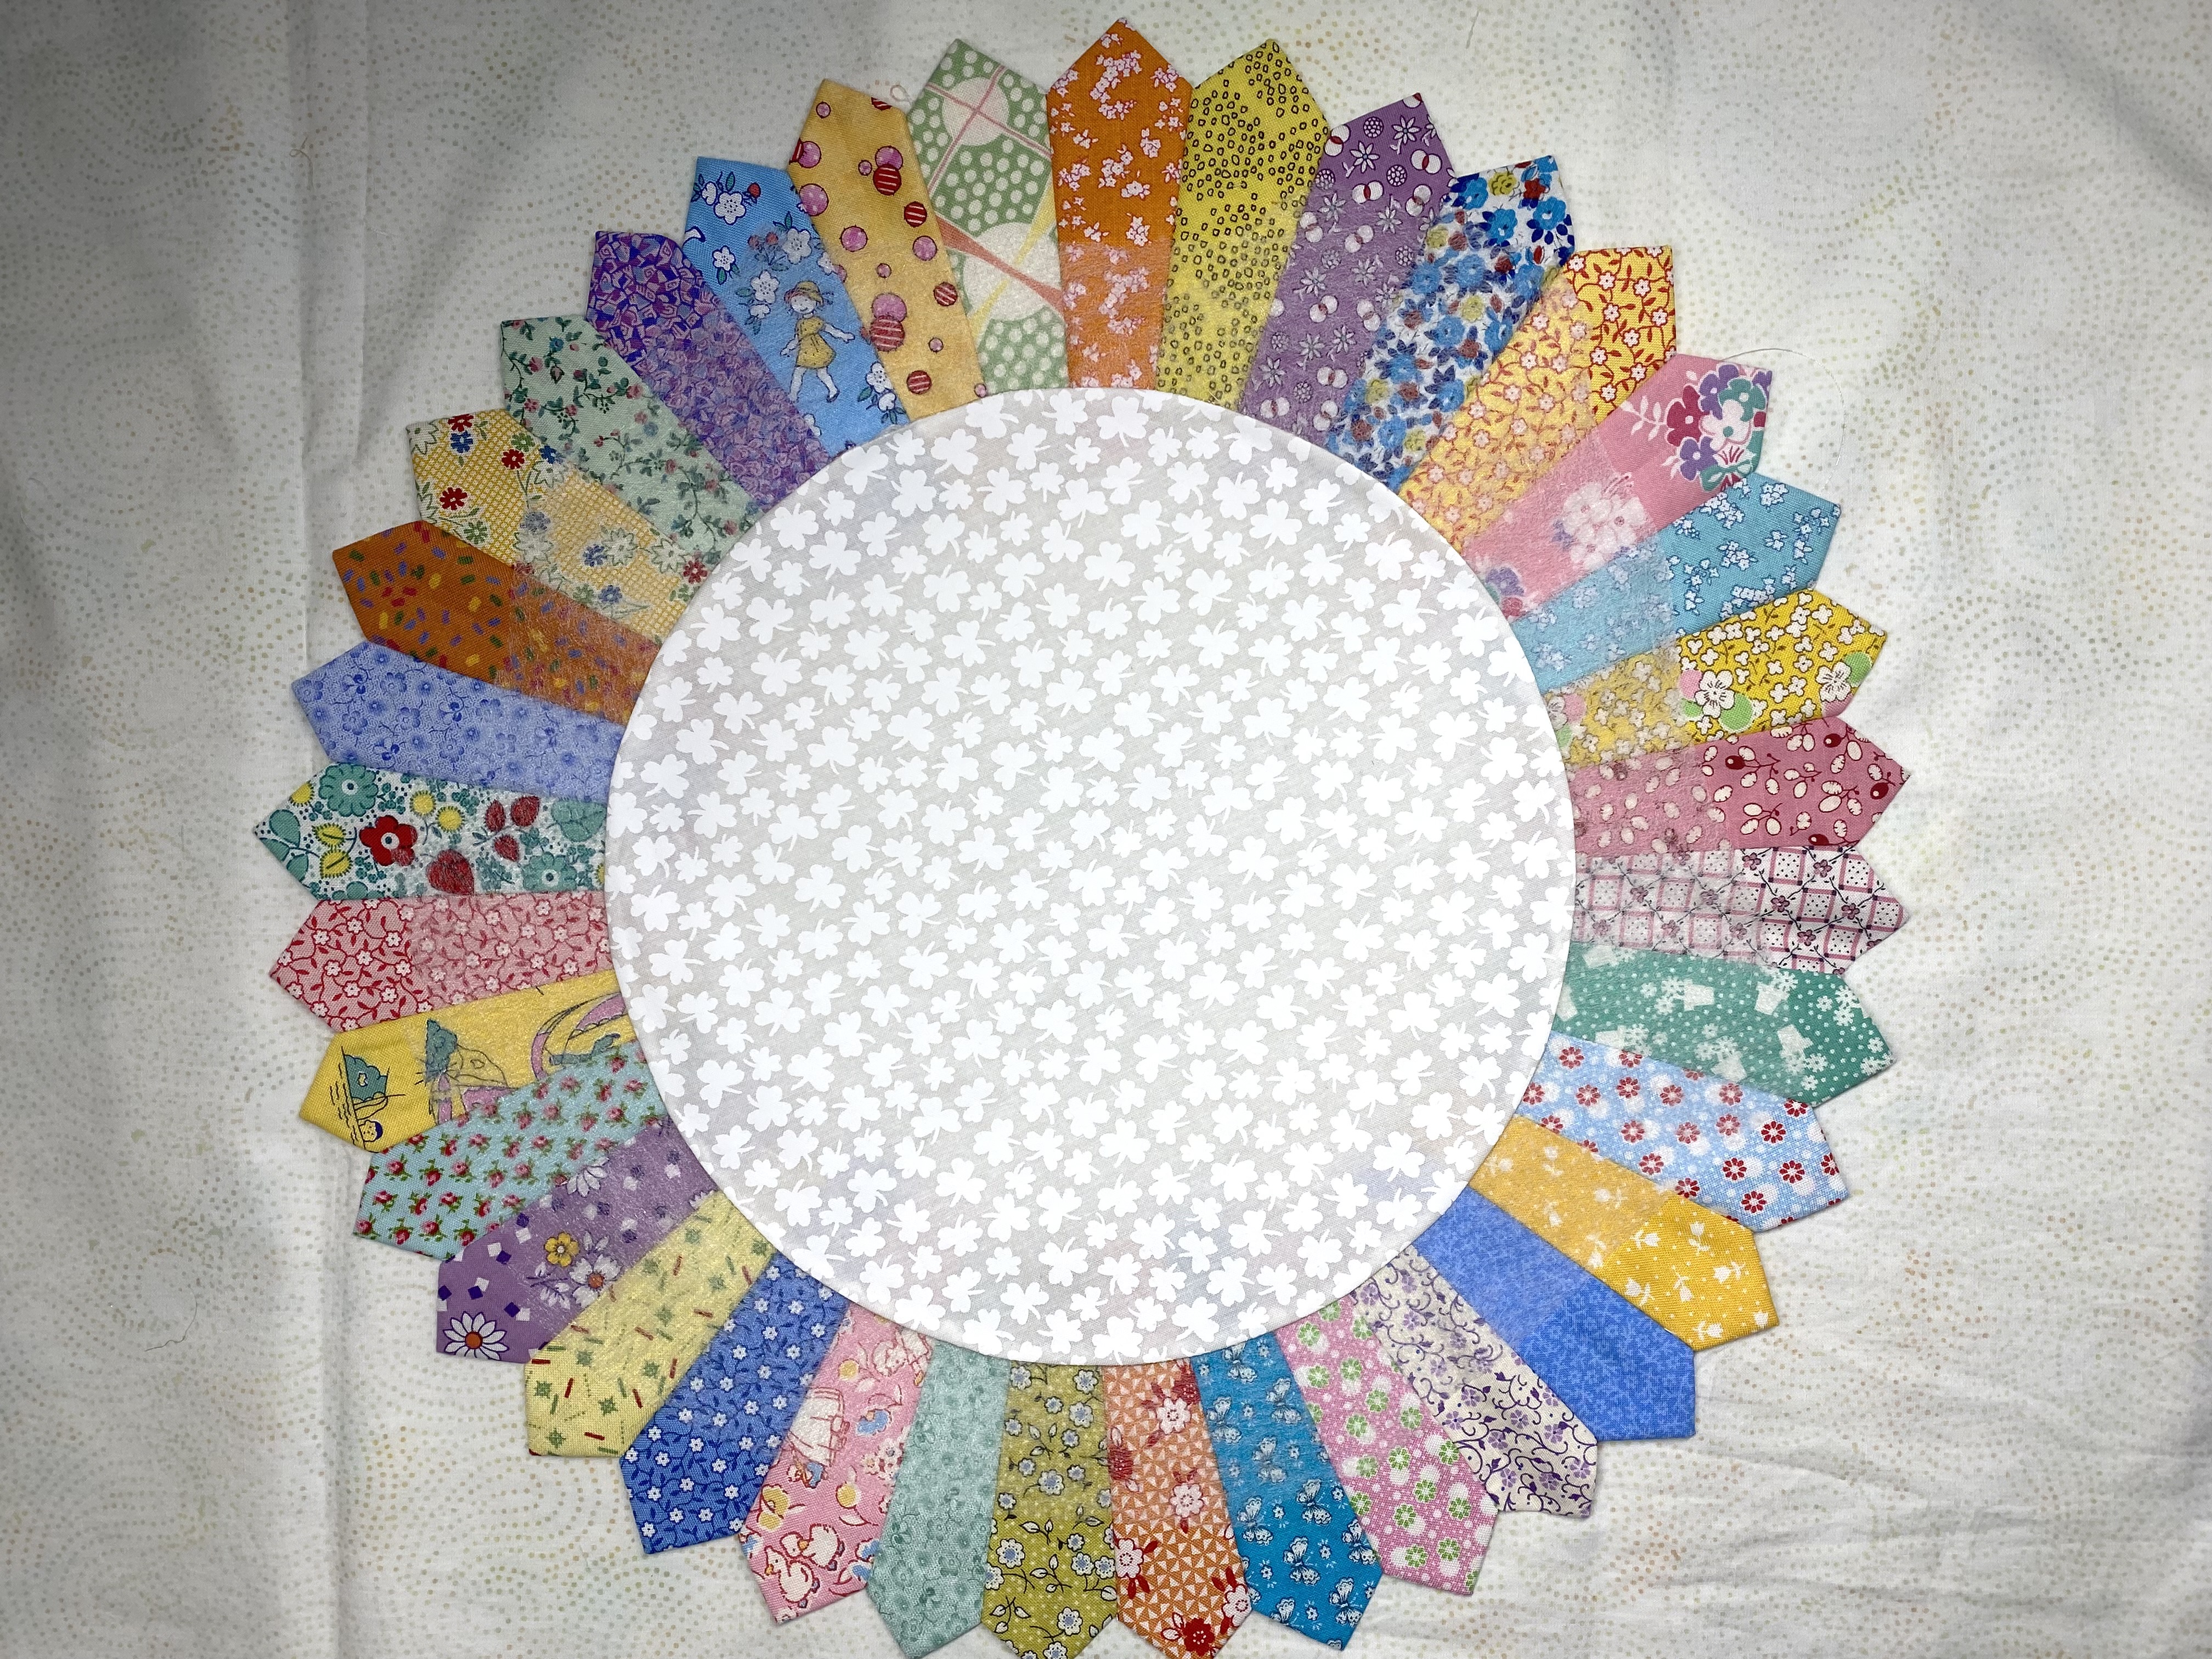
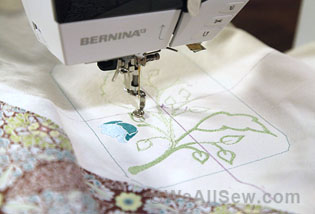
Block’s center applique is ready to be fused on the Dresden wedges. After fusing it be appliquéd in place with techniques described in Techniques for Attaching Dresden to Background Fabric, Part 2 or secured during the quilting process.
Fused Raw Edge Appliqué
As the name suggests, Fused Raw Edge Appliqué requires no turning under of a circular edge. The center for this Dresden requires only the center fabric and a bit of Misty Fuse webbing.
Creating the template
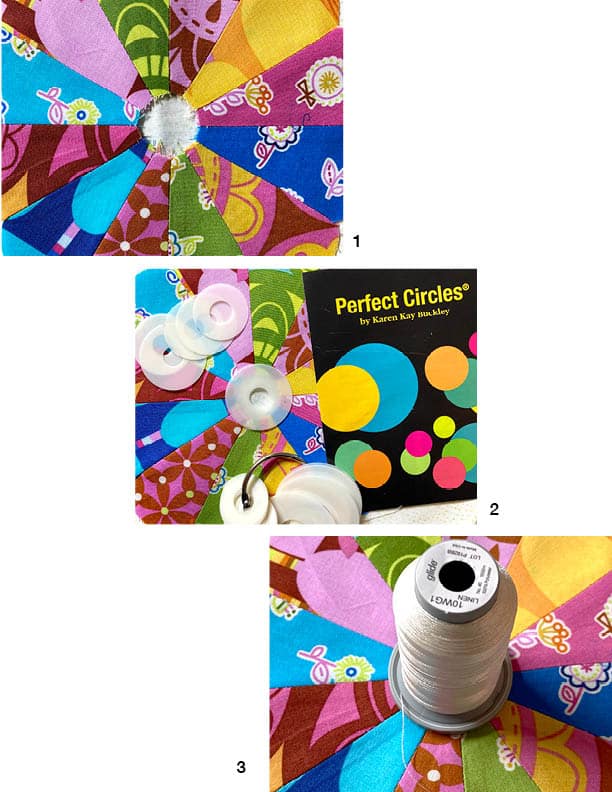
This Dresden, created with twelve 30-degree wedges, is sized so the center opening is much smaller than the example above.
- Fewer wedges create a smaller center opening to cover. With less than 2 inches opening, a wide range of template options are available.
- Karen Kay Buckley created a package of circle templates includes fifteen different size circles; ranging from 7/16-inch up to 2-inch.
- A variety of round objects in your sewing supplies also work well to create a temple. This bottom of a Glide Thread spool is an ideal size.
Creating the Fusible Center Circle
- Cut fabric for center larger than template. Cut slightly smaller Misty Fuse than fabric.
- Place Misty Fuse on silicone sheet or parchment paper. Place fabric over fusible with wrong side down. Press. Allow to cool before peeling from heat resistant sheet.
- Use a fabric marker to trace the template on the WRONG side of fabric.
- Cut along traced line.
- NOTE: Misty Fuse is an extremely thin, low-volume fusible. It adds almost not weight to the fabric, holds well and doesn’t gum the needled during stitching or quilting.
Fusing the Center Circle
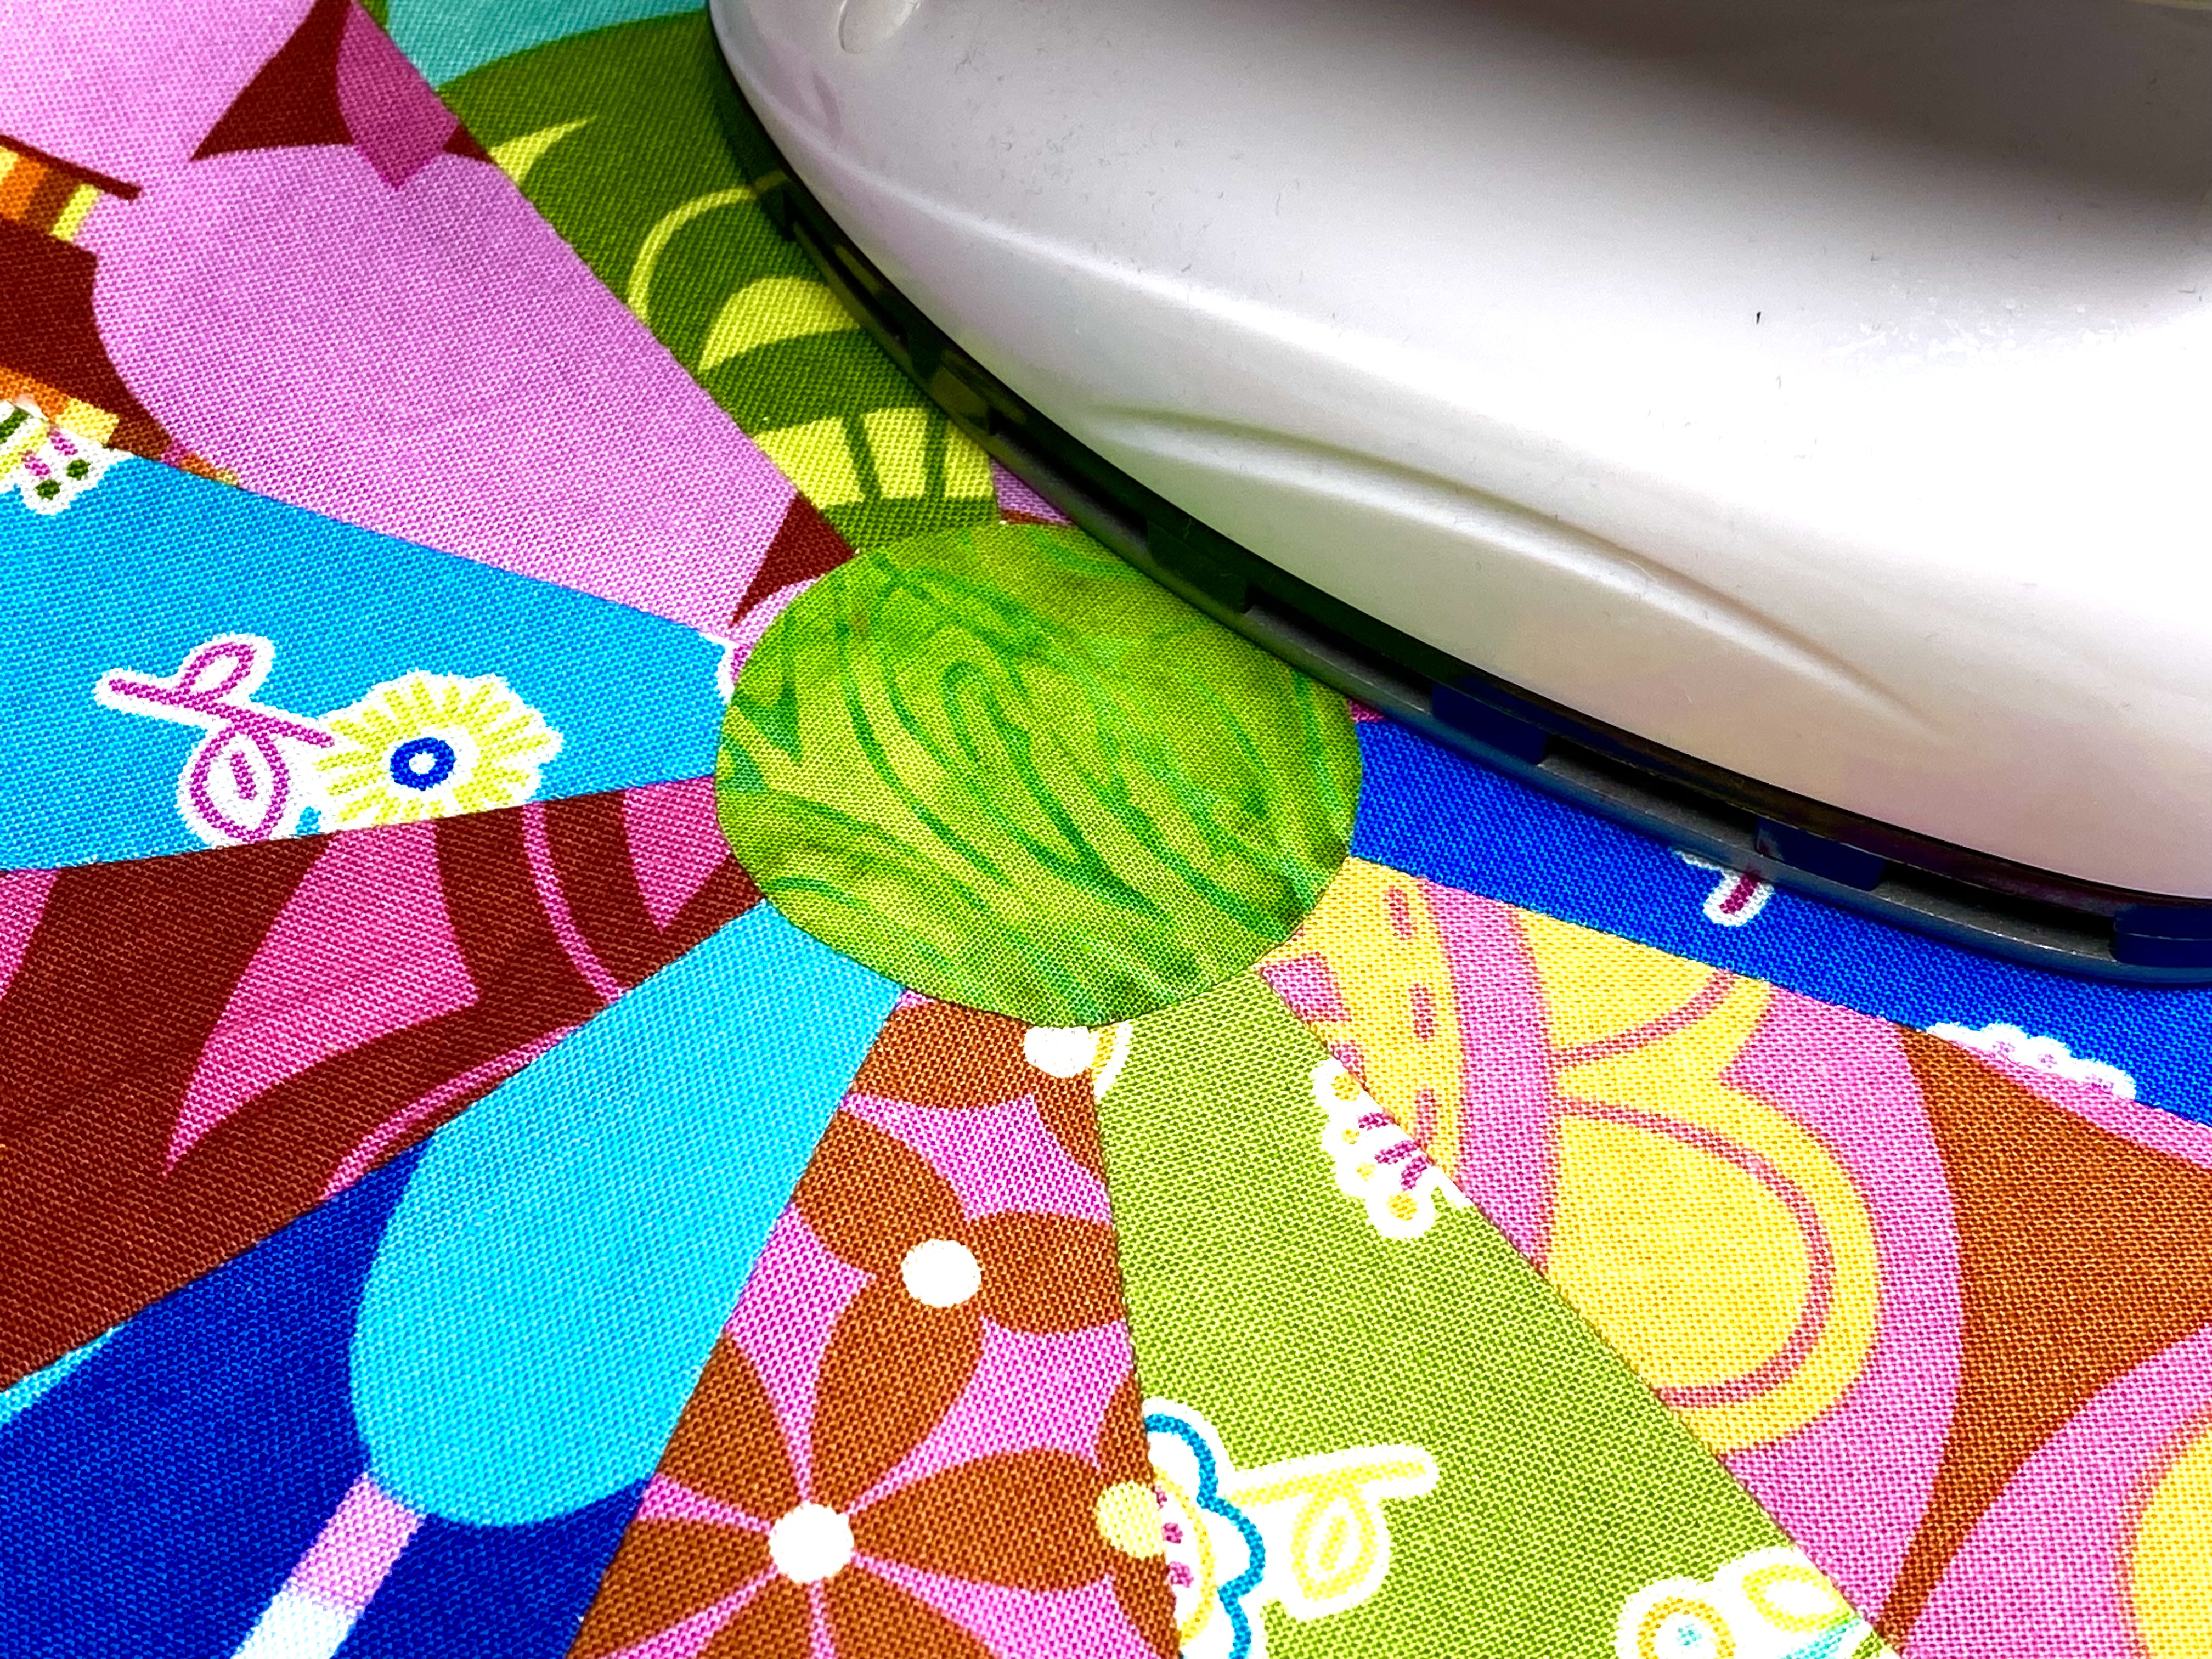
Place center fabric right side up over Dresden opening (fusible down). Check that it is centered on block. Press to adhere to block. It can appliquéd in place with techniques described in Techniques for Attaching Dresden to Background Fabric, Part 2 or secured during the quilting process.

Mini Whimsical Bicycle showing fused raw edge appliqué finished with machine blanket stitch.
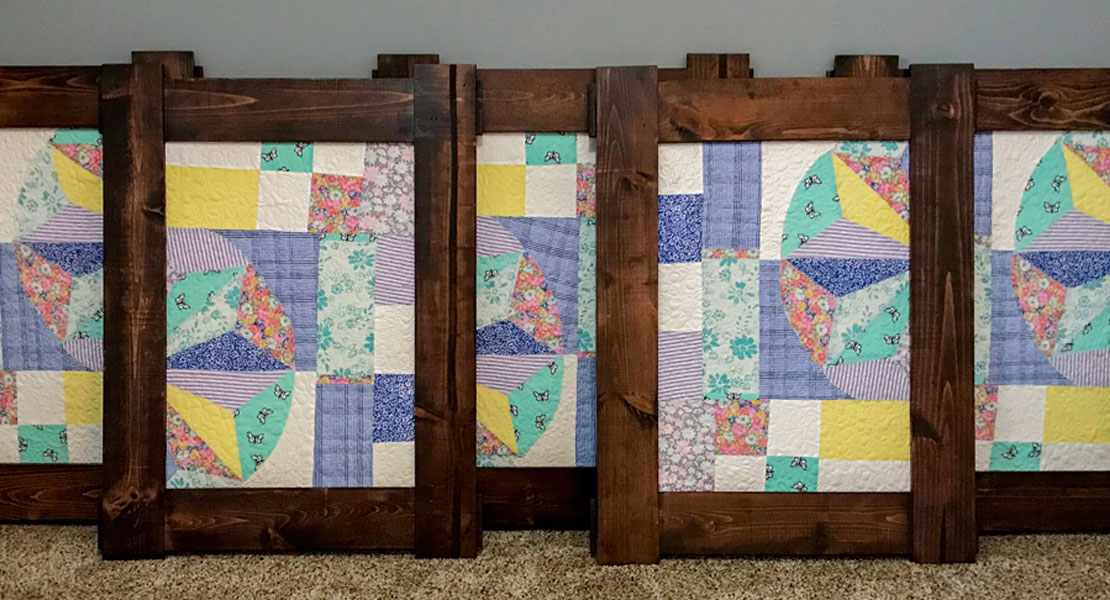
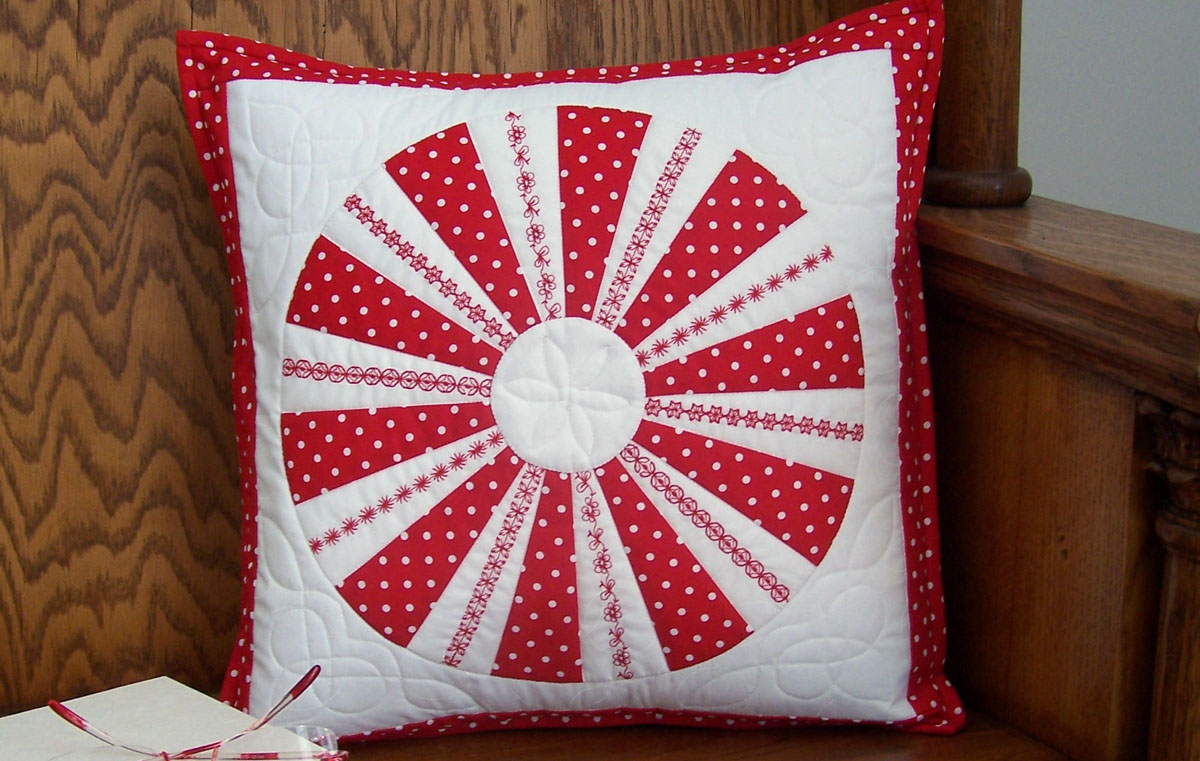
The Dresden Block is incredibly versatile for traditional, modern and art quilts. Curved or circular shapes often cause quilters to step back from a project. Tips and tricks from this three part series will give beginners the confidence to take that next step or allow advanced quilters to speed on with accuracy.