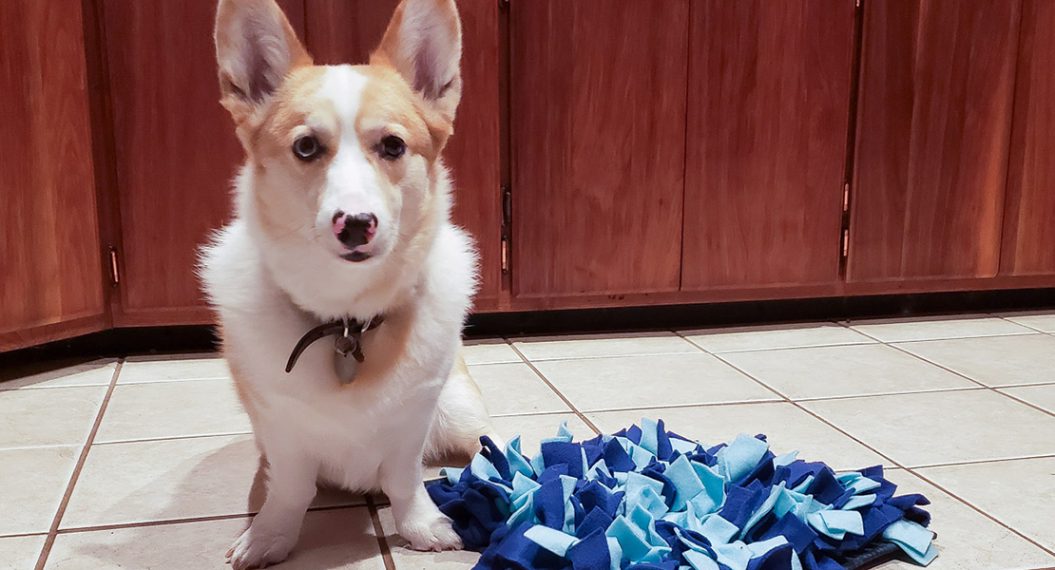
Sew Your Own Snuffle Mat, Part Two
Hi! I’m Kate Toney, the Embroidery Specalist for BERNINA of America, and I love encouraging sewists to use their embroidery machines, especially in new and inventive ways.
A month ago I wrote a blog post for We All Sew called Sew Your Own Snuffle Mat. This was, hands down, the most popular post I have ever written for We All Sew which made me so happy! I loved seeing all the cute snuffle mats y’all were sewing and all the happy pets getting their treats.
Eagle-eyed readers saw there were even more shapes and designs on the snuffle mats than what was written on the blog post and, almost immediately, folks started asking for the remaining 6 designs and I was more than happy to get to writing those. So without further ado let’s check out more snuffle mat designs.
First step, go check out the Sew Your Own Snuffle Mat blog post if you haven’t already. This post has more details about the snuffle mat, how to prep your fabric, finish your snuffle mat as well as six additional block ideas, including how to personalize your mat with machine embroidery.
Supplies:
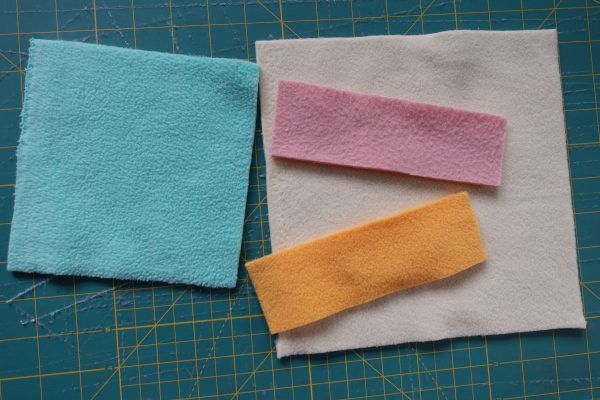
Fleece in the following amounts:
-
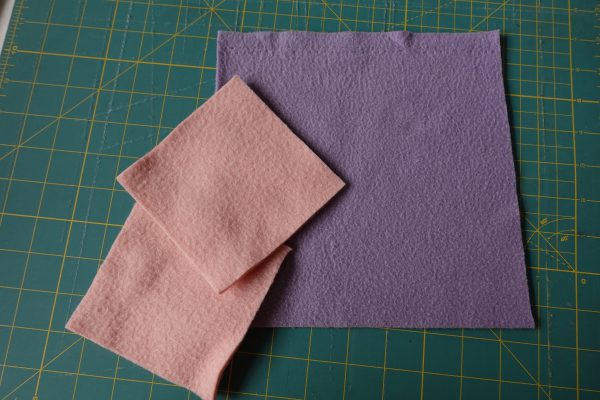
- 1 yard background/backing fabric (Purple)
- 1/2 yard of fleece background fabric (Cream)
- 1/4 yard of fleece accent fabric (Pink)
- 1/4 yard of fleece accent fabric (Orange)
- 1/4 yard of fleece accent fabric (Turquoise)
- 90/14 Stretch Needles
- Polyester Sewing Thread
- If you have a dog who is a strong chewer or likes to shred toys, you may want to use heavy-duty thread.
- Polyester Serger Thread
- I used three cones of Mettler Seracor
- Rotary Cutter & Cutting mat
- Rulers
- Fabric Scissors
- Pins
- Hookey Serger Seam Hook (or preferred method of finishing tail ends)
- Skip Fray Check since this toy will be used for pet treats and meals.
- Marking pen or Hera marker
- OESD Stabilstick Cut Away
- OESD StitcH20 Wash Away
- BERNINA L 890 Overlocker
- BERNINA 790 PLUS with Embroidery module
- Large Oval or Midi Embroidery Hoop
- Edgestitch Foot #10D
- Drop-Shaped Embroidery Foot #26
- Polyester Embroidery thread
- OESD Bobbin Thread
- OESD Medium Weight Tear Away Stabilizer (optional to support the blocks and aid in sewing on fleece)
Cutting instructions:
There will be more cutting instructions based on the blocks you choose; the additional cutting instructions are under each block heading.
The backing fabric size will also vary depending on seam allowance, we will cut that later as well.
- Background/Backing fabric (Purple)
- (3) 8.5″ x 8.5″ squares
- (1) 24.5″ x 8.5″ squares
- 1/2 yard of fleece background fabric (Cream)
- (3) 8.5″ x 8.5″ squares
Machine Set Up for Embroidery:
There is no embroidery on this set of blocks, check the original Sew Your Own Snuffle Mat blog post for more details on how to use machine embroidery to customize your snuffle mat.
Install a 90/14 Stretch Needle in the machine. Thread the machine with polyester embroidery thread in the needle and OESD bobbin thread in the bobbin. Put the Drop Shape Embroidery Foot #26 and straight stitch plate on the machine.
Machine Set Up for Sewing:
Each sewn block uses the same set up for the machine. Install a 90/14 stretch needle in the machine. Thread the machine with polyester sewing thread in the needle and the bobbin (this is a great project to use up those random bobbins you have). Put Edgestitch Foot #10D and 9mm stitch plate on the machine. Decrease presser foot pressure to 25.
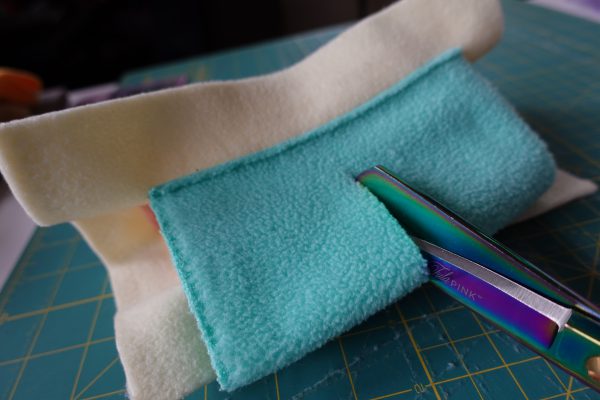
Fabric Prep:
Machine wash and dry all the fleece before getting started to ensure the fabric shrinks before sewing.
Instructions:
Cut Rectangles
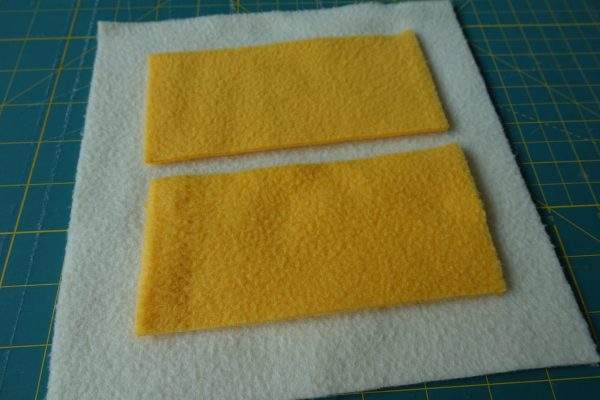
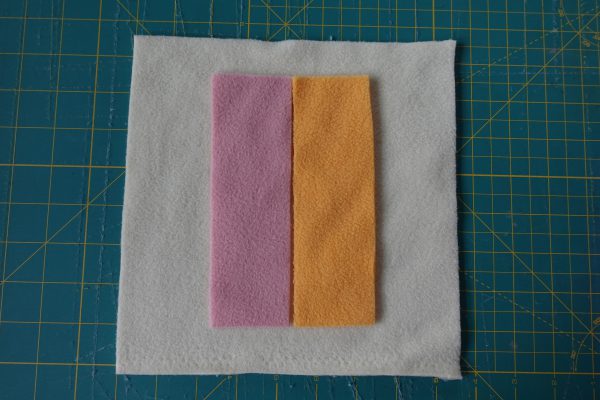
Cut (2) 3.5″ x 5″ rectangles. Place the rectangles as desired on the block.
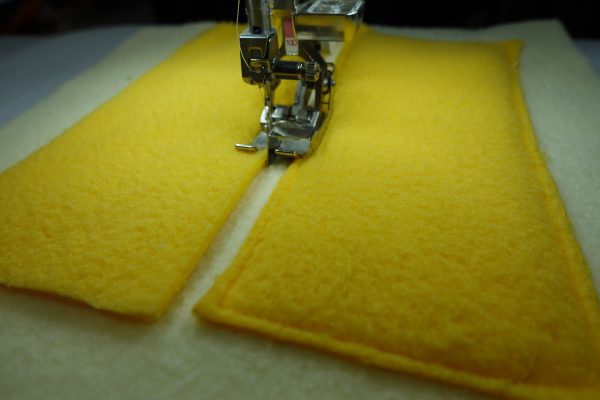
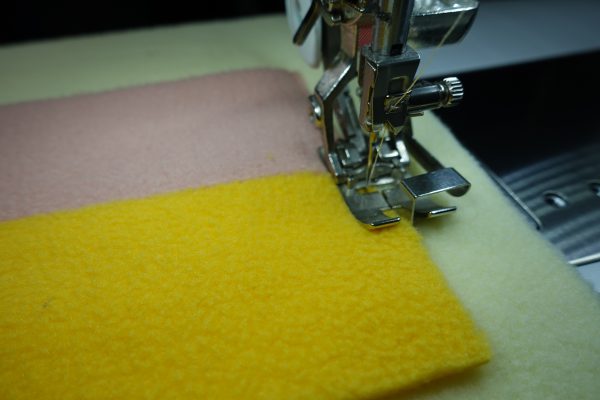
Move the needle to the -5 position, align the blade of the foot to the side of the rectangle and stitch around the rectangle. Repeat for both shapes.
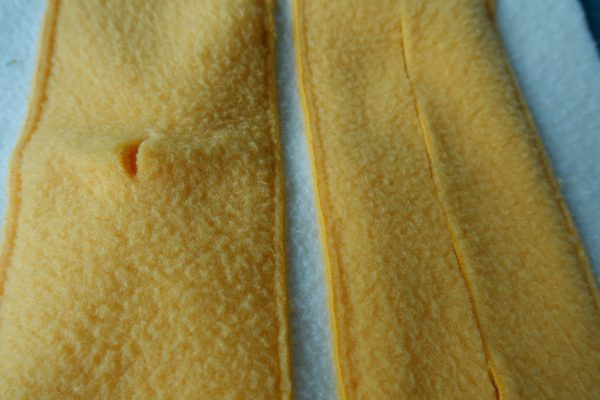
Using fabric scissors cut slits into the centers of the rectangles, being careful not to cut the block fleece underneath.
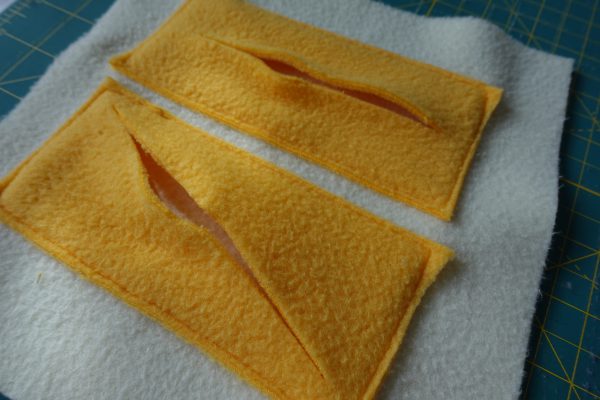
Play around with the slit sizes and shapes. I made one diagonally and one straight down the center. Have a pet who will enjoy a challenge? Make the slits smaller so treats are harder to pull from the rectangles.
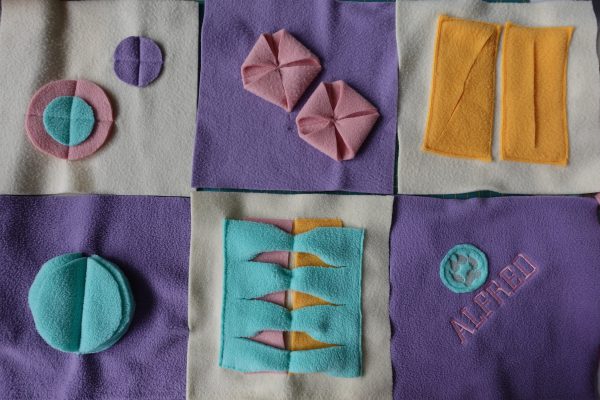
Tangram Triangles

Cut a 4.5″ x 4.5″ square. I chose this size because I have a ruler that size, feel free to play with the sizing of the square.
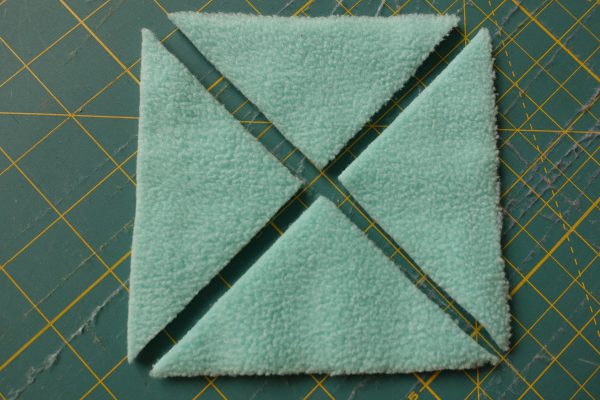
Cut this square into quarters by cutting diagonally from corner to corner.
I then cut some of my triangle pieces in half again but after securing them to the mat, they weren’t really big enough to hide treats. It was fine for my dog Arya cause she’s not very food motivated and needed the easier puzzles, but just something to keep in mind for your pets.
Have fun placing the triangles on the block, play around with the shapes and designs. Secure with pins.
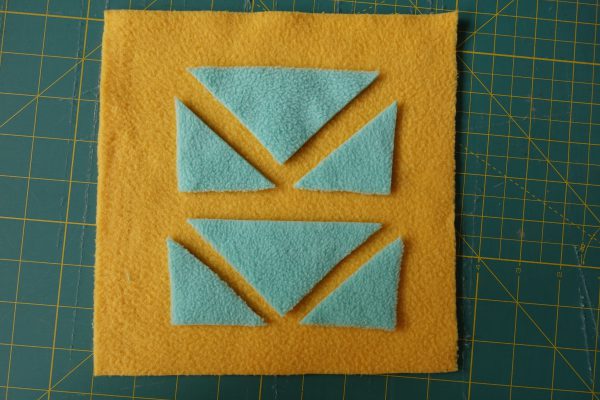
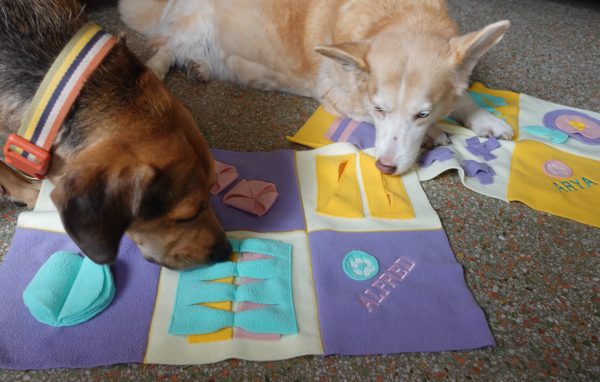
When ready, with the needle in the -5 position, align the blade of the foot to the long edge of each triangle and sew to secure. Be sure to backstitch on these triangles to secure them very well; my dog Alfred liked to tug on them to get the treats out.

All finished and ready to hide the treats!
Xs Mark the Spot
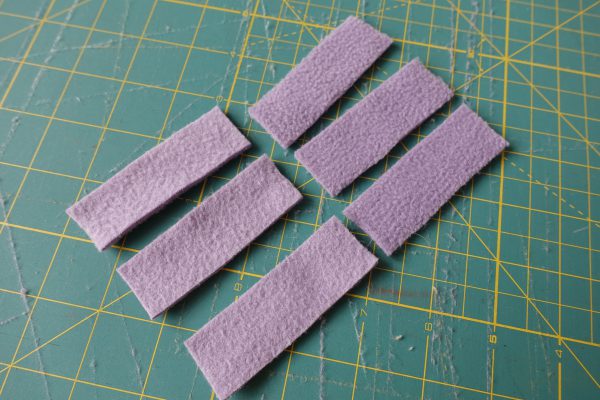
Cut (8) 1″ x 3″ strips
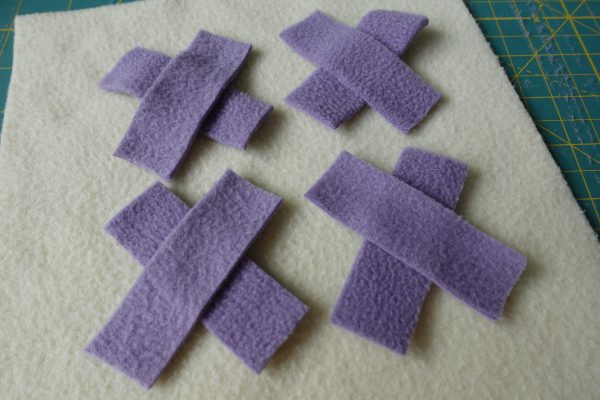
Place the 8 strips on the block by overlapping two pieces in an X shape. Secure each set with a pin.
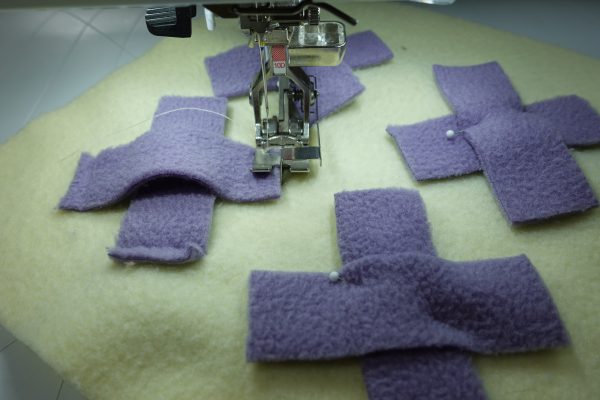
With the needle in the -5 position, align the blade of the foot to the short side of the strip and sew to secure. Repeat for every strip until all 16 short sides are secured.
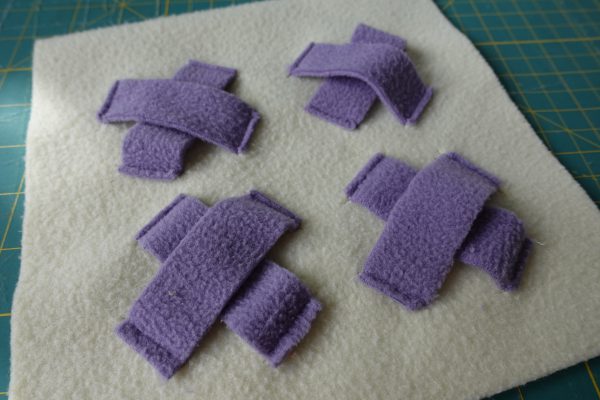
All finished! My pups loved hunting their kibble out of these little X shapes, and I hope yours do too!
Cootie Catchers
Cut (2) 4″ squares.
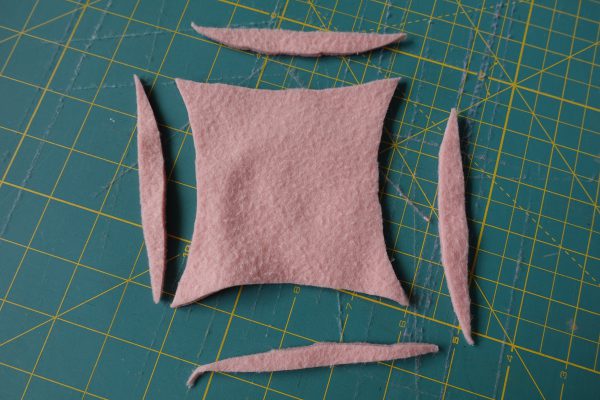
Cut into each side ever so slightly to create curved sides of the square. You can make these shapes with or without this step, try both and see which you like more!
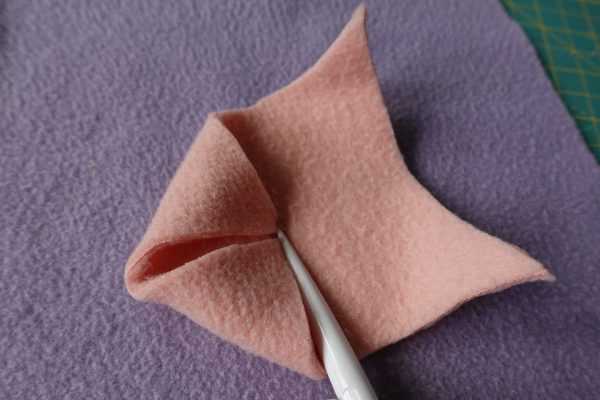
Fold each corner to center, allowing each corner to overlap each other by 1/8″-1/4″. Tip: Use a Stiletto to help hold things in place.
Pin to hold the cootie catcher together and to secure it to the block.
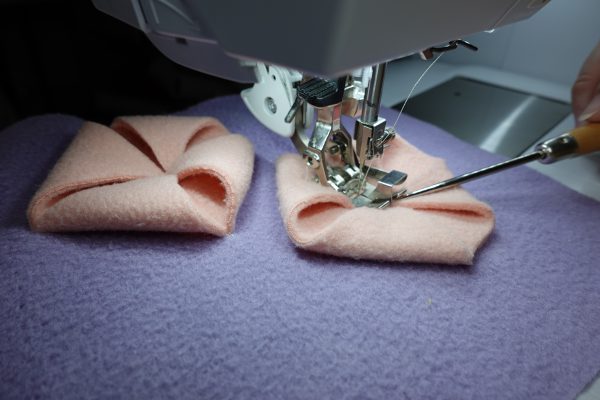
Remove the pins and hold the cootie catcher position using a sewing stiletto.
With the needle in the center position, sew a small X in the center of the cootie catcher, being sure to catch all four corners each time and backstitching multiple times to secure the corners.
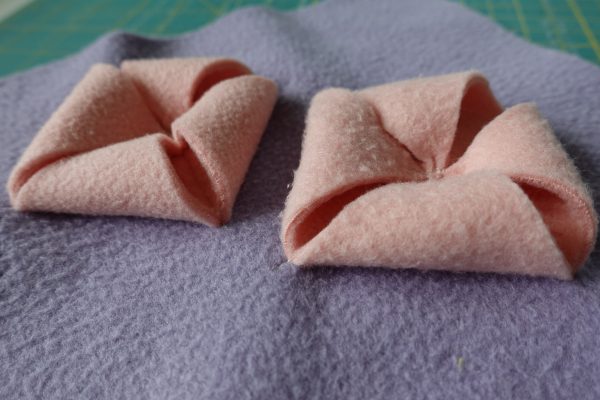
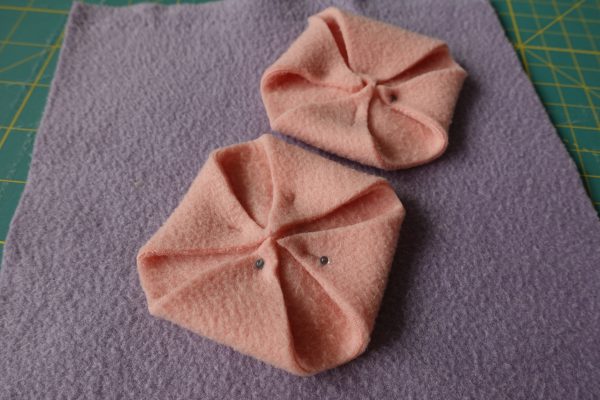
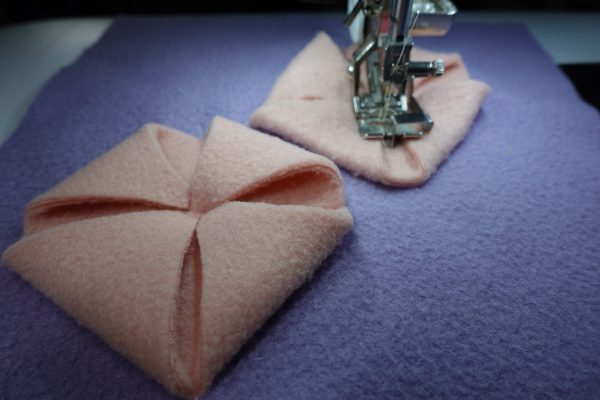
All done! Add as many as you would like on your block. I could have fit a couple more on my block.
Tip: You can switch to another foot like the Open Embroidery Foot #20D for this block or switch to a small zigzag to help you catch all the corners. Whatever helps you have fun making this block and explore the machine. Remember! There are no rules for this project! It’s just a fun sandbox to play in.
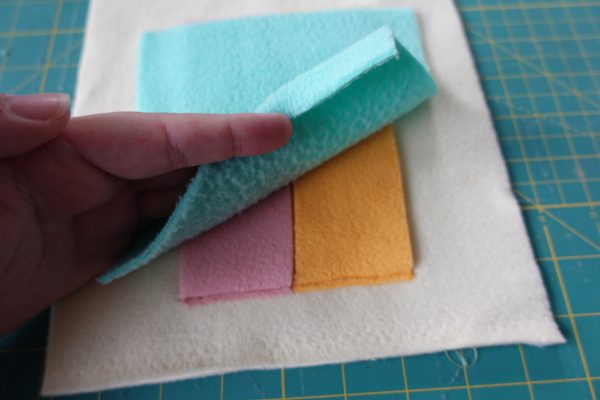
Cheese Danish
Cut a 6″ x 6″ square, and (2) 6″ x 2″ Rectangles
Place the rectangles, long sides together, centered on the block, leaving roughly 1/8″ between the rectangles.
With the needle in the -5 position, align the blade of the foot to the short side of the strips and sew to secure. Repeat for the opposite end, leaving the long sides unsewn.
Place the square over the top of the sewn blocks, centered.
With the needle still in the -5 position, align the blade on the side of the square that is along the long sides of the rectangles and sew to secure. Repeat for the opposite side and leave the remaining two sides (what we will refer to as the ‘top’ and ‘bottom’) unsecured.
Pinch/fold the block pulling the square away from the block and rectangle to ensure nothing else will be cut but the square.
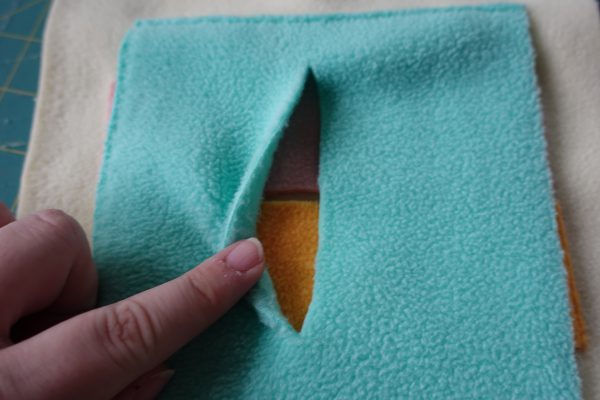
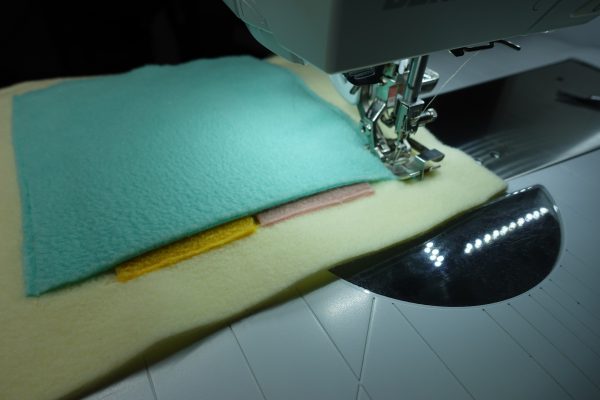
Cut a slit in the center of the square, going perpendicular to the rectangle pieces. Leave roughly .5″ uncut on either side of your slit.
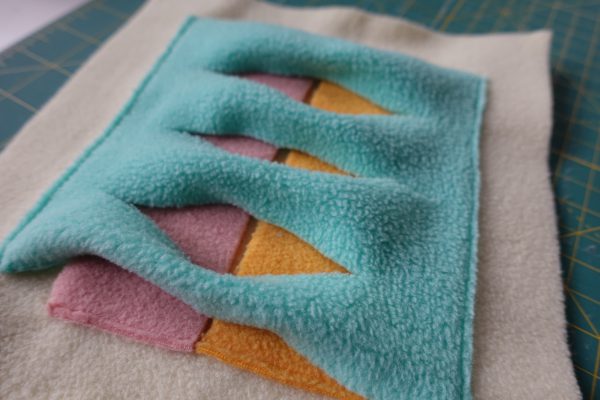
Repeat this process two more times on either side of the center slit. This will create three total cuts in the square. Pinch the centers of each of the four pieces, creating little mountains out of the newly cut strip.
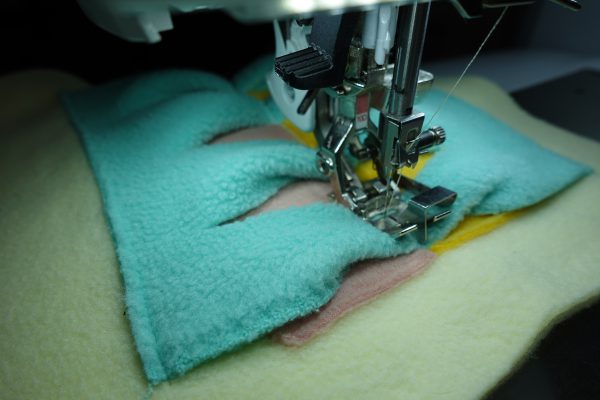
With the needle still in the center position, sew down the center of the square, ensuring you are sewing in the gap left between the two rectangles. As you sew over the pinched centers of each strip, ensure the edges of either side of the strip are folded underneath the strips, this will secure everything in the proper position and keep your block looking neat.
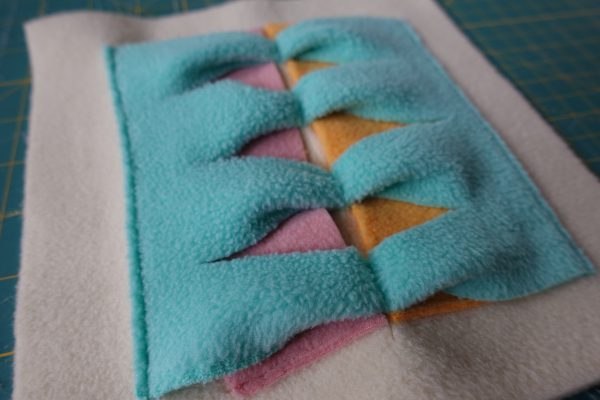
All done! Your Cheese Danish is ready to frustrate and tucker out your pets as much as it did Alfred.
Finishing
Head to the Sew Your Own Snuffle mat blog post to see the finishing information. The first blog post also has tutorials for six more blocks, including how to use your embroidery machine to personalize your snuffle mat for the pets in your life.
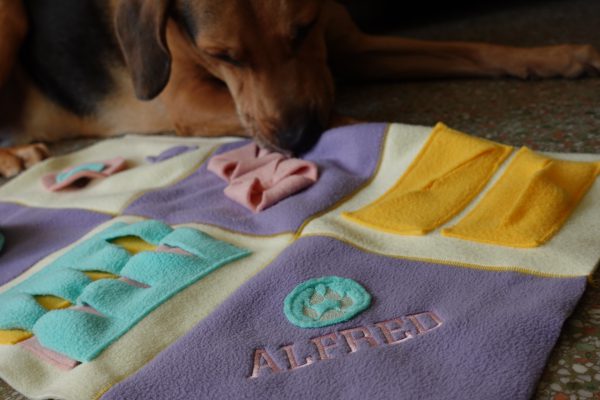
I hope you and your furry friends enjoy the snuffle mats! I know mine do and I’m already cooking up more block ideas because they are just so fun to make. I’m thinking the next one will be garden themed! I’m already excited to make cute tomatoes and carrots, maybe some strawberries too.
What cute themed snuffle mats would you make for your fur babies? Comment below and let me know your cute snuffle mat theme ideas!
Until next time! Happy embroidering!
Kate


What you might also like


2 comments on “Sew Your Own Snuffle Mat, Part Two”
-
-
Thank you so much for sharing this!! Got me a little teary this morning. Best of luck to you and sweet Lily. Thank you for caring for her so sweetly.
-
Leave a Reply
You must be logged in to post a comment.

We have a border collie rescue, who has significant anxiety issues. She does not know how to play with toys and is simply not interested in them. She does love her cookies. I made her a snuffle mat and she loves it! This is a super easy project that you can make in an hour-ish. It provides challenge and excitement to treat time. We believe it has helped reduce Lily’s anxiety. Thanks so much for this project.