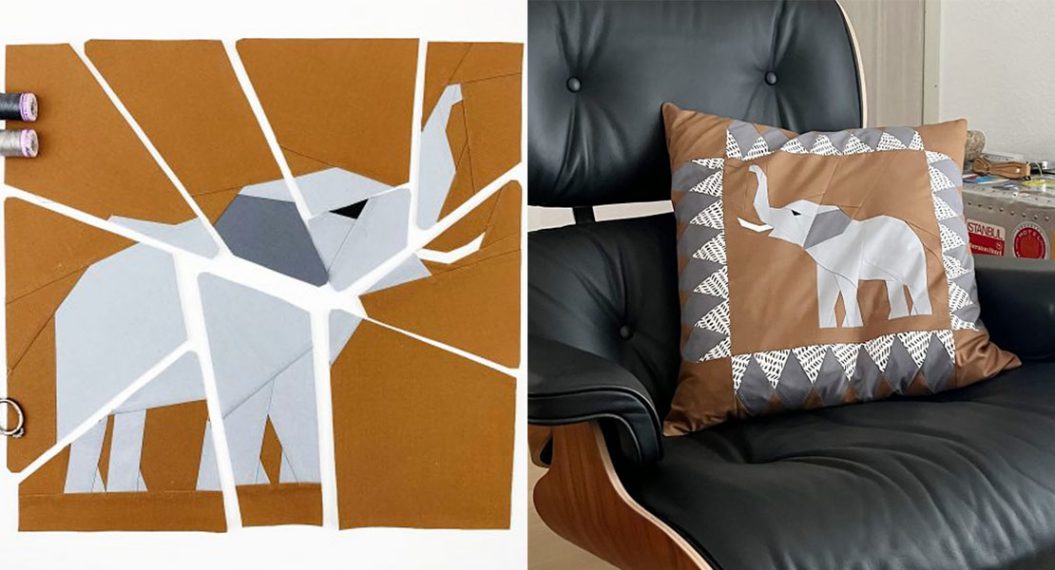
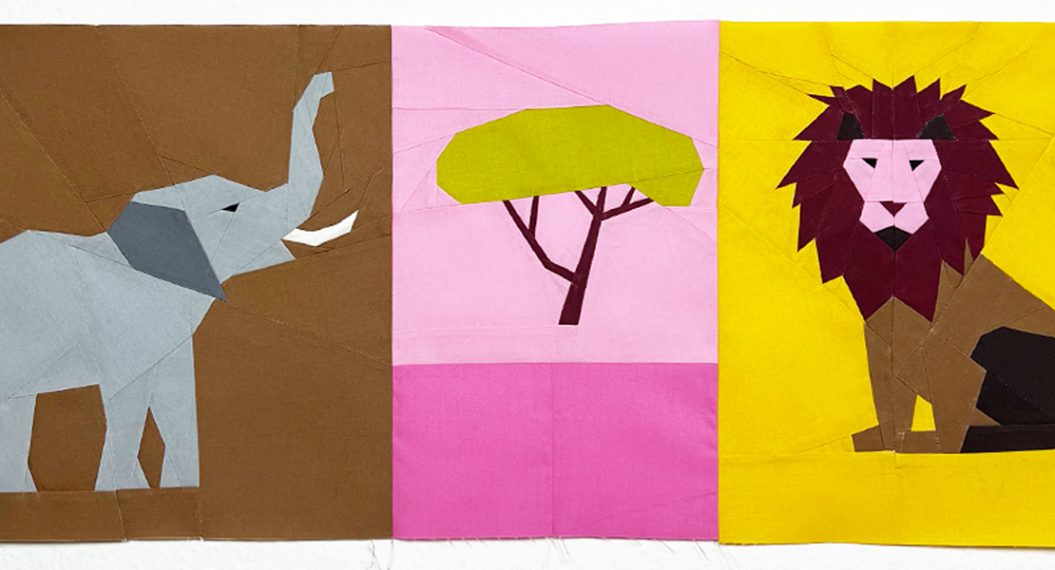
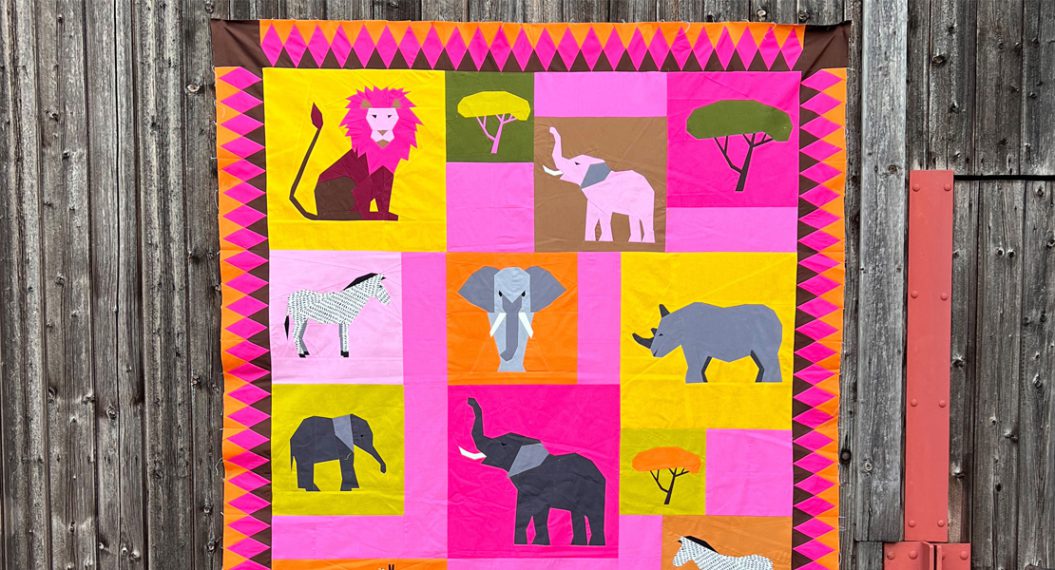
Quilt Safari, Part Four: Standing Elephant
Hey, all of you travelers through the African savannah, how are your quilt blocks coming along? Are you all up to date? And are you ready for the next quilt block? Today we are tackling another majesty of the savannah. We are sewing a new elephant quilt block, the Standing Elephant.
Here’s a quote from Bill Murray: “They say an elephant never forgets, what they don’t tell you is, you never forget an elephant!”
How many of you have ever seen and touched an elephant in real life?
I already mentioned it with Elli the Elephant: I was very surprised at how rough, shaggy and wrinkled the skin of an elephant is. Elephants love to wallow in mud and water. This serves several purposes, it keeps the skin moist and flexible as elephants have no sweat glands, so the mud and water cool the skin in the African heat.
Of course, several elephants are integrated into this quilt, basically a whole family of elephants.
Are You New to the Quilt Safari?
Is this your first time reading about the quilt safari? Or have you been thinking about participating for a while and have only just now decided? No problem, you can hop on into our jeep at any time and explore the savannah with us! Together we will sew a quilt made with FPP blocks featuring wild animal designs.
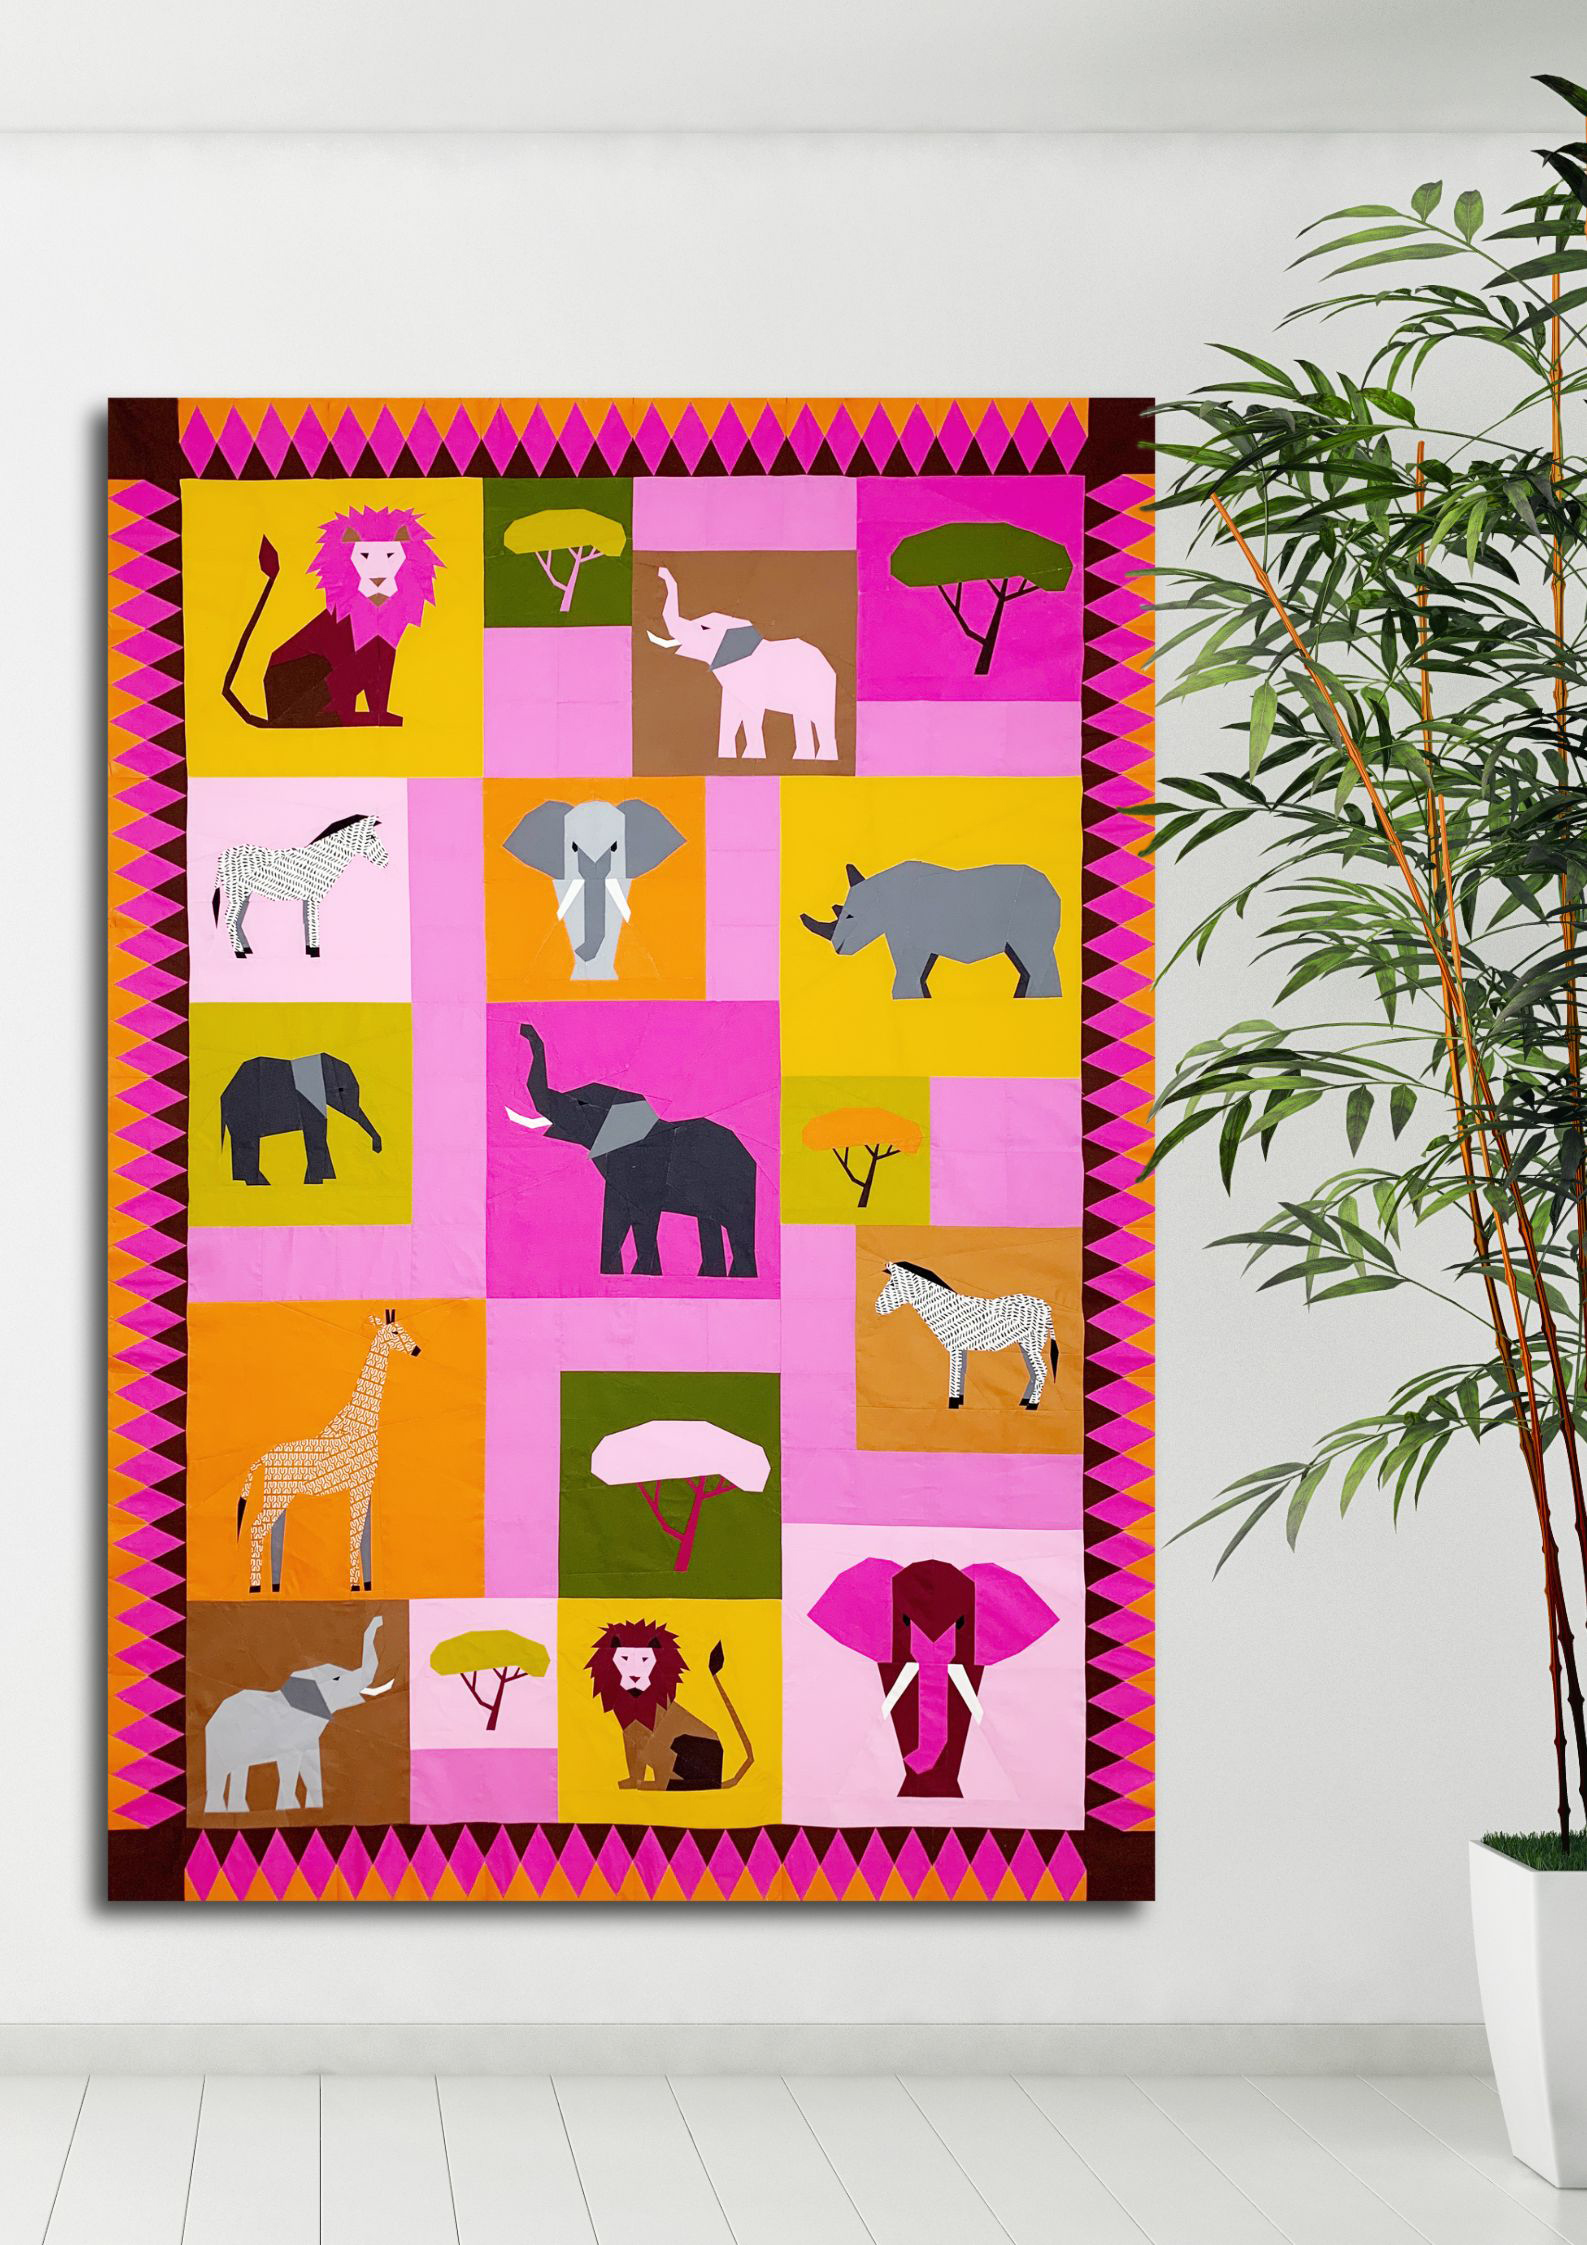
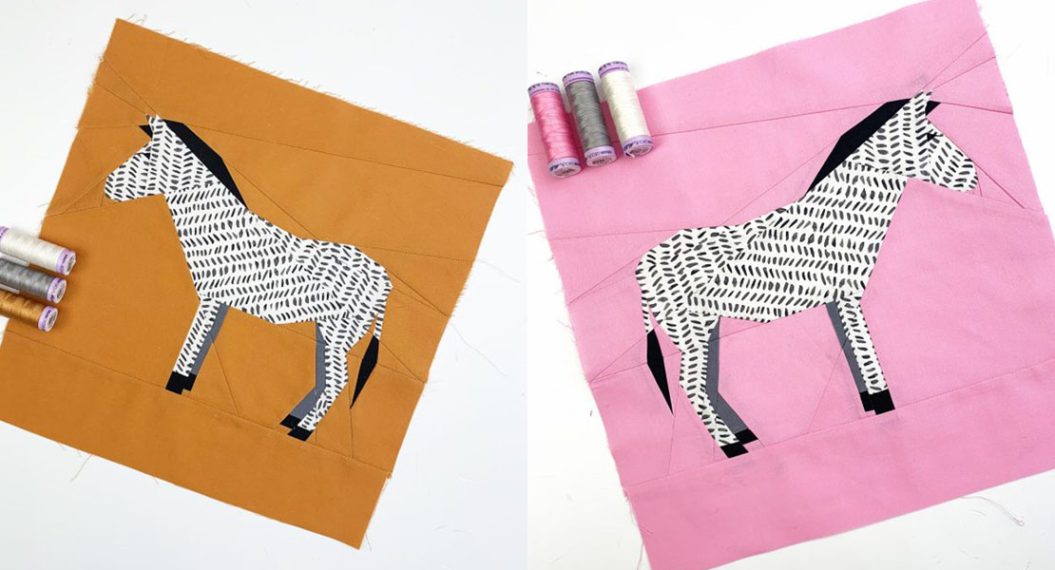
The patchwork instructions appear block by block on the WeAllSew blog. With the Standing Elephant, we have reached part 4. The Border Block, Elli the Elephant and Zoe the Zebra have already been published. Here you can find an overview of the previous articles: Quilt Safari on the WeAllSew Blog.
The best way to start is to read my first quilt safari blog post, in which I put together the most important information: Welcome to the BERNINA Quilt Safari.
There is no time pressure with the Quilt Safari. Basically, you can follow your own rhythm and roam the savannah at your own pace. There is only one date to keep in mind: If you want to take part in the final giveaway, you have to show a photo of your finished quilt top on social media or in the community section of the blog by June 16, 2024.
Do You Only Want to Sew the Standing Elephant?
That’s no problem either because all the patterns in this quilt are available as single patterns, including the Standing Elephant.
Let these instructions inspire you! Maybe your summer patio needs a few “elephant” cushion covers?
Fabrics for the Standing Elephant Quilt Block
Below you will find my fabric choices for the Standing Elephant I am using solids. As always in the Quilt Safari, you are free to work with your own fabrics.
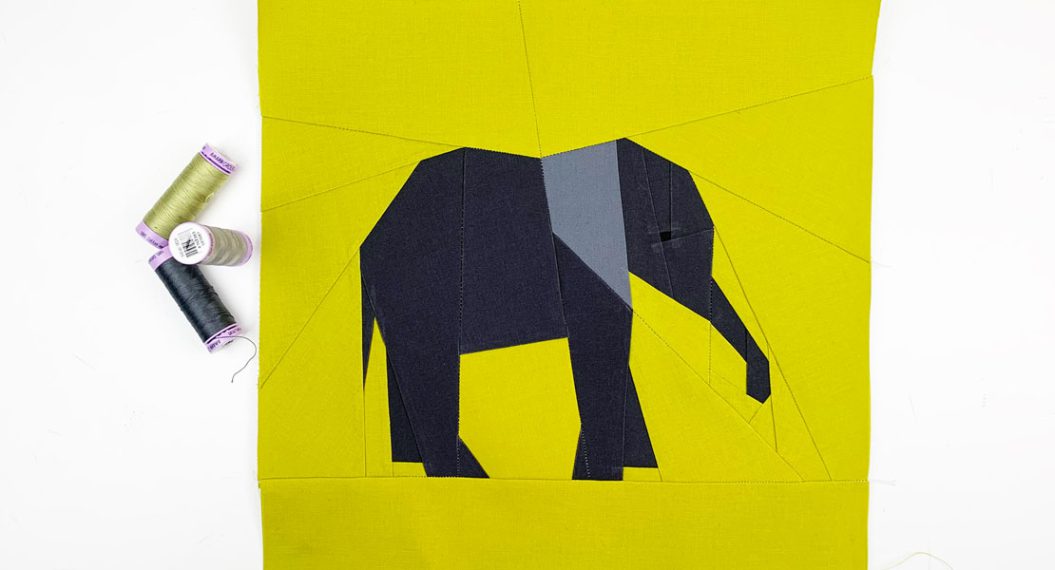
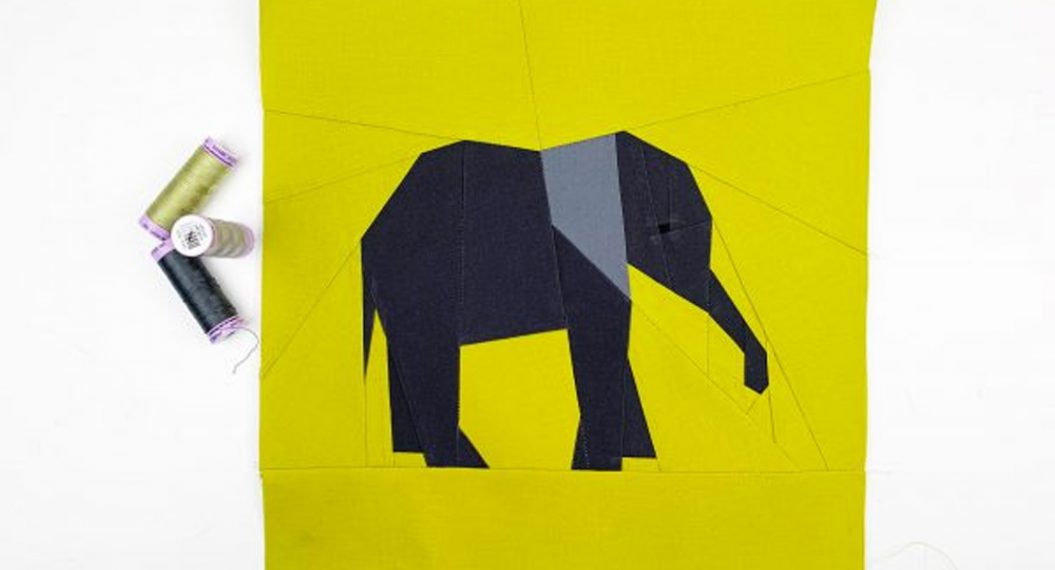
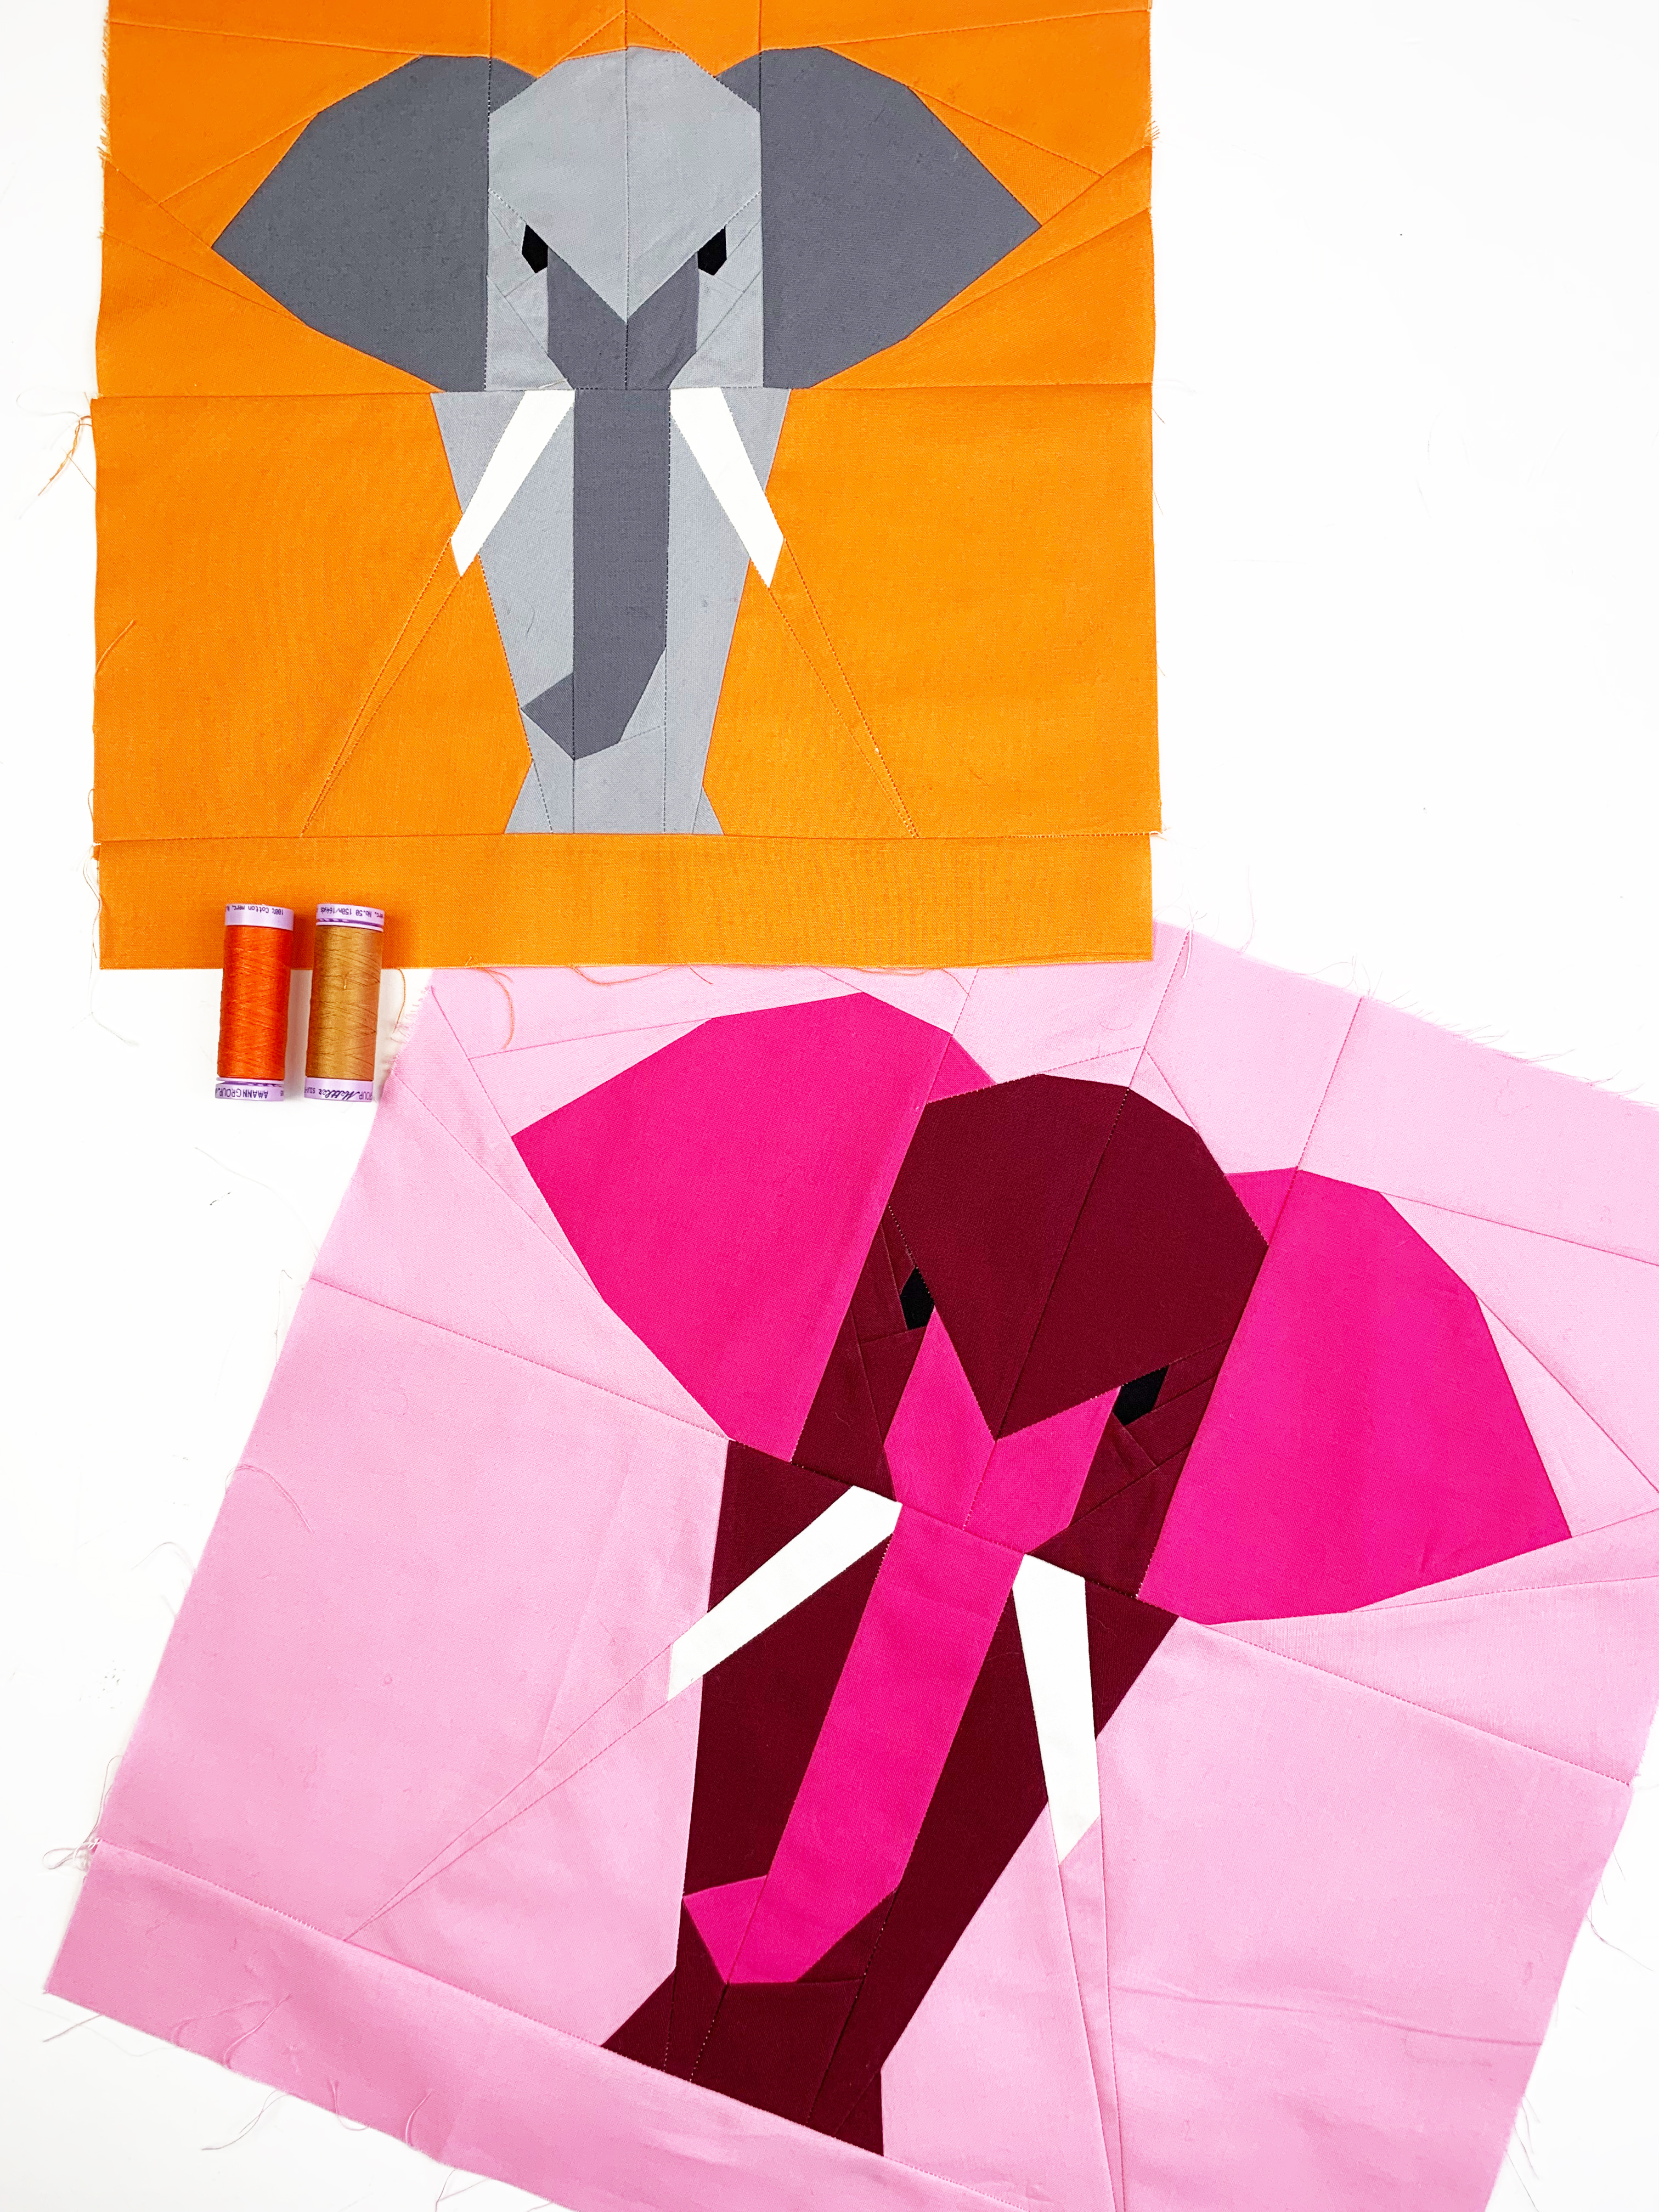
We are sewing this elephant twice for this quilt.
Once in the size 12 “x 12” and once in the size 16 “x 16”.
The 12 “x 12” elephant quilt block:
- Orange (background)
- Light gray (elephant)
- Medium gray (ears and trunk)
- Eggshell (tusks)
- Black (eyes)
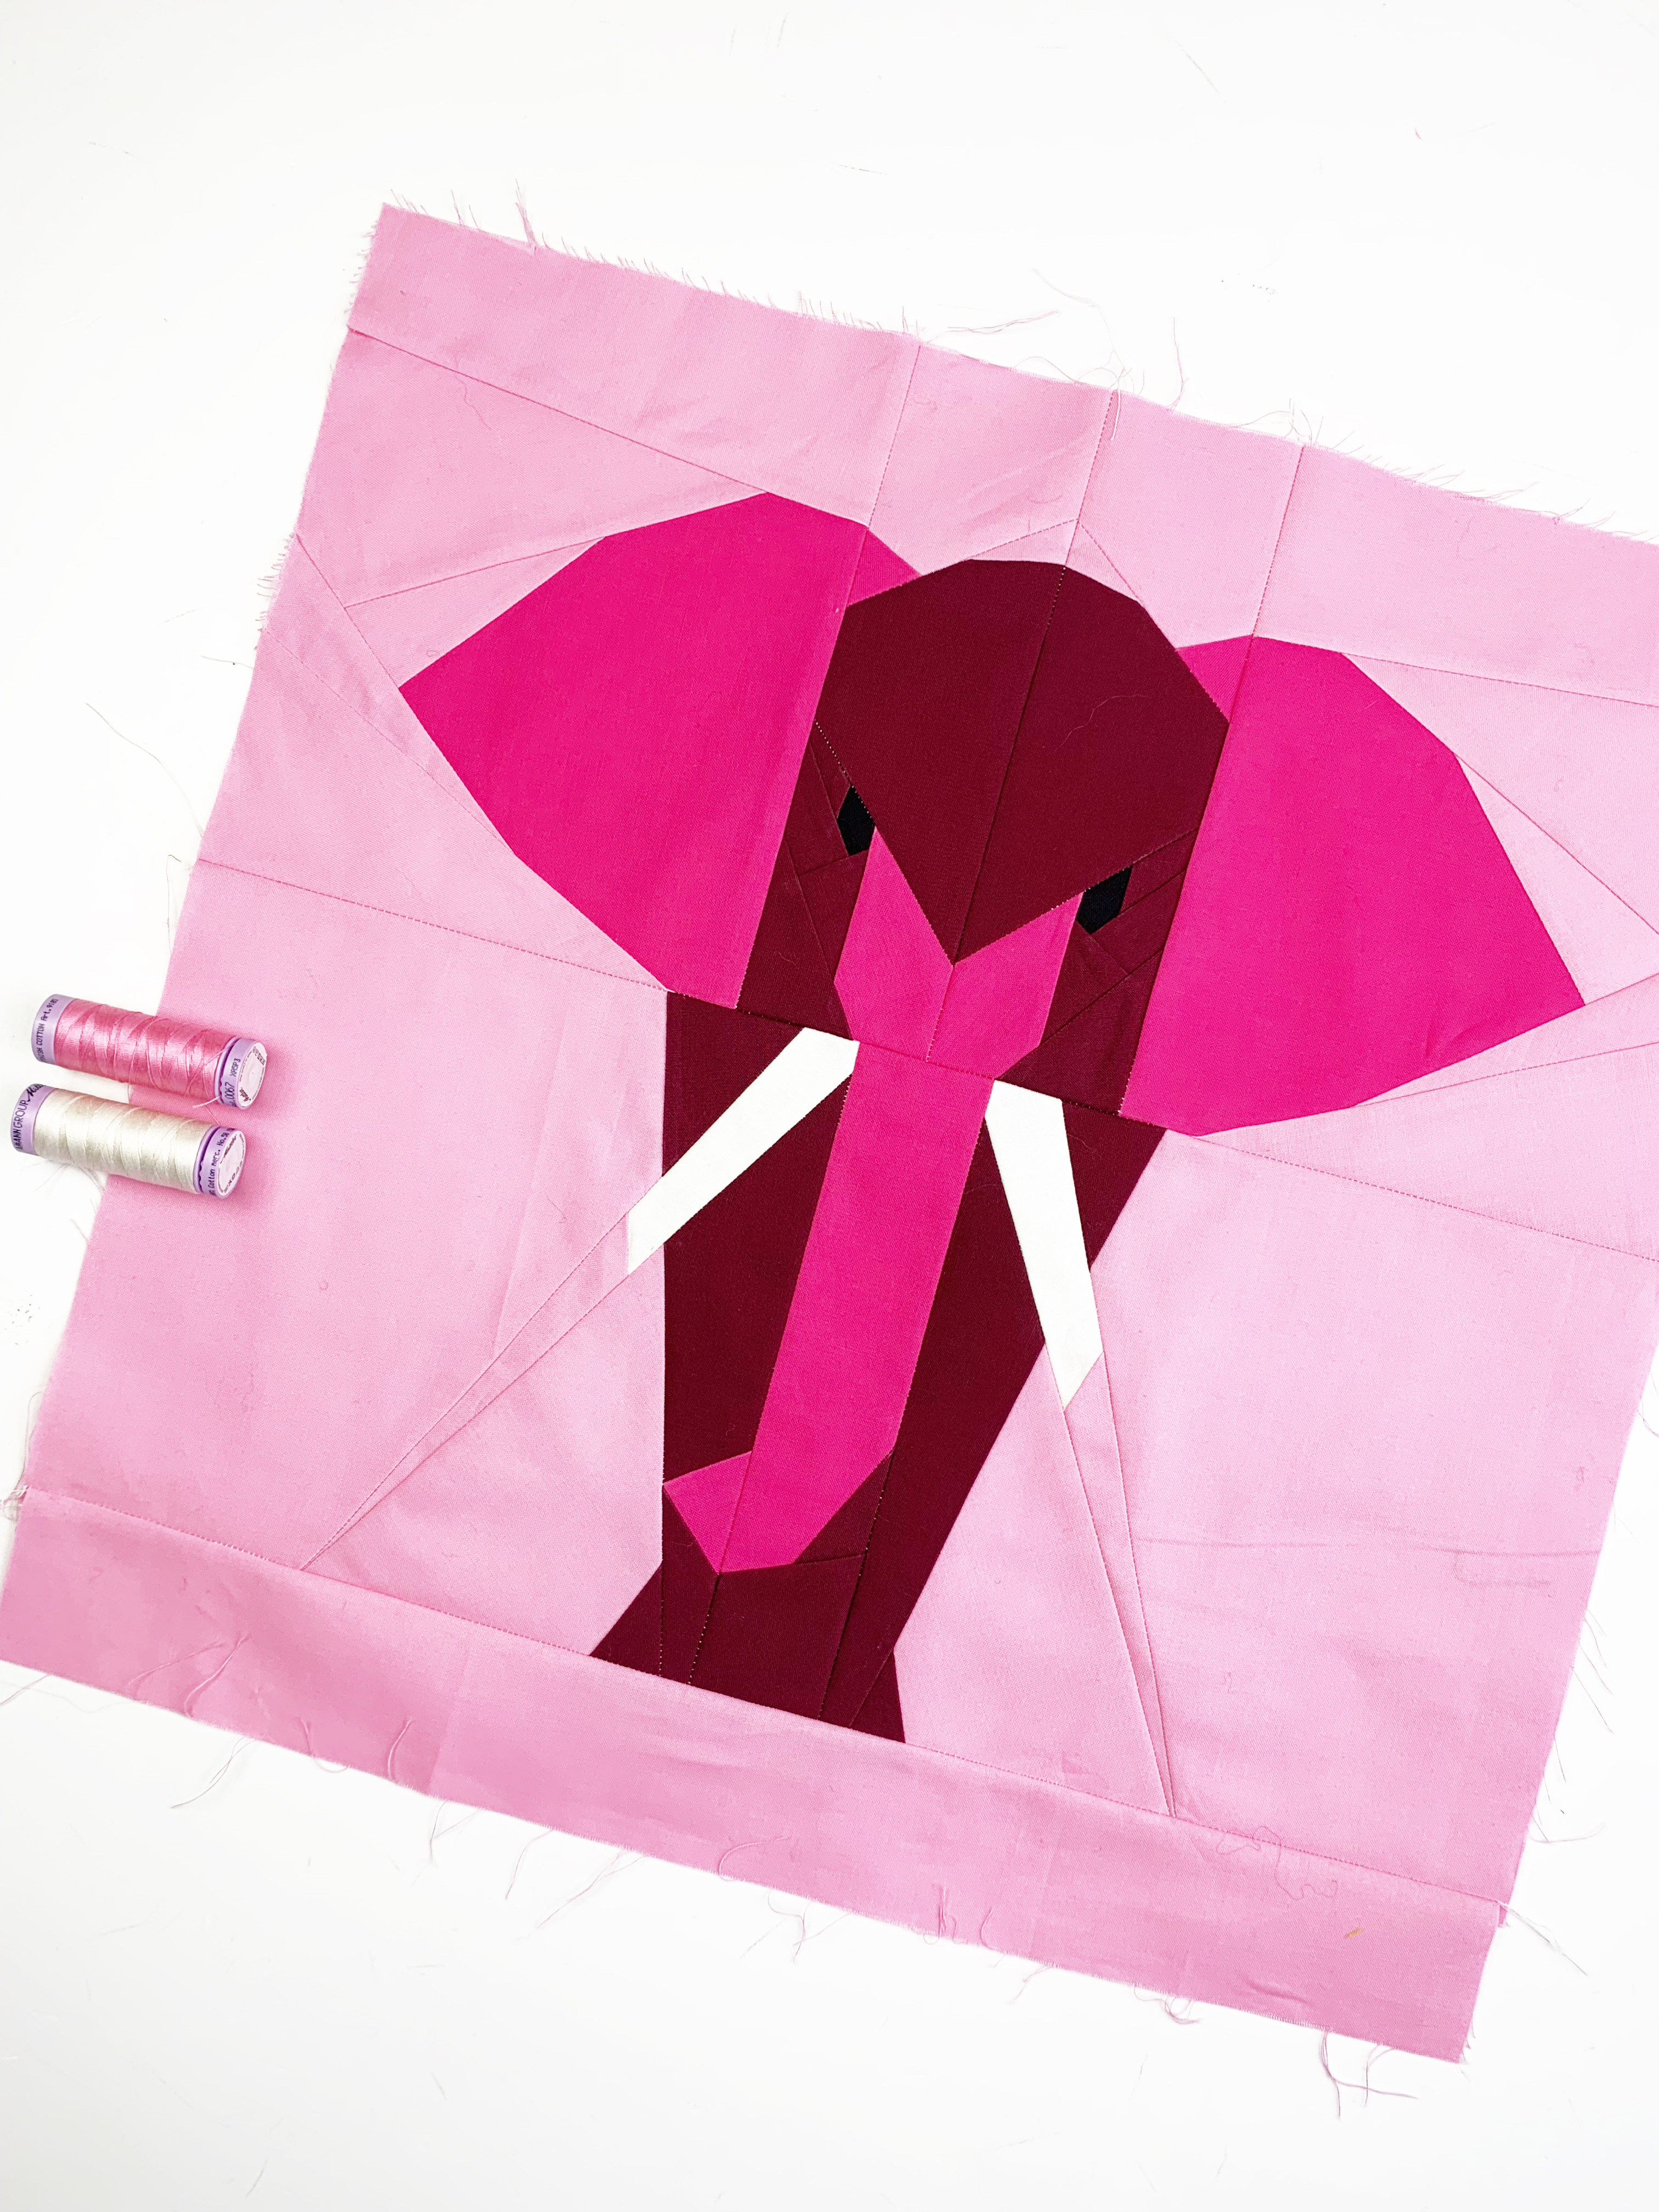
The 16 “x 16” elephant quilt block:
- Light rose (background)
- Garnet red (elephant)
- Bright pink (ears and trunk)
- Eggshell (tusks)
- Black (eyes)
Let’s Begin Sewing the Standing Elephant!
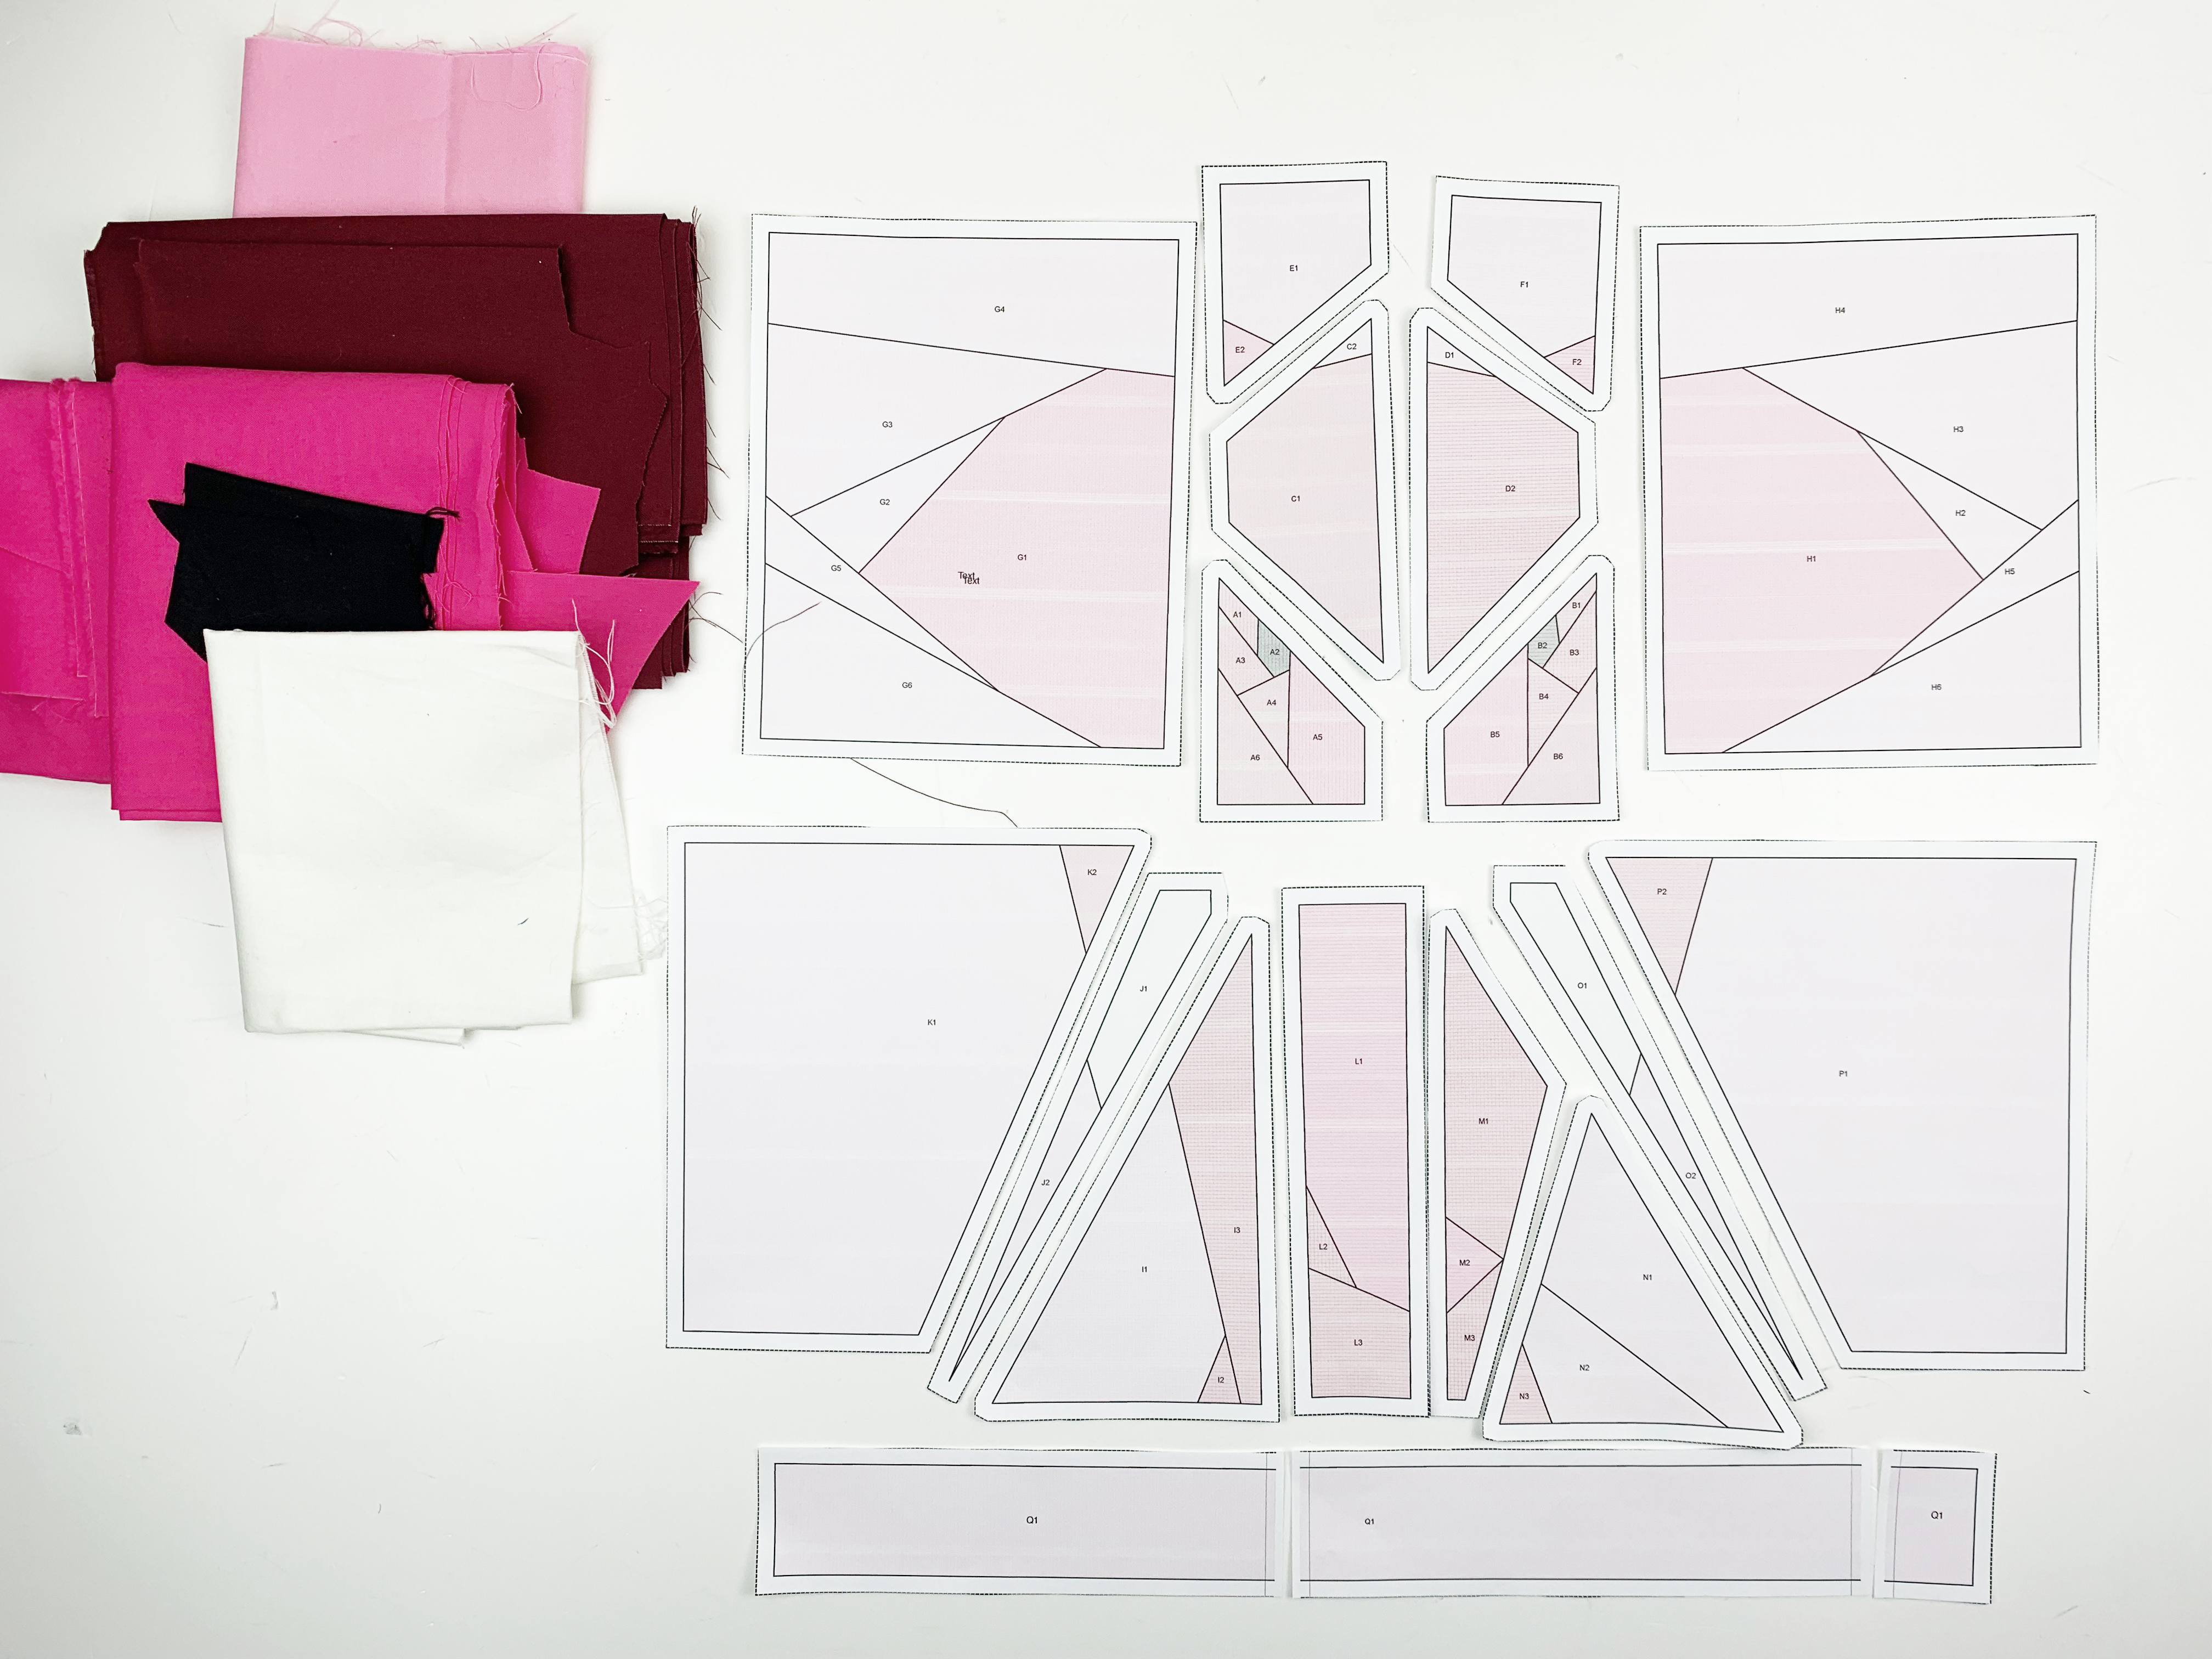
1. You already know that we only print out the parts of the pattern that are marked with letters and numbers.
The Standing Elephant quilt block is sewn in the size 12″x 12″ and the size 16″x 16″. This also means that some of the segments have to be glued together.
As already mentioned in the other patterns, please use a craft glue and not scotch tape. You will have to press this quilt block quite a few times. The tape is guaranteed to stick to the iron!
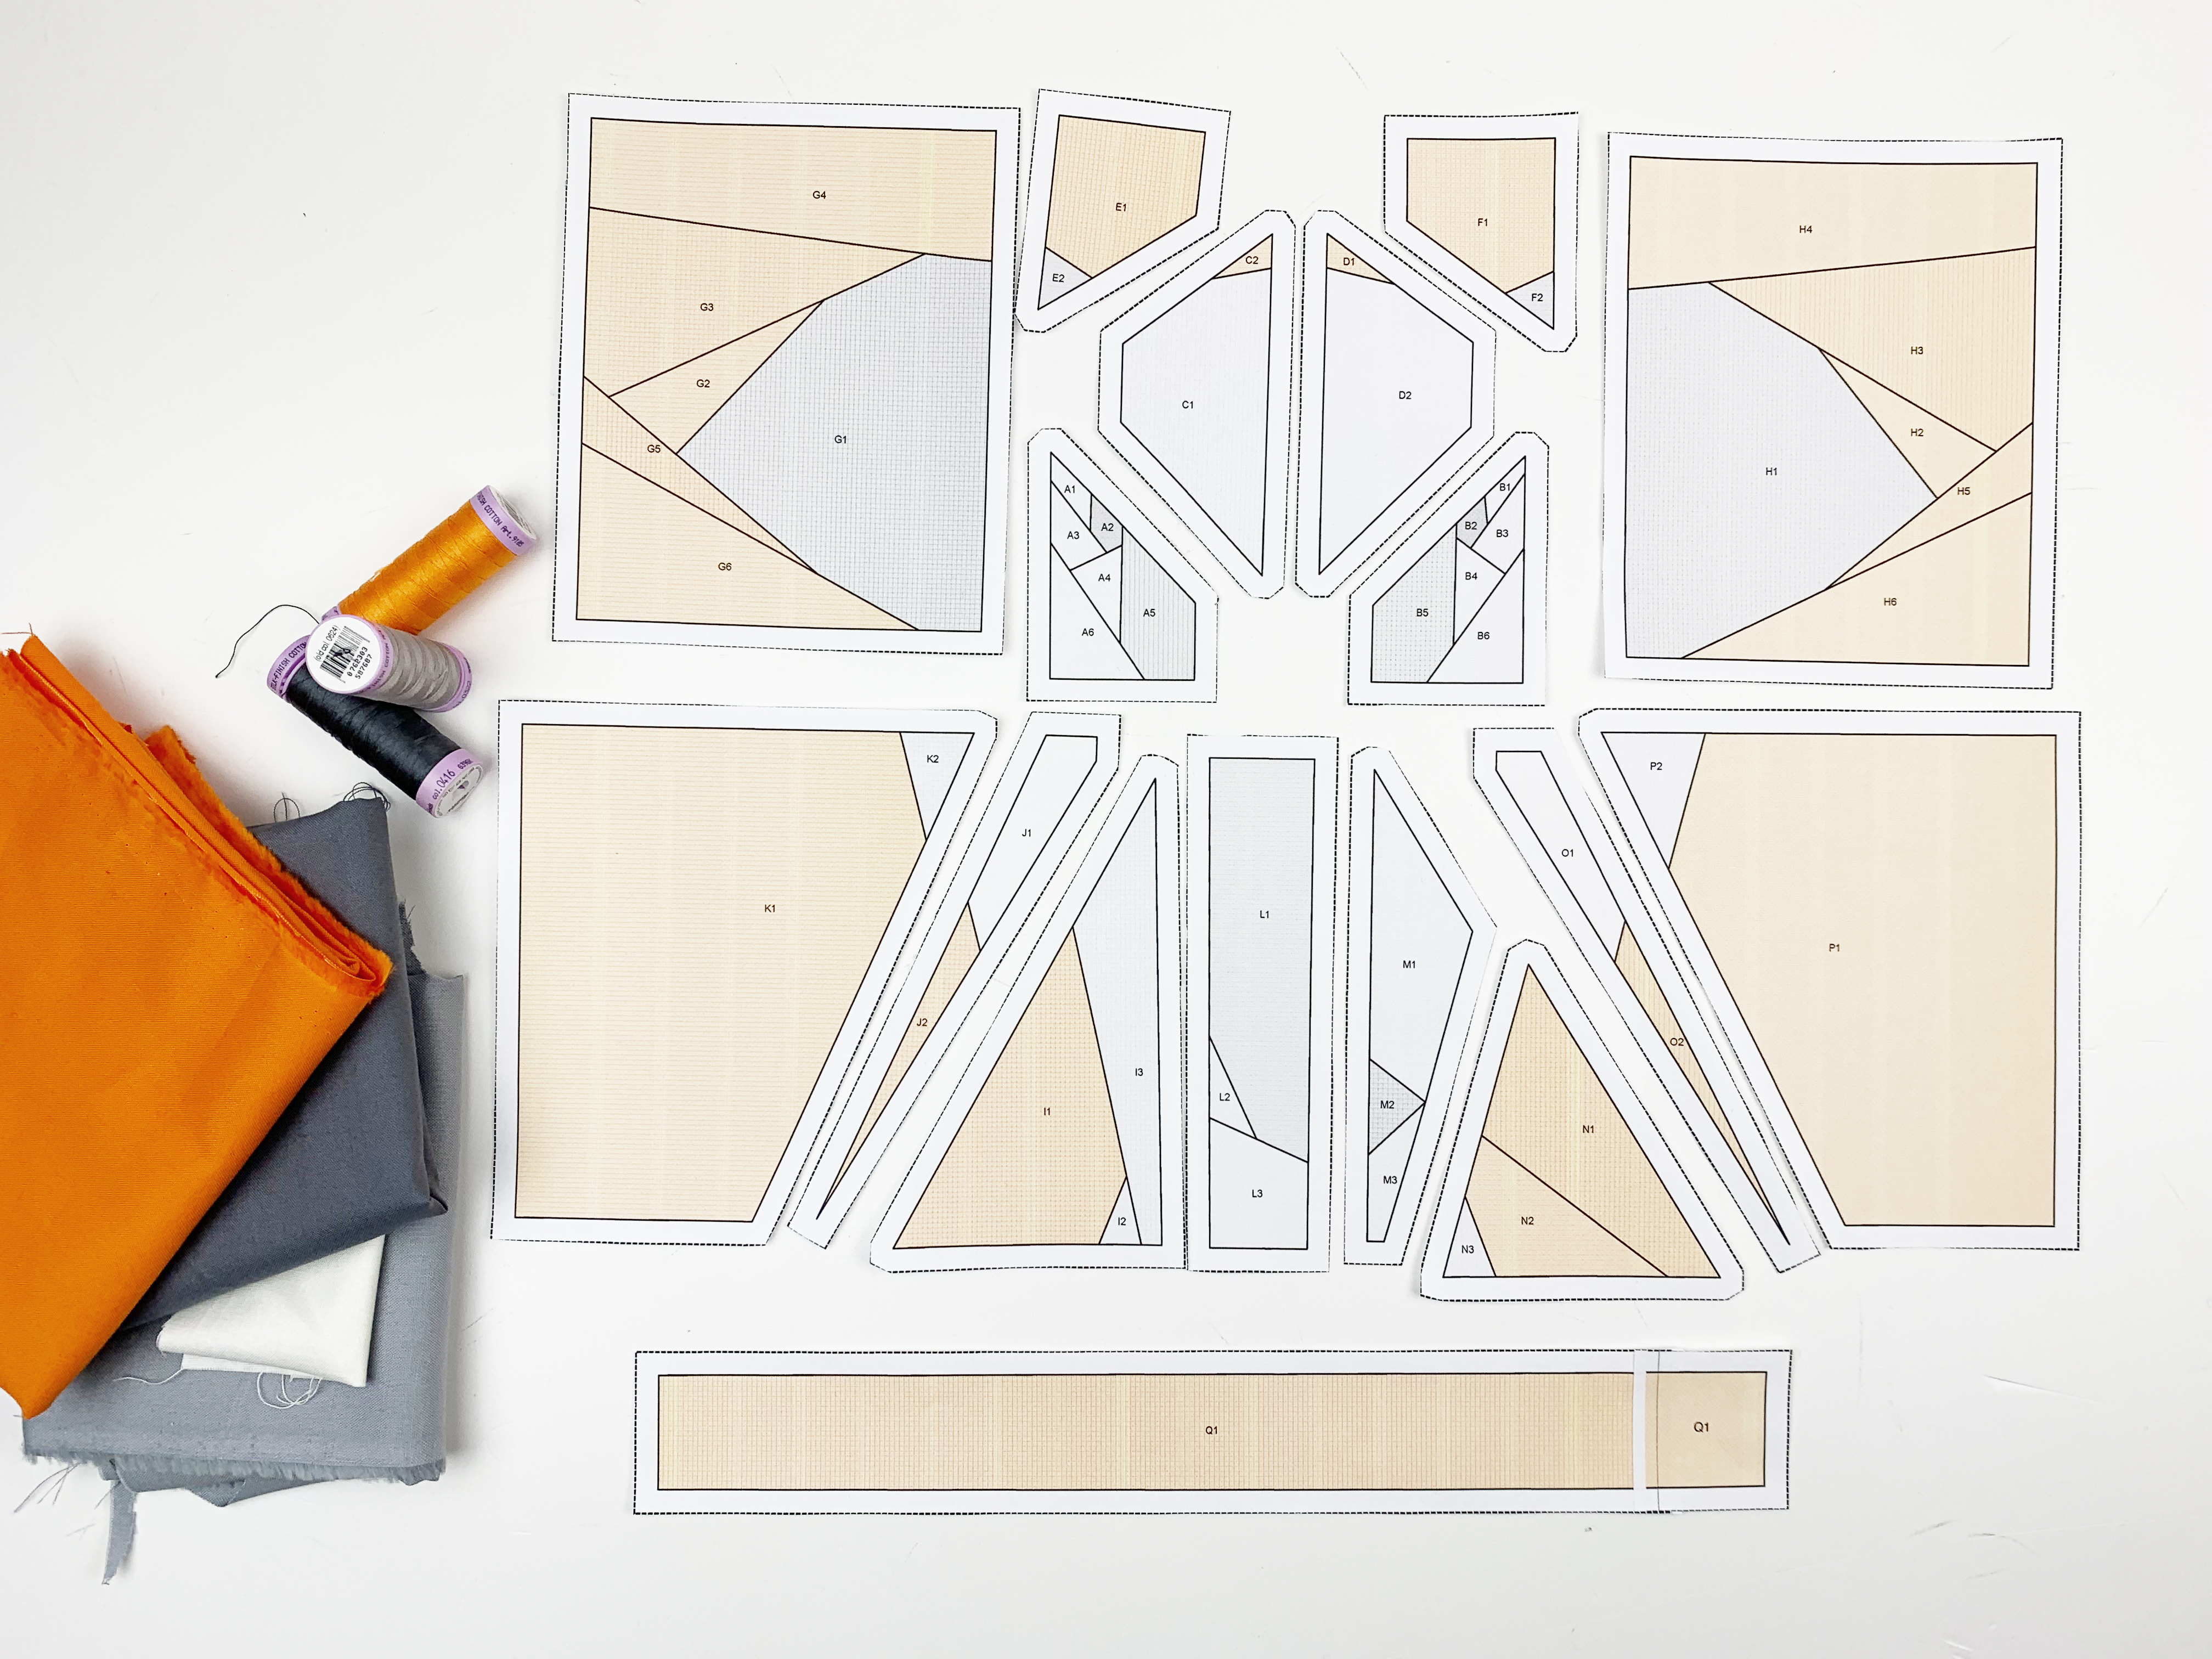
2. I always lay out the individual parts of the pattern exactly as they appear on the numbered overview. I recommend that you proceed in the same way. This simply makes your life easier – you can see all the pieces and can sew them one after the other.
I always start with the pieces that have no seams. As already described in the previous patterns, I use a fabric glue pen. This means that only the fabric is glued here, wrong sides together (i.e. wrong side of the fabric against the wrong, unprinted side of the pattern). Then cut the fabric back to the line of the seam allowance.
Now sew the other segments using the foundation paper piecing method, just as you did with the border blocks.
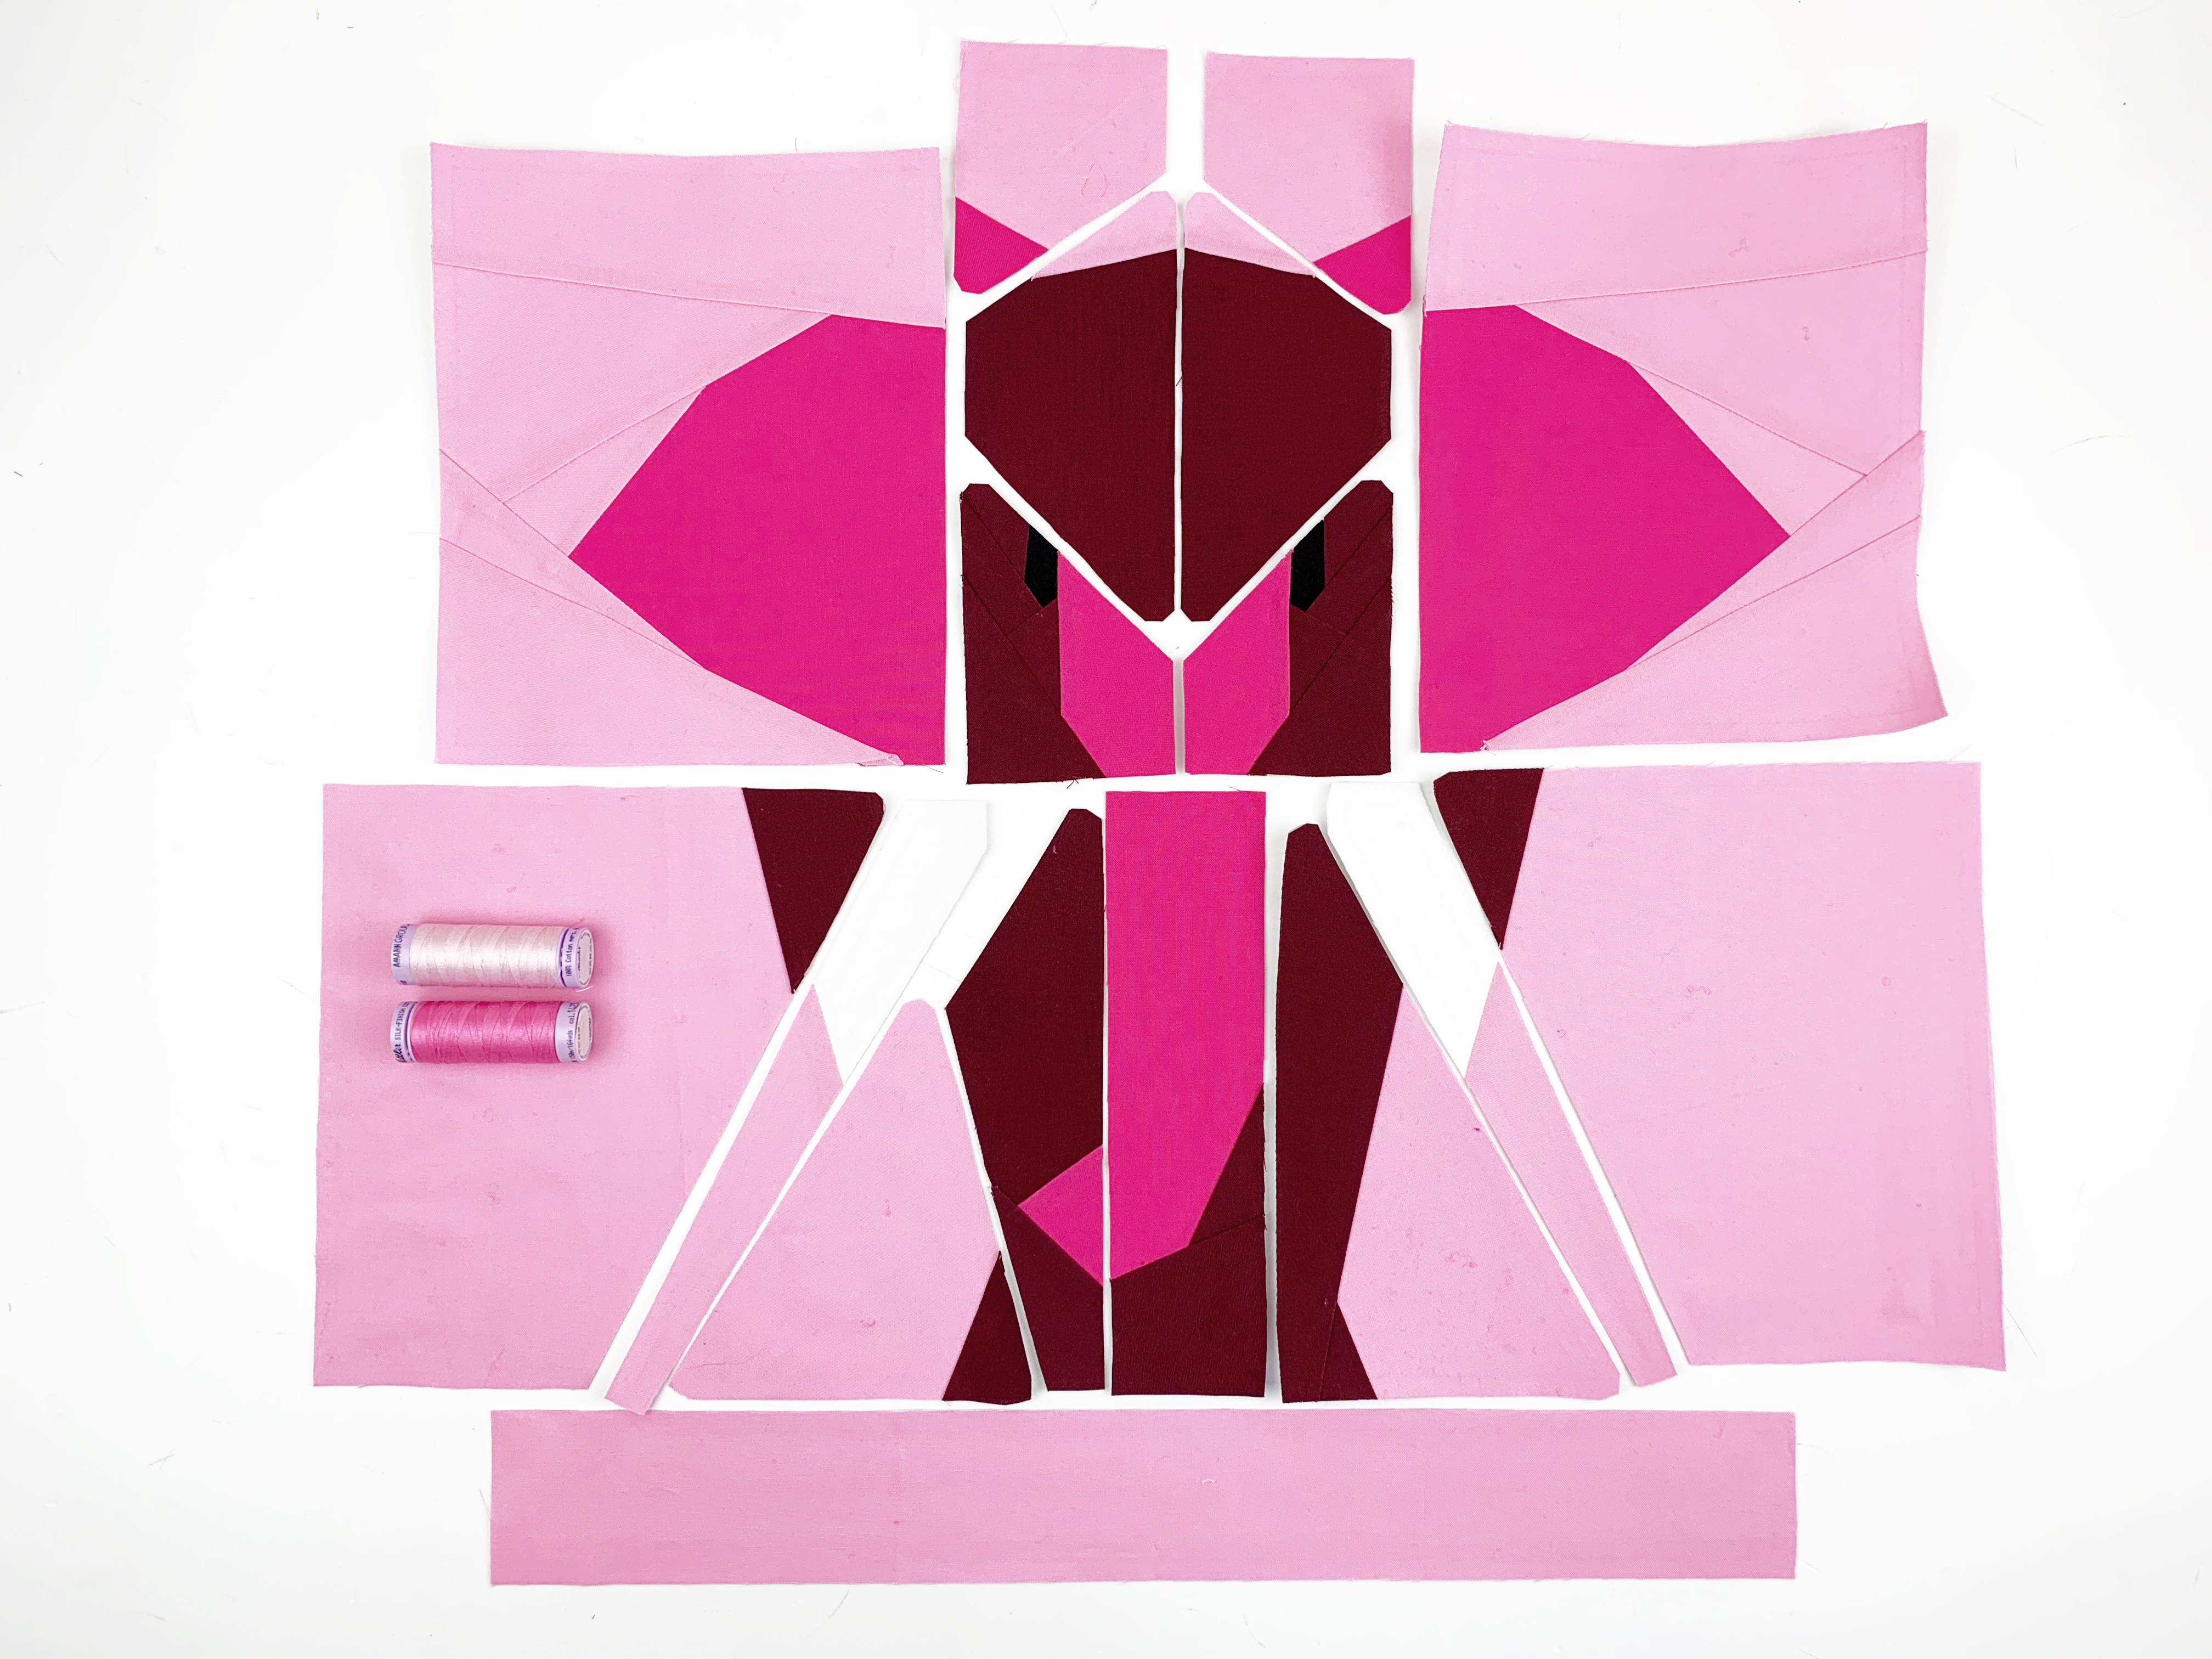
3. When you have sewn all the segments, lay them out again as shown on the overview. You can then place them on the wrong side, which may make it easier to join them together.
You will find the order of joining the segments, in the pattern. After you have joined two segments, remove the paper from the seam allowance and press the seam allowances open. Don’t forget to use the Tailor’s Clapper (if you have one) to get even flatter seams.
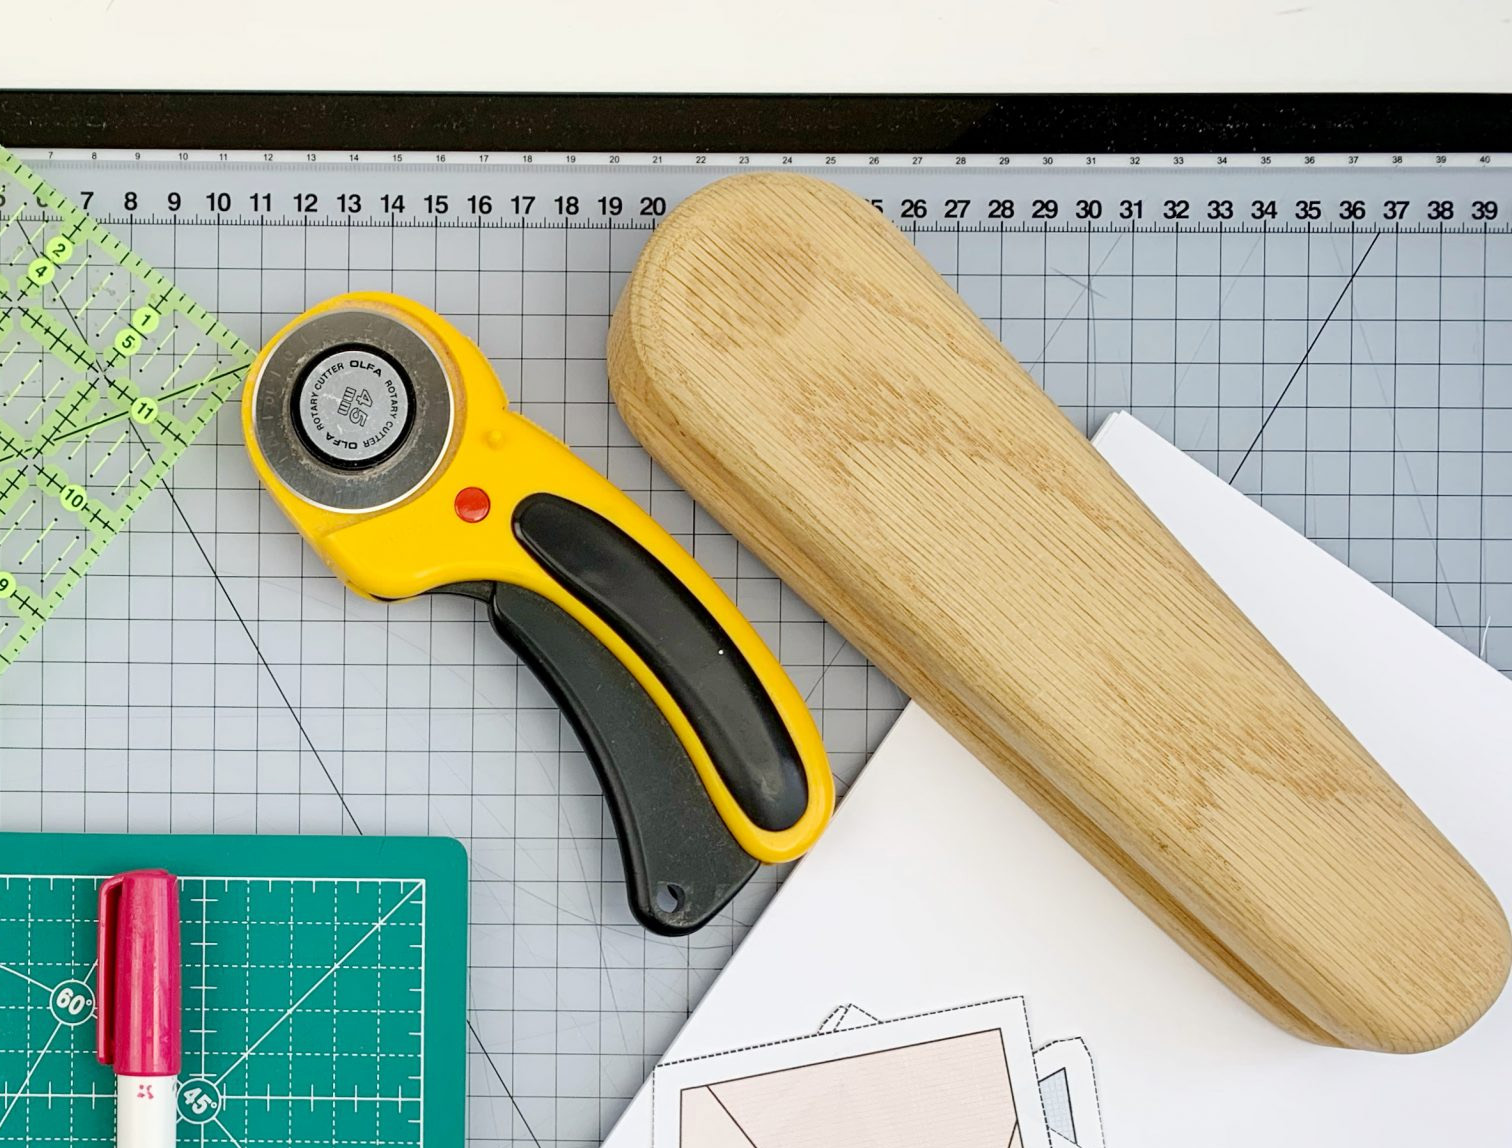
As I mentioned before, I like to use the patchwork foot #97D on my BERNINA 770 QE PLUS Kaffe Edition to assemble the individual segments. Thanks to the 1/4″ markings on the sole of the foot, sewing the segments together is so easy.
4. Wow, the Standing Elephant is finished. He looks proud, doesn’t he?
Show Me Your Elephants!
How are you all doing, did you get on well? Have you been bitten by the foundation paper piecing bug? I hope you had fun with the elephants. If you have any questions, please ask them in the comments.
I’m looking forward to seeing the photos of your blocks. Show them to me on social media or in the community section of the blog! Always use the hashtag #quiltsafari on Instagram and Facebook. In the community section of the blog, don’t forget to select the “Quilt Safari” participation campaign.
See you next time,
warm sewing greetings,
Ingrid