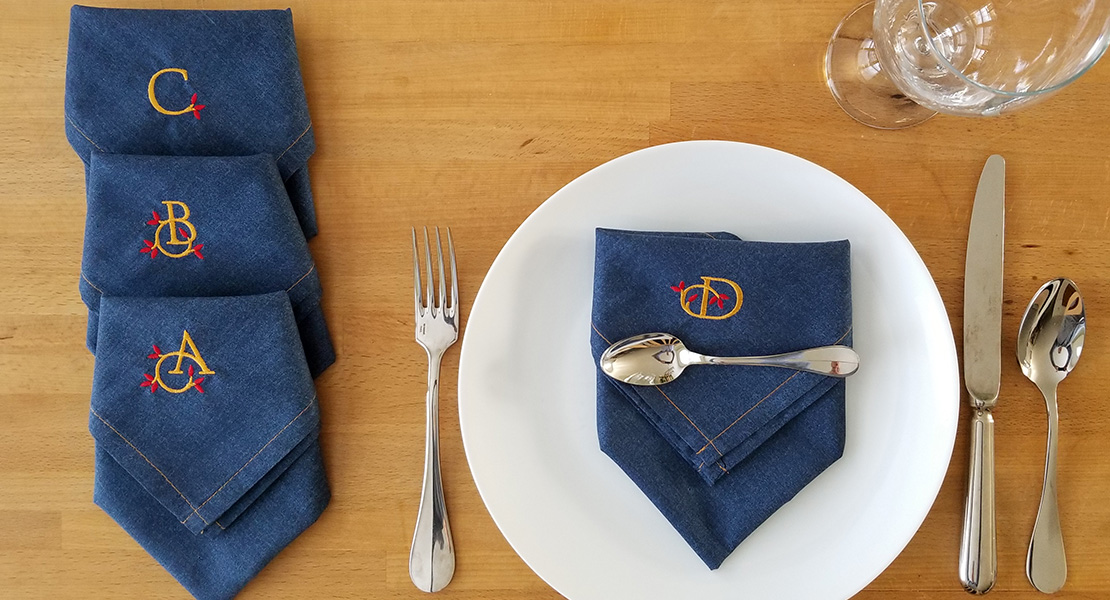
How to Make Blanket Stitch Napkins
Home décor projects always make me smile because they are simple, quick and brighten the home. These blanket stitch napkins are especially enjoyable because of the beautiful thread color and the simplicity. Anytime I see solid-colored napkins for a good price, I grab them. I know I’ll use them for a special occasion, holiday or gift. I always make them custom by adding embroidery or decorative stitches. Today, I’ll show you how to add a beautiful blanket stitch using an overlocker.
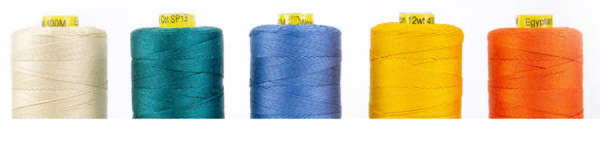
The hardest part of this project is selecting the thread color. Wonderfil offers an incredible assortment of colors in their Spagetti Cotton Thread 12 wt.
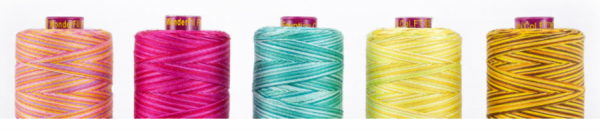
They also offer this same thread in variegated colors called Fruitti.
Machine & Accessories
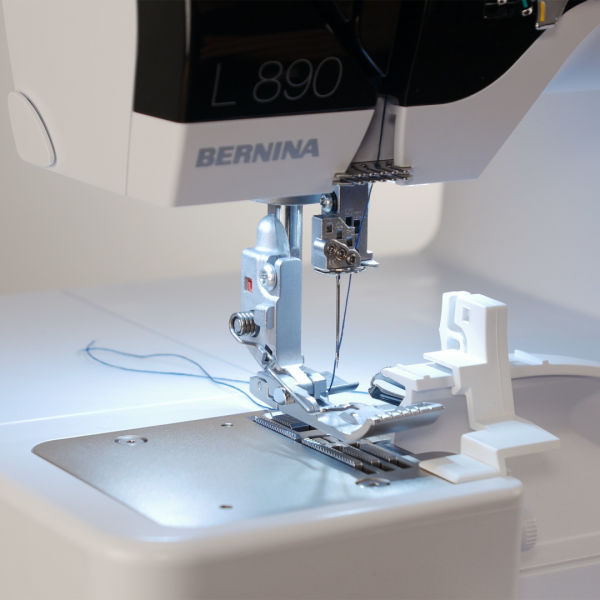
- BERNINA L 890
- Standard Presser Foot Overlock/Coverstitch #C11
- Right Seam Guide
Materials to Make Blanket Stitched Napkins
- Napkins
- Wonderfil Spagetti Cotton Thread 12 wt
- Wonderfil SoftLoc Thread
- OESD StitcH2O Topper
- BERNINA Cover Stitch Needle 90
- Hookey Serger Seam Hook
- Dritz Fray Check
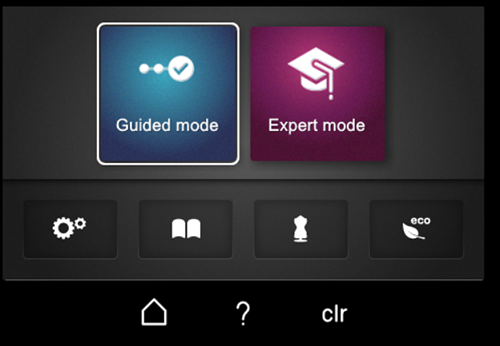
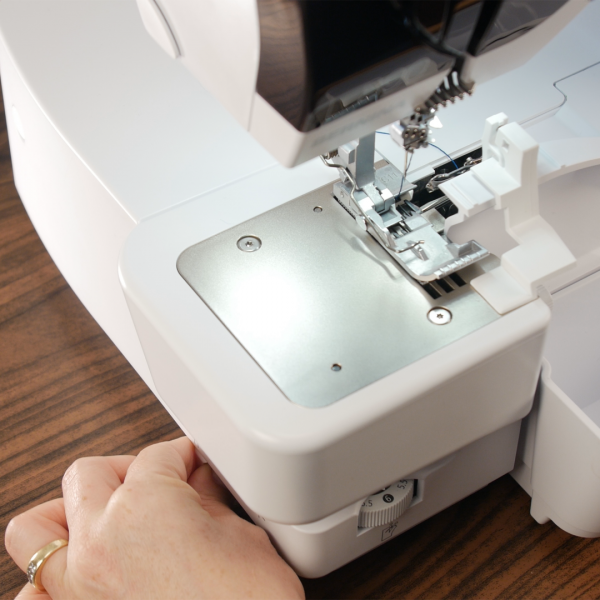
The BERNINA L 890 Combo machine is an airthreading serger that allows you to easily and quickly thread the machine. This amazing machine operates with 4.3” Color Touch Screen in two navigation modes—Guided and Expert.
With Guided Mode, the navigation walks you through step-by-step for the stitch you select. Now, you can literally take the machine out of the box and start serging no matter your experience level!
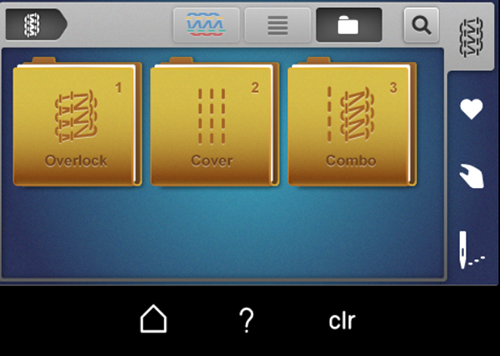
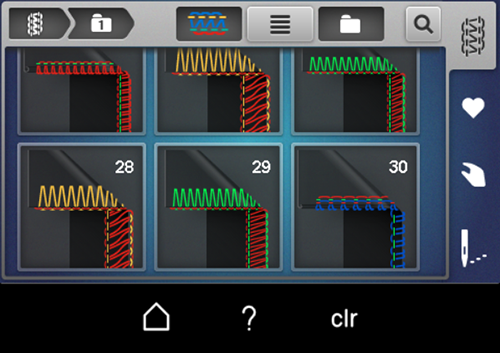
To begin select the stitch selection icon in the top right corner of the screen. This will open up the three folders of stitch types: overlock, coverstitch, and combo stitches. Touch the Overlock folder and select stitch #28 – 2-Thread Blanket Stitch Wide (LN). You can either scroll down or use the search icon to select the stitch.
Now you can set up the machine for this stitch without having to get out the manual or search online videos. Guided Mode takes you through the setup process with a step-by-step tutorial (wizard) including images and animations. Brilliant and simple!
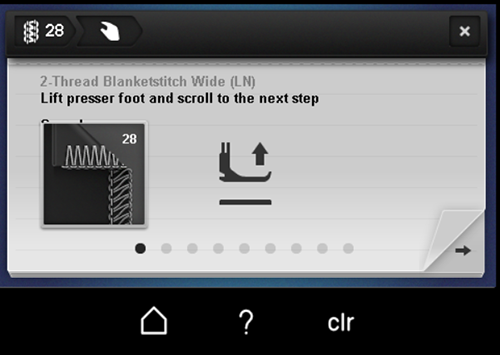
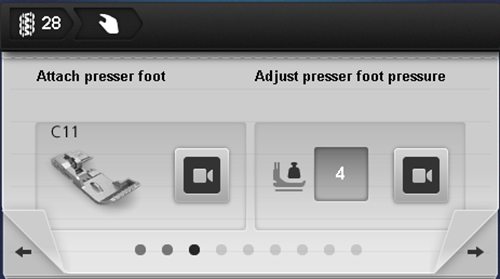
As you scroll through the tutorial, you will be prompted to attach Standard Presser Foot Overlock/Coverstitch #C11 and check the Presser Foot Pressure is 4. Notice the video icons. Select these icons to play an animation if you need additional instruction.
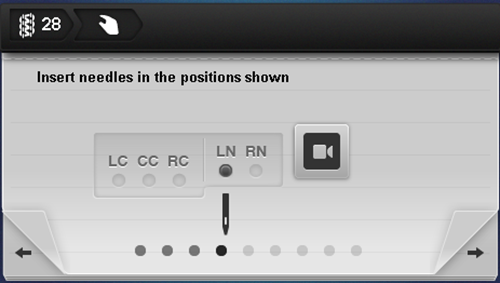
This stitch is the wide blanket stitch, so insert a needle in the left needle position. Again, there is an animation option.
Continue to follow the Guided Mode slides through the threading process.
Thread the left needle with the Wonderful Spagetti thread and use Wonderfil SoftLoc in the Lower Looper. The BERNINA One-Step Airthreader makes using decorative threads like SoftLoc a breeze (no pun intended)!

Select the green checkmark from the last page of the setup wizard. You will now have the stitch view image on your machine screen.
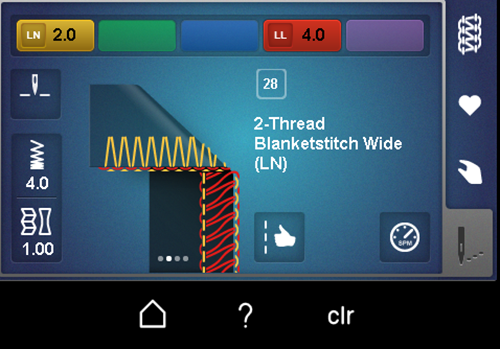
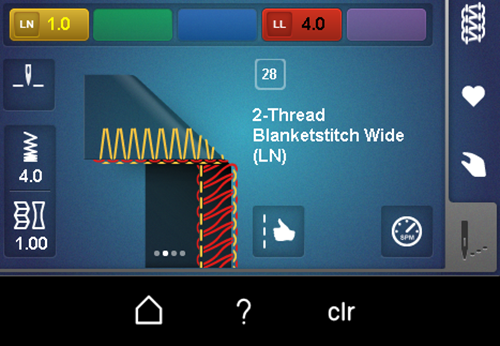
On the stitch view screen are the default settings for tension, stitch length and differential feed for the selected stitch. These settings are a great starting point when using standard serger threads and fabrics. This machine has Total Stitch Control—meaning you can adjust each setting to your liking. Use some scrap fabric to test the stitch and then evaluate the stitch. How does it look? If you are using thick or thin thread and/or fabric, you can easily make adjustments. Click on the Stitch Optimizer icon (thumbs up hand) to show on-screen troubleshooting. It shows possible stitch outcomes and solutions to correct them. I did some test sewing and found decreasing the left needle tension to 1 improved my stitch (notice the change shows the number in yellow). See what works for your stitch!
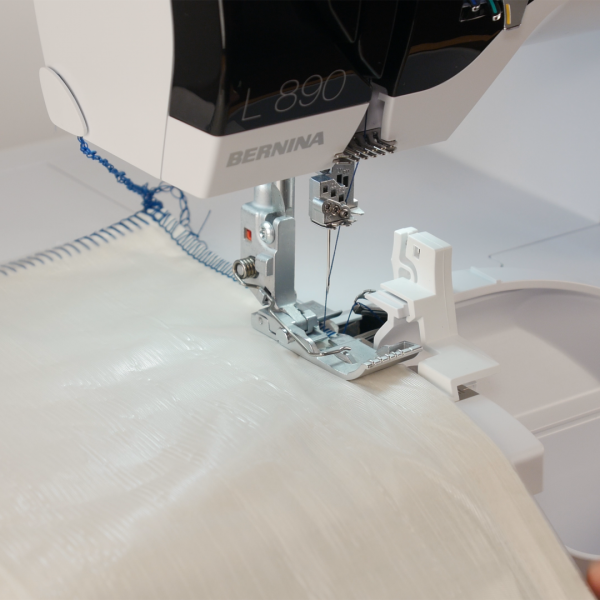
Next, lower the cutting knife by moving the lever on the left side of the machine away from you. It is so convenient to have the knife on/off switch on the outside of the machine.
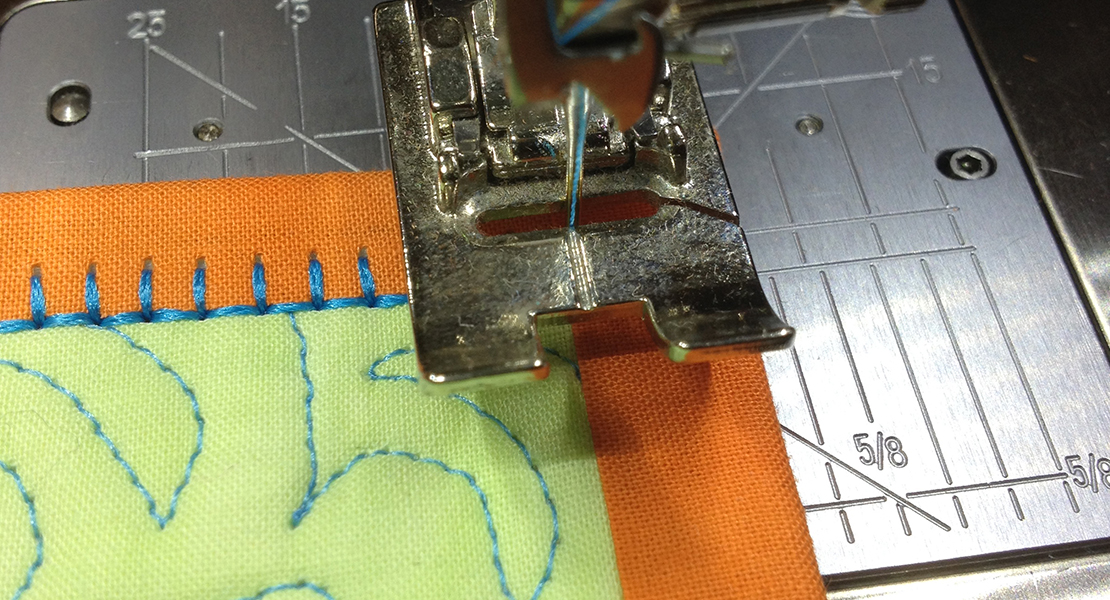
Next, attach the Right Seam Guide to the looper cover door. This guide is particularly helpful when sewing without trimming (knife off).
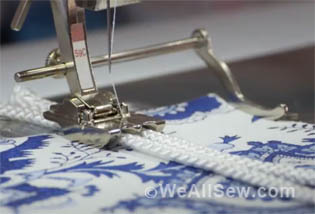
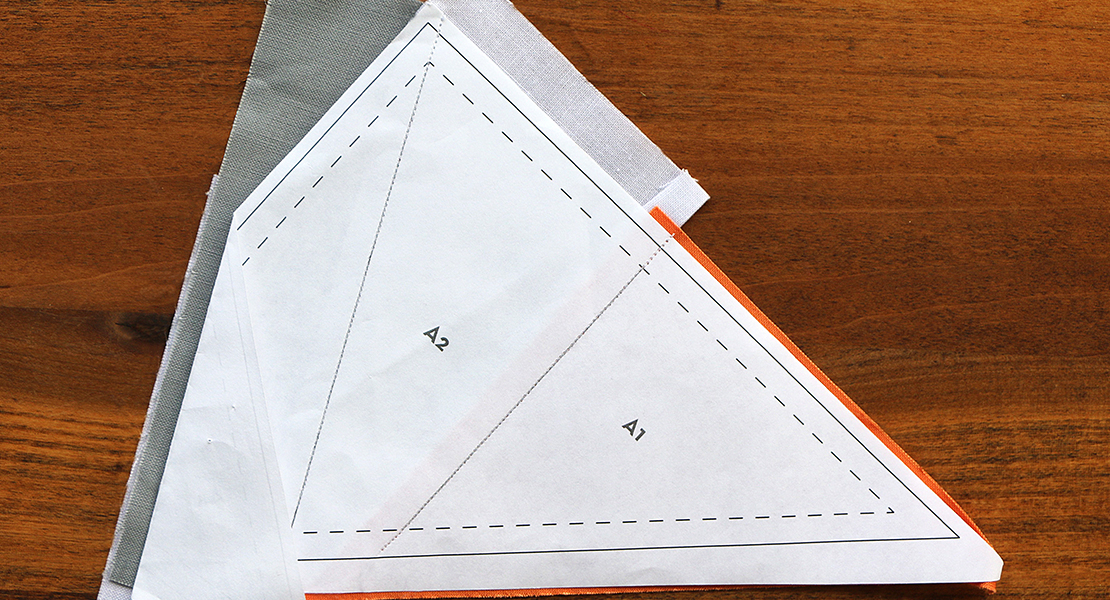
Cut 4 strips of OESD StitcH2O Topper the length of your napkins. Or to conserve, you can cut two strips and then cut those two strips in half lengthwise.
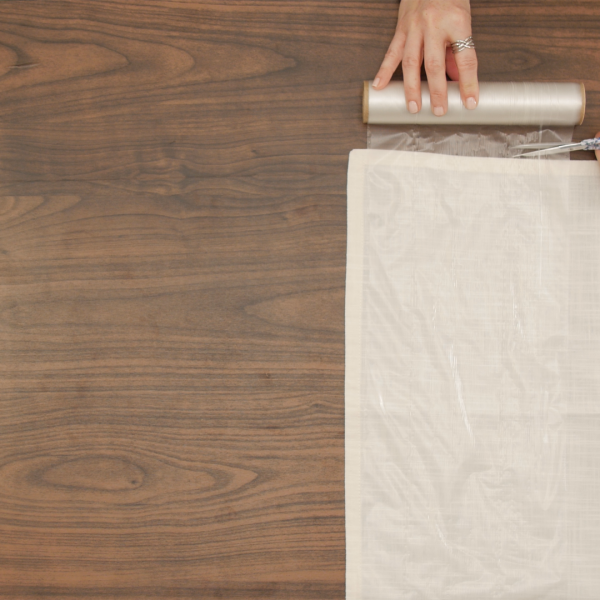
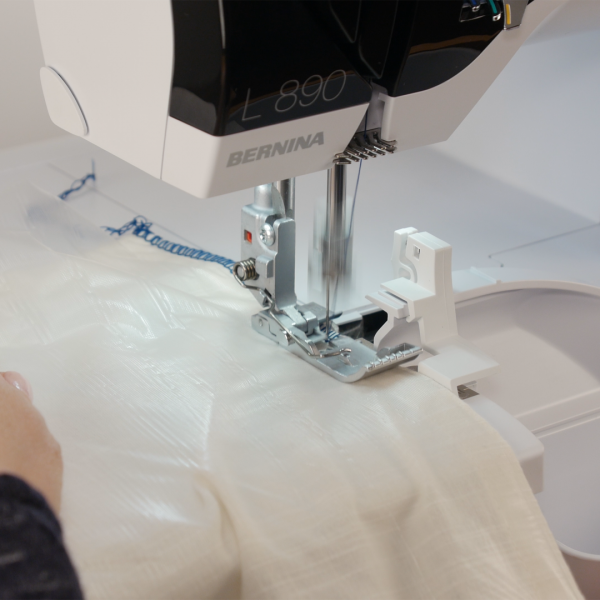
Place the topper on top of the napkin along one side. Starting at the top, place the topper and napkin under the front of the foot with the side aligned with the Right Seam Guide. Notice how my seam guide is lined up with the right mark on the foot.
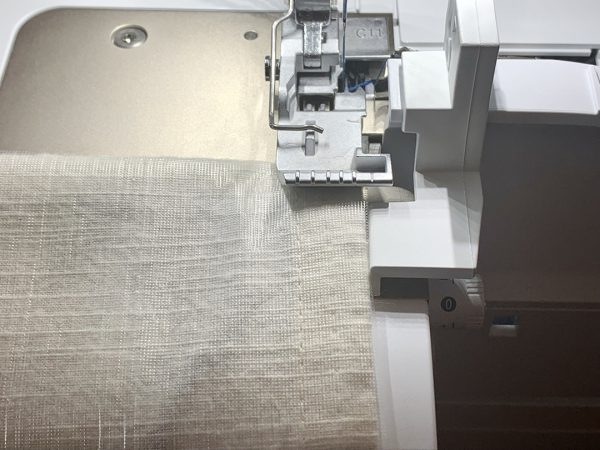
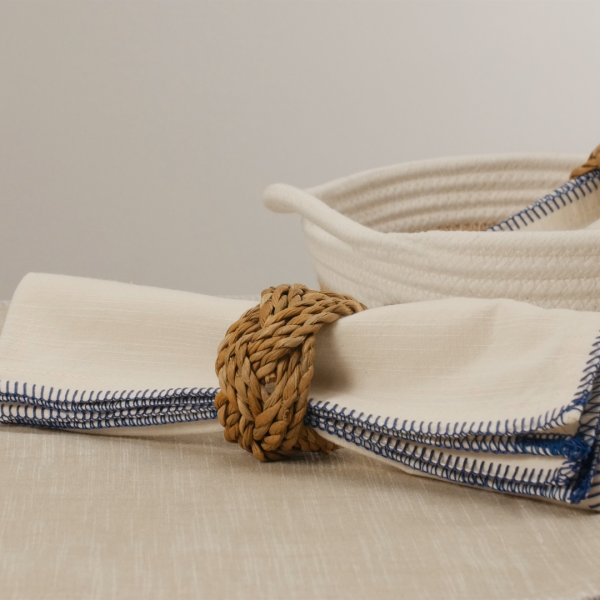
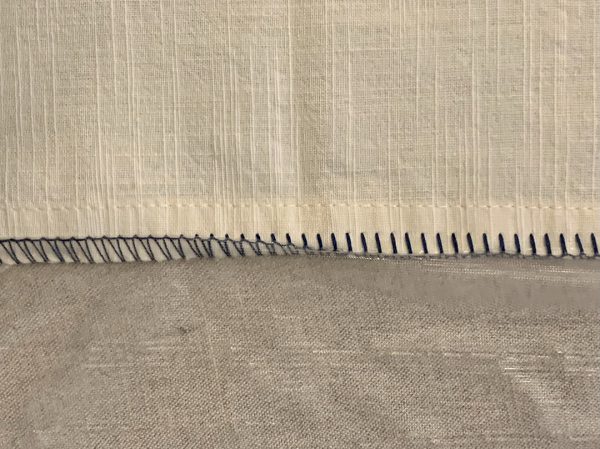
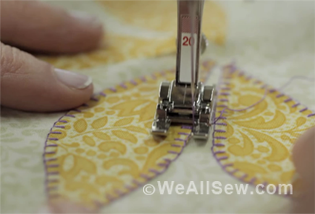
Start your blanket stitch! Keep the napkin edge against the right seam guide and continue until you reach the bottom, then chain off the edge. Do the same for the opposite side.
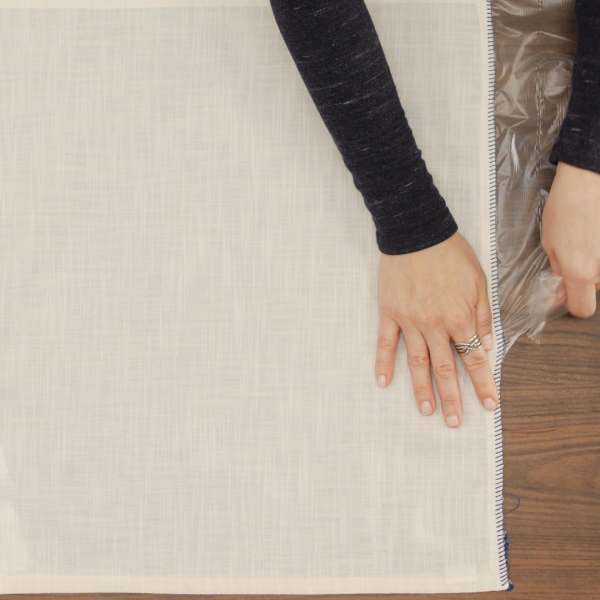
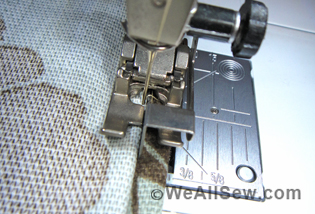
Now, it’s time for the fun part! Lay the napkin on a flat surface. Carefully pull the topper up and over away from the napkin edge. As you do this, notice how the blanket stitch forms a mirror image of itself. We want the spine of the blanket stitch to land on the outside edge of the napkin.
Now remove the topper. Don’t worry if you have little pieces of topper stuck in the stitches. These will dissolve during the first wash but if you want them gone before dinner, dab with water or use tweezers to remove.
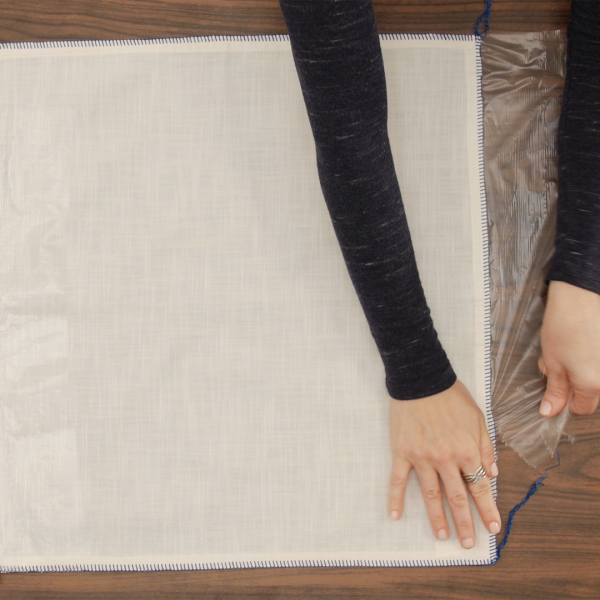
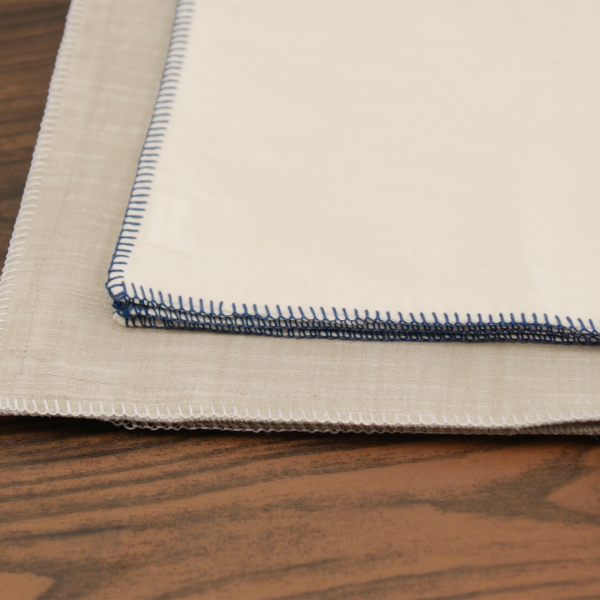
After removing topper on both sides, blanket stitch the other two opposite sides. You can add the tail of the existing stitch into the new stitch to secure.
Again, pull the topper away from the napkin creating a blanket stitch along the outside edge and remove the topper.
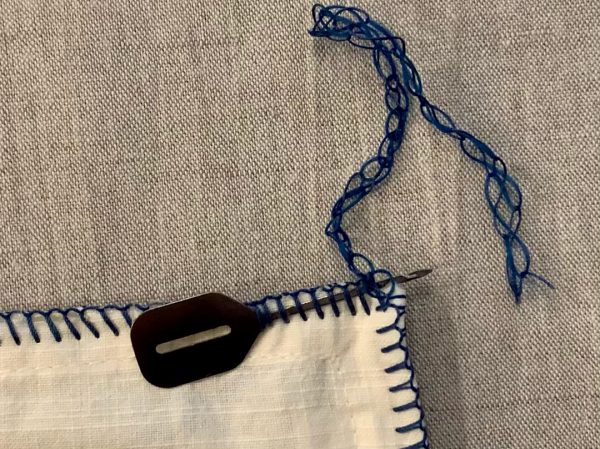
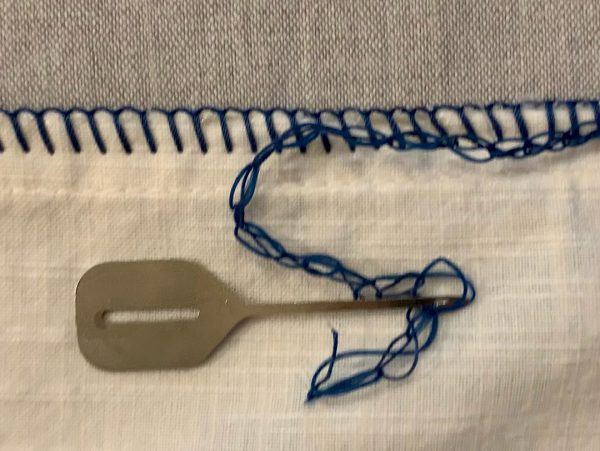
Now use the Hookey Serger Seam Hook to pull the tails through a few stitches to secure.
Add Dritz Fray Check to the thread ends and enjoy your beautiful custom napkins for many meals to come! I’m thinking blanket stitches in seasonal colors are next!
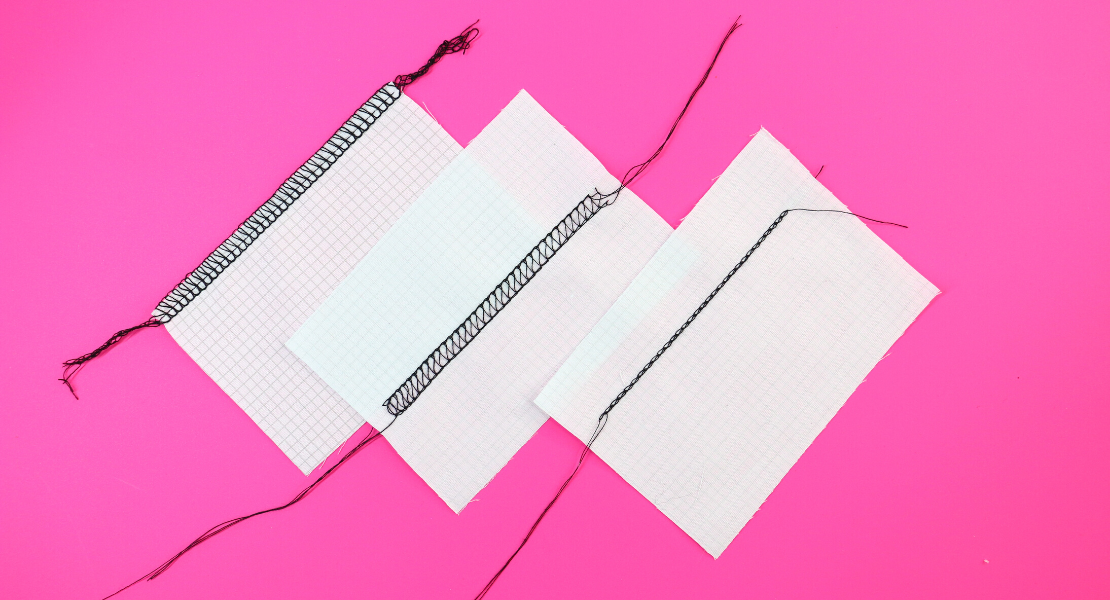
Note: I tested the stitch durability by washing the napkins. I washed them in a gentle cycle and then threw them in the dryer. I gave them a quick press and they were just as beautiful. The stitches held up great!
Used Products

What you might also like


2 comments on “How to Make Blanket Stitch Napkins”
-
-
Yes, the blanket stitch is an option on the sewing machine and the concept will work. That said, the serger can handle the thicker threads more easily which gives a more distinctive “decorative” look. Experiment with different threads & the blanket stitch on your machine. You may find it quite satisfactory.
-
Leave a Reply
You must be logged in to post a comment.

This looks fabulous! Is it possible to accomplish this using a blanket stitch on a Bernina sewing machine (not a serger)?