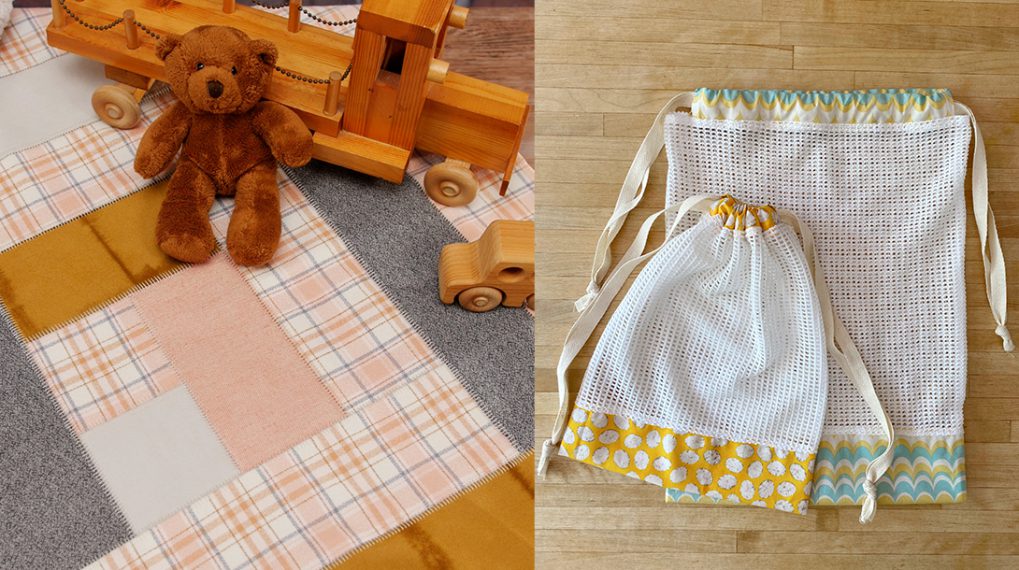
How to Make a Flatlock Throw Blanket
This blanket is a quick and easy project to put together and is inspired by quilting, but made completely with an overlocker! Using a classic log cabin construction and a flatlock stitch, we can create a lightweight and reversible throw—perfect for a light baby blanket or even a wearable scarf. Being able to sew and finish edges at the same time using a serger makes this a really quick and simple project.
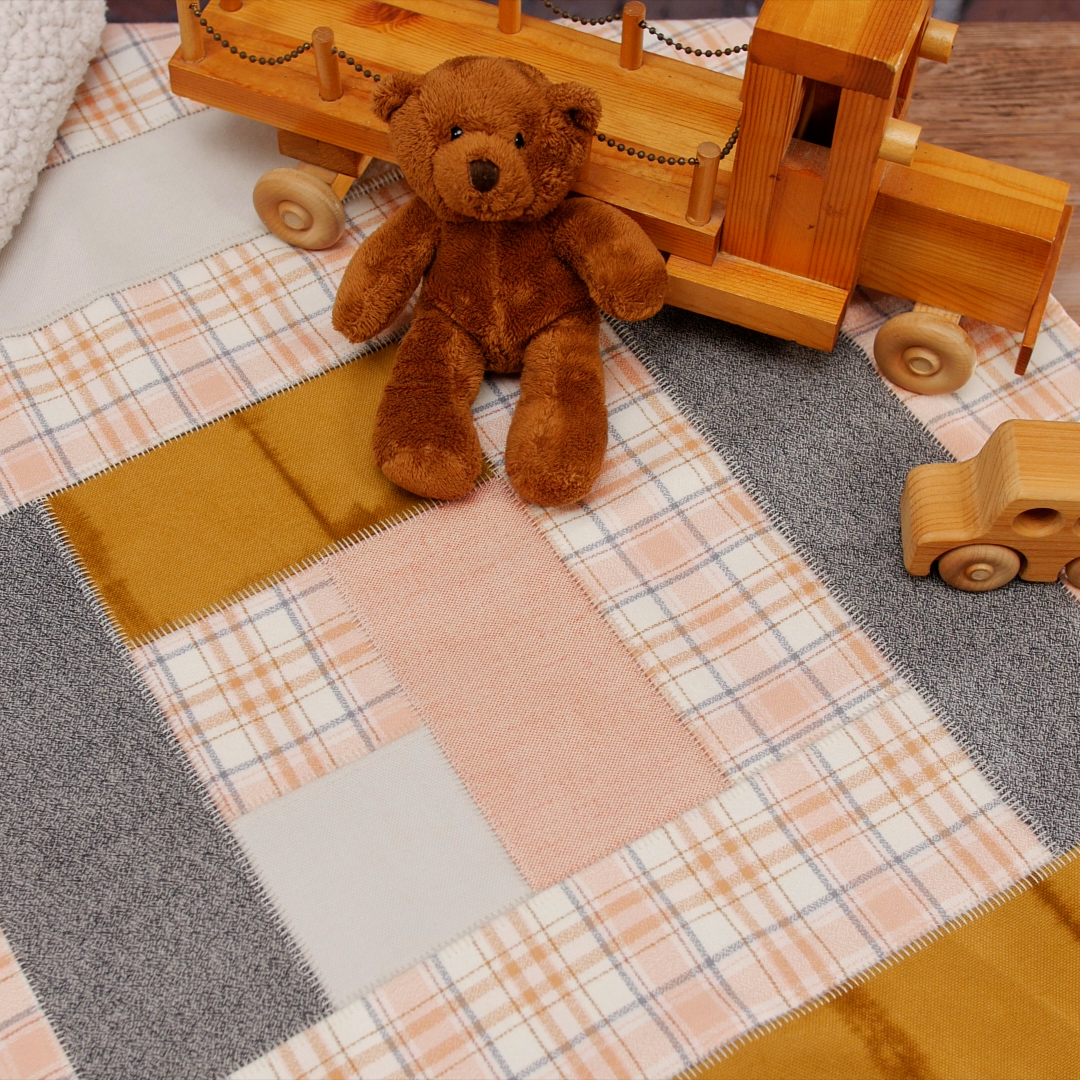
The key here is using fabric that doesn’t have a clear “right” or “wrong” side. Woven cotton flannel is my favorite for this because it is soft, fuzzy, and identical on both sides. You can find lots of solid color flannels as well as woven plaids, textured herringbones, or other geometric designs. If you don’t find the exact color you’re looking for, you can also dye flannel easily (like I did!)
If flannel isn’t the texture you’re looking for, you can also work with other yarn-dyed wovens like shot cotton or linen. My only suggestion is to avoid anything too thick and bulky to keep things stitching smoothly where seams overlap.
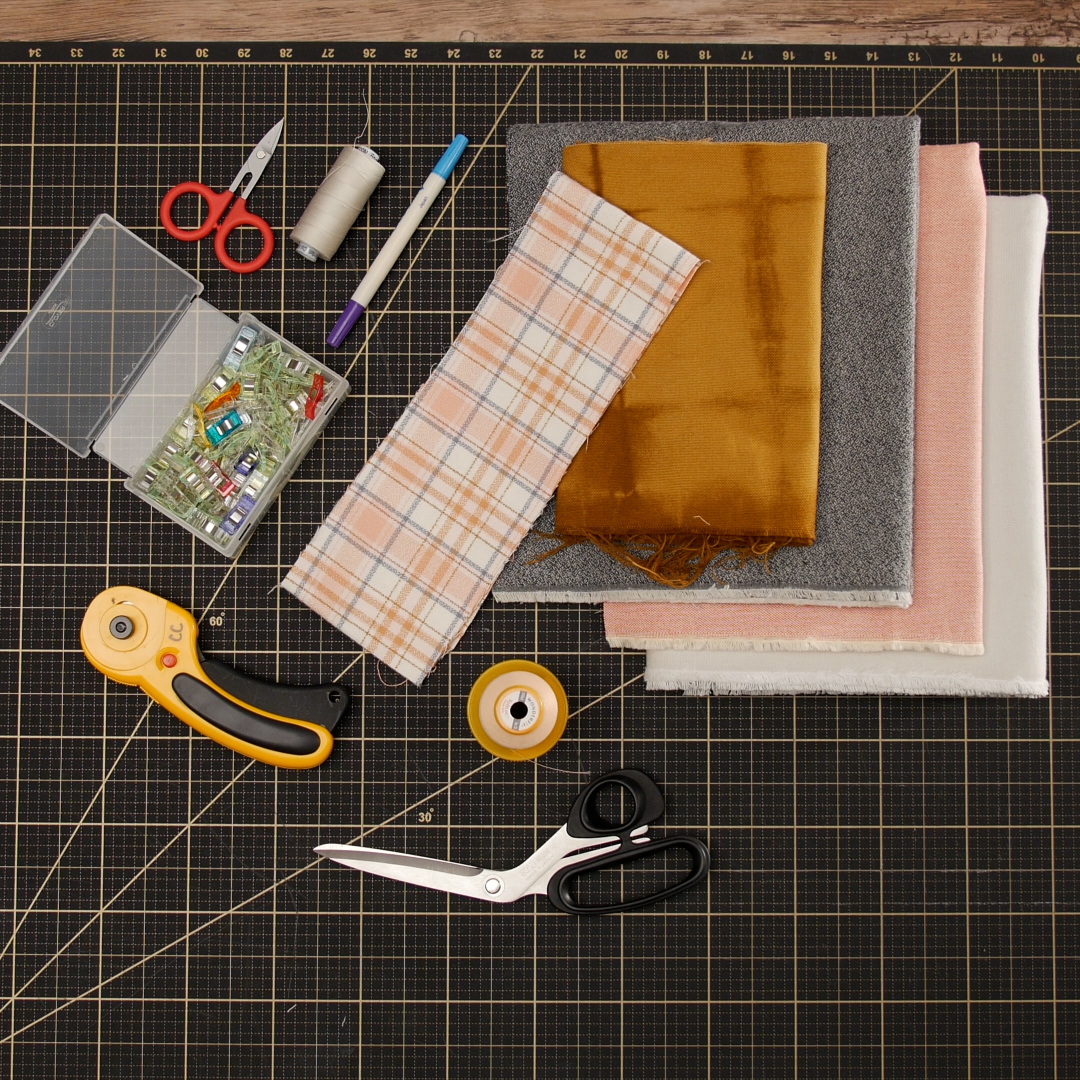
Supplies to Make a Flatlock Fleece Blanket:
- Cotton flannel fabric
- Rotary cutter + cutting mat
- Fabric scissors
- Clover Wonder Clips
- WonderFil SoftLoc thread (two spools)
- Mettler Seracor thread (one spool)
- Fabric marker
- Fray Check
- Large-eyed blunt tapestry needle
- BERNINA L 890 Overlock and Coverstitch Machine
Steps to Make a Flatlock Fleece Blanket:
-
Prepare Fabrics
Typically, I am not one to pre-wash fabric unless it is for garment sewing. Because I’ve chosen flannel for this project, I do want to pre-wash and I recommend doing so for a few reasons. Flannel tends to shrink quite a bit more than a typical quilting weight cotton, and if you’ve chosen several flannels that vary at all in weight, they will shrink at different rates. To create the smoothest seams and prevent any warping down the road, wash and dry your yardage under the same settings that you will wash the finished blanket. Then, press all of your yardage with a dry iron.
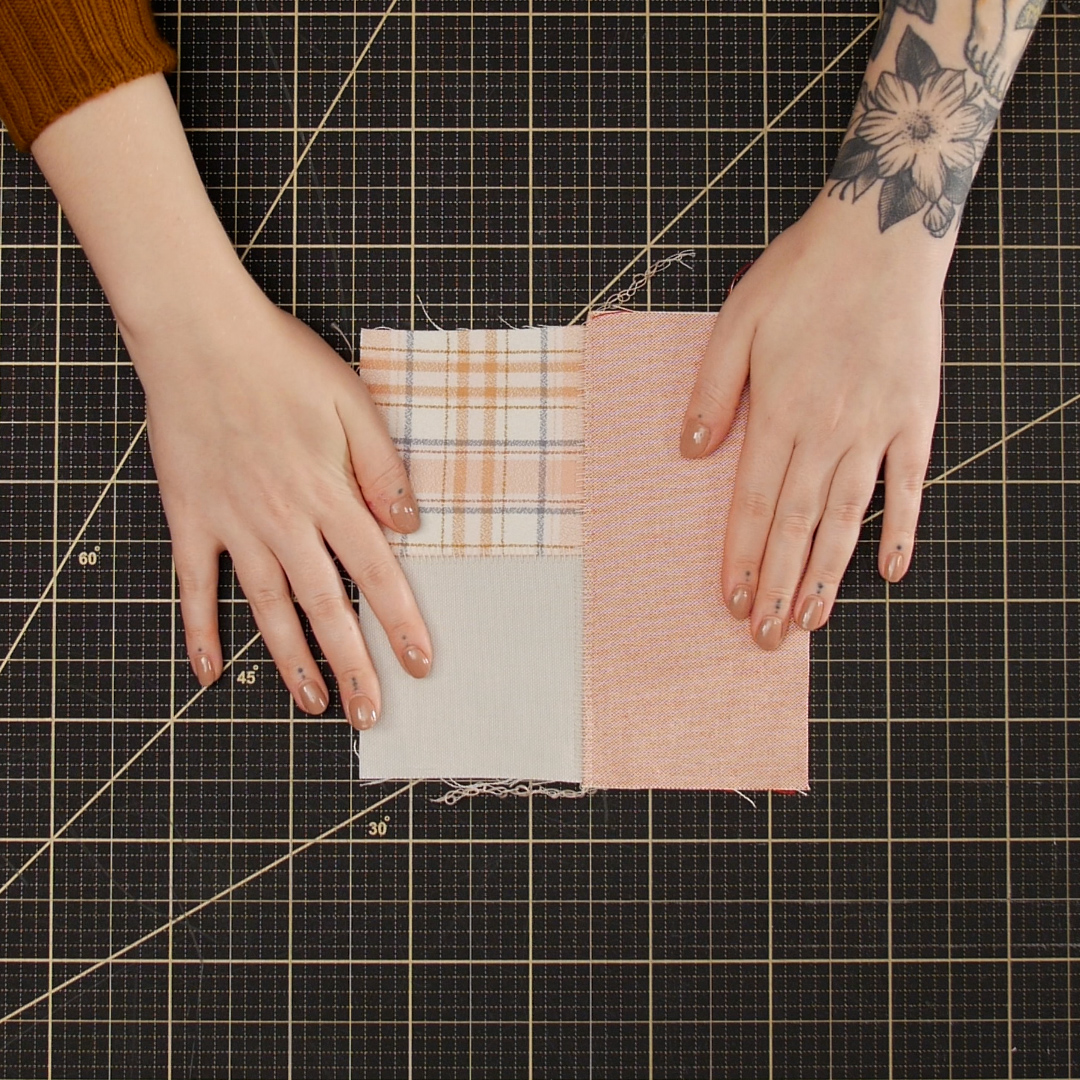
Now, cut your yardage into strips 4” x width of fabric. Decide which fabric will be the center of your log cabin and which fabric the first piece “in the round” and cut one 4” x 4” square from each fabric.
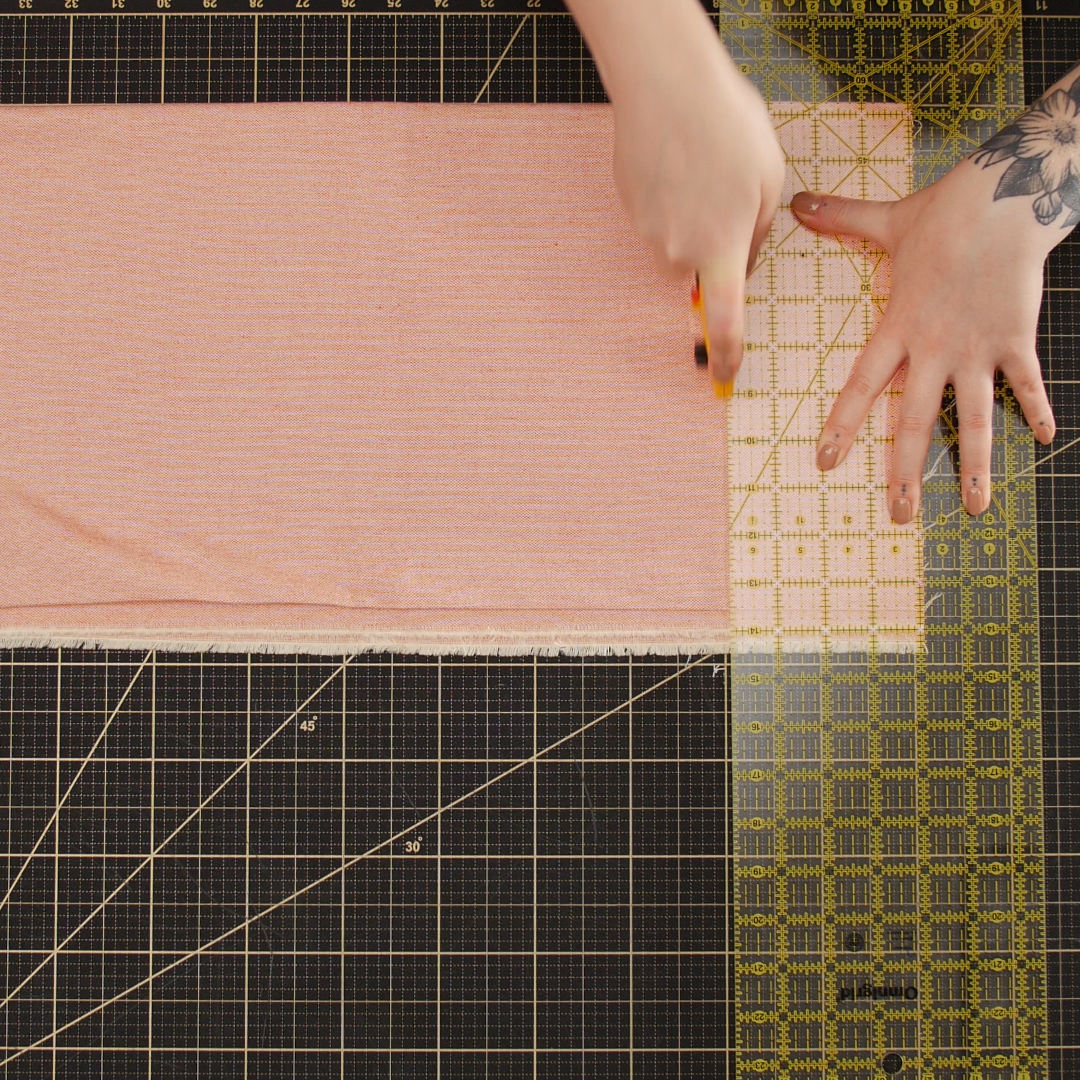
Place the squares right sides together (if applicable) and use Clover Wonder Clips to pin down one side of the squares.

-
Setup 2-Thread Flatlock Stitch
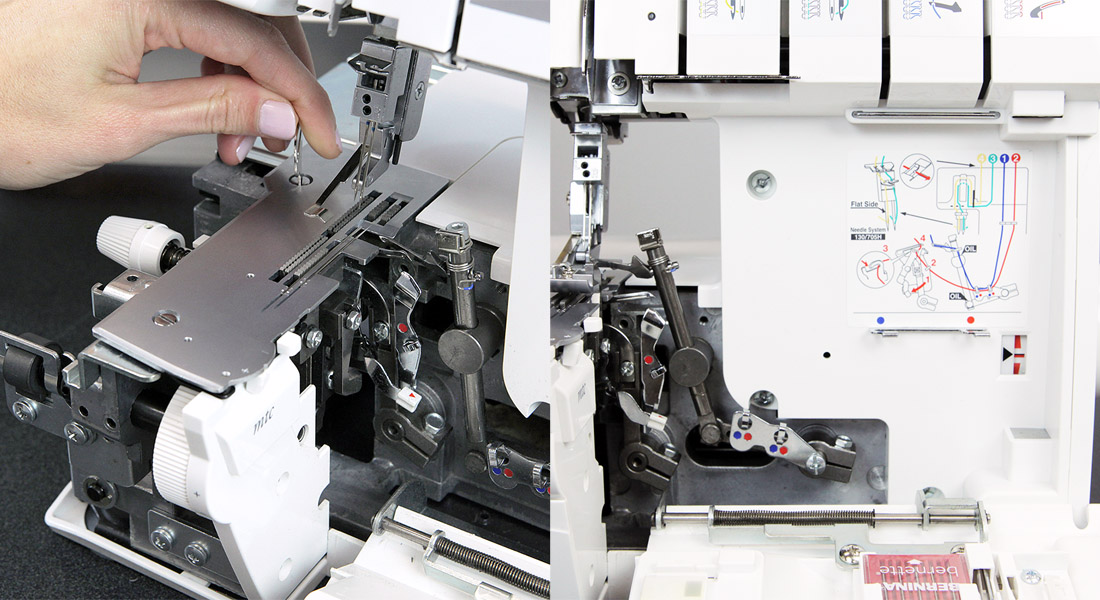
Now we need to move to the machine. First, we need to set up a Flatlock Stitch. Either a 2-thread or 3-thread version of this stitch can be used for this project. I’ve opted for a 2-thread version for my blanket because, without the additional upper looper thread in the mix, the stitch is less likely to come undone when sewing over the seam to join the next piece.
On the L 890, select the wide 2-Thread Flatlock Stitch. You can use either Guided or Expert Mode on the machine for this depending on your comfort level. Let’s take a look at the process through Guided Mode.
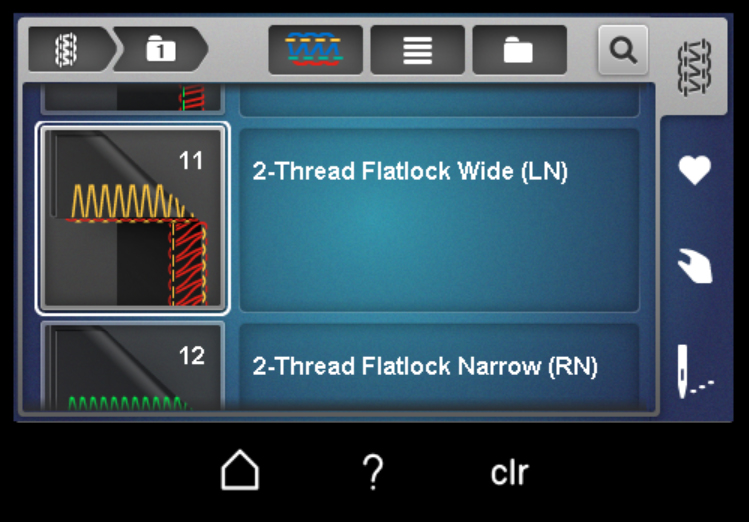
As always, follow each step of the Wizard to get your machine set up for this stitch. You will want one needle inserted in the LN (Left Needle) position for a wide flatlock stitch.
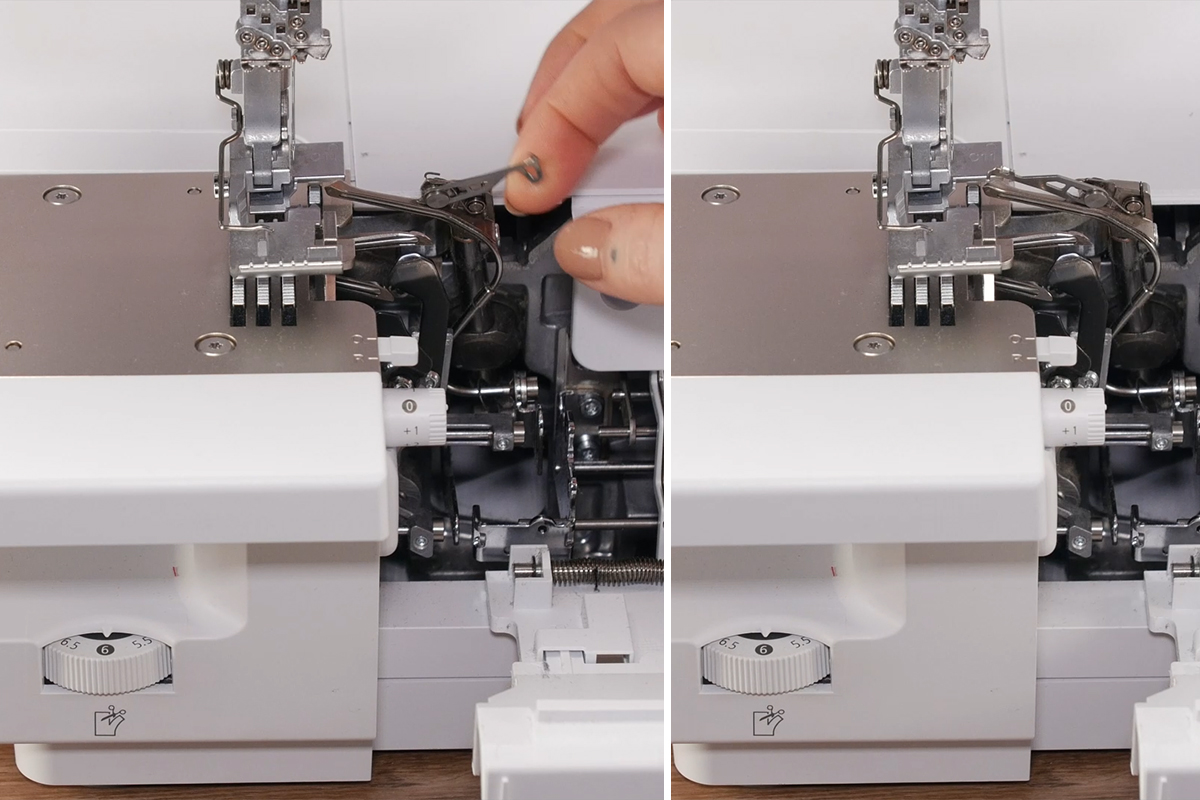
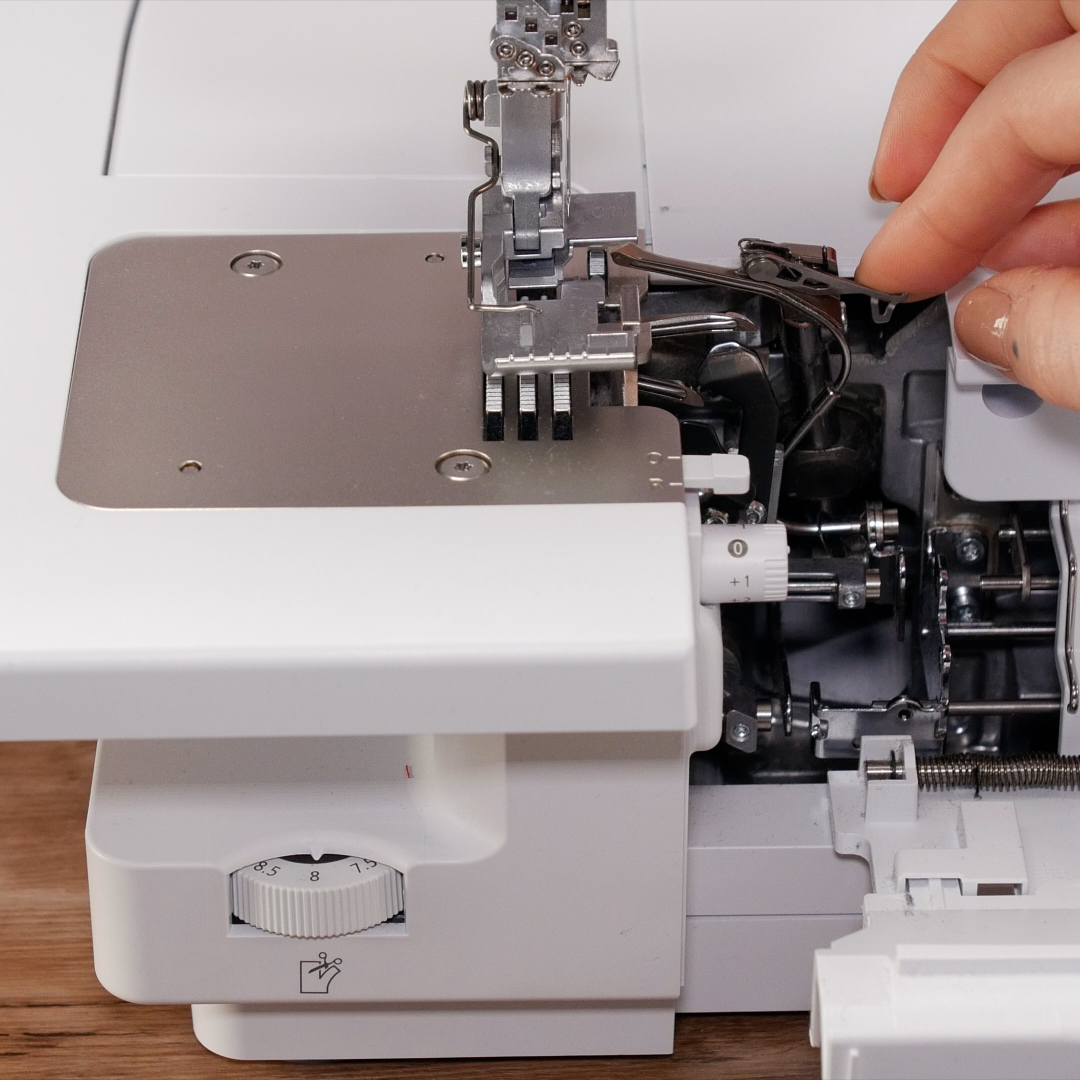
The machine will ask you to engage the Upper Looper Converter, a special attachment used for any 2-Thread Stitch. On most overlockers, you would know this as a tiny metal piece that slides into the Upper Looper, which tucks into the looper eye.
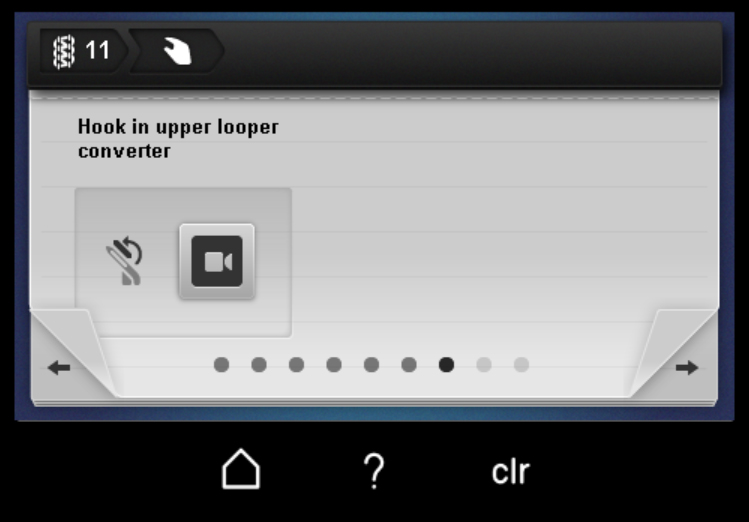
However, on the L 8 Series Overlockers, it’s conveniently attached to the upper looper and just swings into place on a hinge.
Thread the needle path with a high-quality polyester serger thread, like Mettler Seracor. Thread the looper with a fluffy texturized thread, like WonderFil SoftLoc.
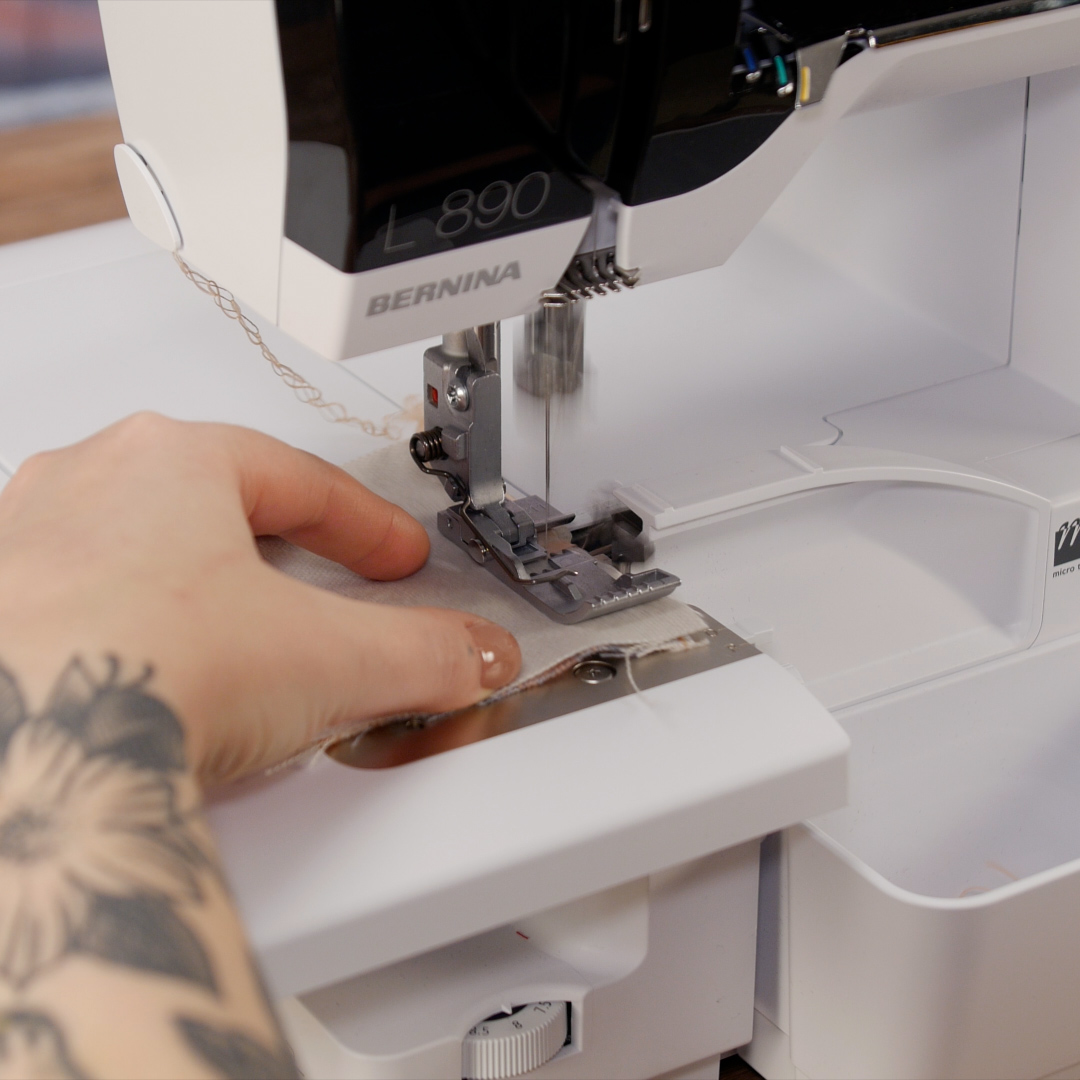
Once the machine is threaded, engage the foot control to begin sewing and chain off with the stitch to make sure it is forming properly. Then, test the stitch on two layers of scrap fabric.
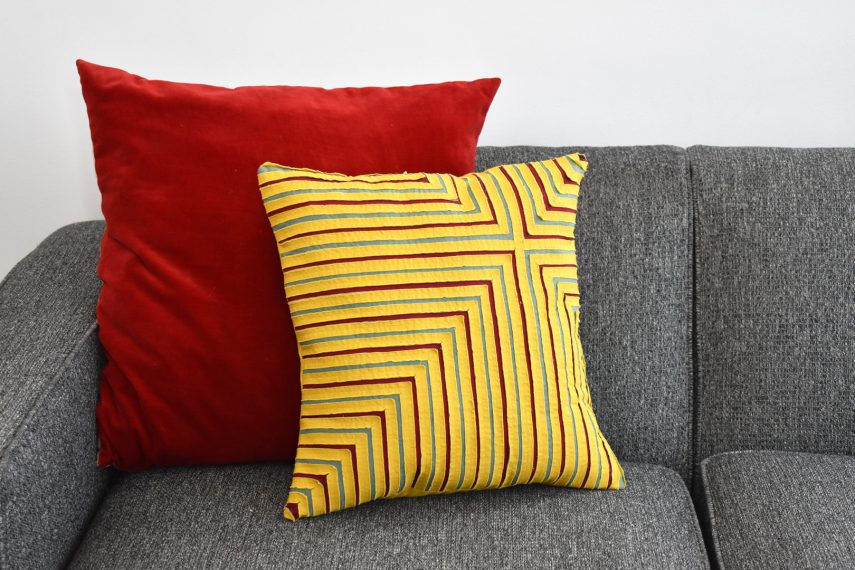
Pull open the two layers to see the flatlock stitch open. The fabric encased in the seam allowances should lay flat on top of one another and the seam should be smooth (not tunneled or bunching.) If your flatlock does not open up neatly, try increasing the Micro Thread Control (mtc) to create a little bit more space in the seam allowance.

-
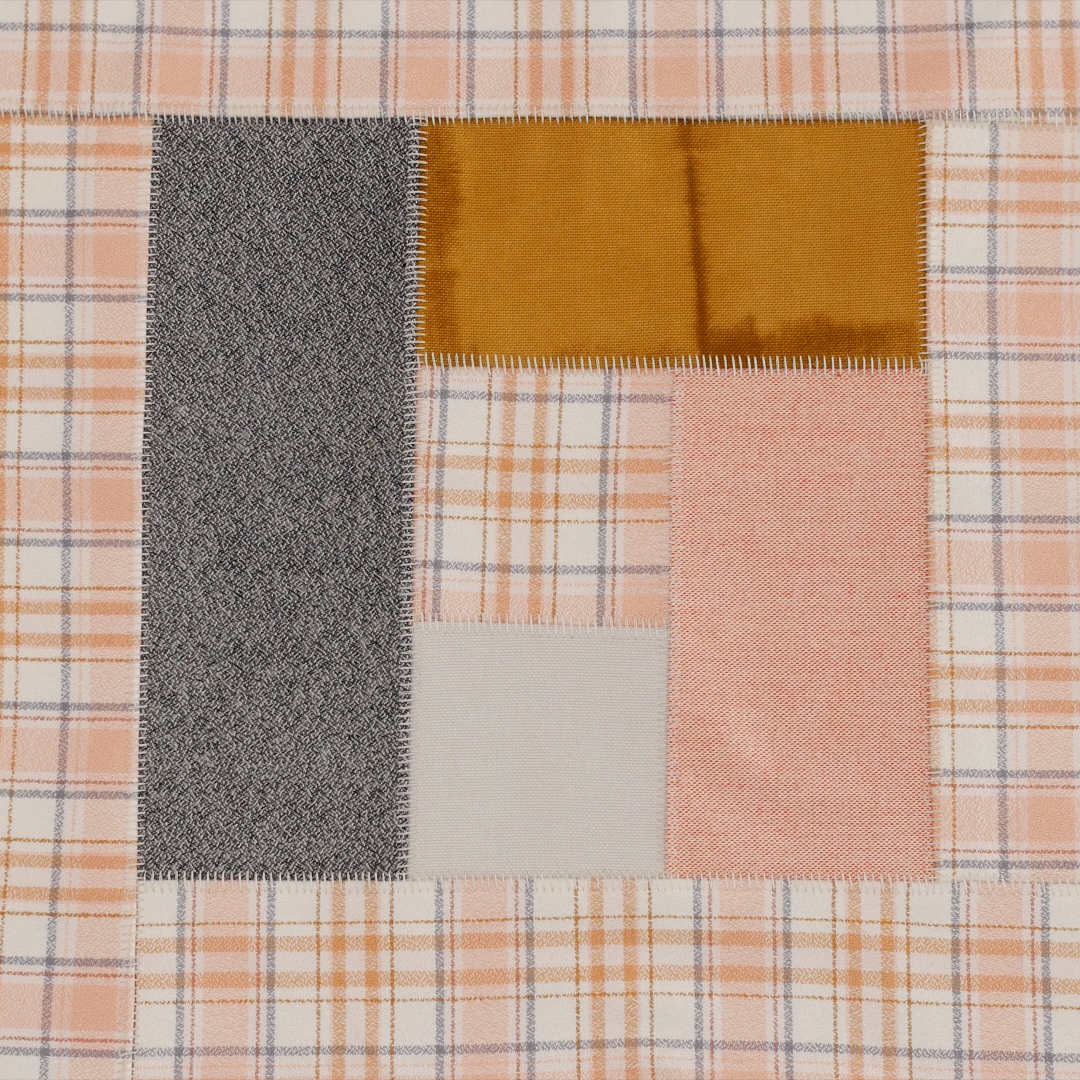
Sew Log Cabin
With our stitch set, we can begin constructing the log cabin. A log cabin block is built as a medallion, adding one side at a time from the center out. The beauty of this block, especially sewn on an overlocker, is that it can be a bit improvisational and you can work in more of a flow or rhythm as you built the block.
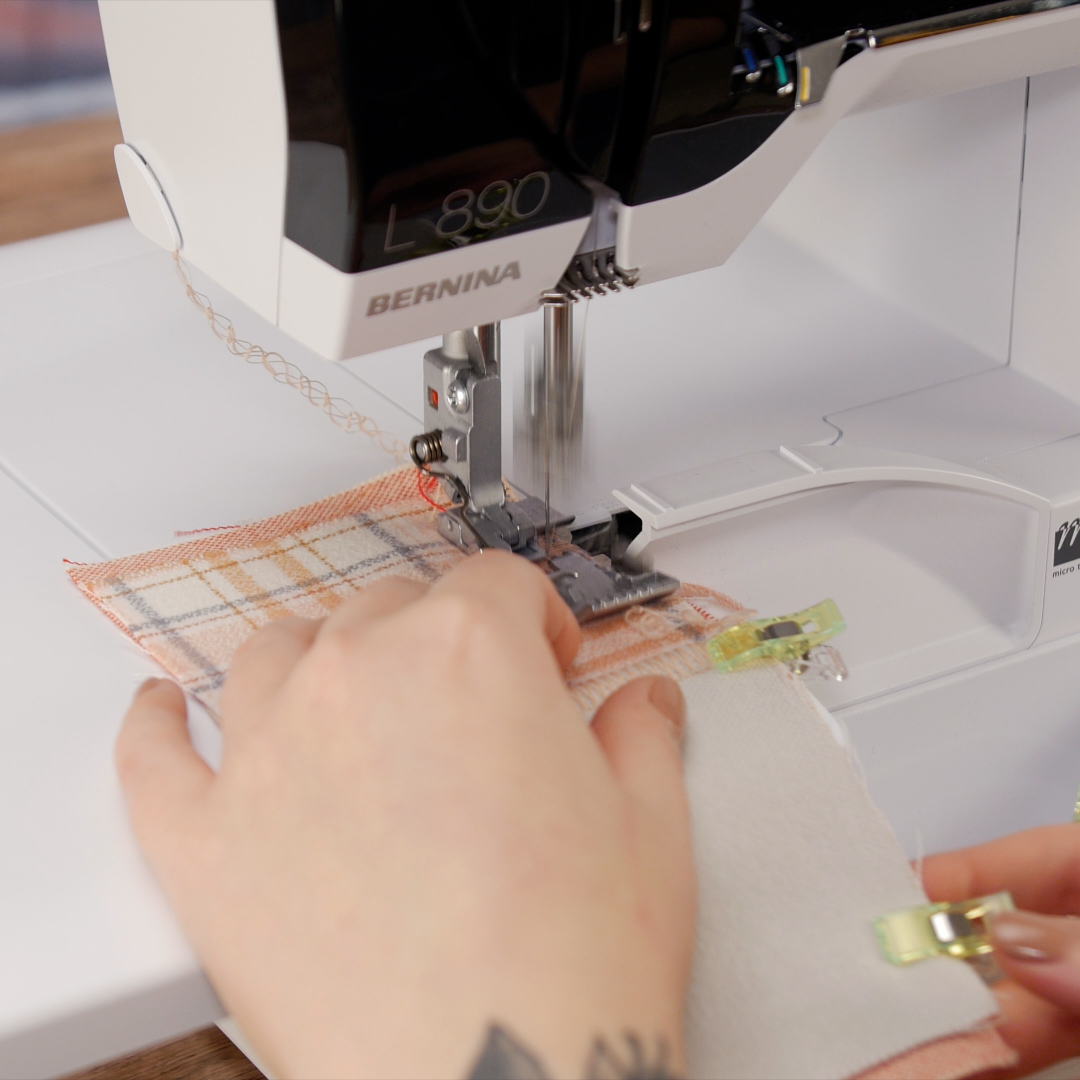
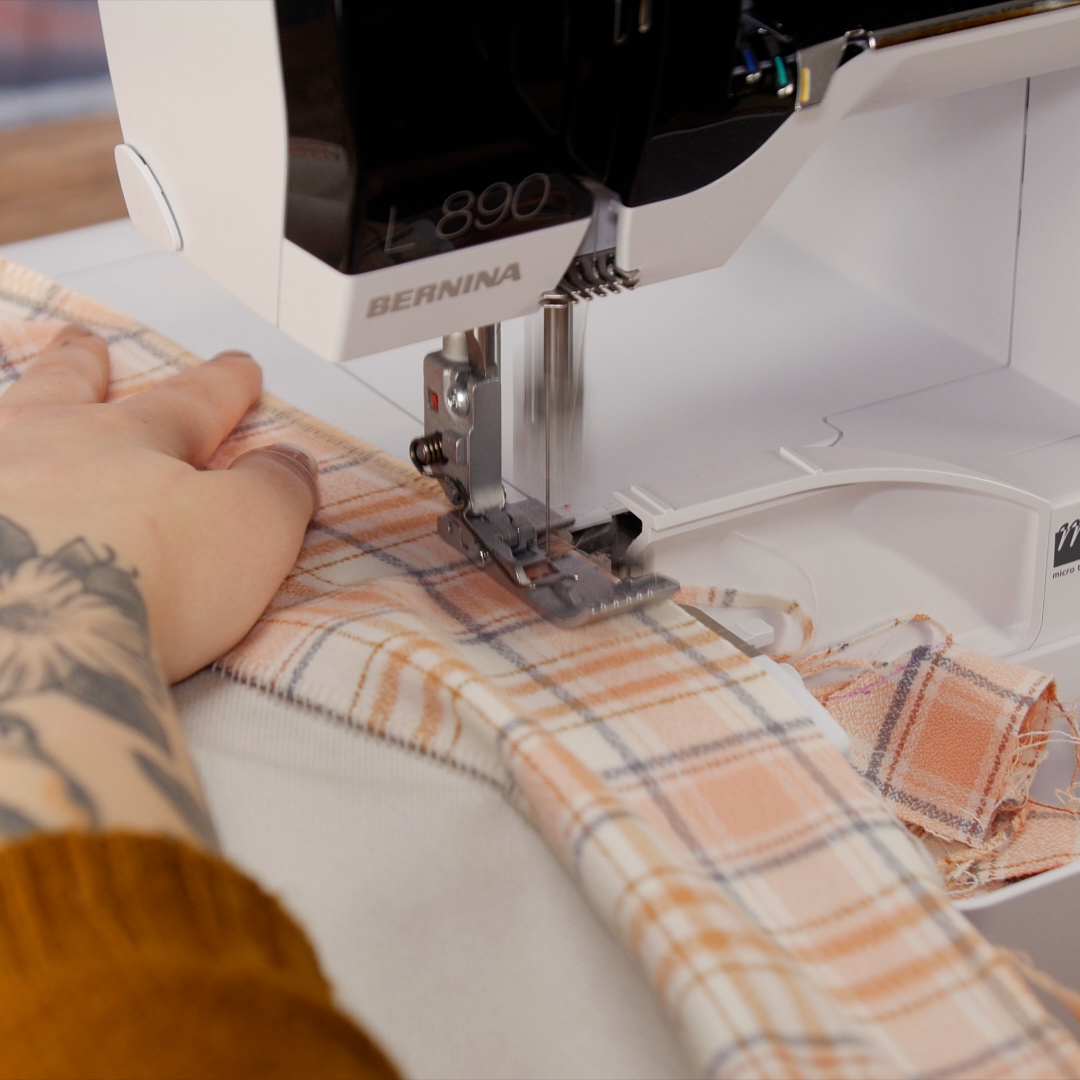
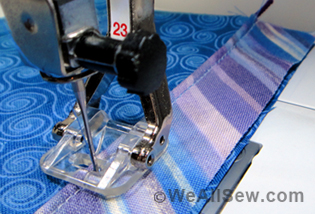
So begin by sewing down the Wonder Clipped edge with the flatlock stitch, just barely trimming the edge of the fabric as you sew. When you reach the end, chain off and cut your threads.
Then, give the two pieces a firm tug to pull the flatlock open. The layers in the seam allowance should lay on top of each other neatly, but you can use a stiletto or fine tweezers to help this process if you need to.

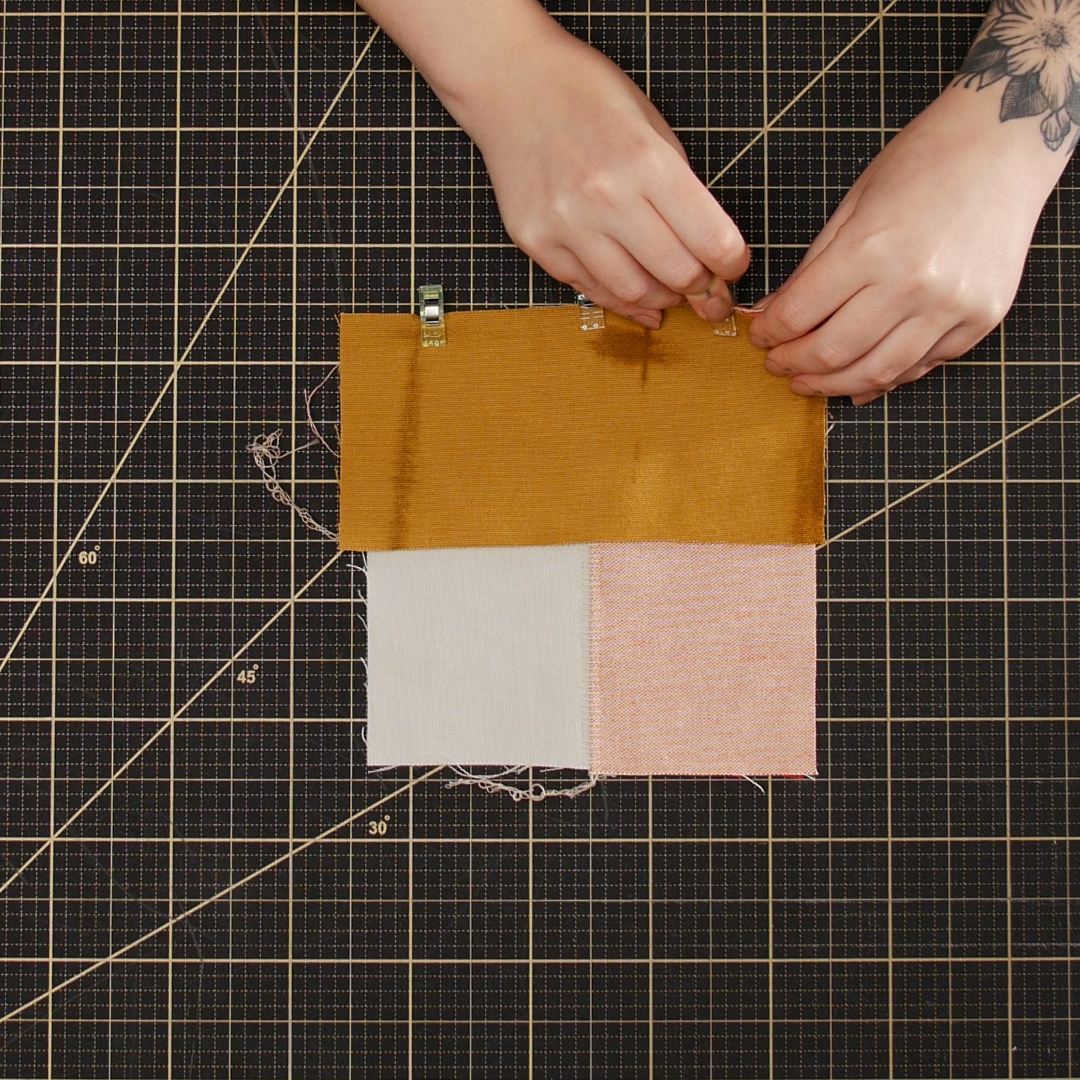
Now lay your sewn piece right side up with the center square on the left and the first “row” on the left. Align the next strip of fabric to be sewn perpendicular to your first seam along the bottom of the block. Trim the strip to fit with either fabric scissors or a rotary cutter. Use Wonder Clips to pin down the edge.

When you take this to the machine, sew with the seamed fabric on top. Begin sewing down this edge. As you stitch over your first seam, sew slowly to make sure that it is caught securely in the new seam.
Again, tug the two layers apart to open the flatlock stitch. Use a clear acrylic ruler and rotary cutter to square up the edges of the newest strip to the base block.
With the right side of the block facing up and the newest strip now positioned at the right, align the next fabric strip to the “top” edge of the block and trim the length to roughly fit the block. Wonder Clip this raw edge and repeat the process to sew with the flatlock stitch and open up.
Continue this process by adding strips around the log cabin in a clockwise pattern, being sure to square up after each addition. You can complete up to six rounds of 4” strips, keeping the maximum size at or under the measurement of your width of fabric. Because this blanket is only one layer, and thus reversible, you want each of your fabric strips to be one continuous piece and not a length that is pieced together.

I ended up sewing four complete “rounds” to create a small baby blanket, about 34” square.
-
Trace Corners
Now we need to finish the raw edge of the blanket. Rounding the corners allows us to sew the perimeter in one smooth pass, rather than starting and stopping to turn 90-degree corners (and also leaving thread tails at each corner.)
Determine the radius of the curve you want for your corners and find an object (like a jar, dinner plate, or another round item) or a paper template to trace for your curve. If you’re intimidated at all by sewing curves on an overlocker, opt for a wider curve.
Trace the curved edge directly onto the blanket corners using a fabric marker.

-
Finish Edge
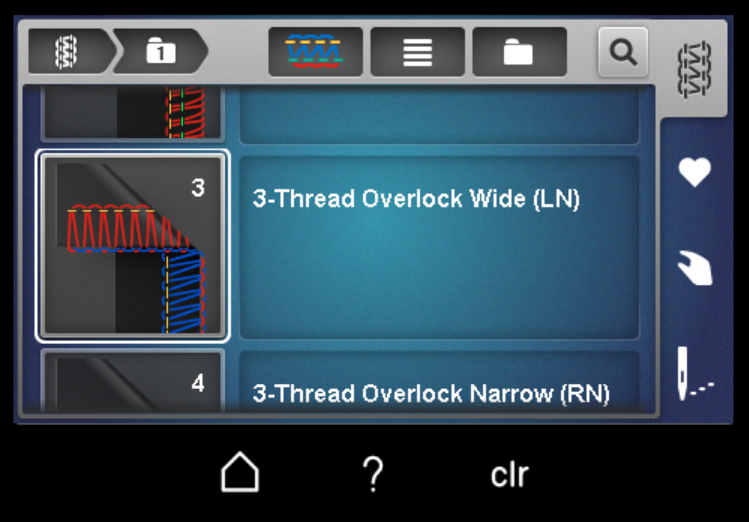
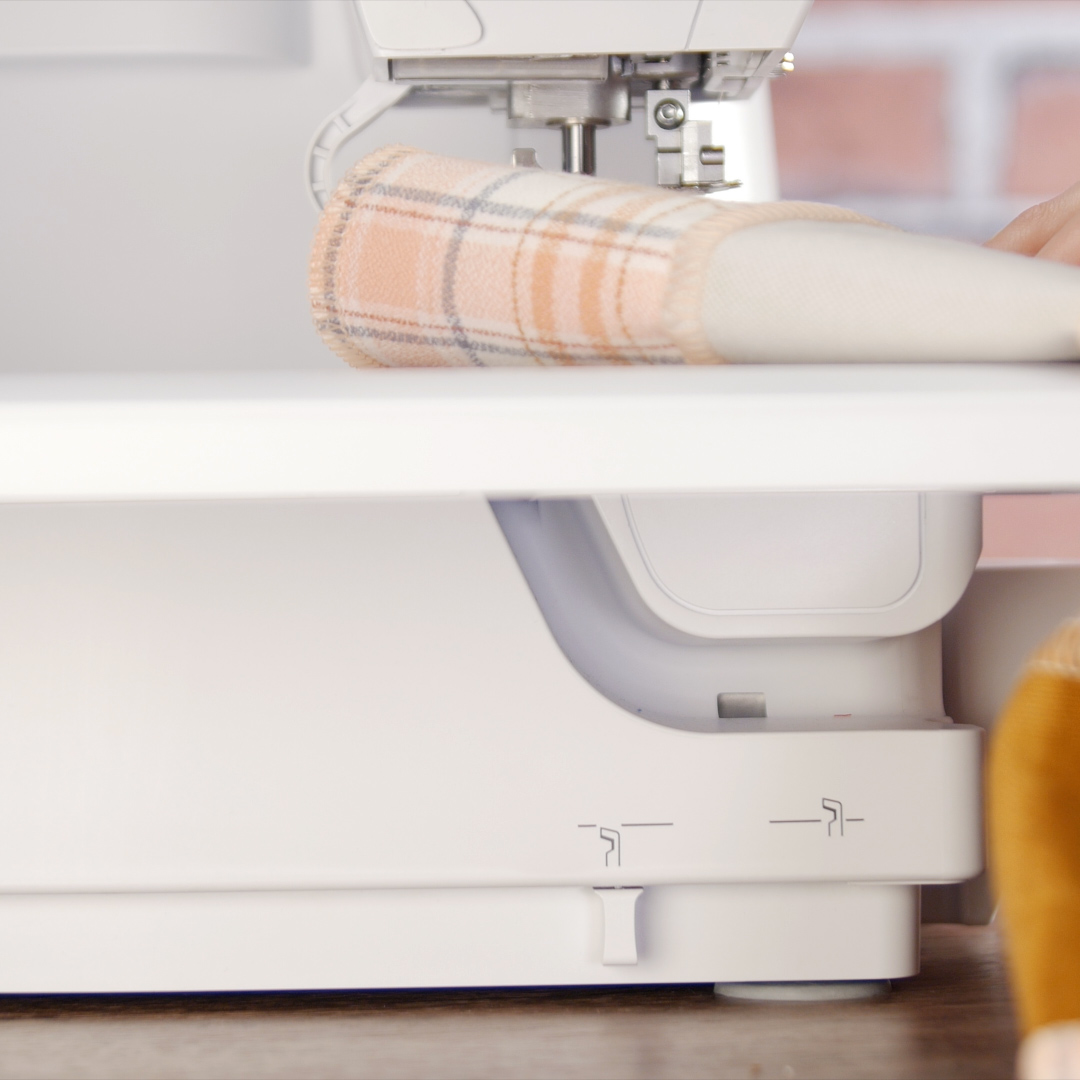
Back at the L 890, go into the stitch selection menu and select a wide 3-Thread Overlock Stitch.
Follow the wizard to set the machine for this stitch. Very little will have to change here—the main things will be disengaging the Upper Looper Converter and threading that Upper Looper. I suggest using the texturized SoftLoc thread in both loopers here.
Begin serging around the perimeter of the blanket, starting your stitch along a straight edge (not on the curved corner). As you approach the first corner, use your left hand to hold the fabric stable alongside the presser foot and use your right hand to pull the raw edge to fall in a straight line in front of the presser foot and cutting blade.
Because of the simultaneous cutting and sewing action on an overlocker, pulling this edge straight is important to creating a flat edge where our looper threads connect neatly with the edge of the fabric. If you try to turn and pivot the fabric around the curve like you would on a standard sewing machine, you might end up not trimming the edge and/or leaving looper threads hanging loosely off the edge.
As you reach your starting point, slow down your stitching. Serge right up until the beginning thread chain gets trimmed by the knife then stop with the needle down in the fabric—you can use the Needle Stop Down function on the machine screen or simply use the Foot Control Back-Kick to drop the needle.
Reach to the lower left side of the machine and locate the Knife On/Off lever. Push this switch all the way forward until you feel it lock in place to lower the cutting knife.
With the knife lowered, slowly stitch to finish the edge and overlap with the beginning of your seam by about 1”. Pivot the fabric and chain off the edge.
Use a large tapestry needle to weave in the thread tail at the end of your seam. Then trim and secure with a bit of a seam sealant such as Fray Check.
Your flatlock blanket is all finished!
Used Products

What you might also like


2 comments on “How to Make a Flatlock Throw Blanket”
-
-
I have been afraid to try the flatlock stitch so this was a helpful tutorial. I would like to see if the flatlock could be used for curtain construction or in pieces denim panels on a jean pant leg to repair holes. Thank you.
Leave a Reply
You must be logged in to post a comment.

I am interested in doing this on my L860
Again I have several baby blankets Ito make. I have yet to make a blanket.
This year I have all the equipment so I’m diving in.