How to Embellish a Table Runner
Do you often find a home décor item you really like, but there’s something missing? Basic or plain home décor items are a great way to make quick, unique projects and a great way to experiment with new sewing techniques. I bought a table runner from a popular home dec store in my area that I knew would be a great base for what I had in mind. I really liked the table runner but I wanted to add some long ruffles and decorative stitching to make it my own and make it special. Keep scrolling to see how I turned this simple table runner into a custom piece that works for my home.
Sewing Machine Set-Up
- BERNINA 790 PLUS
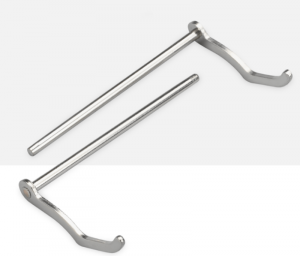
- Zigzag Hemmer Foot #63 or Straight Stitch Hemmer Foot #64
- Open Embroidery Foot #20/20C/20D
One of the following
- Clear Embroidery Foot #39/39C
- Ruffler #86
Optional
Materials to Embellish a Table Runner
- Store-bought table runner
- 2/3 yard Robert Kaufman Essex or other coordinating fabric
- Schmetz Microtex Needle 80
- Schmetz Topstitch Needle 100 or 110
- Mettler Silk Finish Cotton Thread 50 wt – coordinating color
- WonderFil Spagetti and/or Mettler Cordonnet thread—coordinating color(s)
- Rotary Cutter and Ruler
- Tweezers
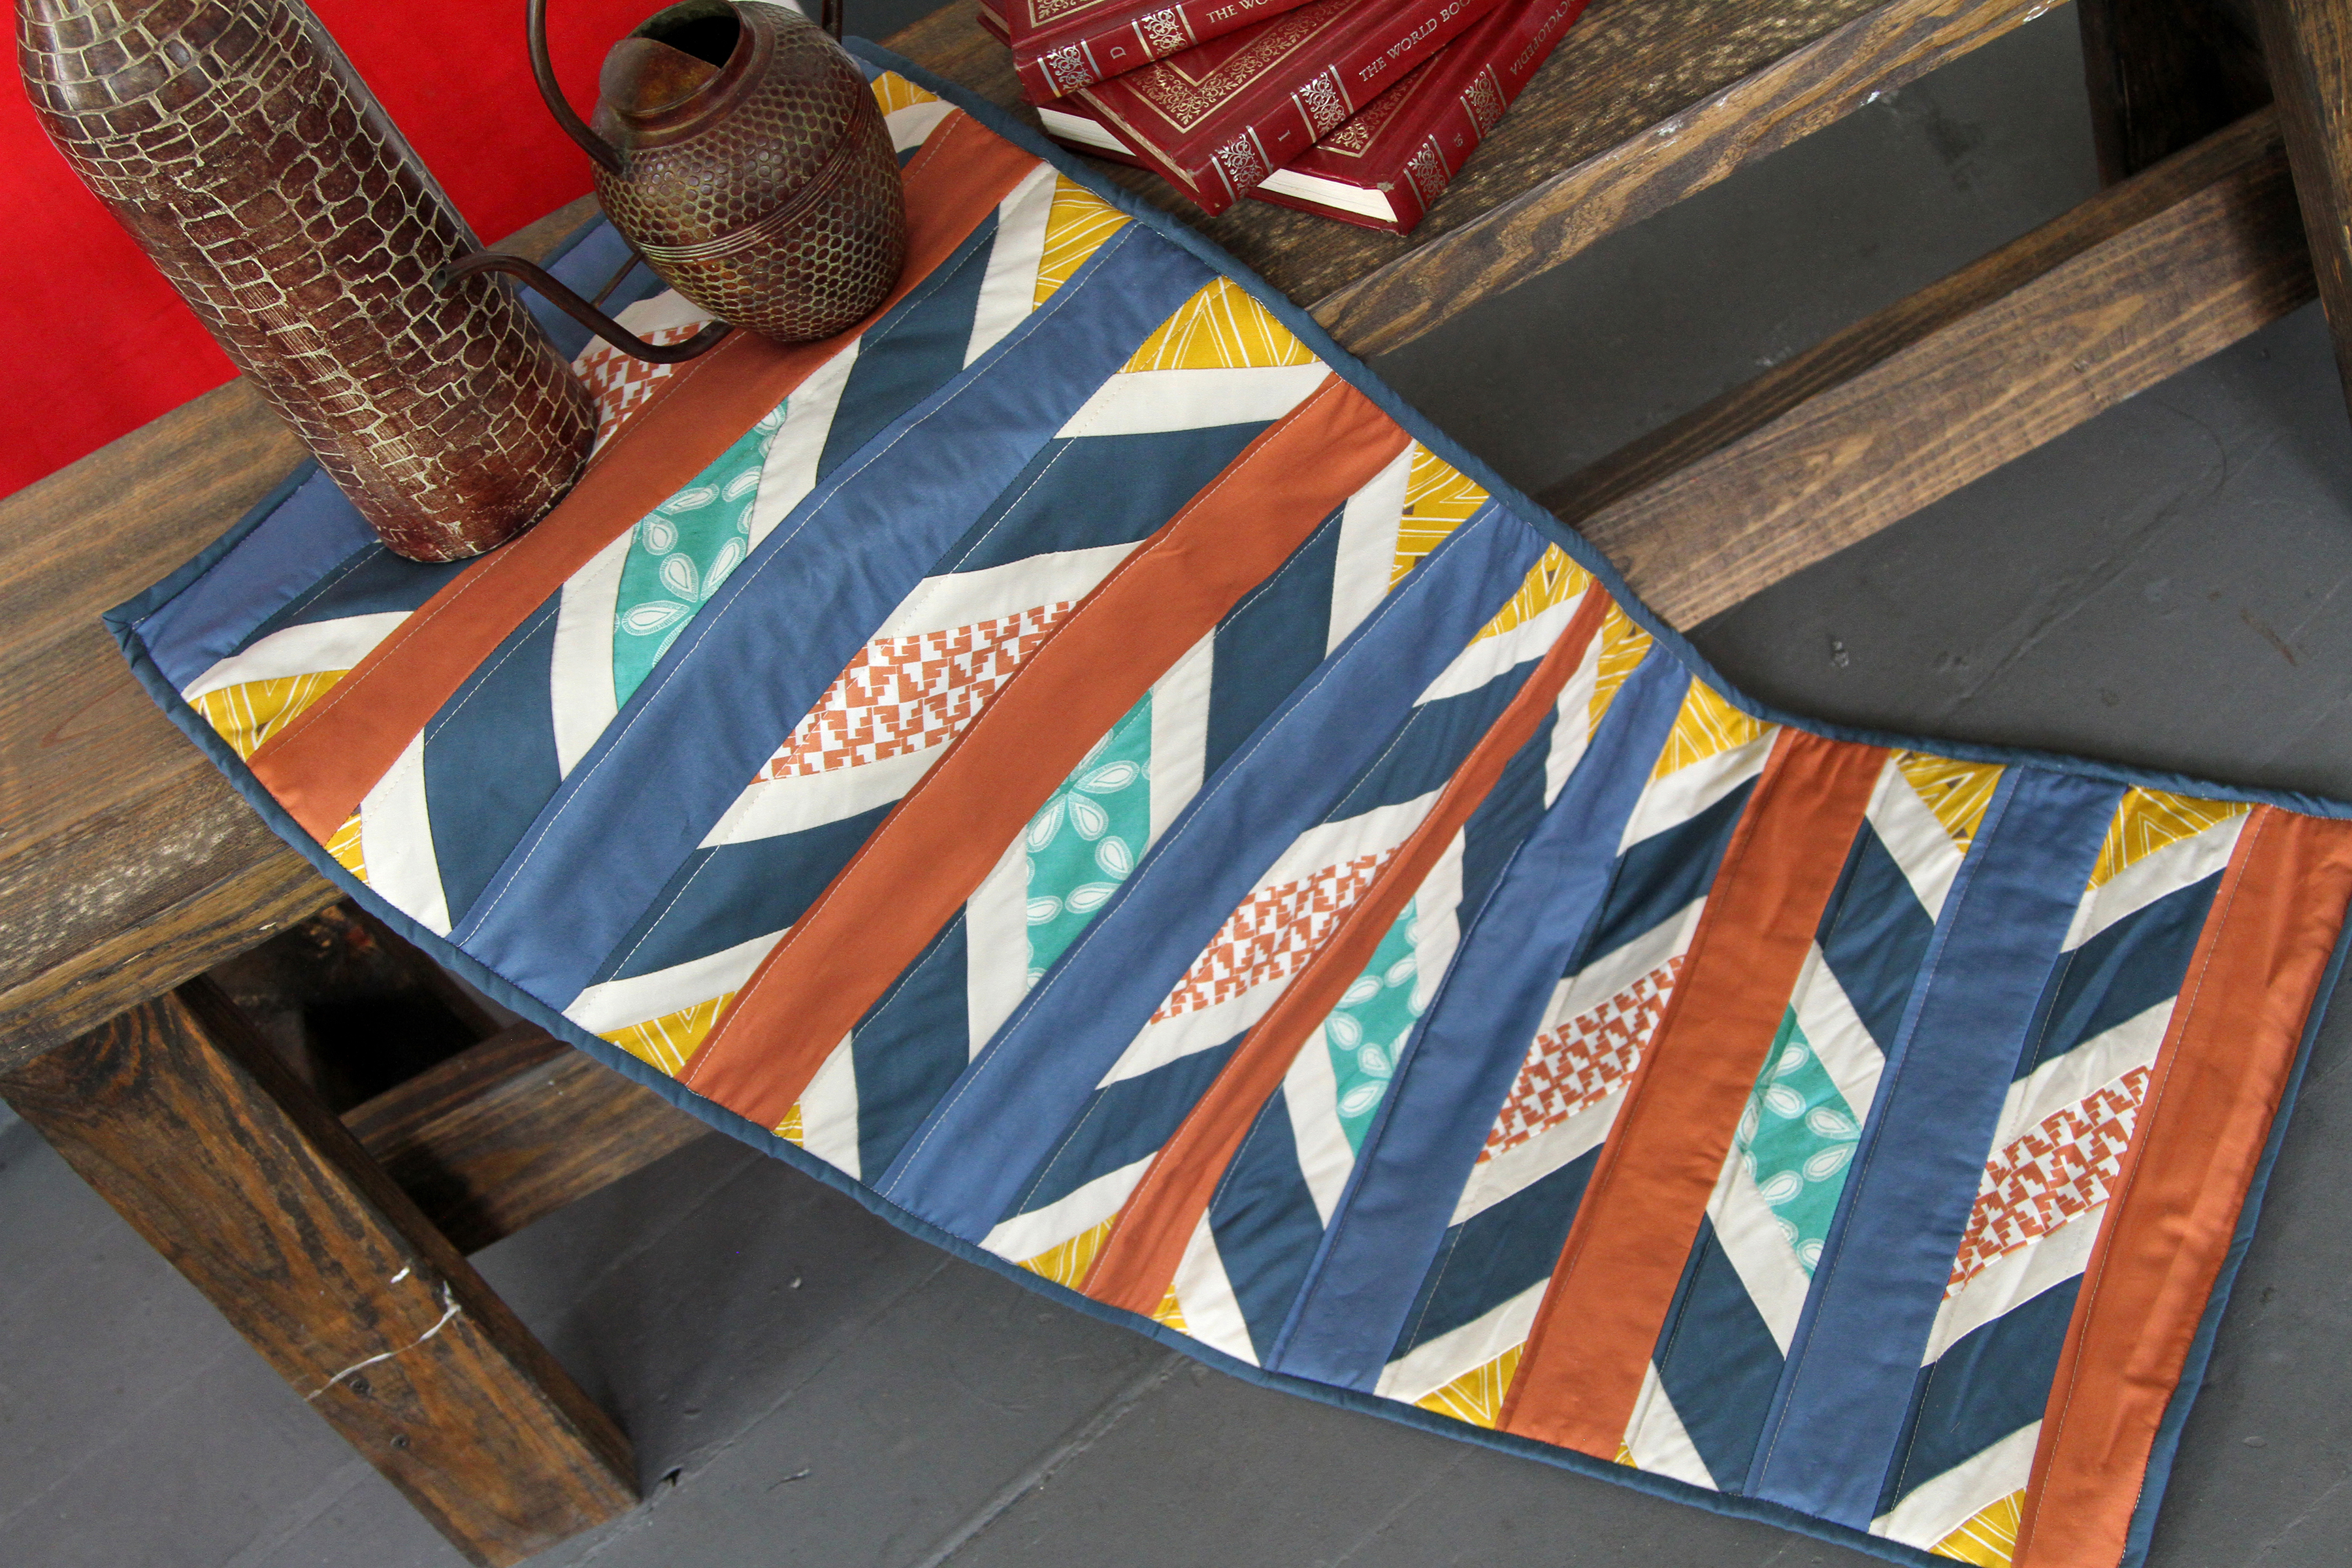
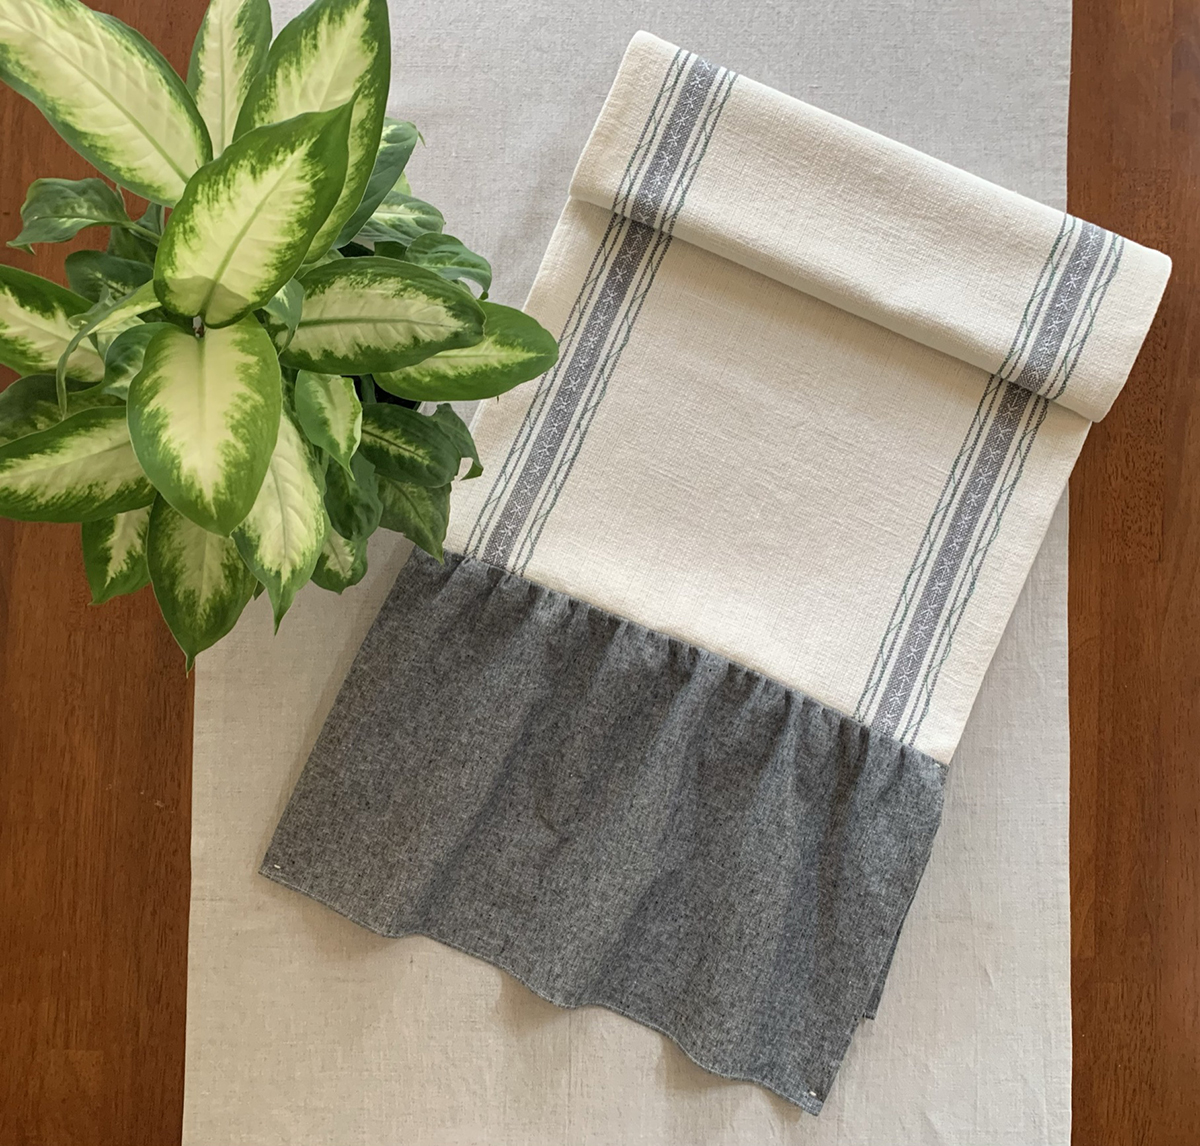
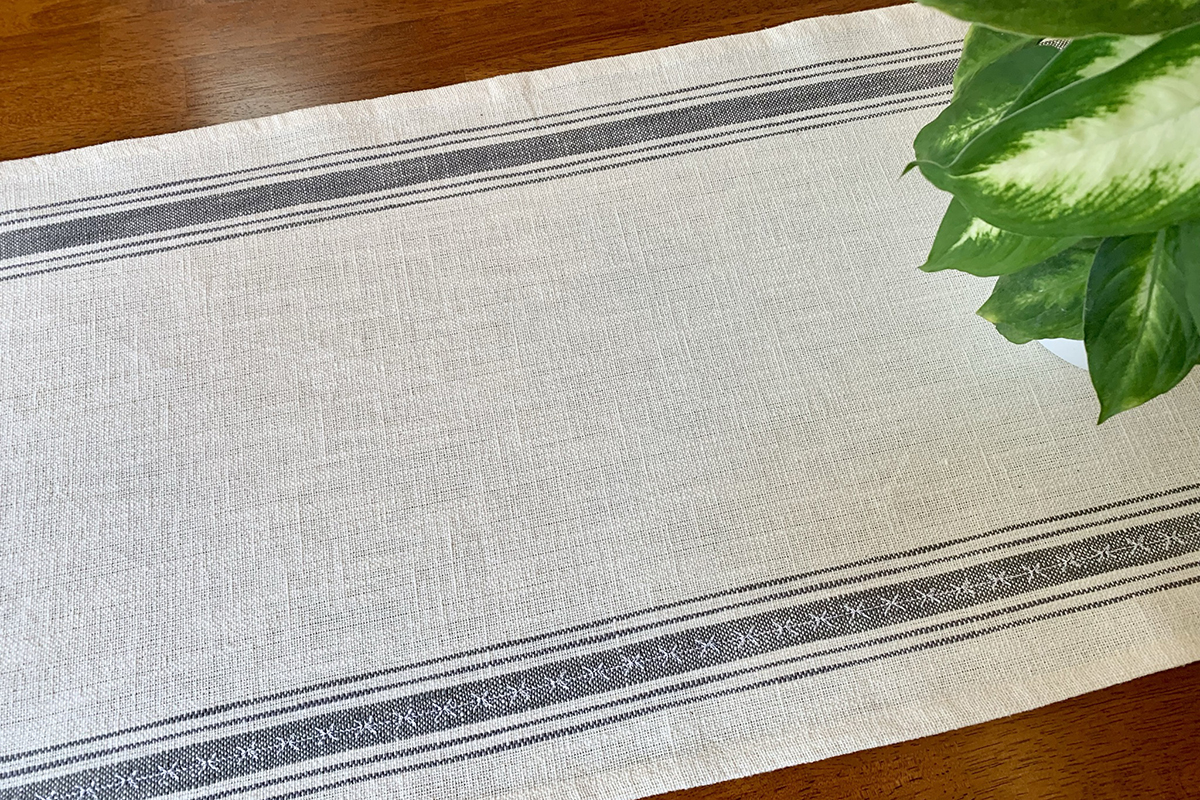
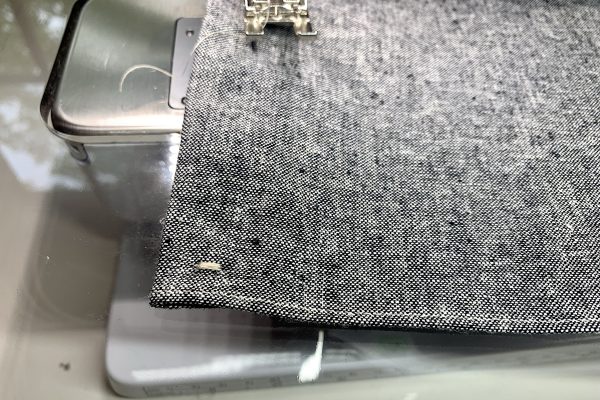
To give you a general reference, my table runner is 17” x 90” and there are grey stripes down the length of the runner. I would like to work with the grey stripes by adding decorative stitches. Also, I would like to add long, gathered fabric to the ends. So, let’s begin!

Decorative Stitches
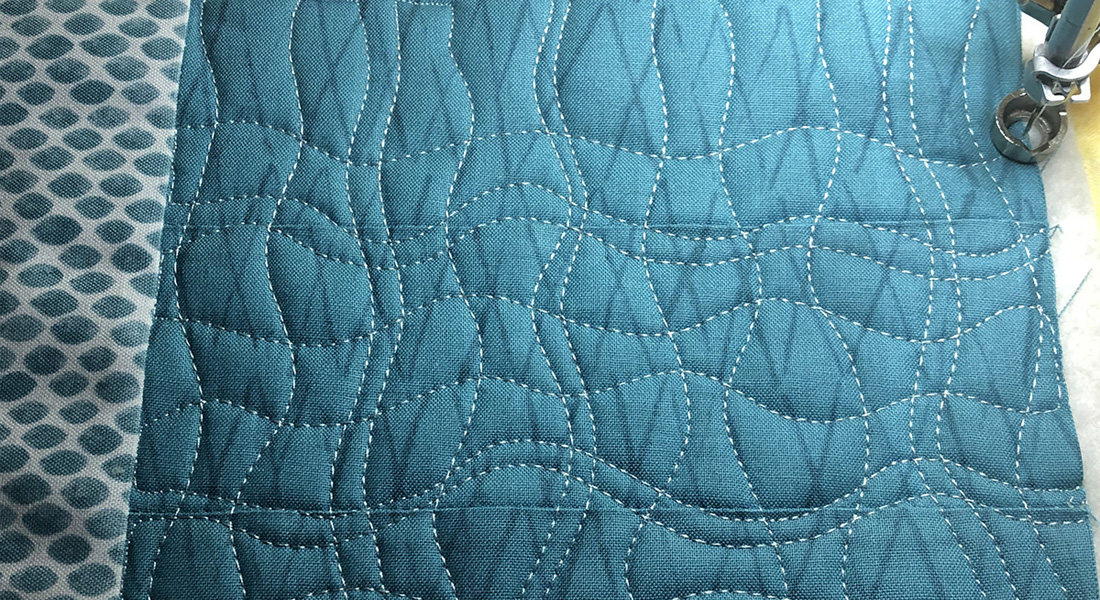
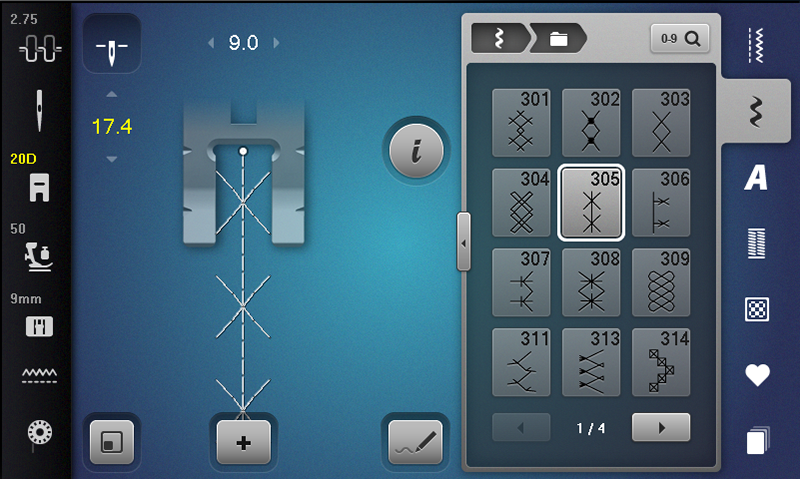
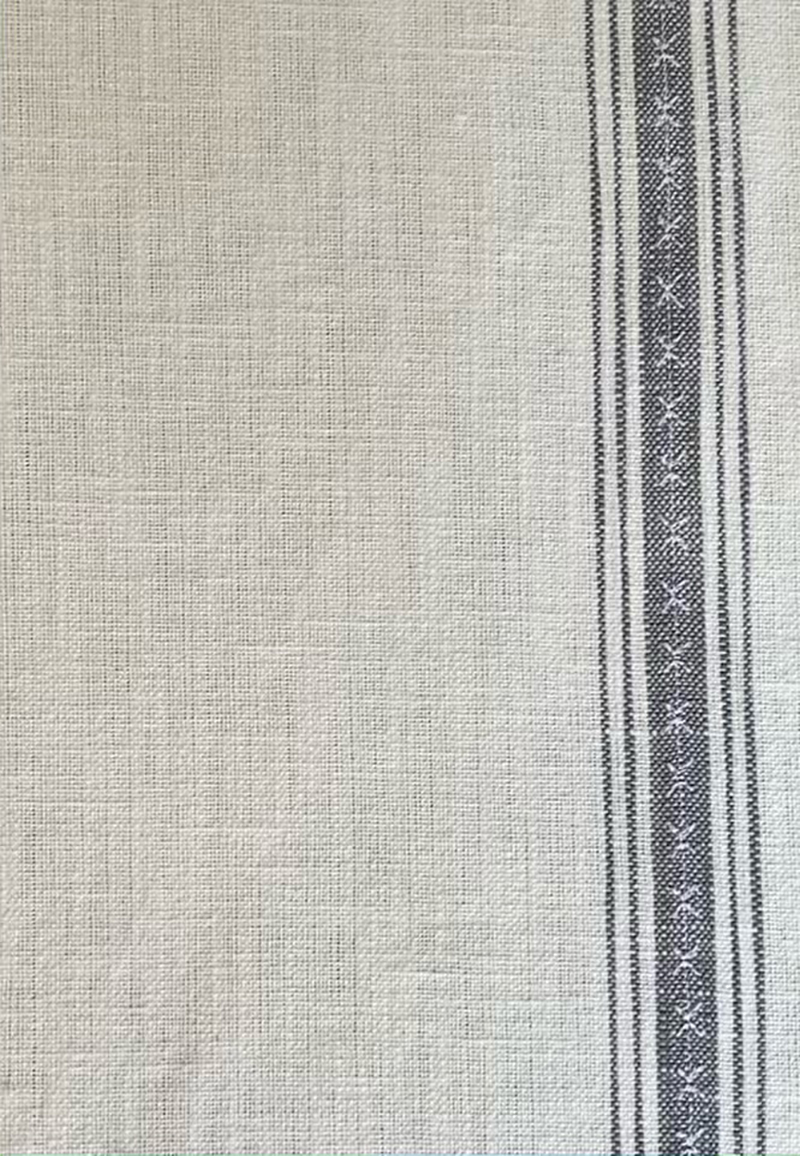
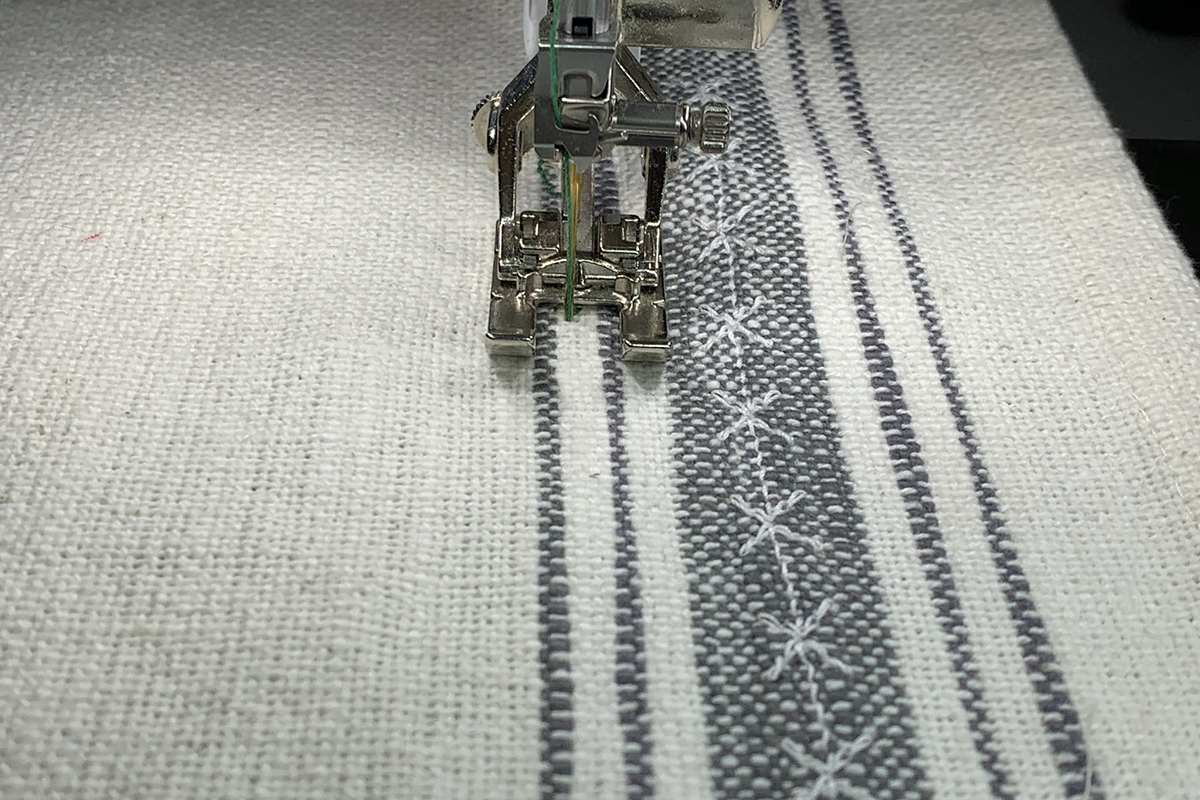
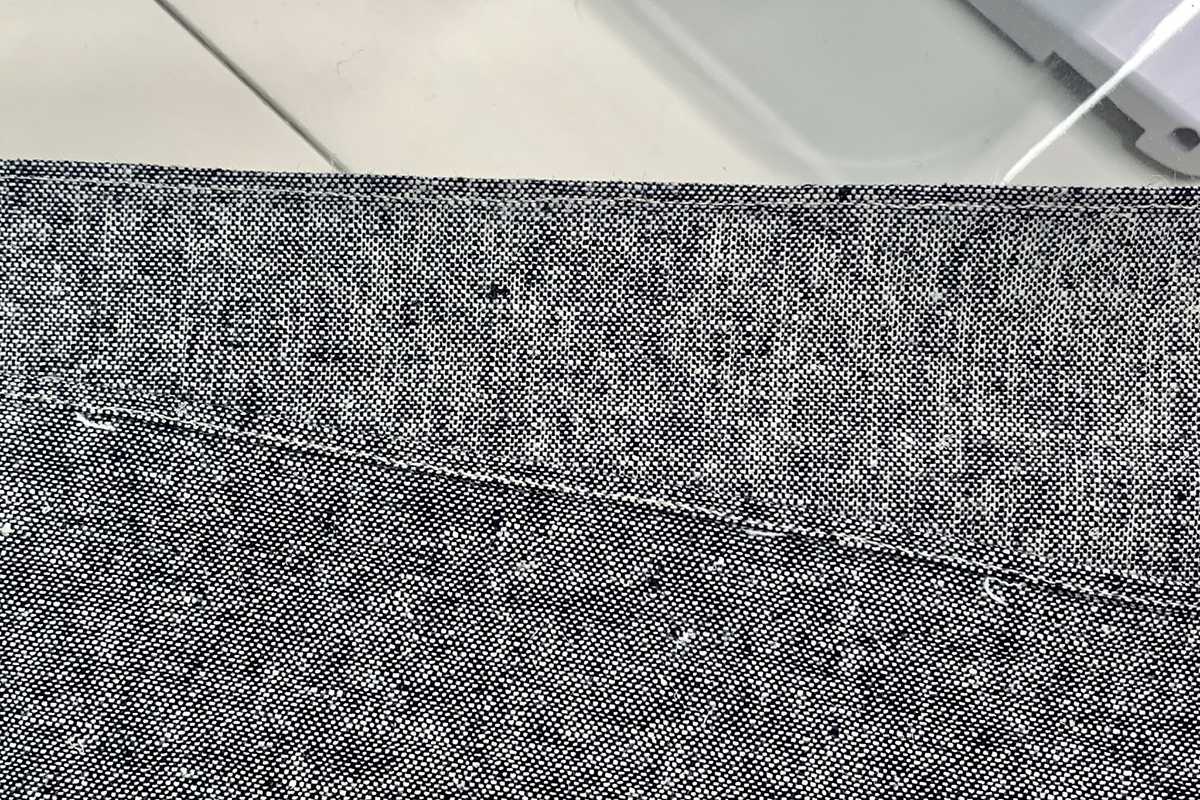
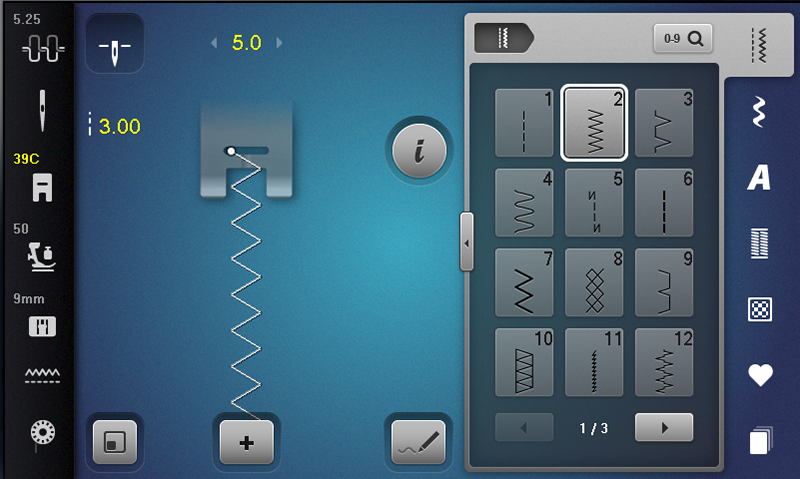
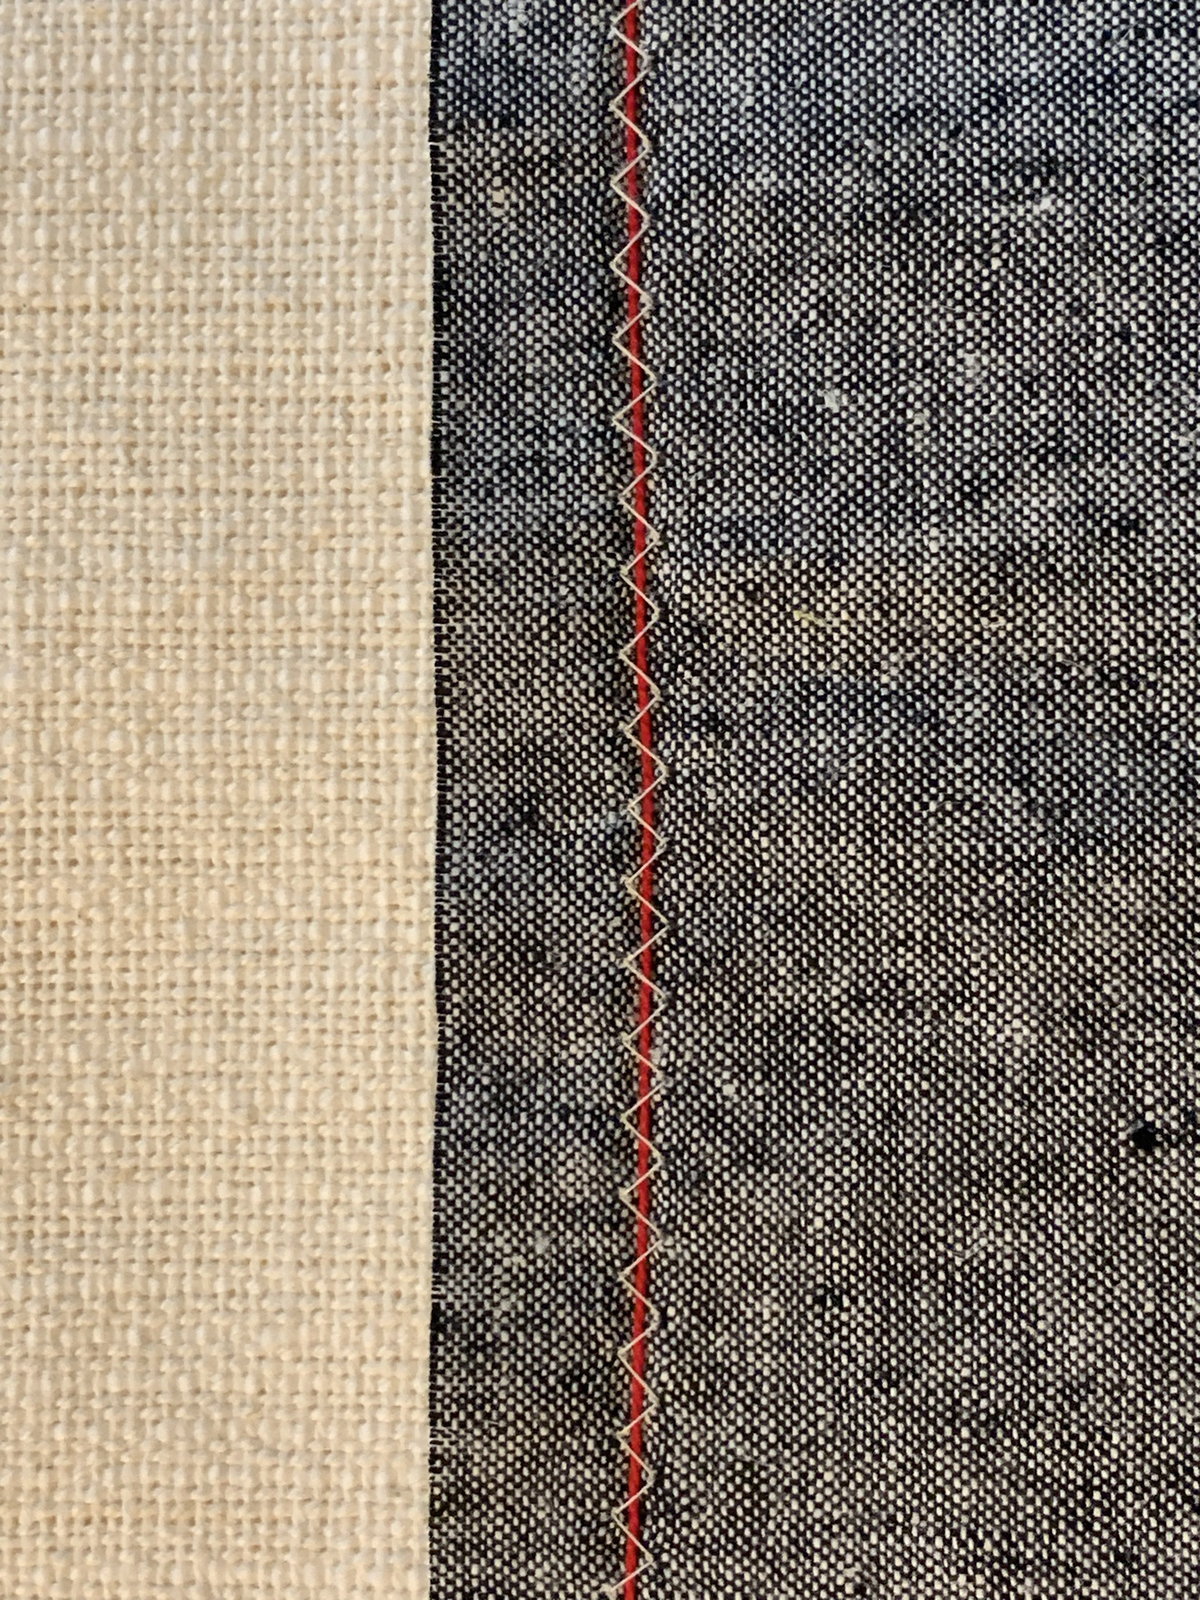
One way to add custom accents is with built-in decorative stitches. The B 790 PLUS has over 500 decorative stitches. Wow! That’s a lot of stitches! Why not incorporate them into your projects? For my table runner, I added decorative stitching down the length of the table runner. I selected Stitch #305 in Folder 3 of the Decorative Stitches Menu. The default Stitch Width is 9 mm and the Stitch Length is 15 mm which is actually the length of the stitch pattern. I want the widest stitch width so I kept that at 9 mm. I’ve increased the stitch length to 17.4 mm, which is really just personal preference.
A note on stitching with thick thread: For decorative stitches, select an open and airy stitch. Thick threads are not meant to be used with dense stitches. If you find a stitch that you are not sure about, try using a stabilizer and see what happens. Always test!
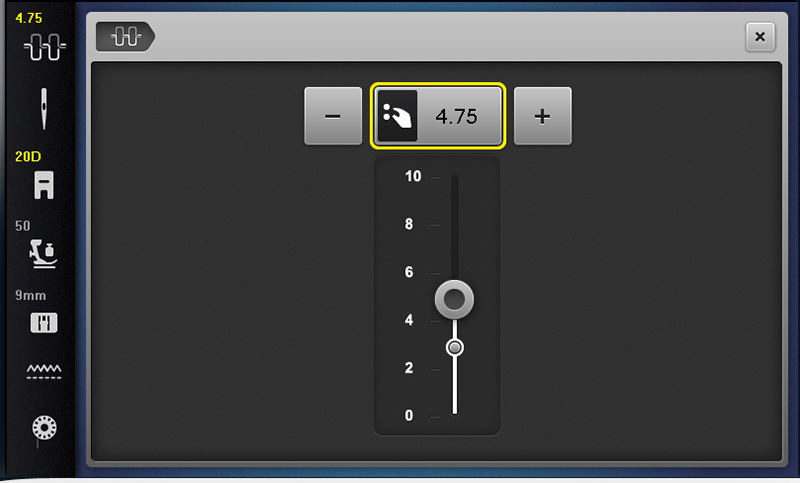
I attached Open Embroidery Foot #20D to my machine and inserted Schmetz Topstitch Needle 100. I used WonderFil Spagetti thread in white for the top thread and Mettler Silk Finish Cotton 50 wt for the bobbin. Notice the difference in thread weight at the top and bobbin. When you have a big difference in thread weights, you will need to adjust thread tension. I did some test stitches and found 4.75 achieved a balanced thread tension.
How lucky for me that the large accent stripe was the same size as my presser foot. I promise this was not planned! I used this stripe to follow a straight line so I don’t have to mark anything.
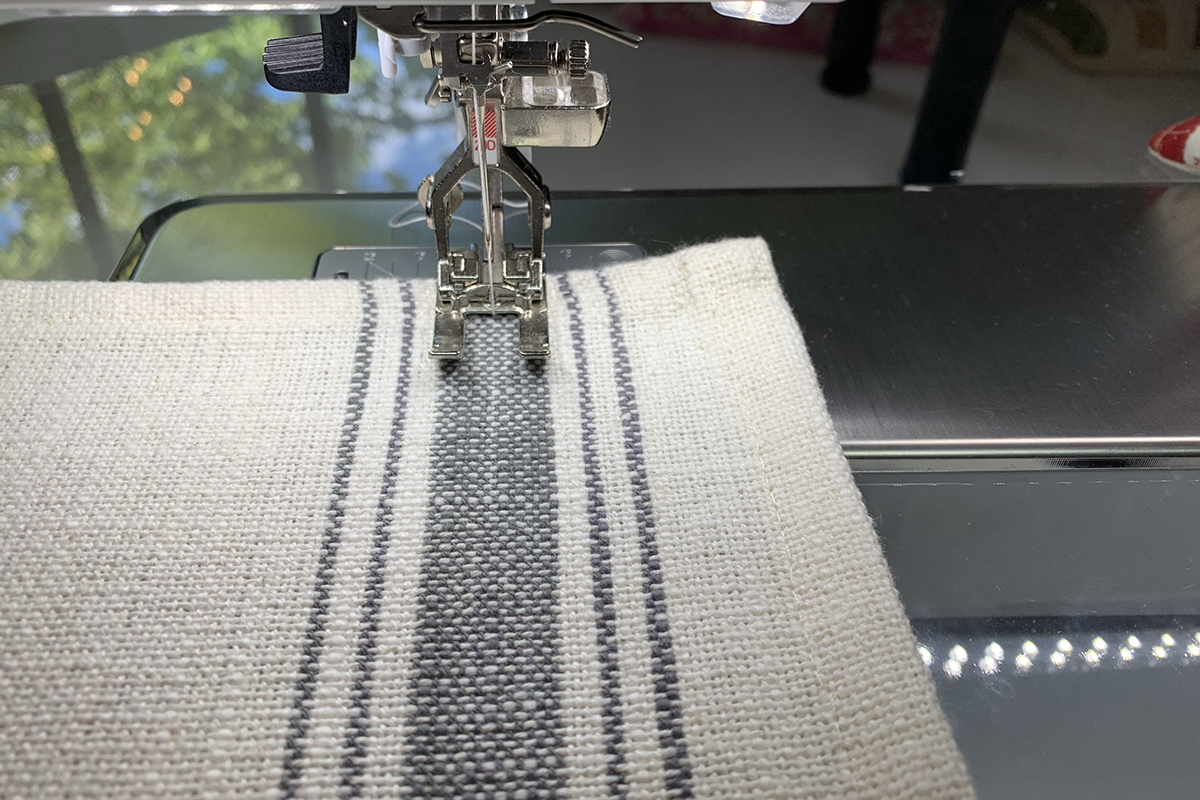
If you do not have a stripe or edge on your table runner to follow, mark a line with a temporary marker or better yet, use the BERNINA Seam Guides. These guides come as a set and attach to the left or right side of most BERNINA presser feet.
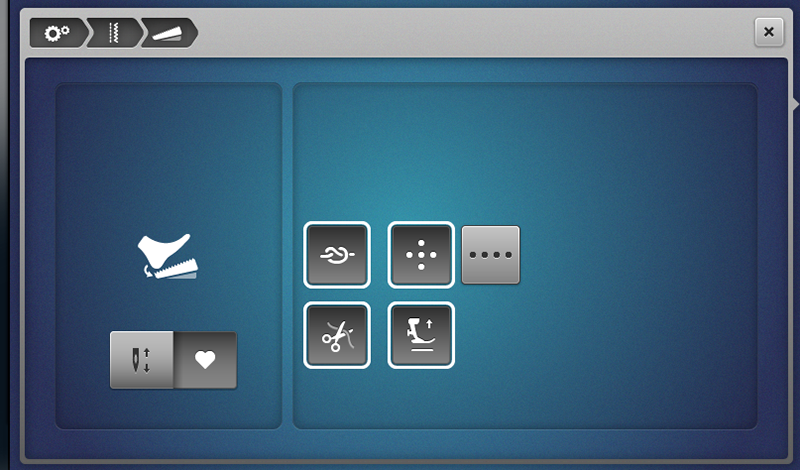
I stitched down one side of the table runner. I stitched at a medium sewing speed. It is not recommended to use top speed when sewing decorative stitches with thick threads. I didn’t secure seams at the start and end since I’m adding fabric there later. But if it bothers you not to secure thread ends, BERNINA gives you many options. You can backstitch, back step (icon in information menu), use the Secure Button, and you can even program the Back-Kick function to secure stitches!
The difference is subtle and I love it! If you want the decorative stitching to have more impact, use a bold contrasting thread.
Close-up view of stitches . . .
I stitched the same exact way on the other side. Something so easy that gives a special, unique look!

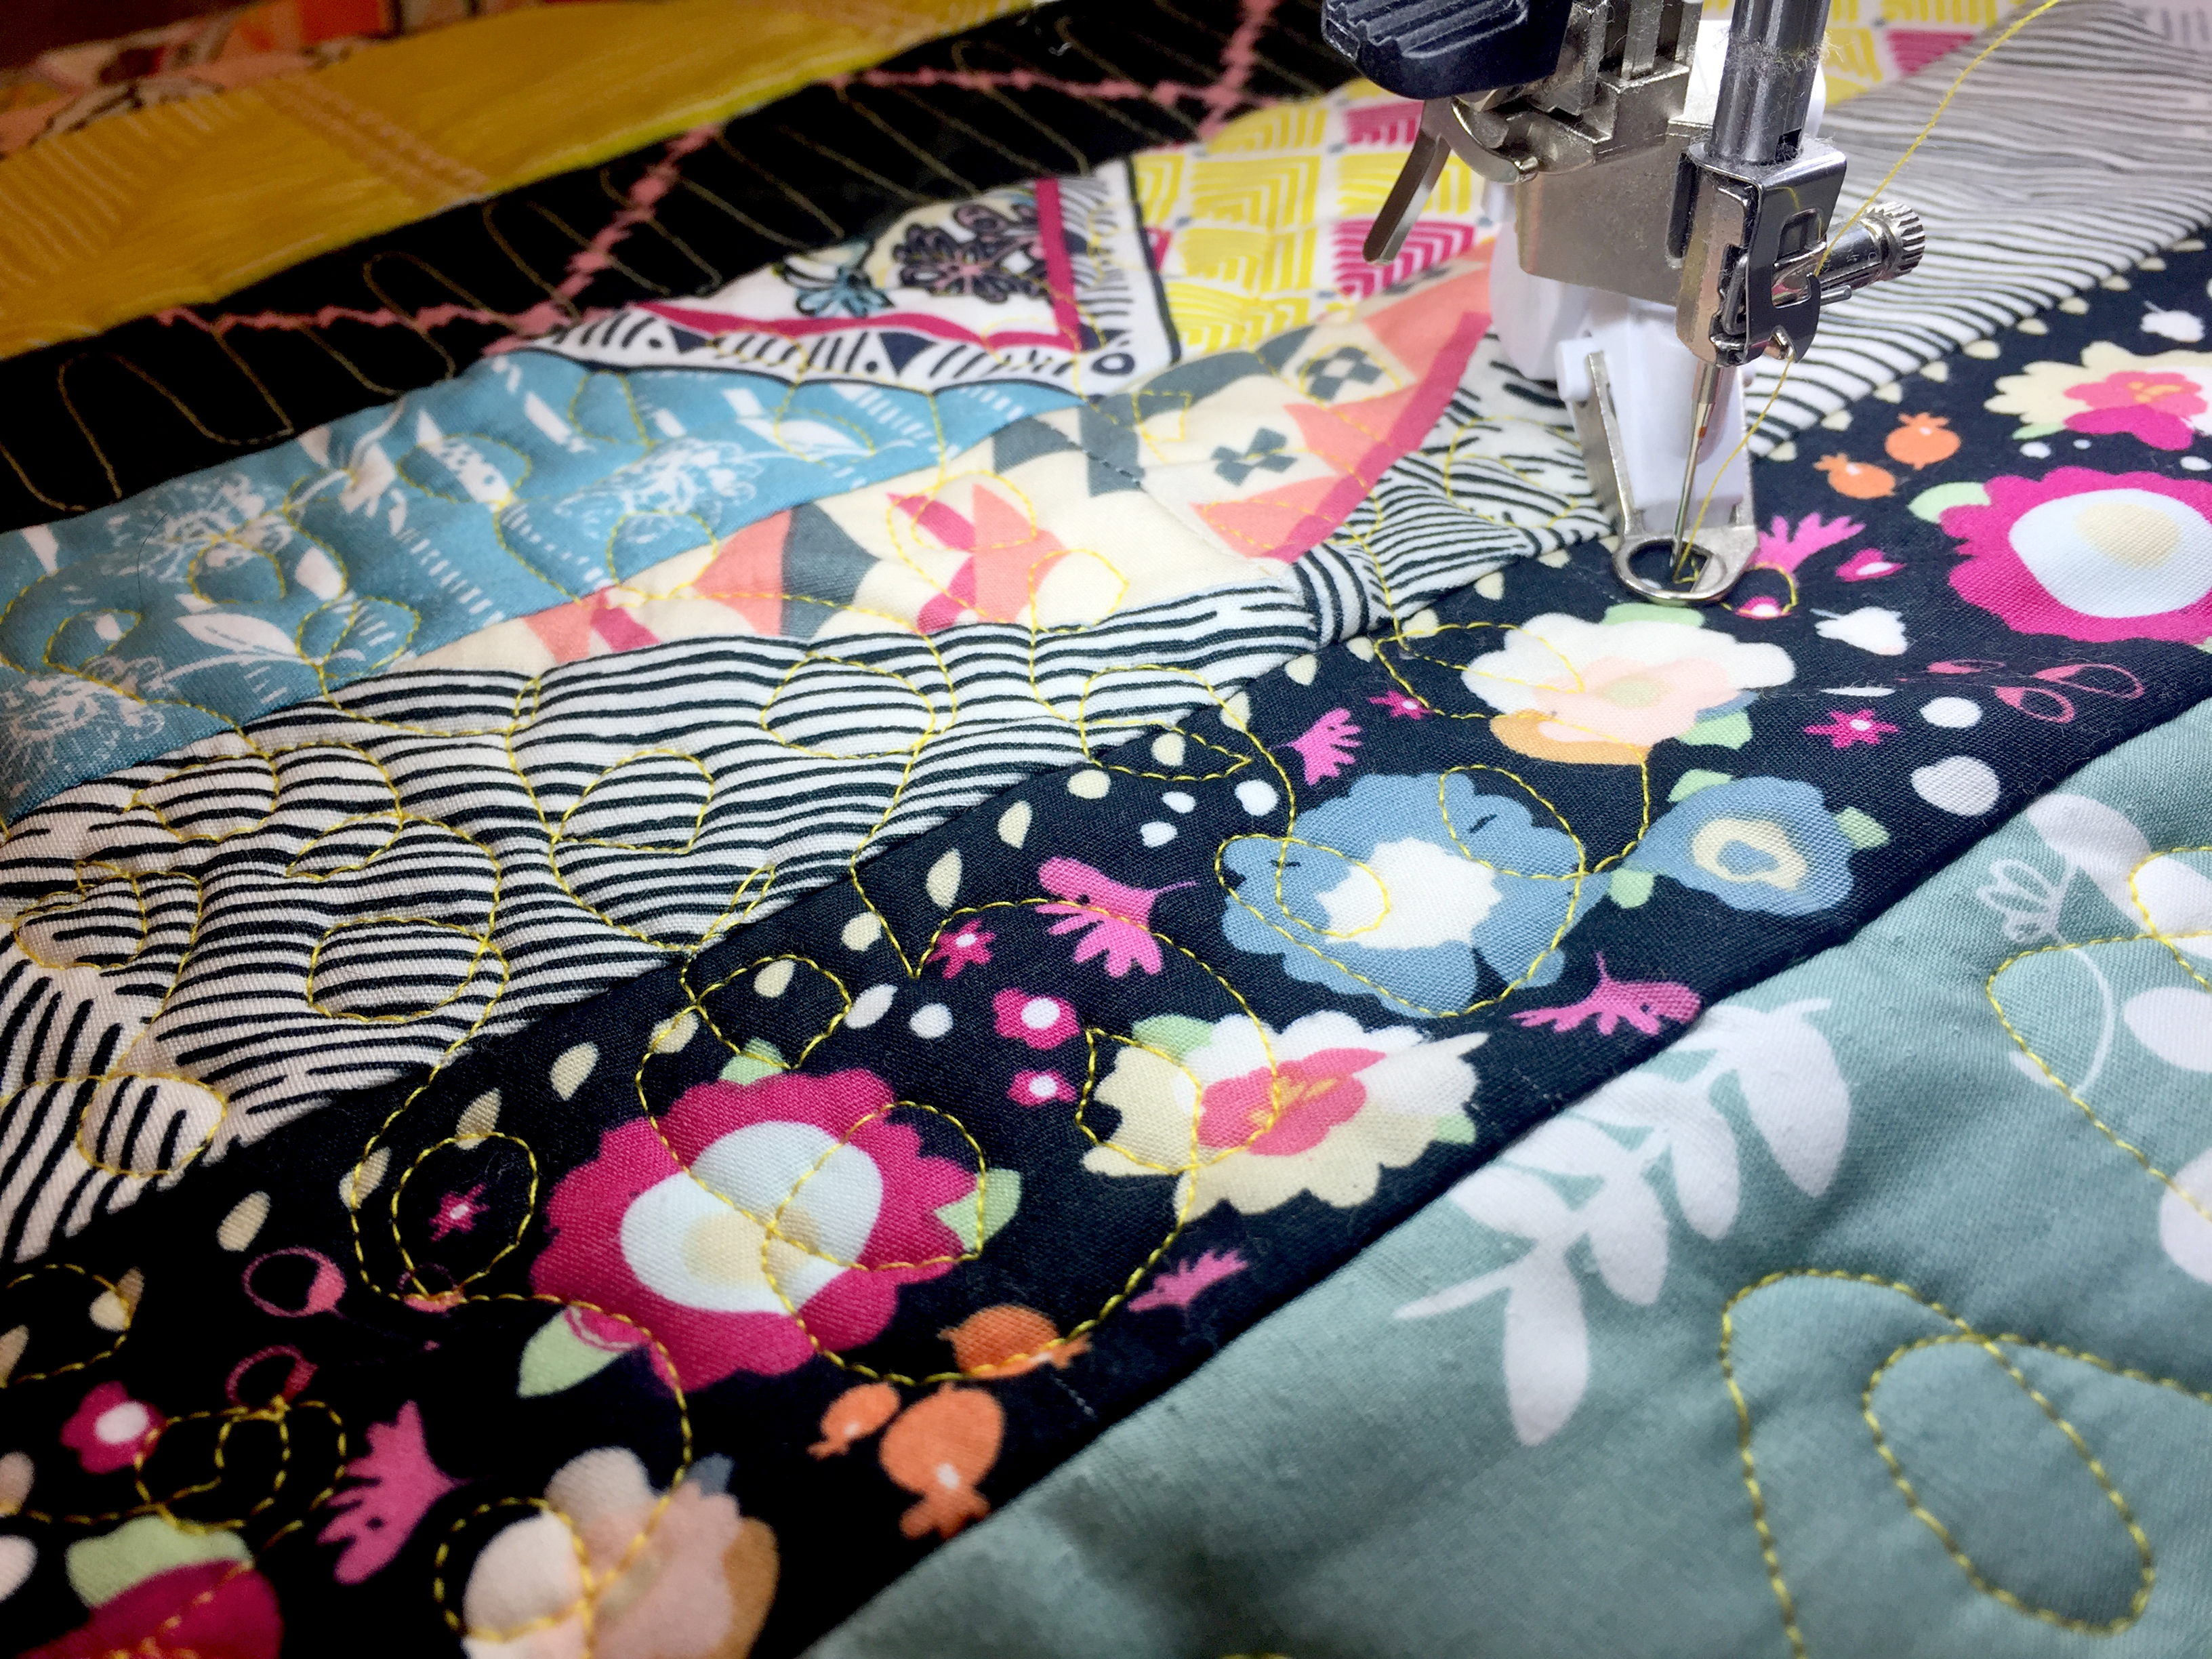
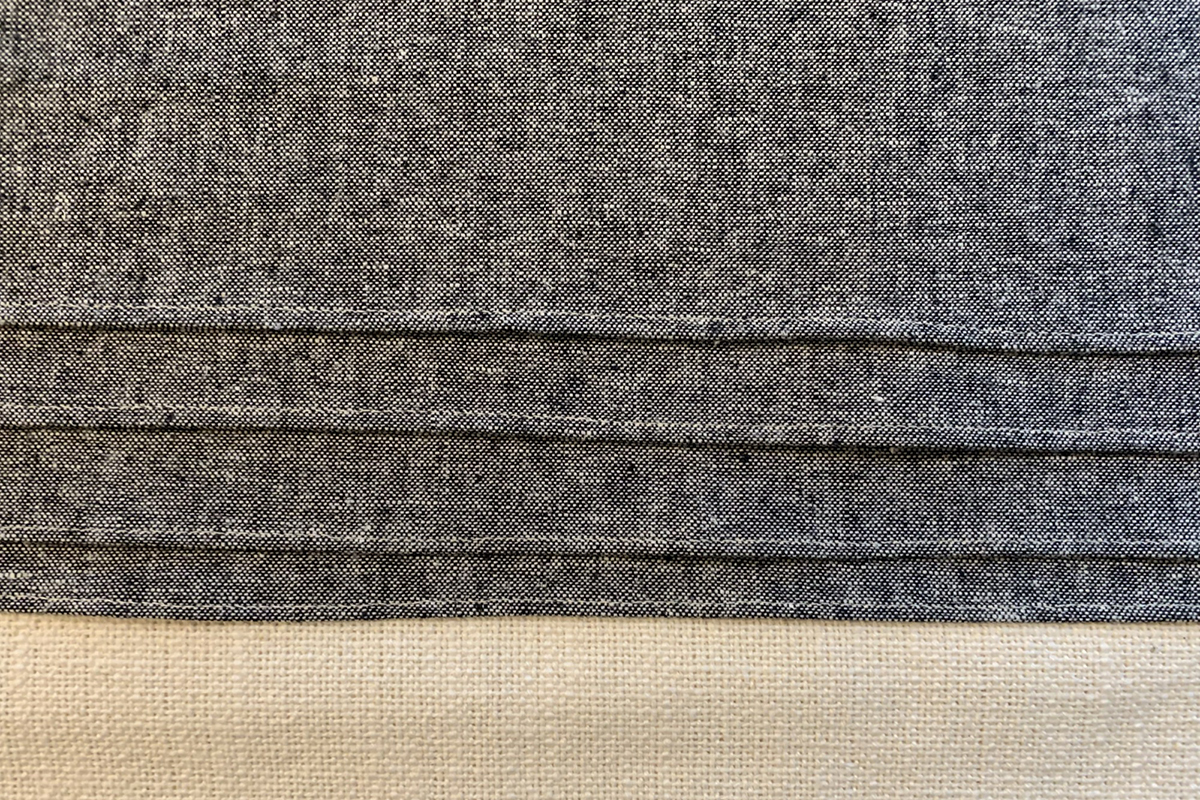
Another fun stitch is Decorative Stitch #1398 in the Quilt Stitches Menu. For this one, I added a Mettler Cordonnet thread in green. I did some test sewing and ended up changing the Upper Thread Tension to 3.5. I lined up the edge of the foot with the grey stripe and started sewing from one end to the other.
Then, I did the same for the other side.
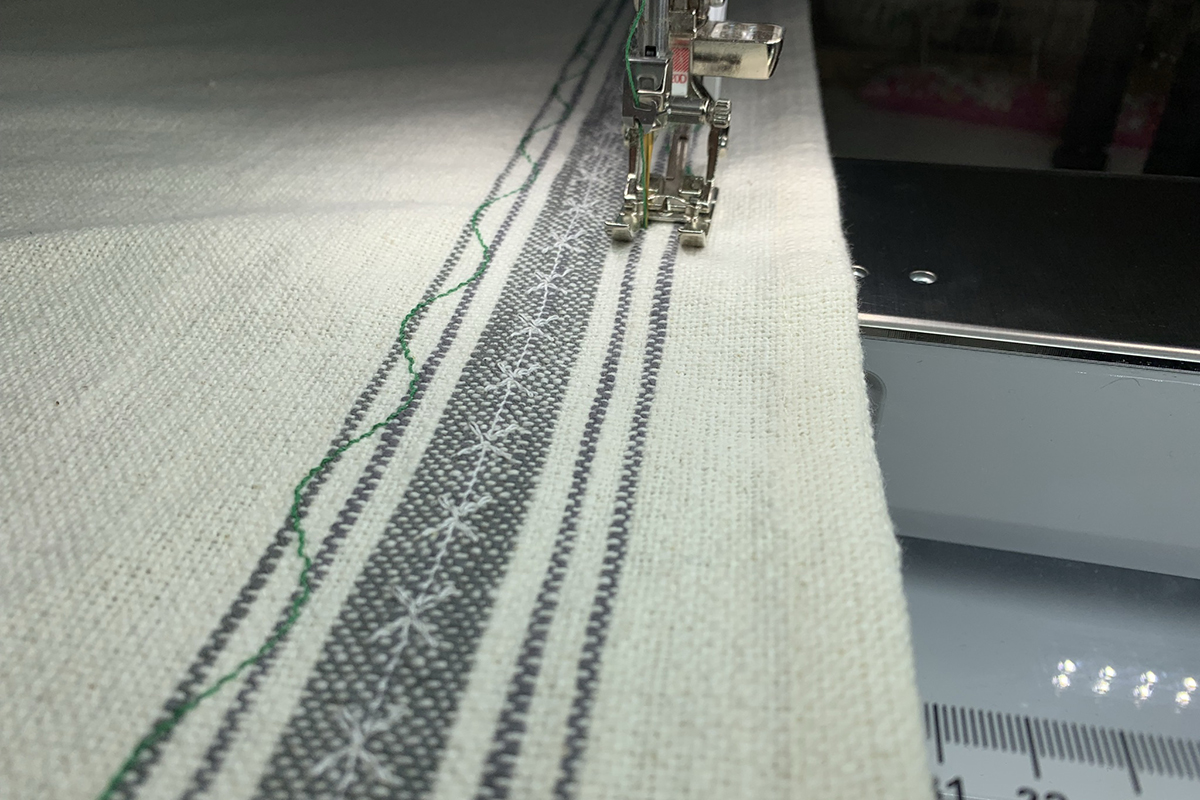
I want a more organic look to the table runner so I didn’t line up the decorative stitches with each other. To line up stitches so the stitch pattern starts at the same exact point, use Clear Embroidery Foot #39/39C. There are red marks on the foot to line up the stitch pattern. Here is a link to a tutorial for this method:
Stitch by Stitch with Clear Embroidery Foot #39/39C

Adding Fabric
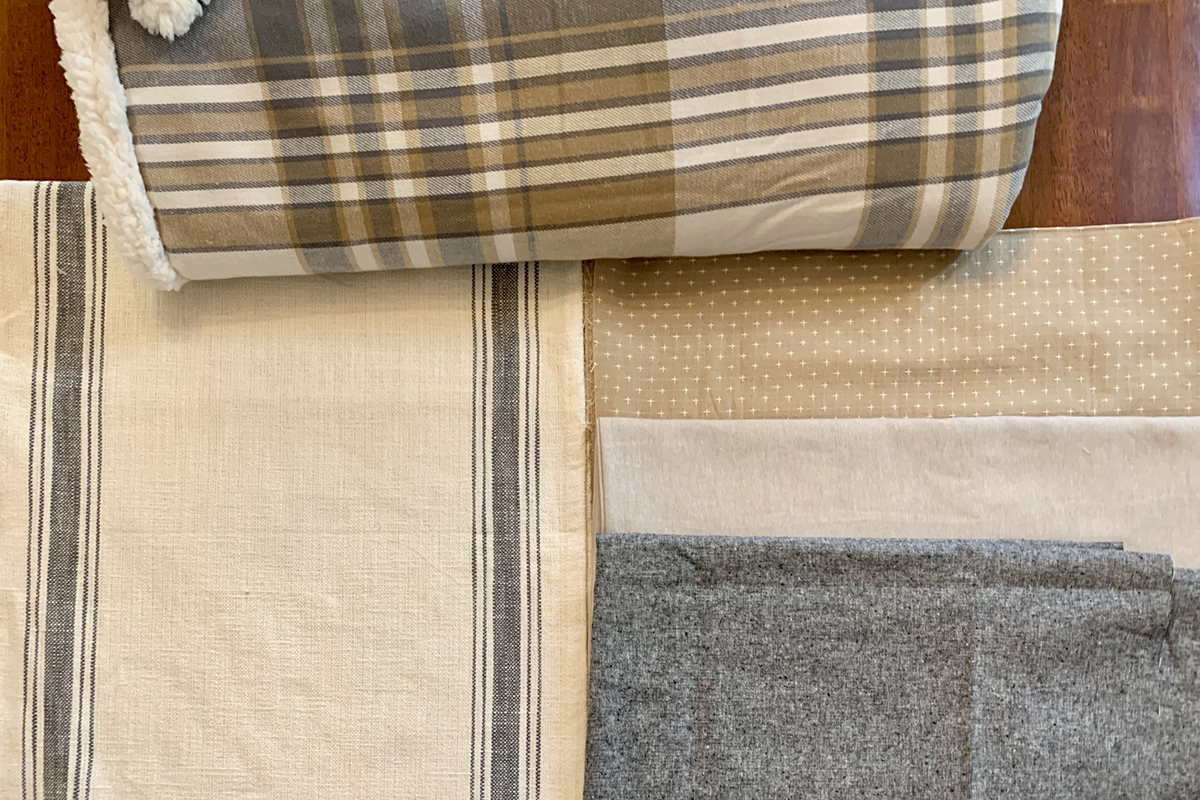
I gathered a few pieces of fabric that could be good choices to accent the runner. The blanket was my color inspiration. Lately, I have been partial to linen fabric by Robert Kaufman for home dec projects, in particular the Essex and Essex yarn dyed lines. The dark grey fabric is Essex by Robert Kaufman.
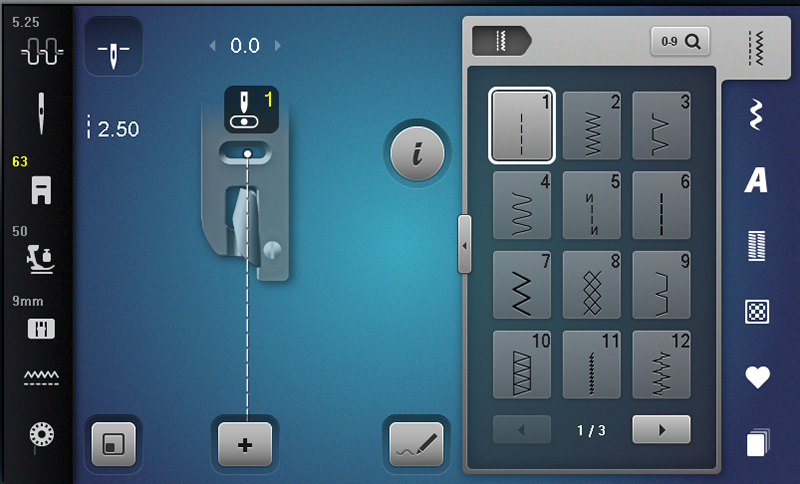
I cut the Essex fabric into two pieces 10” x WOF. First, I need to hem the fabric pieces lengthwise. I attached the Zigzag Hemmer Foot #63 and inserted Microtex Needle Sz 80. I am using Mettler Cotton 50 wt for the top and bobbin thread. At the machine screen, I have Straight Stitch #1 selected and Needle Position at 1. Make sure the Needle Up/Down icon is in the needle down position.
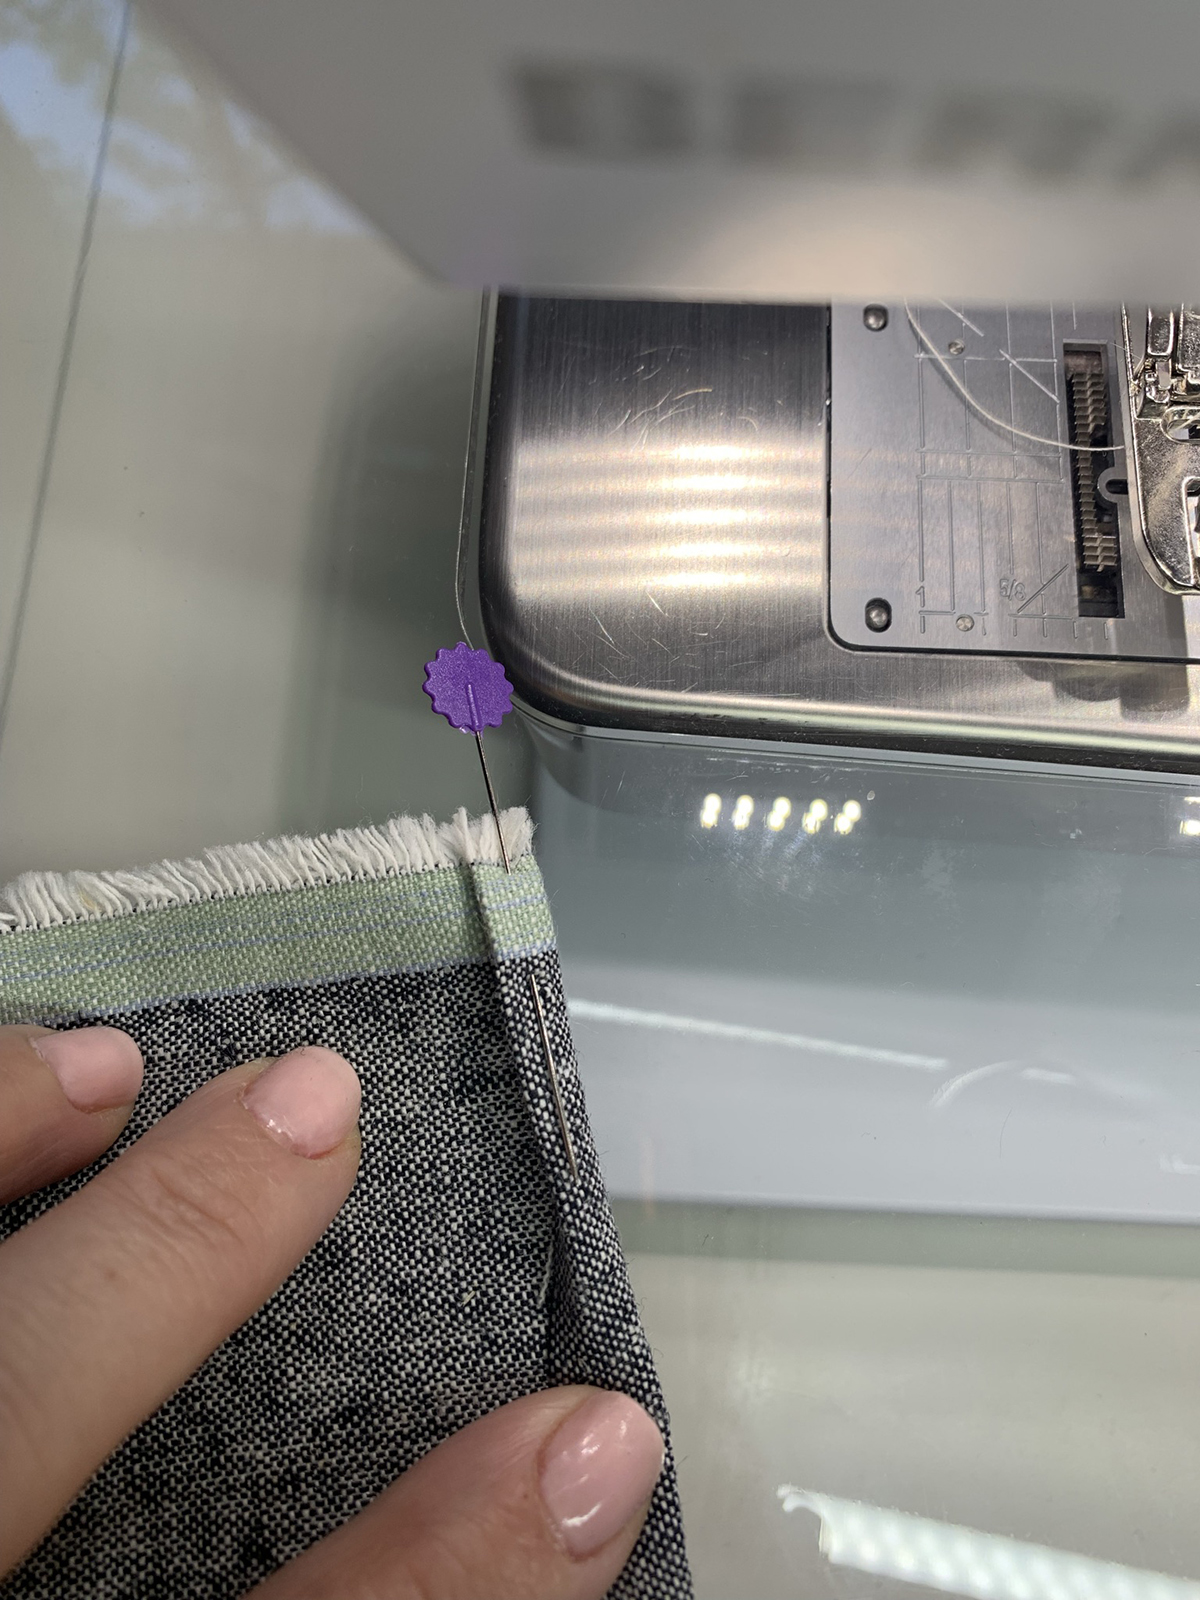
There are a couple of methods to set up your fabric to start the hem. Here is the method I prefer: Fold the edge twice and finger press. The fold is about 1/4”. Then, secure the fold with a large pin.
Next, place the fold under the hemmer foot. The purpose of the pin is to hold the folded edge in place while lining up the fabric under the foot. I use a large pin because it is easy to pull out before I start sewing. Once in position, pull out pin and sew 5-6 stitches. With tweezers, wrap raw edge into coil on foot. The Free Hand System is very helpful here. It allows you to slightly raise the foot and insert the raw edge with as little disturbance as possible. Make sure needle is in the down position.
Once the edge is snug around the coil of the foot, start sewing and continue to make sure the edge stays wrapped around the coil. Keep an eye on the finished hem behind the foot to make sure it looks good. The hemmer foot takes a little practice so don’t start on your good fabric. Practice with some long scrap pieces. This is my hand folding over fabric while I’m sewing.
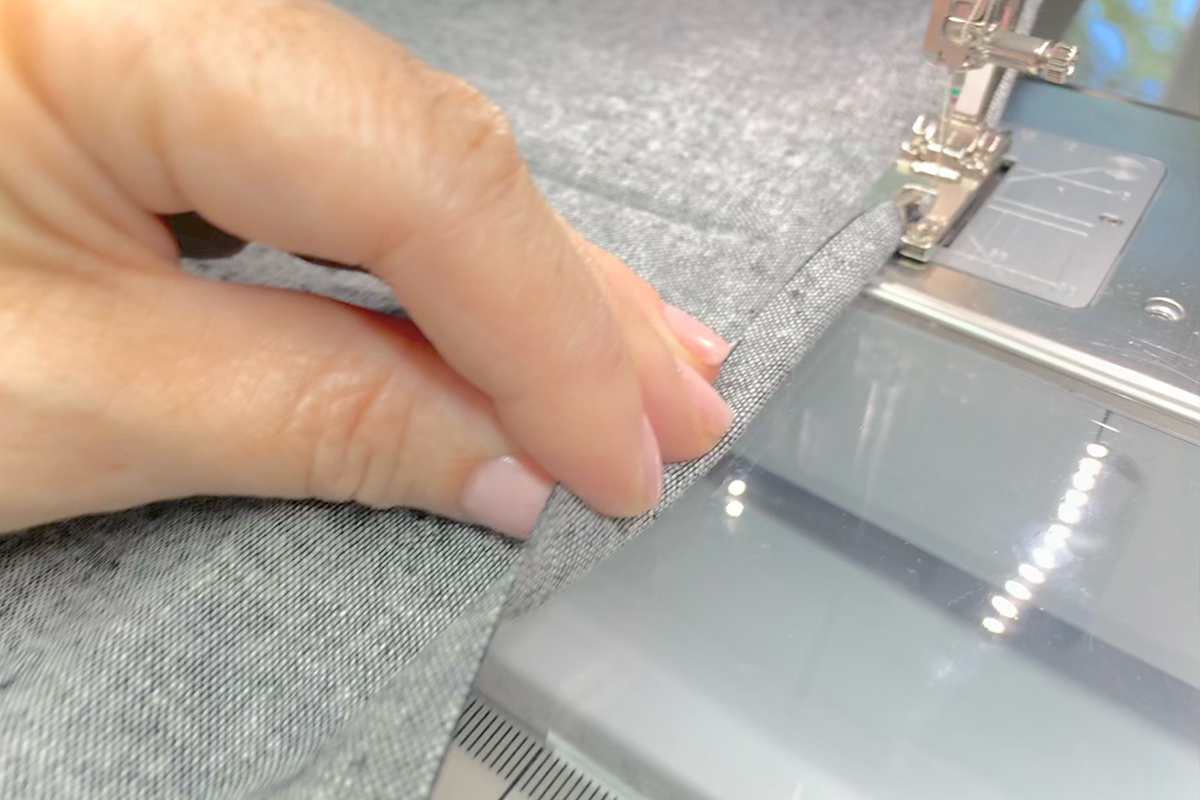
Below is a picture of the fabric from the top. You can see the fabric folded over to the left. Sometimes I angle the fabric slightly more to the left if it keeps coming out of the coil. Eventually, you’ll get a feel for it!

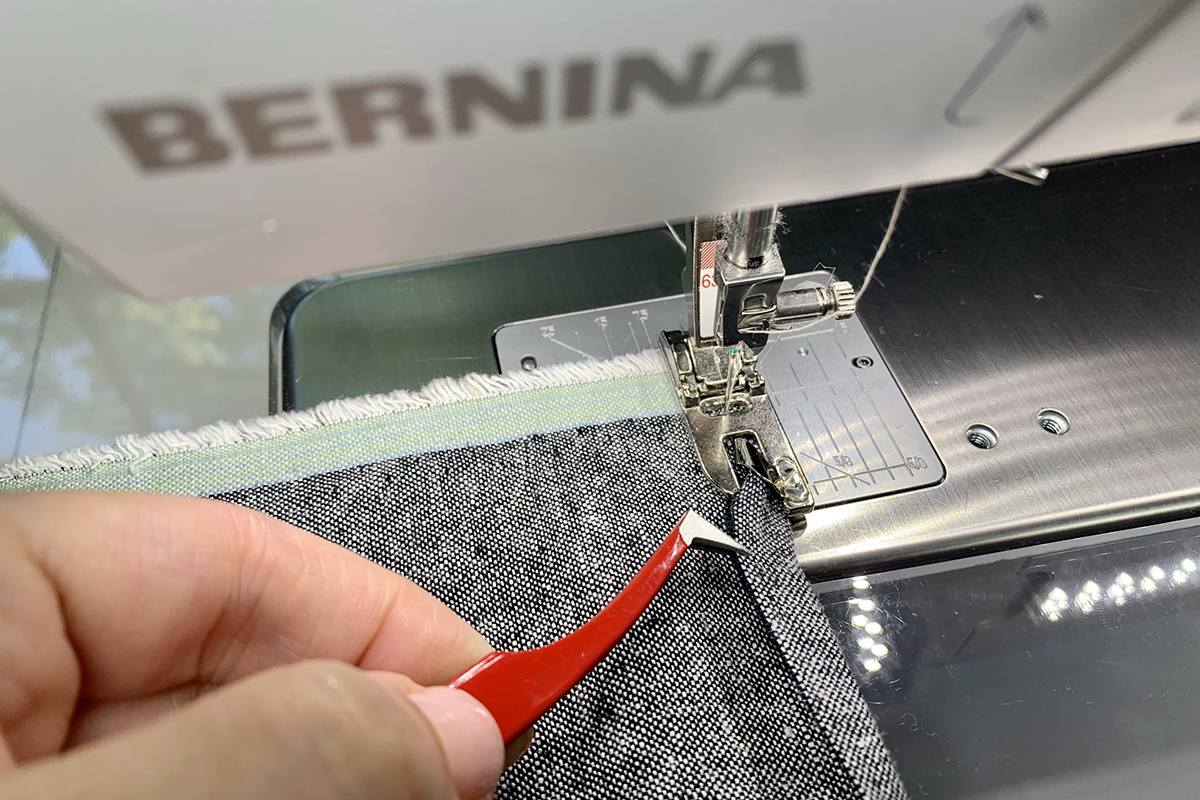
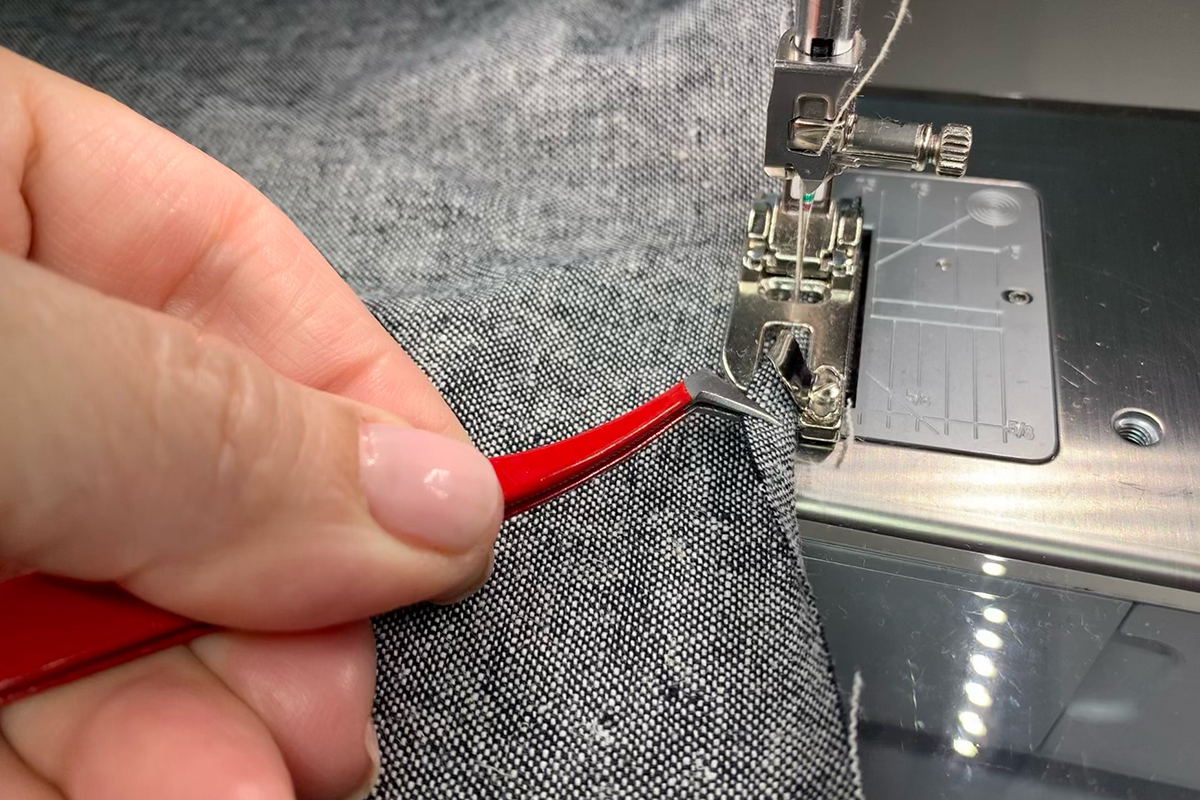
If the raw edge starts slipping off the coil, use tweezers to wrap it back around.
The hemmer foot is quick and results in a beautiful hem! BERNINA has seven hemmer feet to choose from depending on the hem size and hem type. Below is a picture of the front and the back of my hem.
Here is a picture of the difference between Hemmer Foot #63 (bottom two) and #64 (top two). If Hemmer Foot #63 is too small for you, try #64. It’s another great foot but with this one you can only do a straight stitch.
Gathering
There are several ways to gather with a sewing machine. The first and most traditional method is with a zig zag stitch. There are several feet you can use to do this, including the Clear Embroidery Foot #39/39C. The Clear Embroidery Foot is a good option if you are notorious for stitching on the cord. If you stitch on the actual gathering cord, it’s all over! This foot has a small hole to insert the cord and keeps it away from the stitches while sewing. Can you tell I use this foot a lot?

At my machine screen, select Zig Zag Stitch #2 and adjust the length and width.
The cord needs to be the length of the fabric plus 12”. Use leftover perle cotton or cord from another project. Start with cord 4”-5” behind foot so you have something to pull on for gathering. Line up raw edge with the 5/8” mark on the stitch plate.
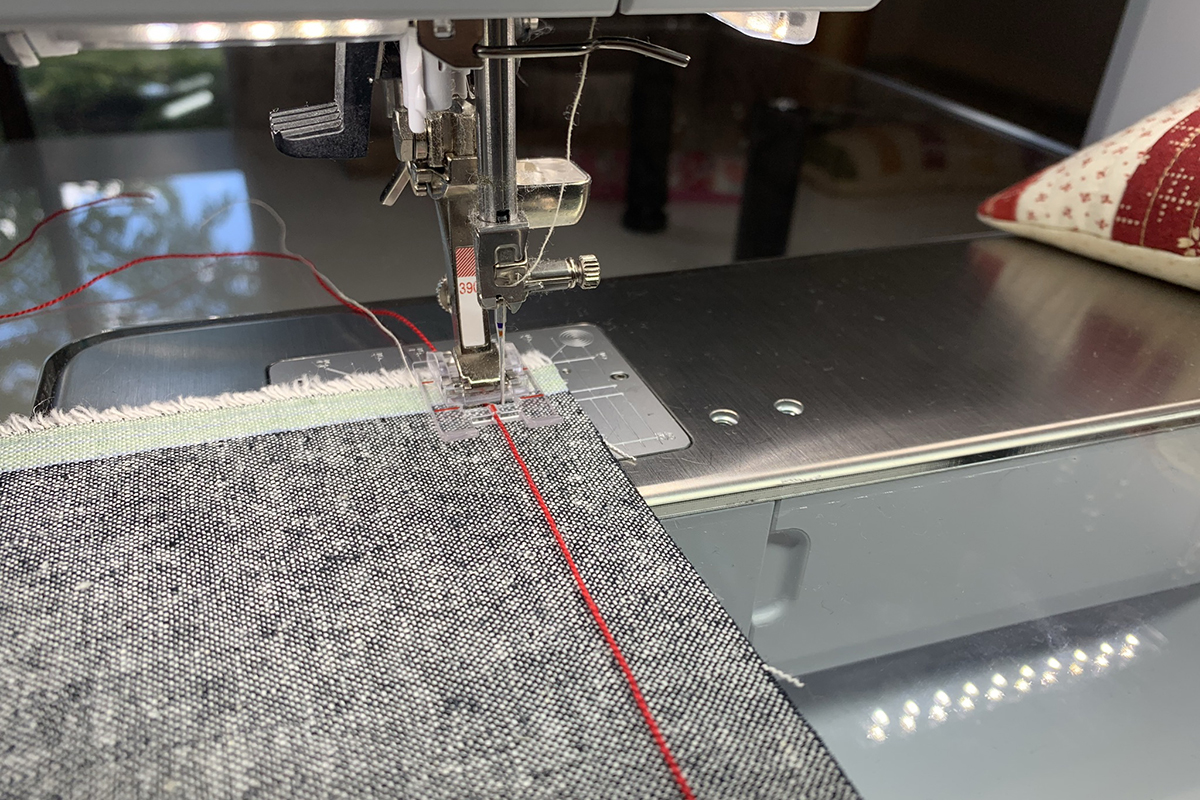
Stitch. End with a 4”-5” tail. Now, gather the fabric making it super ruffled or slightly ruffled – whatever you prefer. Here is a close-up view of the zig zag stitch over the cord.
BERNINA Gathering Foot #16 and Ruffler Foot #86 are two other gathering options. Gathering Foot #16 comes in a wide size for 9 mm machines. Here are a few links to BERNINA WeAllSew Blog for more information about these feet:
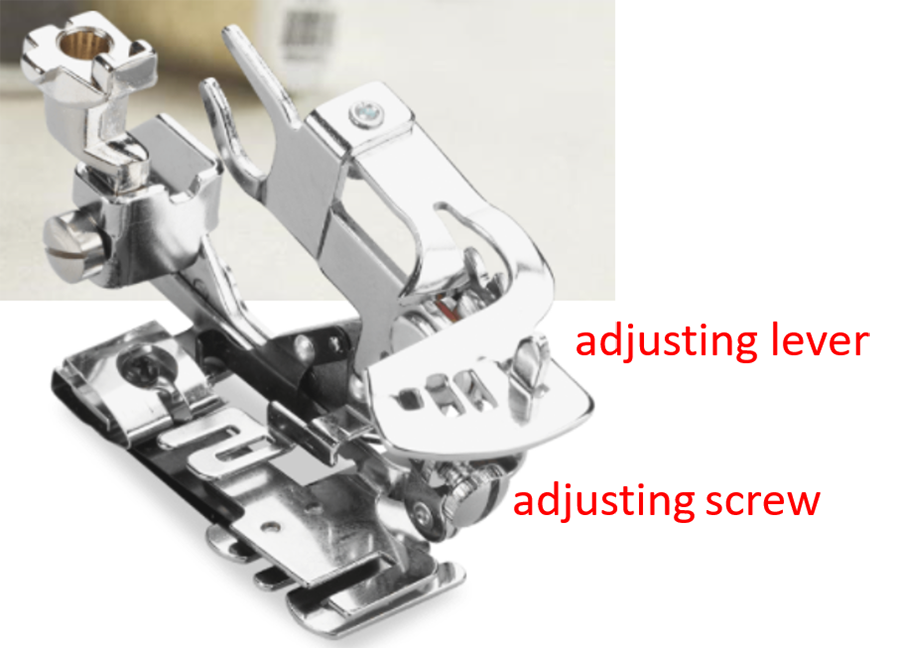
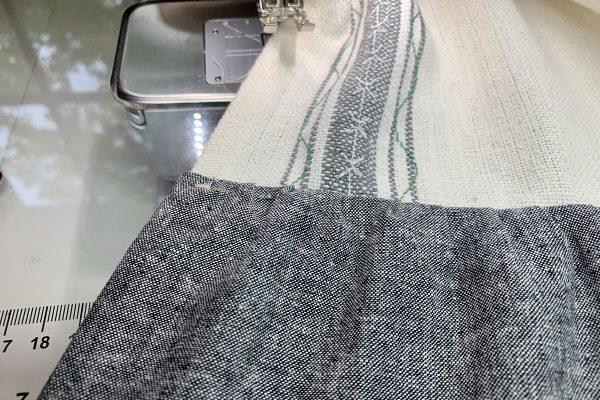
Ruffler Foot #86 is great for pleats too. I decided to try this on the table runner. The Ruffler Foot has an adjusting lever and an adjusting screw. The adjusting lever determines the pleat frequency – every stitch, every sixth stitch or every twelfth stitch. The adjusting screw changes the depth of the pleat. Turn it clockwise for deep pleats and counter-clockwise for shallow ones. This foot looks intimidating, but it’s easy to use! I set the adjusting lever to 6 and the adjusting screw in the middle to create the look I wanted. Have fun and make sample pieces starting with a dense ruffle and finishing with spaced pleats.
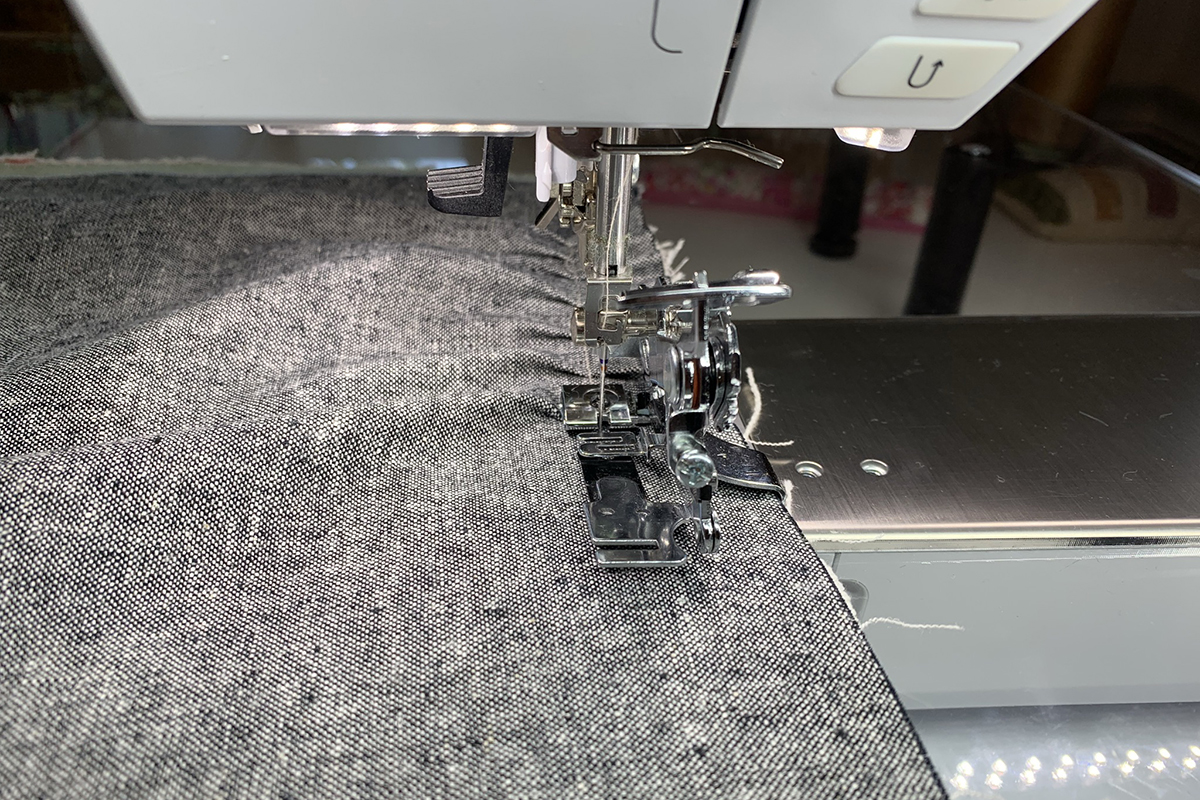
Notice the table runner under the Ruffler Foot. You can sew the flat piece to the ruffled piece while using this foot. I cut off the original table runner hem because it was really thick. Next, I placed the runner right side up under the foot and the Essex fabric right side down under the ruffler blade. I started with 2” of Essex behind the foot so I could create a double fold later to finish the raw edges.

I kept the raw edges aligned on the right side using the metal bar as a guide.
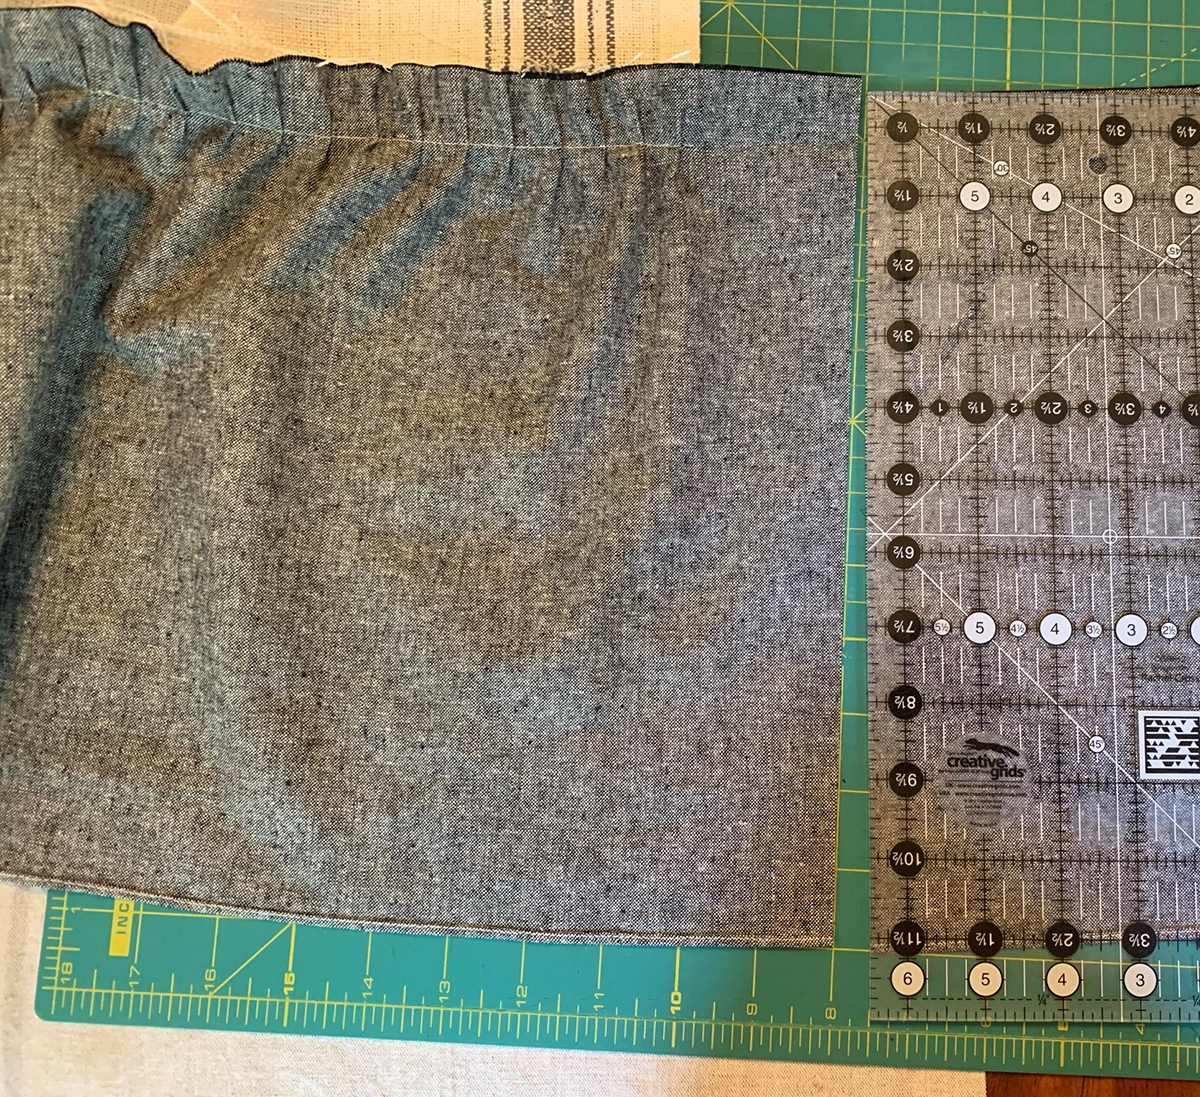
When I reached the end of the table runner, I took the whole project to my cutting mat and cut the excess Essex (say that 10x fast) fabric off, except for 2” to create a double fold. I have 2” excess on each end.
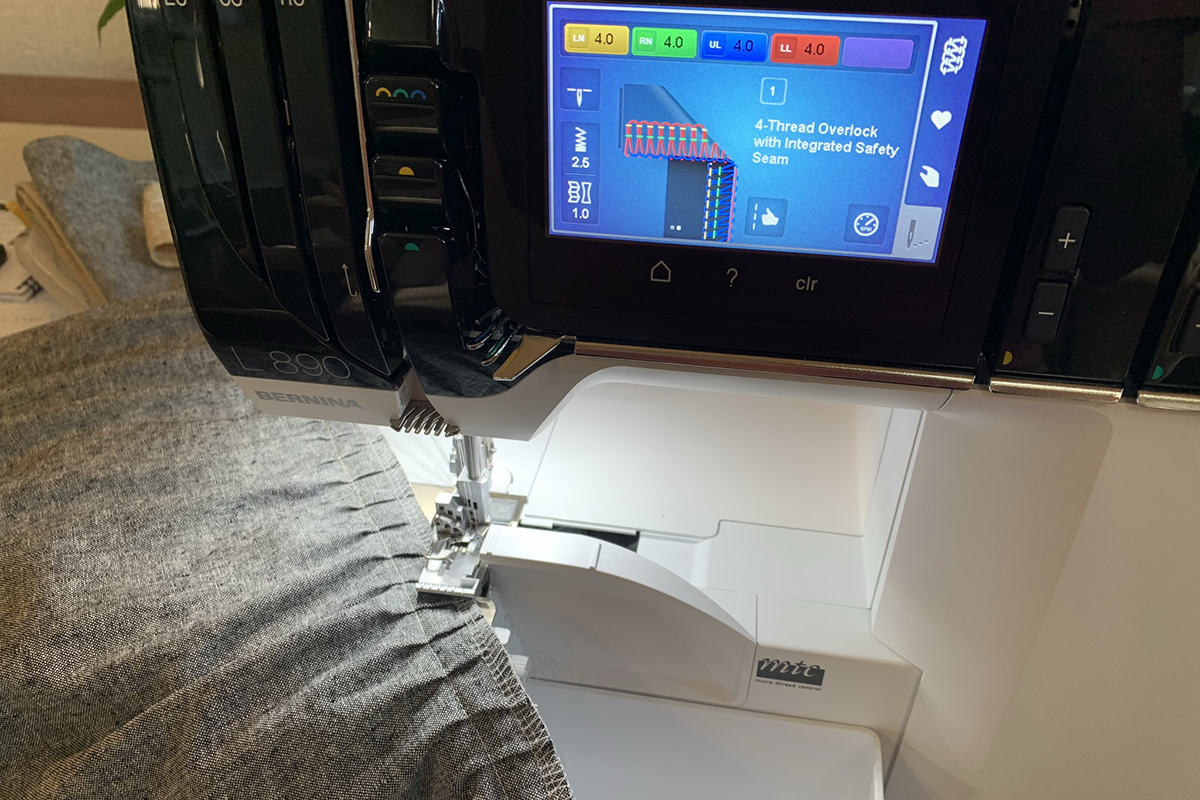
Have you heard about the new BERNINA L 890? I am a beginner when it comes to overlockers, but the L 890 certainly does not make me feel like a beginner. The built-in Guided Mode allows me to thread and prep for each stitch without looking at the manual or online. Guided Mode is a dream! You really can get the machine out of the box and start sewing! I did a 4-Thread Overlock along the raw edges on the backside. Certainly not necessary since it’s on the back but when you have an overlocker, why not? Also, if you plan on throwing the runner in the washing machine, this stitch will keep the fabric intact. You can use a zig zag stitch on the sewing machine if you don’t have an overlocker. Beautiful!
To finish ends, press a double fold with the 2” excess Essex on all 4 sides.
Option: Before you make the fold, add stitches along the bottom. Maybe a triple stitch or one of the many decorative stitches.
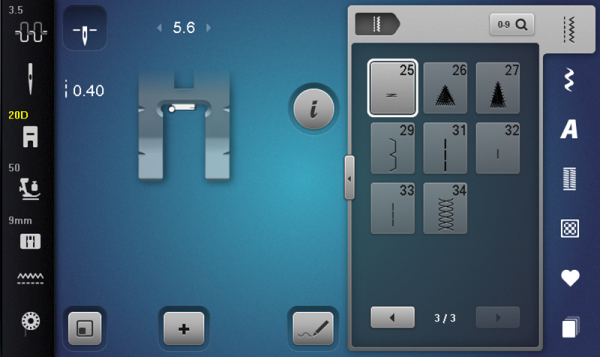
Rather than stitch a line down the fold, I attached Open Embroidery Foot #20/20C/20D and stitched a bartack at the top and bottom. The Bartack Program is #25 in the Practical Stitches Menu.
Line up the right edge of the foot with the edge of the fabric about 1/2” from the bottom of ruffle.
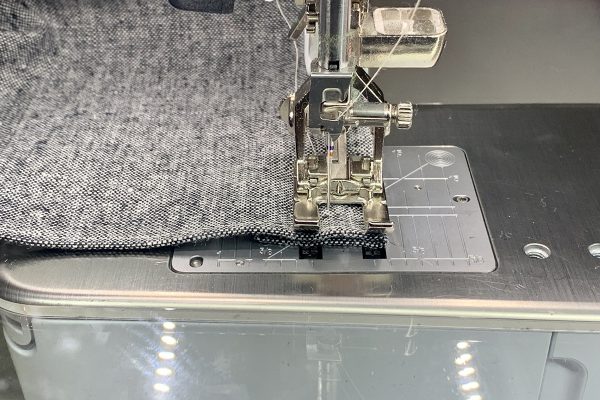
I wanted the ruffles to have a rustic look rather than neat and tidy.
Do the same at the top of ruffle and continue with the other 3 sides.
What a difference a few stitches and ruffles make! A whole new table runner custom embelllished in a cinch using new sewing techniques. It’s a good day!
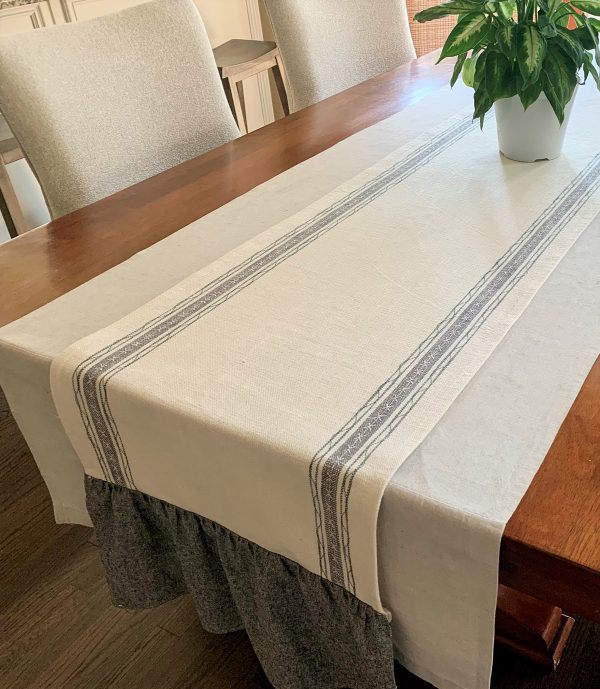
There are many inexpensive, plain table runners available out there. Embellish them for the holidays and special occasions. Or do what I did and turn them into something special for your home. Not to mention, add an embroidered design with machine embroidery. I am thinking of adding a single letter monogram to mine above the ruffles. The possibilites are endless. This tutorial gives you a start on some ideas. Now take them and take off with possibilites!