How to Embellish with Punch Tool #45

Here is a simple project to help you learn how to create art using the BERNINA Punch Tool #45. As an experienced textile illustrator, I’ve used hand felting, wet-felting, and embellishing machines. The beauty of the BERNINA Punch Tool #45, is with the flick of this attachment, you’re able to use the high quality and craftsmanship of your trusty BERNINA and turn it into an incredible embellishing machine. This saves time, eliminates stress, and allows you to be even more creative, WOW, what a game changer!
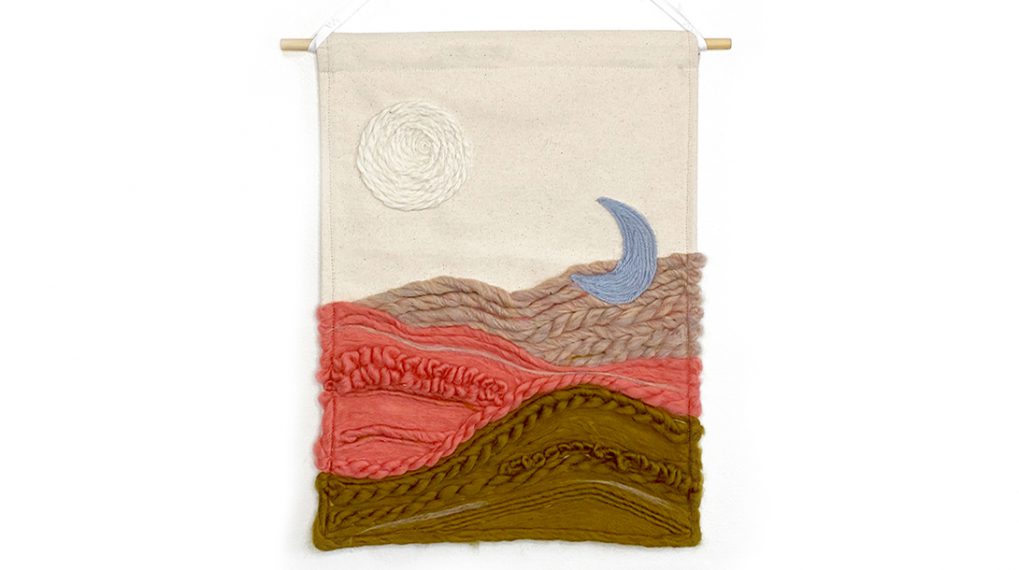
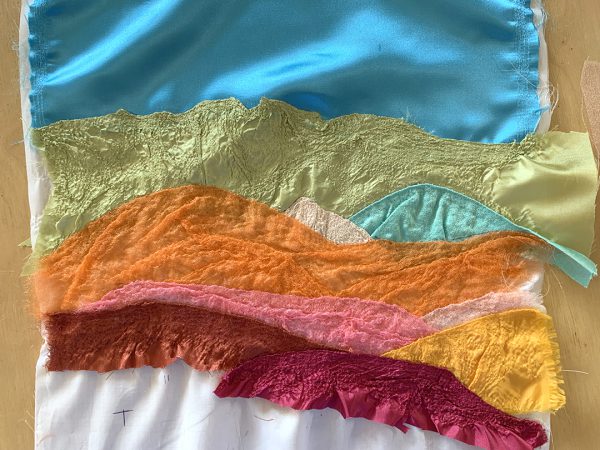
Download the below image of mountains. It will serve as your template.

Template Image is 10″ x 10″
Supplies to Embellish with Punch Tool #45
- Template photo of mountains
- 14” x 14” muslin
- 14” x 14” Pellon® SF101 Shape-Flex®
- Scraps of light fabrics such as organza, taffeta, polyester lining in light, medium and dark shades
- White lace 2” x 14”
- Invisible thread
- 50 wt white thread for bobbin
- Paper scissors
- Fabric scissors
- BERNINA Punch Tool #45
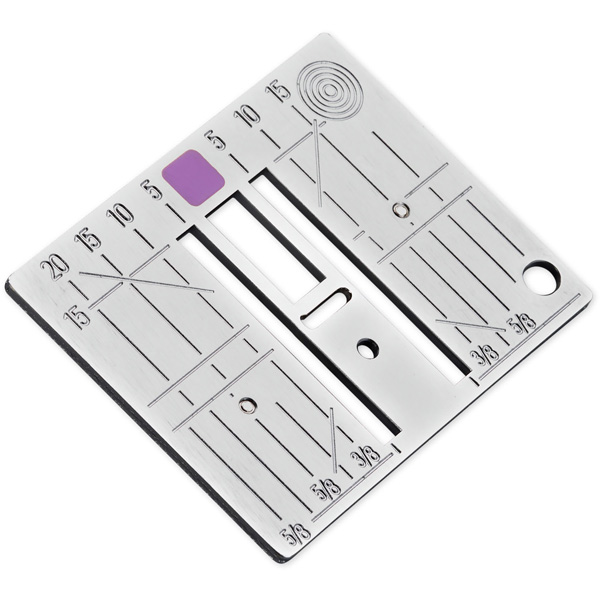
- BERNINA PunchWork Stitch Plate
- BERNINA 9mm Stitch Plate
- BERNINA Quilting Foot #29C
- 90/14 topstitch needle
- Frixion marking pen
- Lightbox
- Masking tape
Steps to Embellish with Punch Tool #45
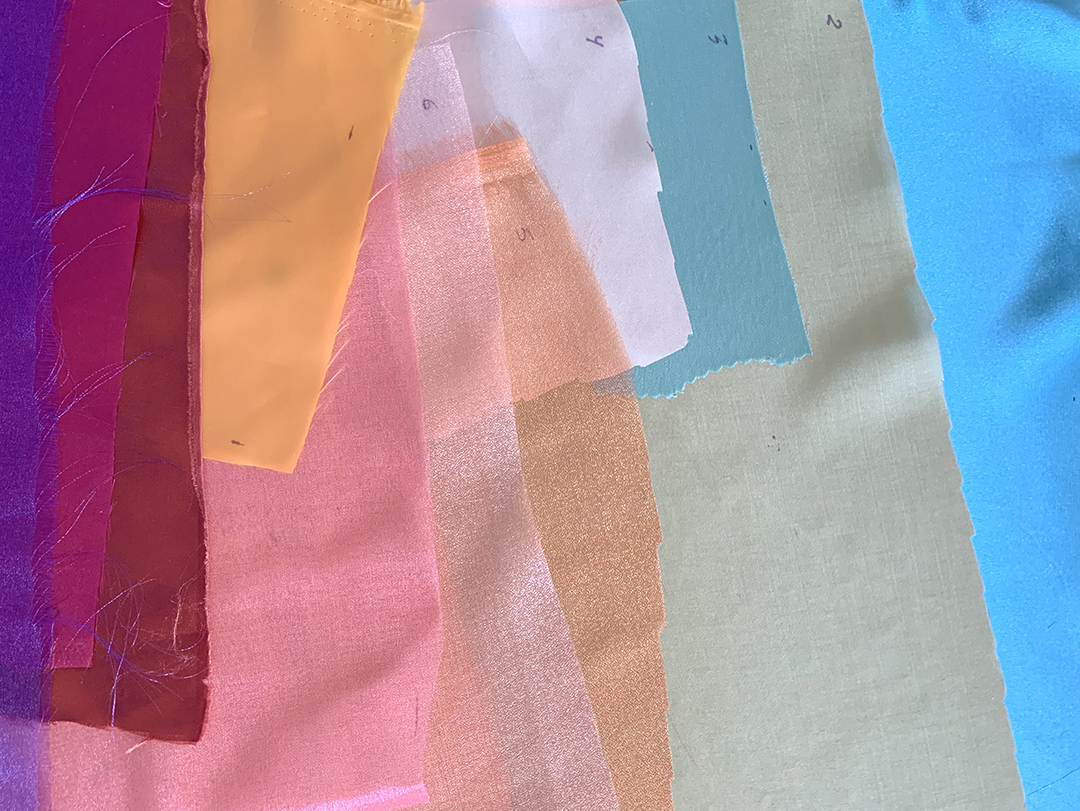
Use a variety of lightweight fabrics
Step 1: Cut Out Fabrics
The numbers below correspond to the shapes from background to foreground.
Instructions are for fabrics that you cannot see through. To determine the visibility, slide your hand under the fabric (you shouldn’t be able to see it). If you can see your hand, then double the height. You will be sewing a double thickness of it. For example, if you choose a sheer fabric for #1 Sky, then you will need to cut it 16” wide by 14” high. The shades of colors are light to dark, (see final art). I have included excess for trimming.
- #1 Sky 16” wide by 7” high
- #2 16” wide by 7” high
- #3 7.5” wide by 5” high
- #4 9” wide by 5” high
- #5 16” wide by 6” high
- #6 6” wide by 3” high
- #7 12” wide by 5” high
- #8 5” wide x 5” high
- #9 10” wide by 5” high
- #10 11” wide by 5” high
- #11 16” wide by 5” high
Step 2: Press the fabrics
For non-sheer fabrics, press the width of fabric under ¼”. Fold sheer fabrics in half lengthwise and press a crease along the edge to make it crisp.
Match centers and trace.
Step 3: Marking
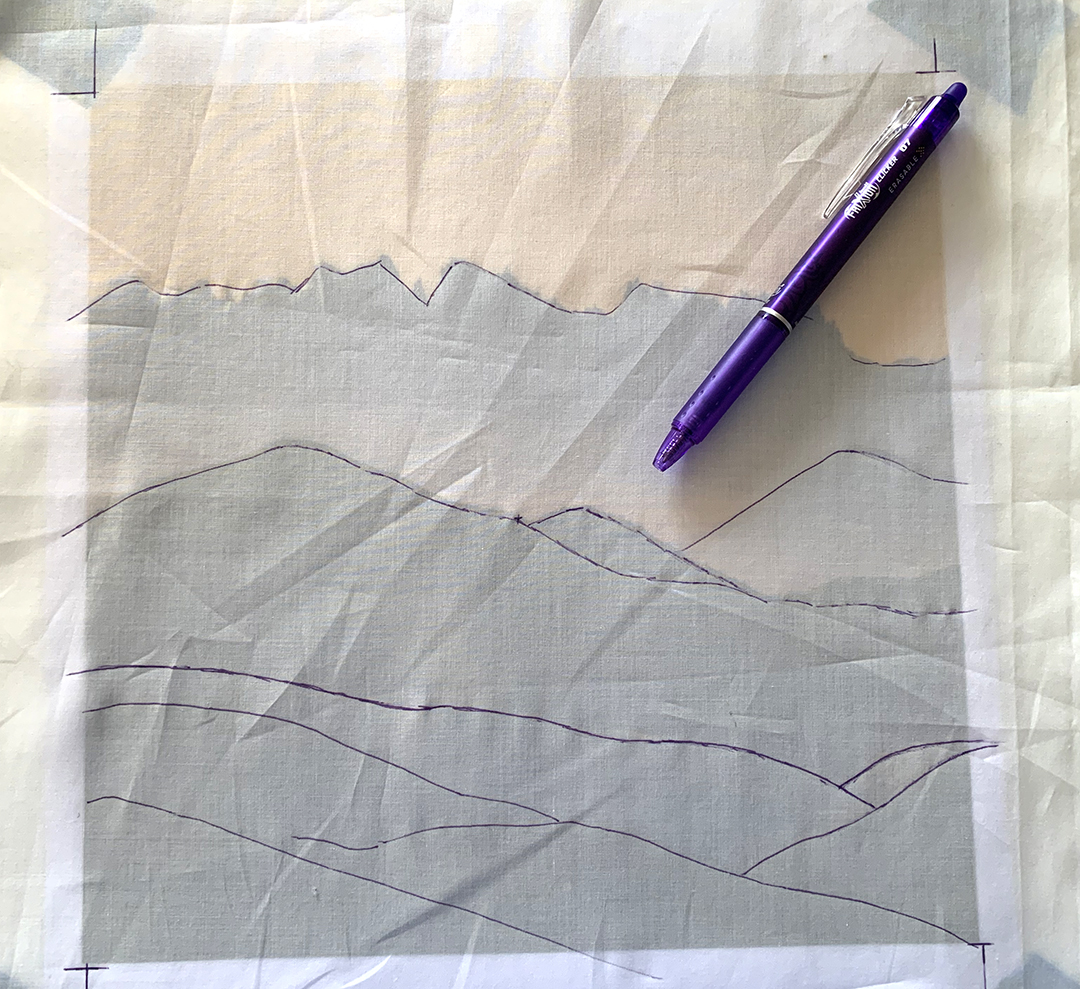
Find the center of the muslin and mark it with the Frixion pen.
Use masking tape to center the image on the lightbox. Next, tape muslin over the photo and use the Frixion pen to trace the image onto the muslin making sure to match the centers. This will now be referred to as the BASE.
Step 4: Attach Accessories
Attach PunchWork Stitch Plate and BERNINA Punch Tool #45. Following the instructions included with the BERNINA Punching tool #45, and set up for YOUR machine. I am using a BERNINA 770QE.
Step 5: Layering Mountains
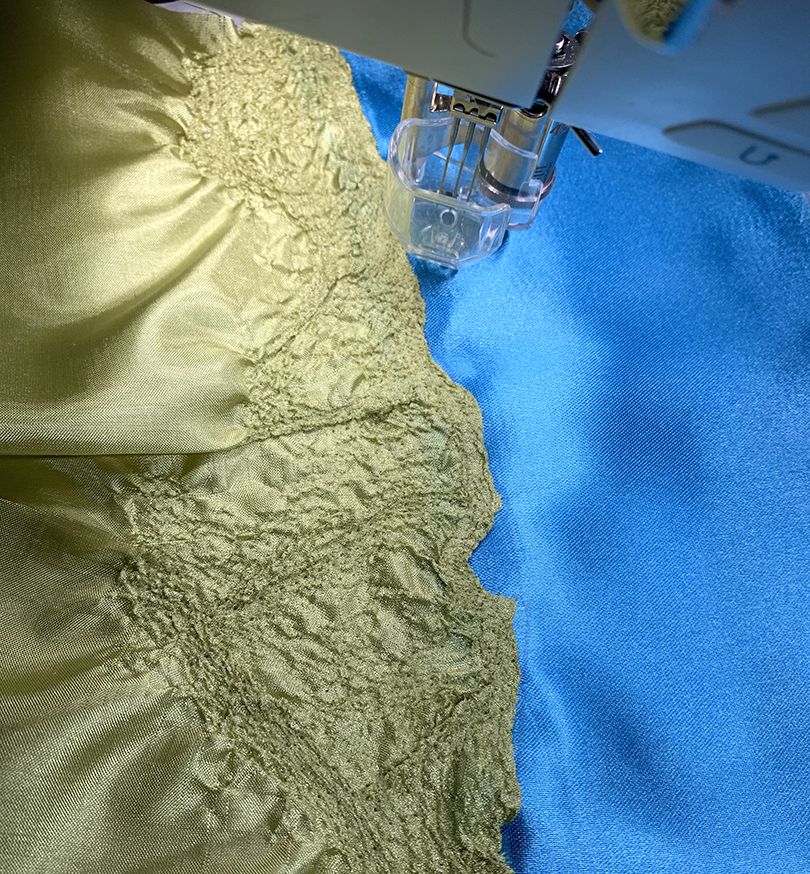
Place the sky fabric over the traced muslin base. It will extend beyond tracing. The punching tool will gather the fabric and you will trim excess later.
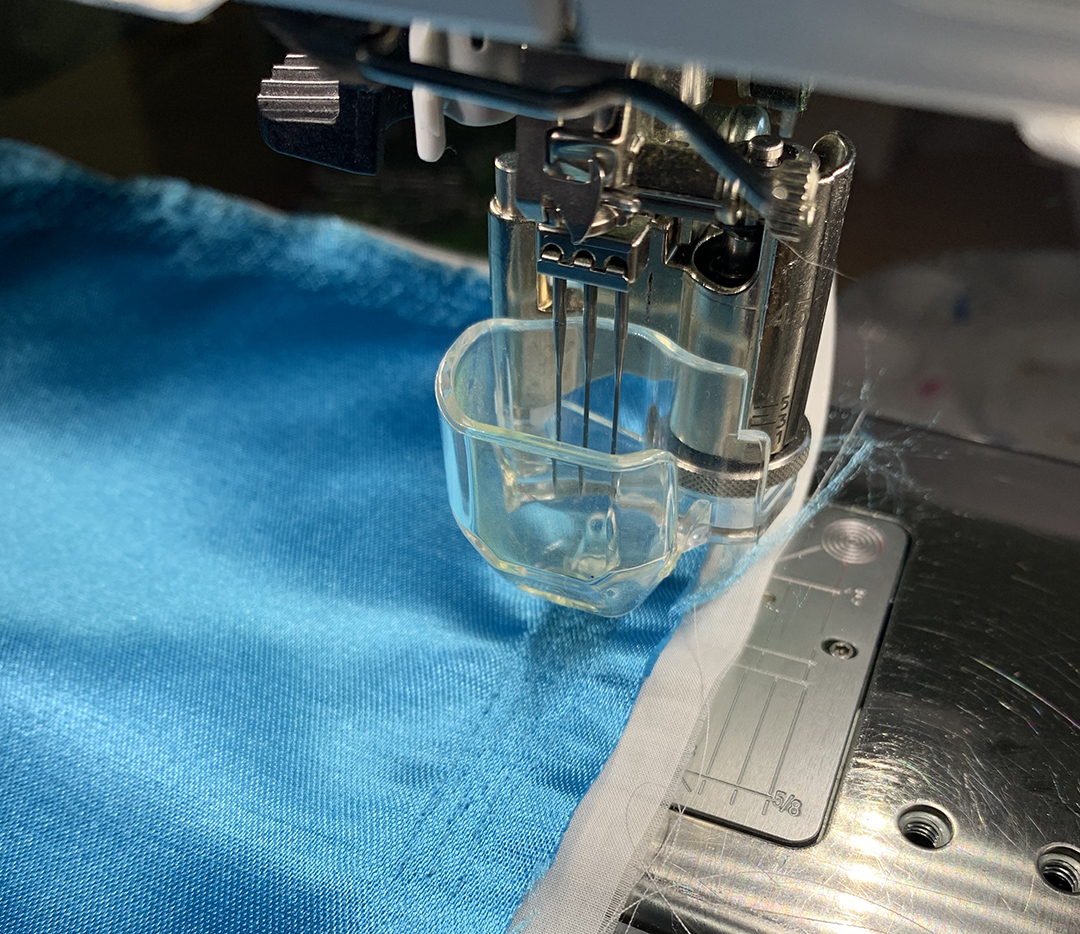
Embellish sky onto base.
Step 6: Embellish Outside Edges
Carefully begin to embellish the three outside edges of the sky leaving the bottom open. It should have a slight puckering on the edges only.

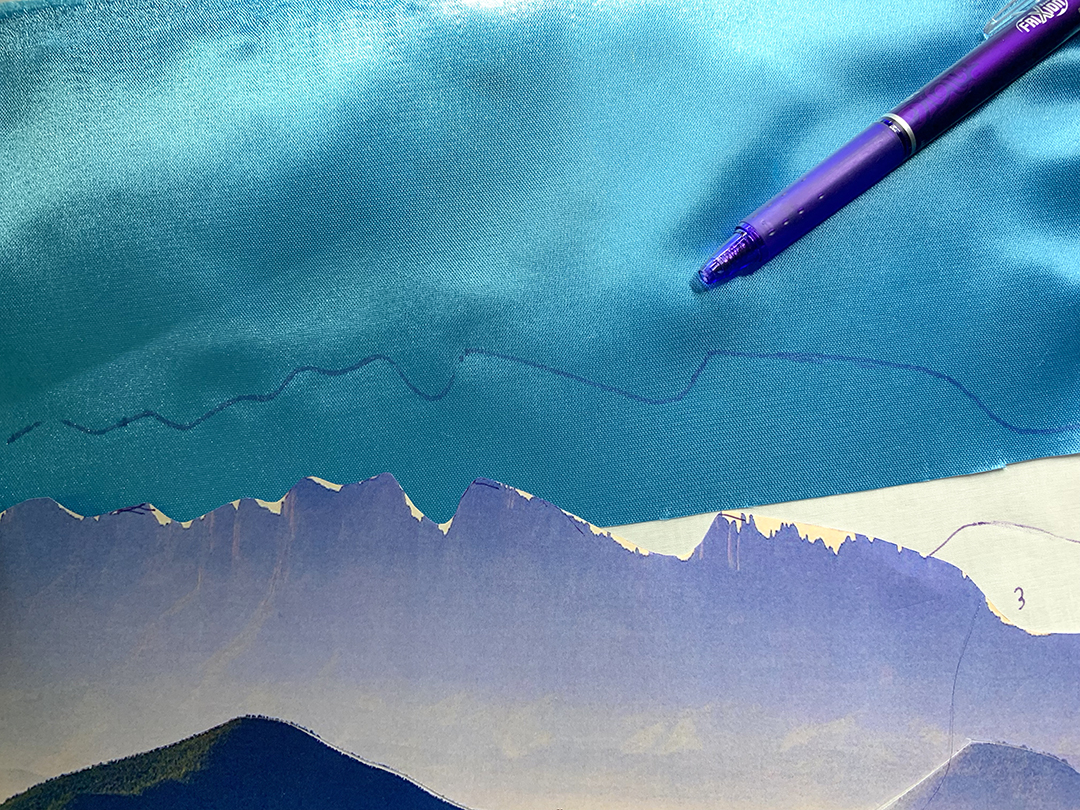
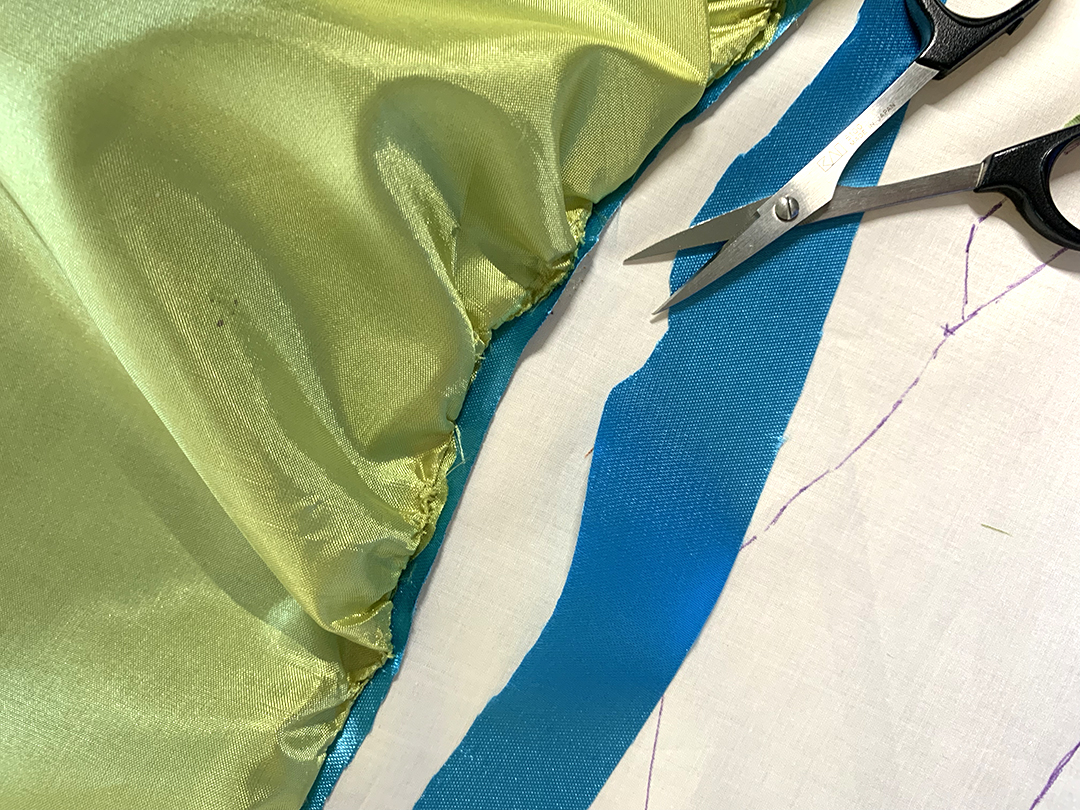
Step 7: Cut Template
Carefully cut the sky and mountains beginning from right to left leaving them still attached and hinged to the left side of the photo. This is done in order to flip and trace each shape. It is now referred to as the TEMPLATE.

Step 8: Tracing
Beginning with the mountain ridge closest to the top, lay the template over the embellished sky fabric, and trace the top edge of the first mountain.
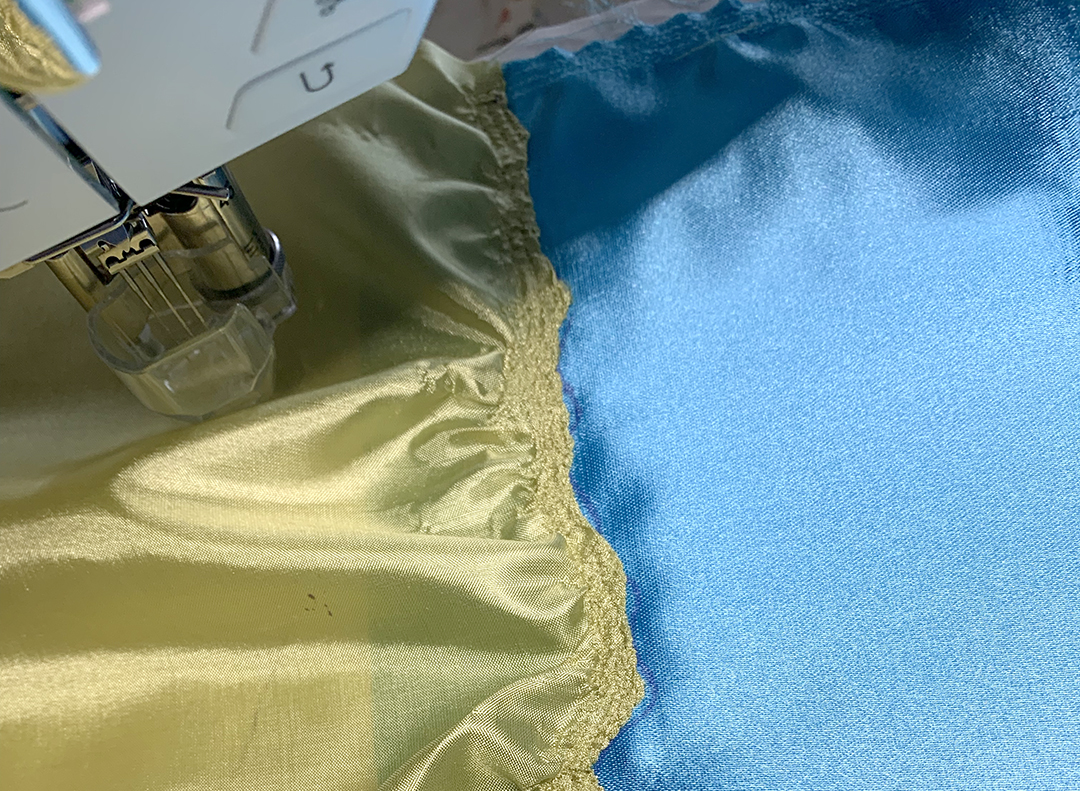
Step 9: Embellish Along Guide Line
Starting at the left side of the mountain line up the #2 creased fabric slightly covering the traced line and embellish into place, repeat. It will extend beyond the tracing.
Step 10: Flip-Up and Trim Excess
Flip the #2 fabric up. Trim the exposed fabric, in this case, the sky, close to the edge which was just embellished.
Step 11: Create Texture
Lay the fabric back down with the right side facing. There will be some excess and many wrinkles. Use your fingers to create creases and folds and embellish into place. There will be extra mountain fabric hanging down over your traced lines. It will be trimmed later.
Step 12: Mark the Mountain
Using the template, mark the top of the next mountain as it meets the bottom edge of the mountain you just embellished.
 Step 13: Repeat

Repeat the same steps for the rest of the mountain ridges working in order. Remember, they do NOT have to be perfect, as you are creating a very organic scene and no two mountains are alike. Trace, line up, embellish, flip, trim, flip back and embellish creases and folds. It’s that simple.
Note: All fabrics may not embellish easily. Be sure to repeat the process moving back and forth. If it still doesn’t hold, touch up those odd spots using invisible thread later.
Step 14: Clean and Remove Lint
Once you are happy with your embellished mountains, remove the yellow plate and #45 Punching tool and needles. Use the brush and carefully clean and remove all lint.
Step 15: Attach Accessories
Attach BERNINA 9mm plate, 29C foot, 90/14 needle, 50 wt white thread in the bobbin, and invisible thread on top. Drop the feed dog.
Step 16: Fuse Stabilizer
Following the manufacturer’s instructions, fuse the stabilizer to the backside of the mountain art. Press both sides and be sure all Frixion markings have disappeared.
Step 17: Create Clouds
Snip apart the white lace to create clouds. Bridal lace often has white netting and it’s perfectly fine to see it when creating clouds.
Step 18: Free-motion
Set up your machine for free-motion sewing.
My settings for the BERNINA 770QE are:
- Stitch: Straight
- Width: 0mm
- Length: N/A
- Feed dog: lowered
- Needle position: Center
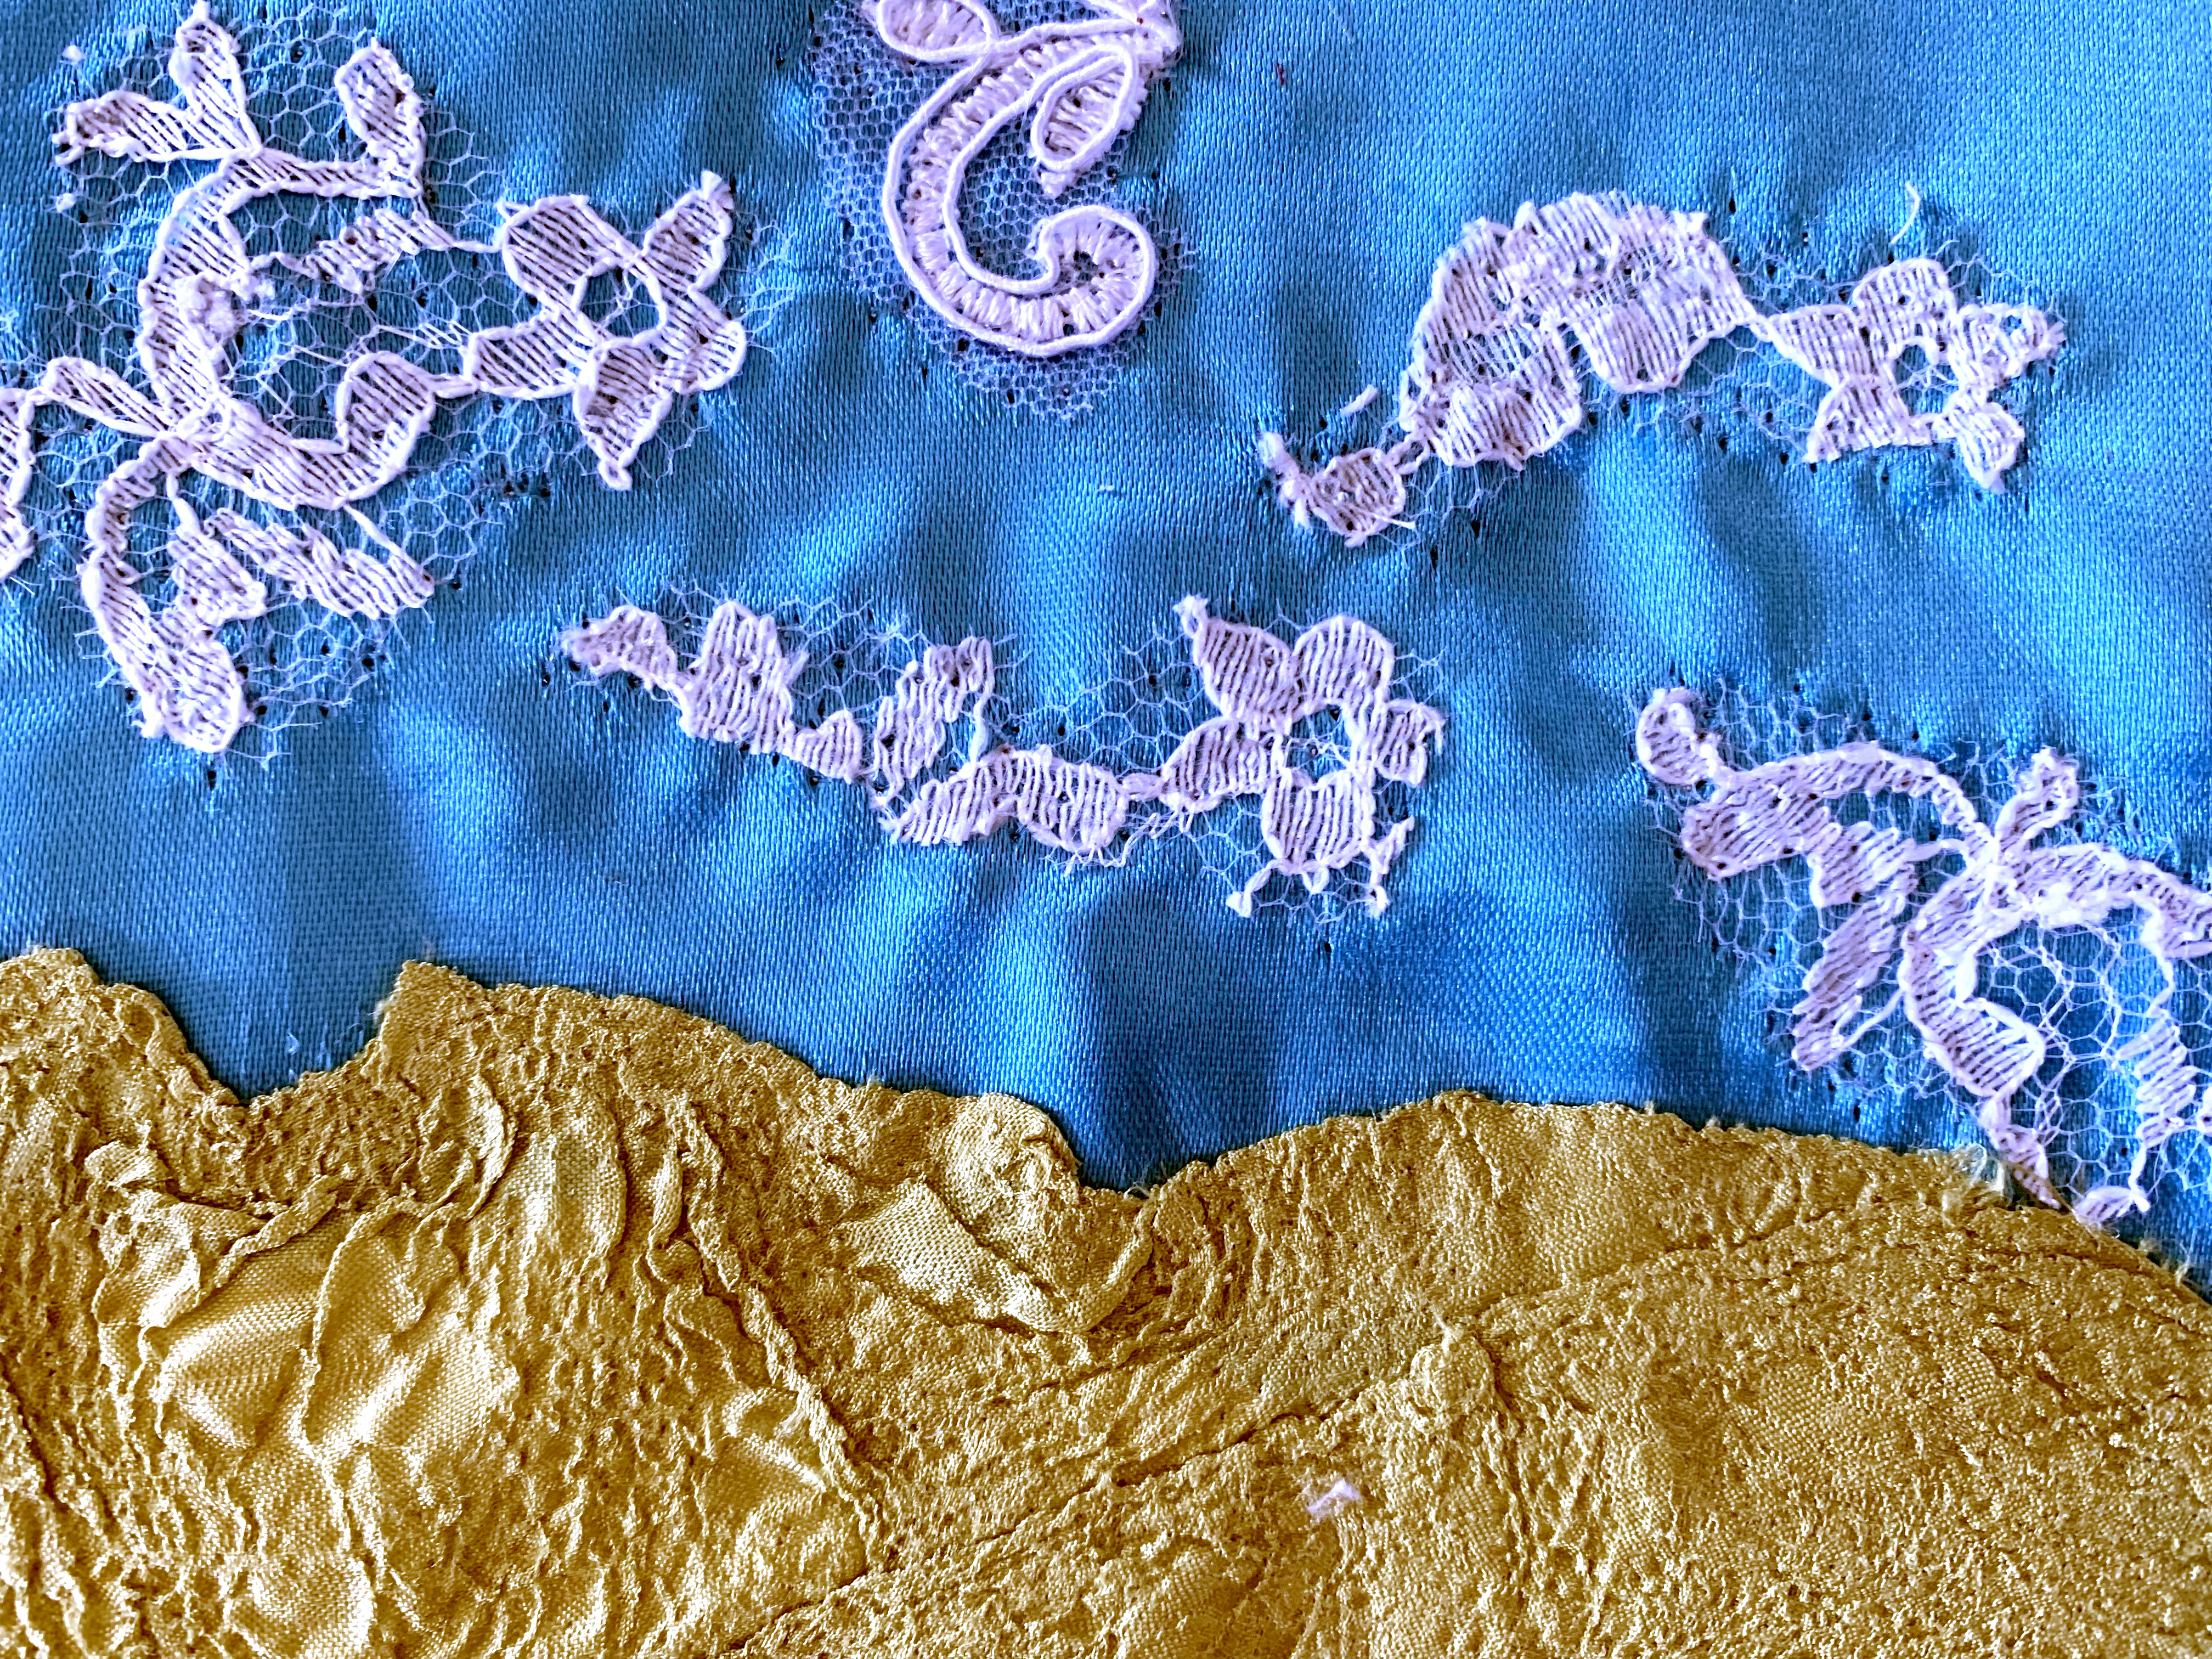
Step 19: Add Clouds
Lay the mountain art onto the bed of the sewing machine and scatter the lace across the sky. It should look pleasing to the eye. You want the clouds to look natural. I try to make them appear as if they’re dancing across the mountains. You don’t need many clouds—just enough to add interest to your art.
Start with the cloud furthest to the left. Pull up your bobbin thread and begin sewing in a meandering pattern. Stitch all over the lace and then trim. Repeat with the next cloud moving across the sky until all are attached.
Step 20: Check Embellishments
Examine each mountain to be sure all are embellished and firmly attached. If you find any loose edges, simply stitch them into place using the invisible thread.
Step 21: Trim and Frame
Press, square up, and trim the mountain art to 10.5”
The art is now ready for framing or can be made into a lovely pillow.
*Optional, before squaring up:
• Use free motion to embroider trees and bushes into the foreground
• Hand embroider or bead shrubs or flowers into the foreground
• Embellish with dyed cheesecloth, eyelash lace, scrim, ribbons, dyed doilies or lace in the foreground. HAVE FUN!
To view a gallery of my textile illustrations that use embellishing techniques please visit my website.