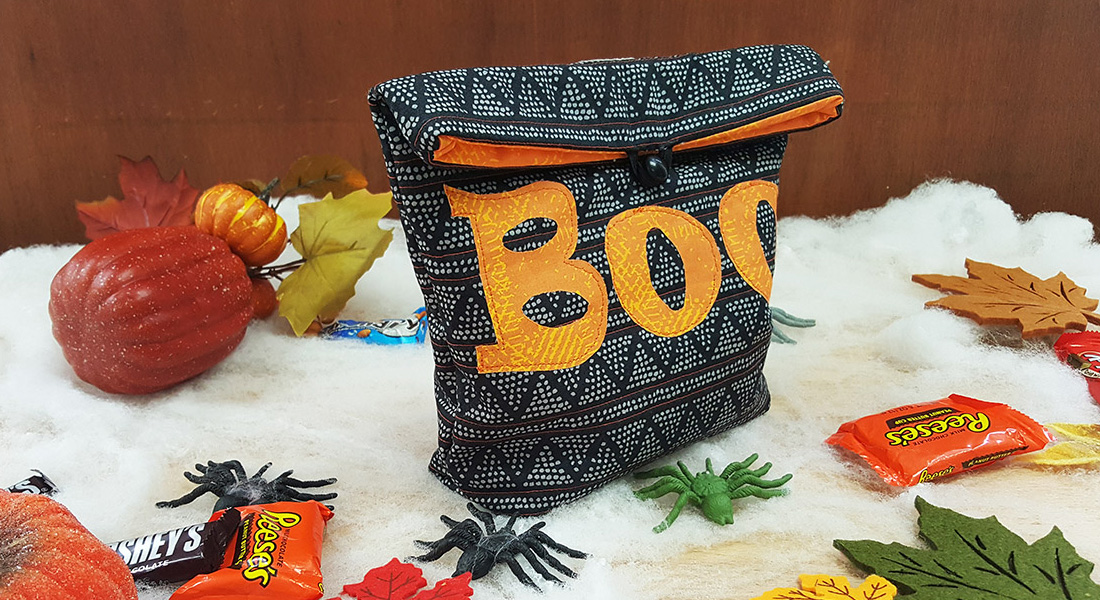
Sew a Clutch Bag Embellished with Metallic Stitches or Couched Yarns
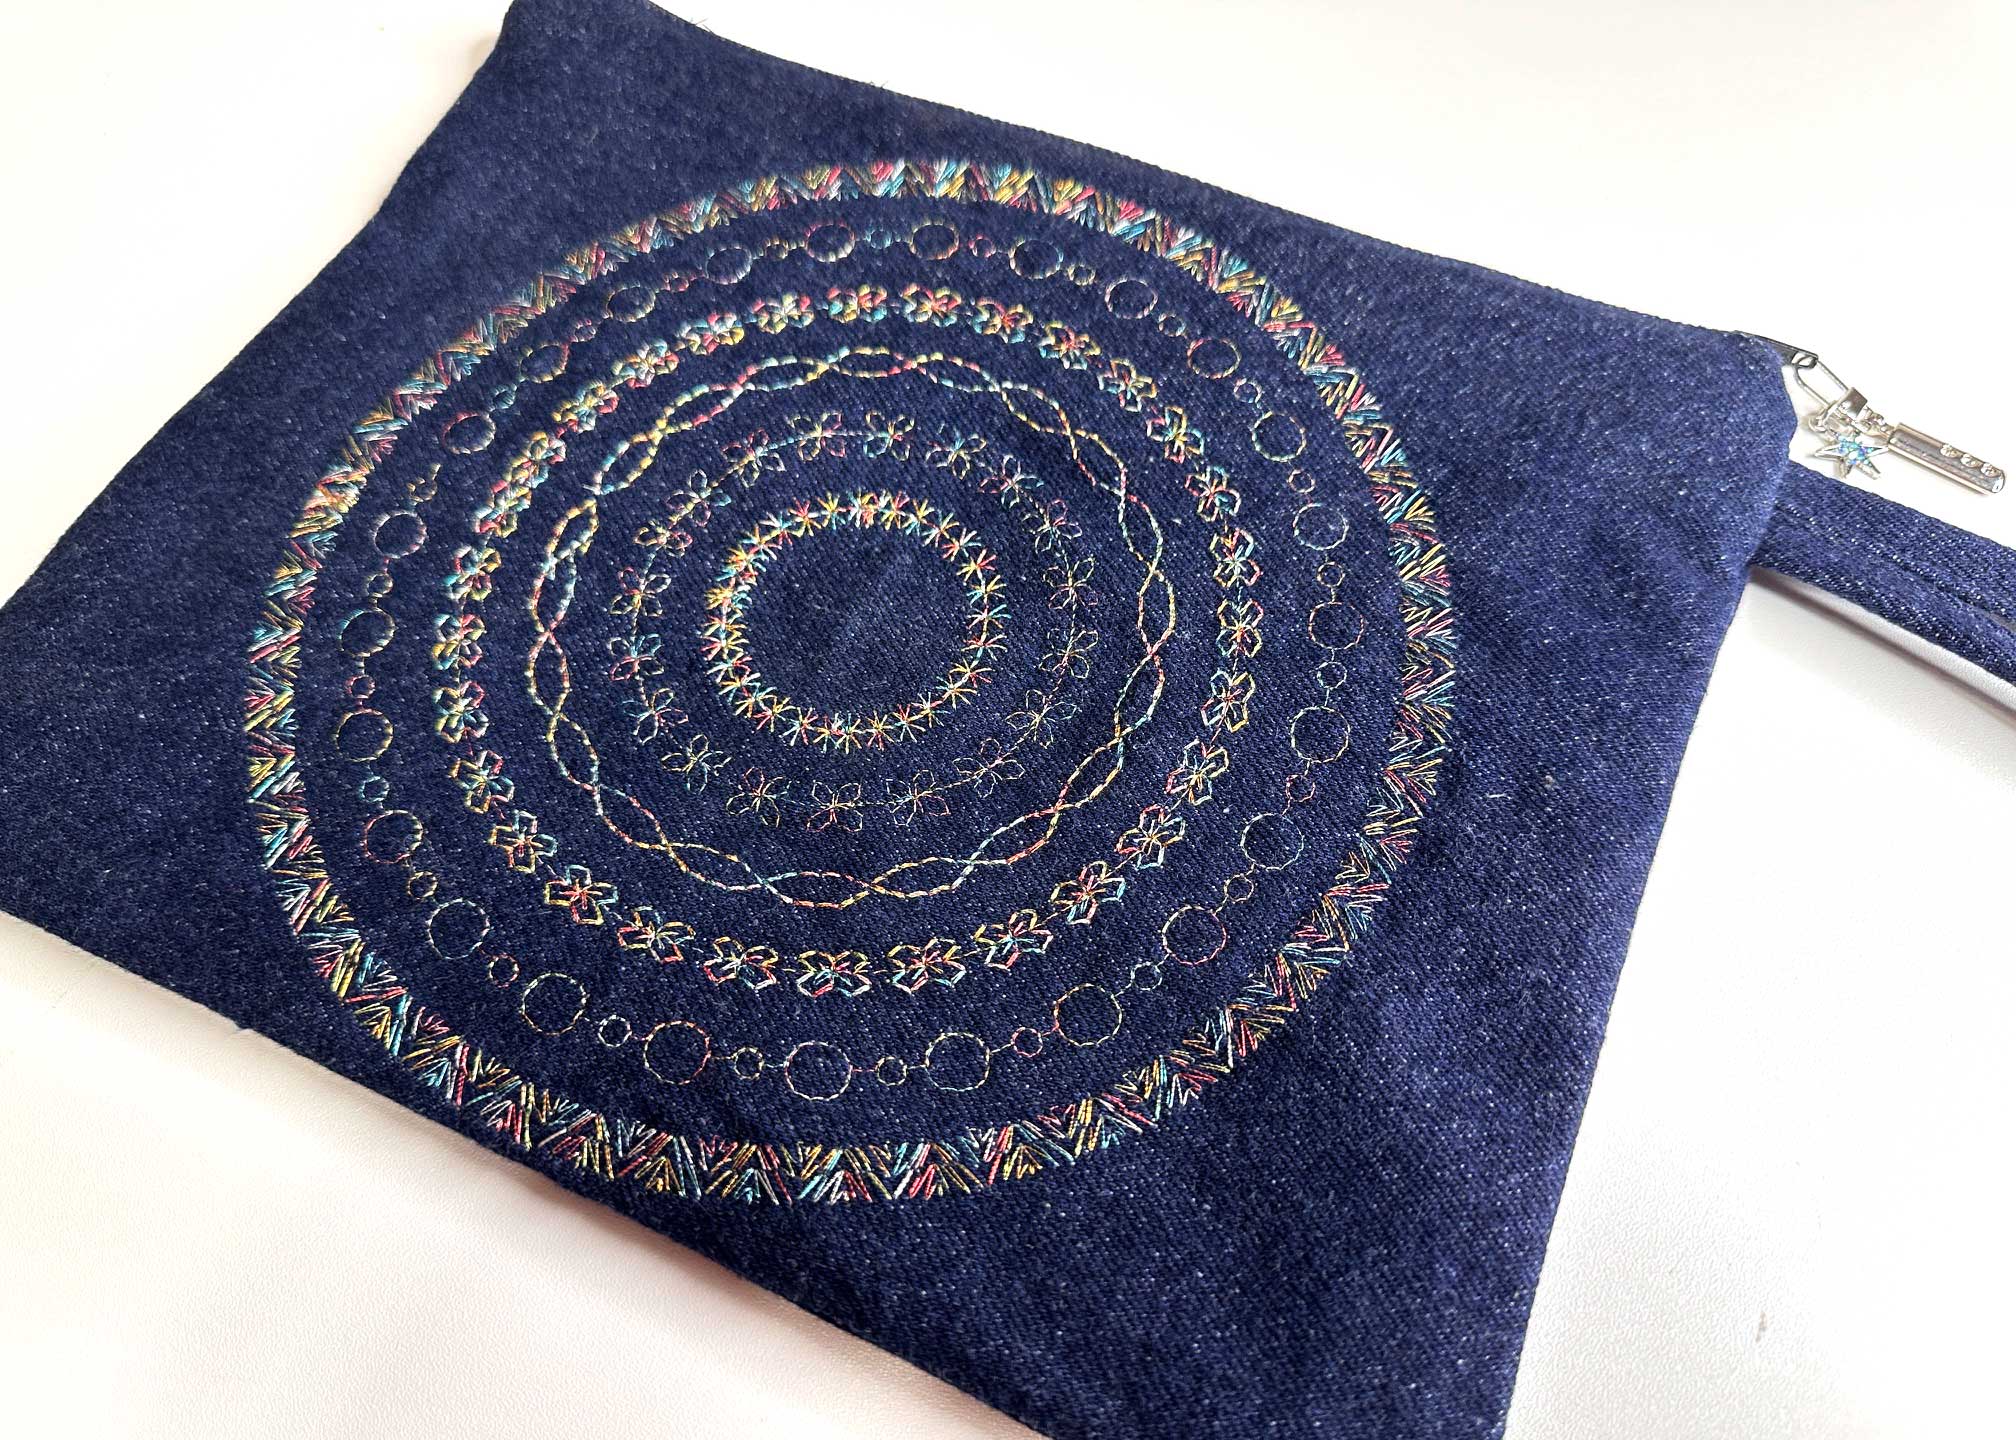
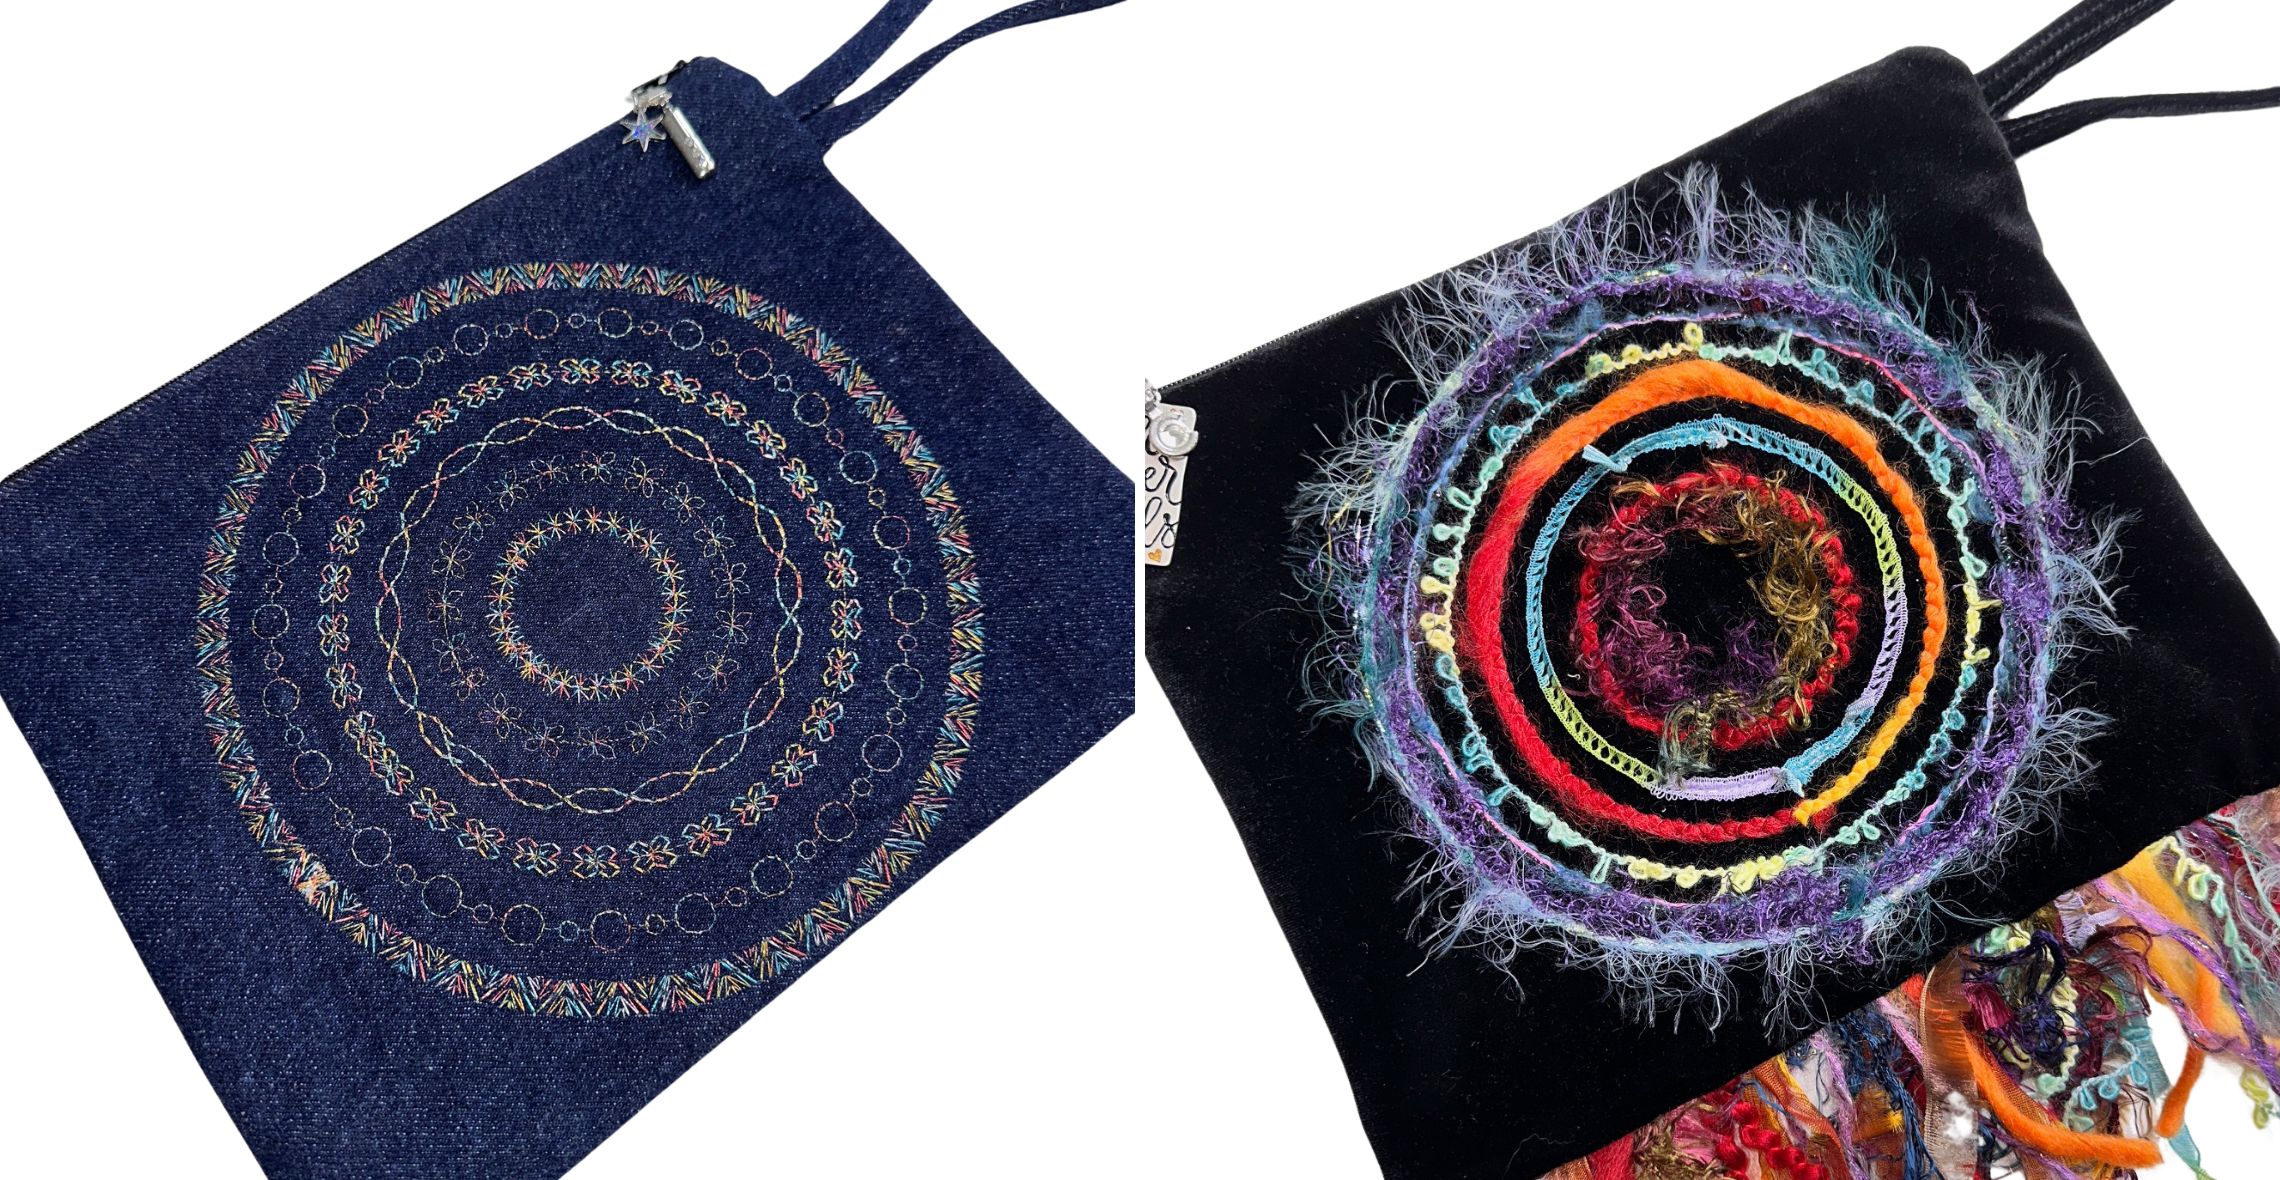
While many like to ring in the New Year sparkling with satin and sequins, I enjoy wearing jeans and adding some glitz and glamor with accessories. No matter what you wear while celebrating the New Year, this easy-to-sew clutch bag is ready for any event. Sew it in denim with an eye-catching circular design created with metallic thread for extra sparkle, or sew a velvet one with a circular design and fringe created using decorative trims.
Hello everyone! It’s Sharon from Sharon Sews. You can connect with me on YouTube, Instagram and Facebook, where I share sewing tips, projects, reviews, and fashion sewing ideas.
Materials to Sew the Denim Clutch Bag with Metallic Stitches
- Sewing Machine – I used my BERNINA 770 QE PLUS
- Circular Embroidery Attachment #83
- Denim fabric – 1/4 yard (or enough to cut rectangle sizes listed below)
- I used a thrifted pair of wide leg jeans for my clutch bag
- Cotton fabric (lining) – 1/4 yard (or enough to cut rectangle sizes listed below)
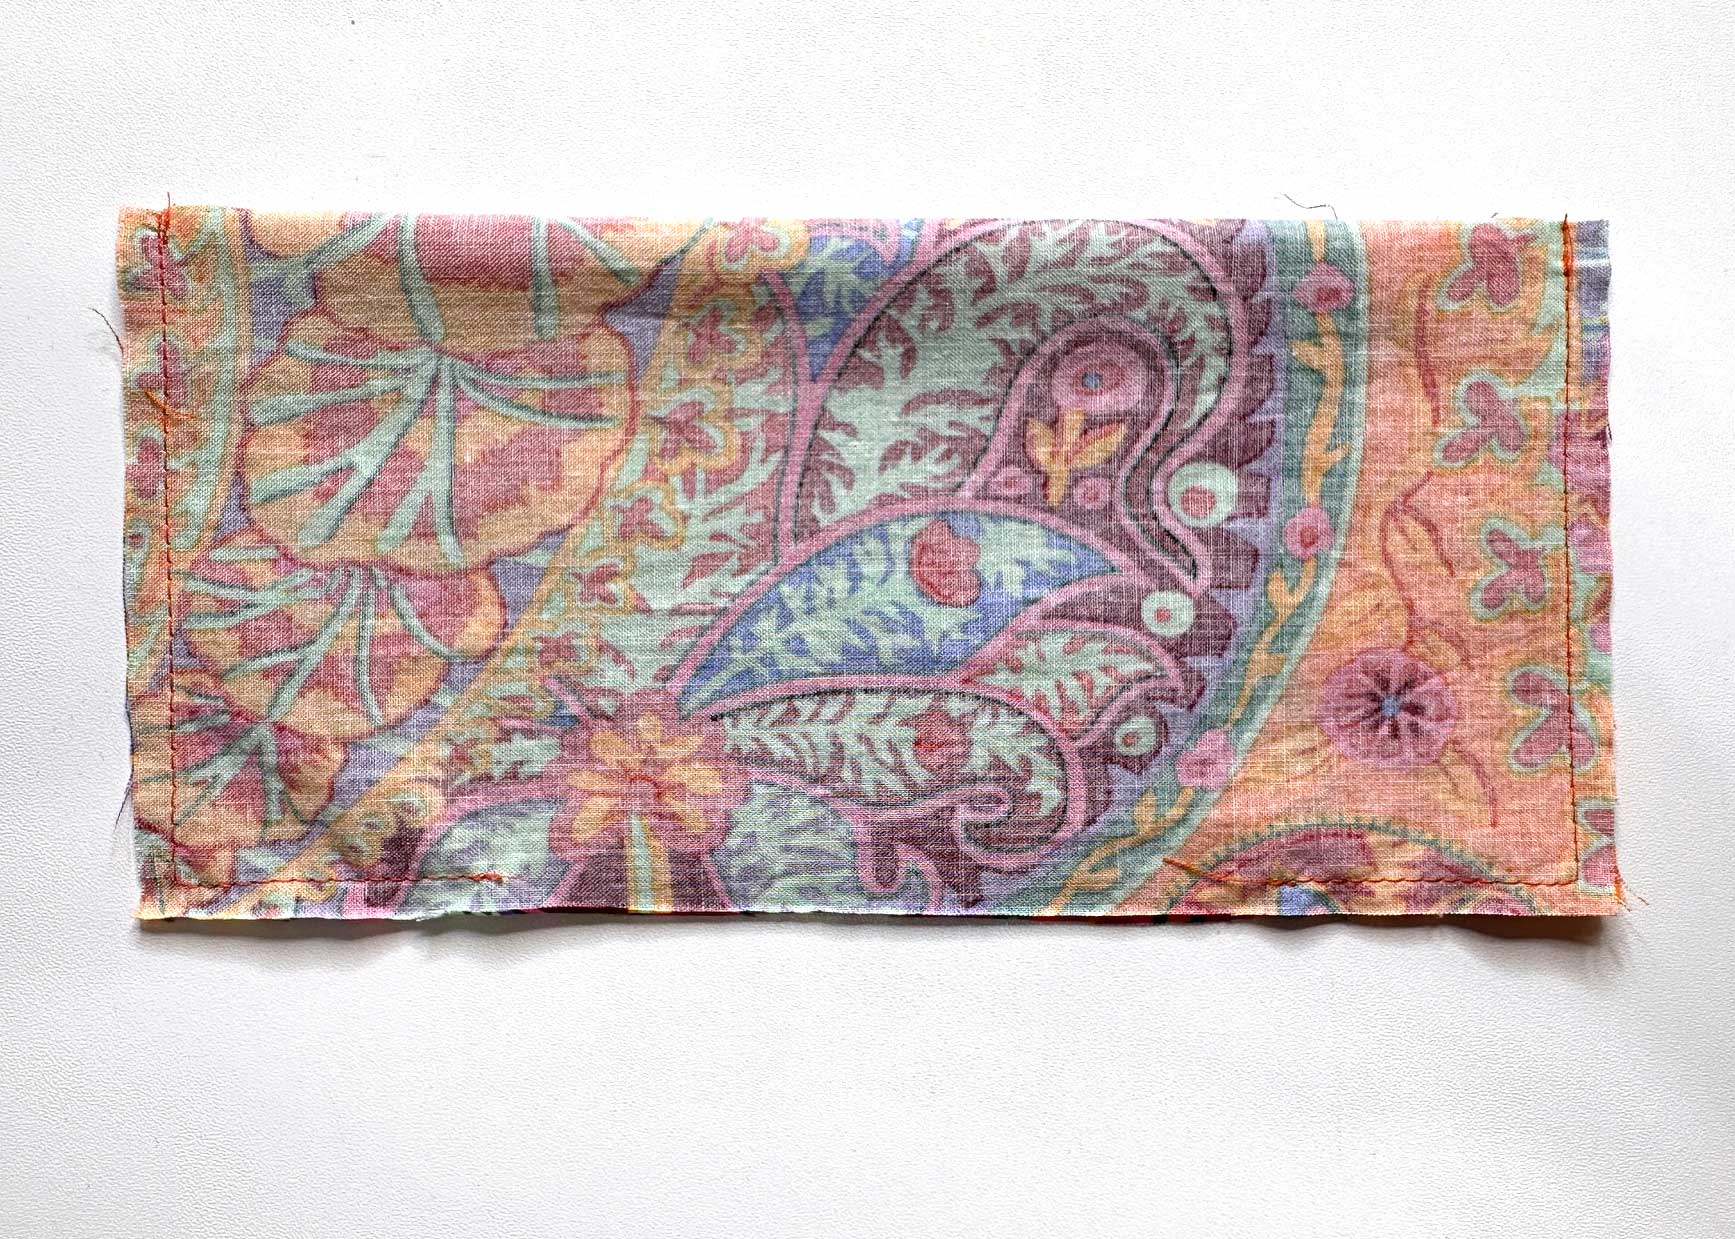
- I used Kaffe Fassett for Free Spirit GP 60 Paisley Jungle
- Coordinating all-purpose thread to construct the clutch bag
- I used Navy Blue Mettler Metrosene
- Contrast metallic thread
- I used 2004 Mettler Jewel Multi
- Sewing machine needle for metallic thread
- 80/12 or 90/14 depending on thickness of your denim
- Sewing machine needle for constructing the bag
- Tear-away stabilizer
- I used Sulky Totally Stable
- 14″ (or longer) nylon coil zipper (excess will be trimmed)
- Decorative zipper pull (optional)
- Ruler
- Removable marking device
- Fabric scraps to test decorative stitches
- Pins and clips
- General sewing supplies
- Iron and pressing surface
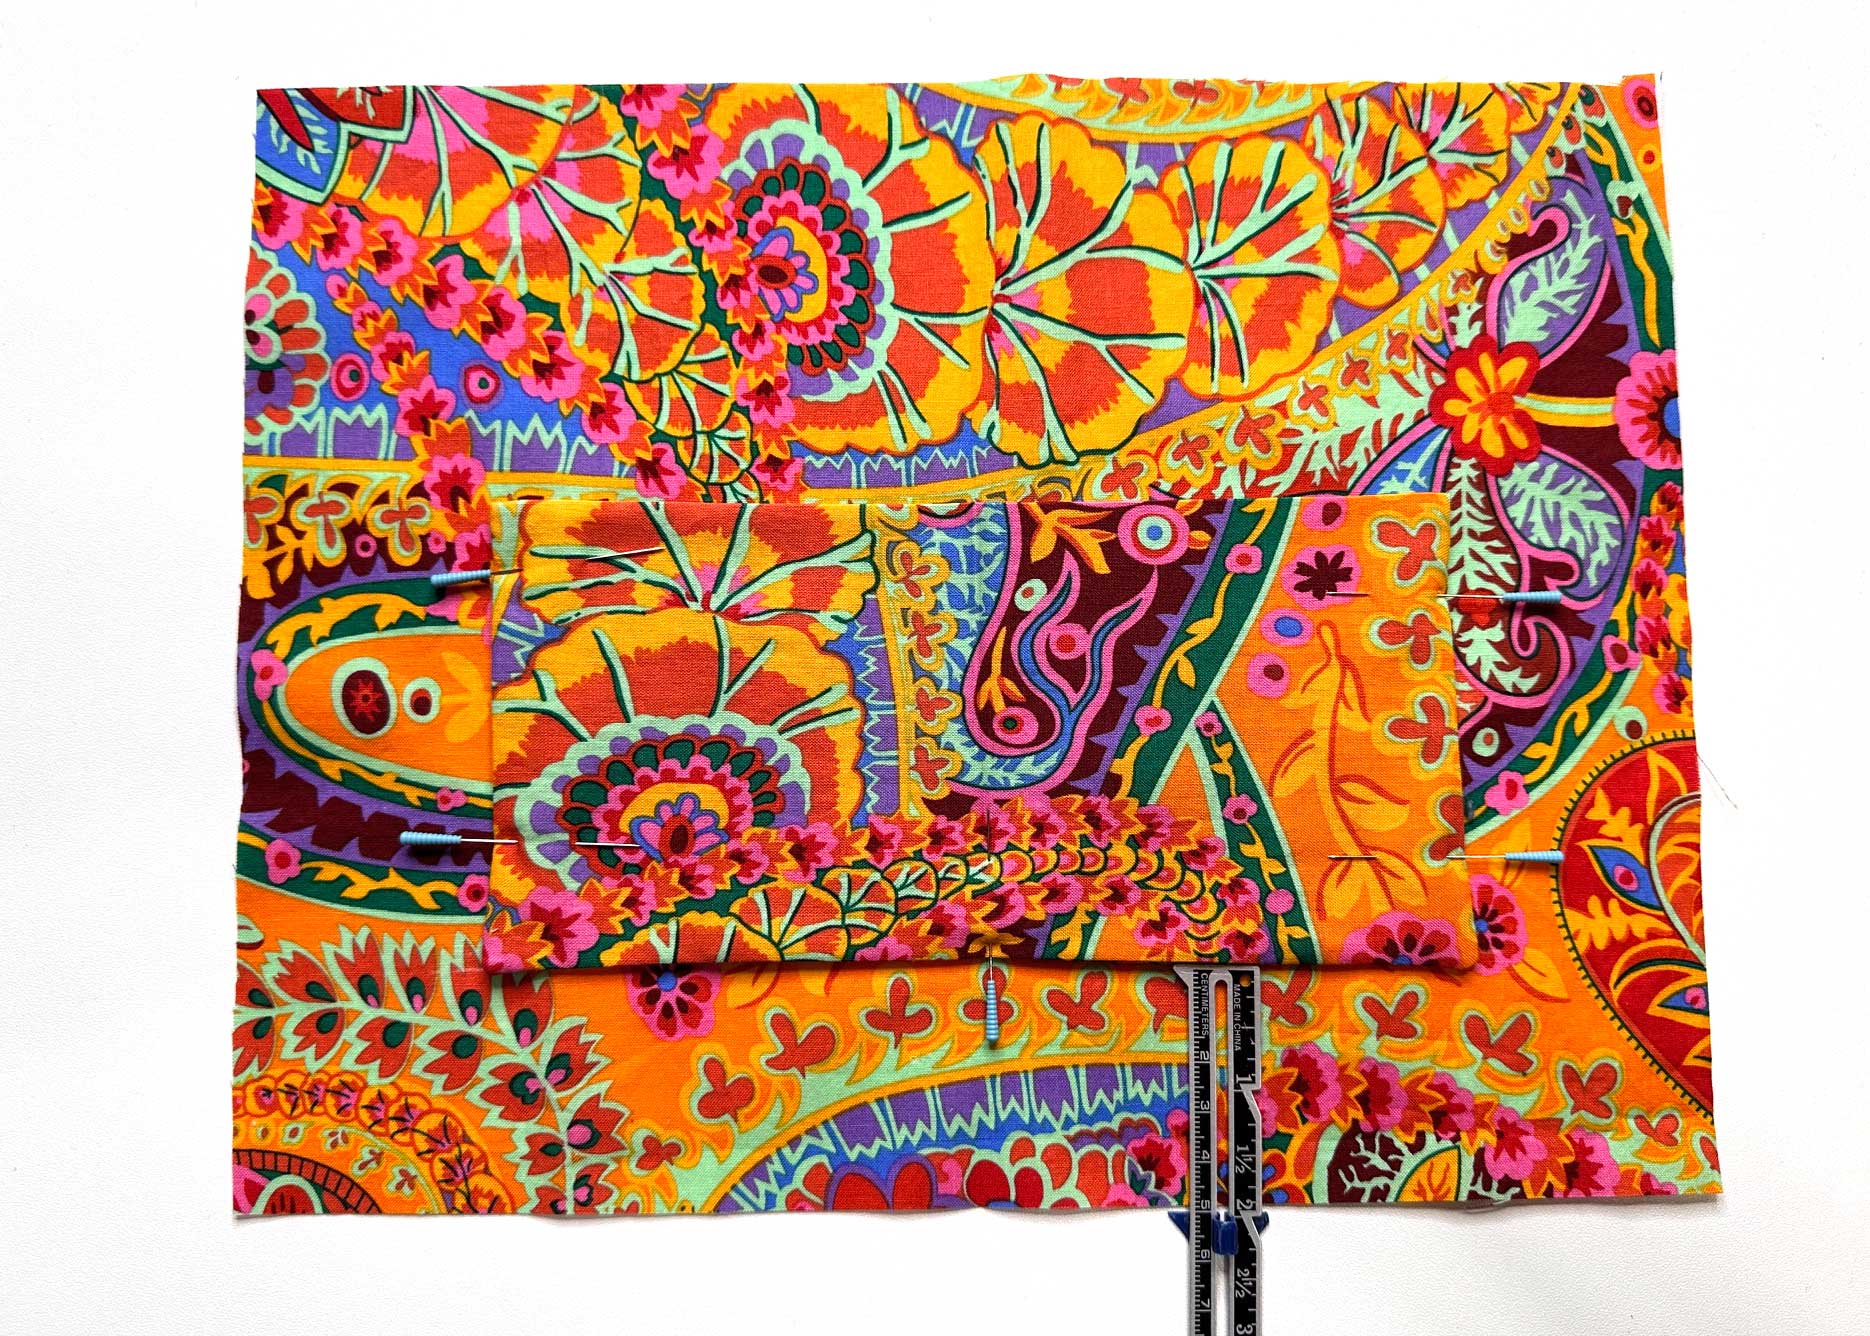
Cutting Instructions for the Clutch Bag
- (2) 9″ x 12” rectangles of denim fabric (main body of clutch bag)
- (2) 9” x 12” rectangles of lining fabric (lining of clutch bag)
- (1) 8″ x 9″ rectangles of lining fabric (inside pocket)
- (1) 1-3/4″ x 16″ rectangle of denim fabric (optional wrist strap)
Prepare the Denim Clutch Bag for Decorative Stitches
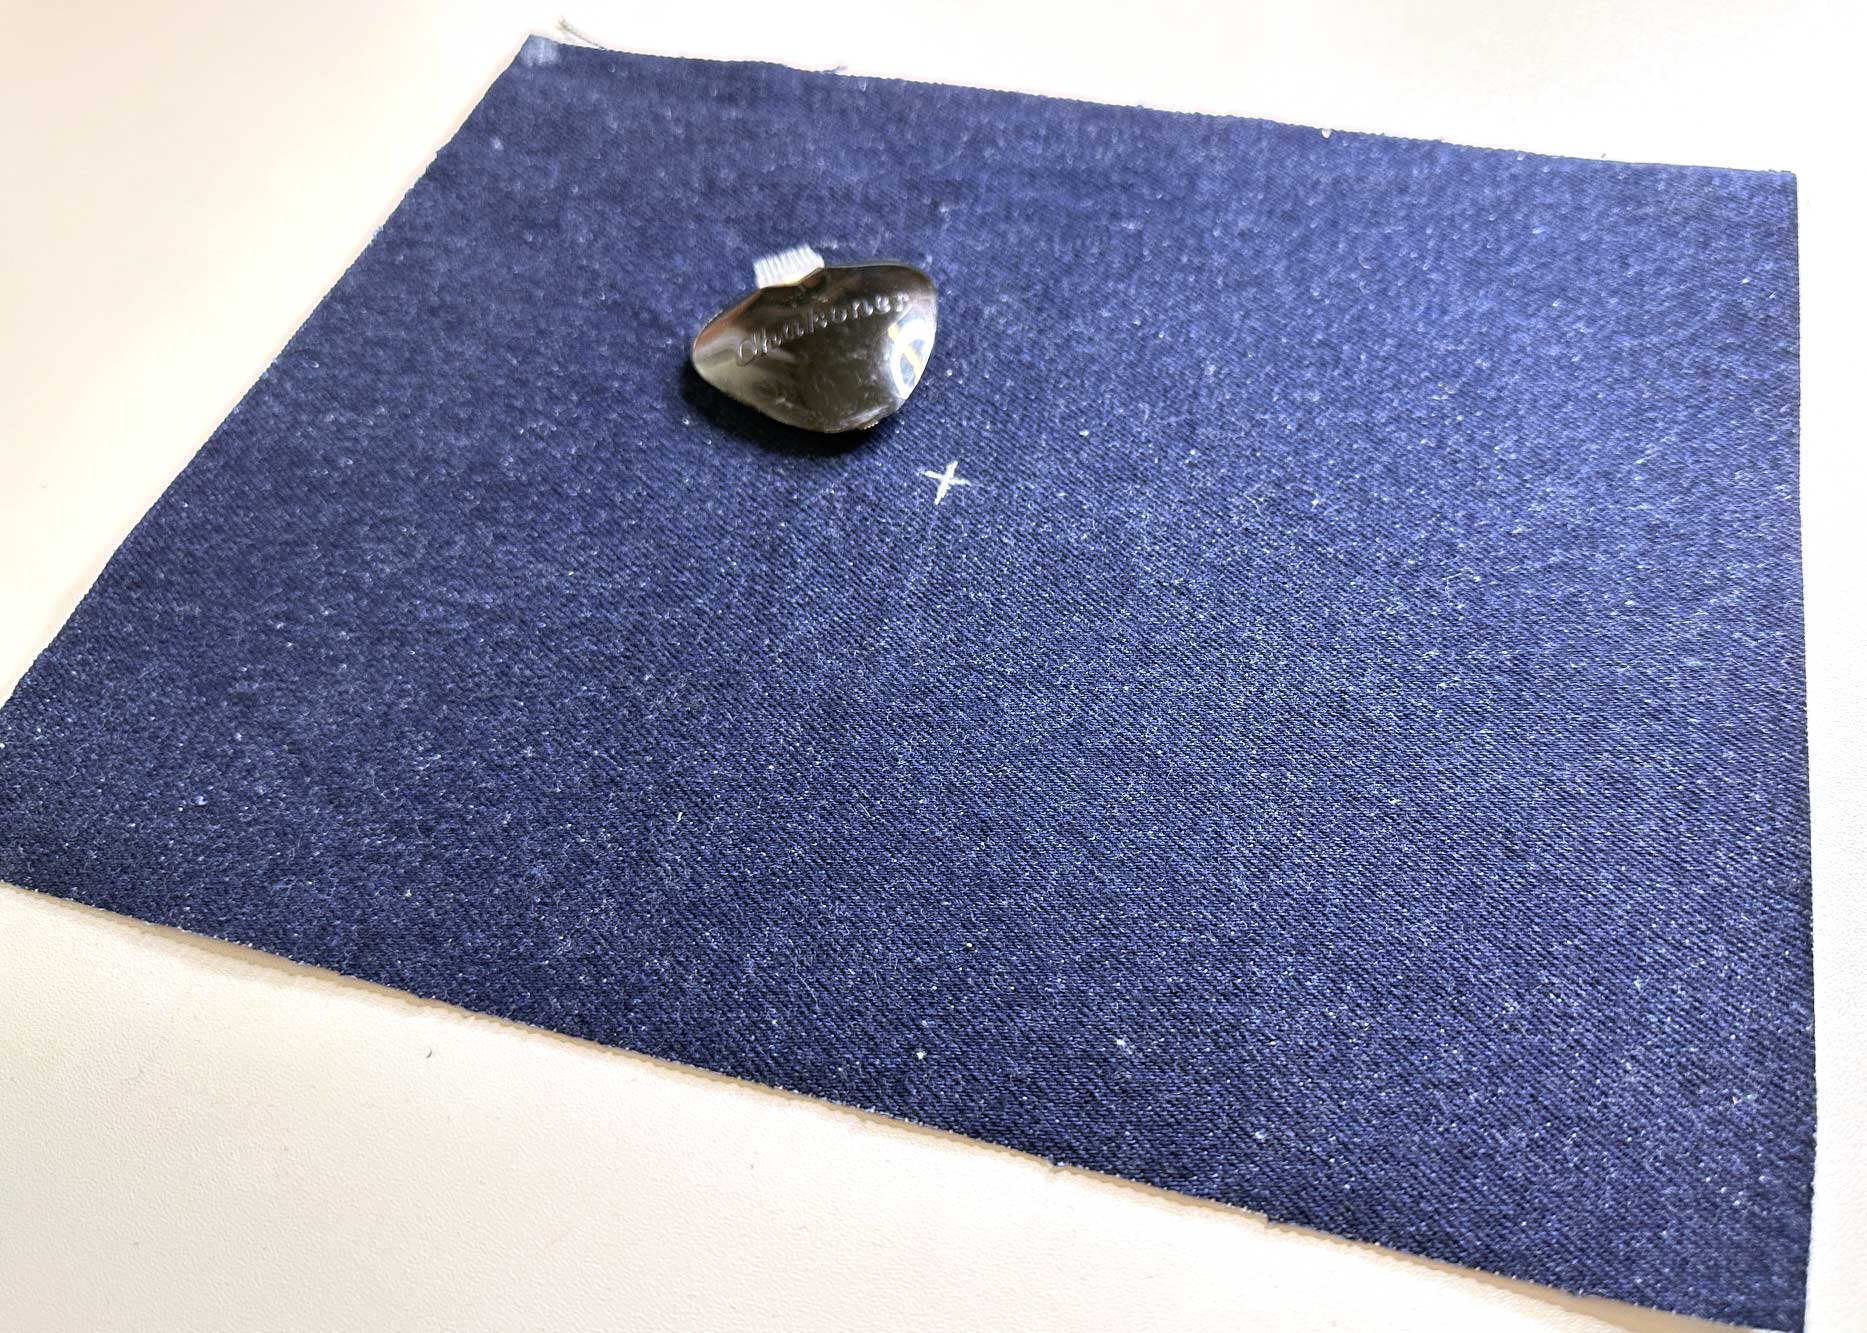
With a removable marking device, mark the center of the clutch bag. I like to use a Chakoner, which dispenses chalk in a fine line. Whatever you use, make sure it can be removed as it will be visible once your clutch bag is completed.
Add stabilizer to the wrong side of the denim fabric where the decorative stitches will be added.
Insert a new needle designed to be used with metallic thread. I found a 80/12 metallic thread needle worked fine for the medium-weight denim I used for the clutch bag. Note that a 90/14 metallic needed is recommended for many metallic threads.
Thread your sewing machine with metallic thread. The Mettler metallic thread I used is a 40 wt. thread.
Do not use the metallic thread in the bobbin. I used the Mettler Metrosene thread in my bobbin for both constructing the bag and stitching metallic decorative stitches. Another option is to use a 60 wt bobbin thread.
Learn more about pairing thread and needle sizes on this blog post.
Adding the Decorative Circular Stitches on the Clutch Bag
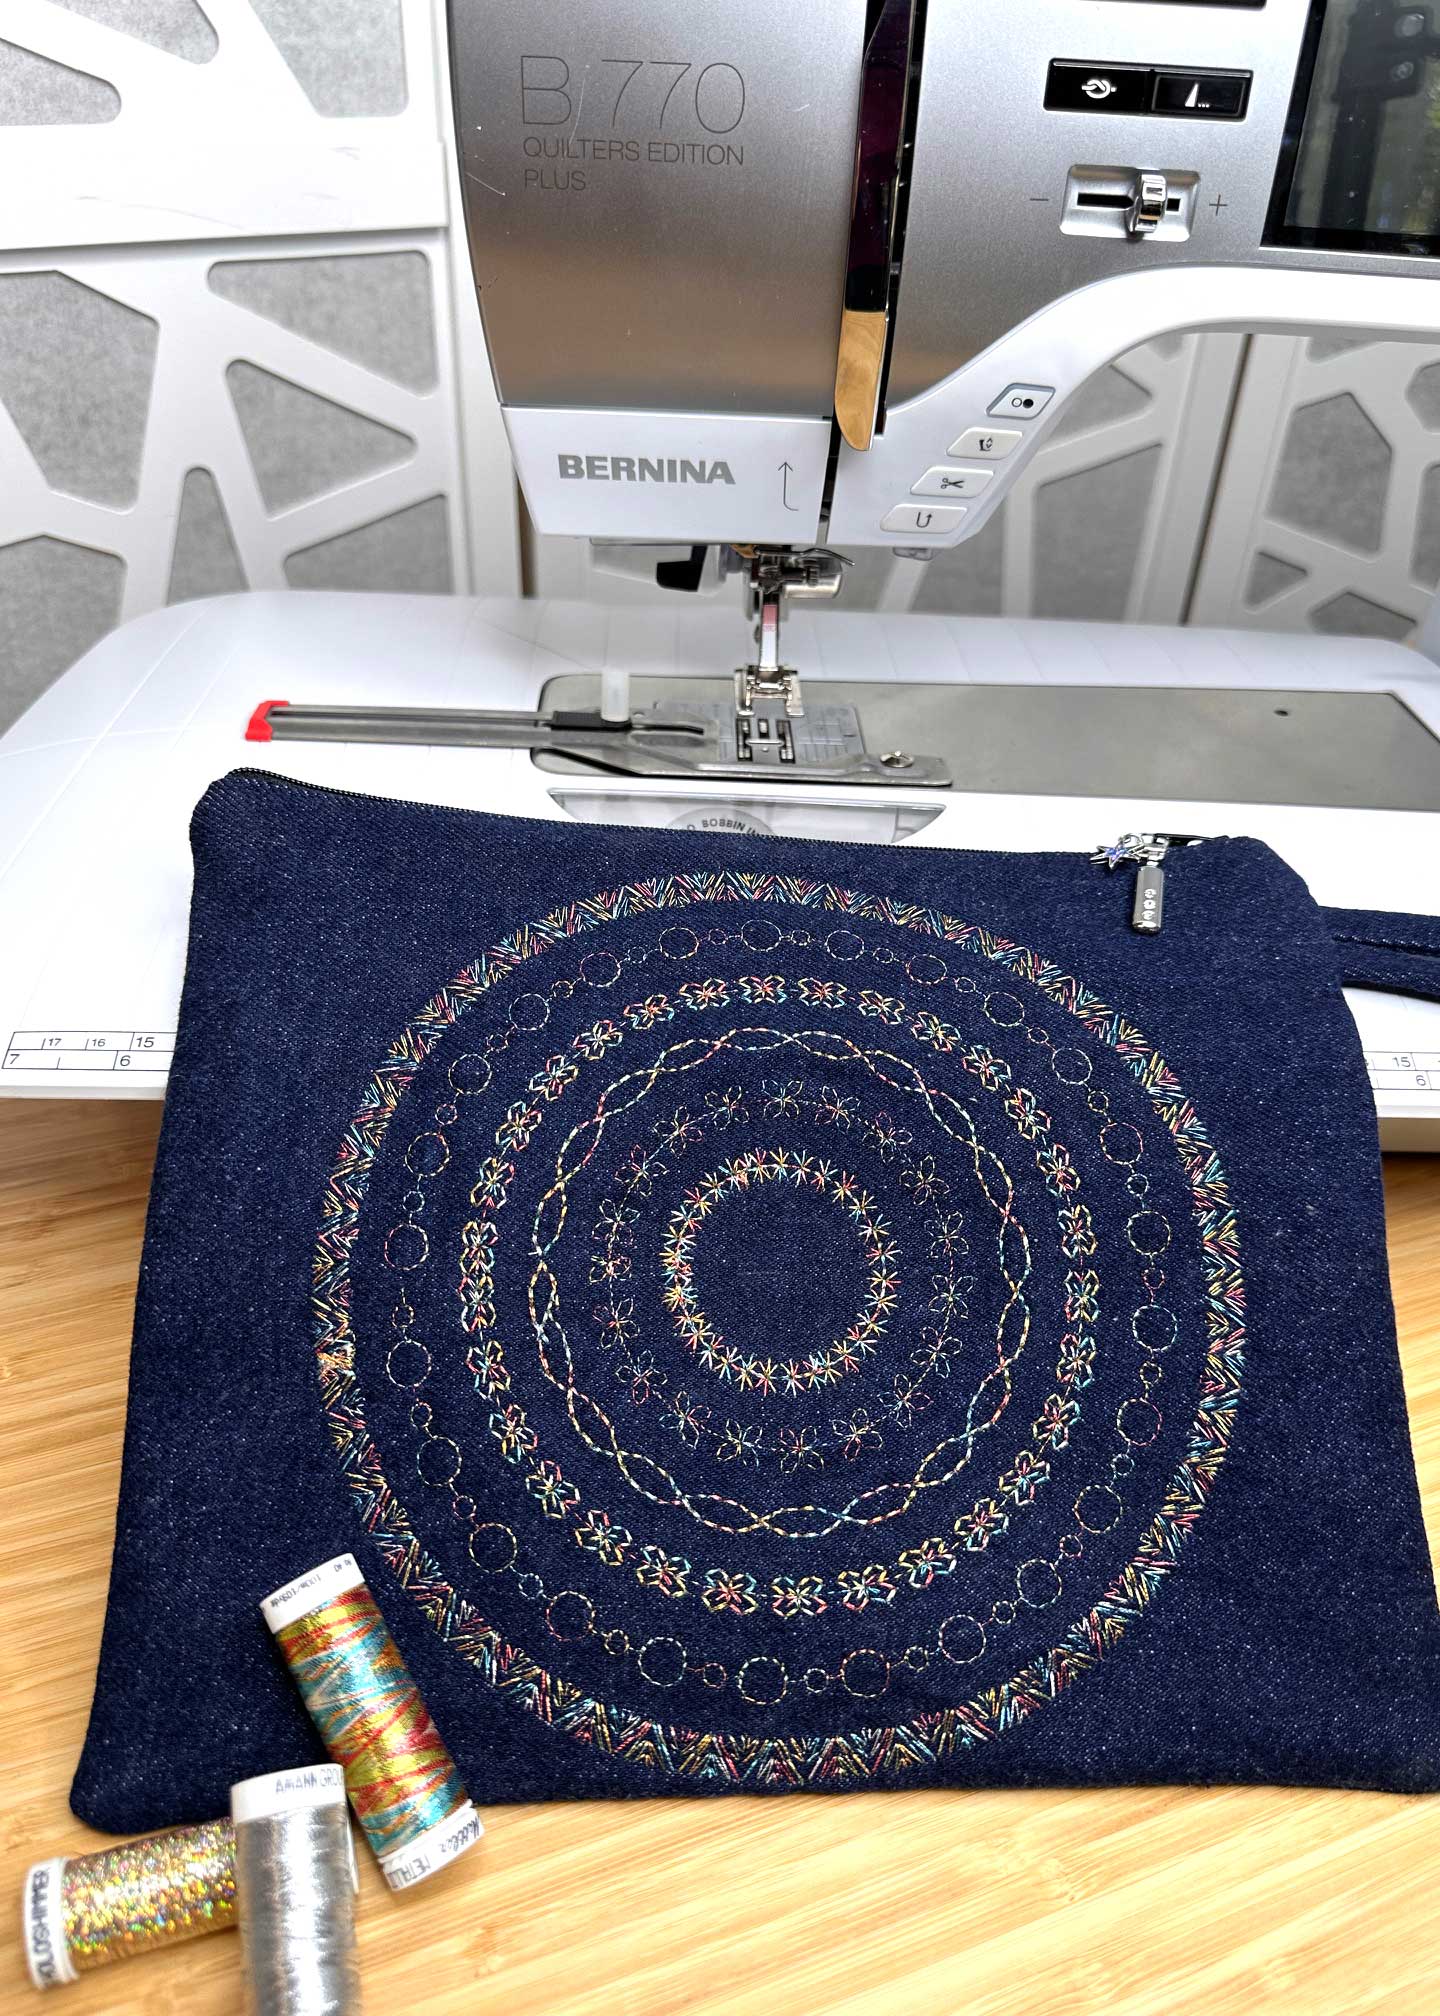
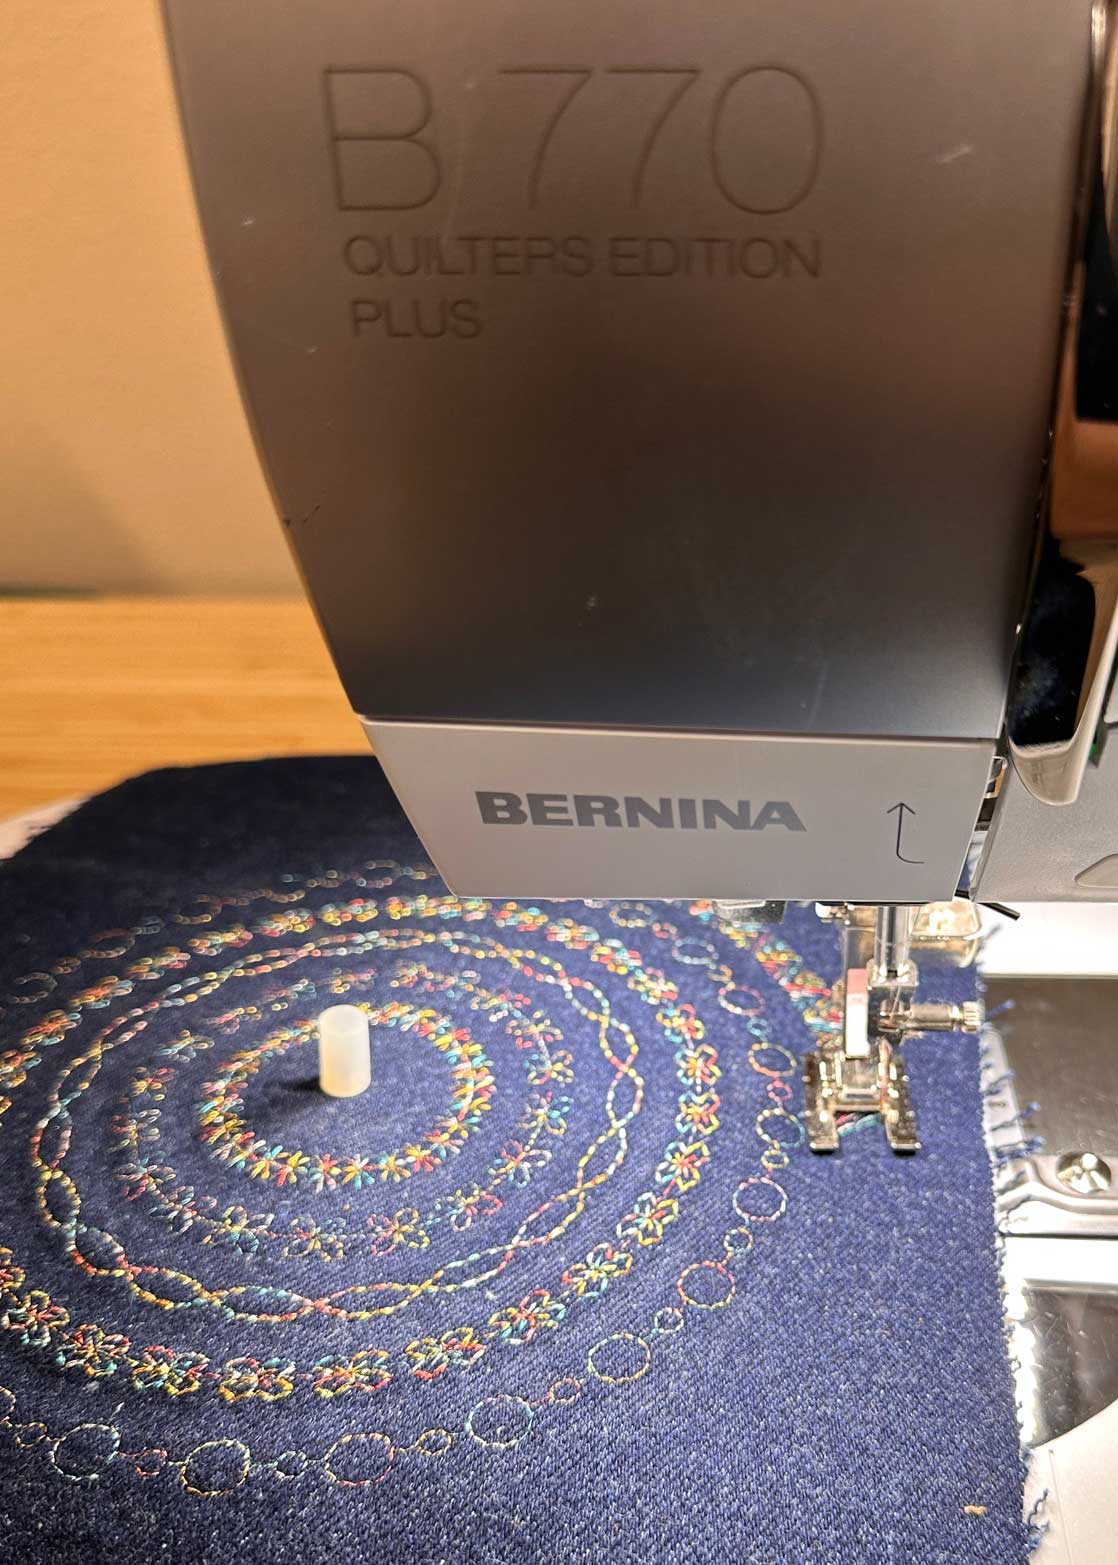
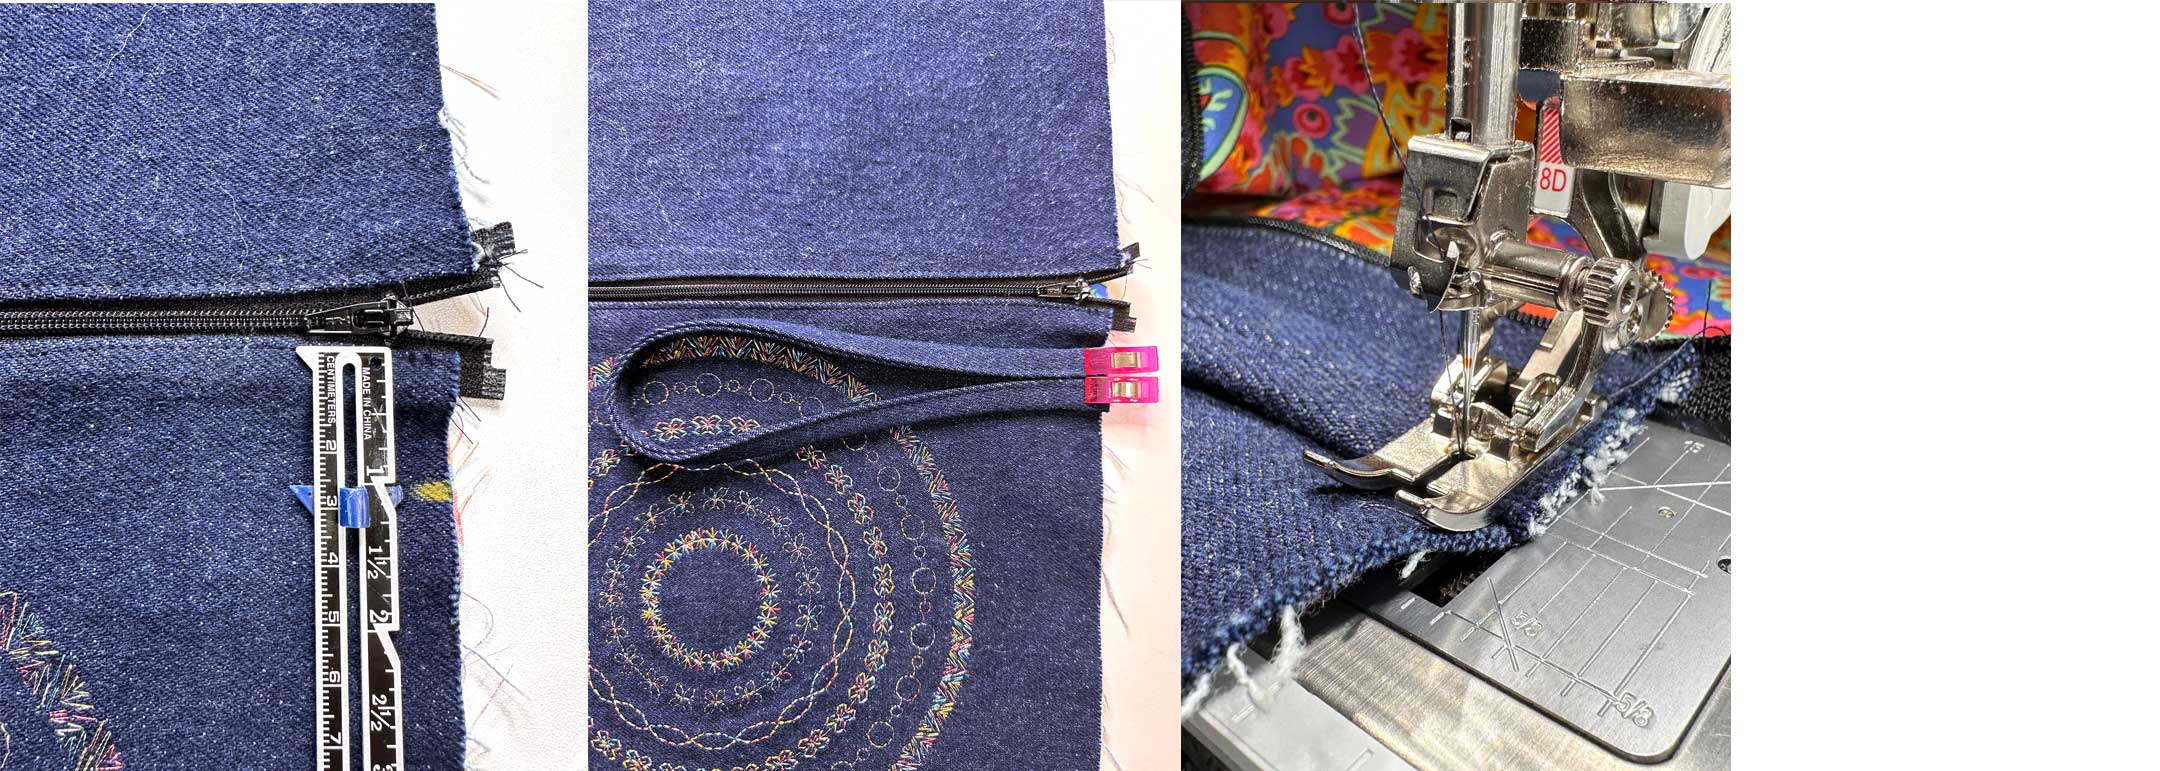
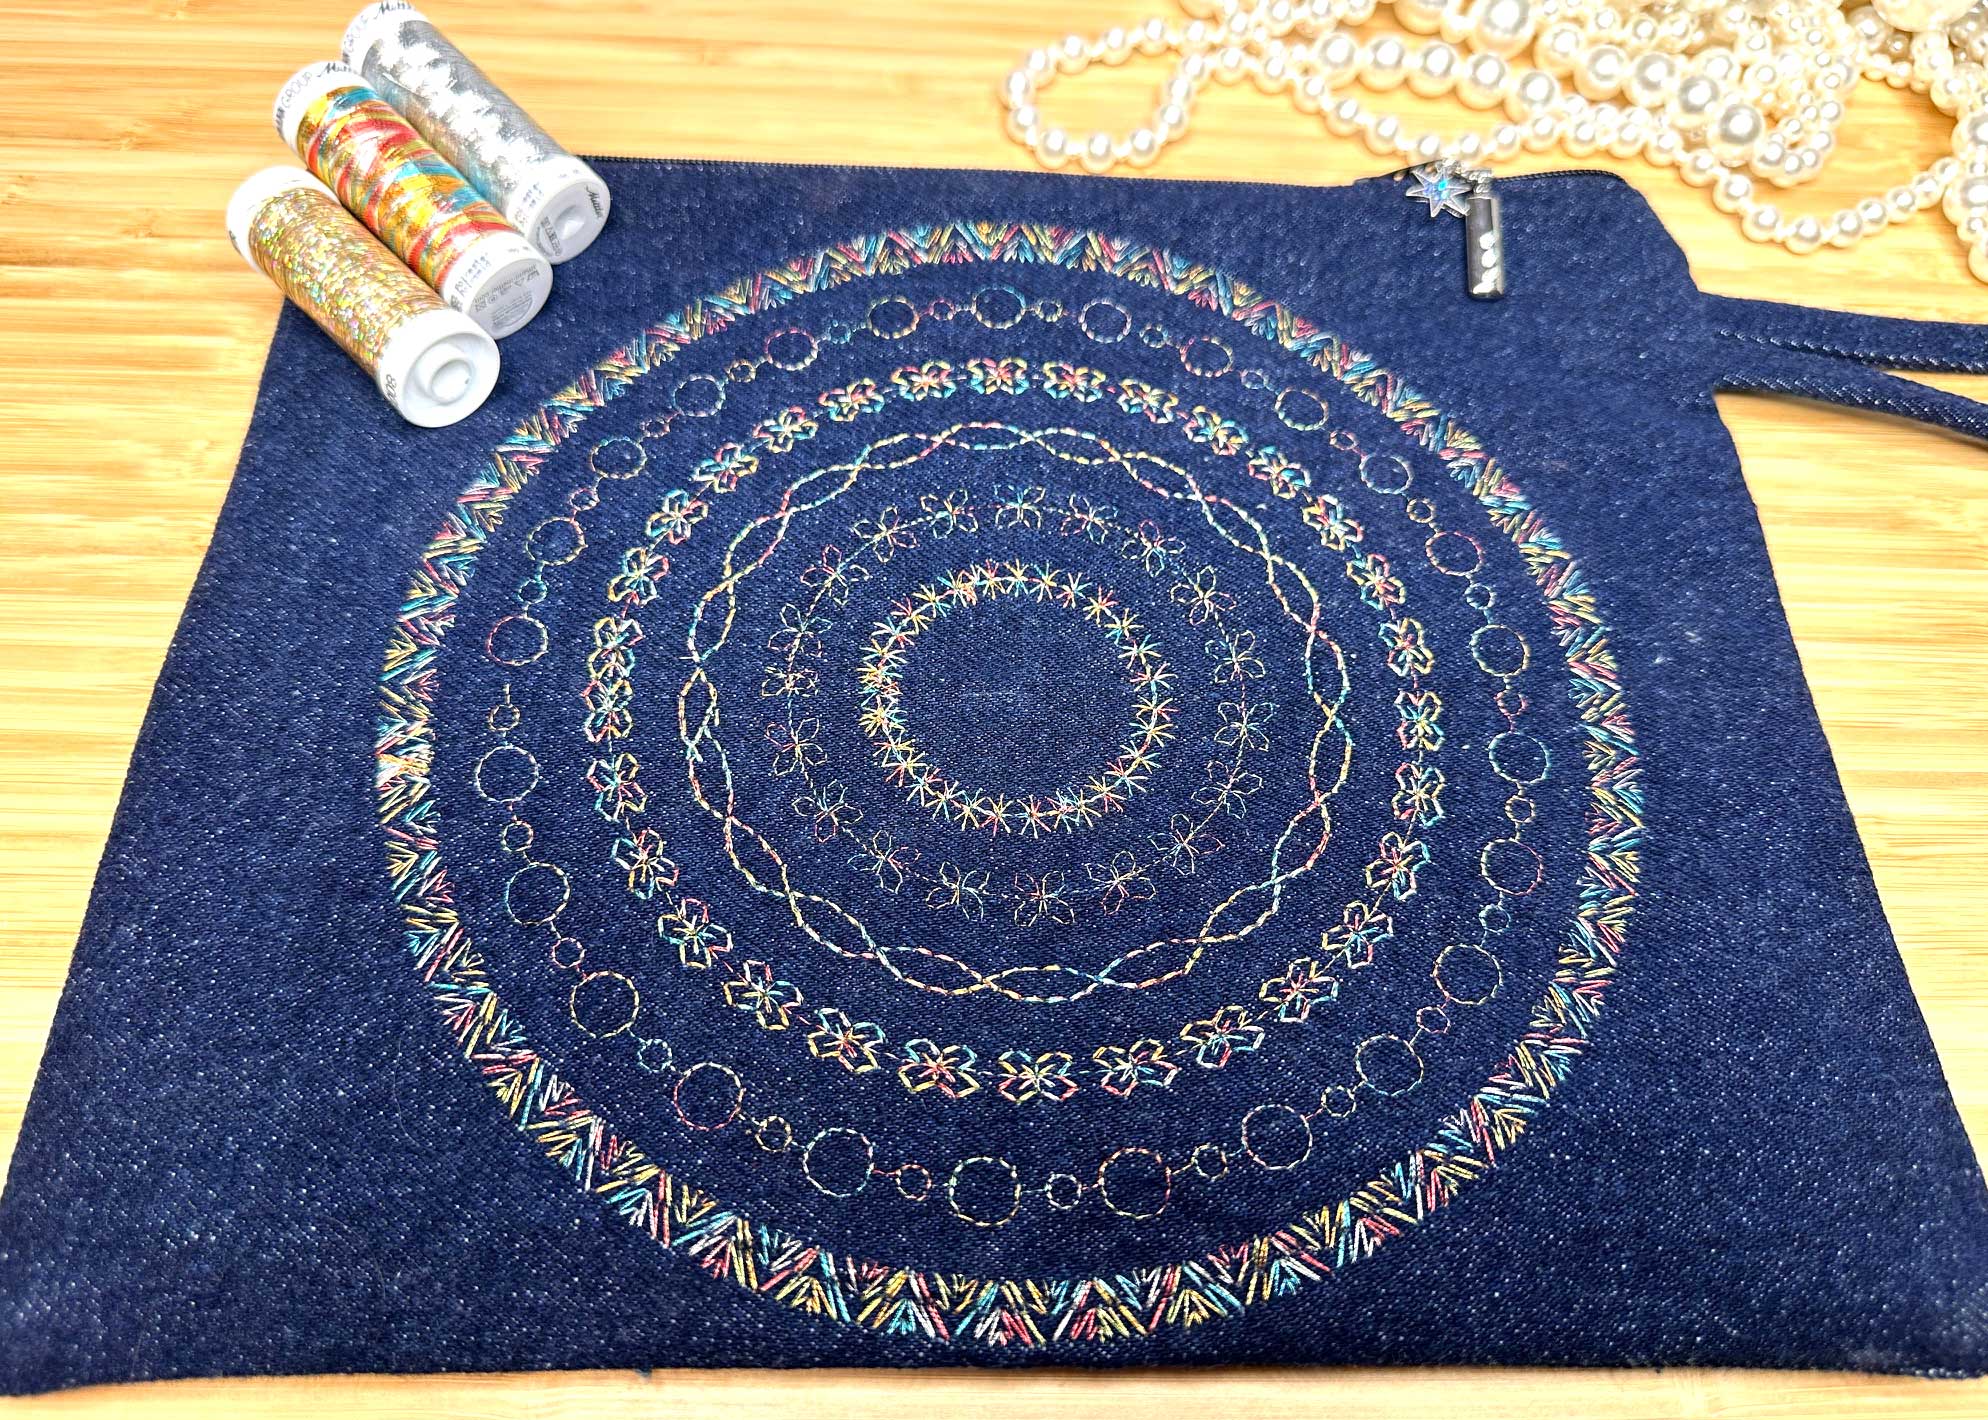
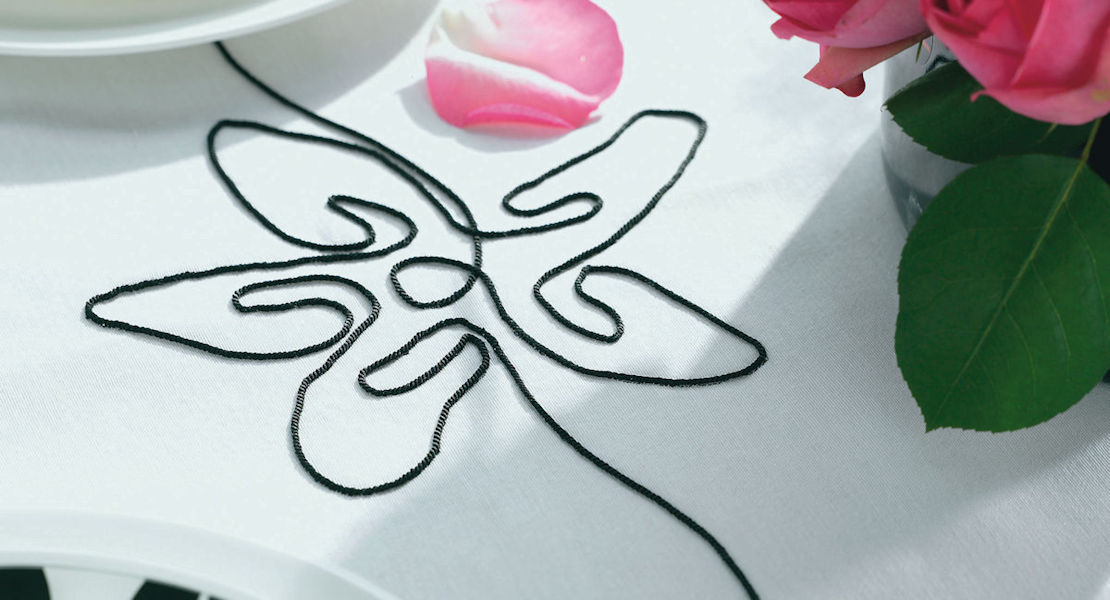
Here’s the fun part! The design on the front of the bag has multiple decorative stitch circles, which are easy to create using the Circular Embroidery Attachment #83, which can be used on 5.5 mm and 9 mm machines.
The attachment can create circles ranging from 1-1/2″ to 10-1/2″ in diameter. On this clutch bag there are six circles, with the center circle 1-1/2″, the smallest size.
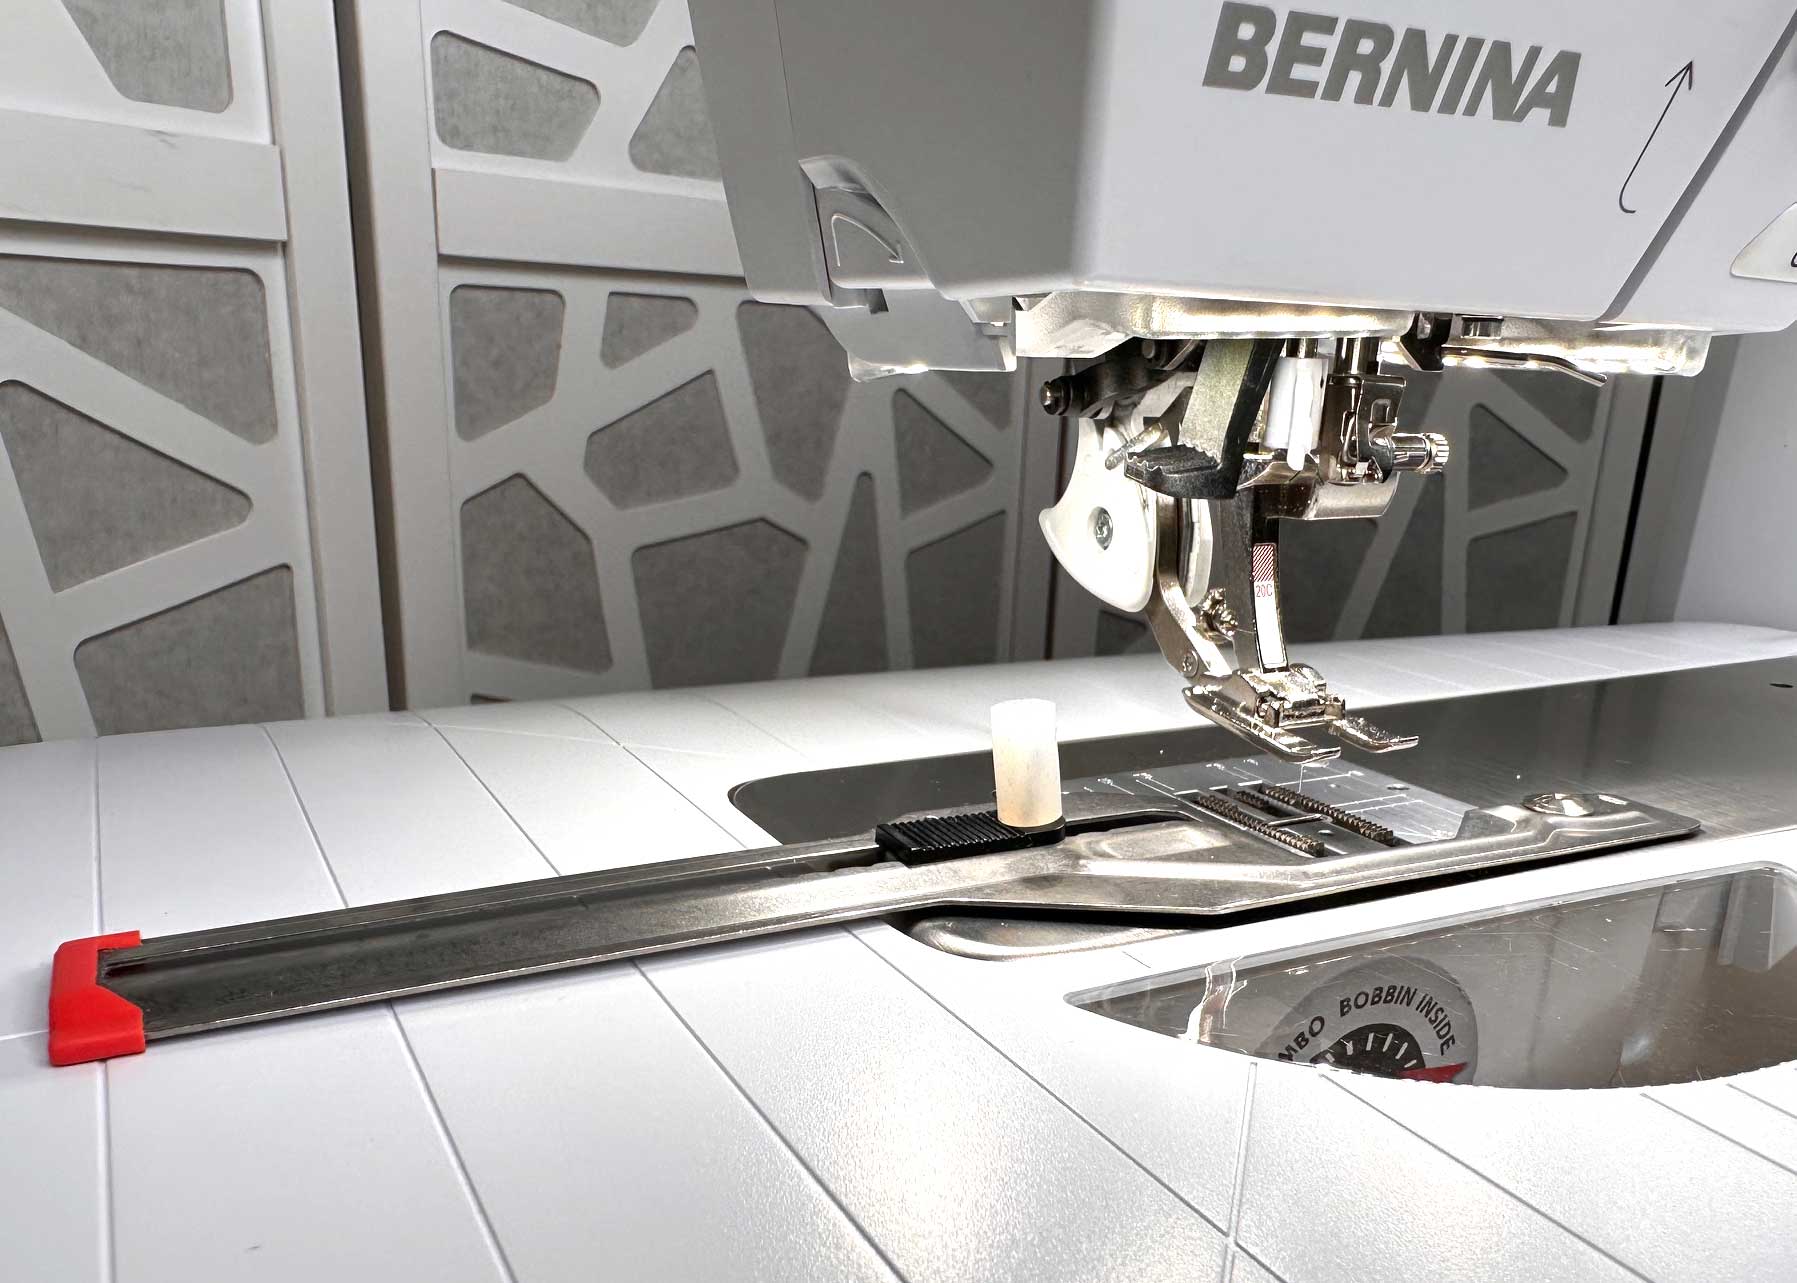
Attach the Open Embroidery Foot #20, which has a wide opening at the front of the foot which lets you see the stitching area clearly.
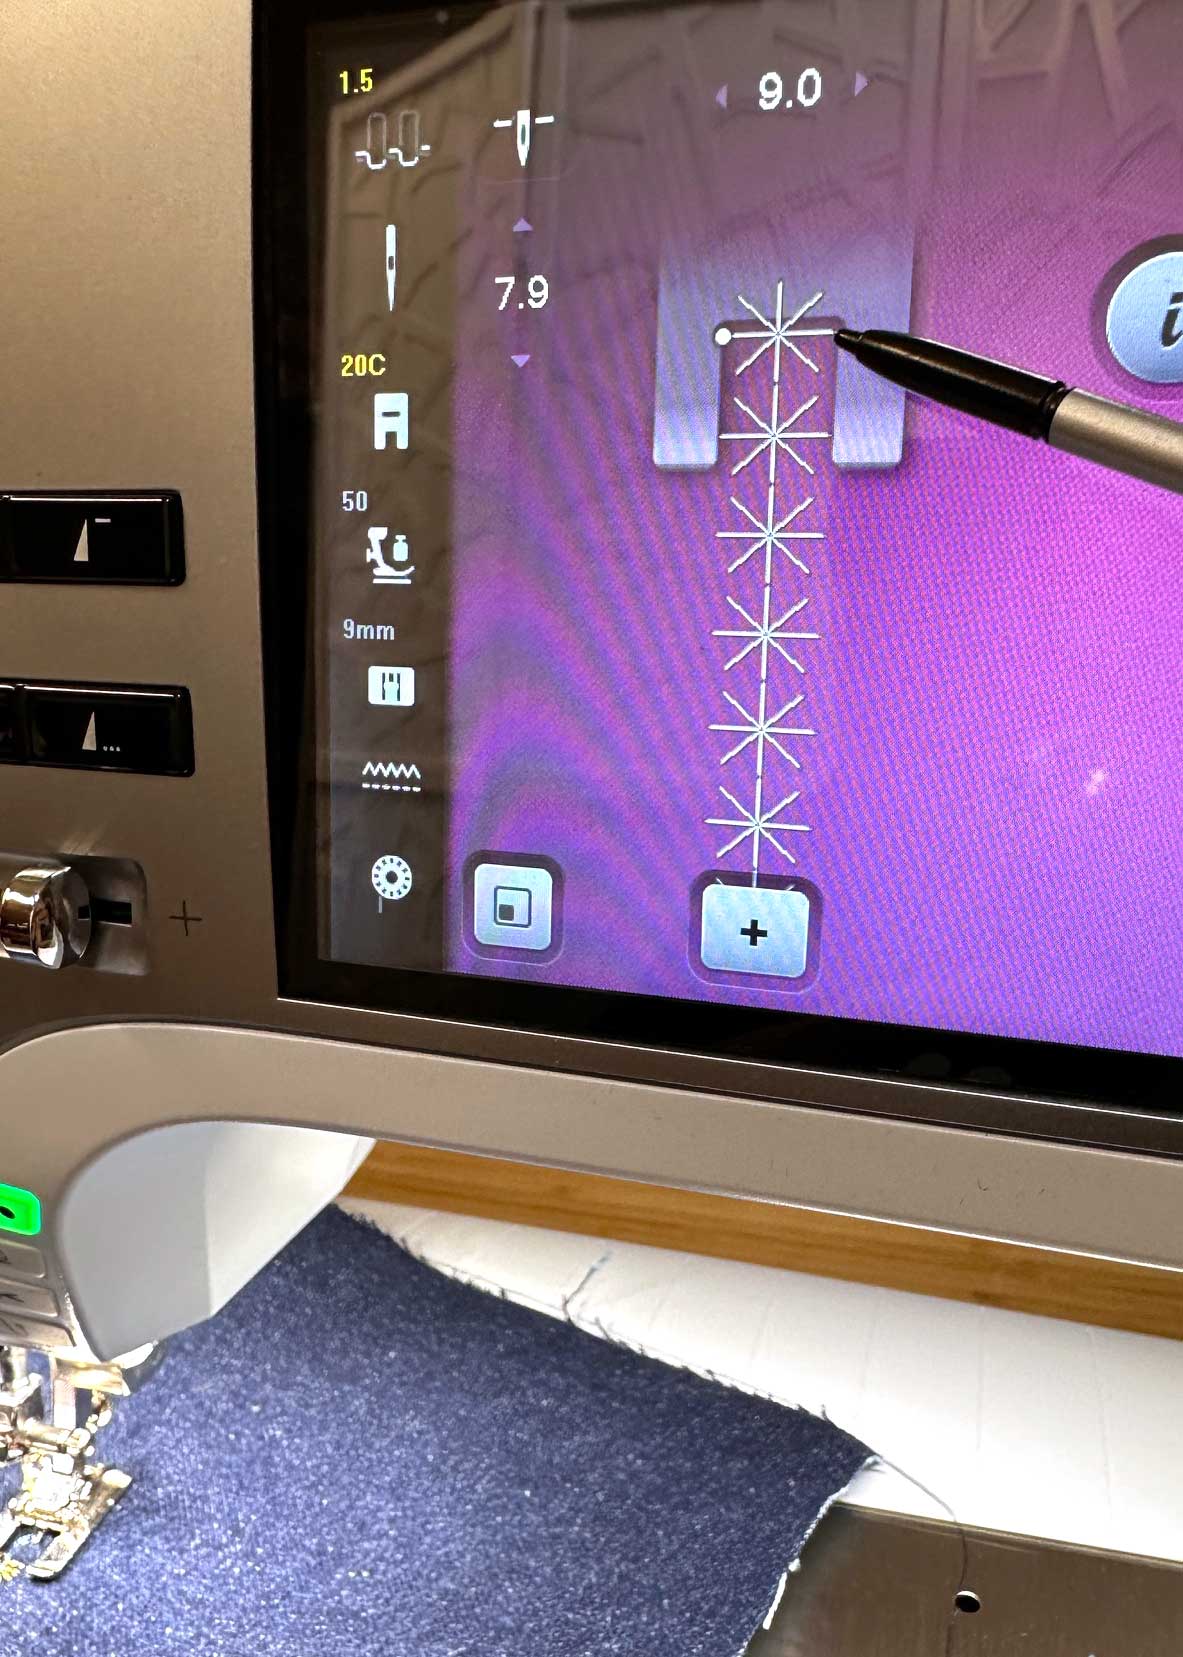
Practice the decorative stitches on a scrap of fabric (same weight and stabilizer) to determine if any tension adjustments need to be made. I found with the metallic thread I used, that I needed to lower the thread tension my 1 complete number. For example, the default tension setting for stitch 711 is 2.5, and I lowered it to 1.5.
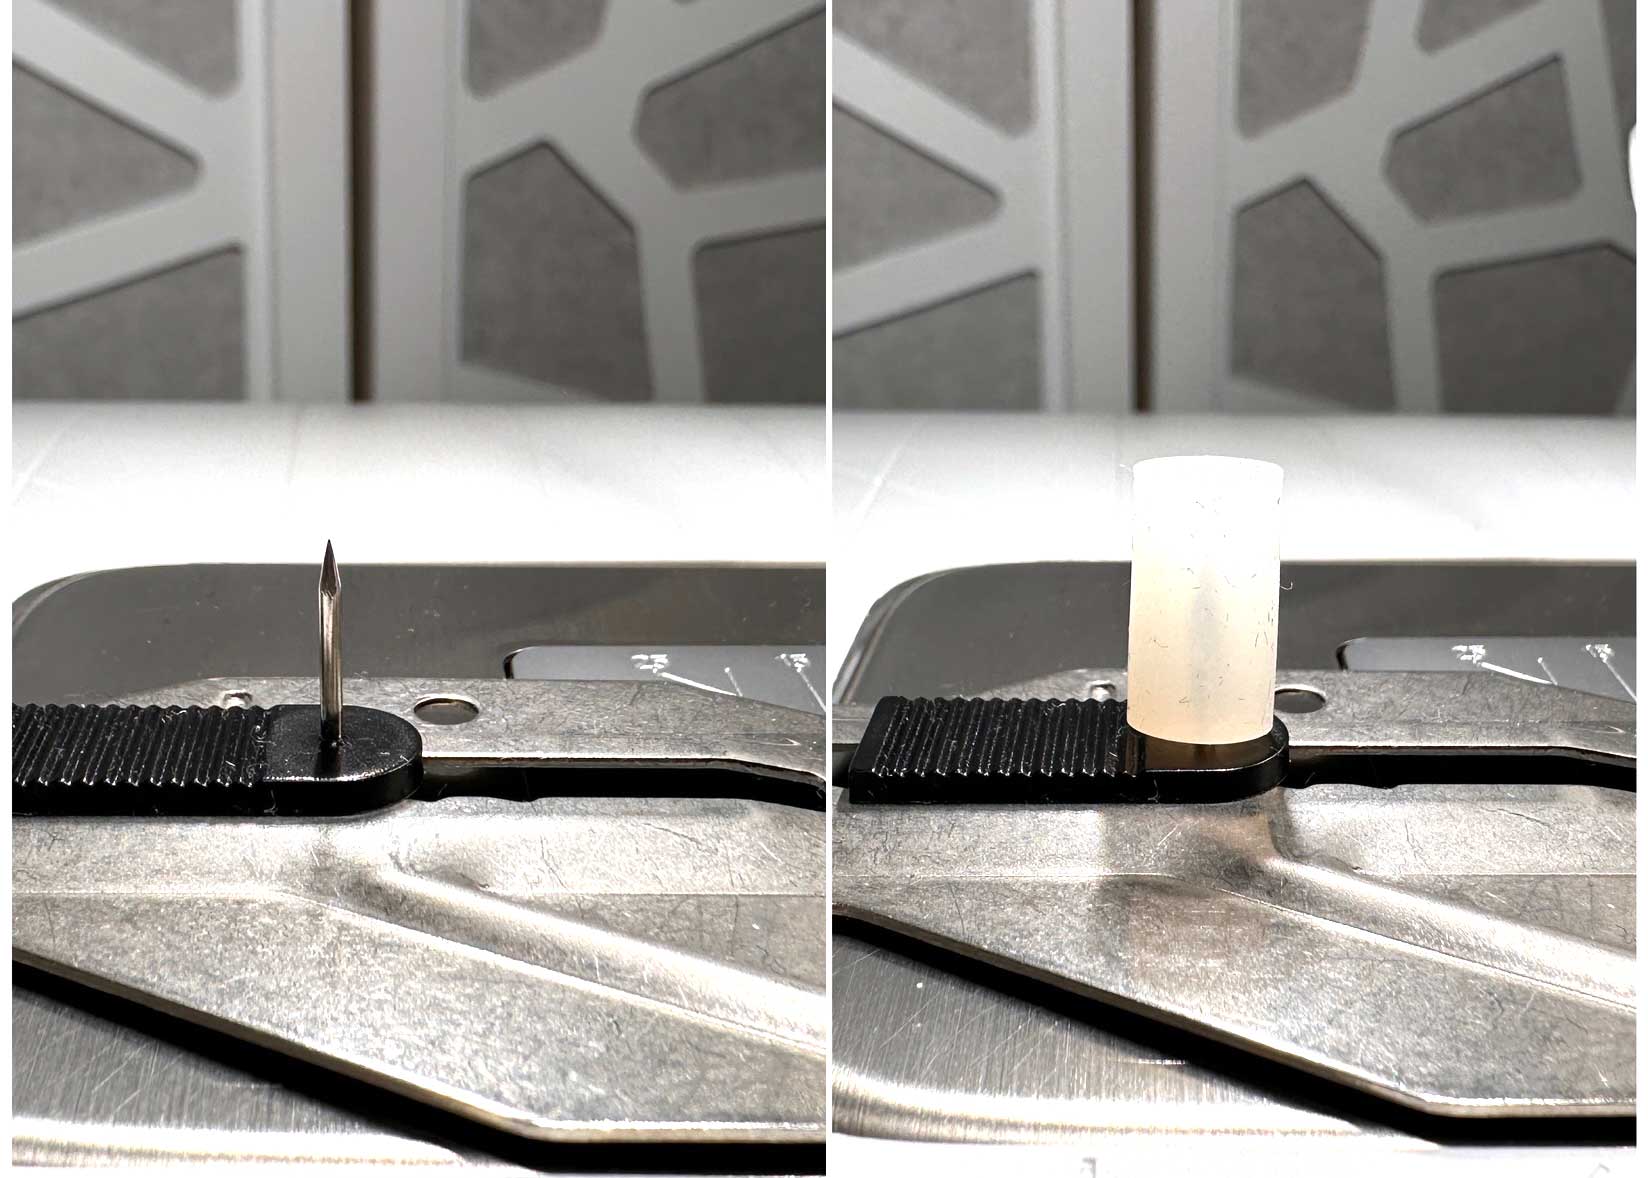
To use the circular embroidery attachment, simply align the hole on the circular attachment to the hole on the bed of the machine and screw in place. Be sure to keep the rubber stopper on the pin (it’s quite sharp!) until you’re ready to place your fabric on the attachment. When changing the size of the circles, use the black tab to slide the pin to prevent the pin from becoming bent or damaged.
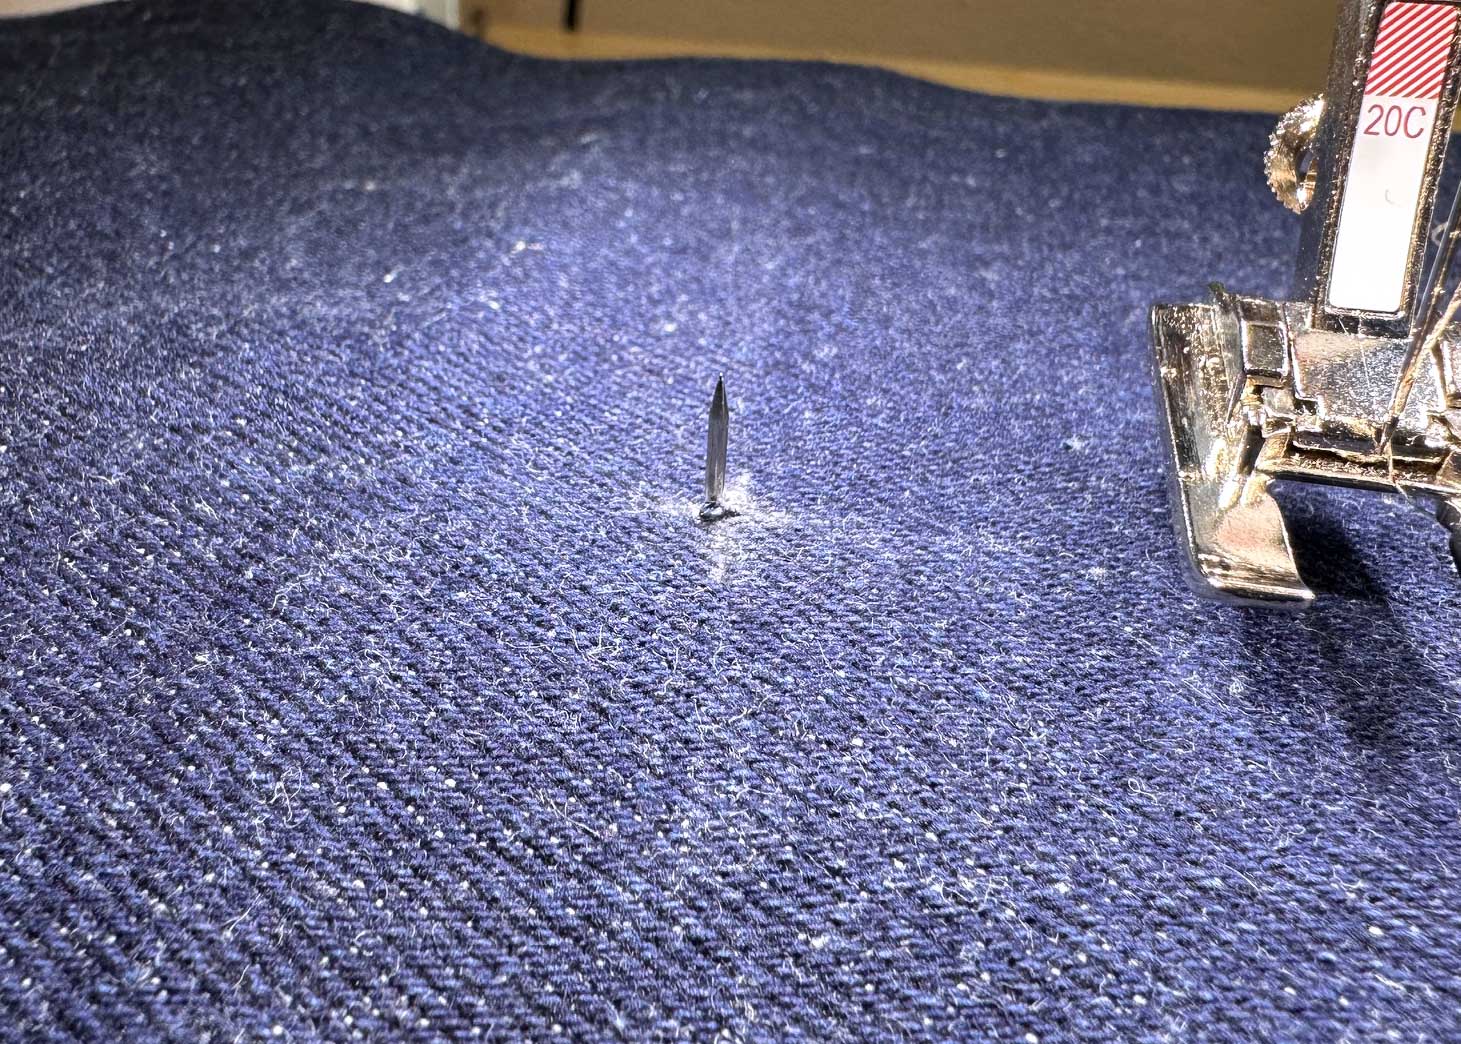
Remove the rubber stopper from the pin, place the marked center of the denim rectangle over the pin, press the fabric down and replace the rubber stopper.
Stitching the Decorative Circles on the Clutch Bag
Start by sewing the smallest circle first. When ready to stitch the next circle, remember to use the black tab to slide the pin to prevent the pin from becoming bent or damaged.
The stitches I used on my B 770 QE Plus (from smallest to largest circle).
- Circle 1 – Stitch #711,
- Circle 2 – Stitch #123
- Circle 3 – Stitch #708, elongated 275%
- Circle 4 – Stitch #644, elongated 175%
- Circle 5 – Stitch #607, elongated 130%
- Circle 6 – Stitch #636
Lower the pressure foot and begin stitching. With metallic thread, it helps to stitch slowly.
Matching the pattern to complete the circle is a bit of trial and error. You may not be able to match exactly, but the only one who will notice is you! Everyone else will be dazzled by the beautiful design on your denim clutch, especially when they learn you created it yourself.
When nearing the end of the circle, slow down and keep an eye on the screen to watch the progression of the stitch. The small dot on the stitch pattern identifies the location of the needle. Use the Pattern End function when close to end, adjusting the stitch length so the pattern fits.
Once the first circle is complete, carefully reach under the fabric and use the black tab to slide the pin out by three notches. Select the decorative stitch, lower the pressure foot, and sew the second circle.

Once the second circle is complete, use the black tab to slide the pin out by three notches, select the next decorative stitch, and sew the third circle.
Continue until all six circles have been sewn.
Remove the stabilizer from the back. If you prefer, keep the stabilizer on the back of the clutch bag as it will be covered up with the lining. The stabilizer will help keep the stitches secure.
Sew the Clutch Bag Lining
Add the Interior Pocket to the Lining
Fold the pocket fabric in half, wrong side together and raw edges matching. Pin and stitch using a 1/4″ seam allowance, leaving a 3 to 4″ opening at the bottom edge.
 Turn right side out and press, pressing the seam allowance of the opening inside. The opening will be closed when the pocket is stitched in place.
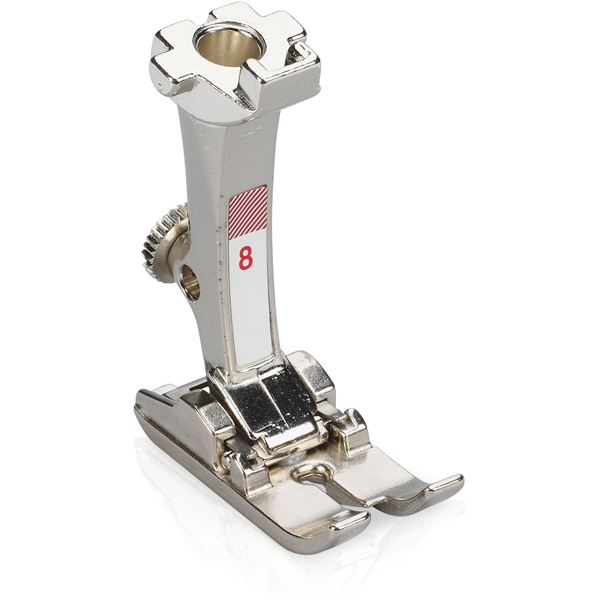
Center the pocket piece on one piece of the clutch bag lining 2″ from the bottom, pin, then edgestitch around all three edges, leaving the top open. Using the Edgestitch Foot #10D makes edgestitching easy and accurate.
Sew the Zipper to the Clutch Bag
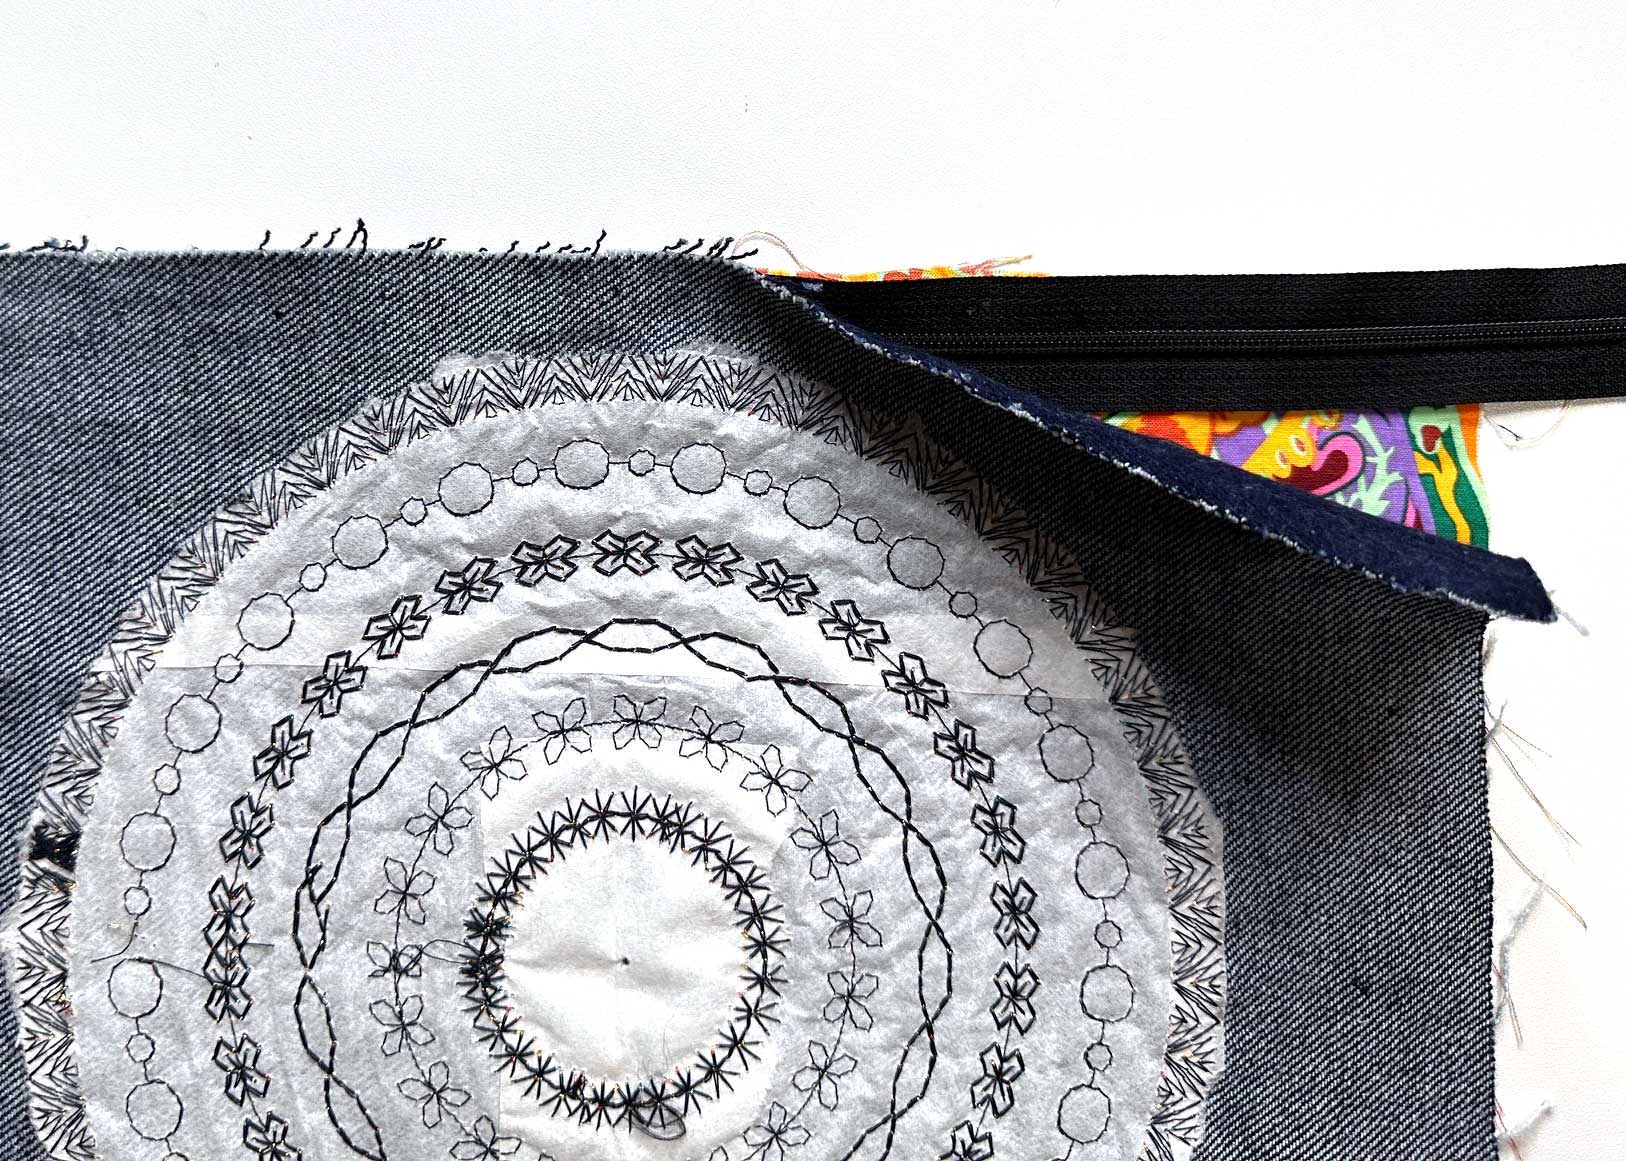
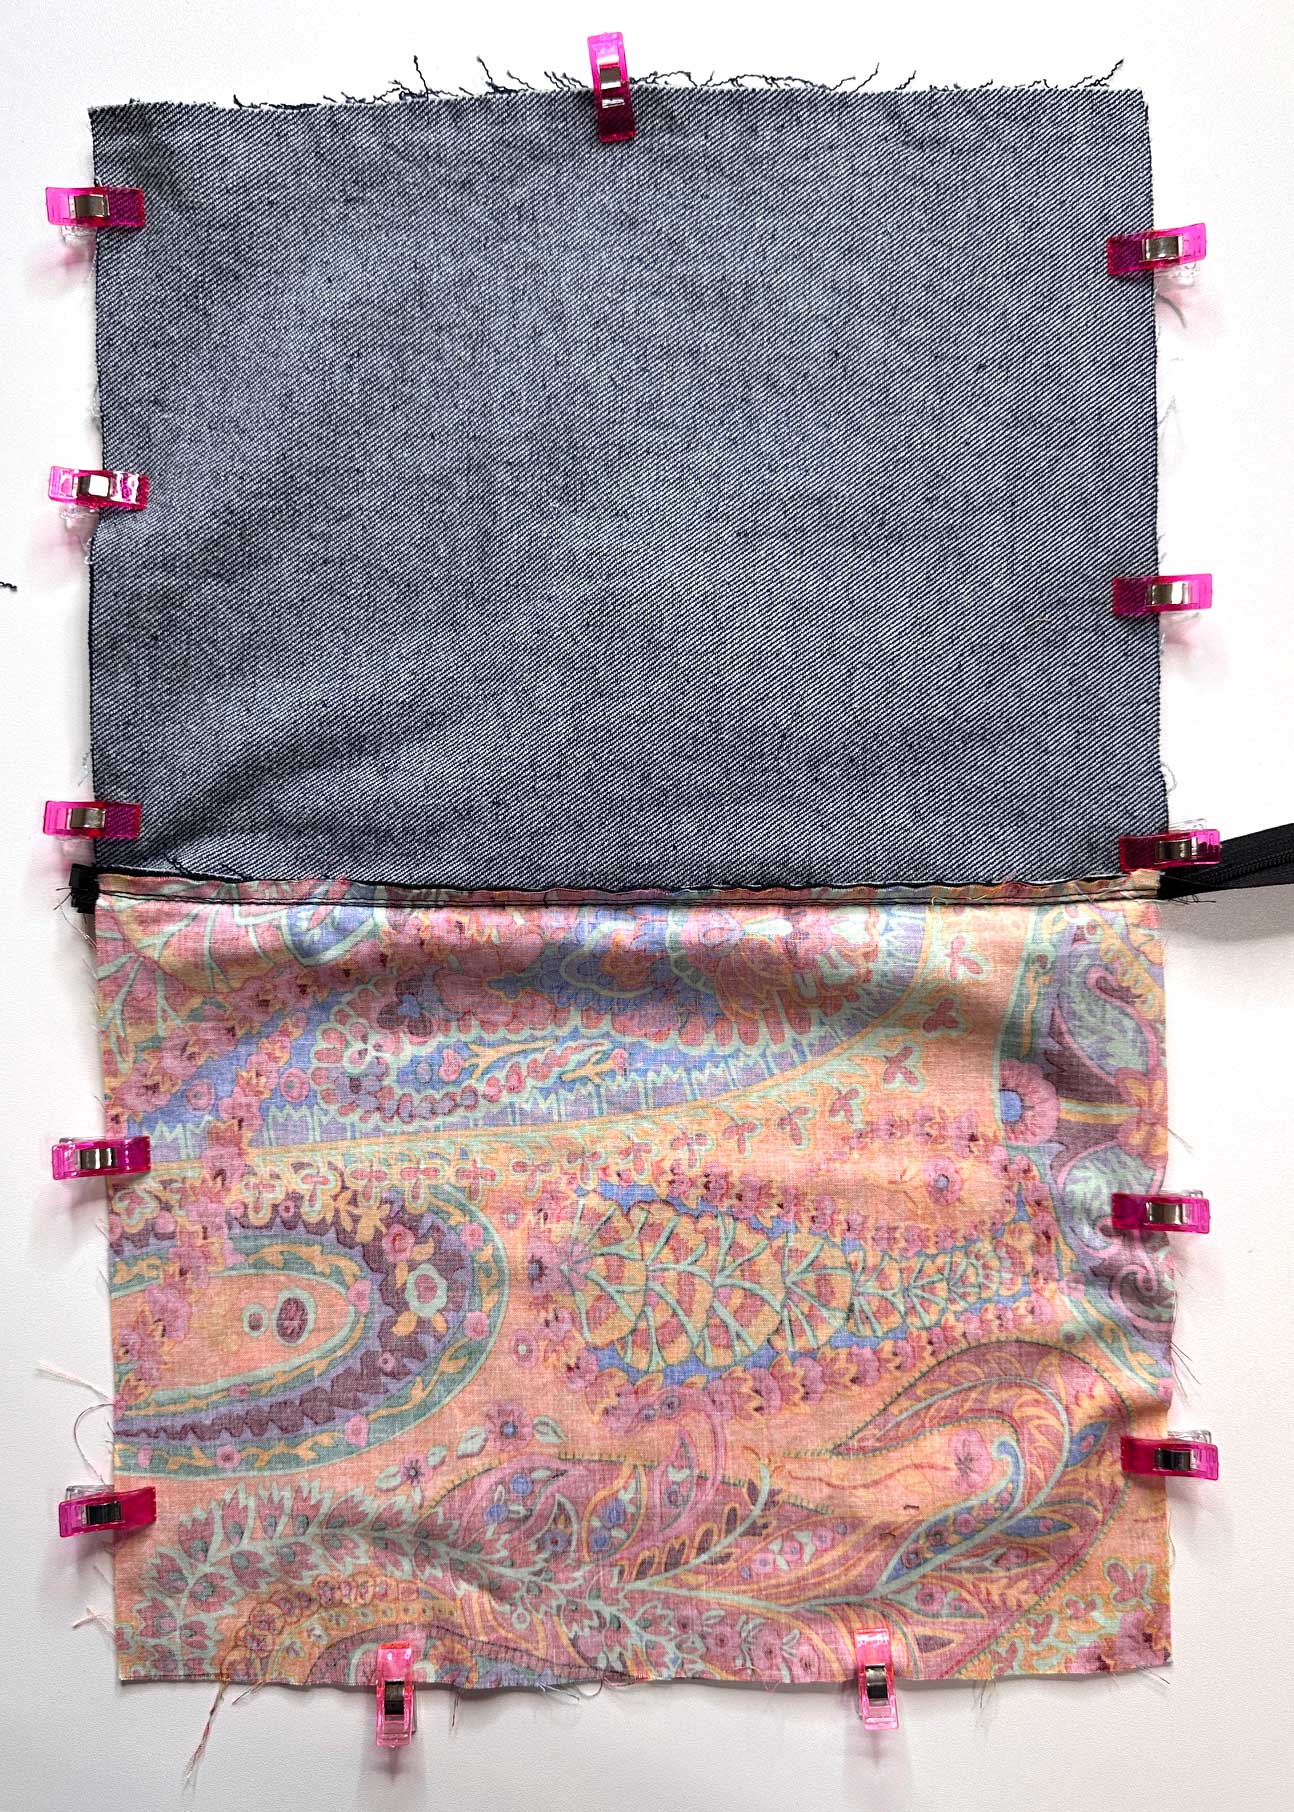
Place a lining rectangle right side up on a flat surface and center the zipper on the top edge. The zipper will be longer than the fabric and the excess will be cut off after the clutch bag is sewn together. You may find it helpful to baste the zipper in place before adding the denim portion.

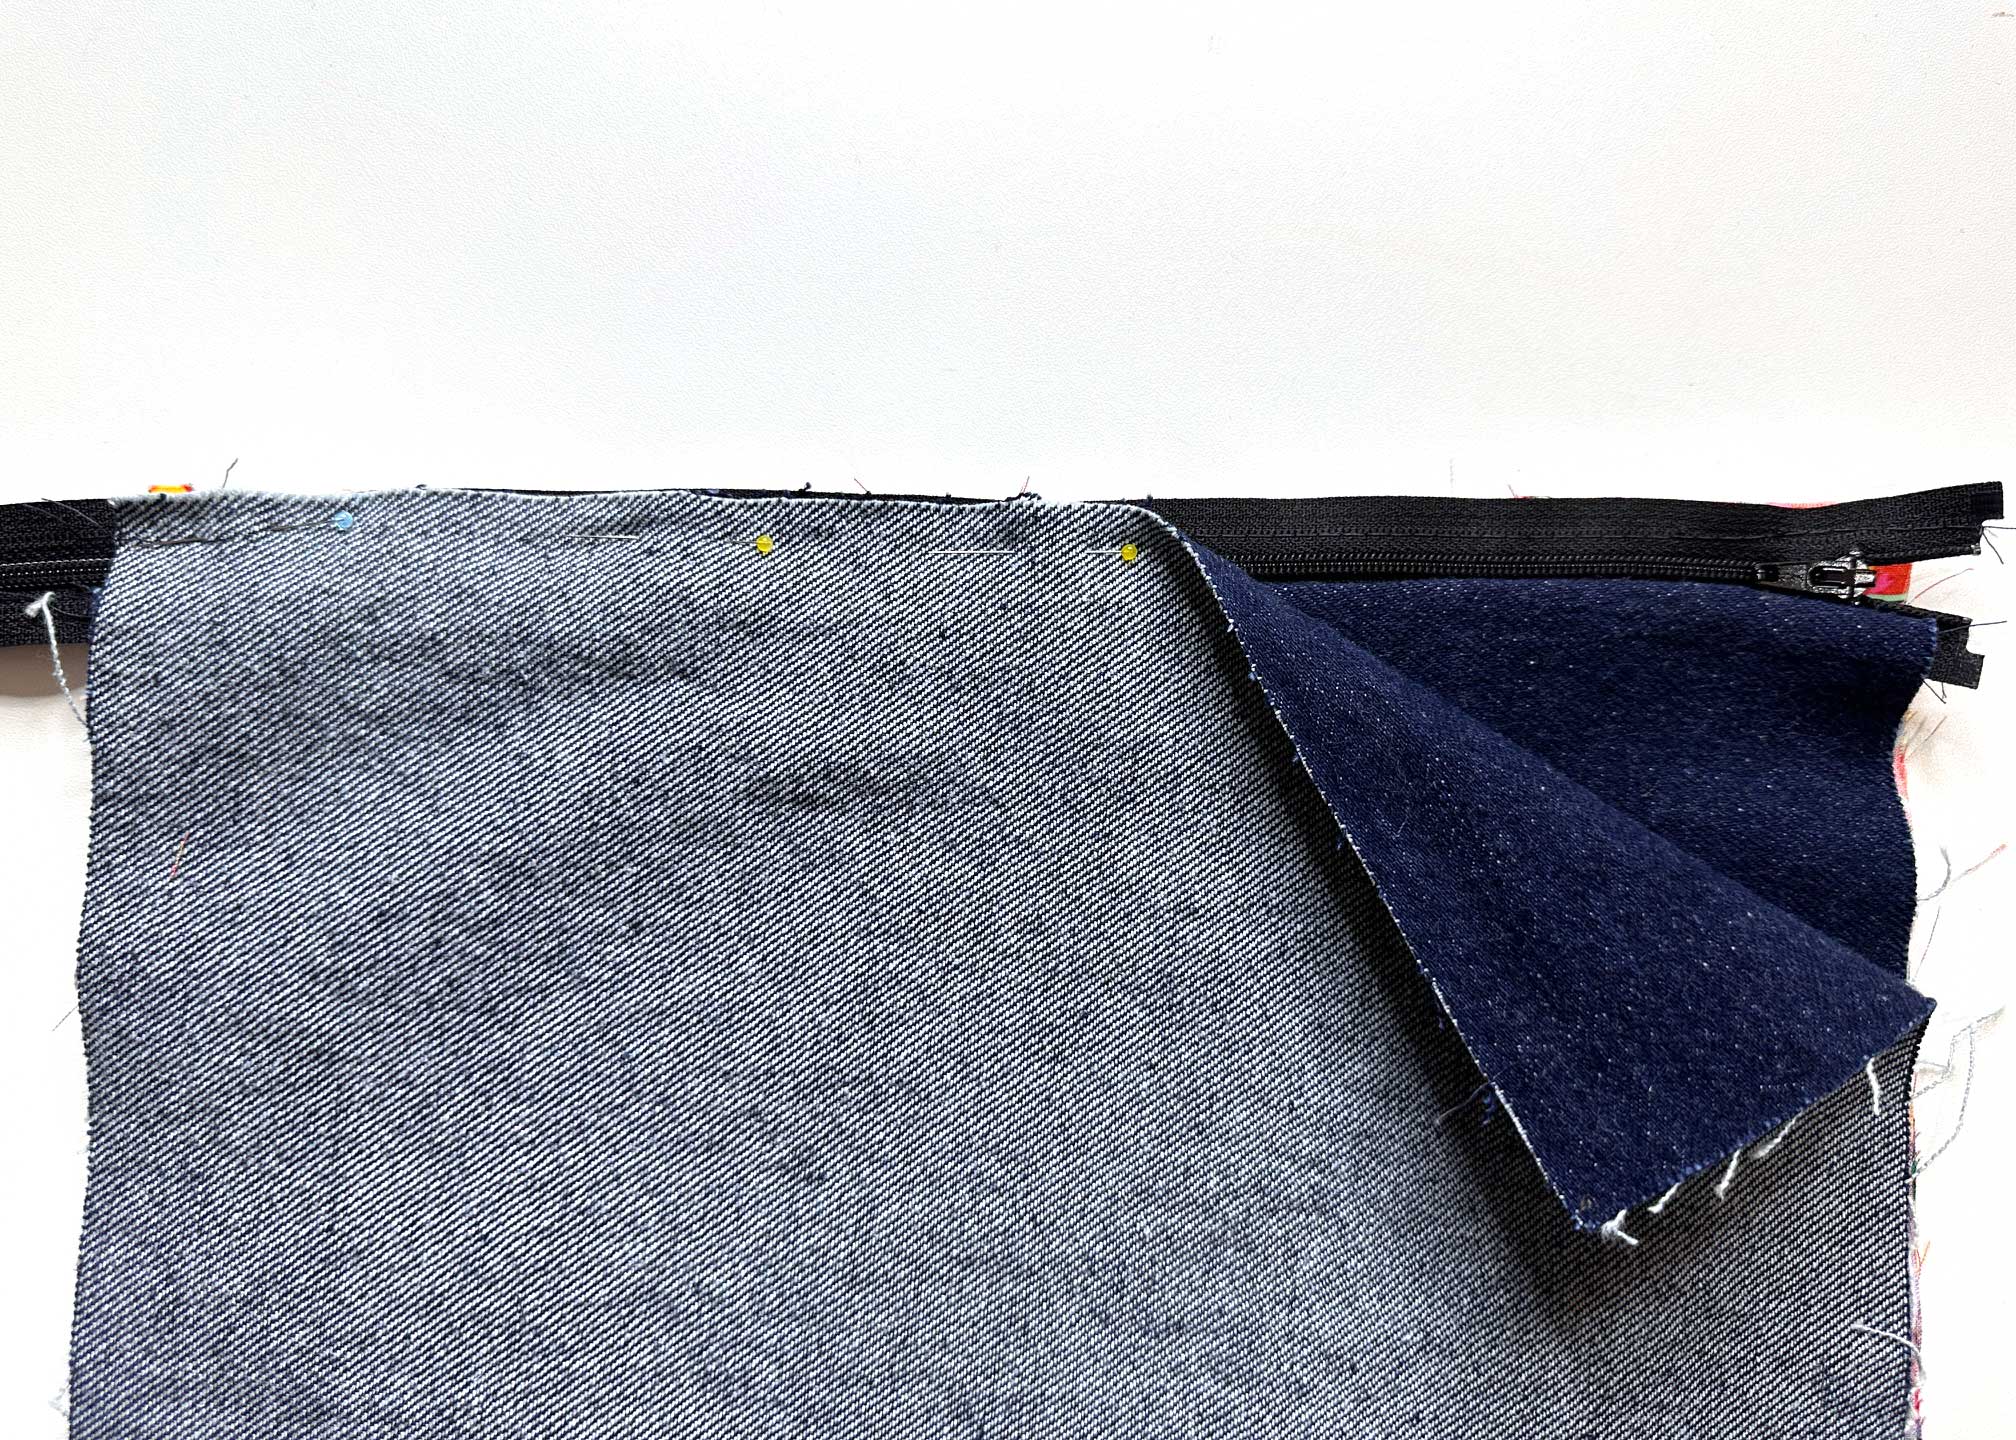
Next, place a denim rectangle right side down sandwiching the zipper between the denim and the lining, and pin or clip in place.
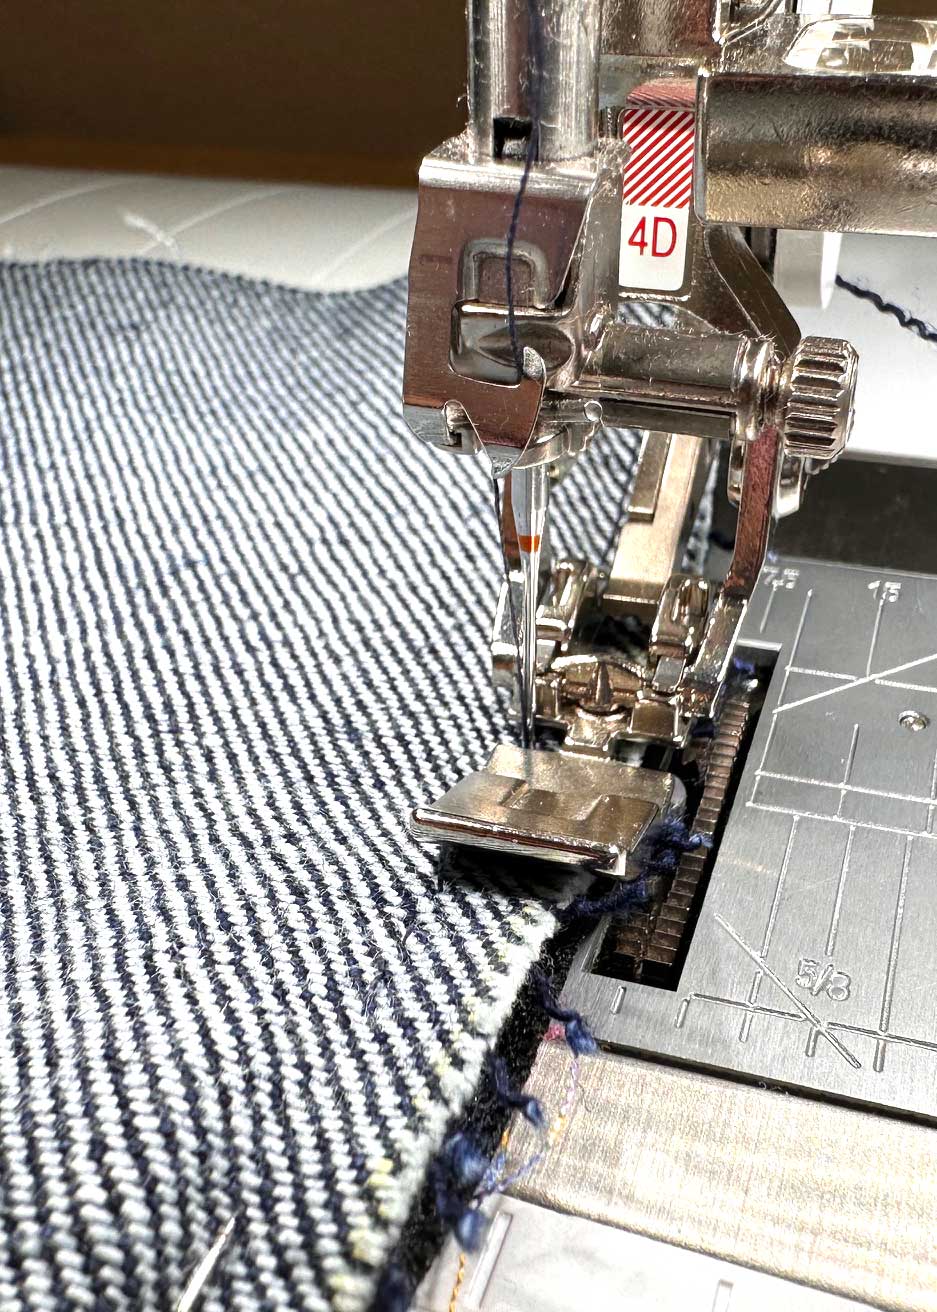
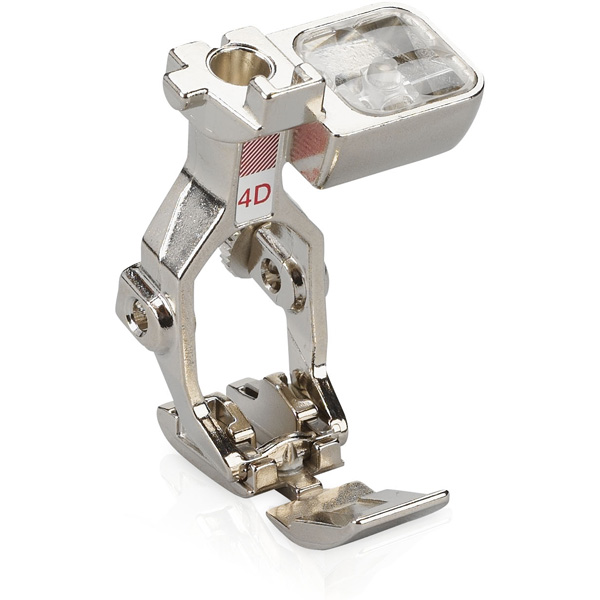
Stitch with a 1/4″ seam allowance using Zipper Foot #4D.
Fold it open, then flip it over with the zipper at the top, the lining fabric right side down, and the denim fabric right side up.
Repeat for the other side, sandwiching the zipper between the other lining and denim fabric rectangles.
Edgestitch on the denim fabric along each side of the zipper, making sure not to catch the lining in the stitches. When you get close to the zipper tab, Lift the pressure foot with the needle still in the fabric and carefully slide the tab out of the way.
Sew the Clutch Bag Wrist Strap (Optional)
On each long side of the strap, press the fabric 1/4″ to the wrong side. Fold in half again enclosing the raw edges. Stitch along the edge using the Edgestitch Foot #10D.

Measure 1″ from the zipper along one side edge and make a mark. Fold the strap in half, pin or clip at the mark, and baste. Use the Jeans Foot #8D if your denim is thick as this foot will easily sew over the thickness.
Finish Sewing the Clutch Bag
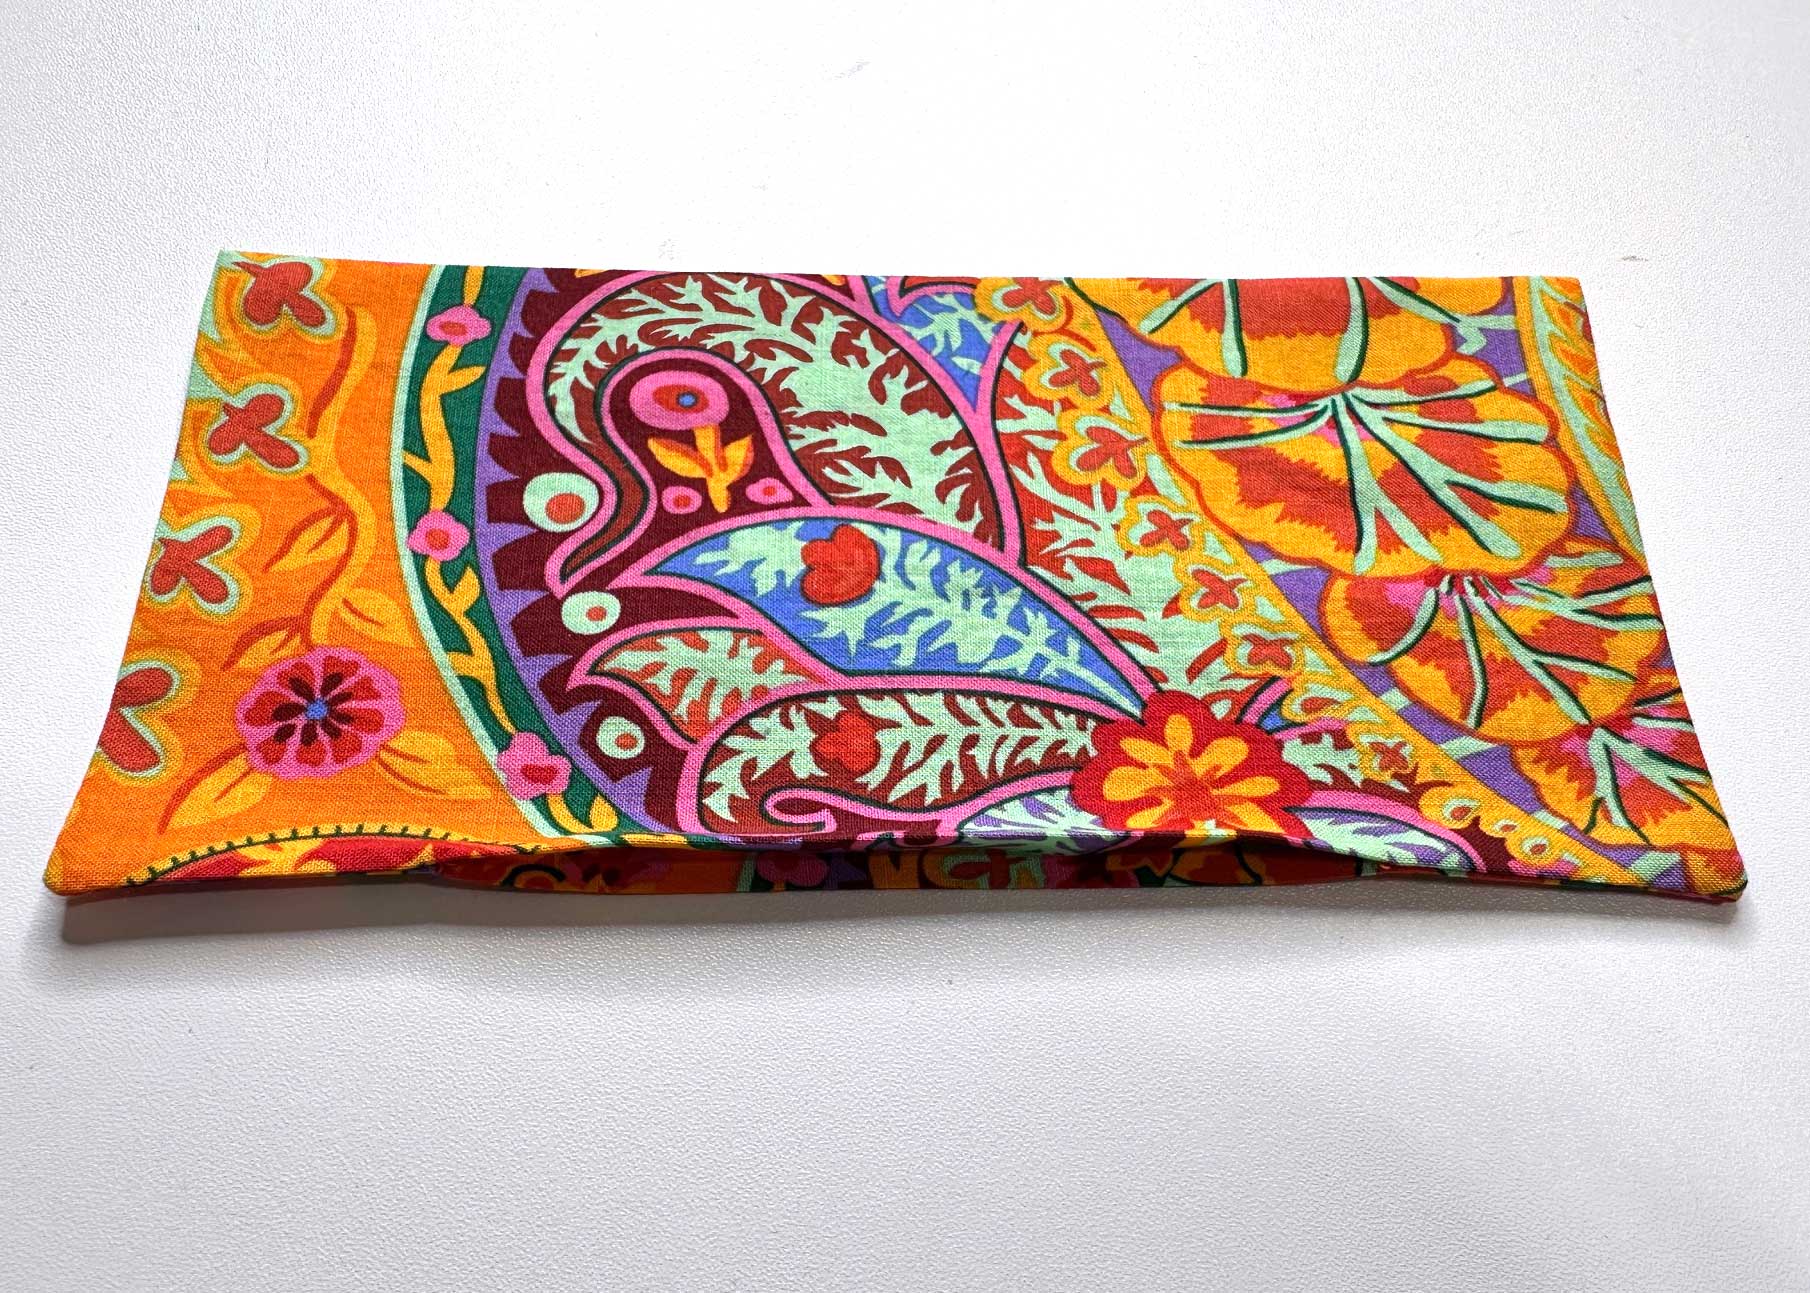
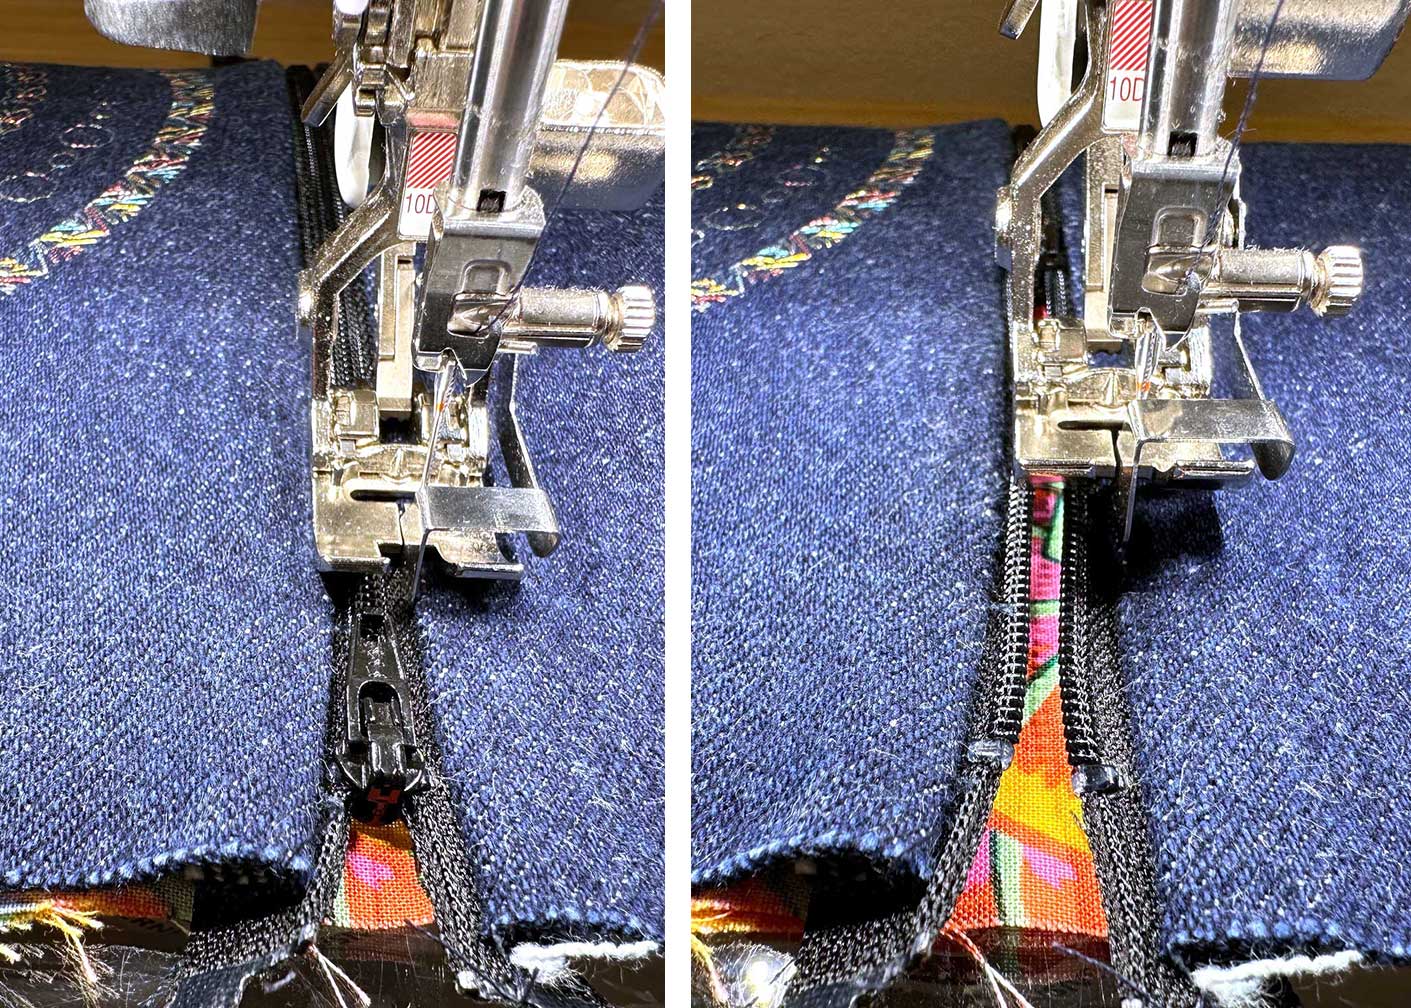
Separate the denim and lining fabric, placing the pieces together with right sides facing. Pin or clip in place leaving a 5″ opening at the bottom. The zipper will extend beyond the fabric and will be stitched over and trimmed in the next step. That’s why it’s important to use a nylon coil zipper.
IMPORTANT! Reach inside and unzip the zipper before you begin stitching. If you forget to do this you will not be able to turn your clutch bag right side out.
Using a 1/2″ seam allowance, stitch around all four edges, leaving a 5″ opening at the bottom, remembering to backstitch at the start and end. If you want you can trim the four corners, just be careful not to trim too closely.
Using a sharp pair of scissors, trim off the excess zipper tape.
Turn the bag right side out through the opening and press lightly. Be sure to press the lining opening seam allowance to the wrong side. Stitch the opening closed either by hand or machine. I used the Edgestitch Foot #10D to stitch the lining opening closed on my machine.

The Final Touch for the Clutch Bag
The final step is to add a decorative zipper pull. For my denim clutch bag, I added a decorative zipper pull along with a small sparkly star that I found in jewelry making section of a local craft store.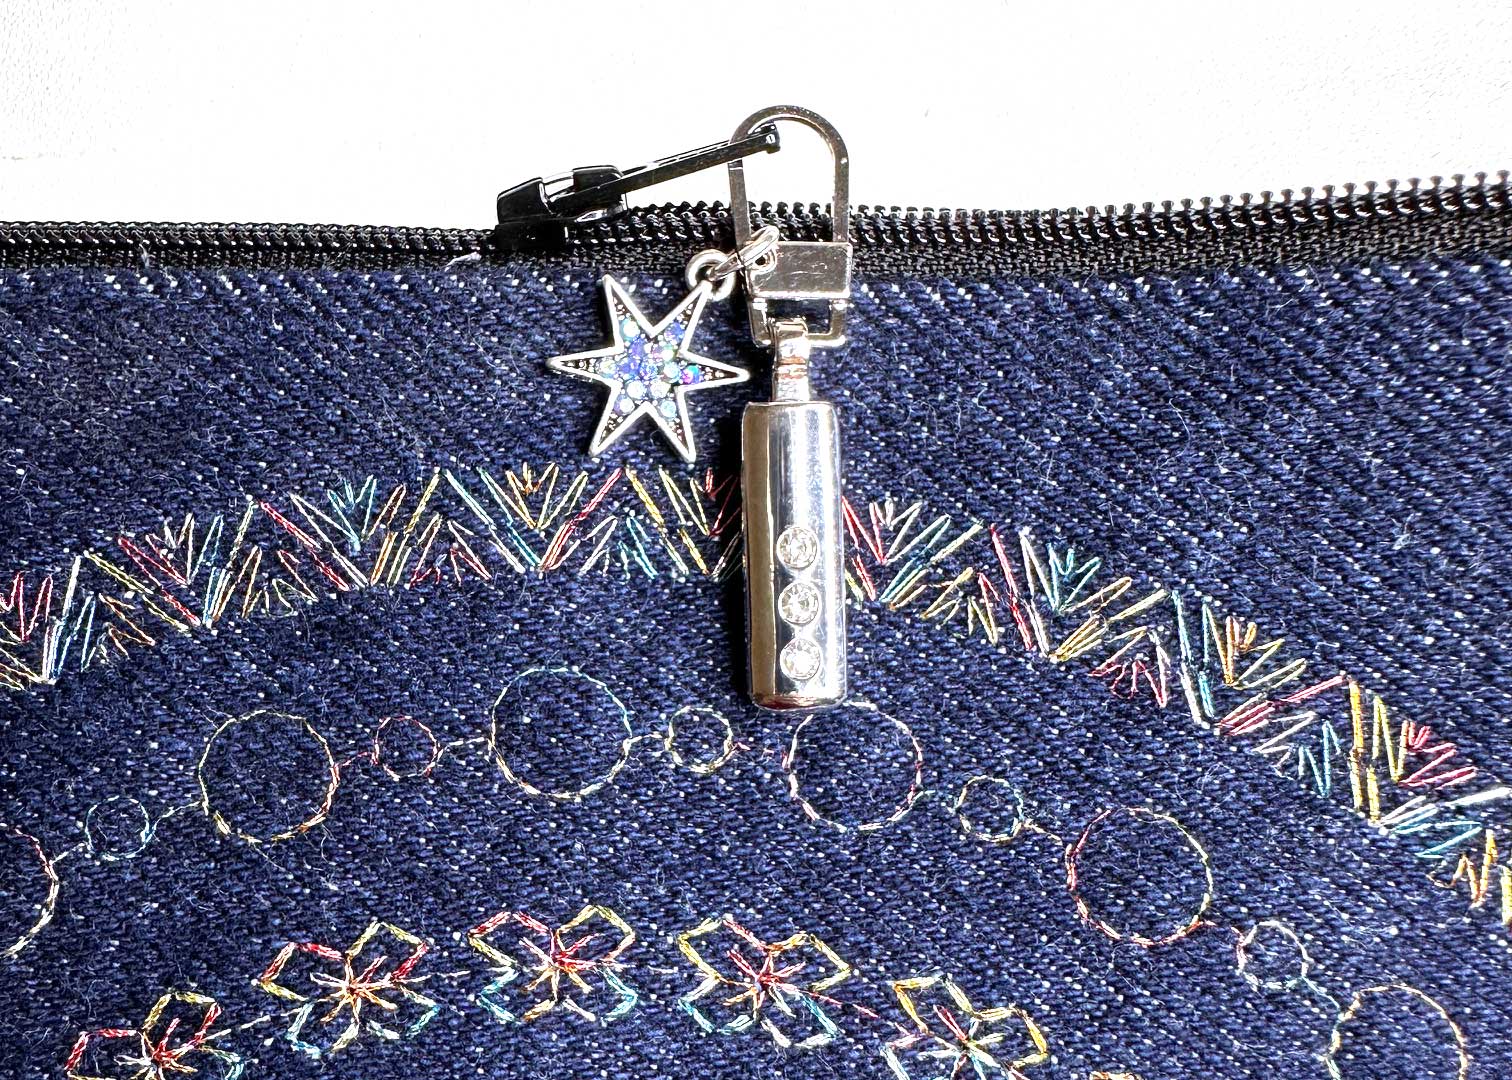
You’re done! The camera doesn’t capture the beauty of the decorative stitches sewn with the metallic thread.
You can add more bling by sewing beads in between the circles, pin a sparkly brooch to the center of the circle, or even add more decorative stitches than I’ve shown.
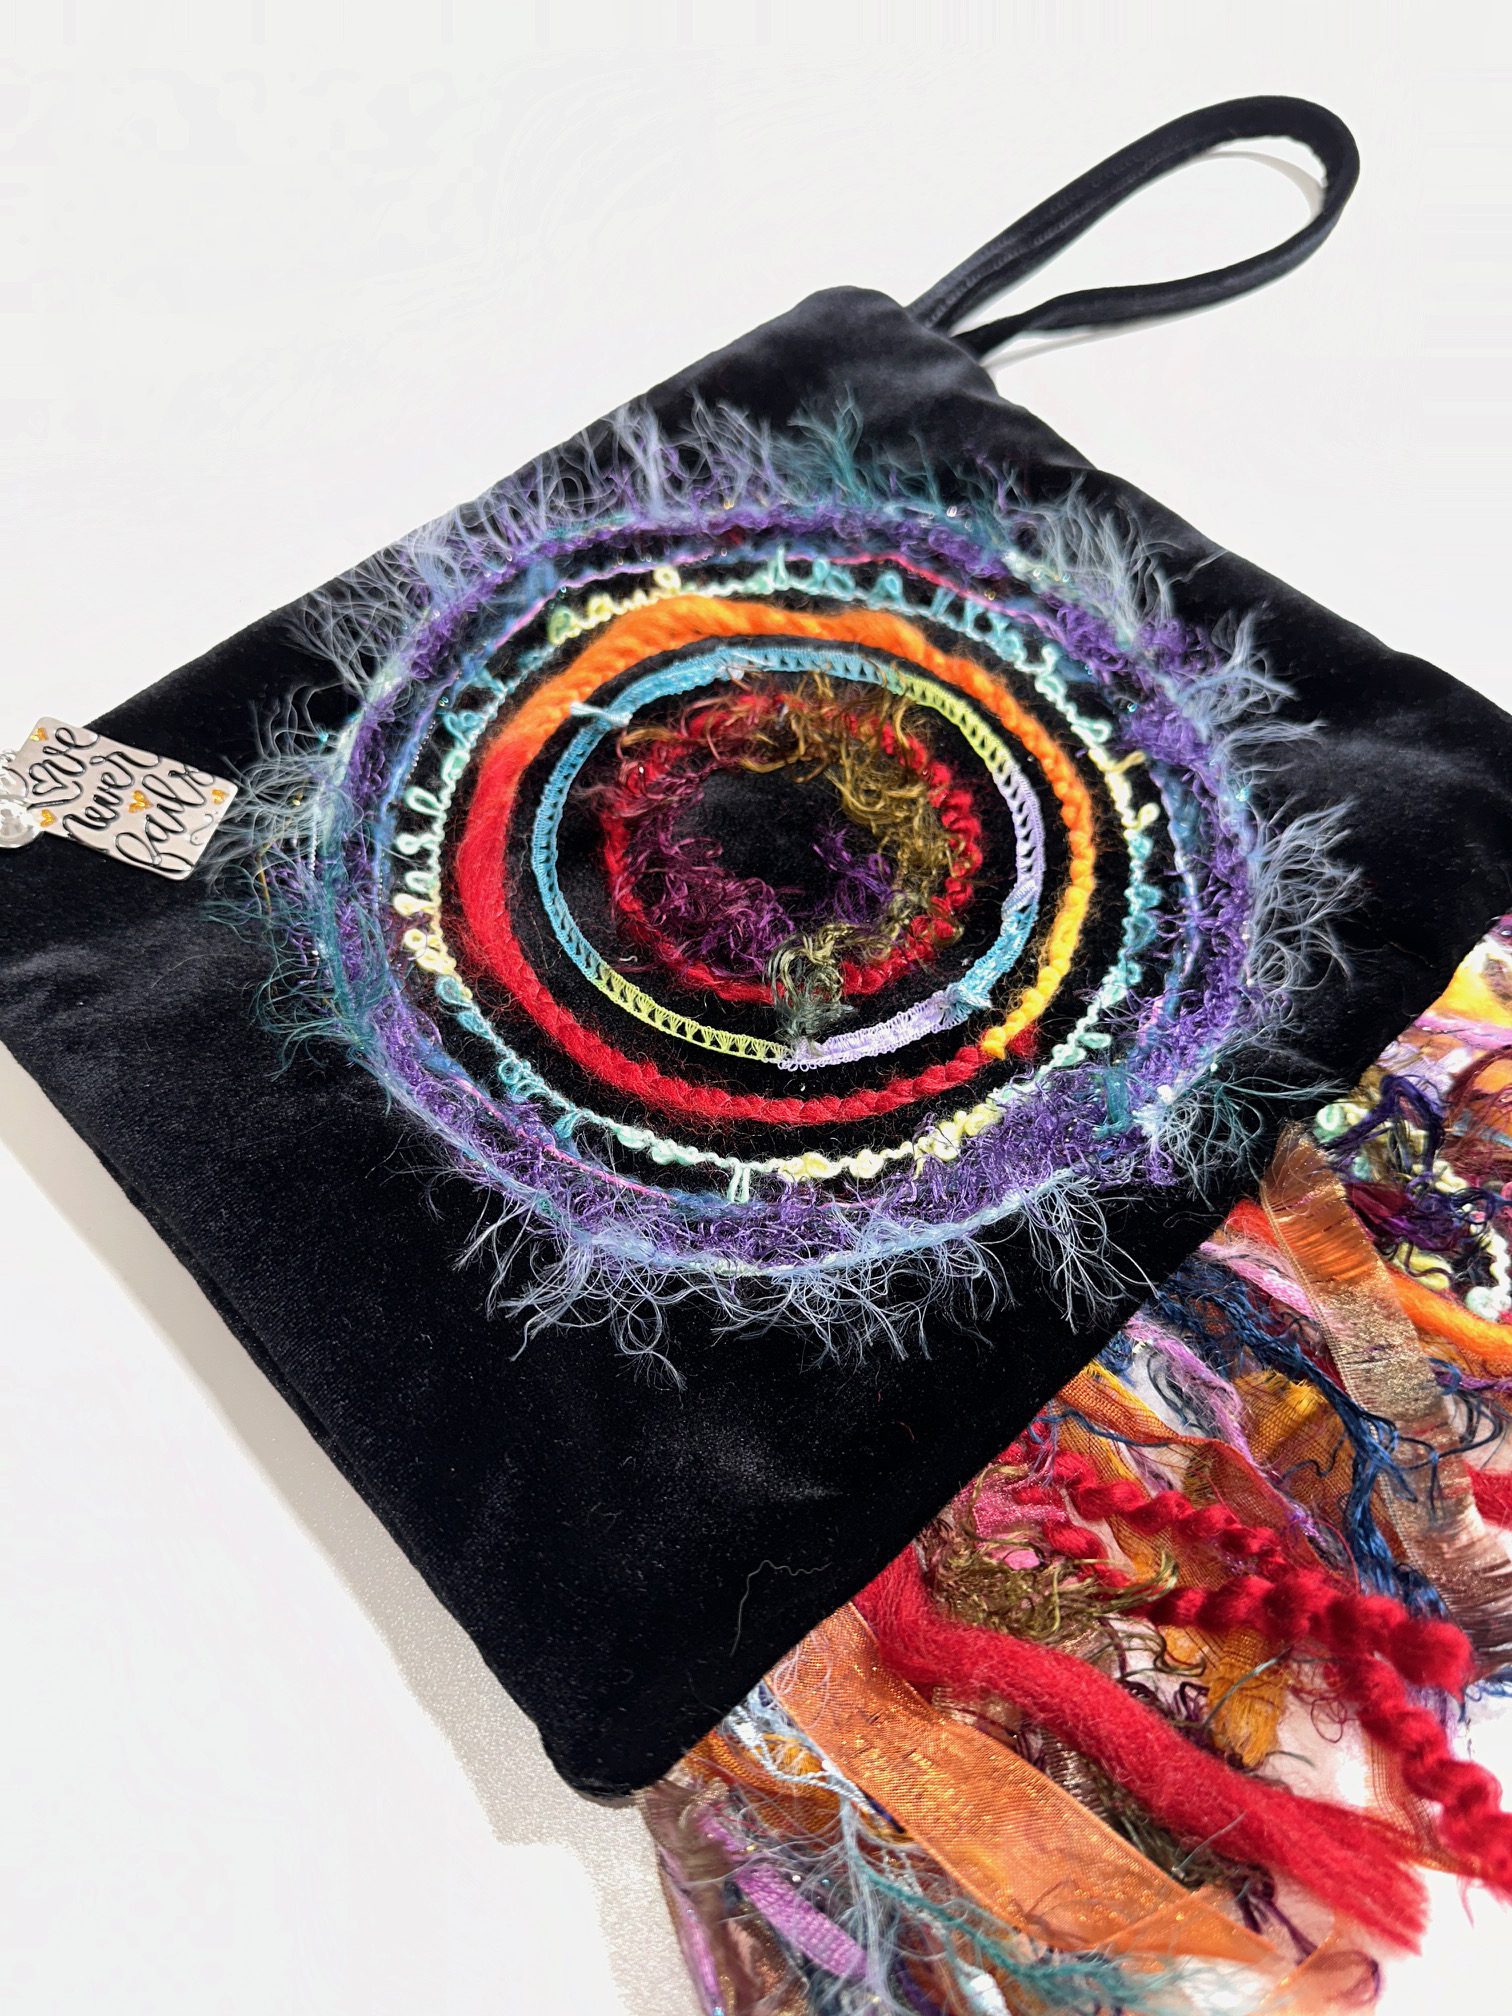
Velvet Clutch Bag with Circular Couched Trims
The instructions to sew the velvet clutch bag are identical to the denim one.
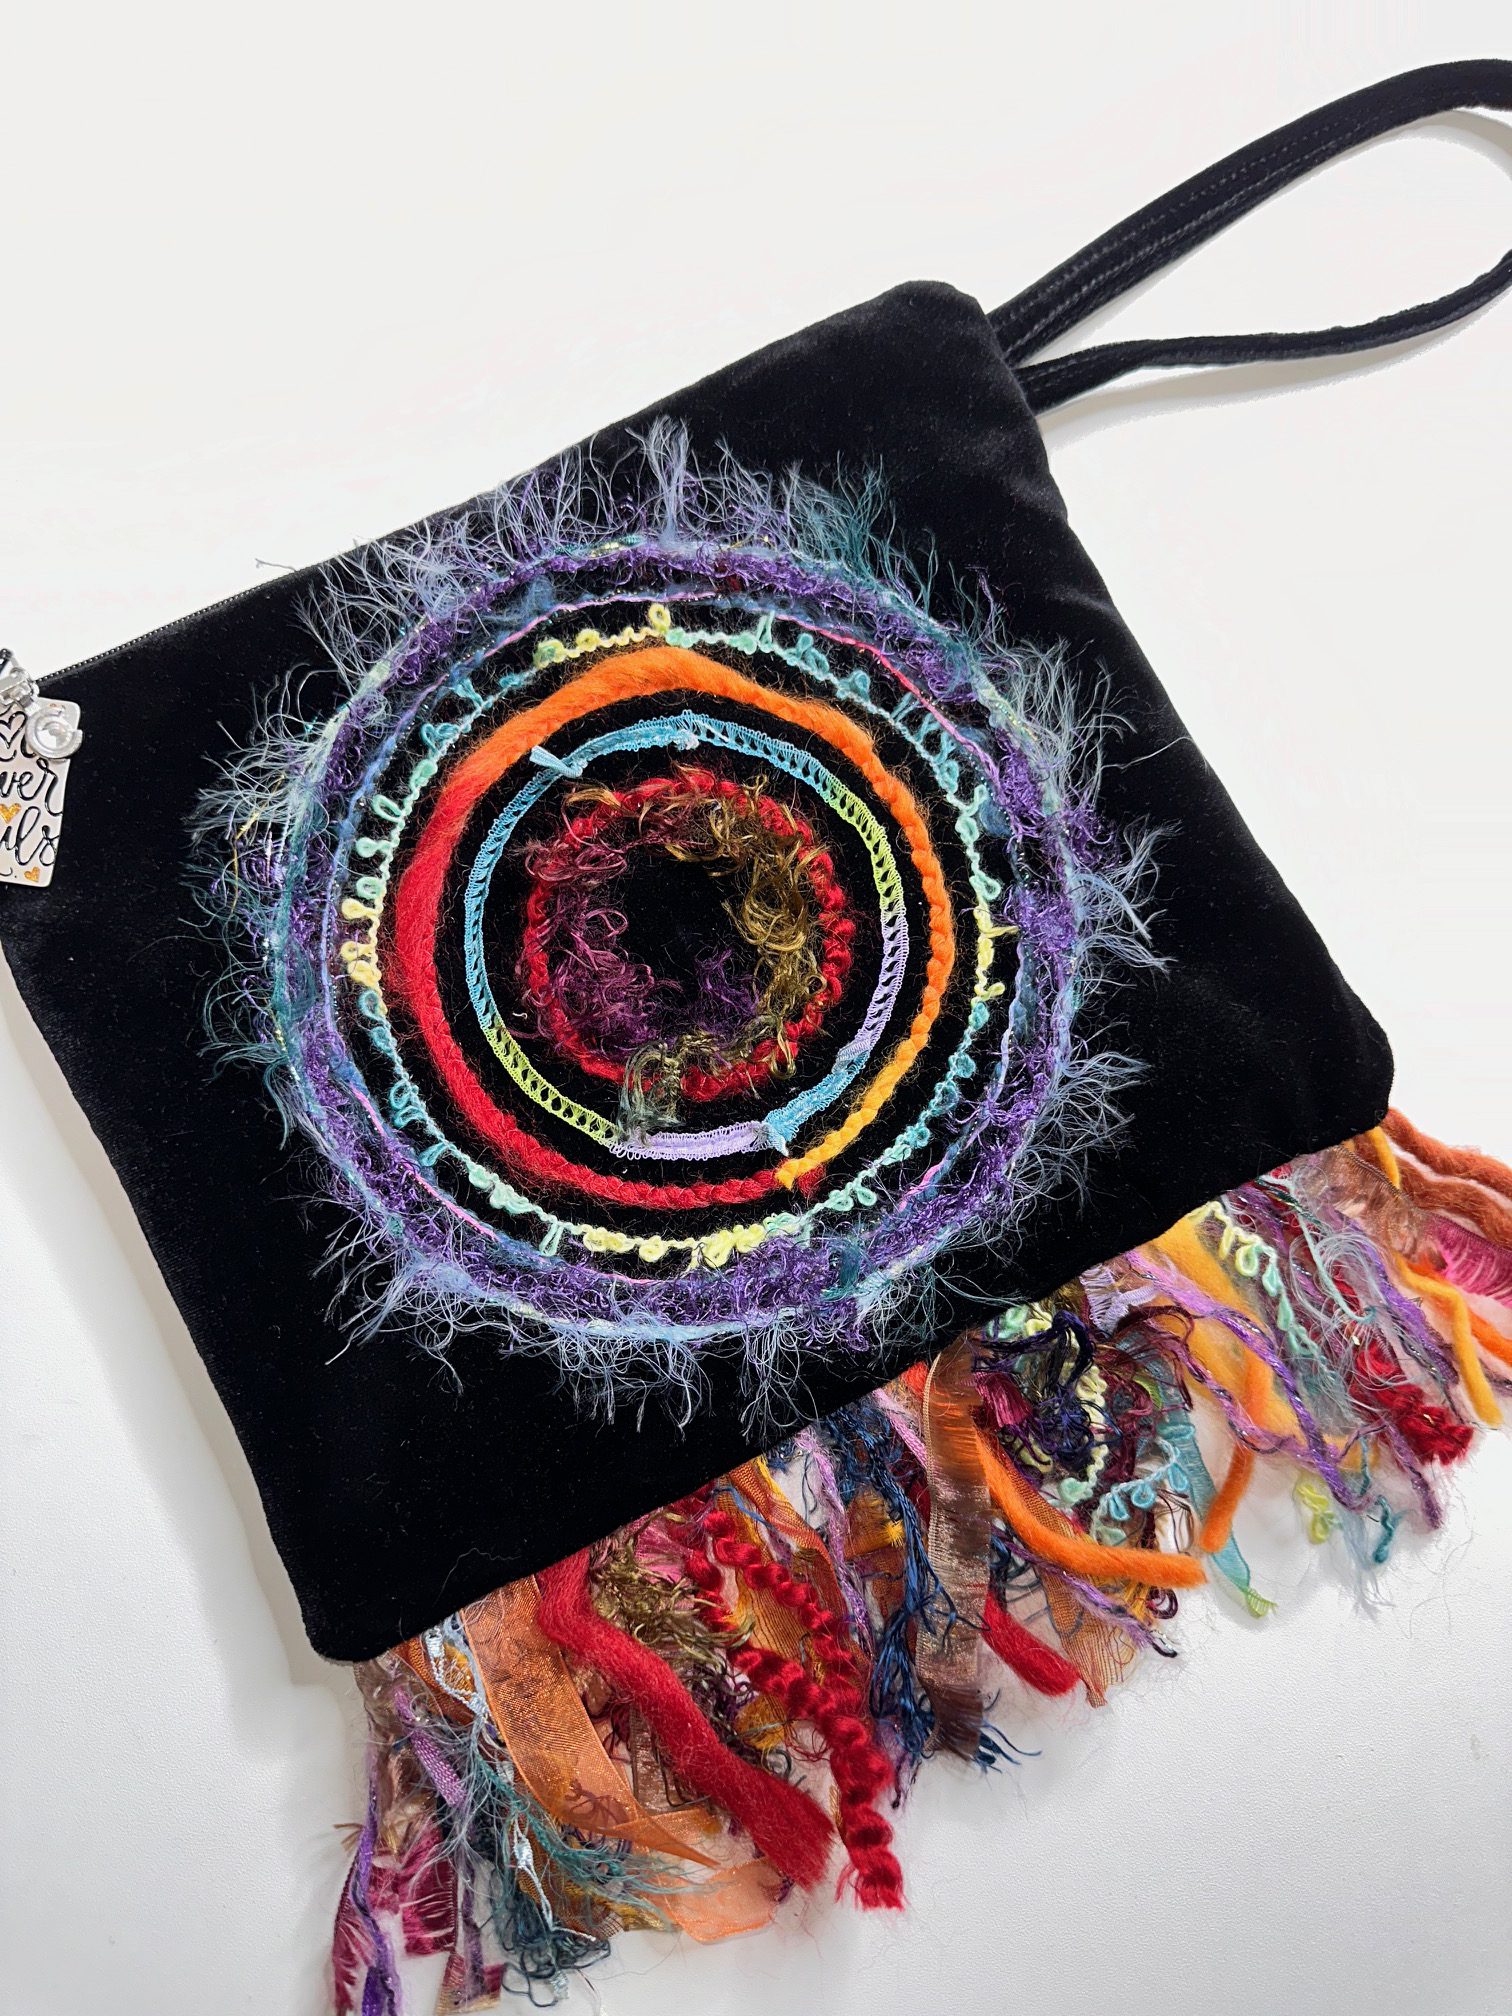
Instead of denim for the body of the clutch bag I used velvet (from an old thrifted skirt) with interfacing added to back of the velvet for more structure. Keep in mind that velvet has a nap so you will want to make sure the nap goes in the same direction on each side of the clutch bag.
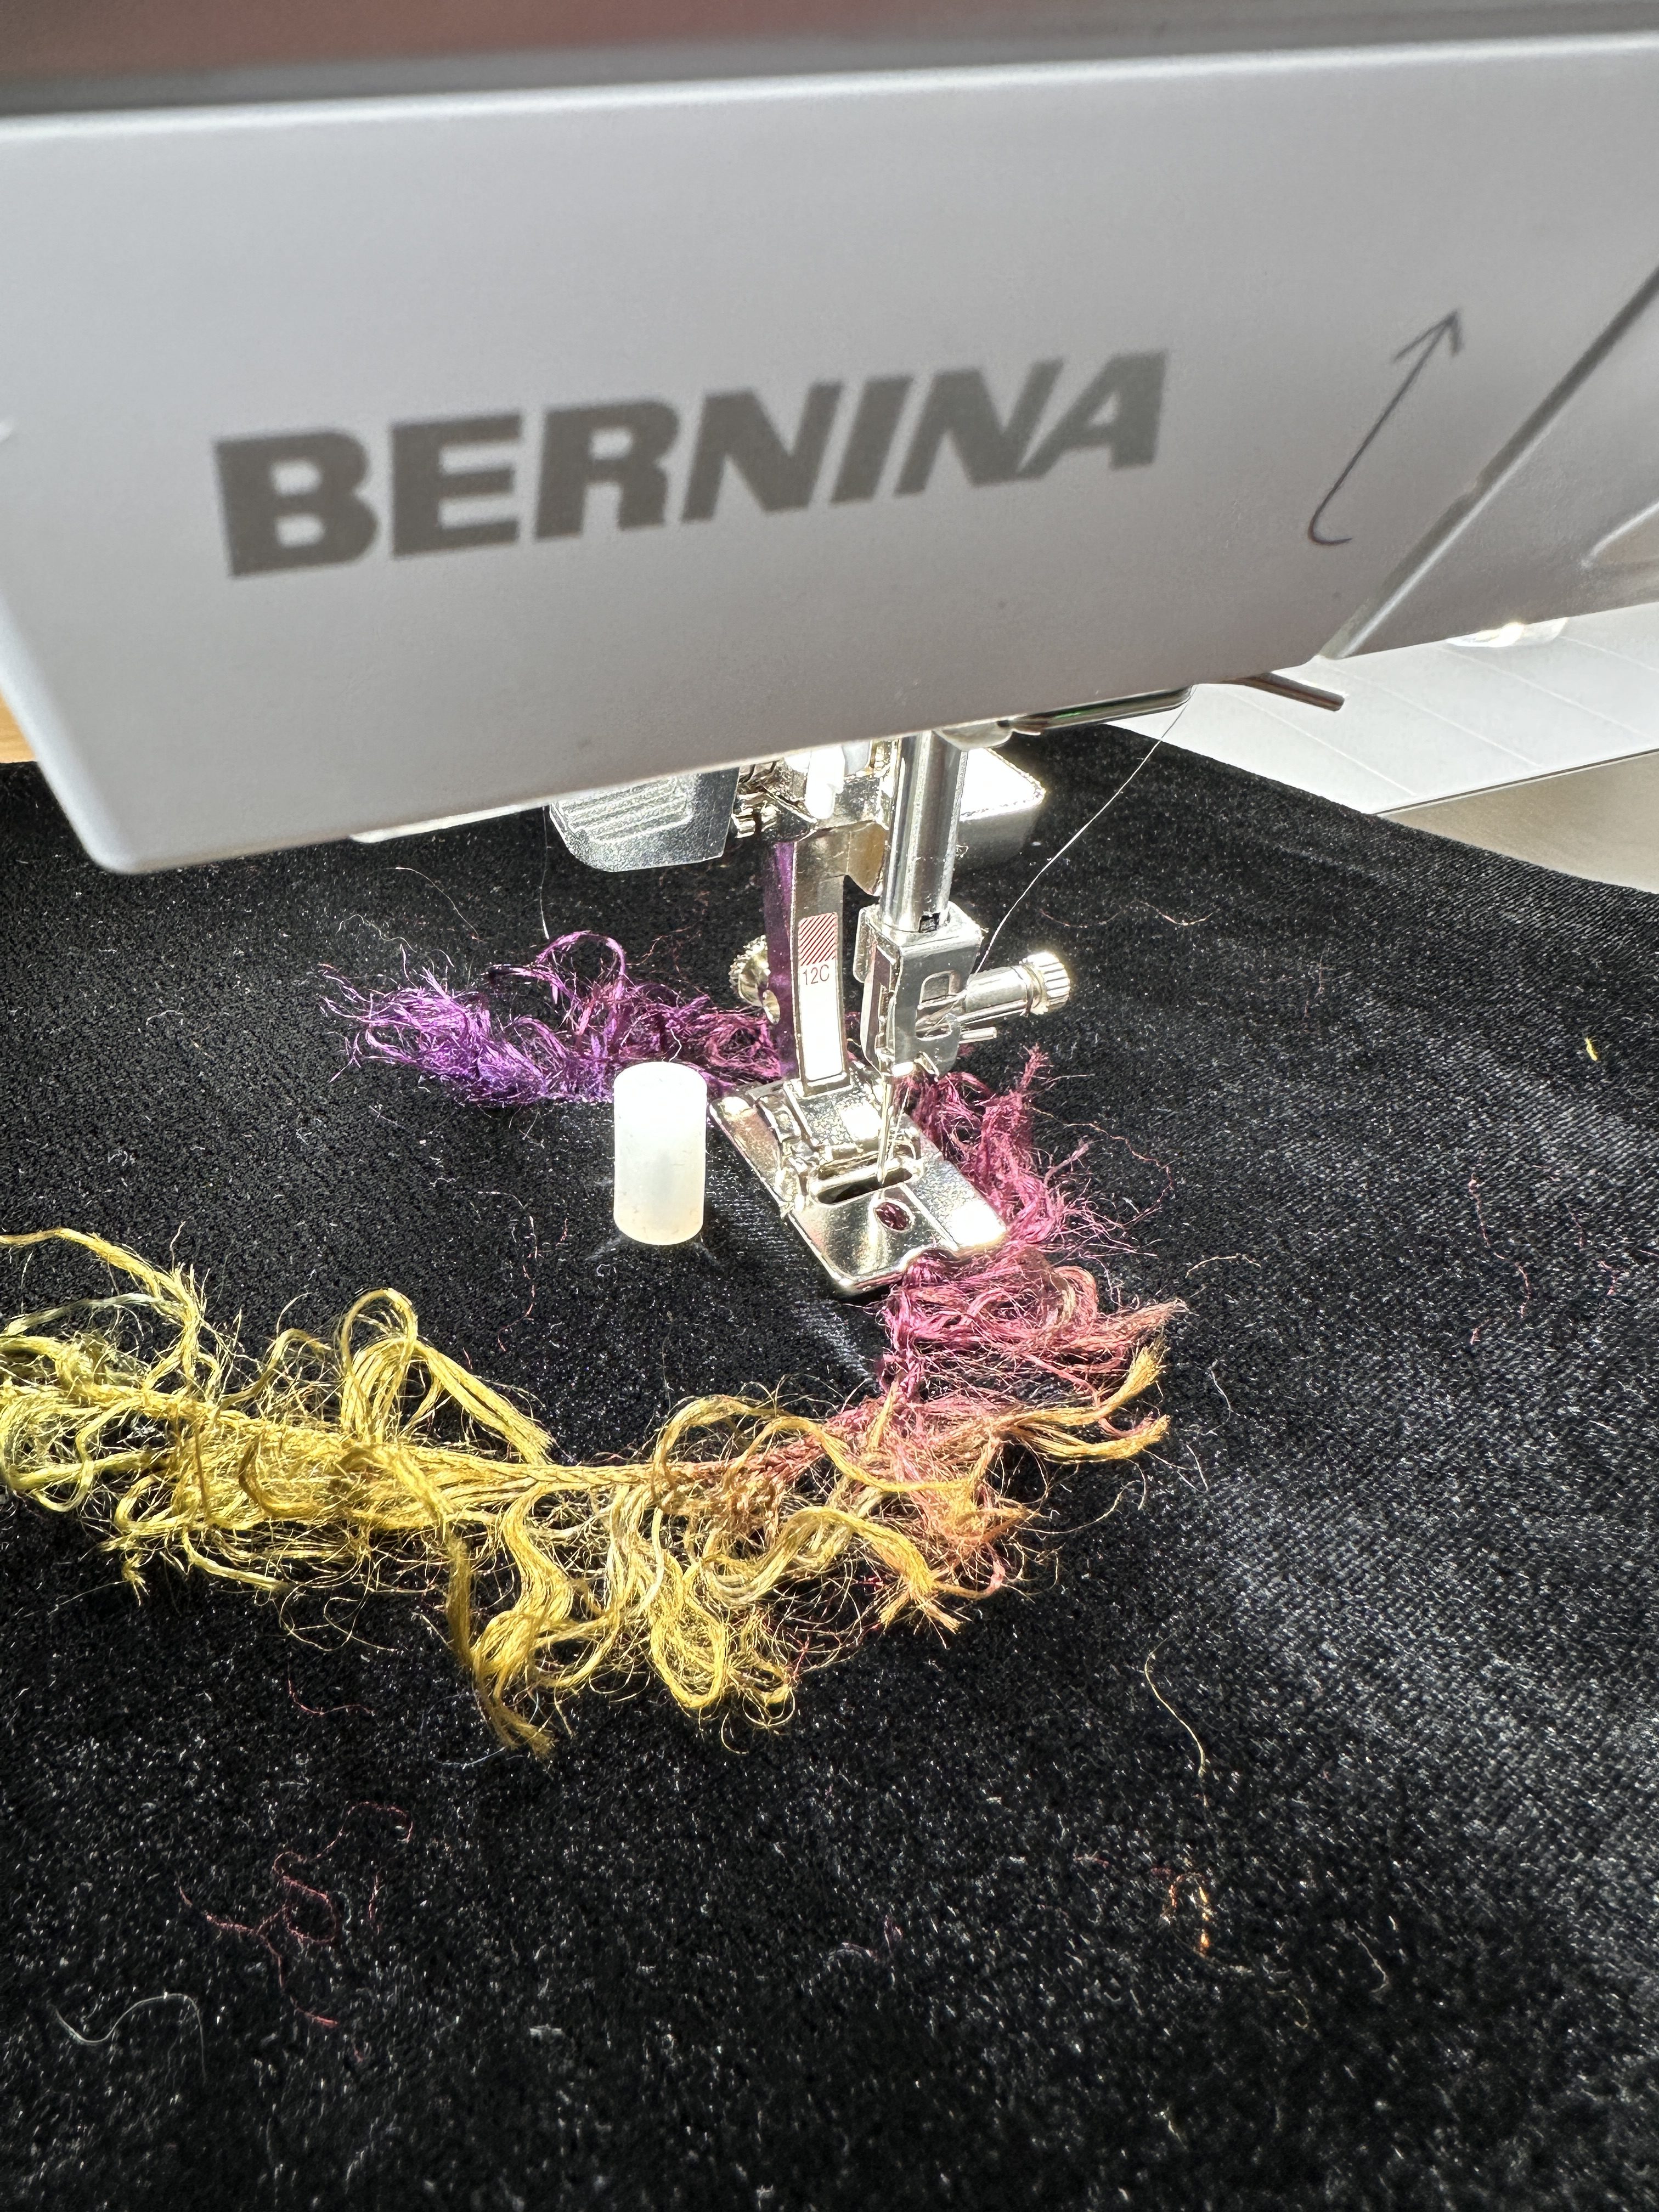
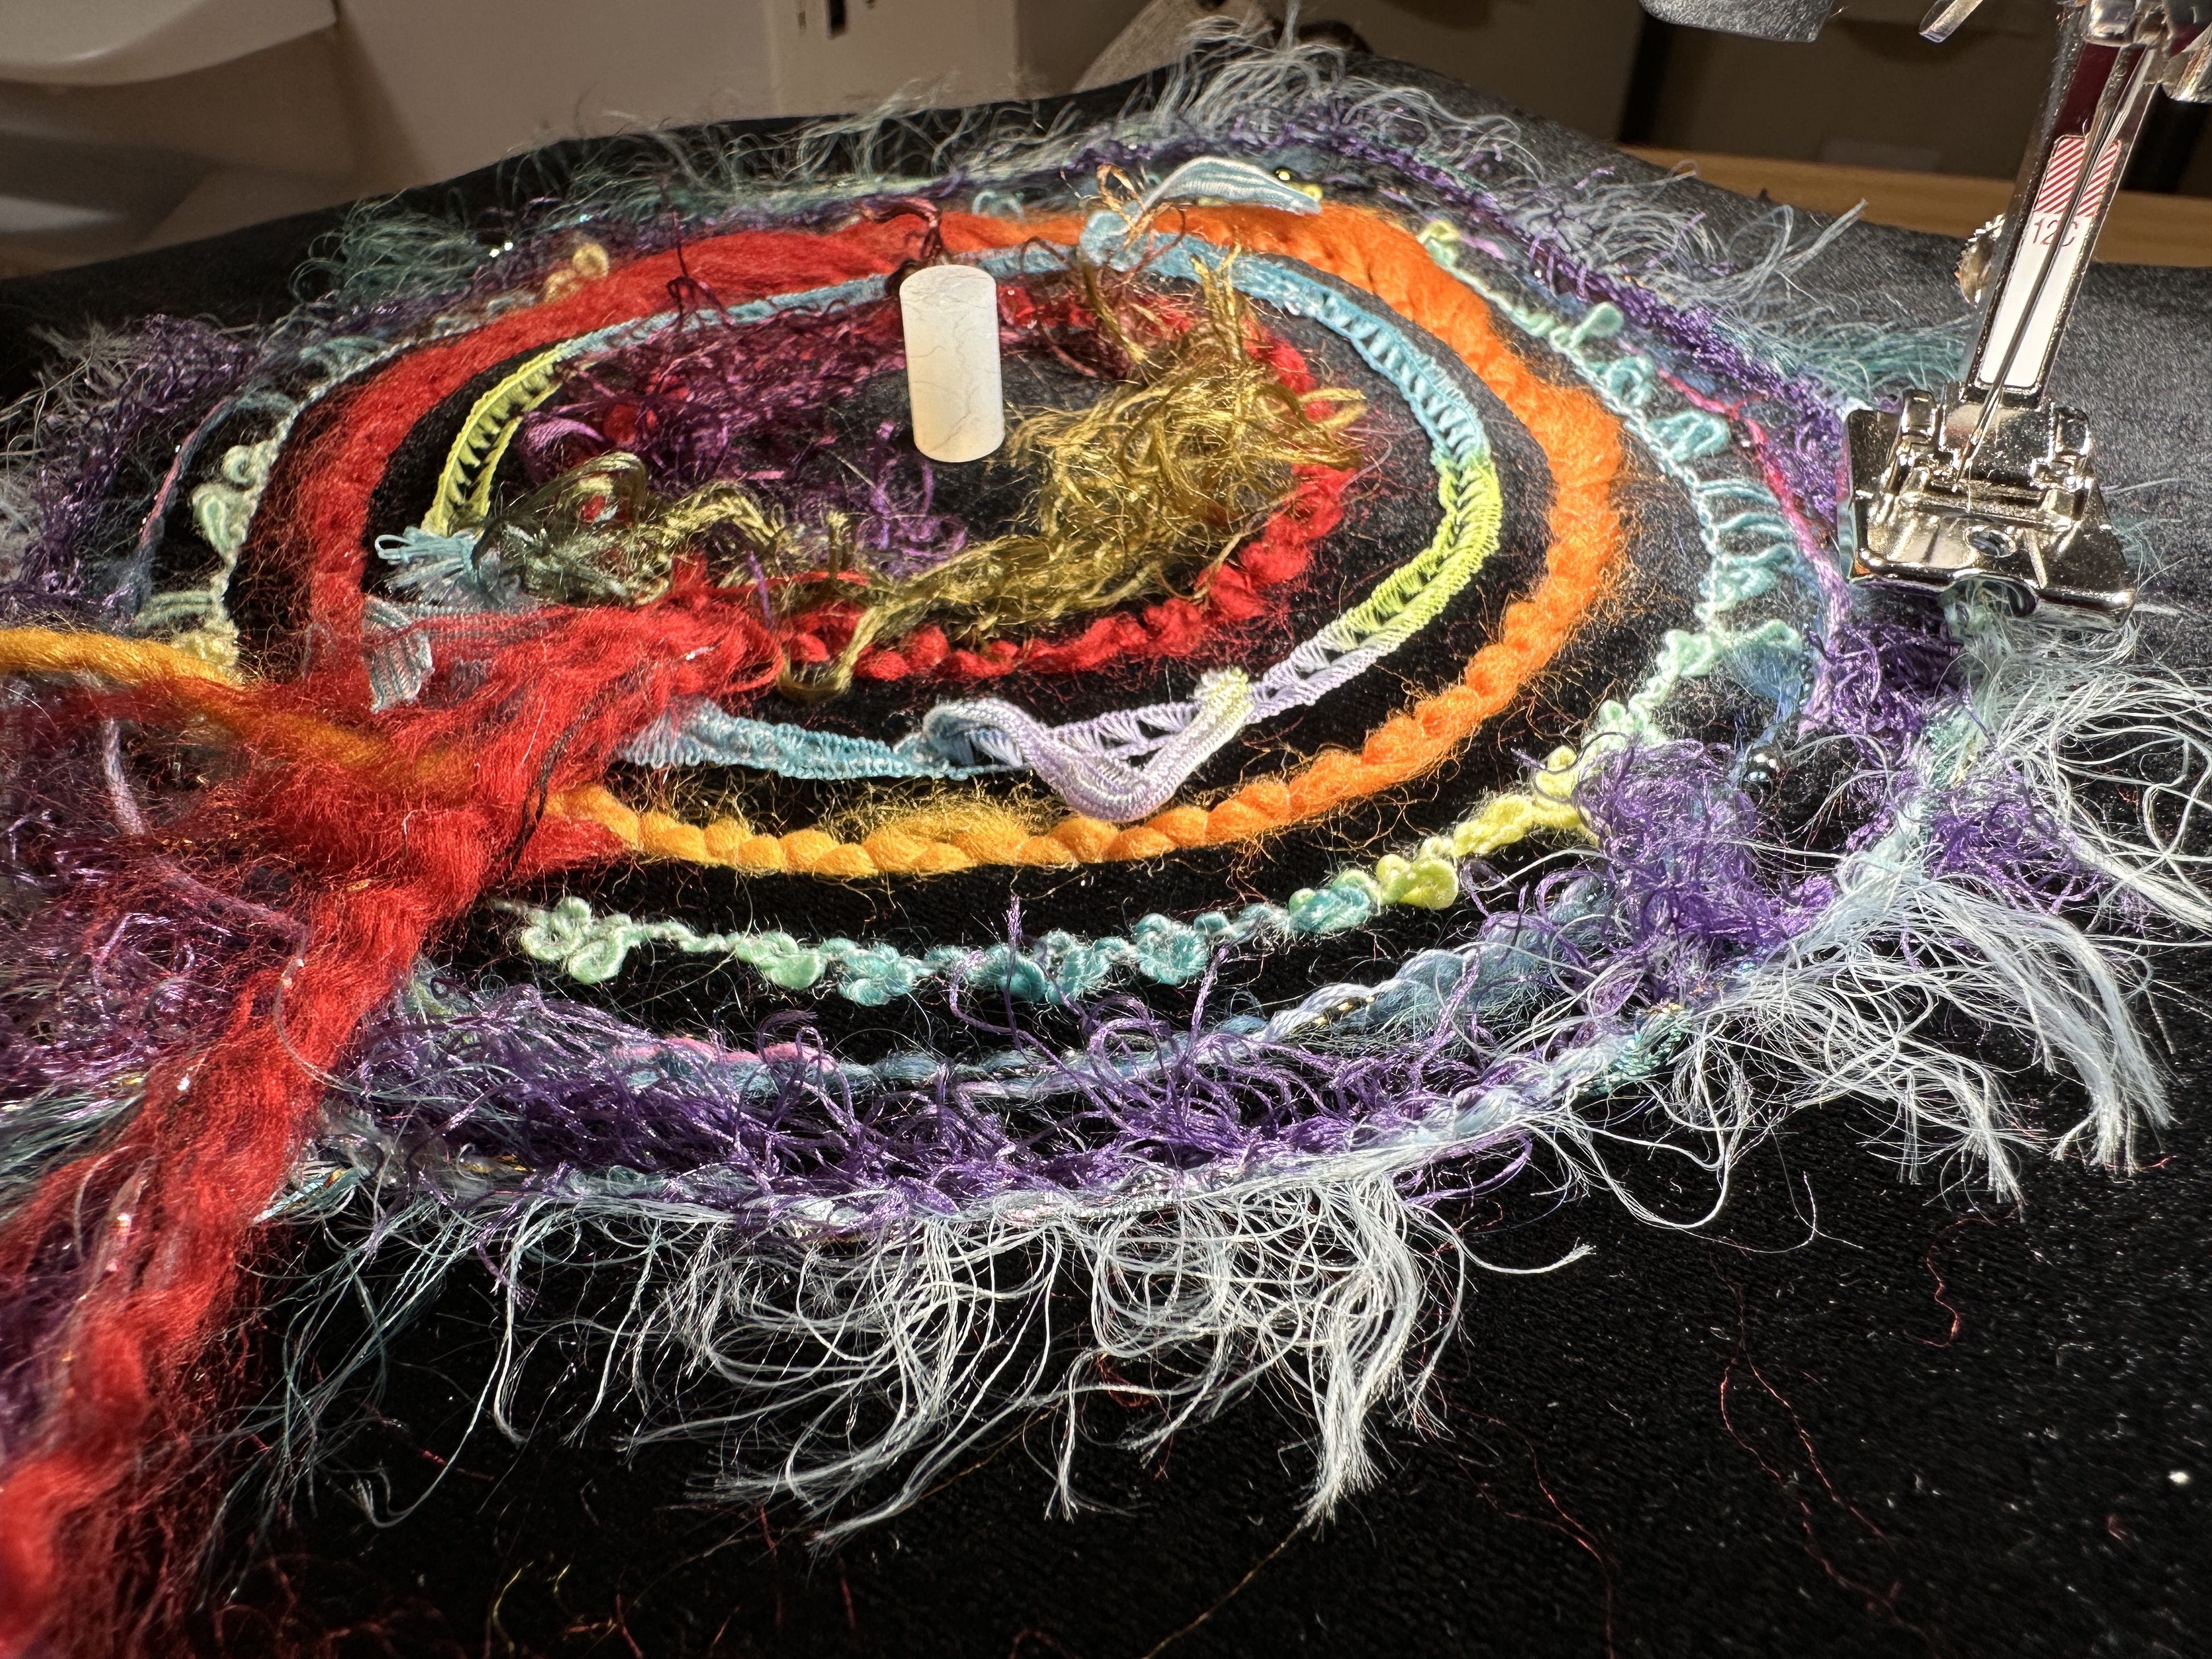
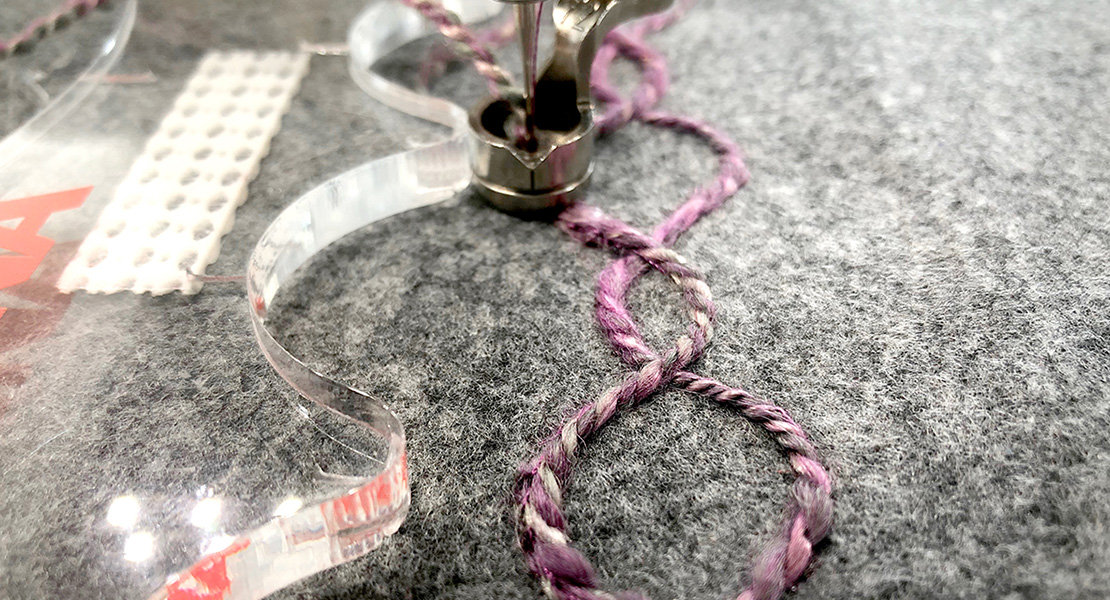
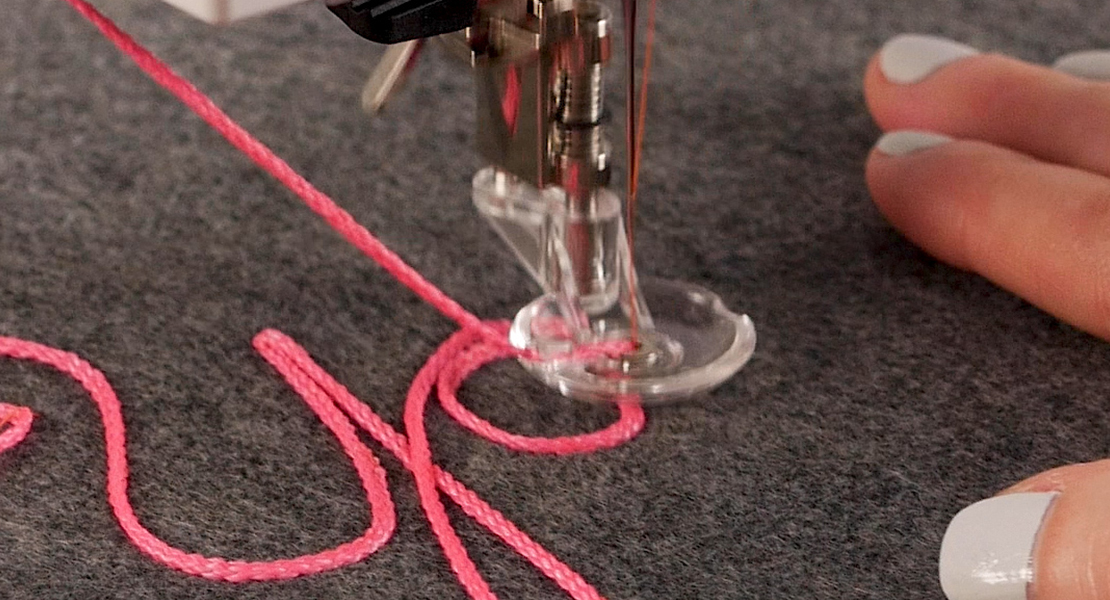
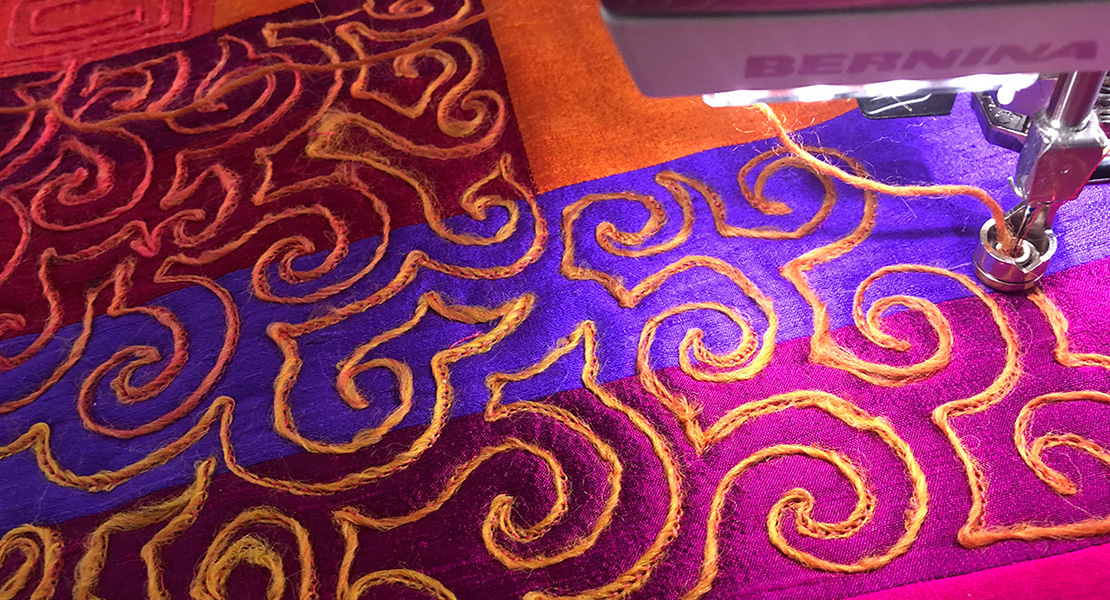
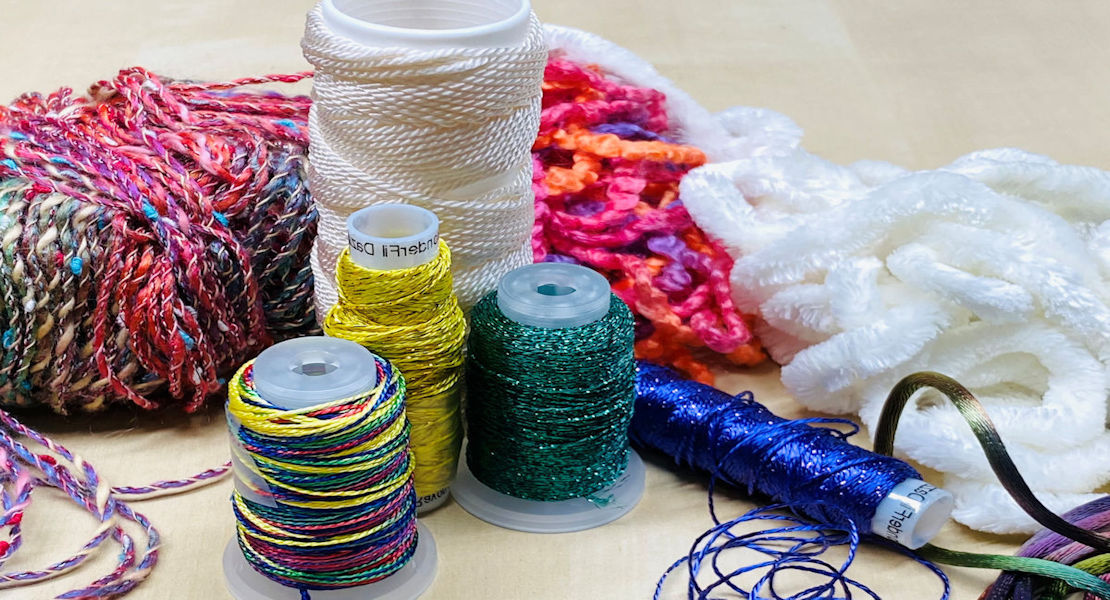
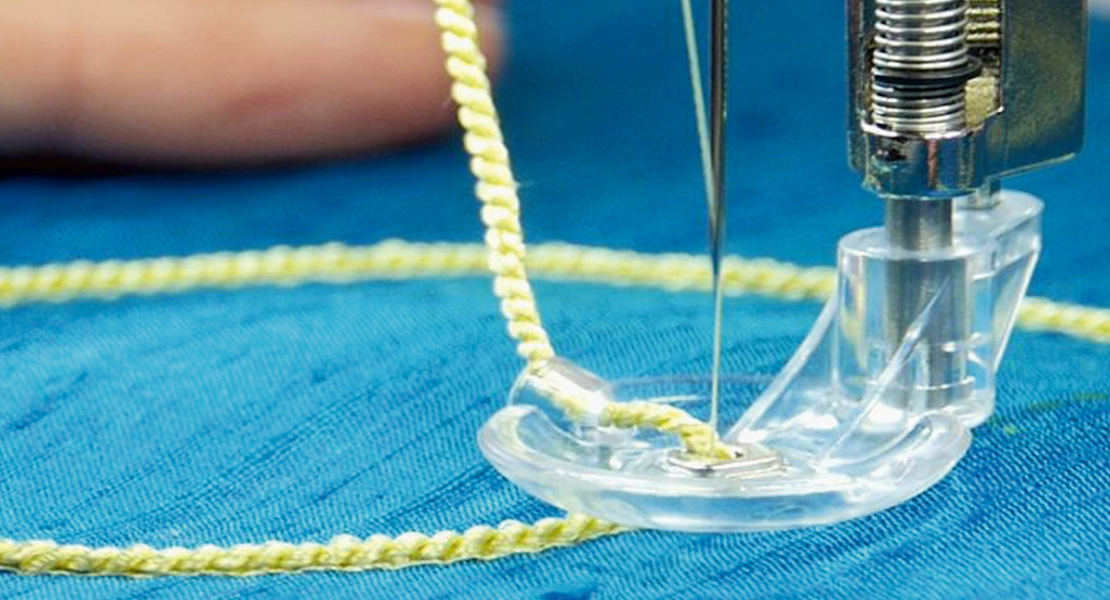
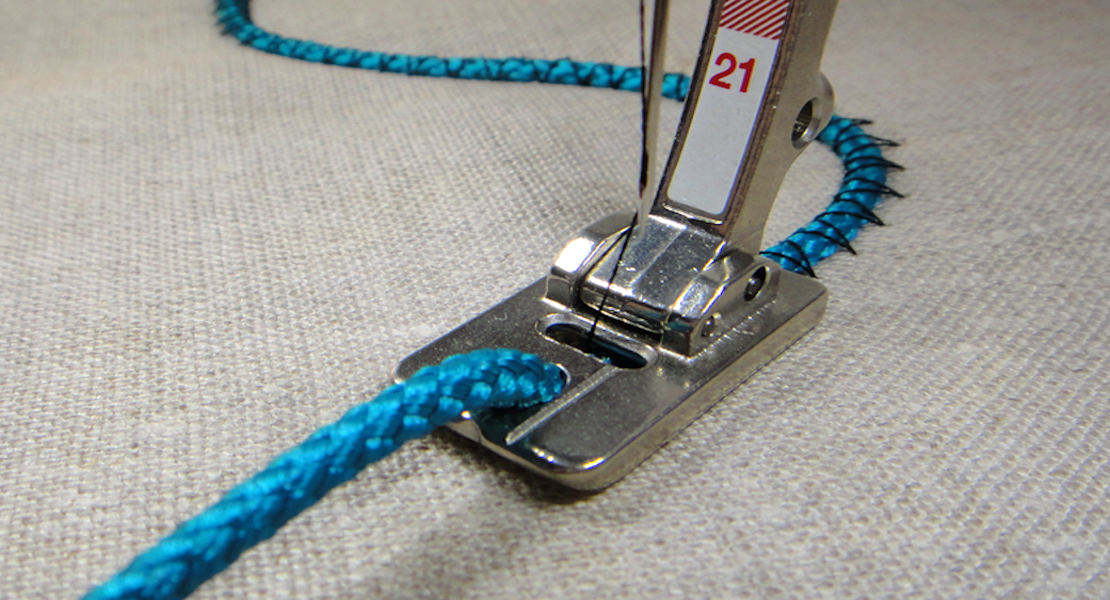
Mettler clear monofilament thread was used to couch a variety of decorative trims using one of my favorite feet – the Bulky Overcast Foot #12C. Of course, for that extra sparkle, metallic thread could be used for the couching also. In the bobbin I used Mettler Metrosene thread.
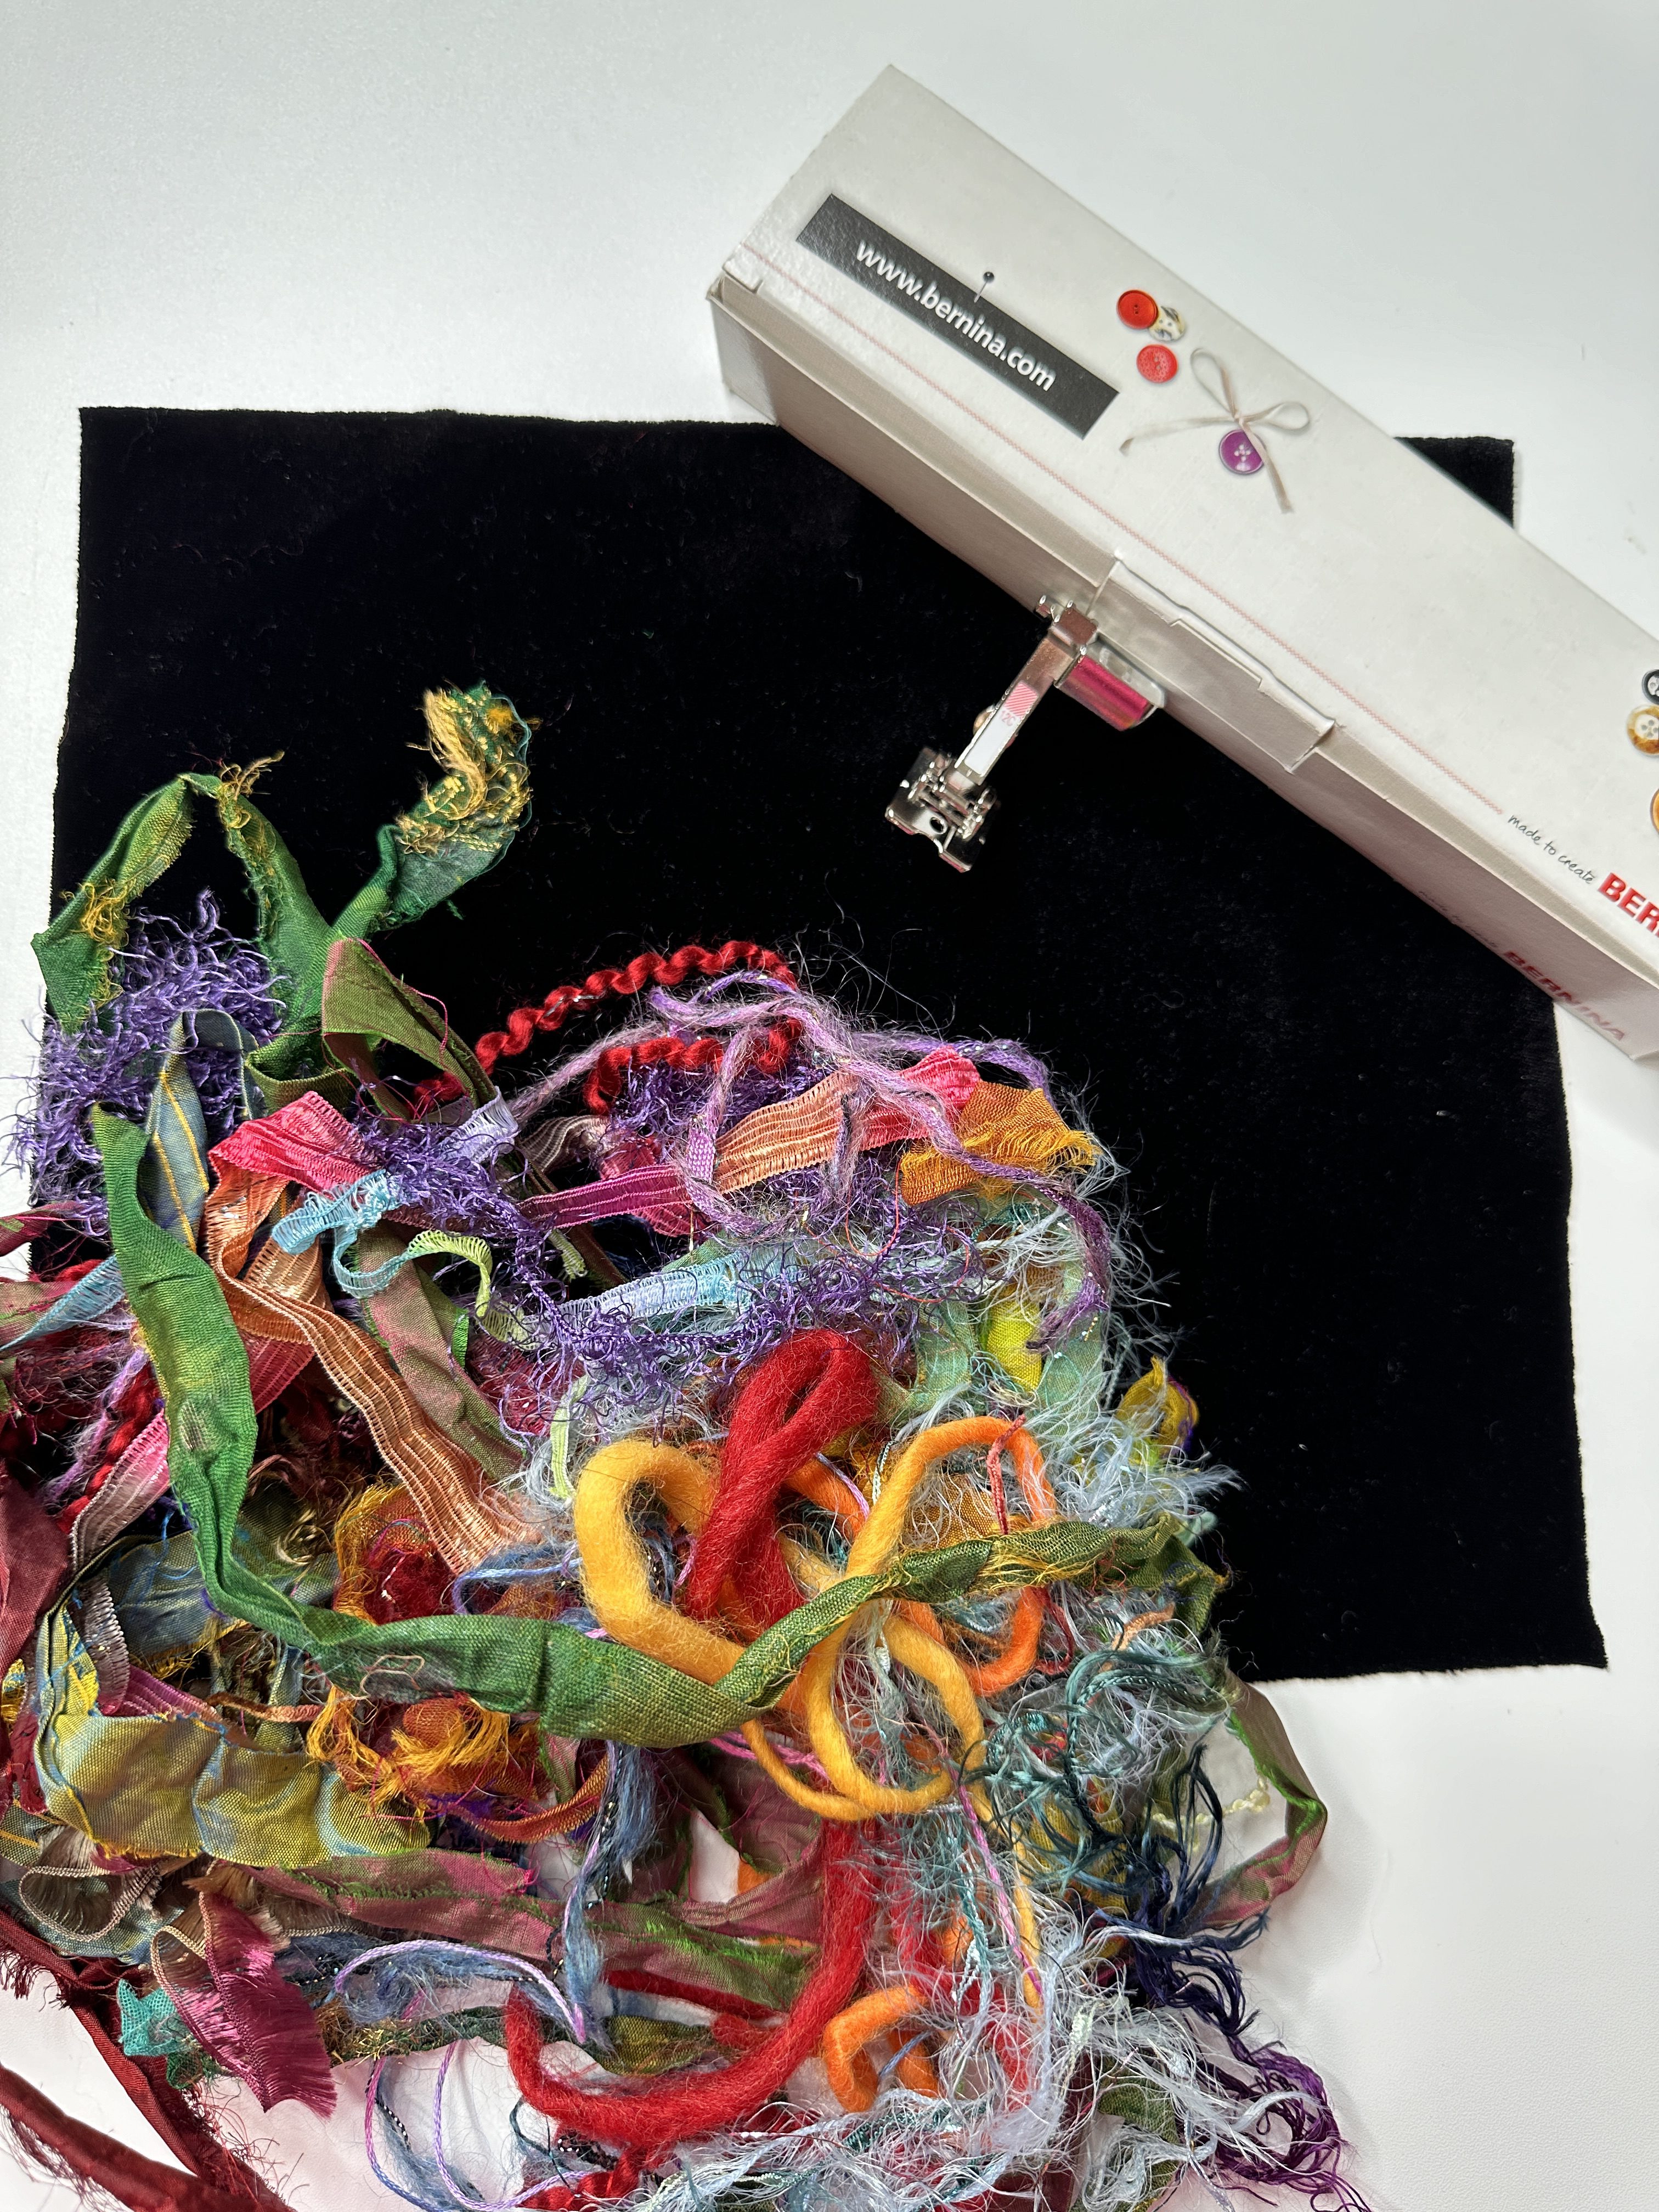
Set up the Circular Attachment on the machine, put on the #12C Foot, and thread the machine with clear thread.
Mark the center of the velvet piece, place it on the circular attachment pin and put the rubber stopper in place. Slide the black tab to the smallest setting.
Set the machine for a zig zag stitch wide enough to cover the decorative trim. Place the trim for the first circle so it is centered in the groove of the #12C Foot and begin stitching; be sure to backstitch at the beginning and end.
Slide the black tab and begin couching the second circle of trim. The excess can be left as a decorative feature or trimmed when stitching is completed

Continue moving the black tab and couching additional decorative trims until you reach your desired circle size.
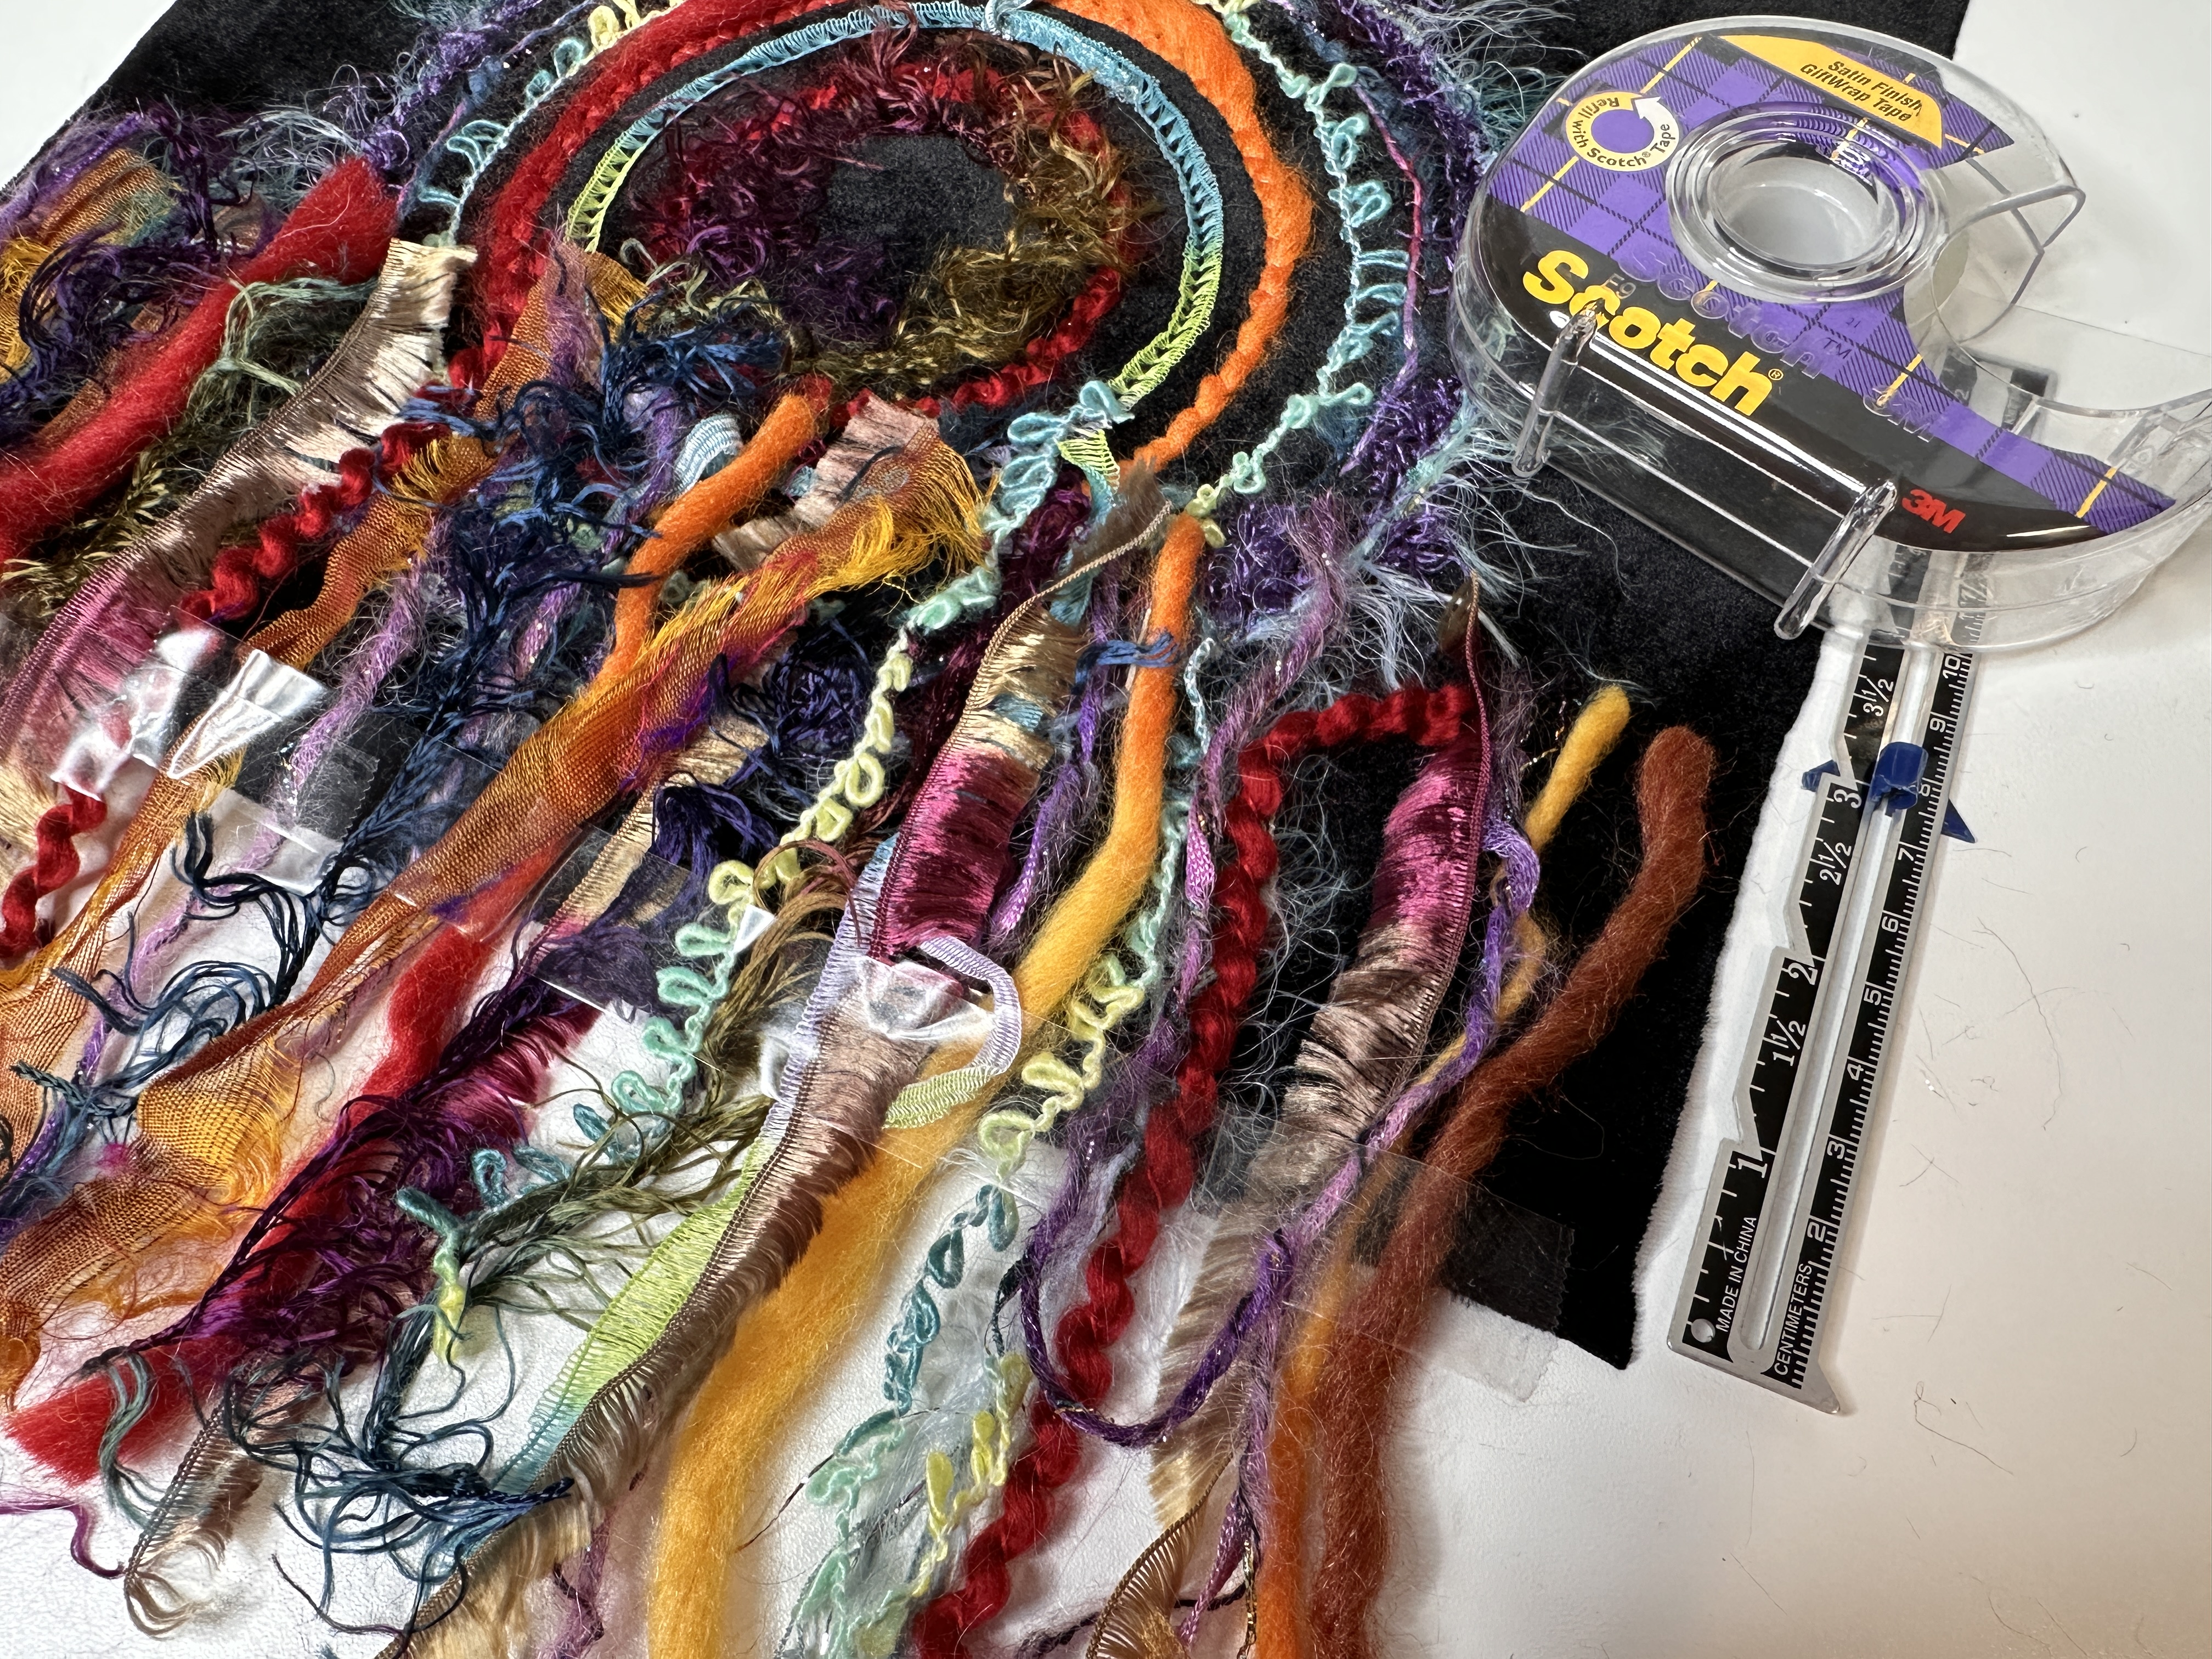
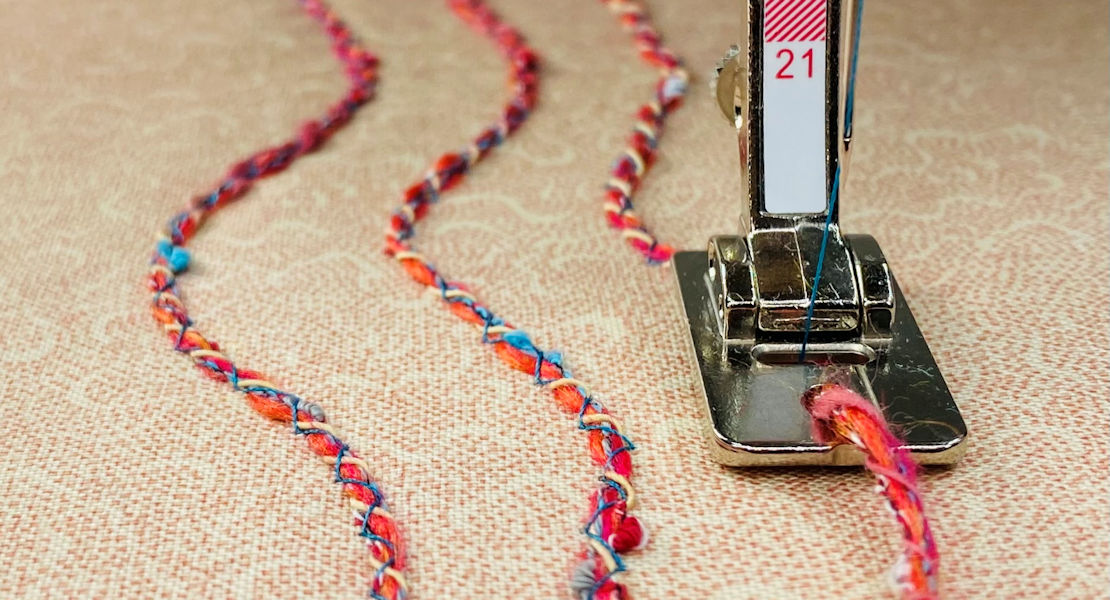
Add Fringe to the Velvet Clutch Bag (Optional)
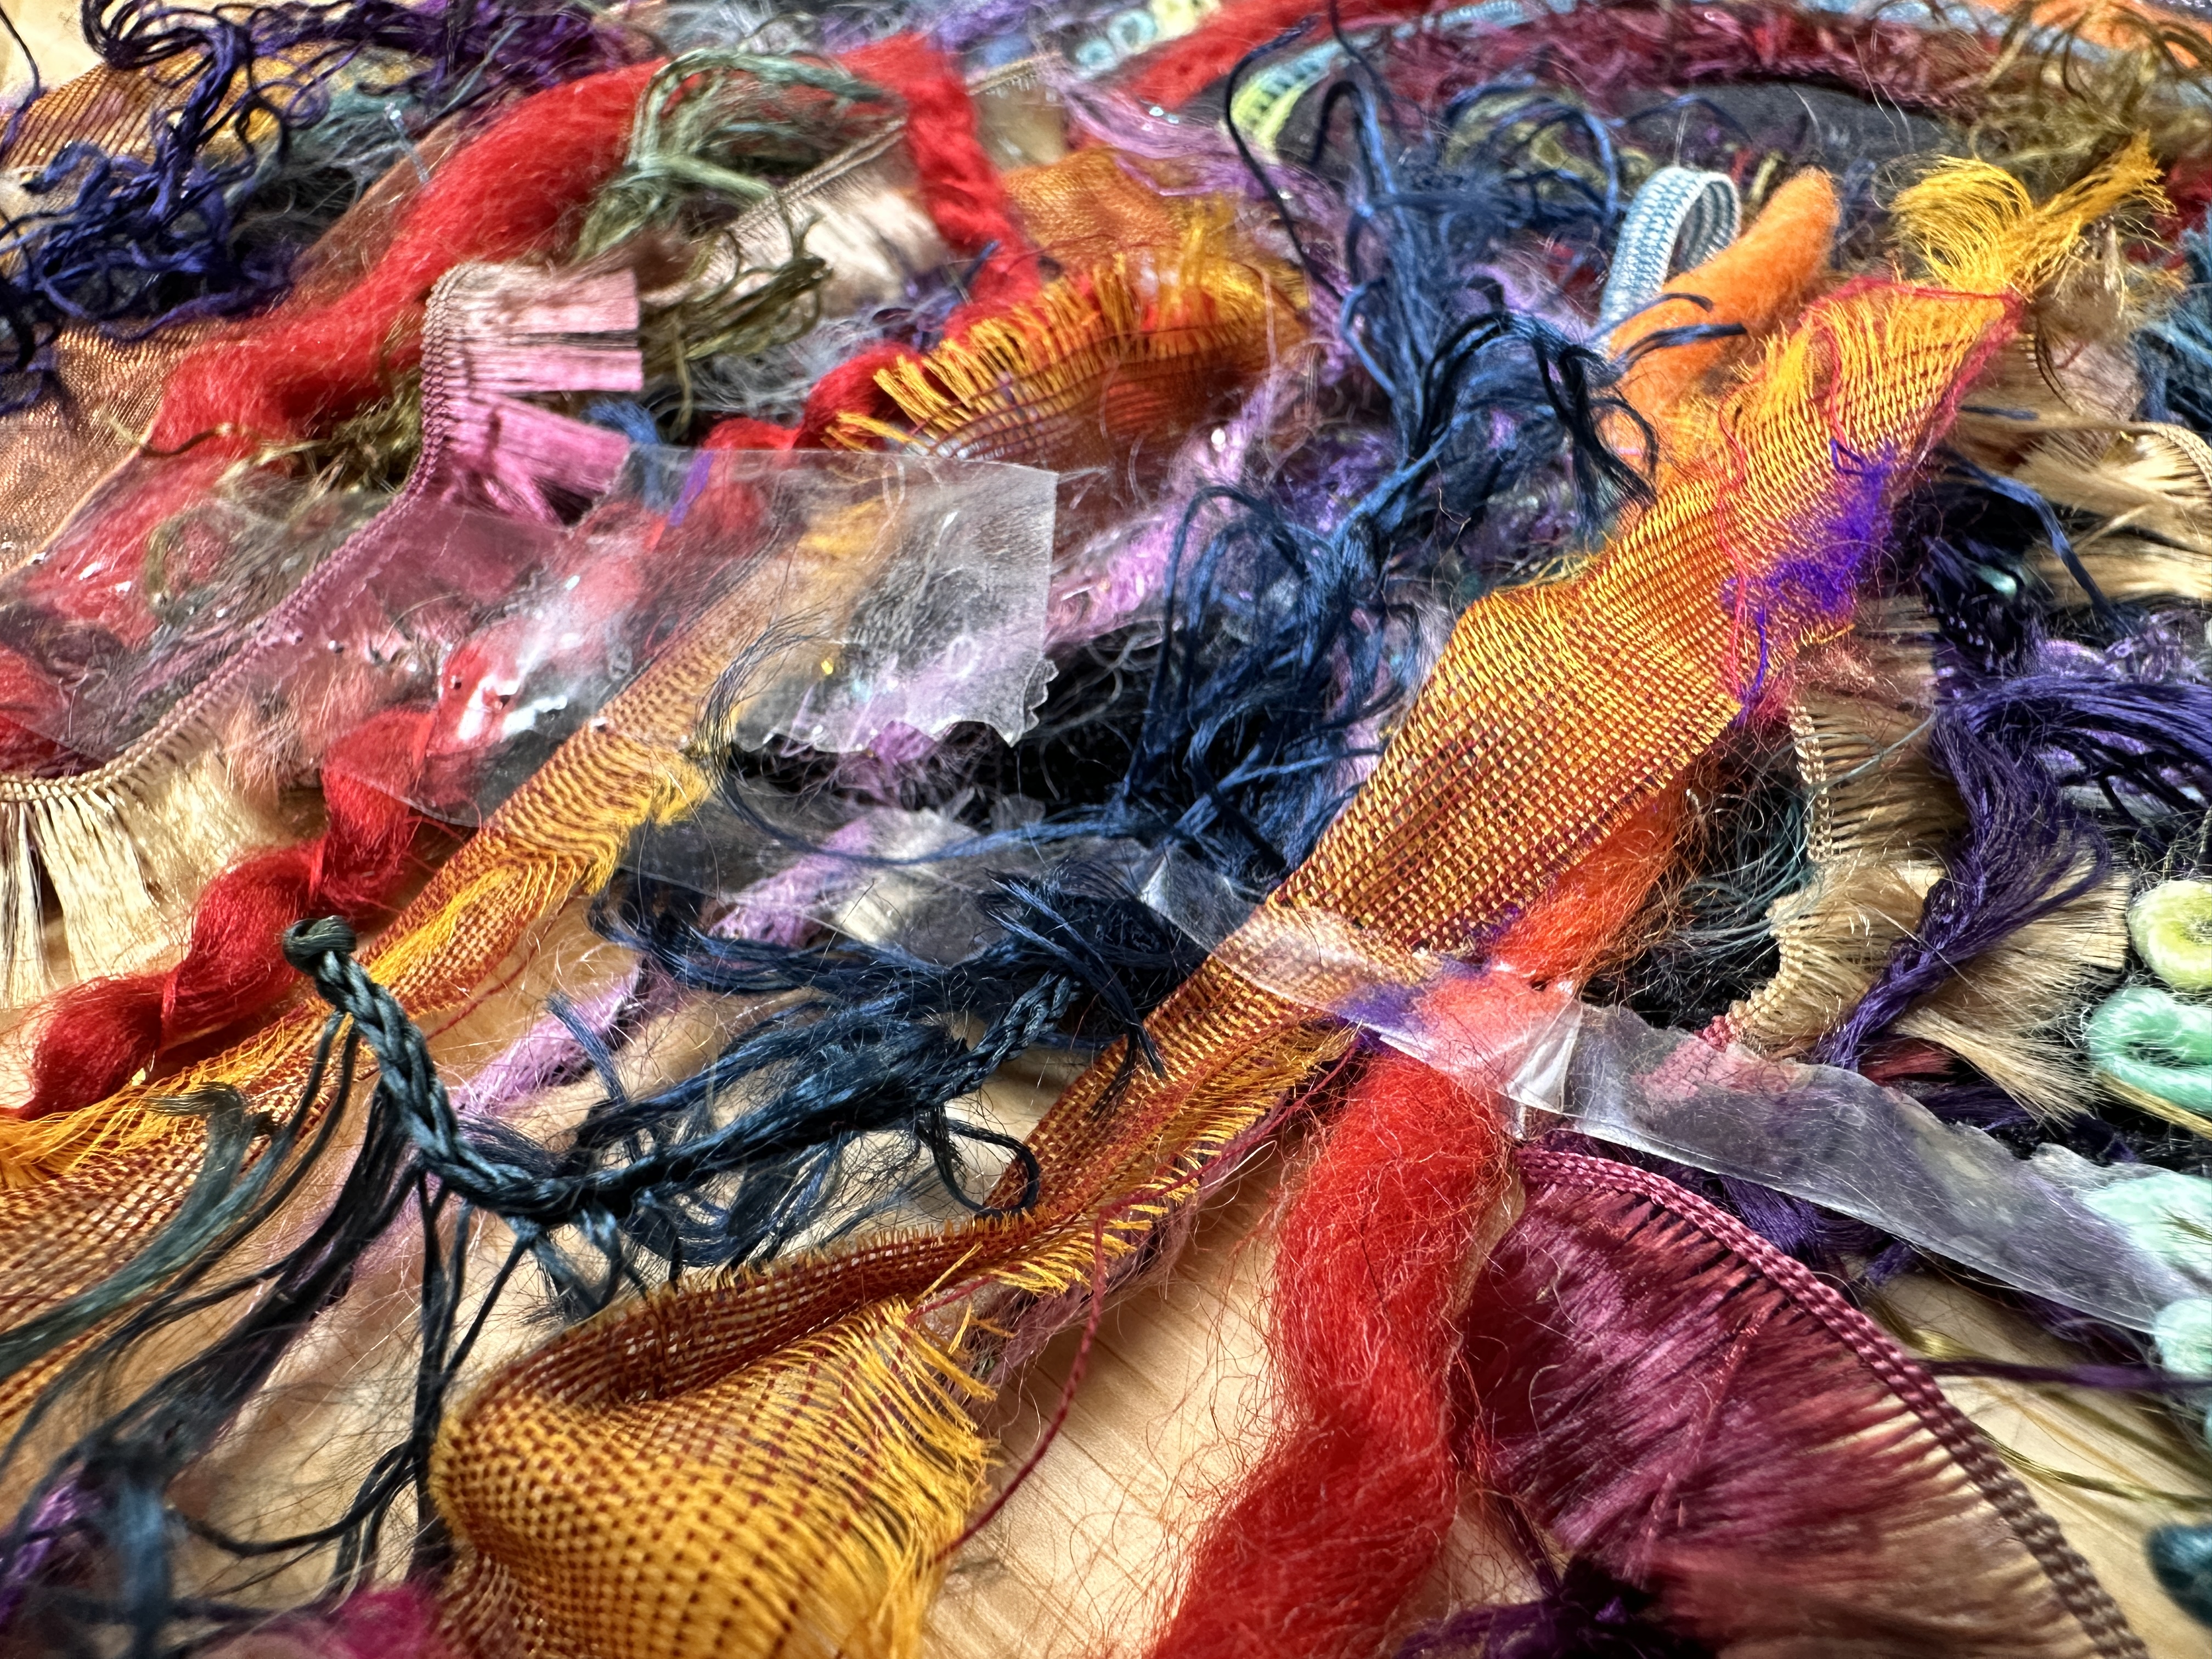
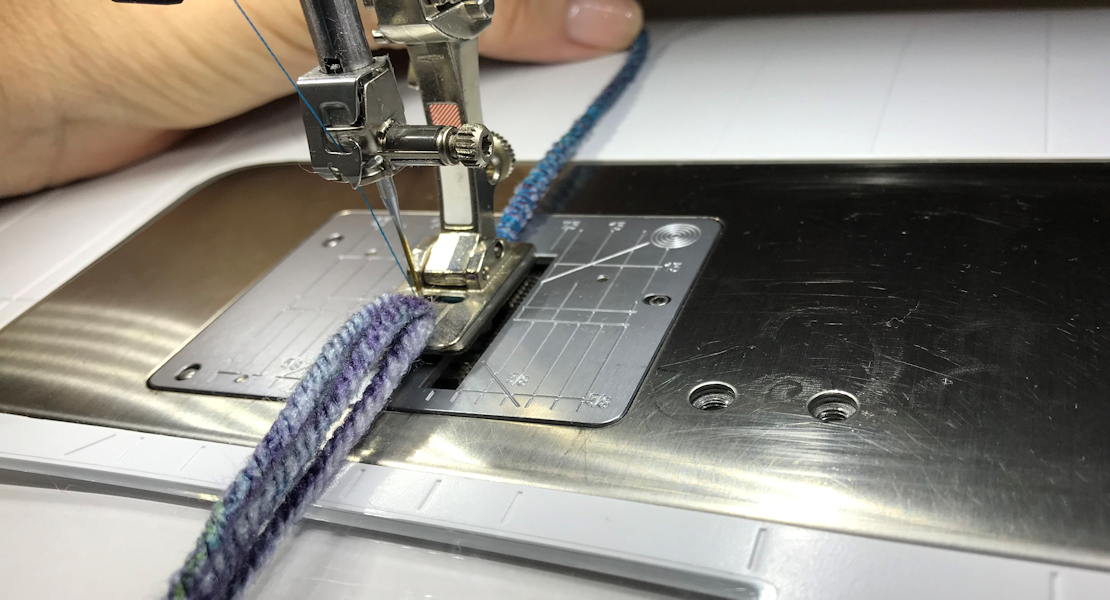
Once the circle embellishment was complete I realized I had small pieces of the decorative trims left. Instead of tossing them, I created fringe.
Cut the trim into 6” pieces, as many as needed to fill along the bottom of the clutch bag. The exact number will vary depending on the thickness of the trims being used.

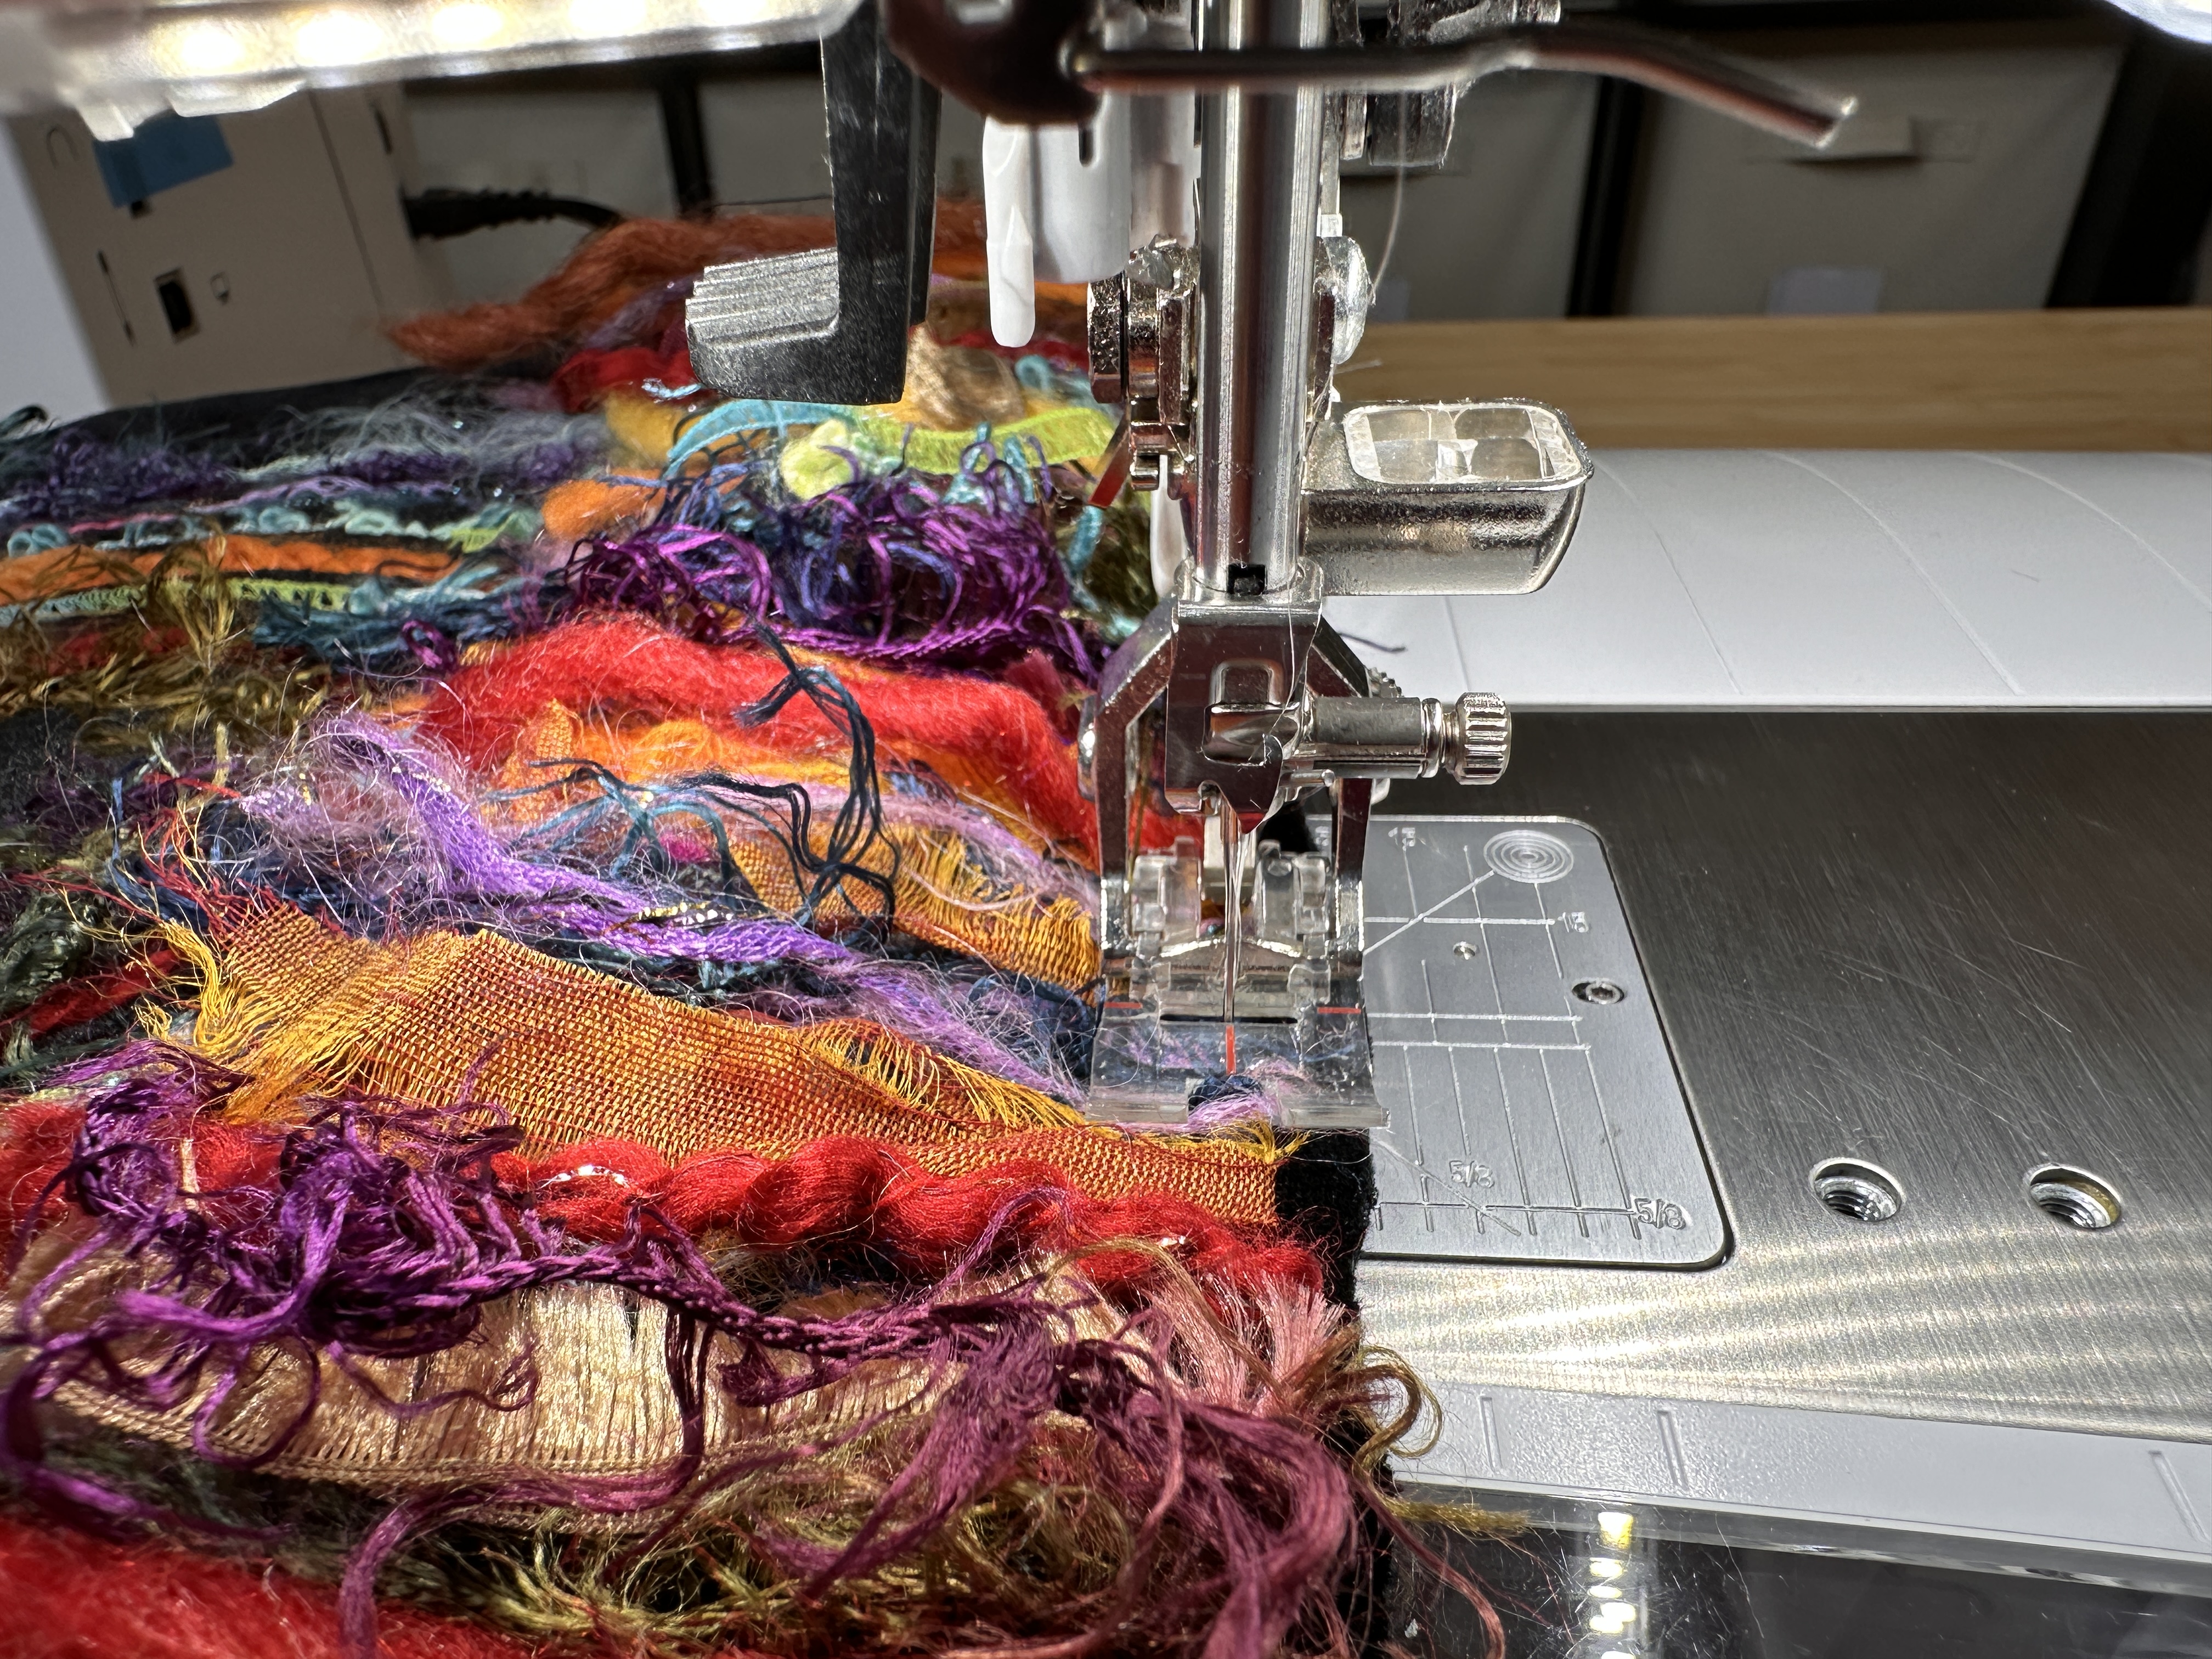
Place the fringe along the bottom of the clutch bag with the center close to the bottom. Use a piece of clear tape to hold the fringe in place. Don’t press the tape too hard, just enough to keep the trims from shifting when stitched.
Use a long straight stitch to baste the fringe to the bag 3/8” from the edge.

Once the fringe is basted to the clutch bag, carefully remove the clear tape. This part takes a bit of patience, especially if the tape was pressed too hard onto the fringe and velvet. Ask me how I know 🙂
Flip the fringe up toward the clutch bag and use a long straight stitch to baste in place. Make sure the basting stitch is inside the 1/2” seam allowance.
Finish constructing the bag per the instructions above.
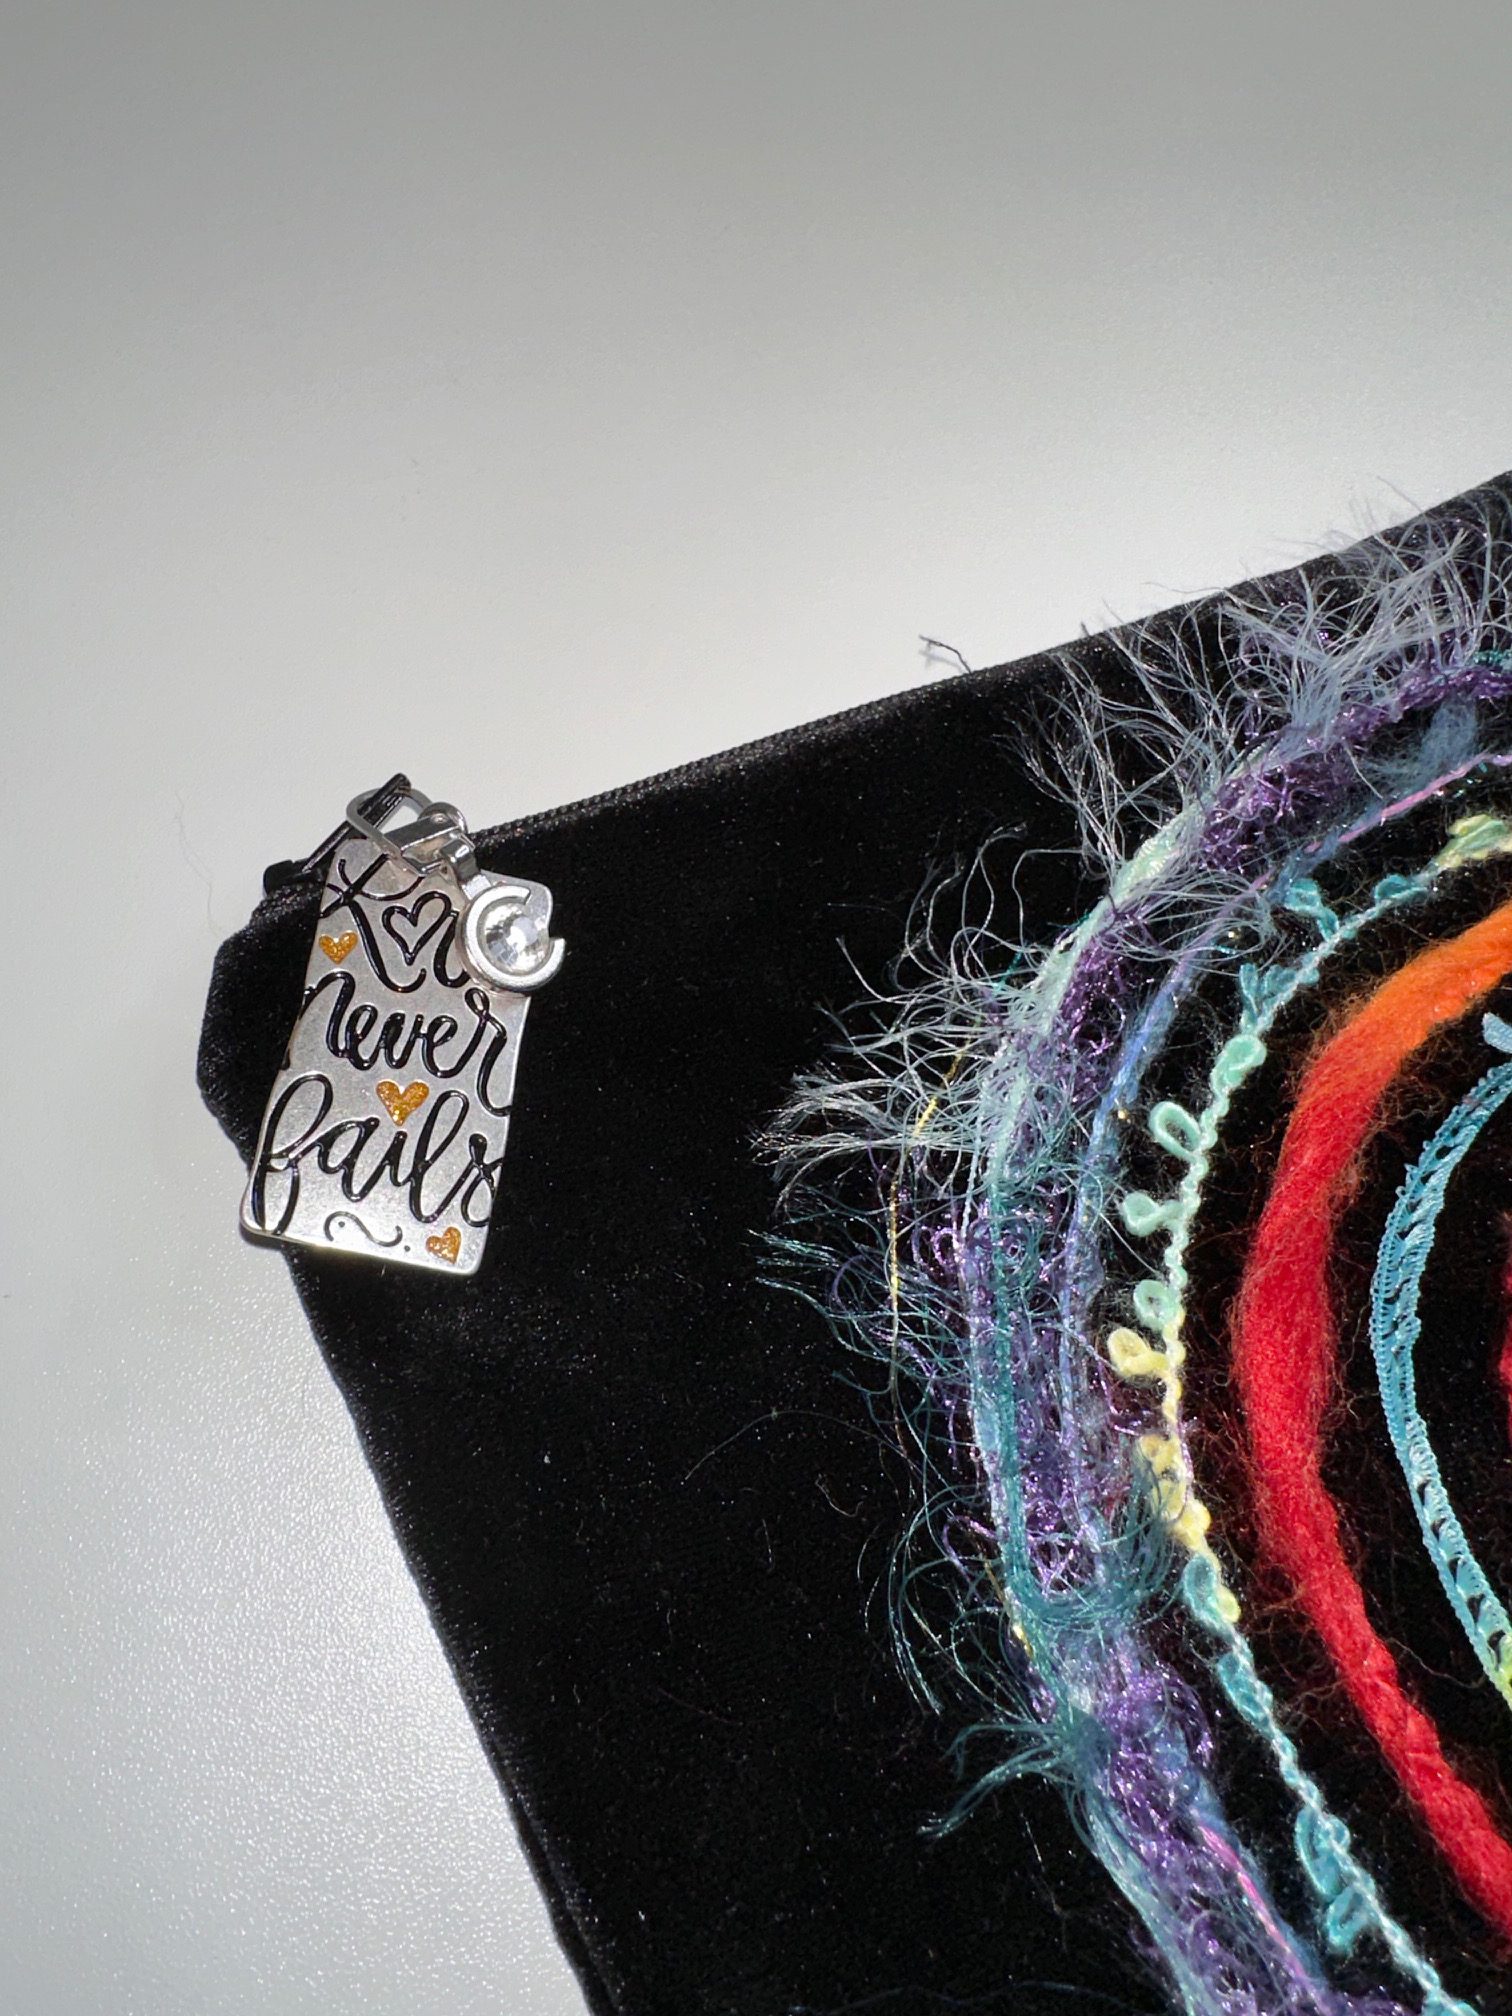
On the velvet bag, in addition to the decorative zipper pull, I added a “Love Never Fails” jewelry finding.
No matter which embellished clutch bag you create, when you make yours be sure to take a photo and tag me (@TheSharonSews) and BERNINA! (@BERNINAUSA) on Instagram!
Happy Sparkly Sewing!
Used Products


What you might also like


One comment on “Sew a Clutch Bag Embellished with Metallic Stitches or Couched Yarns”
Leave a Reply
You must be logged in to post a comment.

I just started making eyeglass cases with metallic thread again. Pretty and fun. This inspires me to make more! Thank you,