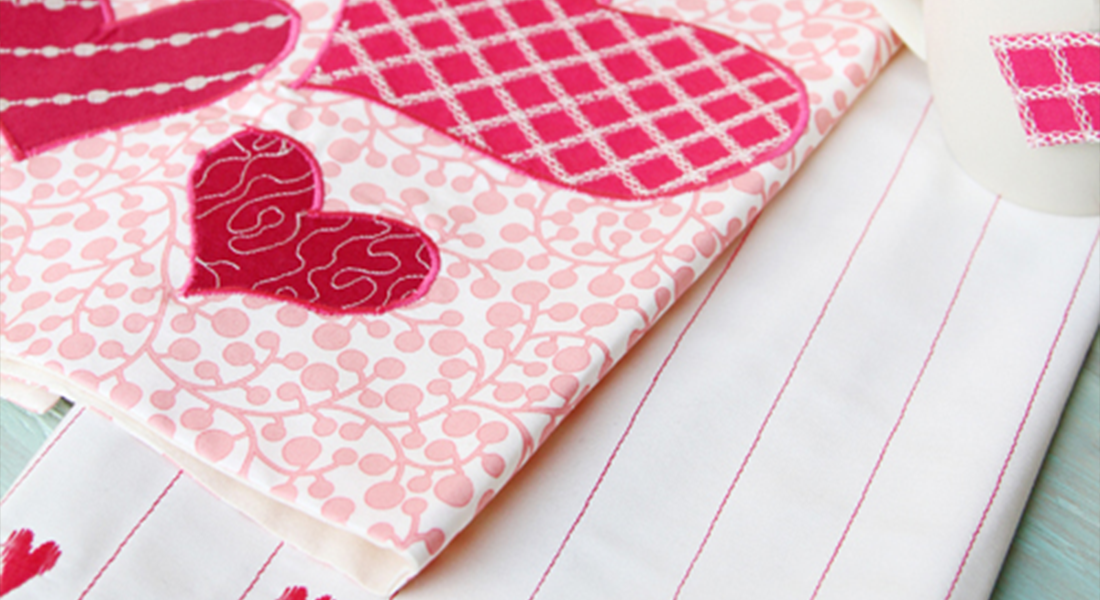
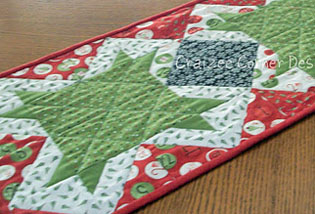
Be My Valentine Table Runner

Hi, I’m Cherry Guidry of Cherry Blossoms. With Valentine’s Day just around the corner and all the pink, red, and sweets, I was inspired to create this easy table runner that would look great on a table, make a fantastic bed runner, or perhaps, use the appliquéd blocks individually to make a few quick pillows!
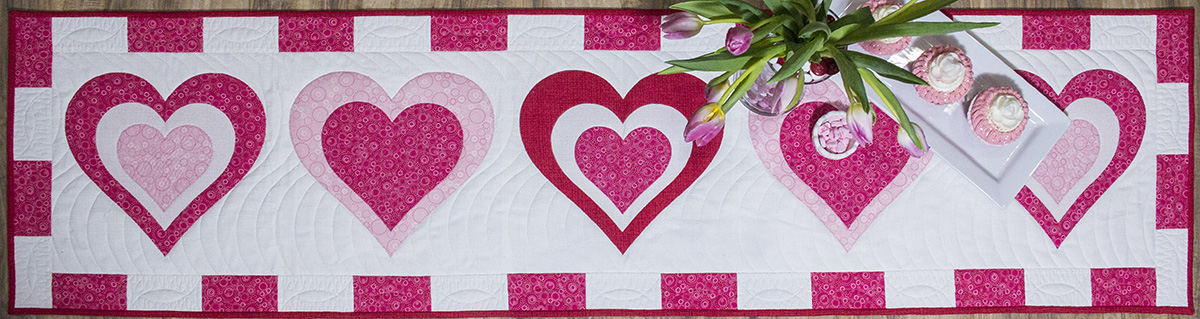
This runner is made with fusible appliqué, but the templates will work with your favorite appliqué technique.
Materials to Make a Valentine Table Runner
- Download the Be My Valentine Table Runner Template
- White fabric for backgrounds and appliqués: 1 yd (I used Color Weave White from Color Weave by Benartex)
- Dark pink fabric for appliqués and border: ½ yd (I used Beaded Circles Dark Pink from Sunday Ride by Benartex)
- Light pink fabric for appliqués: 1 fat quarter (I used Beaded Circles Light Pink from Sunday Ride by Benartex)
- Red fabric for appliqués and binding: ½ yd (I used Color Weave Rouge from Color Weave by Benartex)
- Backing fabric: 1½ yd for pieced or 2 yds for a one-piece backing
- Batting: 20″ x 70″
- Paper-backed fusible: 2 yds of 17″ wide
- Thread: white, light pink, dark pink
- Sewing machine (I use a B 880)
- Open embroidery foot #20/#20C/#20D
- BERNINA Stitch Regulator (BSR)
- BERNINA Adjustable Ruler foot #72
How to Make the Be My Valentine Table Runner
Step 1 – Cut the fabric
White:
- (3) 2 ½” x WOF (width of fabric) strip subcut into (19) 2 ½” x 4 ½” – pieced border rectangles
- (2) 12 ½” x WOF (width of fabric) strips subcut into (5) 12 ½” x 12 ½” – background squares
Dark pink:
- (3) 2 ½” x WOF strip subcut into (19) 2 ½” x 4 ½” – pieced border rectangles
Red:
- (5) 2 ¼” x WOF binding strips
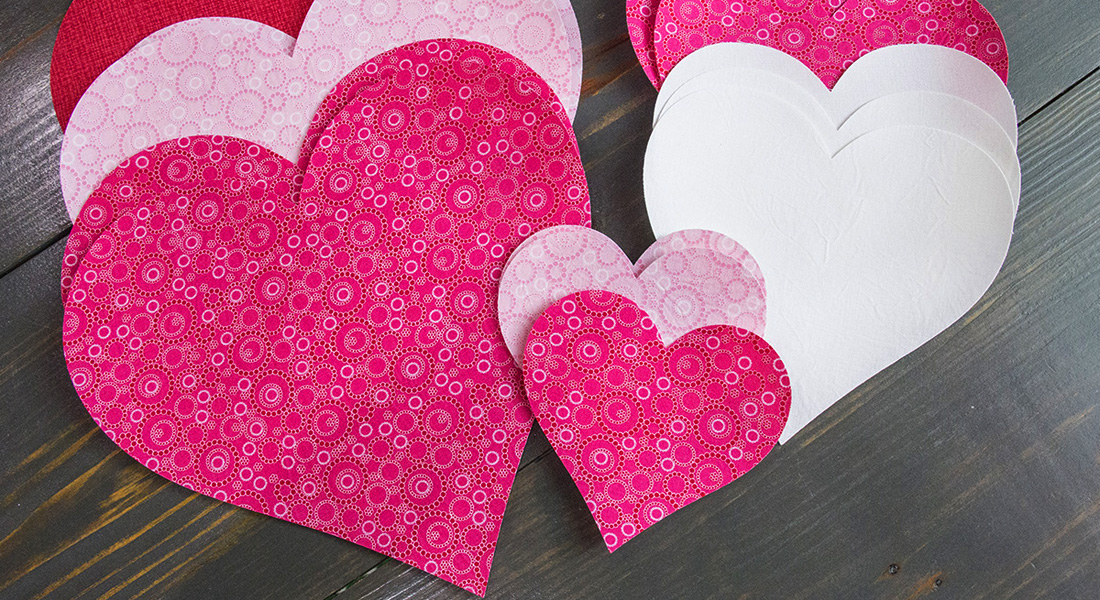
Step 2 – Prepare the appliqué shapes
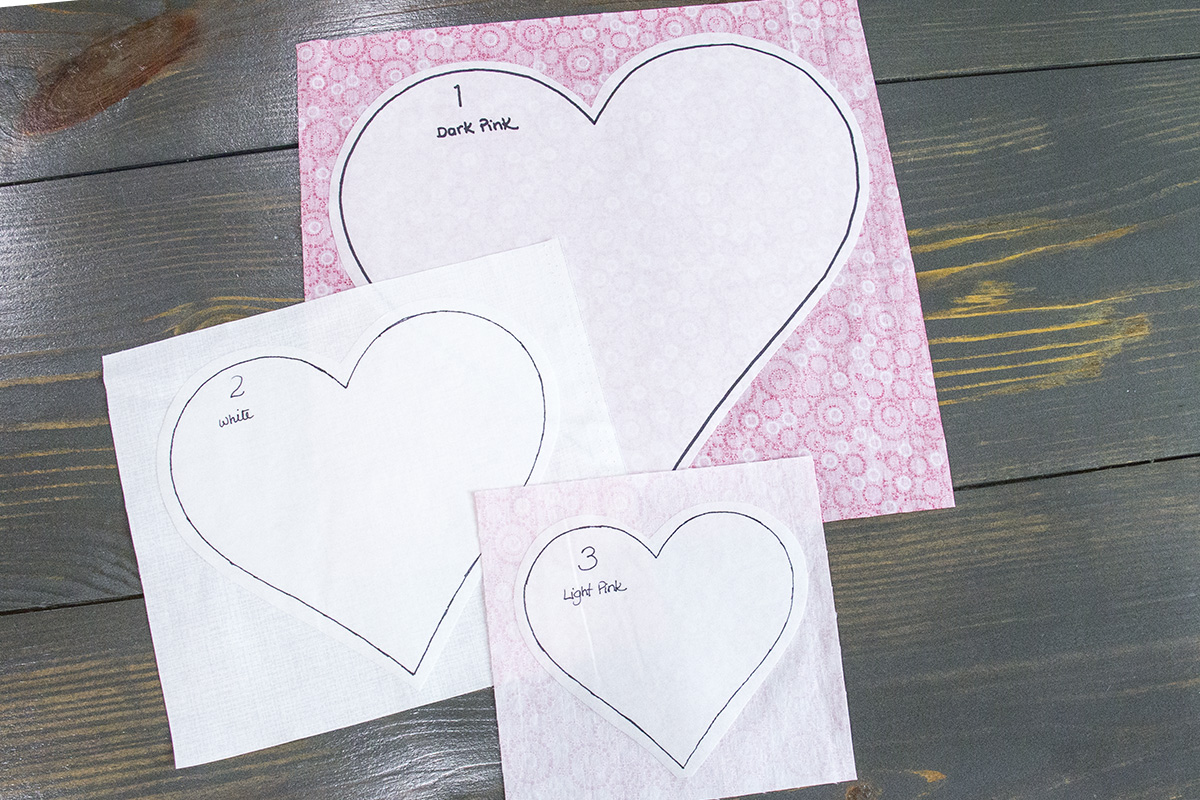
Using the Be My Valentine templates, trace the appliqué shapes onto the paper side of the fusible; I like to use a fine tip marker and allow approximately ½” between the traced shapes. Label each traced shape with its number and fabric color.
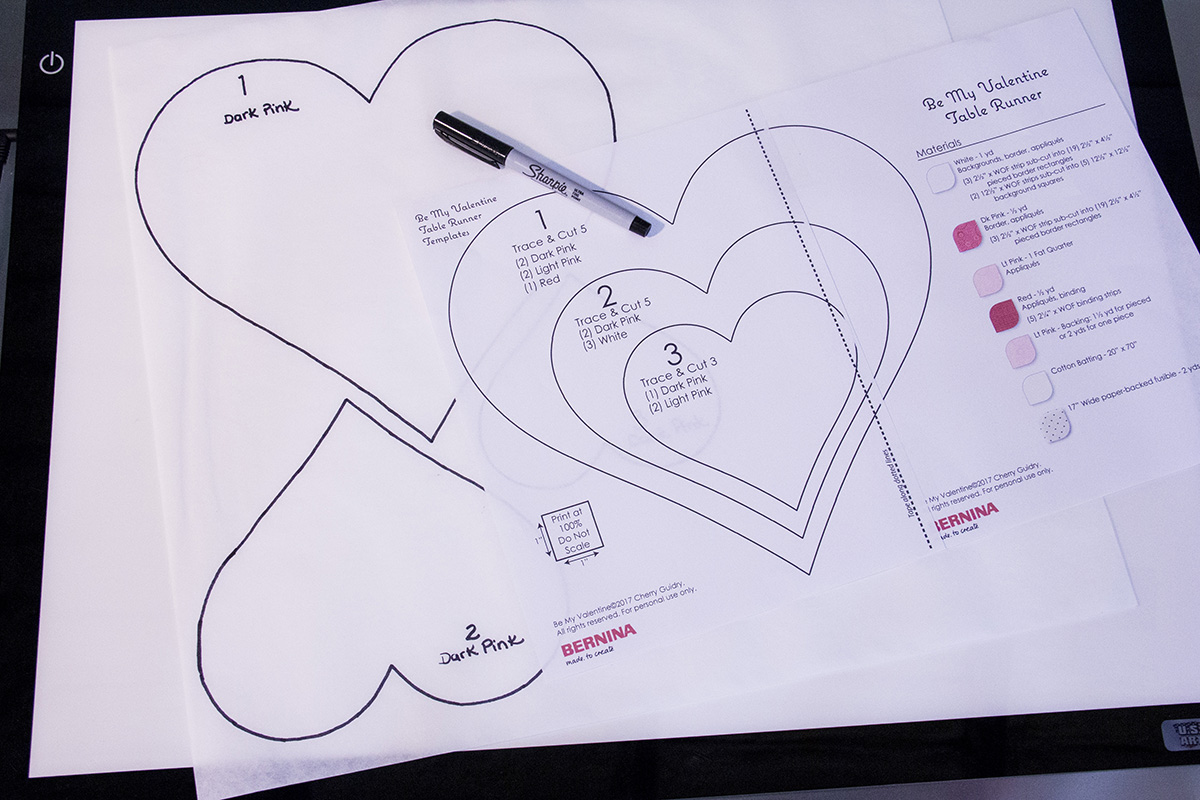
Cut the templates apart about ¼” away from the traced line and with fusible side down, fuse onto the wrong side of its corresponding fabric:
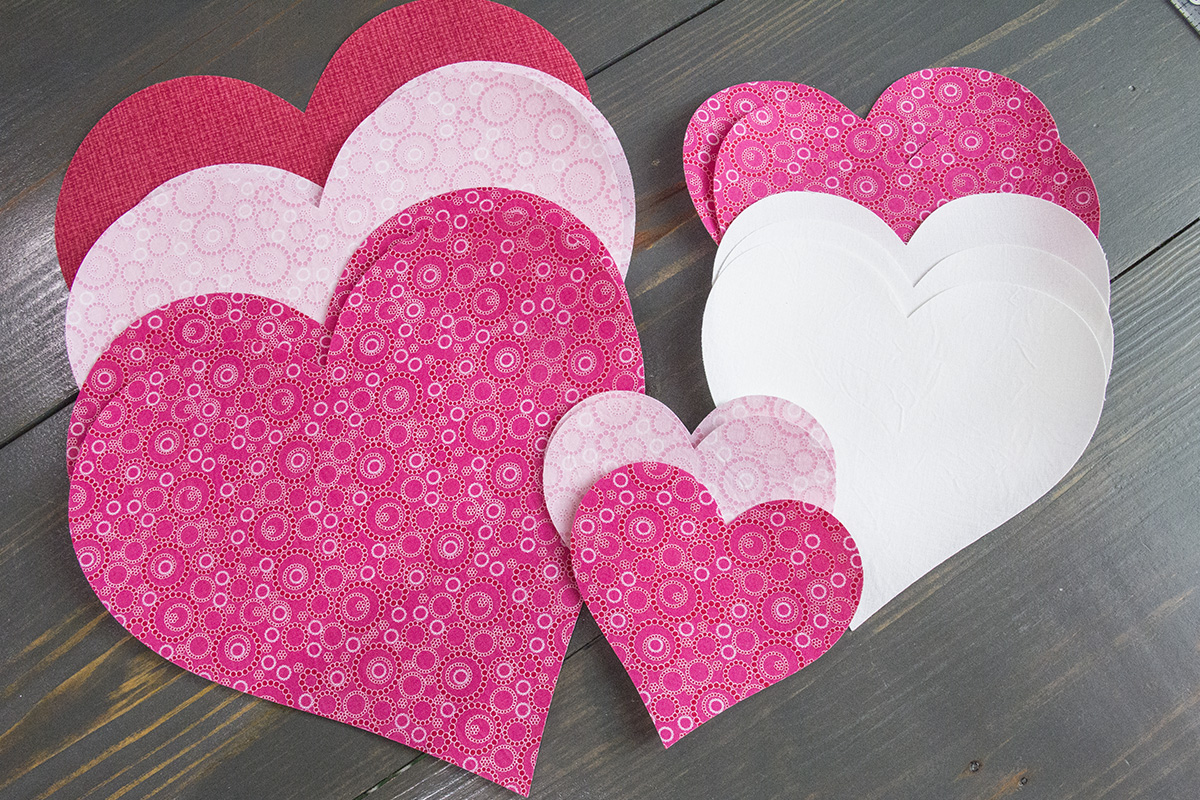
Heart #1: (2) dark pink, (2) light pink, (1) red
Heart #2: (2) dark pink, (3) white
Heart #3: (1) dark pink, (2) light pink
Cut the fused pieces on the traced line.
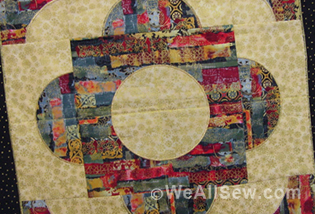
Fuse the shapes onto the center of the (5) 12 ½” x 12 ½” white background squares following the diagram below:


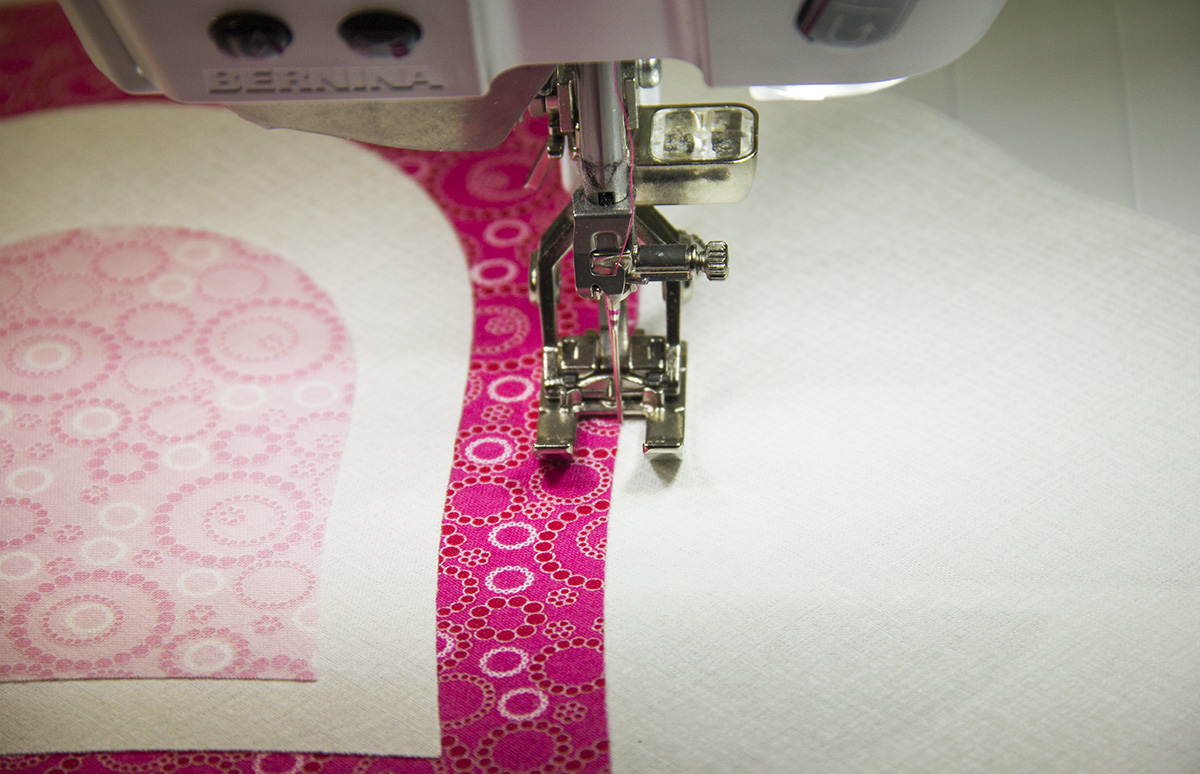
Step 3 – Stitch around each of the fused shapes
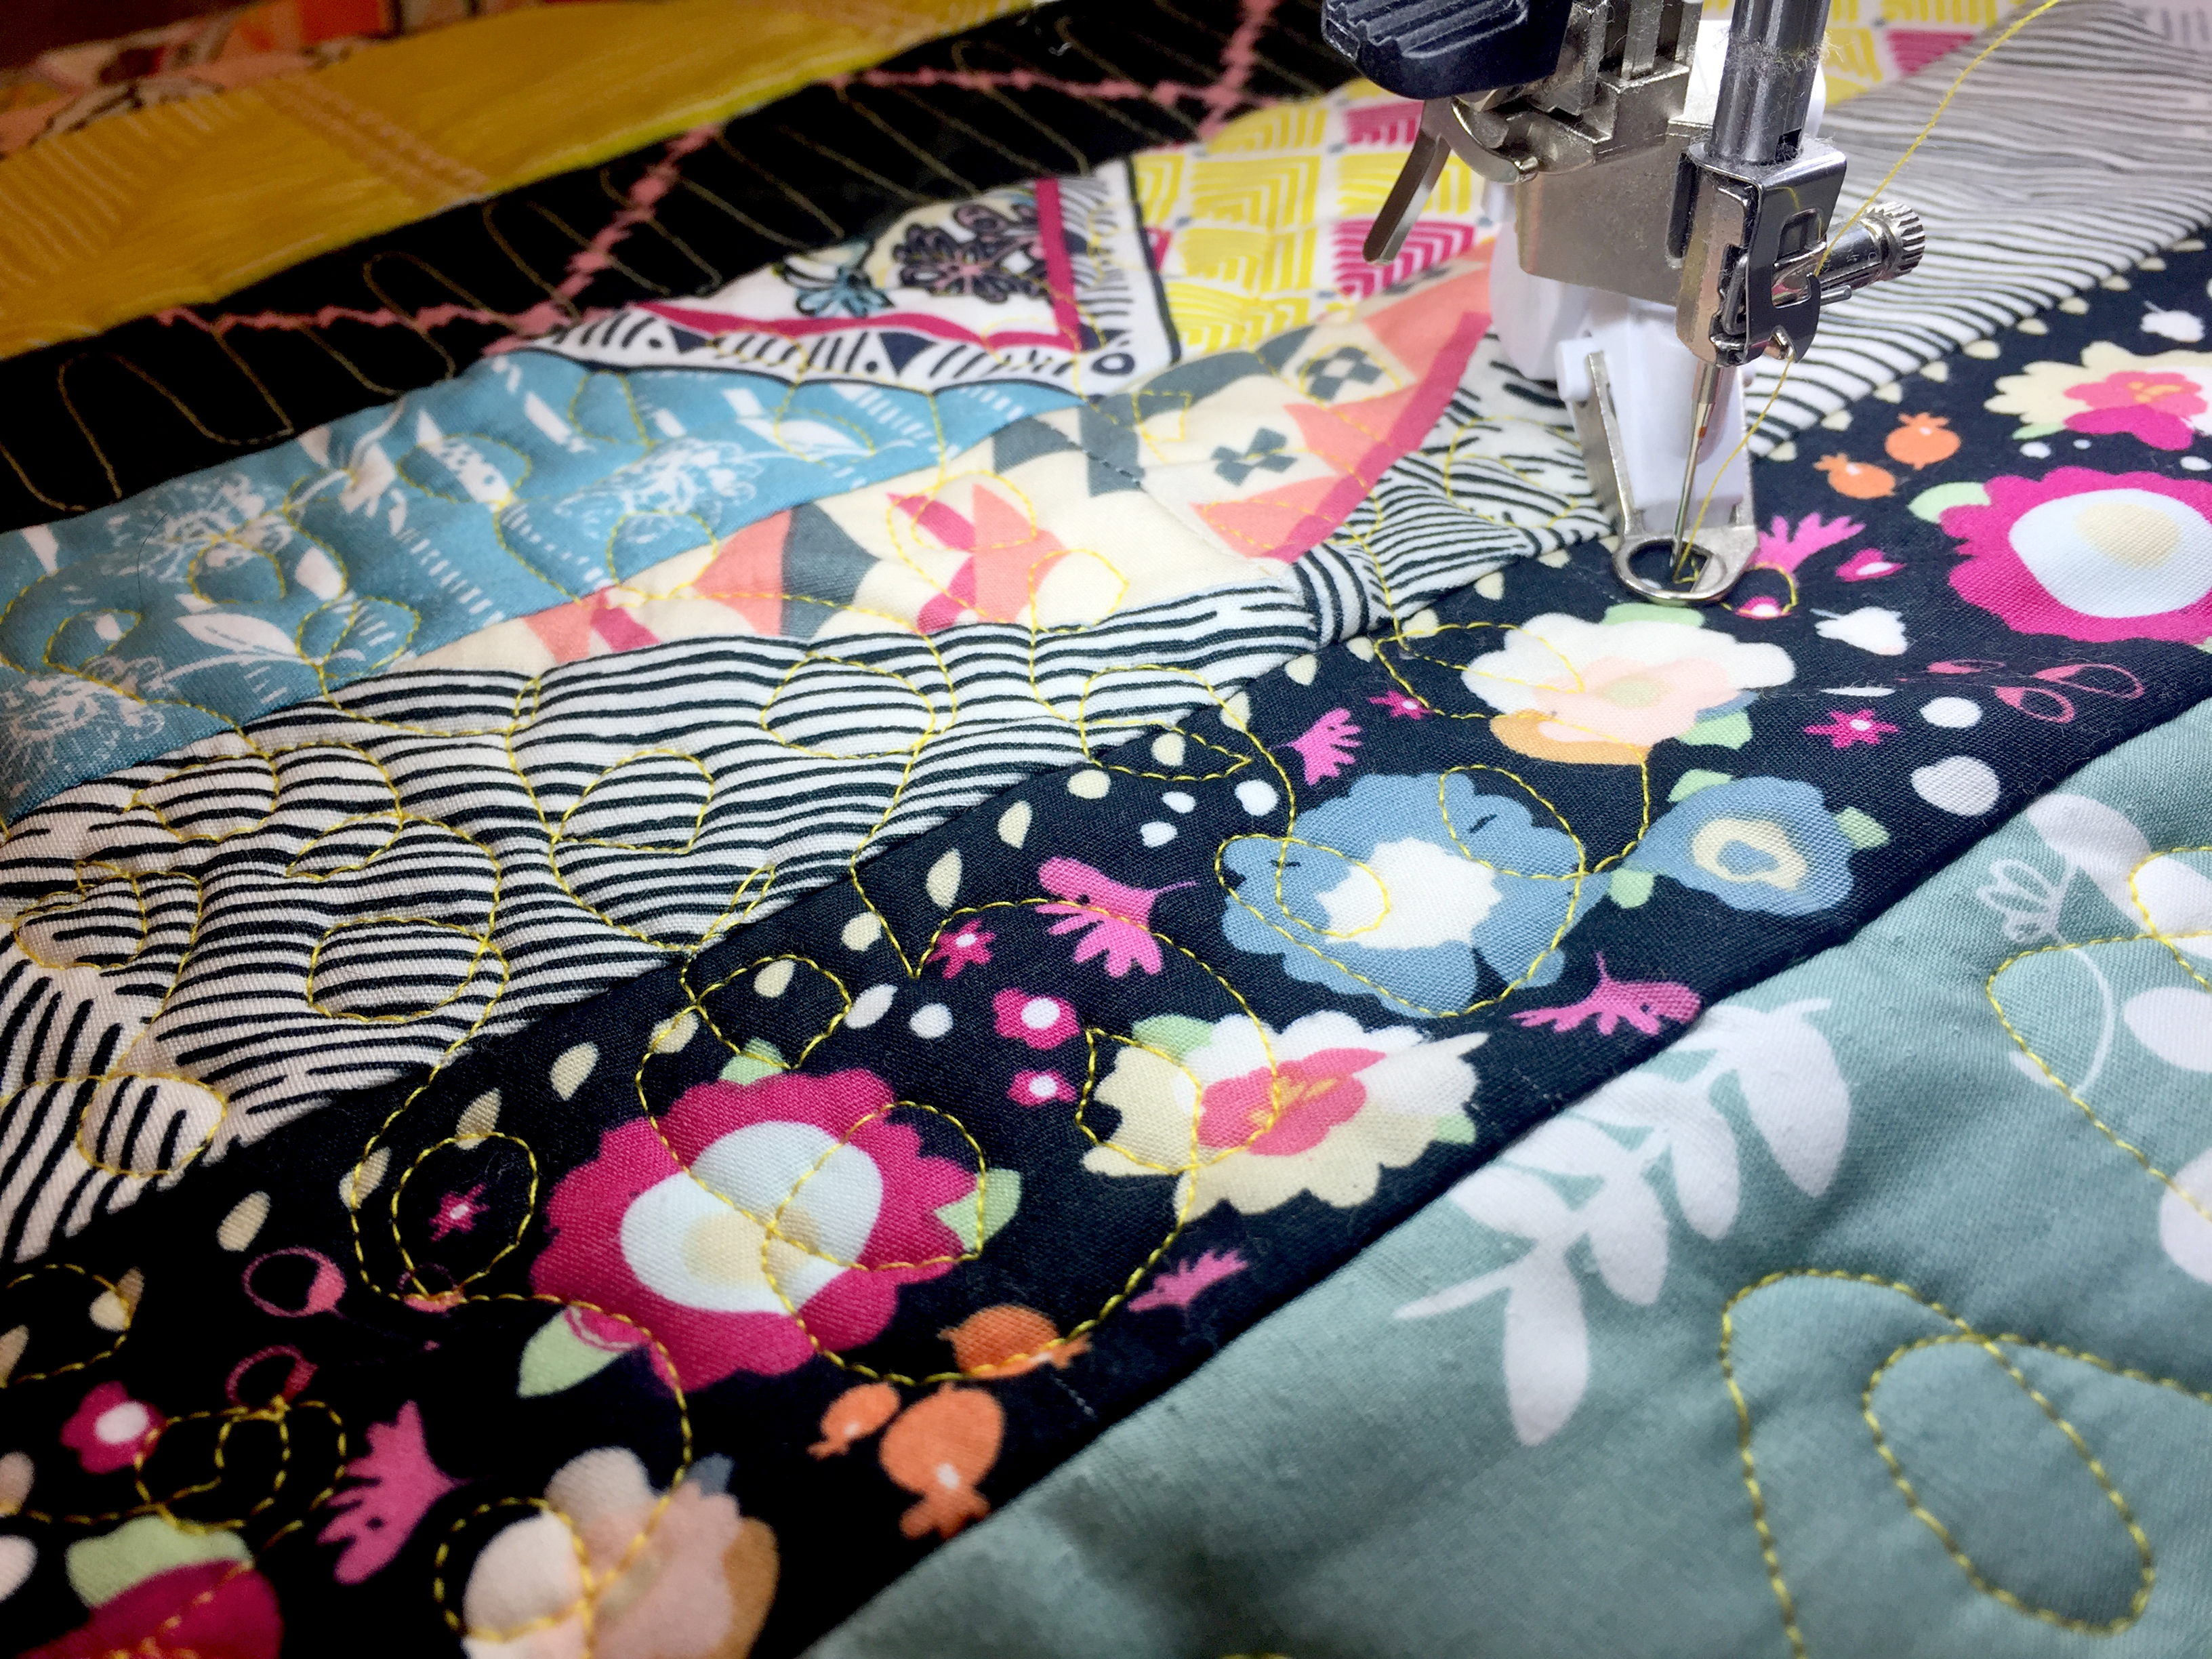
I sewed this project on a BERNINA 880 using the blanket stitch #1320 with a thread that matched each of the shapes and my favorite BERNINA Open embroidery foot #20D.
Step 4 – Sew the pieced-border
Make (2) side border units by alternating (2) dark pink and (2) white 2 ½” x 4 ½” pieced border rectangles. With the remaining dark pink and white 2 ½” x 4 ½” pieced border rectangles, sew (5) white/pink/white units and (5) pink/white/pink units.

Sew the units onto top and bottom edges of the appliqued blocks as follows:

Step 5 – Assemble the runner
Sew the blocks and side borders into a row:

Step 6 – Finishing
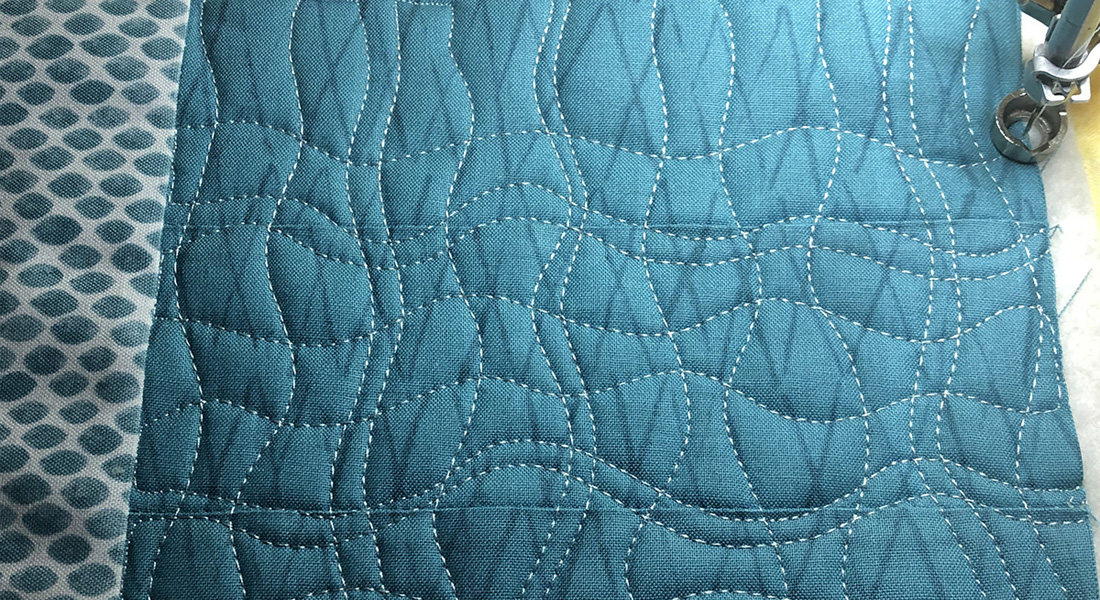
One of my favorite things in any project is the quilting phase and absolute love the new BERNINA Adjustable Ruler foot #72 that allows the use of longarm rulers on the BERNINA domestic machines; I also used the BERNINA Stitch Regulator (BSR) for a bit of evenly spaced free-motion quilting.

Layer the backing, batting, and quilt top, and quilt as desired. Bind with the (5) 2 ¼” red binding strips. Here is a helpful tutorial on how to bind a quilt using double fold binding.
Laying the blocks vertically would also make a great wall hanging!

I hope you have a sweet Valentine’s Day!


What you might also like


15 comments on “Be My Valentine Table Runner”
-
-
Thanks so much! I hope you enjoy making it… would love to see pictures!
-
-
This is so perfect for my couch table! I was cleaning yesterday, noticed how I was needing a new spring colored runner, so perfect! Thank you for sharing!
-
Thanks! It’s a quick project and would love fabulous on a couch table… I hope you’ll share pictures of your finished runner!
-
oops… would look… 🙂
-
-
-
This is beautiful. Just a suggestion and don’t want to sound ungrateful, It would be nice to have it sooner to have it done before Valentine’s Day.
-
Thanks so much Pam!
-
excited to make this and may make placemats to match too
-
What are the finished dimensions,pls.
-
Made a smaller version of this, only laid them out in two rows so it’s a big square, not a long rectangle. Now it’s hanging on my front door to greet everyone when they come in! What a great, festive project! Fast, fun, beautiful and did I mention, easy? Perfect for someone new to sewing/quilting. Thank you for sharing this pattern!
-
Hi, I have started to make this, and it occurred to me that no seam allowance is given. Is 1/4″ assumed? Thanks! I’m making 3 hearts as a wall hanging!
-
I finally completed this over the long President’s Day weekend. I know, too late for Valentine’s Day this year. Made it into a vertical wall hanging and just love it! I added some very cute “Roly-Poly Birds” machine embroidery to add some drama and humor. And then spent forever, because I’m simply not very good at free-motion embroidery, doing pebbles over all the background color to make sure my hearts and embroidered birds would really pop. End result? Absolutely darling! So glad I saw this post as it was just fun all around! 🙂 Wish I could share a photo here of my final result.
-
Thank you! Finished mine just in time for Valentine’s 2020!
-
It is beautiful, can’t wait to start one. Thank you!!
-
Just as beautiful in 2023!!!!!
Leave a Reply
You must be logged in to post a comment.

This is beautiful! I could see the hearts arranged vertically, too, to be made into a wall hanging. Hopefully, I’ll get one made for next year…thanks!