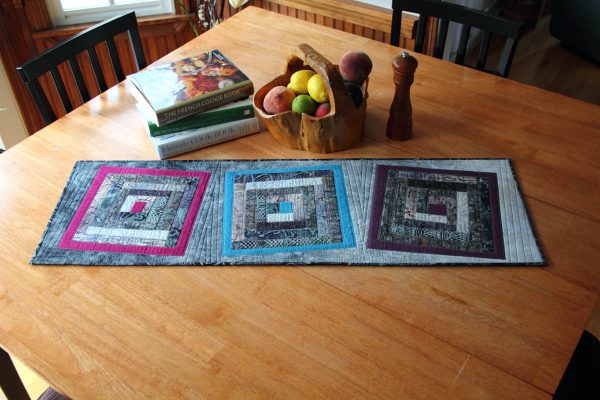
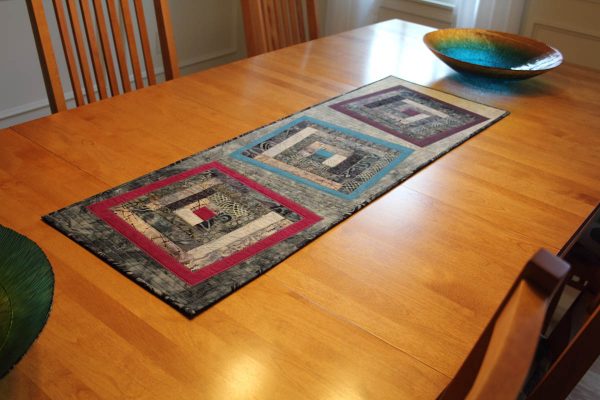
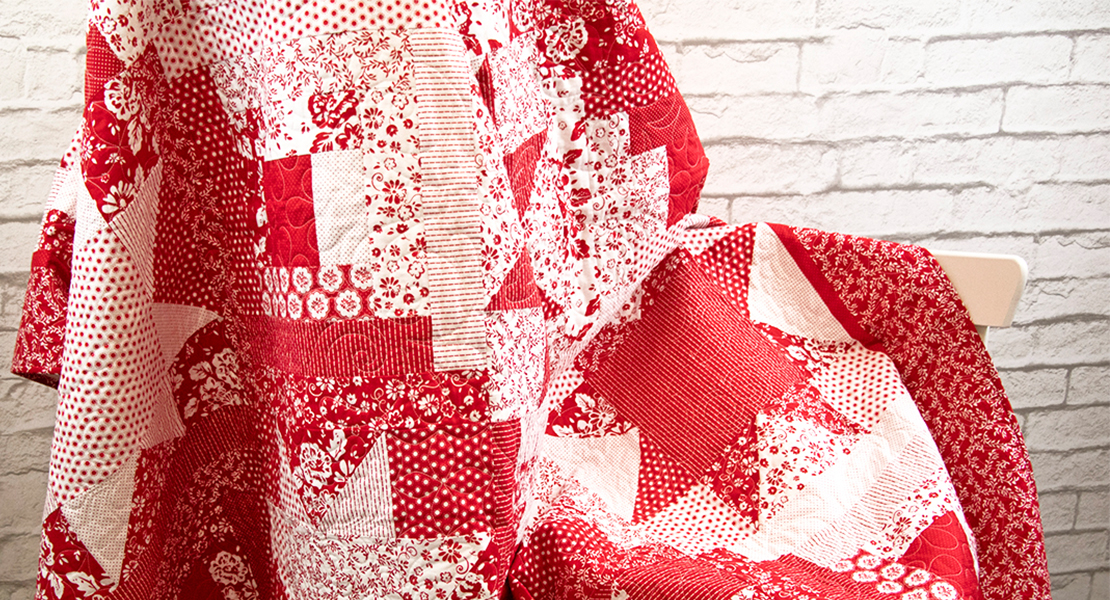
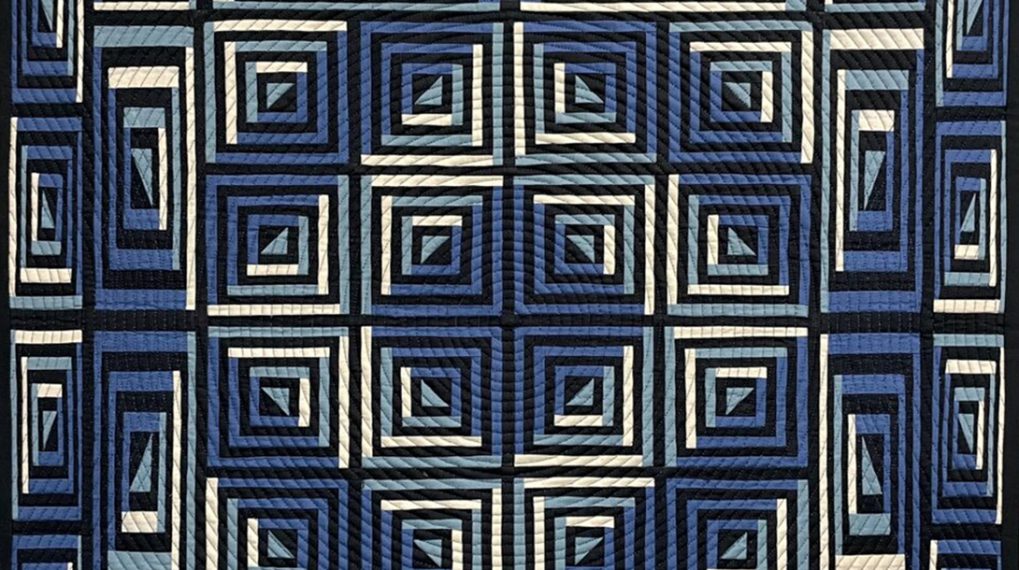
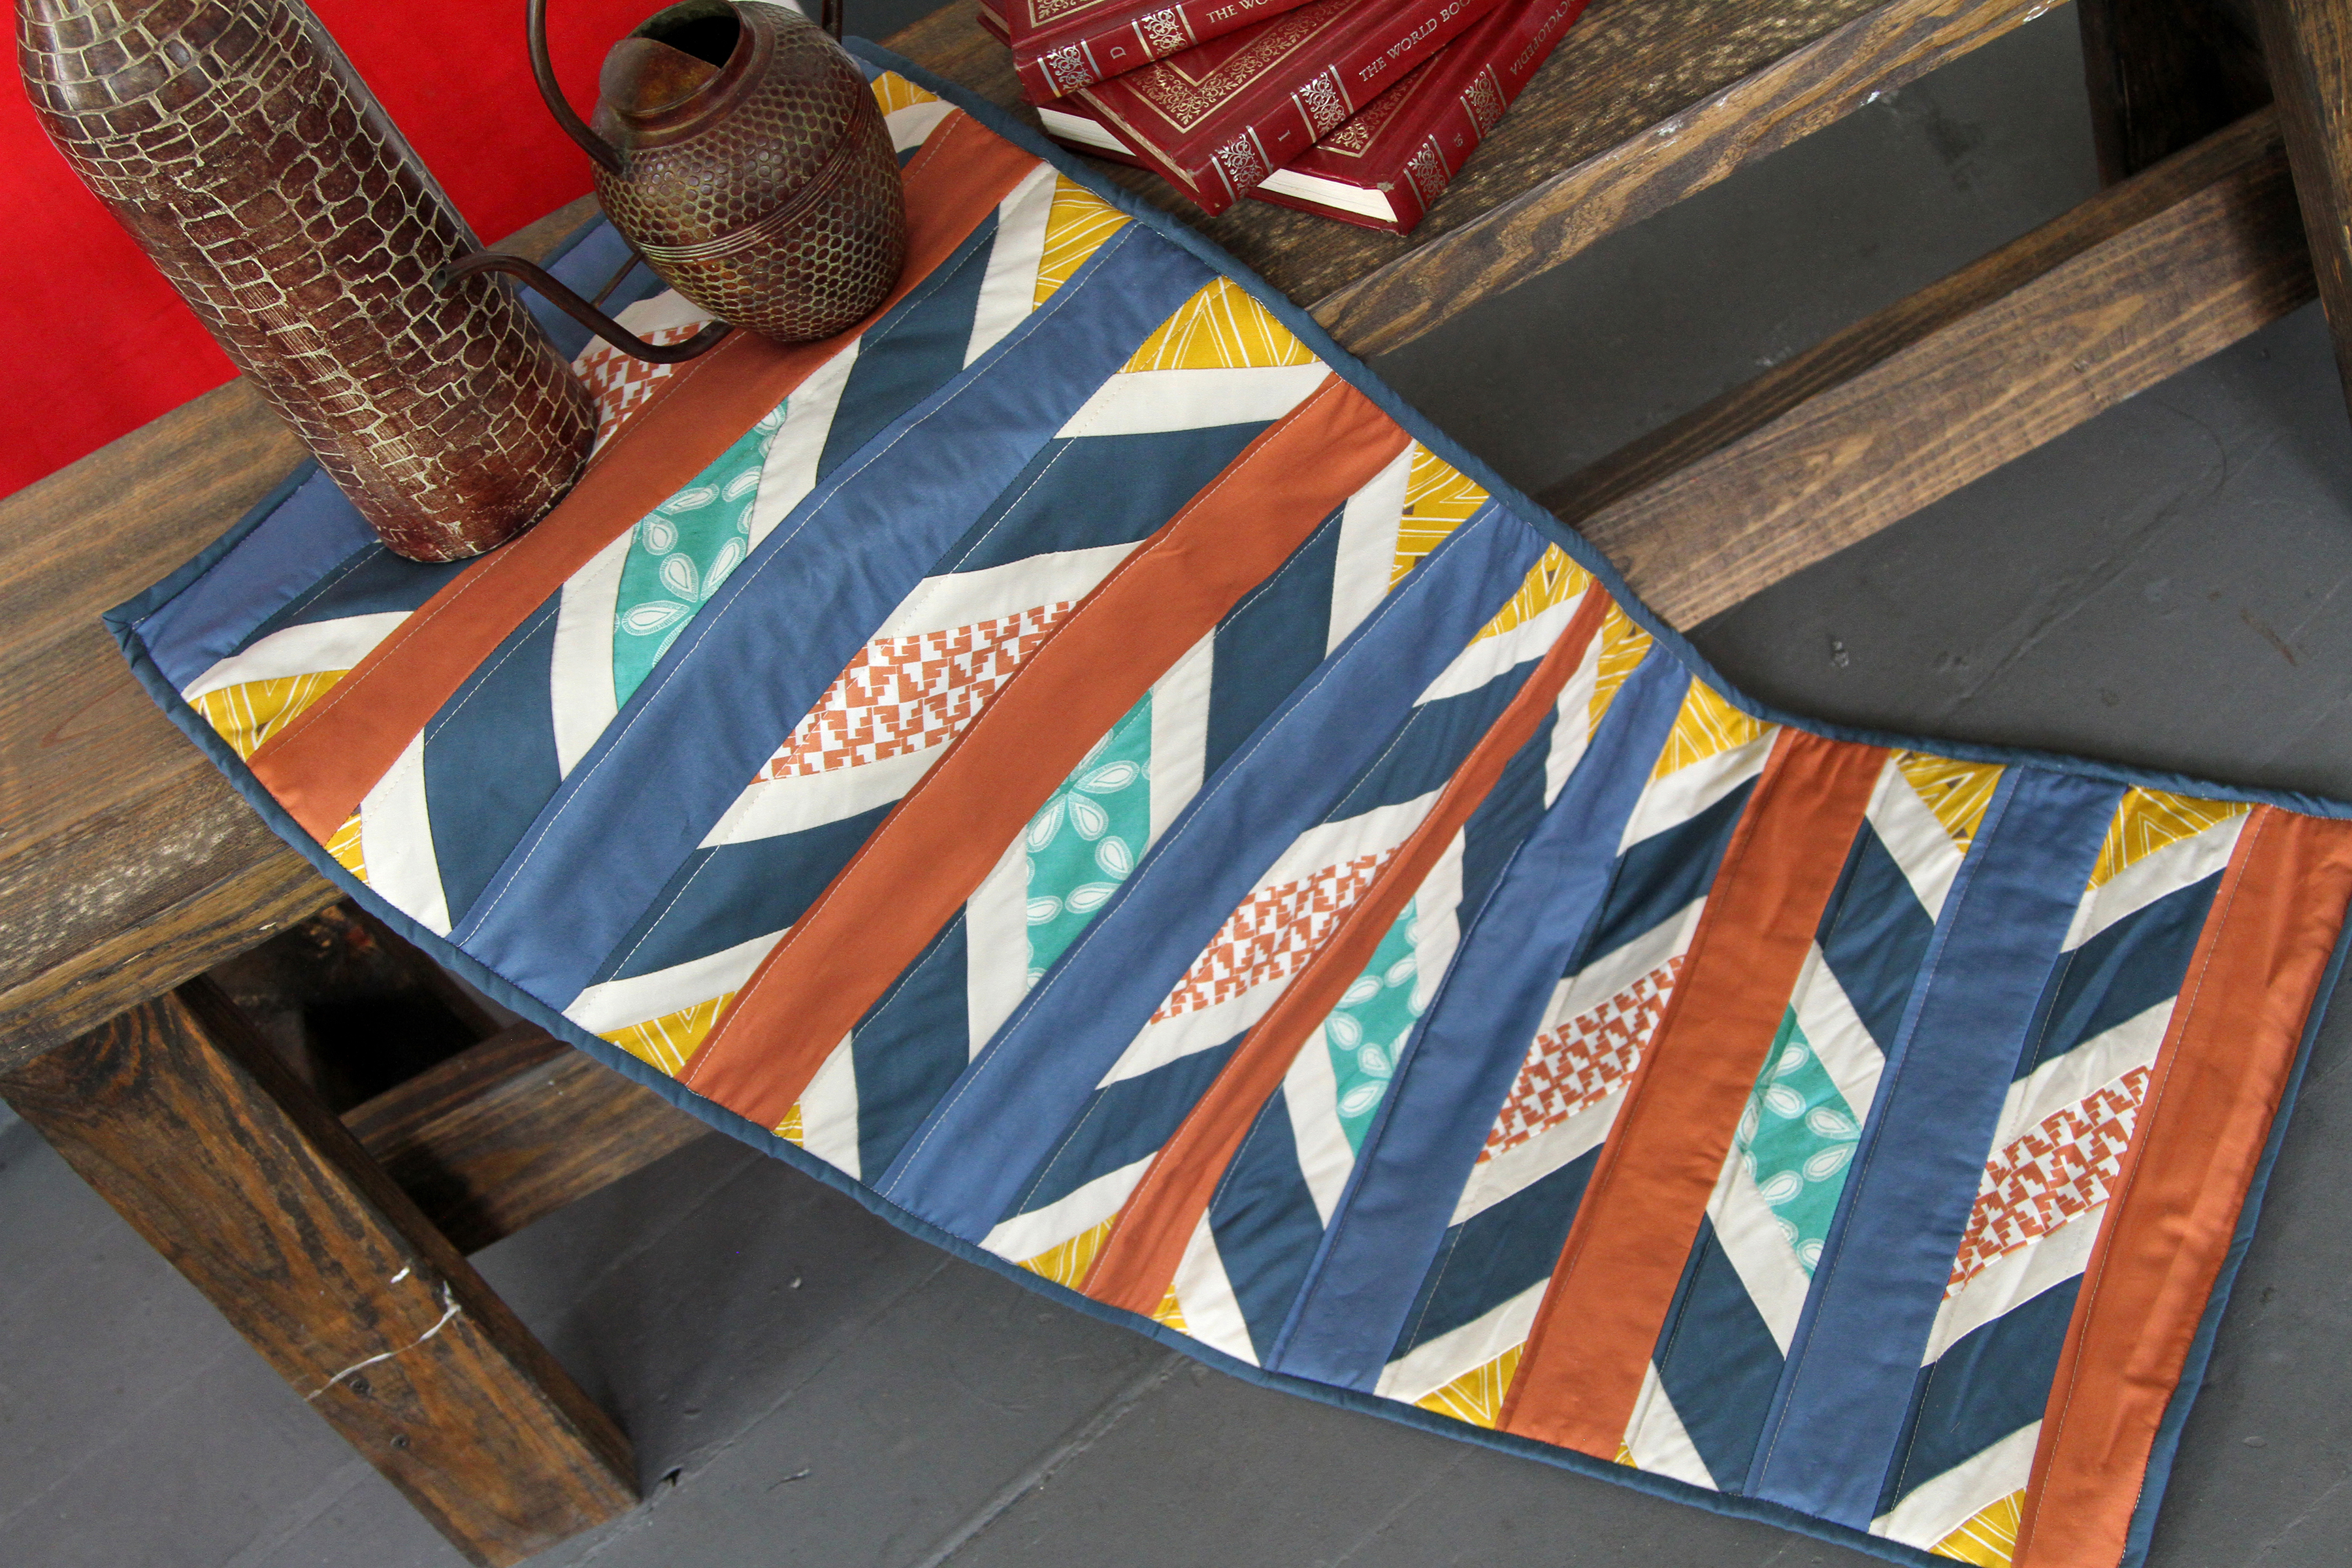
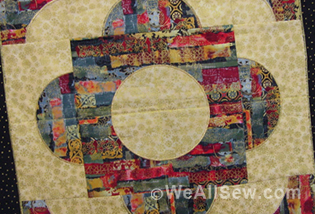
Fused log cabin table runner
I love the look of wonky log cabin blocks but I do not like dealing with all those 1/4″ seams to make them, so I came up with this fused method to create them.
Supplies needed to make the fused log cabin table runner
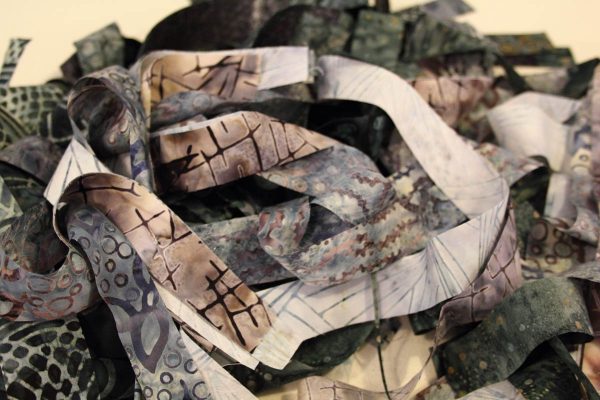
- A selection of coordinating fat quarters. I used 8 different fabrics to make my blocks (note that I used three extra coordinating solid colors in my blocks in addition to the 8 printed ones)
- One piece of National Nonwovens wool felt (I use the 65/35 rayon/wool blend) measuring 13″ x 42″ or you can substitute quilt batting if you prefer.
- One piece of muslin or scrap fabric measuring 14″ x 42″
- Fabric for the background measuring 14″ x 42″
- Fabric for the binding: two strips measuring 2″ x 42″ and two strips measuring 2″ x 16″
- Mistyfuse Fusible Web
- Parchment paper or a non stick pressing sheet
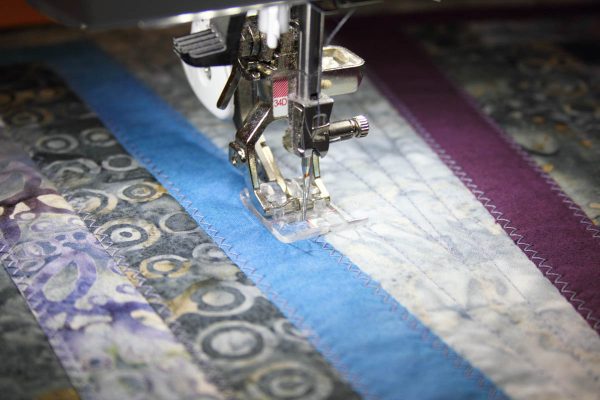
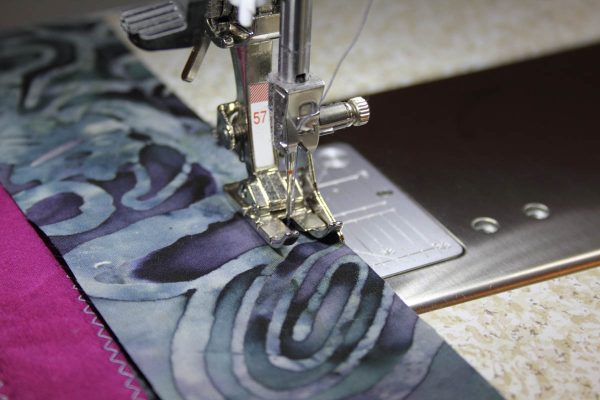
- I used two of my favorite feet for this project – the BERNINA Reverse pattern foot with clear sole #34D and the BERNINA Patchwork foot with guide #57
- Your sewing machine. I sew on a BERNINA 750 QE
Step 1
Fuse a layer of Mistyfuse fusible web onto the wrong side of the fabrics that you will be using to make your blocks.
Cut the fat quarters into wonky strips measuring from 1″ to 2″ wide. Cut the strips at an angle so that one end is wider than the other. This will give your finished block a wonky look.
Step 2
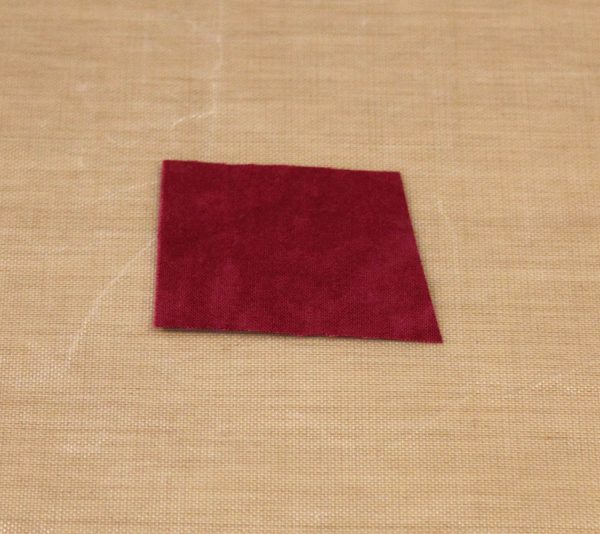
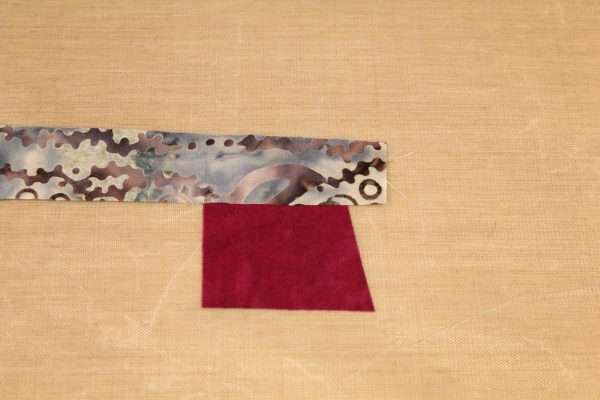
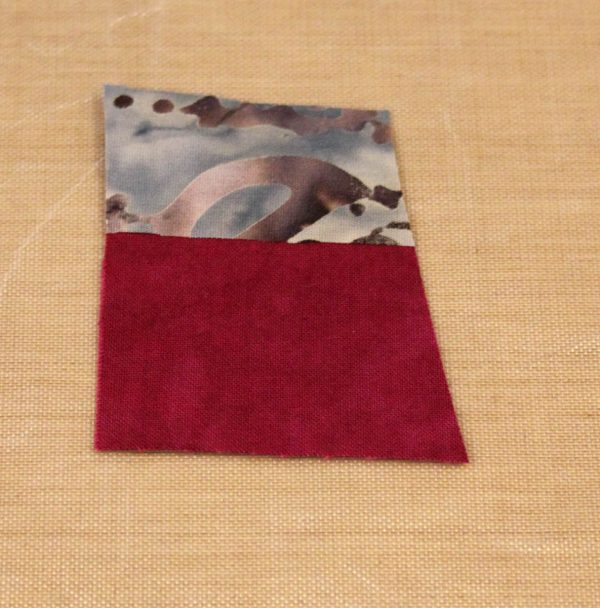
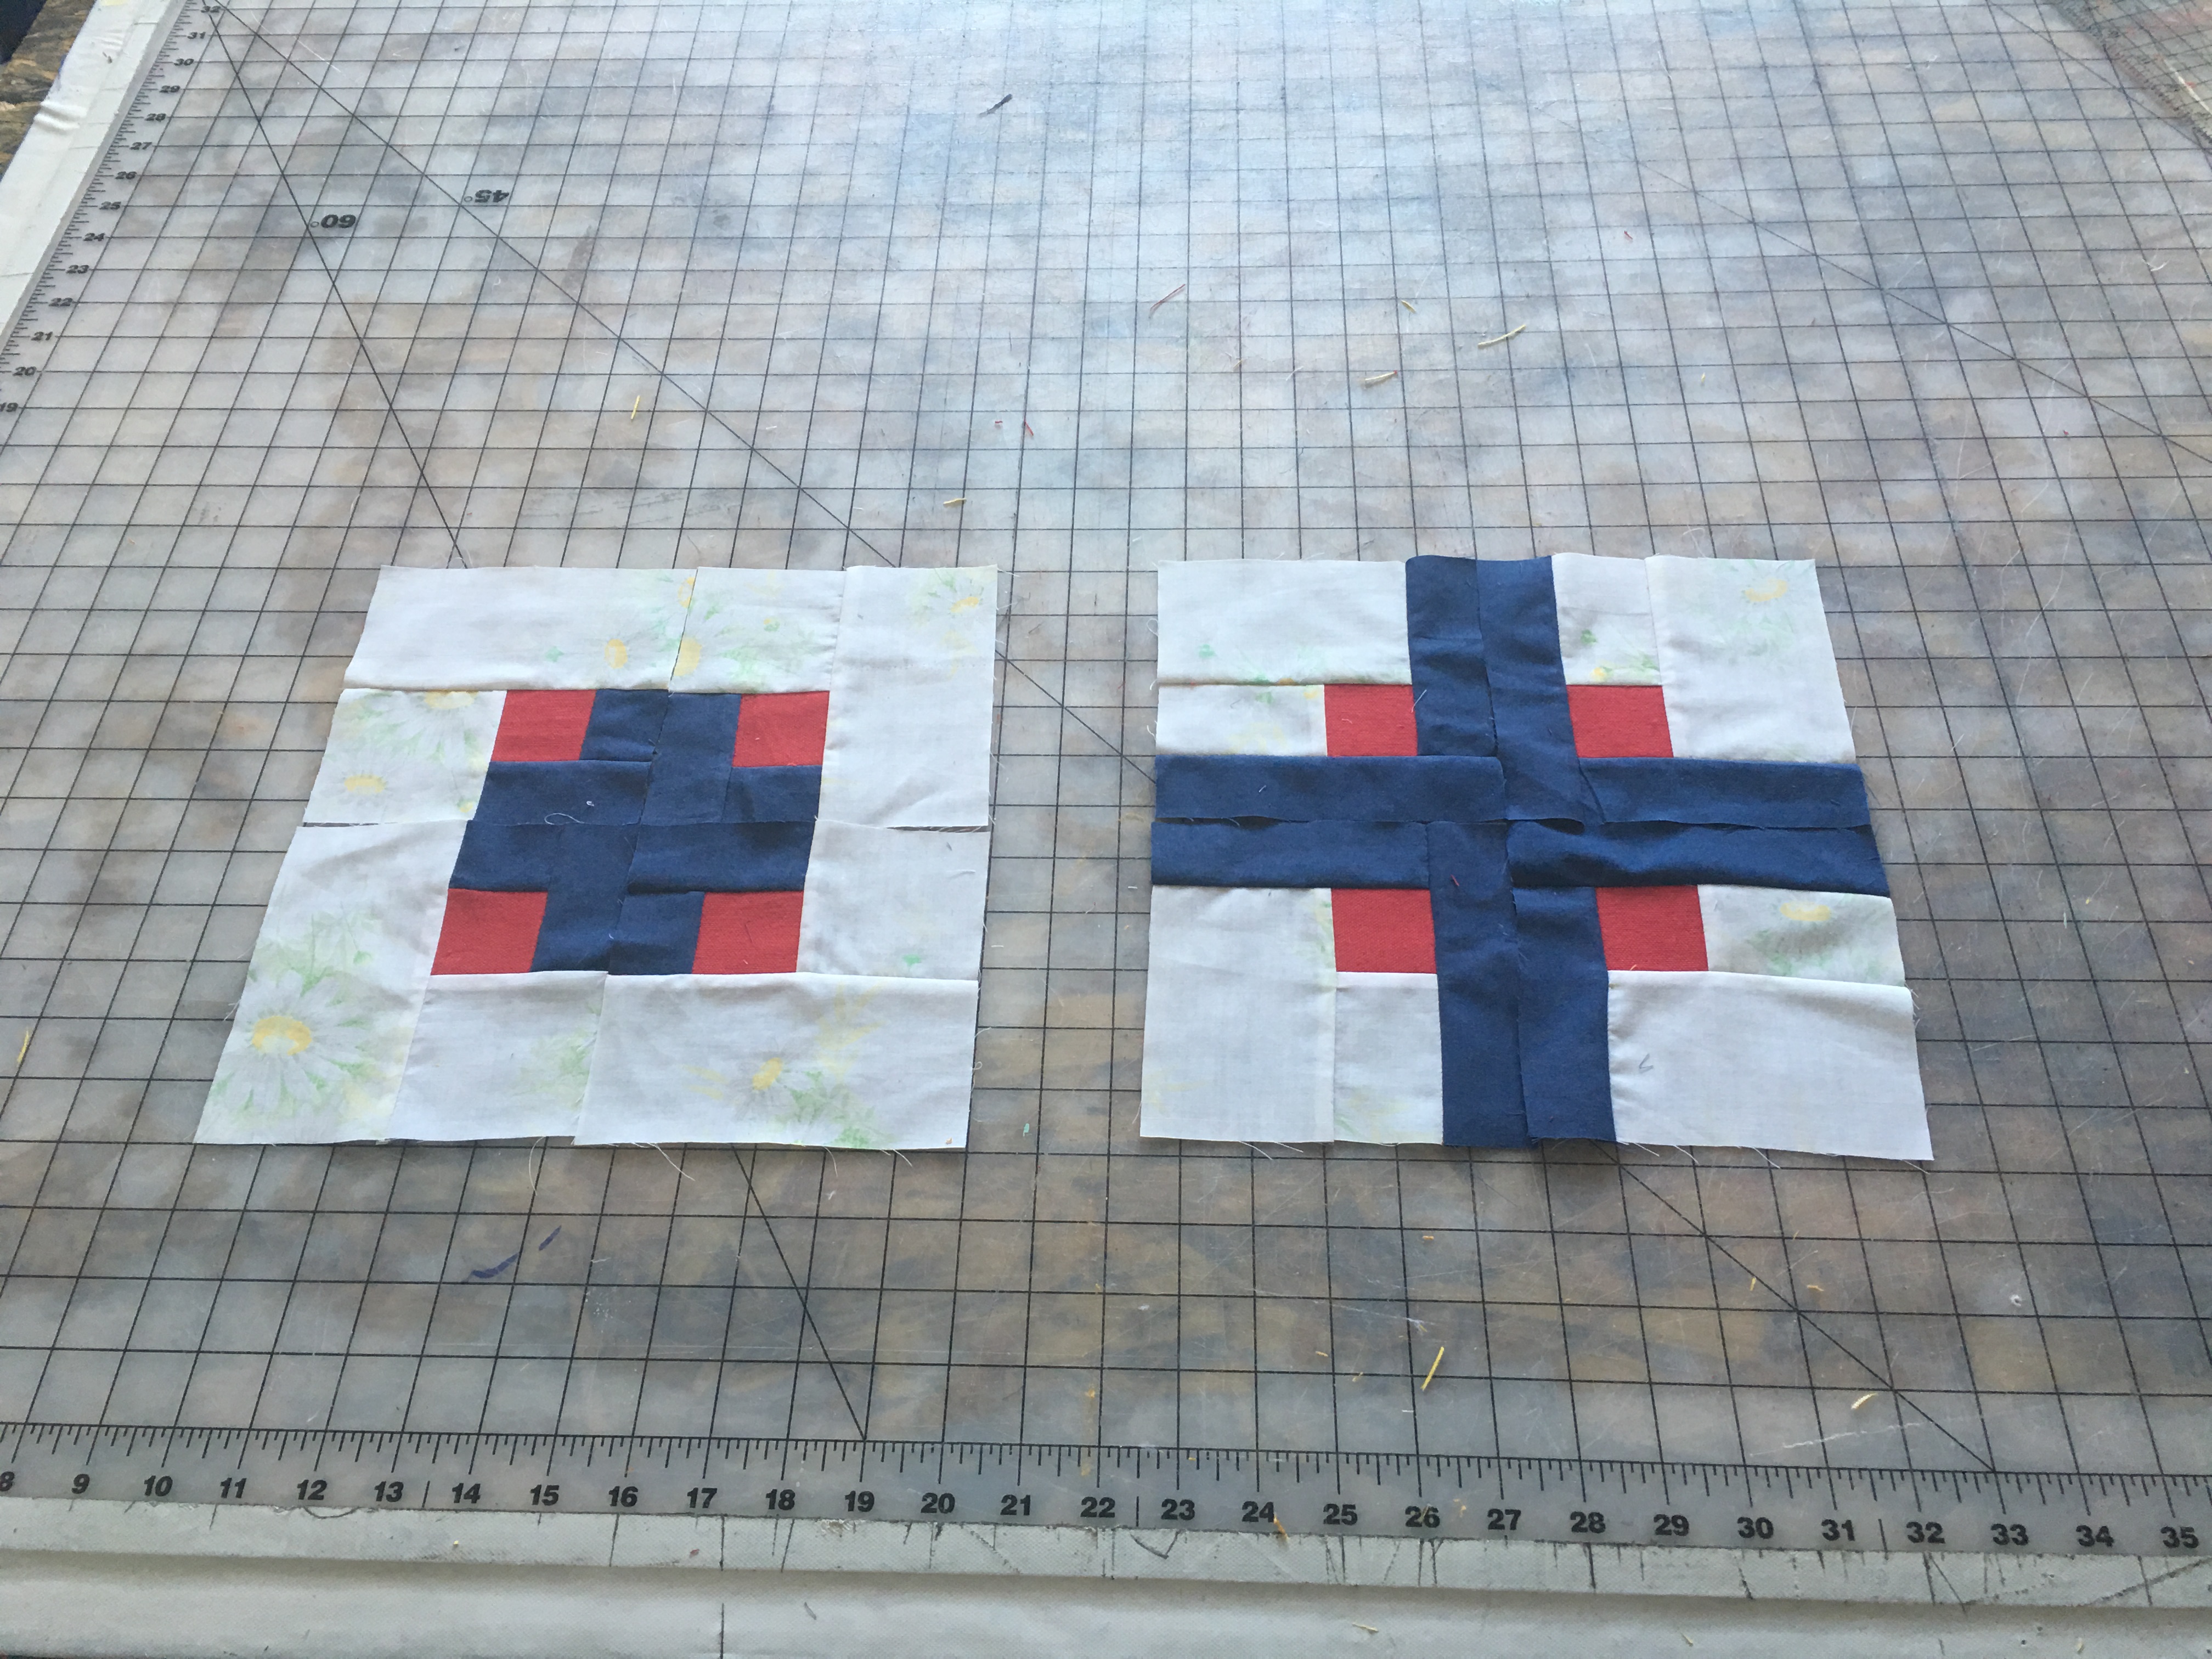
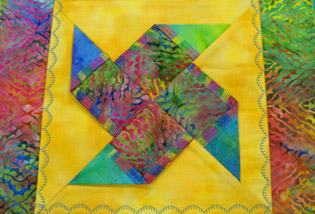
Cut a piece from one of your strips approximately 2″ long and place it right side up on top of a piece of parchment paper or a non stick pressing sheet. This is the center “square”.
Place another strip along the top edge of the center square overlapping it about 1/8″ and press it in place with a hot iron. Trim the edges to be flush.
Step 3
Place another strip along the left edge of the center square overlapping it about 1/8″ and press it in place with a hot iron. Trim the edges to be flush.
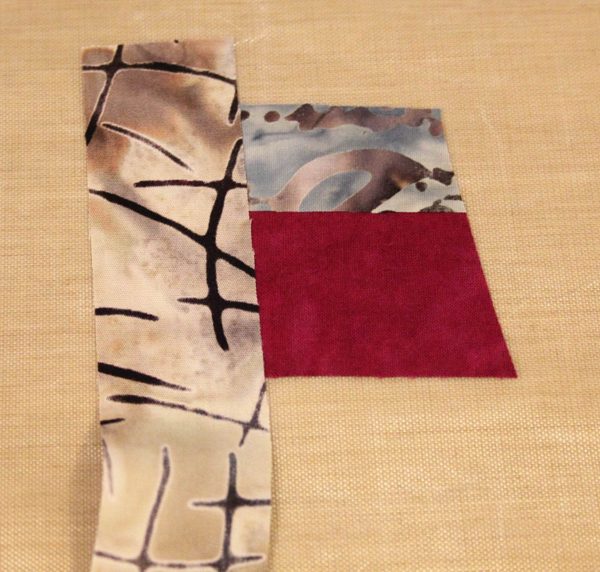
Place another strip along the bottom edge of the center square overlapping it about 1/8″ and press it in place with a hot iron. Trim the edges to be flush.
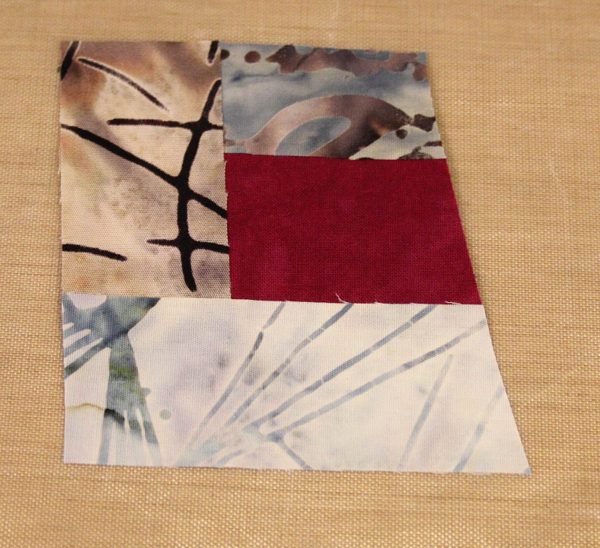
Place another strip along the right edge of the center square overlapping it about 1/8” and press it in place with a hot iron. Trim the edges to be flush.
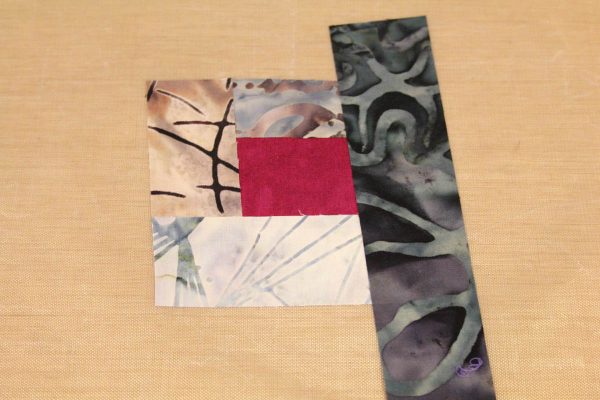
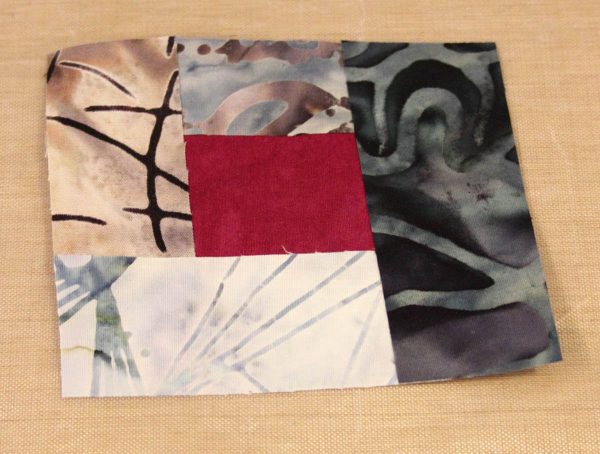
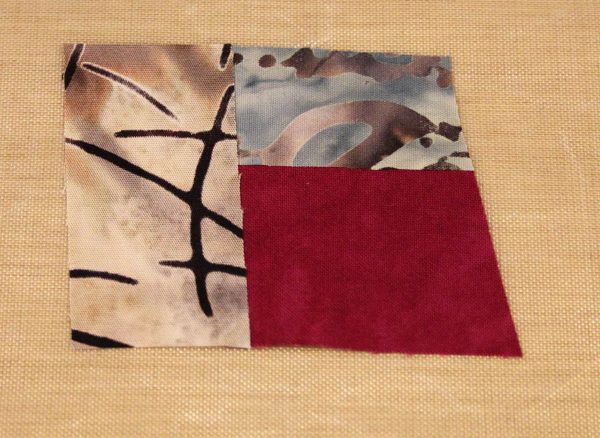
Continuing working in this manner until you have a block that measures at least 11″. If your block comes out larger than 11″, which it probably will because of the wonkinesss of the strips you’re using, then trim it down to measure 11″ square. I used a solid color fabric as the last round of strips on my block and then trimmed it to 11″ square.
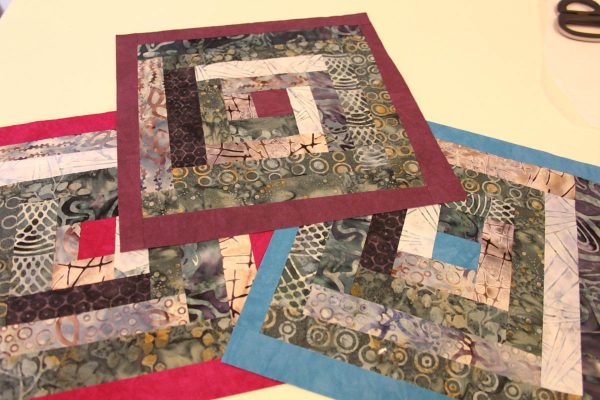
Create two more blocks in this same manner.
Step 4
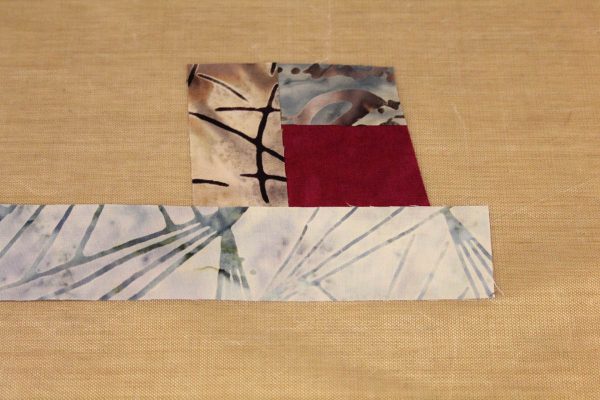
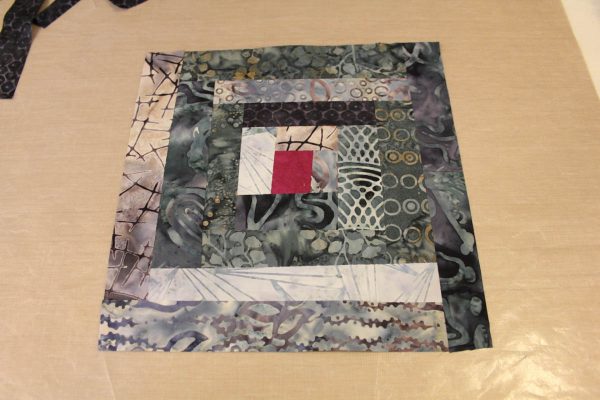
Fuse a layer of muslin or scrap fabric to one side of the piece of wool felt (or batting if that’s what you’re using). Trim off any excess muslin. The muslin acts as a stabilizer and provides additional body and stiffness to the finished runner.
Fuse your background fabric to the other side of the wool felt. Trim off any excess.
Step 5
Place your fused log cabin blocks on top of the background fabric and use a hot iron to fuse them in place.
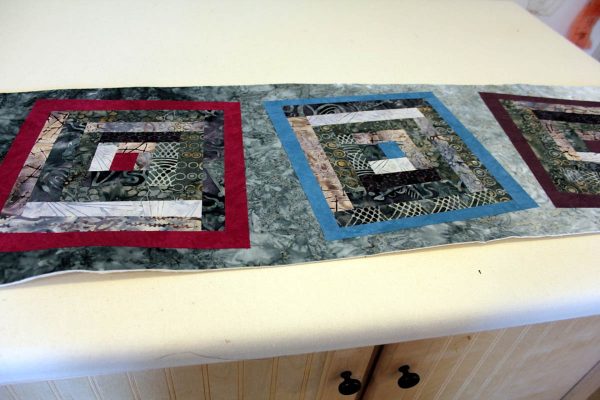
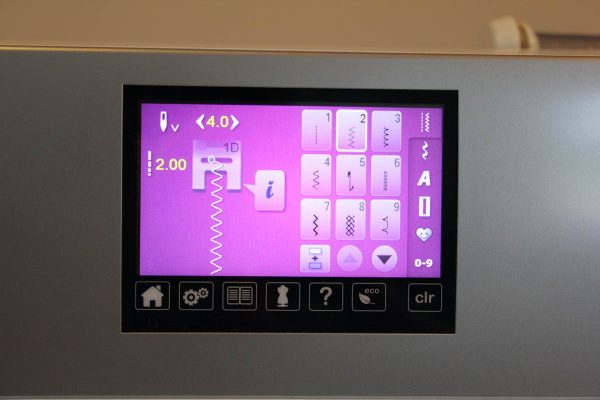
Quilt your blocks as desired. I set up my machine for a zig zag stitch and stitched over all the raw edges of the block. When that was done I changed back to a straight stitch and sewed straight lines over the rest of the runner.
Step 6
You can bind your table runner using your favorite method but here’s my 4 strip binding technique directions. I use my BERNINA Patchwork foot with guide #57 foot for this, it makes sewing the binding so much easier.
Start by stitching each of the 2″ x 42″ strips to each long side of the runner using a 1/4″ seam allowance.
Press the binding strips flat and turn the runner over so that the backing side faces up. Fold each of the binding strips in half lengthwise and press them to set the crease. Fold the binding strips toward the back, pin in place and then hand stitch them in place to the back of the runner.
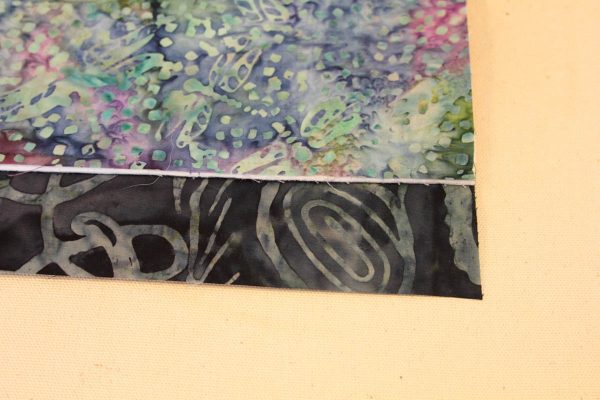
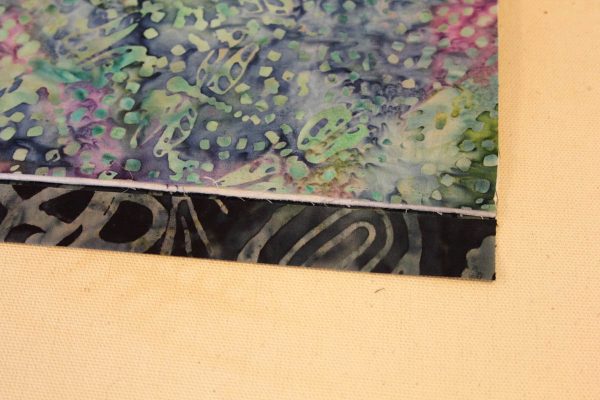
Sew the other two binding strips to the short edges of the runner using a 1/4″ seam allowance so that there is 1″ excess on each edge.
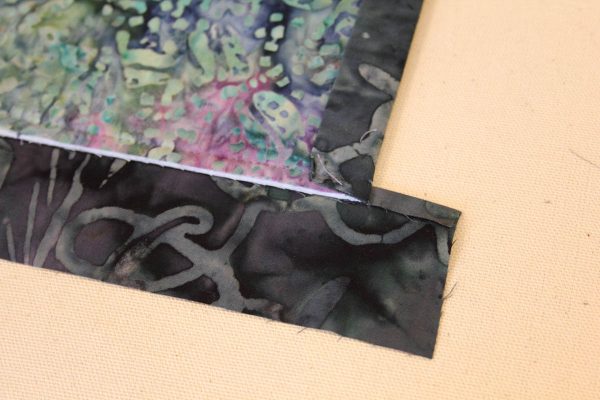
Press the binding strips flat and turn the runner over so that the backing side faces up. Fold the excess 1″ on each edge towards the runner and press.

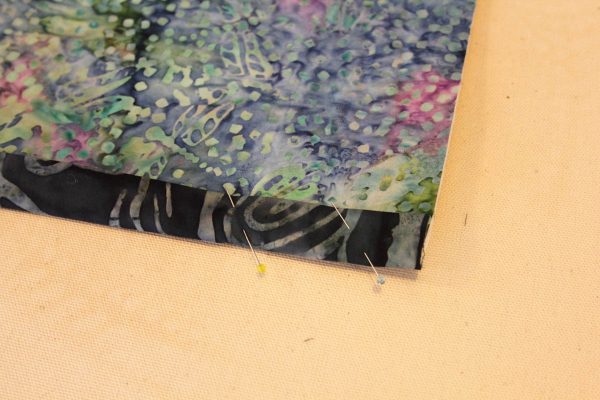
Fold each of the binding strips in half lengthwise and press them to set the crease just as you did for the binding strips along the long edge. Fold the binding strips toward the back, pin in place and then hand stitch them in place to the back of the runner just like you did with the other long edges.


One comment on “Fused log cabin table runner”