Quilted Belt Tutorial
Quilted Belts, and an Adventure in Learning to Free Motion Quilt through making small projects by Molly Hansen of Sew Wrong…Sew Right.
When I first started learning to free motion quilt I found myself with lots of pretty quilted scraps of fabric and practice squares that I had no use for. Being the practical gal that I was it started to bother me wasting all this good fabric and thread and not having a use for it when finished. I was already a fan of making small projects like pillows and handbags and the like and thought to myself, I wonder if I could do quilted versions of all these small projects I love to make-and get to practice my quilting and have a useful item when I am all finished. That was the beginning of a long journey of learning to free motion quilt and learning to find ways to adapt quilted squares or strips or scraps into useful things. Not every project was a success just like not every quilted practice square was worth saving, but in the end I had tons of fun projects, had learned a new skill, and had a ton of fun doing both.
When it came time to write my book “Free Motion Quilting for Beginners” (and those who think they can’t) I decided to have a small project or two with each new stitch design I was teaching to help reinforce the new stitch and provide readers with a fun project to make while learning. I have patterns for several different types of bags, as well as some kitchenware, and home décor. These items are all useful and functional, and make great gifts, and they all require quilting the pieces of the project before putting the pattern together.
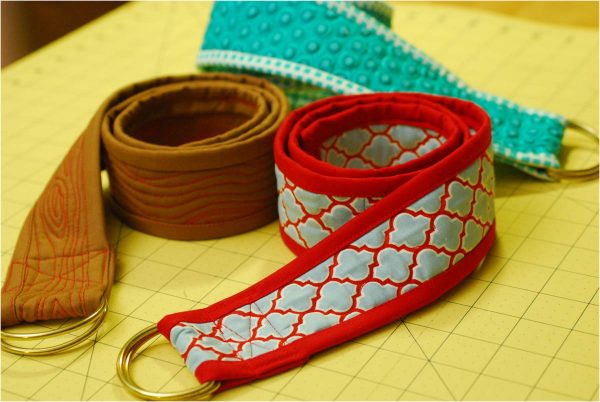
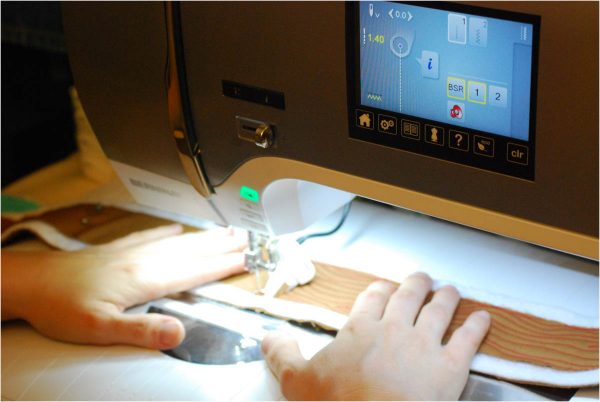
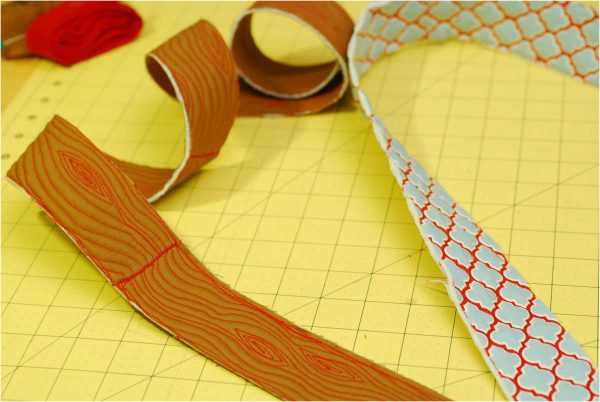
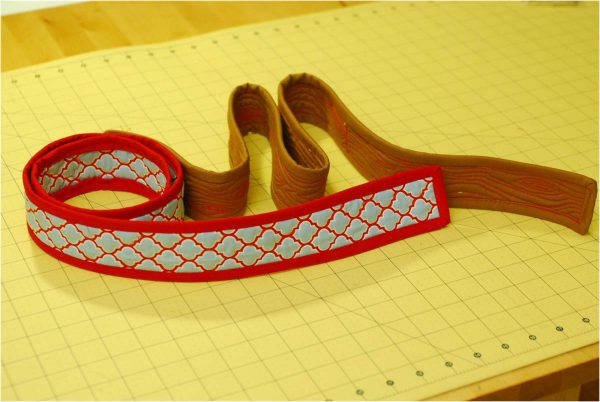
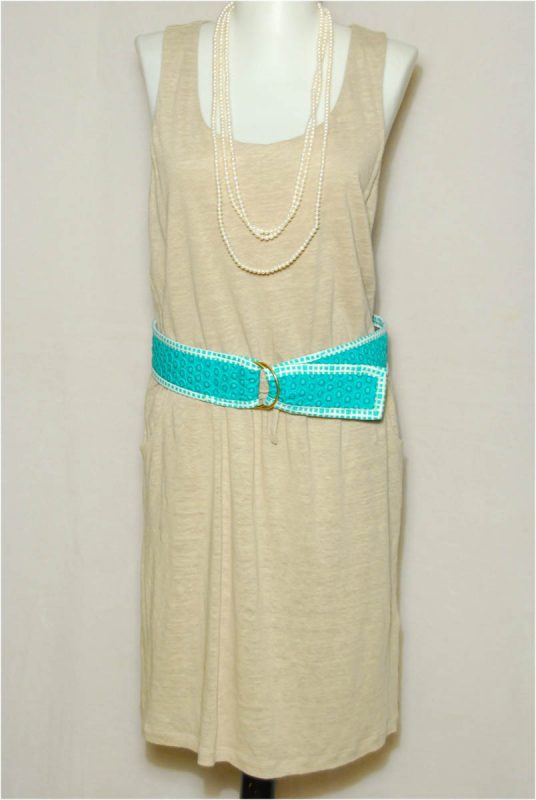
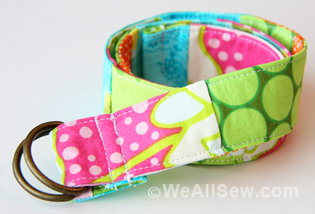
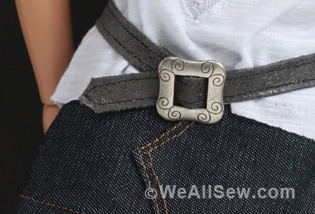
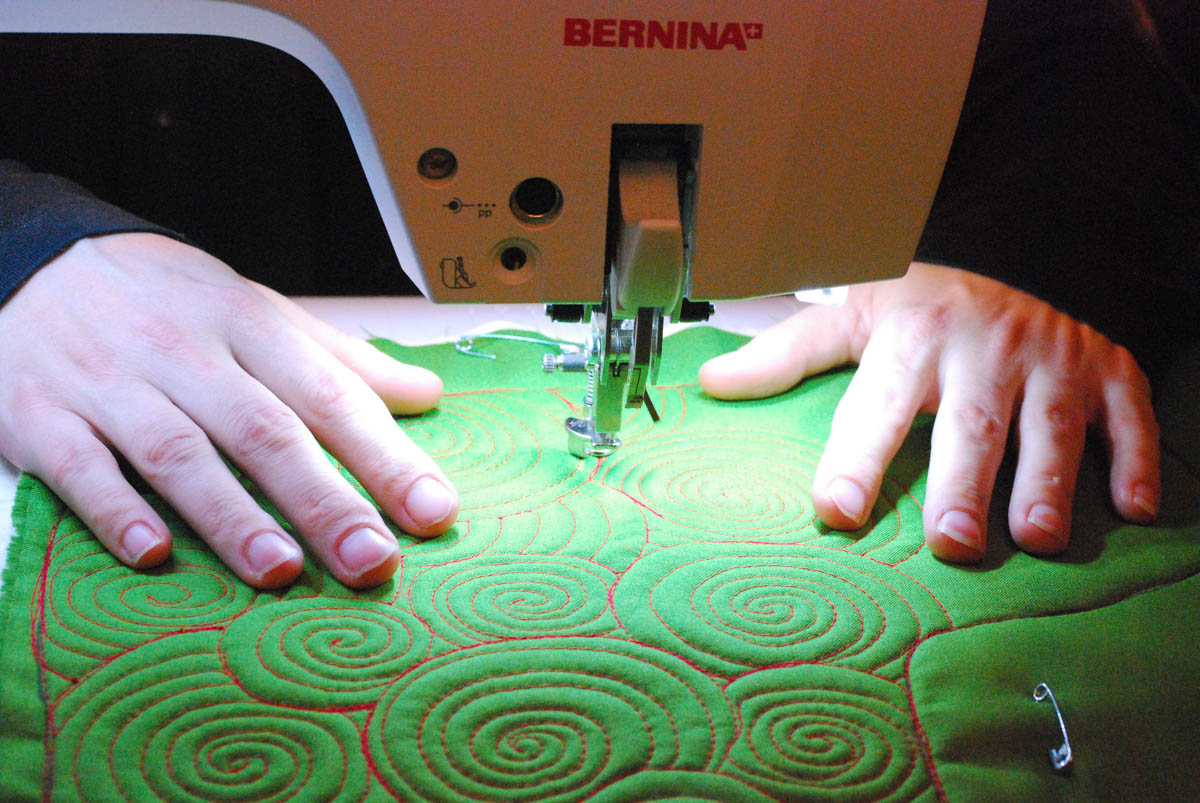
When I got the opportunity to write another post for BERNINA’s WeAllSew blog I decided to share one of the projects that didn’t make it in the book. I was only allowed so many, and believe me I have figured out a lot of ways to use up quilted fabric. Once while making a quilted strap for a tote bag I thought to myself that the strip would make a cute belt. I happened to have a set of brass D rings on hand and decided to give it a try. The quilted belt was born! I have made a few of these, and I love wearing them. They really brighten up an outfit, not to mention my mood when I get to see my favorite fabrics quilted up all pretty every time I look in the mirror. These also double as a strap to put around a rolled up quilt when travelling—which I have found quite useful. I think they would make a great gift too, and you can make one in just a few hours. I used woodgrain quilting on one of my belts, and did print tracking on the other two. Even though the belts are only 2″ wide they are long, so I still got some good practice in. These are also a great use for all those long skinny batting scraps you get once you have trimmed away the extra batting/backing after quilting and before binding a quilt. I decided to use my BERNINA Stitch Regulator (BSR) on my BERNINA 750 QE as I am still new at using it and I was practicing after all. I was so pleased I did use it, because it really helped me achieve good results with print tracking tiny geometric prints. This was because I was able to turn the stitch length down to 1.5 and get a consistent tiny stitch—which really helps when trying to do detailed work. I will be using the BSR for all tiny detailed quilting in the future, it was a real life saver for tracking those small prints.
Note: To make a belt you first need your waist measurement to determine how much fabric you need—your waist measurement plus 8″ is the length you need. We’ll call that measurement (Y) for later reference.
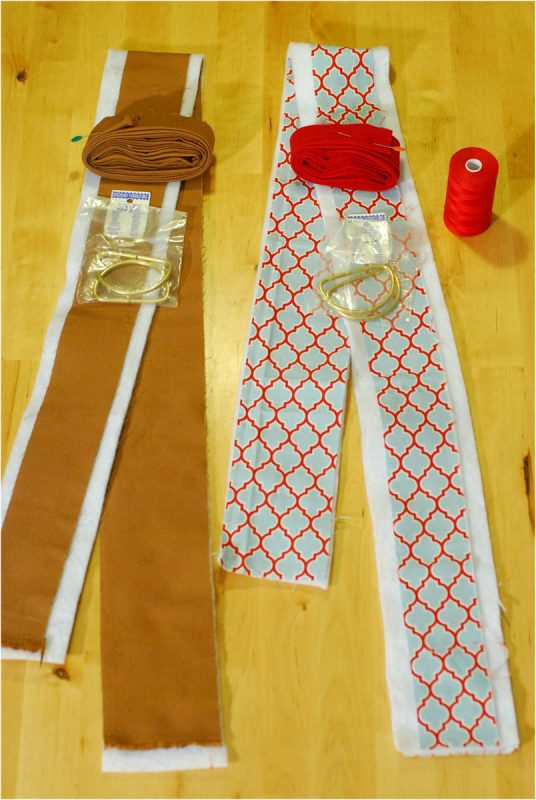
Materials to create a quilted belt
- 2″ x (Y) strip of fabric for front of belt
- 4″ x (Y) strip of fabric for the back of the belt (I found using the same print/or solid on both front and back was easiest)
- 4″ x (Y) strip of batting
- Binding to go around the whole length of the belt (this is where a contrasting fabric can be nice)
- Pair of 2″ wide D rings
Note: If you have a different size D ring set and want to make a different width belt just adjust your width measurements accordingly, making sure to make your backing a few inches wider than the top piece so you have room to hold onto it while quilting.
Step One
After cutting and pressing strips and layering them with batting baste them with safety pins every few inches or so to keep the belt from shifting while quilting

Step Two
If you are doing print tracking like I did on this blue and red belt then before quilting it mark a line 6″ from the end on one side and when you reach that line flip the belt over and quilt the print from the back (that is if you are using the same print on the front and back of the belt like I did). This makes it so when the belt folds over through the D rings when you are wearing it the pretty print tracked side is always showing. If you aren’t print tracking then skip this step.
Step Three
Quilt your belt however you desire.
Step Four
Once your belt is all quilted trim around all the batting and backing edges with a long straight edge ruler to make sure it is all square and straight.
Step Five
Bind the edges of your belt as you bind the edges of a quilt on all 4 sides.
Step Six
Thread your belt through both D rings on one end (if you did step two make sure it isn’t the end of the belt you designated to be the side that folds over) and fold the end of the belt 2″ down encasing the D rings. Sew a rectangle around the edges encasing your D rings, and then sew an X from corner to corner to make the belt really strong. Congrats, you are done. Now all you need to do is figure out what to wear with your new belt!
I hope you decide to try and make a quilted belt. Even if Free-Motion Quilting isn’t your thing, a belt created using a Walking Foot and straight line quilting would look great too! If you want to know more about woodgrain quilting and print tracking I have sections on both in my book.
Giveaway Time!
I have a “Free Motion Quilting for Beginners” to give away to one awesome WeAllSew fan. All you have to do is post a comment below answering the following question:
Tell me what fabric you would use for a belt or what stitch design you would use to quilt one in the comments below and enter to win!
A winner will be chosen on November 25, 2015 and announced later this month!


What you might also like


6 comments on “Quilted Belt Tutorial”
-
-
I am looking forward to trying this out with fine leather strips. What an added fashion statement. Off to the store to get some leather. And thread. Thanks for the tutorial. Bev Hunt
-
Great tutorial. I have some faux purple leather that might be a great looking belt. I bought a lot of it not relizing it was something like 90″ wide and I bought about 5 yrs. I was shocked upon delivery when that came to my door in this HUGE package as they’d left it on the bolt. It was almost as long as half of my sewing room. LOL I still don’t know where to store that stuff. I think maybe I should make the projects I originally purchased it for and a LOT of other things. This might be put onto that list as gifts for a few friends who also love purple.
-
I have so much scrap fabric I would make lots of belts, probably in fun colors other than black or brown.
-
Haven’t tried this before but I think I would begin with a belt for a little girl and do a heart and bee motif.
-
I would use scraps (since mine are overflowing) and try some different stitch designs – how fun!
Leave a Reply
You must be logged in to post a comment.

This belt is a great idea for using up scraps! I think I’d do some echoed scallops, perhaps with some pebbles fitted into some of the “channels” created by the scallops.