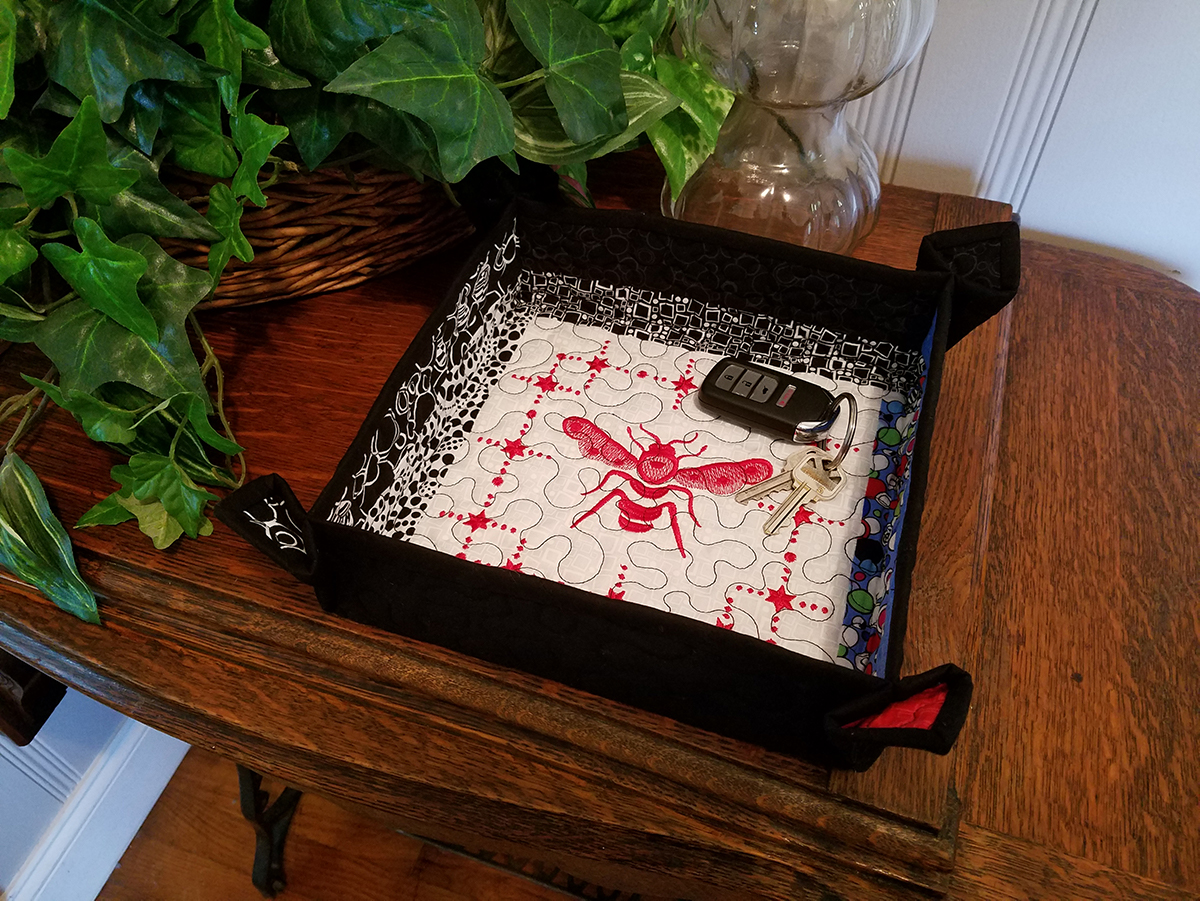
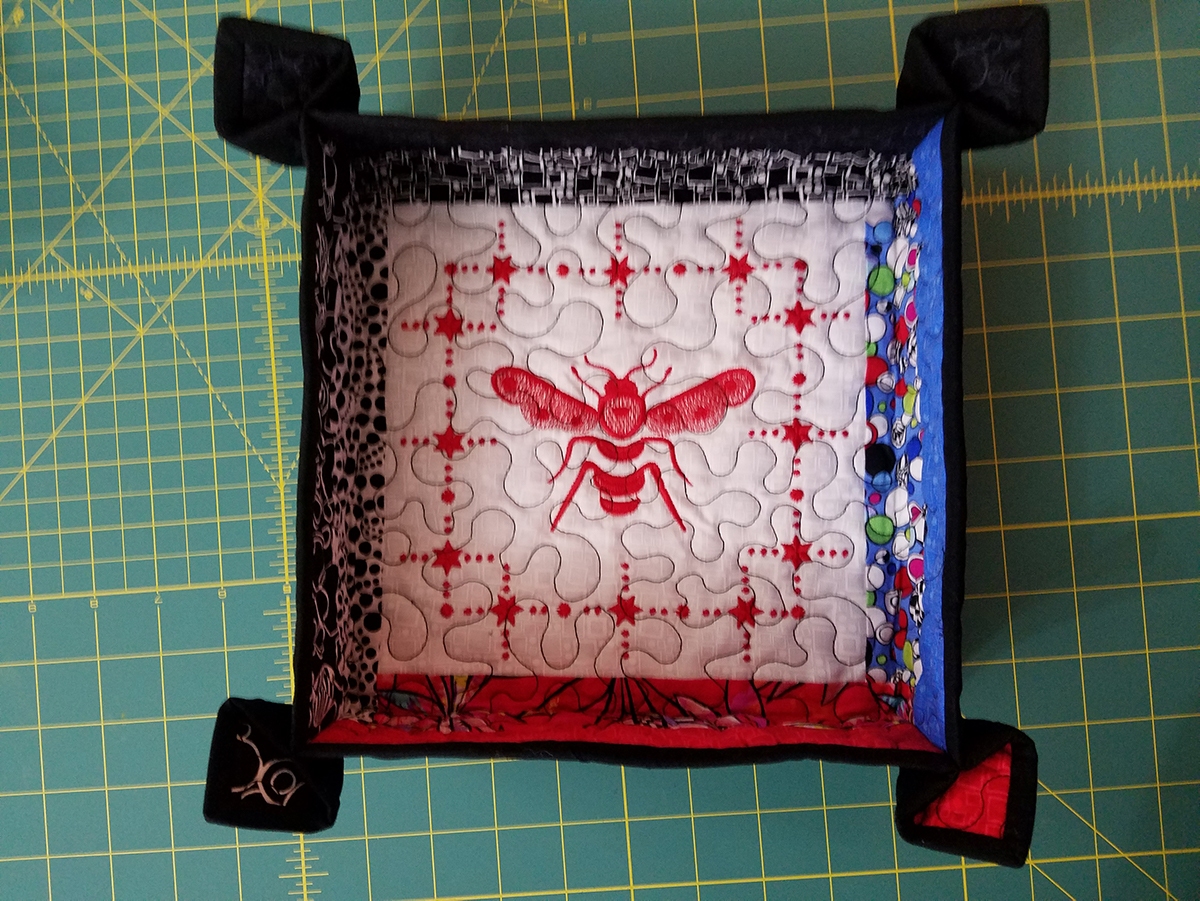
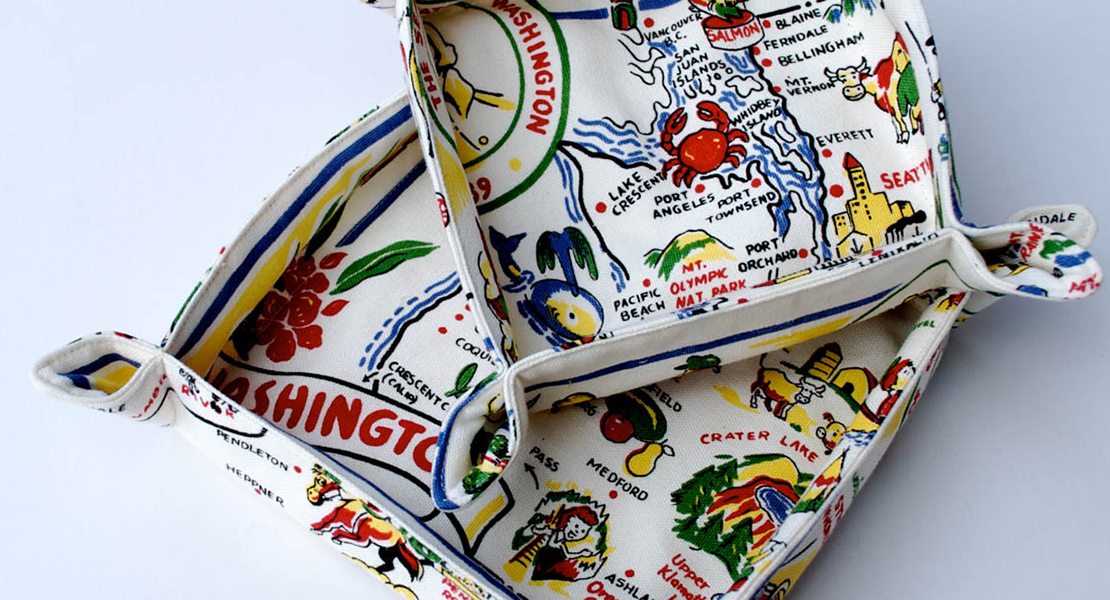
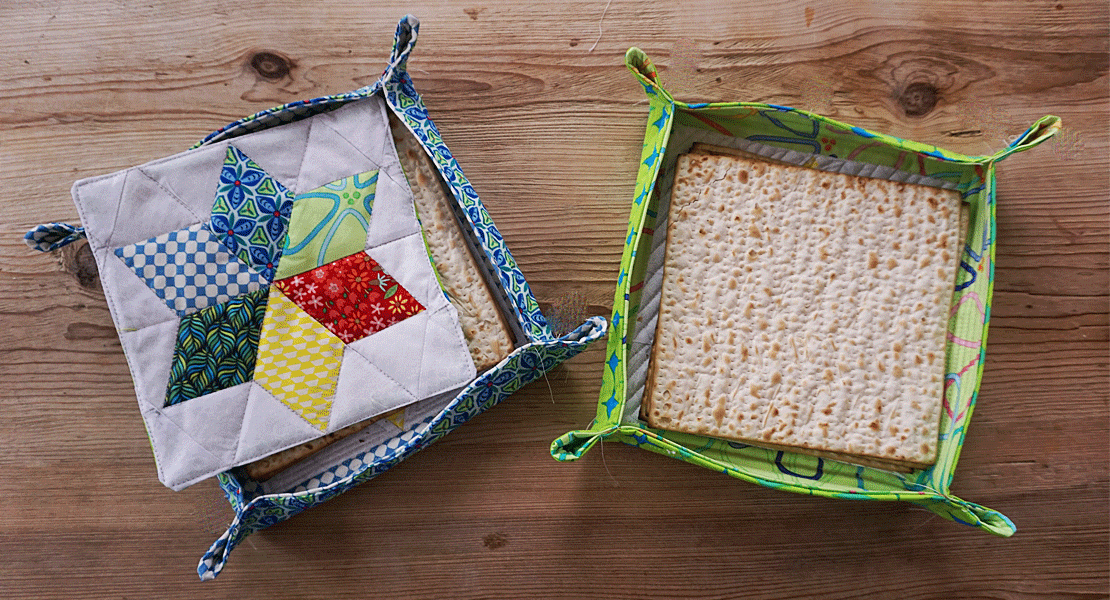
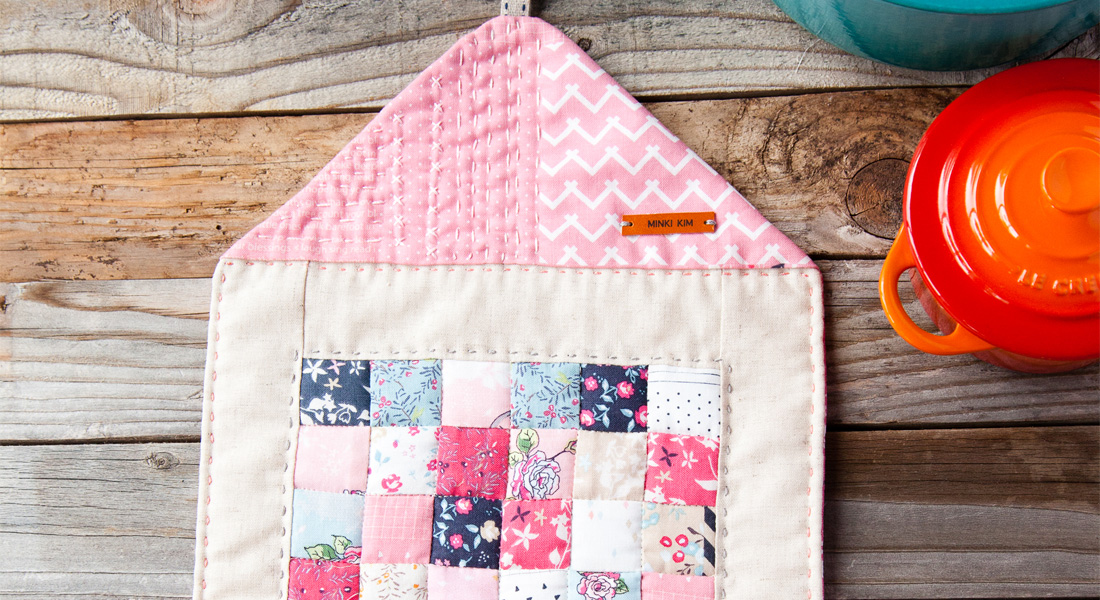
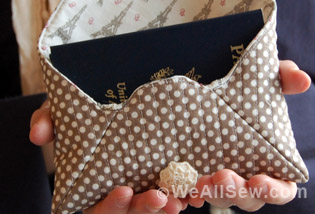
Quilted Tray
This is my last project for the BERNINA’s Block Party Block of the Month. I will miss reading Nina’s blogs and creating a project from each block that she creates. And I will miss meeting with you all! To go out on a good note, let’s create a quilted tray out of this last block. Whether you use it for your keys or for sewing supplies, this will be a handy tray to have anywhere you place it.
Supplies to Create a Quilted Tray
- 1 solid color fat quarter for embroidered center
- 8 fat quarters of your favorite fabrics (I used the Anything Goes fabric collection by Benartex Fabric): Cut one each of all 2” widths in the Embroidered Block instructions
- Batting: Cut 3 inches larger than your finished embroidered/pieced block
- Backing: 4 inches larger than your finished embroidered/ pieced block
- Binding: 2 strips cut 2 ¼ inches wide by the width of fabric (44”)
- OESD Embroidery Design Collection #80117 Seventy Six by Alison Glass
Instructions to Create a Quilted Tray
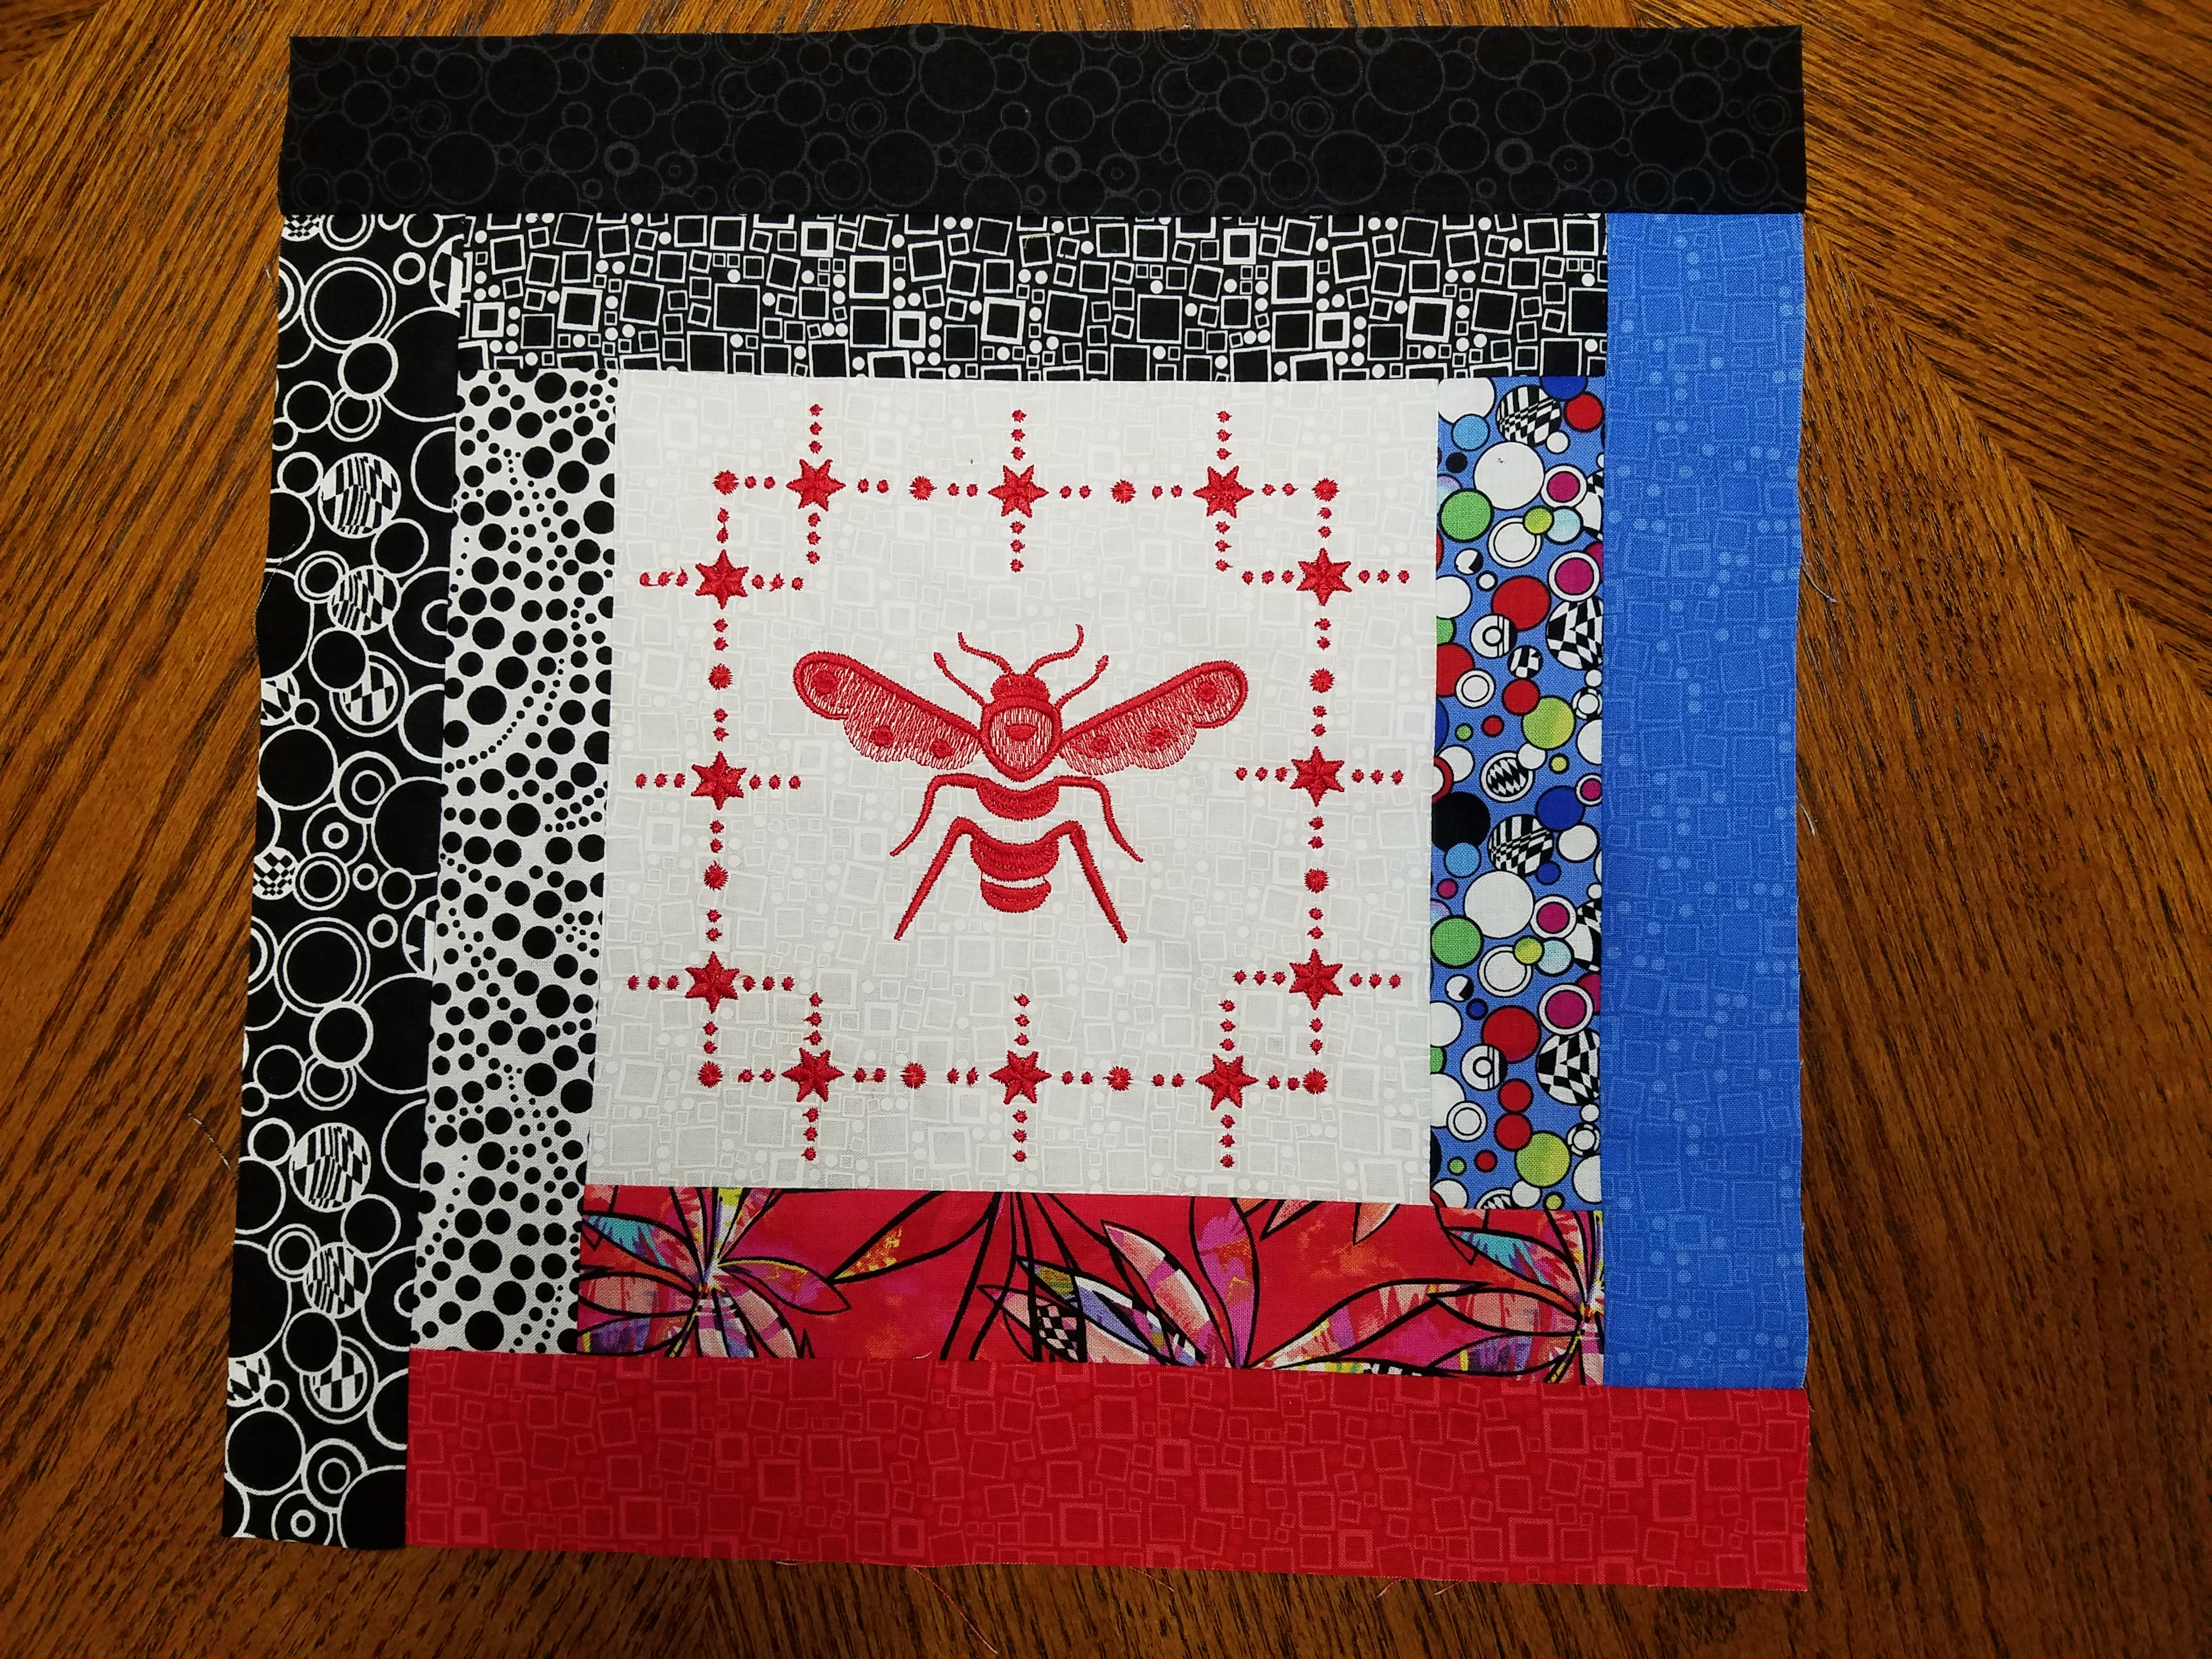
Embroider the block on the solid color fat quarter (I used a white fabric) using the designs suggested in Nina’s Block 12 Embroidered Block blog post. I embroidered all the designs using red embroidery thread. Follow the instructions in Nina’s Block 12 Blog Post for embroidery instructions and how to trim block after embroidery.
Here are the strip sizes that Nina used. On the second group, Nina used the grey background fabric. I opted to use a different fat quarter for each of the 8 rectangles. They are stitched “log cabin style” around the center embroidered piece:
2” X 7”
2” X 8 1/2”
2” X 8 1/2”
2” X 10
2” X 10”
2” X 11 1/2”
2” X 11 1/2”
2” X 13”
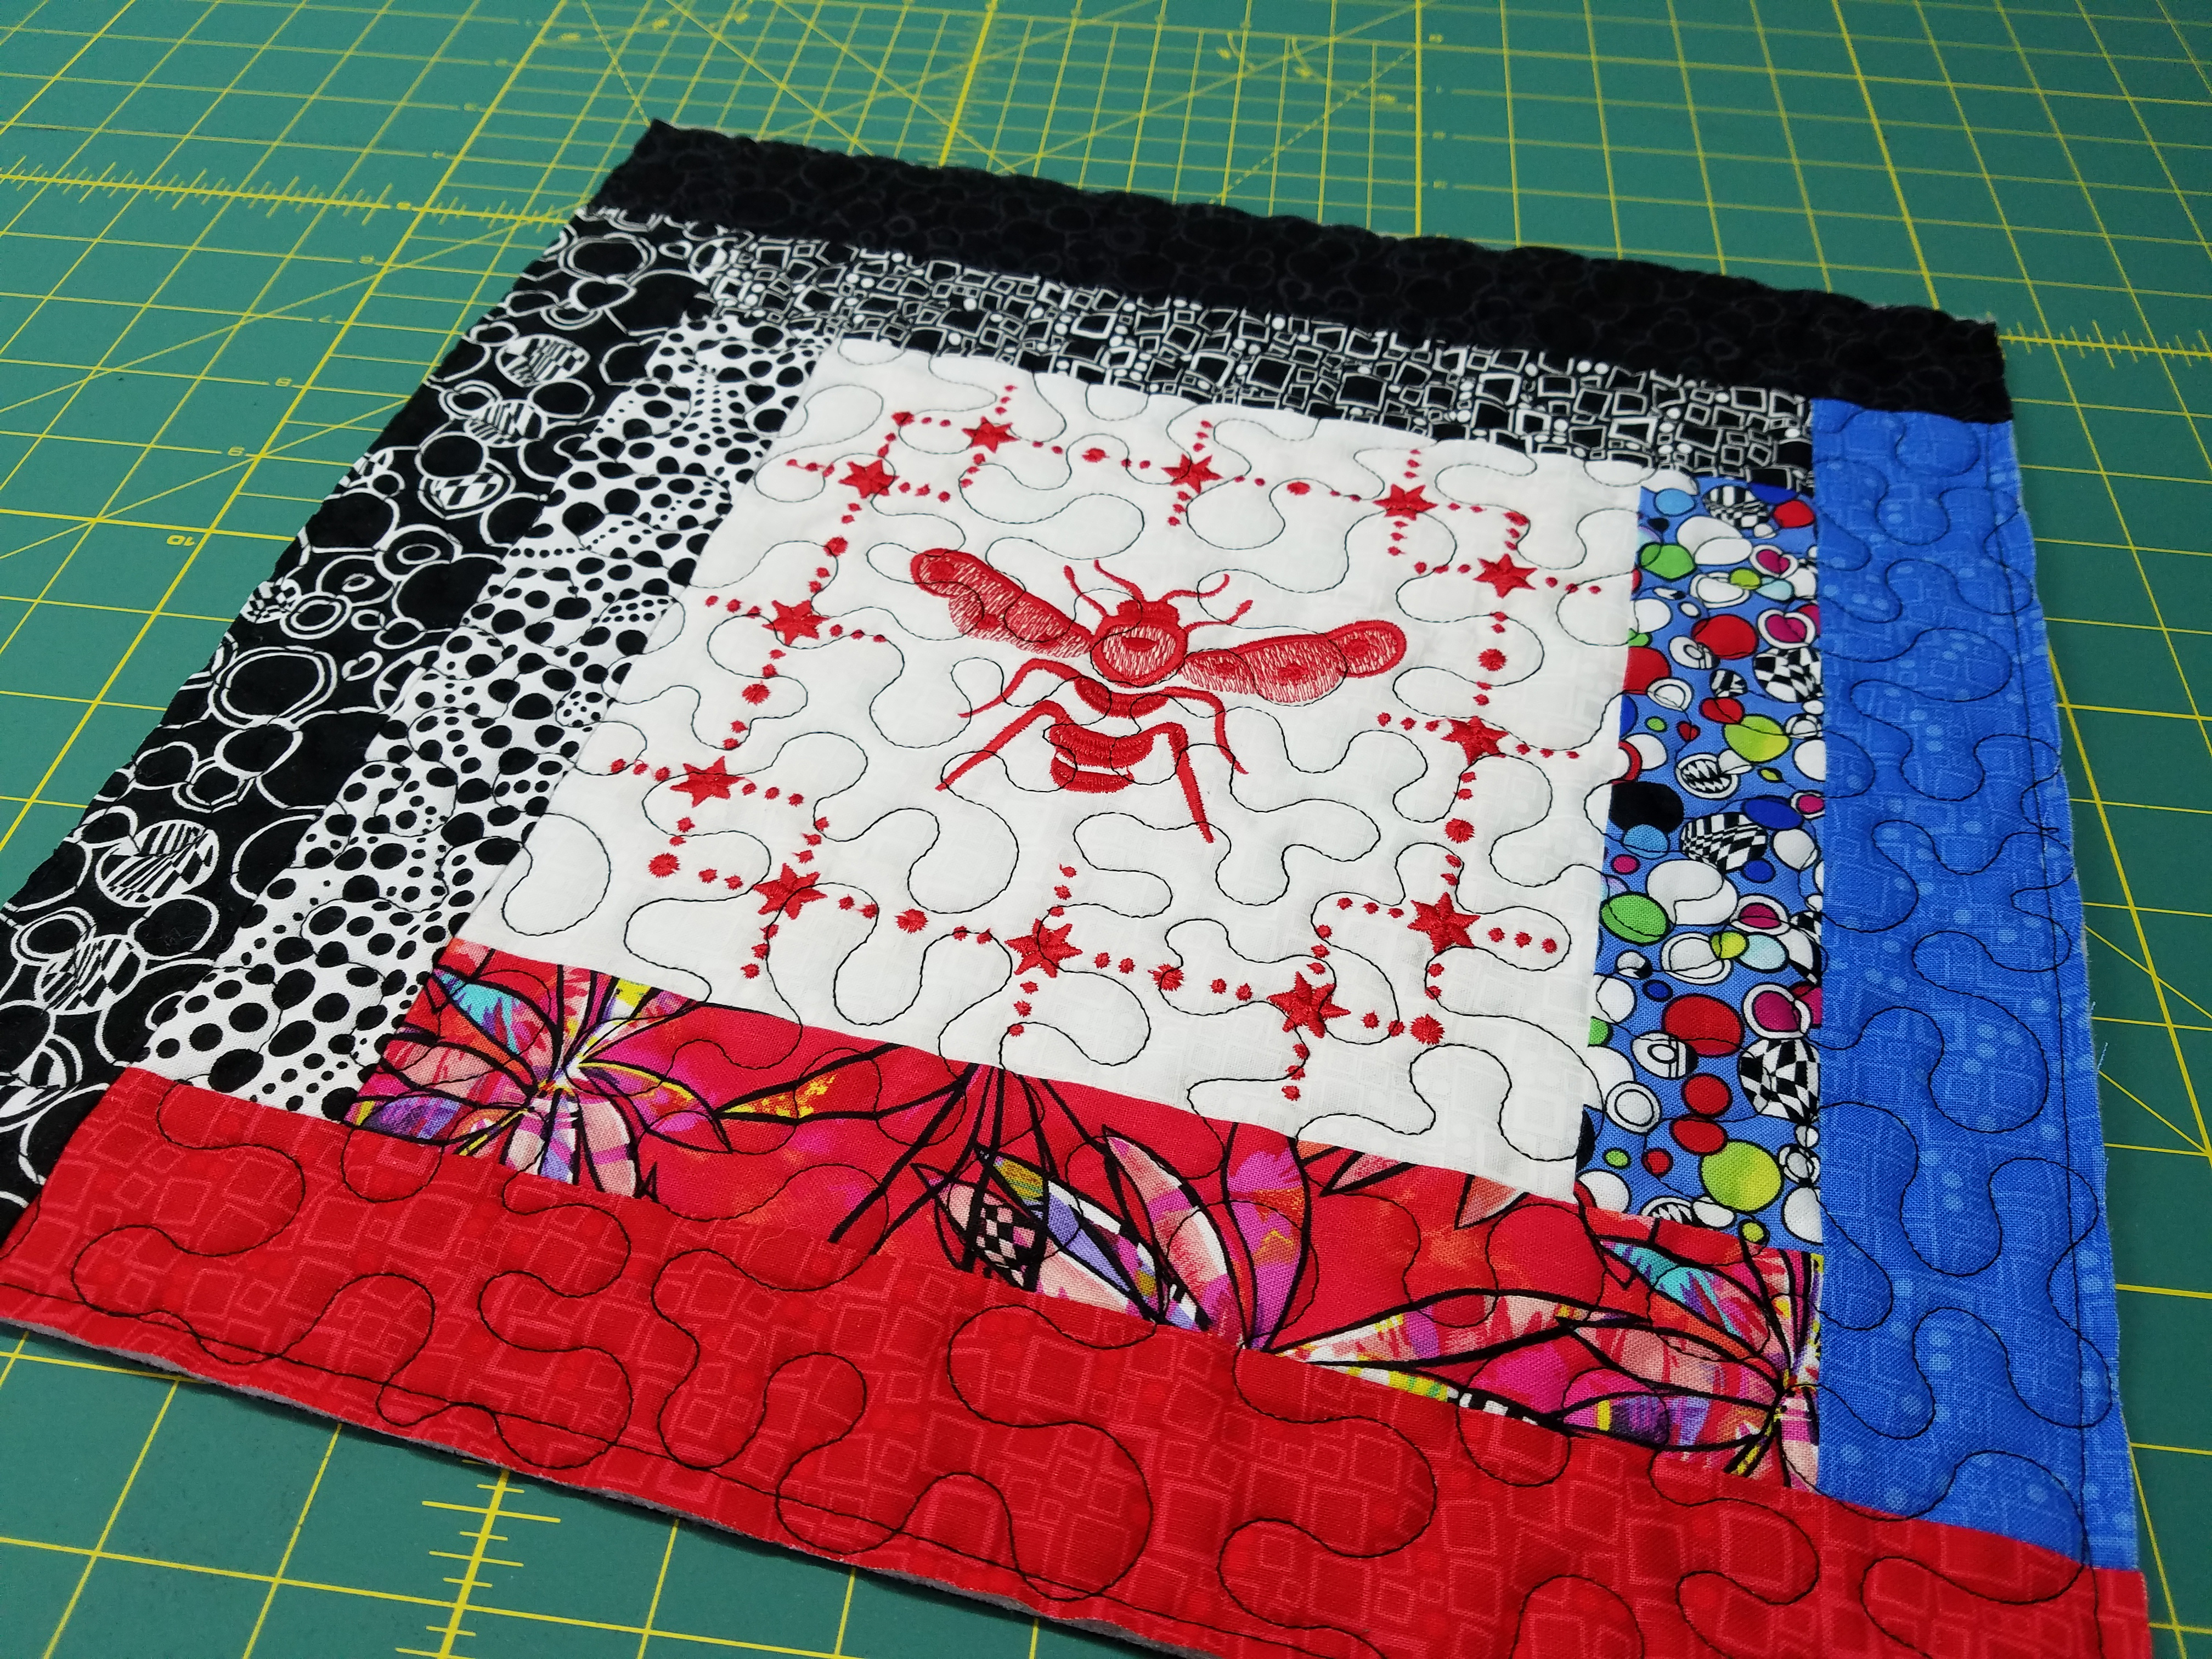
Center the batting on the wrong side of the backing fabric. Then center the embroidered/pieced block over the batting.
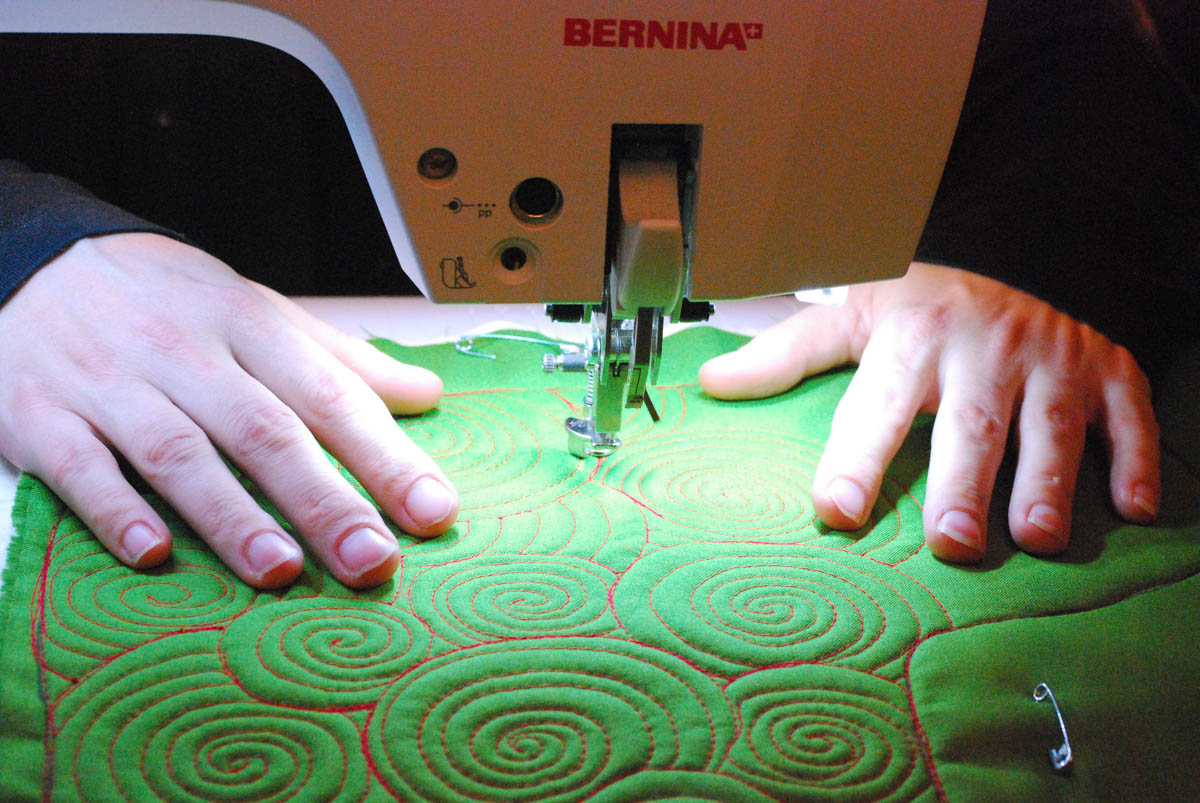
Quilt as you would like. I quilted this piece with an all over meander with a dark gray and black variegated thread. You can do this on either a longarm machine or a domestic machine.
Square the block up. Stitch about 1/8” from the edge on all 4 sides.
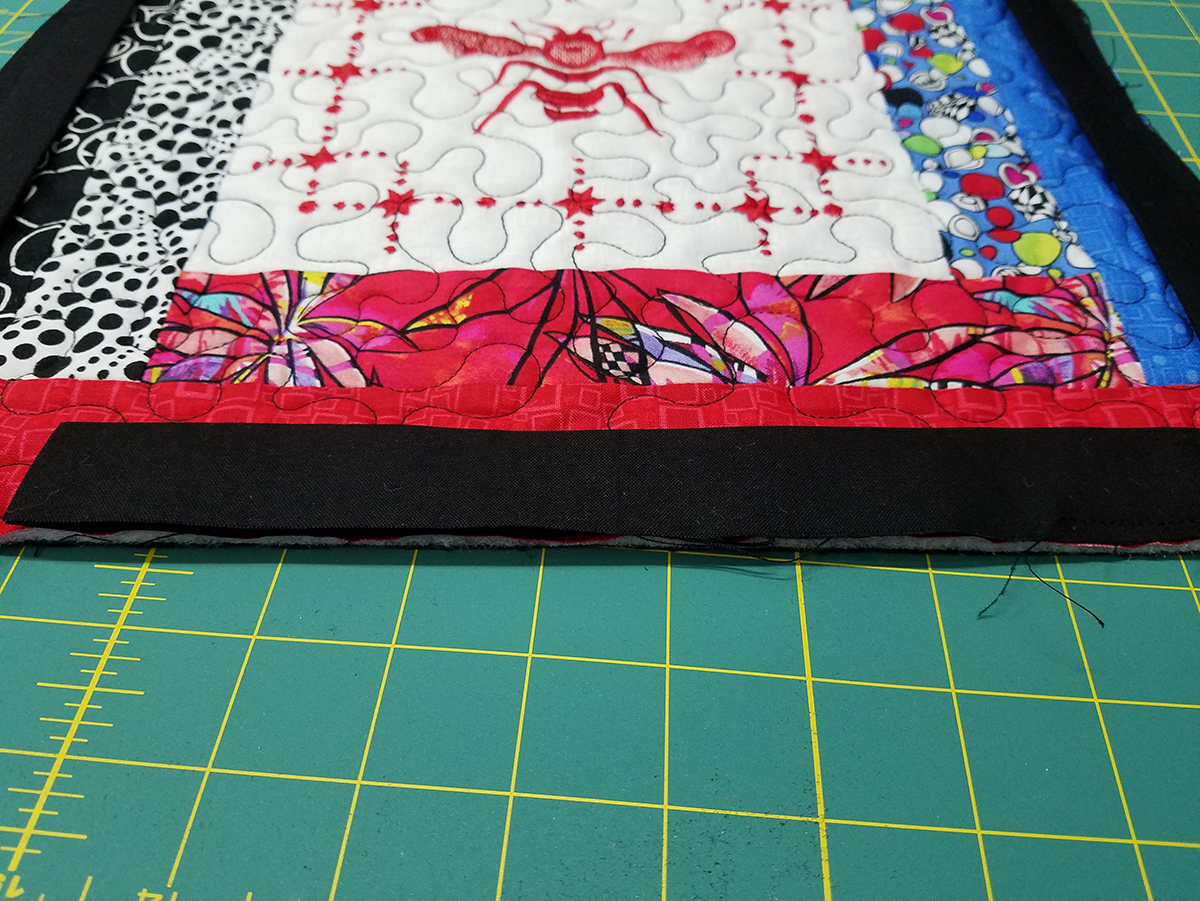
Stitch short end of the two 2 ¼” strips of binding together using a diagonal seam. Trim the seam to ¼” and press open. Fold the binding in half lengthwise with wrong sides together. Cut the beginning tail at a 45 degree angle.
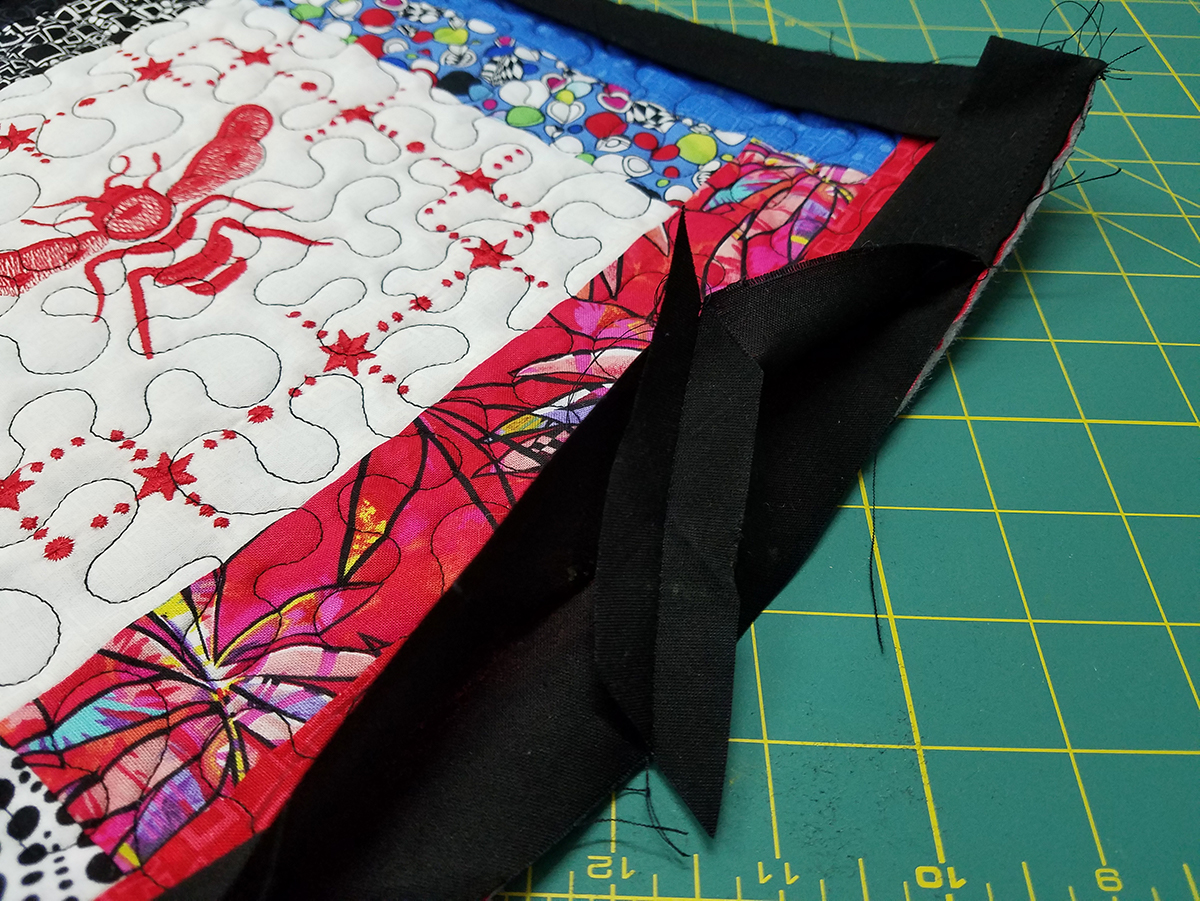
We will attach the binding as we have done before with other projects using a ¼ inch seam allowance. Start by placing the binding on the front of the quilted block with the raw edges of the binding even with the block’s raw edge. Keep about 5 or 6 inches of binding unstitched as you begin stitching.
Continue stitching around the block creating your mitered corners. If you want additional information on how to miter the corners, take a look at the Shoofly Block Placemats that we made earlier.
To join the ends of the binding, stop stitching about 5 or 6 inches from where the beginning tail is.
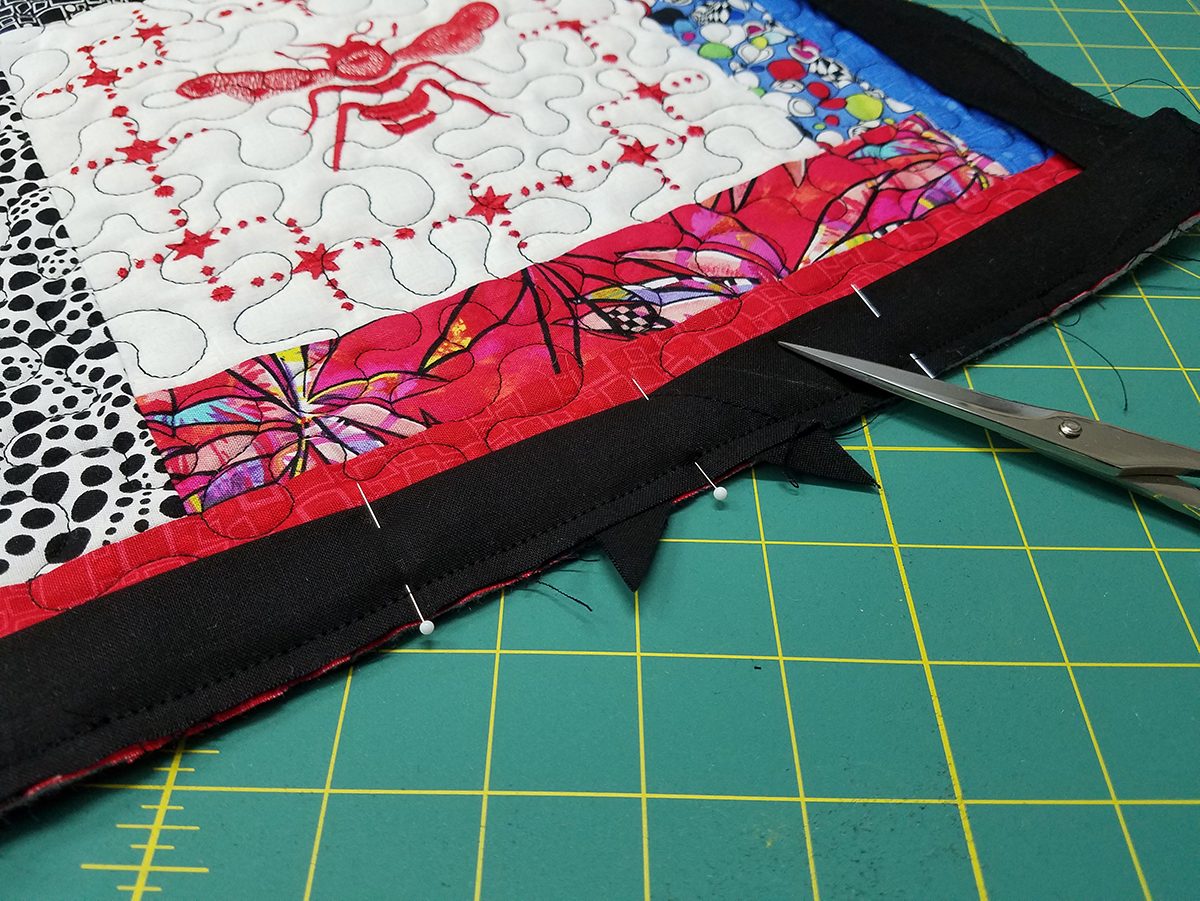
Slide the end of the binding into the folded/mitered end of the beginning tail. Trace the angle of the beginning tail onto the ending tail with a chalk marker.
Cut off the excess tail 1” beyond the chalked line.
Mark a line on both the binding and ending tails ½” from the cut ends. Making these marks will help you get a more accurate seam allowance.
Align the ½” marks and pin.
Stitch the ends together. Finger press seam open.
Refold binding, stitch flat and trim corners of seam.
With the binding all sewn on, press the binding away from the right side of your quilted block, and then fold the binding over to the back. Stitch in place by hand or by machine.
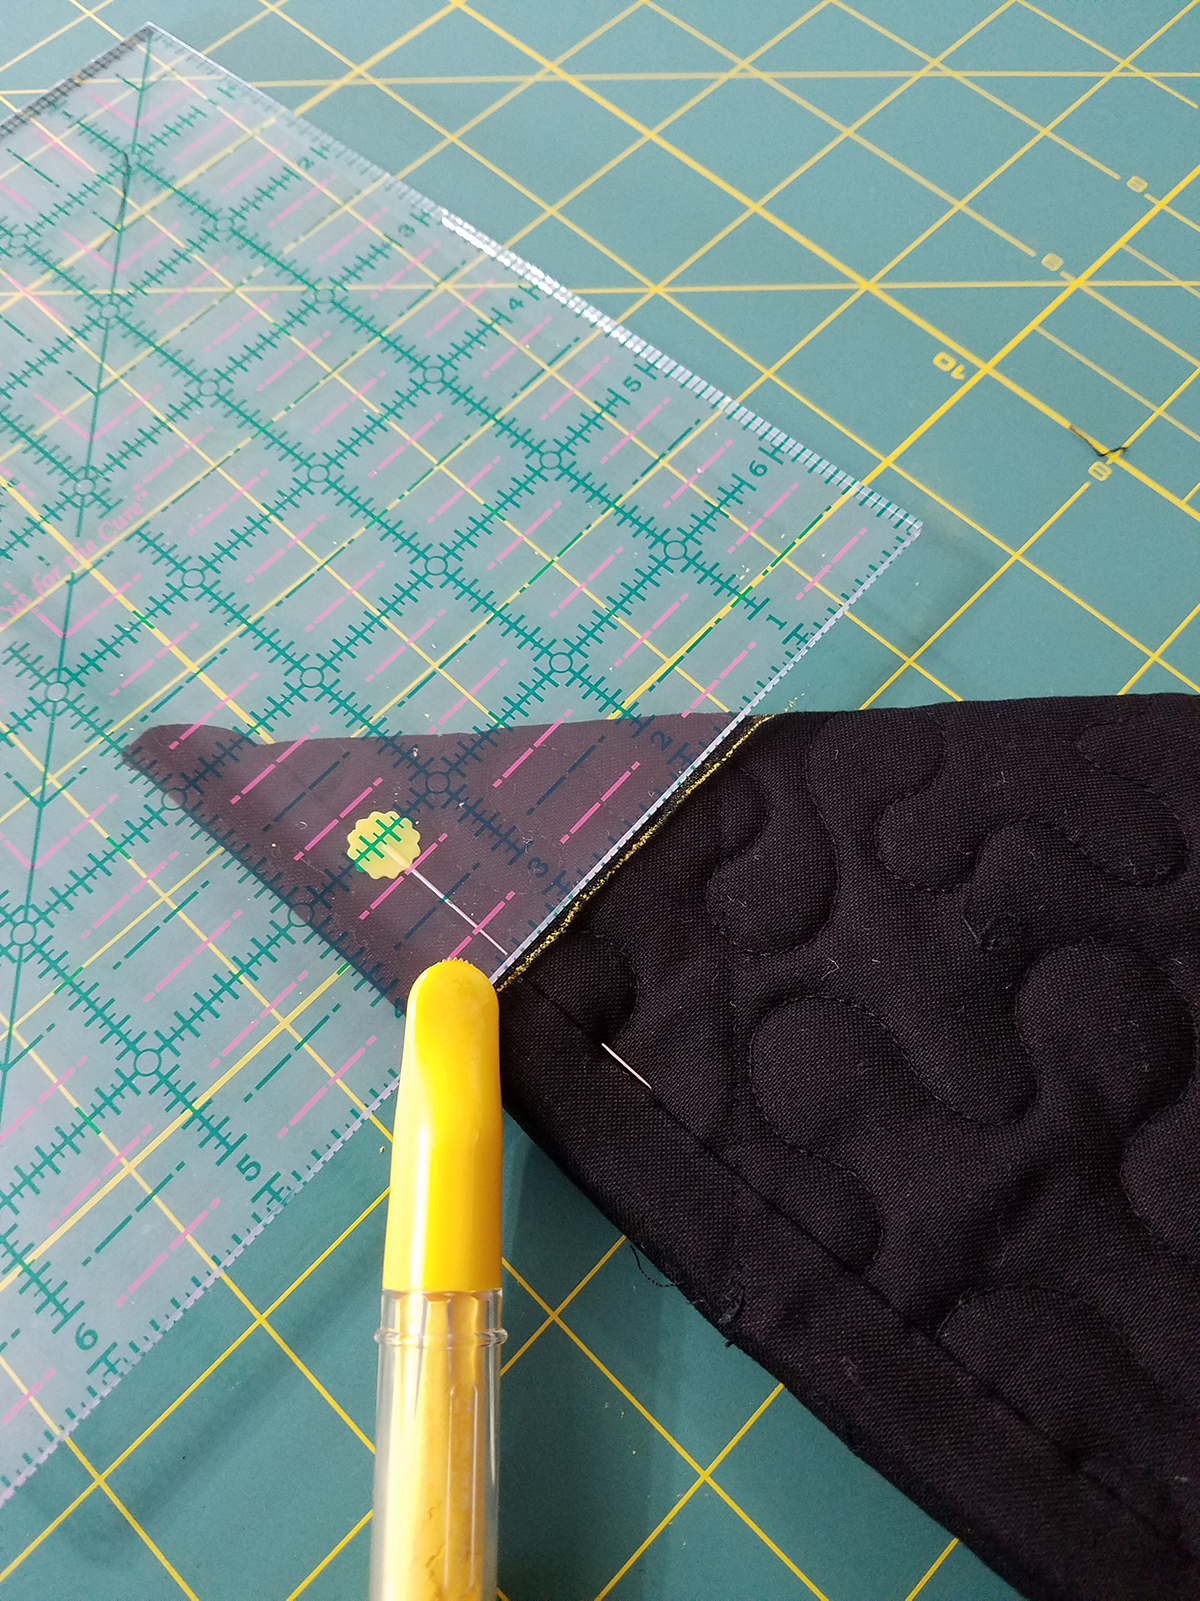
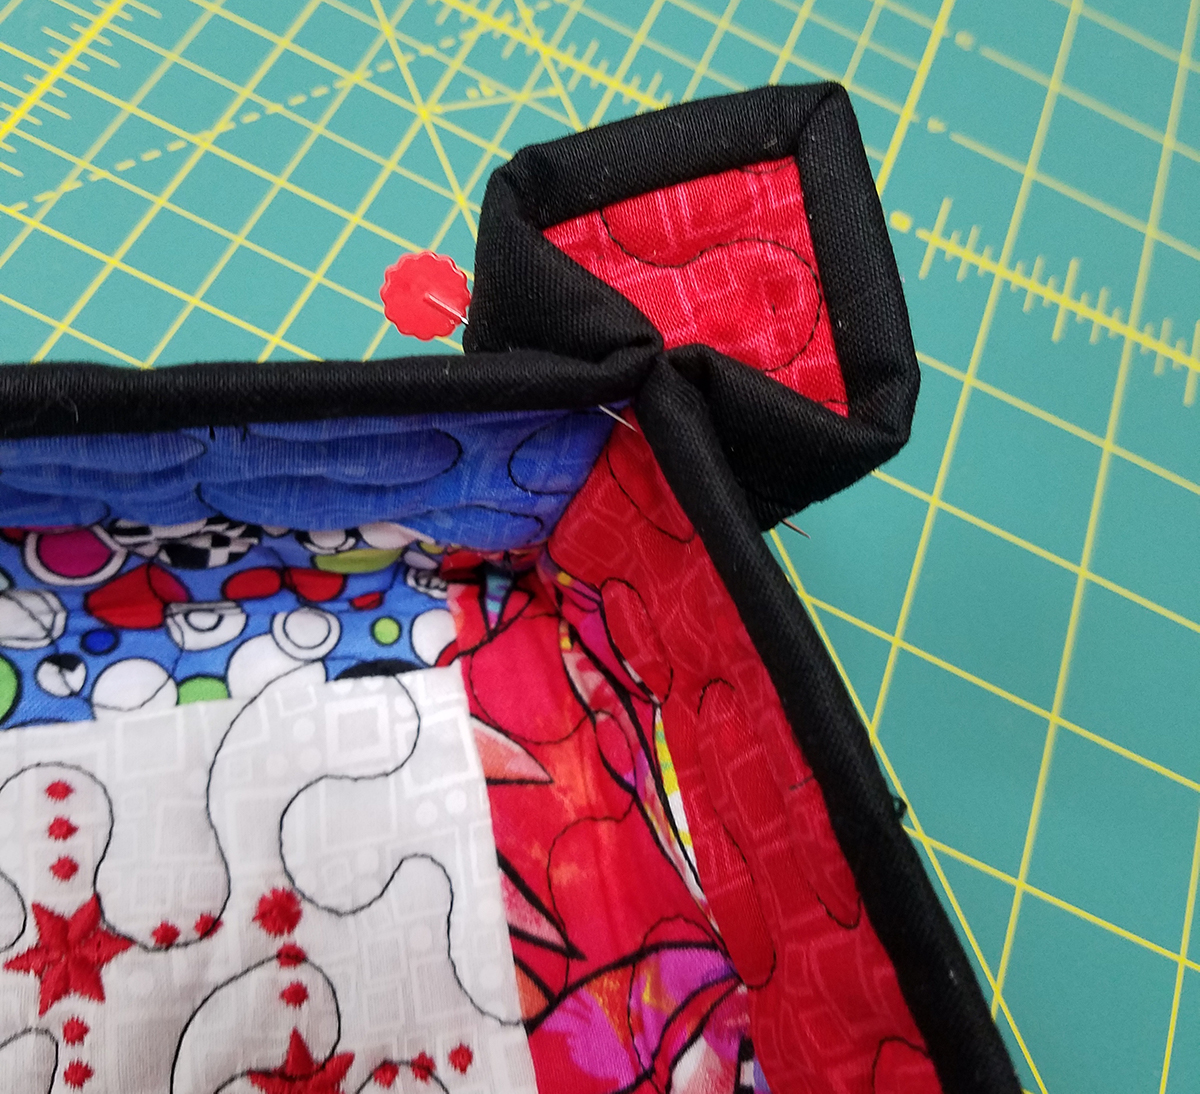
Fold the block in half diagonally, right sides together, so that you have a triangle. Working from the side that has the binding, draw a line perpendicular to the binding. Draw this line so that it measures 2 ½ inches straight up from binding. Repeat for other side.
Take to machine and stitch on drawn line.
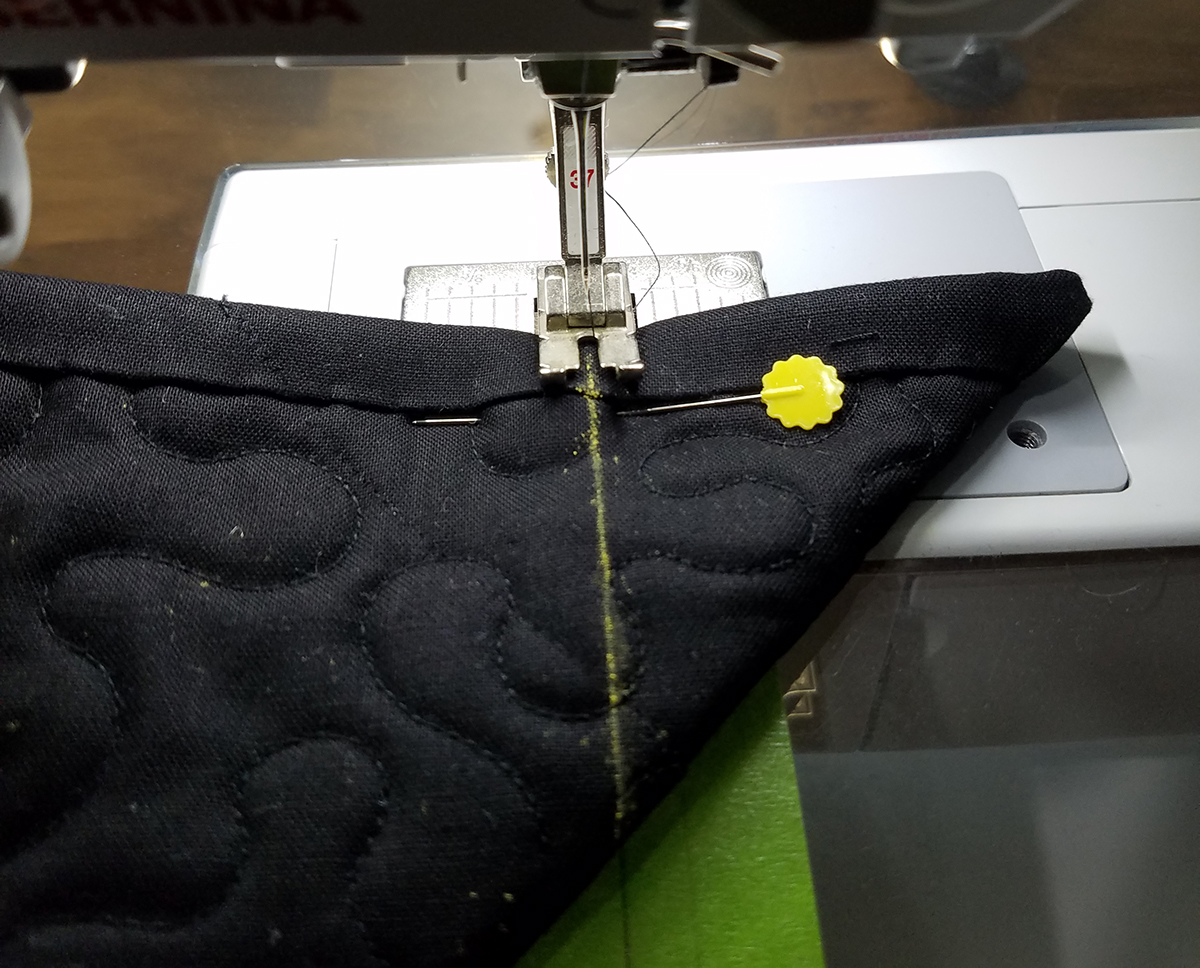
Repeat this process for the other three corners of your quilted block. They will be a little hard to fold, but you can do it. Remember, pins and clips are our friends so put a pin or two in it. Stitch with machine to form your tray.
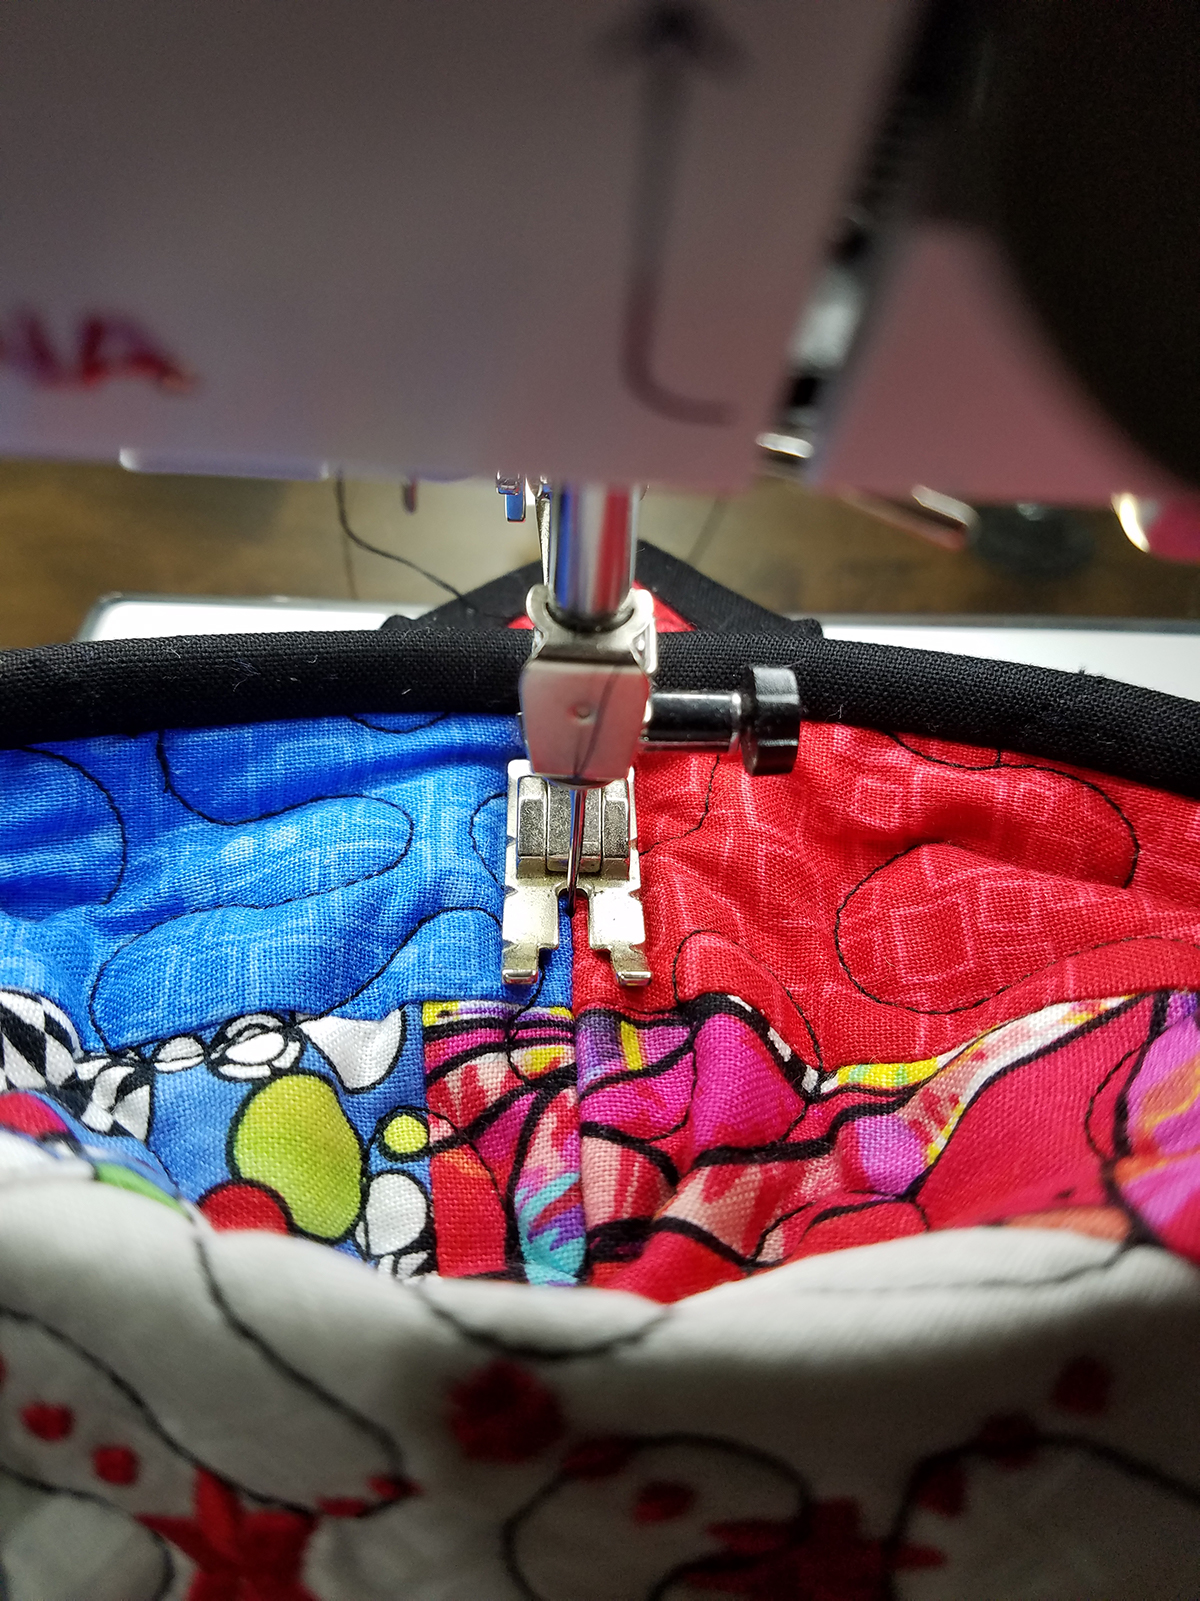
Now take the point that is sticking out and flatten it to the seam you just sewed. Put a pin through all layers.
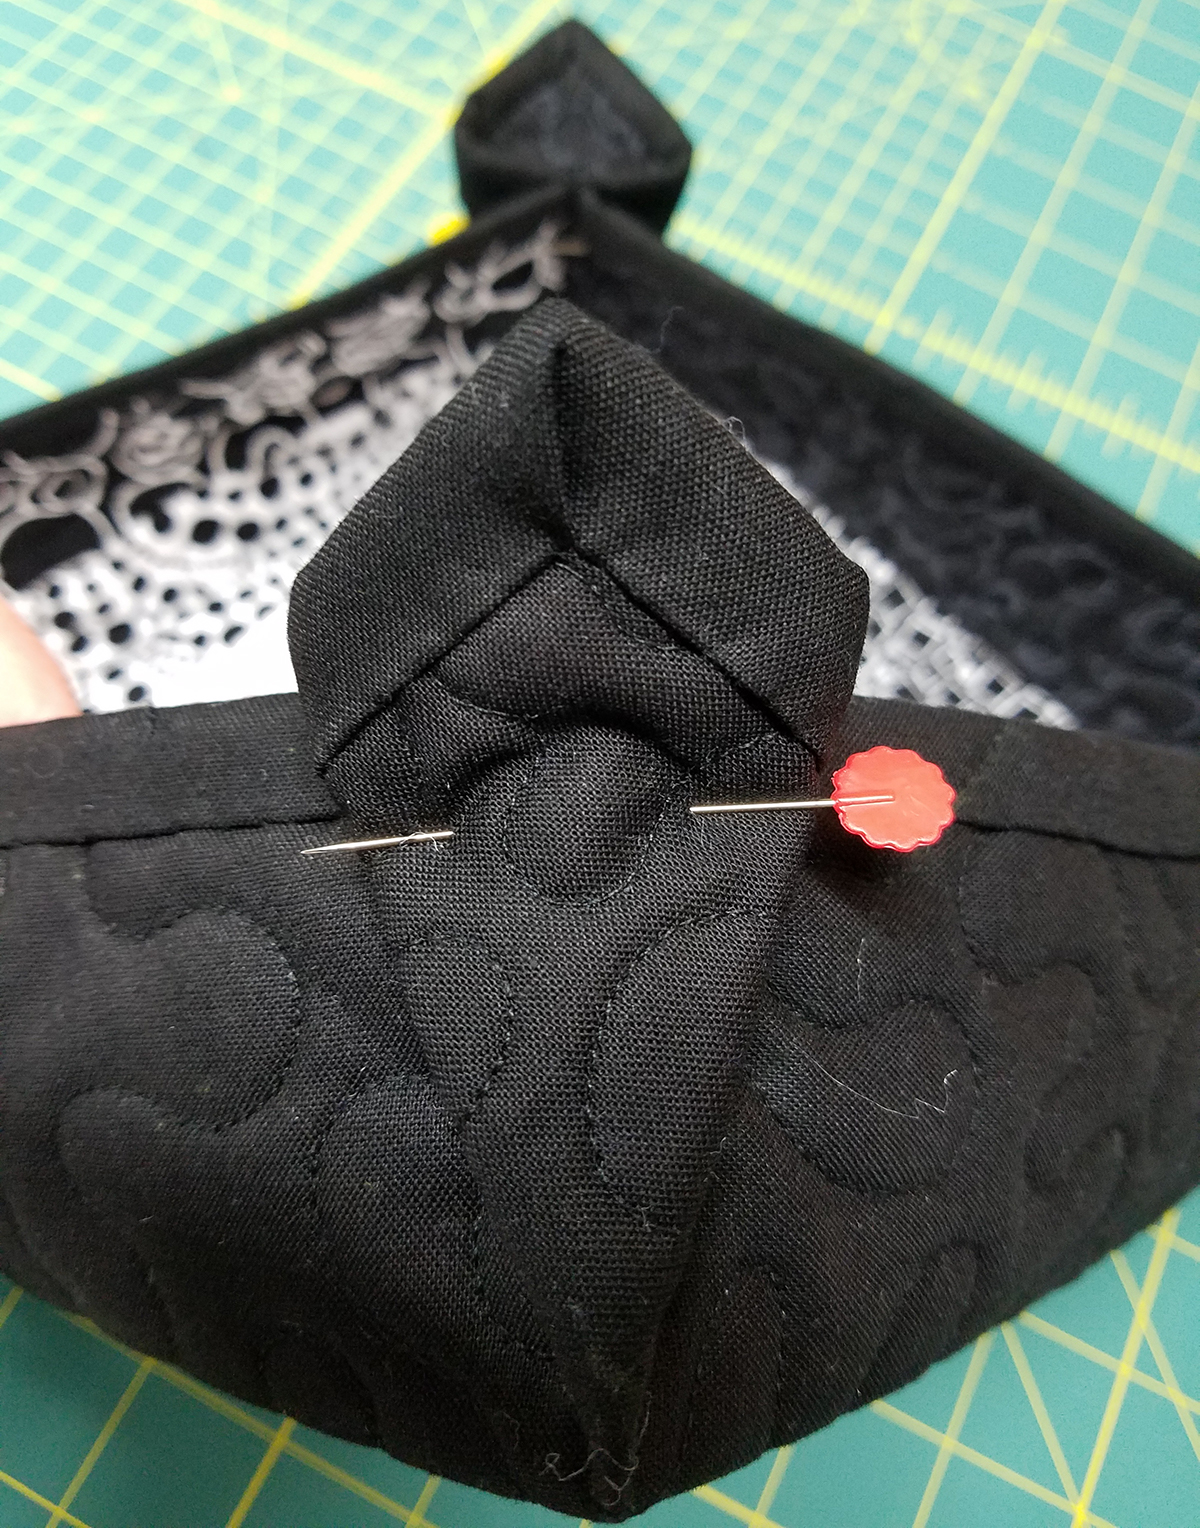
Take to machine and stitch right in the ditch of the first seam you made on the corner. You only need about an inch long seam, but longer is okay too.
Repeat for all four corners. This little bit of extra stitching is what gives this tray a little extra personality!
You are finished with the tray!
I have enjoyed working on each of these projects featuring the blocks in the BERNINA Block of the Month over the past year with all of you. Thank you so much for letting me share this time with you!
Denise


What you might also like


2 comments on “Quilted Tray”
-
-
Hi Gayle,
I believe it is approximately 7 1/2 inches square.
-
Leave a Reply
You must be logged in to post a comment.

What is the finished size of the tray?