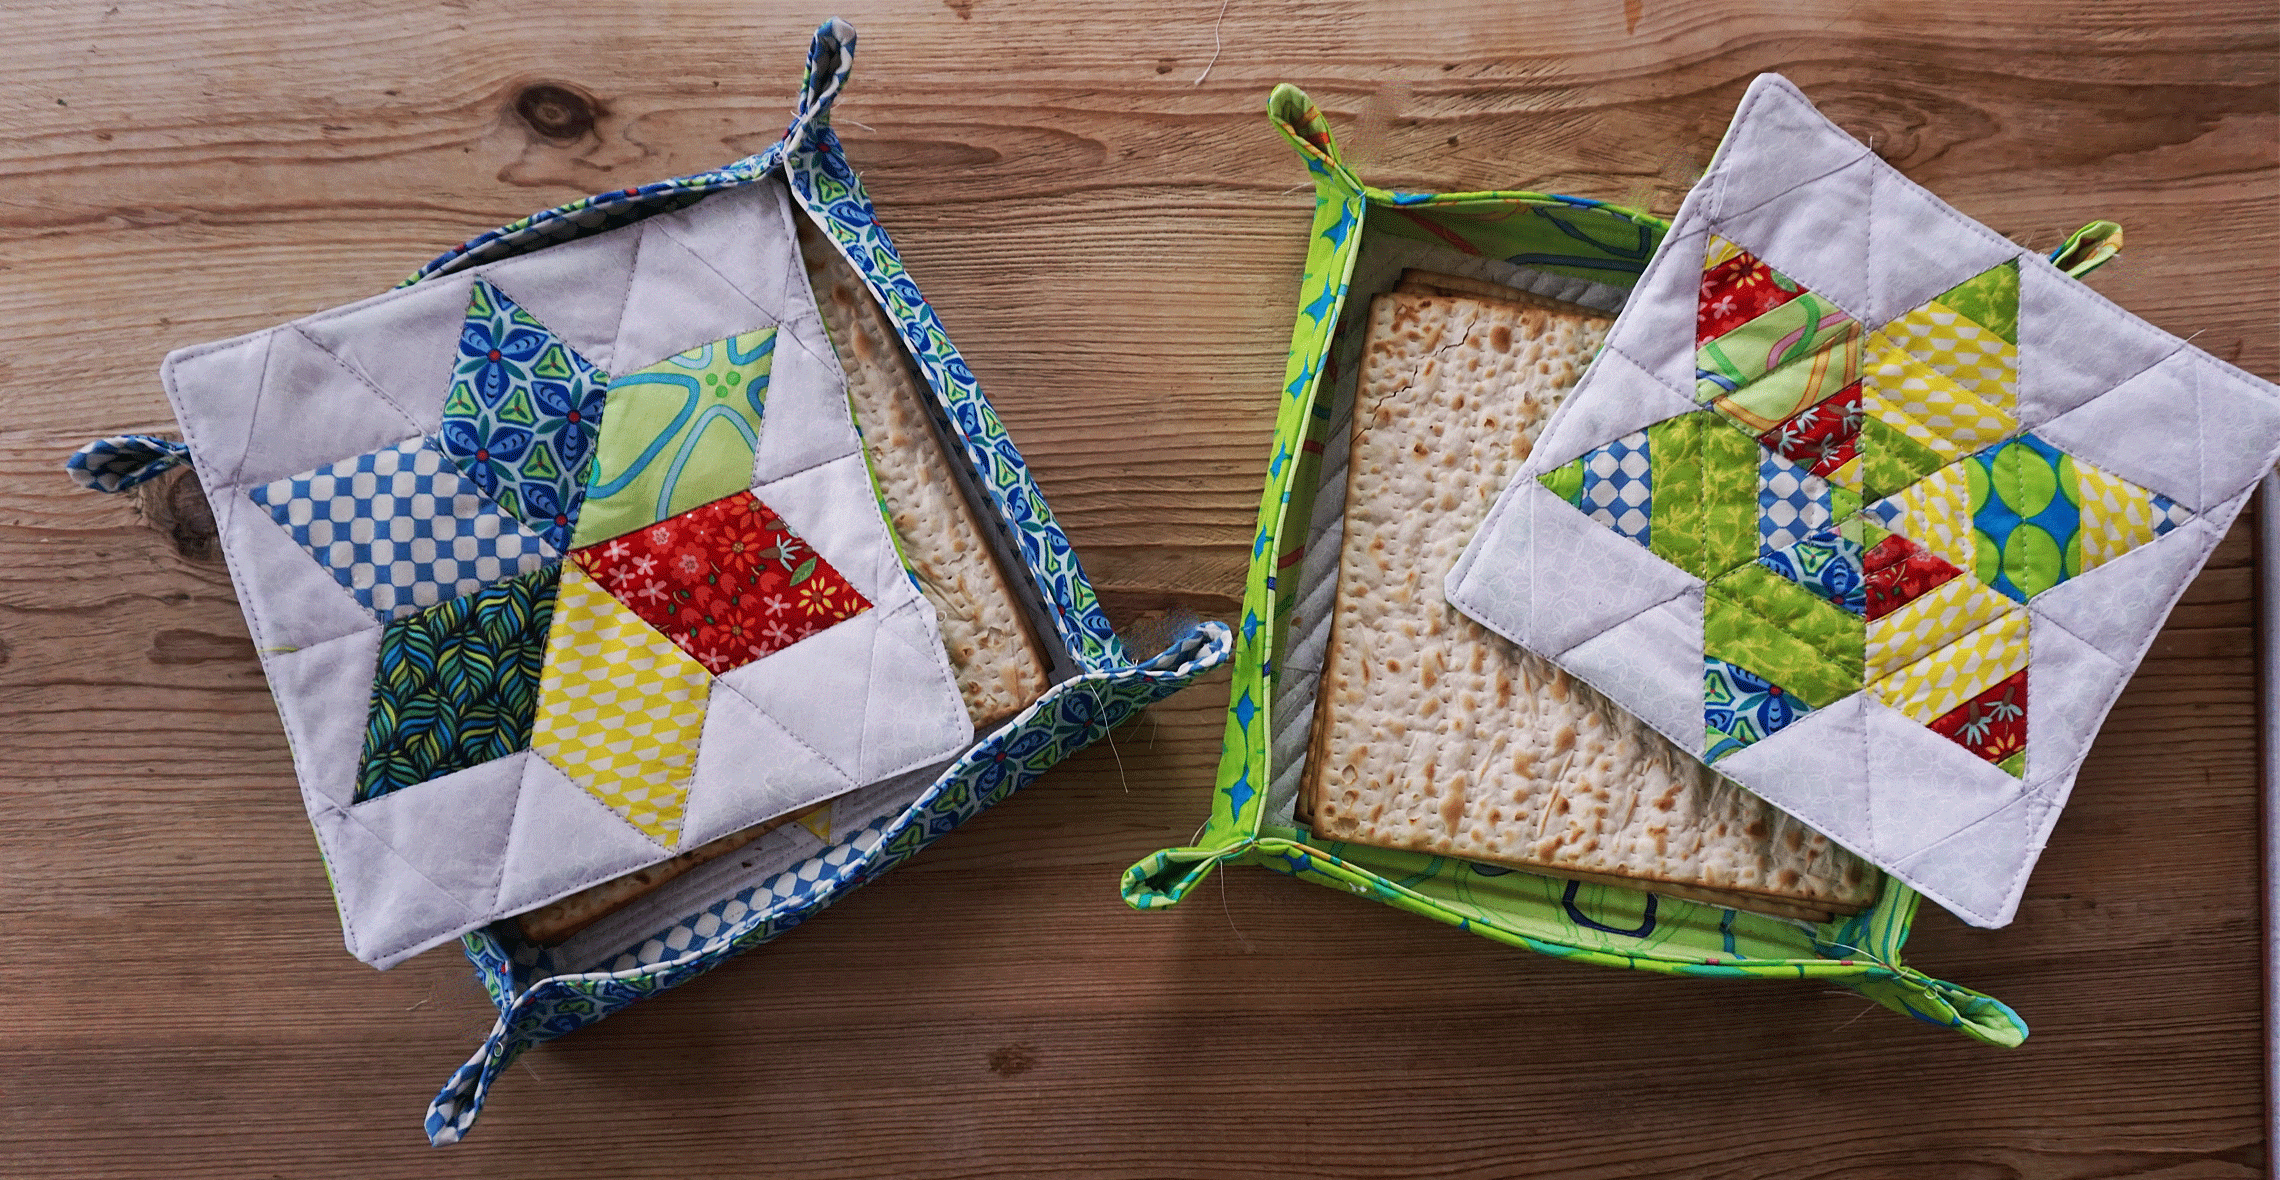
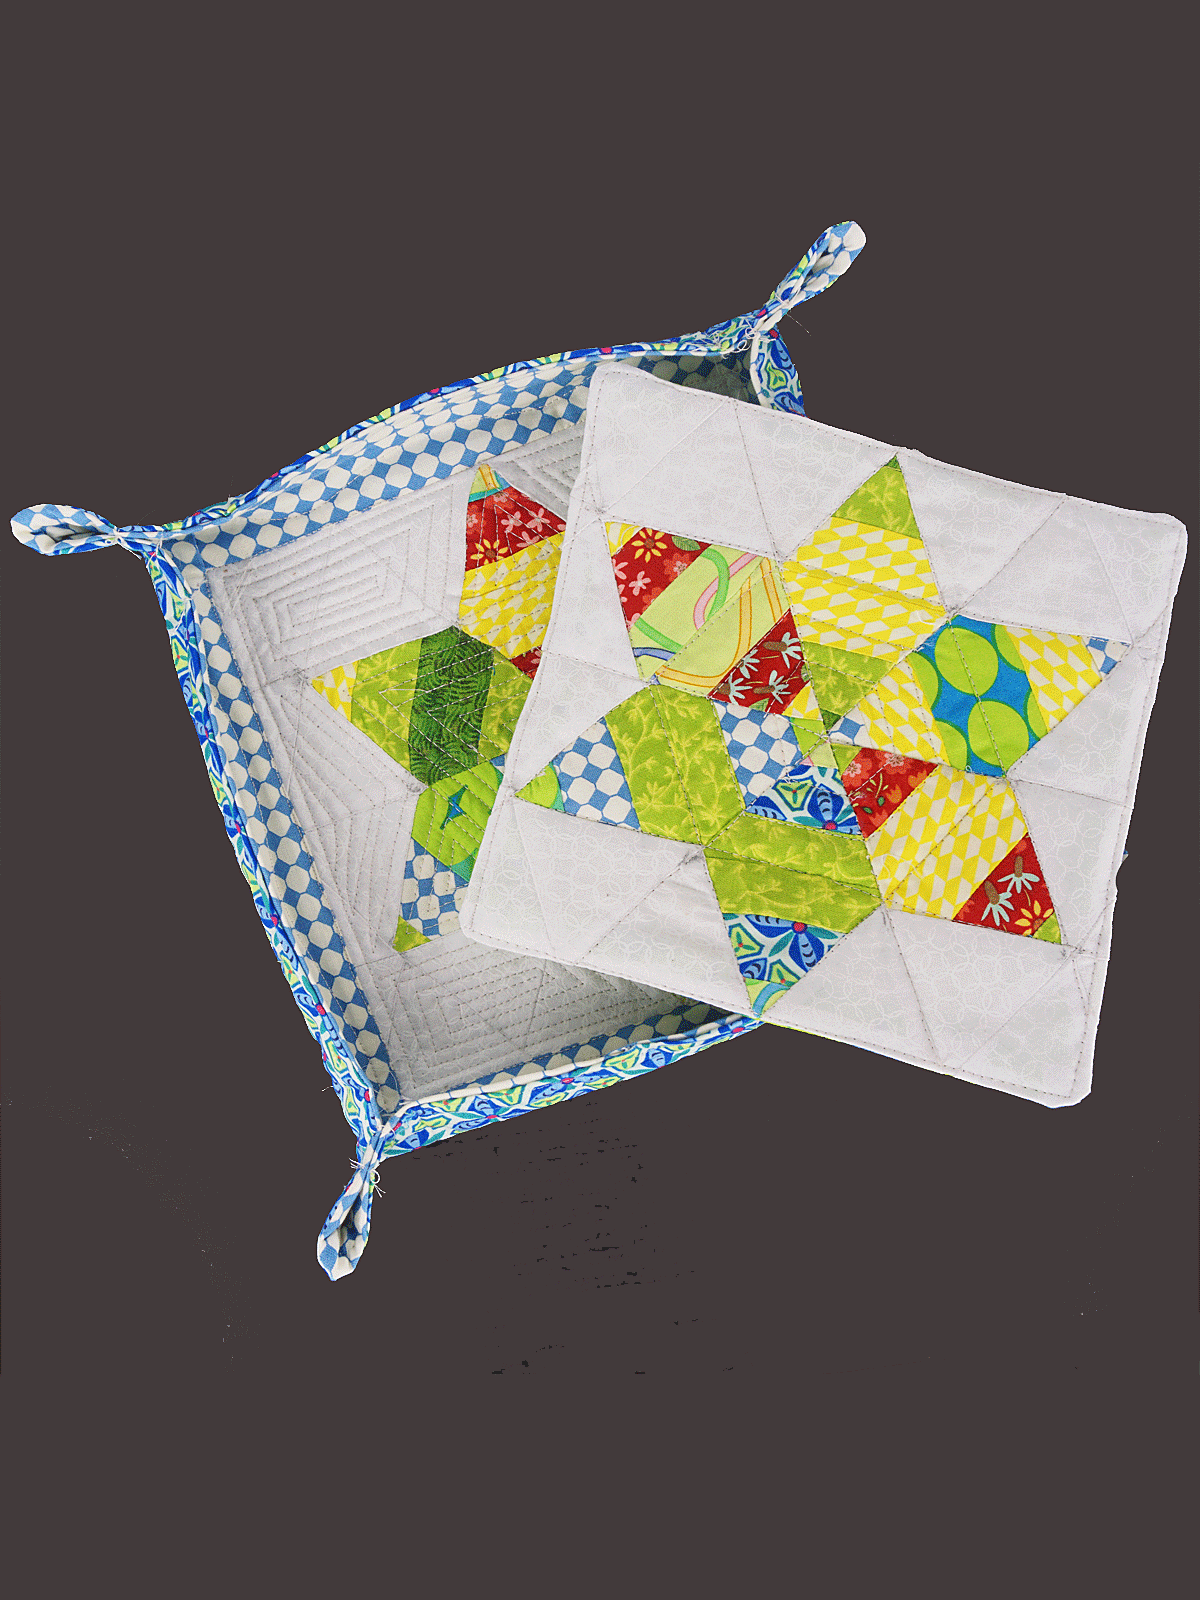
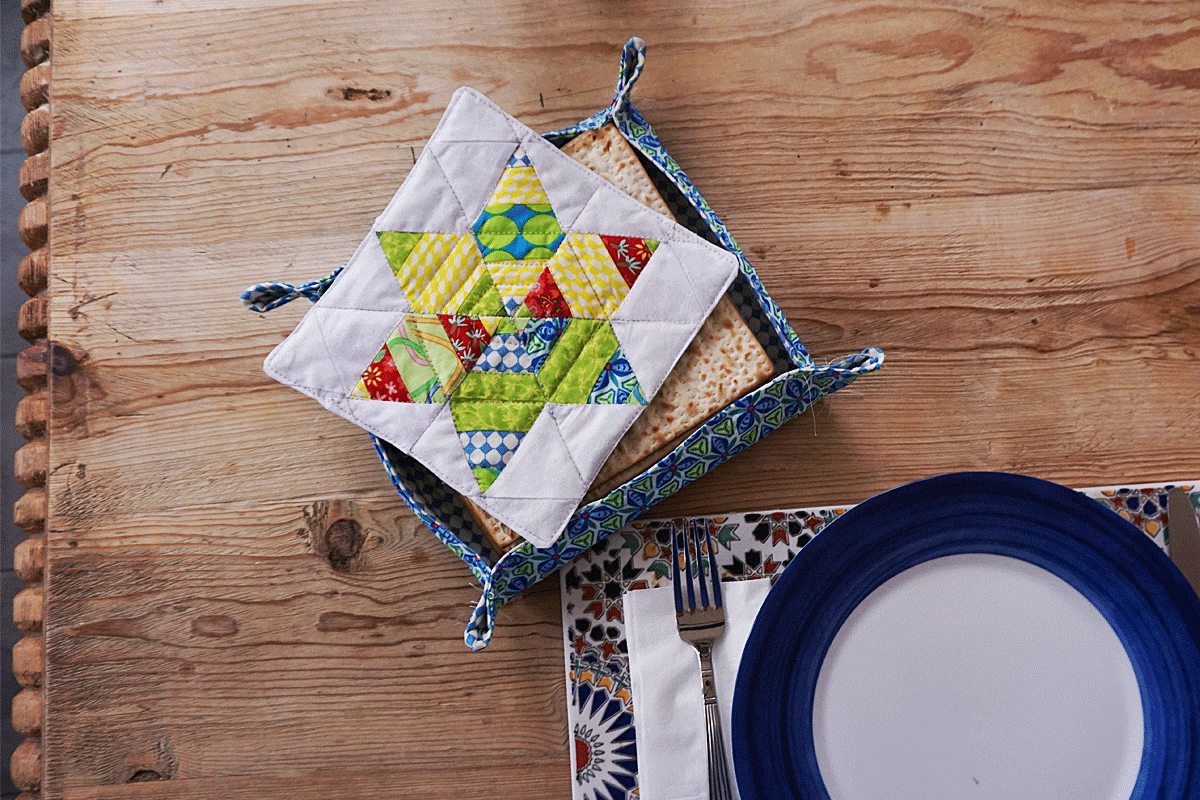
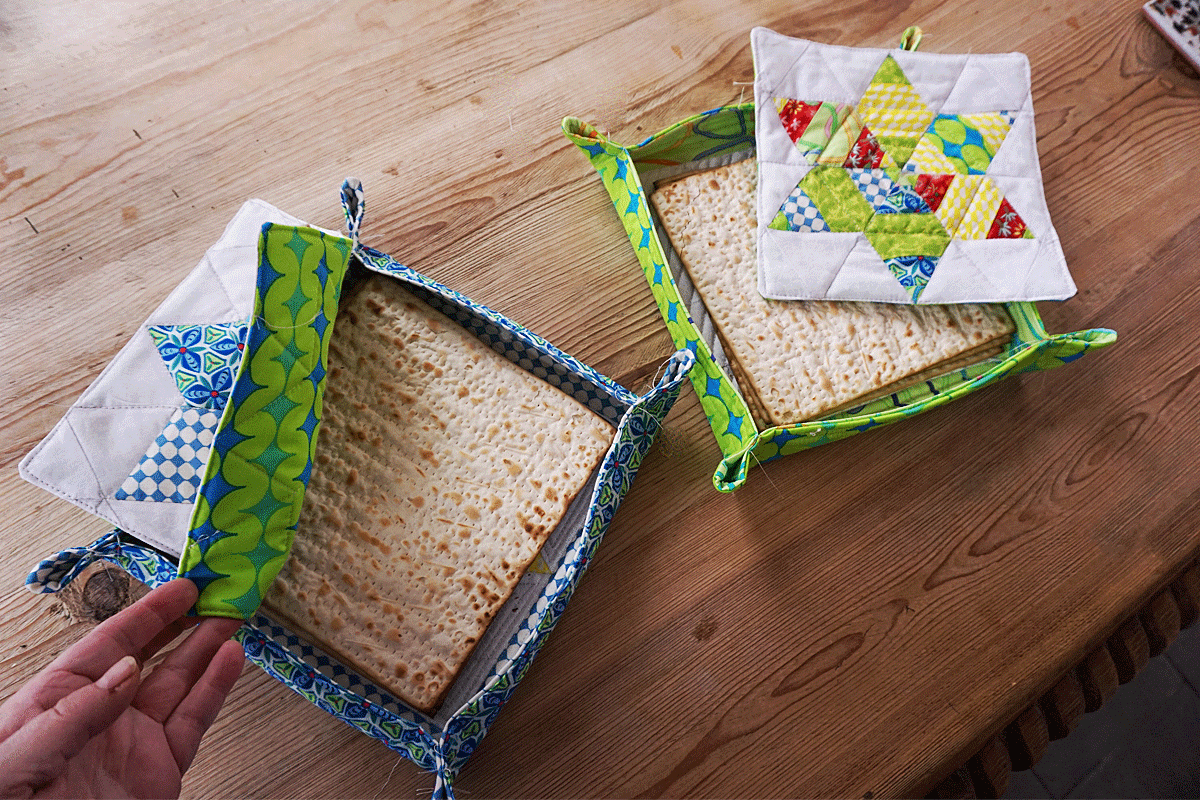
Sew a Matzo Tray with a Matching Cover for Passover
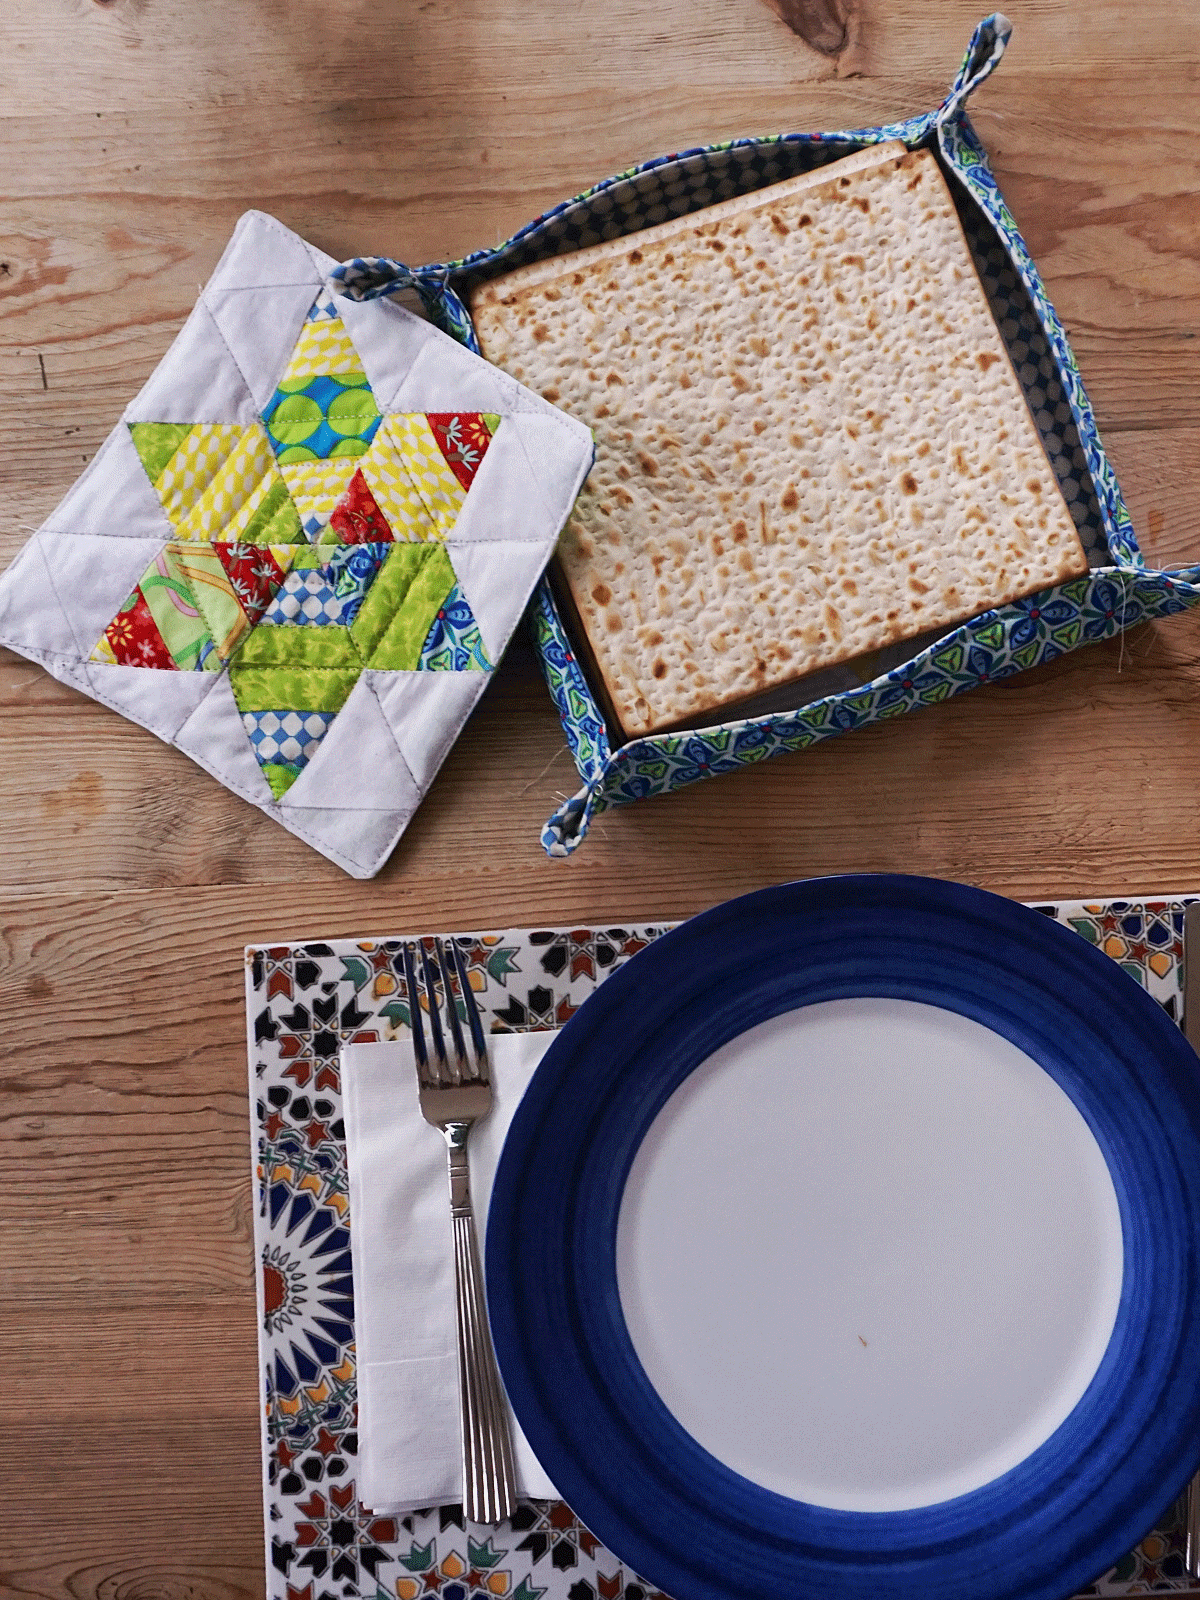
During the Passover Seder, the matzo is covered on the Seder table. Lots of us have fancy matzo covers for our annual Seder, but during the rest of the week when we are eating matzo at most meals, we usually just keep it in the box. So boring! This cute and fresh matzo tray with a matching cover is just for fun during the rest of the week—so much prettier on your table than that cardboard matzo box. And, what a great gift!
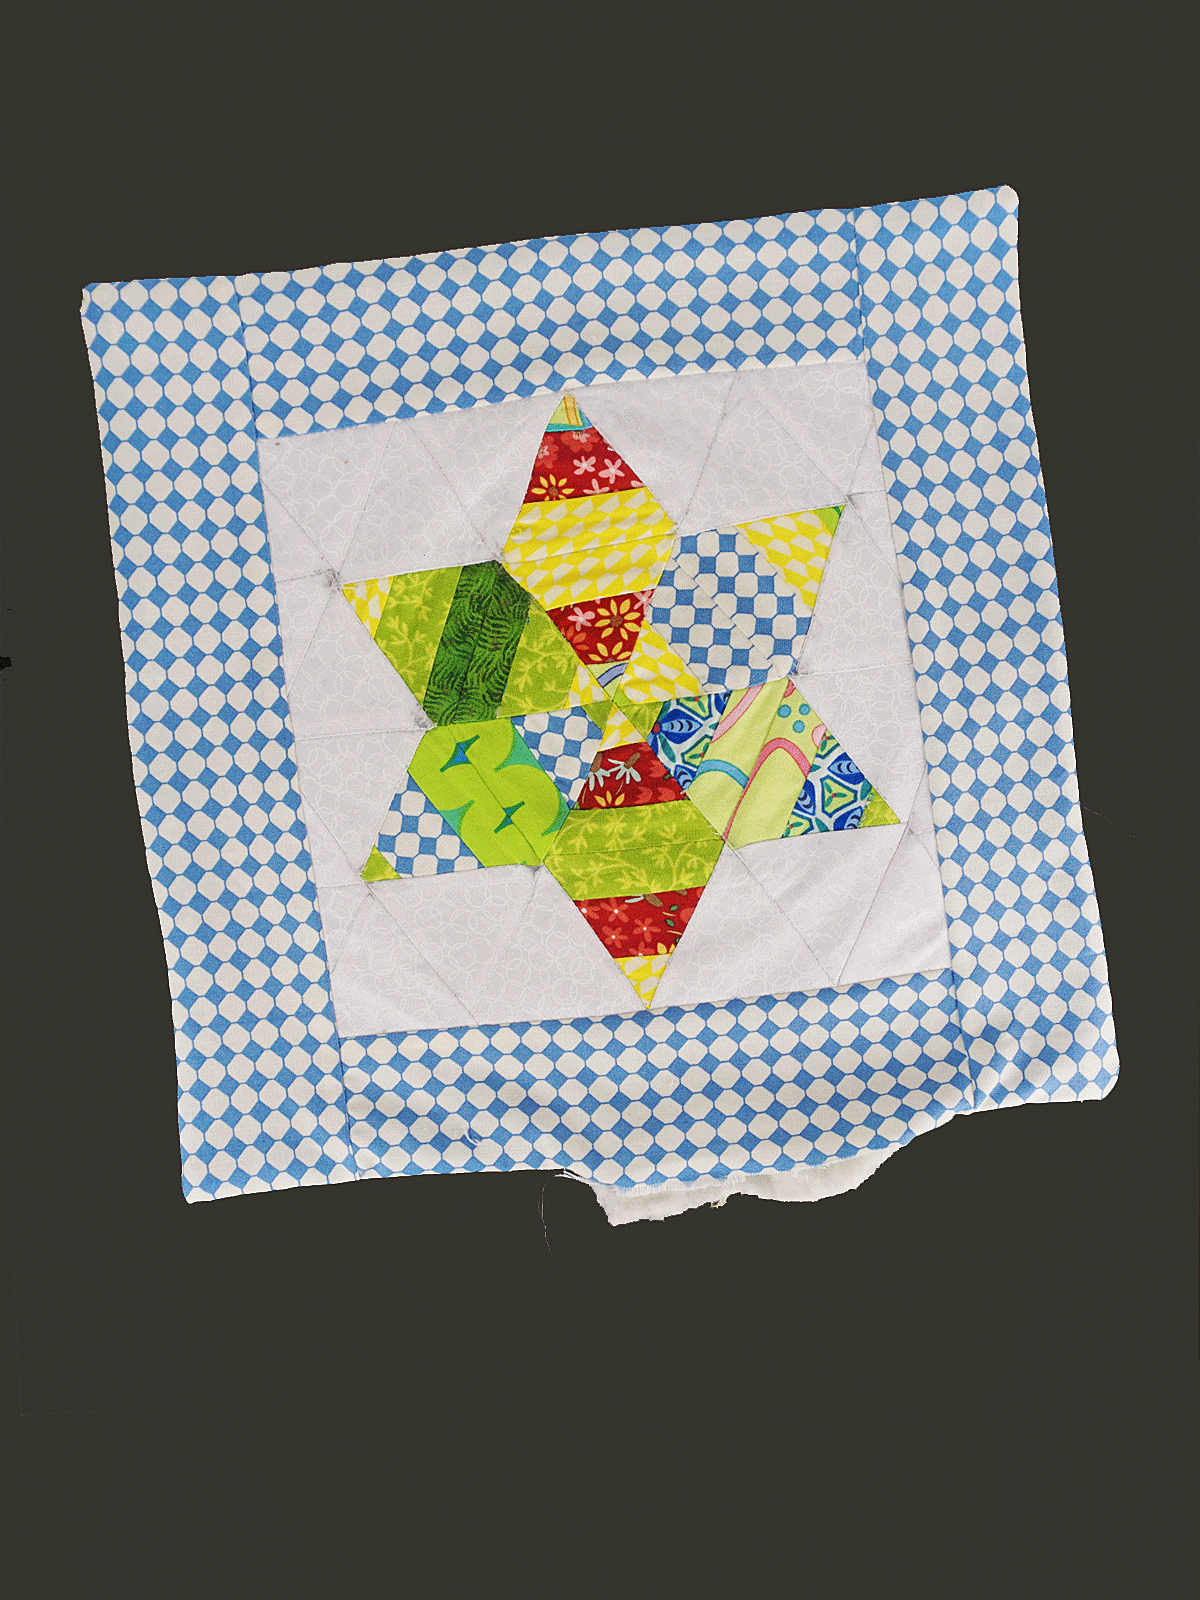
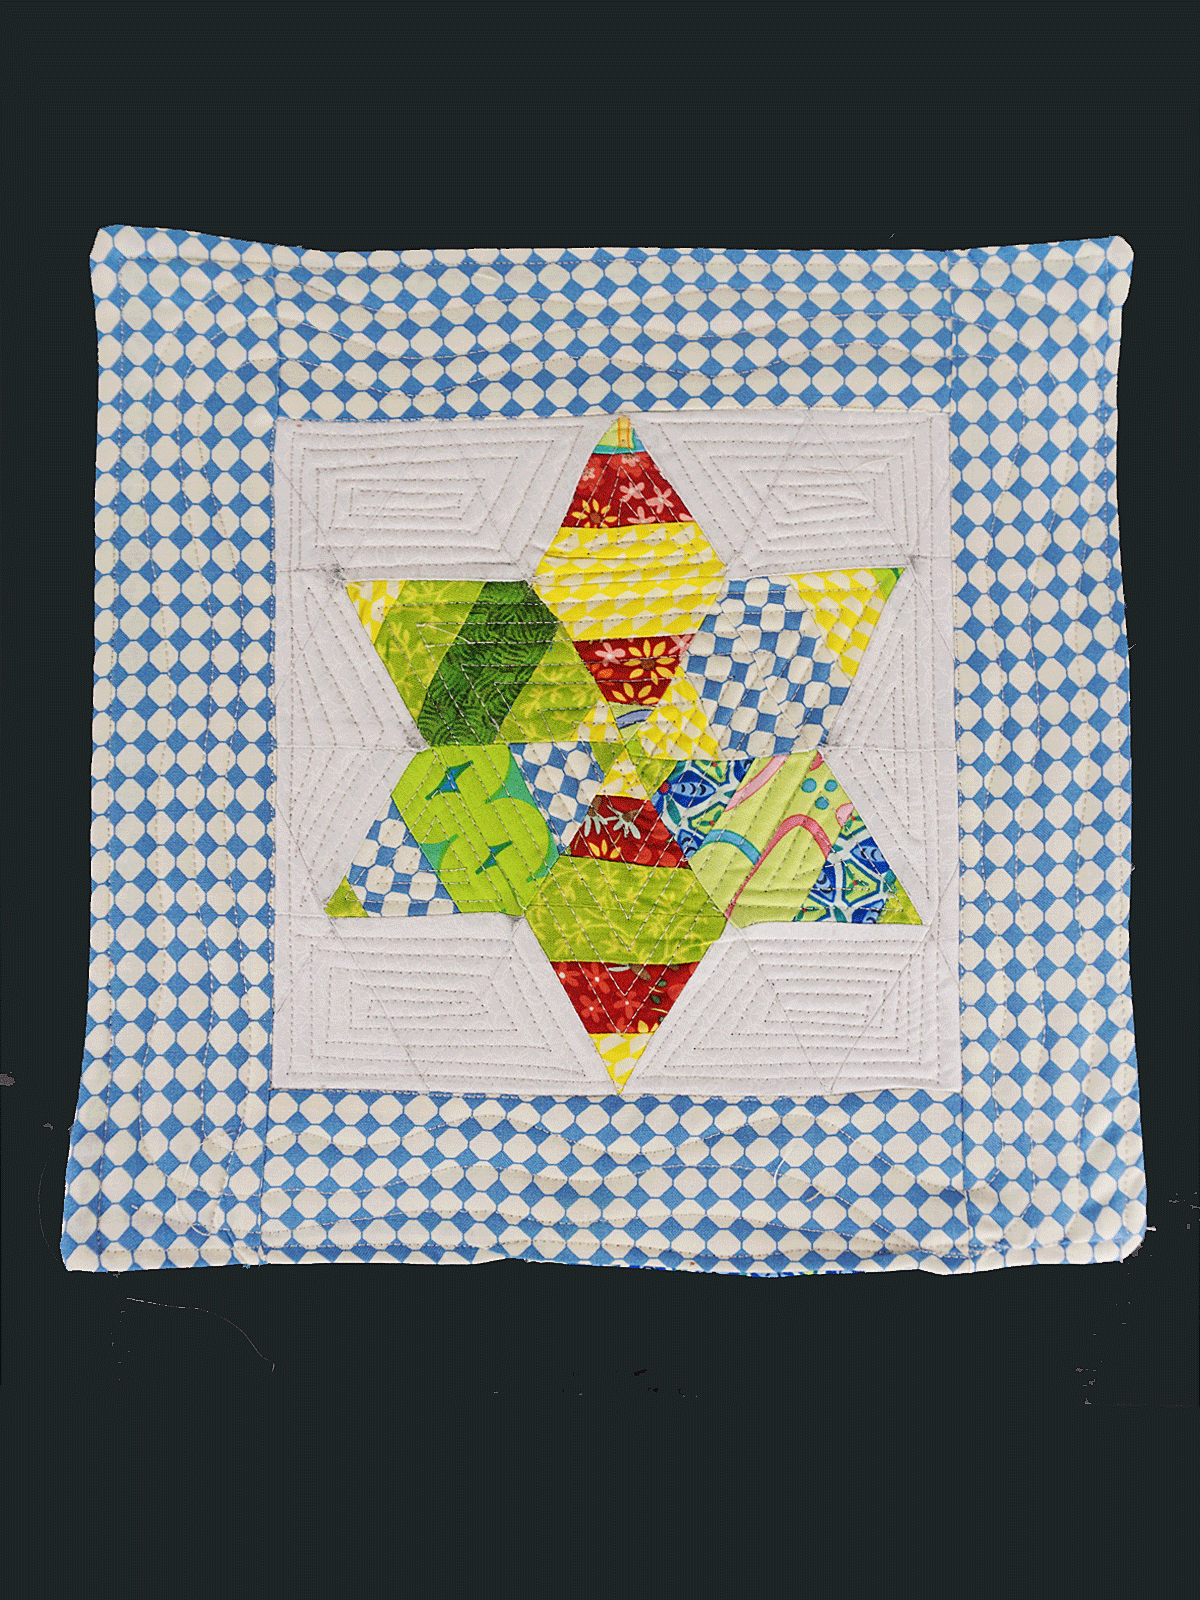
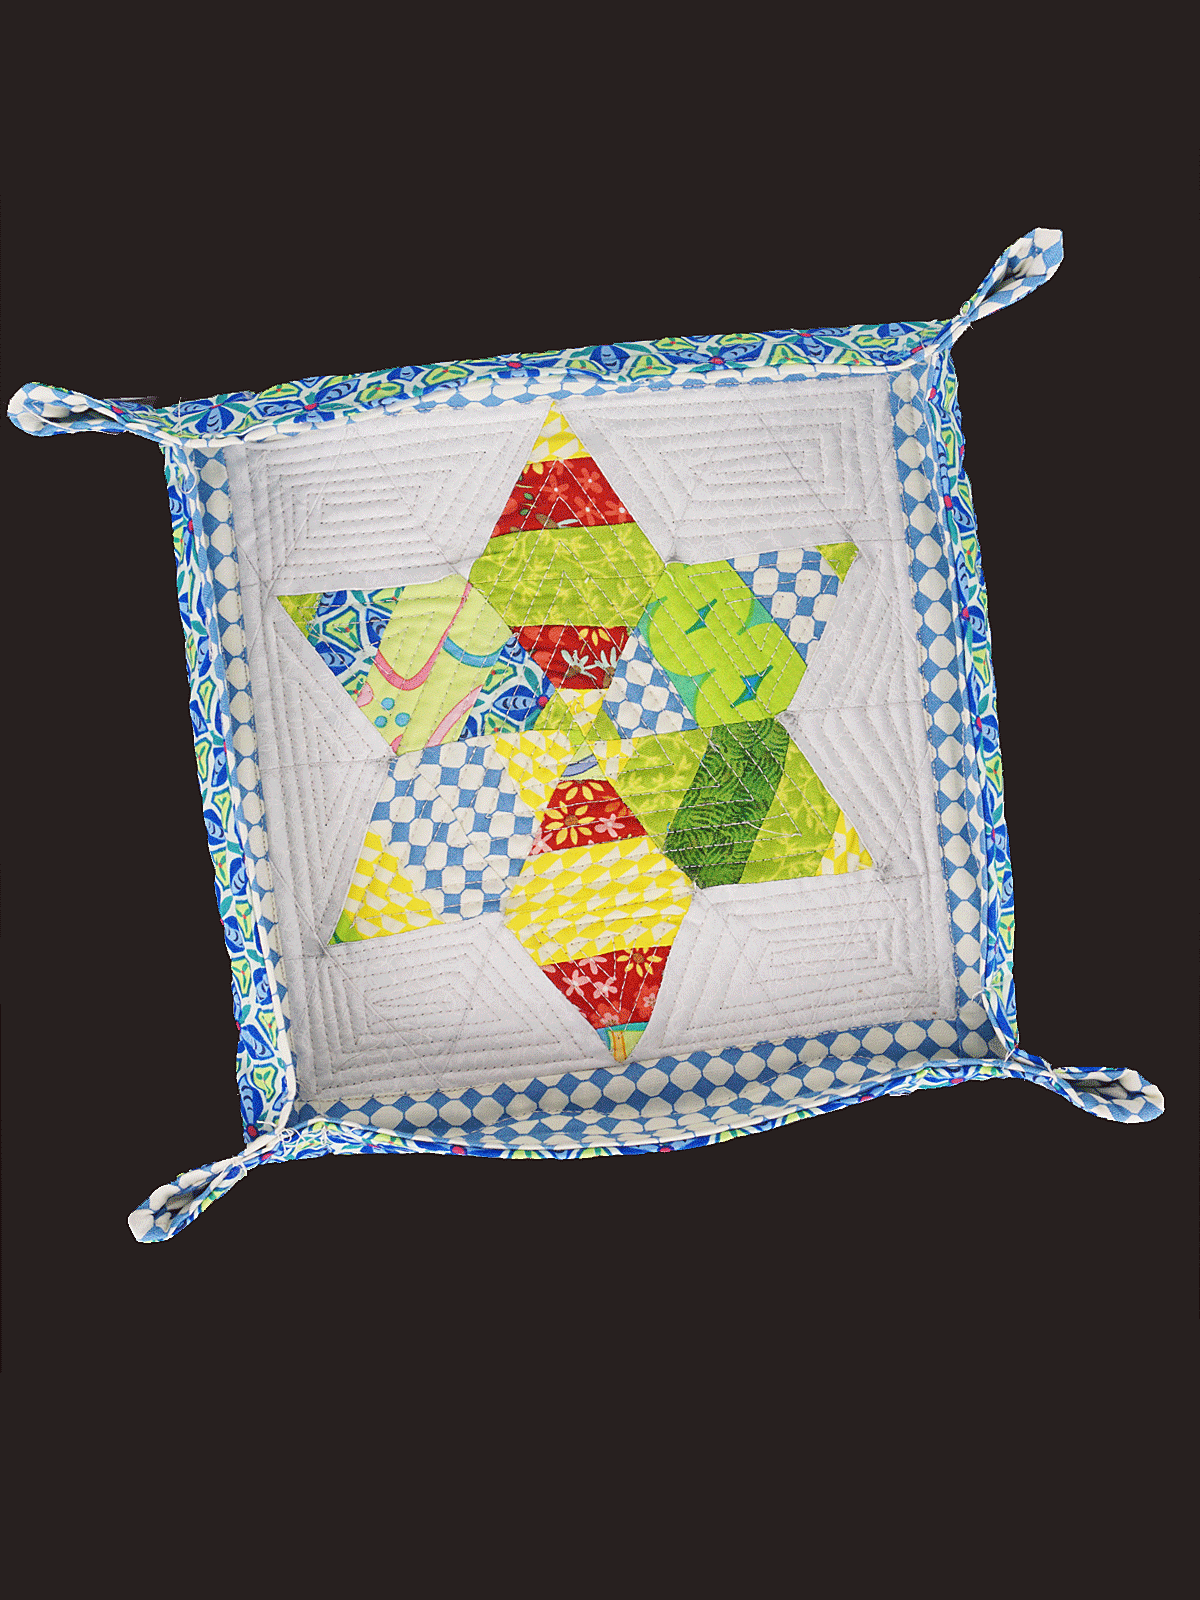
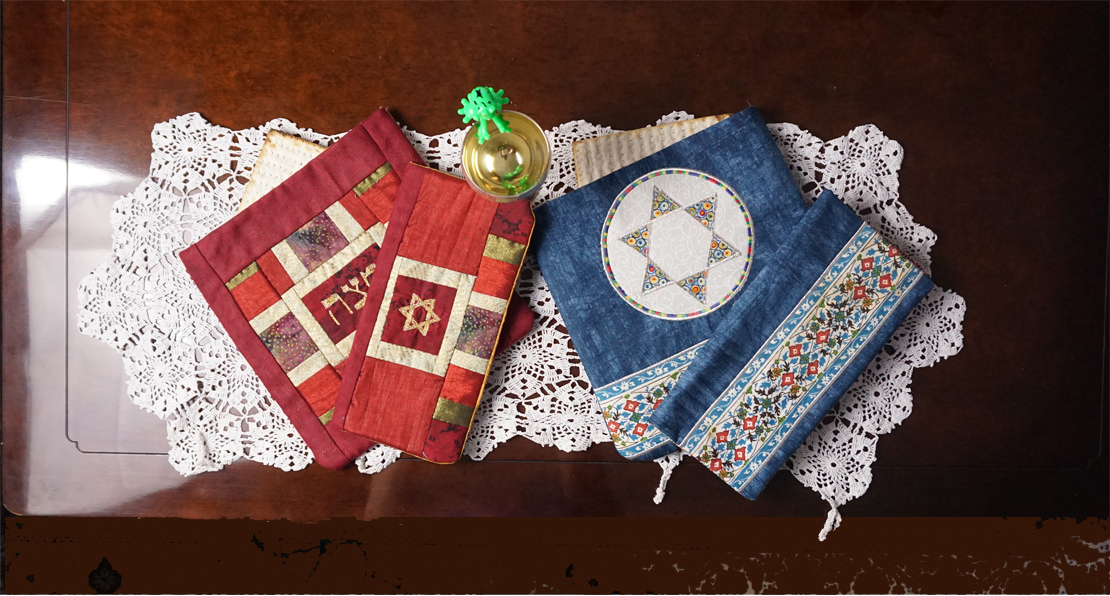
I have chosen to make this bright star in the center of my fabric tray, and a matching one on the top of the cover. You can alter the design or replace it with whatever you want—it’s your creation.
You can also use the pieced star outlined in the project as a mug rug, or sew three of them tougher for a cheerful table runner! Just make the basic square—border and bind as you wish.
Materials to Sew a Matzo Tray and Matching Cover
Materials Needed for the Matzo Tray
(approx. 7 ½” square finished)
- Backing and batting
- Each 13 ½“ square
- Fabric for star points and background
- 1/4 yard each of six or seven fabrics or scraps plus a 2 ½” strip for the border on the tray
Materials Needed for the Cover
(approx. 7 ½” square finished)
- 9” batting
- 9” square piece of backing fabric
- Fabric for star points and background as above
Additional Supplies
Instructions to Sew a Matzo Tray
Make the Star Points
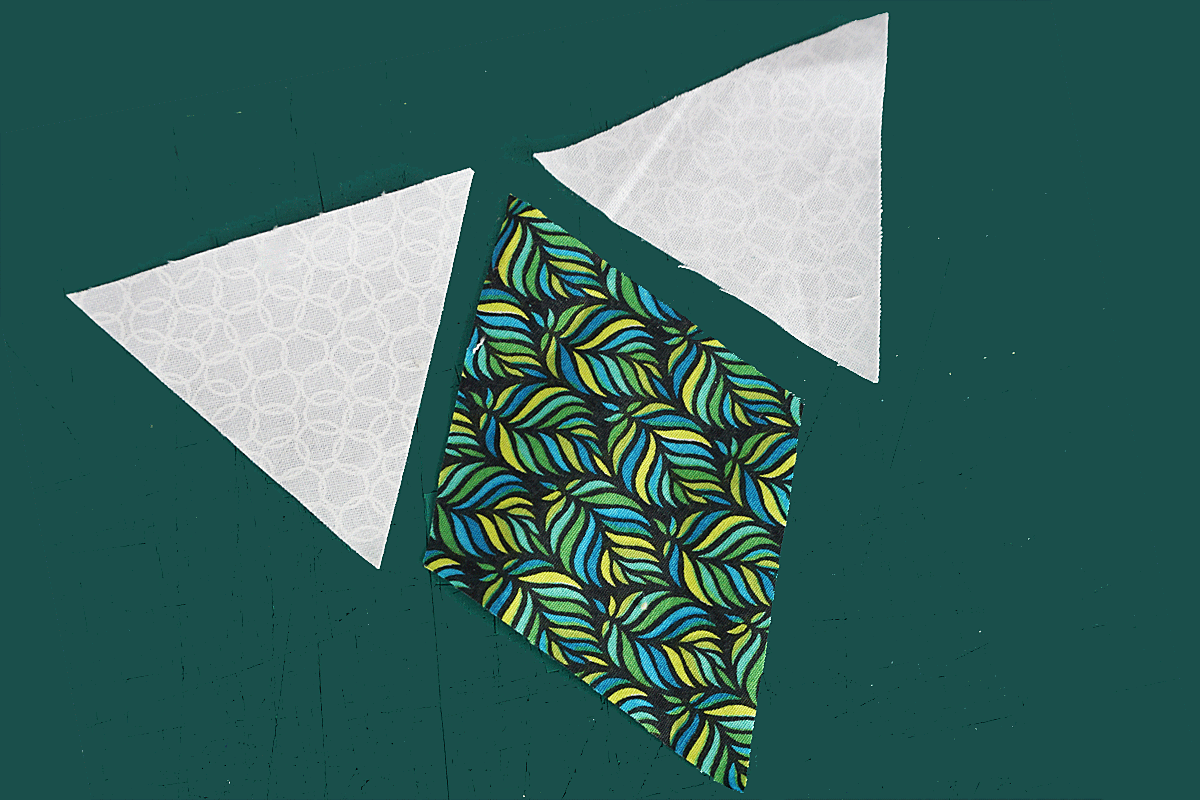
Sew together three strips of fabric—each strip can be from 1” to 1 ½” wide and about 8” long. I started with three strips each 1 ¼” wide.

Press and trim to 2 ½ “. I find these thin strips can get wonky when sewing and pressing so I prefer to make the finished units a little wider than 2 ½” so I can trim them to size when finished.
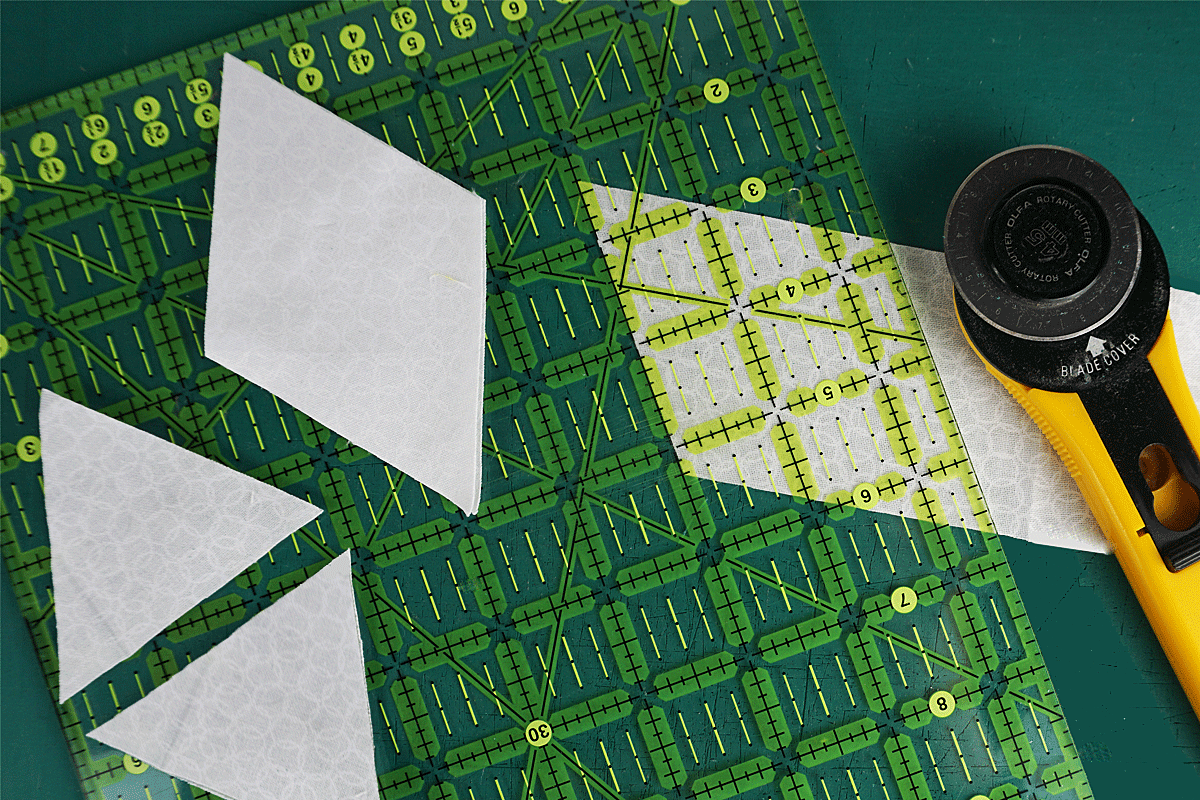
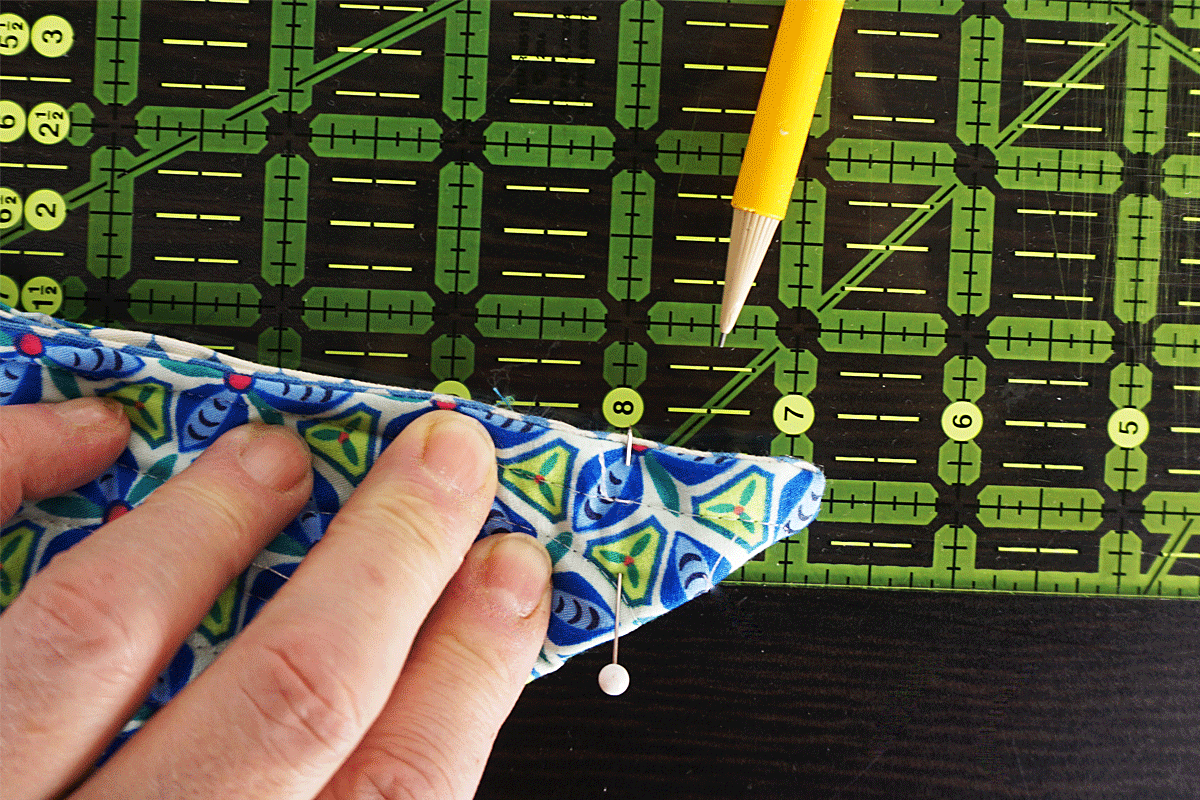
There are a lot of ways to cut equilateral triangles; using special rulers, using the lines on the ruler or using the lines on the cutting mat. But they all involve flipping the fabric back and forth which can be confusing, so I have a different way.
Find the 60-degree line on your rotary ruler and line it up along the top edge of the fabric strip with the corner of the ruler at the corner point of the strip. This will leave a small wedge (it looks like half a triangle) on the front edge of the fabric. Trim that wedge off. That establishes your 60-degree angle. Note: If you place the ruler on the 60-degree line and you see a very long and wide triangle to cut off, you need to turn the ruler around. You only want to cut off what looks like half of a small equilateral triangle.
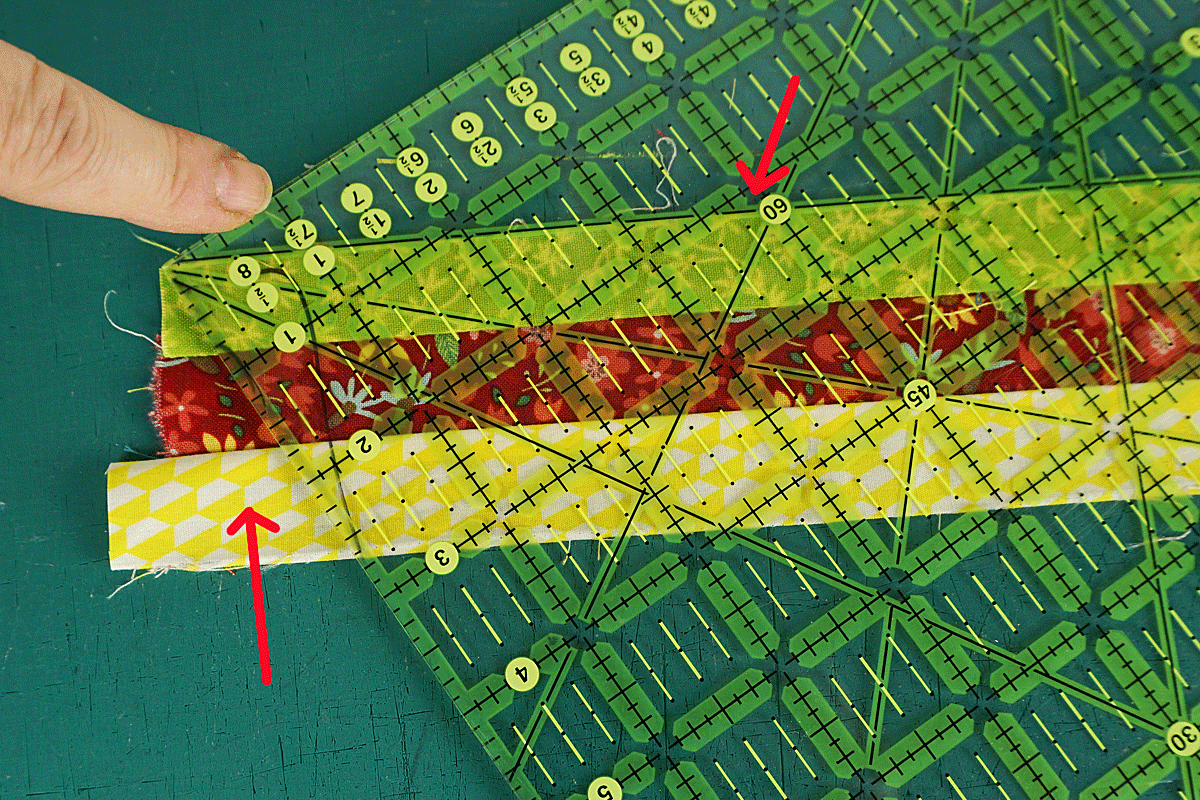
The wedge outside the ruler should look like this
If the wedge is large like this, you need to turn the ruler around.
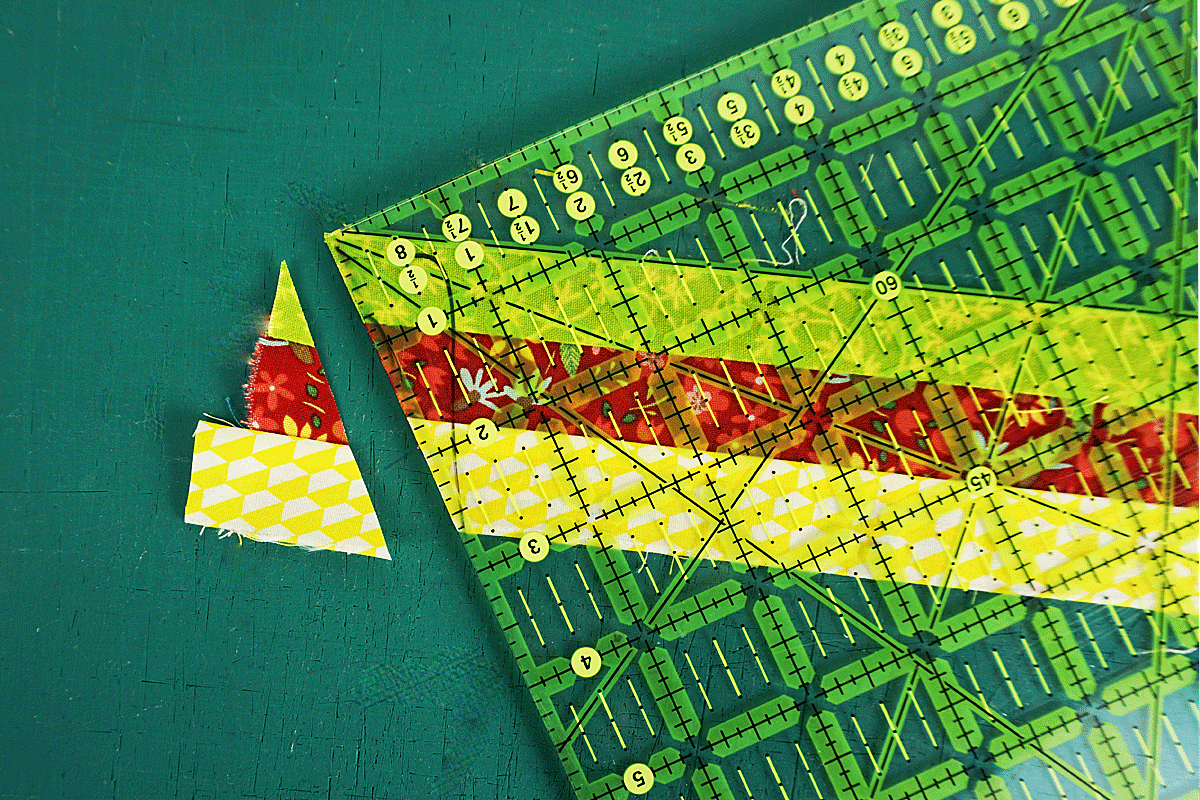
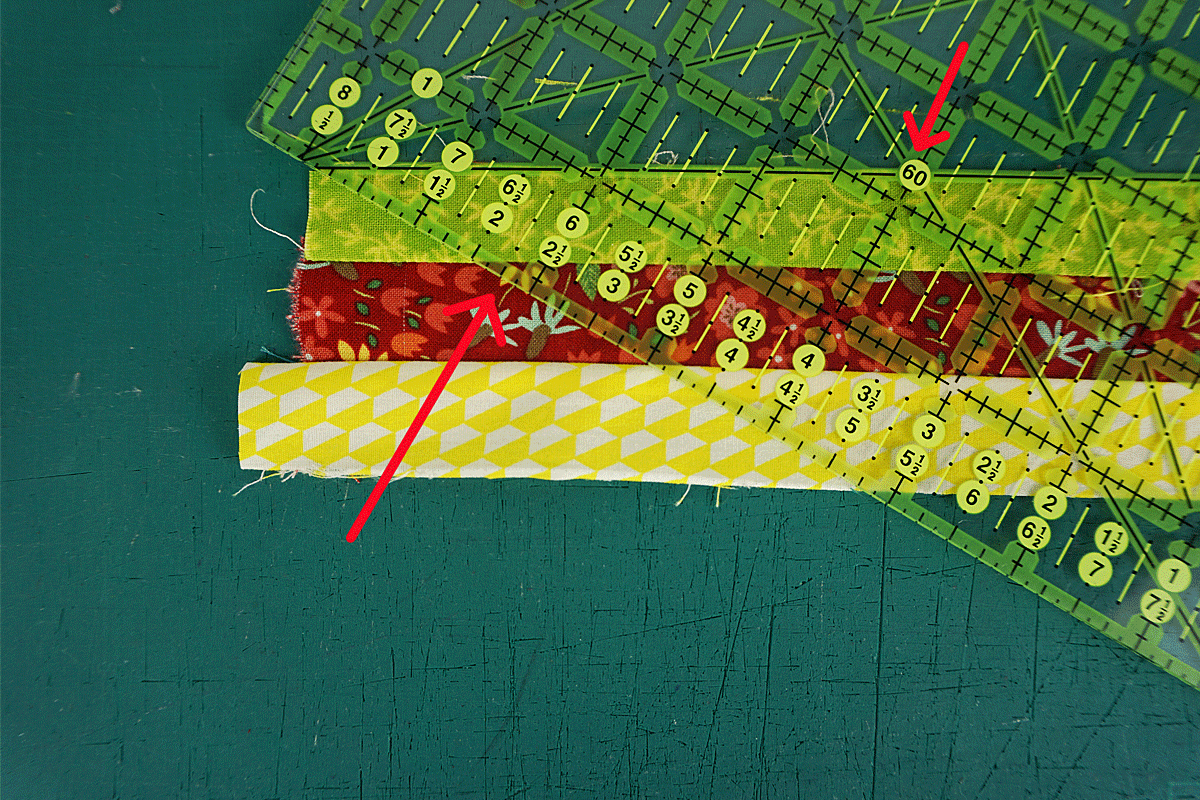
Using that cut edge as your guide, line up your ruler to cut 2 ½ inches into the fabric strip. This will yield one diamond shape. Cut another diamond from your strip. You only need two of these diamonds.
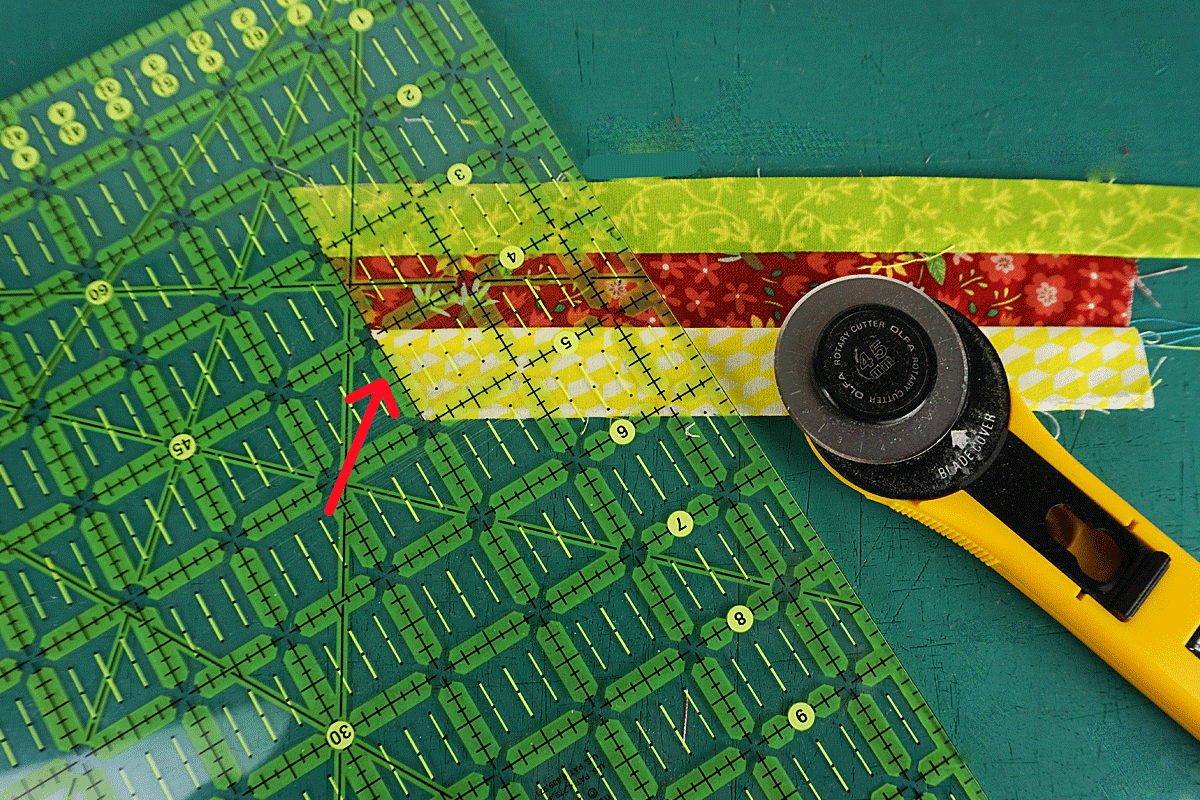
Line the measurement up with this cut edge to cut at a 60-degree angle.
Now cut those diamonds in half at the widest point and you will have two different looking equilateral triangles. Match up the first one from each diamond and pin together; match up the other two, pin together and set aside for the cover.
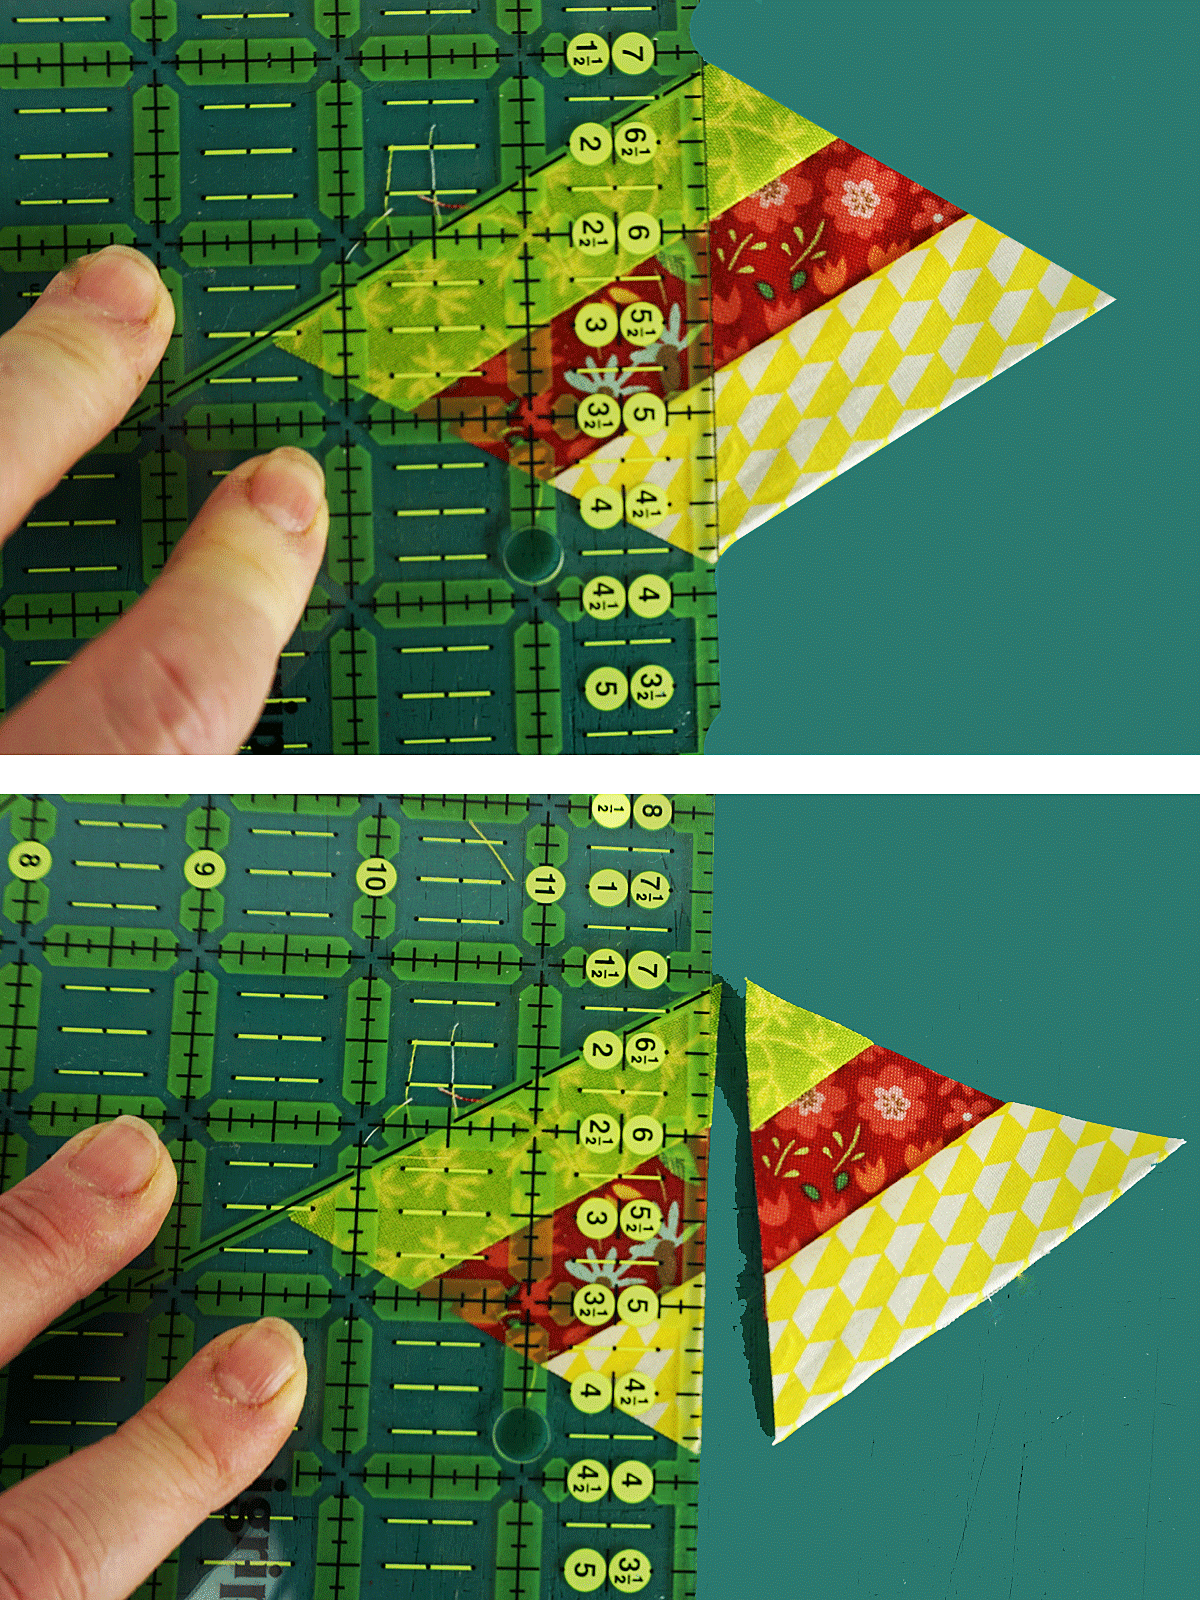
Cut each diamond in half through the widest point to form two equilateral triangles.
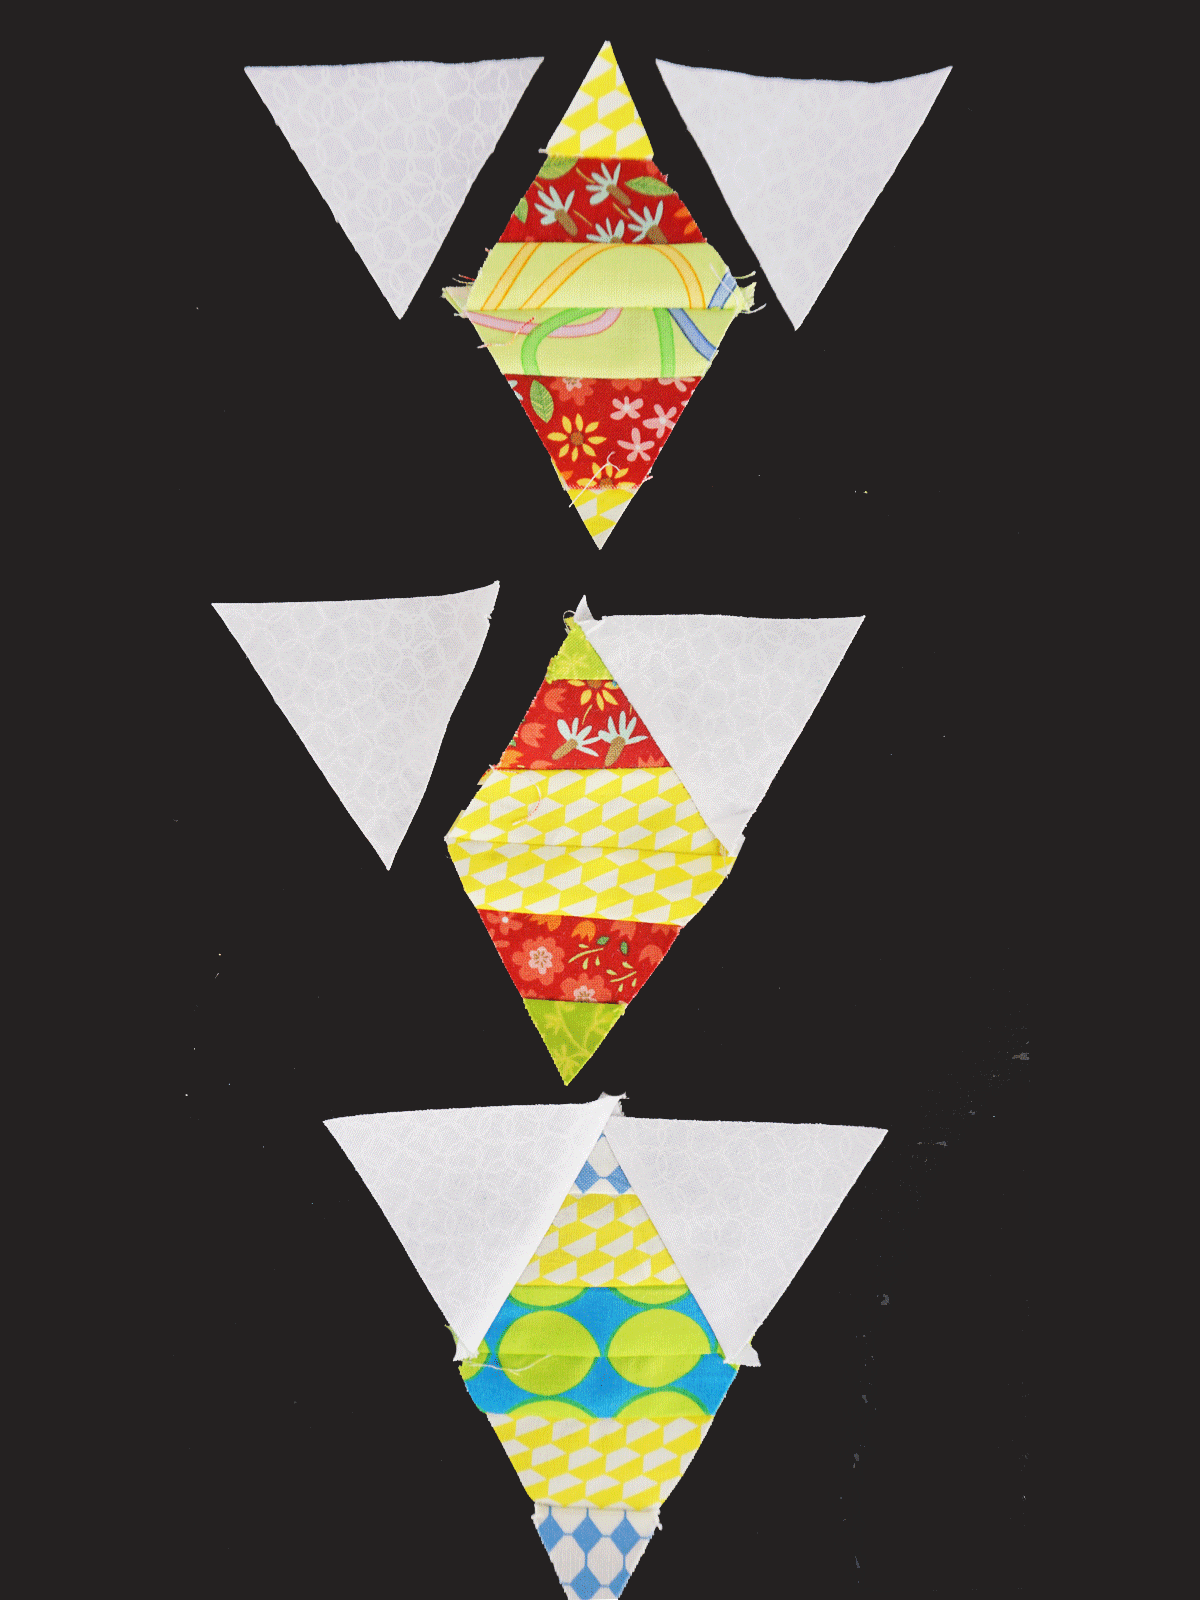
Turn the triangles so that the strips are horizontal in the triangle. Put the two matching triangles right sides together and sew ¼” along the base. This will form a diamond shape with all the fabrics running horizontally. Repeat until you have six different sets of diamonds—I think they are more interesting if they are all different, but you can do it any way that you like. I used the first set of each for the tray and the second set of each for the cover. That way they were similar but not identical.

You will get two different-looking triangles from each diamond.
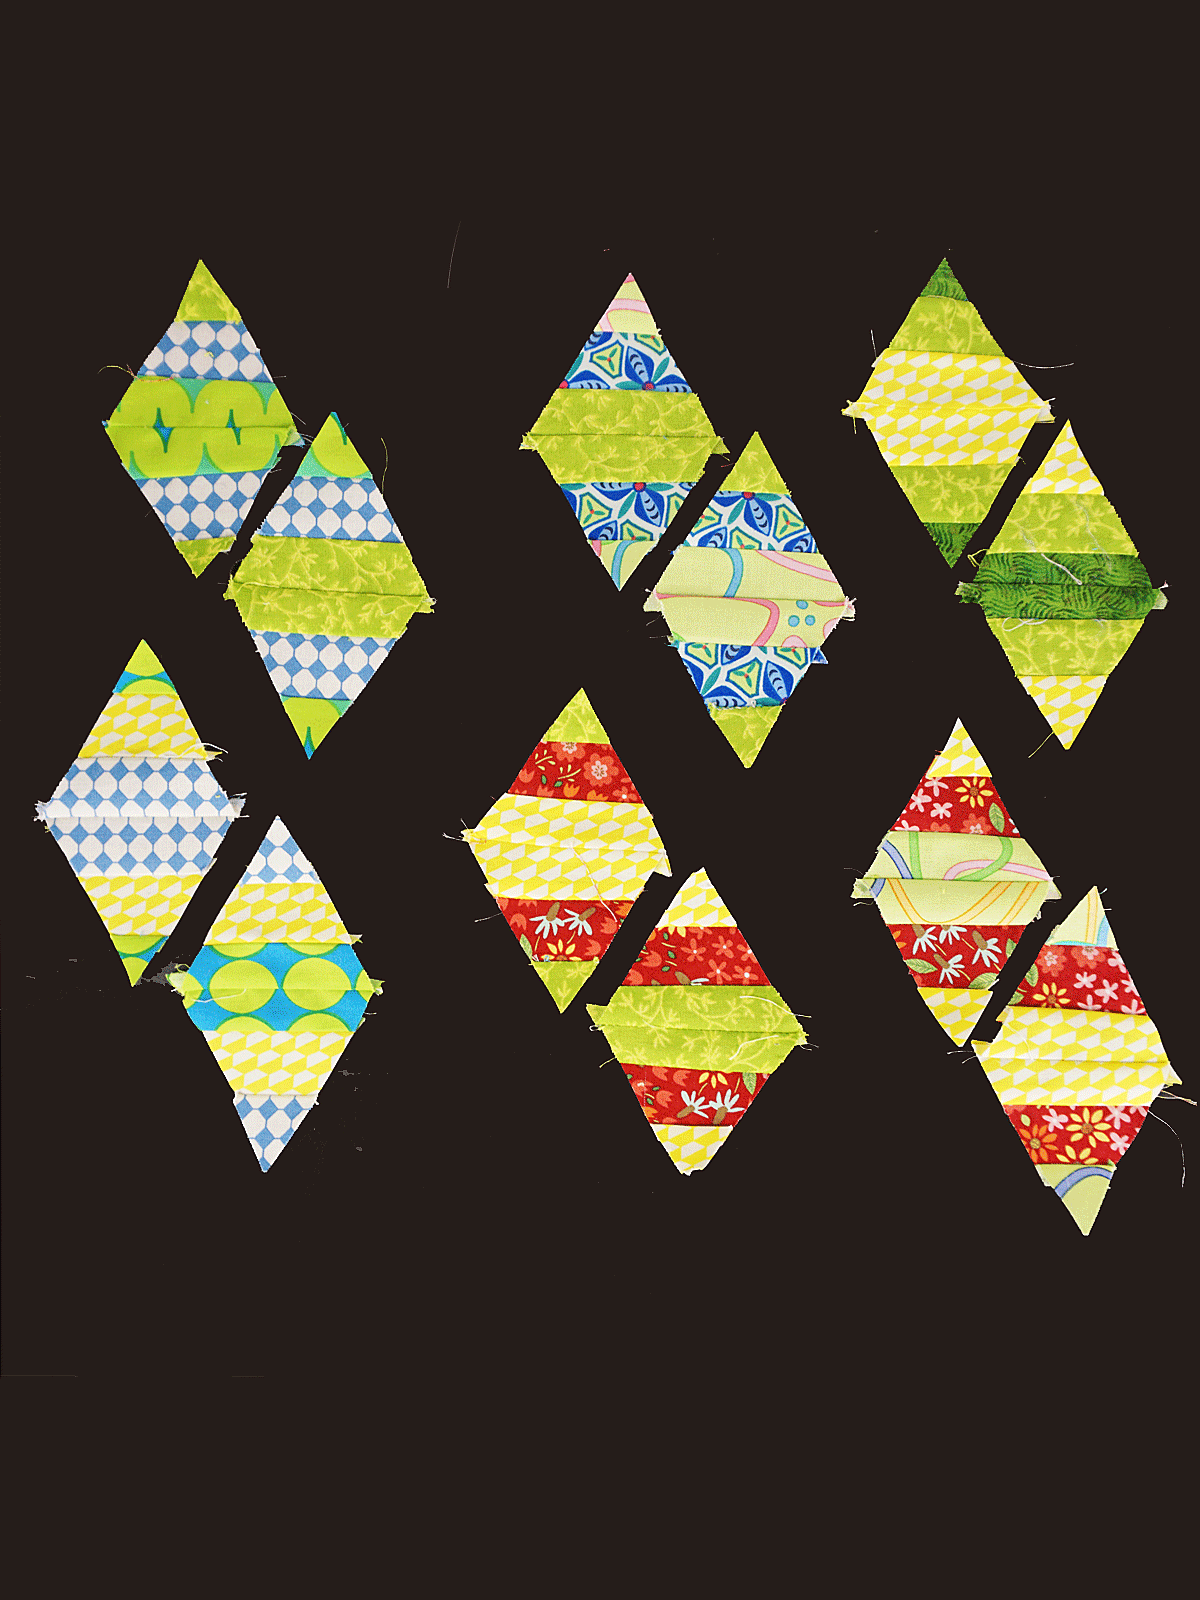
I like to use one set for the matzo tray and the other for the cover.

The two different sets will create different but similar stars.
Press.
Completing the Fabric Tray
The background strips will be cut the same way. Start with a strip of background fabric 2 ½” wide, and establish the 60-degree angle. Line your ruler with that cut edge and cut into the strip 2 ½” to create diamonds. Cut each of these diamonds in half at the widest point in the center. You will need 24 of these triangles for the matzo tray and 24 for the cover—48 in all, cut from 24 diamond shapes—or about 3 strips of fabric 1 ½” wide.
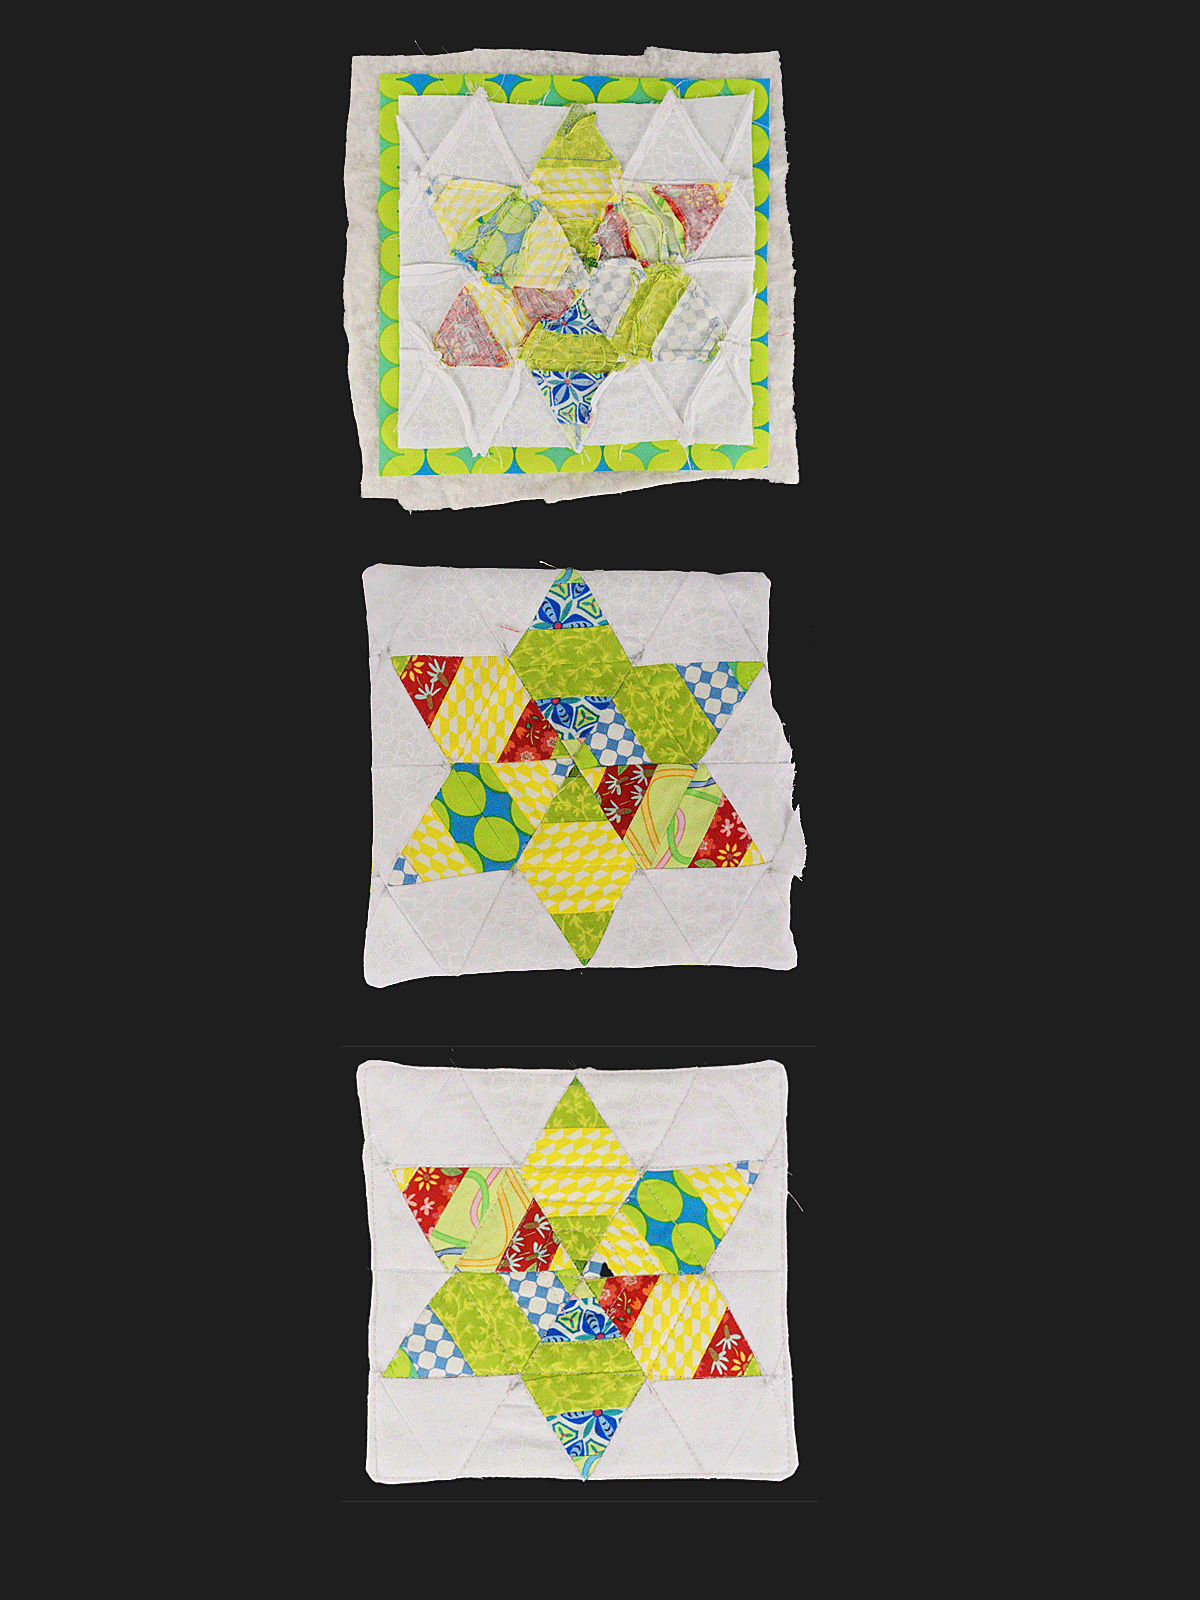
Sew a triangle to the outside edges of the tops of each of the strip pieced diamonds, positioned as shown. Take three diamonds and combine them to form half a star. Sew the two halves together to complete the star. Handle these pieces carefully and try to sew without pulling as it feeds. These edges are bias and can be stretched out of shape.
Sew one triangle to the outside edges of each diamond.
Now sew three background triangles together as shown and add these to the outside edges to create what appears to be a wide rectangle. Press well.

Sew three sections to form the top of the star and three to form the bottom of the star.

Sew these two halves together to form the star.
Press. If your star is not lying flat, just press using a spray bottle of water or set your iron to steam. Allow it to sit untouched until cooled.
Adding the Corners
Using the background triangles, sew three together. You will need four sets like this.
Add one of each set to the sides of the star.
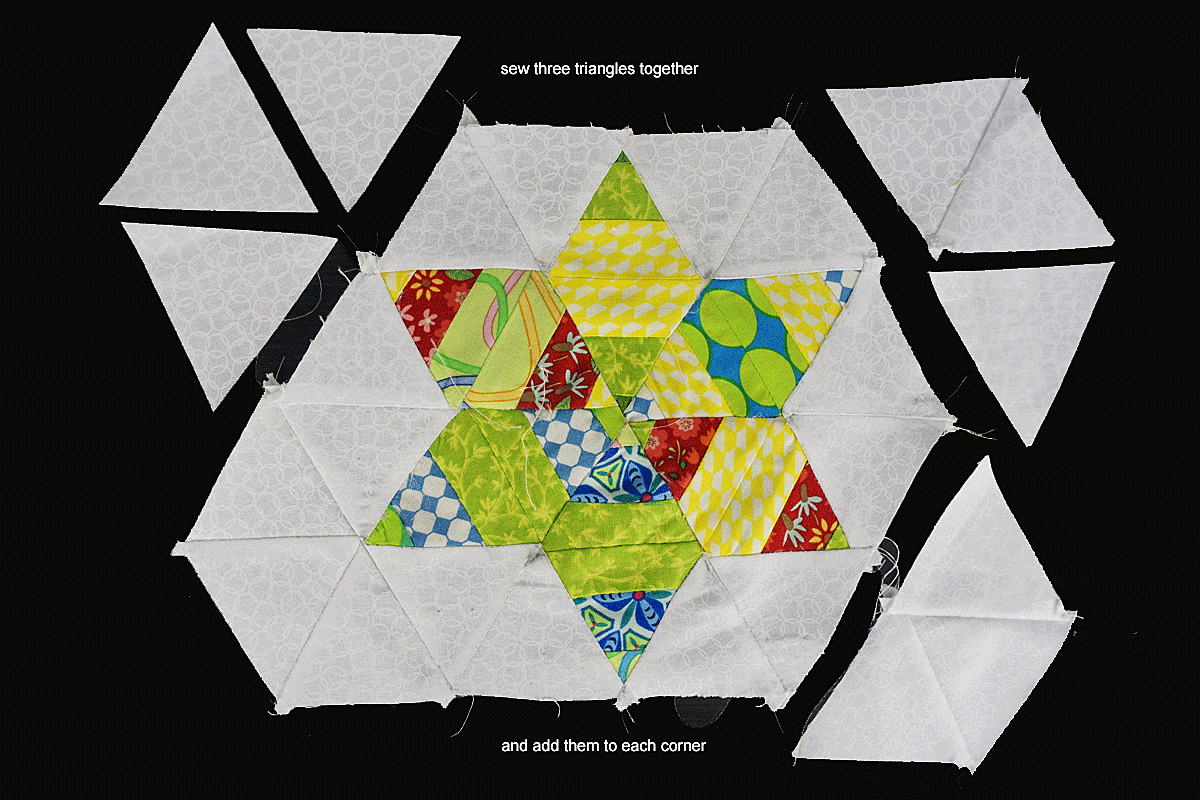
Sew together four sets of three triangles to add to the corners to form a rectangle shape.
Align your ruler so that the 4” line runs through the center of the center diamonds and cut the edge. Repeat on the other side.

Add a 2 ½ ” strip of border to all sides. Press.
Layer the batting underneath the backing fabric, and layer with right sides of backing and top together. Pin to hold in place.
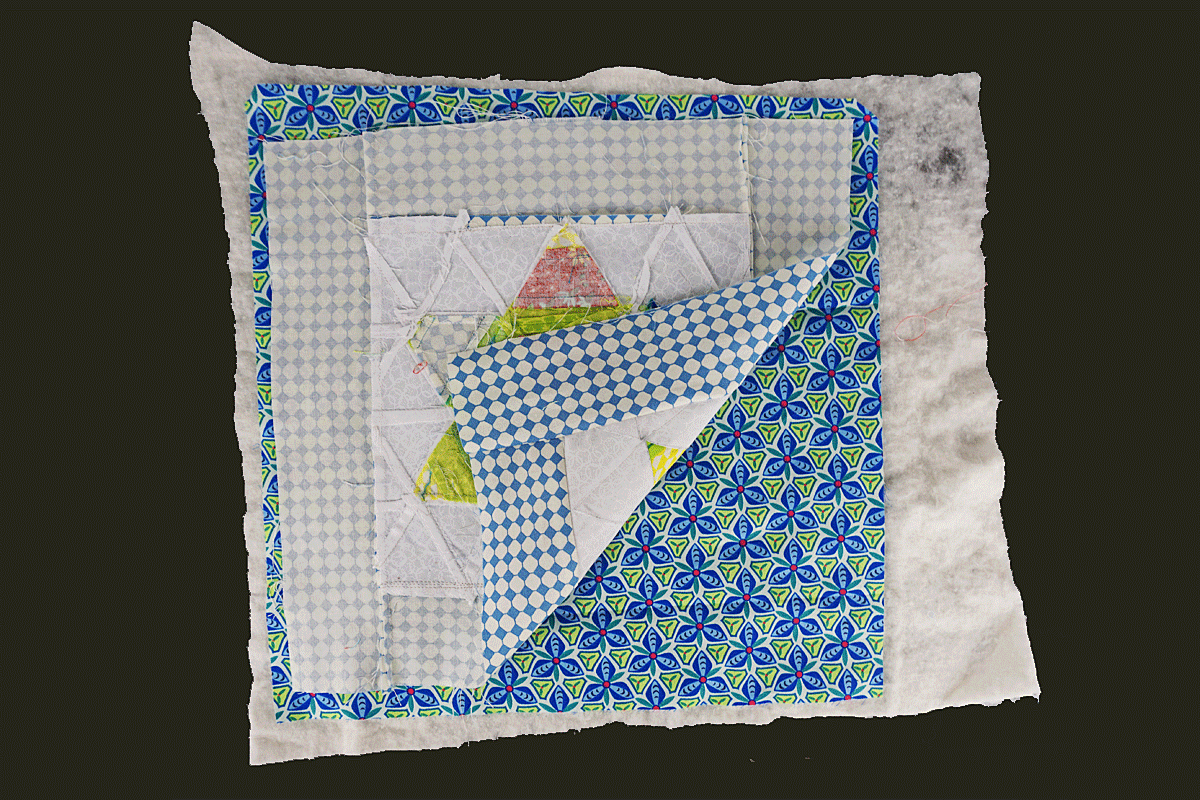
Sew around the edges, leaving a 2” gap in one of the sides to turn outside right again. Tuck that opening in and pin so it lines up with the sewn seam. Sew 1/8” from the edge to stabilize and close up that gap. Do a line of stitching along the inside edge of the border strip, and do any functional quilting you want at this point. The more quilting you do, the flatter the tray will lay.
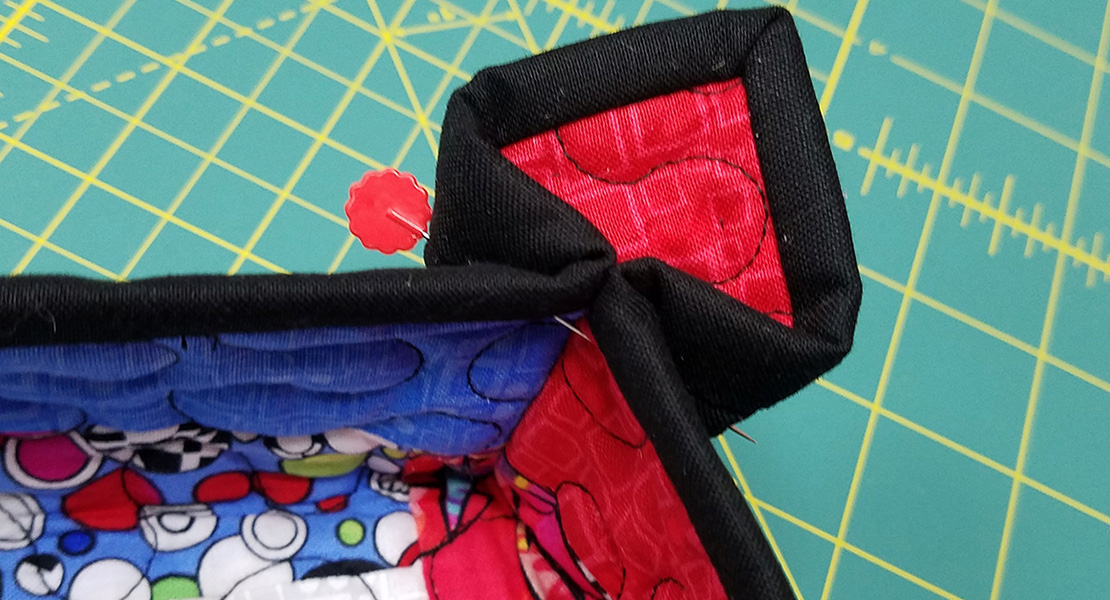
Turn up the corners as shown and stitch straight up one inch in from the corner. I find that the sides stand up a bit straighter if you then create a little “wedge” by sewing ¼” out from the top into the same bottom point. Repeat for all four corners and the little fabric matzo tray is completed.
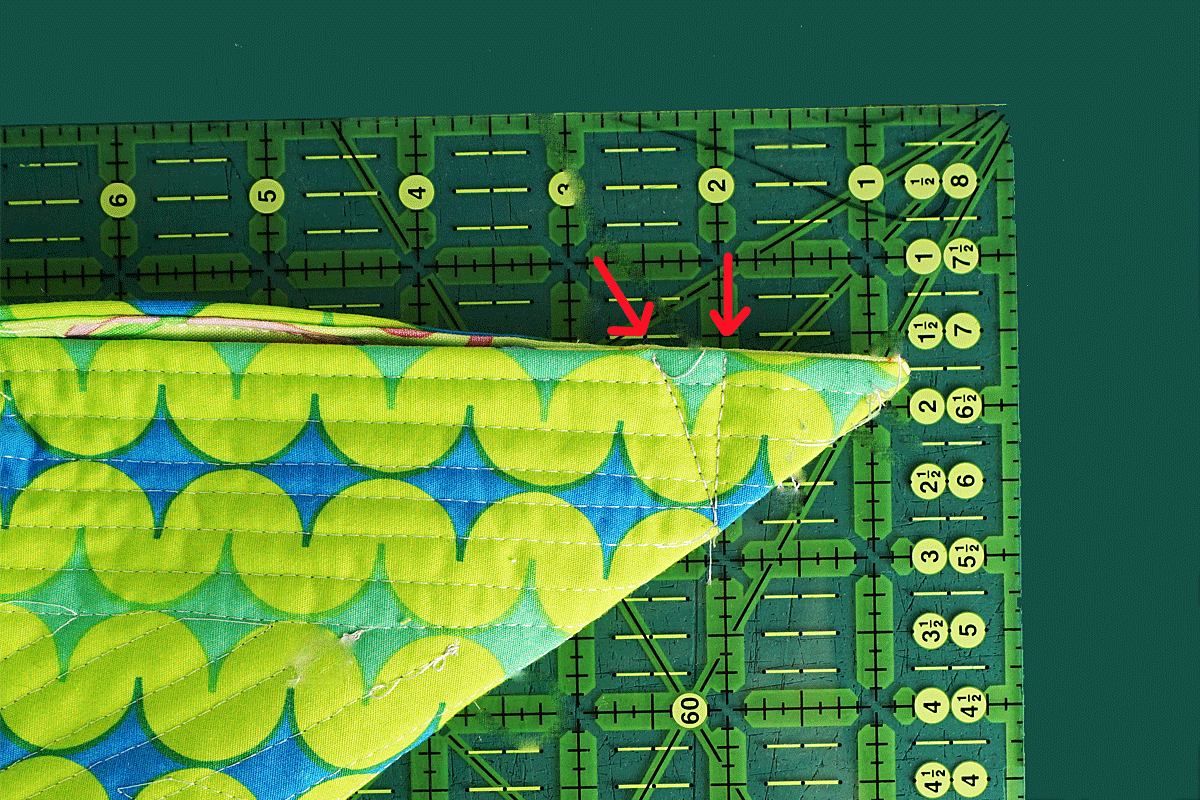
Once the initial line of sewing is done, moving towards the center and creating a “triangle” stitch helps hold the sides up.
Note to Make the Project Even Easier
I love all the different fabrics in the mix, but if you don’t or you want a really quick project, just cut 2 ½” strips of your chosen “star” fabric or fabrics and cut diamonds from them as you did for the background triangles. Don’t cut them apart. Simply add the background triangles to the sides of each diamond and complete them as above.

Cut the initial diamonds but do not cut them apart into triangles.

Add the background triangles and complete as described above.
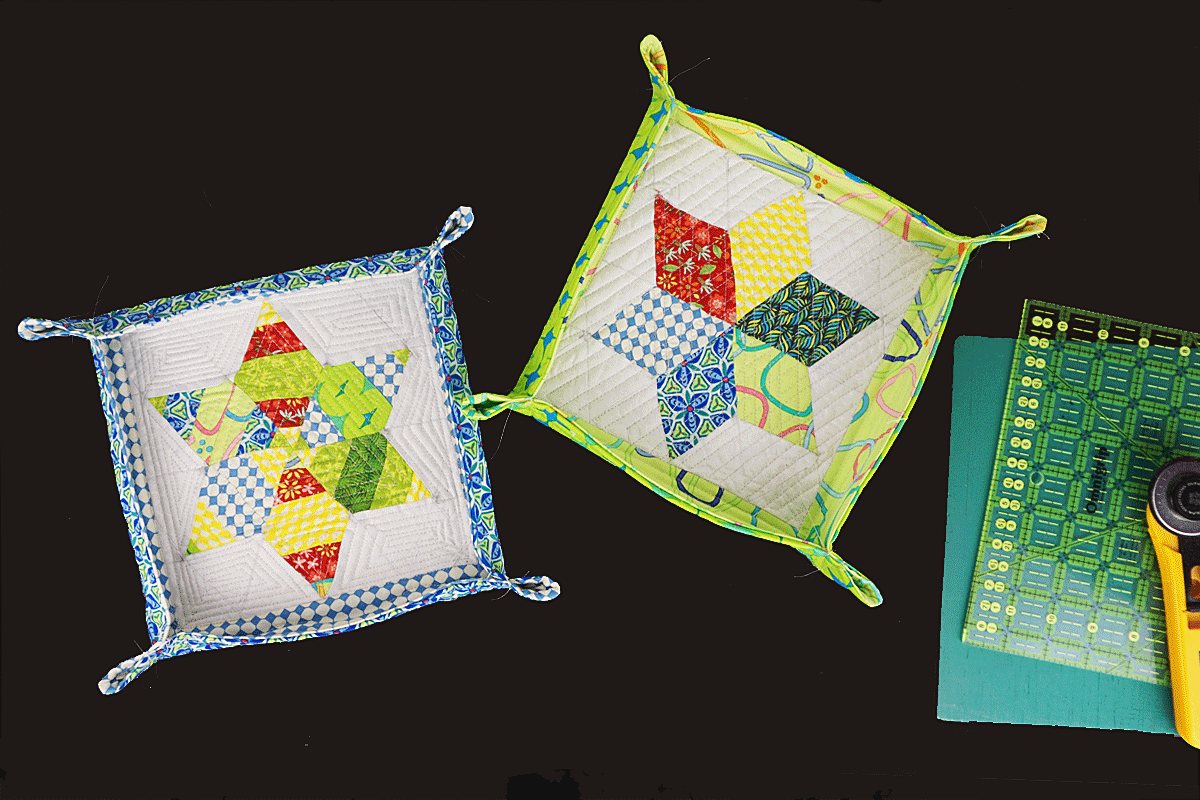
Sew the Matching Cover
Make the top the same way you did for the tray, but do not add any border. Layer and sew the backing, batting and front as before, sew the edges and turn outside right, encasing the edge with a top stitch and quilt as you would like.
Trim, layer, sew, turn out and quilt
Done!

Used Products


What you might also like


10 comments on “Sew a Matzo Tray with a Matching Cover for Passover”
-
-
Thank you for this pattern!
-
Help. Have major conceptual issues. For the equilateral triangles, do the prefinished lines measure to 2.5” each? And how large for each diamond?
-
the equilateral triangles, whether pieced or cut whole, when standing straight up and down (like a diamond shape) should measure 4″ from top point to bottom point, before being sewn. Hope that helps.
-
I would love to make the matza tray. I need to know how long the sides are on the equilateral triangles. I can’t do it the way shown. Please help. Thanks
-
Got it. Thanks so very much
-
each of the sides (at 60 degree angles) are 2 1/2″ and from tip to tip it is 4 1/2″ before sewing.
-
Dumb question here…we’re not of Jewish decent, but I LOVE this. Could you pls give us some ideas for applications other that matzo crackers?
-
Not a dumb question! This project is just a variation on a fabric tray that lots of people make, in fact there was a very simple project for a fabric tray posted on this blog site the other day. You can make the tray out of a single piece of fabric, or piece it in a star as I have done here, or any pieced arrangement you want. I added the cover to keep the matzo inside from getting stale, but also because I thought it was cute. Use it for jewelry, for loose change, pens and pencils, or a place for your keys. I have one next to my sewing machine without a cover that holds the feet I use most often. How about all your quilting pins? Keep in mind that if you determine another use for the tray and cover, you can make it the appropriate size quite easily. On my “to do” list is a fabric tray sized to hold papers and mail on my desk–with a cover so it doesn’t look sloppy. Or maybe just make it as a gift for someone who celebrates Passover. Have fun with it. (Or, you could learn to love matzo!!!)
-
Not sure why, but on the solid diamond star I had to make a 1/4” seem side to side, then it all worked fine. Otherwise they did not fit nicely together. It is beautiful and now I have to make several!
Leave a Reply
You must be logged in to post a comment.

Love this! I am going to make one.