DIY Straps and Belts for Any Project!
Need to make your own belts or straps for your project? This DIY will show you how to make your own basic strap that can be modified with any hardware you’d like!
There are many uses for straps and belts in both crafting and in the cosplay community. Here are some ideas:
- Bag or purse strap
- Costume belts
- Cosplay armor attachments
- Decorative belting for jackets and boots
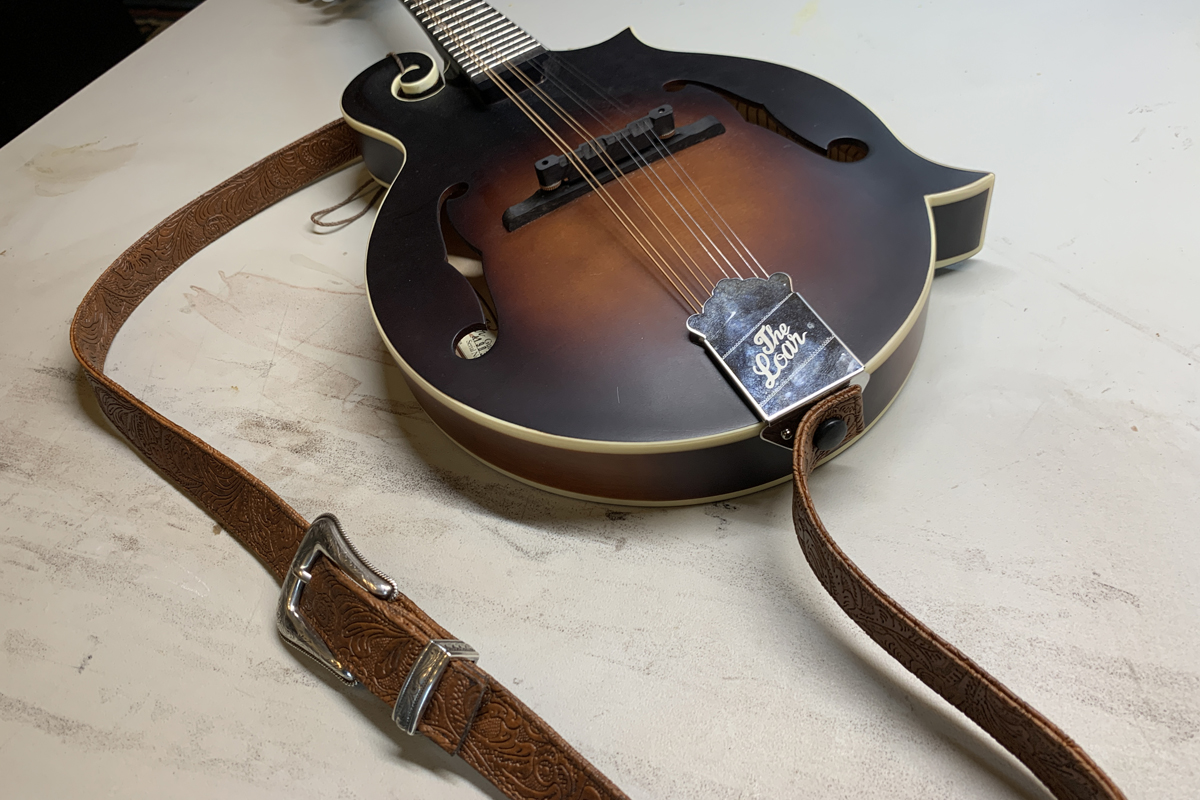
You can use this tutorial for any kind of belt or strap, but as an example we are making a 1″ strap for a Mandolin. This tutorial will walk you through how to glue, sew, and weather beautiful strapping with clean seams and a sturdy look.
Materials
- A thicker, more heavy duty fabric like pleather or upholstery fabric.
- A strong spray adhesive (we used Locktite)
- Scissors or rotary cutter
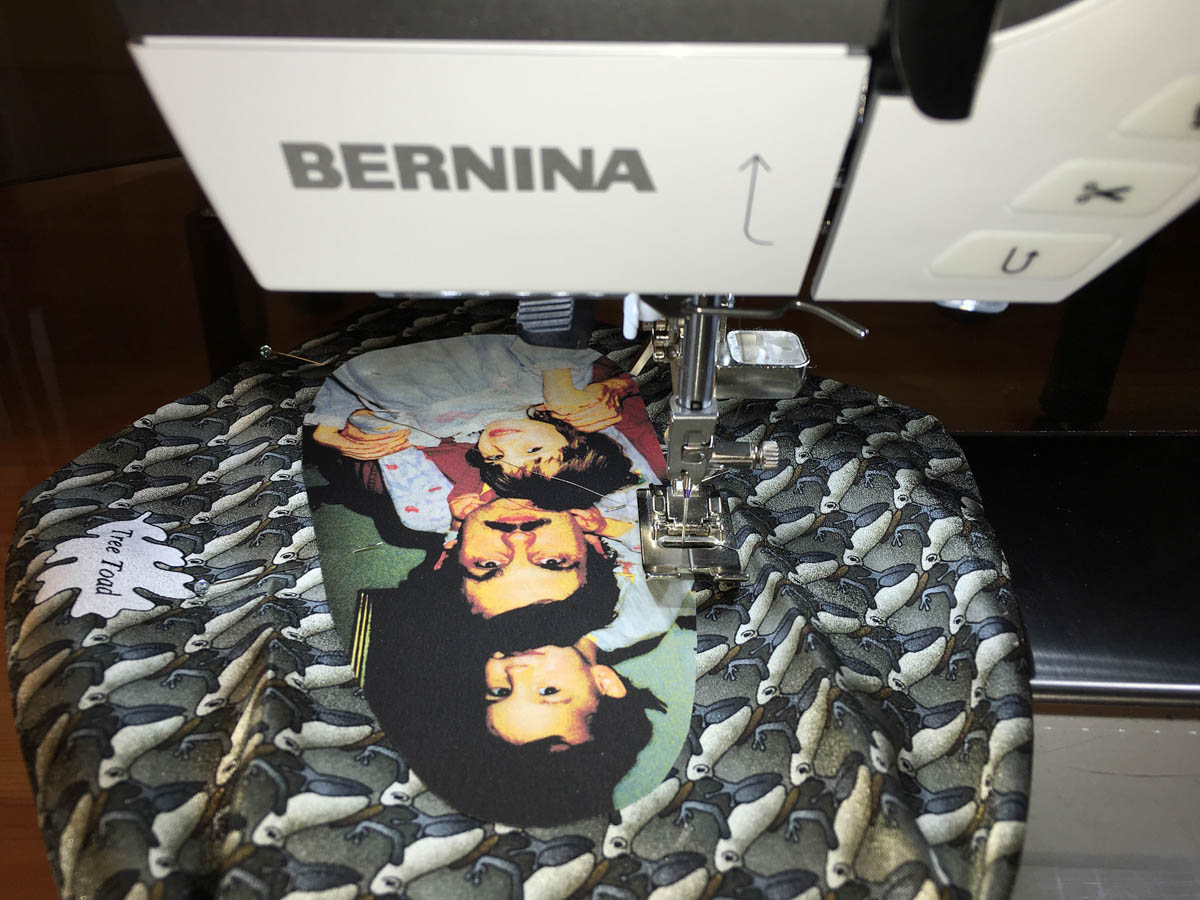
- BERNINA 435 sewing machine
- 130/705 H LR 90 Leather Needle
- All purpose thread
- Clips
- (Optional) Hardware: buckle assembly, Chicago screws, D rings, cording
- (Optional) Leather punch tools, hammer
- (Optional) 2mm EVA Foam
Instructions to make a strap or belt
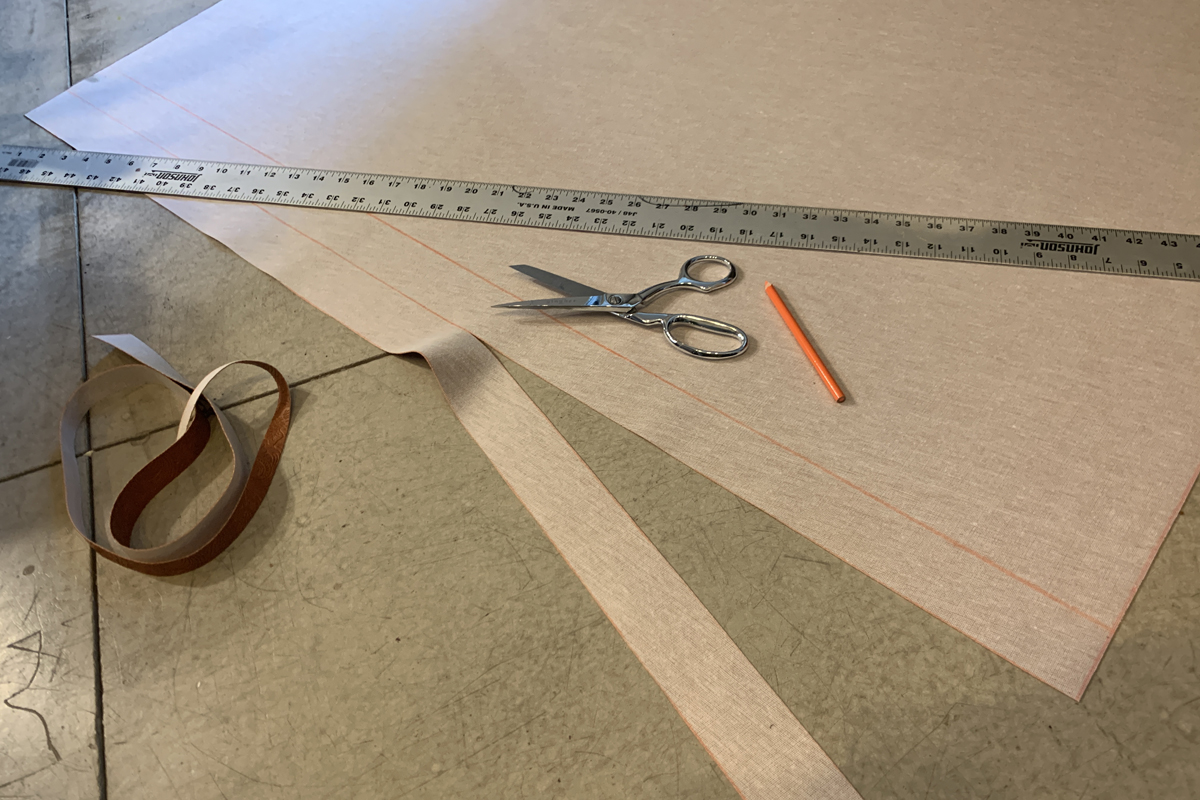
Step 1: Cut the fabric
This tutorial is making a 1″ wide strap. Since we will be folding back the edges, we will double the width and cut the fabric 2″ wide. The length will also be measured double since we will be folding the straps in half and stitching them together for clean edges.
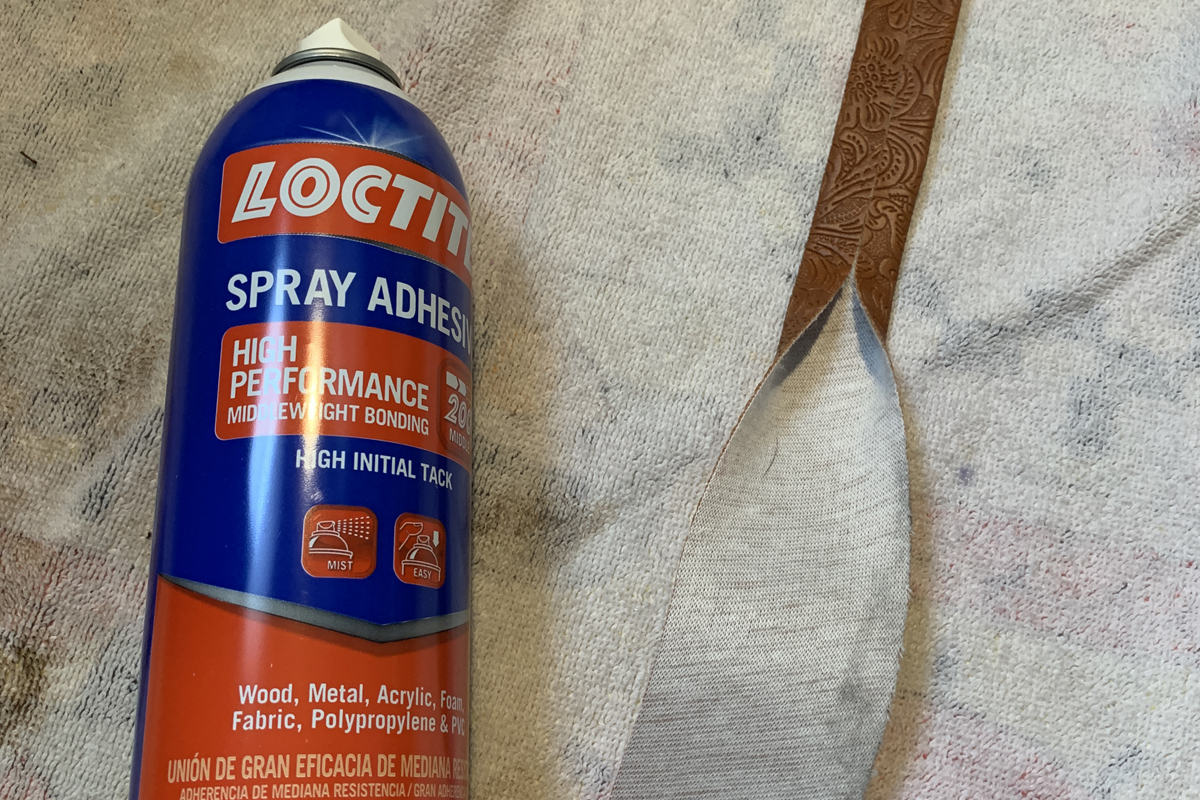
Step 2: Spray back of fabric with spray adhesive
When working with pleather we often use Loctite high performance spay adhesive. It is available at your local craft or hardware store. In a well ventilated area, we put down some newspaper to protect our work surface. Laying down the strips of fabric, backing side up, we sprayed an even coat of adhesive along the entire surface.
Step 3: Fold over each side of fabric so it meets in the middle of the backside
While still wet, we carefully folded the edges back so that they met in the center. Working our way down the strap until it was completely adhered.
Step 4: Press straps and let cure
We placed a board over the straps and placed some heavy items on top of it. This ensured we would have flat even straps with no bubbles or buckling. The straps were left to set for about 30 mins.

Step 5: Assemble the belt
The strip was first folded over lengthwise, matching the sides with the seam together leaving the solid side facing out. Using clips and we carefully lined up the strap edges and secured them together. The clips were helpful to keep both sides lined up evenly as we stitched.
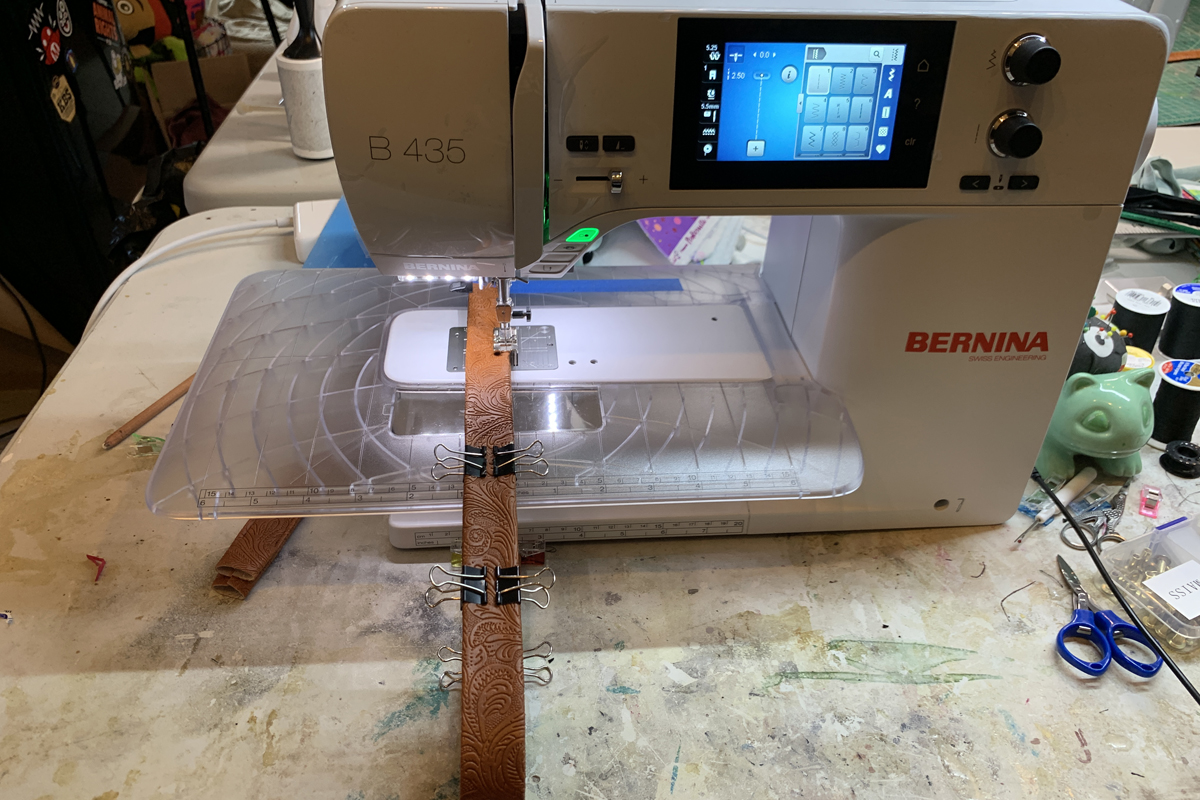
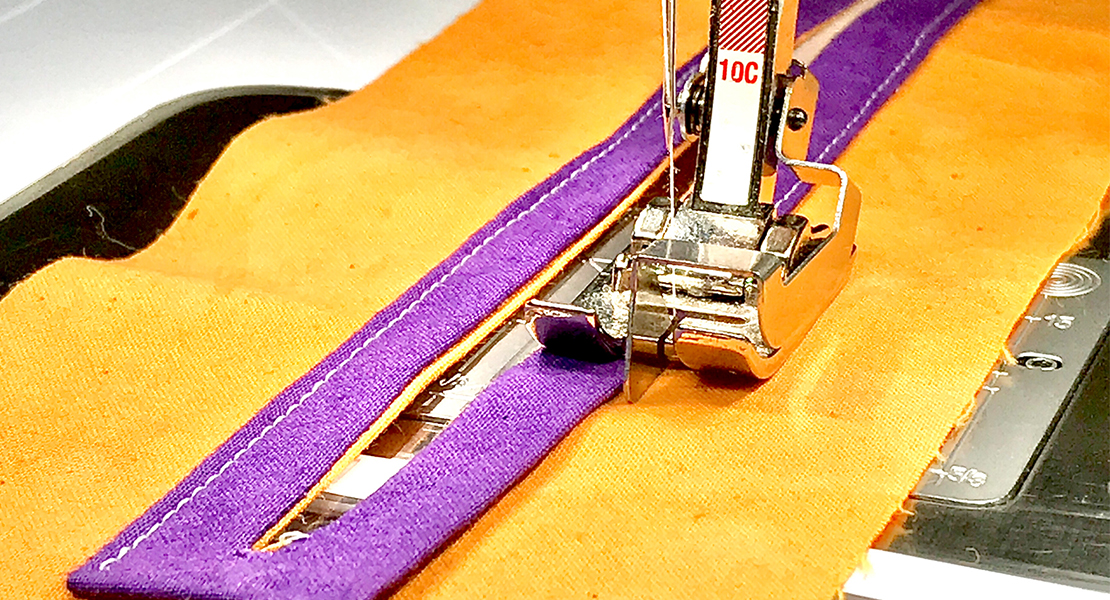
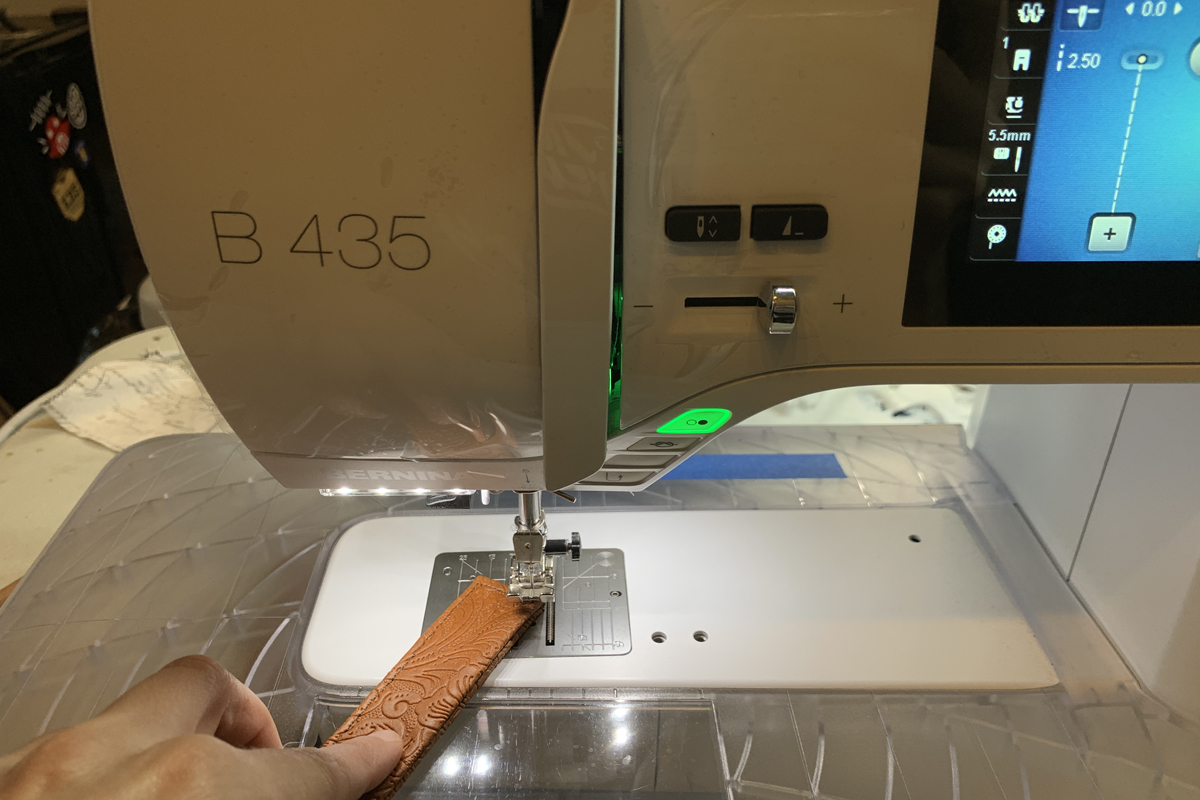
Step 6: Stitching the straps
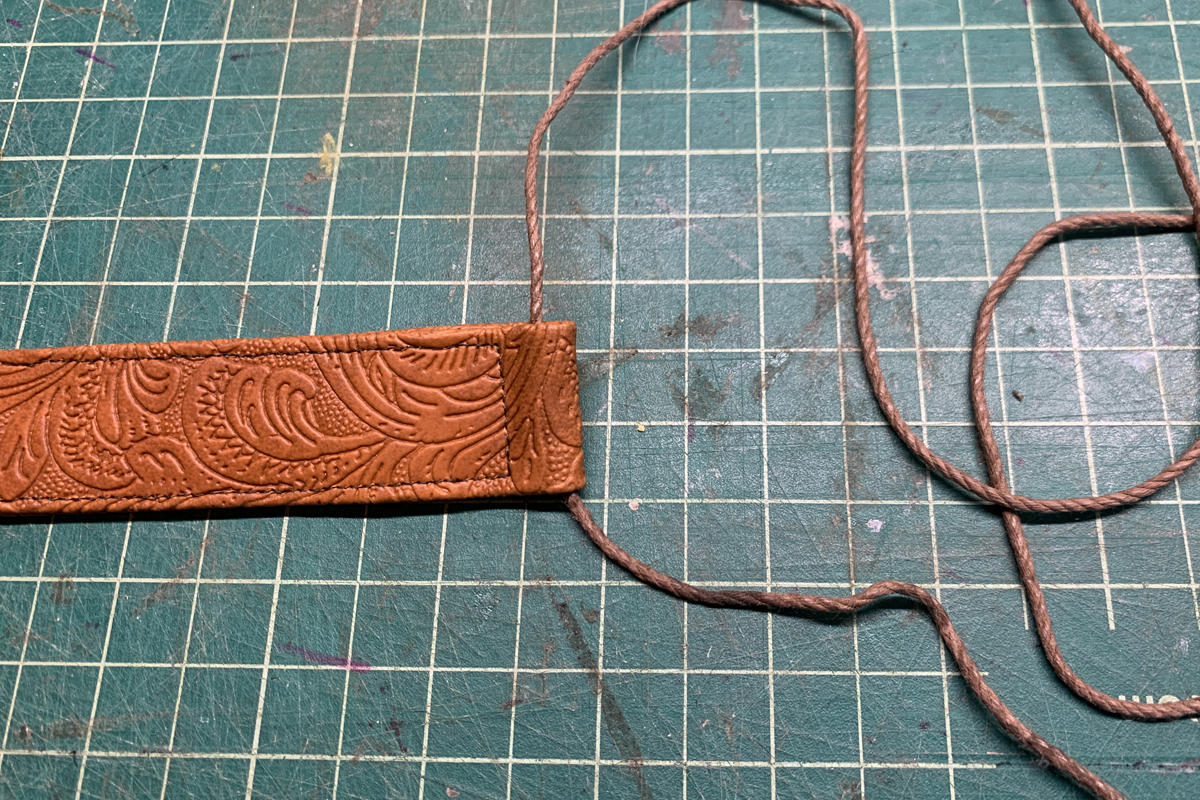
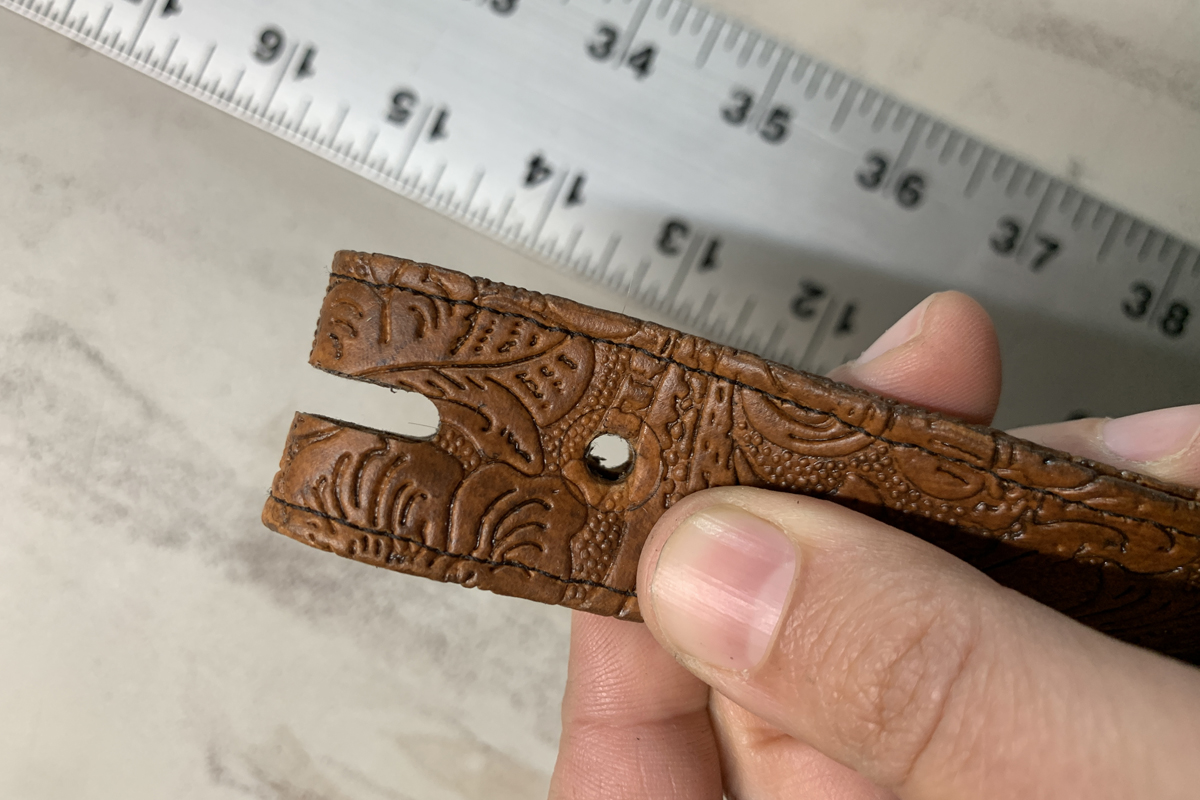
To keep the stitch tight to the edges, it was lined up to just inside one of the sewing foot prongs. Following along the edge we sewed all the way down the strap. The finishing on the end of the strap will depend on the project you are working on. For the mandolin strap we needed one blunt end finished in a half rectangle. We achieved this by keeping the needle in the down position and rotating the strap at a 90 degree angle.
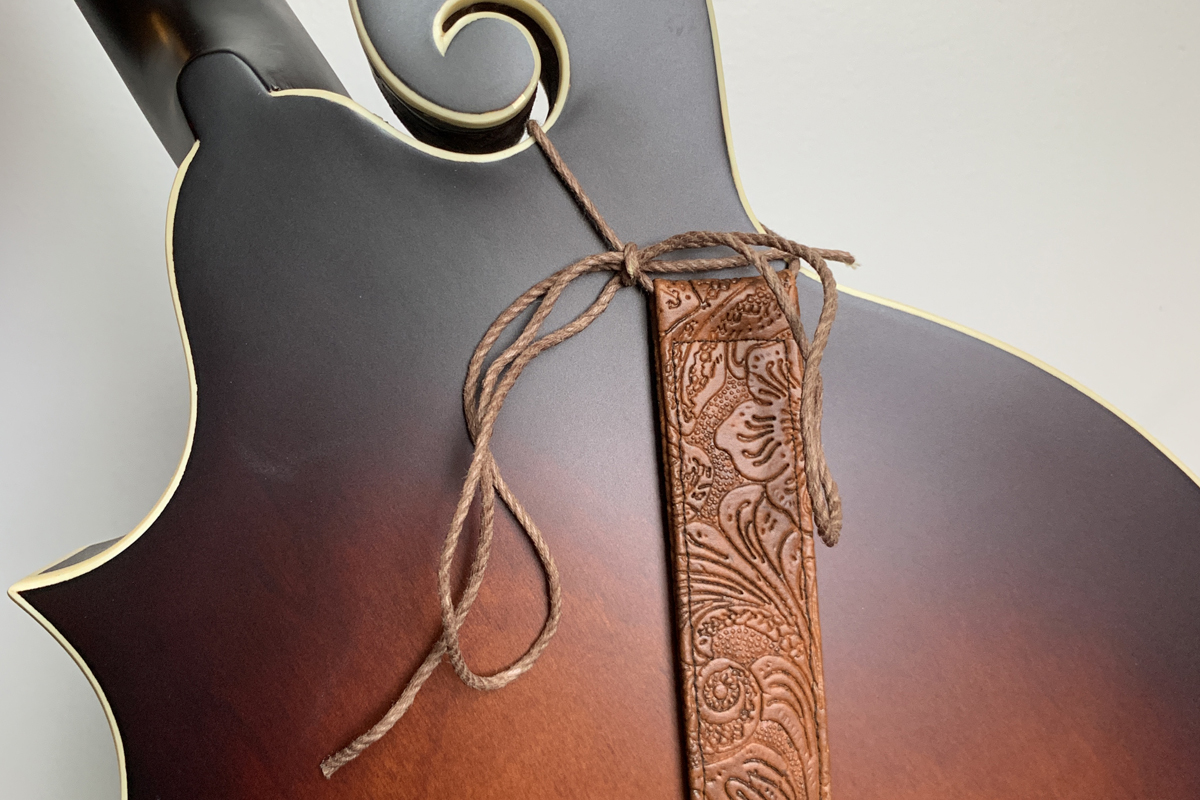
On the other strap we left a gap at the fold and ran cording through it. (This is for tying to the top of your Mandolin.) We often use this technique adding “D” rings for various attachments. (just make sure you add the “D” ring before you start sewing it together!)
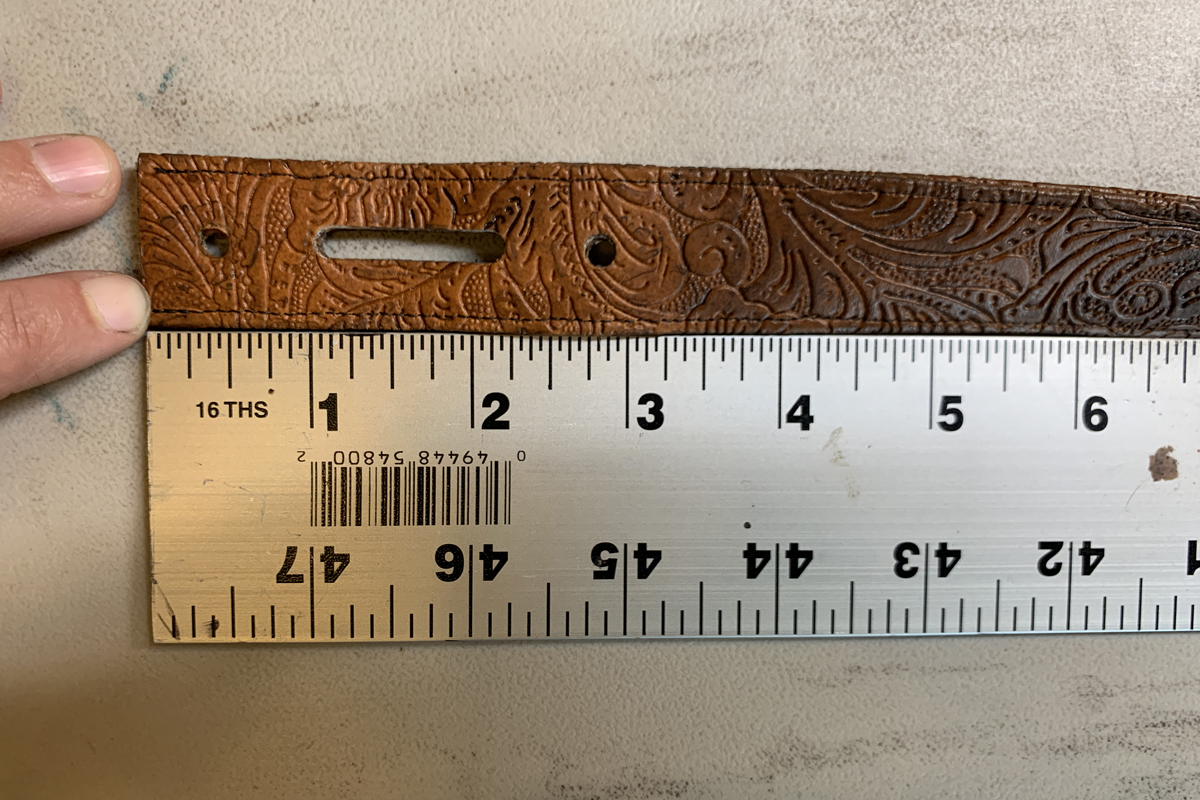
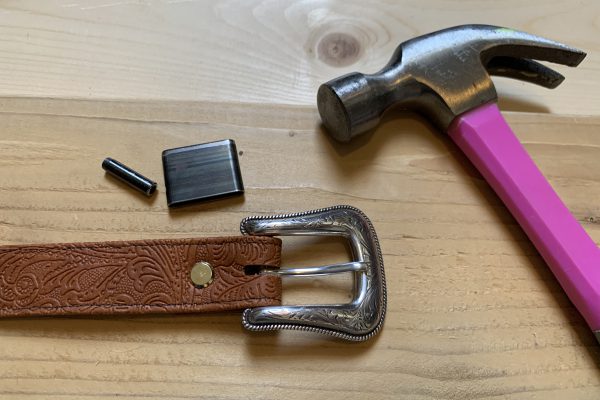
Step 7 (Optional): Make holes for belt buckles or other attachments
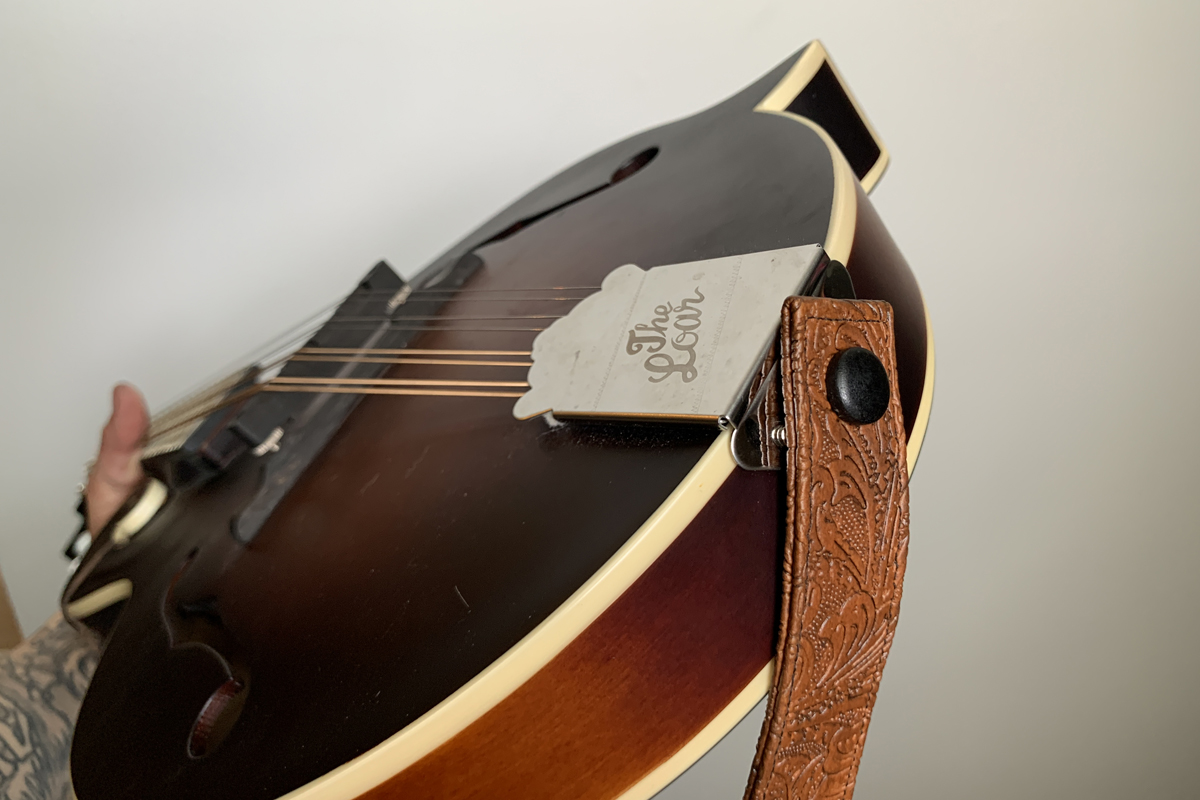
Using a leather punch tool and a hammer you can cut shapes into the strap to accommodate buckles, straps, attachments etc. We used a small circle and oval for the buckle and a large circle for the mandolin button. We placed the punch tool where we wanted the hole, cutting side down, and tapped it with a hammer until it cut completely through the strap. It helps to do this on a piece of wood so you don’t destroy your table!
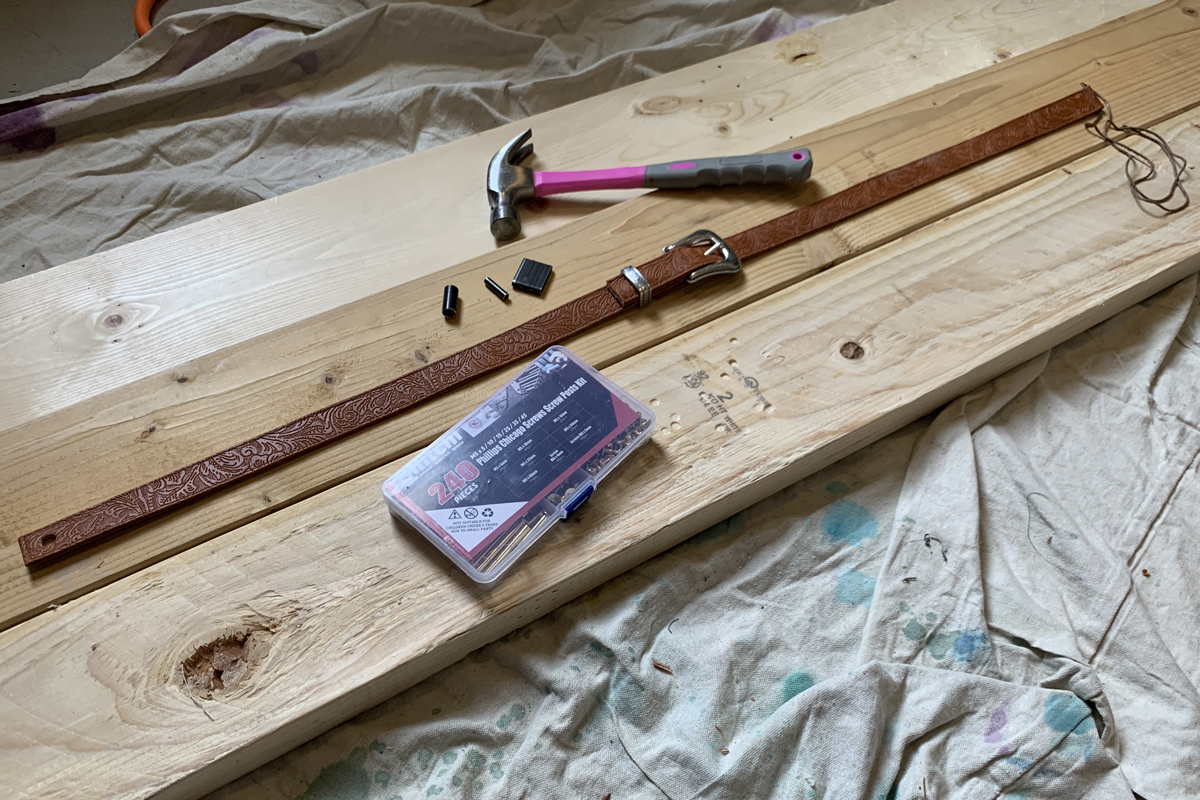
Based on our hardware’s size, we used a small circle to punch two holes for a Chicago screw to hold the buckle in place. We also added an oval between the small holes, allowing room for the prong of the buckle to pivot.
Folding over the edge, the belt buckle was installed and was secured with a Chicago screw.
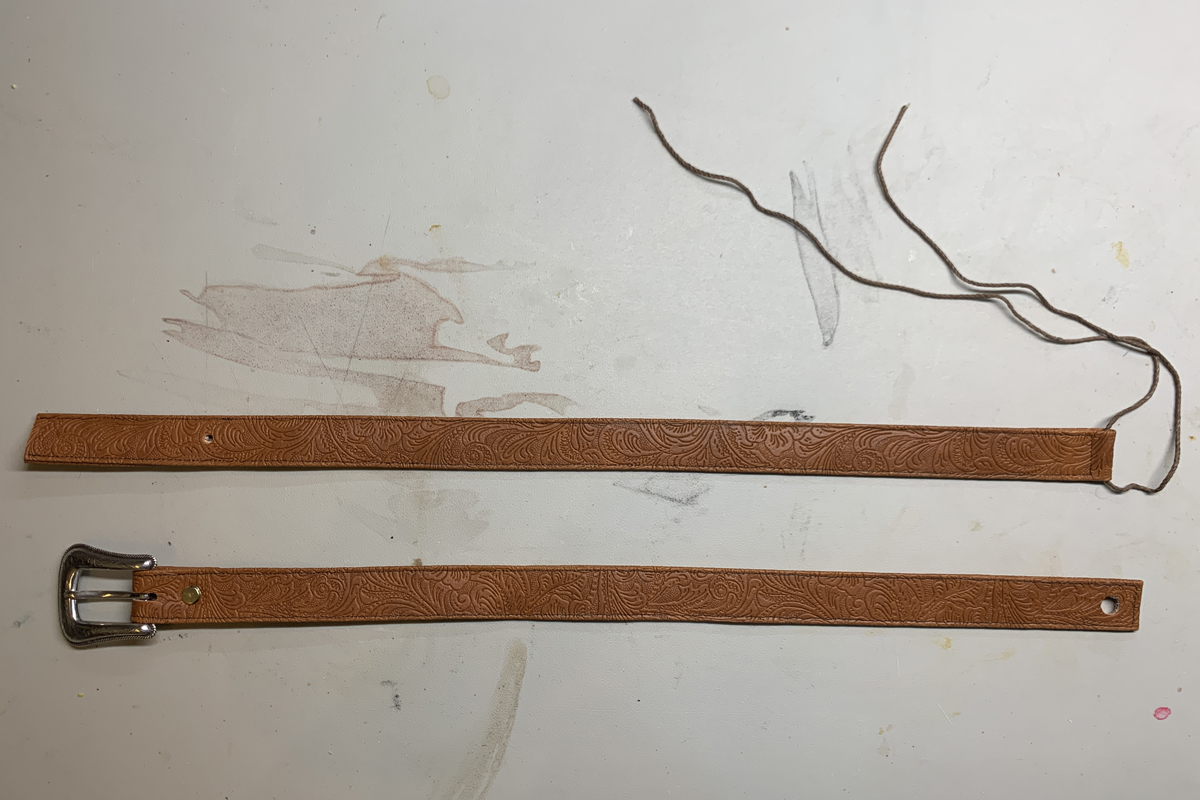
Here are what our two straps look like with the various attachments:
Step 8 Weathering the straps
One of the most important and most enjoyable parts of making realistic projects is weathering. Adding a little paint or “wear and tear” can really make your item pop. For these straps we used black and dark brown leather paint. Leather paint works well on pleather materials because of its flexibility but regular acrylic paints work well too!
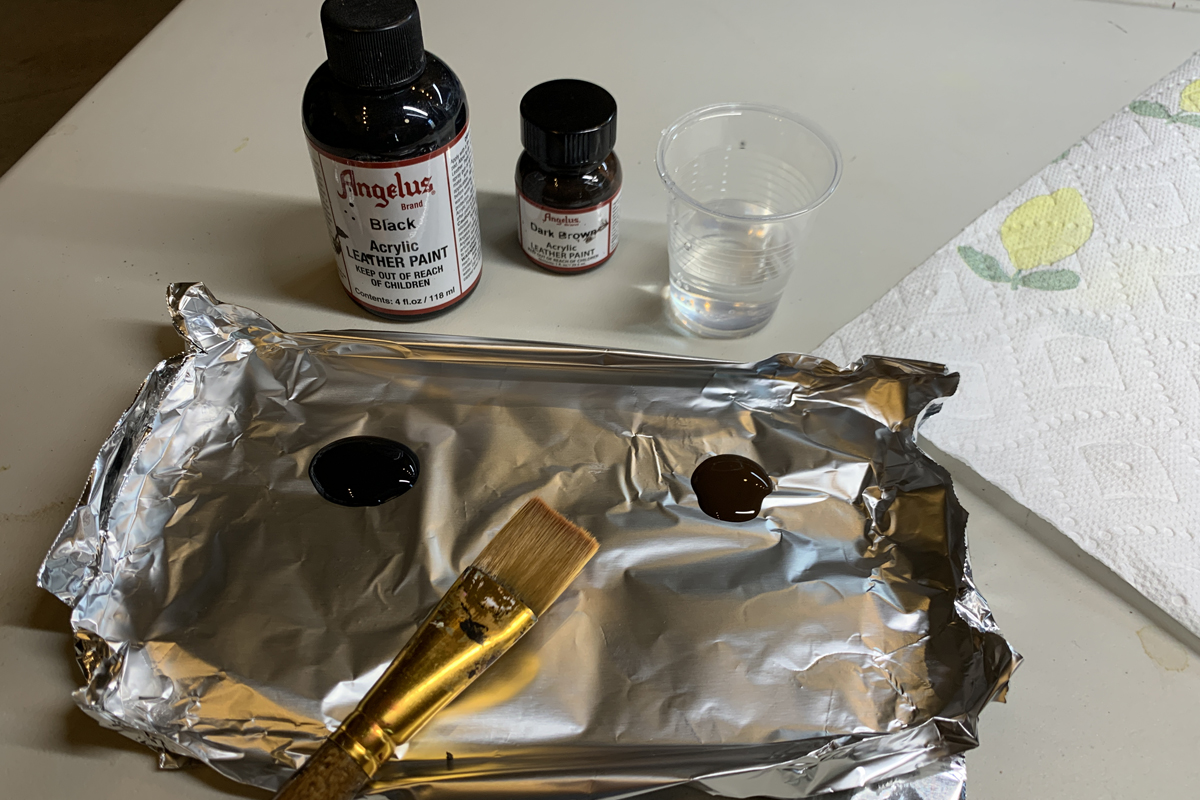
We mixed a little bit of black to the brown so it become a darker shade. Then it was watered it down and washed over the belt straps.
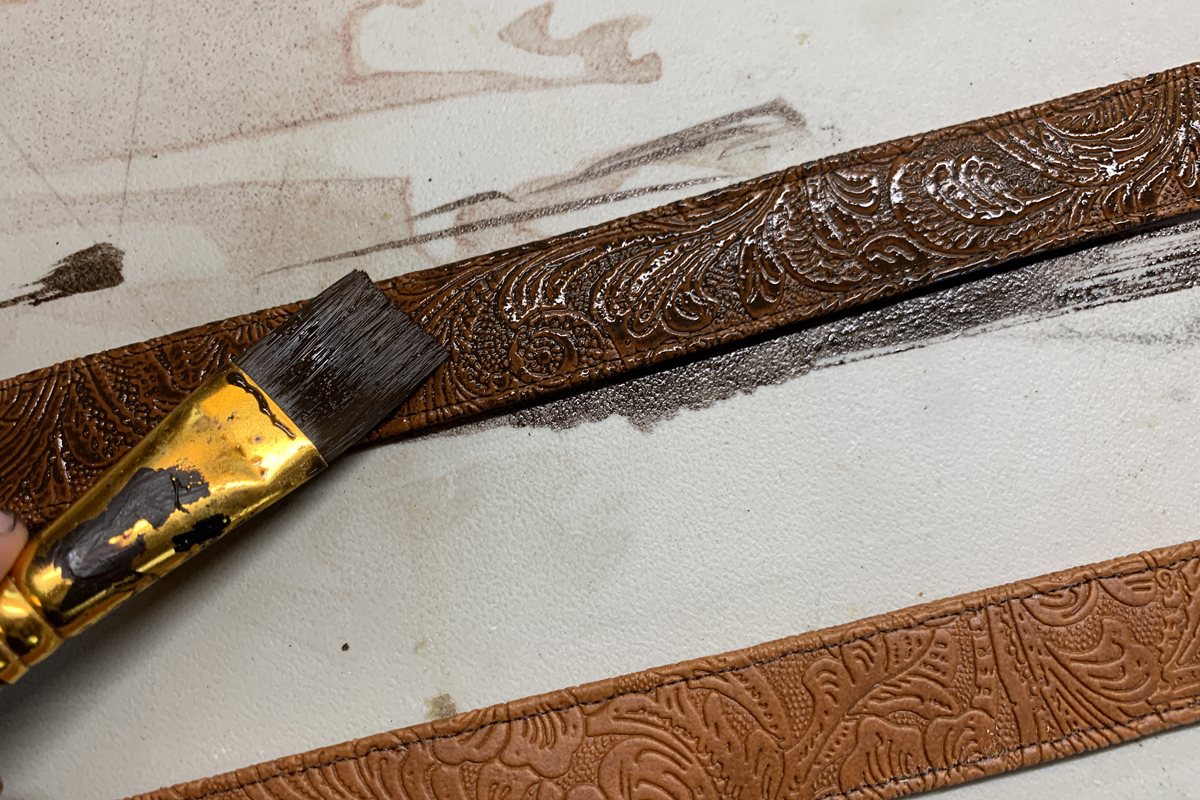
After letting it set for a few seconds we lightly dabbed it with a paper towel. This process was repeated until we had a the desired effect. You can really see what a difference a little paint can make!

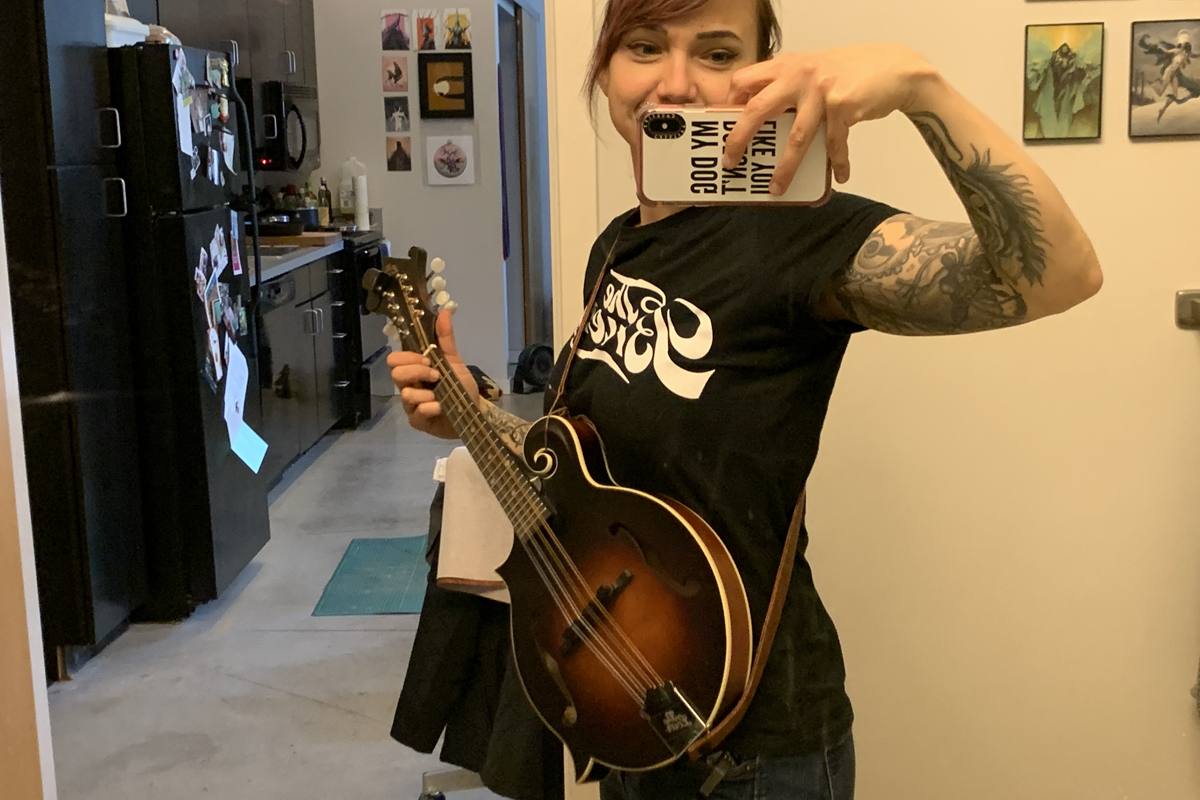
And there you have it! This is what the final product looks like attached to the mandolin.
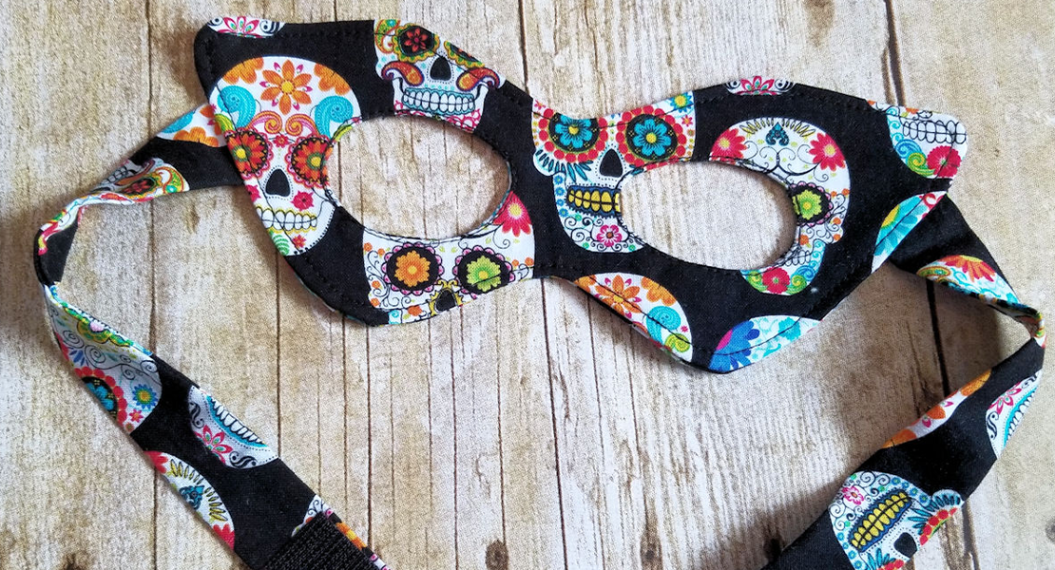
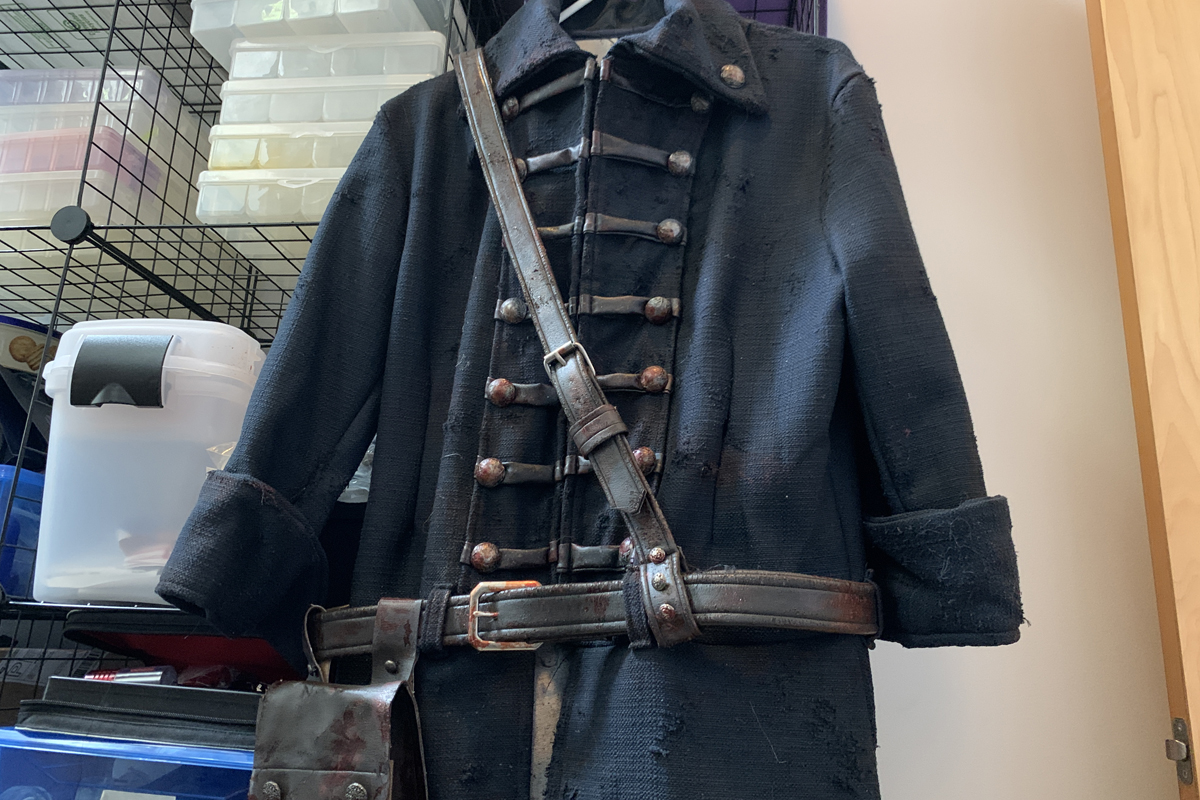
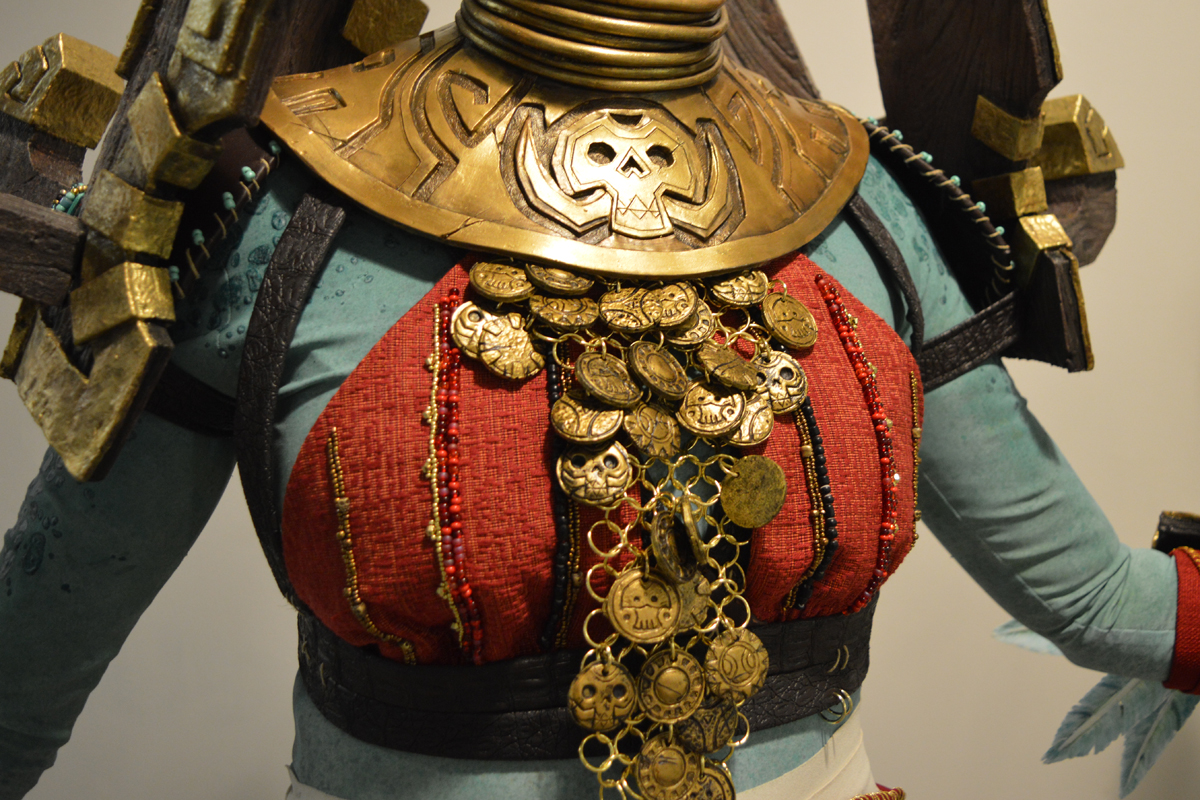
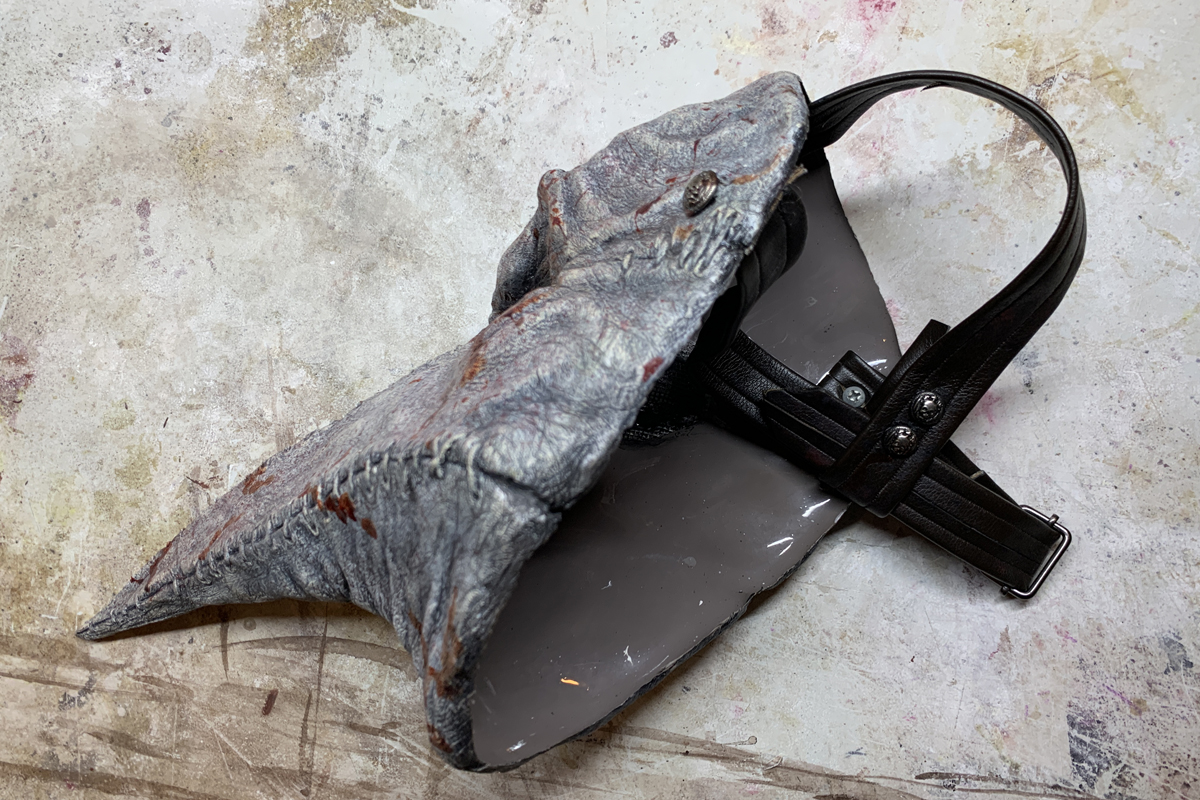
The possibilities are endless. Here are some examples of other projects we’ve used this technique on:
For a thicker strap, you can insert a strip of 2mm EVA foam. Just glue the foam in the center of the fabric before folding over the edges in step 3.
This project called for a lot of weathering. In addition to paint, we used a Dremel tool to add wear marks on the edges and around the buckles for a more distressed look.
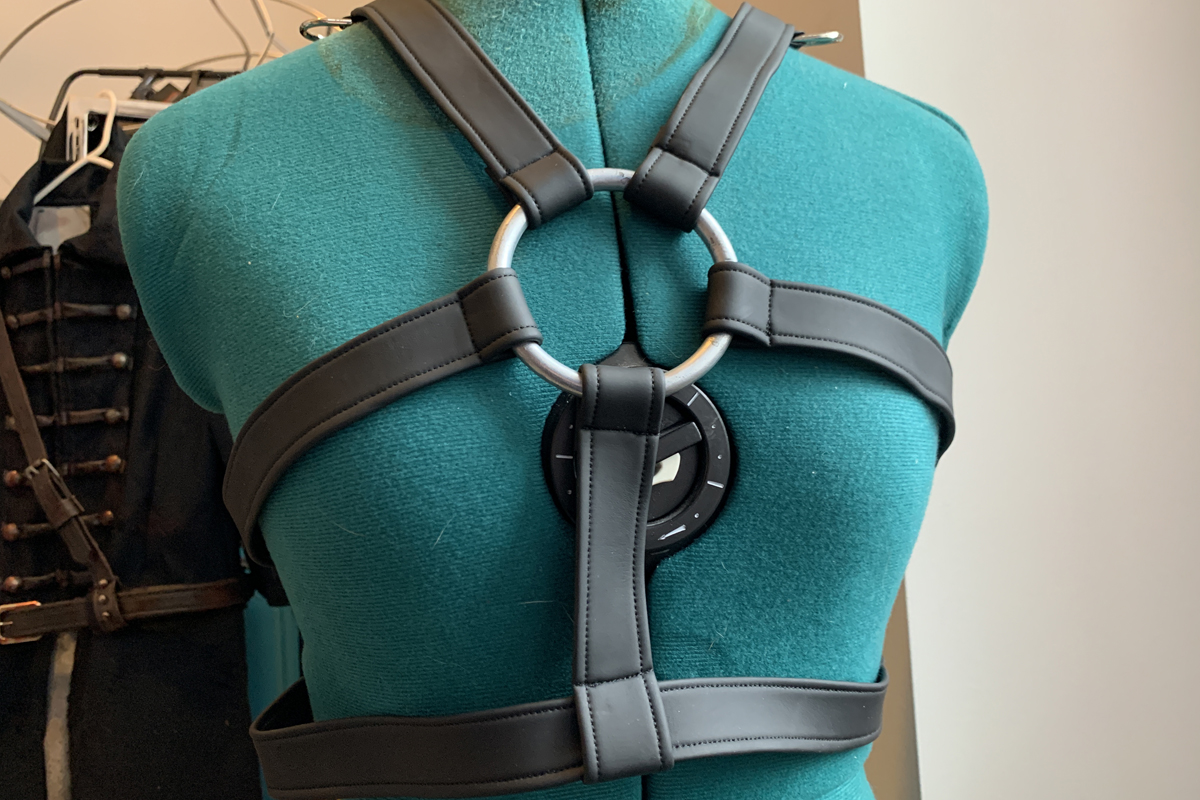
This is an example of how strapping can be used to attach armor. The shoulders are attached with “D’ rings at the top with additional strapping around the arms.
These straps were attached to the armor using Chicago screws and connect together with magnets that where sewn directly into the belt ends.

These adjustable straps were added to a resin mask to make it fit comfortably on the head.
Thank You for looking. We can’t wait to see what uses you come up with!