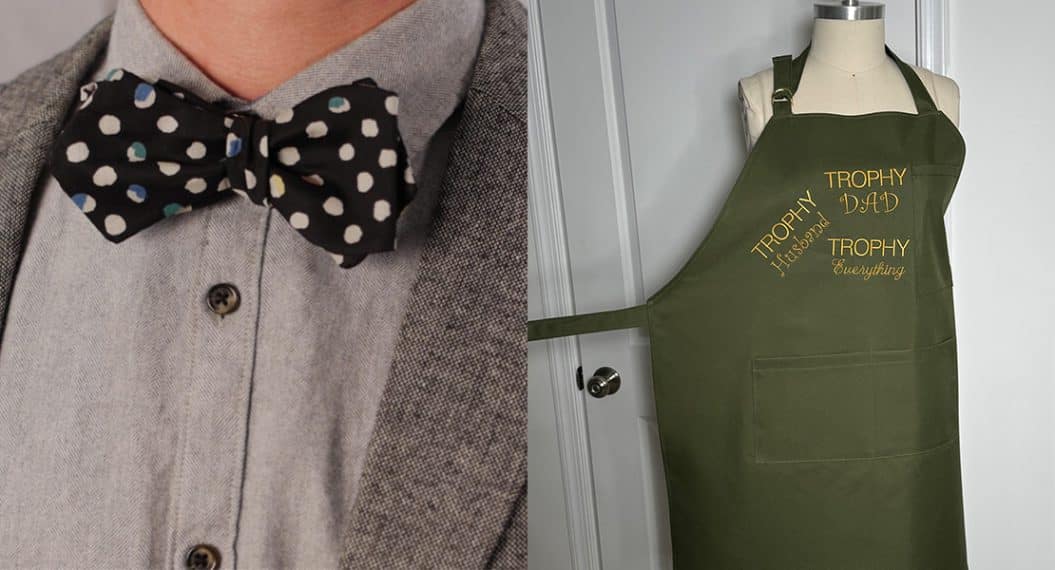
Photo Tie Project for Dad
This is a quick and simple sewing project for a special gift for Father’s Day. And this project pays tribute to the great Dad in your family by creating a tie with an image of his child or children on it. Once you have found a picture the rest is easy. If you have not looked through those old family albums, the time spent doing so will be fun. The steps in this tutorial will show you how to process the picture you choose to print it on fabric, then fuse and appliqué it to the tie.
Now, for the really ambitious, you can create a whole tie from a pattern to make the background tie for the image. There are lots of patterns available for making ties. But keep in mind that the average man’s dress tie can be 58 inches long and 4 inches wide. This means you are using long skinny pieces of fabric to make the base tie. There is an easier way.
I like “green” projects where you reuse or recycle materials. You can often find like-new ties at a local thrift store. What someone else passed along may be just the right tie for your project. The small cost of the silk tie used for this project, one dollar, was far less than buying the materials and a pattern.
It also makes this a very fast and easy project, as you do not have to cut fabric for the front of the tie, interfacing or backing. And you do not need to sew them all together before fusing and appliqueing the photo image on the tie.
At the thrift store I really did not care what current style in men’s wear was in vogue. I was simply looking for the widest tie I could find in a color range and pattern that would work for the photo I wanted to appliqué on it.
What you want to look for is a tie with a pattern and color that will blend in as a nice background for the family image that you want to put on the tie.
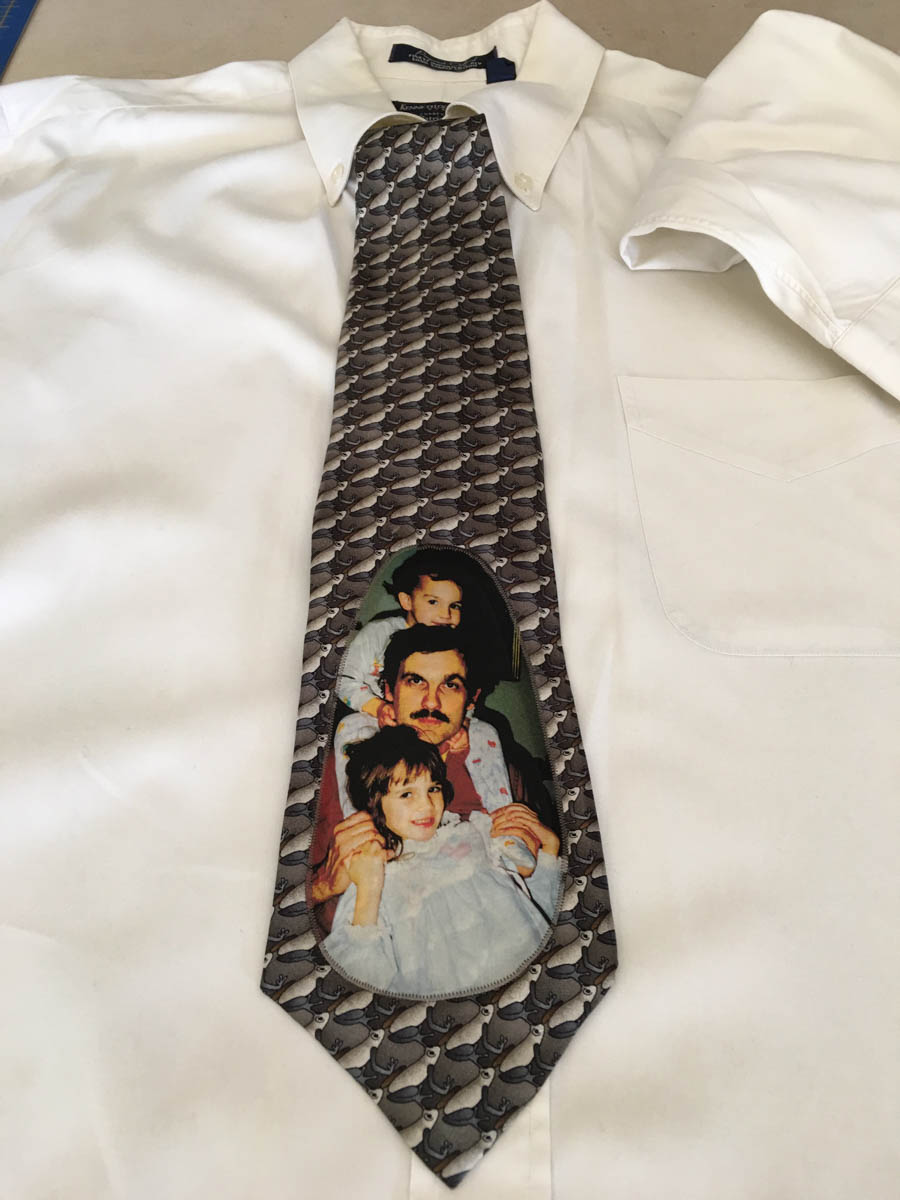
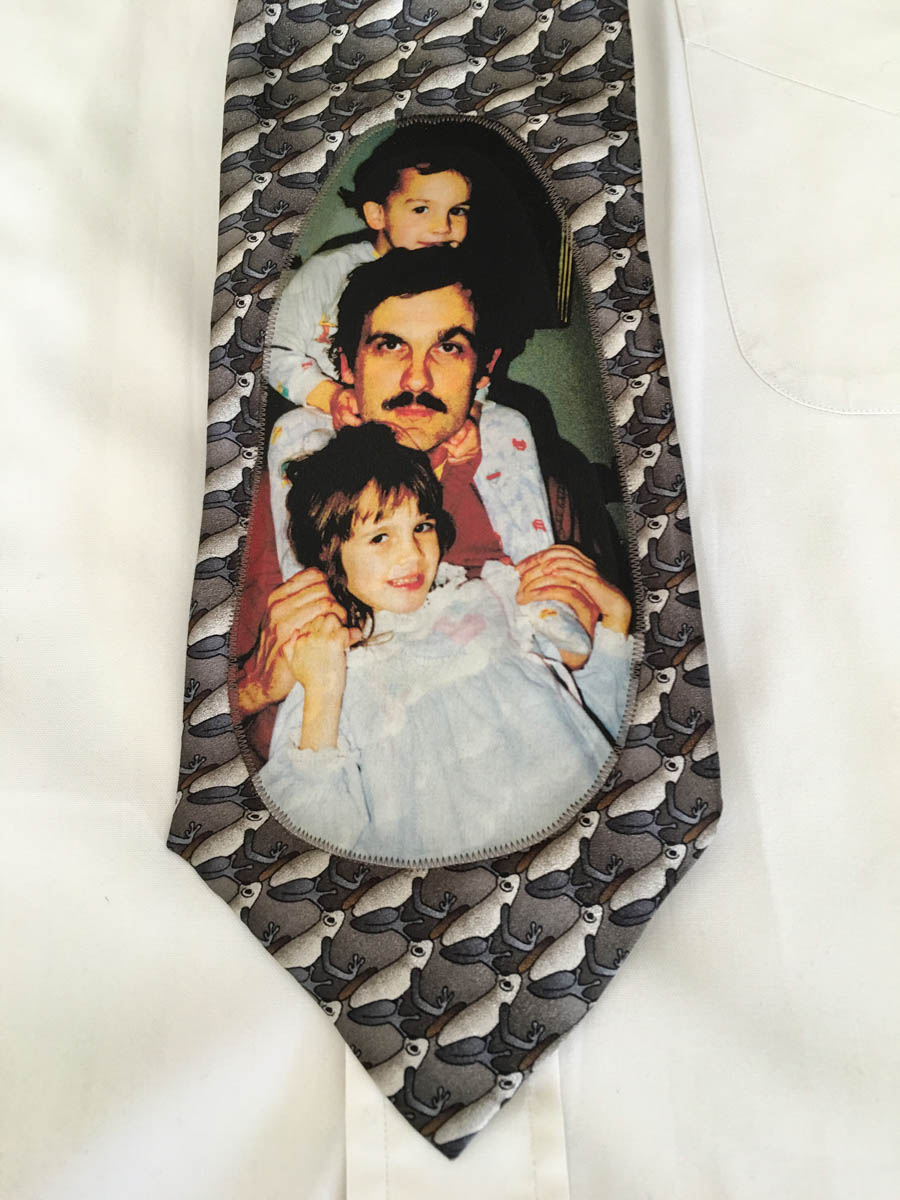
Looking through our family photo albums, I wanted a vertical image that would work well on the space of the tie. The image I found was a snapshot from a Christmas morning when my daughter was five years old and my son was two. It was a typical early morning picture taken with a flash. The photo has all of the problems common to holiday snap shots. There was red-eye from the flash in the eyes of the subjects. It was high contrast and on the dark side. It was not an artistic photo, but it was special to me.
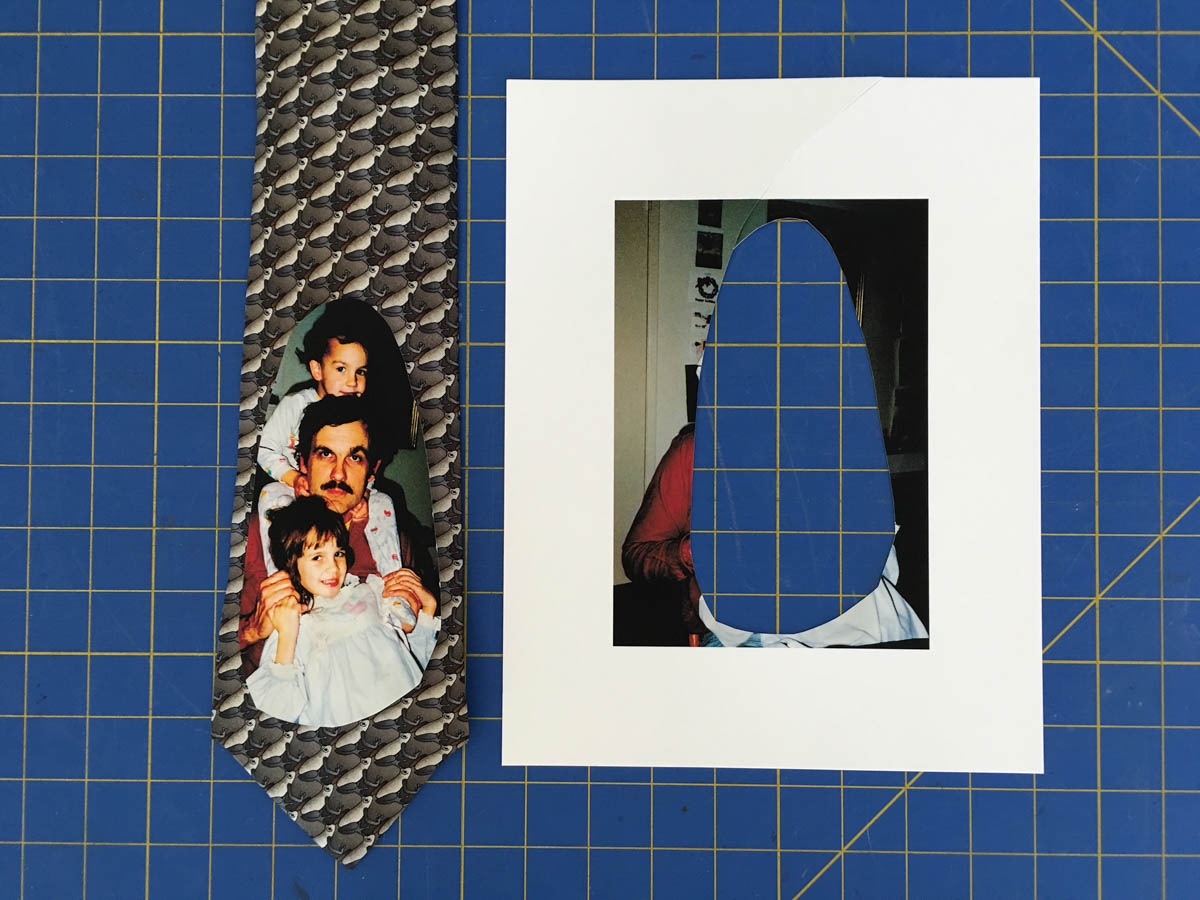
The tie I chose at the thrift store was 4 inches across at the widest point. The area I wanted to place the image on the tie was approximately 3.5 inches by 7 inches.
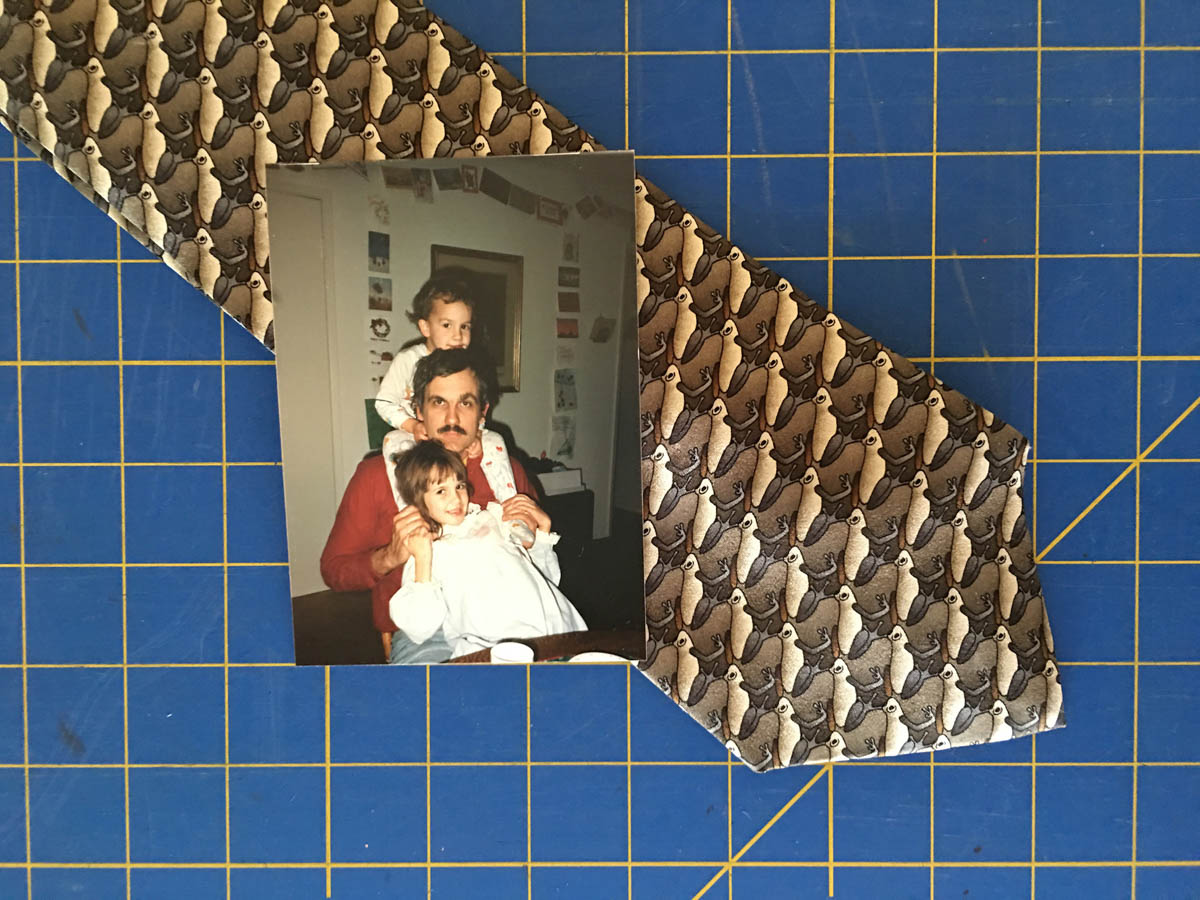
The print from the photo album was only 3.5 inches by 5 inches. I needed the center portion of the image larger. I scanned the print at 200 percent using the scanner that came with my “All-In-One” printer. You can usually find the settings to do so in the “advanced” menu of the software that comes with the scanner.
Next, take the digital scan of the snapshot into a program like Adobe’s Photoshop Elements to make adjustments. There are other programs that will allow you to make similar adjustments. I use Photoshop Elements because it is affordable and easy for my students to use in the classes I teach on printing photos on fabric.
The first thing to do to the snapshot is clean it up. Even though I wiped the print with a soft cloth before placing it on the scanner bed, there were spots that needed to be cleaned up in the scanned digital file. Create a new layer and use the “Clone” tool (Rubber Stamp icon) to remove the spots in the image. Cloning or cleaning on a new layer makes all of your work reversible in your digital file. This is also where you would clean up the “red-eye” effect from the flash.

The next step is to adjust the brightness and contrast of the scan. Once again, do this on a separate layer, in case you want to make adjustments after making a test print. For this image I increased the brightness and decreased the contrast.
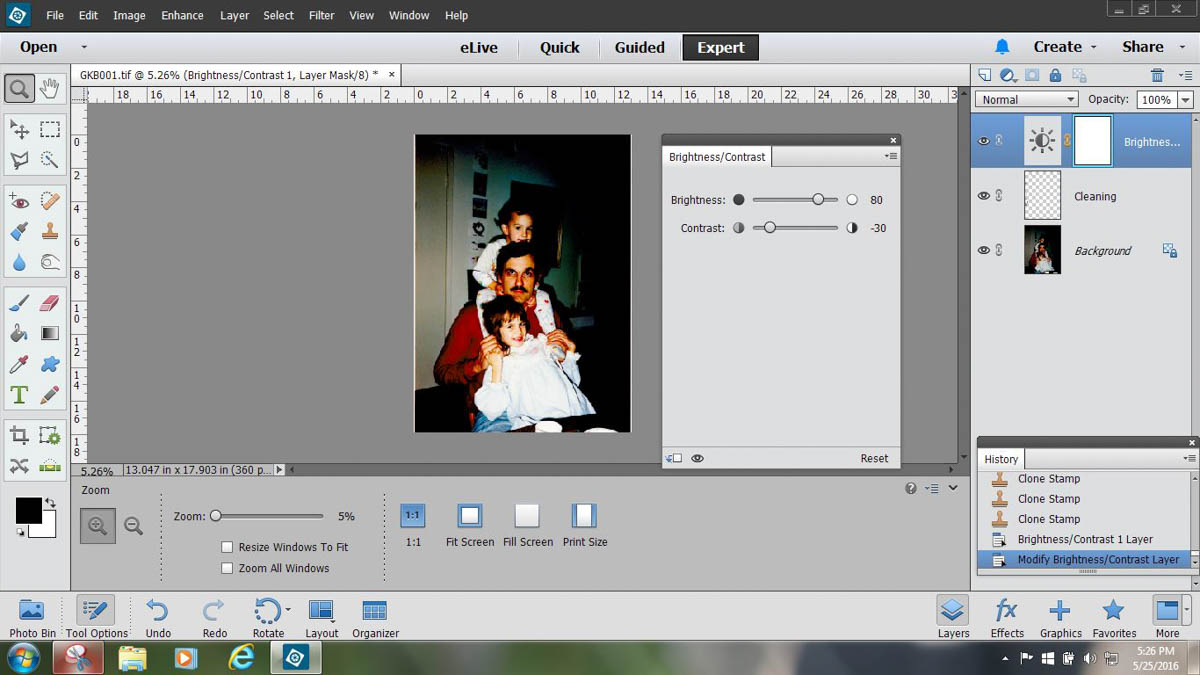
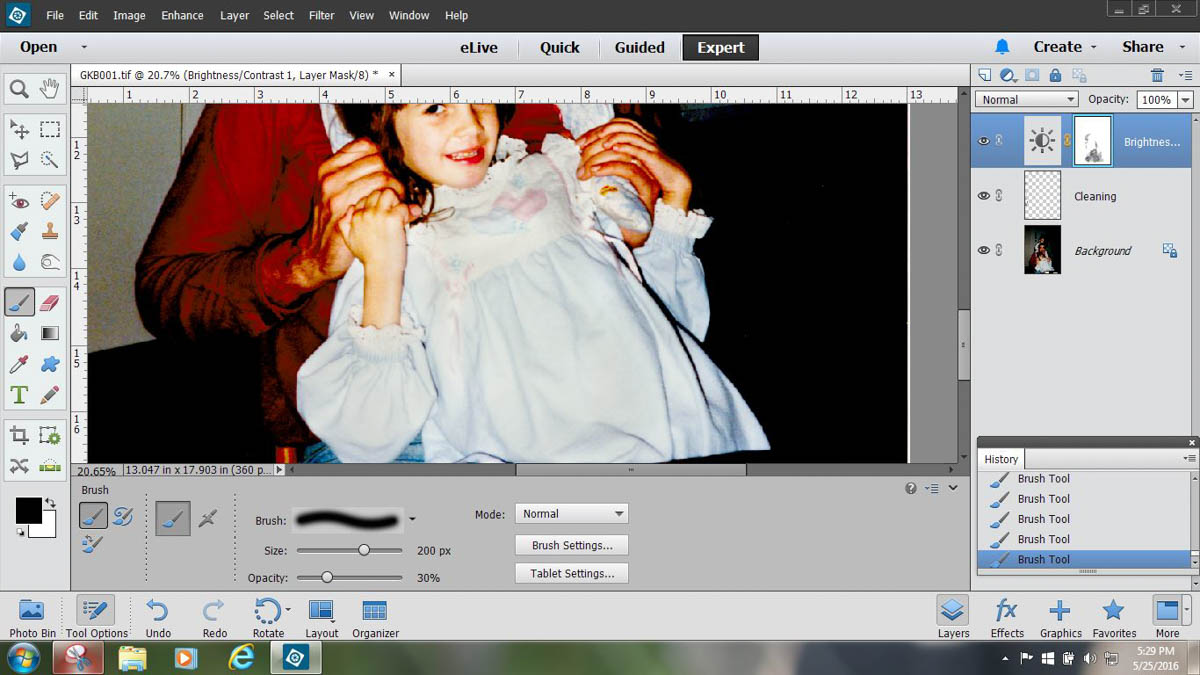
When I increased the brightness of the image, even though I reduced the contrast, the nightgown of my daughter and the pajamas of my son were too light, and detail was lost. Therefore, I used the “Brush” tool to block the adjustments made with the Brightness and Contrast layer. Simply paint over the areas of the nightgown and pajamas in the adjustment layer. Use a soft edge brush at 30 percent opacity. It blocks the change to the adjustment layer, creating what is called a “mask.” If you start with a low percentage of opacity, you can always brush over the area to increase the blocking of the adjustment layer where needed. This blocking of the Brightness and Contrast layer puts detail back into the light areas of the image.
At this point, save your work on the digital file with its layers in a folder called “Master.” Once you have saved your Master file, you can reopen it and duplicate the file. By working on a copy of your Master file, you do not have to worry if you make a mistake in the next steps.
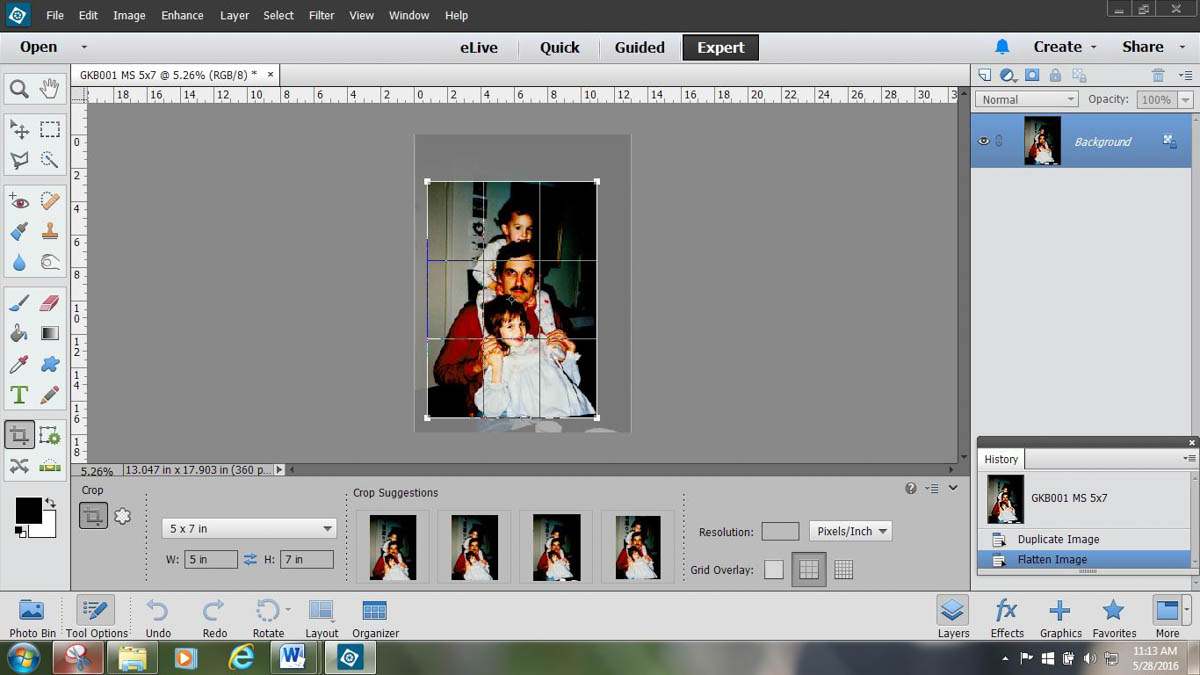
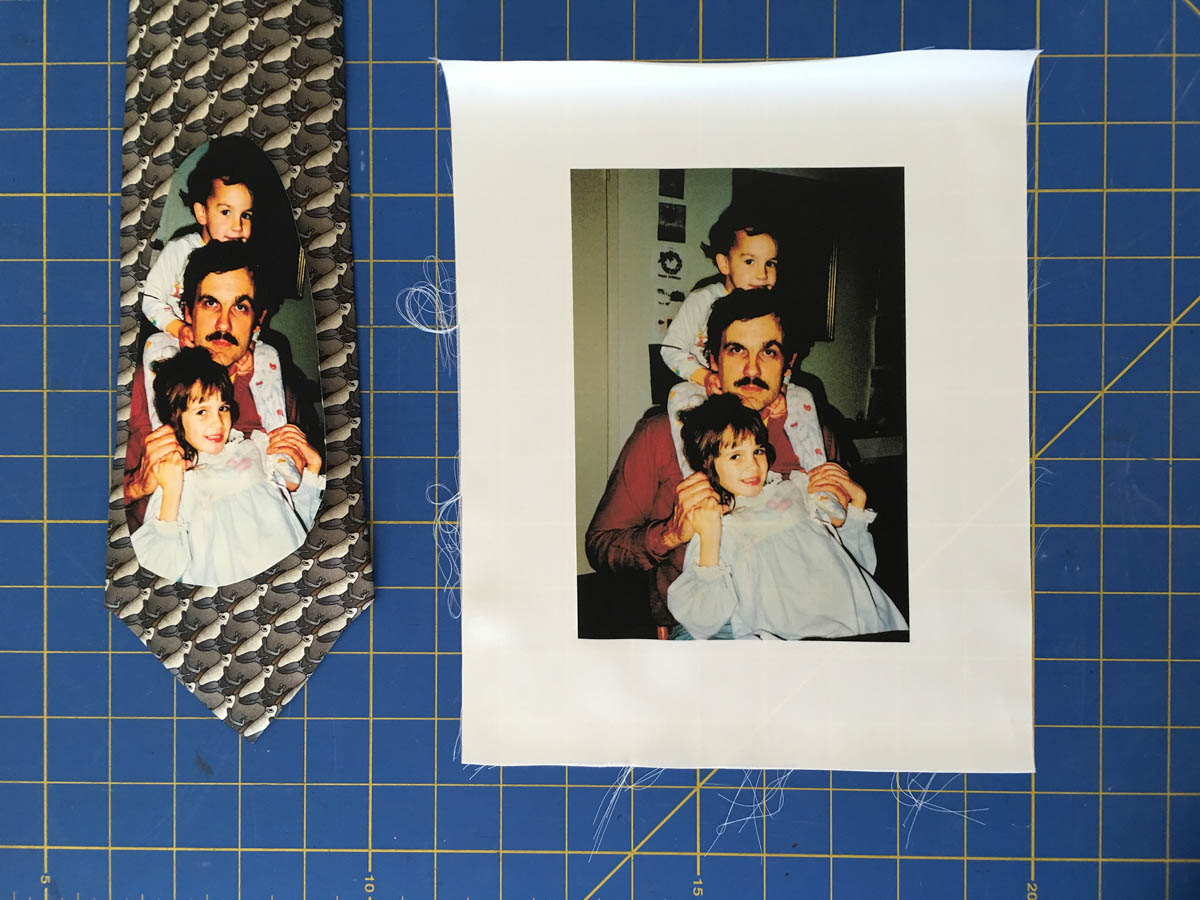
The next step is to flatten all of the layers. This is not reversible, and is why I work on a copy of my master file to create a print file. Once the file is flattened, then crop the image to the size you want it to be on the tie: in this case, 5 inches by 7 inches.
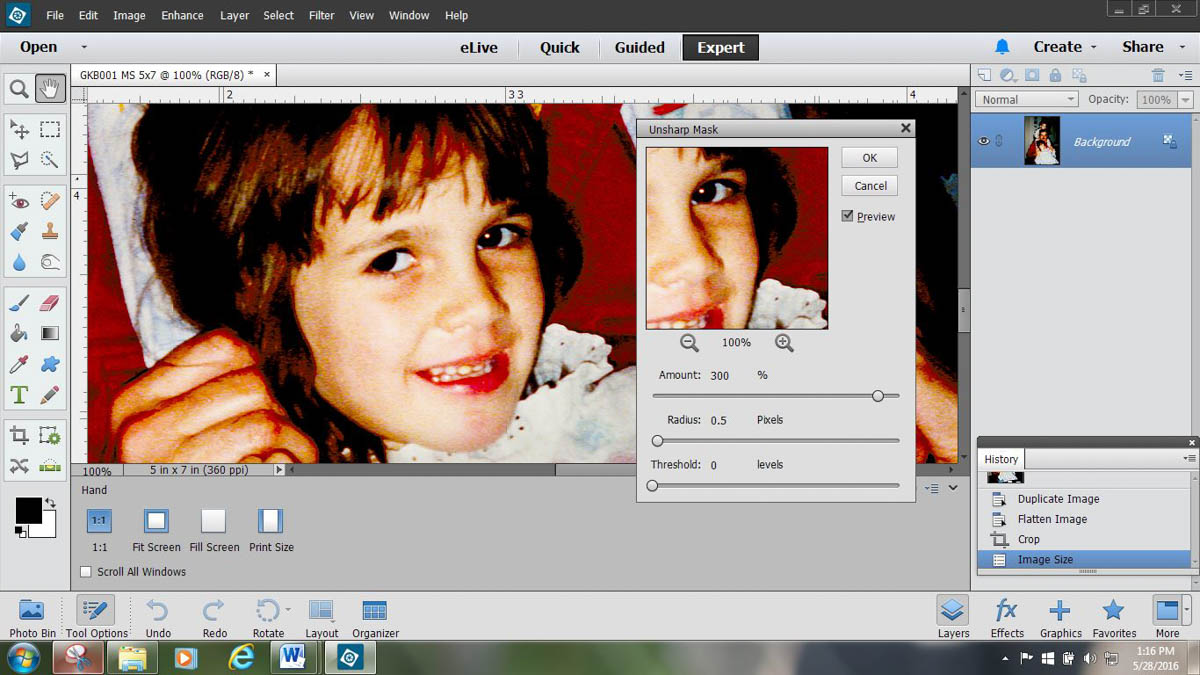
The last step before making a test print is to sharpen the digital image. It seems like a misnomer, but the best way I have found to sharpen an image in Photoshop Elements is by using “Unsharp Mask.” It is under the “Enhance” drop down menu. When you select Unsharp Mask, a dialog box opens and in it there is a check box for “Preview.” By clicking and unclicking the Preview box you can see how much sharpening is being applied to the image.
After sharpening the digital image you can save it in a folder for print files on your computer. Because it is flattened, print files do not take up as much space as a master files with layers. The next step is to make a test print from the print file.
Inkjet fabric sheets are laminated to either a paper or plastic sheet to make them feed through your inkjet printer. They also have an inkjet receptor coating on the surface of the fabric. Because of this, they are more expensive than inkjet paper.
Commercial inkjet fabric sheets like the Threads brand are available from several suppliers. Threads inkjet printable fabrics come in a variety of materials, from cotton poplin to silk. For this project I chose the Threads 100% Silk Charmeuse 19mm. The 8.5×11-inch sheets come in packages of six.
To avoid wasting printable silk, use sheets of matte paper for test prints. Images printed on matte paper look very similar to those printed on the fabric sheets. Once you have a print that you like on matte paper then you can print it on a fabric sheet.
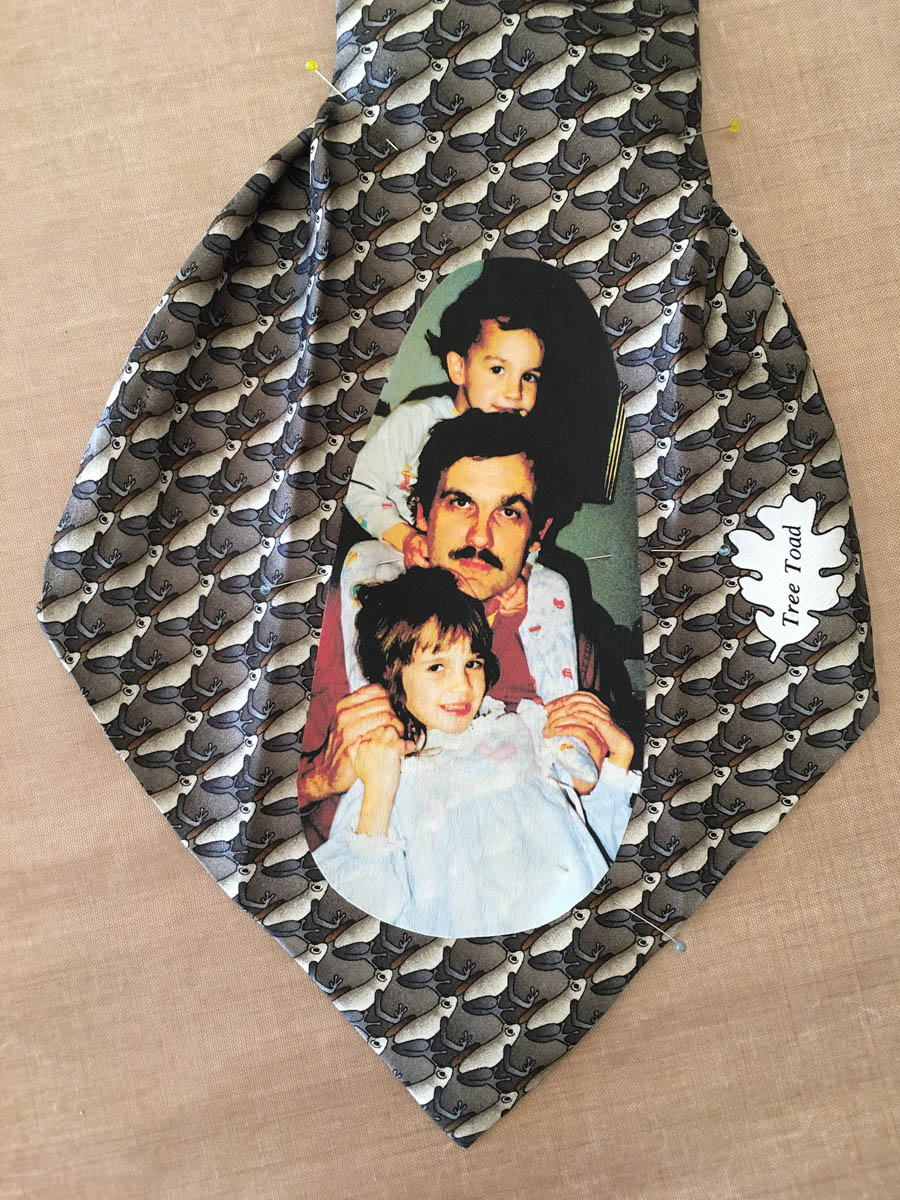
The paper test print is also helpful to check on the size of the image that you will fuse and appliqué onto the tie. Cut out the portion of your paper print that you will use, and place it on the tie. If you need to make any adjustments in size, go back to your print file and re-size it before making a final print on fabric.
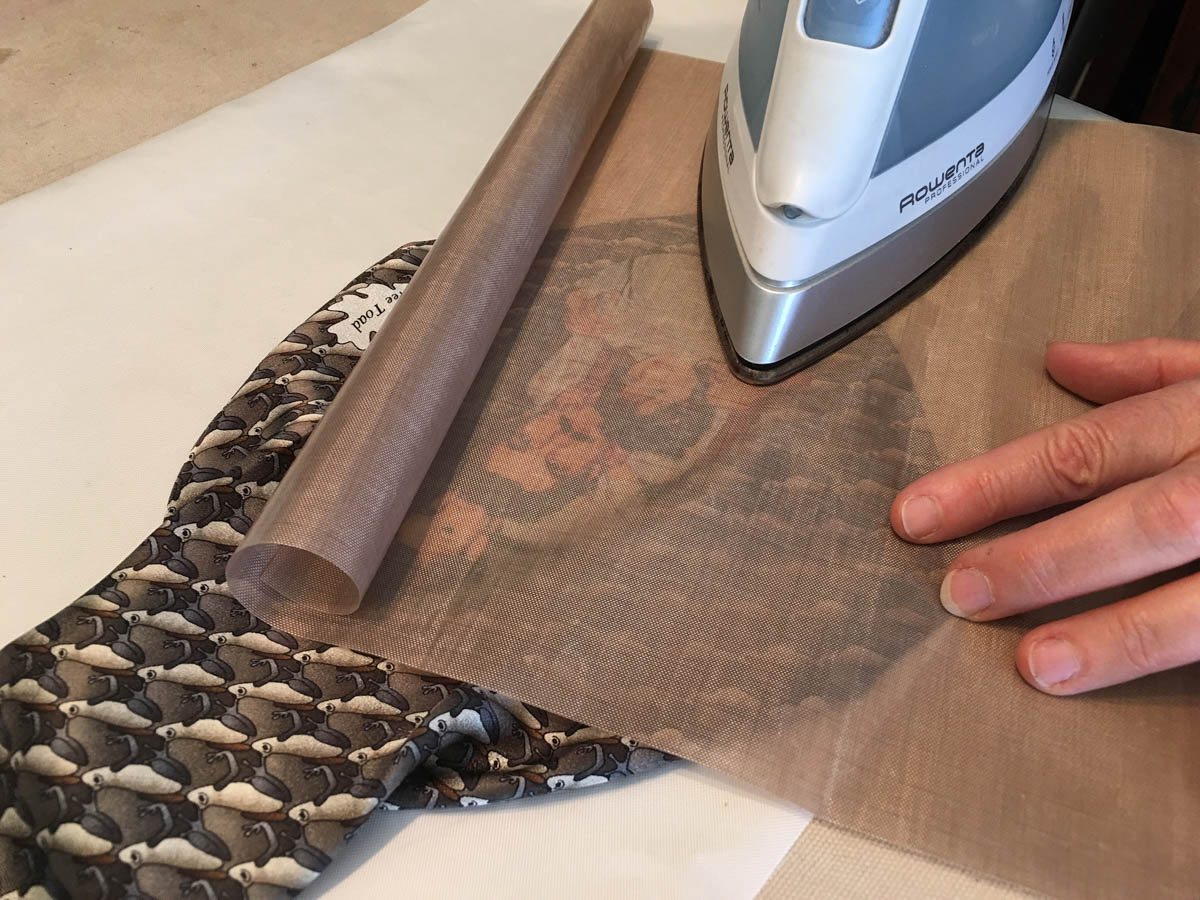
Once you have printed the silk fabric sheet and let the ink dry, peel the backing sheet off, making sure not to distort the bias of the fabric. The next step is to apply a fusible material, such as Wonder Under, to the back side of the fabric print. The fusible material will also help keep the silk from raveling when the image is cut out.
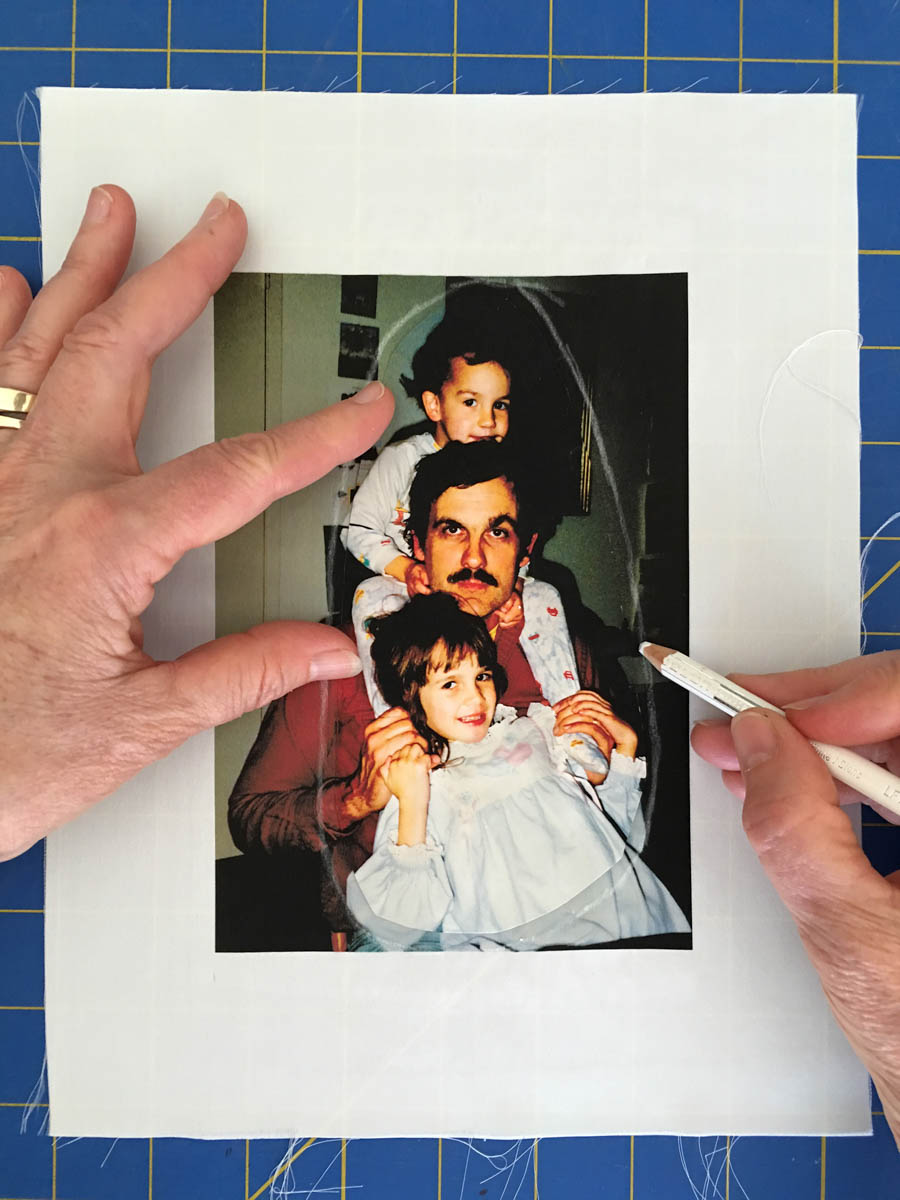
Because the silk fabric sheet is so flimsy once released from the backing paper, it may be difficult to cut out. You can use the paper cutout of your test print as a template to mark the part of the image you want to cut out on the silk fabric. Place the paper template over the silk print and using a colored or chalk pencil, draw an outline around the template, leaving a little space.
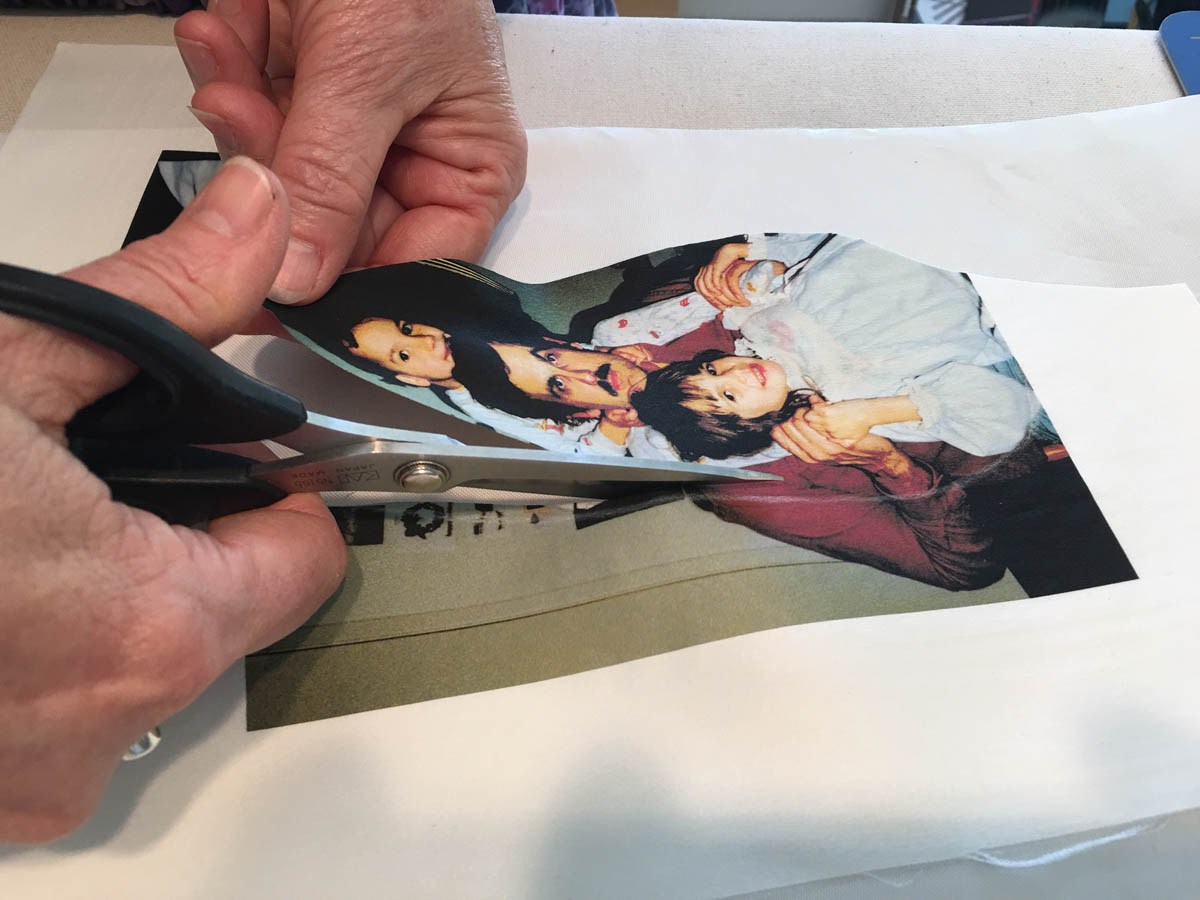
When cutting the silk fabric print, cut just inside the colored outline.
The next step is to open up the back of the tie to get a flat surface for fusing and stitching the fabric photo cutout print. You only need to open the lower part of the back of the tie where you are going to add the fabric photo image.
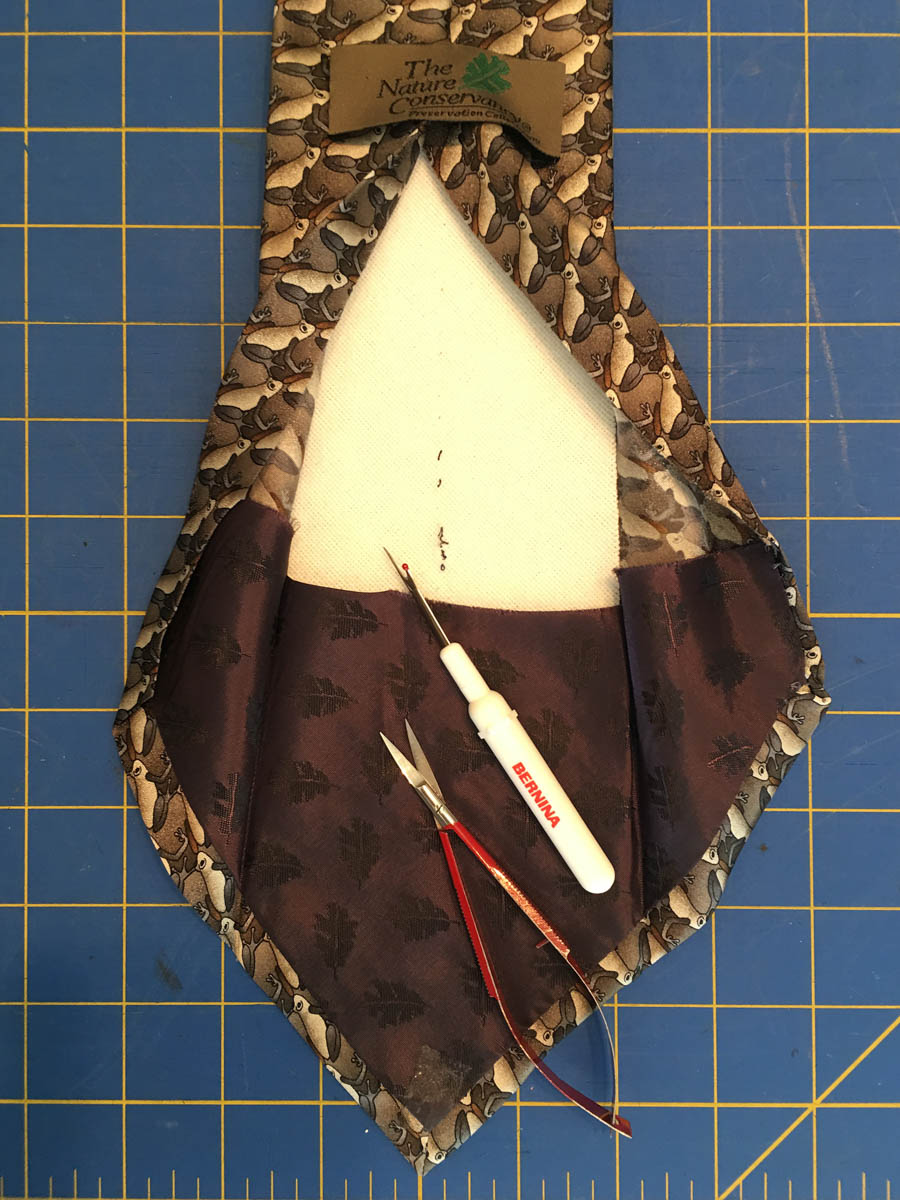
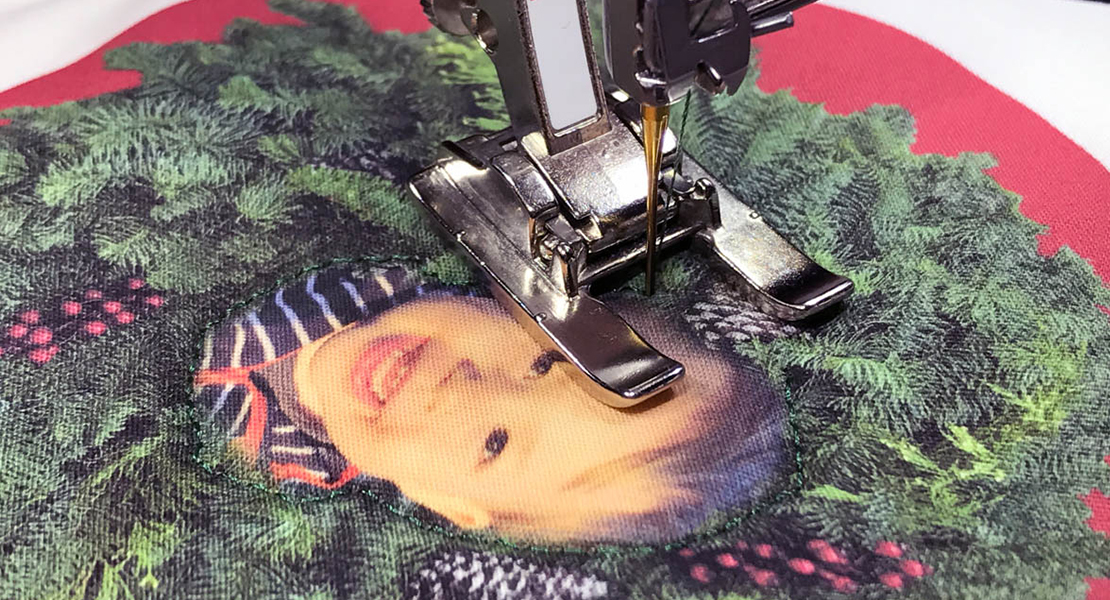
The next step is to fuse the fabric photo image on the tie. A press sheet helps protect the delicate silk of the print and the tie. The fusible keeps the raw edge applique smooth and ravel-free.
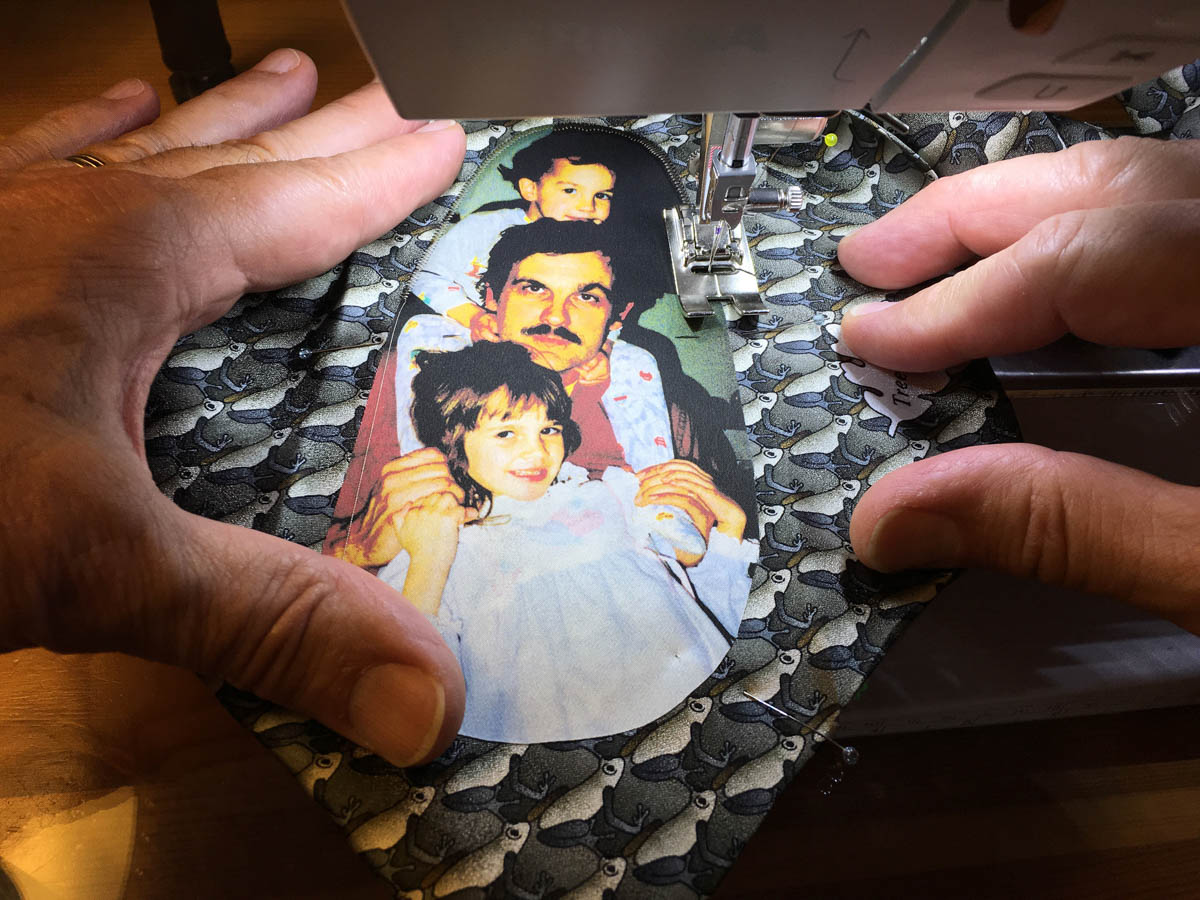
I used a few pins to stabilize the layers of fabric.
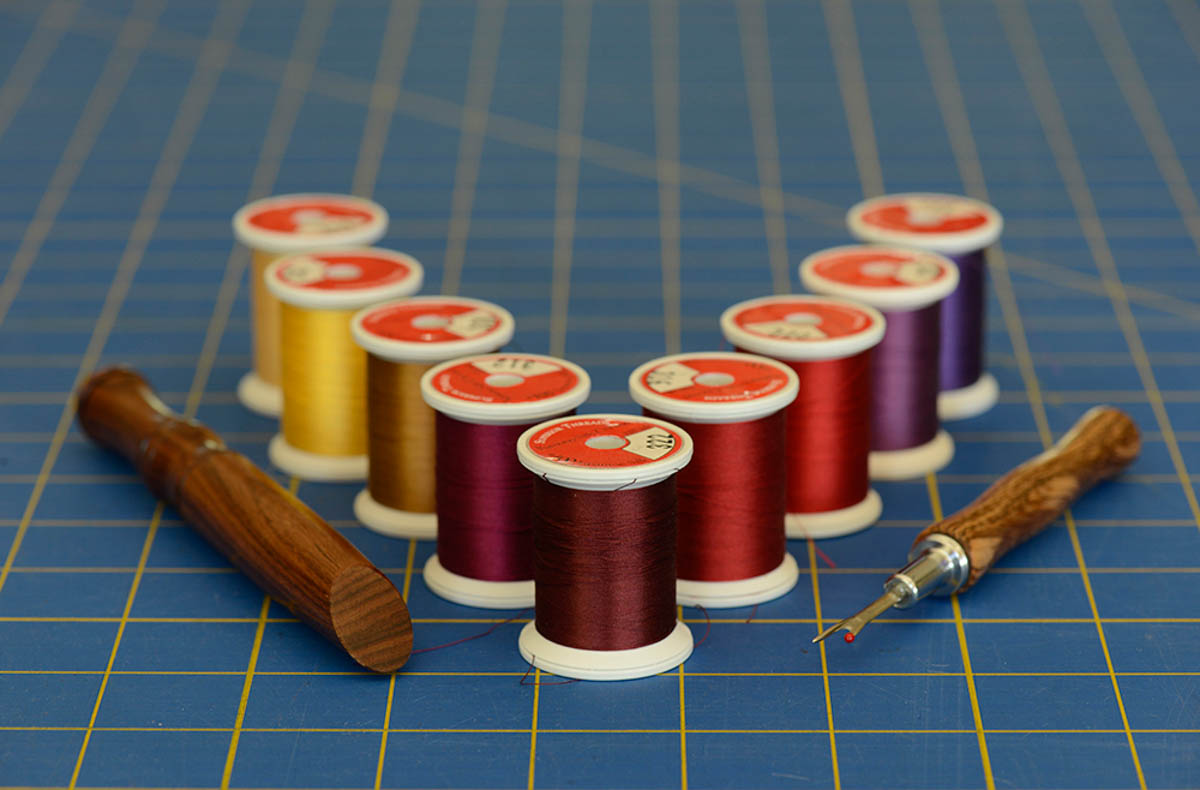
Because I was using silk materials, I chose 100# silk thread for both the top thread and in the bobbin. To keep the needle holes as small as possible, I used a 60/8 Microtex Sharp needle. Because the hole on the needle is small I hand threaded it instead of using the BERNINA 770 QE’s needle threader.
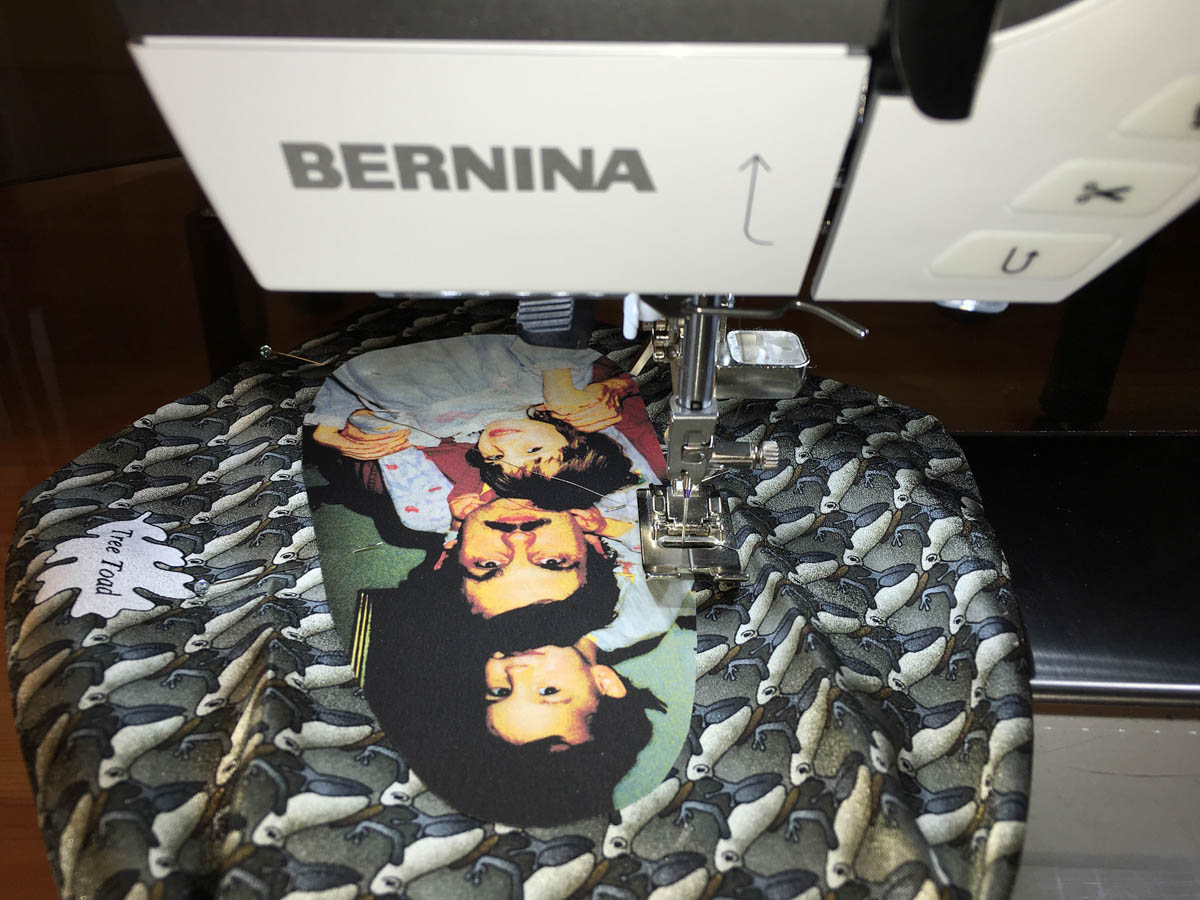
My presser foot was the BERNINA Reverse pattern foot #1C. Use a narrow zigzag stitch to appliqué the silk photo fabric image to the tie. Once the image is stitched onto the tie, replace the opened sides of the tie to the back as they were before, press, and hand stitch them closed.
All that is left is to box up and gift wrap this one-of-a-kind tie for the Father you want to celebrate.