How to Sew a Blind Hem
In romance languages, a blind hem is called an ‘invisible’ hem. This means that none of the stitches that go into the hemming process are visible from the outside; all stitching is done on the hem allowance that is tucked inside.
In this tutorial, we’ll review the basic steps to sew a blind hem, with tips along the way that will make it easier to achieve professional results.
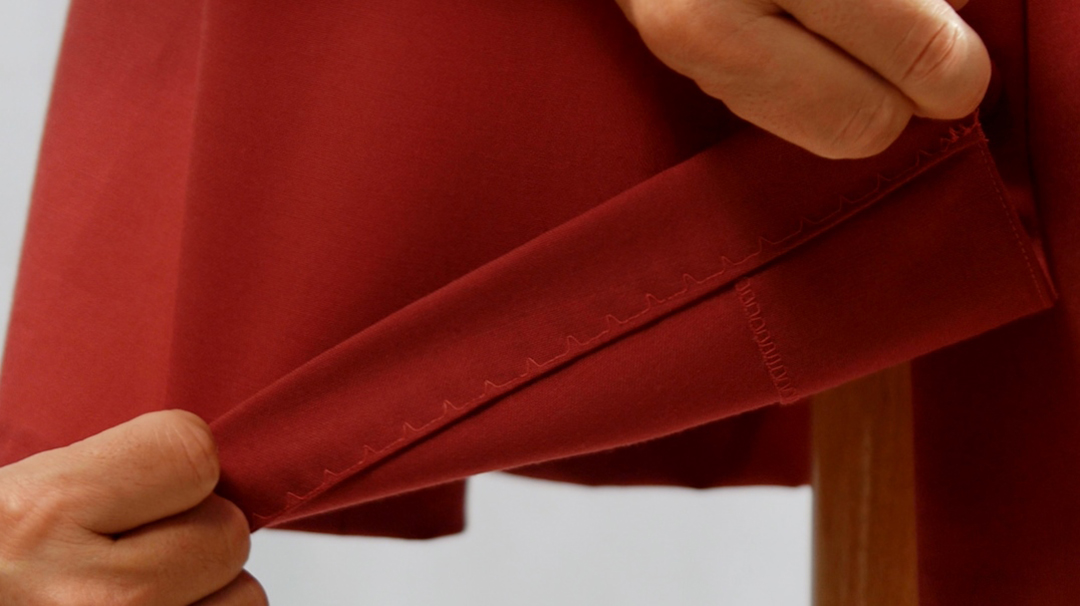
In short, a blind hem consists of straight stitches traveling along the hem (on the far right), taken on the hem allowance interrupted by single zig-zag stitches (on the left) that ‘bite’ only as much as needed to capture the fabric of the project or garment and thus secure the hem allowance without leaving a trace on the right side.
What is a Blind Hem Suitable For?
- Suits, dresses, tailored garments, etc. where the hem is to be sewn but not seen
- Heavy projects where a hem sewn through the layers would be too stiff and bulky, typically leading to the hem pulling up
- Deep hems on curtains: a blind hem allows the curtains to hand freely all the way to the bottom, promoting the intended drape (pun unintended) of the fabric
- Any other application where the hem has to hang free without stitches showing
What a Blind Hem is NOT Suited For:
- Sheer and exceptionally lightweight fabrics: the zig-zag stitches will be impossible to hide in the (lack of) thickness of the fabric
- Hems that are subject to heavy wear and/or friction:
- Jeans
- Furniture coverings
- Awnings and other exterior projects subjected to wind and buffeting
- For hems on knits (e.g. t-shirts), a blind hem leaves the raw edge of the hem allowance with a tendency to curl up which causes the hem to not hang straight.
- TIP: A 4 mm double-needle hem (with lowered thread tension) will yield better results for most.
A Bit of Blind Hem History
There are commercial blind hemming machines that use a single (very slender) thread, whipping it around to fasten the hem without leaving a trace. While that allows hemming at high speed, it’s a one-thread deal. One snag of the hem of the pants (e.g. on your boots in winter) and the hem rapidly unravels.
Home sewing machines have long had a blind hem stitch. I remember way back reading complaints about sewing machine blind hems not hanging free. That they would pull up toward the right side of the garment. Not on a BERNINA.
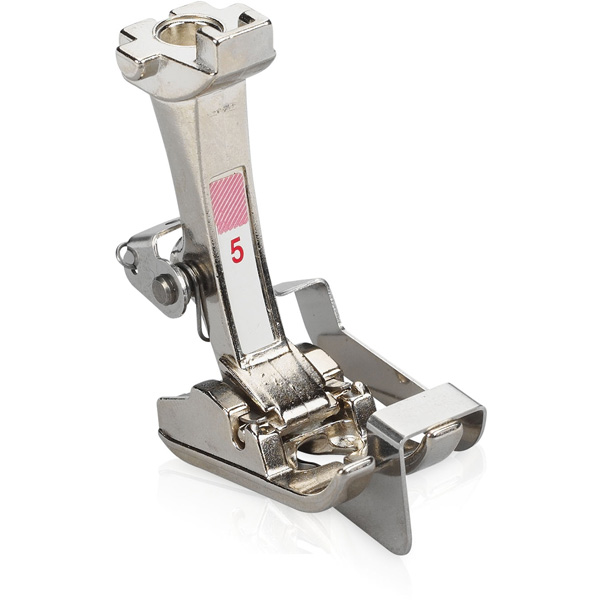
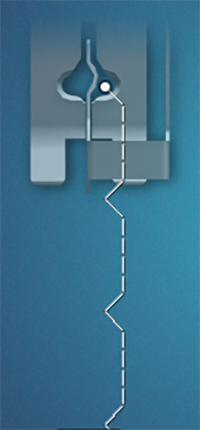
The BERNINA Blindstitch Foot #5 has a blade (guide) that lets you keep the fabric aligned as you sew the hem. The secret sauce, however, is that the guide extends from front to back, past the stitching point. So when the machine takes the zigzag stitch on the left, both legs of that zigzag stitch are laid over the blade, generating some slack in that portion of the stitch. That slack is what allows the blind hem to hang freely and to not ride up once it is sewn.
How to Sew a Blind Hem
Prepping the Hem:
Note: There are two basic scenarios:
-
Hemming a project being made from scratch:
If you are making a project from scratch, you can pre-cut the fabric to the right length, with the intended hem allowance included. In such cases, you can conduct the steps that follow easily; overcast the raw edge and use a hem gauge to measure the hem allowance as you turn it in and press it.
-
Hemming (often re-hemming) an existing article (e.g. shortening dress pants).
In these common cases, the steps below will illustrate the process, only the sequence will be different.
Note: The steps below reflect the process of sewing a blind hem on a project assembled from scratch (e.g. making a skirt, pants or hemming curtains being made).
For re-hemming an item already made:
(e.g. shortening a skirt or pants), the process is very similar, only the sequence varies. See the modified sequence at the bottom of this article.
-
Plan/trim the hem allowance down to the desired hem depth:
TIP: If you know the depth of the hem allowance you can cut the fabric with the intended hem allowance, adding the allowance to the finished size of the piece:
- g. 1 – 1.5 inch wide on garments
- 3-6 inches deep on curtains
Curtain Tips:
- Allow a wider/deeper hem allowance on curtains at first. Pin the hem in place and test for the hang and drape of the panel.
- Trim to a narrower hem allowance based on the thickness and weight of the curtain fabric until you like the ‘hang’ of the curtain.
-
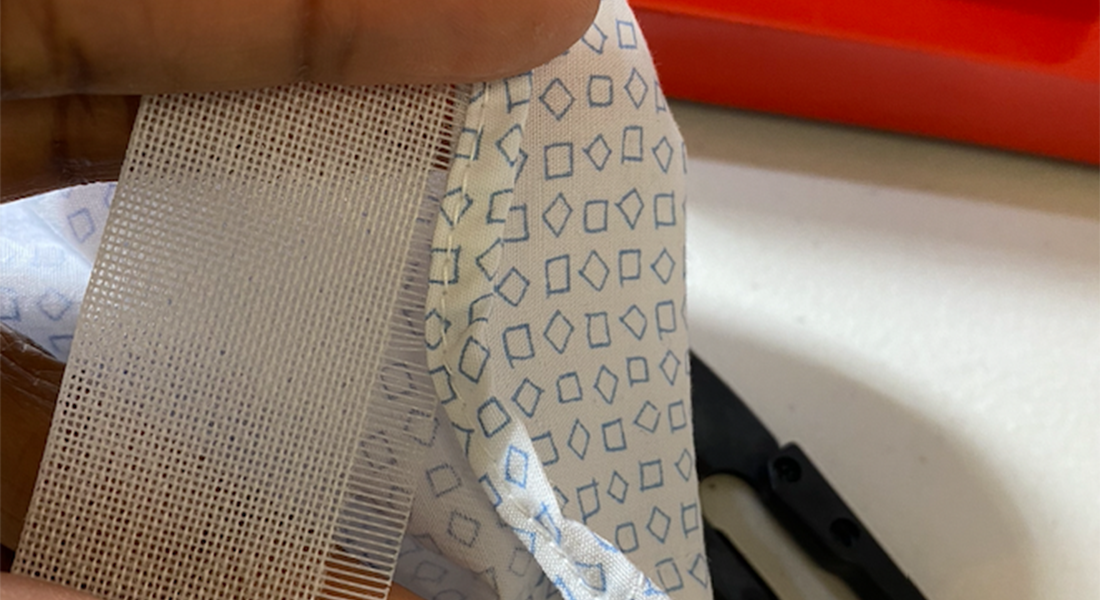
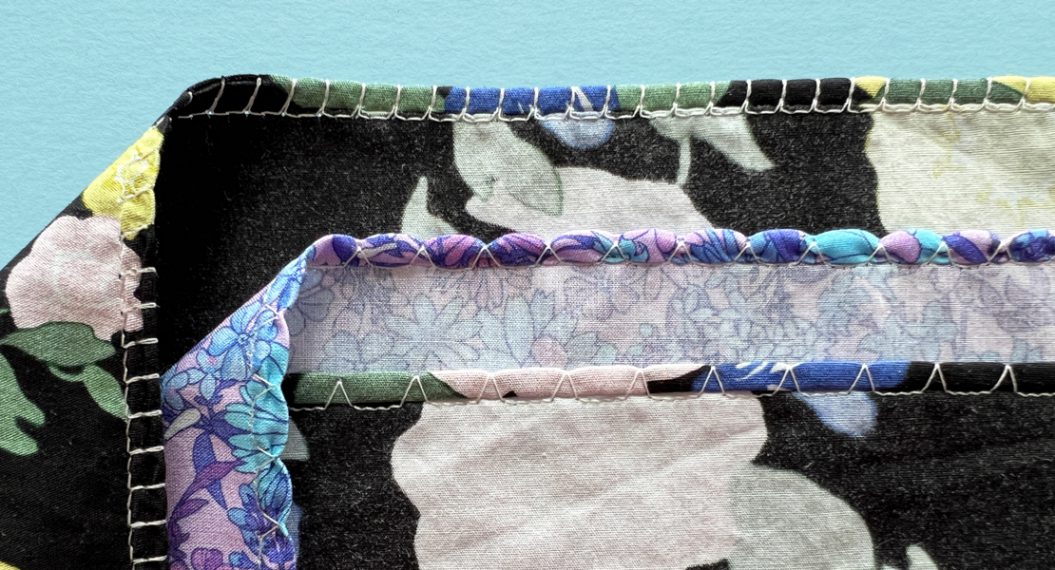
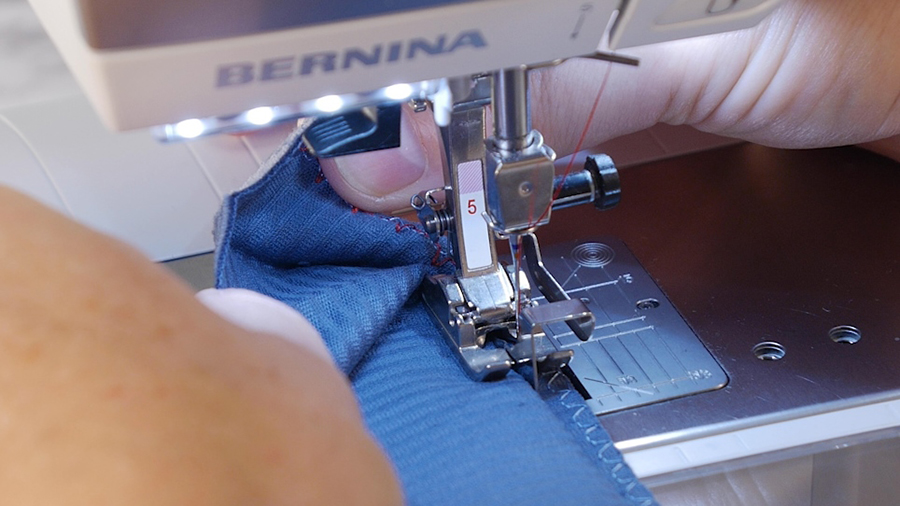
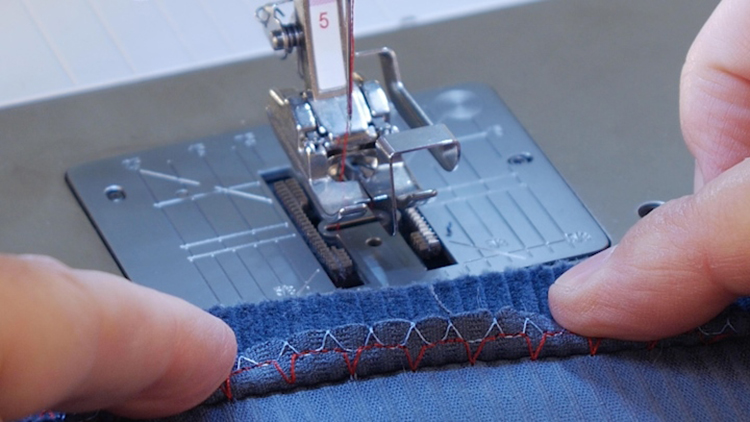
If the fabric is prone to fraying (most are), secure the raw edge with the Vari-Overlock Stitch.
TIP: If you have an overlocker, you can secure the raw edge faster with a regular 3-thread overlock stitch.
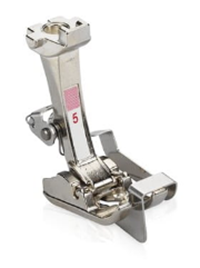
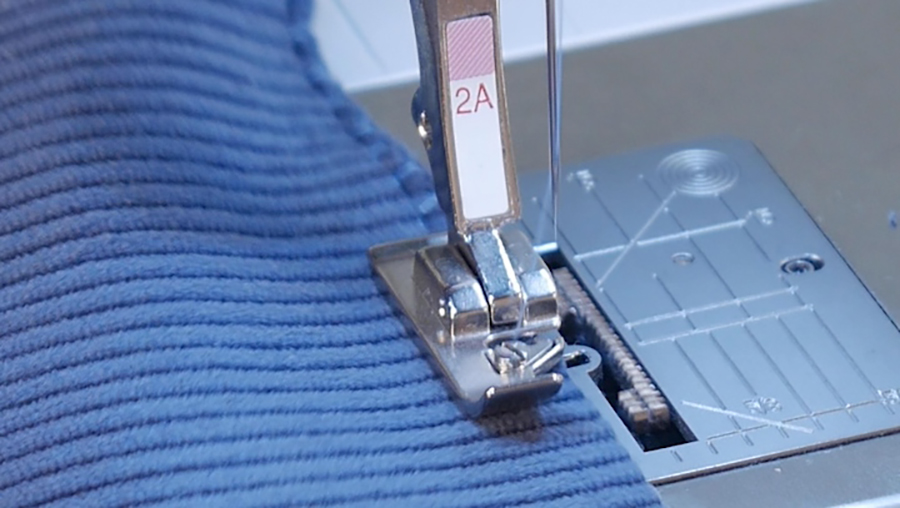
- Select the Vari-Overlock stitch (Stitch #3 on most current and recent BERNINA machines)
- Attach Presser Foot #2/2A
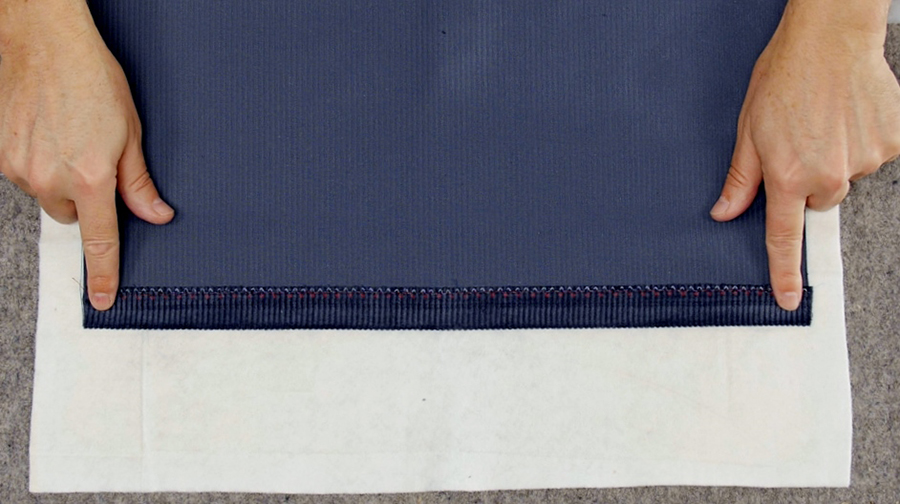
If you are making a project from scratch, you can pre-cut the fabric to the right length, with the intended hem allowance included. In such cases, you can overcast the raw edge before folding and pressing the hem line.
- Fold the project at the intended hem line and turn so that the main fabric is right side down and hem is turned up.
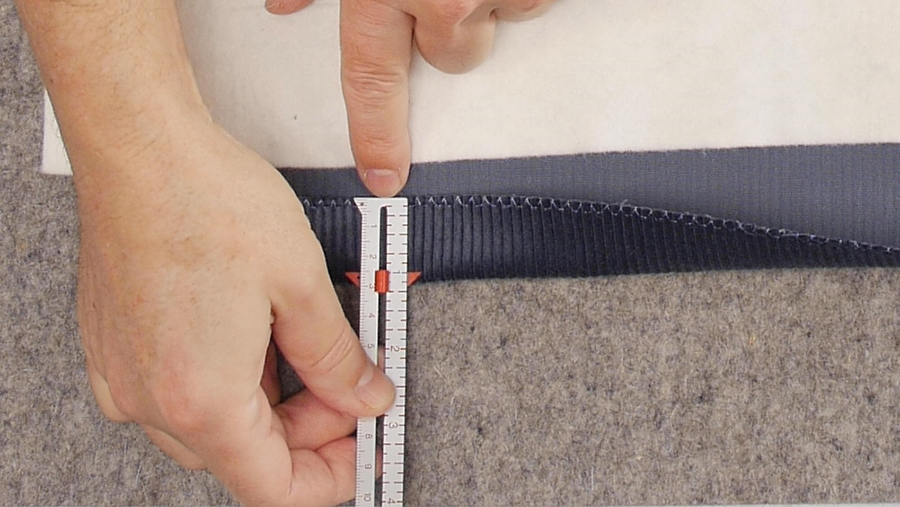
Use a hem gauge to verify the turned-in hem allowance is of the correct (and regular) depth. Note that on projects constructed from scratch, the raw edge can be overcast prior to folding the hem.
-
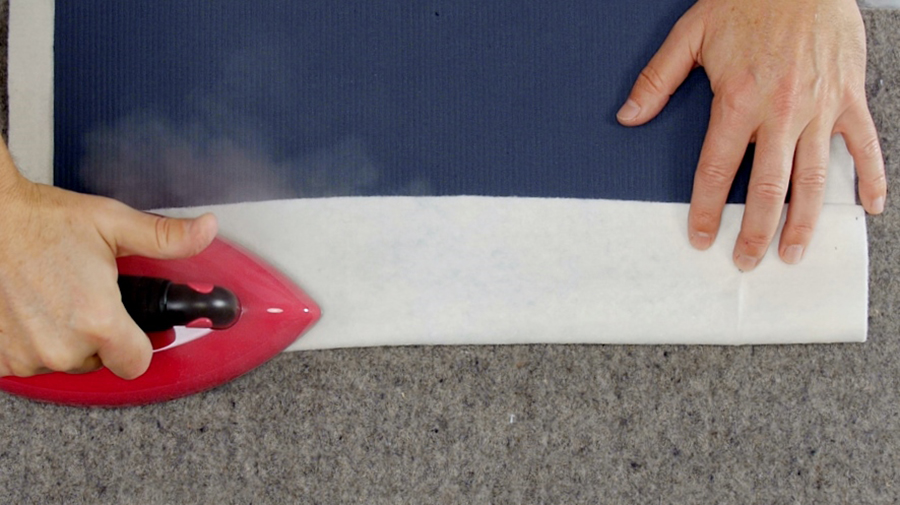
Press the hem line to set it:
TIPS:
- Pressing will make handling the garment/project/fabric easier while stitching the hem.
- Insert a pressing cloth between the main fabric panel and the hem allowance to avoid creating an imprint of the hem into the outside of the project.
TIP: If pressing inside pant legs, use a small piece of folded cloth so you can place it along your pressing points.
- Press with the hem allowance turning up.
Pressing is shown here with a pre-trimmed hem allowance (e.g., for a skirt or pants)

Pressing Tips:
- Set your iron to dry.
- Position the iron and issue a brief puff of steam. (On my iron, I press the steam puff button about 1/3 of its way down)
- Linger a couple of seconds with the iron back to dry (after the steam has stopped coming out) to set the crease at the hem line.
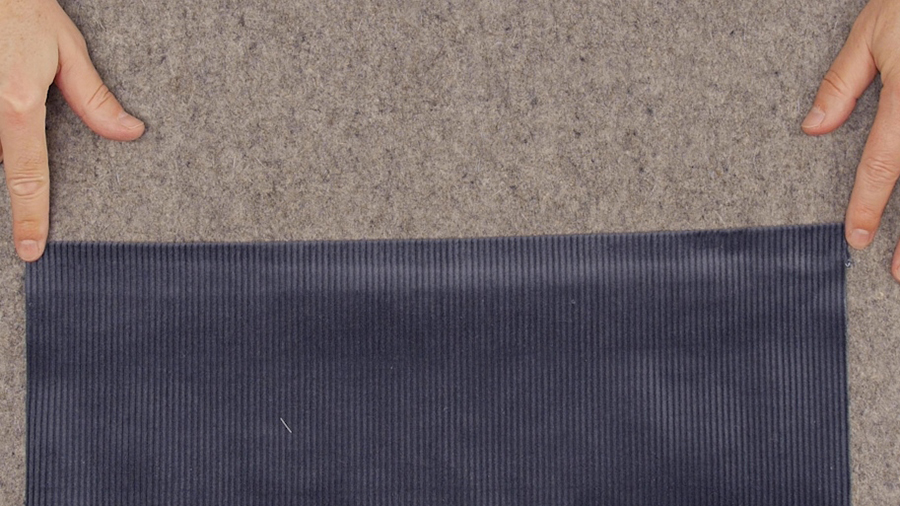
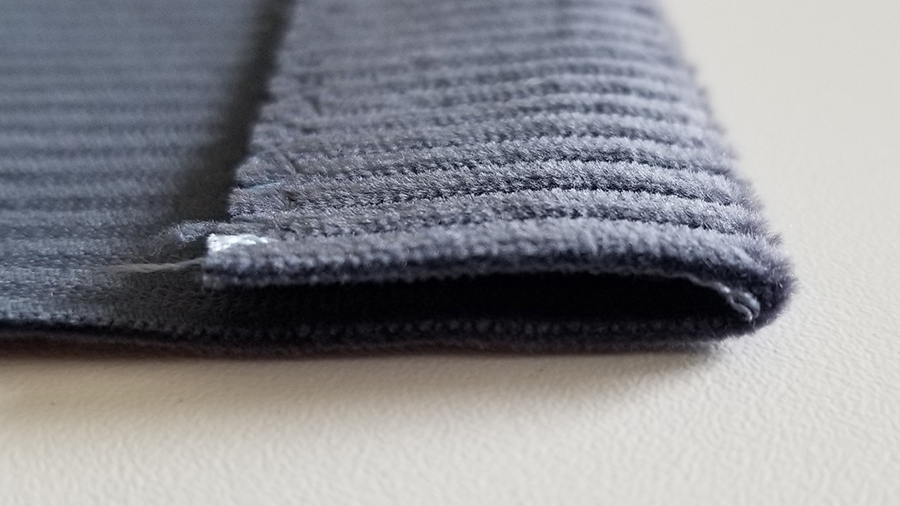
Hem turned and pressed.
Note: Corduroy is a good fabric to test this pressing technique as it easily shows any imprint from pressing the hem. The imprint here is a fraction of what it would be without the use of a pressing cloth and will fade out as the project is put in service.
-
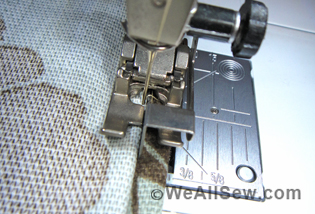
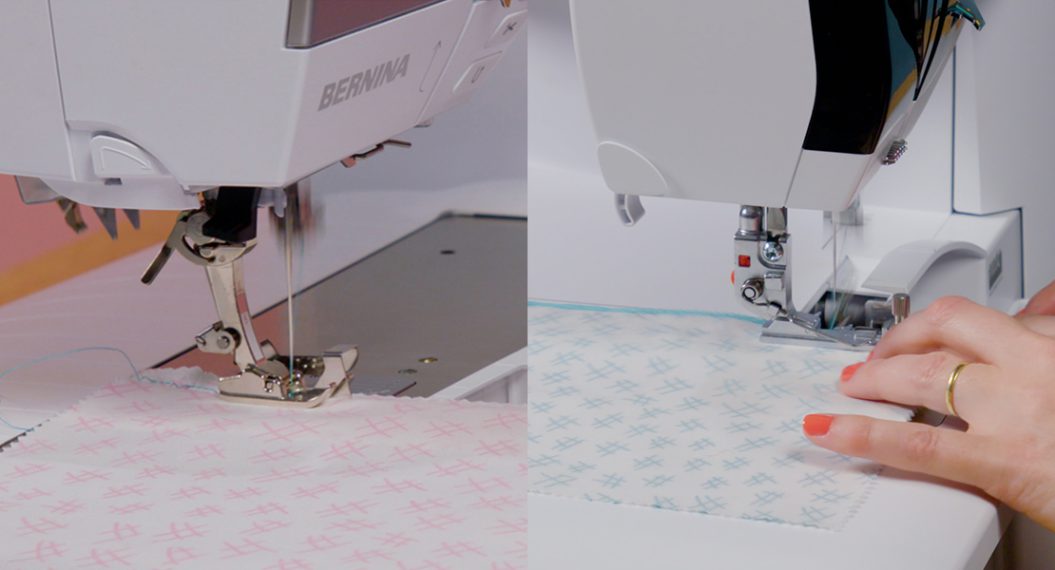
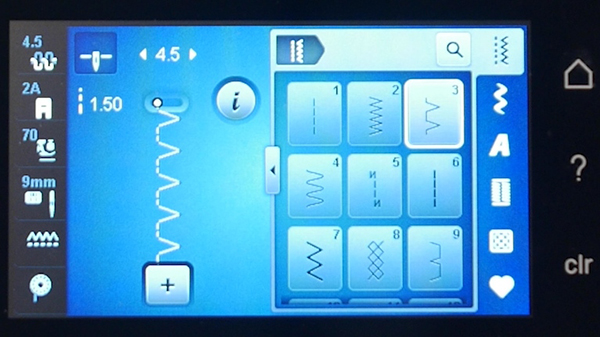
Set the machine for a blind hem:
- Attach Blindtitch Foot #5:
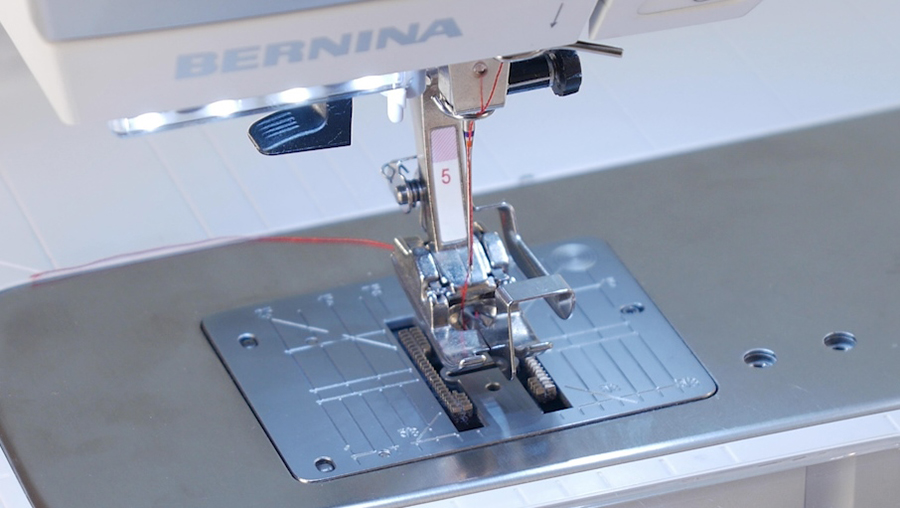
- Select the Blind Hem Stitch #9 (on most current and recent BERNINA models)

- Activate the Securing Function if available on your machine to secure the start of the seam.
TIP: If your machine lacks a securing function, you can drop the feed dog and take the first 4-5 stitches with the feed dog down to secure the beginning of the seam, and repeat this step at the end.
- Activate the needle ‘down’ function on your machine if available. This will help prevent your hem from swaying as you reposition your hands on the project along the hem seam.
-
-
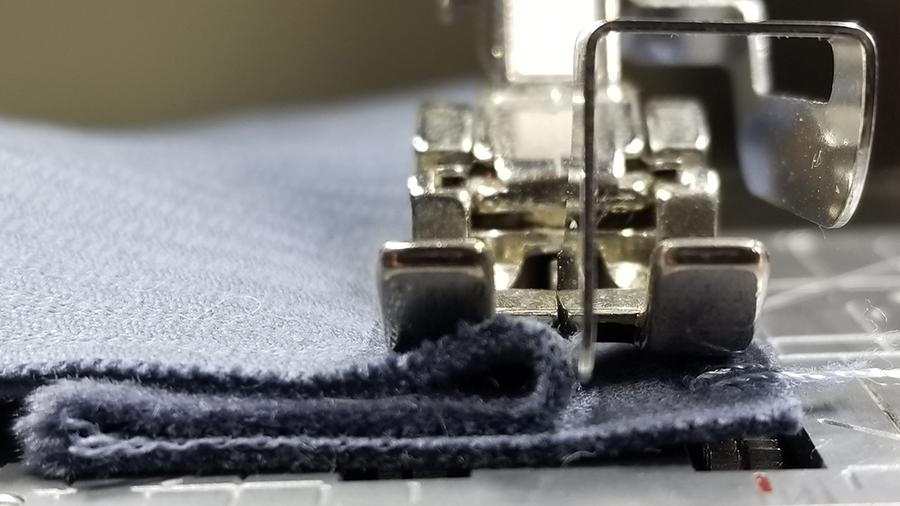
Position the hem on the machine:
-
- With the main fabric panel right side down and with the hem allowance turned up.
- Hold the two layers along the hem and turn them both under, together. Note: the main panel will curl up and away from the raw edge of the hem allowance
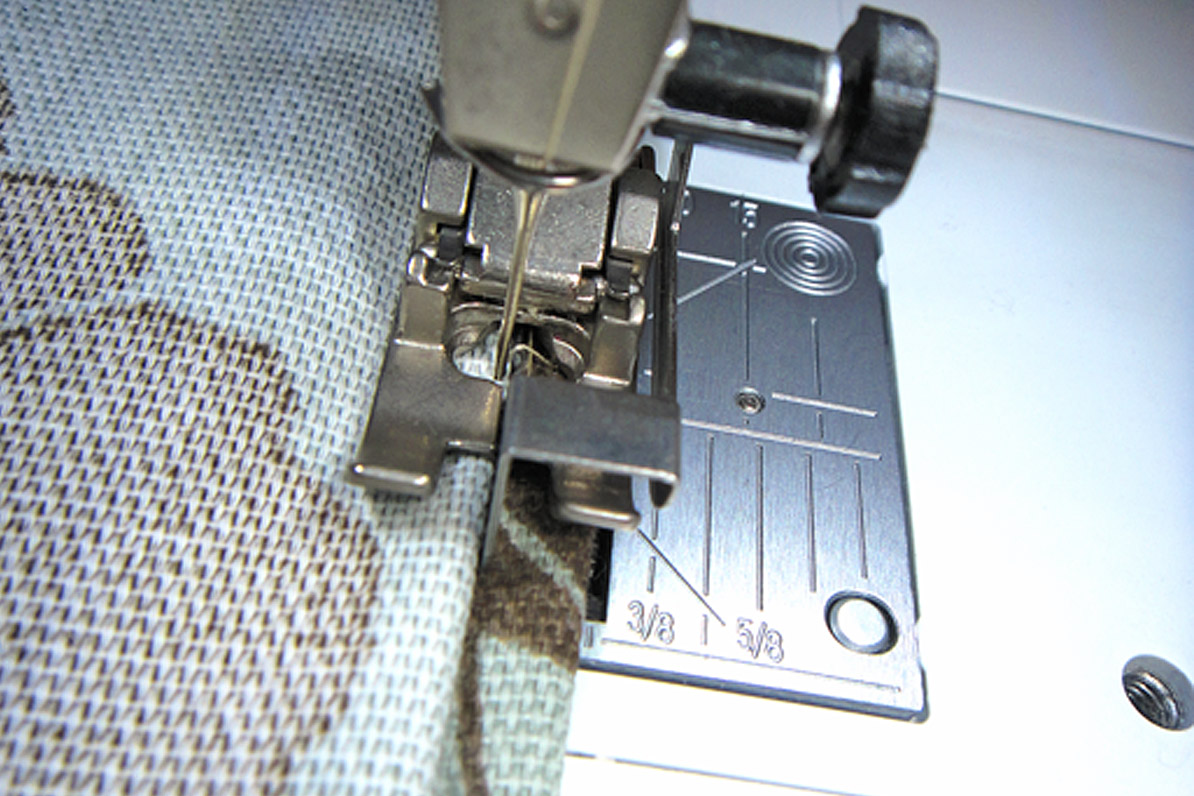
- Position the hem under the presser foot:
- The right edge of the foot should align with the raw (now overcast) edge of the fabric.
- The curled-up fabric should be coaxed back toward the guide at the center of the foot so that it folds on itself, with the fold butting against the foot guide.
-
Start sewing the hem:
Note: With Blindstitch Foot #5, the blind hem stitch is automatically based on the far right needle position (the straight stitch portion will be on the far right). Widening or narrowing the stitch will only affect the zigzag portion of the blind hem stitch, sending it further toward or away from the fold of the fabric, to accommodate various fabric thicknesses, plushness, etc.
TIP: For tubular items like skirts and pant legs, start at the intersection of a side seam. The thicker layers there make it easier to conceal the startup stitches.
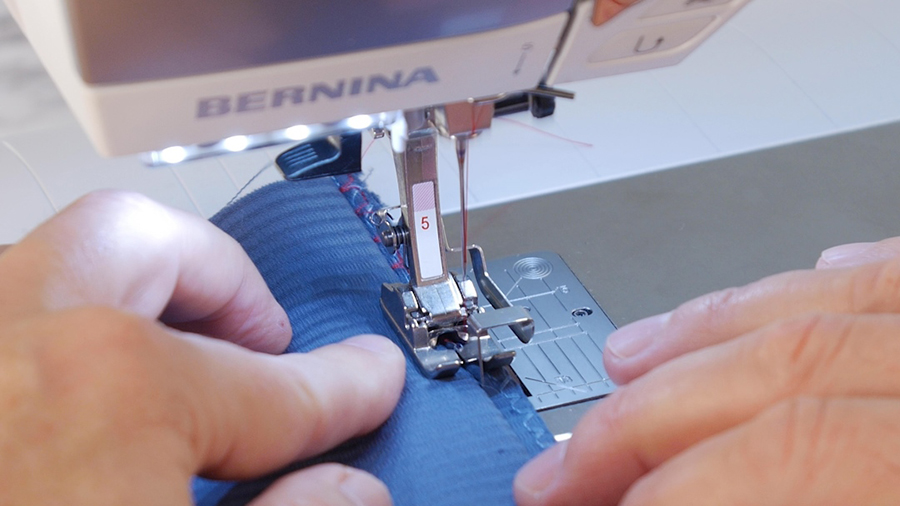
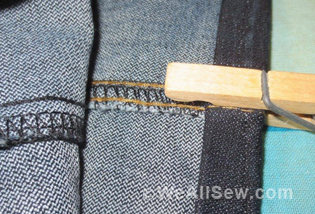
- After a couple of inches of stitches, pause and verify that the left swing of the needle (on the periodic zig zag stitches) actually bit into the fold of the fabric. You can check at the same time that the stitch is not showing on the right side of the fabric.
Adjust the stitch width as needed:
NOTE: The left swing of the zigzag portion of the stitch should just catch the fold without the sewing thread showing on the right side of the fabric.
- If the left swing of the zigzag stitch did not catch the fold of the fabric:
- Widen the stitch by 0.1 mm at a time and stitch some more.
- Repeat until the blind hem stitch just catches the fold without showing through on the right side
TIP: On circular items, if the zigzag didn’t catch the fold, you can continue widening the stitch without restarting at the beginning of the seam. Since the stitches in this case are only into the hem allowance, all you have to do is continue stitching the hem until you come full circle to the point where the stitch started ‘catching the fold’ and overlap by a couple of stitches.
- If the left swing of the zigzag did catch the fold but is visible on the right side of the fabric:
- Make the stitch narrower by 0.1 mm at a time and stitch some more.
- Repeat until the blind hem stitch just catches the fold without showing through on the right side
-
Sew the rest of the hem:
- Keep sewing until either you come full circle (e.g., pant legs) or the end of the panel of fabric (e.g., curtains).
-
Secure the end of the hem:
- I like to use a manual securing method I ‘grew up’ with it since my early BERNINA’s didn’t have a securing function.
- My favorite securing stitch is a straight stitch, Stitch Length = 0.5 mm
- Here, I move the needle position to the far right:
- It will line up with the baseline straight stitch portion of the blind hem stitch.
- It will secure the end of the seam on the hem allowance, remaining invisible.
- Sew 4-5 stitches to secure the seam and cut the threads.
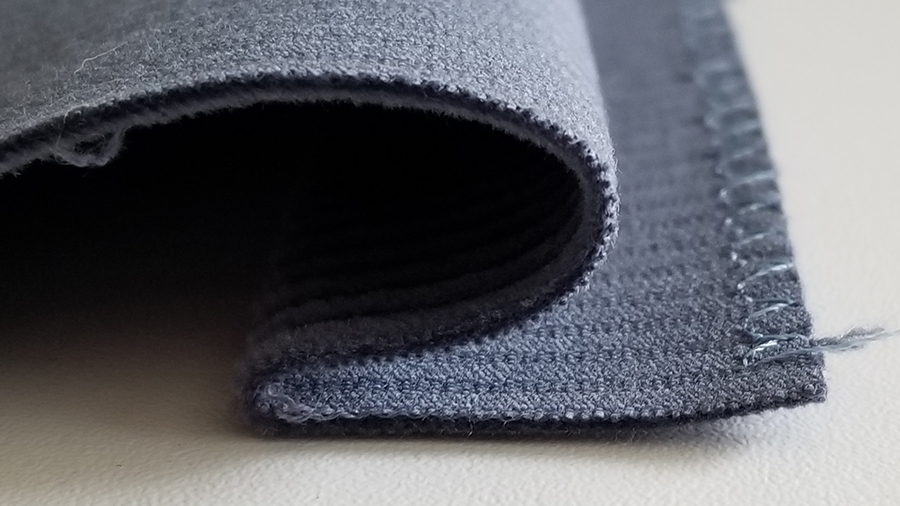
- When the hem is done, release it from the machine and verify that it lies flat when hanging down naturally:
-
Final pressing of the hem:
- Since the hem was turned (and folded) upside down for sewing, it will need a pressing to relax it so that it lies flat, without flattening it!
- The key here is to use a press cloth that wraps around the hem area. This way, the hem allowance will not show through the front of the project, or at least not as much.
TIP: Use steam and a light pressure on the iron to minimize hem allowance imprint.
Pointers for Blind Hems on Existing Articles:
e.g., re-hemming a skirt or shortening dress pants.
The process is essentially the same, only the sequence differs. So here are the steps for re-hemming:
- Measure and fold the hem in to the desired hemline.
- Press the hem line. This step will make everything that follows easier.
- Trim the hem allowance to the desired hem depth.
- Overcast the raw edge of the hem allowance.
- Fold under the hem (with hem allowance) and position under the foot of the machine as illustrated above.
- Sew the blind hem following the same process as illustrated above.
In closing…blind hems are only scary before you stitch one. Once you test drive the process, it’s no longer intimidating. And the results are impressive. Nothing gives the tailored look to a garment as a blind hem. It works wonders also on curtain hems. Not that I suggest we wear curtains!