Hemmer Feet: Sew Delicate Rolled & Shell Hems with Ease
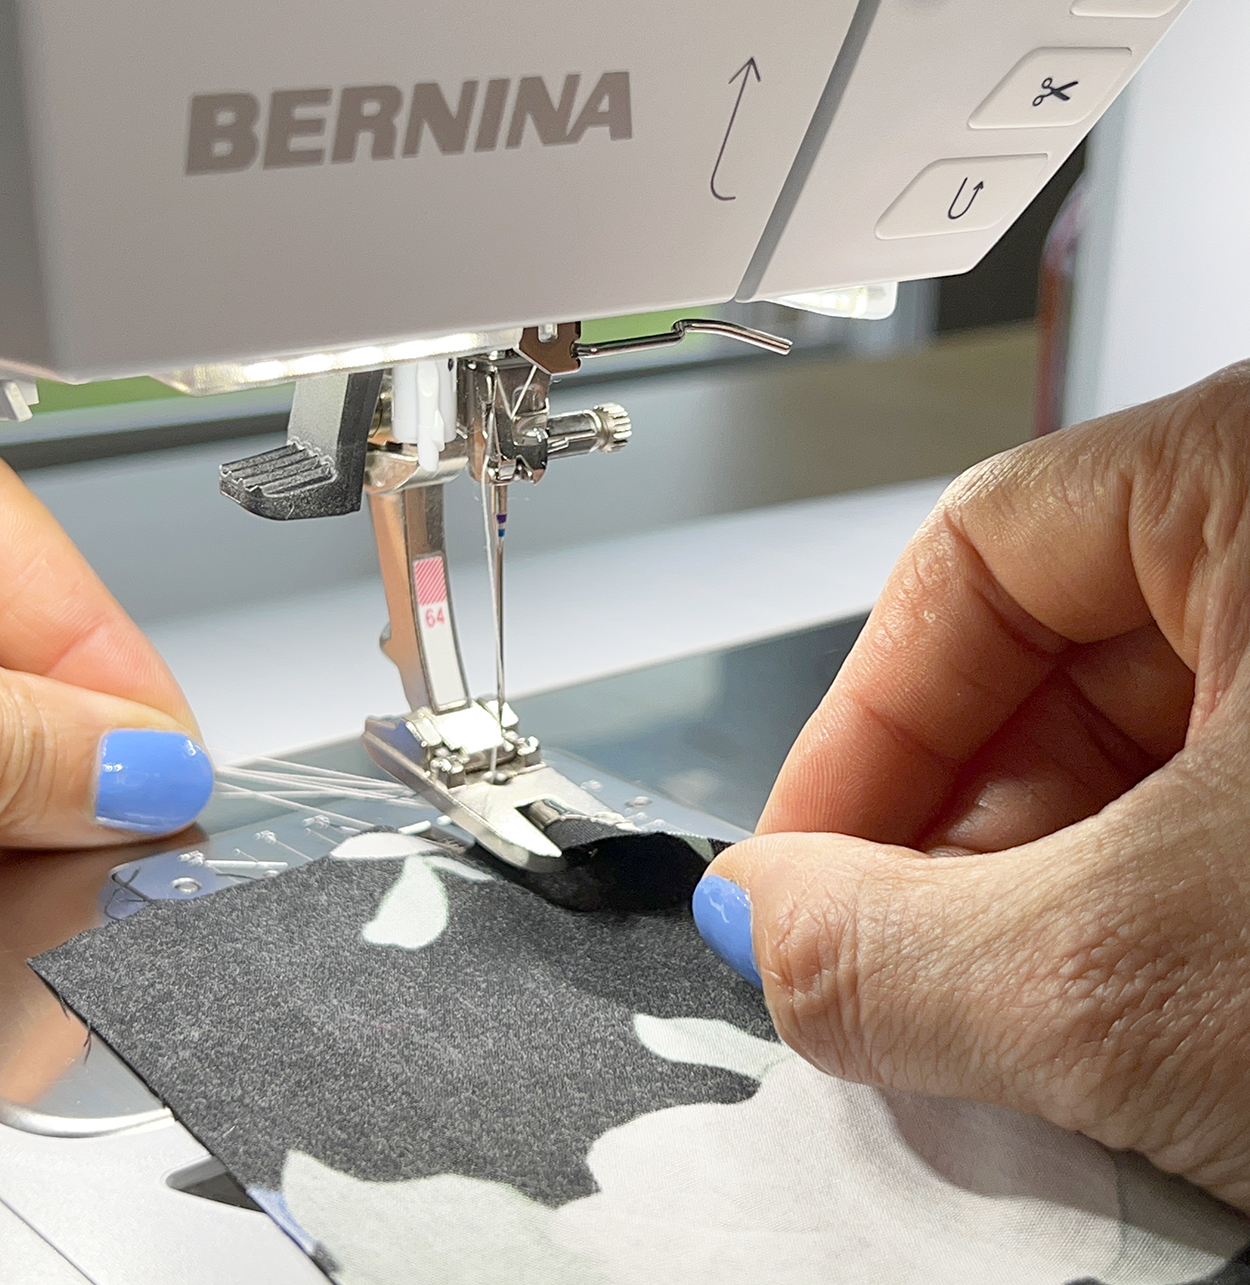
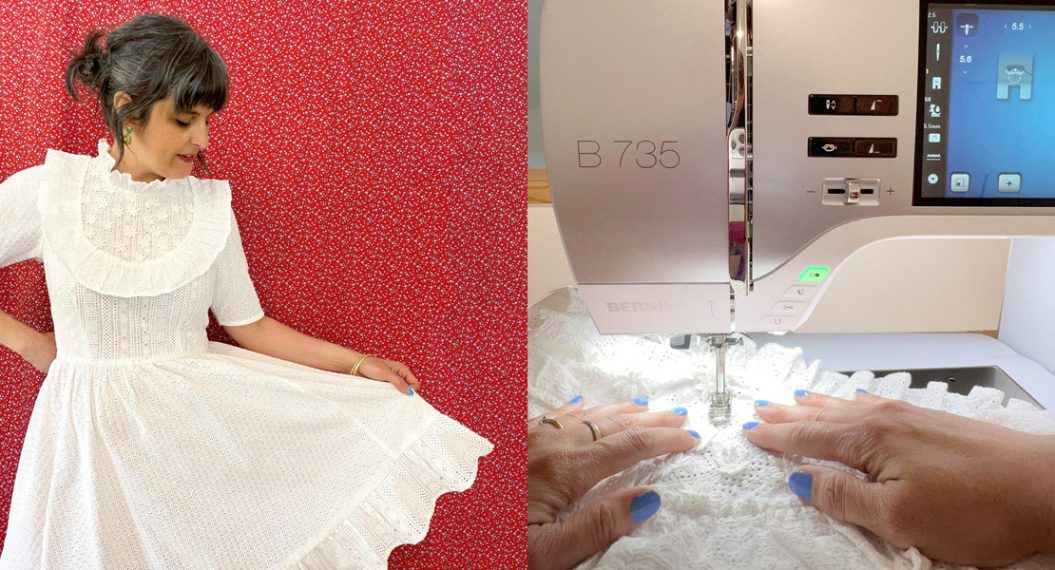
Hi everyone! Martha here from Buried Diamond. You may have read my recent review of the B 735 sewing machine. Since adding this wonderful machine to my sewing room, I have enjoyed using every foot in my collection. Some of the feet I reach for most are the BERNINA Hemmer Feet (numbers 61, 62, 64, 66, 68, and 69). These feet create delicate, double rolled hem and shell hems with just one pass of the machine.
I’m going to show you how I use Hemmer feet, with tips, tricks, and troubleshooting to help you get started with them, too. Hemmer feet, like so many things in life, have a learning curve. Practice using them, and you’ll be rewarded. Once you have the muscle memory of using these feet, you can jump straight into your projects and save time hemming. No pressing or pinning is required, just feed fabric into the foot, and it comes out the other side hemmed!
Preparing For Your Project
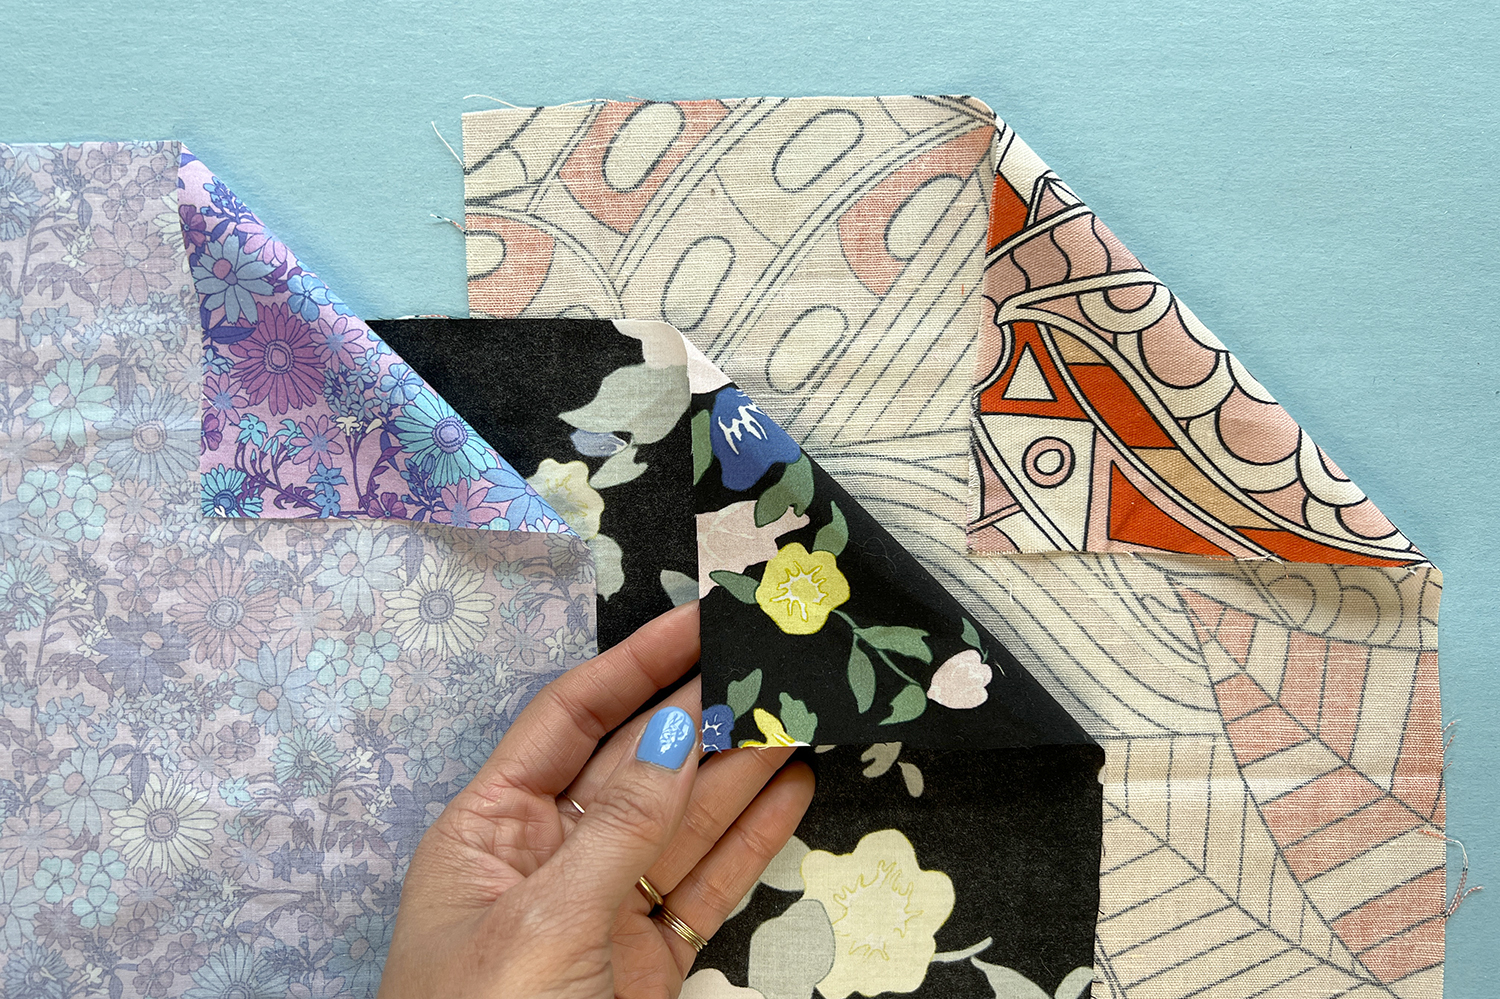
Select crisp, lightweight fabrics from your stash. Cotton lawn, batiste, and poplin are good options. While it is absolutely possible to use these feet with wiggly fabrics such as silk and rayon, I recommend mastering the basics with stable cotton fabrics first.
Press your fabric and cut strips about 3” wide to practice your technique. It is essential to have a cleanly cut edge. Don’t rip your fabric, instead, cut it with a rotary blade or sharp scissors. Begin with a fresh, sharp needle in your machine (I just cleaned and oiled mine).
This is a project where you may wish you had an extra set of hands! Use the Free Hand System (FHS) and make the most of both hands. You’ll see how much this can help when I get into troubleshooting.
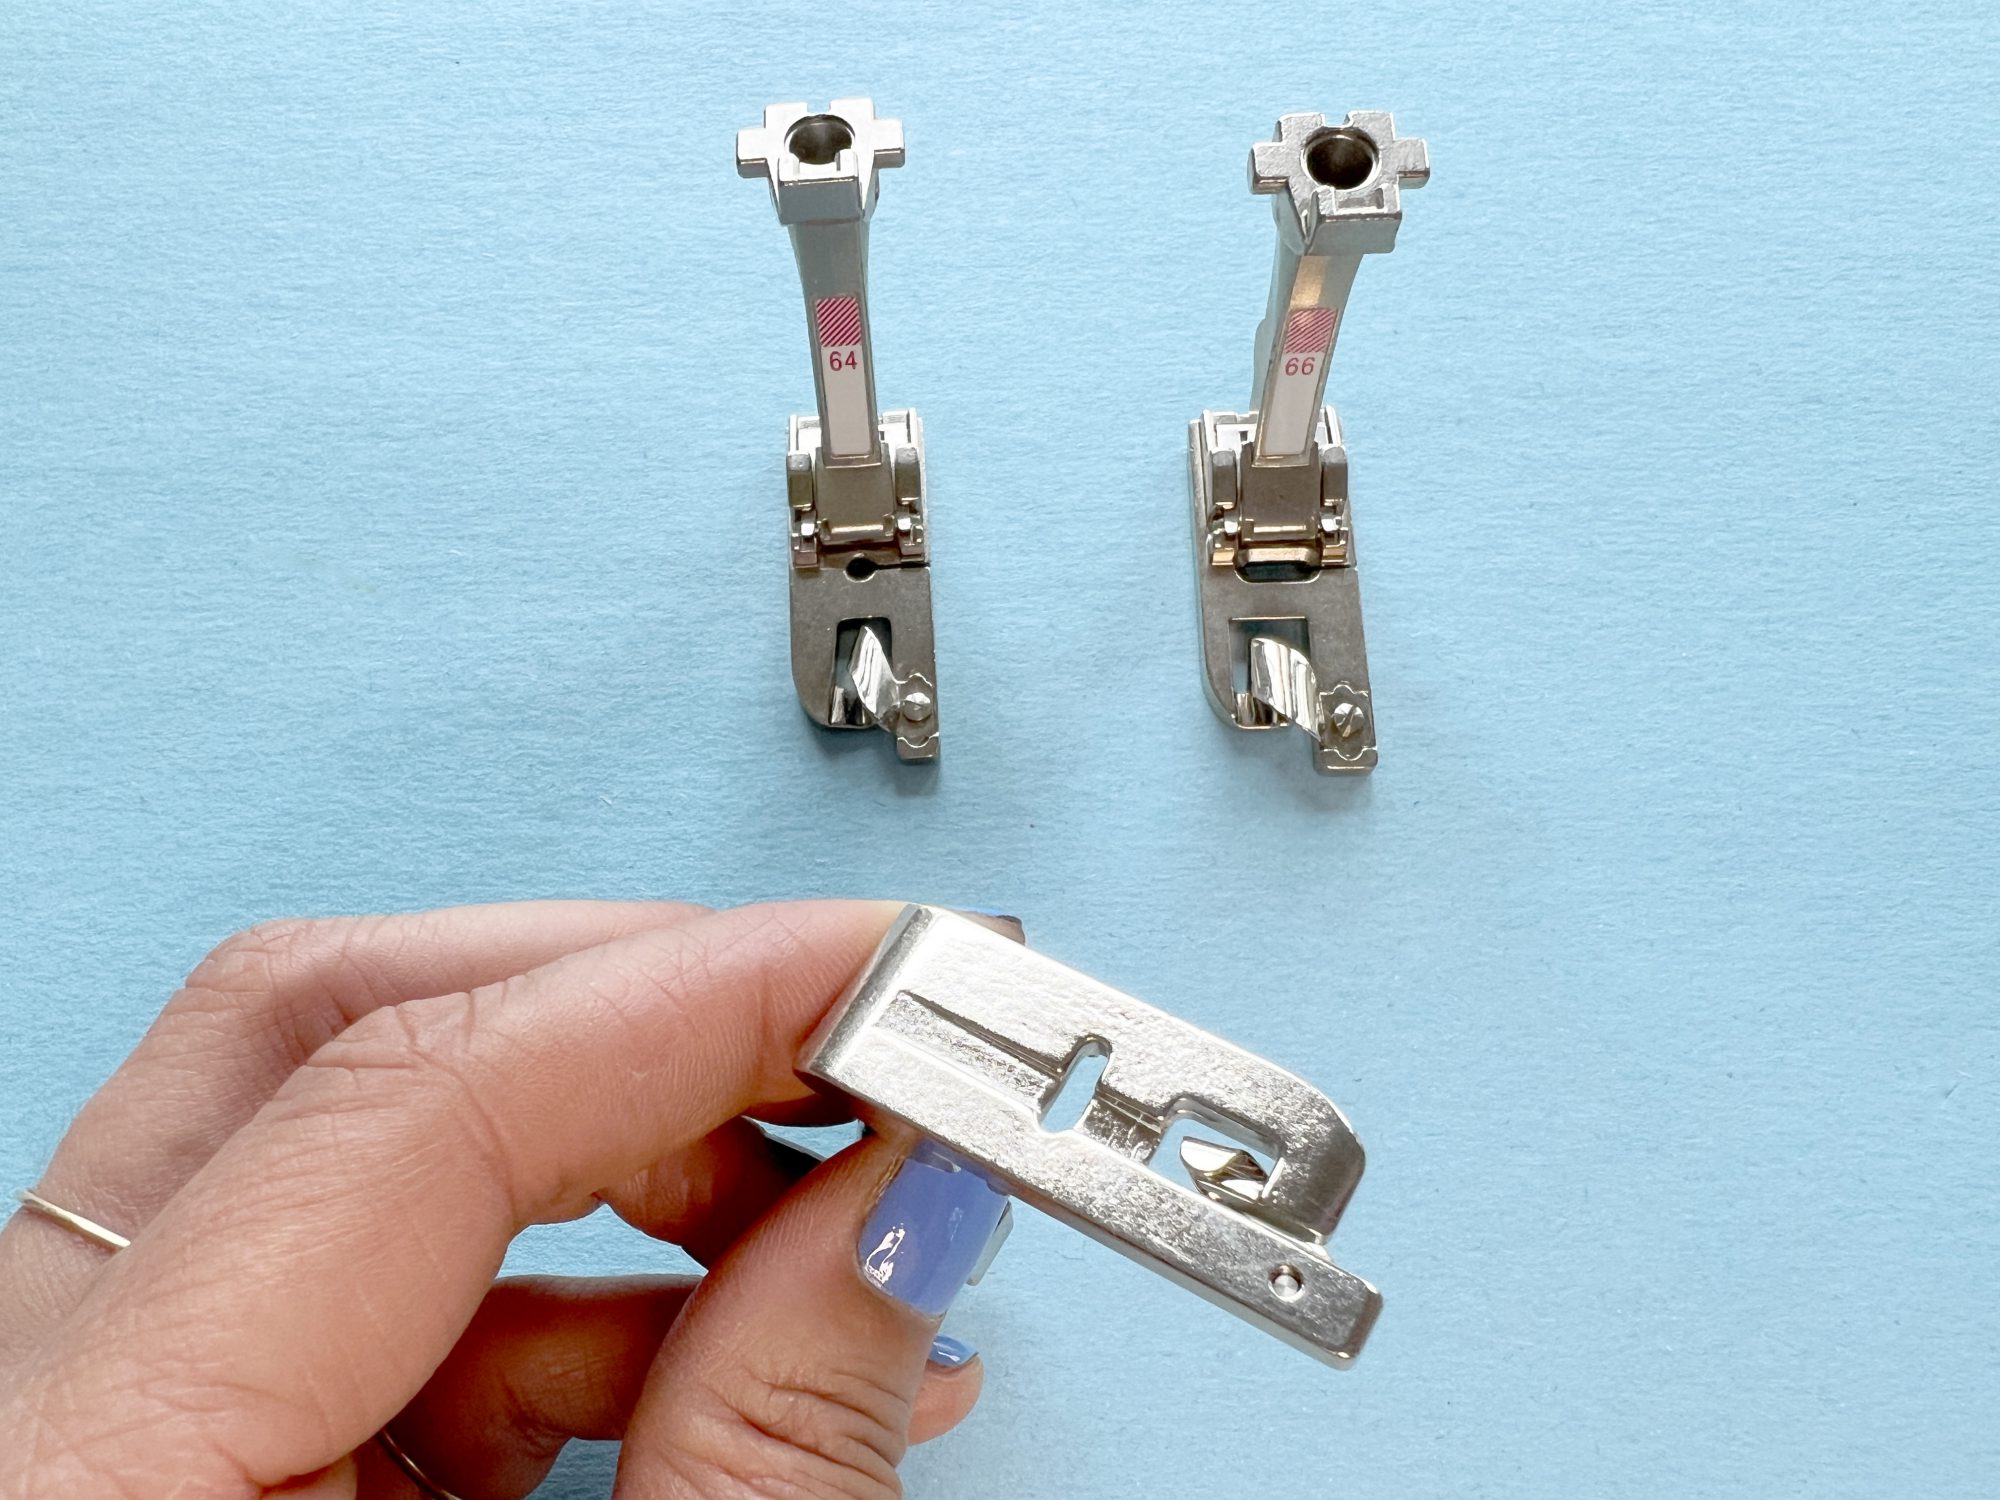
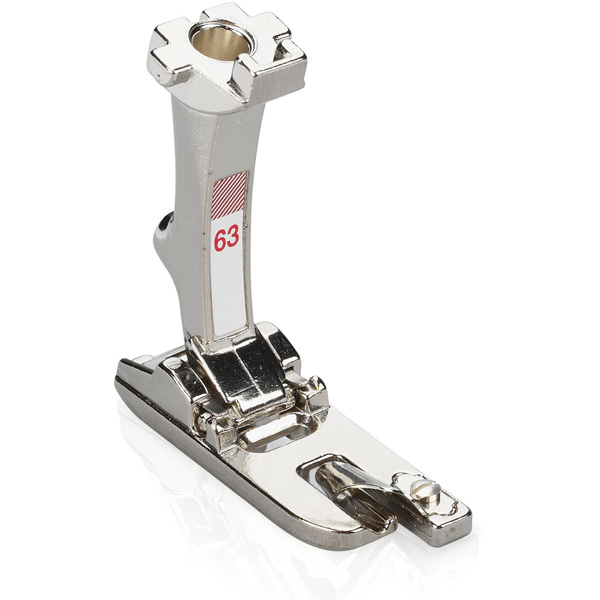
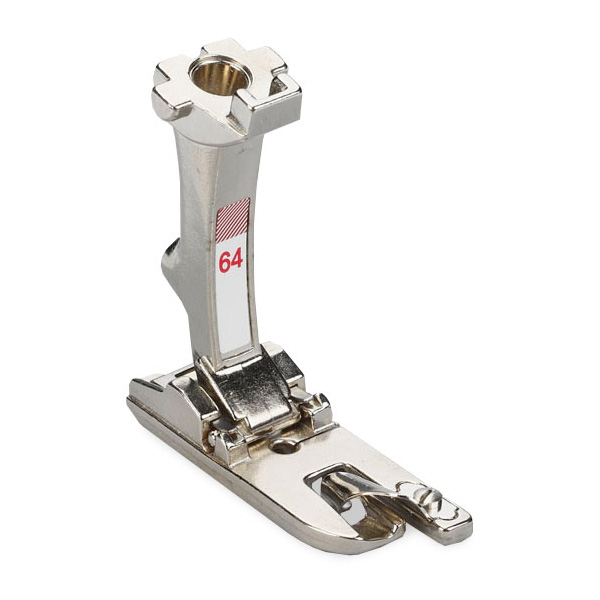
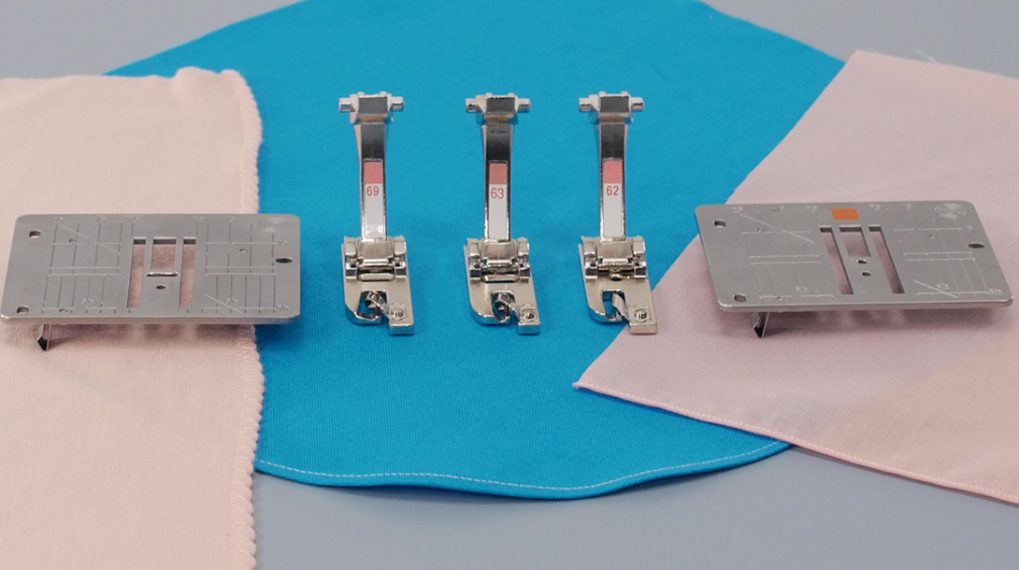
Foot #64 is a straight stitch foot; #66 can accommodate zig-zag and other stitches. Foot #63 is shown upside down so you can see the bottom channel.
Choosing Your Foot
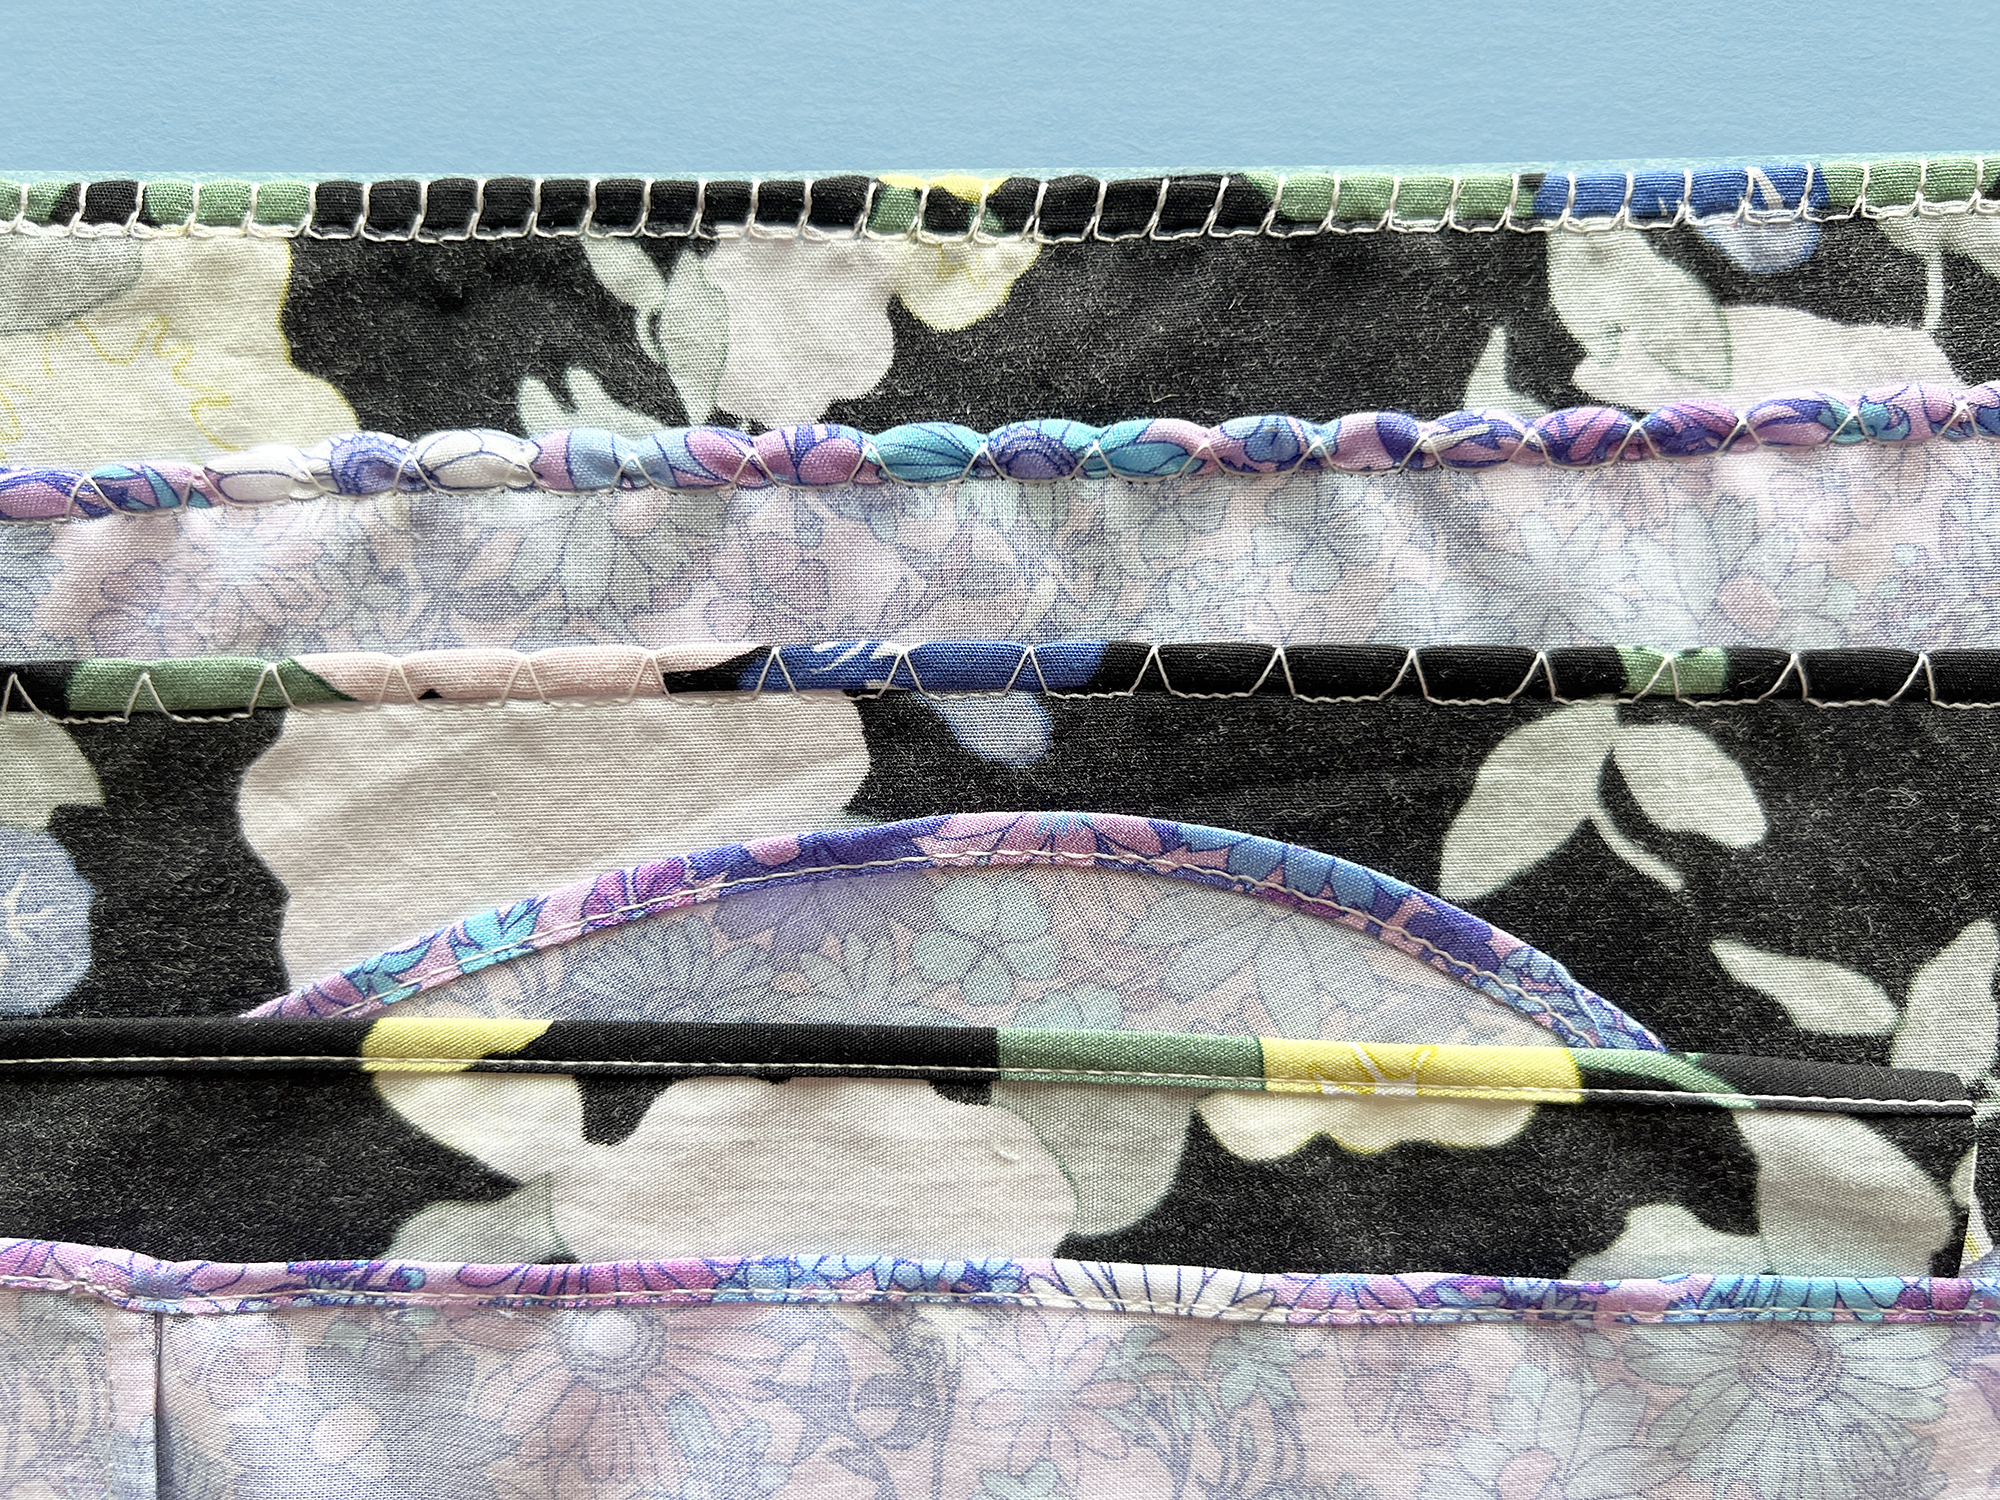
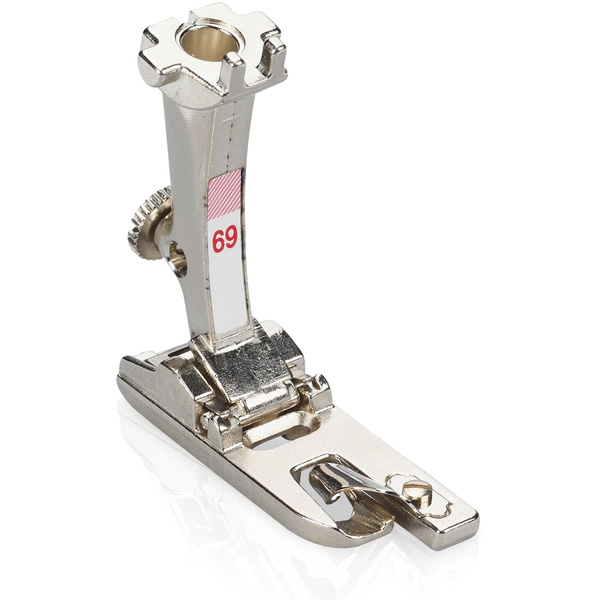
BERNINA makes seven hemmer feet: #61 (2 mm zigzag); #62 (2 mm straight stitch); #63 (3 mm zigzag); #64 (4 mm straight stitch); #66 (6 mm zigzag); #68 (2mm roll and shell); #69 (4mm roll and shell). I own three (63, 66, 68… with eyes on adding the rest to my collection) and you will see all three used in this post.
Let’s Roll!
A tricky part of creating a rolled hem is starting! I’m going to outline two techniques for getting things rolling. This first technique is best if you are hemming a piece of fabric longer than what you require in your project, for example, a ruffle. Sometimes I cut my ruffle 1-2” longer than I need. This way, I hem the ruffle, and then trim off the first inch or so if it isn’t perfect.
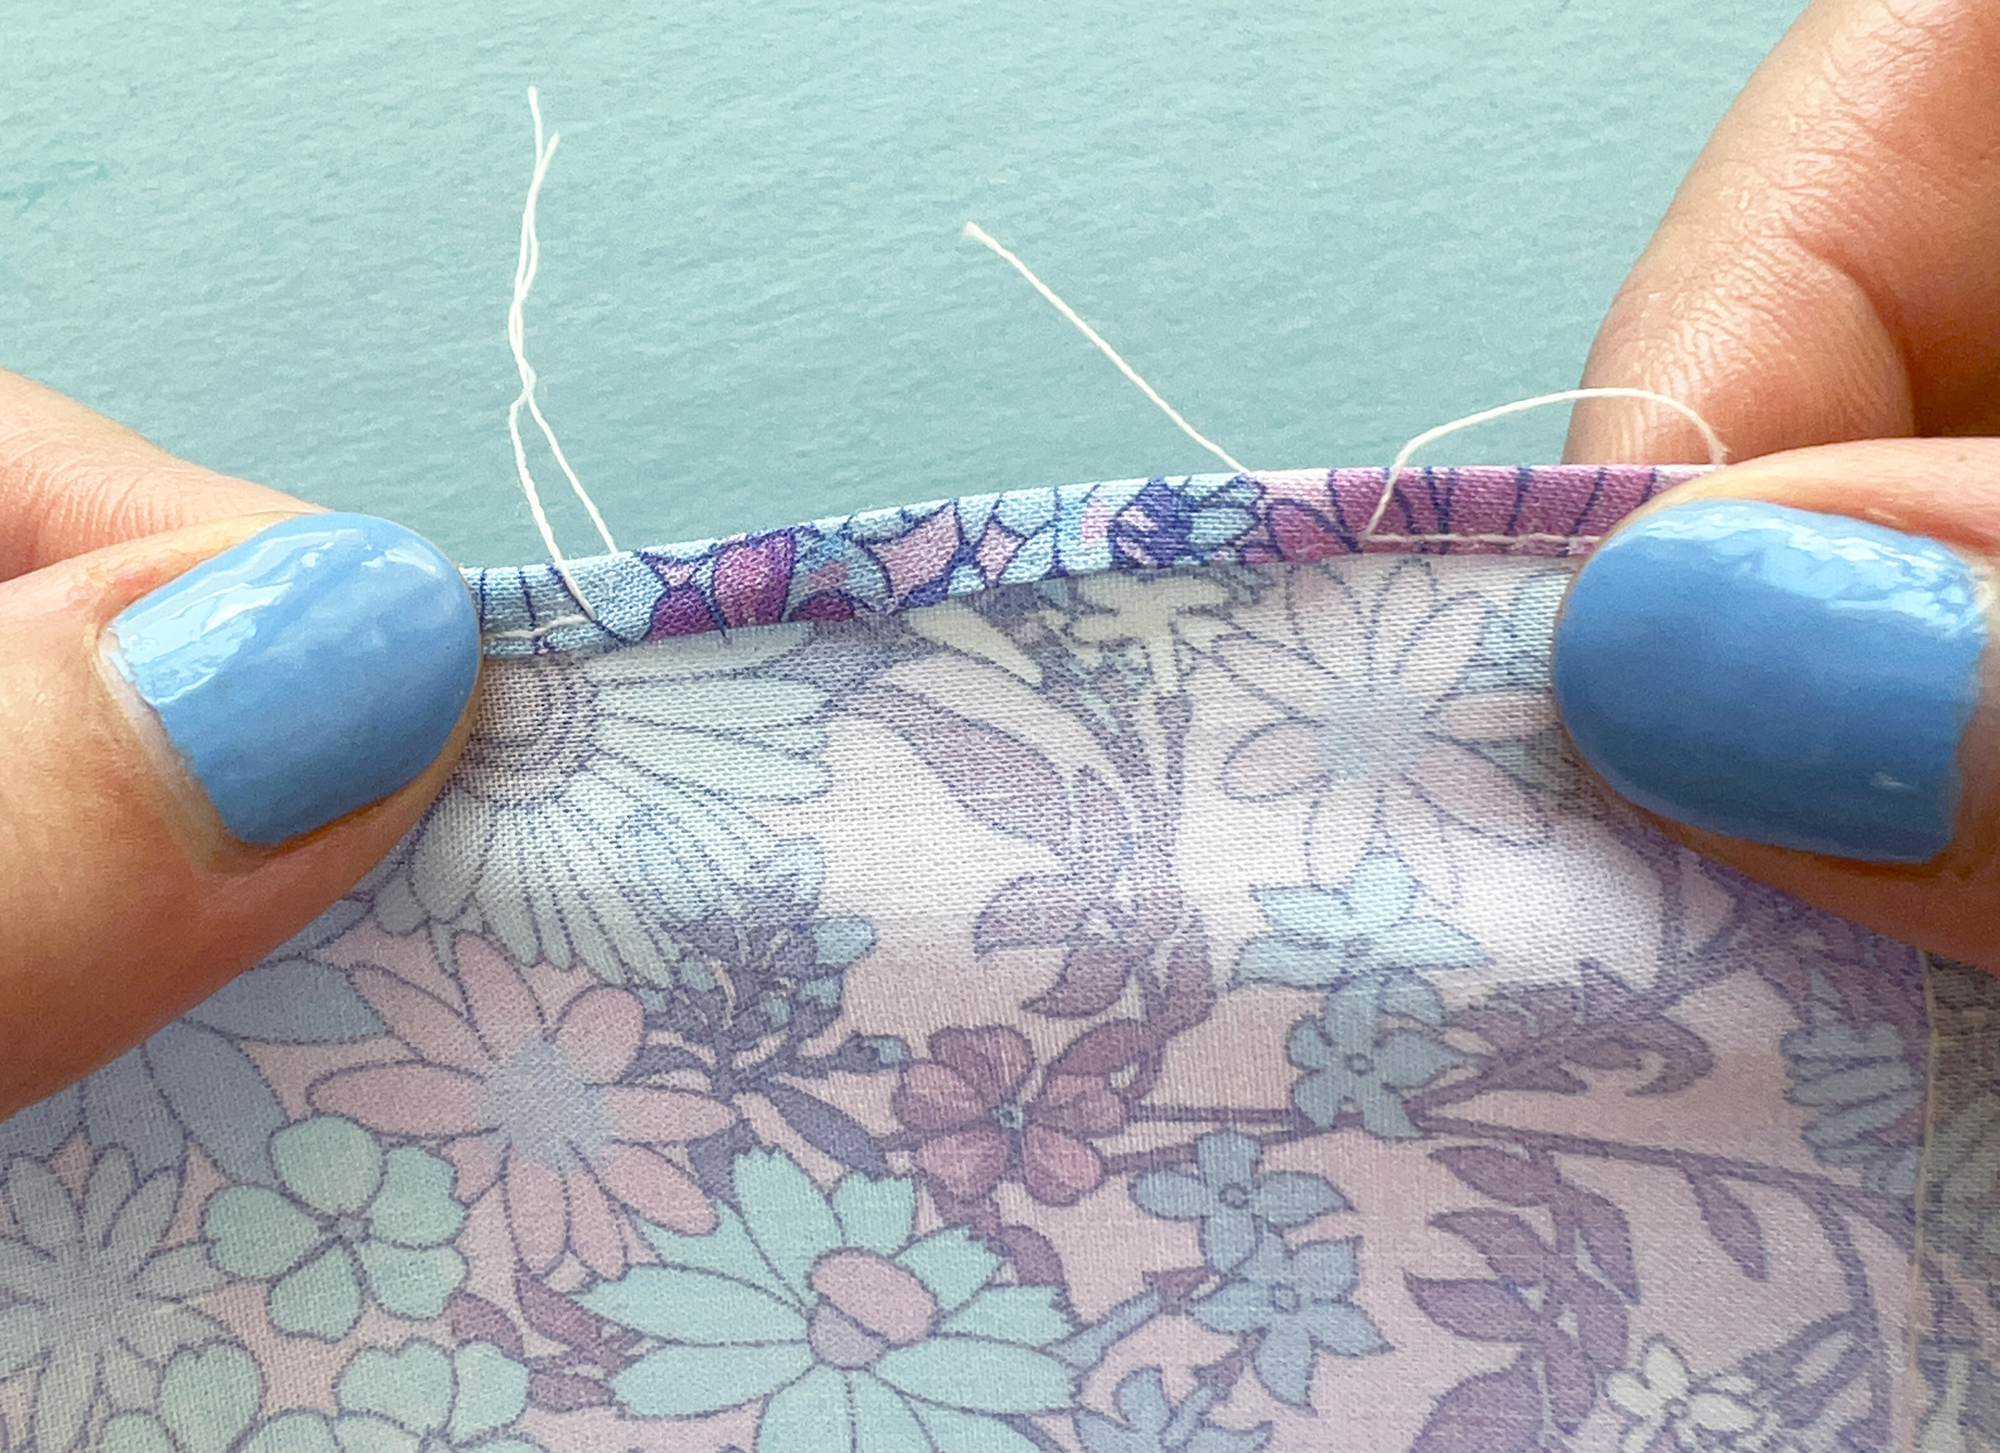
- Begin with your fabric wrong side up. Place it under the foot, with the edge of your foot against the cut edge of your fabric.
- Hold your thread and bobbin tails.
- Sew 3-4 stitches (I’m using straight stitch at the default length of 2.5mm).
- Stop stitching, and lift your needle up. Using the FHS, lift the foot.
- Still holding your thread with your left hand, and holding your fabric edge in your right hand, gently pull the fabric edge into the roller at the front of the foot. This is a bit like flossing your teeth. You will see when the fabric is rolling. You don’t need the fabric to go far, just up to the needle is perfect.
- Lower the foot.
- Begin to sew. Use both hands. Your left hand will guide the fabric forward – do not pull it, but move with the speed of your sewing. Your right hand will gently feed fabric into the front of the foot.
- Keep your eyes on the front of the foot, where fabric is feeding. Stitch at a consistent pace.
- When you complete hemming your fabric strip, Press your fabric and give yourself a pat on the back. If that first inch of your sewing isn’t perfect, you may cut it off and proceed with your project. You can also carefully unpick those first guide stitches, and leave the fabric uncut if it looks tidy. If you are not happy with your results, I’ve been there, and I discuss troubleshooting below.
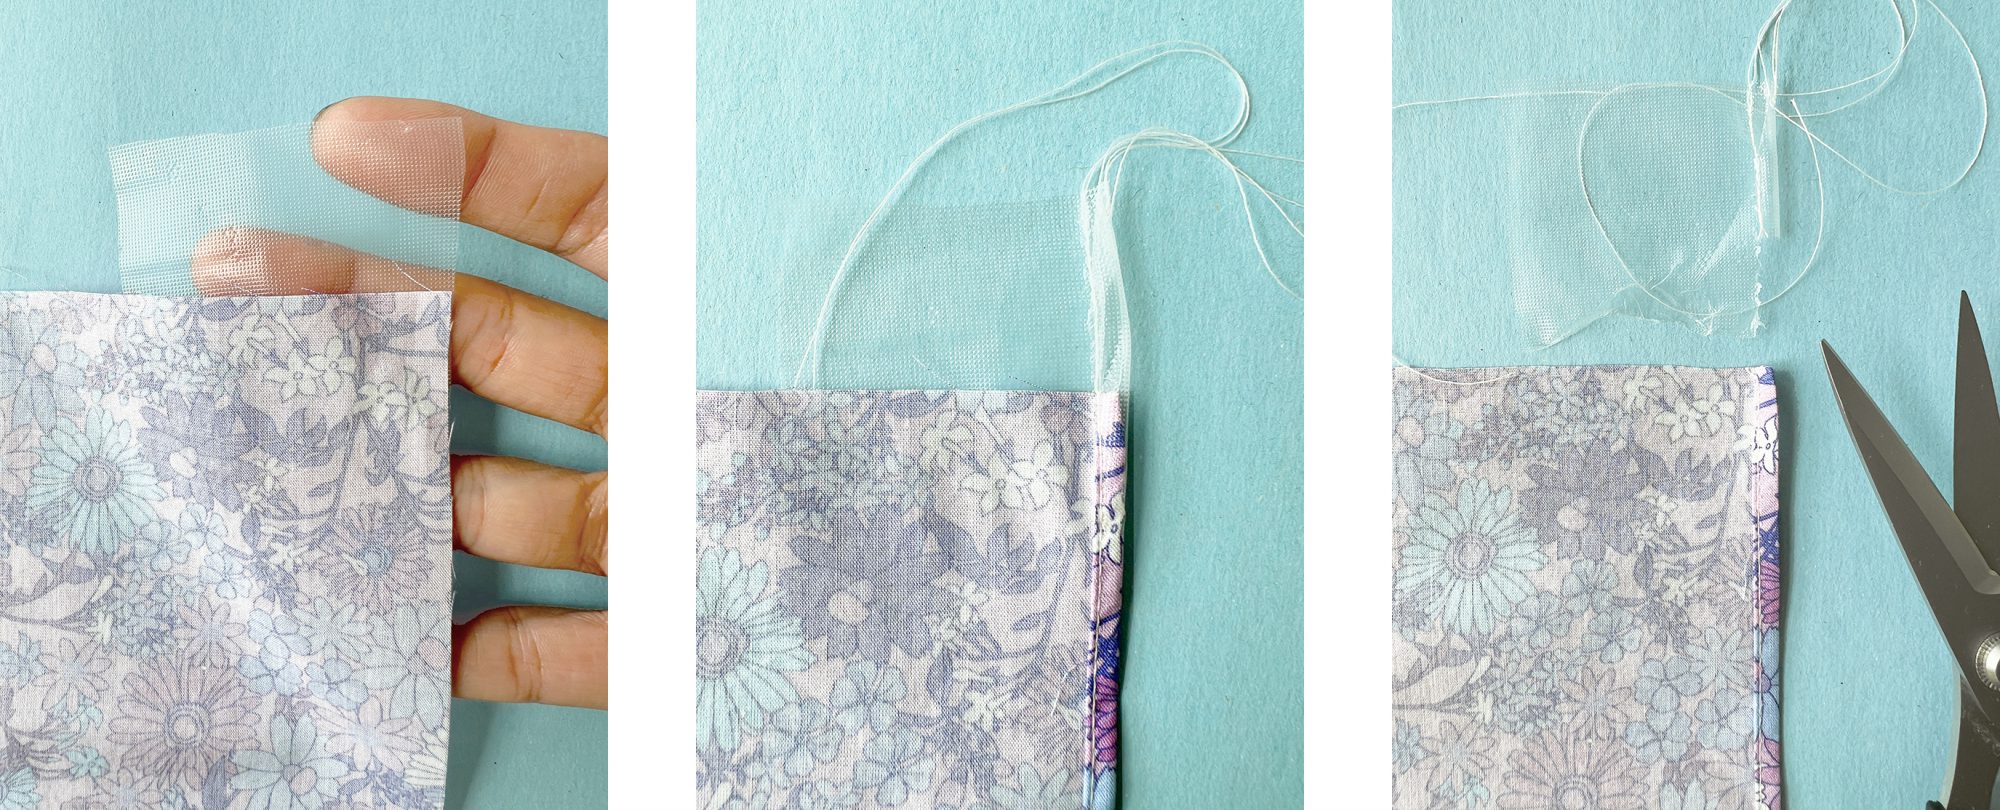
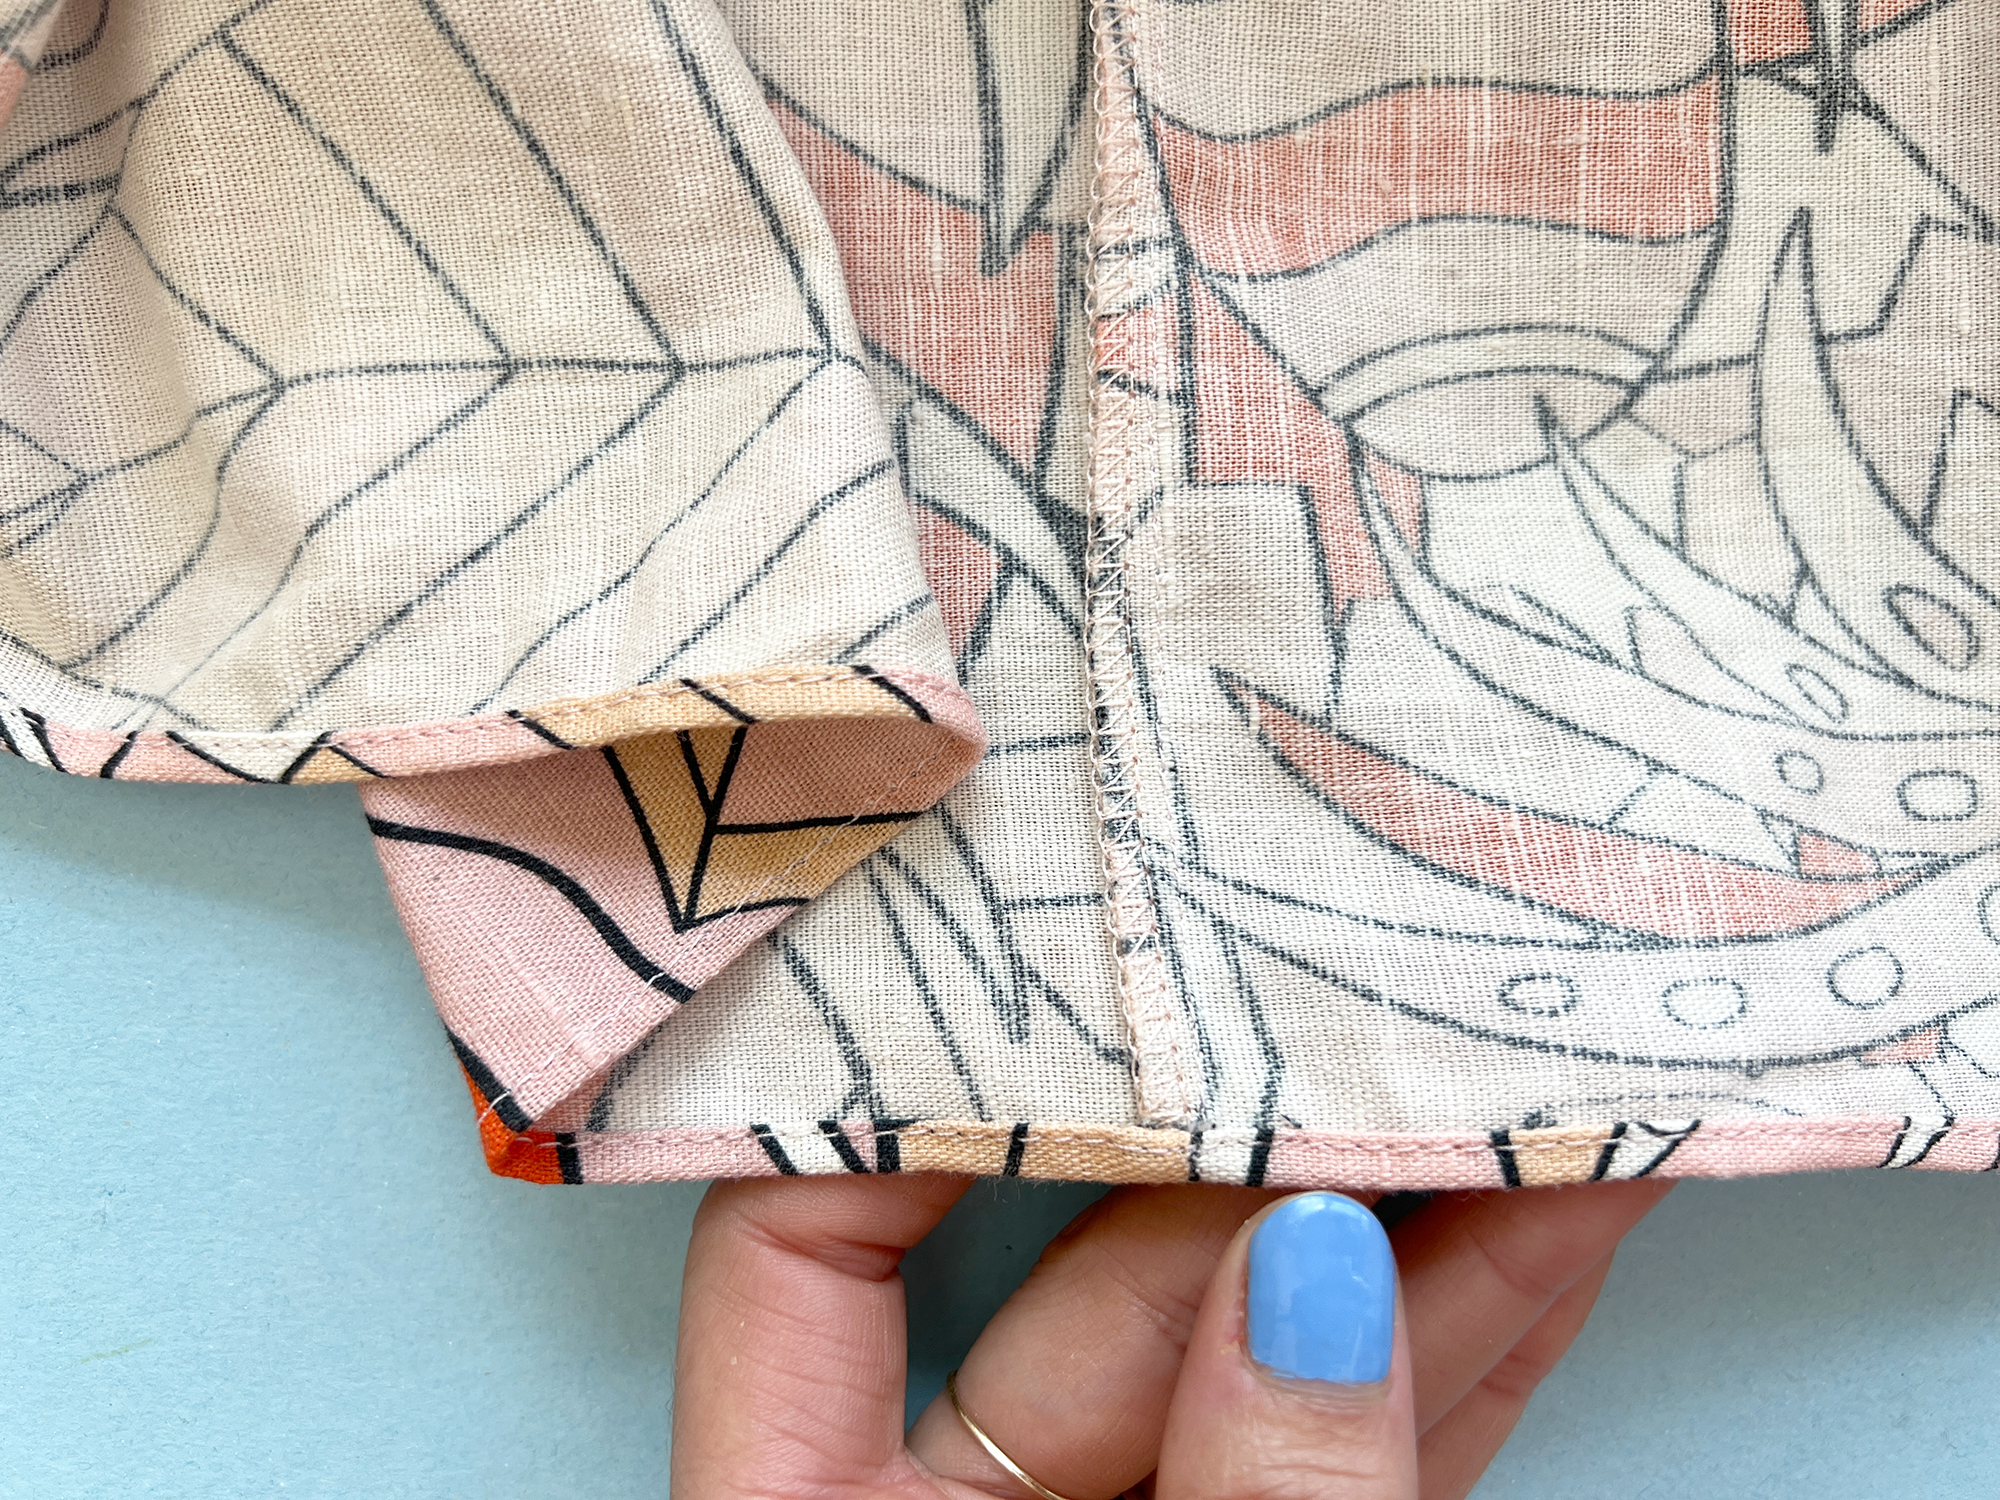
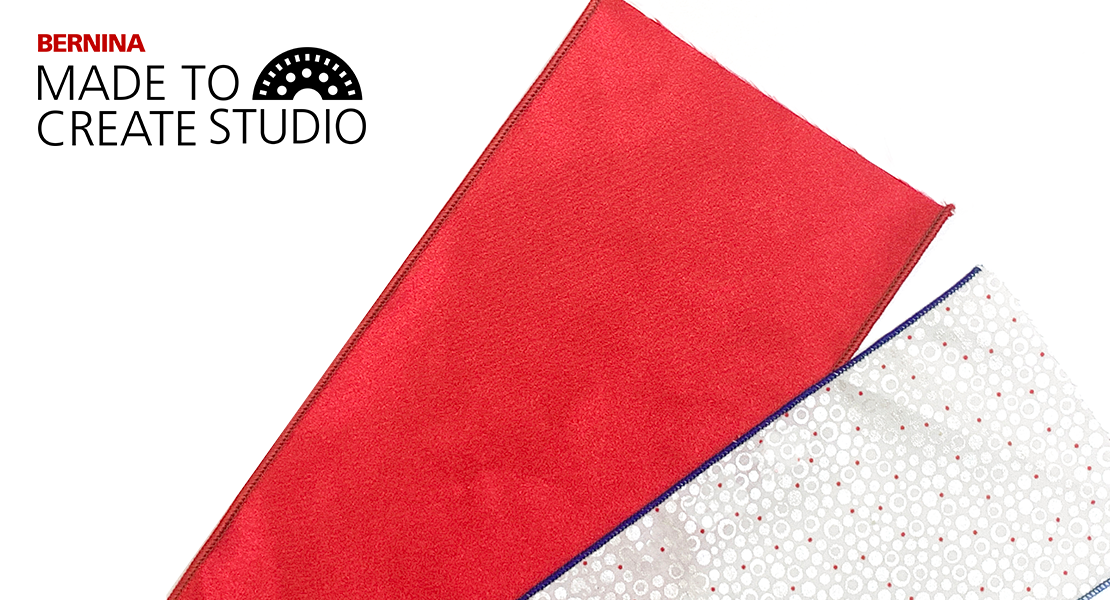
From Left to Right: Water soluble interfacing is attached to the top right edge of the fabric; the rolled hem is sewn, with stitches beginning in the interfacing; the interfacing and additional stitches are trimmed away, leaving a perfectly hemmed corner.
Another Way To Start
Let’s say you need that first inch of rolled hem to be perfect. An example of this would be if you are hemming a rectangle of fabric to make a scarf, and you will not trim any fabric off the piece you have cut. This technique is similar to the one above, but you will also need a small scrap of water-soluble interfacing. Attach the interfacing to the top edge of your fabric, and begin sewing into the interfacing. Once you complete your hemming, simply cut away the interfacing and threads. You can also try this trick with tearaway interfacing.

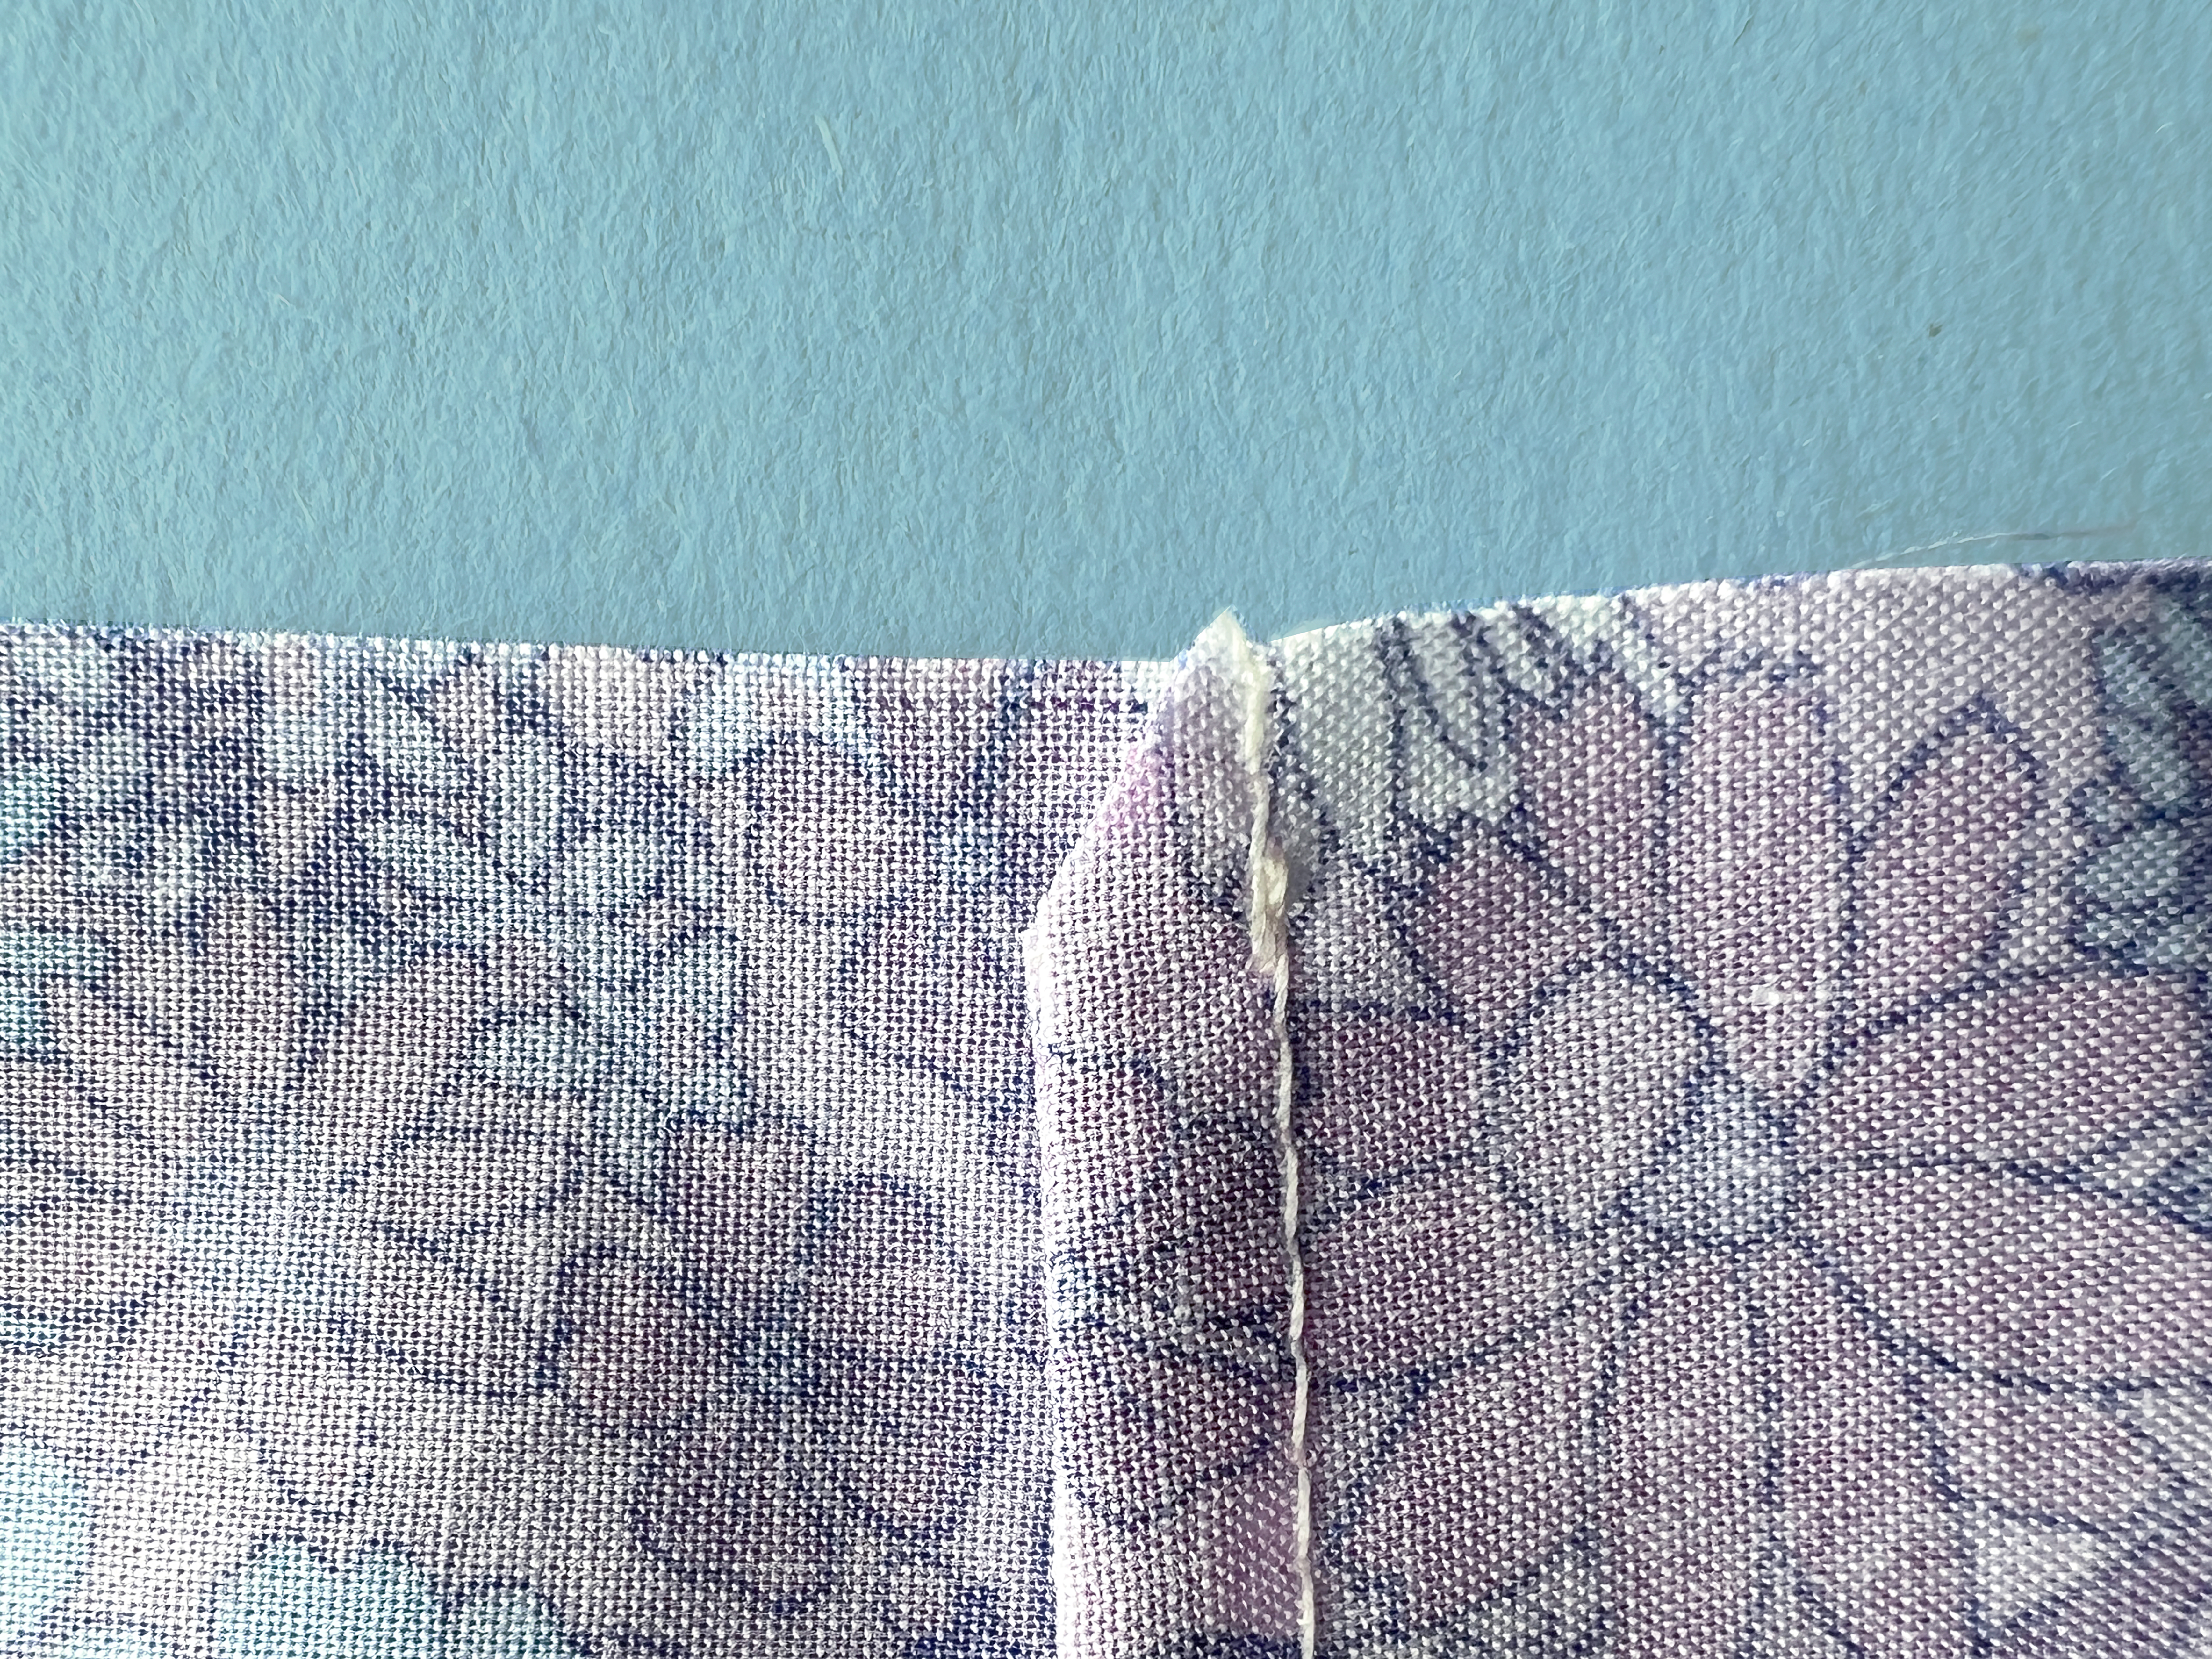
From left to right: too much fabric being fed, not enough fabric being fed, and fabric getting caught under the front of the foot.
Troubleshooting
The three most common problems I see when people are learning to make a rolled hem are easy to correct with some patience and practice:
- Too much fabric fed into the foot. To course correct, use your right hand to gently roll less fabric into the foot and continue sewing.
- Too little fabric fed into the foot. You won’t get a double roll if there isn’t enough material to fold over. Use your right hand fingertips to gently roll more fabric into the foot and continue sewing.
- Fabric caught under the right toe (side) of the foot. This is the mistake I make the most! Sometimes when this happens, I need to pause sewing with the needle down, and lift the foot using the FHS. With my left hand, I can gently pull my project to the left, while at the same time using my right hand to correct how much fabric is feeding into the foot.
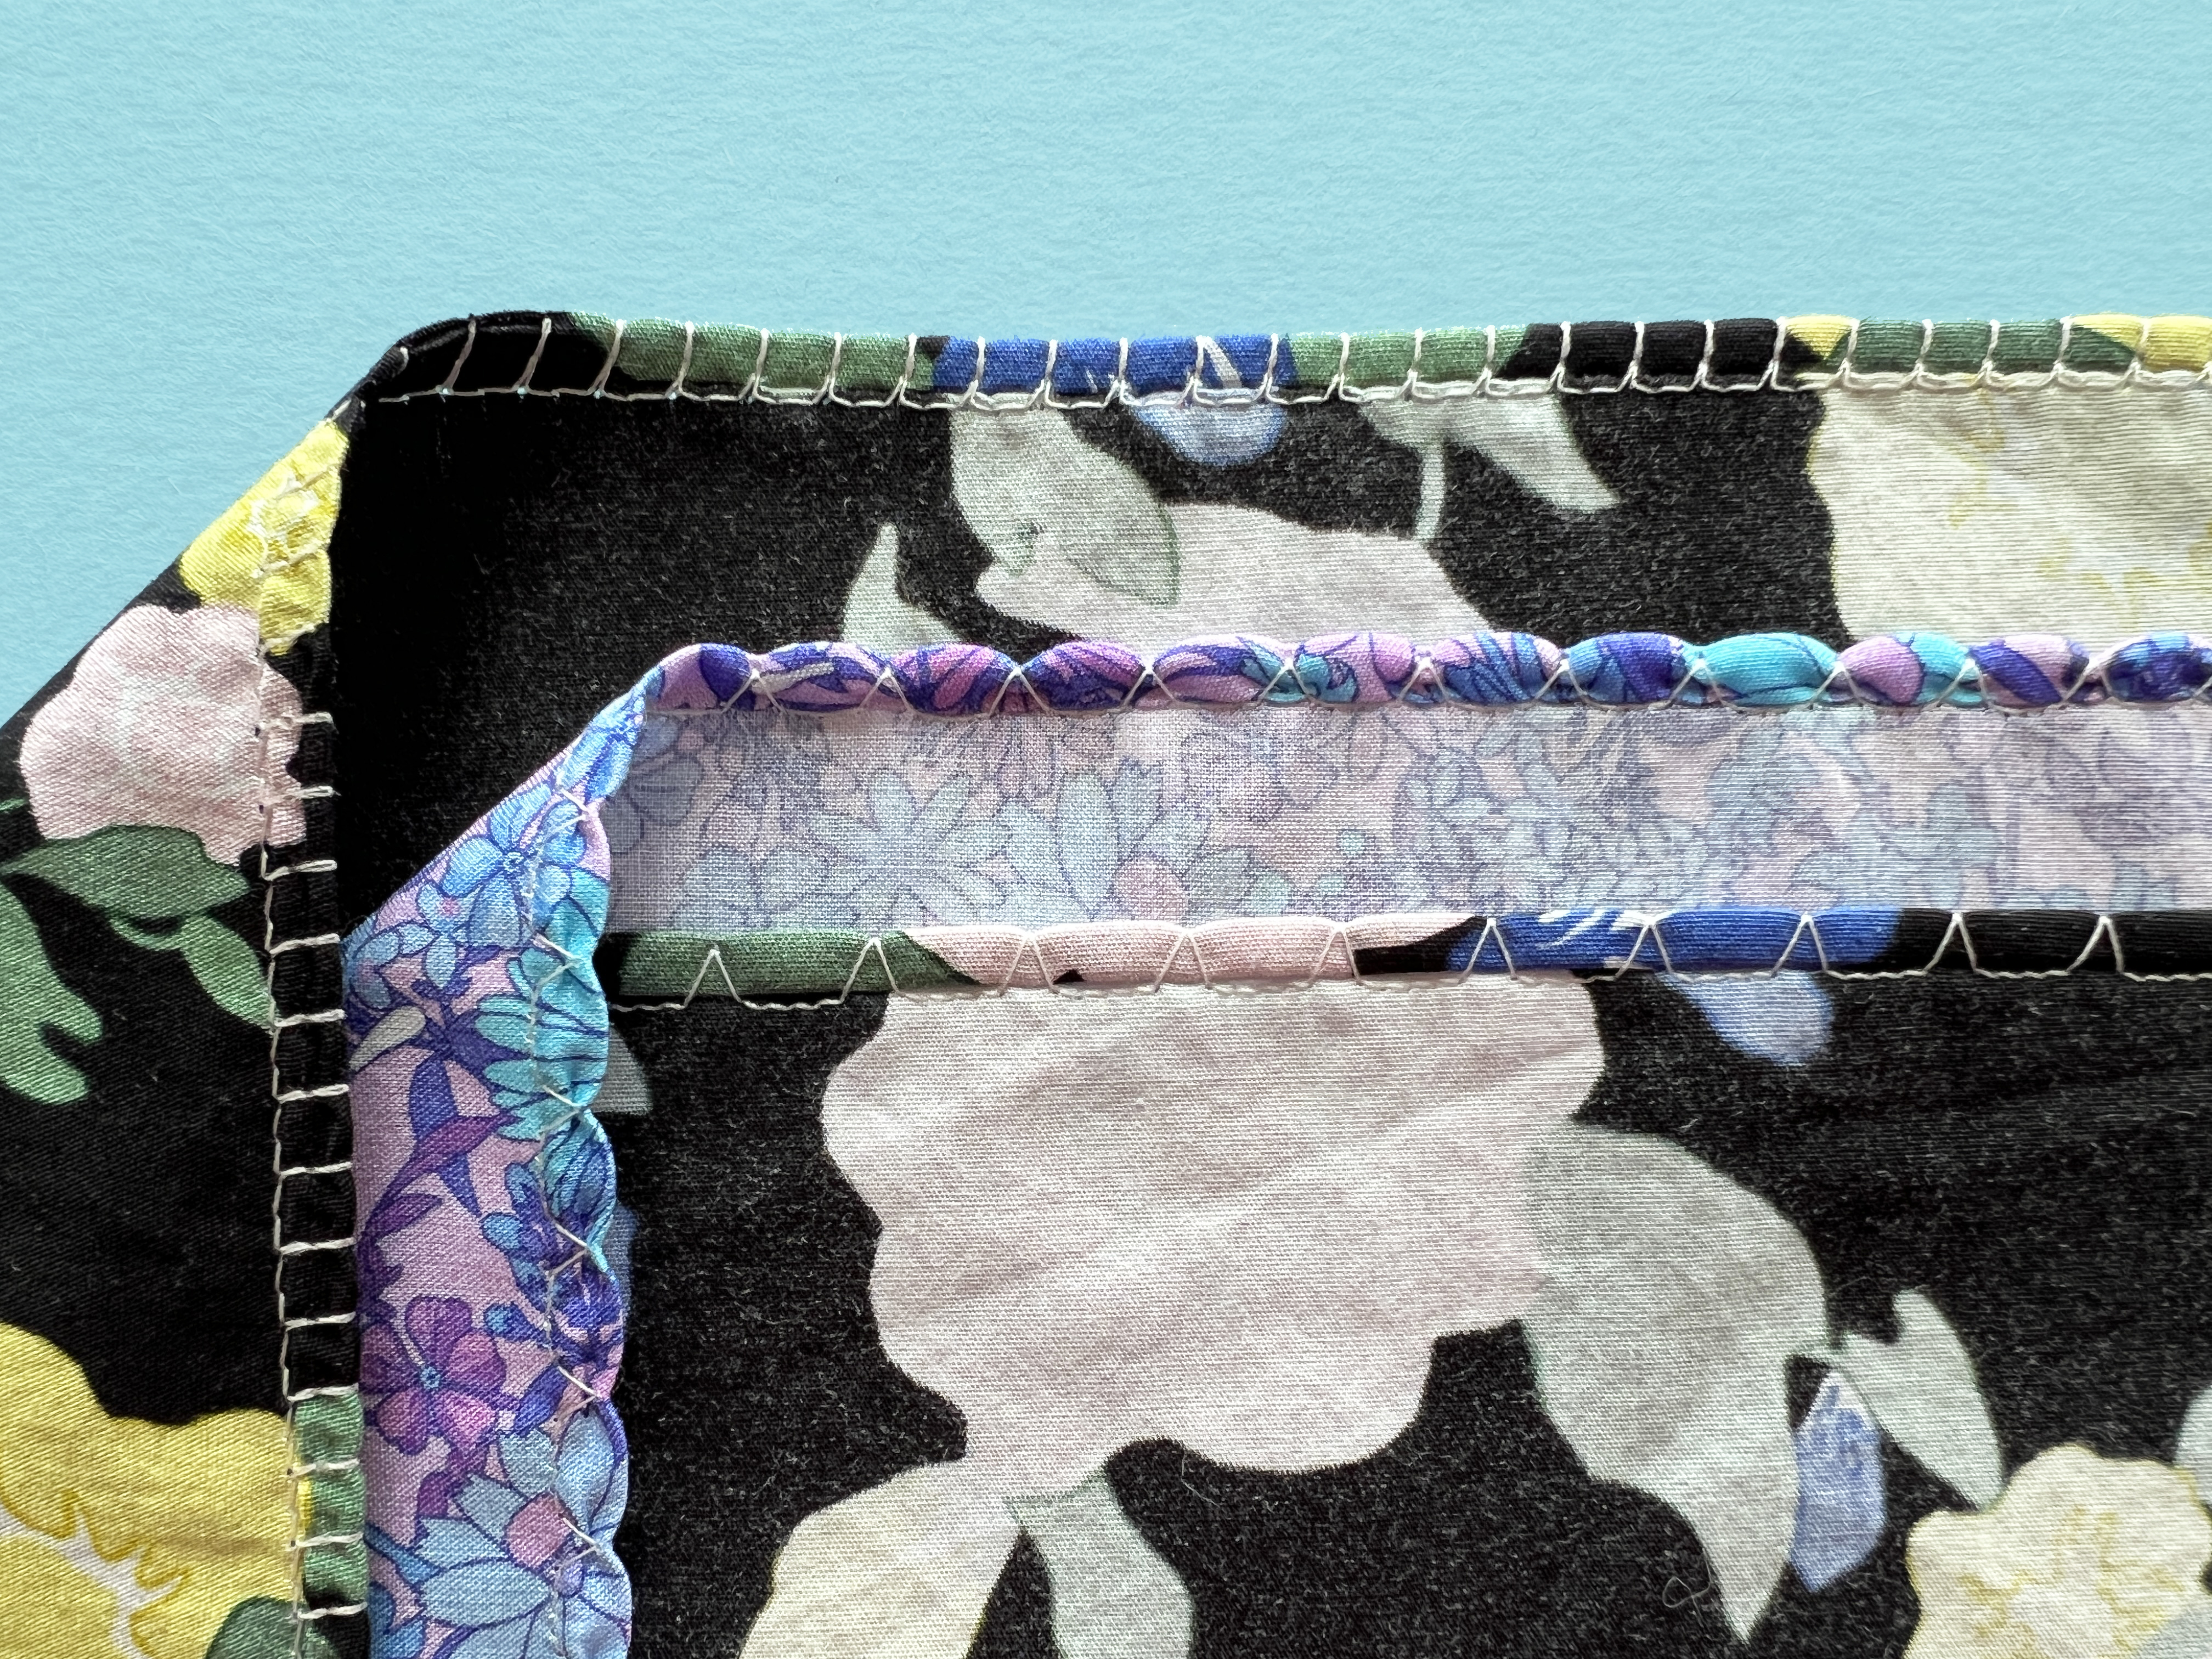
The space between the broken threads needs to be hemmed. By gently tugging on both sides, the fabric rolls into the correct shape, and can be stitched to match the stitching on either side.
Fixing a Mistake
What if you have sewn a long ruffle, and the hem is perfect, except for one 3” section at center front of your garment (it’s always center front, isn’t it)? Fret not! You don’t need to unpick the entire hem. Unpick just the problem area, plus maybe an inch or so on either side of it.
Pull your hem taught, and see if that problem area rolls into place. You may need to coax it with your fingers, or pin it into place. Press this section into a hem that matches the rolled hem on either side of the section. Press, and then stitch that area down. You may prefer to use a different foot for this part (I tend to use Reverse Pattern Foot #1, and use the center front marking on that foot to guide where my stitches land on the hem.)
One More Trick
If you are doing everything you can, and your fabric just feels too flimsy or wiggly, try adding spray starch. Starch your fabric until it is extra crisp, especially at your starting corner. For some fabrics, this will give you the control required to get a consistent roll.
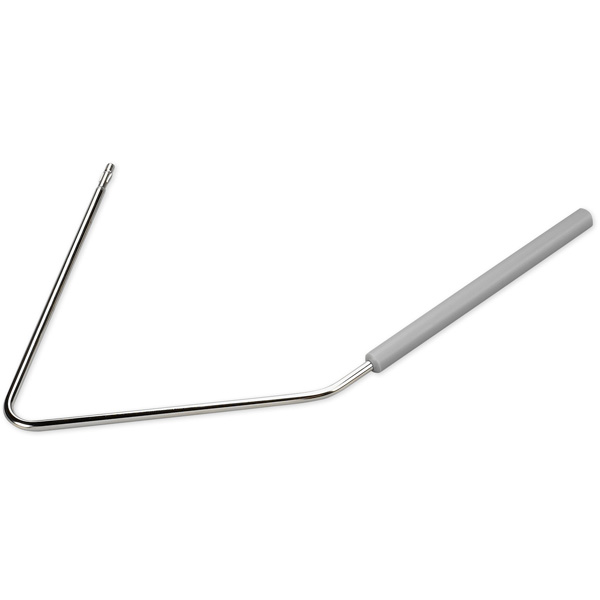
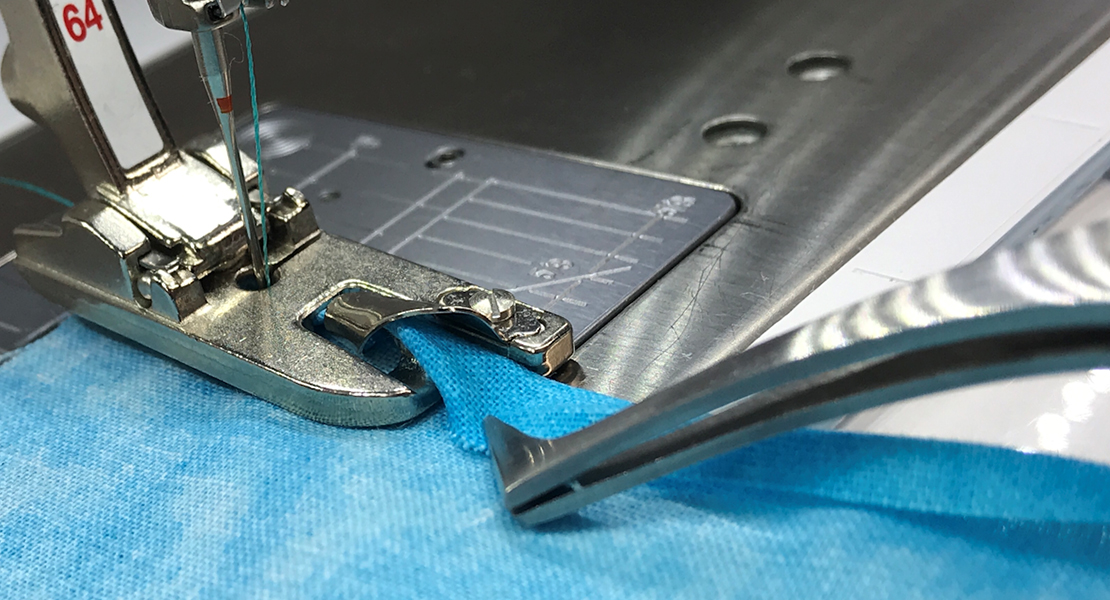
Look closely to see the sharp point of my awl guiding fabric into the foot.
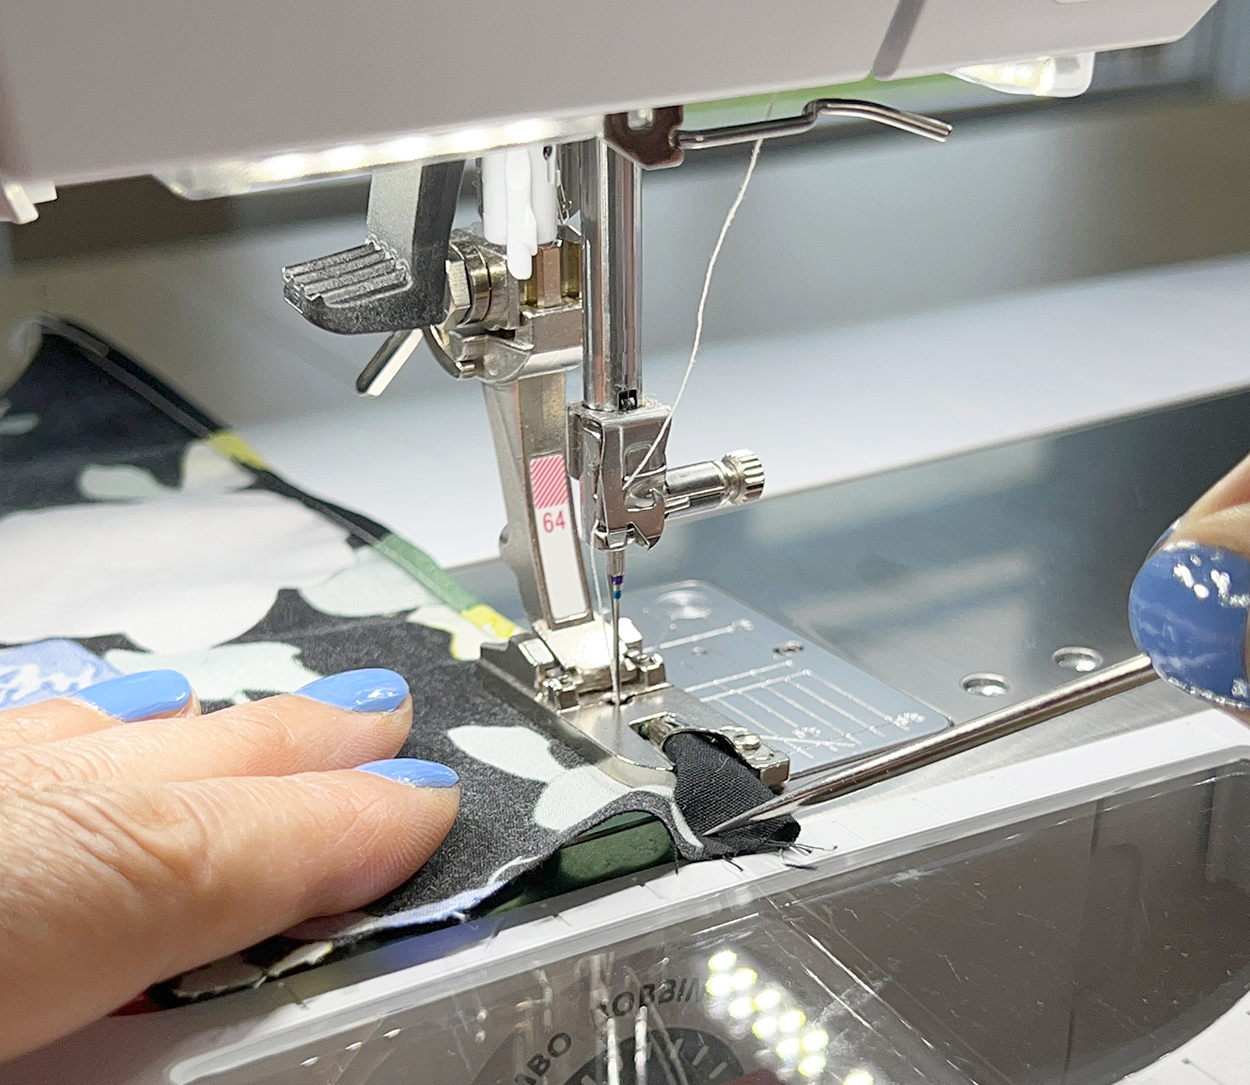
If you’re using the FHS and both hands, but feel like your fingers are clumsy, try using an awl or stiletto. I use my awl to guide fabric right up to the front of the foot. It is more precise than your finger, and it is safer to use a tool rather than your finger this close to the needle.
Advanced Moves
What about curves? Can you sew over a seam? This foot looks like it can accommodate a zig-zag stitch, can I use a different stitch? Yes, yes, YES! If you’re confidently sewing straight lines, let’s take it to the next level!
Hemming Curves
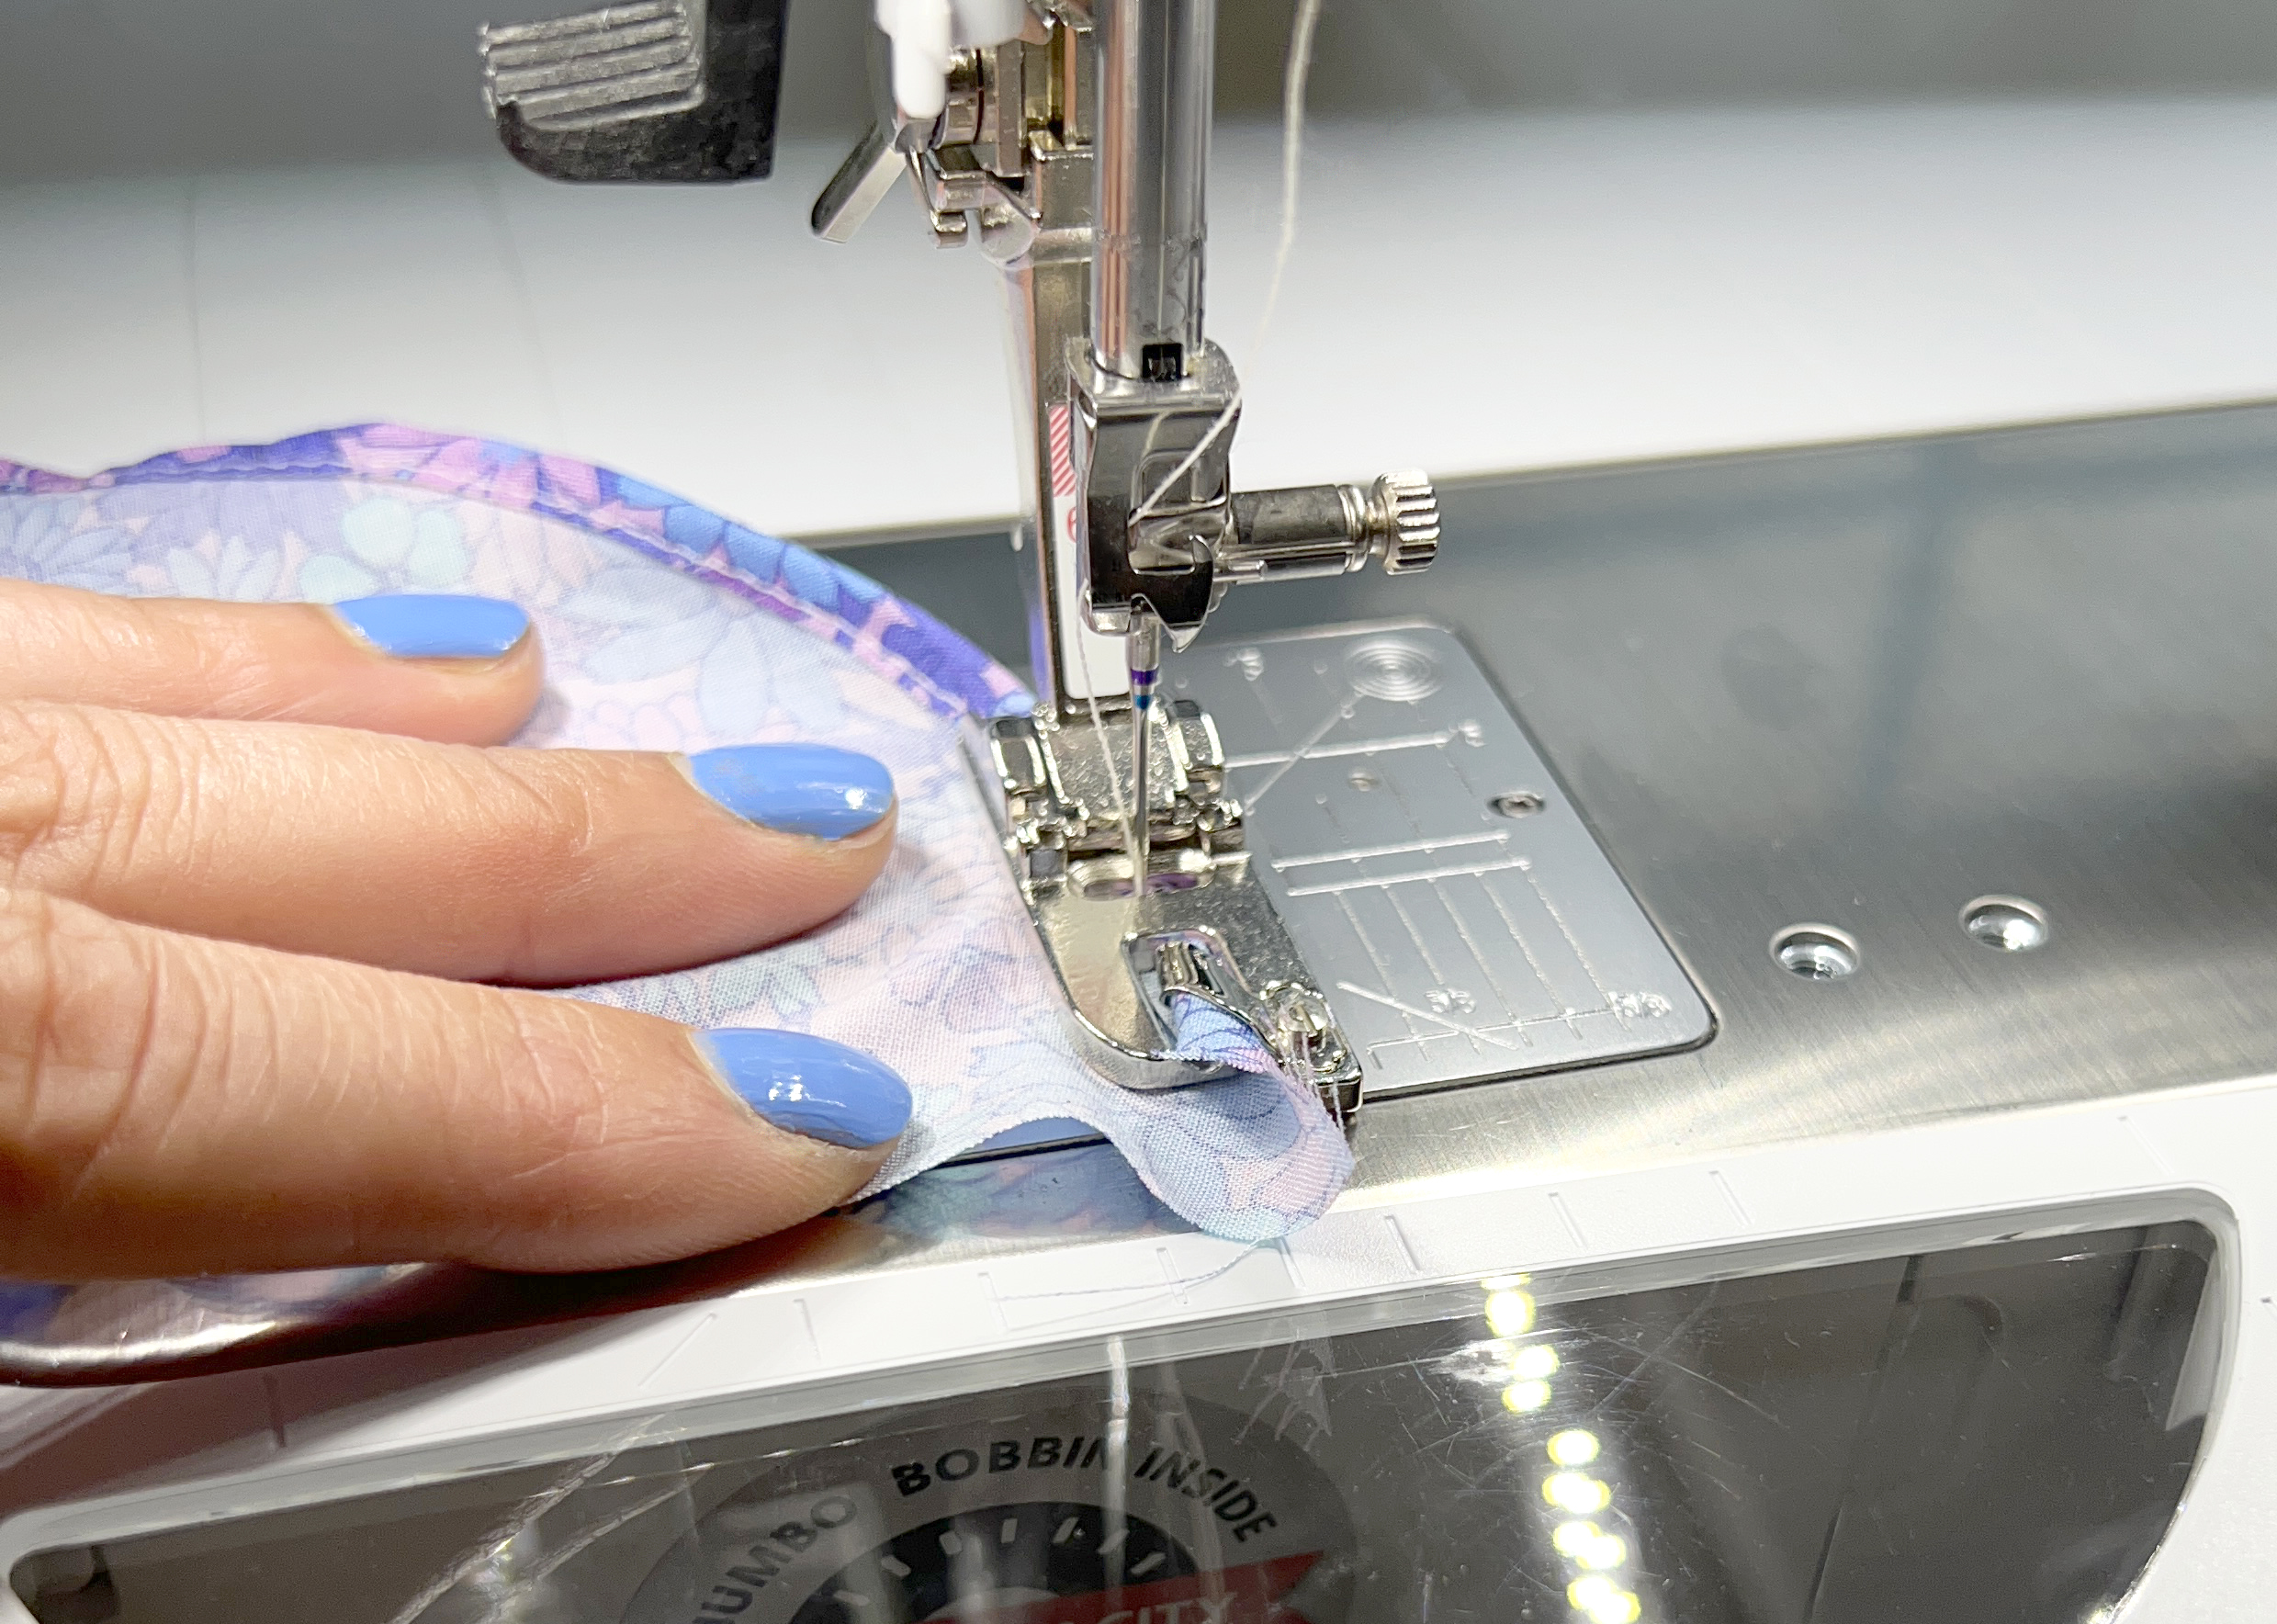
For curves, I suggest Hemmer Foot #63. Look at the bottom of this foot in comparison to other hemmer feet. See how the channel on the bottom of the foot ends before the back of the foot? On other feet, that channel helps you sew in a perfectly straight line. But on this foot, it drops off to allow your fabric to curve as it passes under the back end of the foot.
As with any hemming method, a soft curve is easier to hem than a sharp one. When preparing your pattern, consider re-drawing dramatic curves to be softer. When hemming, pay special attention to when your fabric is on true bias, as this will be the trickiest part. Feed your fabric and stitch at a consistent pace for best results. Press the fabric after sewing to set your stitches and allow the curved hem to relax.
Sewing Over Seams
If you plan to sew over seams, use a hemmer foot that can accommodate heavier fabric than you would if sewing that same fabric without going over seams. For example, if you would typically choose a 2mm foot for your project, consider a 4mm foot, which can handle the additional layers of fabric you’ll be rolling into the hem.
Reduce bulk as much as possible. If your project has a serged finish, use a narrow 3 thread overlock; if you are using French seams, be sure they are narrow. Clip the seam allowance at an angle at the edge that will be hemmed, to reduce what is rolled into the hem. Use the sharp point of an awl or stiletto to hold seam allowances into place as you feed them into the foot.
Hemming in the Round
If hemming in the round, begin hemming anywhere that isn’t a seam (allow yourself to build momentum before tackling a seam). Your first inch or so of stitches will not be perfect. Keep sewing! The hem will begin to roll correctly. When you come back to that spot to complete sewing in the round, stop sewing with your needle down, and unpick that first bit of stitching. Continue with the hemmer foot until you only have a small area left to hem – the foot will not be able to finish in the round.
At this point, you can lift the foot, gently coax the fabric out from the roller, and then carefully stitch down this last bit of hem. You may be able to do this without cutting your thread. But if you do need to cut your thread, just complete the area as shown above in the “Fixing a Mistake” section.
Shell Hems
Shell hems create a delicate, decorative finish. To make one, use any of the Hemmer feet that accommodate zig zag or decorative stitches. I am using foot #66. Select a stitch where some stitches will be on the un-hemmed, single layer of fabric, and other stitches will go over the rolled edge, forming a stitch without the needle piercing any fabric.
I have used stitch #13 and I mirrored stitch #29 (mirroring stitches expands which ones you can use!). Any overlock style or blanket stitch can be used. For the scalloped shape to form, you may need to experiment and adjust your settings. Every fabric will behave differently. For example, for the purple swatch above, I raised my thread tension to 6.75, and elongated the stitch slightly. Adjusting the tension pulled the fabric in to create a more pronounced scallop shape. After a few quick swatches, make note of your settings, and get going on your project.
Conclusion
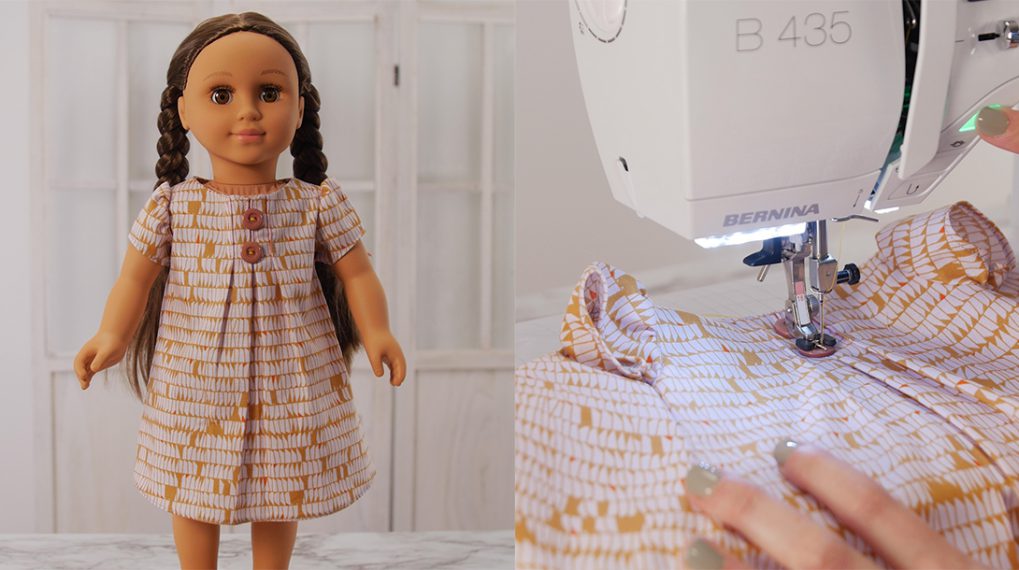
This post covers a lot of techniques, but don’t be intimidated, give these feet a try! I love wearing ruffles, which is an easy place to start with these feet. They make quick work of hemming scarves and handkerchiefs. You could also easily incorporate rolled hems into home décor projects or heirloom sewing, and just think of the possibilities for doll clothes! It’s a delicate touch that elevates any project. Let me know if you give these feet a try! I know you’ll love them.
Happy sewing! Martha
Used Products
What you might also like


3 comments on “Hemmer Feet: Sew Delicate Rolled & Shell Hems with Ease”
-
-
Thanks Julie! Wishing you happy hemming!
-
-
Great article. Love the explanation and video to explain how and when to use this foot.
The extra tips on success are very helpful.
Leave a Reply
You must be logged in to post a comment.

Great tips! Thank you!