Fast Fusible Hems with a Serger
The best part of a serger is the speed! Why not take advantage of its speed and finish hems quickly. Today I am sharing with you my two tricks in order to create fast fusible hems with a serger.
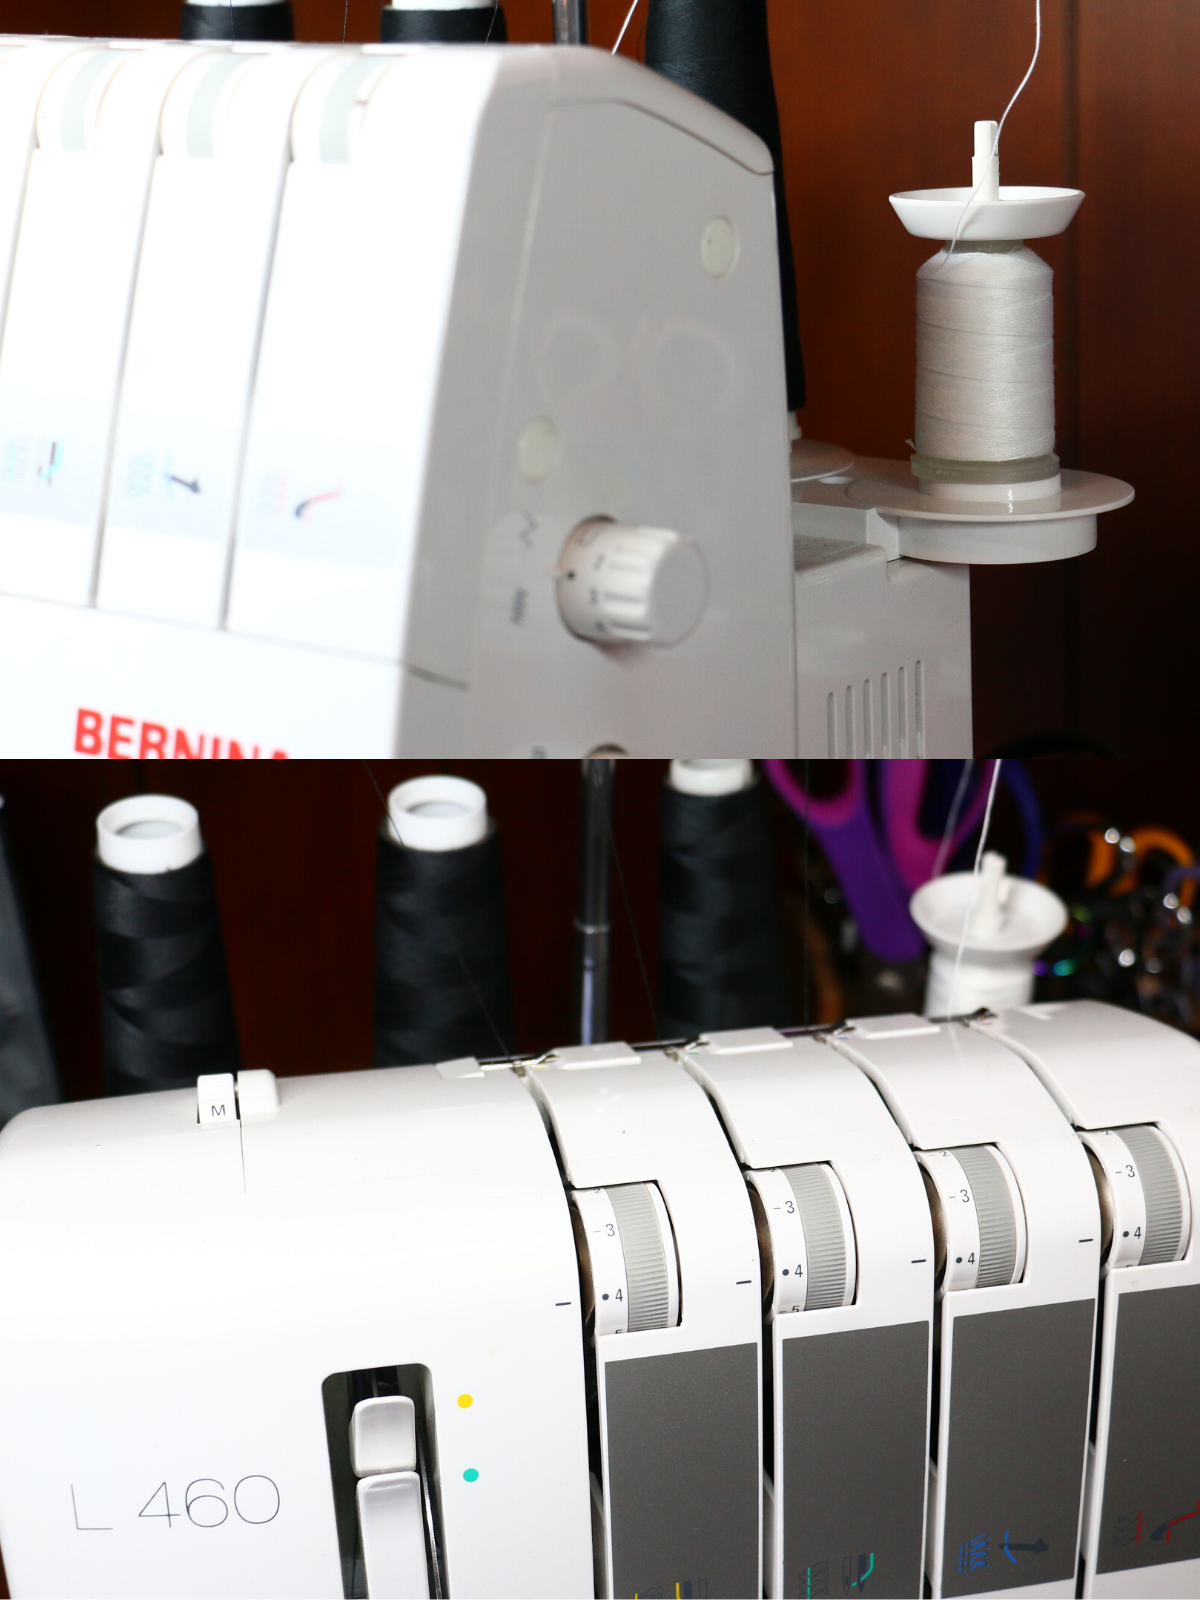
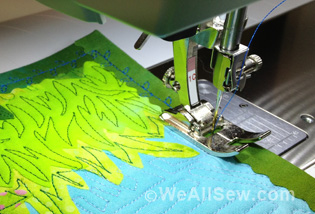
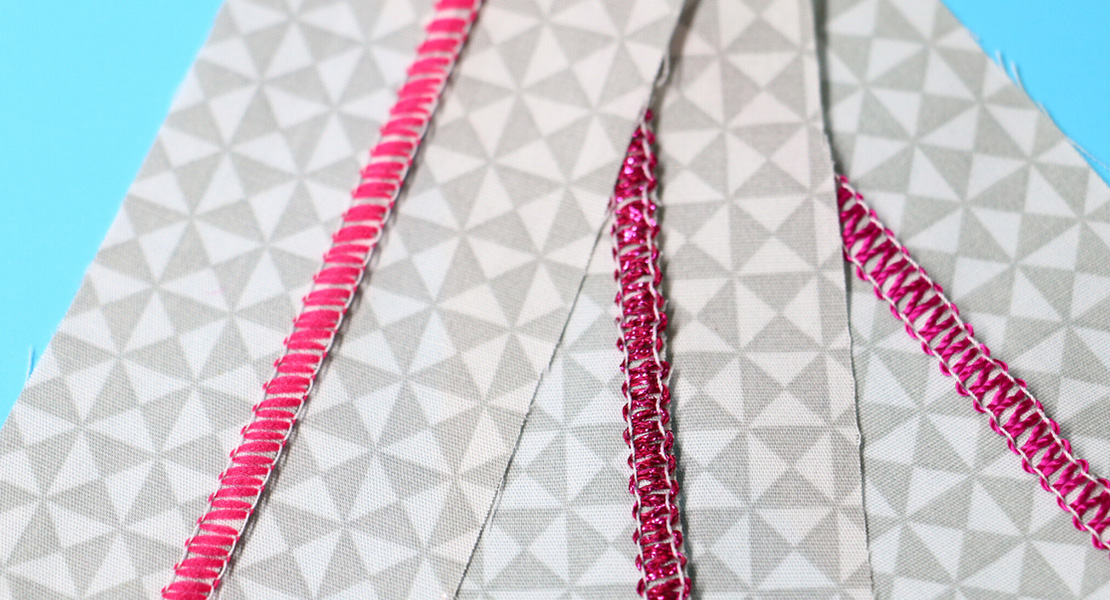
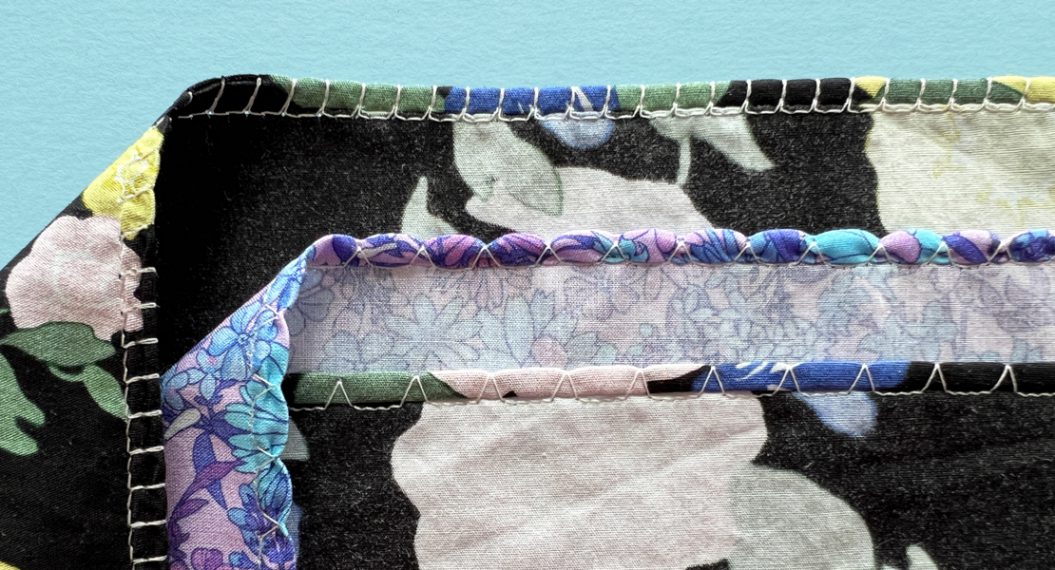
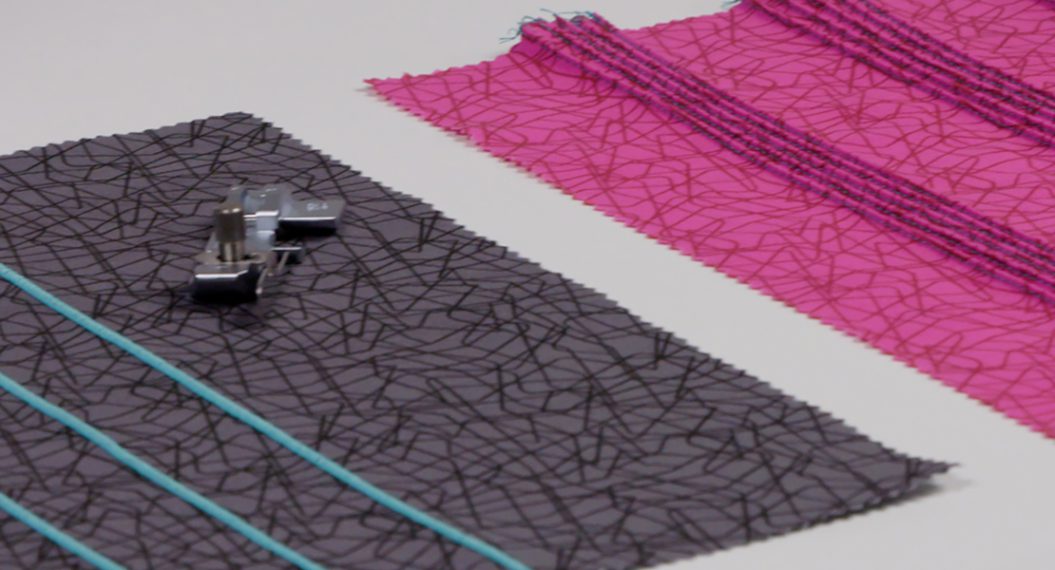
The basic 4-thread overclock stitch stays set up on my serger most all of the time. It’s defiantly my favorite because it covers the edges beautifully and is the most secure. Another reason I keep this threading configuration is that just by changing the lower looper to a fusible thread, my stitch now becomes a fusible hem. Let me show you how.
My favorite fusible thread is YLI Fusible thread, however, there are multiple brands on the market (Gutermann and Superior). I just prefer how the YLI sits on my serger stand. By adding the spool cap, which came with my BERNINA L 460, it rests perfectly. Just thread your serger like normal, no extra work is required and now the lower looper (the thread that is on the bottom) will be fusible!
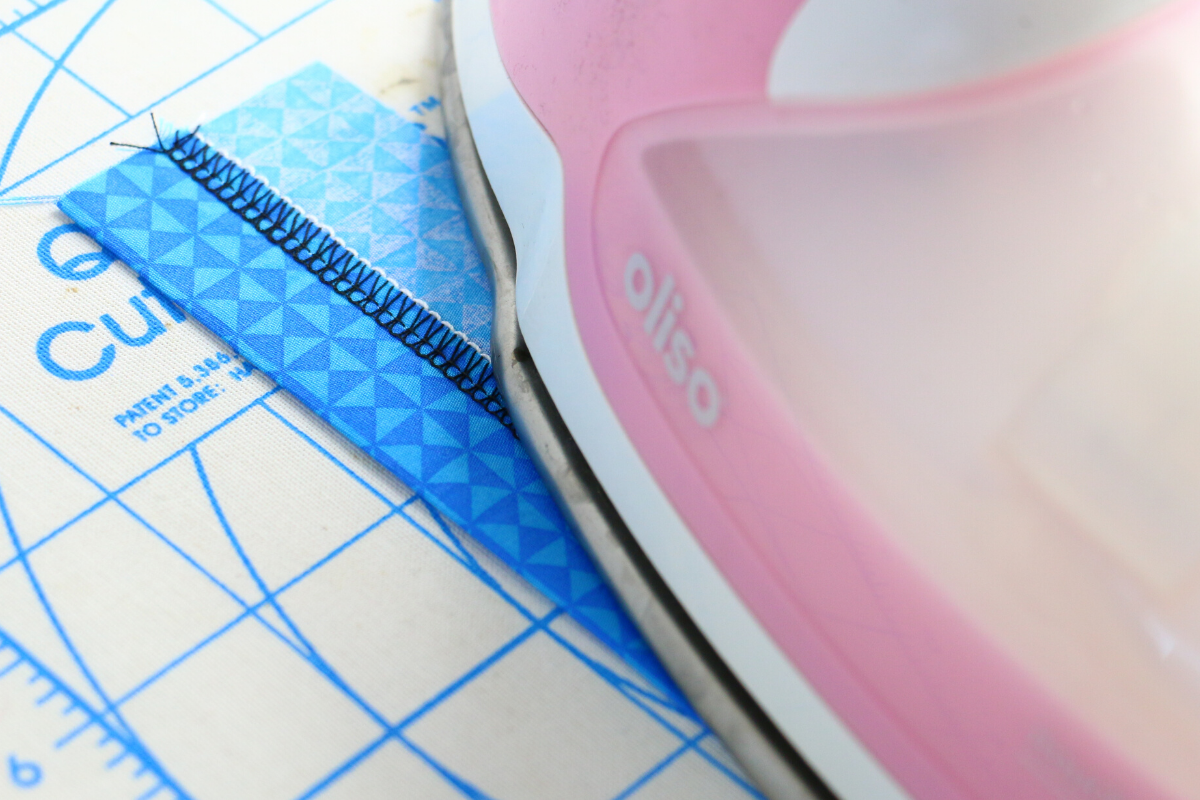
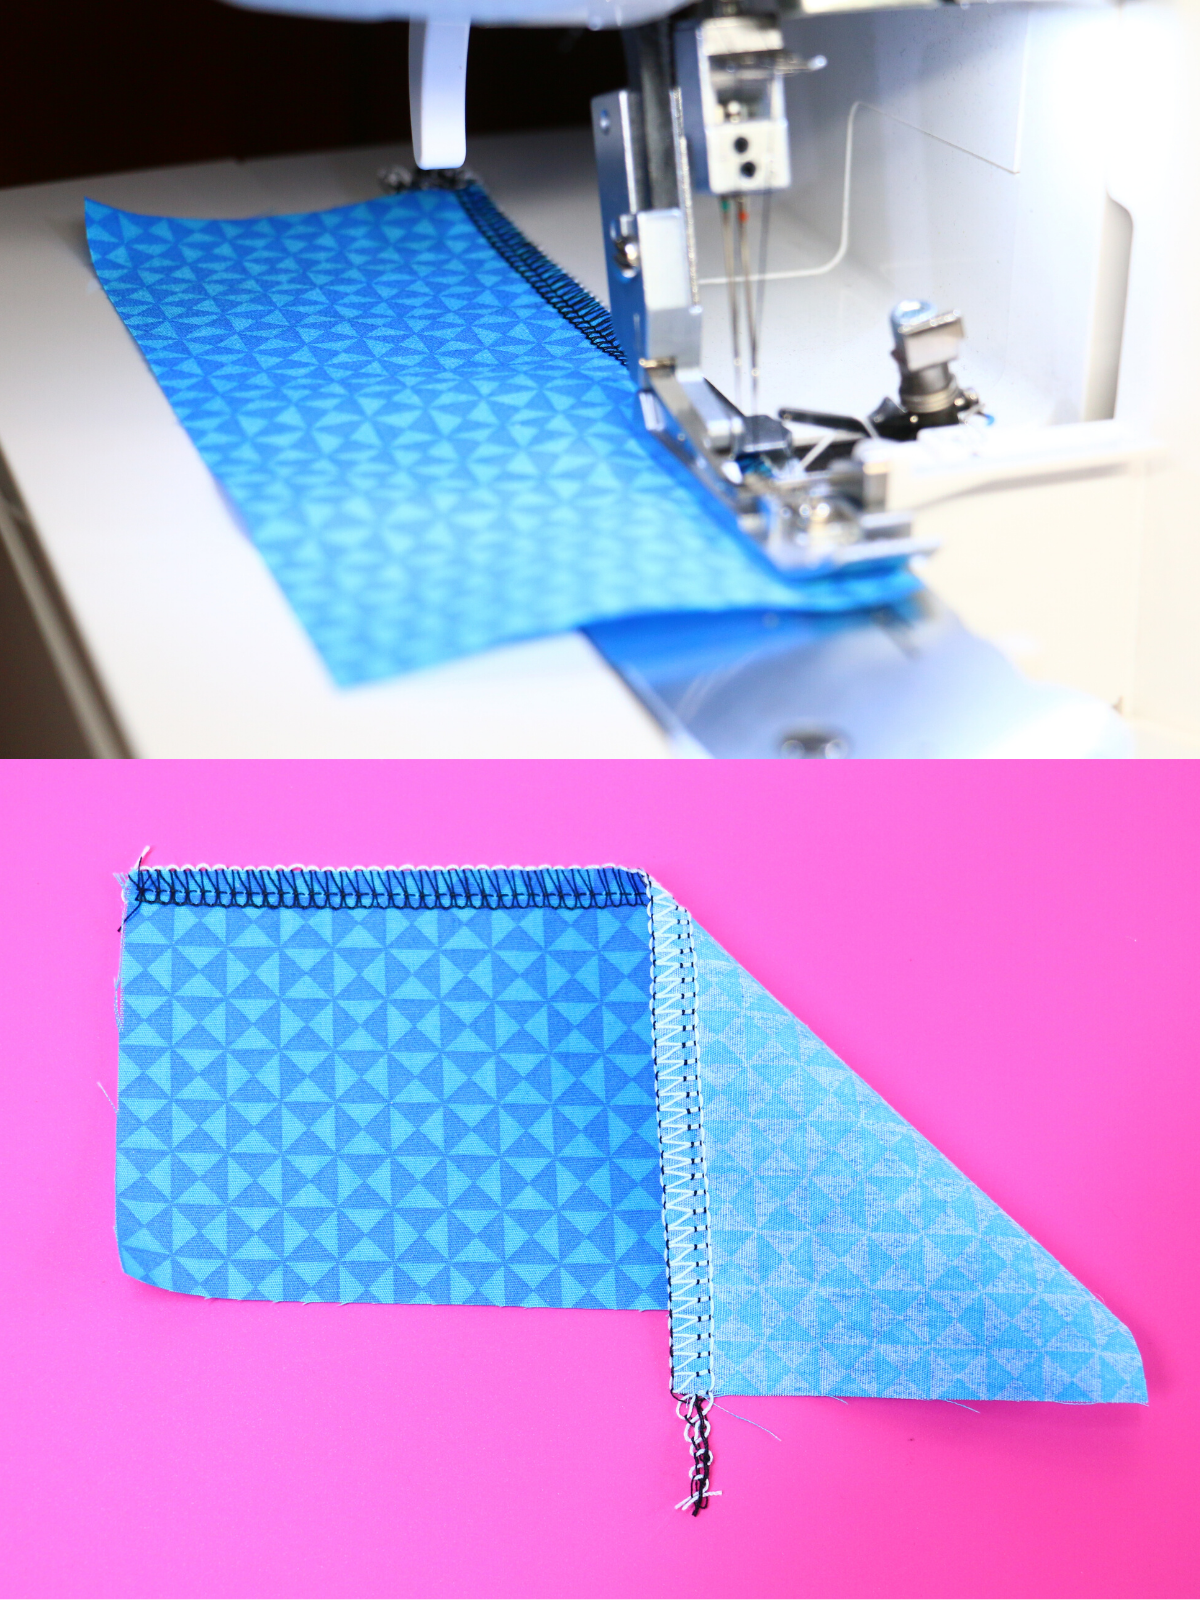
Finish your edge as normal, you might find it necessary to adjust the lower looper tension slightly looser, however, you will see my tensions remained all at normal “4”. I love how fast I can stitch and now my hem is fusible. Notice the lower looper (the bottom stitch) is white, that is the fusible thread.
Turn your hem up to the desired distance, and press! It’s that easy. Just remember that this thread is fusible, so keep the thread away from your iron’s soleplate (use a press cloth as needed).

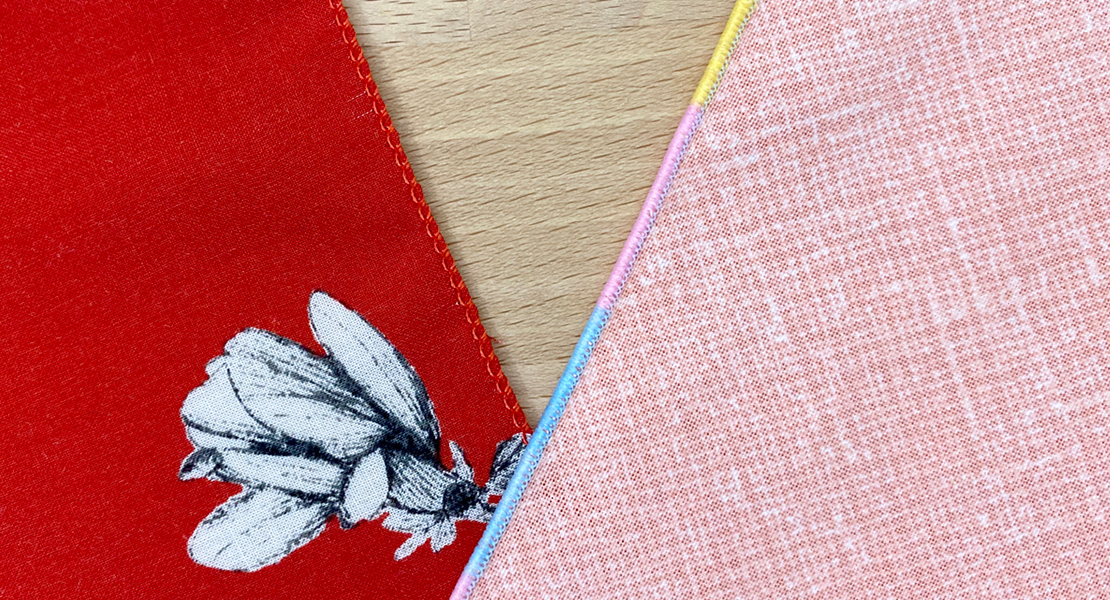
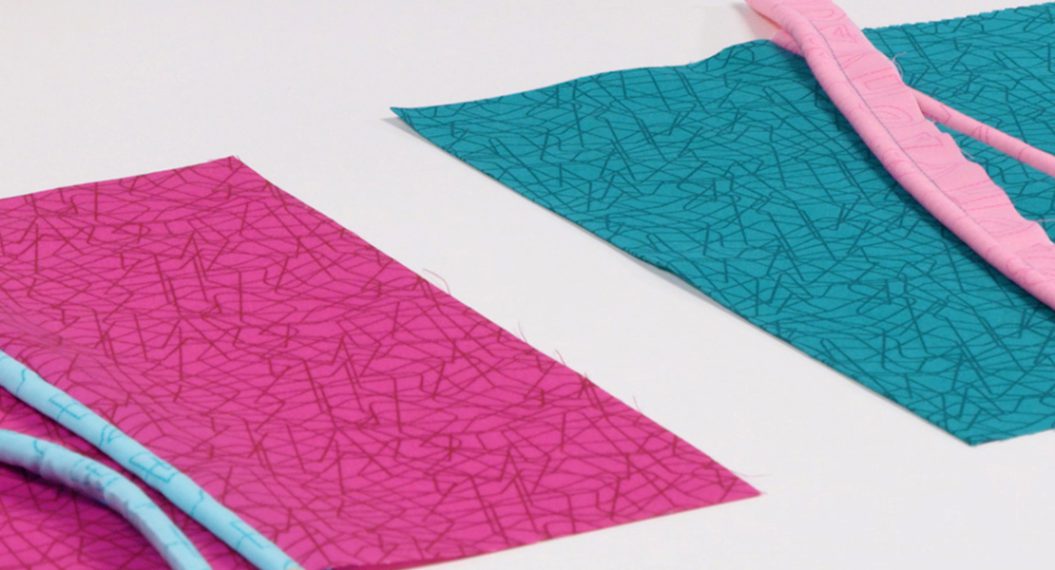
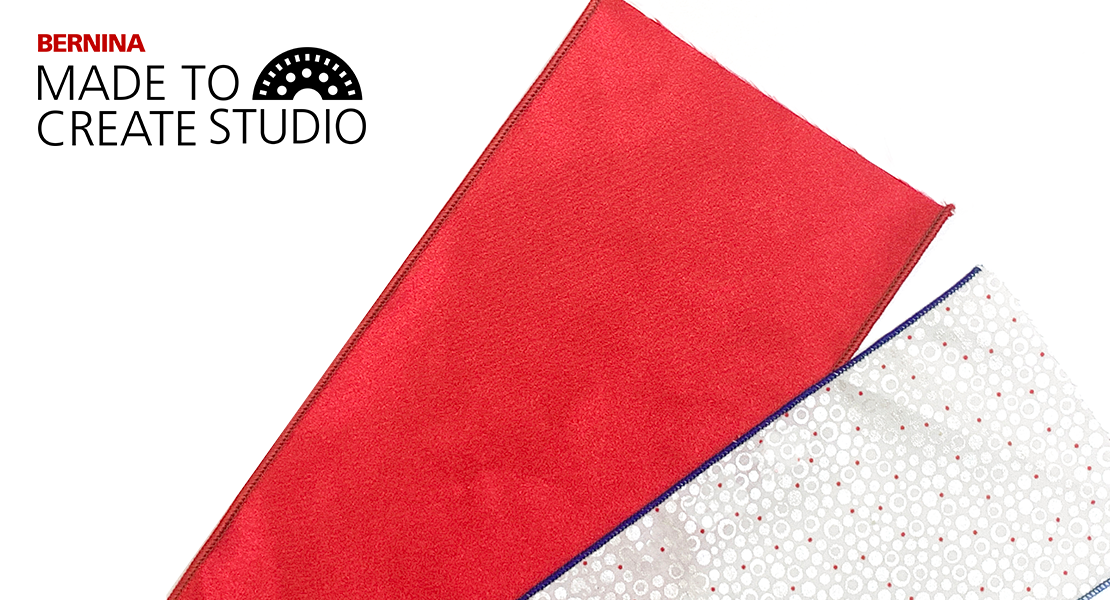
Another fast fusible hem is very simple but extremely effective and this trick doesn’t require changing any threads. Set your serger up for a 3 or 4-thread overlock with standard serger thread, I used the Maxi-Lock. In this demonstration, I used the 4-thread overlock because as mentioned earlier, a 4-thread is more durable. You will need some sort of I used a fusible hem tape, I used HeatNBond Super Weight Hem 3/4″ because it is strong enough to stitch through (some fusible hem tapes are quite thin and fall apart under the needle). Even though the packaging states you don’t need to sew, I found that serging through this particular hem tape is nice for two reasons:
- The hem tape is exactly 3/4″ – assuming you cut off about 1/8″, it offers a nice width hem for most projects (check the pattern for how long the hem should be)
- The tape adds a little extra body to the hem
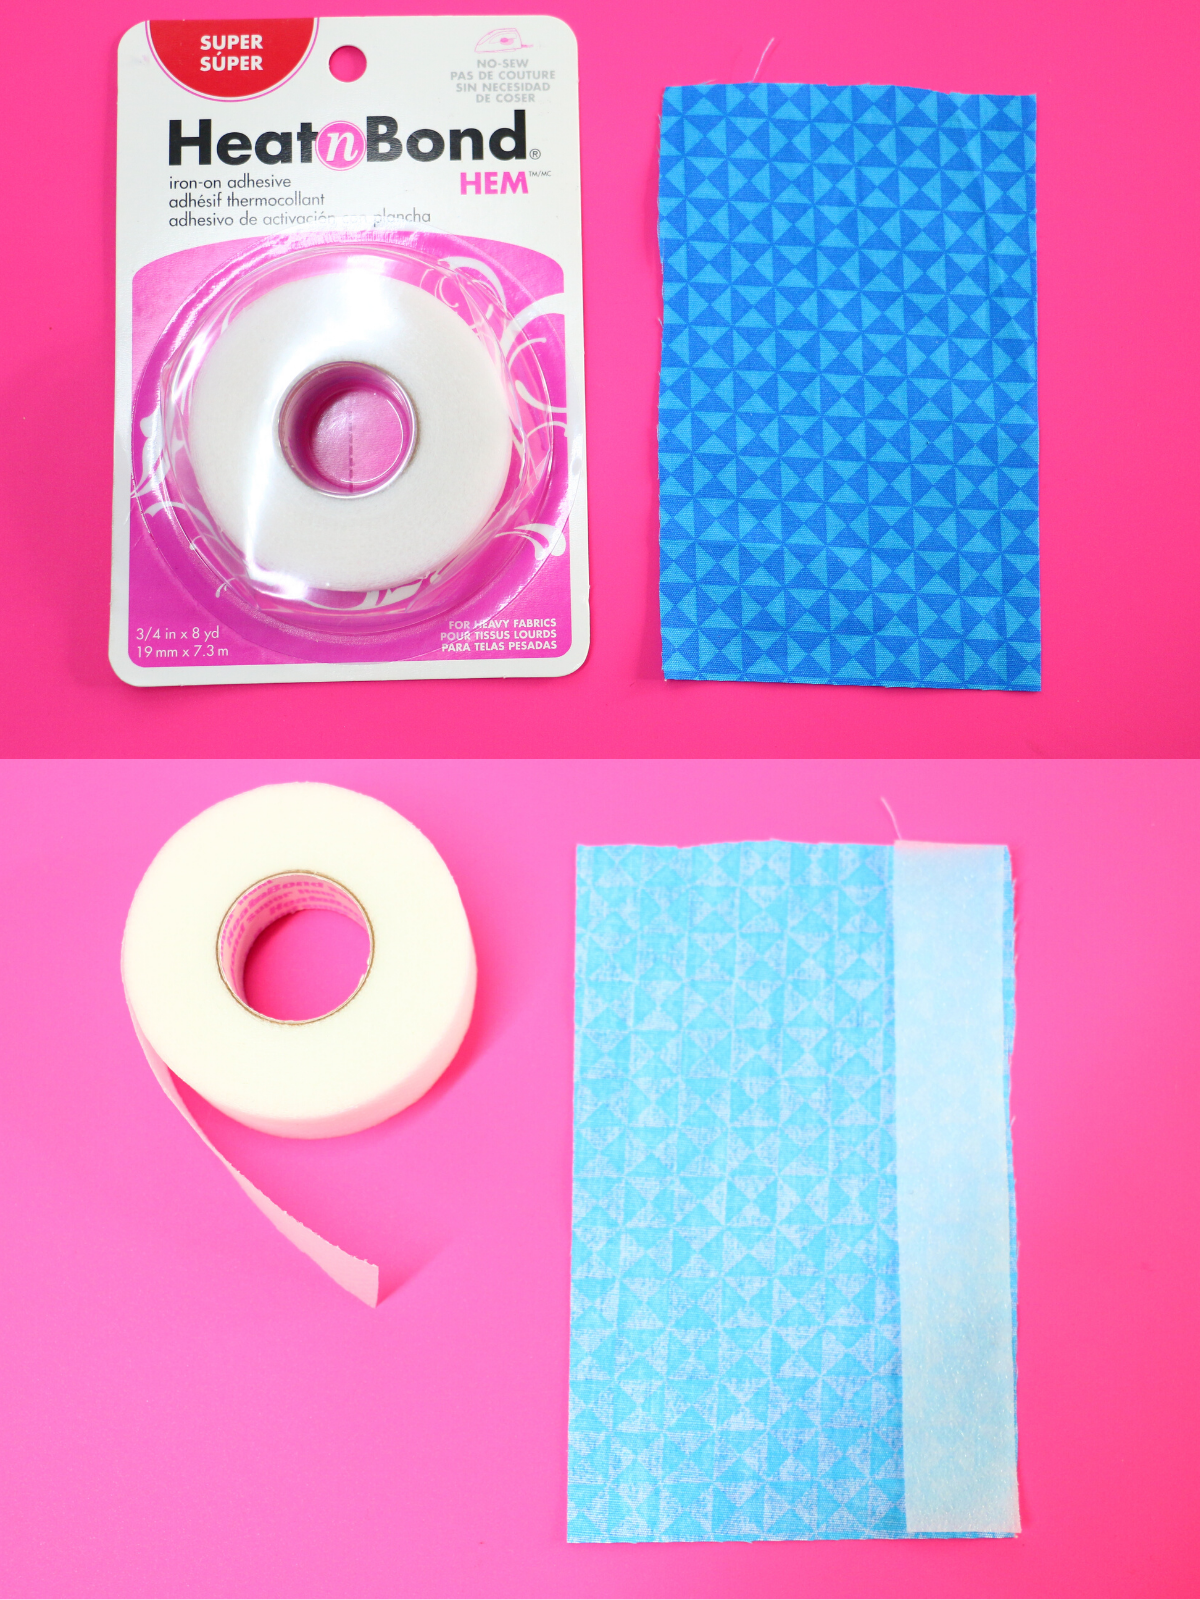
Pay close attention to the right and wrong side of the hem tape, there is a clear fusible side. Place the fusible side right side up and along the raw edge of your hem. This way when you fold the hem up, the fusible will be closest to the wrong side of the fabric and adhere to your hem properly.
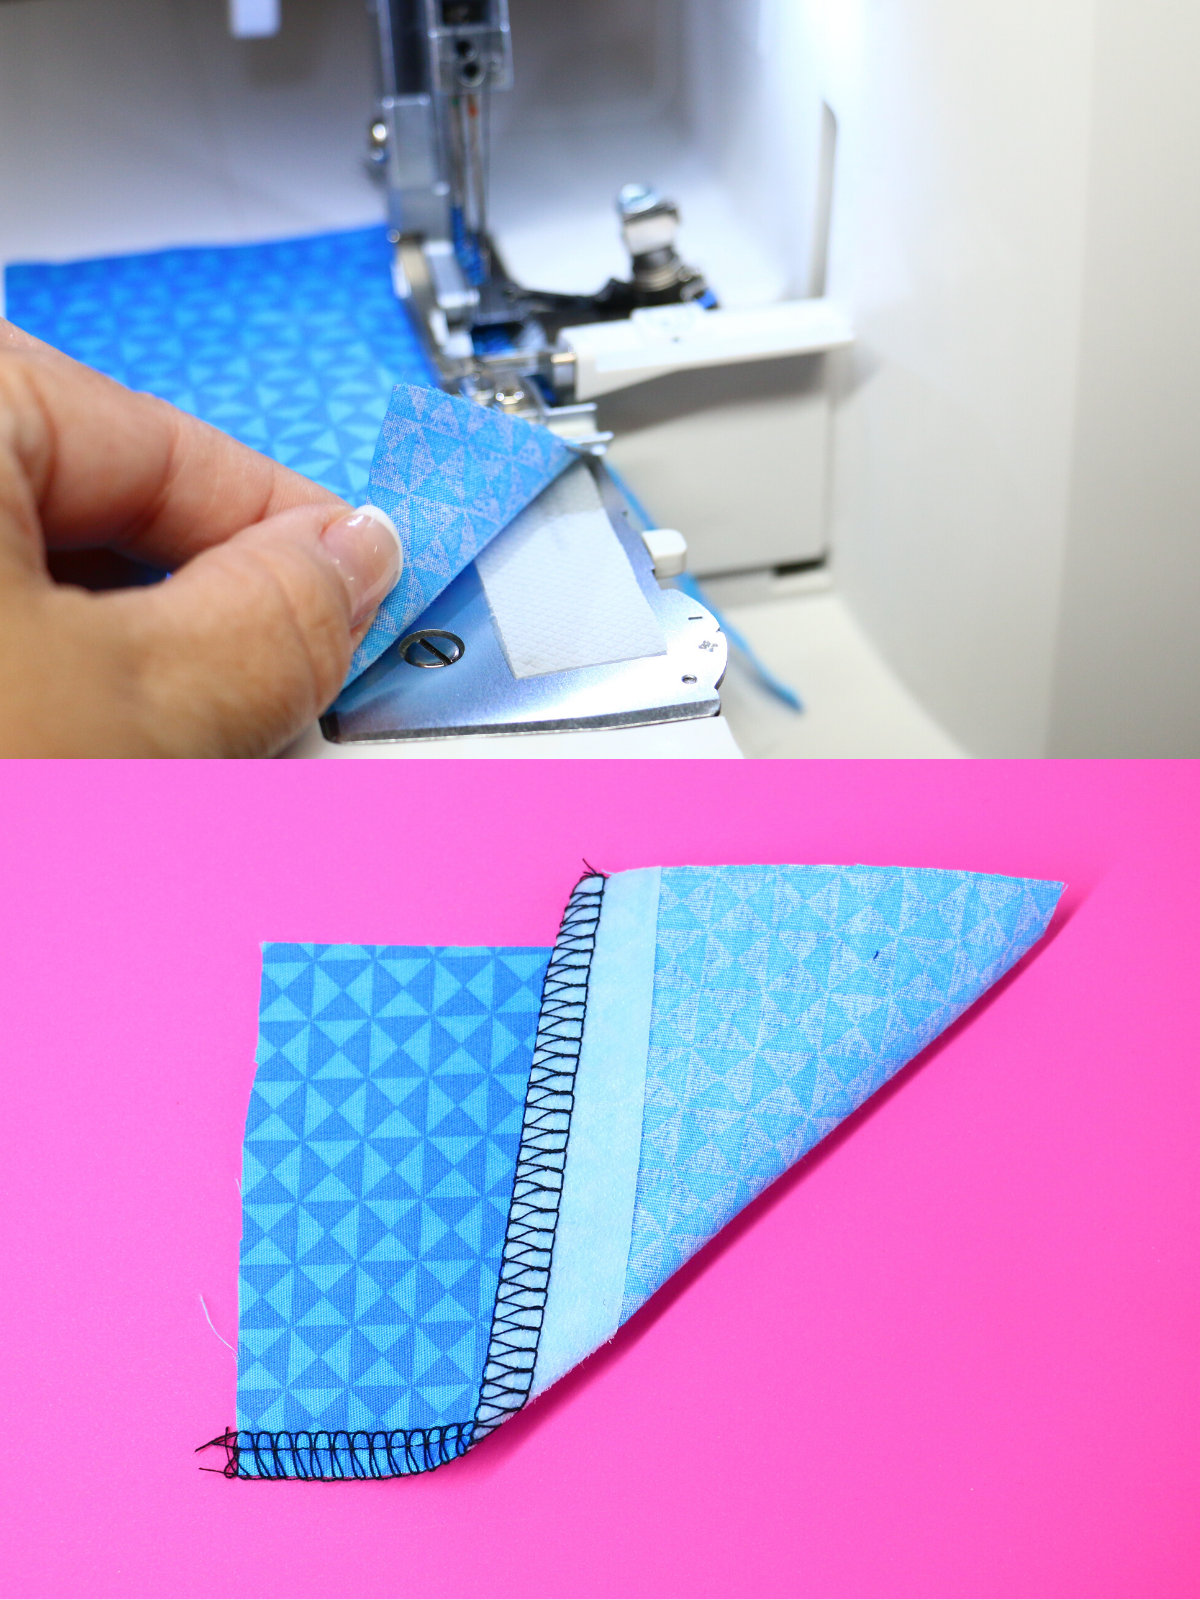
Cut off no more than 1/8″ with the serger blade (add extra hem as needed depending on the pattern you are following). When finished stitching, fold up the hem according to the pattern and press.
These two easy and effective ways of creative fast fusible hems will surely come in handy with some of your upcoming projects. In order to get the most effectiveness from your fusible thread and fusible hem tape, be sure to read the pressing instructions and adjust your iron temperatures accordingly. A press cloth might also be needed to avoid getting any fusible residue on your iron soleplate. Remember, these are fast fusible hems but not all projects will be suitable for these fast tricks. If your project will be laundered often, you might need to go back and press after each washing, or you might find it necessary to stitch. Either way, this hemming trick will come in handy for pressing quickly.
Let me know in the comments below your favorite hemming trick?
Have a Creative day,
Sue
Used Products

What you might also like


3 comments on “Fast Fusible Hems with a Serger”
-
-
Sure worth a try. You might have to adjust your differential feed (maybe set to 1+). If you have the cover stitch machine then you could also use that once you’re confident of your positioning. Or if you don’t have the cover stitch you could do the first tip and then stitch with a twin needle on your sewing machine.
~ Sue
-
-
Thanks for the tip I need all the help I can get ! I never thought of this !
Leave a Reply
You must be logged in to post a comment.

Great Idea! Would you suggest this for t-shirts?