Pintucks with a Serger and Sewing Machine
When sewing, I am always trying to find unique ways to create my favorite techniques. One way I like to jazz up my projects is by adding pintucks. I know how to do this on my sewing machine, using one of the several BERNINA pintuck presser feet options. But I recently discovered I can also achieve these beautiful embellishments on a serger.
Let’s take a look side by side.
Machines Featured
First Things First: Feet
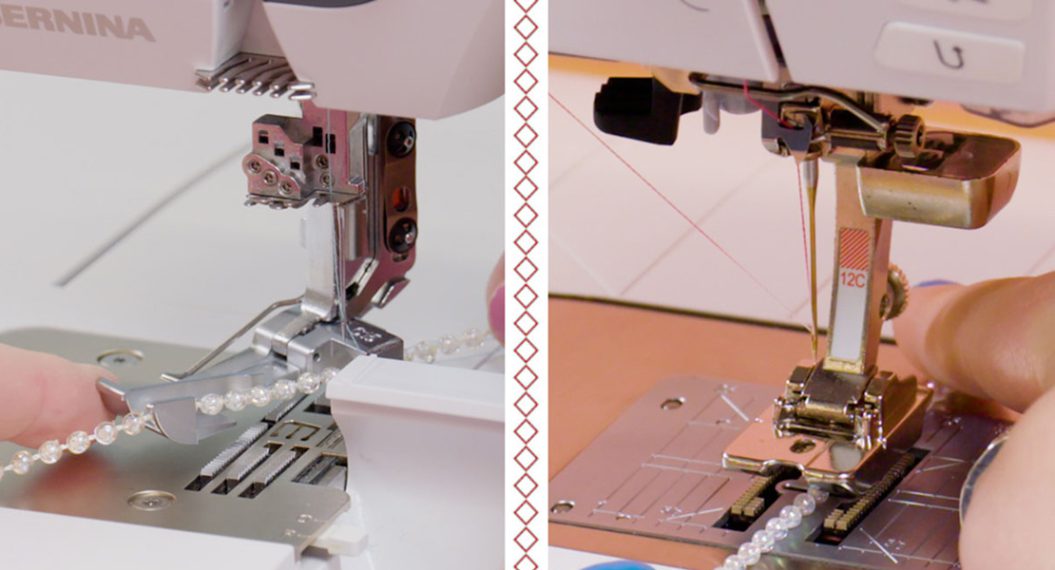
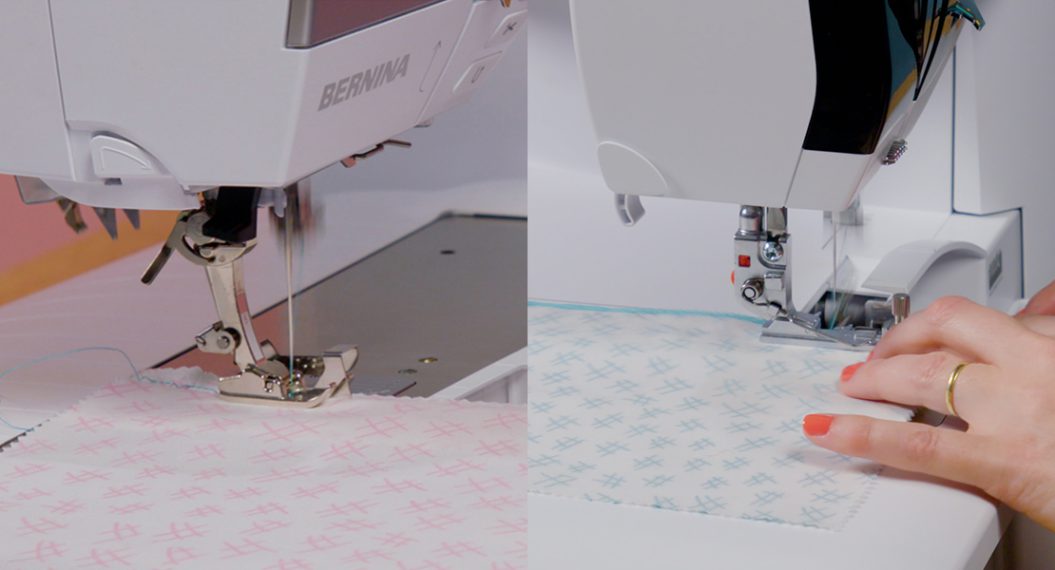
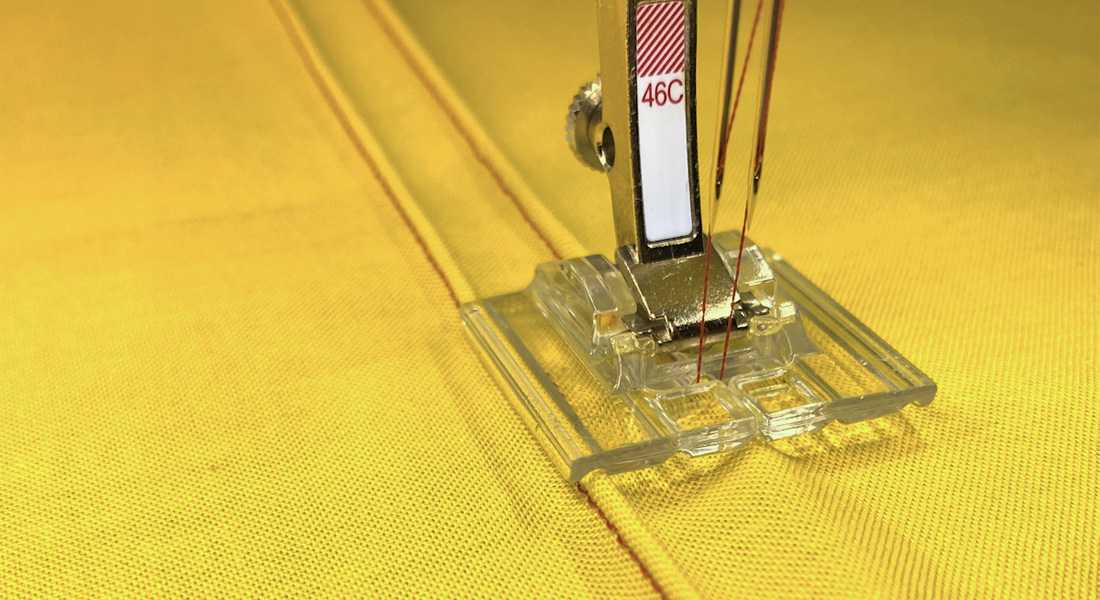
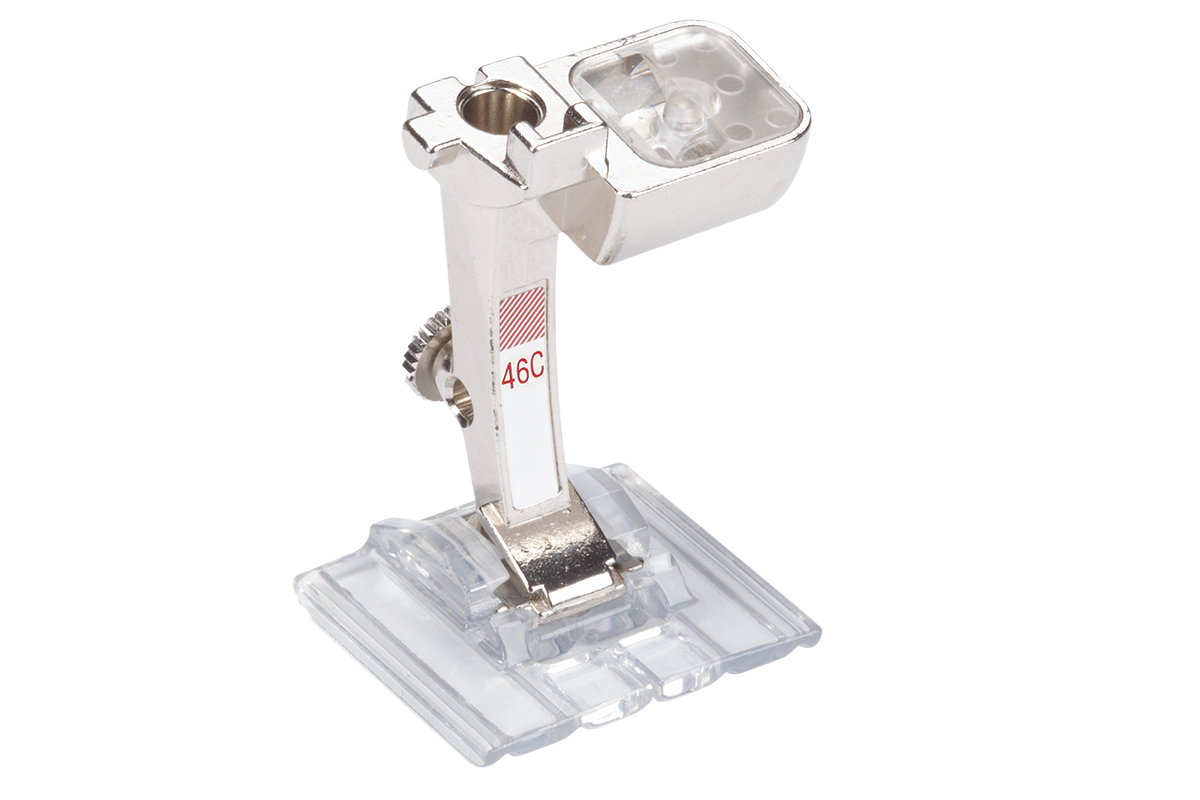
Sewing Machine – Pintuck & Decorative Stitch Foot with Clear Sole #46C

Did you know BERNINA has five different pintuck presser feet for your BERNINA sewing machine?
Each pintuck foot can create a different size of pintuck. Pintuck and Decorative Stitch Foot with Clear Sole #46C can even be used to add decorative stitching between the rows of pintucks.
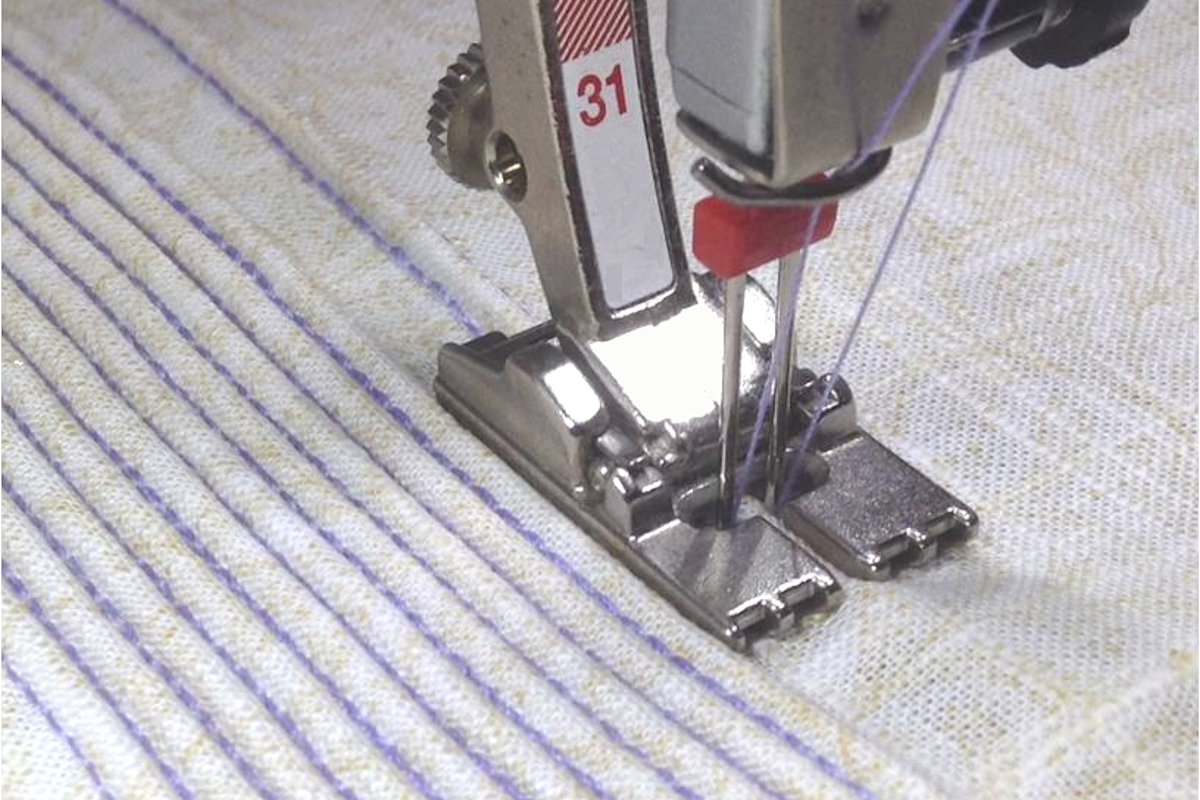
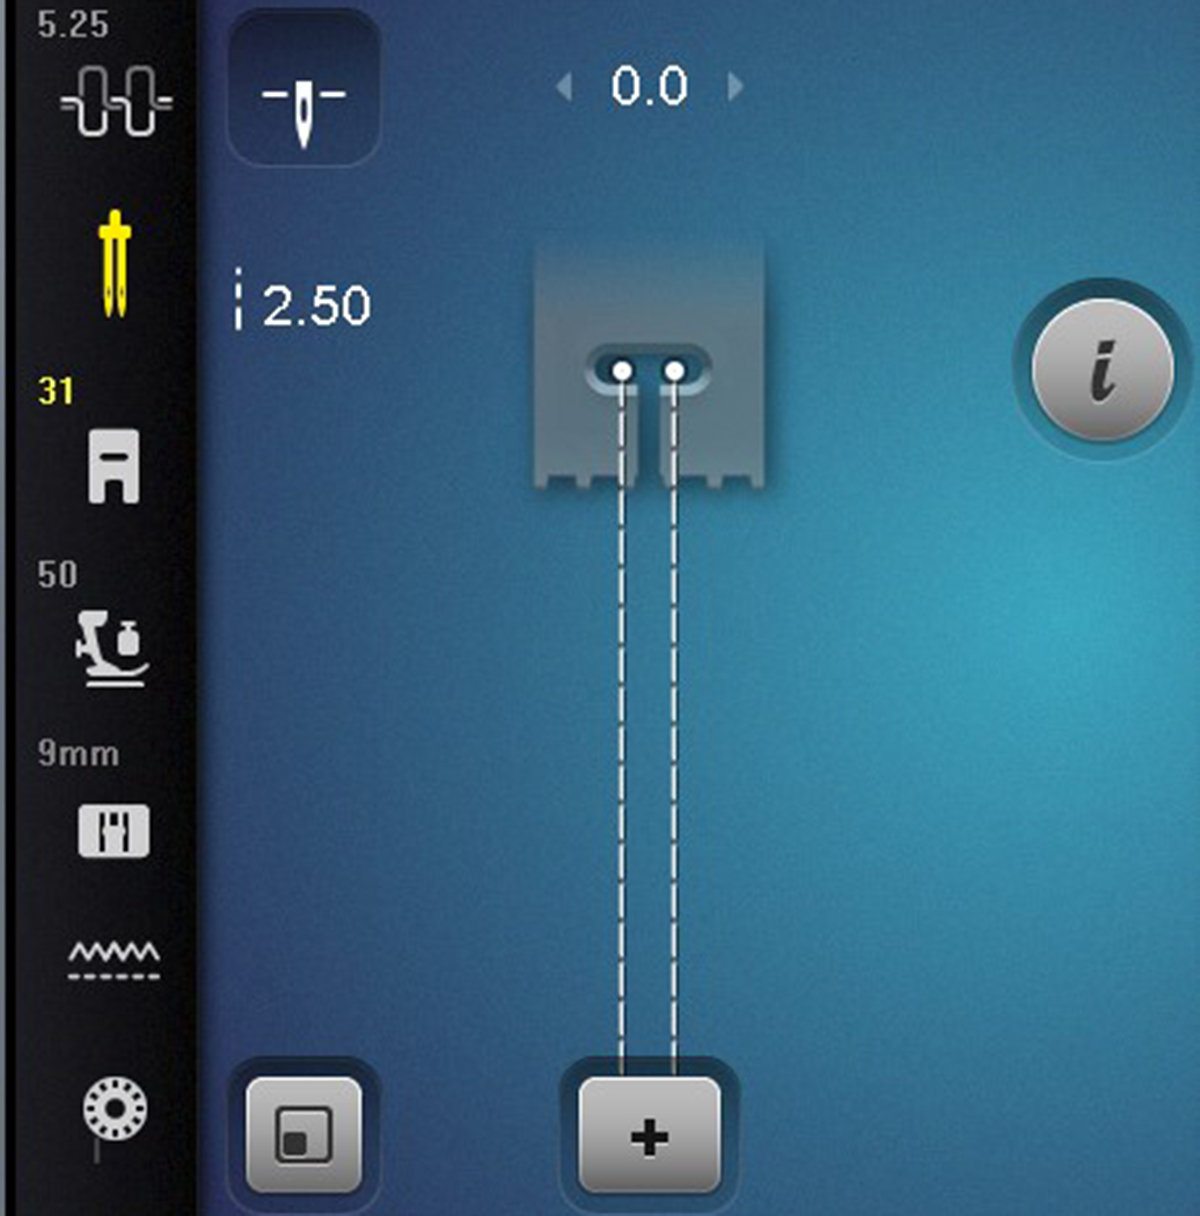
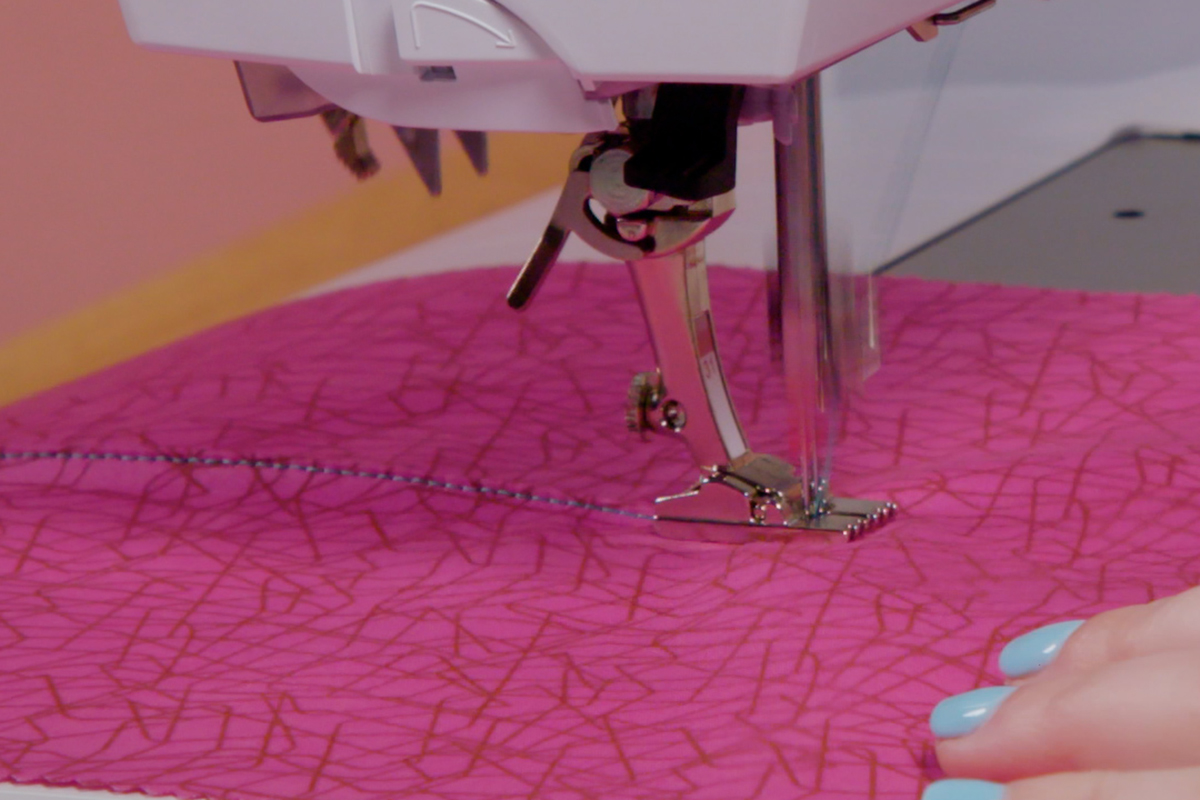
For this tutorial, I used the Pintuck Foot with 5 Grooves #31 with a twin needle. As the name implies, it features five grooves on the bottom of the sole. The size of the grooves indicates the size of the pintuck that will be sewn. The grooves can also be used for alignment. The pintucks will glide through and maintain an equal distance from the next pintuck being created.
For more information on which BERNINA pintuck foot to use, check out this blog post.
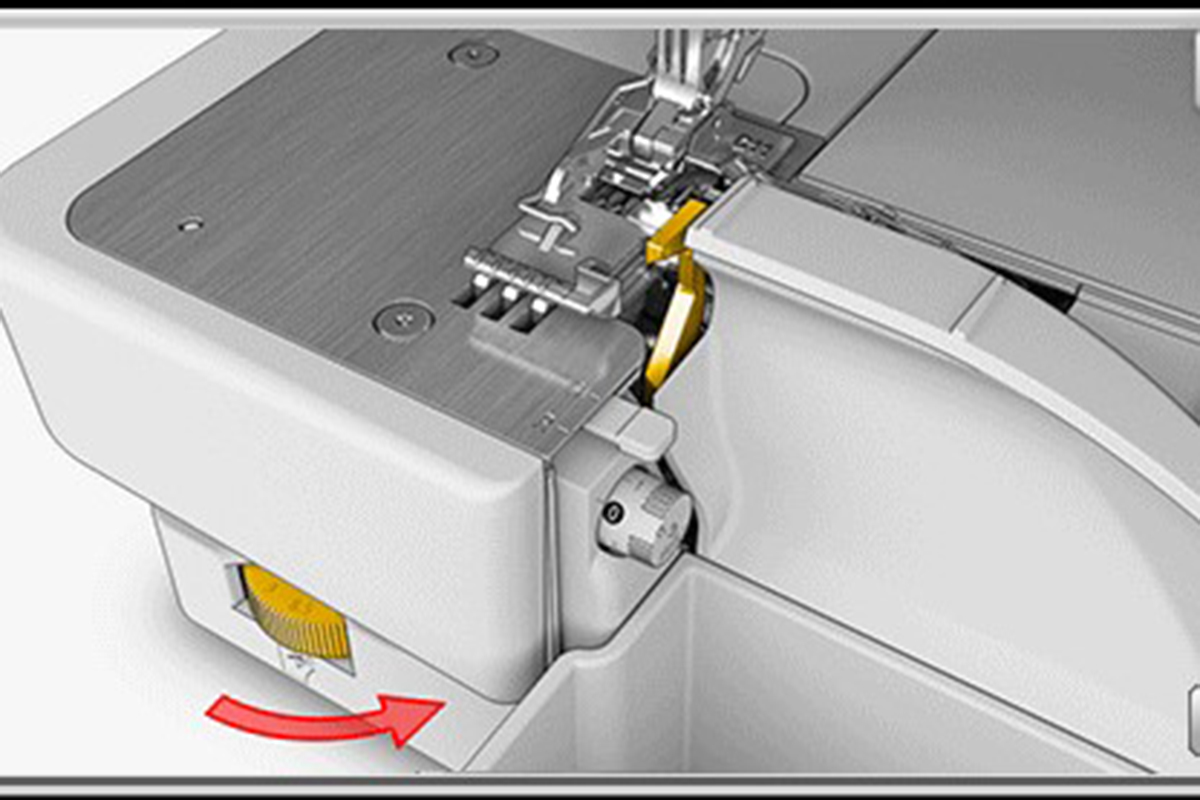
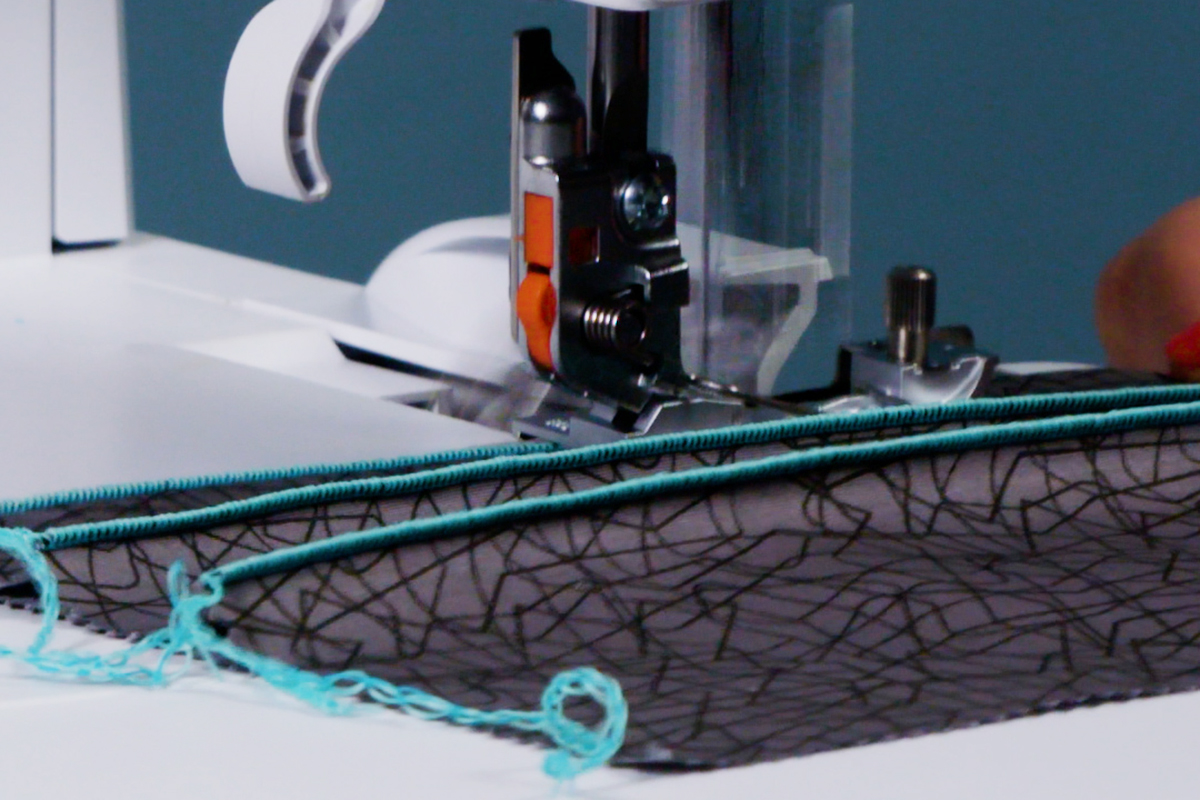
Serger – Blindstitch Foot #C19
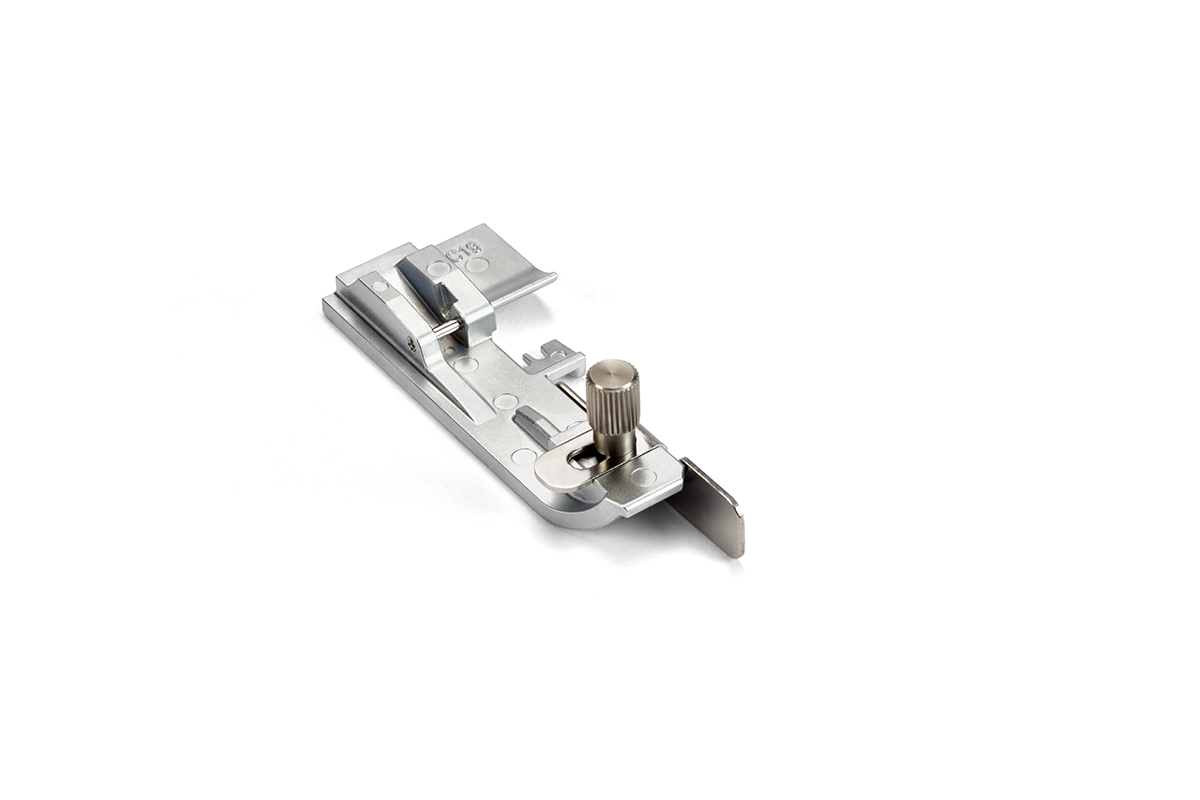
One essential component to creating a pintuck on a serger is to sew over a fold in the fabric. The Blindstitch Foot #C19 for the BERNINA L 8 Series features an adjustable guide to place the fold against. The guide is simple to adjust by twisting the screw at the toe of the foot, then moving the guide to the proper placement. Depending on which needle and stitch you are selecting, you can set the perfect finished width for your pintucks. It is always best practice to test on scrap fabric when making these adjustments before you start on your finished project.

TIP: The L 890 uses the overlocker presser feet that begin with the letter “C”. This distinguishes this machine from the other L 8 Overlockers that are not a Combo Machine.
Set Up For Success: Machine Settings
Sewing Machine
The first thing to do once a presser foot is attached is to select it in Presser Foot Selection. With each pintuck presser foot, you’ll need to use a specific size twin needle. To determine if a twin needle (also called a double needle) will work with the selected pintuck presser foot, place it against the sole of the foot. The needles should fit into two grooves right next to each other. The twin needle featured in this post is Schmetz Universal Twin, size 3.0/90, so the distance between the needles is 3mm.
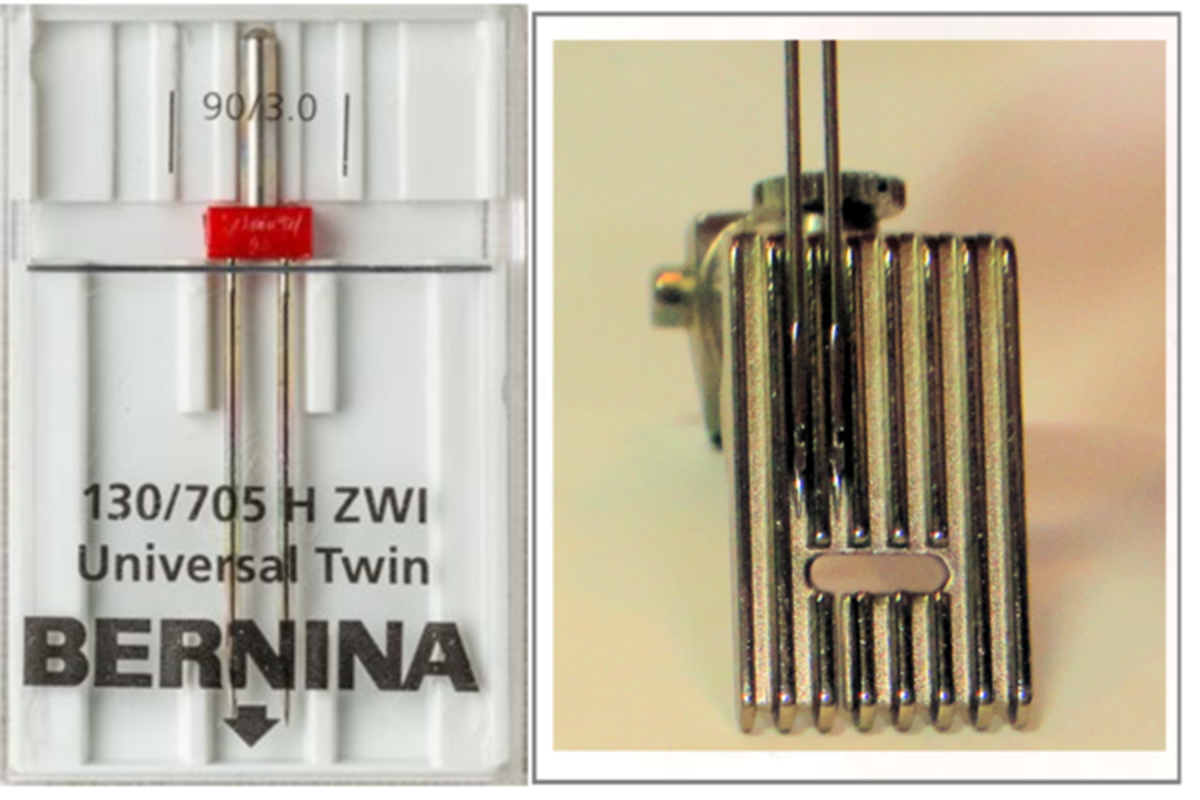
TIP: If your machine has a needle security function, select the width of the twin needle being used. This will ensure that the stitch width does not increase so much to cause the needle to strike the foot and break.

Beyond using a pintuck presser foot, there are a couple of adjustments that can be made to the stitch. For more defined pintucks, tighten the needle tension. When sewing with a twin needle, the bobbin thread is shared, creating a zig-zag pattern on the wrong side. By increasing the needle tension, the bobbin is pulled tighter, resulting in a quality pintuck.
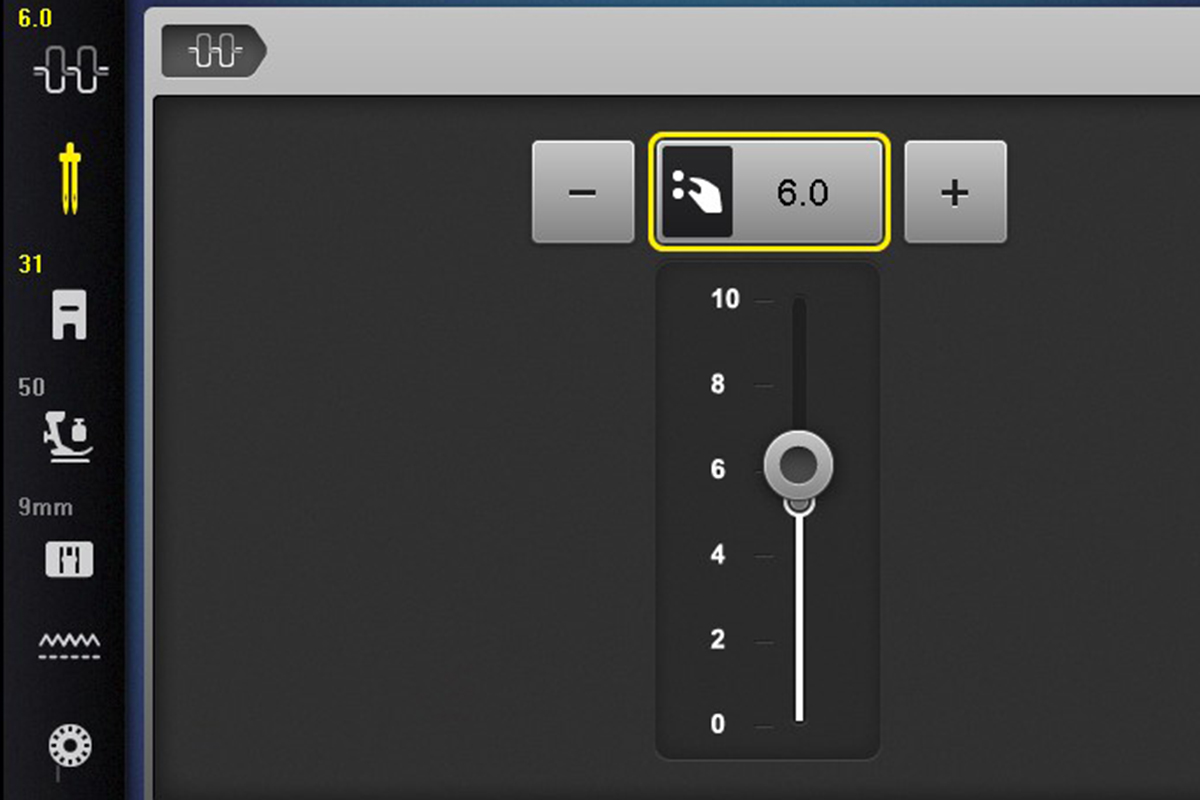
It is also recommended to shorten the stitch length slightly. Decrease the stitch length between .5-1.0 of the original length.
Serger
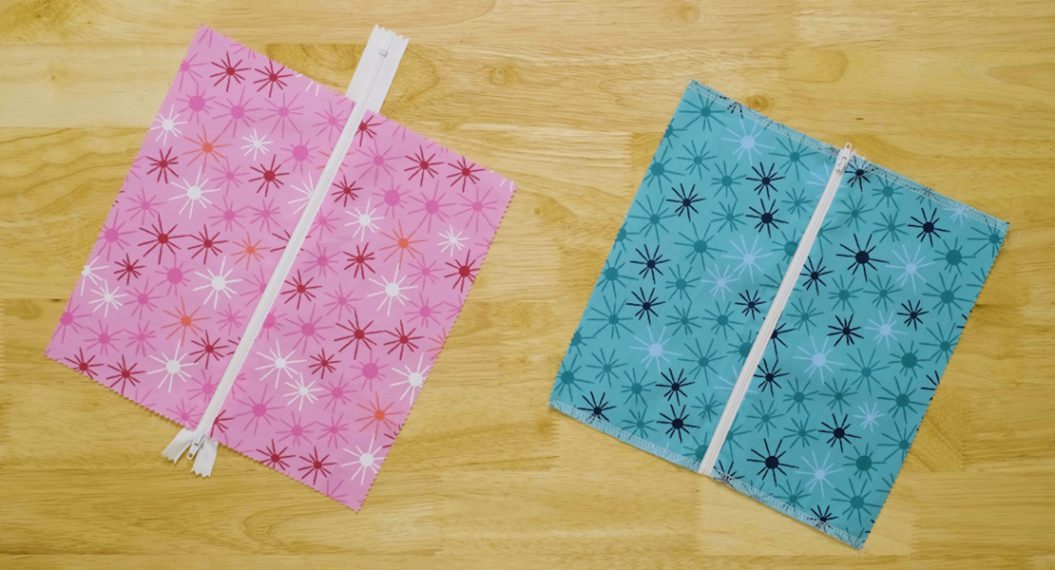
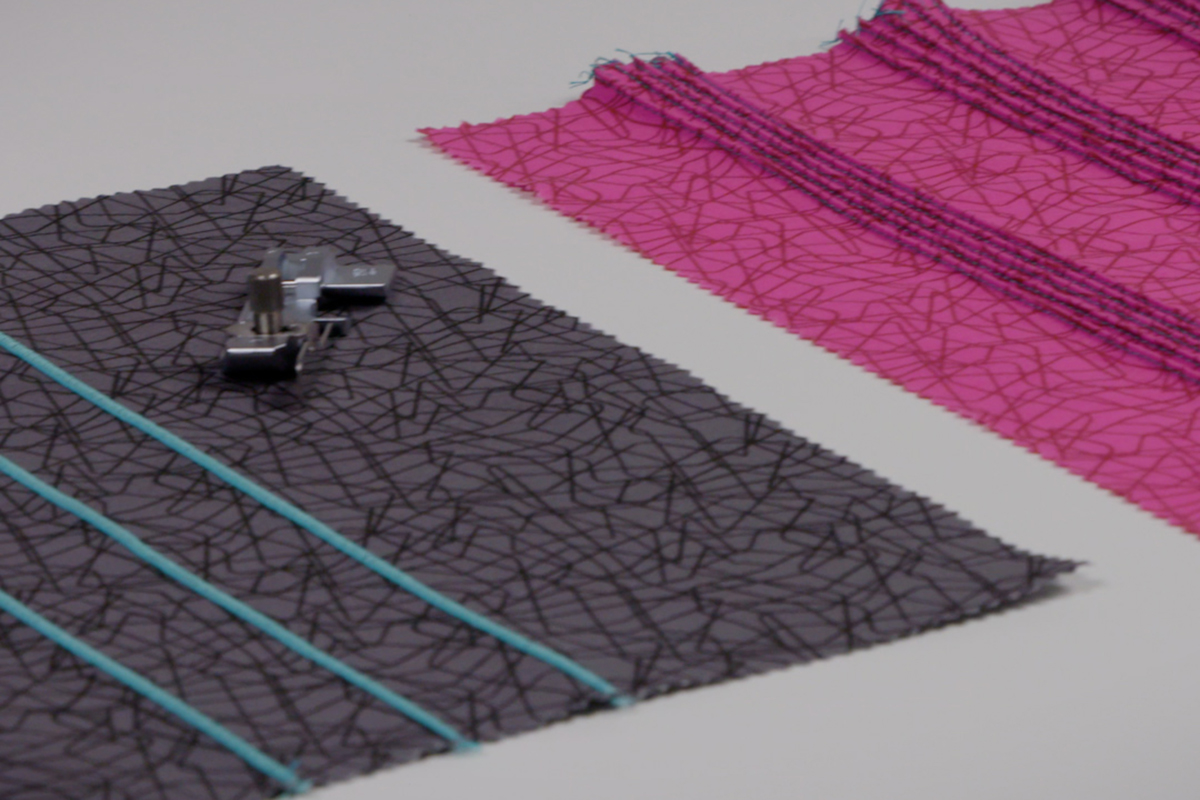
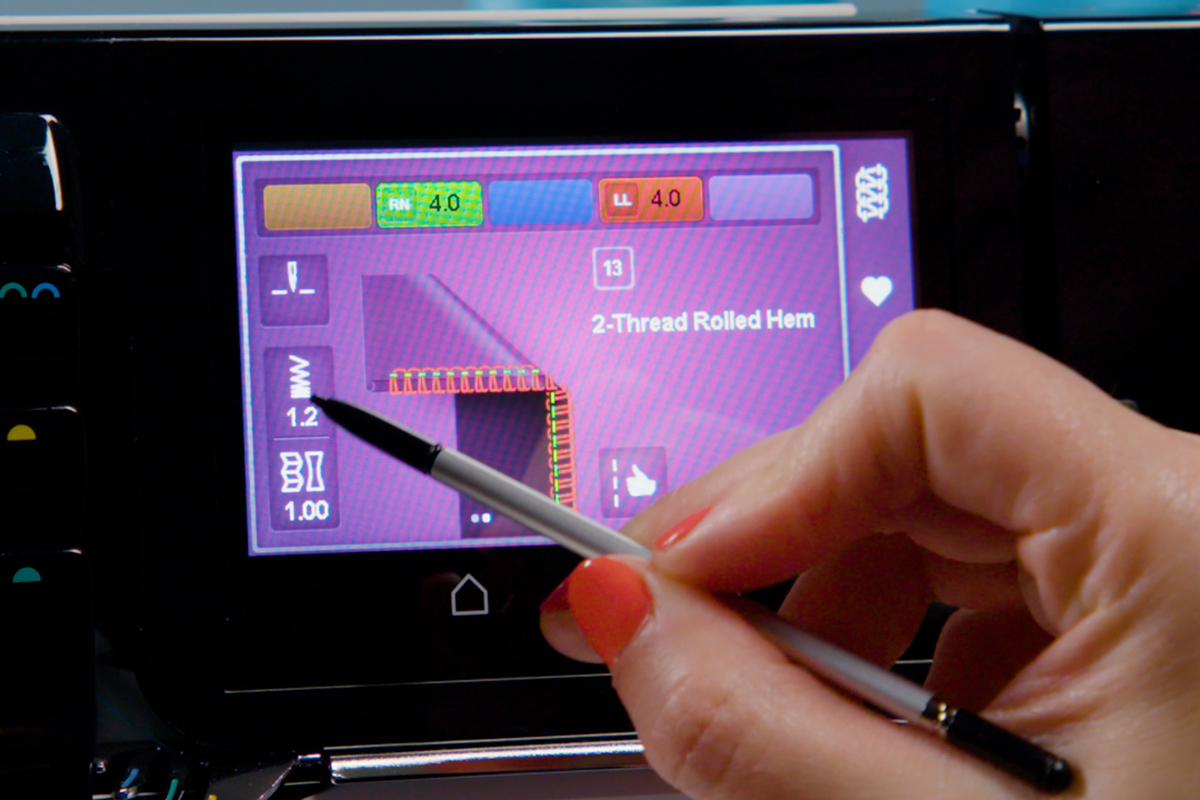
The stitch used for pintucks on a serger is up to preference, but it is recommended that the stitch wraps around the fold. With this being the case, I would suggest a rolled hem. With a rolled hem stitch, the fold is covered with a tube-like finish, imitating the round look of a sewing machine pintuck. In this tutorial, a 2-thread Rolled Hem was used to create a wrapped stitch over the folds of the fabric.
Serger pintucks have a standout appearance. To create pintucks on a sewing machine, the fabric is pinched together. With the serger, the fabric is folded right side out, and the stitching becomes the pintuck. I prefer to thread my machine with contrasting thread for a real pop of color.
On the BERNINA L 890, you can adjust the stitch length right on the screen. For a tightly packed stitch, decrease the stitch length to 1.0.
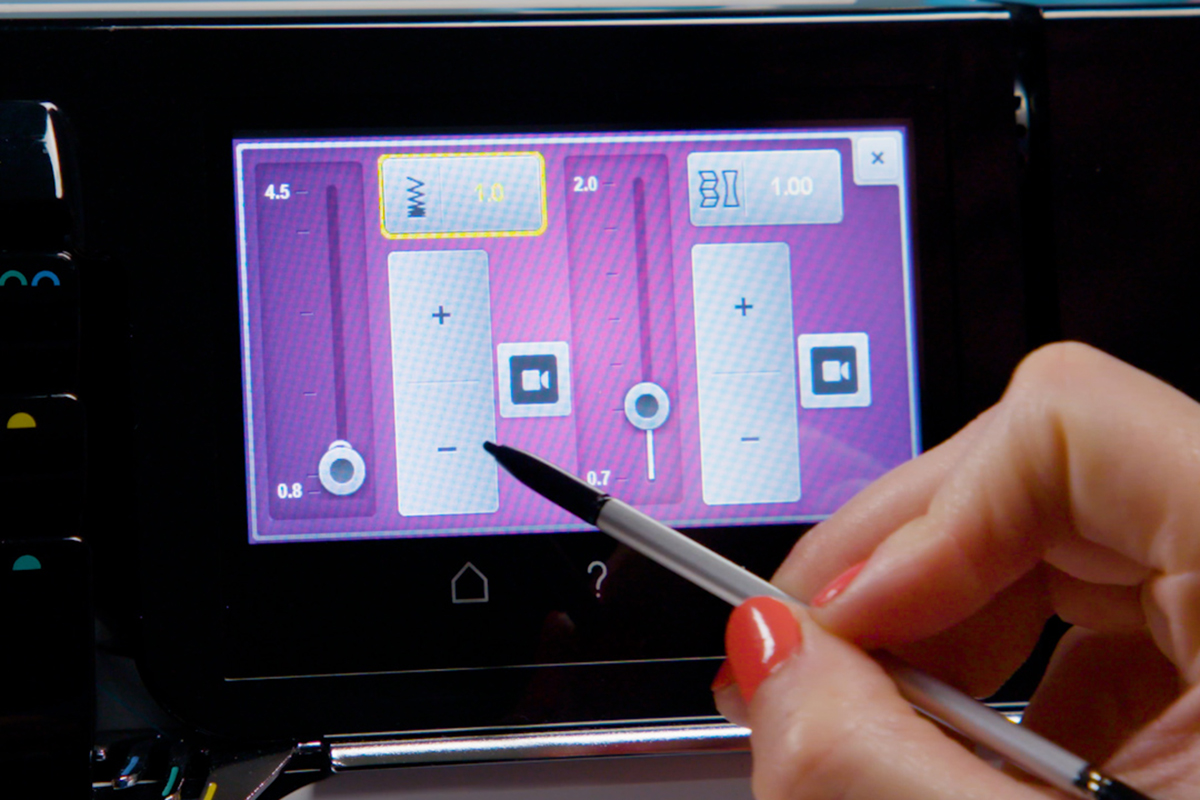
Finally, as a precaution, it is recommended to lower the cutting knife. This prevents any unwanted cutting or trimming during the sewing process. The fold provides structure to the serger pintucks, so do not risk cutting it off by accident. However, you can still increase the stitch width by adjusting how wide or narrow the cutting width is set at.
Tried and True: Techniques
Sewing Machine
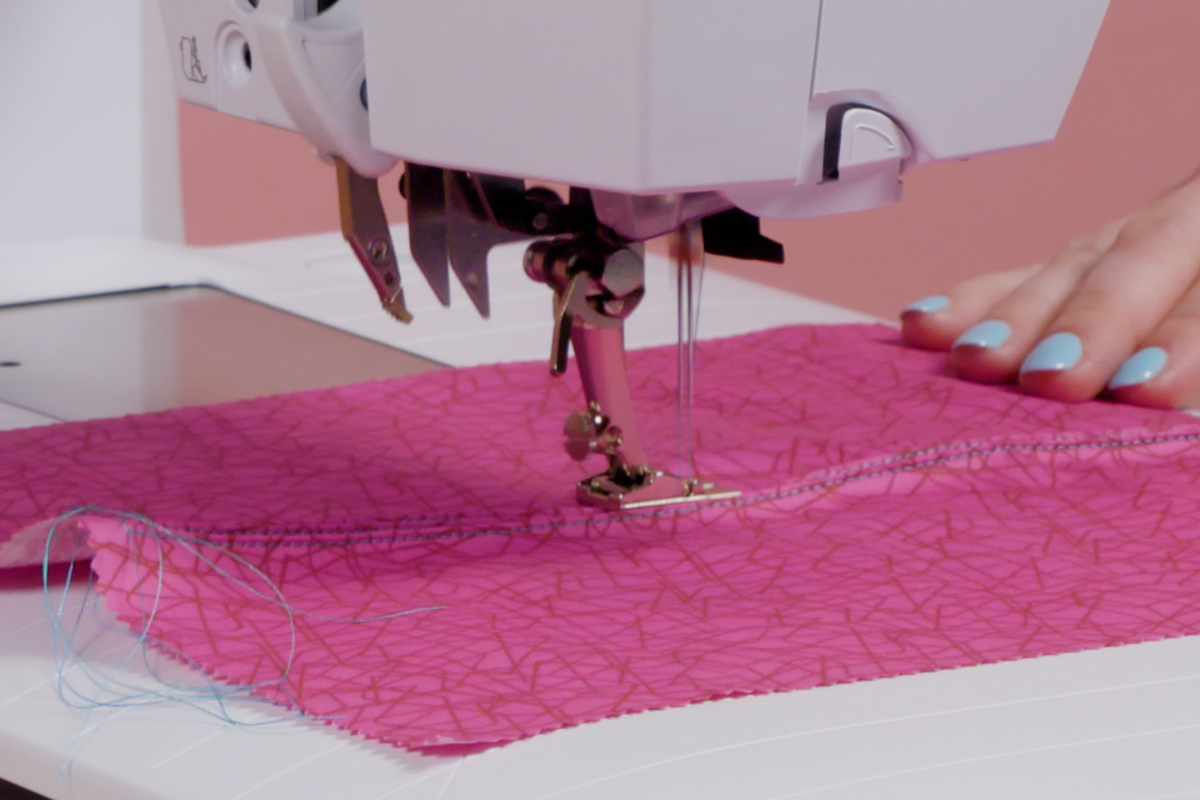
The pull from the pintucks will be significant, so cut a piece of fabric larger than needed. Determine where the first pintuck will be. Center the starting point under the presser foot, and stitch the length of the fabric.
At the end of the pintuck, cut the threads. If the edge of the fabric will not be hidden in a seam, secure the stitching with a knot.
After stitching the first pintuck, determine how far away the next one should be stitched. Align the first pintuck in one of the grooves on the bottom of the foot. Stitch the length of the fabric again. Continue until you have as many pintucks as desired. Alternate the stitching direction with each pass.
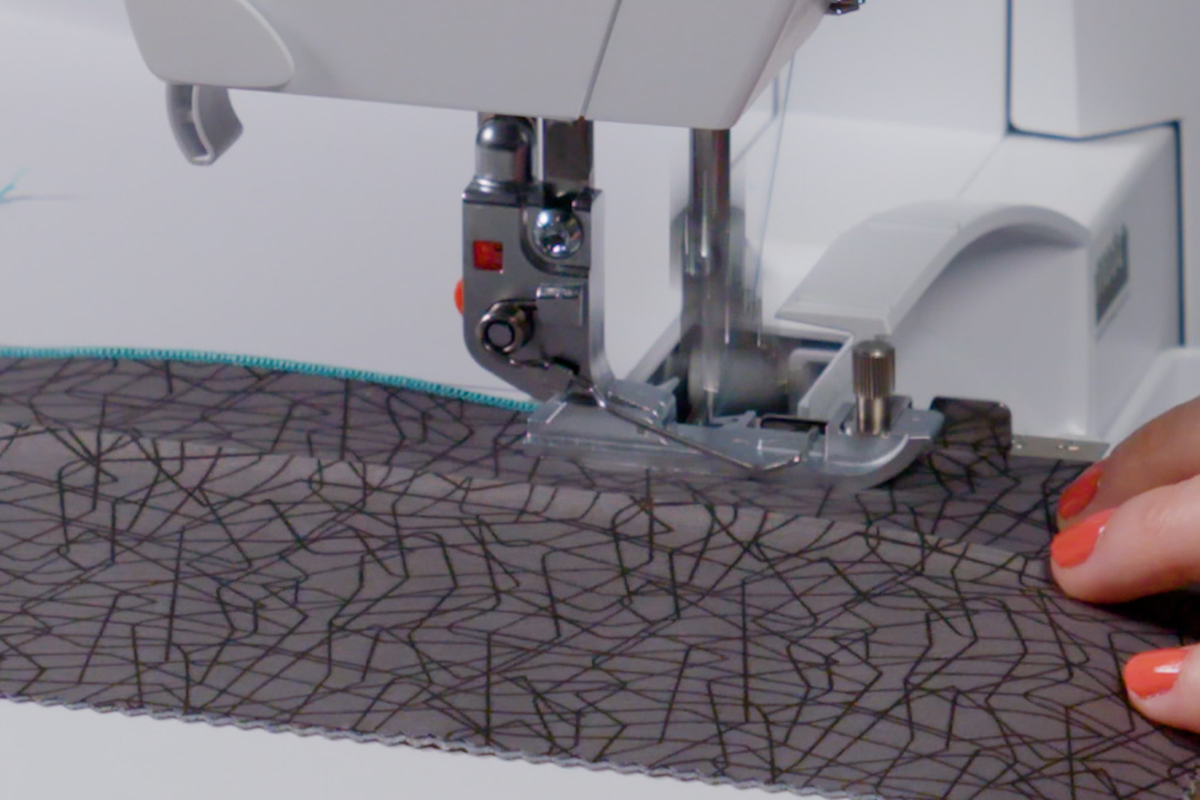
Serger
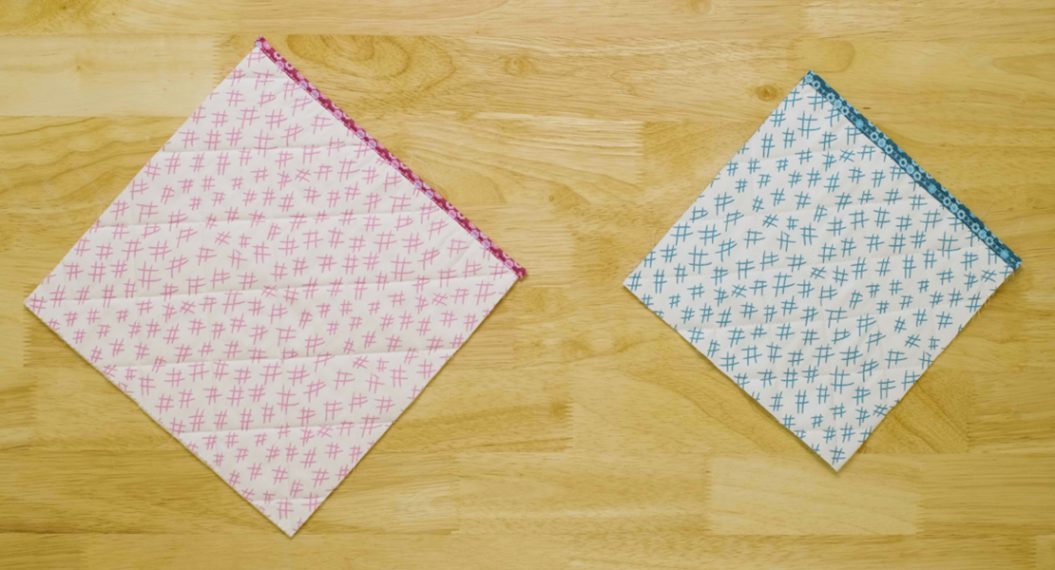
Like with the sewing machine, start with a larger piece of fabric. To mark the placement of the first pintuck, fold the fabric and press. Create as many folds as you want pintucks.
Place the first folded edge against the guide on the blindstitch foot. Stitch the length of the fold and cut the threads at the end of the seam. If the edge of the fabric will not be in a seam allowance, secure the stitching with a dab of glue.
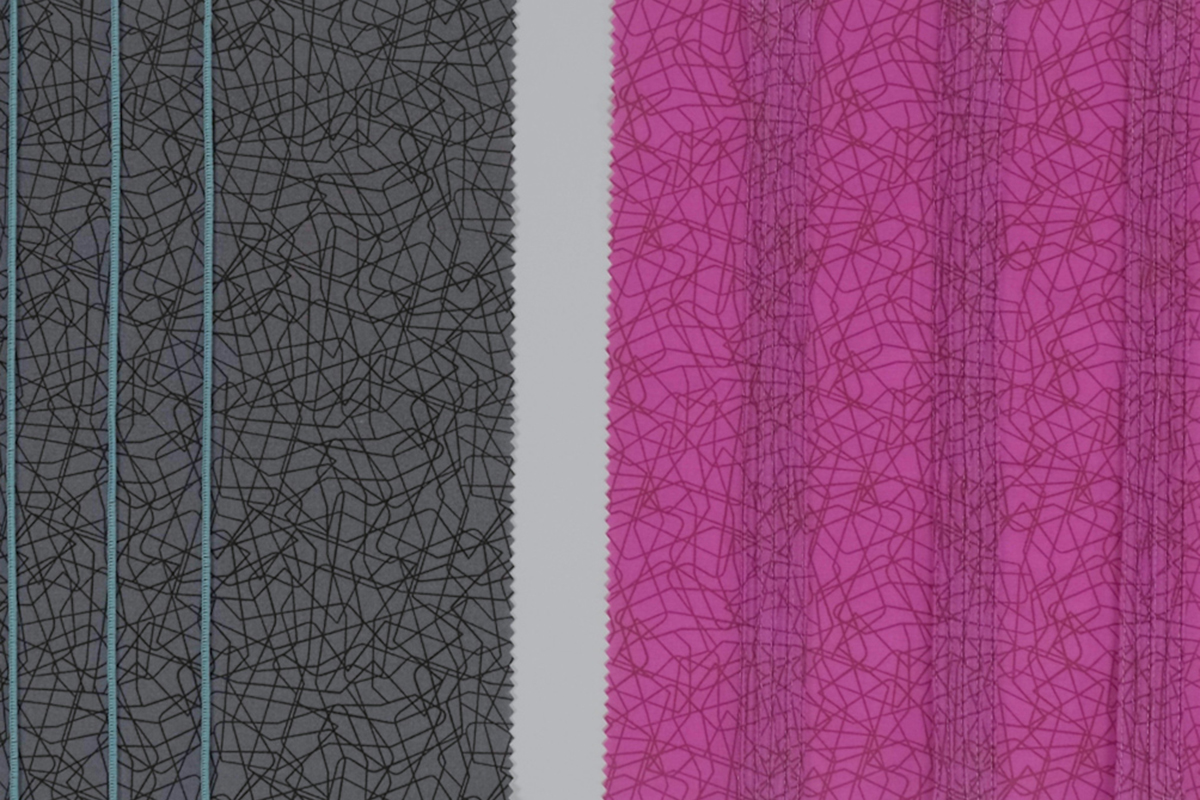
Sum of it All: Results
Let’s see how the pintucks turned out from both machines.
Sewing Machine
Successful pintucks! Try each BERNINA pintuck foot, varying the size and spacing of the pintucks.
Serger
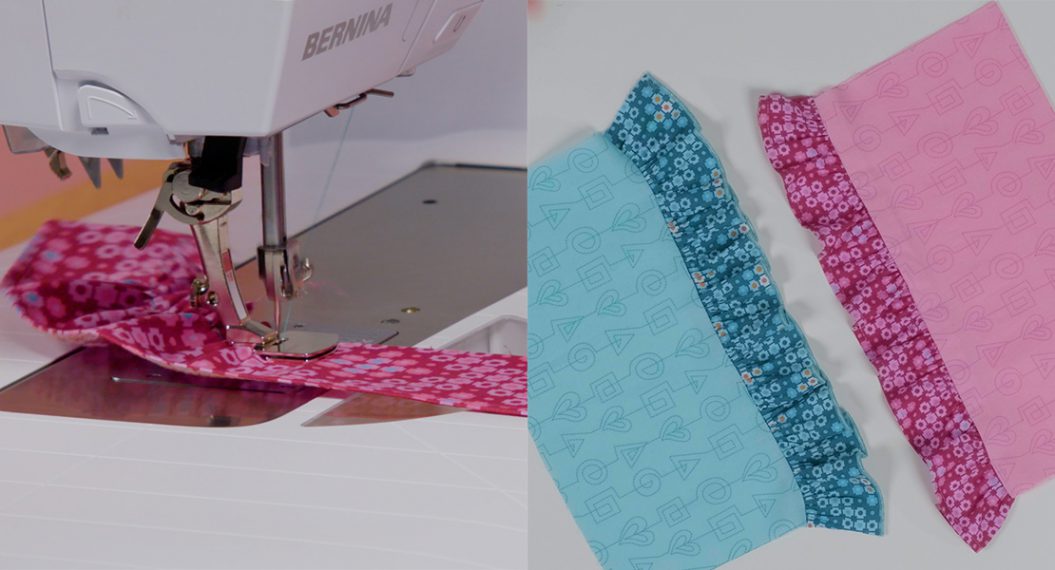
After stitching the pressed folds, unfold the fabric. I recommend finger pressing on either side of the pintuck to prevent depressing the tuck with an iron. The fun thread will add an accent to any project.
So which machine are you going to play with first? Give both a try!