Pintucks and Decorative Stitching with Foot #46C
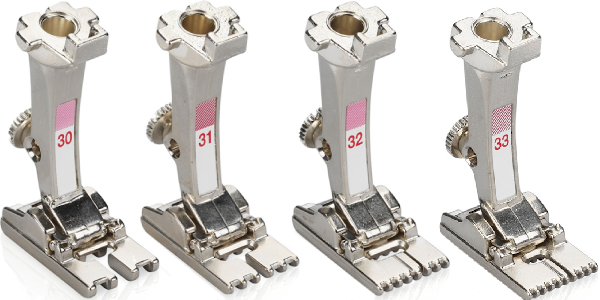
If you made pintucks before, you know that they are a subtle embellishment and a great way to add texture to fabric. BERNINA has four basic pintuck feet for making various sizes of pintuck. Click here to read an earlier post I did about how to use these feet to embellish almost any type of project with beautiful pintucks.
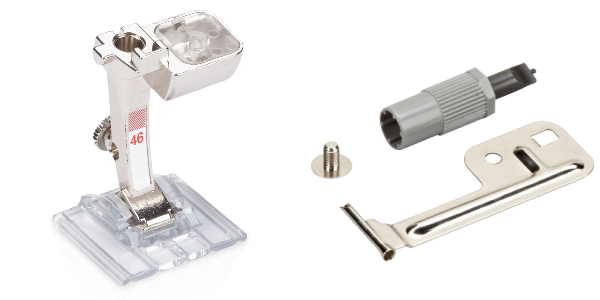
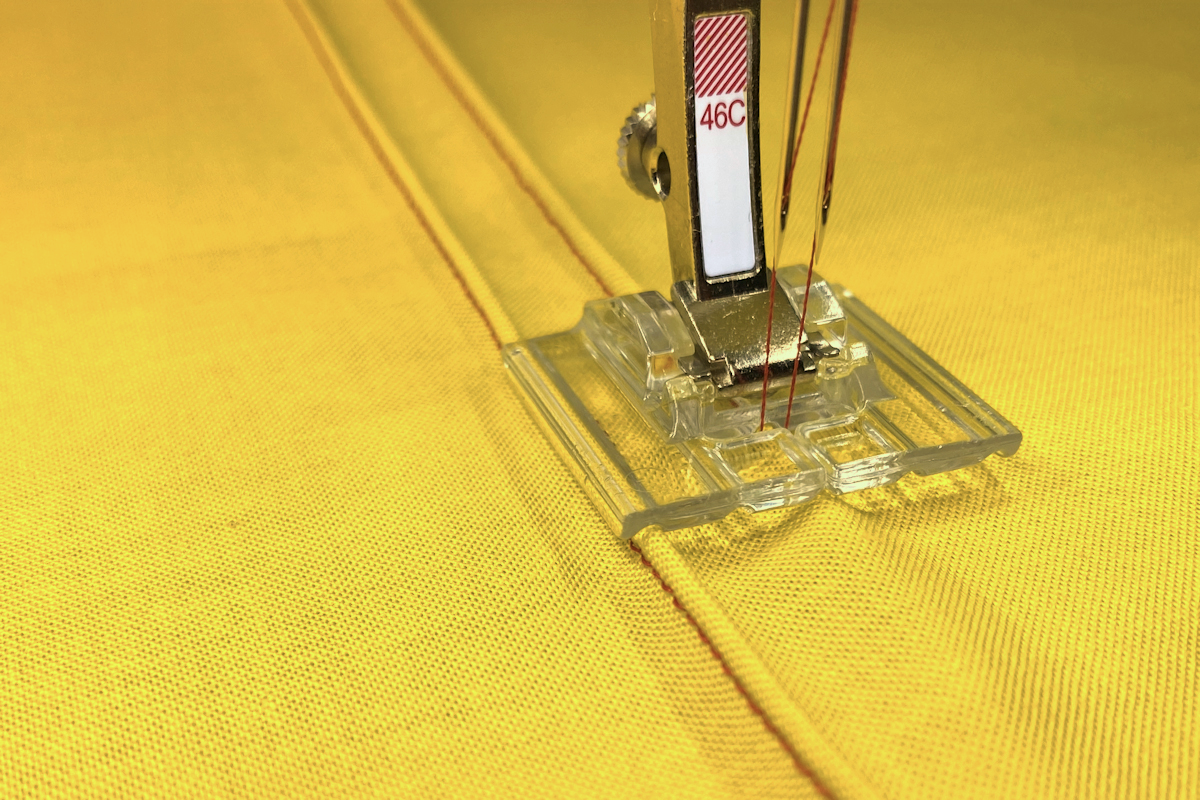
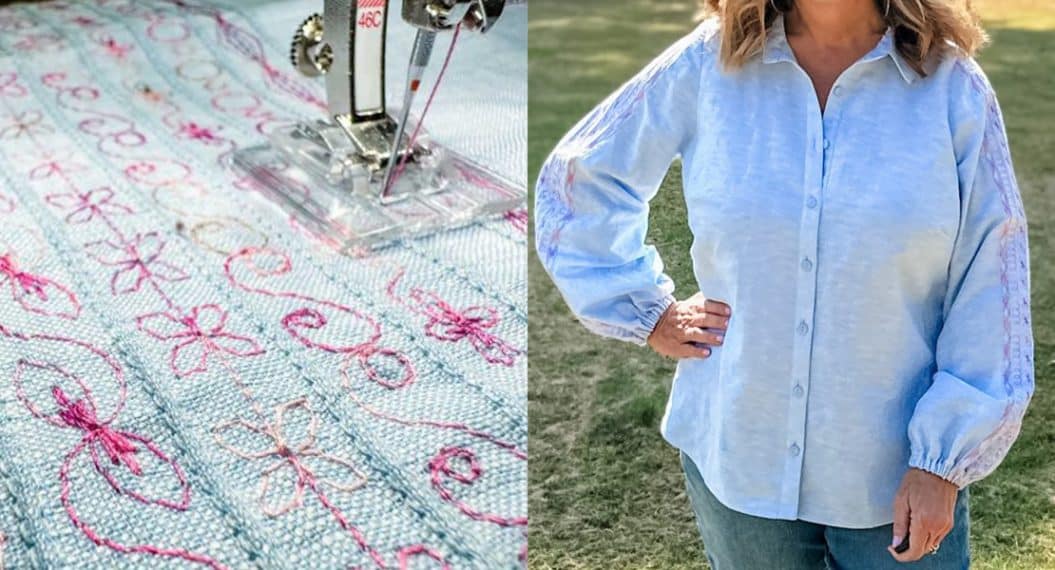
Today’s post is about a special pintuck foot, #46C. This is known as Pintuck and Decorative Stitch Foot #46C. It is available in just one version and works with all BERNINA models. The needle opening is 9 mm and the foot is coded to allow wide decorative stitches on models equipped to stitch them. On other models, the maximum stitch width remains 5.5 mm. Pintuck feet require the use of a double needle and a cording attachment if you want to make corded pintucks (more about that later).
Threading a Double Needle
Using a double needle is just as simple as using a single one but there are a couple of slight changes to the threading process.
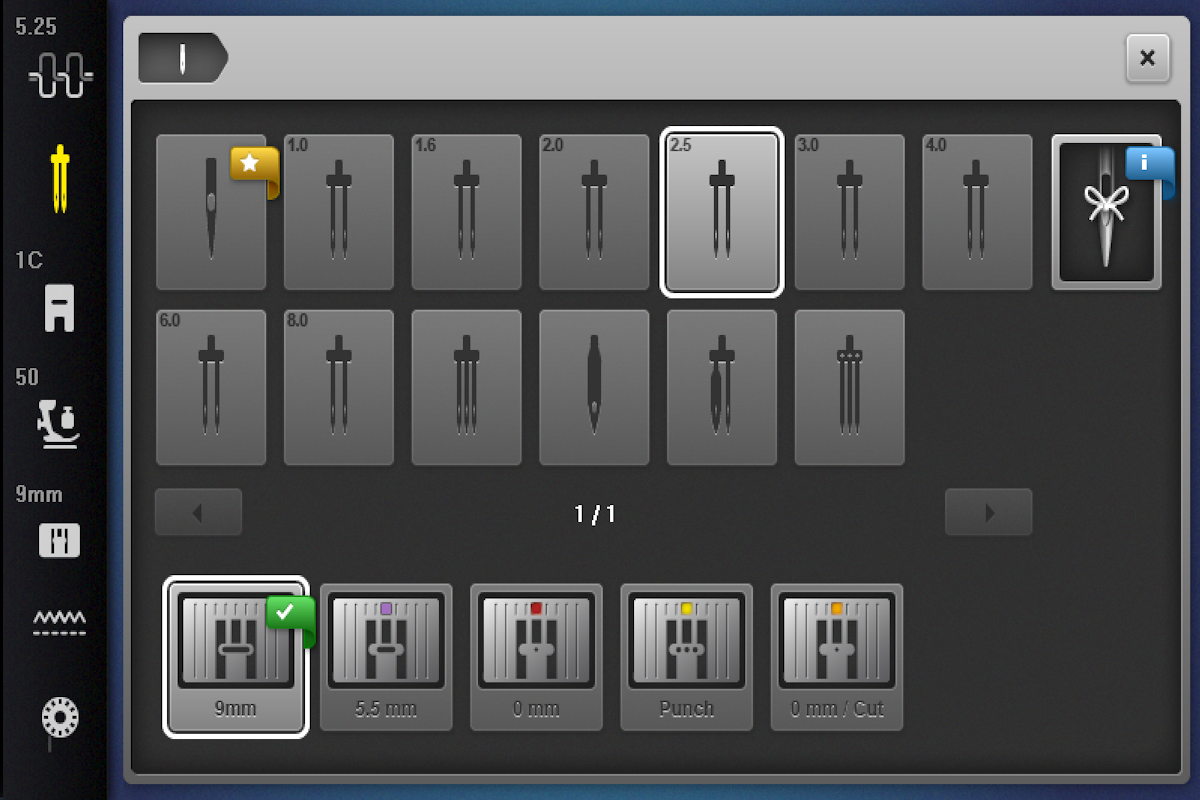
Insert a Double Needle (1.6 mm-2.5 mm) into the machine. If your machine has a Needle Minder, open it and select the size double needle you are using. This is especially useful if sewing with decorative stitches. It will keep you from accidentally setting your stitch width too wide, causing a broken needle.
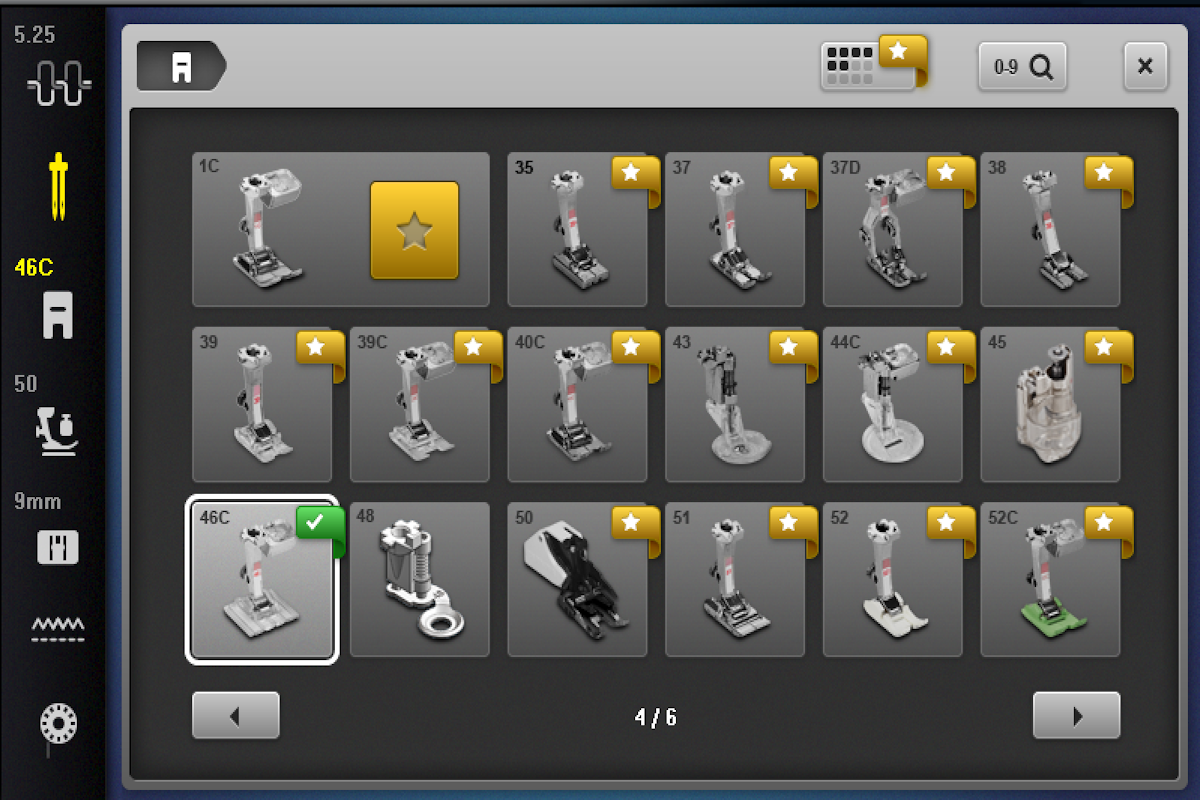
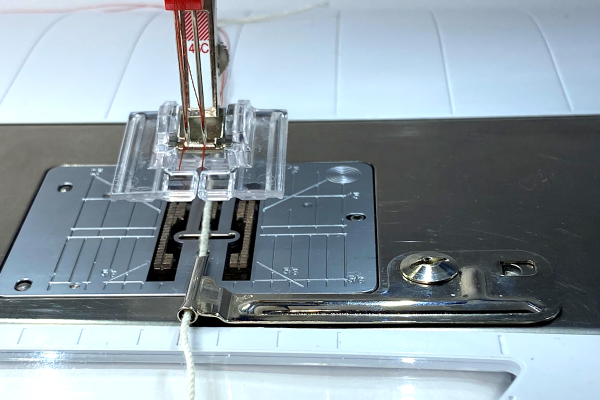
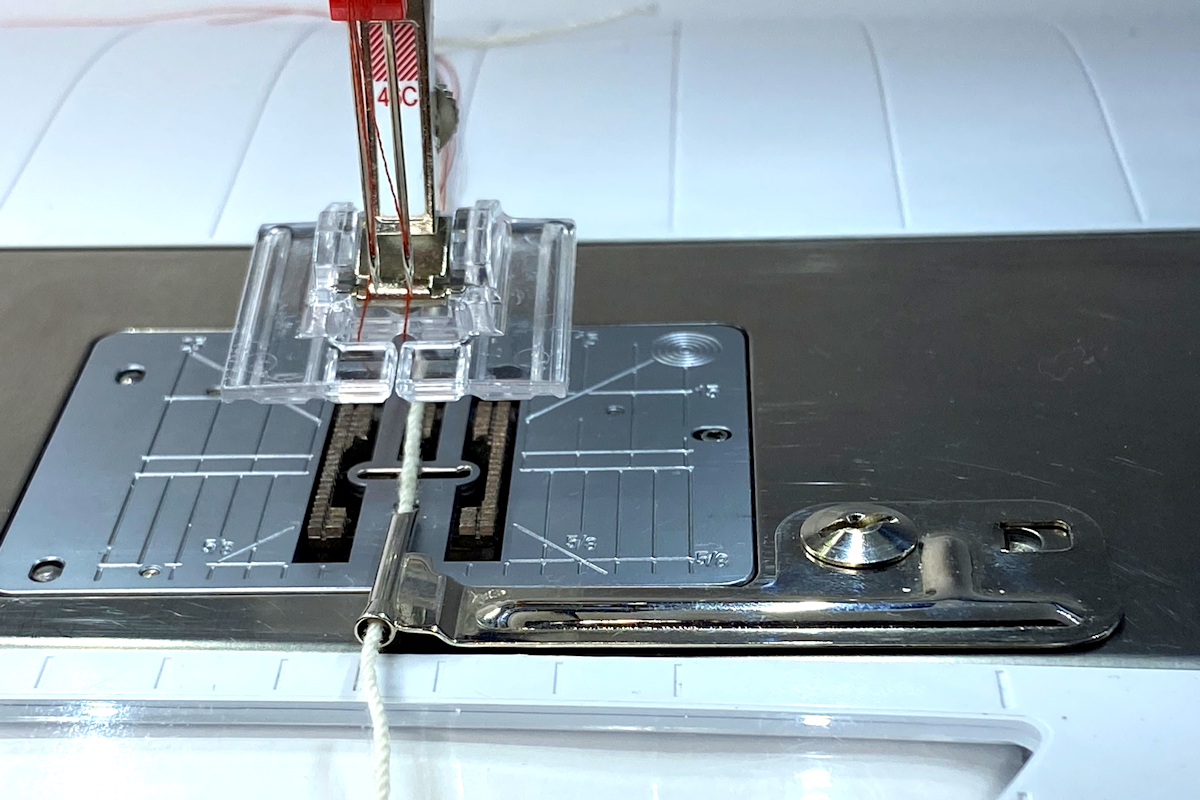
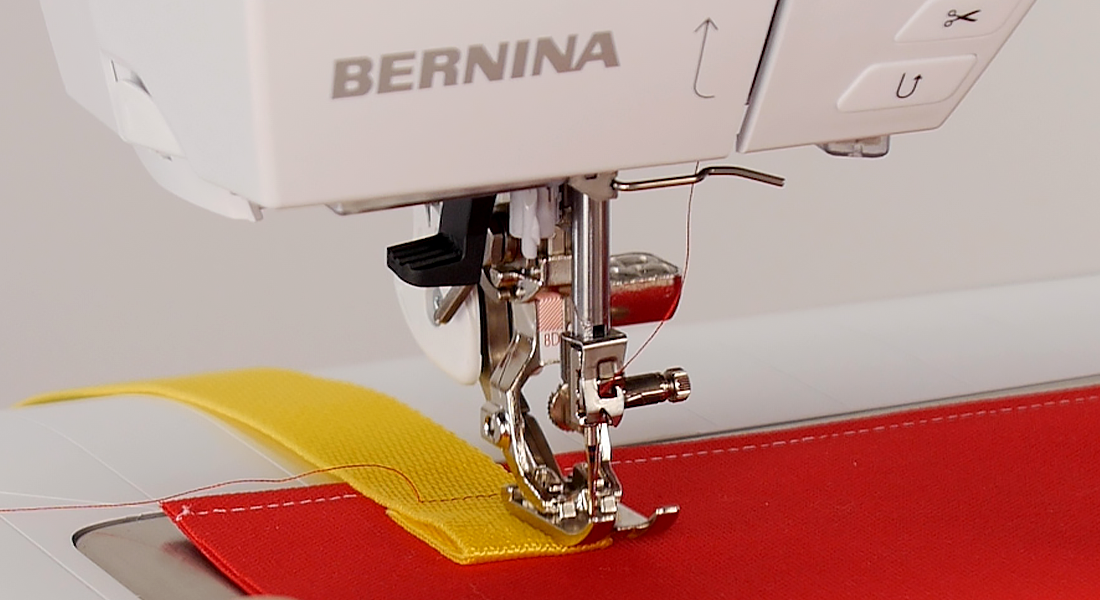
Attach Pintuck and Decorative Stitch Foot #46C to the machine. Select this foot on the Presser Foot Recognition screen if you machine has this feature.
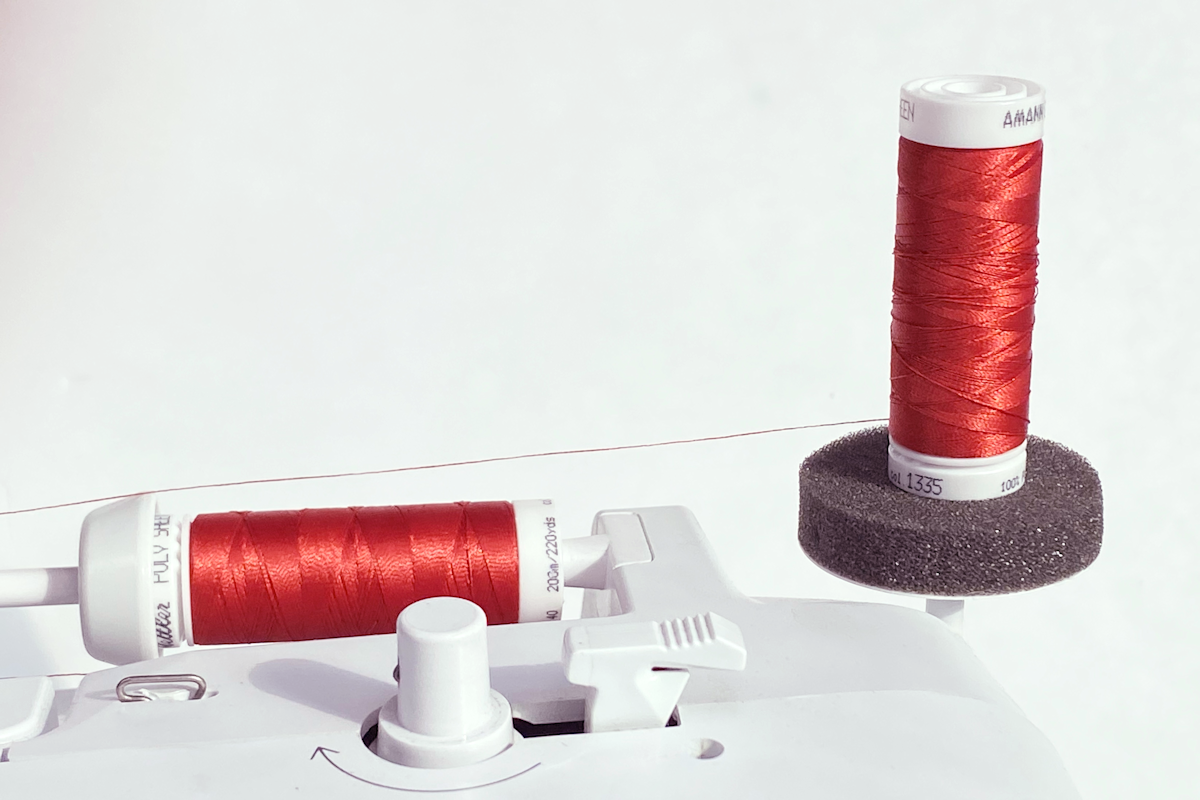
Place two spools of thread on the machine, one on the horizontal pin and one on the vertical pin. Place the foam pad that came with the machine under the spool on the vertical pin. This helps the thread feed evenly without “puddling” as it comes off the spool.
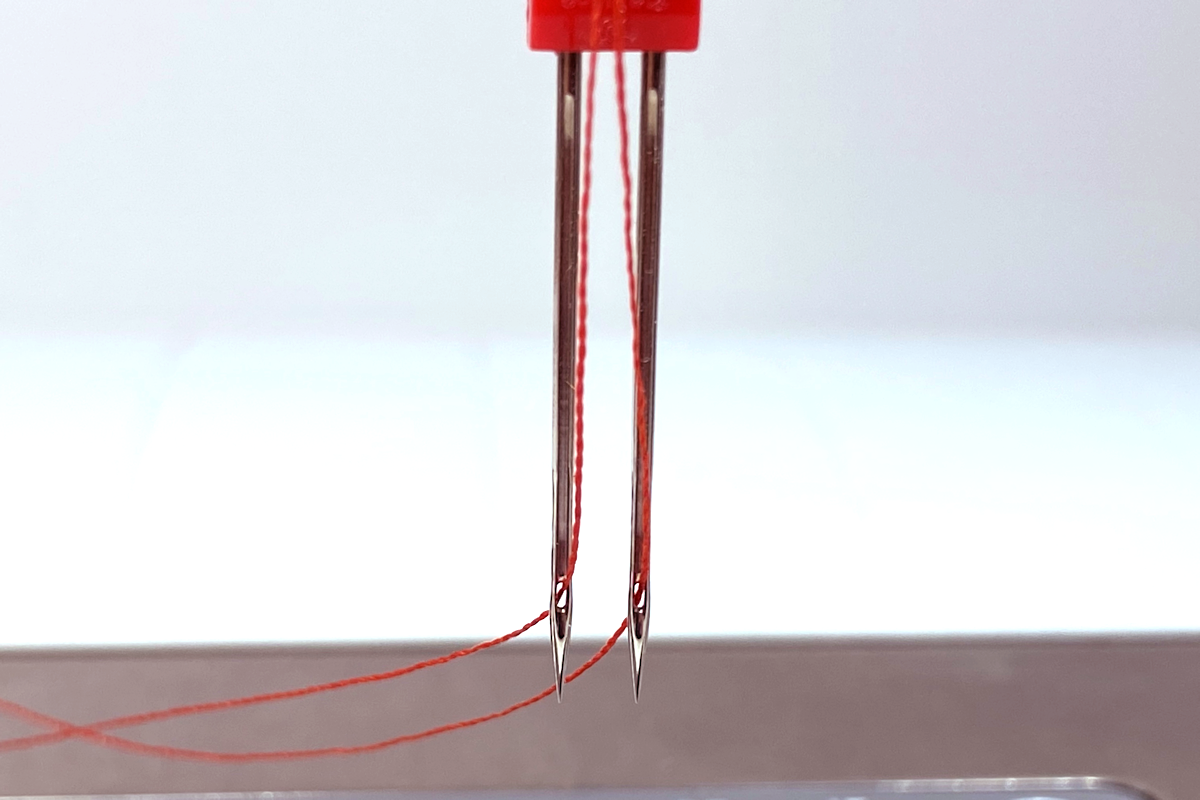
Start the threading process the same way as with a single needle, but when you come to the tension disc on top of the machine, place one thread on the right and one on the left of the disc.

Hold both threads in one hand and continue threading in the usual way, treating the two threads as one. When you get to the eyes of the needles, put one thread into each eye.
Setup for Corded Pintucks
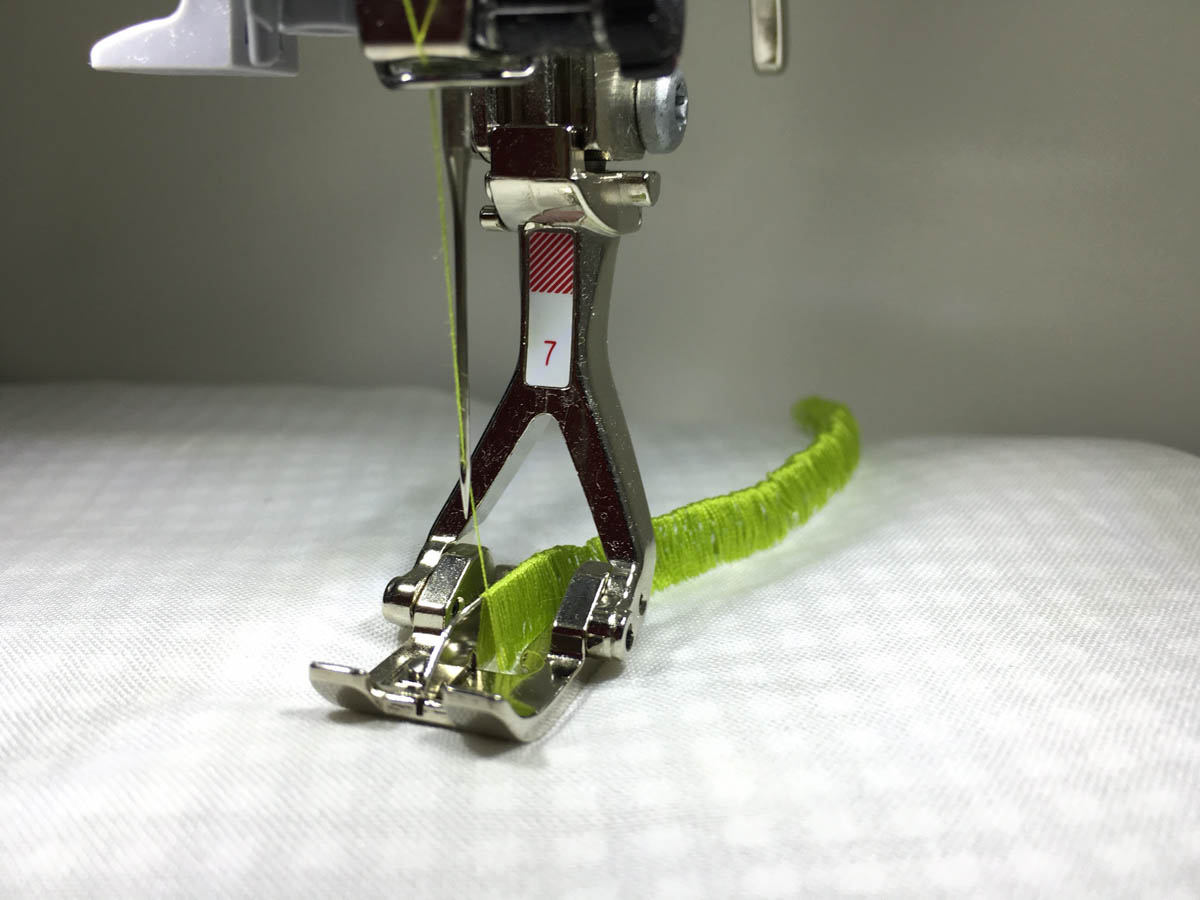
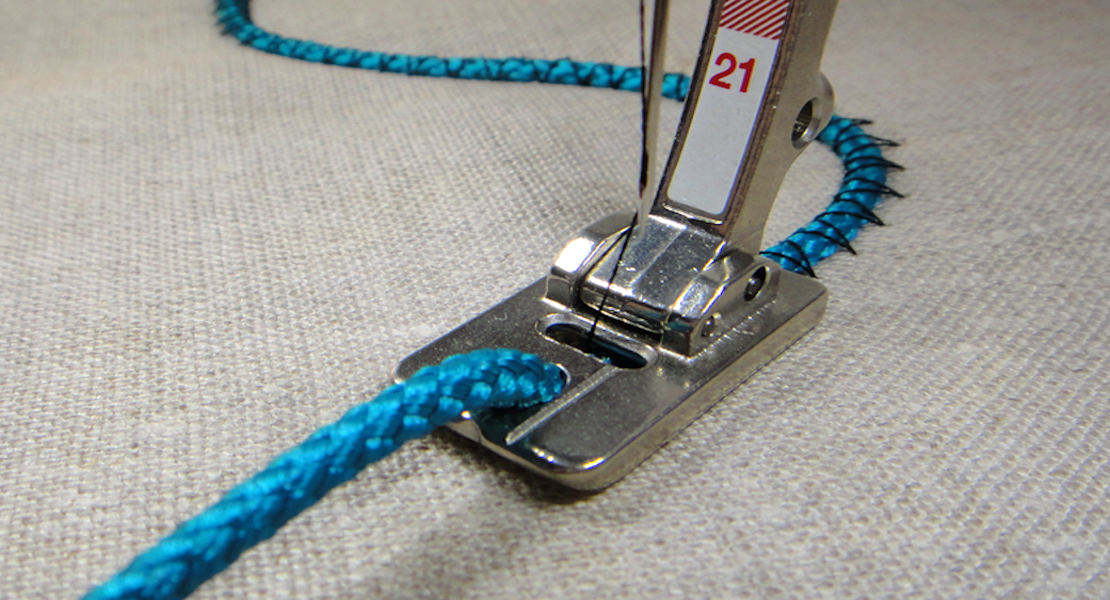
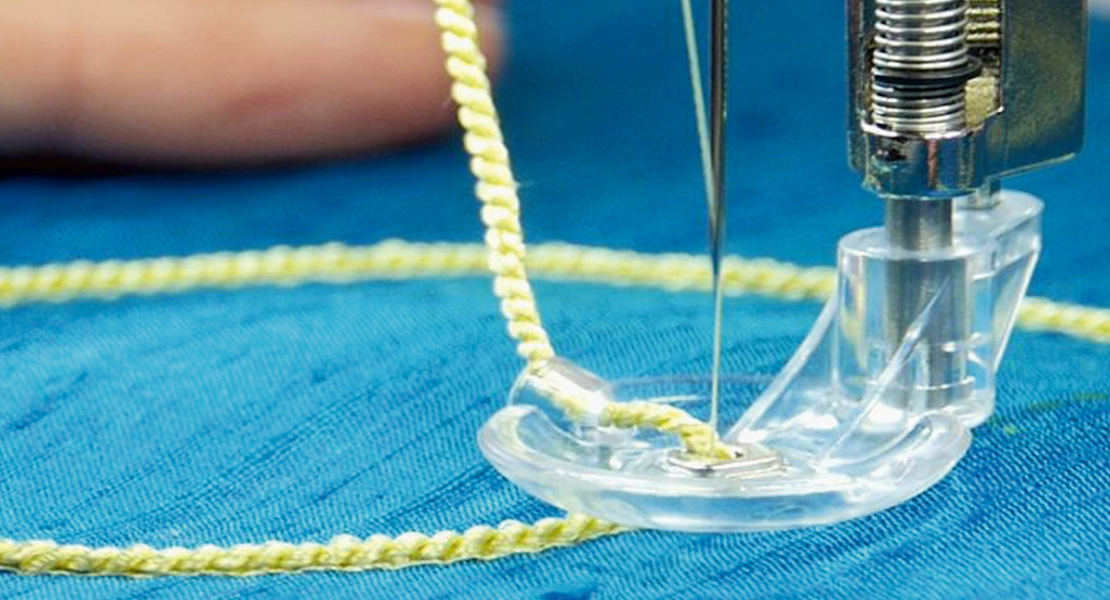
Pintucks can be corded or not. The cording adds body and structure to the pintuck, giving it more definition. A narrow cord such as crochet cotton or a perle cotton works well for this. If you choose to use cording (I always use cord because I think the pintucks are prettier), you’ll need the Pintuck Cording Attachment. Attach the Pintuck Cording Attachment to the machine. It attaches with just one screw and is positioned to hold the cord directly in front of the needle. Feed the cord into the “tunnel”. The end of the tunnel that is closest to you is flared, making it easy to slip the cord into it. Pull about 5”-6” of cord through the tunnel and out the back of the foot.
 Stitching Pintucks
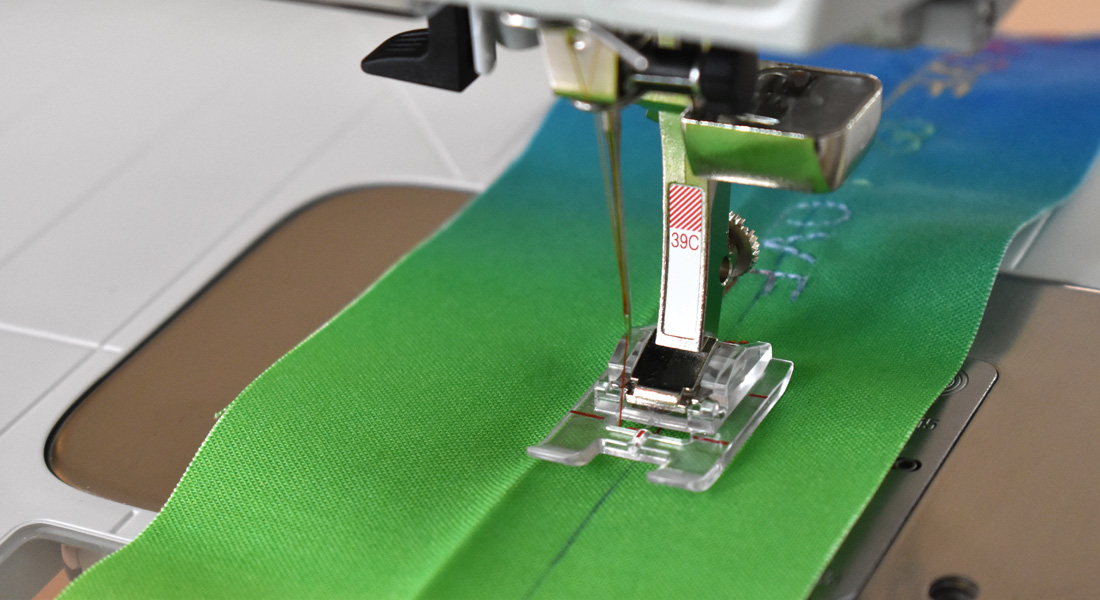
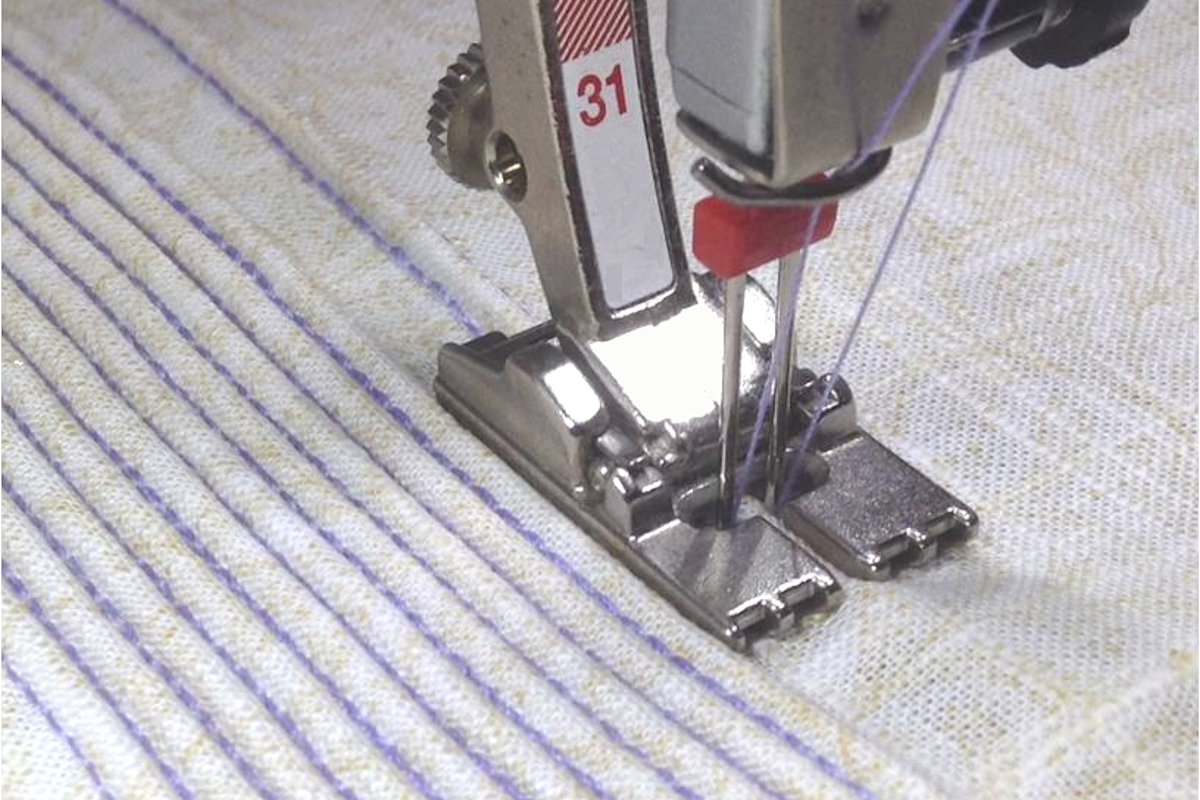
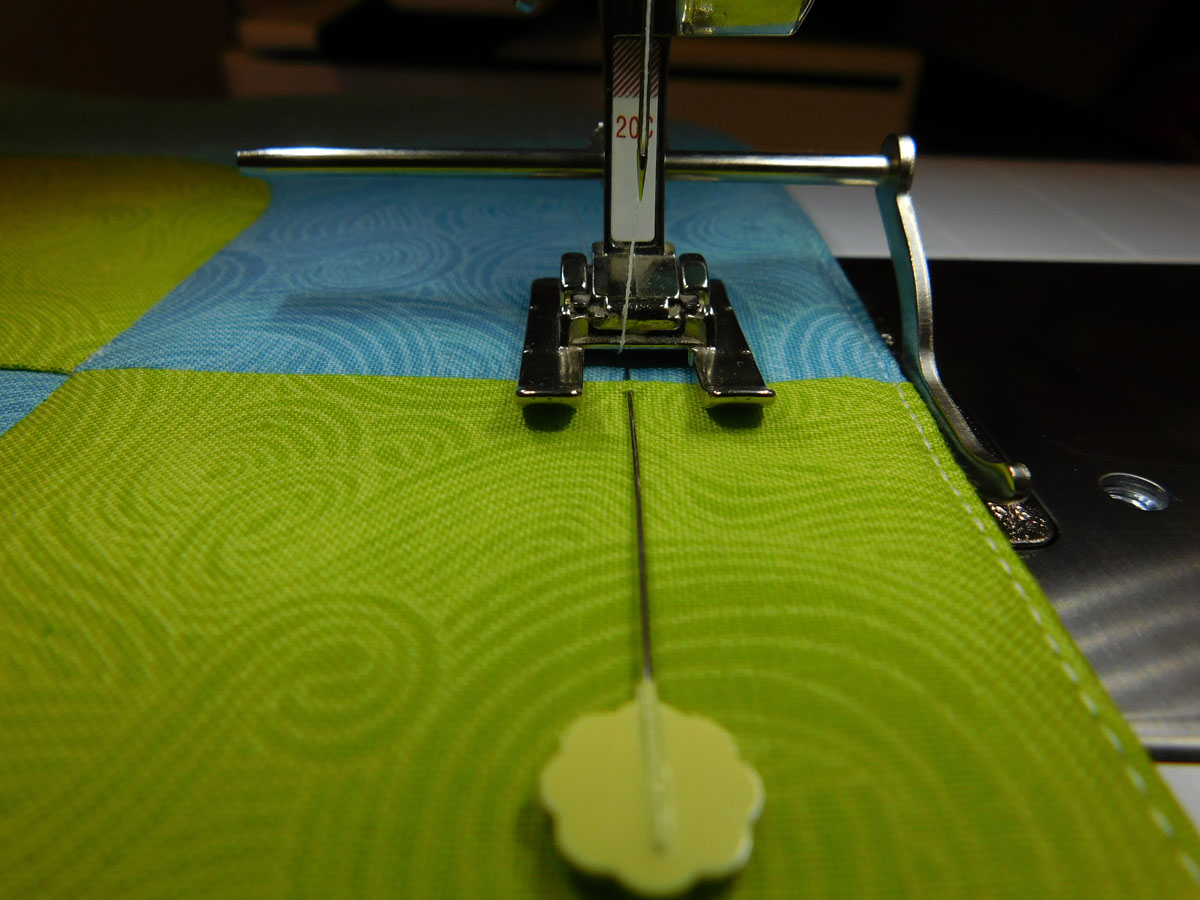
Combining pintucks and decorative stitches is a 2-part technique. First, stitch the pintucks and then sew the decorative stitches. Mark a line or press a crease on the fabric for the first pintuck and stitch, aligning the drawn line or crease with the center of the presser foot. Move the fabric and position the first pintuck in one of the outer grooves on the sole to get the desired spacing. Stitch a second pintuck. This leaves a 9 mm space between the pintucks to accommodate decorative stitching. Continue re-positioning the foot and aligning the pintucks in the grooves until the desired number of pintucks are sewn.
Decorative Stitching
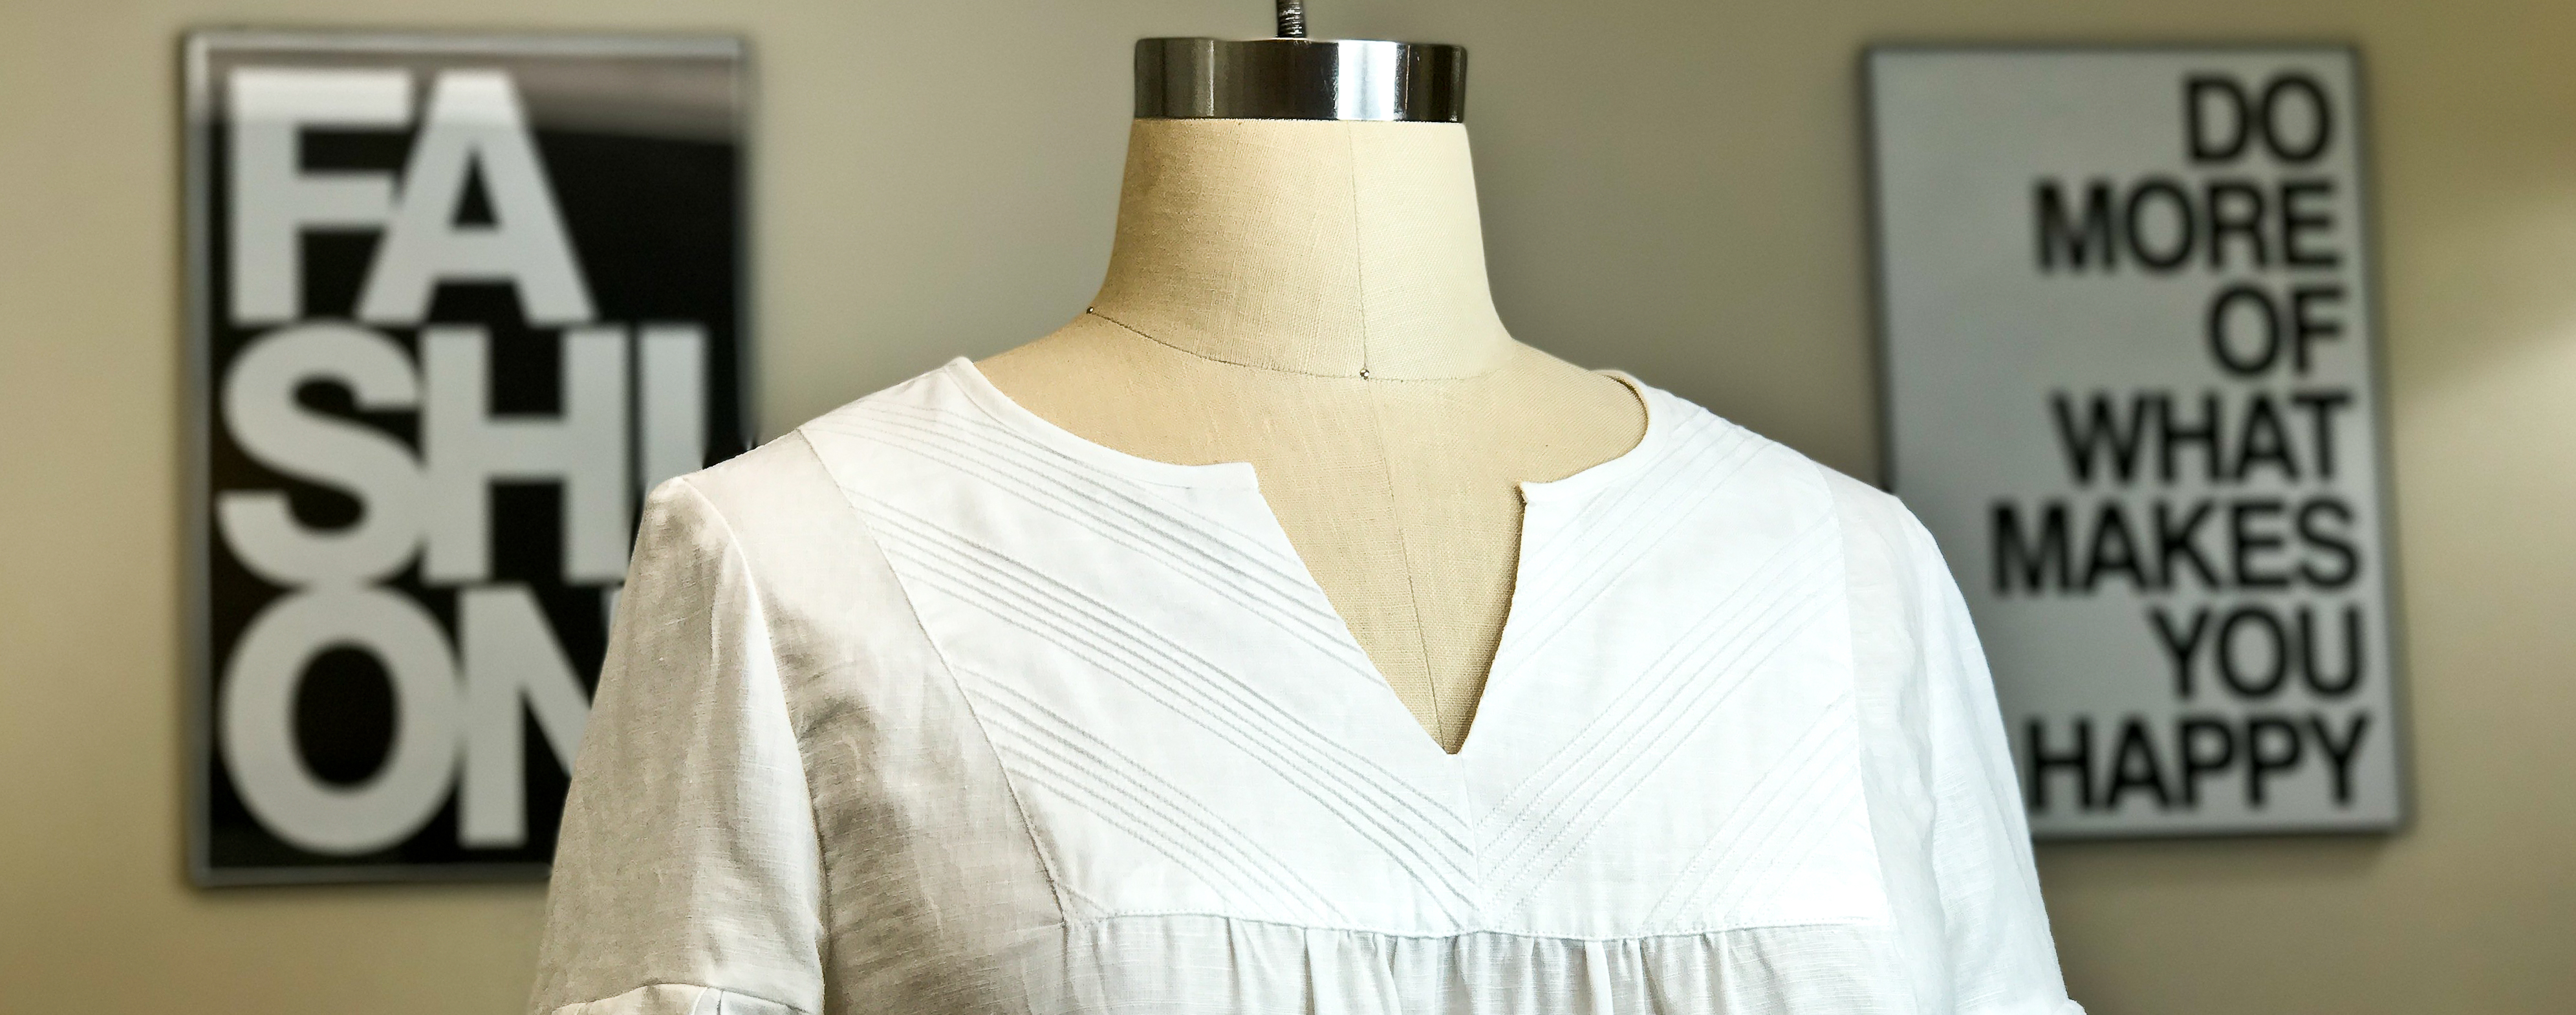
Place 1-2 layers of stabilizer behind the fabric. Choose the type of of needle you want to use, single, double, or wing. Each of these give a slightly different finished look. Once you have the desired needle in place and threaded, you are ready to start adding decorative stitches. Position the foot over the pintucks with a pintuck in the grooves closest to the needles. Select a decorative stitch; sew the stitch between the pintucks. Almost any stitch can be used but not all of them will be pretty, so you should experiment. Stitch menus #300 and #600 are great places to start exploring. After filling the space between the pintucks, add an edging stitch on each side, outside of the pintucks.
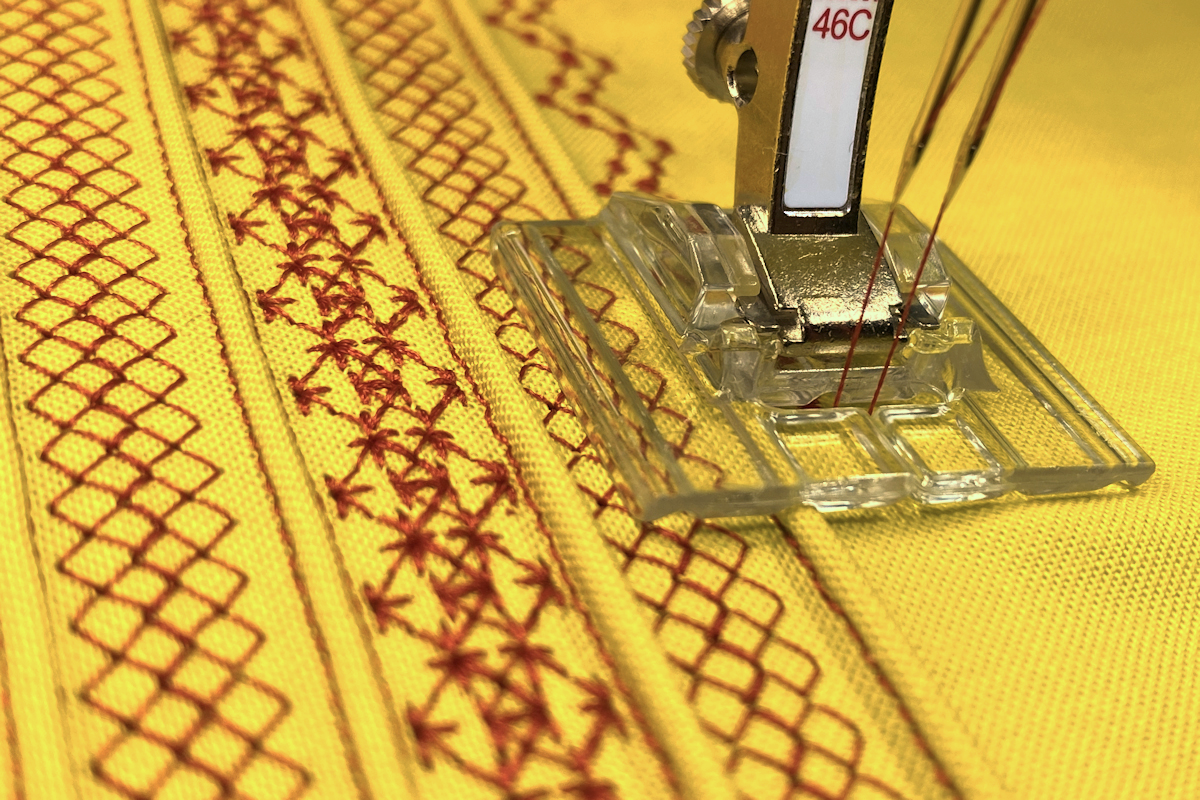
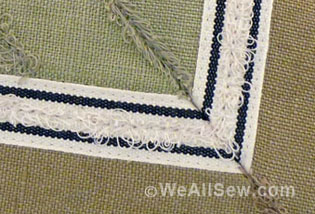
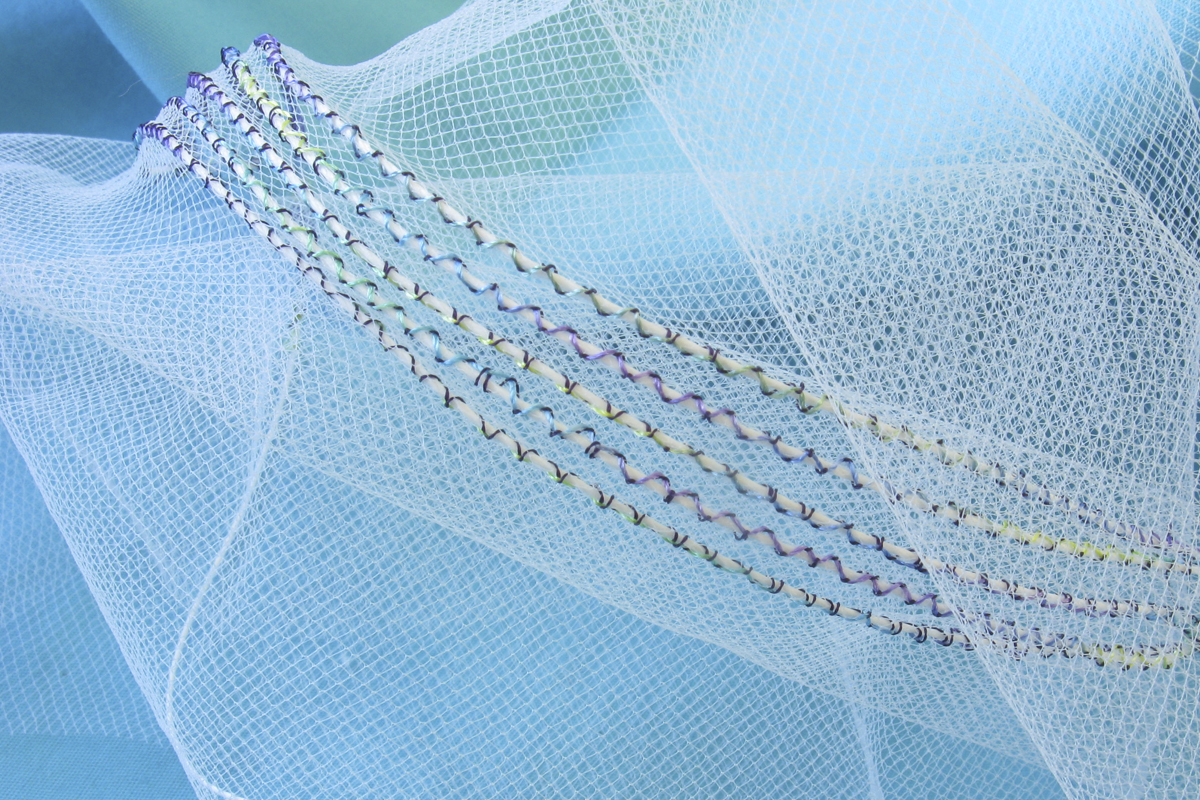
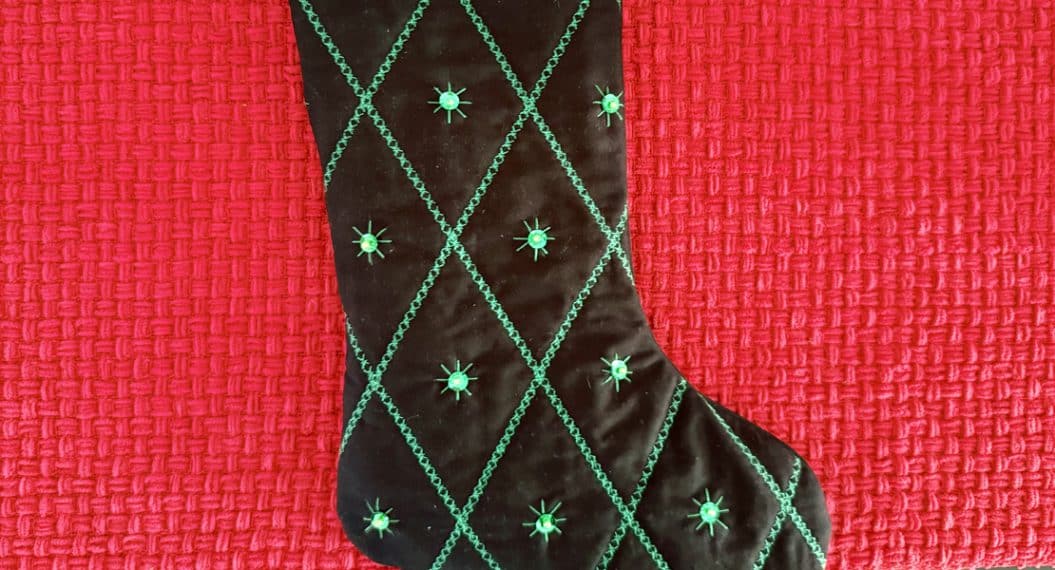
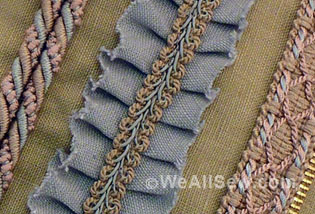
Continue re-positioning the fabric and filling the spaces with decorative stitches as desired. The stitches used below, from left to right are, Edging stitch #721, Honeycomb stitch #8, Cross stitch, #722, Honeycomb stitch #8, and Edging stitch #721.
Click here to see a video on using all of the BERNINA pintuck feet, including the basic Pintuck Feet #30, 31, 32, and 33 as well as Pintuck and Decorative Stitch Foot #46C.
NEED PHOTO of stitches replaced here
Click here to download a FREE eBook about stitching pintucks.
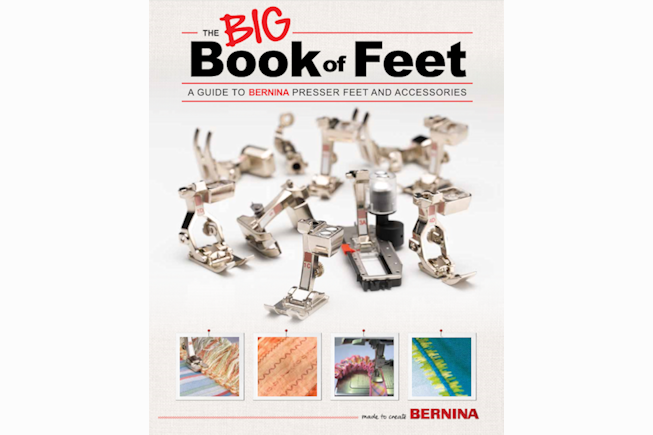
To discover about BERNINA presser feet and attachments, see The Big Book of Feet at your local BERNINA store.
Used Products
What you might also like
3 comments on “Pintucks and Decorative Stitching with Foot #46C”
-
-
Hello @dolosew, thanks for your comment! We double-checked the link above to the free e-book, and the link is now working.
-
-
I too was unable to download free E-book for pintuck feet.
Leave a Reply
You must be logged in to post a comment.

I was unable to find your free e-book on using pintuck feet